このチュートリアルでは、Firebaseを使用してIonic Capacitorアプリにプッシュ通知を統合します。これには特定のサービスは必要ありませんが、事前にいくつかの設定を行う必要があります。Firebaseは、Androidに必要であり、データベースを使用せずに通知を送信できるため、優れた選択肢です。
まず、Capacitorを有効にしたIonicアプリを作成し、アプリのユニークな識別子であるパッケージIDを指定します。次に、アプリをビルドし、ネイティブプラットフォームを追加します。
ionic start pushApp blank --type=angular --capacitor --package-id=com.appdactic.devpushcd ./pushAppionic buildnpx cap add iosnpx cap add androidすでにアプリがある場合は、capacitor.config.jsonを変更してappIdを含めることができます。ただし、ネイティブフォルダーがすでに存在する場合は、Capacitorがフォルダーを一度だけ作成し、ID自体を更新しないため、IDが表示されるすべてのファイルでIDを置き換える必要があります。capacitor.config.jsonでは、バッジカウントの更新、プッシュ時に音を鳴らす、通知が到着したときにアラートを表示するなどのオプションも指定できます。
{ "appId": "com.appdactic.devpush", "appName": "pushApp", "bundledWebRuntime": false, "npmClient": "npm", "webDir": "www", "plugins": { "SplashScreen": { "launchShowDuration": 0 }, "PushNotifications": { "presentationOptions": ["badge", "sound", "alert"] } }, "cordova": {}}さて、アプリの外部でプッシュ通知を設定しましょう。
Firebase設定
まず、新しいFirebaseプロジェクトを作成するか、既存のものを使用します。新しいプロジェクト名とデフォルトオプションを提供します。
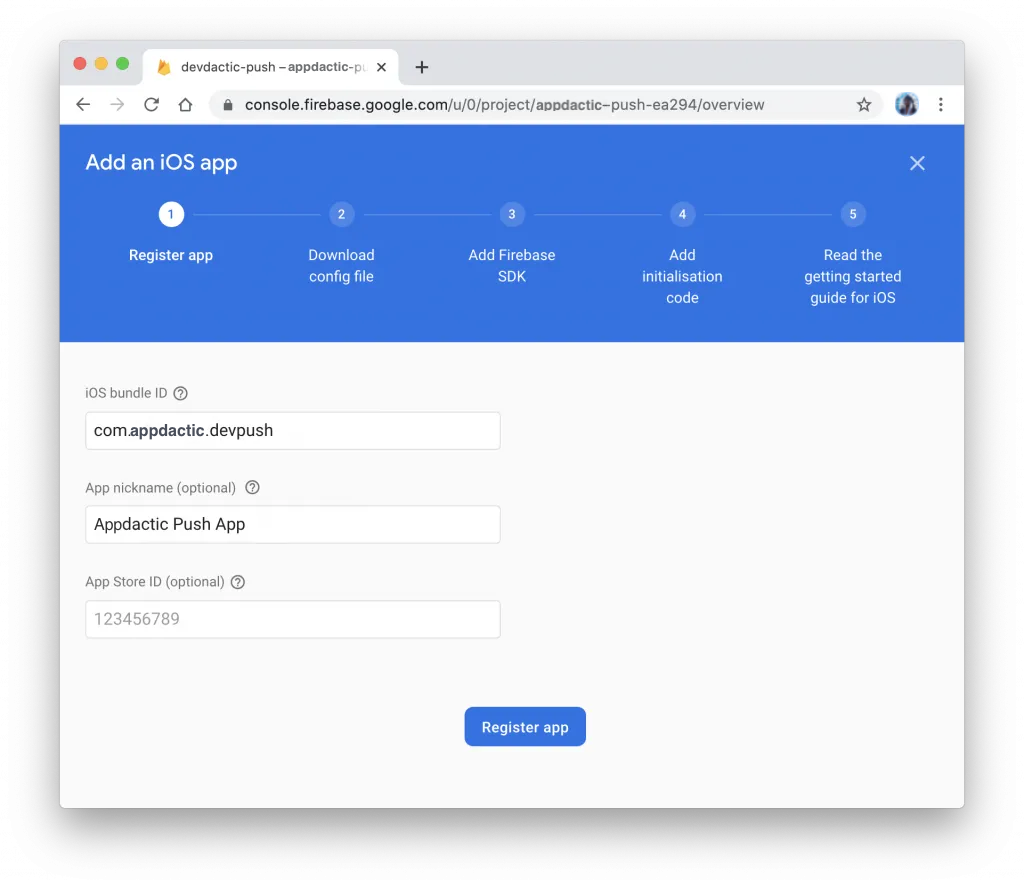
新しいアプリがある場合、アプリのダッシュボードに**「Firebaseをアプリに追加して始める」と表示されます。そうでない場合は、歯車アイコンをクリックしてプロジェクト設定**に移動し、アプリを追加します。
iOSとAndroidのダイアログは似たような外観で、重要なのはアプリ用にパッケージIDを使用することです。
初期ステップの後、以下のファイルをダウンロードします:
- Android用のgoogle-services.jsonファイル
- iOS用のGoogleService-info.plistファイル
次に、プラットフォームを設定します。
Androidプッシュ準備
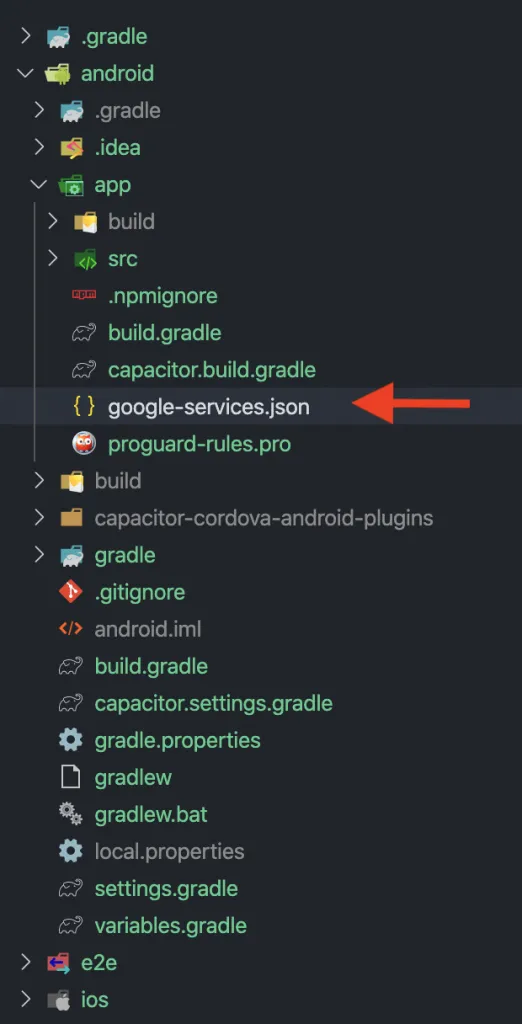
Androidでは、ダウンロードしたgoogle-services.jsonファイルを**android/app/**フォルダーに移動します。
これでAndroidは完了です。次にiOSを設定しましょう。
iOSプッシュ準備
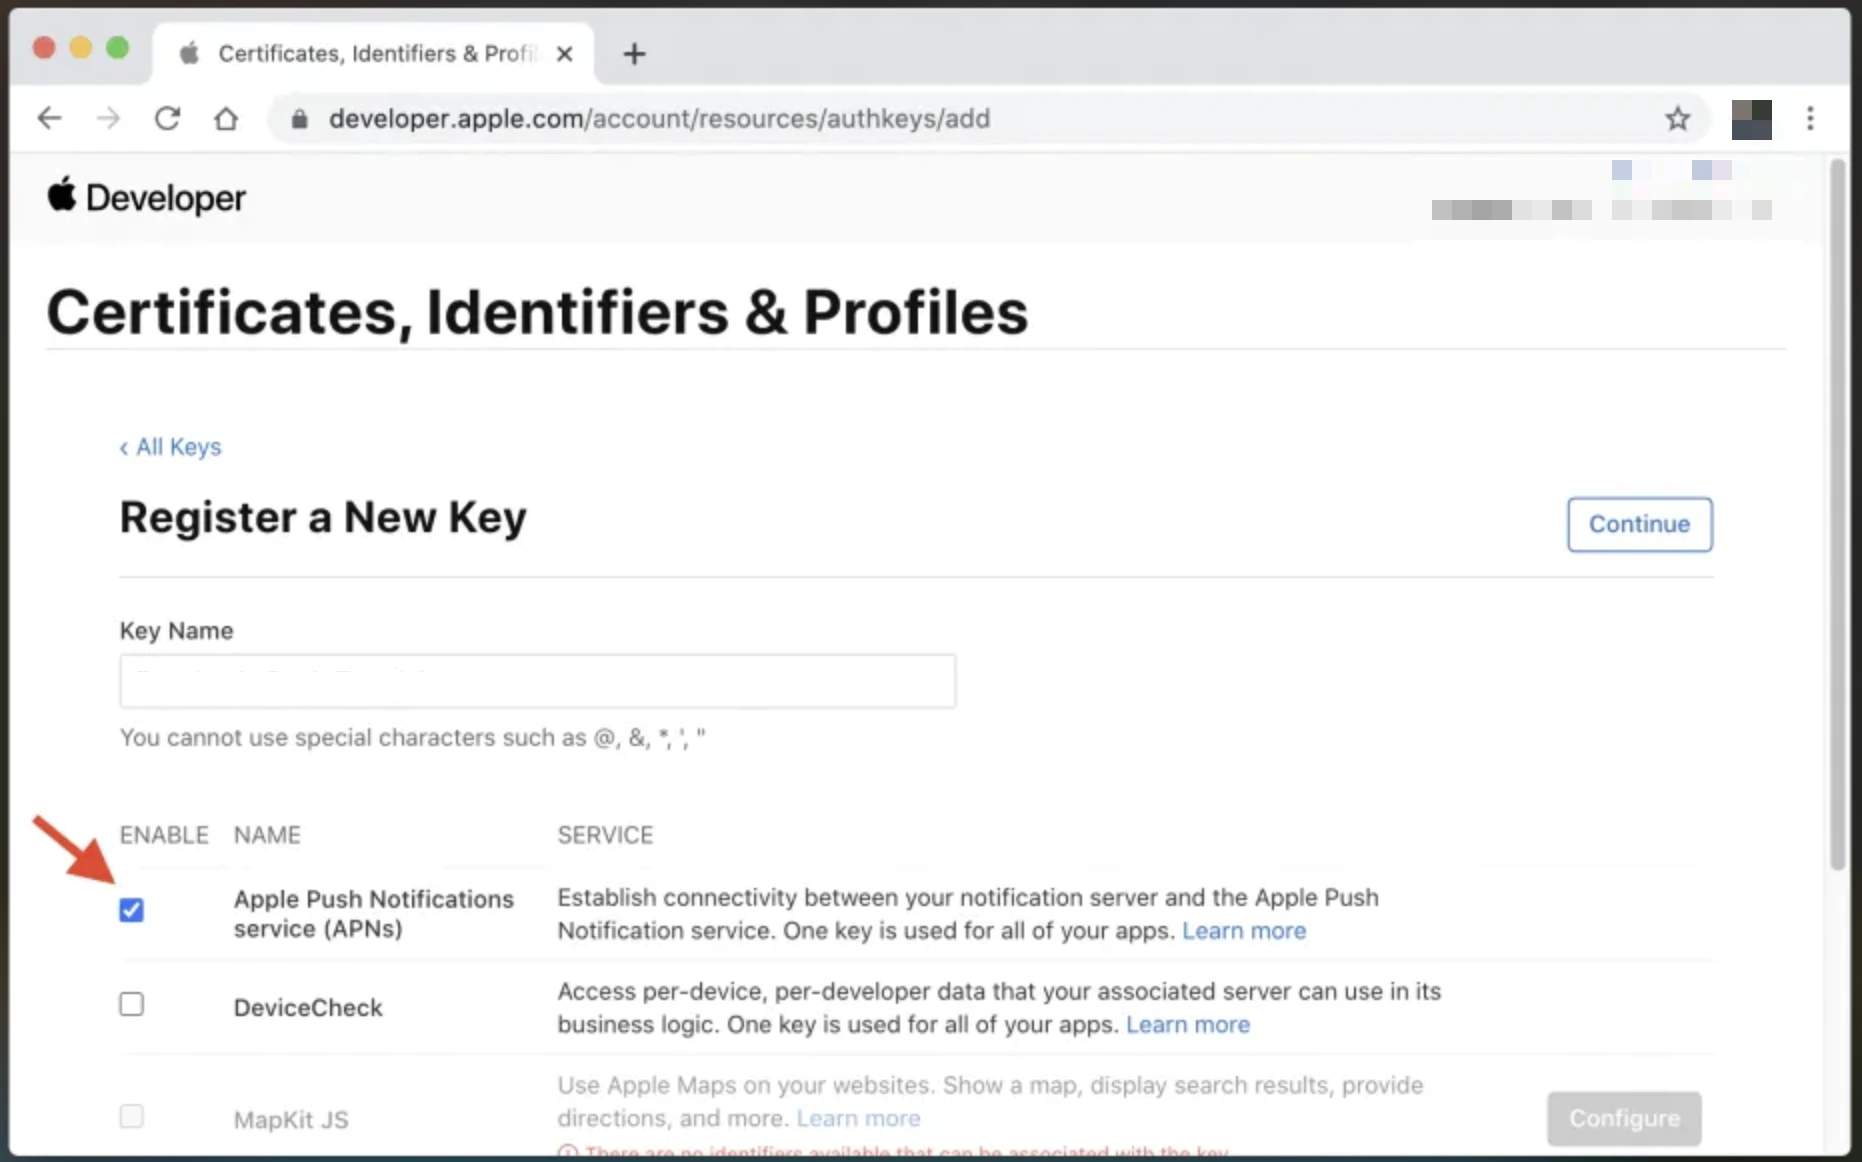
この部分はより複雑です。まず、Apple Developerアカウントの識別子リスト内にアプリのApp IDを作成します。リストからプッシュ通知機能を選択してください。
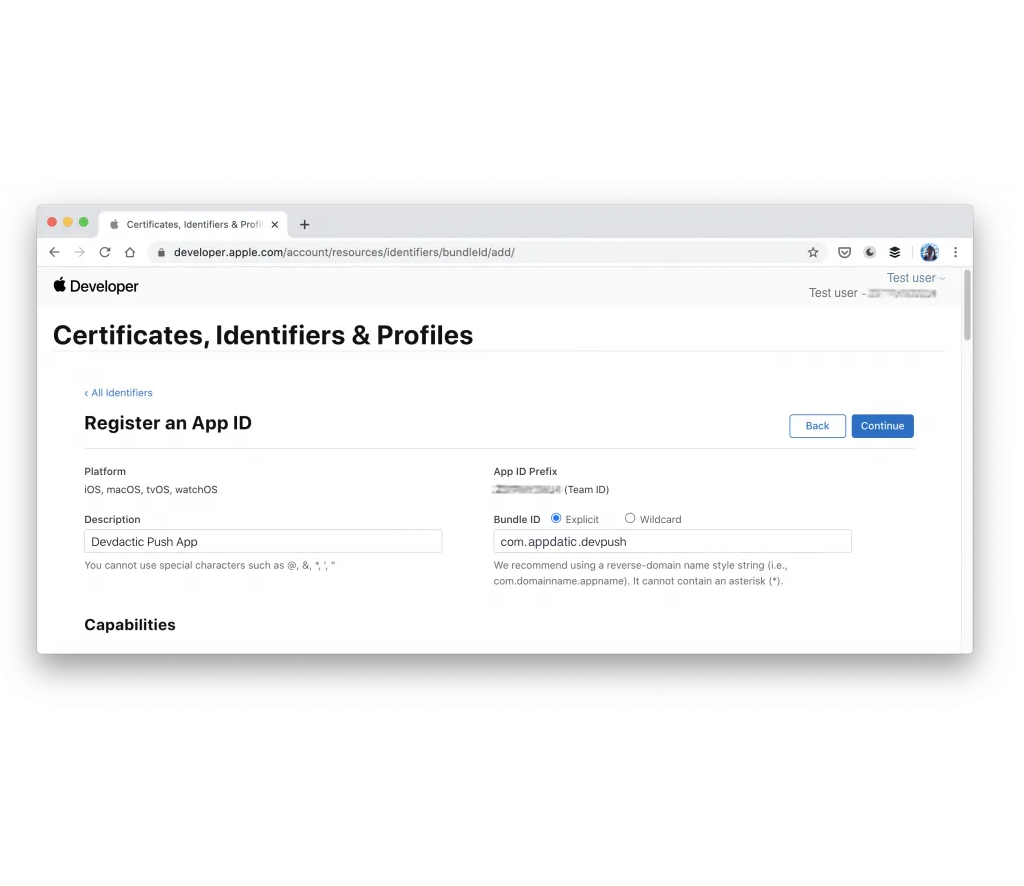
Bundle IDは、CapacitorおよびFirebase内のあなたのApp IDと同じである必要があります。
次に、鍵を作成し、**Apple Push Notifications service (APNs)**を有効にします。鍵の最大数に達した場合は、既存の鍵や証明書を代わりに使用できますが、そのプロセスはより複雑です。
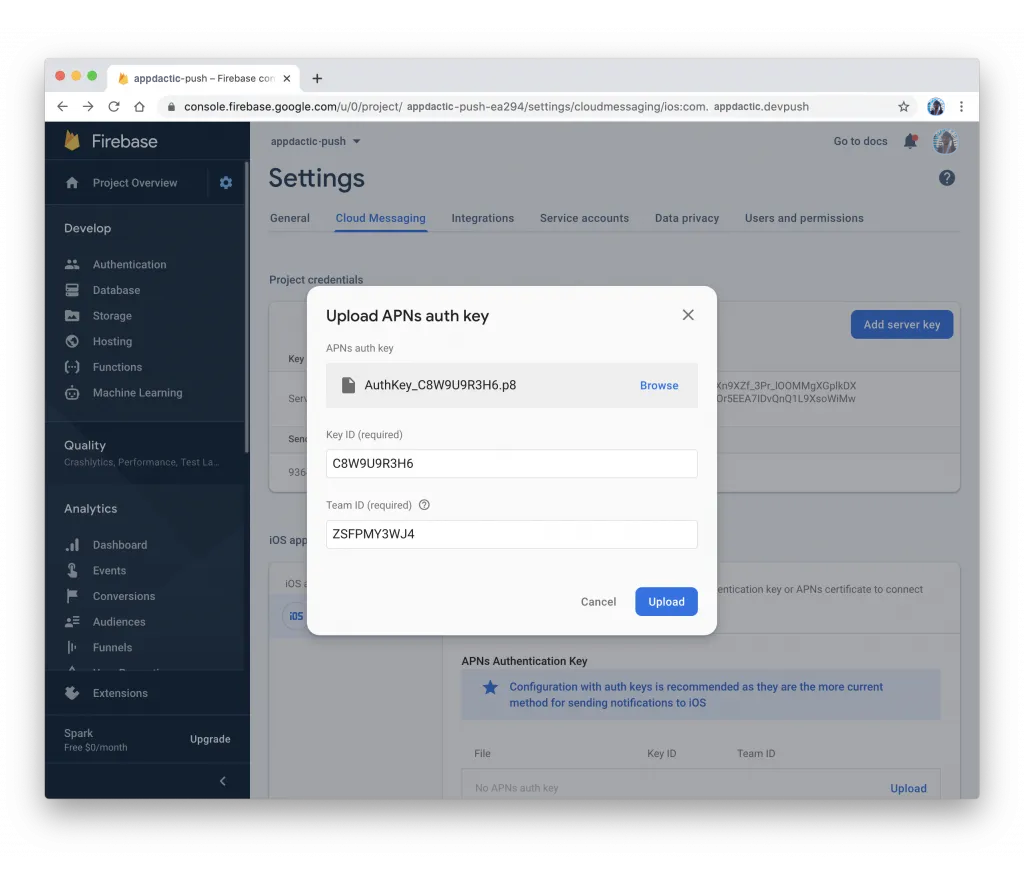
.p8ファイルをダウンロードした後、Firebaseにアップロードします。Firebaseプロジェクト設定のCloud Messagingタブを開き、ファイルをアップロードし、iOSからのKey IDとTeam IDの詳細を入力します。
次に、以下のコマンドを実行してXcodeプロジェクトに変更を加えます:
npx cap open iosFirebaseからダウンロードしたGoogleService-Info.plistファイルをiOSプロジェクトにコピーします。ファイルをアプリ/appフォルダー内のXcodeプロジェクトにドラッグし、必要に応じてアイテムをコピーを選択します。
次に、ios/App/PodfileにFirebase依存関係用の新しいPodを追加します:
target 'App' do capacitor_pods # Add your Pods here pod 'Firebase/Messaging'endこのコマンドでネイティブプラットフォームを更新します:
npx cap update iosios/App/App/AppDelegate.swift内のネイティブSwiftコードを修正して、Firebaseに登録し、アプリに正しいトークンを返します。
import UIKitimport Capacitorimport Firebase
@UIApplicationMainclass AppDelegate: UIResponder, UIApplicationDelegate {
var window: UIWindow?
func application(_ application: UIApplication, didFinishLaunchingWithOptions launchOptions: [UIApplication.LaunchOptionsKey: Any]?) -> Bool { // Override point for customization after application launch. FirebaseApp.configure() return true }
// All the existing functions // ...
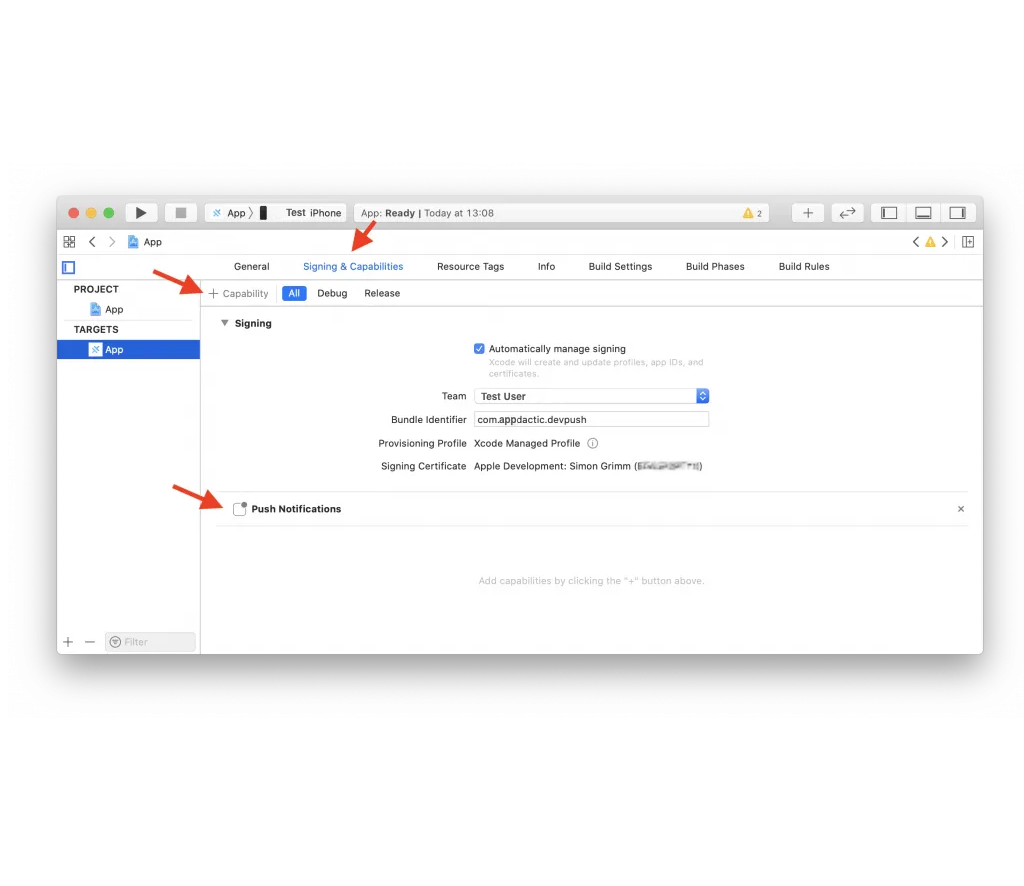
// Update this one: func application(_ application: UIApplication, didRegisterForRemoteNotificationsWithDeviceToken deviceToken: Data) { Messaging.messaging().apnsToken = deviceToken InstanceID.instanceID().instanceID { (result, error) in if let error = error { NotificationCenter.default.post(name: Notification.Name(CAPNotifications.DidFailToRegisterForRemoteNotificationsWithError.name()), object: error) } else if let result = result { NotificationCenter.default.post(name: Notification.Name(CAPNotifications.DidRegisterForRemoteNotificationsWithDeviceToken.name()), object: result.token) } } }}最後に、Xcodeプロジェクト内でプッシュ通知の機能を追加します。
これでアプリをビルドし、プッシュ通知を統合しましょう。
Ionicプッシュ通知統合
Ionicプロジェクトにサービスと新しいページを作成します:
ionic g service services/fcmionic g page pages/detailsapp/app-routing.module.ts内のルーティングを新しいページと動的IDを含むように更新します:
import { NgModule } from '@angular/core';import { PreloadAllModules, RouterModule, Routes } from '@angular/router';
const routes: Routes = [  {    path: 'home',    loadChildren: () => import('./home/home.module').then( m => m.HomePageModule)  },  {    path: '',    redirectTo: 'home',    pathMatch: 'full'  },  {    path: 'home/:id',    loadChildren: () => import('./pages/details/details.module').then( m => m.DetailsPageModule)  },];
@NgModule({ imports: [ RouterModule.forRoot(routes, { preloadingStrategy: PreloadAllModules }) ], exports: [RouterModule]})export class AppRoutingModule { }services/fcm.service.ts内でプッシュ通知を処理するサービスを作成します:
import { Injectable } from '@angular/core';import {  Plugins,  PushNotification,  PushNotificationToken,  PushNotificationActionPerformed,  Capacitor} from '@capacitor/core';import { Router } from '@angular/router';
const { PushNotifications } = Plugins;
@Injectable({  providedIn: 'root'})export class FcmService {
  constructor(private router: Router) { }
  initPush() {    if (Capacitor.platform !== 'web') {      this.registerPush();    }  }
  private registerPush() {    PushNotifications.requestPermission().then((permission) => {      if (permission.granted) {        // Register with Apple / Google to receive push via APNS/FCM        PushNotifications.register();      } else {        // No permission for push granted      }    });
    PushNotifications.addListener(      'registration',      (token: PushNotificationToken) => {        console.log('My token: ' + JSON.stringify(token));      }    );
    PushNotifications.addListener('registrationError', (error: any) => {      console.log('Error: ' + JSON.stringify(error));    });
    PushNotifications.addListener(      'pushNotificationReceived',      async (notification: PushNotification) => {        console.log('Push received: ' + JSON.stringify(notification));      }    );
PushNotifications.addListener( 'pushNotificationActionPerformed', async (notification: PushNotificationActionPerformed) => { const data = notification.notification.data; console.log('Action performed: ' + JSON.stringify(notification.notification)); if (data.detailsId) { this.router.navigateByUrl(`/home/${data.detailsId}`); } } ); }}app/app.component.ts内でinitPush()関数を呼び出します:
import { Component } from '@angular/core';
import { Platform } from '@ionic/angular';import { SplashScreen } from '@ionic-native/splash-screen/ngx';import { StatusBar } from '@ionic-native/status-bar/ngx';import { FcmService } from './services/fcm.service';
@Component({  selector: 'app-root',  templateUrl: 'app.component.html',  styleUrls: ['app.component.scss']})export class AppComponent {  constructor(    private platform: Platform,    private splashScreen: SplashScreen,    private statusBar: StatusBar,    private fcmService: FcmService  ) {    this.initializeApp();  }
  initializeApp() {    this.platform.ready().then(() => {      this.statusBar.styleDefault();      this.splashScreen.hide();
// Trigger the push setup this.fcmService.initPush(); }); }}pages/details/details.page.ts内で詳細ページの情報を処理します:
import { Component, OnInit } from '@angular/core';import { ActivatedRoute } from '@angular/router';import { Plugins } from '@capacitor/core';const { PushNotifications } = Plugins;
@Component({  selector: 'app-details',  templateUrl: './details.page.html',  styleUrls: ['./details.page.scss'],})export class DetailsPage implements OnInit {  id = null;
  constructor(private route: ActivatedRoute) { }
  ngOnInit() {    this.route.paramMap.subscribe(params => {      this.id = params.get('id');    });  }
  resetBadgeCount() {    PushNotifications.removeAllDeliveredNotifications();  }
}pages/details/details.page.html内で詳細を表示します:
<ion-header>  <ion-toolbar>    <ion-buttons slot="start">      <ion-back-button defaultHref="/"></ion-back-button>    </ion-buttons>    <ion-title>Details</ion-title>  </ion-toolbar></ion-header>
<ion-content>  My Id from push: {{ id }}
  <ion-button (click)="resetBadgeCount()" expand="block">    Reset Badge Count  </ion-button></ion-content>
アプリをビルドし、変更を同期し、デバイスにデプロイします。
ionic buildnpx cap syncこれでFirebaseを使用してプッシュ通知を送信できます。
Firebaseでのプッシュ通知送信
Firebaseでプッシュ通知を送信する方法はいくつかあります。
特定デバイスタスト
デバイスにアプリをデプロイした後、登録後のトークンを確認するためにコンソールログを確認できます。このトークンを使用して、統合が正常に動作していることを確認するために、ターゲットテストプッシュを送信します。FirebaseでCloud Messagingに移動し、テストメッセージを送信を選択します。ログからデバイストークンを追加します。
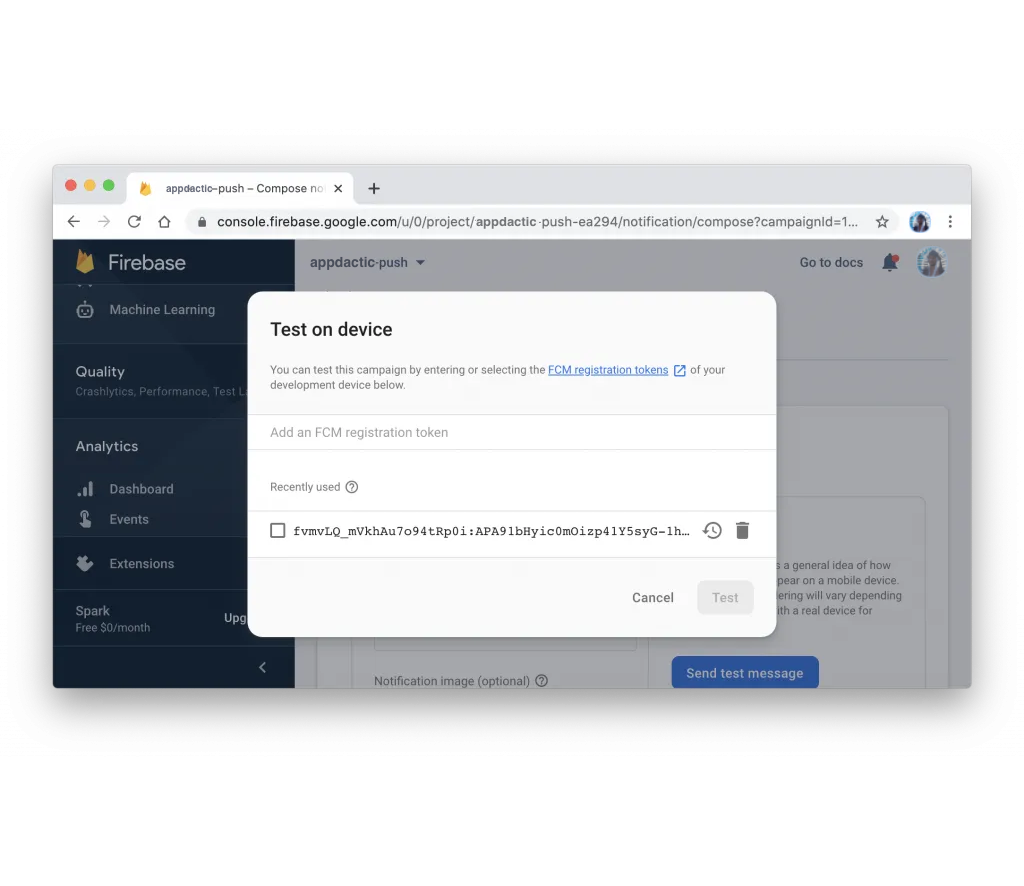
すべてが正しく設定されていれば、デバイスでプッシュ通知を見ることができるはずです。
ペイロード付きプッシュメッセージ
追加情報を含むプッシュ通知をテストするには、同じページのウィザードに従い、一般情報を指定し、ターゲットとするプラットフォームを選択します。プッシュ通知にペイロードを送信するための追加オプションを追加します。
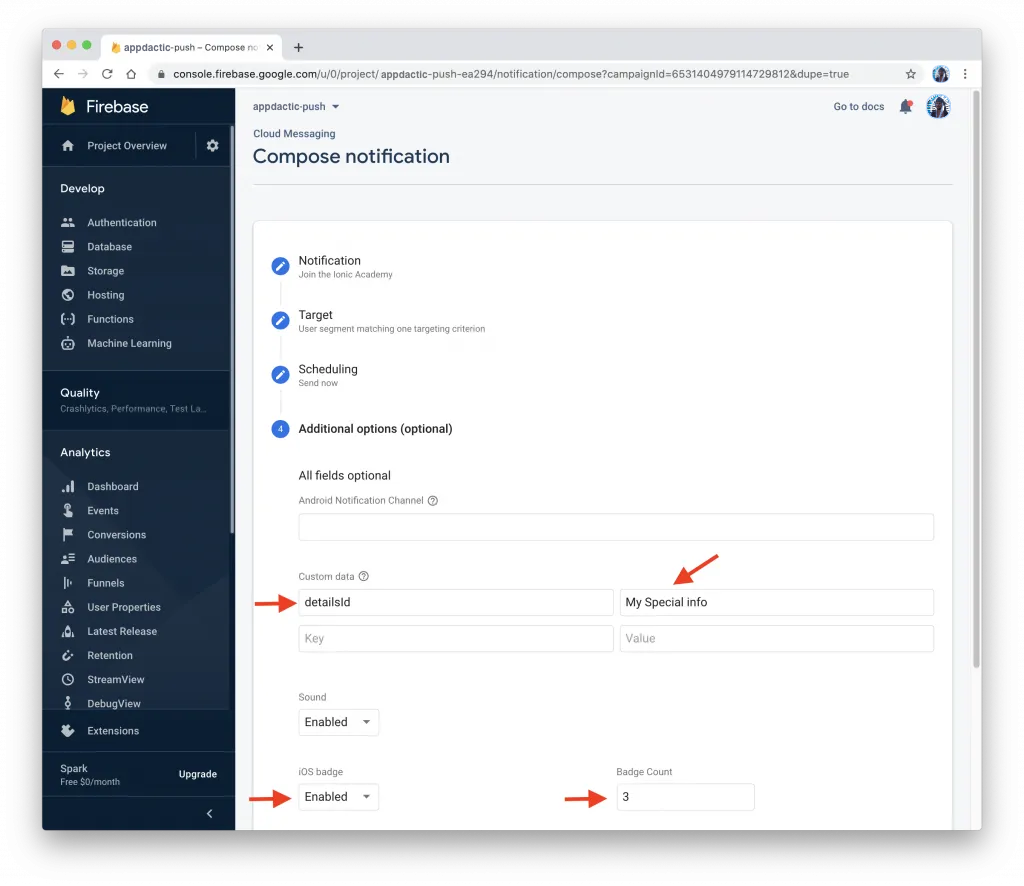
高度なオプションセクションで、カスタムデータのキーと値のペアを追加します。たとえば、detailsIdというキーと任意の値を使用できます。このデータは、指定したIDを持って詳細ページに移動するためにアプリで使用されます。
プッシュ通知を送信した後、アプリはそれを受信し、通知がタップされたときに指定したIDを持った詳細ページを表示する必要があります。
Firebase APIを使用
Firebase APIを使用してプッシュ通知をプログラム的に送信することもできます。これを行うには、Firebaseプロジェクト設定のCloud Messagingタブからサーバーキーを取得する必要があります。
サーバーキーを使用して、必要なペイロードを持つPOSTリクエストをFirebase APIに送信できます。以下は、Node.jsとrequestライブラリを使用した例です:
const request = require('request');
const serverKey = 'YOUR_SERVER_KEY';const deviceToken = 'YOUR_DEVICE_TOKEN';
const options = {  method: 'POST',  url: 'https://fcm.googleapis.com/fcm/send',  headers: {    'Content-Type': 'application/json',    Authorization: 'key=' + serverKey  },  body: JSON.stringify({    to: deviceToken,    notification: {      title: 'Test Push',      body: 'This is a test push notification with custom data'    },    data: {      detailsId: '123'    }  })};
request(options, (error, response, body) => { if (error) { console.error('Error sending push:', error); } else { console.log('Push sent successfully:', body); }});YOUR_SERVER_KEYとYOUR_DEVICE_TOKENを実際のサーバーキーとデバイストークンに置き換えます。スクリプトを実行すると、デバイスはカスタムペイロードを持つプッシュ通知を受信するはずです。
これで完了です!Firebaseを使用してIonic Capacitorアプリにプッシュ通知を正常に統合しました。これでAndroidおよびiOSプラットフォームでユーザーにプッシュ通知を送信できます。


