
Codemagic을 사용한 iOS 지속적 배포
사전 요구사항
튜토리얼을 계속하기 전에…
- iOS 개발자 프로그램 멤버십
- 읽고자 하는 의지 😆…
가격에 대한 중요 안내
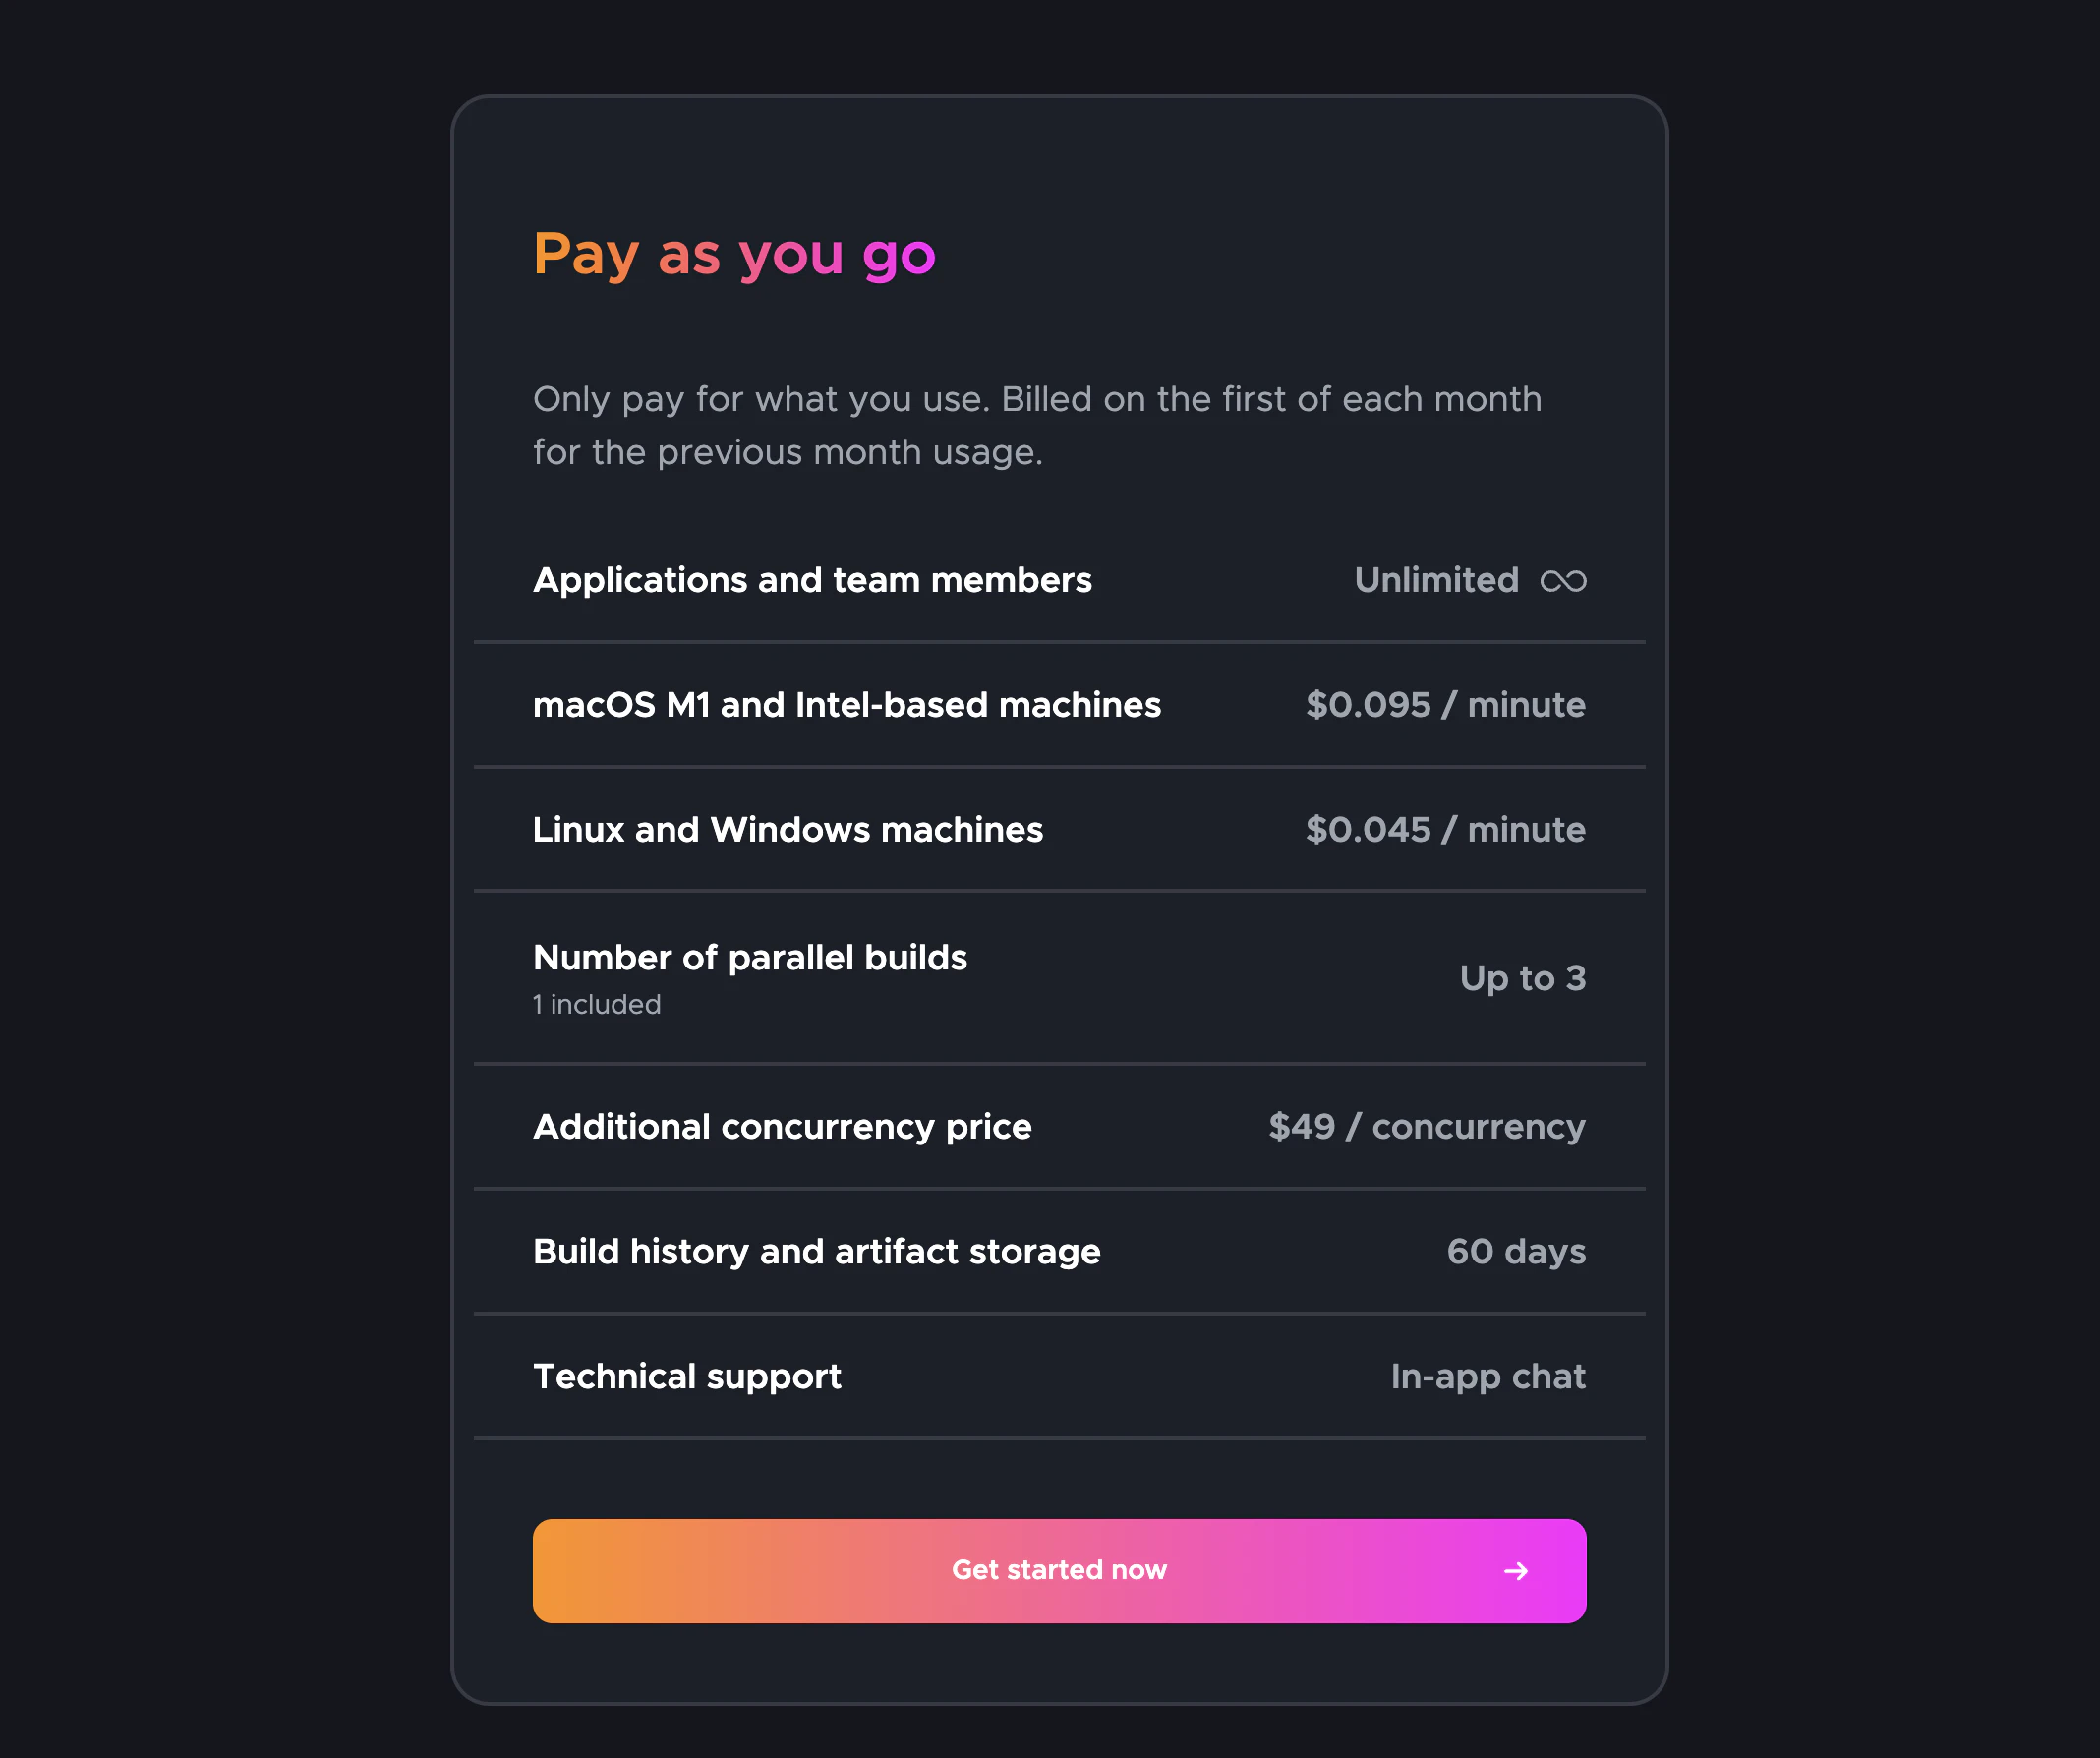
선택한 머신에 따라 월 500 macOS M1 분까지 ‘무료’로 서비스를 이용할 수 있습니다. 우리는 macOS M1 머신을 사용할 예정이며, 스크린샷에서 가격과 제한을 확인할 수 있습니다 (가격은 튜토리얼 작성 시점 기준이며, 향후 변경될 수 있습니다)
🔴 요구사항과 가격에 대해 안내했으니, 계속 진행하시겠습니다…
📣 이 포스트에서는 iTunes Connect에 앱이 생성되어 있고, Apple 생태계의 인증서가 있다고 가정합니다. 모든 것은 Codemagic이 설정할 것입니다!
시작해봅시다 🤿
포스트에서 다룰 단계들
- Codemagic에서 App Store Connect API 사용하기
- 요구사항
- App Store Connect API 키 생성하기
- App Store Connect API 키 사용하기
- Fastlane 파일 복사하기
- Codemagic 구성하기
1. Codemagic에서 App Store Connect API 사용하기
2021년 2월부터 App Store Connect 로그인 시 2단계 인증 또는 2단계 확인이 모든 사용자에게 필요합니다. Apple ID에 대한 이 추가 보안 계층은 계정에 접근할 수 있는 유일한 사람이 본인임을 보장합니다. Apple Support 참조
match를 시작하려면 기존 인증서를 취소해야 합니다. 하지만 걱정하지 마세요, 새로운 인증서를 바로 받을 수 있습니다.
요구사항
App Store Connect API를 사용하기 위해 Codemagic은 세 가지가 필요합니다.
- Issuer ID
- Key ID
- 키 파일 또는 키 내용
[… 나머지 내용 계속됨 …]


