In this tutorial, we’ll begin with a new SvelteKit app and transition to native mobile development using Capacitor. You can also add Capgo Native Navigation and Transitions for a native mobile feel, and use tailwind-capacitor for safe areas.
Capacitor allows you to easily convert your SvelteKit web application into a native mobile app without the need for significant modifications or learning a new skill like React Native.
Follow this step-by-step guide to transform your SvelteKit app into a mobile app using Capacitor, with optional Capgo Native Navigation, Transitions, and iOS layout guidance.
About Capacitor
CapacitorJS is a game-changer! It can be effortlessly integrated into any web project, wrapping your application in a native webview and generating native Xcode and Android Studio projects for you. Its plugins provide access to native device features like the camera via a JavaScript bridge.
Capacitor enables you to create a fantastic native mobile app without any complicated setup or steep learning curve. Its slim API and streamlined functionality make it easy to integrate into your project. You’ll be amazed at how simple it is to achieve a fully functional native app with Capacitor!
Preparing Your SvelteKit App
To create a new SvelteKit app, run the following command:
npm create svelte@latest my-app
cd my-app
npm install
npm run build
After running the build command, you should see a new dist folder at the root of your project.
This folder will be used by Capacitor later, but for now, we need to set it up correctly.
Adding Capacitor to Your SvelteKit App
To package any web app into a native mobile container, we need to follow a few initial steps. Afterward, it’s as simple as running a single sync command.
First, install the Capacitor CLI as a development dependency and set it up within your project. During the setup, you can press “enter” to accept the default values for name and bundle ID.
Next, install the core package and the relevant packages for the iOS and Android platforms.
Finally, add the platforms, and Capacitor will create folders for each platform at the root of your project:
# Install the Capacitor CLI locally
npm install -D @capacitor/cli

# Initialize Capacitor in your SvelteKit project
npx cap init

# Install the required packages
npm install @capacitor/core @capacitor/ios @capacitor/android

# Add the native platforms
npx cap add ios
npx cap add android
At this point, you should see new ios and android folders in your SvelteKit project.
These are real native projects!
To access the Android project later, you need to install Android Studio. For iOS, you need a Mac and should install Xcode.
Additionally, you should find a capacitor.config.ts file in your project, which contains some basic Capacitor settings used during the sync. The only thing you need to pay attention to is the webDir, which must point to the result of your build command. Currently, it is incorrect.
To fix this, open the capacitor.config.ts file and update the webDir:
import { CapacitorConfig } from '@capacitor/cli'

const config: CapacitorConfig = {
  appId: 'com.example.app',
  appName: 'my-app',
  webDir: 'build',
}

export default config
ow that we’ve updated our Capacitor settings, let’s change out Sveltekit project to a static application by downloading the proper static adapter package:
npm i -D @sveltejs/adapter-staticAfter the package is installed, we’ll need to alter svelte.config.js file from the auto-adapter to static:
import adapter from '@sveltejs/adapter-static'
import { vitePreprocess } from '@sveltejs/kit/vite'

/** @type {import('@sveltejs/kit').Config} */
const config = {
// Consult https://kit.svelte.dev/docs/integrations#preprocessors
// for more information about preprocessors
  preprocess: vitePreprocess(),

  kit: {
    // adapter-auto only supports some environments, see https://kit.svelte.dev/docs/adapter-auto for a list.
    // If your environment is not supported or you settled on a specific environment, switch out the adapter.
    // See https://kit.svelte.dev/docs/adapters for more information about adapters.
    adapter: adapter({
      // default options are shown. On some platforms
      // these options are set automatically — see below
      pages: 'build',
      assets: 'build',
      fallback: null,
      precompress: false,
      strict: true
    })
  }
}

export default config
With the svelte.config.js updated, we’ll need to add a prerender option by creating a +layout.js page to src/routes and just add the following export to +layout.js:
export const prerender = trueAfter adding and updating the +layout.js page, we’ll need to add our mobile platforms, re-build our project to create the build folder
You can do it by running the following commands:
npm run build
npx cap sync
The first command npm run build will build your SvelteKit project and copy the static build, while the second command npx cap sync will sync all the web code into the right places of the native platforms so they can be displayed in an app.
Additionally, the sync command might update the native platforms and install plugins, so when you install new Capacitor plugins, it’s time to run npx cap sync again.
Without realizing it, you’ve now completed the process, so let’s see the app on a device!
Build and Deploy Native Apps
To develop iOS apps, you need to have Xcode installed, and for Android apps, you need to have Android Studio installed. Moreover, if you plan to distribute your app on the app store, you need to enroll in the Apple Developer Program for iOS and the Google Play Console for Android.
If you’re new to native mobile development, you can use the Capacitor CLI to easily open both native projects:
npx cap open ios
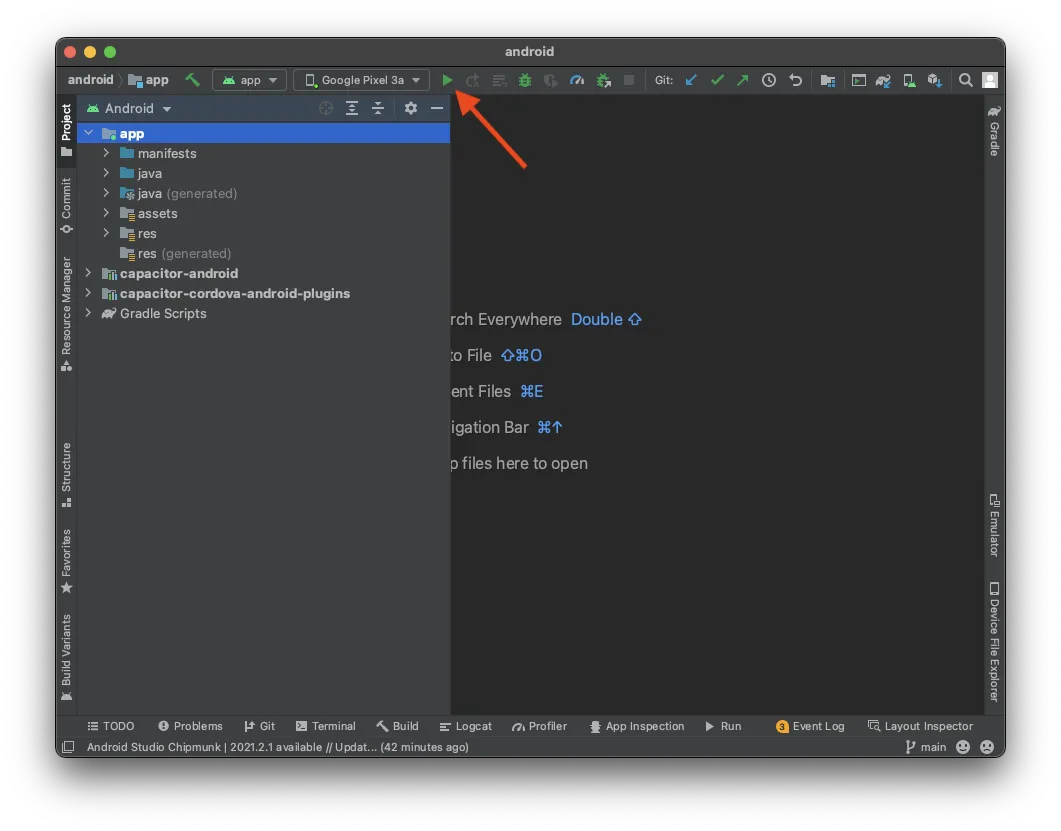
npx cap open androidOnce you’ve set up your native projects, deploying your app to a connected device is easy. In Android Studio, you just need to wait for everything to be ready, and you can deploy your app to a connected device without changing any settings. Here’s an example:
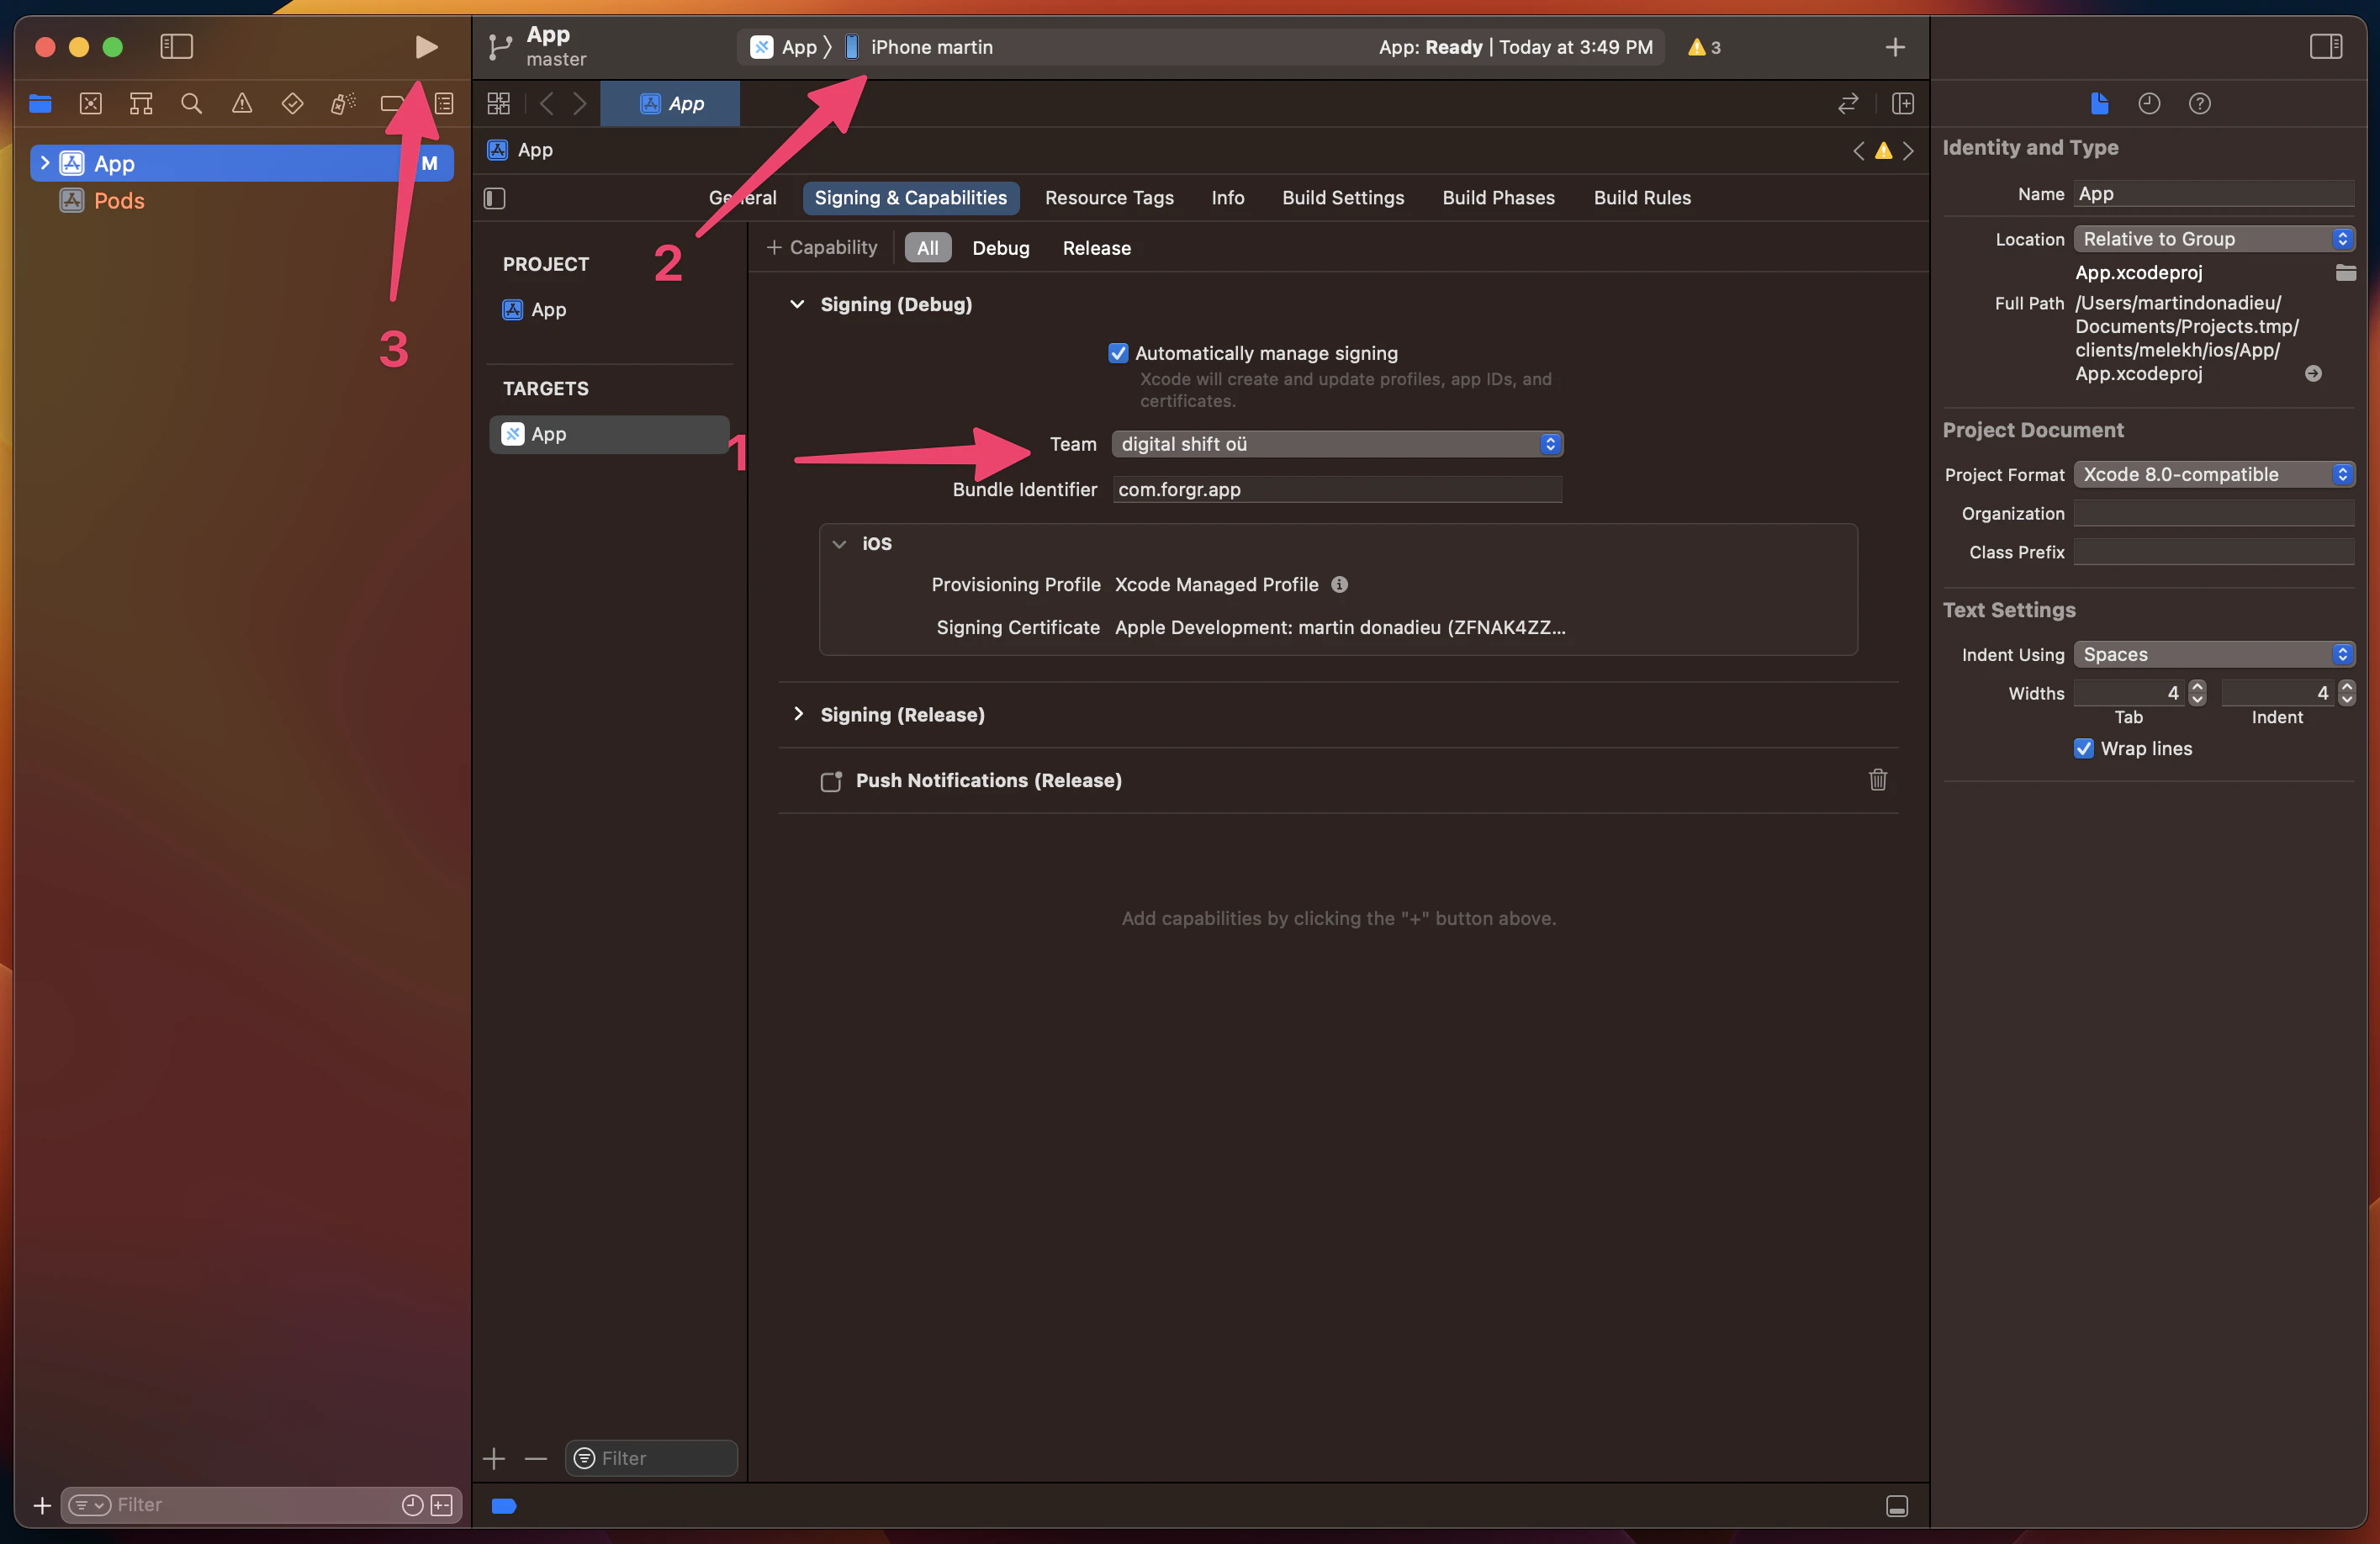
In Xcode, you need to set up your signing account to deploy your app to a real device instead of just the simulator. If you haven’t done this before, Xcode guides you through the process (but again, you need to be enrolled in the Developer Program). After that, you can simply hit play to run the app on your connected device, which you can select at the top. Here’s an example:
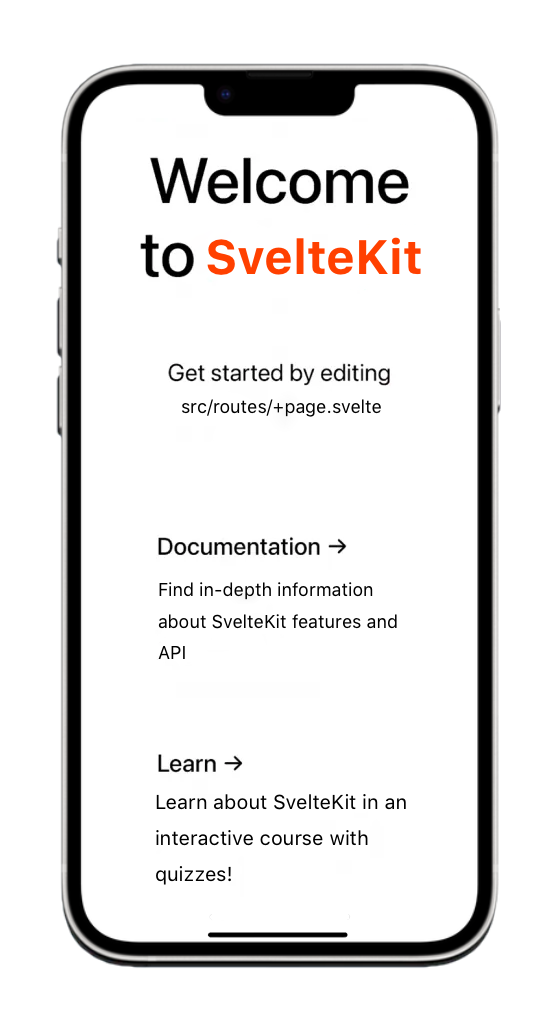
Congratulations! You have successfully deployed your SvelteKit web app to a mobile device. Here’s an example:
But wait, there’s also a faster way to do this during development…
Capacitor Live Reload
By now, you’re probably used to having hot reload with all modern frameworks, and the good news is that you can have the same functionality on a mobile device with minimal effort!
Enable access to your locally hosted application with live reload on your network by having the Capacitor app load the content from the specific URL.
The first step is to figure out your local IP address. If you’re using a Mac, you can find this out by running the following command in the terminal:
ipconfig getifaddr en0On Windows, run:
ipconfigThen look for the IPv4 address.
We can instruct Capacitor to load the app directly from the server by adding another entry to our capacitor.config.ts file:
import { CapacitorConfig } from '@capacitor/cli';

const config: CapacitorConfig = {
  appId: 'com.example.app',
  appName: 'my-app',
  webDir: 'dist',
  bundledWebRuntime: false,
  server: {
    url: 'http://192.168.x.xx:3000',
    cleartext: true
  }
};

export default config;
Be sure to use the correct IP and port, as shown in the example above.
Now, we can apply these changes by copying them over to our native project:
npx cap copyThe copy command is similar to sync, but it will only copy over the changes made to the web folder and configuration, without updating the native project.
You can now deploy your app one more time through Android Studio or Xcode. After that, if you change something in your Svelte app, the app will automatically reload and show the changes!
Keep in mind that if you install new plugins such as the camera, it still requires a rebuild of your native project. This is because native files are changed, and it can’t be done on the fly.
Note that you should use the correct IP and port in your configuration. The code block above shows the default SvelteKit port for demonstration purposes.
Using Capacitor Plugins
Let’s take a look at how to use a Capacitor plugin in action, which we’ve mentioned a few times before. To do this, we can install a simple plugin by running:
npm i @capacitor/shareThere’s nothing fancy about the Share plugin, but it brings up the native share dialog! For this, we now only need to import the package and call the share() function from our app, so let’s change the src/routes/index.svelte to this:
<script>
  import { Share } from '@capacitor/share';

  async function share() {
    await Share.share({
      title: 'Open Youtube',
      text: 'Check new video on youtube',
      url: 'https://www.youtube.com',
      dialogTitle: 'Share with friends'
    });
  }
</script>

<h1>Welcome to SvelteKit and Capacitor!</h1>
<button on:click={share}>Share now!</button>
As mentioned earlier, when installing new plugins, we need to perform a sync operation and then redeploy the app to our device. To do this, run the following command:
npx cap syncAfter hitting the button, you can witness the beautiful native share dialog in action!
Next, you can make the app feel more native on iOS and Android with Capgo navigation and transitions, and fix common iOS layout issues that cause horizontal overflow or cropped safe areas.
Native-feeling UI with Capgo Native Navigation and Transitions
I’ve worked for years with Ionic to build cross-platform applications, but integrating it with SvelteKit is hacky and rarely worth it when you already have Tailwind CSS.
For a native mobile feel in a SvelteKit + Capacitor app, use Capgo plugins instead of web-only UI kits like Konsta UI:
- @capgo/capacitor-native-navigation — native navbar, Liquid Glass tab bar on iOS, and a blurred tab bar style on Android. Your SvelteKit router keeps route state; the plugin owns the native chrome.
- @capgo/capacitor-transitions — Ionic-style page transitions and iOS edge swipe-back in the WebView layer, without adopting Ionic UI.
Install both:
bun add @capgo/capacitor-native-navigation @capgo/capacitor-transitions
bunx cap sync
Configure native navigation with CSS inset mode so web content respects the native bars:
import { NativeNavigation } from '@capgo/capacitor-native-navigation';

await NativeNavigation.configure({
  contentInsetMode: 'css',
  animationDuration: 360,
  glass: {
    effect: 'liquidGlass',
  },
});
Render a Liquid Glass tab bar (iOS uses system-owned rendering; Android uses a blurred WebView backdrop):
await NativeNavigation.setTabbar({
  selectedId: 'home',
  labelVisibilityMode: 'labeled',
  icons: true,
  colors: { dynamic: true },
  tabs: [
    { id: 'home', title: 'Home', icon: { svg: '...' } },
    { id: 'settings', title: 'Settings', icon: { svg: '...' } },
  ],
});

await NativeNavigation.addListener('tabSelect', ({ id }) => {
  goto(`/${id}`);
});
Add native page transitions in your app shell:
<script>
  import { goto } from '$app/navigation';
  import { routerOutlet, page, setDirection } from '@capgo/capacitor-transitions/svelte';
  import '@capgo/capacitor-transitions';

  function openSettings() {
    setDirection('forward');
    goto('/settings');
  }
</script>

<cap-router-outlet use:routerOutlet>
  <cap-page use:page>
    <cap-content slot="content">
      <slot />
    </cap-content>
  </cap-page>
</cap-router-outlet>
Wrap routed pages in cap-router-outlet, cap-page, and cap-content, and call setDirection('forward') or setDirection('back') before navigating. Do not duplicate web headers or footers when native navigation owns those surfaces.
See the full guides: Using @capgo/capacitor-native-navigation and Using @capgo/capacitor-transitions.
Safe areas with Tailwind
For device safe areas in Tailwind CSS, use @capgo/tailwind-capacitor (published as tailwind-capacitor on npm). It provides safe-areas utilities and other Capacitor-friendly Tailwind plugins:
bun add -D tailwind-capacitorIn src/app.css:
@import 'tailwindcss';
@plugin "@capgo/tailwind-capacitor/platform";
@plugin "@capgo/tailwind-capacitor/safe-areas";
Use utilities such as pt-safe, pb-safe, and px-safe instead of sprinkling env(safe-area-inset-*) by hand. The project is actively developed — if something is missing for your SvelteKit setup, open a PR on GitHub.
Fixing iOS Layout Issues (Viewport, Safe Area, and Horizontal Overflow)
If content looks cropped, shifted, or horizontally scrollable on iOS, adding more overflow-x: hidden or tweaking the viewport tag alone usually does not fix it. Work through these checks in order.
Make sure the viewport meta tag is applied correctly
In src/app.html, set the viewport meta tag in <head>:
<meta name="viewport" content="width=device-width, initial-scale=1, viewport-fit=cover" />Handle iOS safe area from one root wrapper only
Create a single app shell and apply safe area padding there — not in multiple nested components:
html,
body,
body {
  width: 100%;
  min-height: 100%;
  margin: 0;
  padding: 0;
  overflow-x: hidden;
}

* {
  box-sizing: border-box;
}

.app-shell {
  min-height: 100dvh;
  width: 100%;
  padding-top: env(safe-area-inset-top);
  padding-right: env(safe-area-inset-right);
  padding-bottom: env(safe-area-inset-bottom);
  padding-left: env(safe-area-inset-left);
}
Wrap all page content inside .app-shell. Duplicated safe-area padding in headers, modals, and layout wrappers often makes the UI look cropped or too large.
With @capgo/tailwind-capacitor, you can express the same padding with utilities like pt-safe pb-safe px-safe on that single shell.
Set Capacitor iOS contentInset to never first
In capacitor.config.ts, prefer native inset disabled and let CSS (or Native Navigation’s contentInsetMode: 'css') own the safe area:
const config: CapacitorConfig = {
  appId: 'com.example.myapp',
  appName: 'my-app',
  webDir: 'build',
  ios: {
    contentInset: 'never',
  },
};
Mixing Capacitor’s automatic content inset with CSS env(safe-area-inset-*) padding is a common cause of double spacing.
Find the real overflowing element
The usual culprit is an element using 100vw, Tailwind w-screen, a fixed pixel width, or a large min-width.
In Safari Web Inspector, run:
[...document.querySelectorAll('*')]
  .filter(el => el.scrollWidth > document.documentElement.clientWidth)
  .map(el => ({
    el,
    tag: el.tagName,
    class: el.className,
    scrollWidth: el.scrollWidth,
    clientWidth: document.documentElement.clientWidth,
  }));
With Tailwind, replace w-screen with w-full when possible. Many horizontal overflow issues come from 100vw / w-screen, duplicated safe-area padding, or a fixed-width container — not from the viewport meta tag itself.
Conclusion
Capacitor is an excellent option for building native applications based on an existing web project, offering a simple way to share code and maintain a consistent UI.
And with the addition of Capgo, it’s even easier to add live updates to your app, ensuring that your users always have access to the latest features and bug fixes.
If you would like to learn how to add Capgo to your SvelteKit app, take a look at the next article:
Learn how Capgo can help you build better apps faster, sign up for a free account today.
Keep going from Building Mobile Apps with SvelteKit and Capacitor
If you are using Building Mobile Apps with SvelteKit and Capacitor to plan CI/CD automation, connect it with Capgo CI/CD for the product workflow in Capgo CI/CD, Capgo Native Builds for the product workflow in Capgo Native Builds, Capgo Integrations for the product workflow in Capgo Integrations, CI/CD Integration for the implementation detail in CI/CD Integration, and GitHub Actions Integration for the implementation detail in GitHub Actions Integration.


