Continuous Delivery for iOS using Codemagic
Prerequisites
Before continuing with the tutorial…
- iOS developer program membership.
- Desire to read 😆…
Important about the price
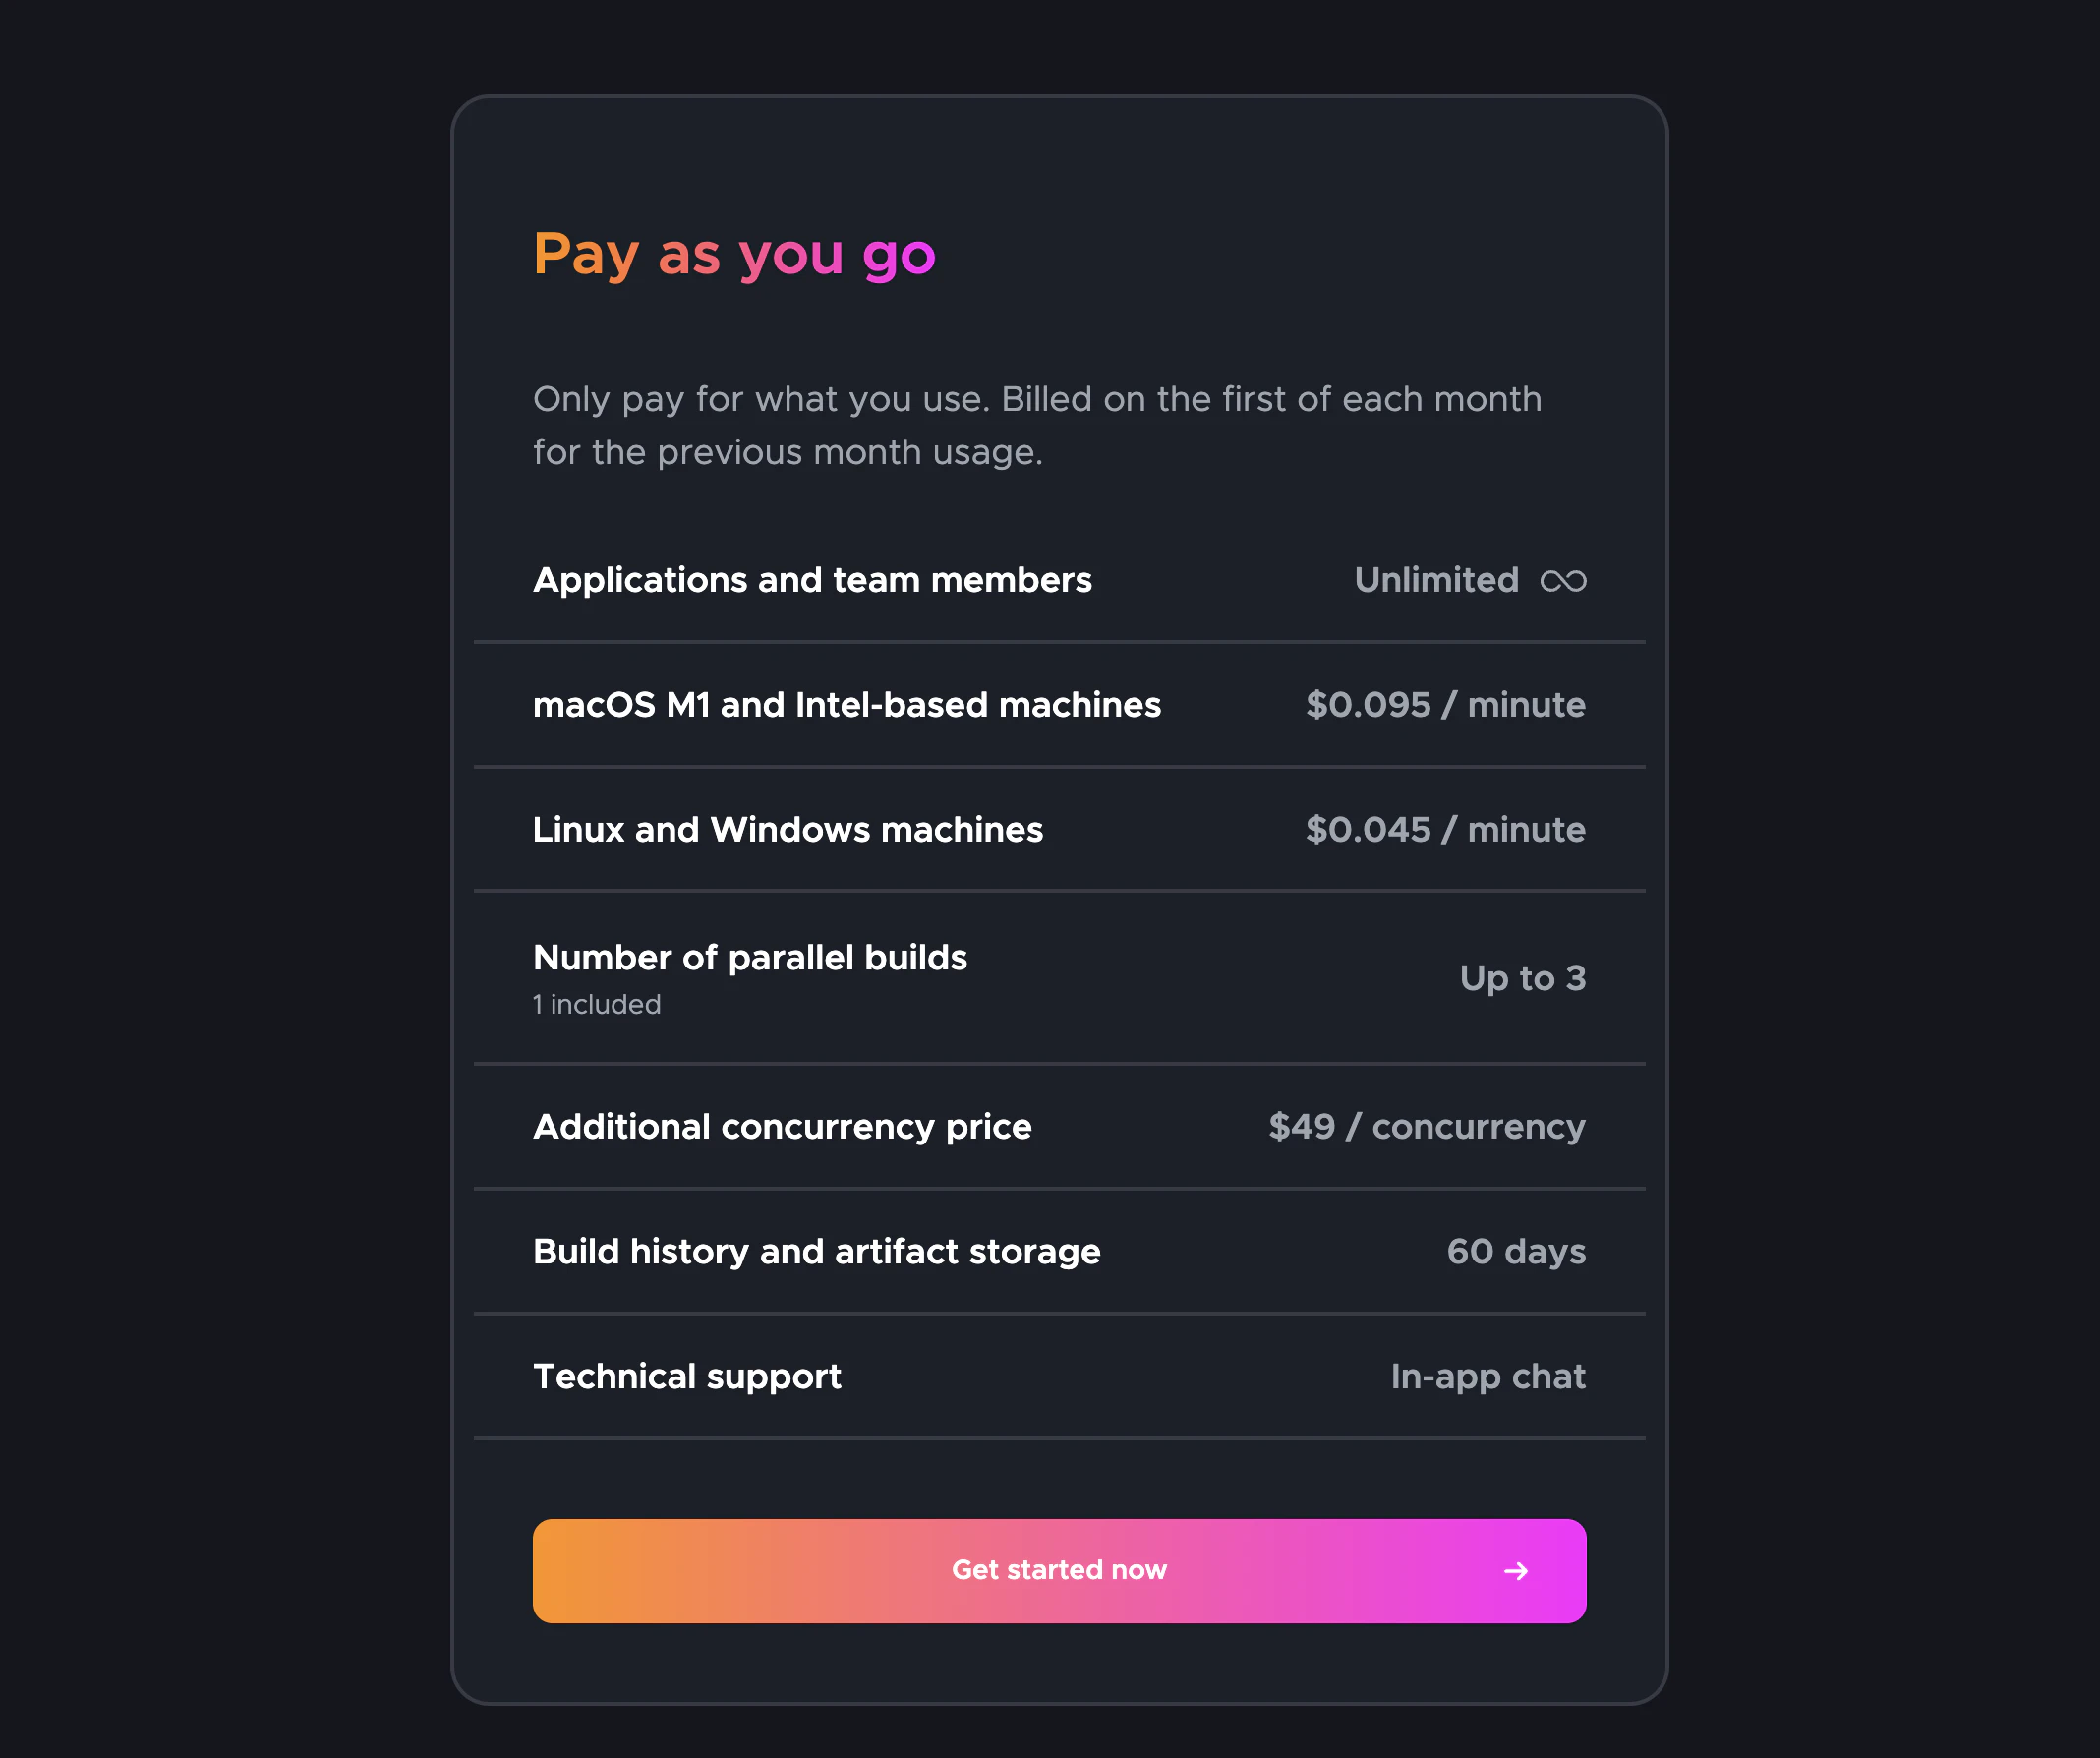
The service is ‘free’ up to 500 macOS M1 minutes / month, depending on the chosen machine.
We are going to use a macOS M1 machine, you can see in the screenshot its price and limits (prices as of the creation of the tutorial, they could undergo changes in the future)
🔴 Once warned of requirements and prices, if you like, we continue…
📣 In the post we assume that we have the app created in iTunes connect, we do have the certificates of the Apple ecosystem, everything will be setup by Codemagic!
Let’s dive in 🤿
Steps to follow in the post
- Using App Store Connect API with Codemagic
- Requirements
- Creating an App Store Connect API Key
- Using an App Store Connect API Key
- Copy Fastlane files
- Configure Codemagic
1. Using App Store Connect API with Codemagic
Starting February 2021, two-factor authentication or two-step verification is required for all users to sign in to App Store Connect. This extra layer of security for your Apple ID helps ensure that you’re the only person who can access your account.
From Apple Support
Getting started with match requires you to revoke your existing certificates. But no worry, you will have the new one directly.
Requirements
To be able to use App Store Connect API, Codemagic needs three things.
- Issuer ID.
- Key ID.
- Key file or Key content.
Creating an App Store Connect API Key
To generate keys, you must have Admin permission in App Store Connect. If you don’t have that permission, you can direct the relevant person to this article and follow the following instructions.
1 — Log in to App Store Connect.
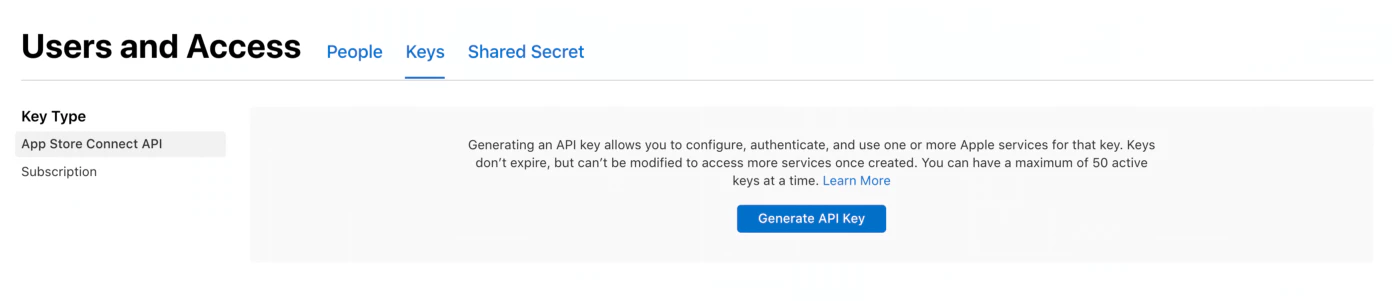
2 — Select Users and Access.
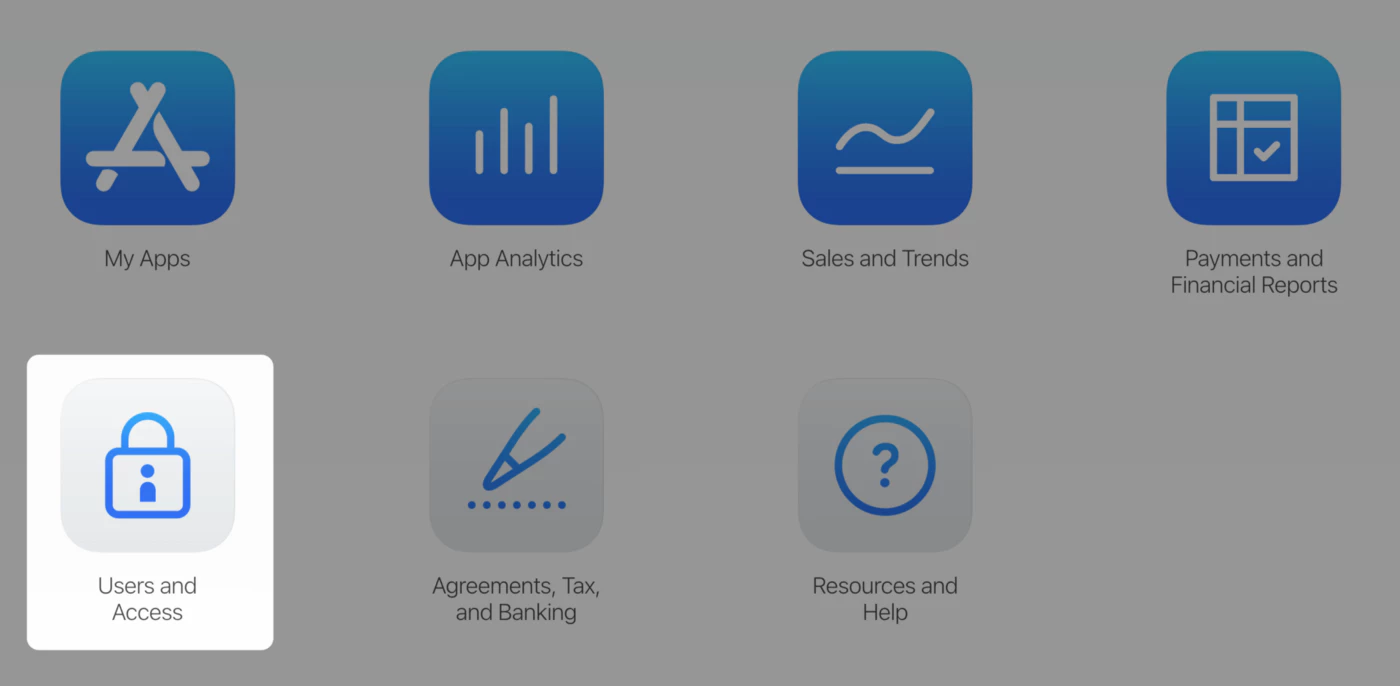
3 — Select the API Keys tab.
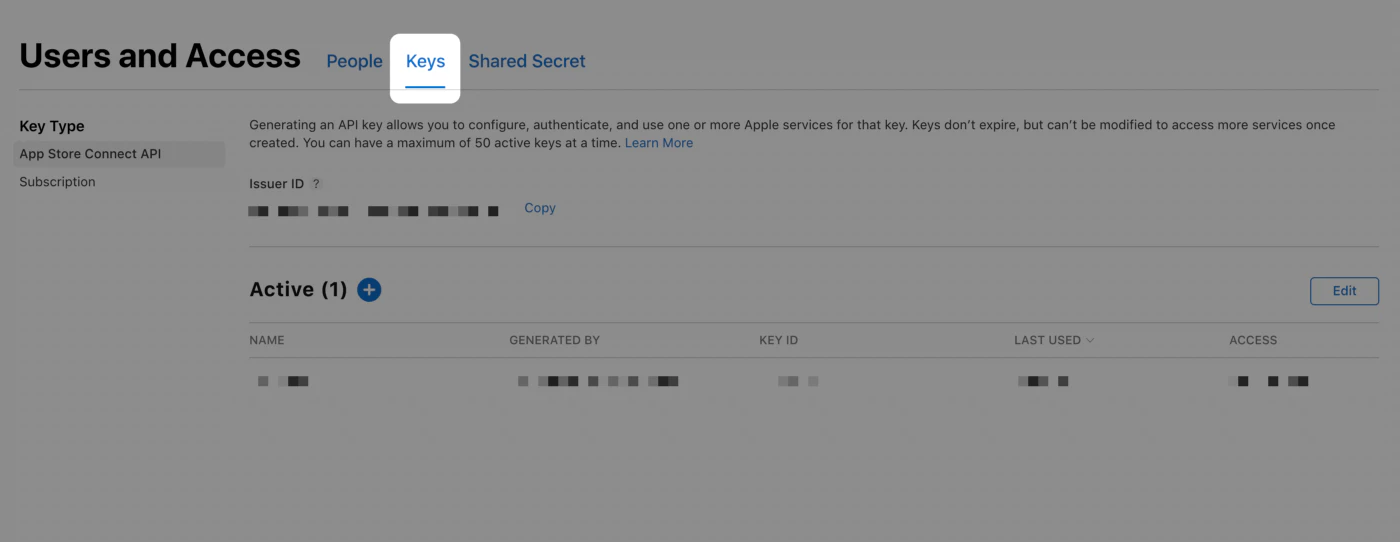
4 — Click Generate API Key or the Add (+) button.
5 — Enter the name for the key and select an access level. We recommend choosing App Manager access rights, read more about Apple Developer Program role permissions here
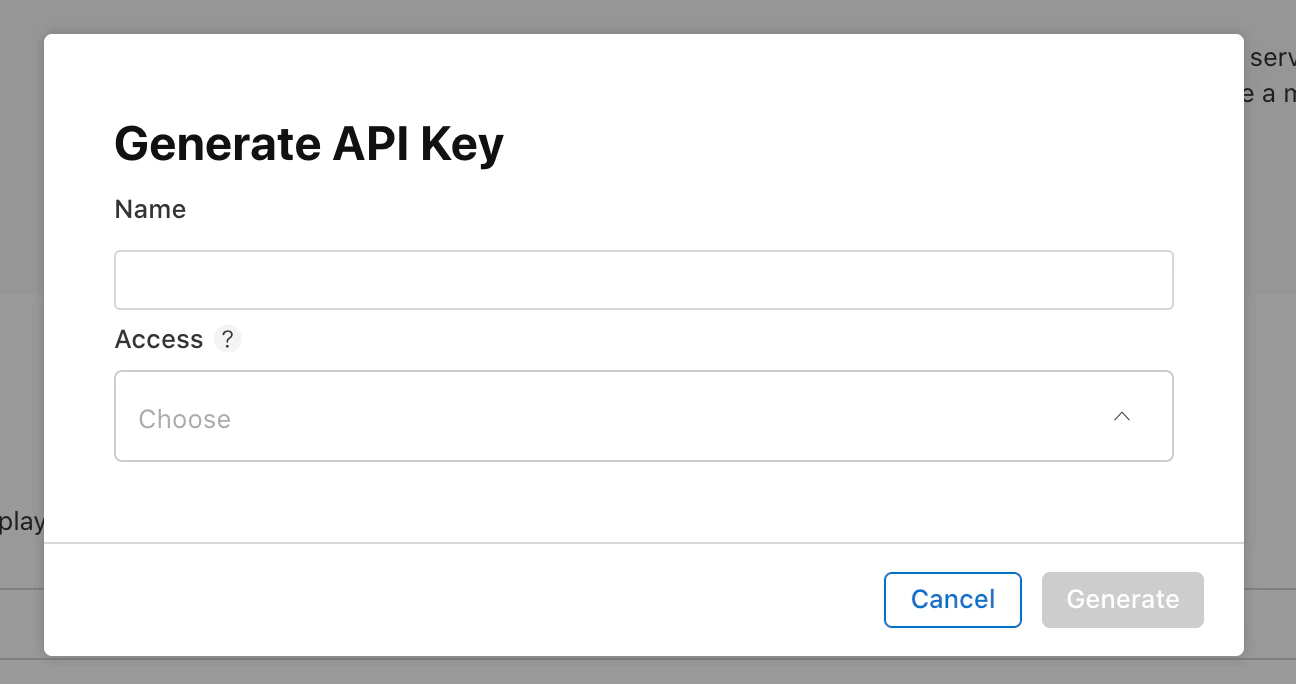
6 — Click Generate.
An API key’s access cannot be limited to specific apps.
The new key’s name, key ID, a download link, and other information appear on the page.
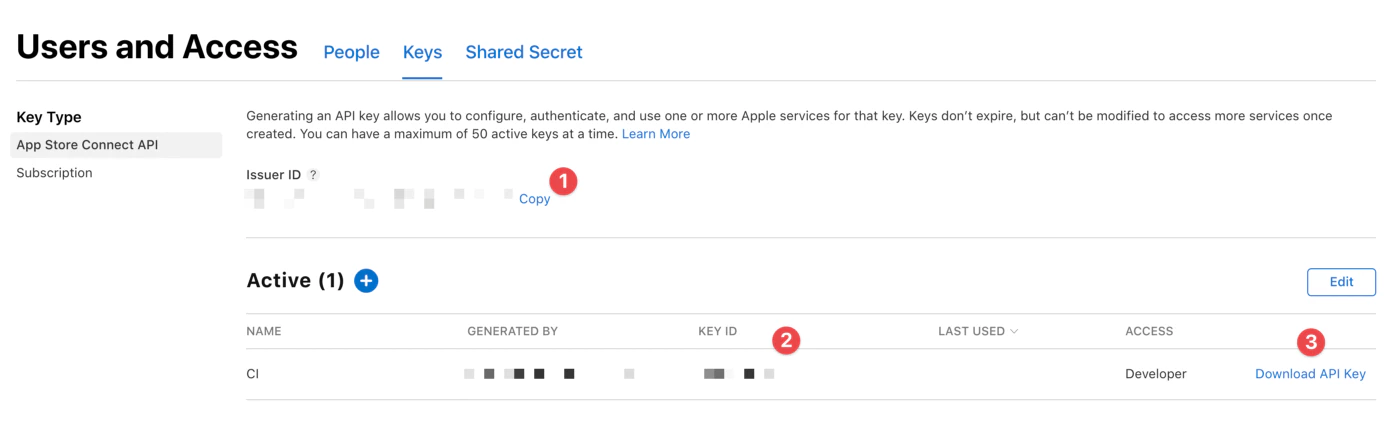
Grab all three necessary information here:
<1> Issue ID.
<2> Key ID.
<3> Click “Download API Key” to download your API private key. The download link appears only if the private key has not yet been downloaded. Apple does not keep a copy of the private key. So, you can download it only once.
🔴 Store your private key in a safe place. You should never share your keys, store keys in a code repository, or include keys in client-side code.
Adding the App Store Connect API key to Codemagic
-
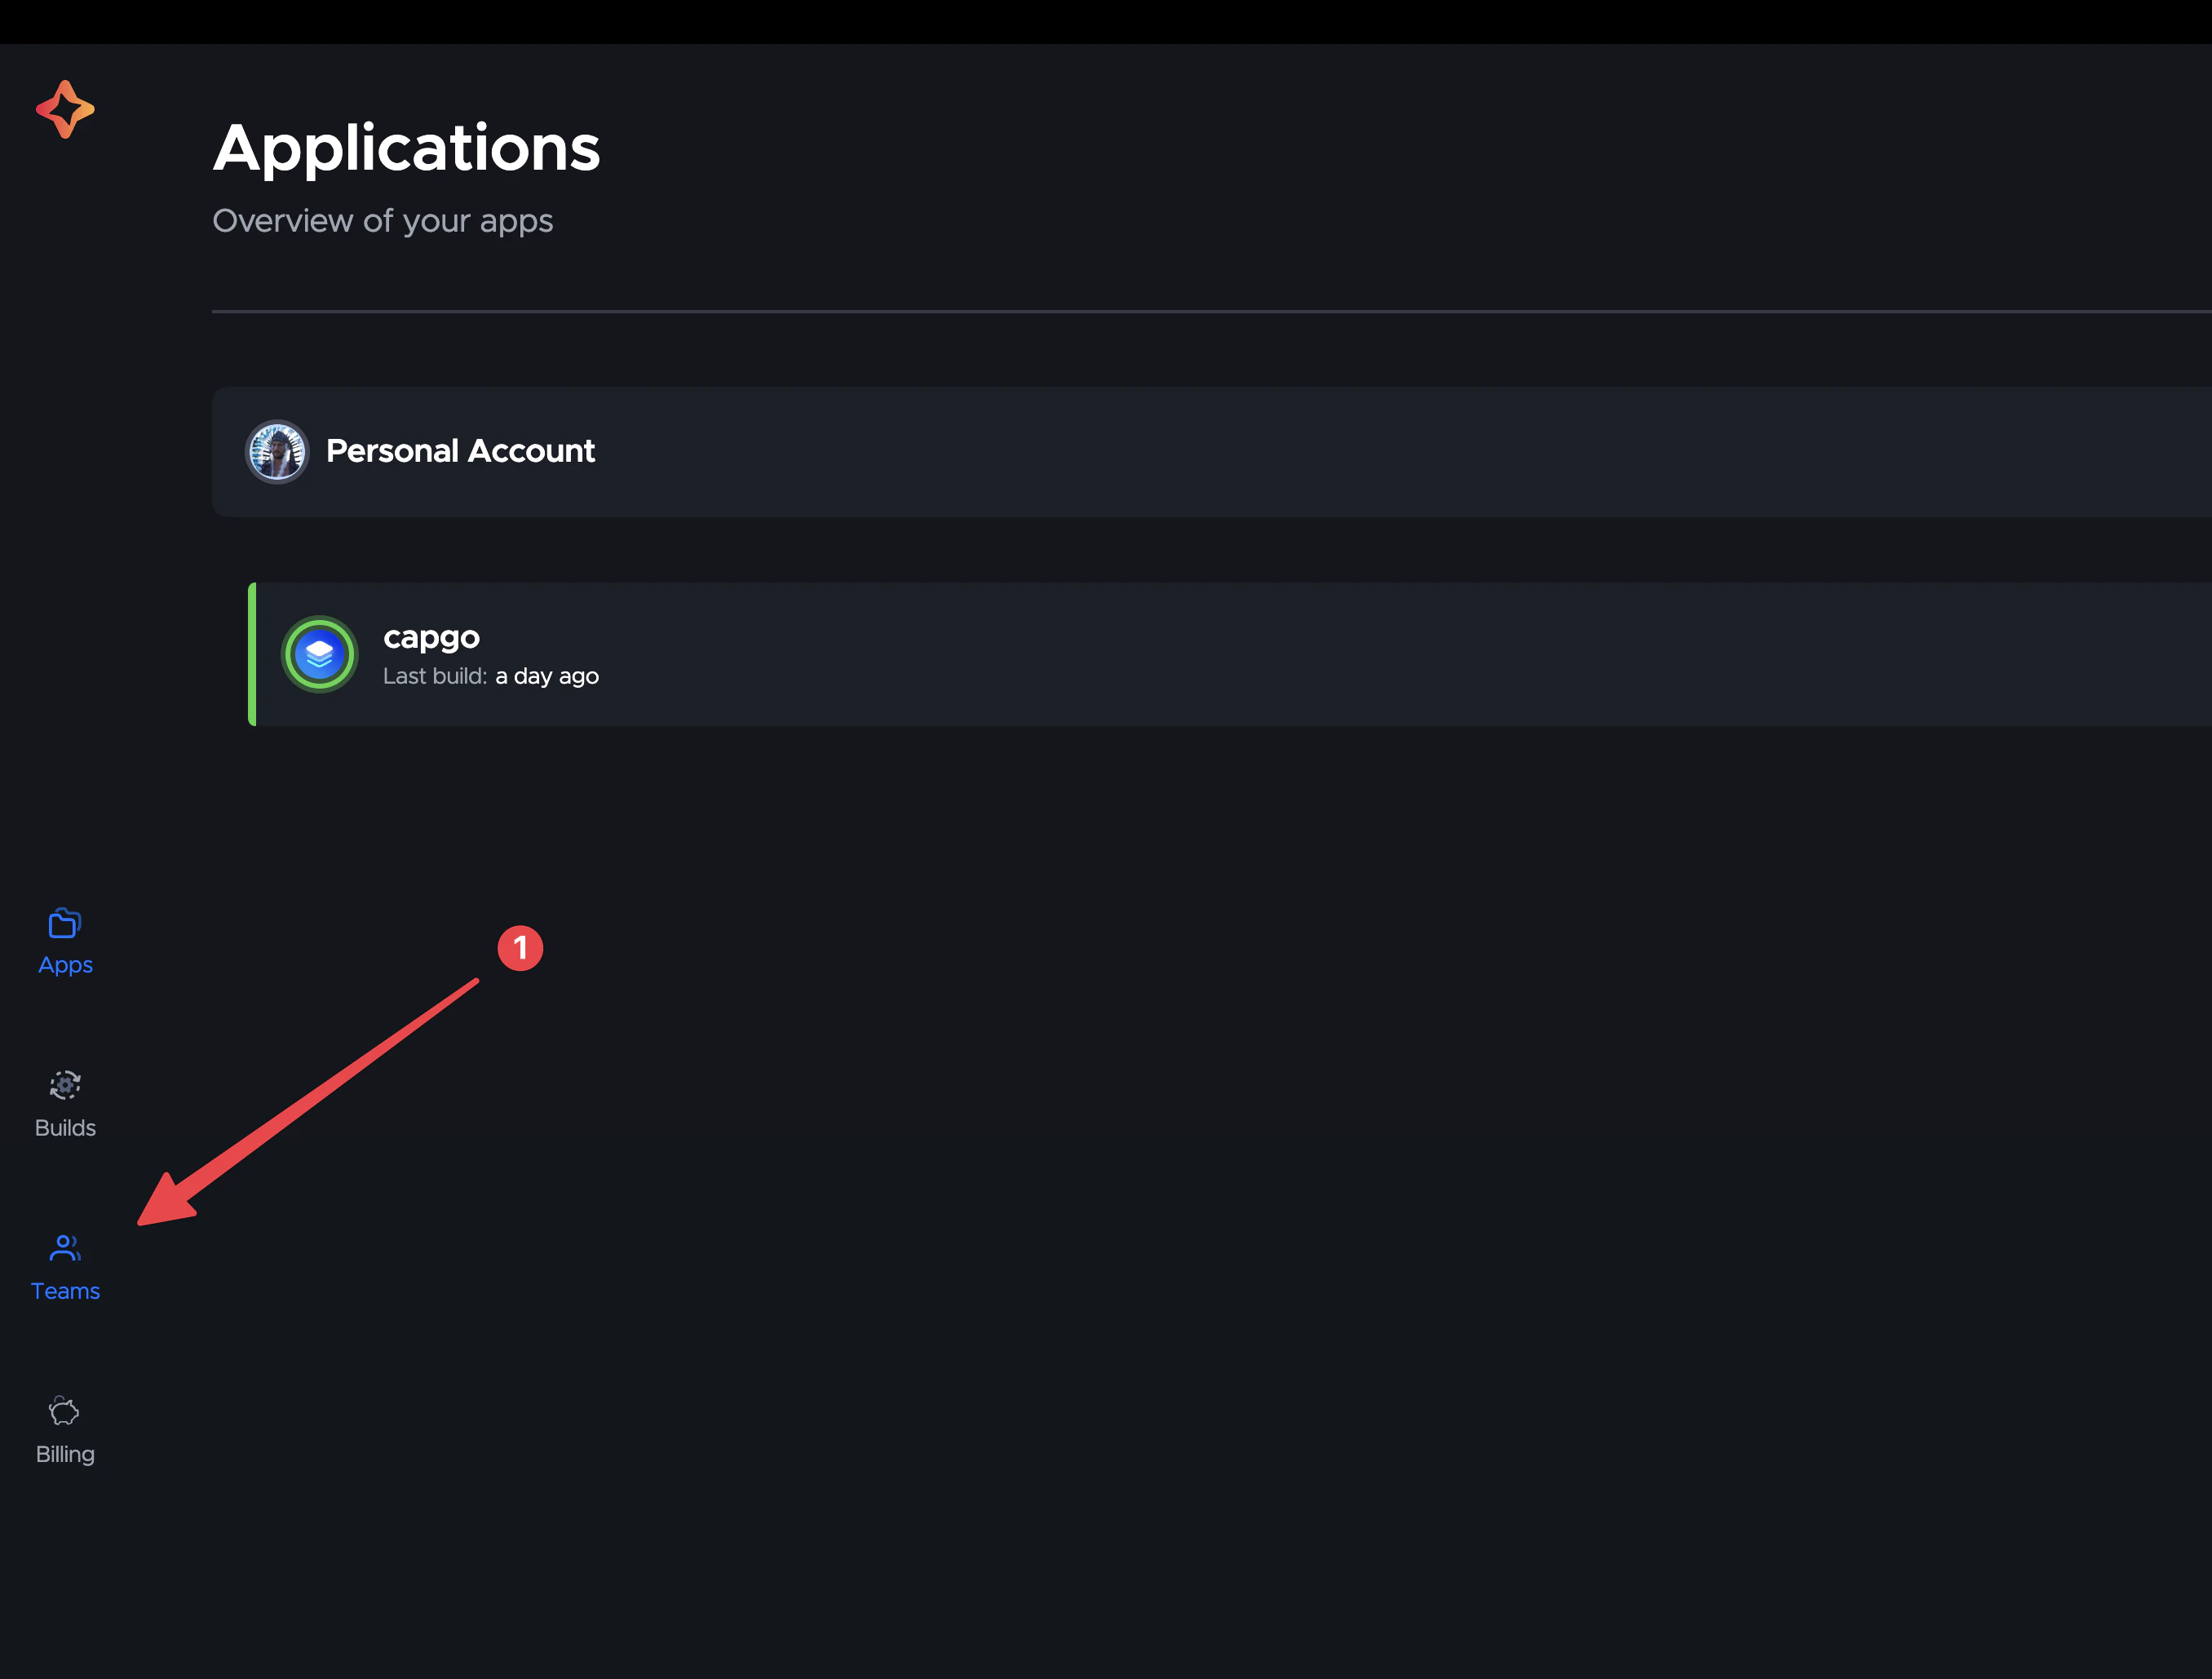
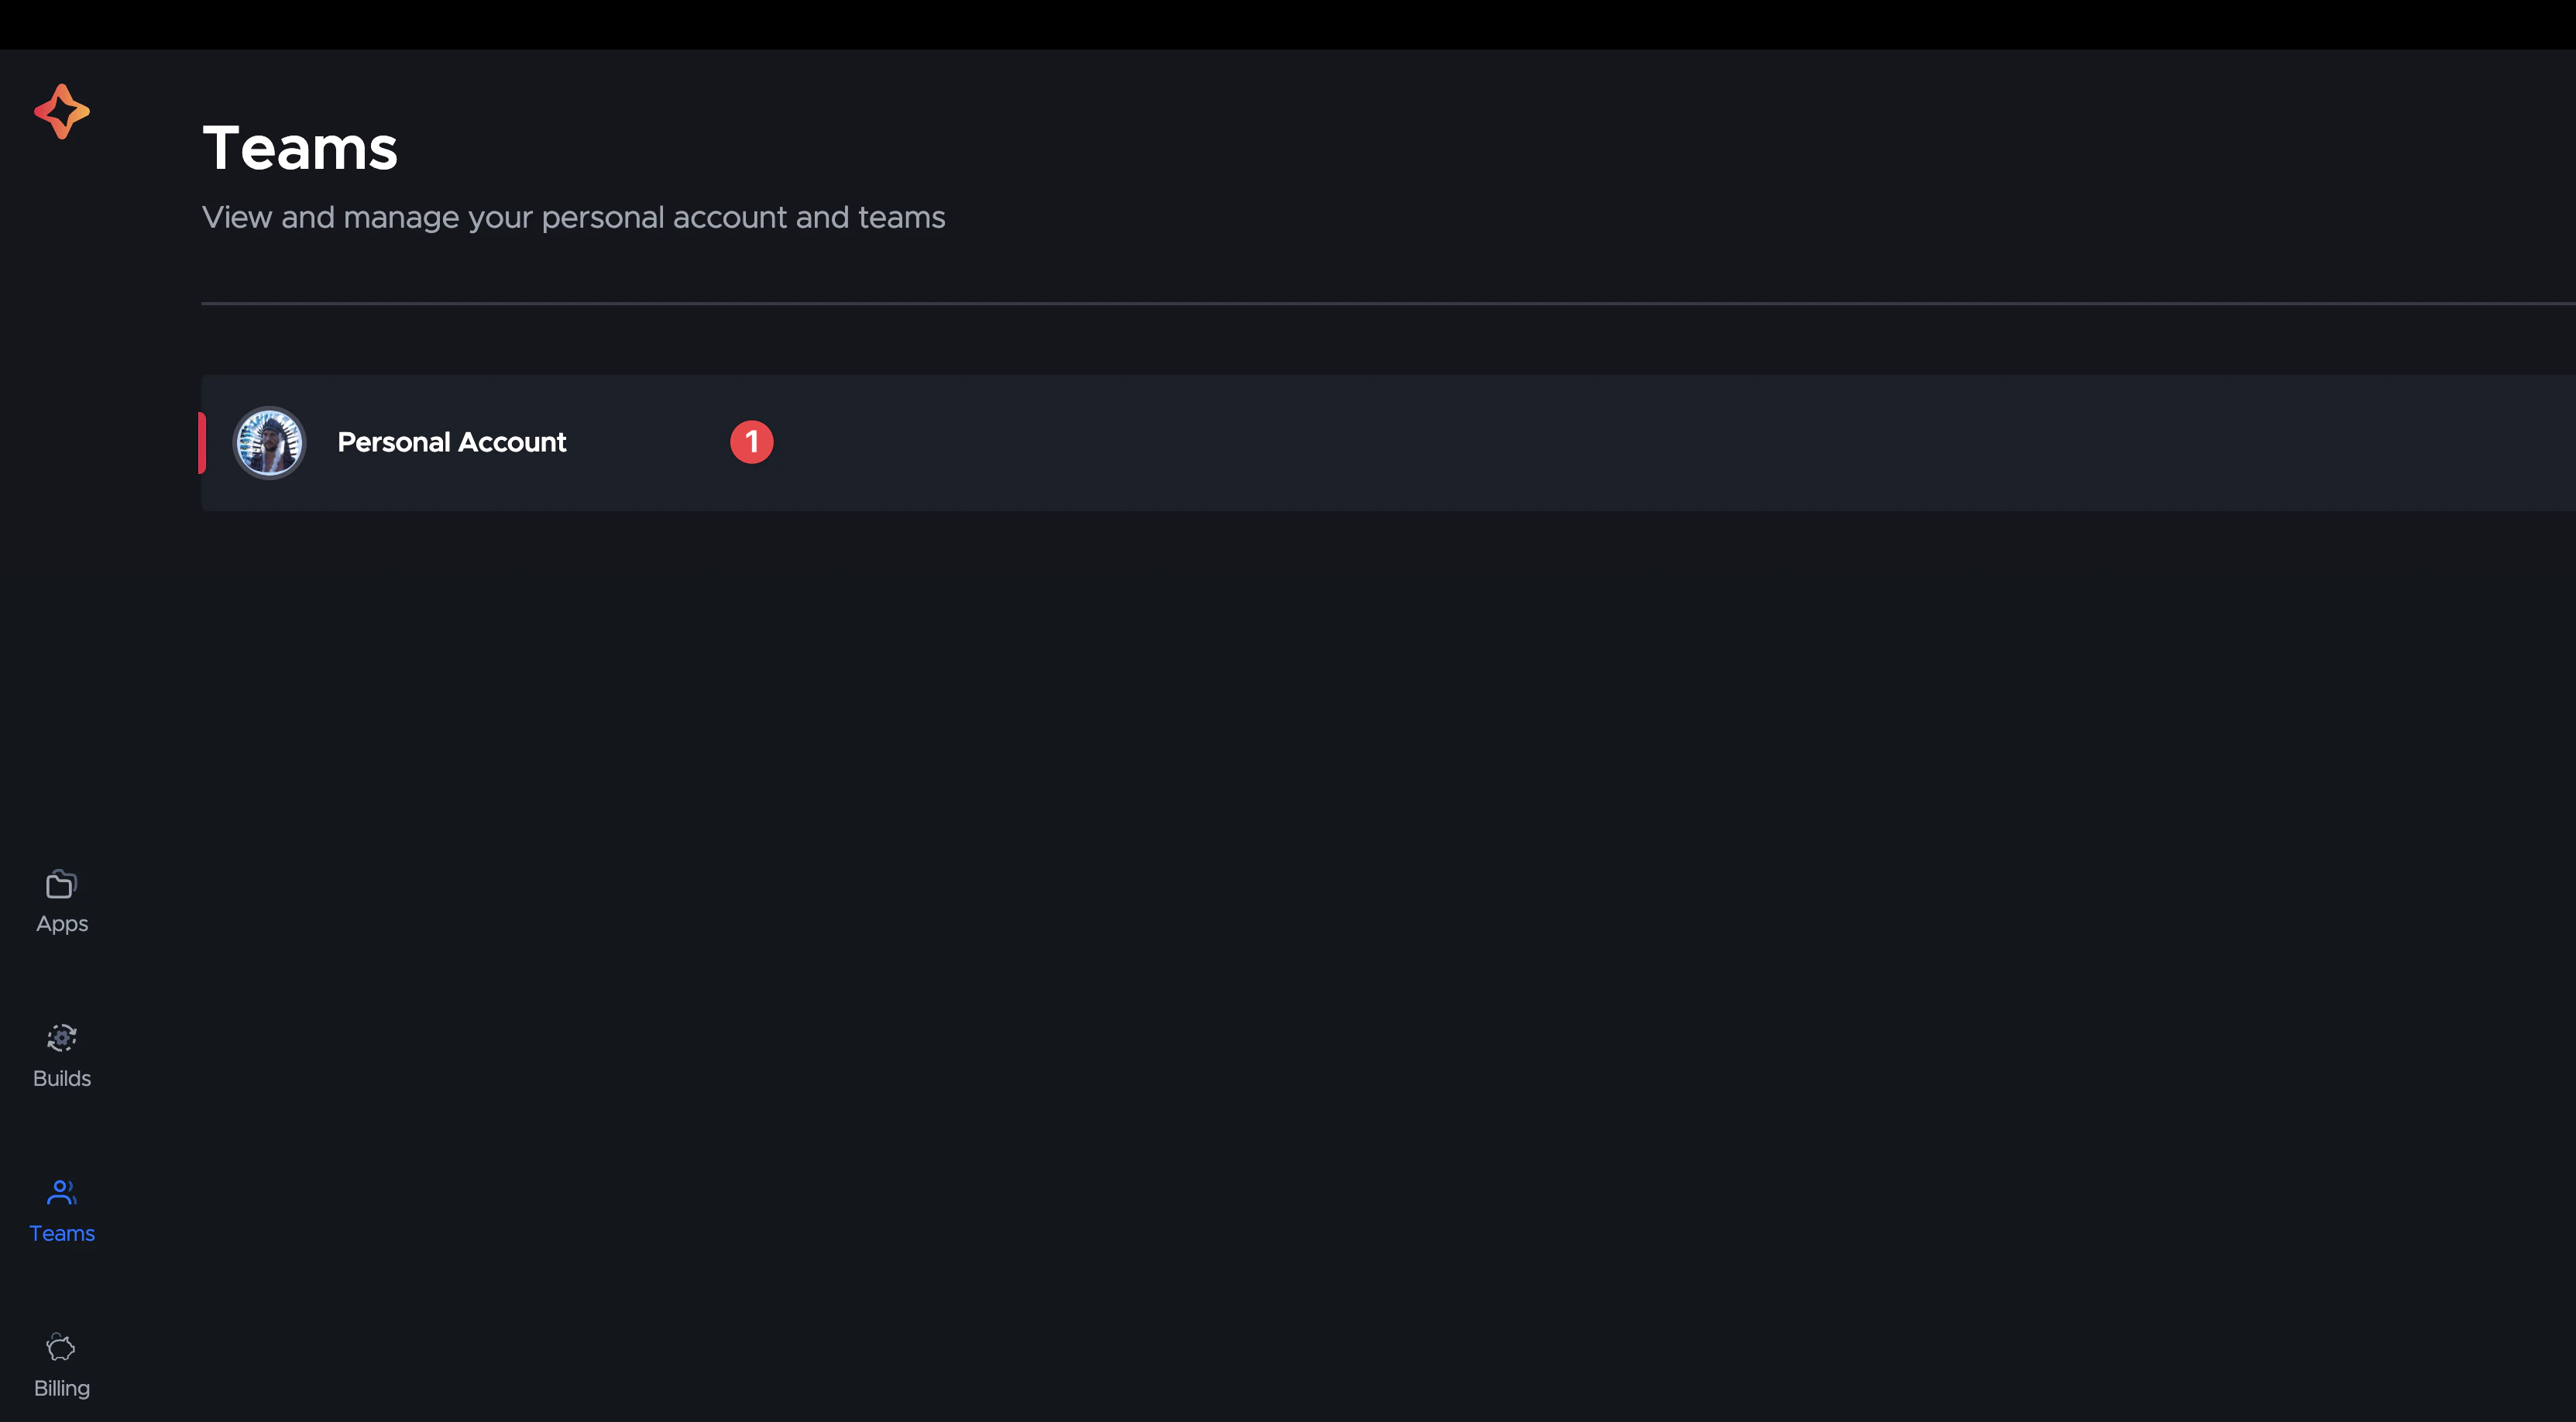
Open your Codemagic Team settings,
-
Click the Add key button.
-
Enter the
App Store Connect API key name. This is a human readable name for the key that will be used to refer to the key later in application settings. -
Enter the
Issuer IDandKey IDvalues. -
Click on Choose a .p8 file or drag the file to upload the App Store Connect API key downloaded earlier.
-
Click Save.
Now we can manage Codemagic with the App Store Connect API key, great!
2. Create certificates and provisioning profiles
Certificates
Open XCode and go to Settings > Accounts > Apple ID > Teams and select your team.
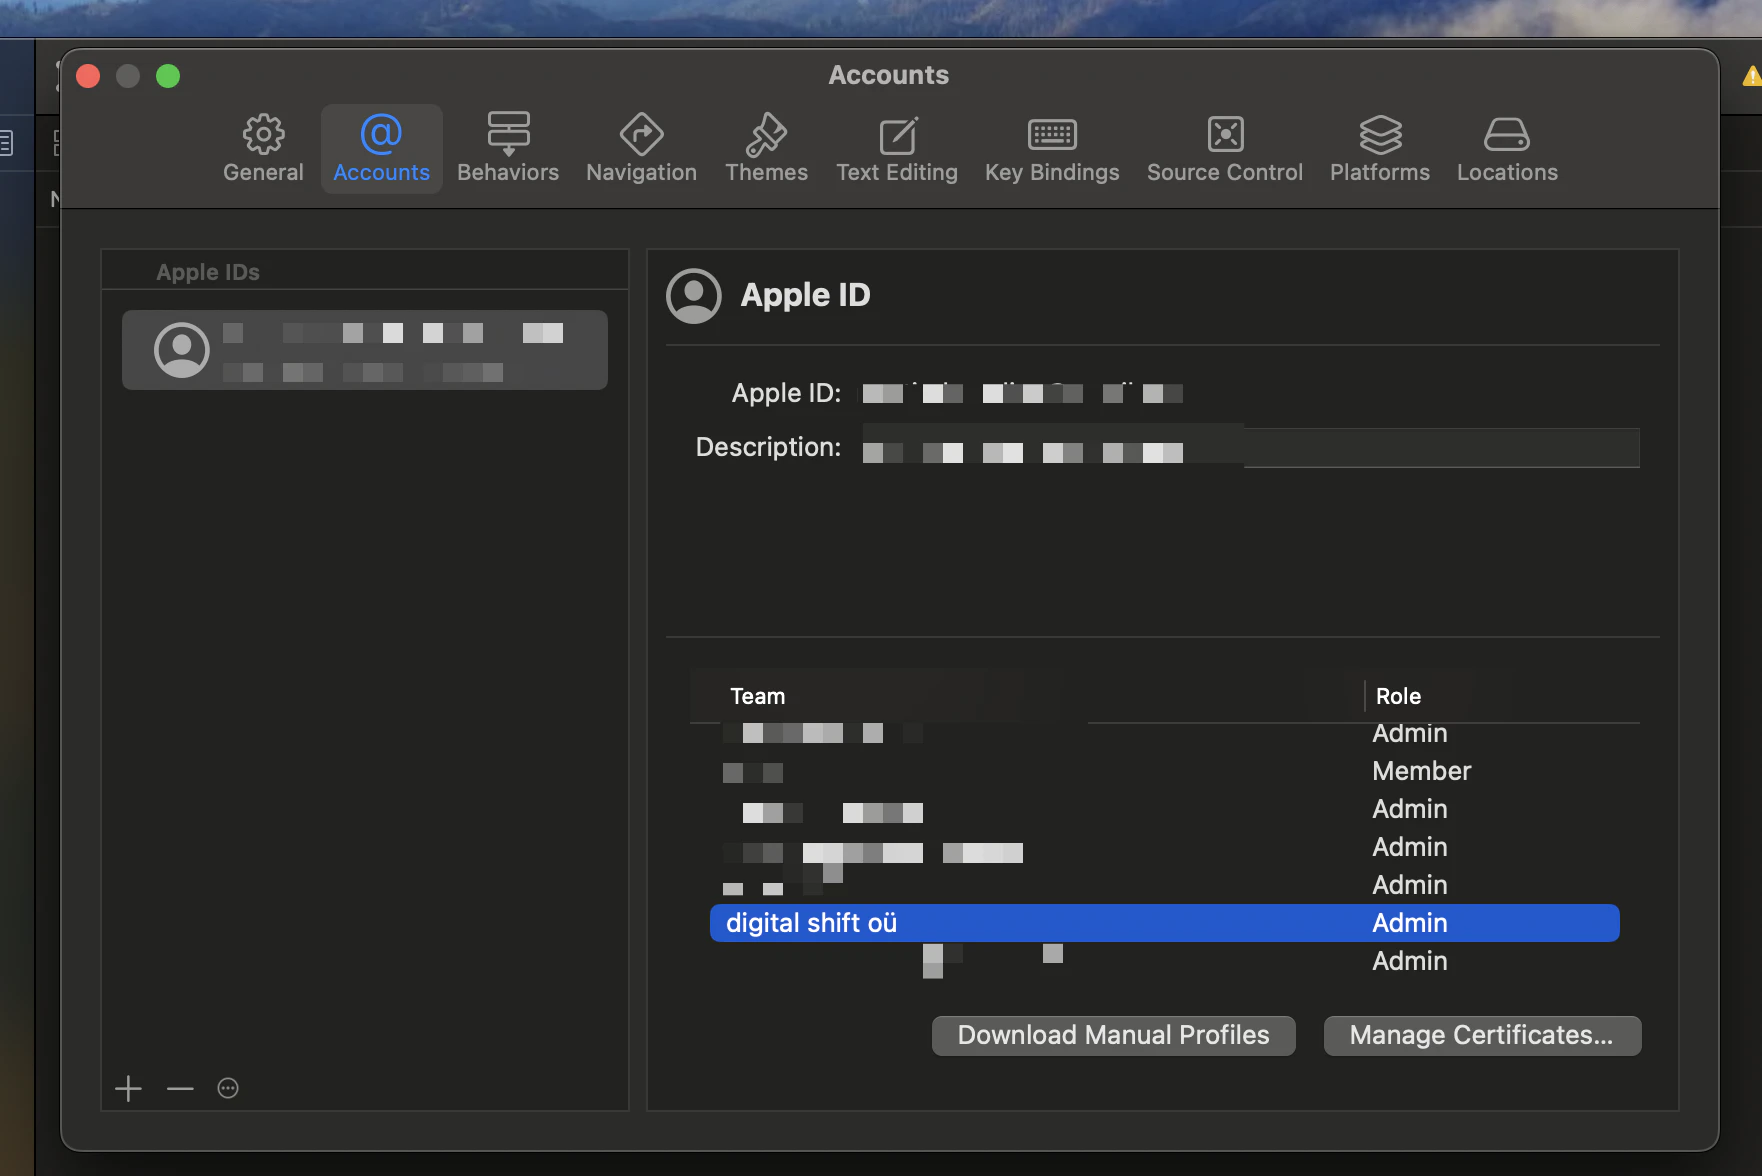
Click on Manage certificates > + and select Apple Distribution.
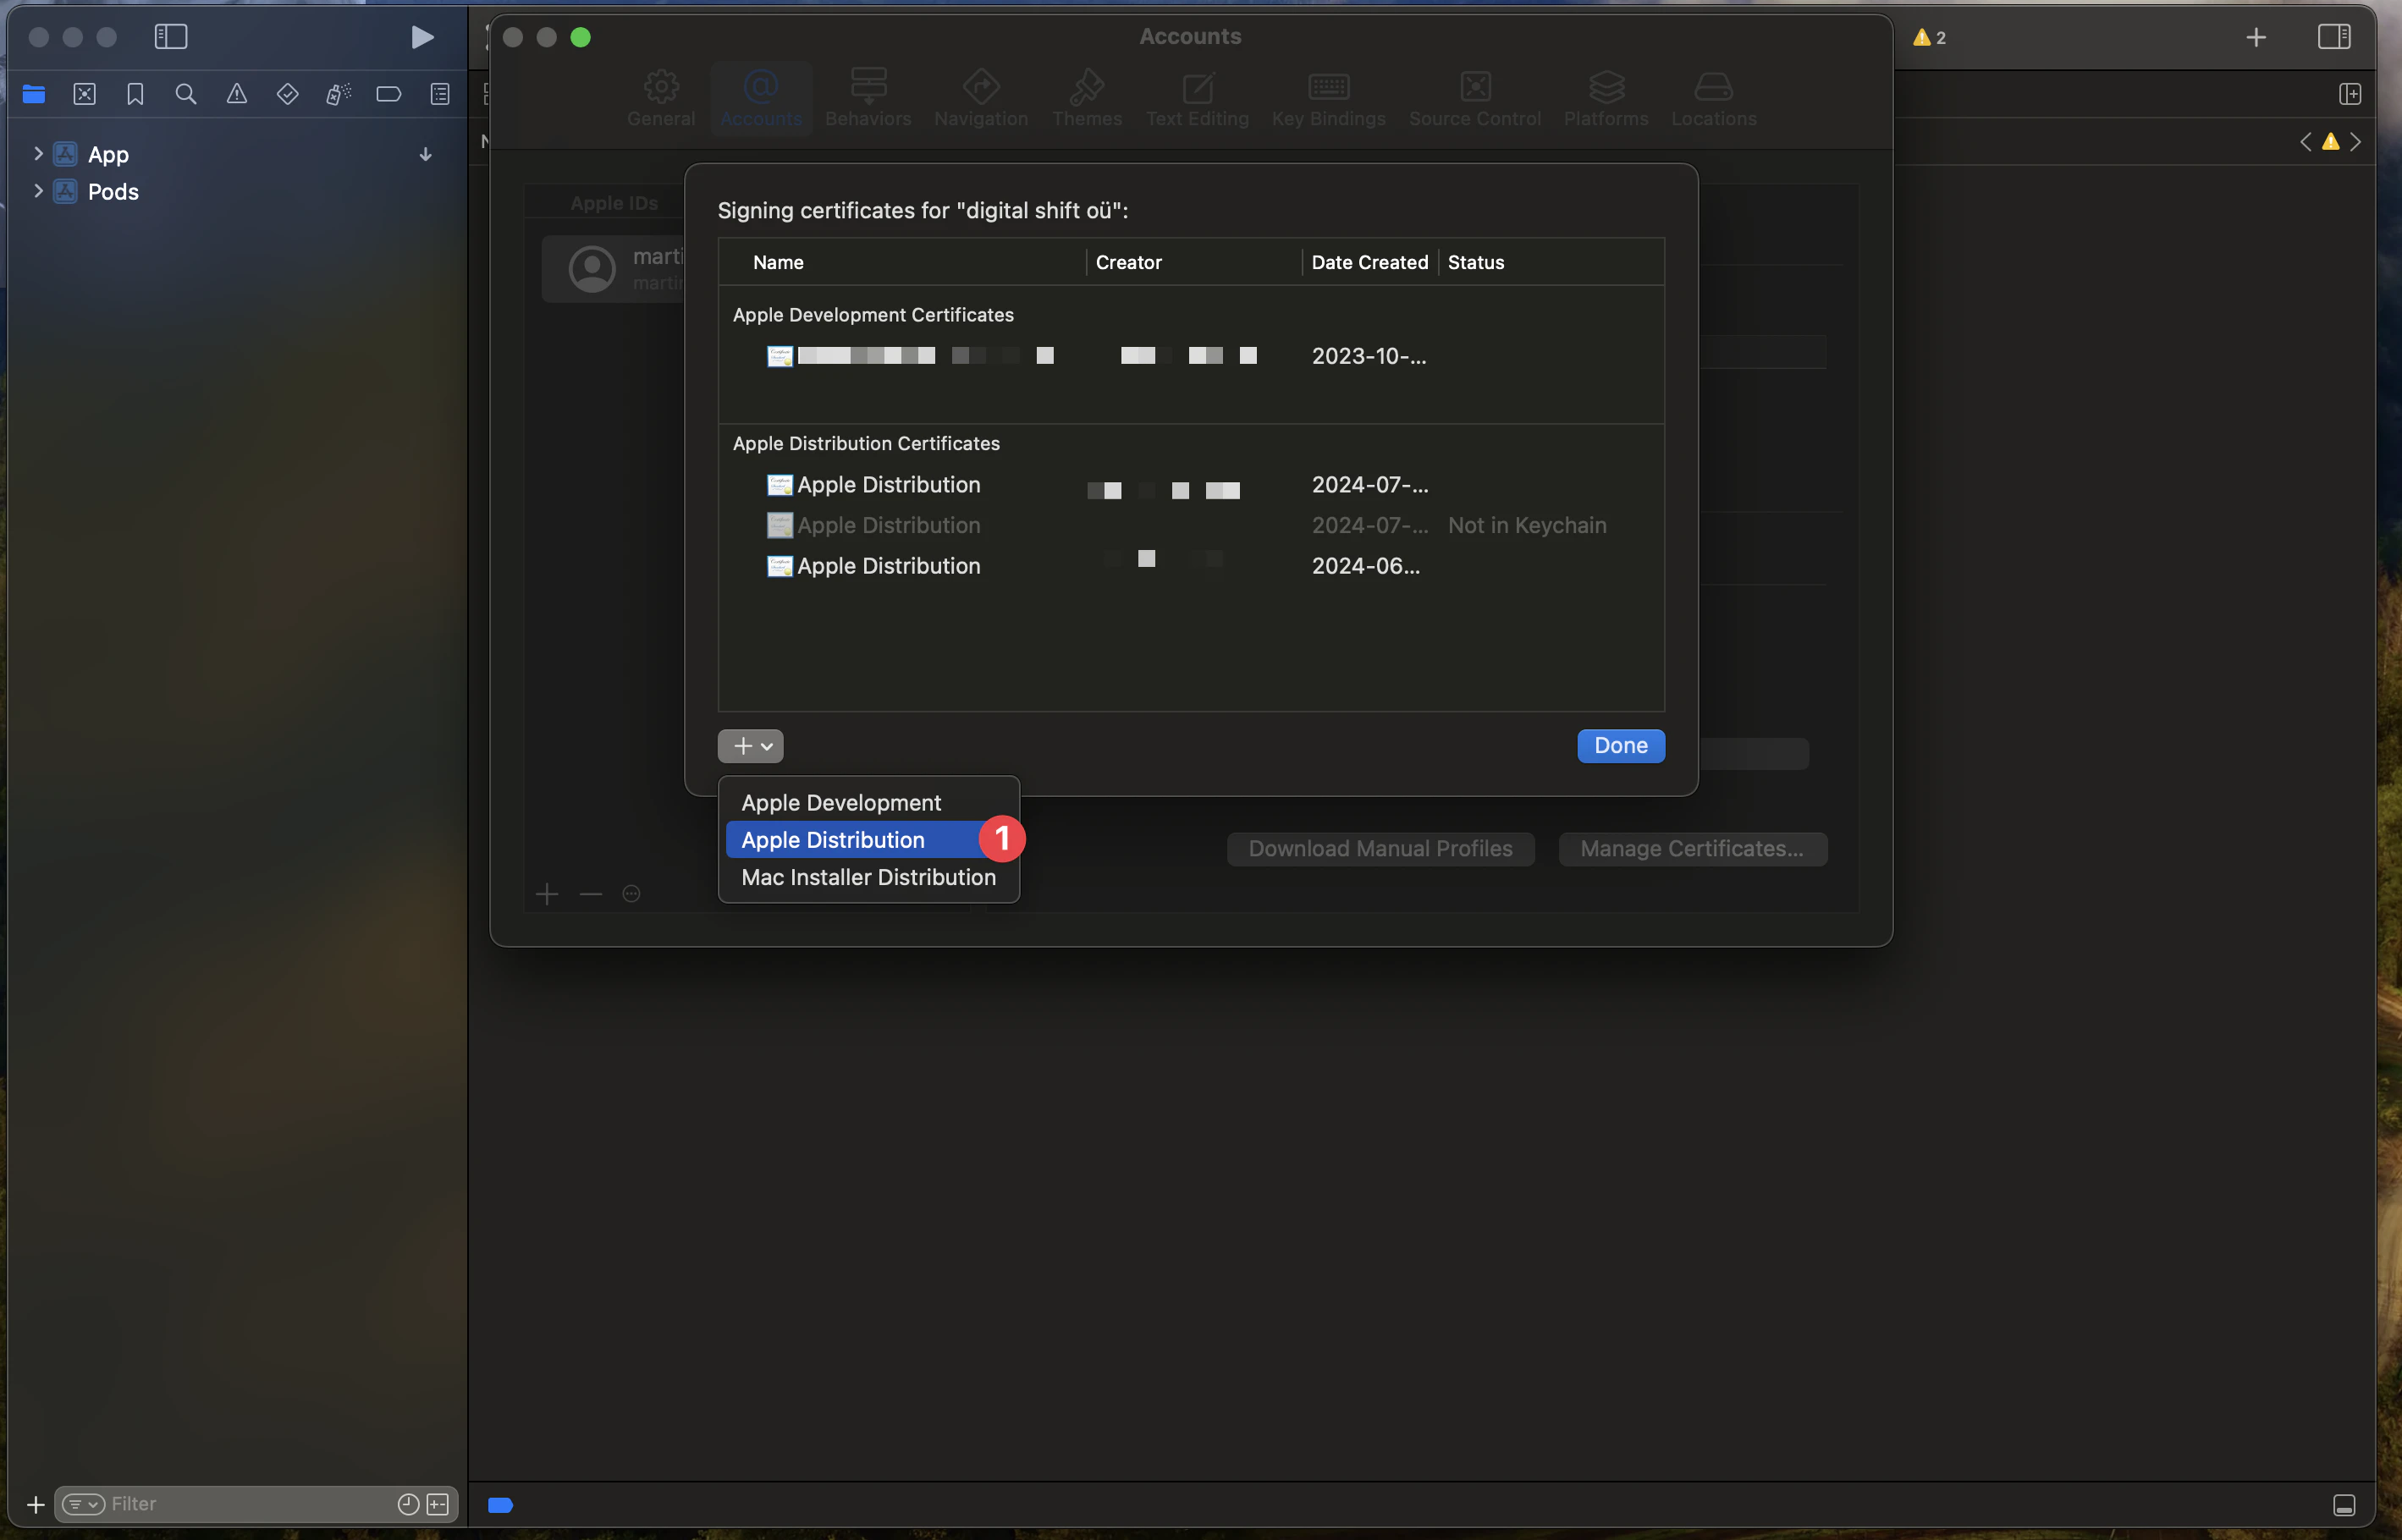
Then you can create a new certificate.
Then you need to go to keychain to download the certificate as a .p12 file.
To do so, you need to go to keychain switch to the login keychain and then the tab My Certificates.

Then you can select the certificate you want to download. (Look by the date of the certificate)
And then right-click on the certificate and select Export.
Choose the file format Personal Information Exchange (.p12).
That will download the certificate as a .p12 file.
Provisioning profiles
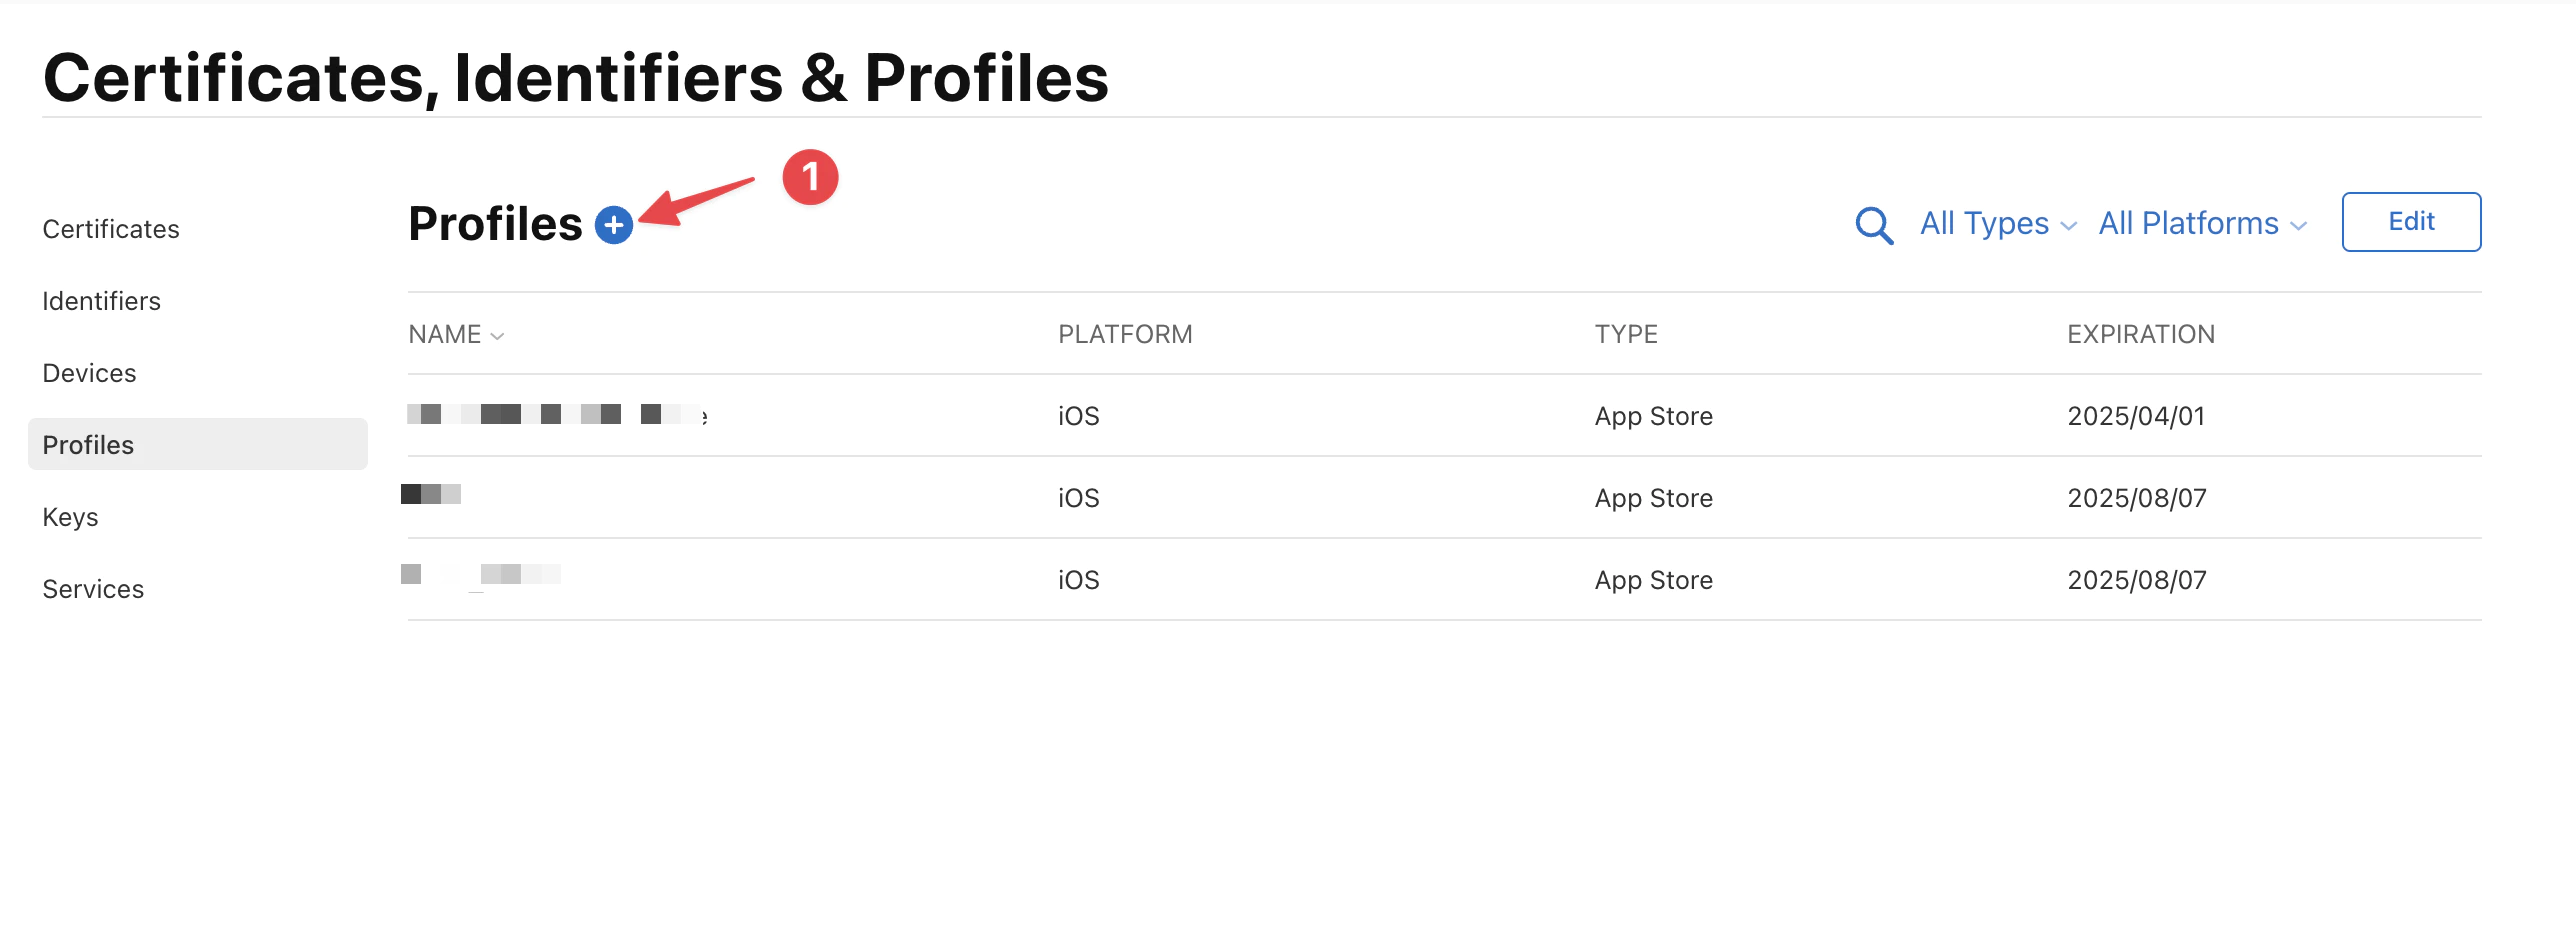
Open Apple Developer and select the right team.
Then create a new profile, by clicking on +
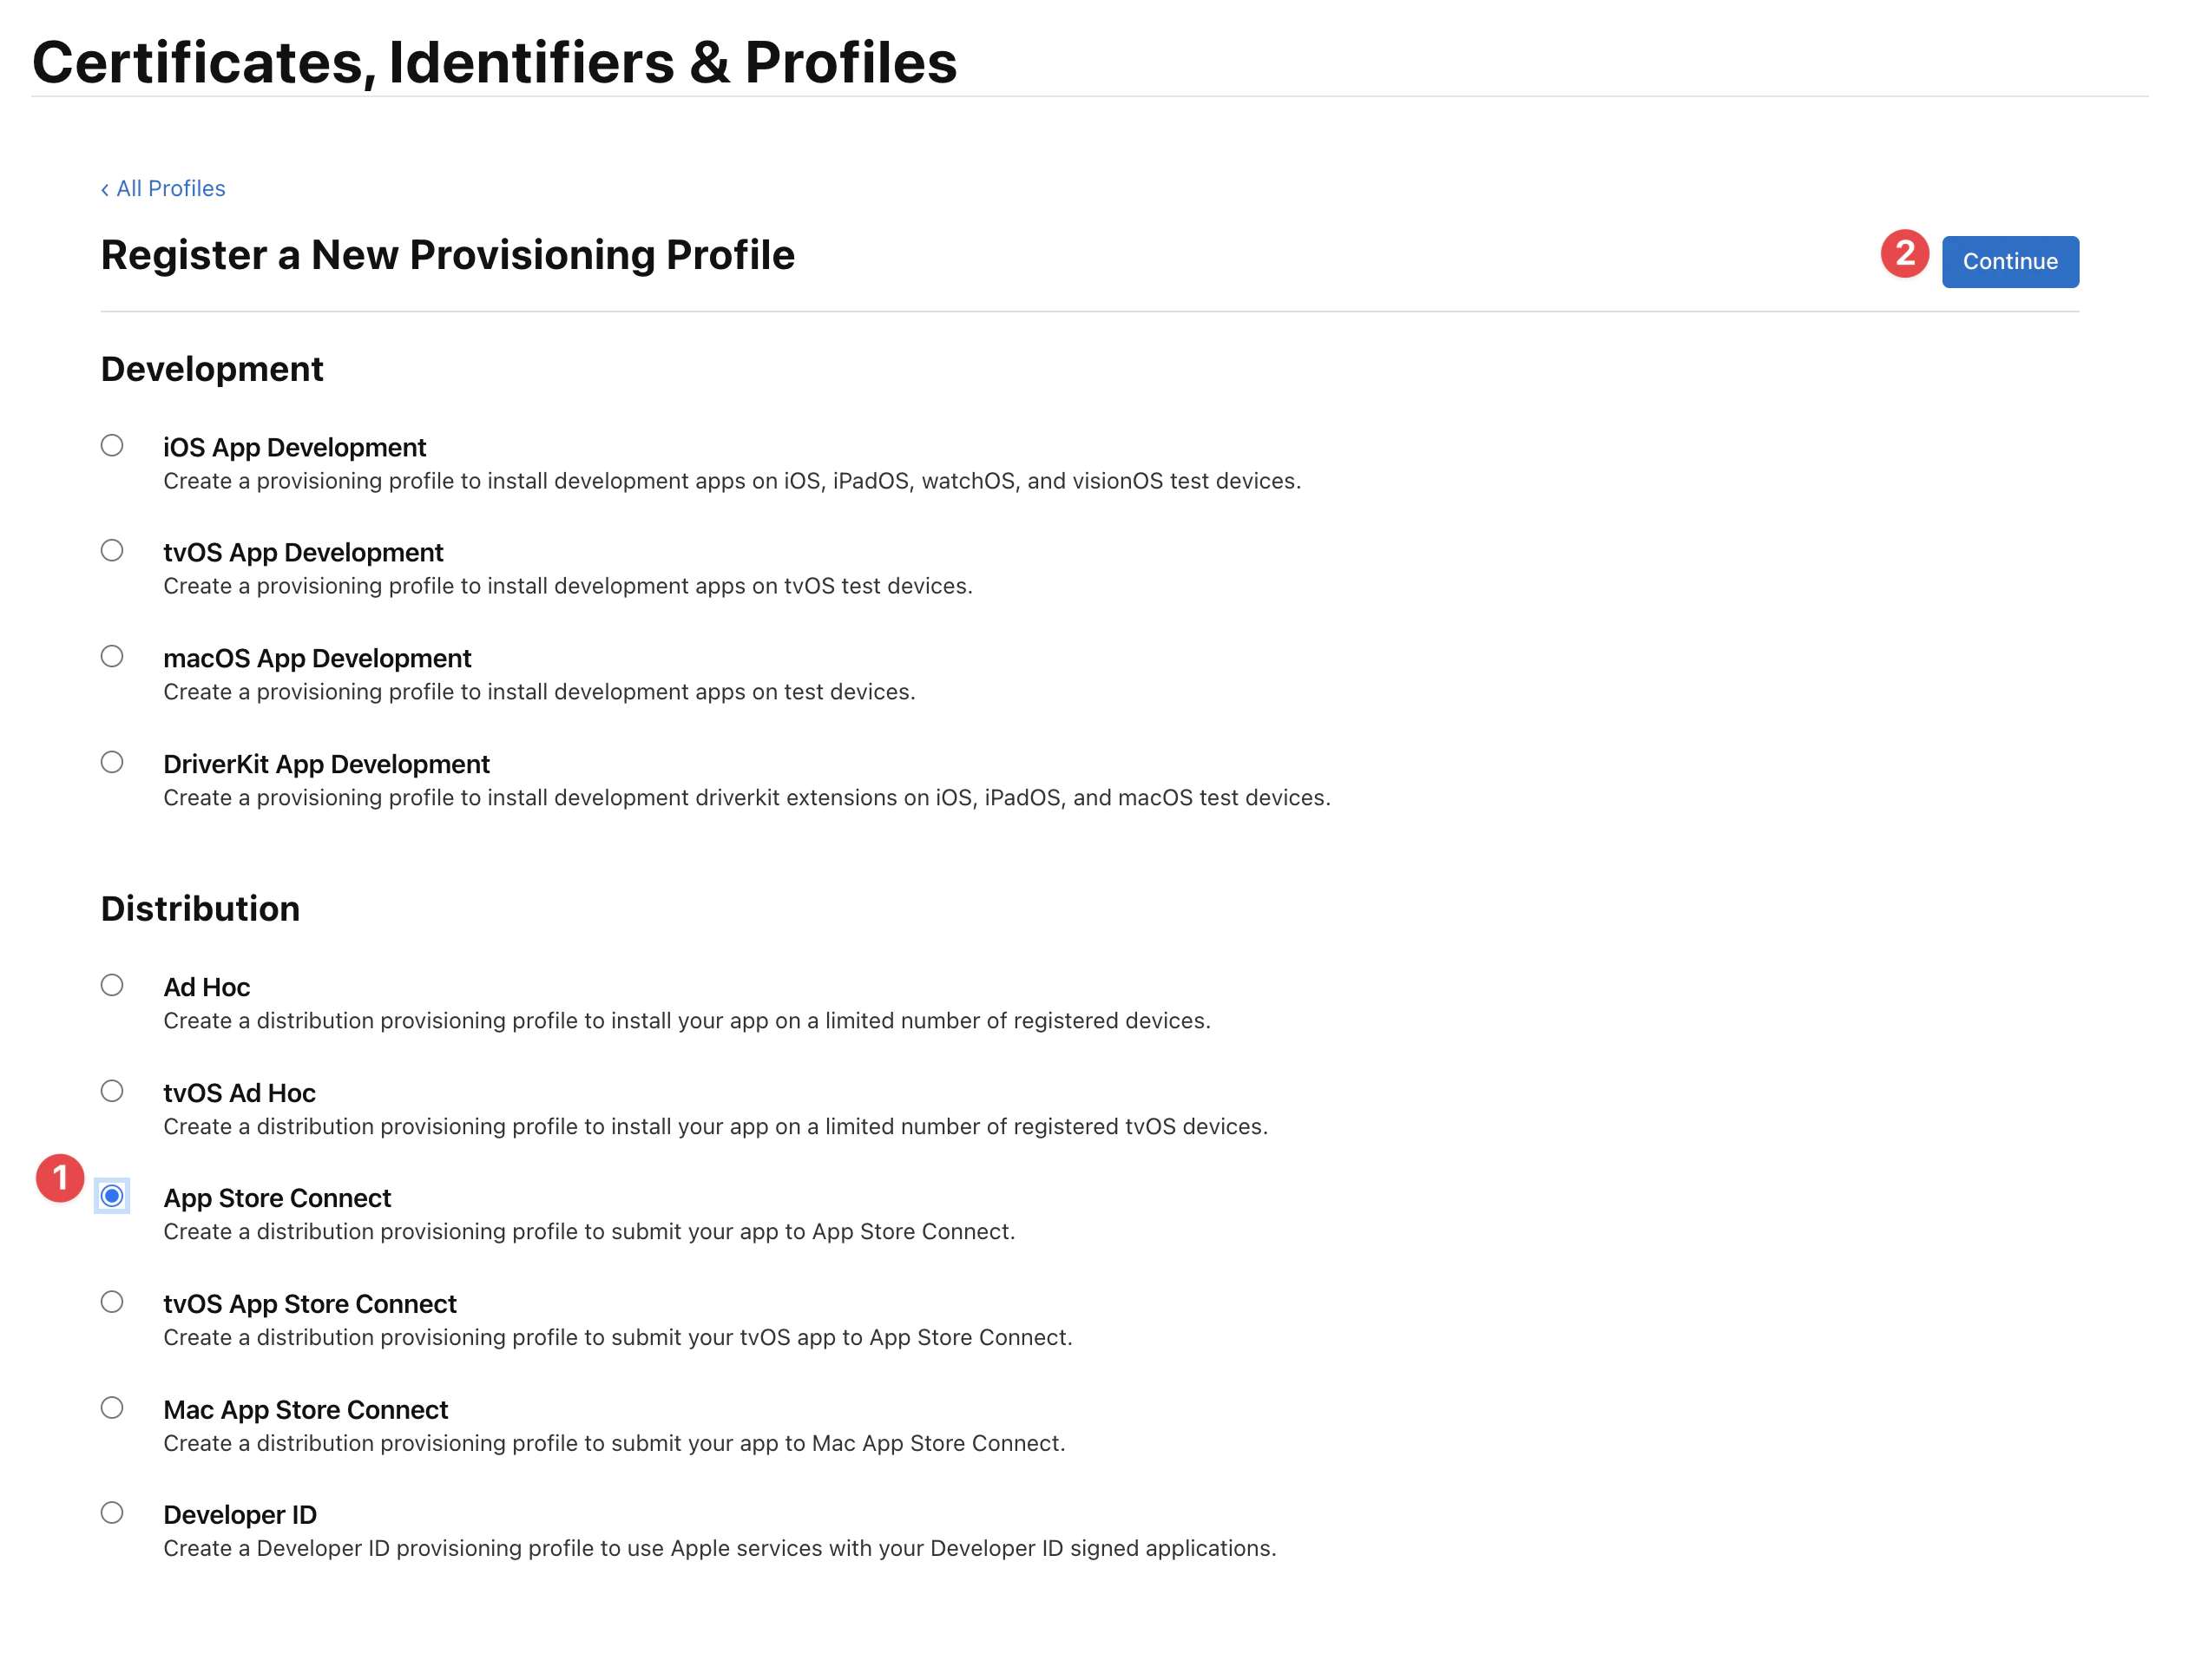
And select App Store Connect.
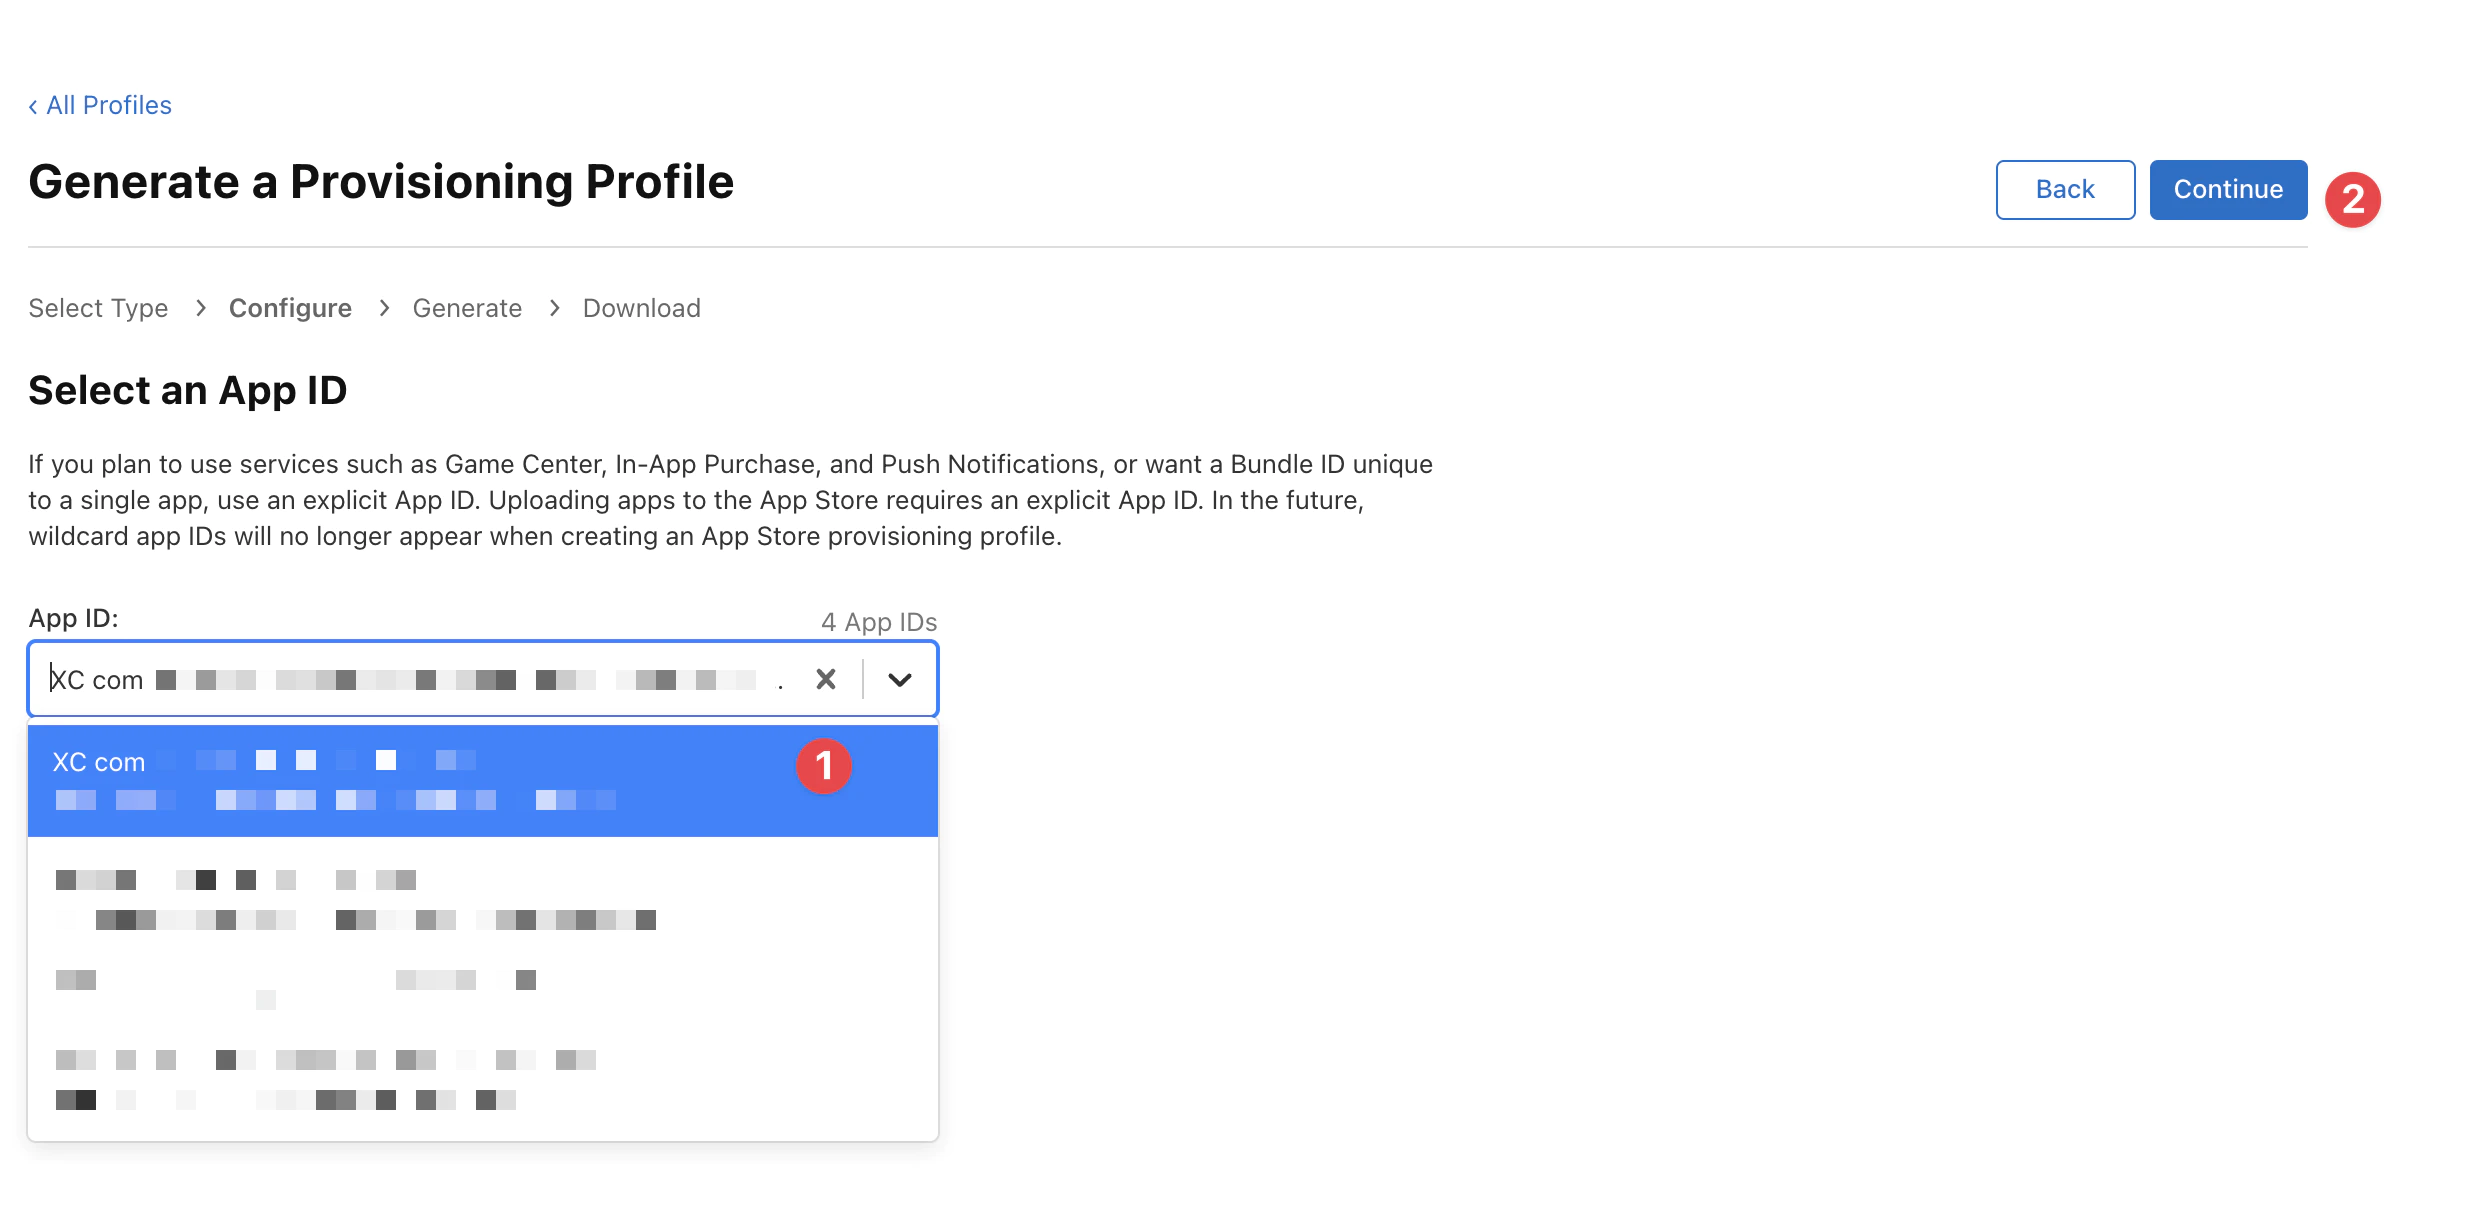
Then you need to select the right app, be careful you cannot use wildcard otherwise signing will fail.
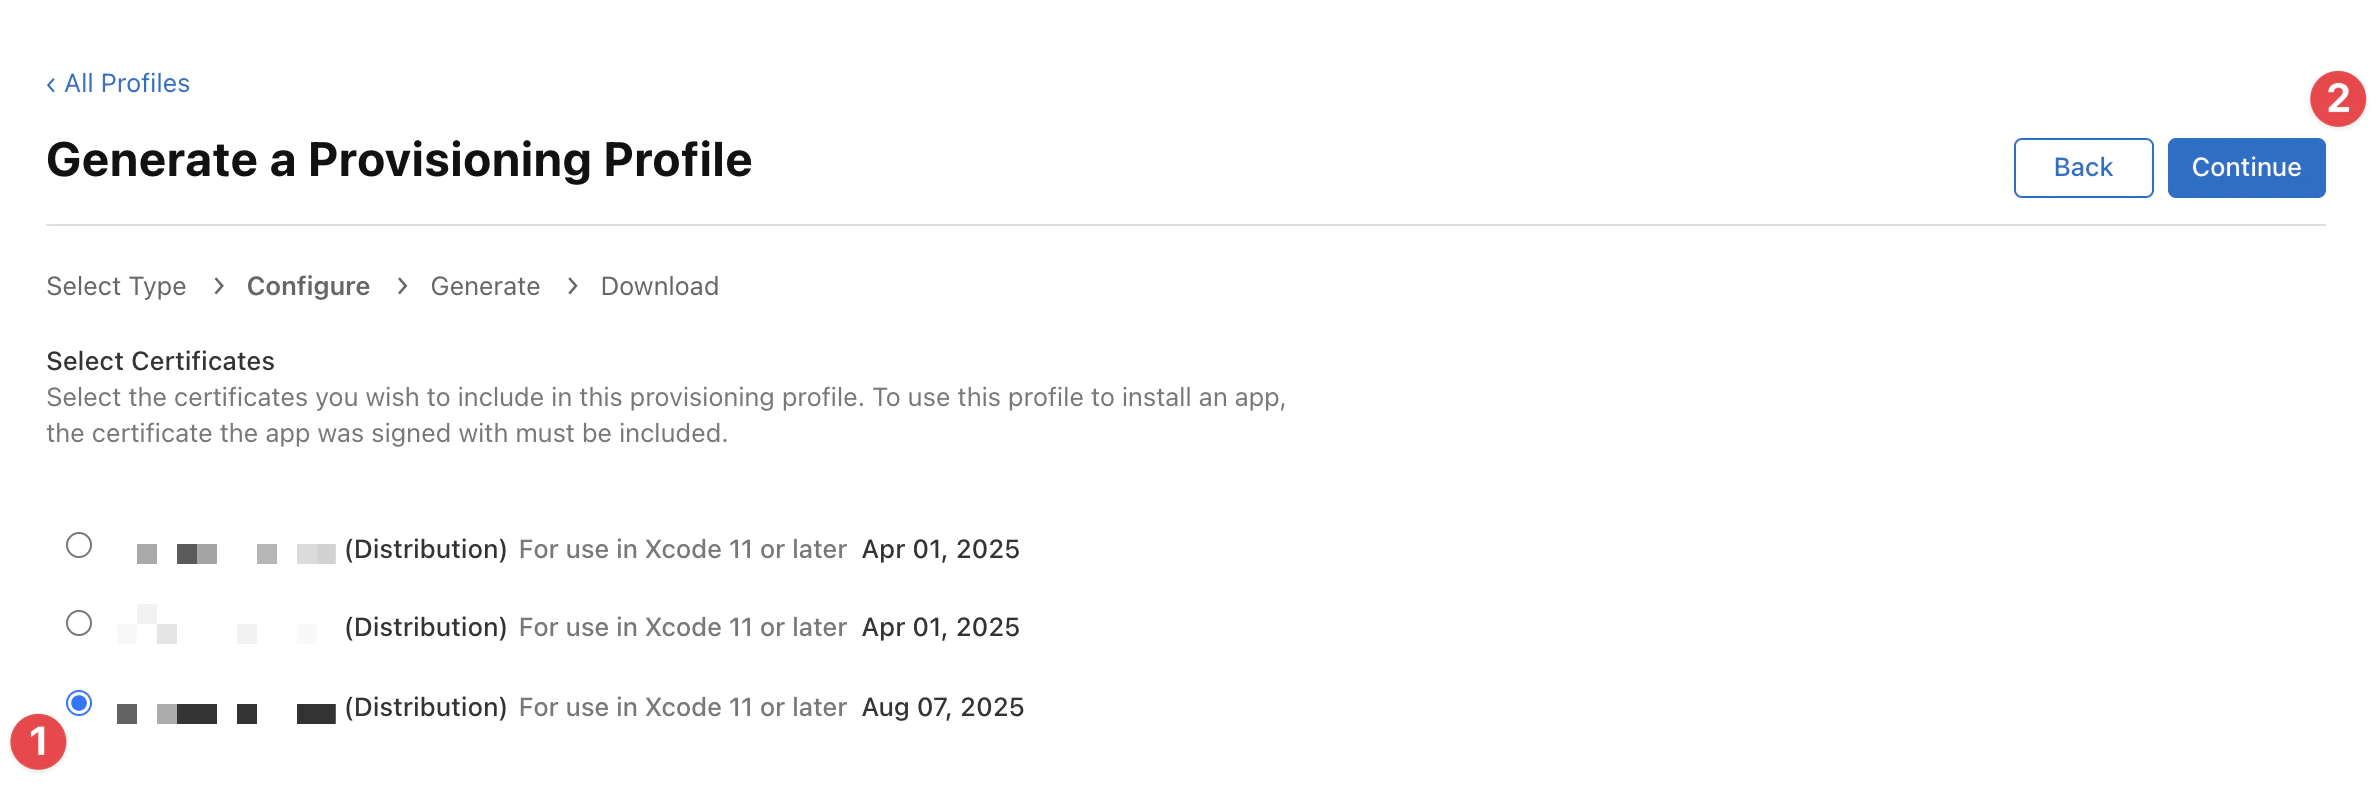
Select the right certificate you created before (look for the date of expiration it should same day and month as today) and click on Continue.
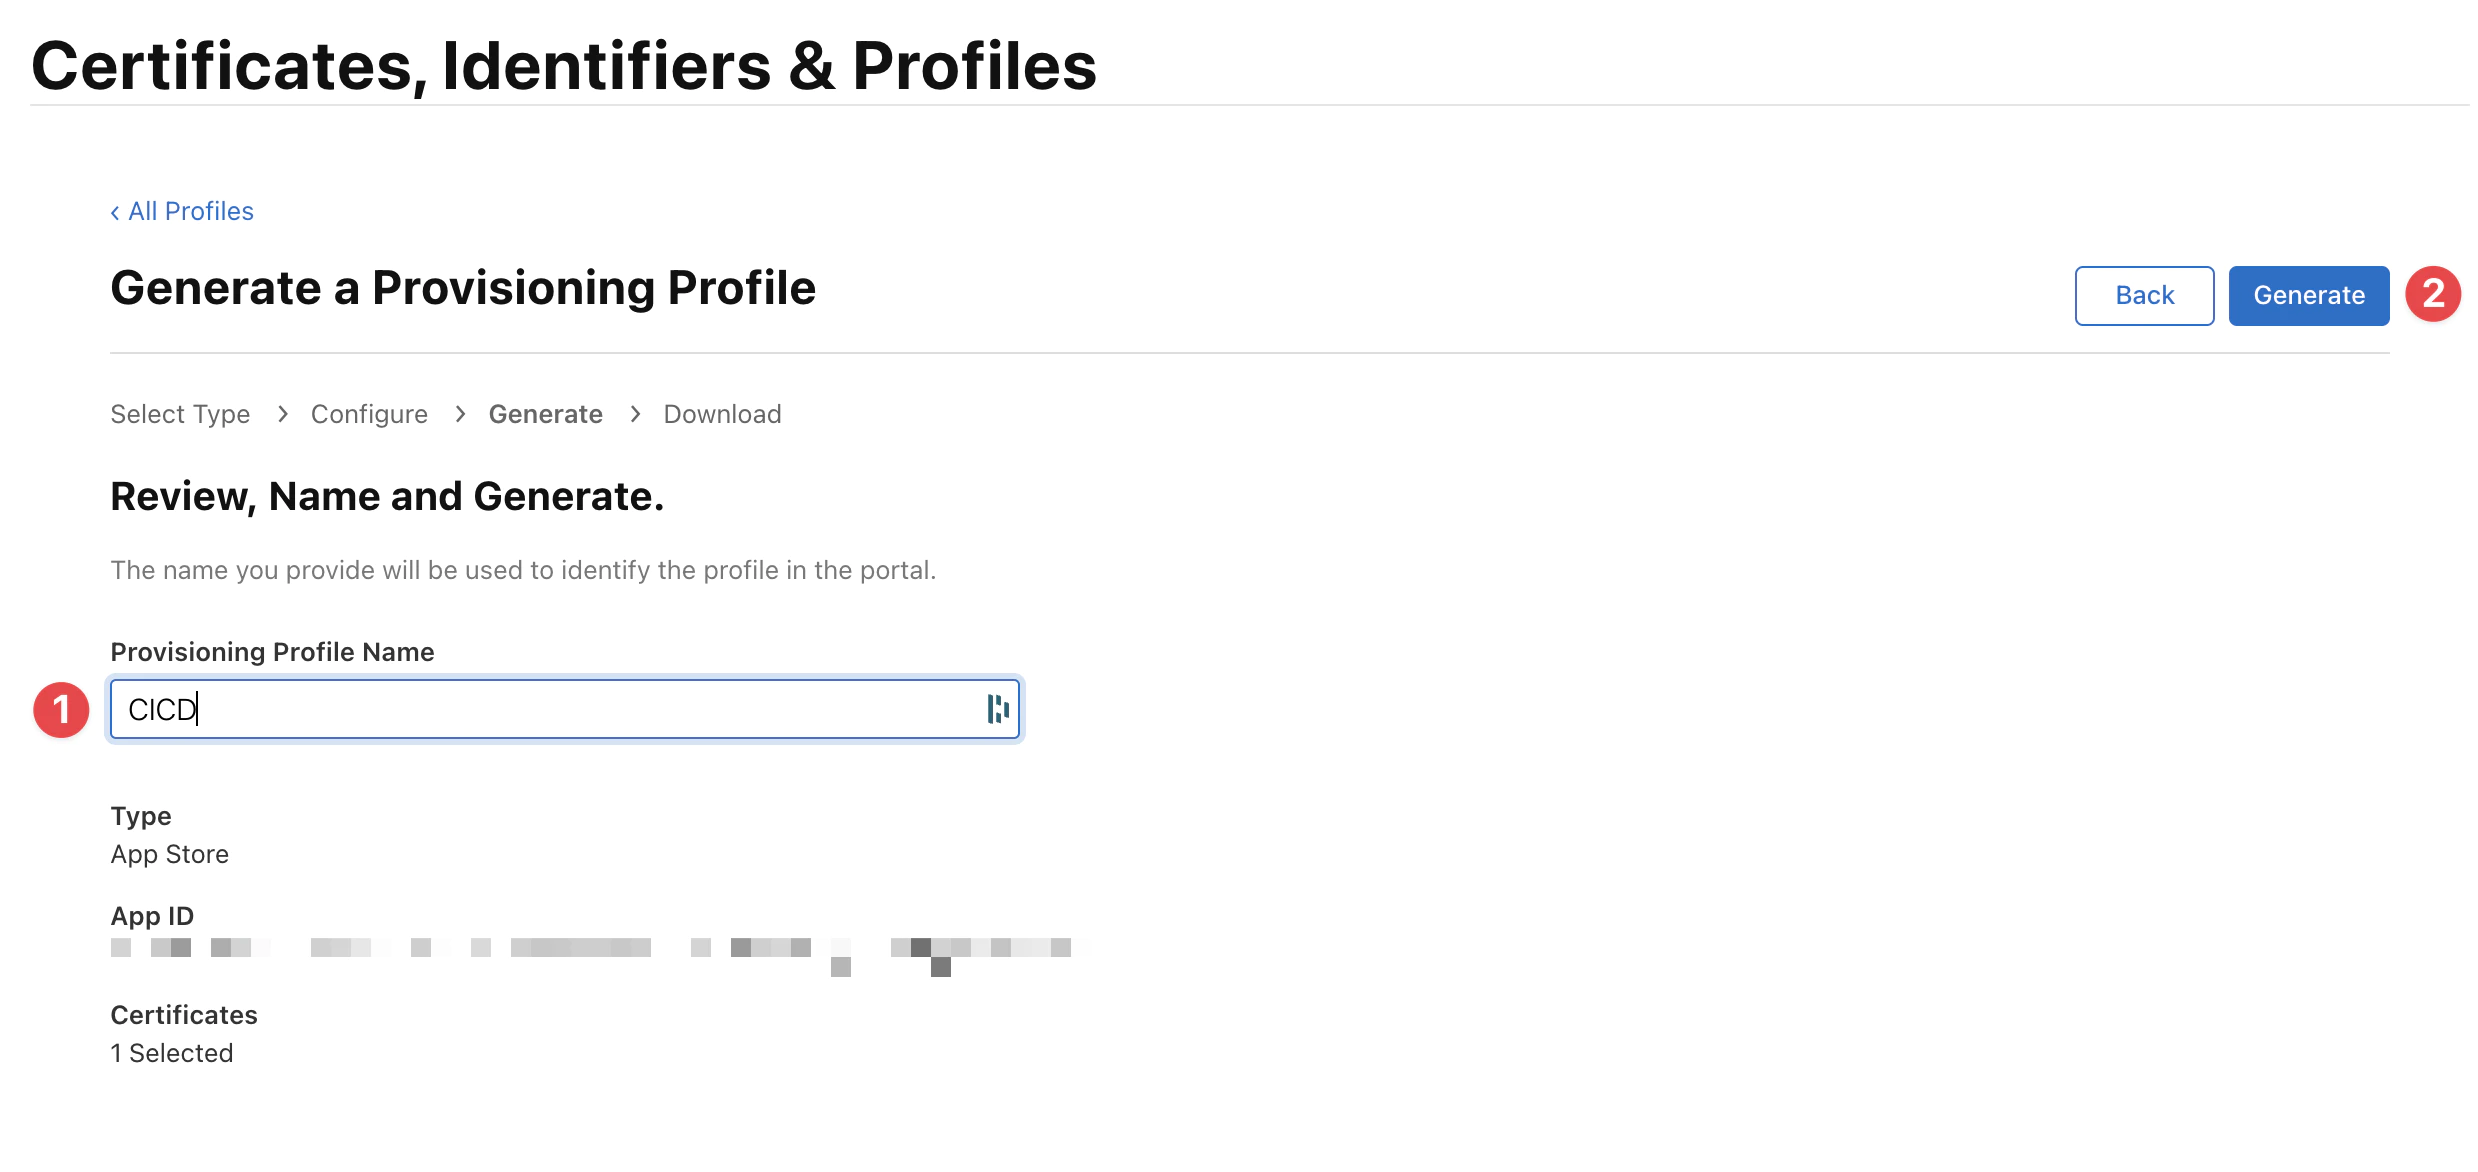
Finally enter the name of the profile and click on Generate.
The name will be used to identify the profile in Codemagic.
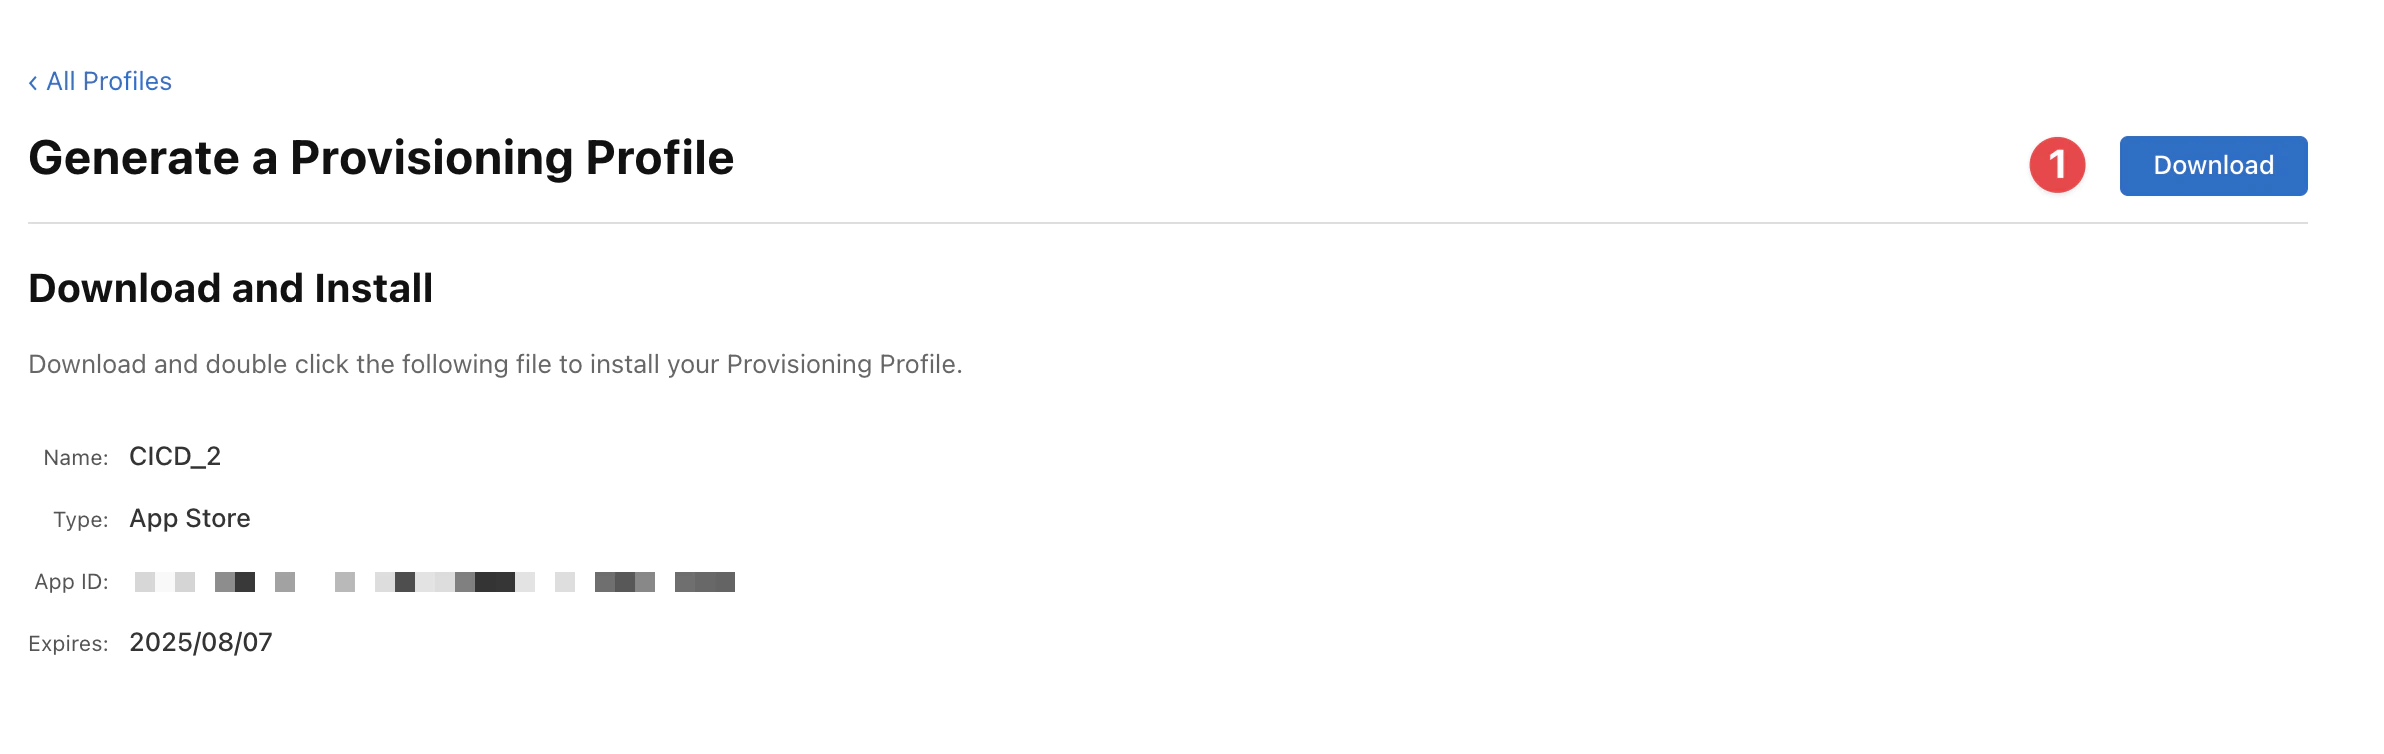
You can download the profile as a .mobileprovision file.
Adding the Code signing certificate
Codemagic lets you upload code signing certificates as PKCS#12 archives containing both the certificate and the private key which is needed to use it. When uploading, Codemagic will ask you to provide the certificate password (if the certificate is password-protected) along with a unique Reference name, which can then be used in the codemagic.yaml configuration to fetch the specific file.
- Upload certificate
- Generate new certificate
- Fetch from Developer Portal
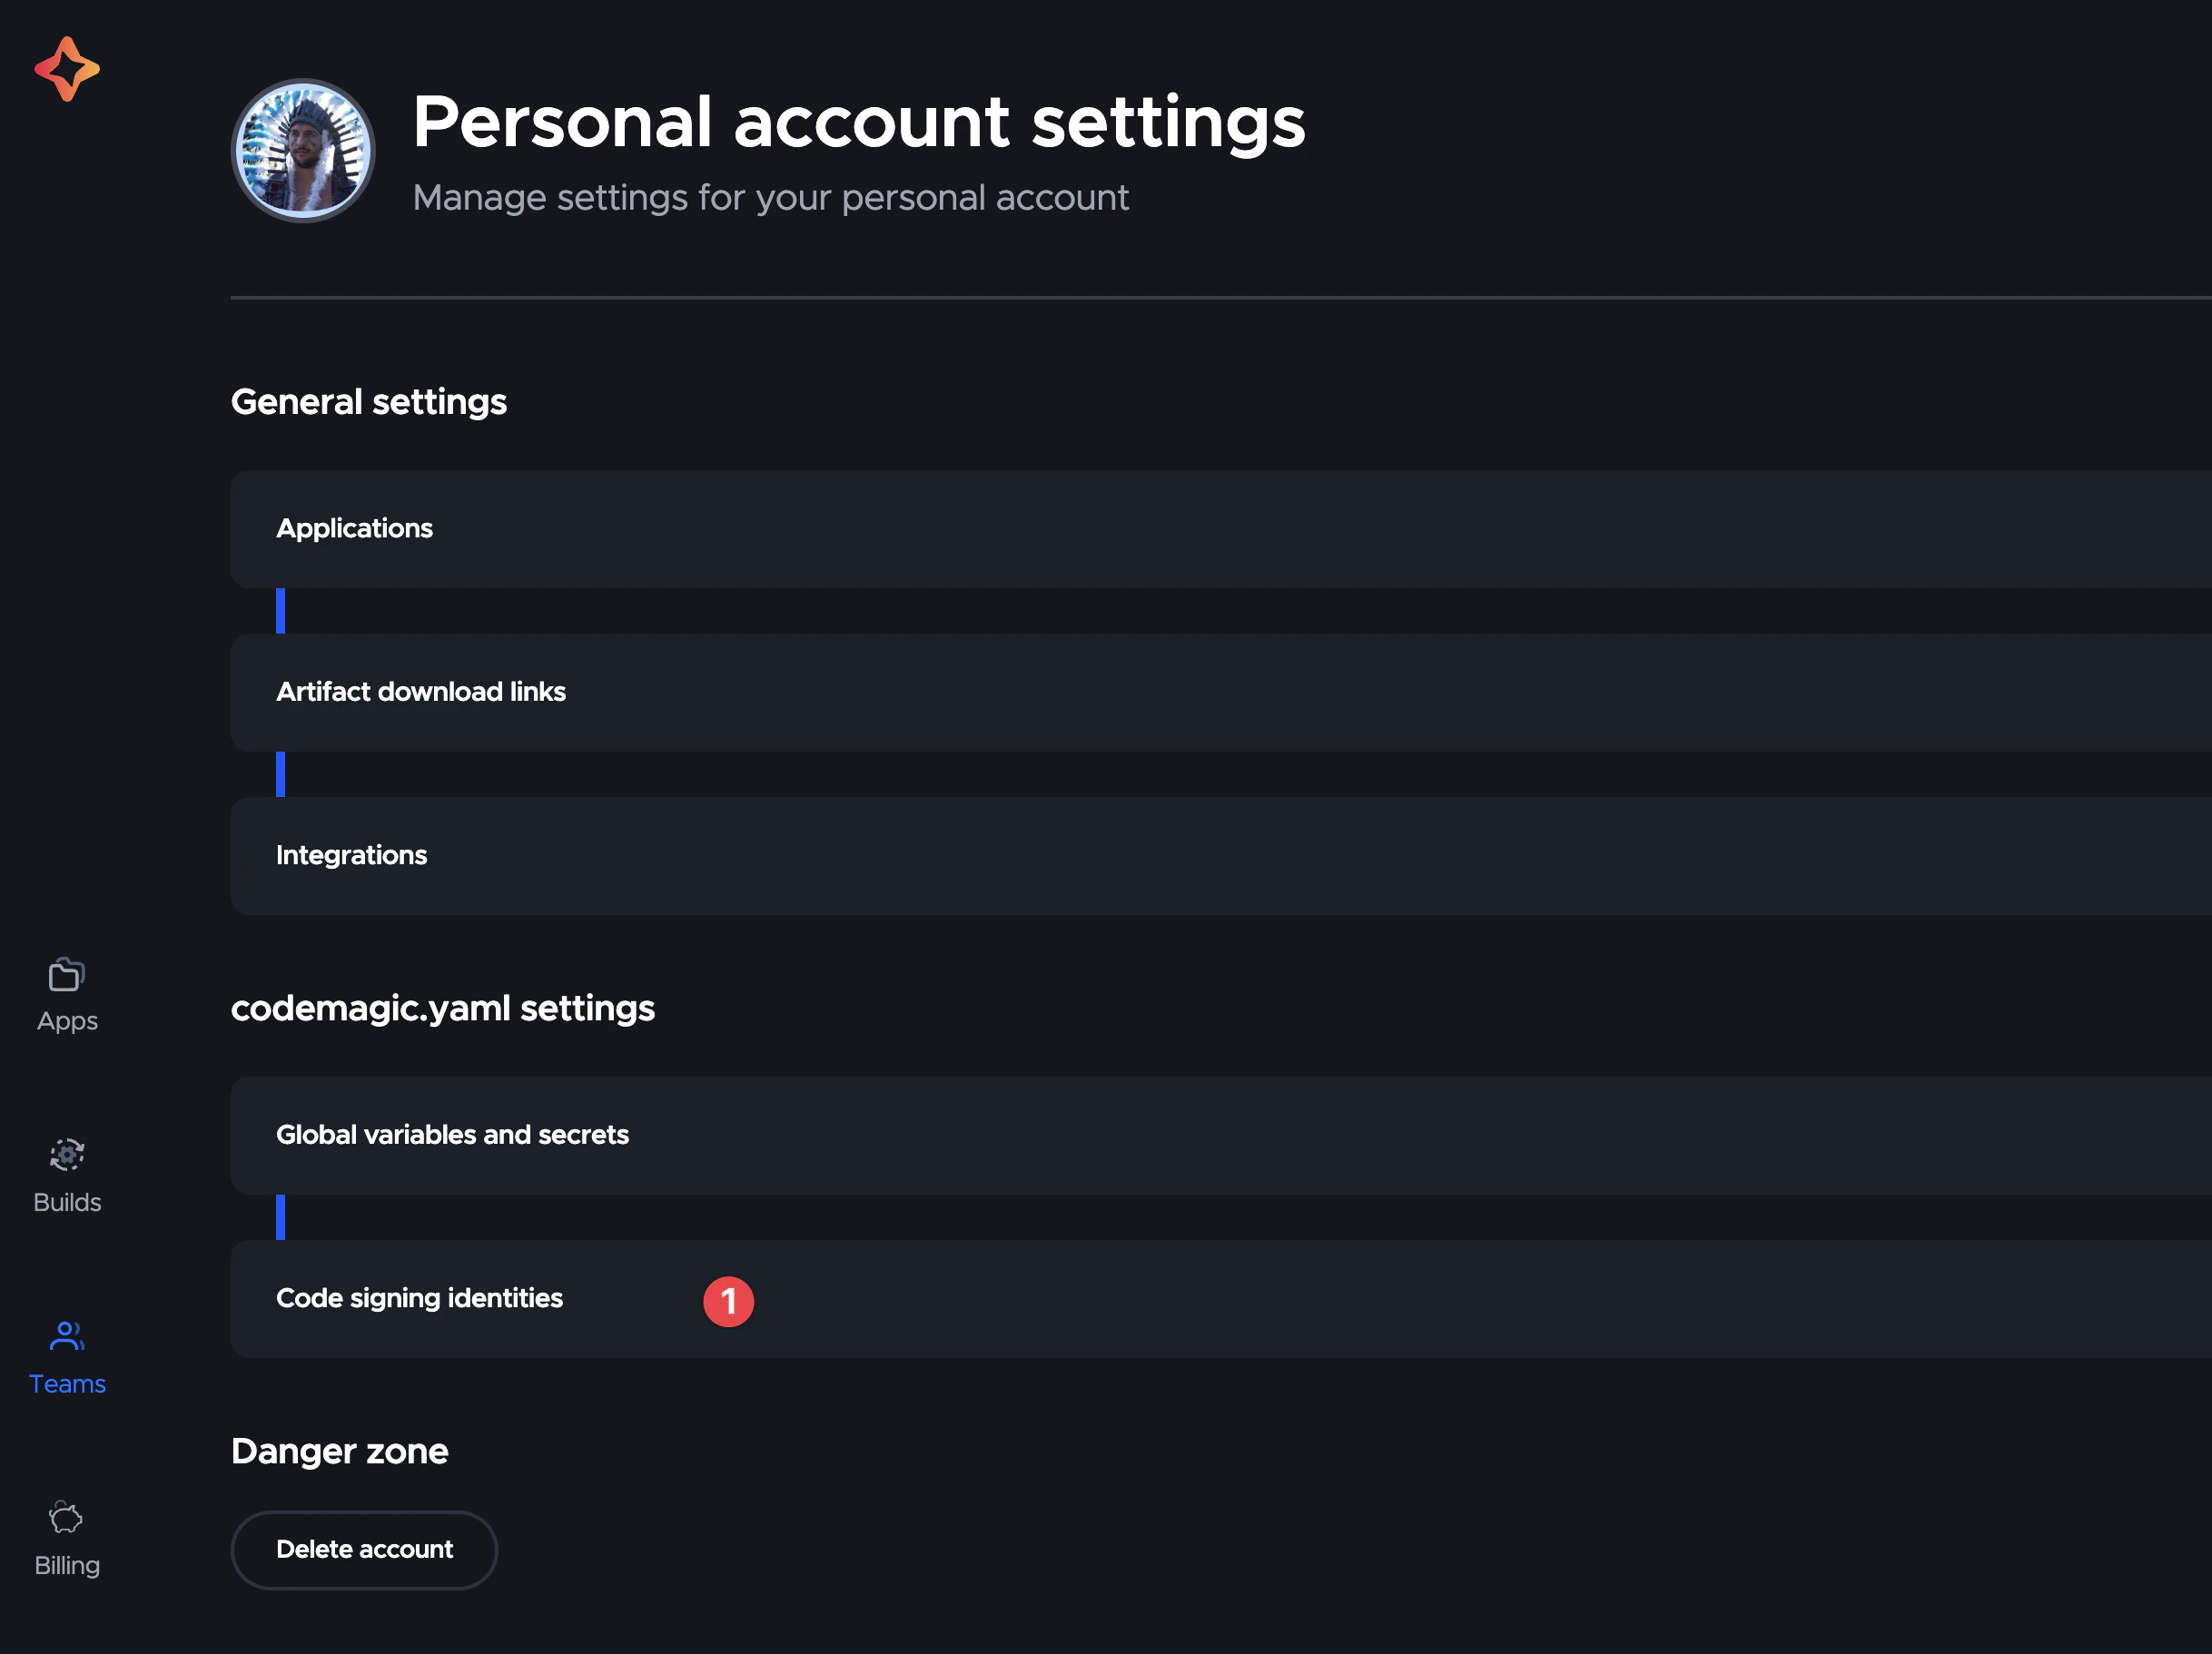
- Open your Codemagic Team settings, go to codemagic.yaml settings > Code signing identities.
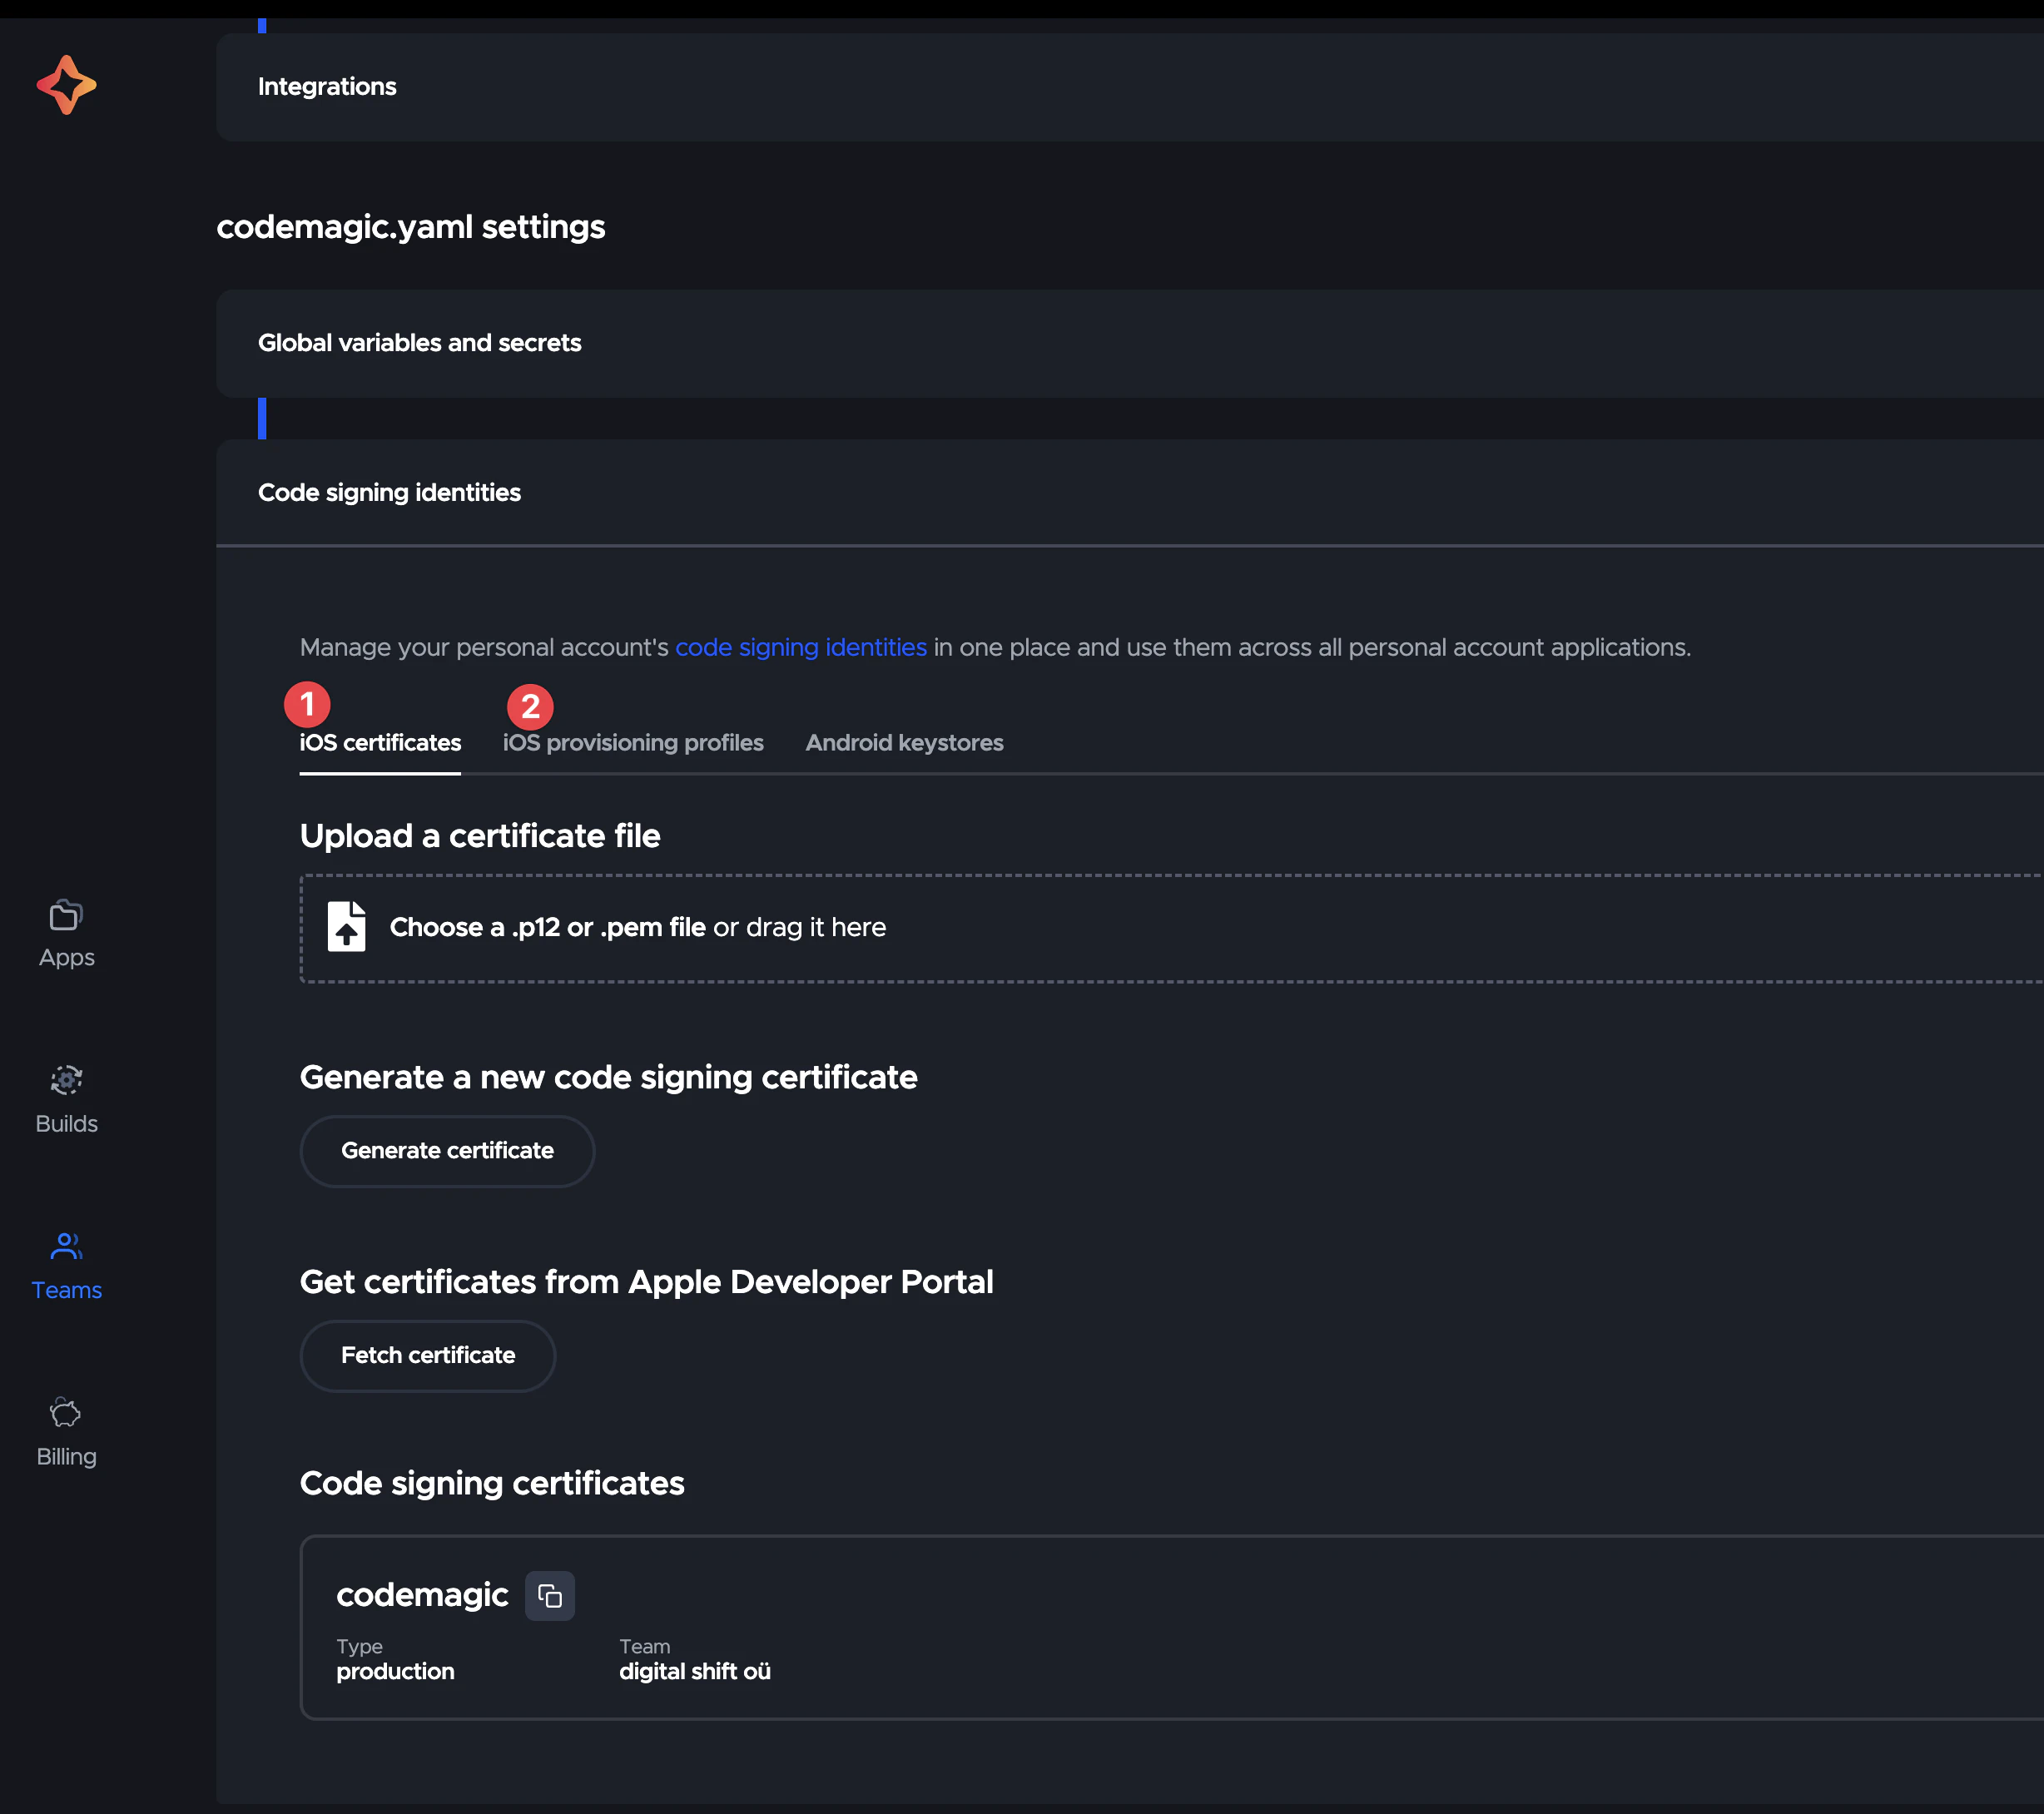
- Open iOS certificates tab.
- Upload the certificate file by clicking on Choose a .p12 or .pem file or by dragging it into the indicated frame.
- Enter the Certificate password and choose a Reference name.
- Click Add certificate
Adding the provisioning profile
Codemagic allows you to upload a provisioning profile to be used for the application or to fetch a profile from the Apple Developer Portal.
The profile’s type, team, bundle id, and expiration date are displayed for each profile added to Code signing identities. Furthermore, Codemagic will let you know whether a matching code signing certificate is available in Code signing identities (a green checkmark in the Certificate field) or not.
3. Setup Codemagic
Configure Codemagic secrets
Ever wonder where the values of the ENV are coming from? Well, it’s not a secret anymore – it’s from your project’s secret. 🤦
4. Configure Codemagic workflow file
Create a file named codemagic.yml at the root of your project and add the following.
workflows: ionic-capacitor-ios-workflow: name: Capacitor iOS Workflow max_build_duration: 120 instance_type: mac_mini_m1 integrations: app_store_connect: CodeMagic environment: ios_signing: distribution_type: app_store bundle_identifier: YOUR_BUNDLE_IDENTIFIER vars: XCODE_WORKSPACE: ios/App/App.xcworkspace XCODE_SCHEME: App APP_STORE_APP_ID: YOUR_APP_STORE_APP_ID node: v20.14.0 xcode: 15.4 cocoapods: default triggering: events: - tag tag_patterns: - pattern: '*' include: true scripts: - name: Install dependencies script: | npm install - name: Cocoapods installation script: | cd ios/App && pod install - name: Update dependencies and copy web assets to native project script: | npm run build npx cap sync ios - name: Set up code signing settings on Xcode project script: | xcode-project use-profiles - name: Increment build number script: | cd $CM_BUILD_DIR/ios/App LATEST_BUILD_NUMBER=$(app-store-connect get-latest-app-store-build-number "$APP_ID") agvtool new-version -all $(($LATEST_BUILD_NUMBER + 1)) - name: Build ipa for distribution script: | xcode-project build-ipa \ --workspace "$XCODE_WORKSPACE" \ --scheme "$XCODE_SCHEME" artifacts: - build/ios/ipa/*.ipa - /tmp/xcodebuild_logs/*.log - $HOME/Library/Developer/Xcode/DerivedData/**/Build/**/*.app - $HOME/Library/Developer/Xcode/DerivedData/**/Build/**/*.dSYM publishing: email: recipients: - YOUR_EMAIL notify: success: true # To not receive a notification when a build succeeds failure: false # To not receive a notification when a build fails app_store_connect: auth: integration # Configuration related to TestFlight (optional) # Note: This action is performed during post-processing. submit_to_testflight: true # Configuration related to App Store (optional) # Note: This action is performed during post-processing. submit_to_app_store: falseThis workflow should be triggered manually or after each GitHub tag, if you need to automatize tag please, refer to Automatic build and release with GitHub actions first.
Then this workflow will pull your NodeJS deps, install them and build your JavaScript app.
Each time you send a new tag, a release will be built in TestFlight.
Your App doesn’t need to use Ionic, only Capacitor base is mandatory, it can have old Cordova module, but Capacitor JS plugin should be preferred.
5. Trigger workflow
Trigger the workflow
Push the new commits to the branch main or development to trigger the workflow.
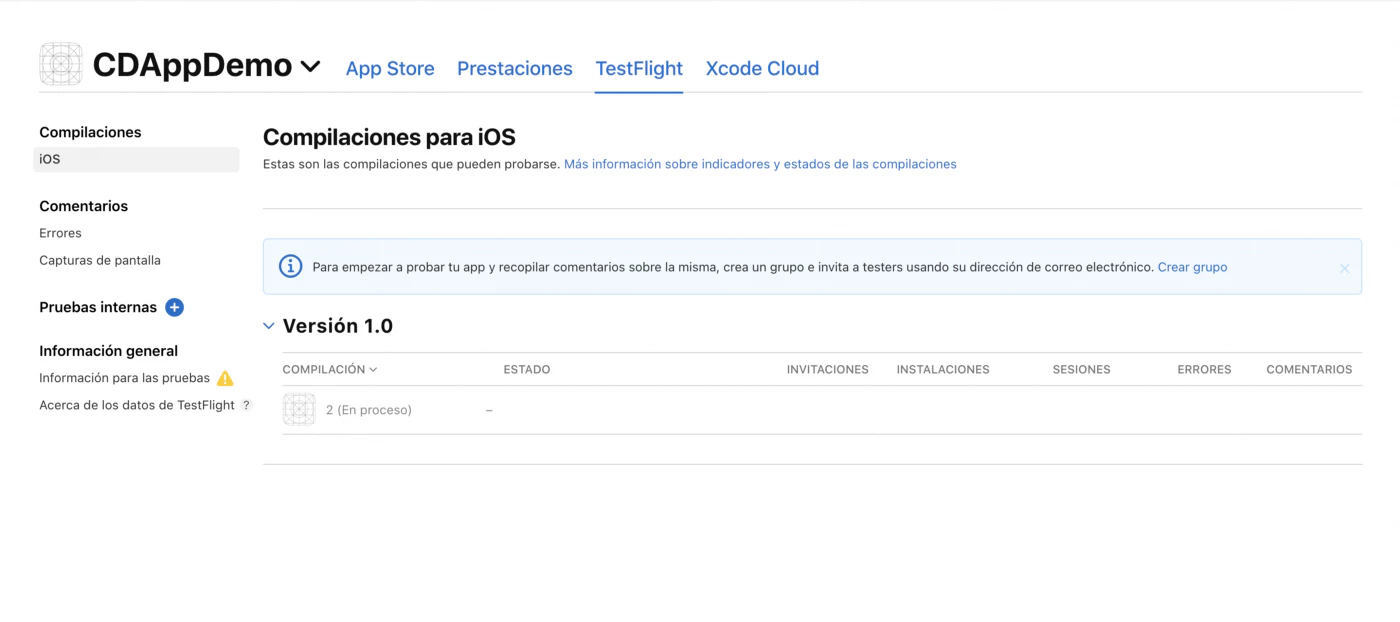
After a few minutes, the build should be available in your App Store Connect dashboard.
Start manually
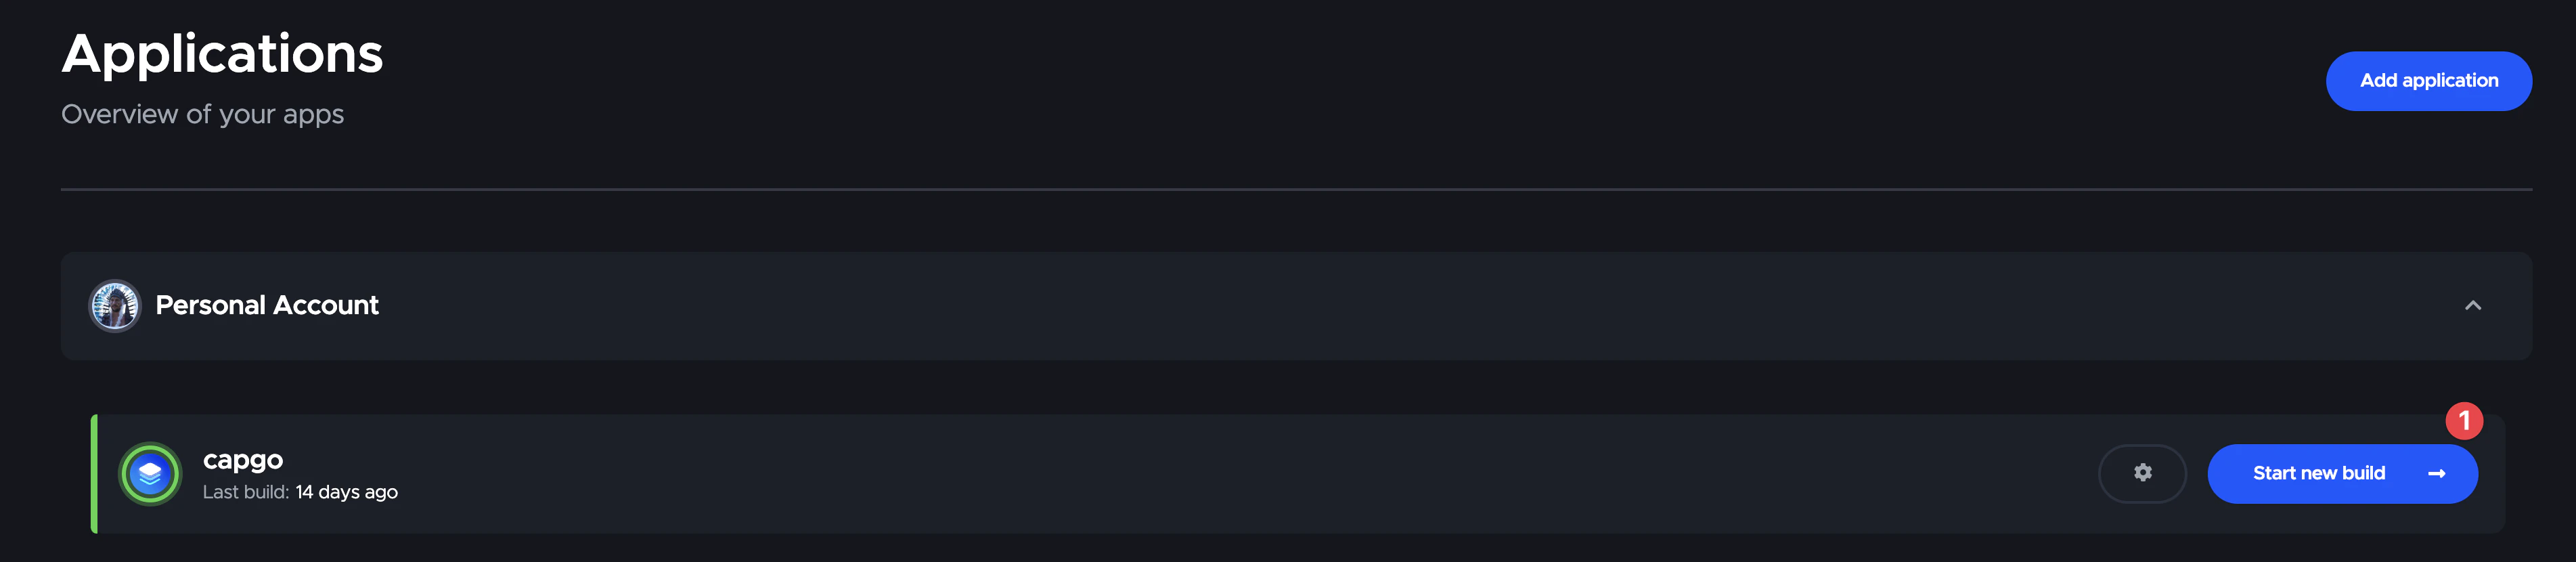
You can start the workflow manually.
First select the app you want to build, then click on Start new build.
Then select the branch you want to build.
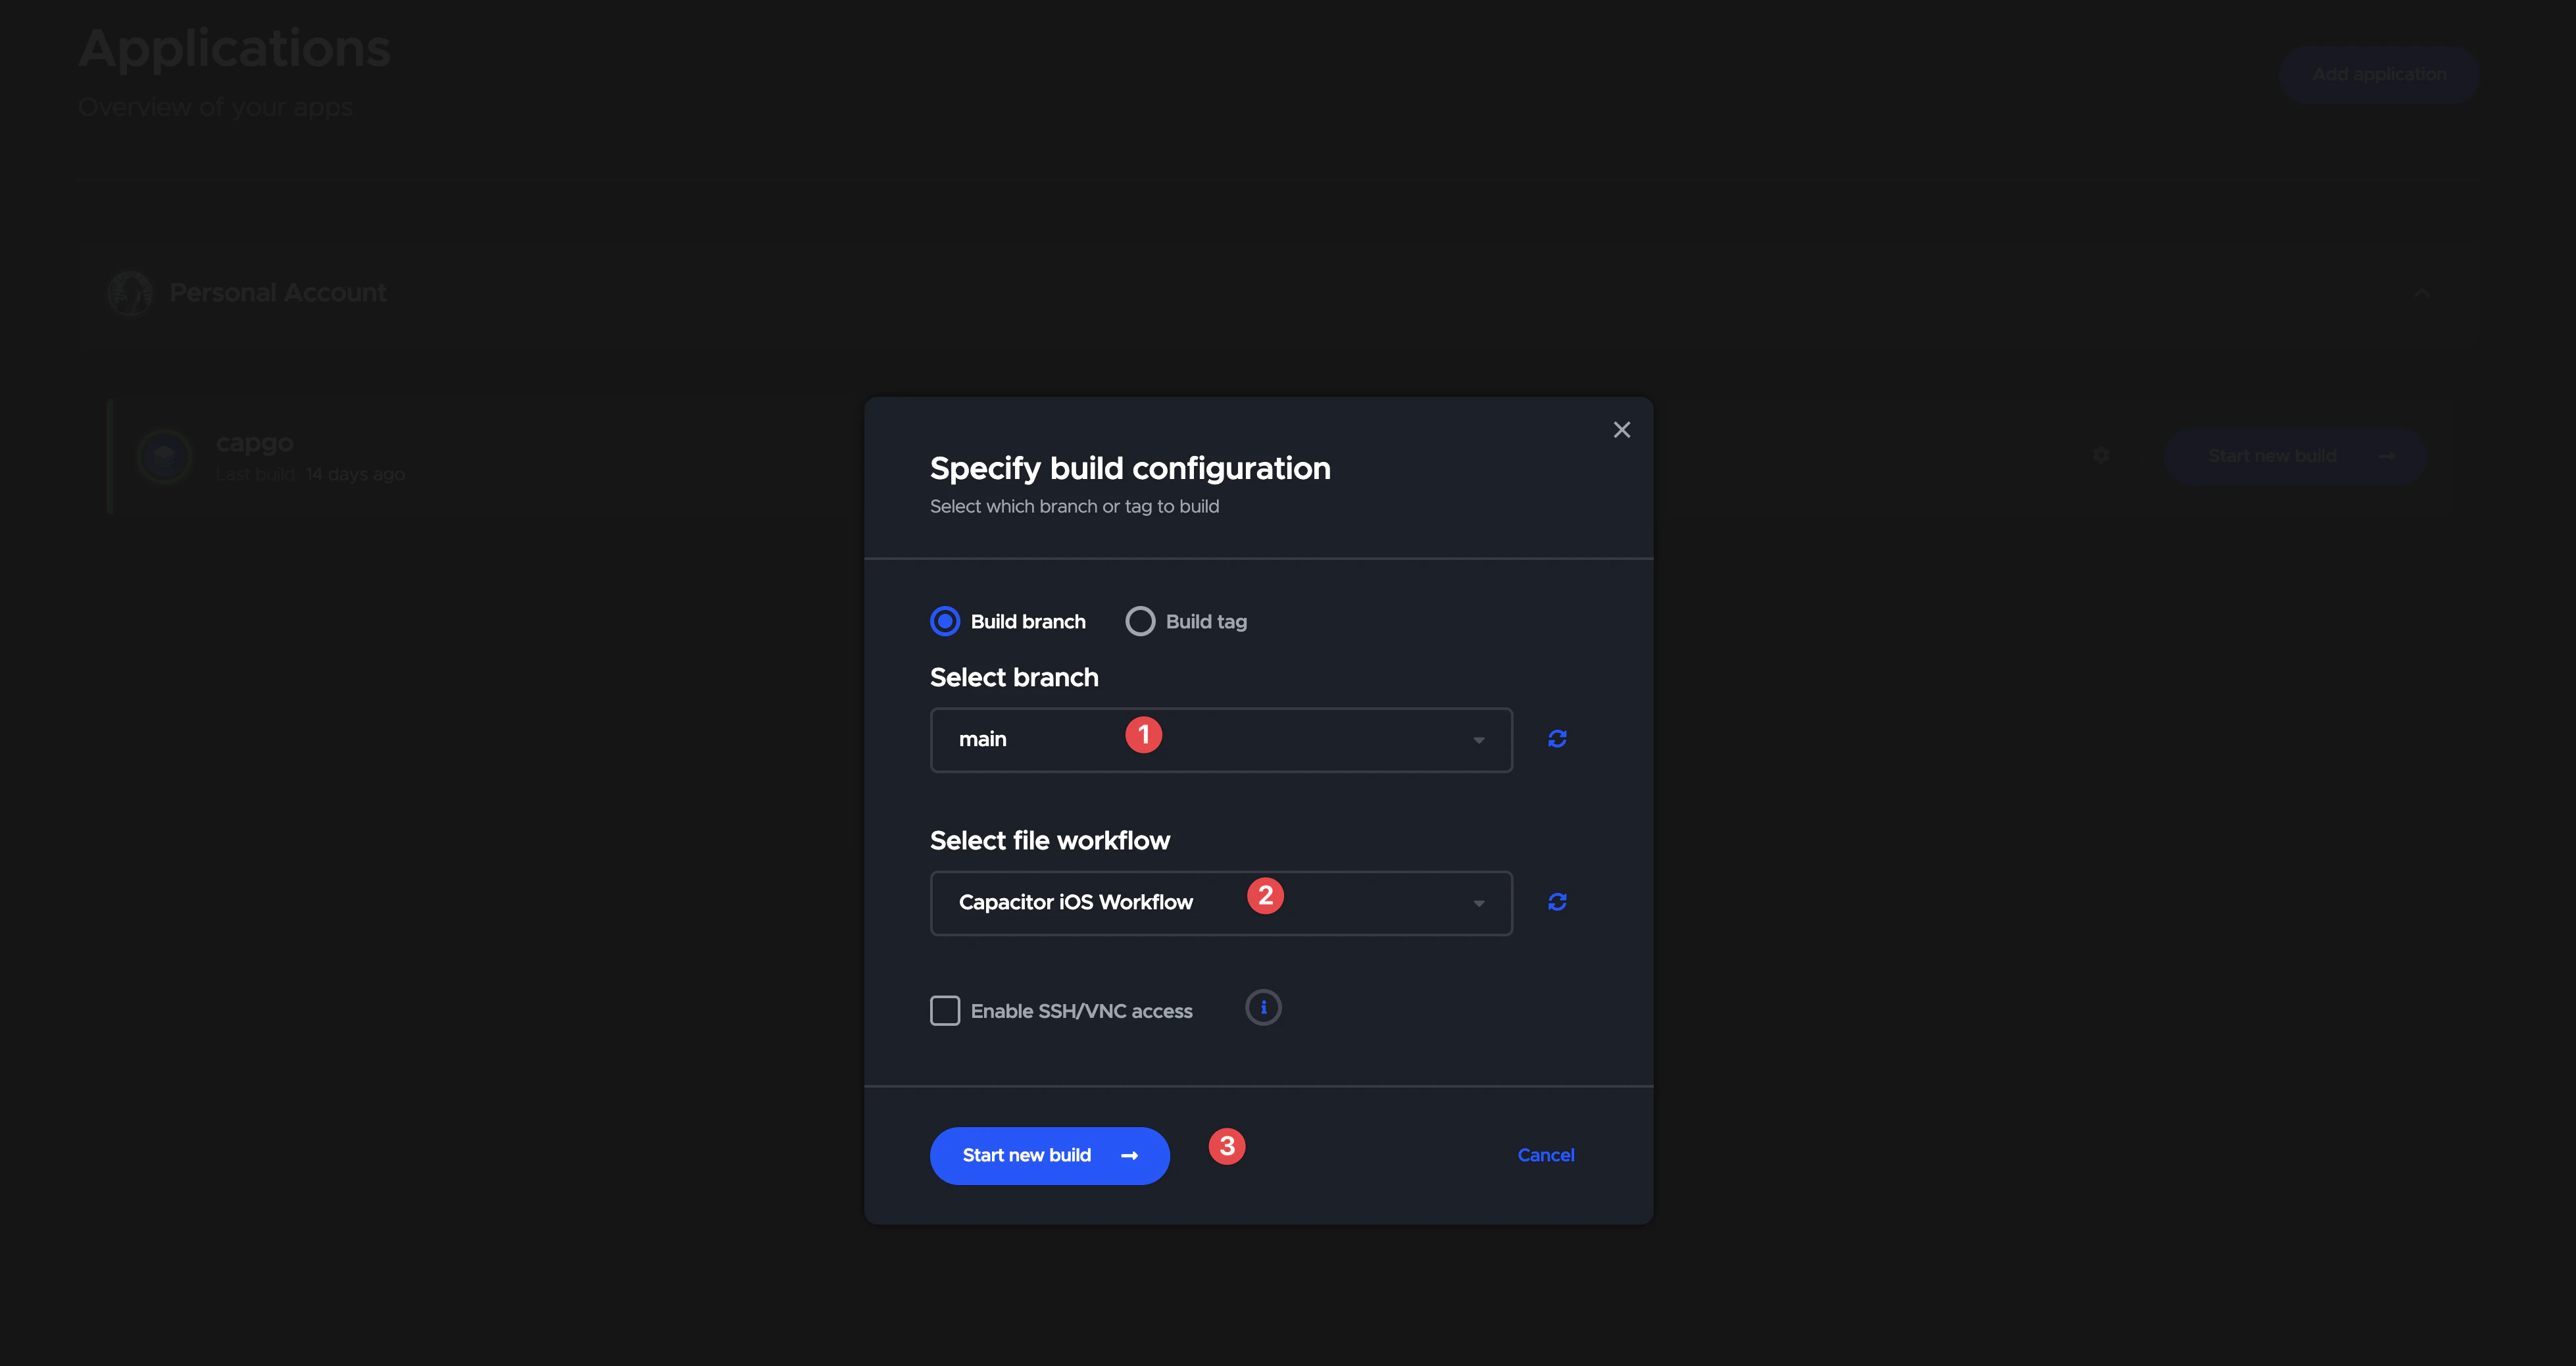
And click on Start new build.
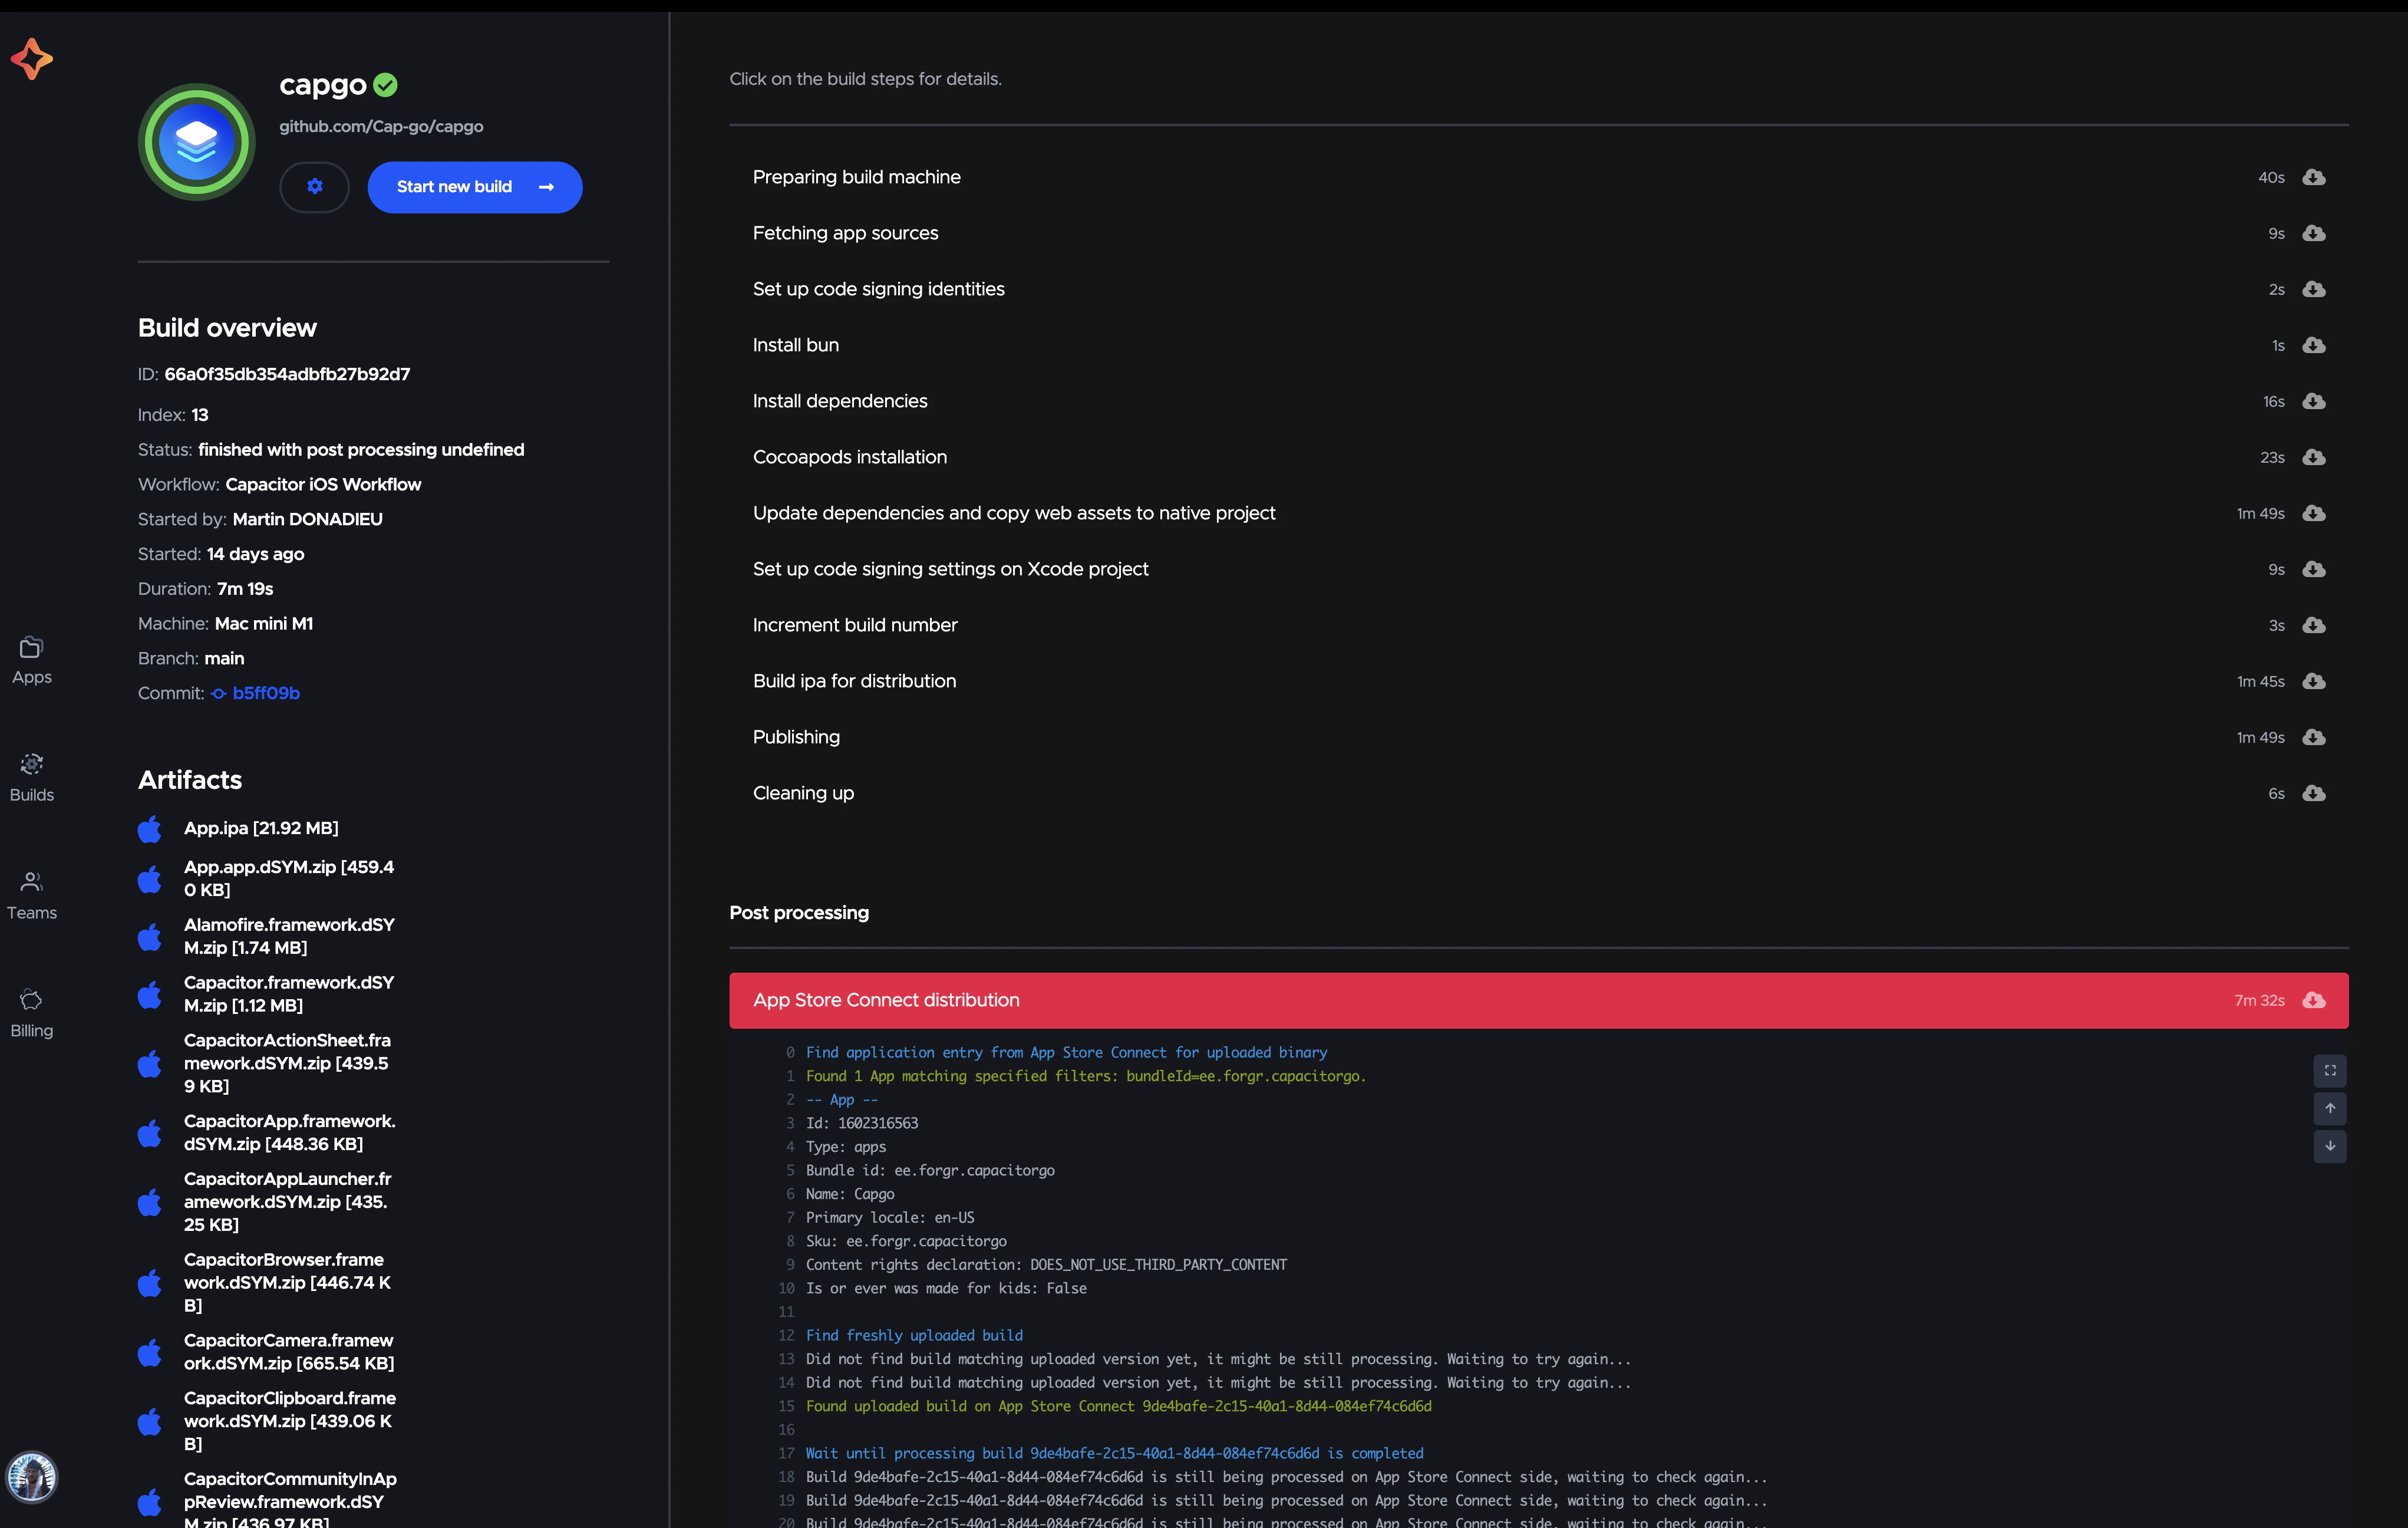
Then go you the build list
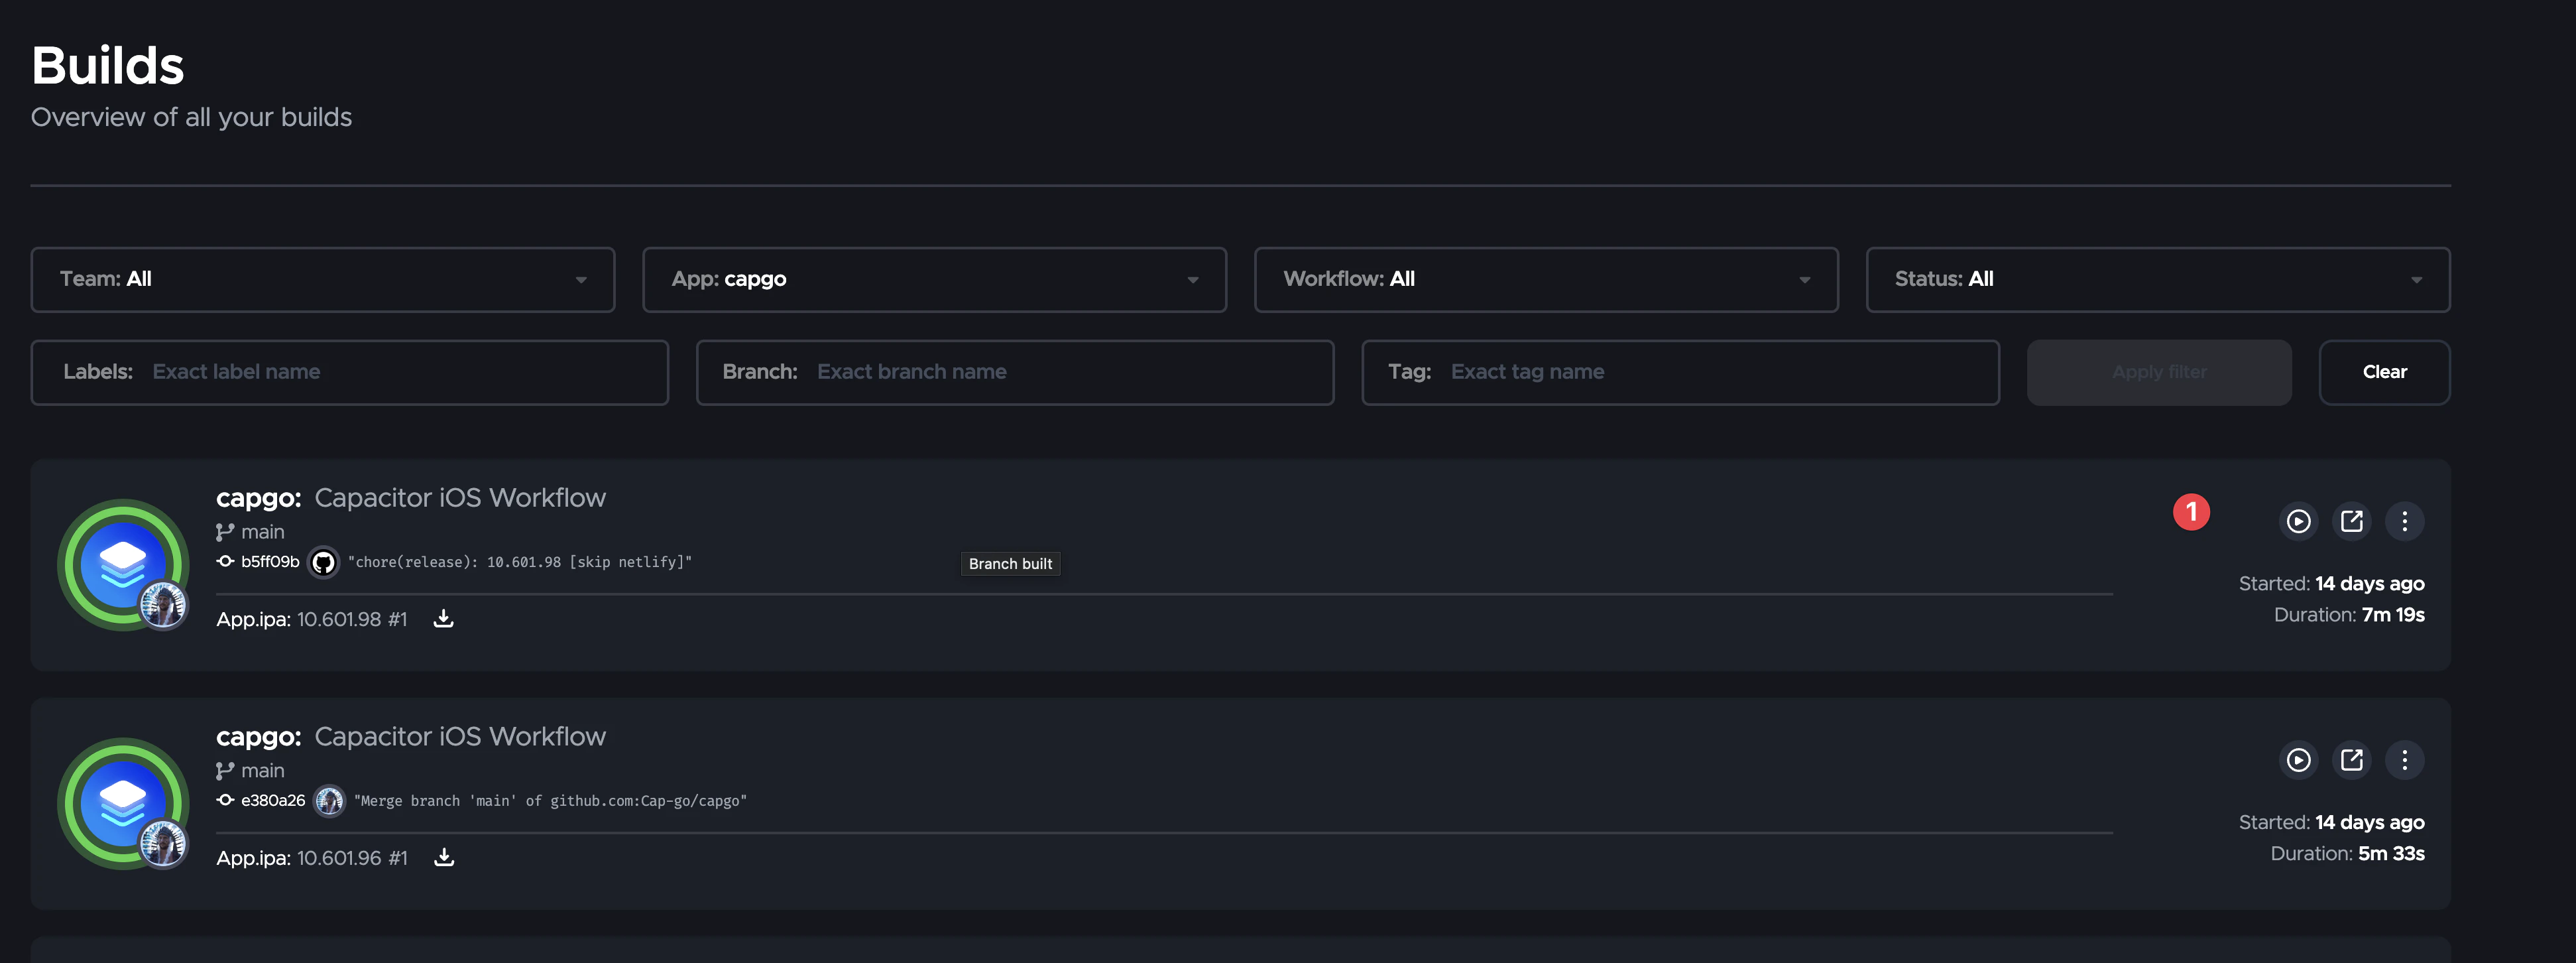
And click on the build to see the result.
Can deploy from local machine
Yes, you can, and it is effortless.
You can use Xcode to build and sign your app, as always.
Thanks
This blog is based on the following articles:


