This plugin is now transferred to RevenueCat official repository. Please look at the official documentation for more information.
If you prefer a simpler native API without RevenueCat, @capgo/native-purchases implements in-app purchases and subscriptions directly with StoreKit and Google Play Billing.
Capacitor Purchases is a plugin for the Capacitor framework that allows in-app purchases on iOS and Android. It provides a simple and consistent API across multiple platforms, making it easy for developers to implement in-app subscriptions and purchases in their mobile apps.
One of the key features of the Capacitor Purchases plugin is that it integrates with RevenueCat, a platform that provides tools for in-app subscriptions and in-app purchases. RevenueCat simplifies the process of implementing in-app subscriptions and purchases by providing a simple and consistent API across multiple platforms, and automating tasks such as receipt validation and user management.
With RevenueCat, developers can easily manage subscriptions, track revenue, and perform other related tasks. Some features offered by RevenueCat include:
- Automated receipt validation
- User management
- Support for custom pricing models
- Detailed analytics -Scalability
By using the Capacitor Purchases plugin with RevenueCat, developers can save time and effort when implementing in-app subscriptions and purchases in their mobile apps, and provide additional features that can help to improve the user experience and increase revenue.
Using Capacitor Purchases plugin and RevenueCat, developers can easily manage and track in-app subscriptions and purchases, validate receipts, and manage users across multiple platforms. It also allows creating custom pricing models and get detailed analytics to improve the performance and revenue.
Installation
Be sure to use the latest version of Capacitor and the Capacitor Purchases plugin. You can check the latest version of Capacitor and the Capacitor Purchases plugin on the Capacitor website.
To install the Capacitor Purchases plugin, run the following command:
npm i @capgo/capacitor-purchases
add the plugin to your app native code
npx cap sync
add in-app purchases capability in Xcode:
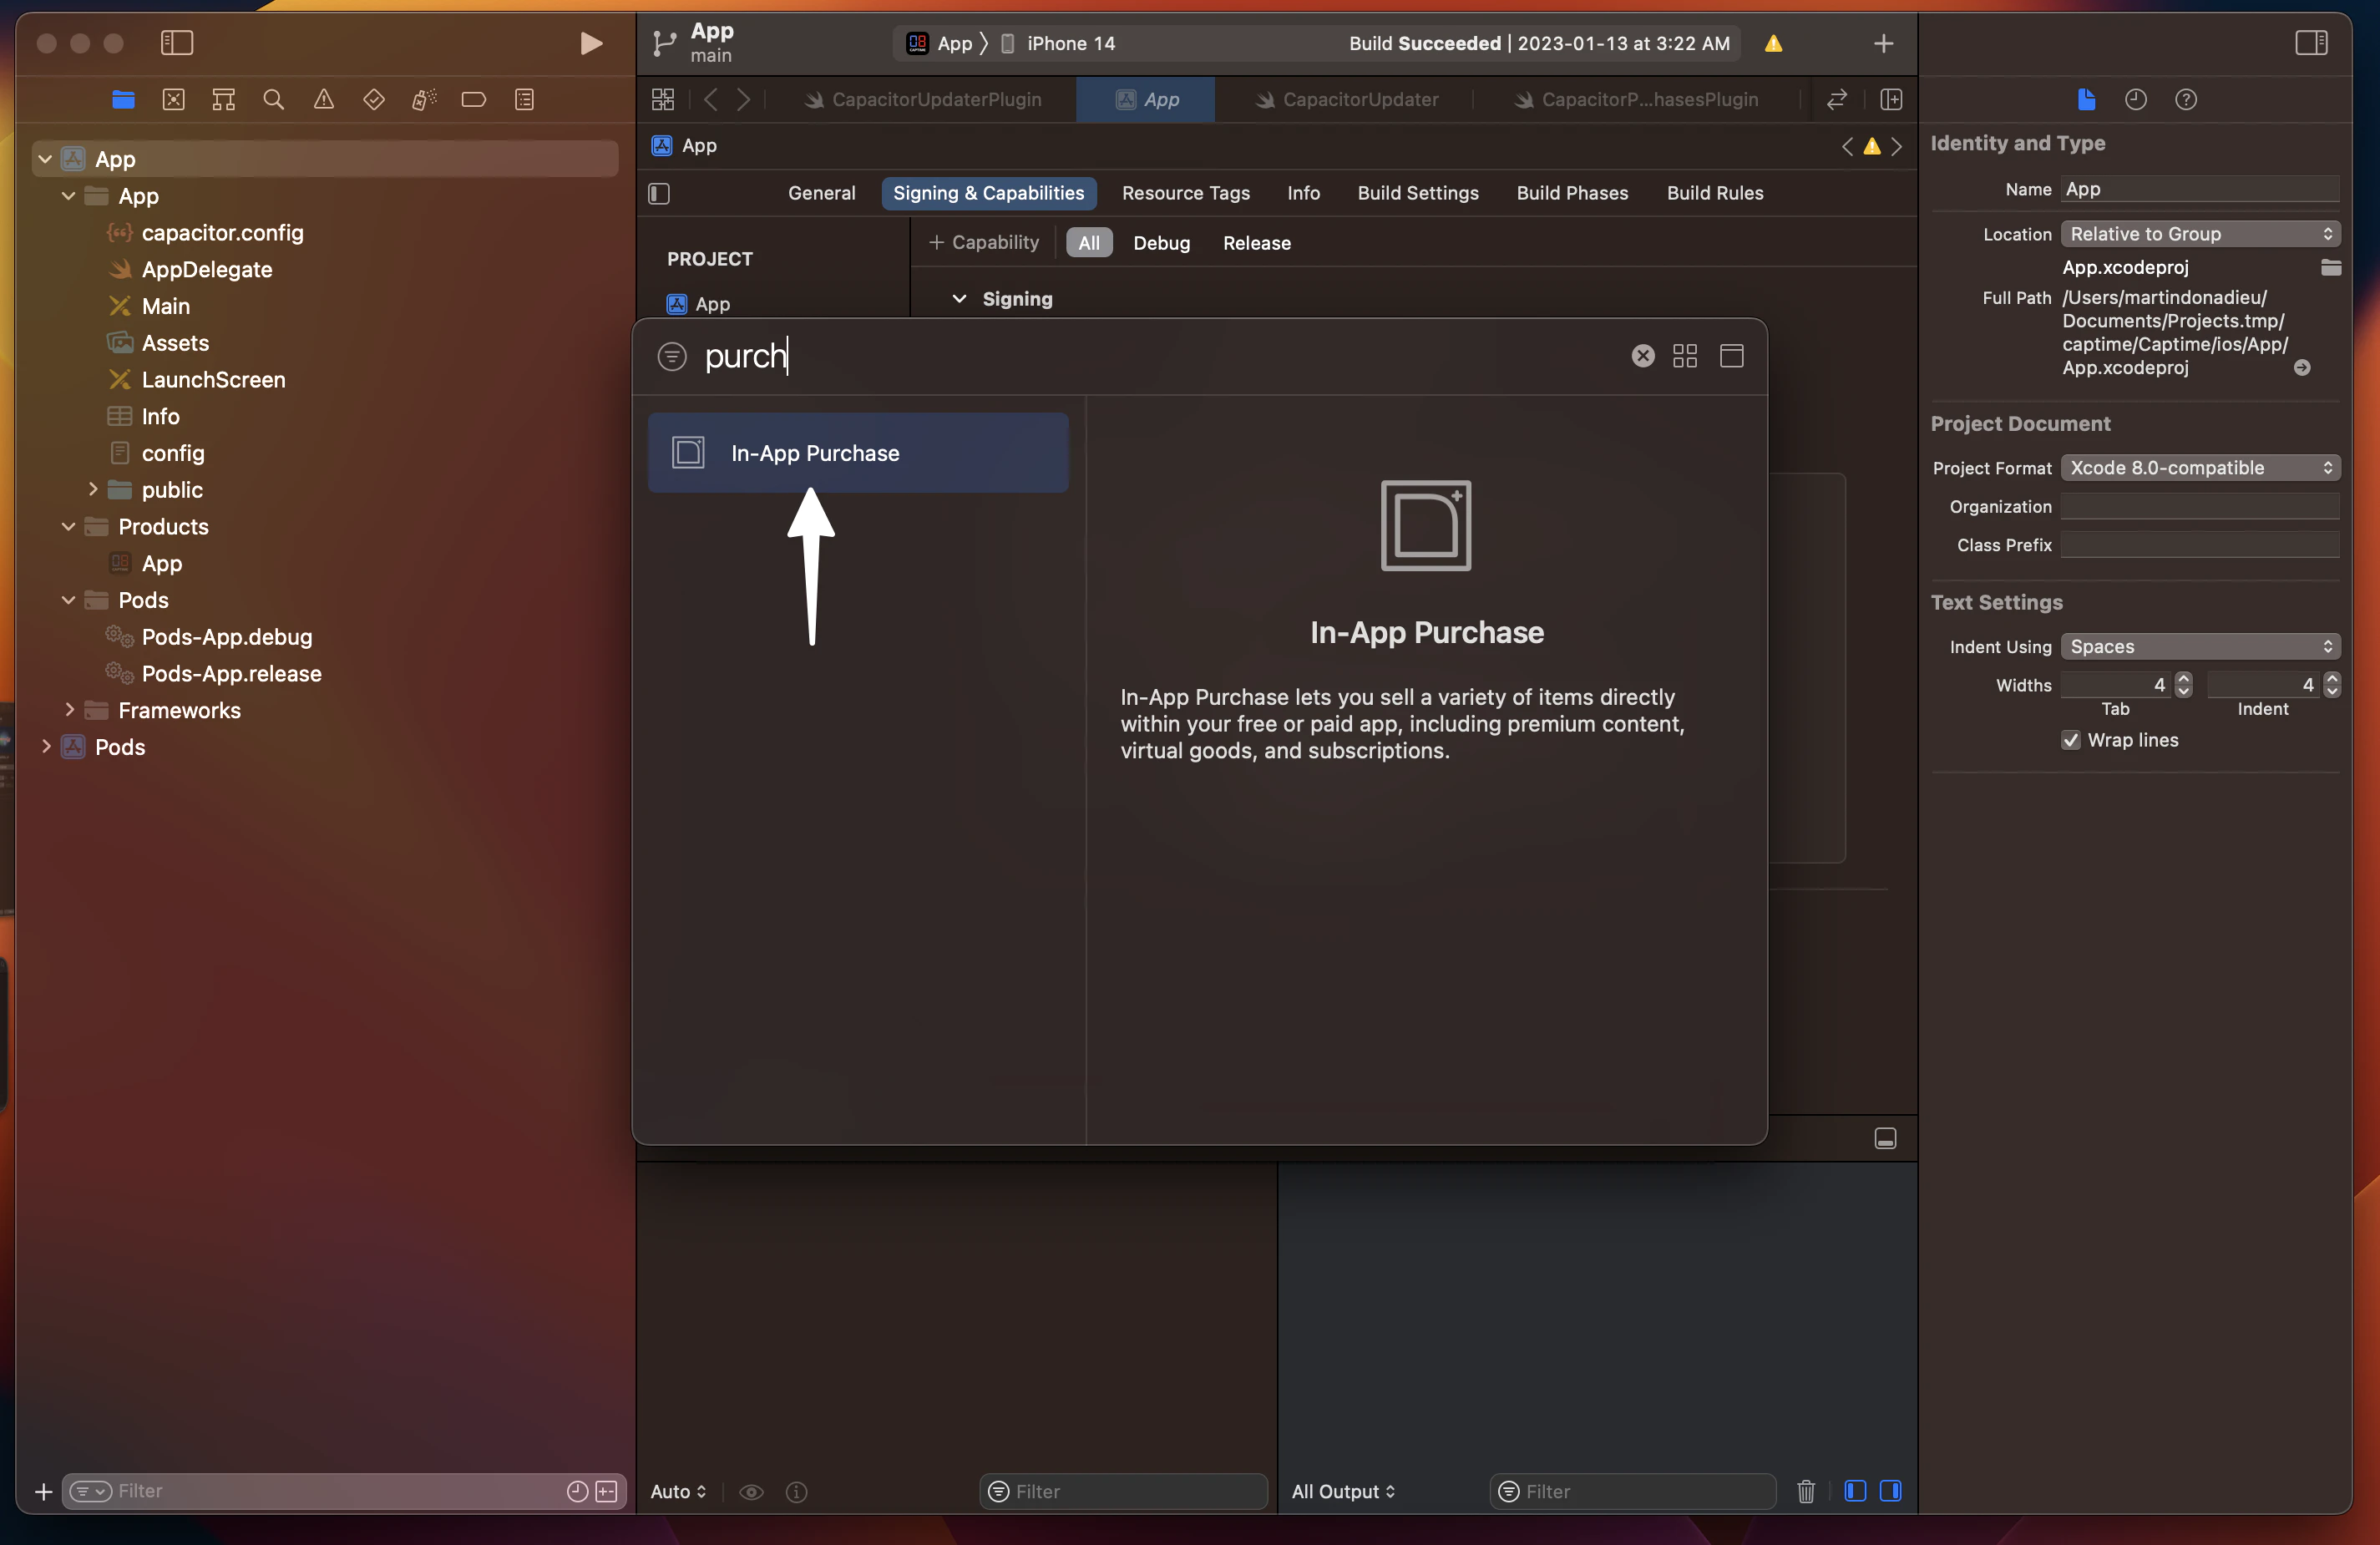
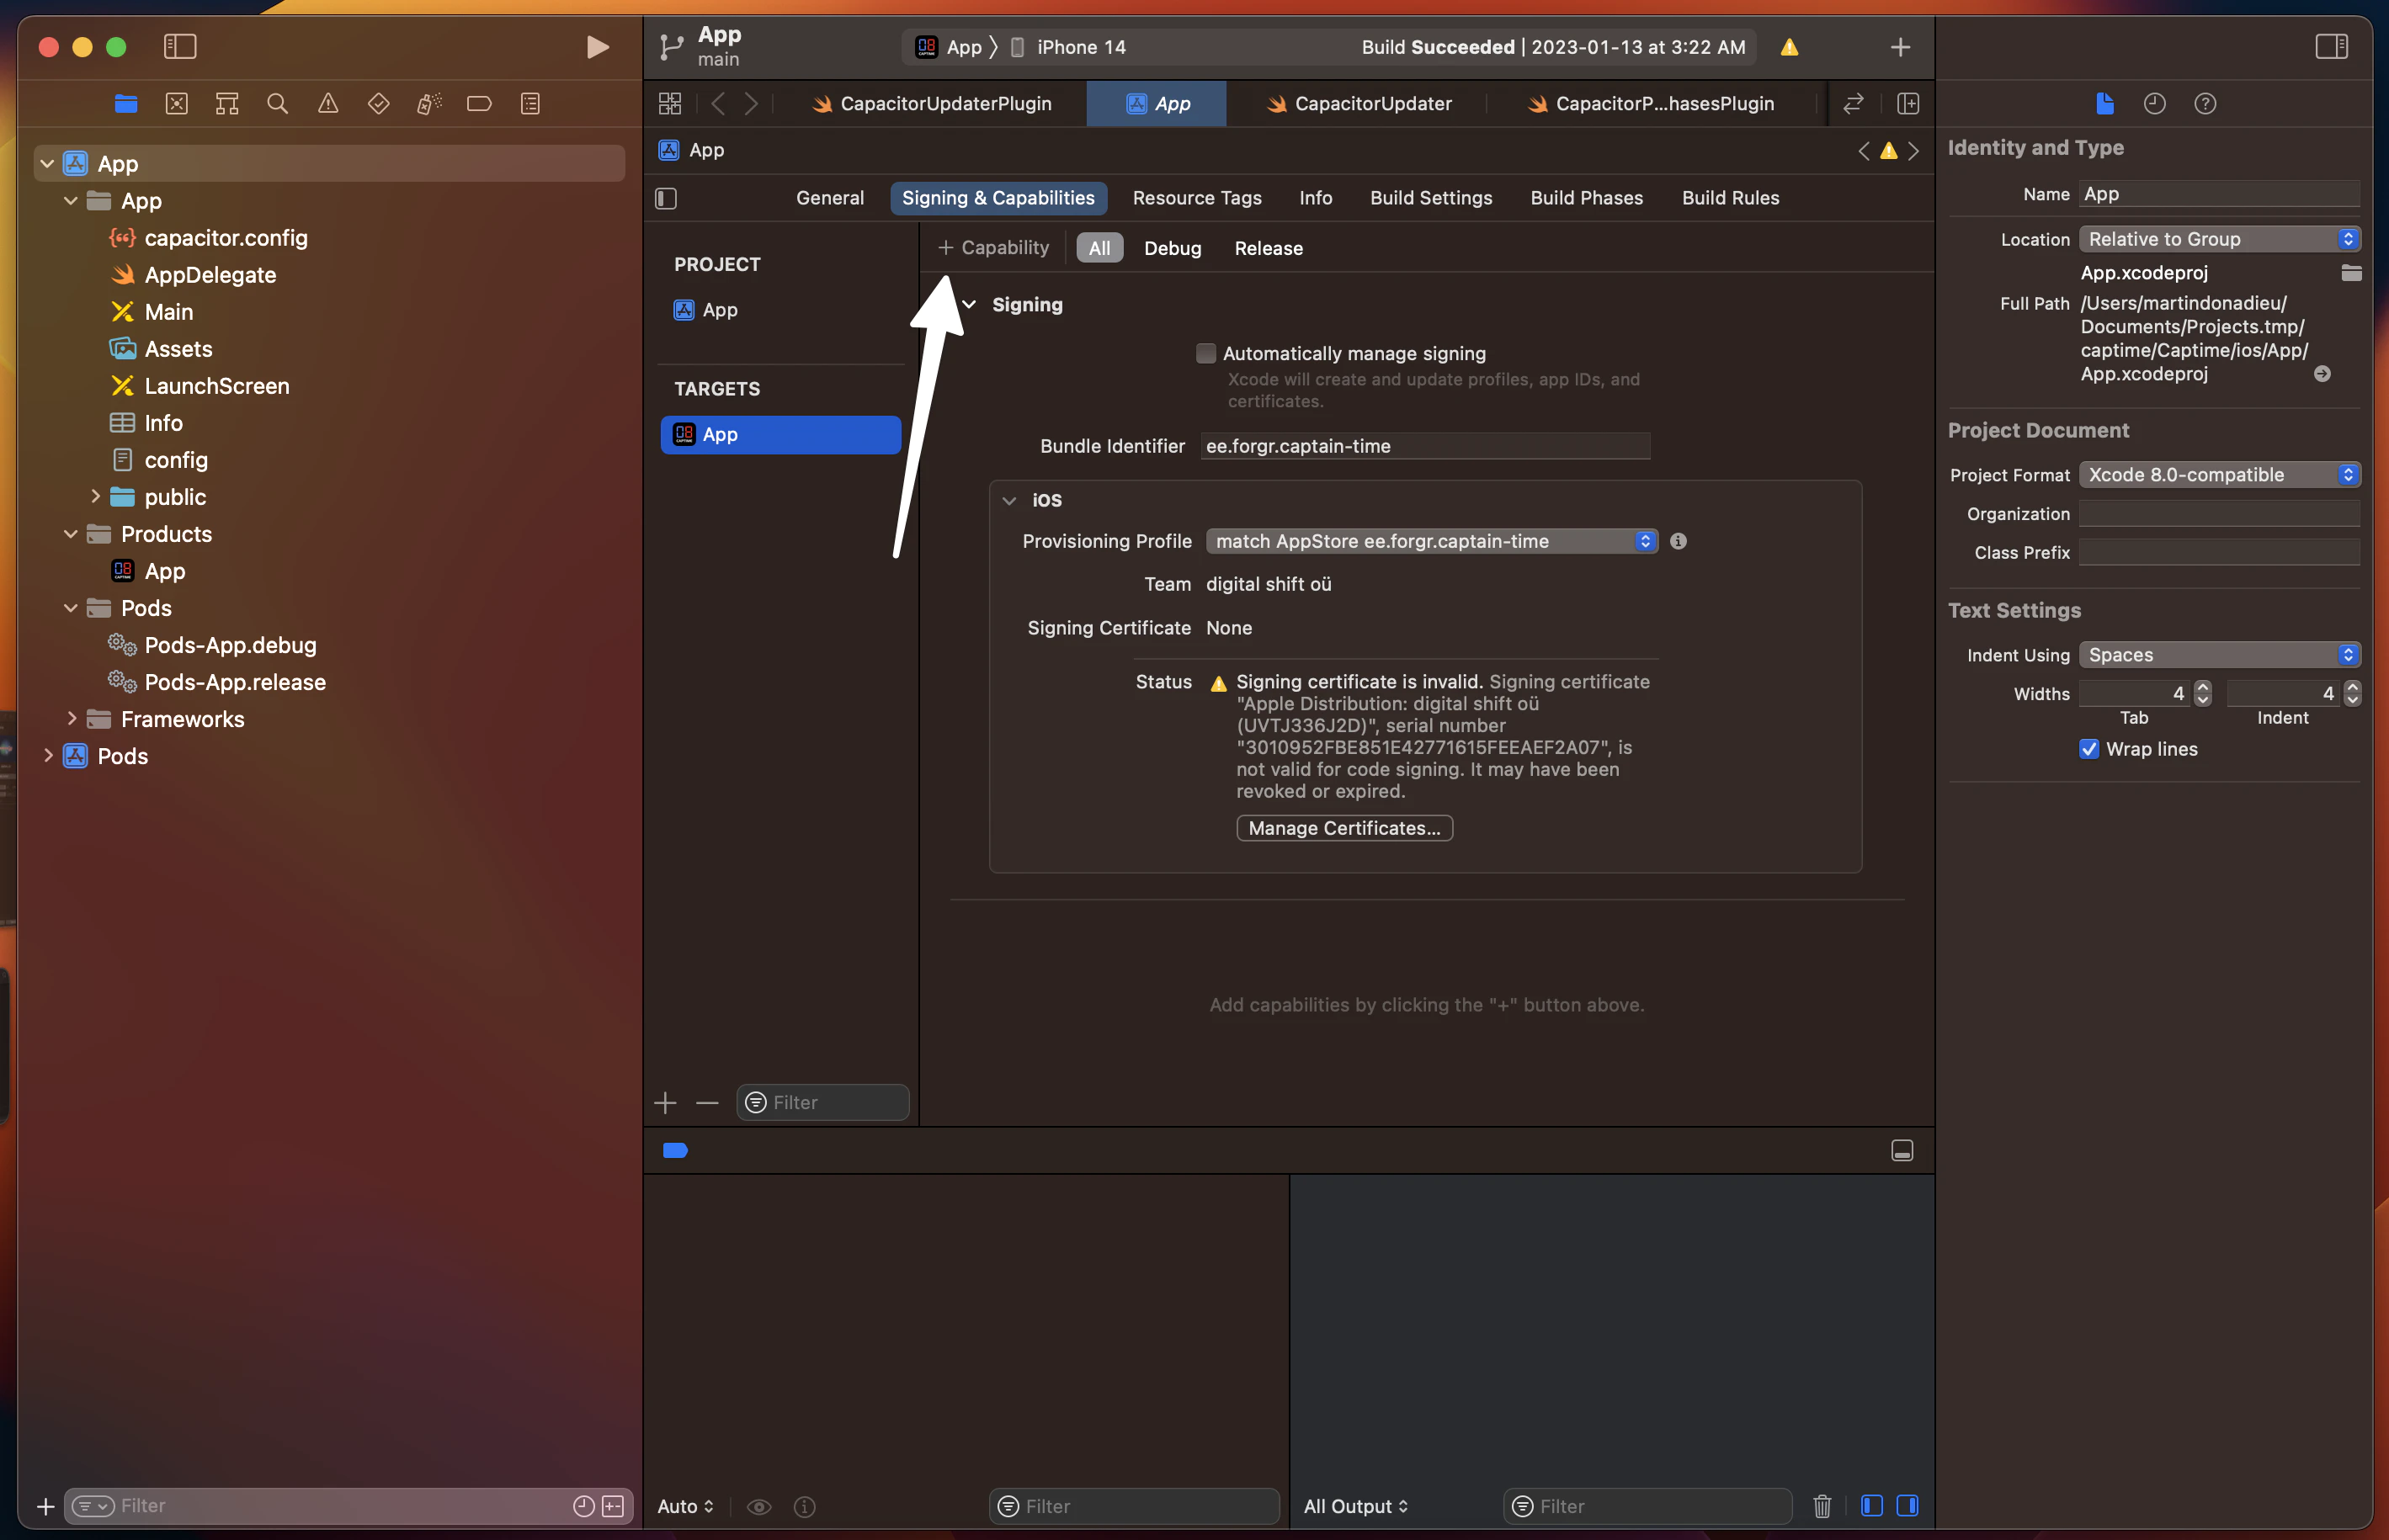 then
then
1. Create a RevenueCat Account
This guide will walk you through how to get up and running with subscriptions and RevenueCat’s SDK with only a few lines of code.
Sign up for a new RevenueCat account here.
📘
💡 Here’s a tip!
RevenueCat recommends creating a separate RevenueCat account for each app / project you have, especially if you ever intend on selling the app. This will speed up the transfer process, since you can transfer the entire account rather than waiting for RevenueCat Support to transfer individual projects.
Organizations / Enterprise
We recommend using a company account when registering for RevenueCat and setting up your app within a project. You’ll be able to invite the rest of your team as collaborators to your project, but only the project owner can manage billing. Project collaborators can’t manage billing details.
2. Project and App Configuration
▶️ Create a Project
Navigate to the RevenueCat dashboard and add a new project from the dropdown in the top navigation menu called Projects.
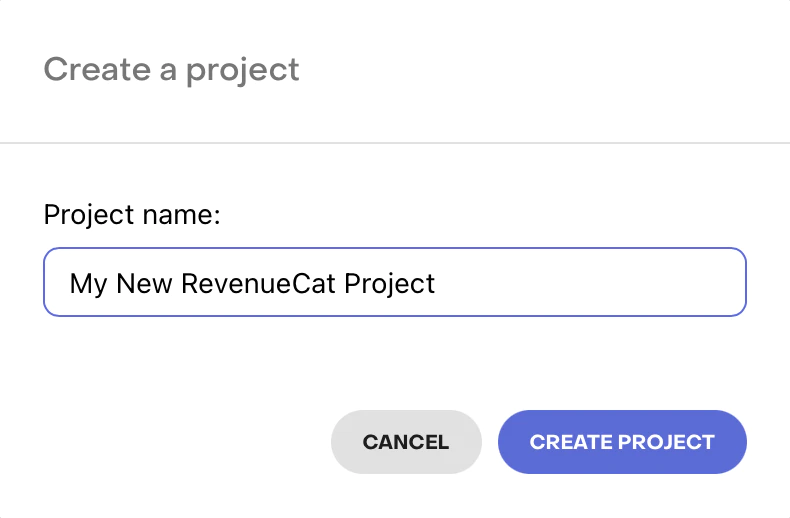
The popup modal for creating a new Project
▶️ Add an App / Platform
From Project Settings > Apps in the left menu of the project dashboard, select the platform for the app you will be adding.
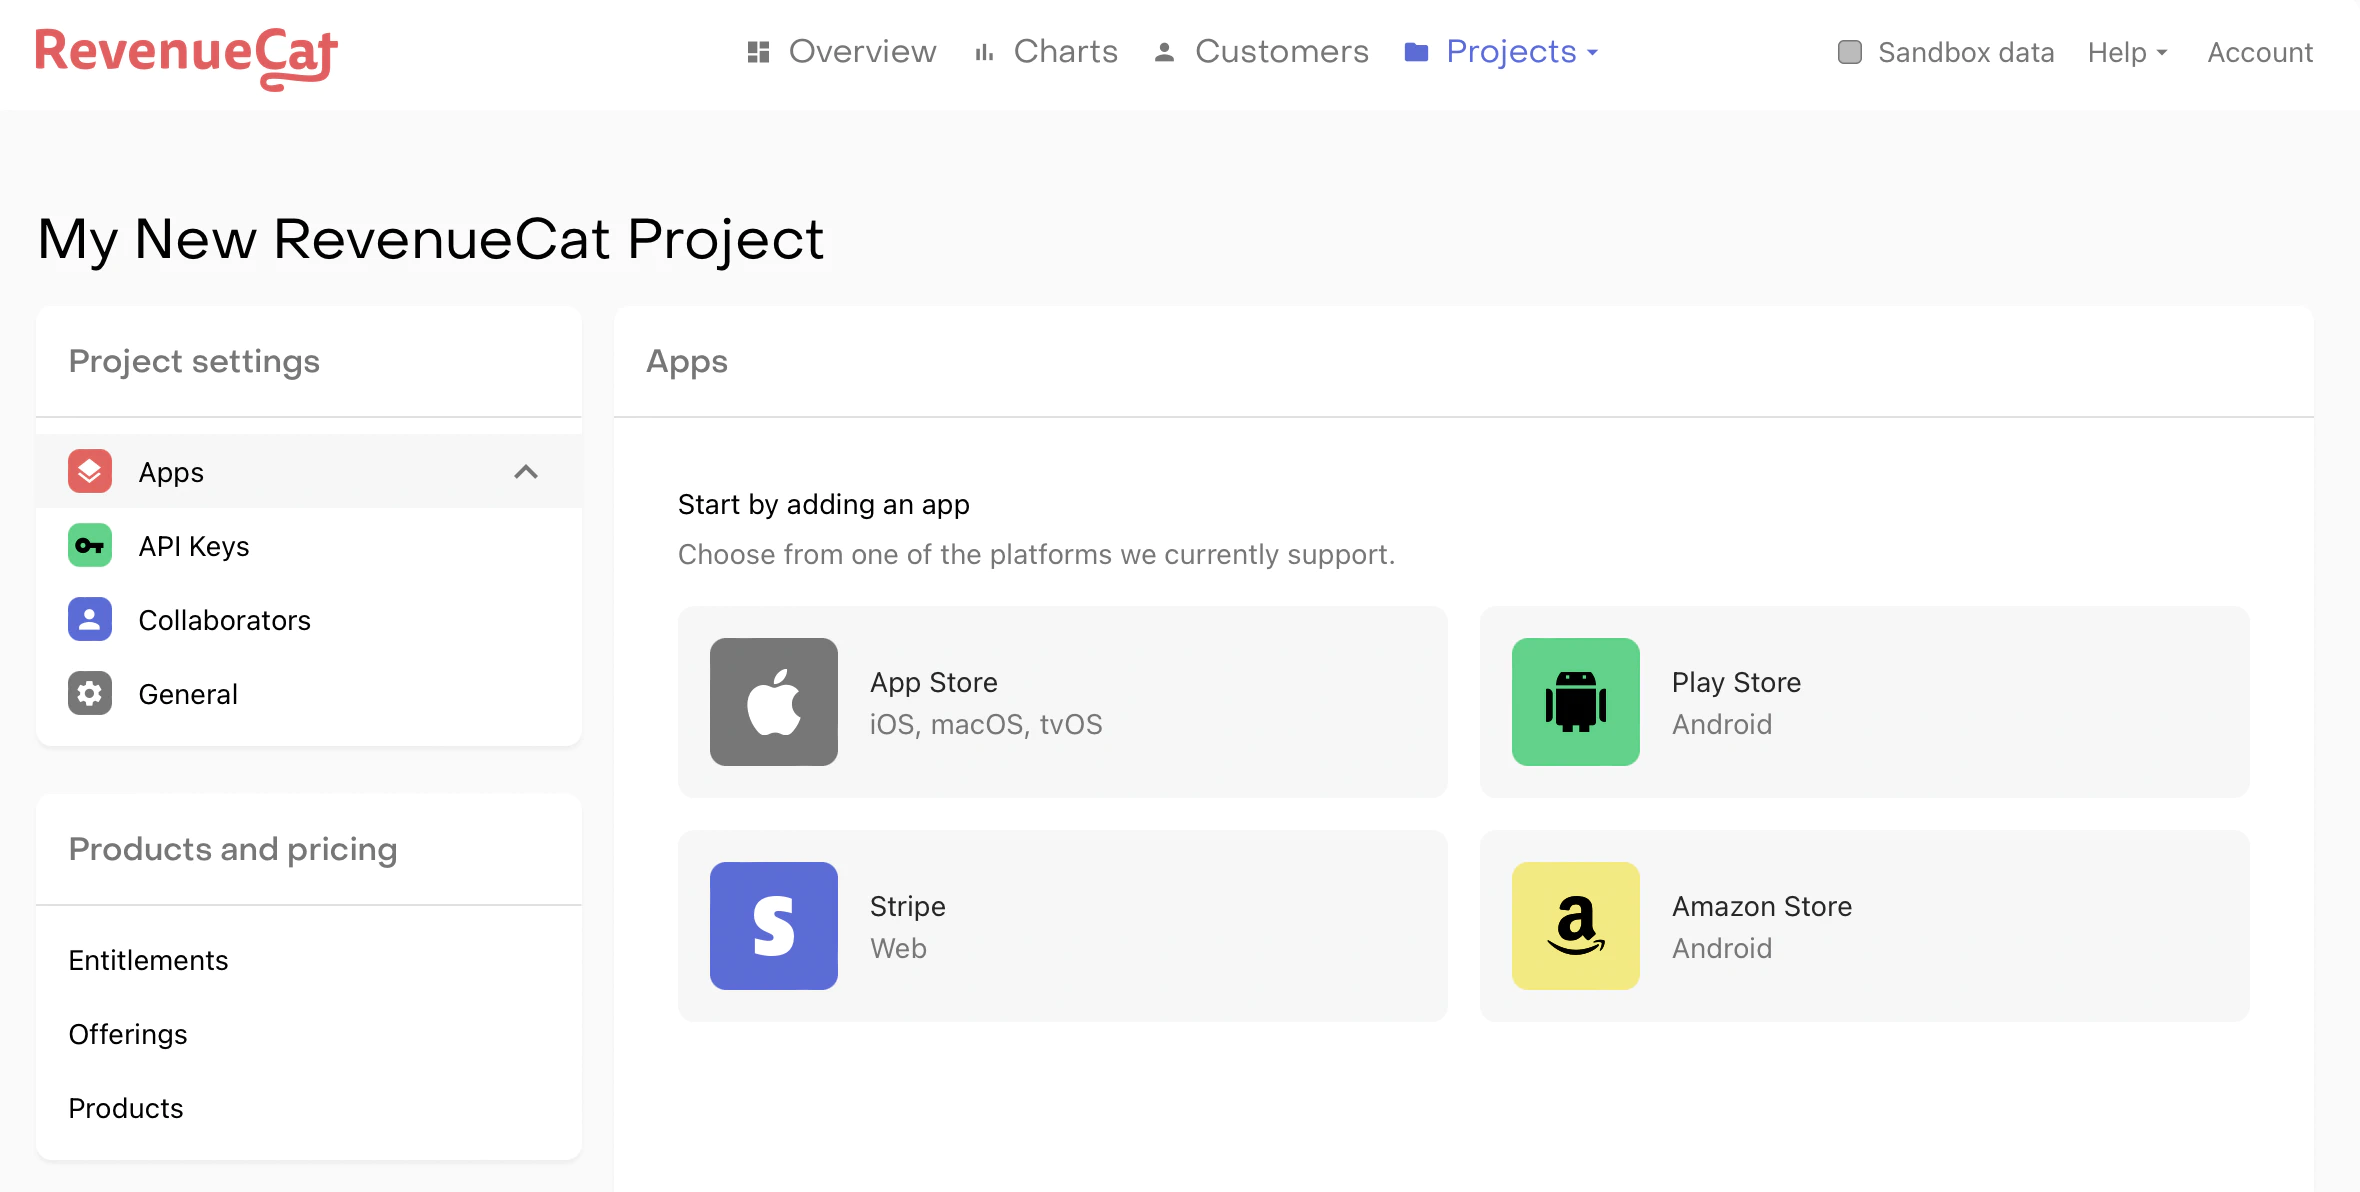
Project dashboard for selecting the app platform
The field App name is required to add your app to RevenueCat. The rest of the configuration fields can be added later. To make test and production purchases, the Bundle ID (iOS) / Package Name (Android) as well as the Shared Secret (iOS) / Service Credentials (Android) must be configured.
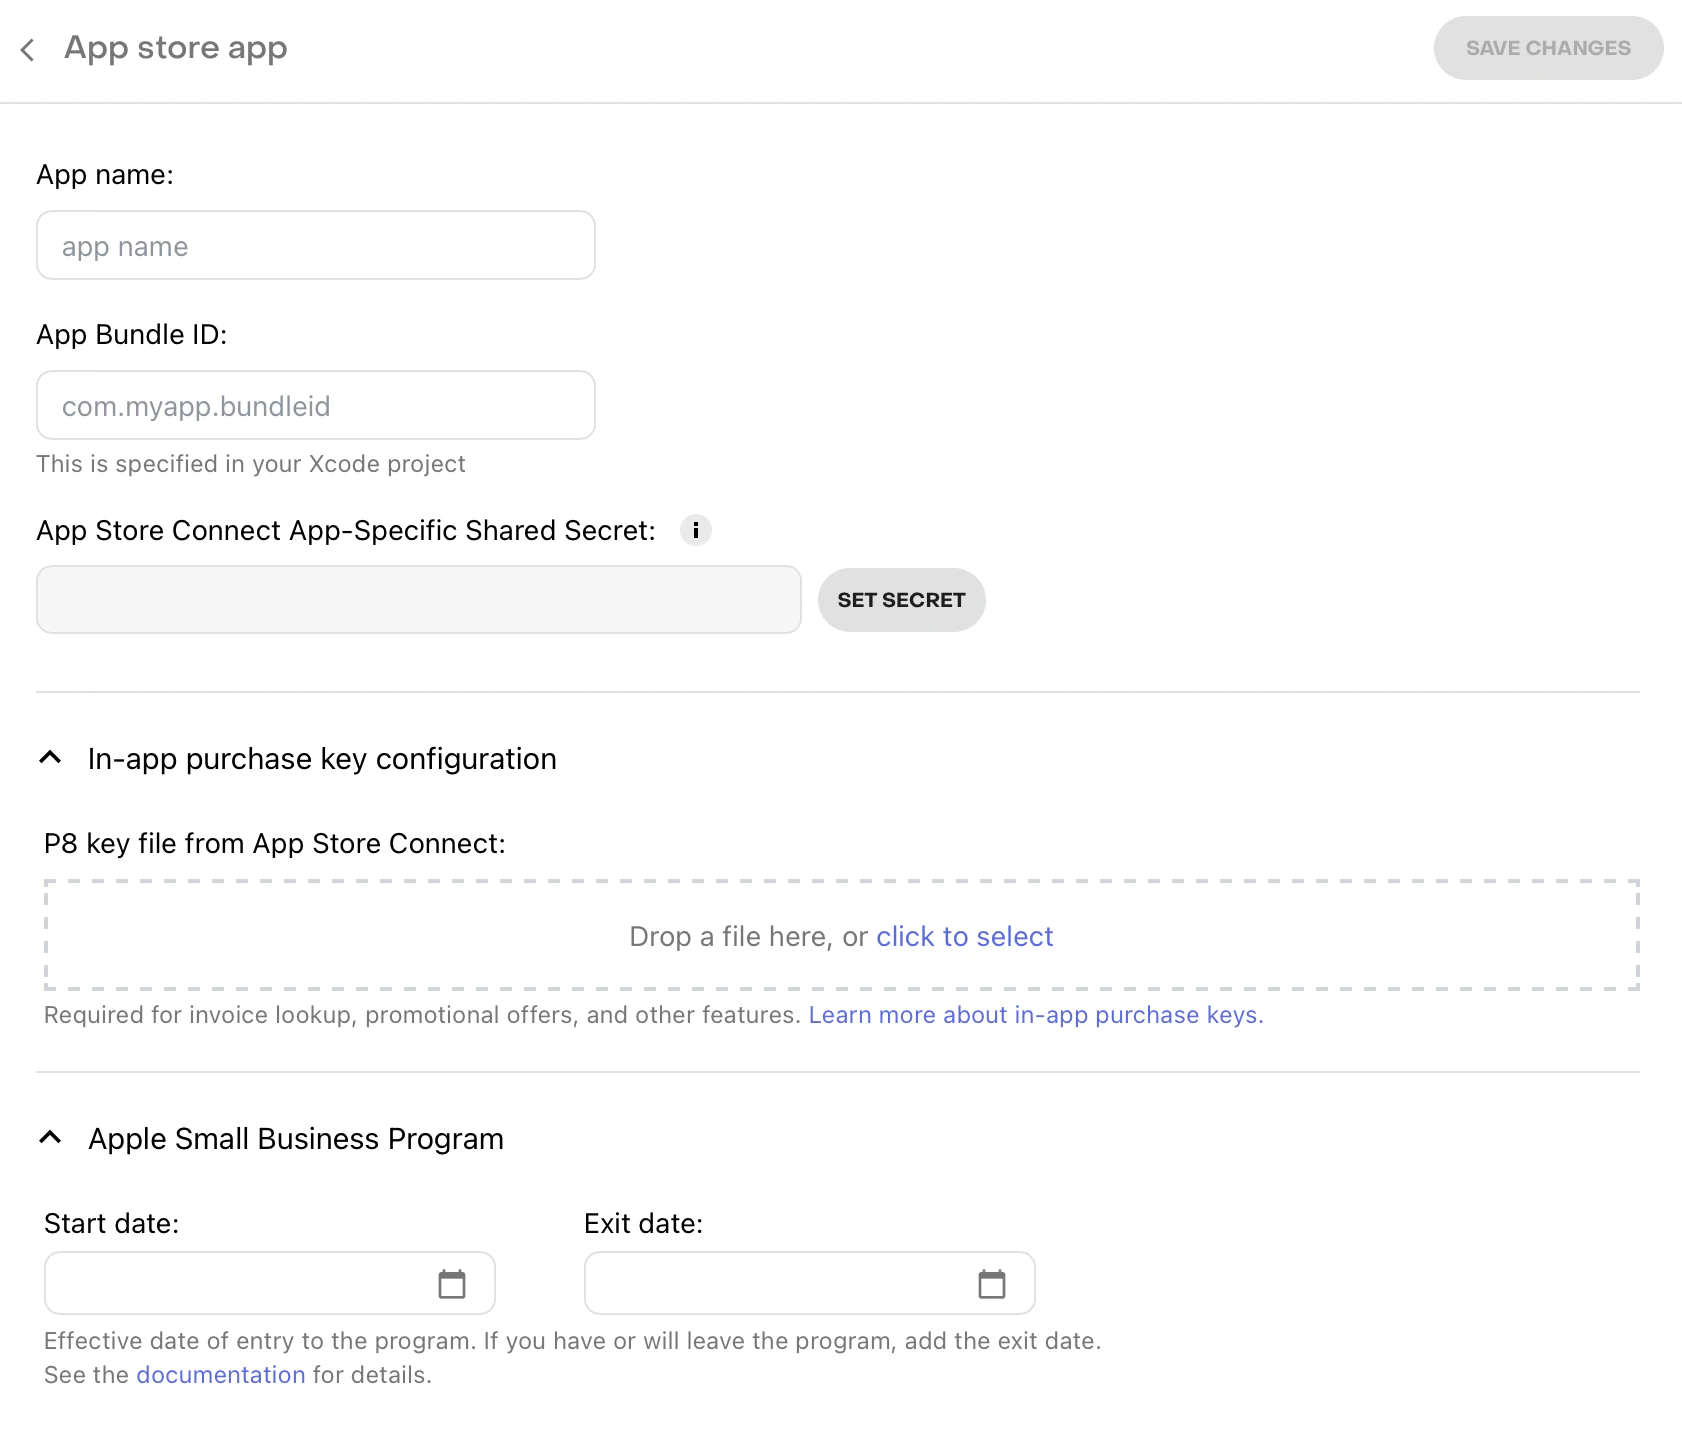
App configuration page for an Apple App Store app
📘
💡 Here’s a tip!
After registering your app, RevenueCat recommends setting up Platform Server Notifications. These notifications aren’t required, but will speed up webhooks and integration delivery times and reduce lag time updating your subscribers.
📘
Staging vs. Production apps and users
RevenueCat itself does not have separate environments for staging and production. Rather, the underlying transactions for users are differentiated by sandbox and production.
Any RevenueCat app can make both sandbox and production purchases from the stores. If you do have separate apps for staging and production, you can create multiple projects in RevenueCat to mirror your setup.
Furthermore, users are not separated by environment, either. The same user can have active sandbox purchases and active production purchases at the same time.
▶️ Service Credentials
Service credentials need to be set up for RevenueCat to communicate with the app stores on your behalf. See RevenueCat guides App Store Connect Shared Secret, Play Service Credentials, and Amazon Appstore Shared Secret for more information.
Note that play service credentials can take up to 36 hours to propagate throughout Google’s servers.
3. Product Configuration
▶️ Store Setup
Before you can start using RevenueCat to fetch products, you must configure your products in the respective stores. See the following guides for App Store Connect, Google Play Console, Amazon Appstore, and Stripe for help to navigate through this process.
If you are selling iOS products, be sure to sign your ‘Paid Applications Agreement’ and fill out your bank and tax information in App Store Connect > Agreements, Tax, and Banking. This needs to be completed before you can test any purchases.
📘
Want to skip the store setup while testing?
On iOS, you can delay configuring products in App Store Connect by testing with StoreKit Configuration files instead. These config files require minimal setup and are configurable via Xcode directly.
Read more about setting up StoreKit Configuration files in RevenueCat Sandbox Testing guide.
▶️ Configure Products and Entitlements in RevenueCat
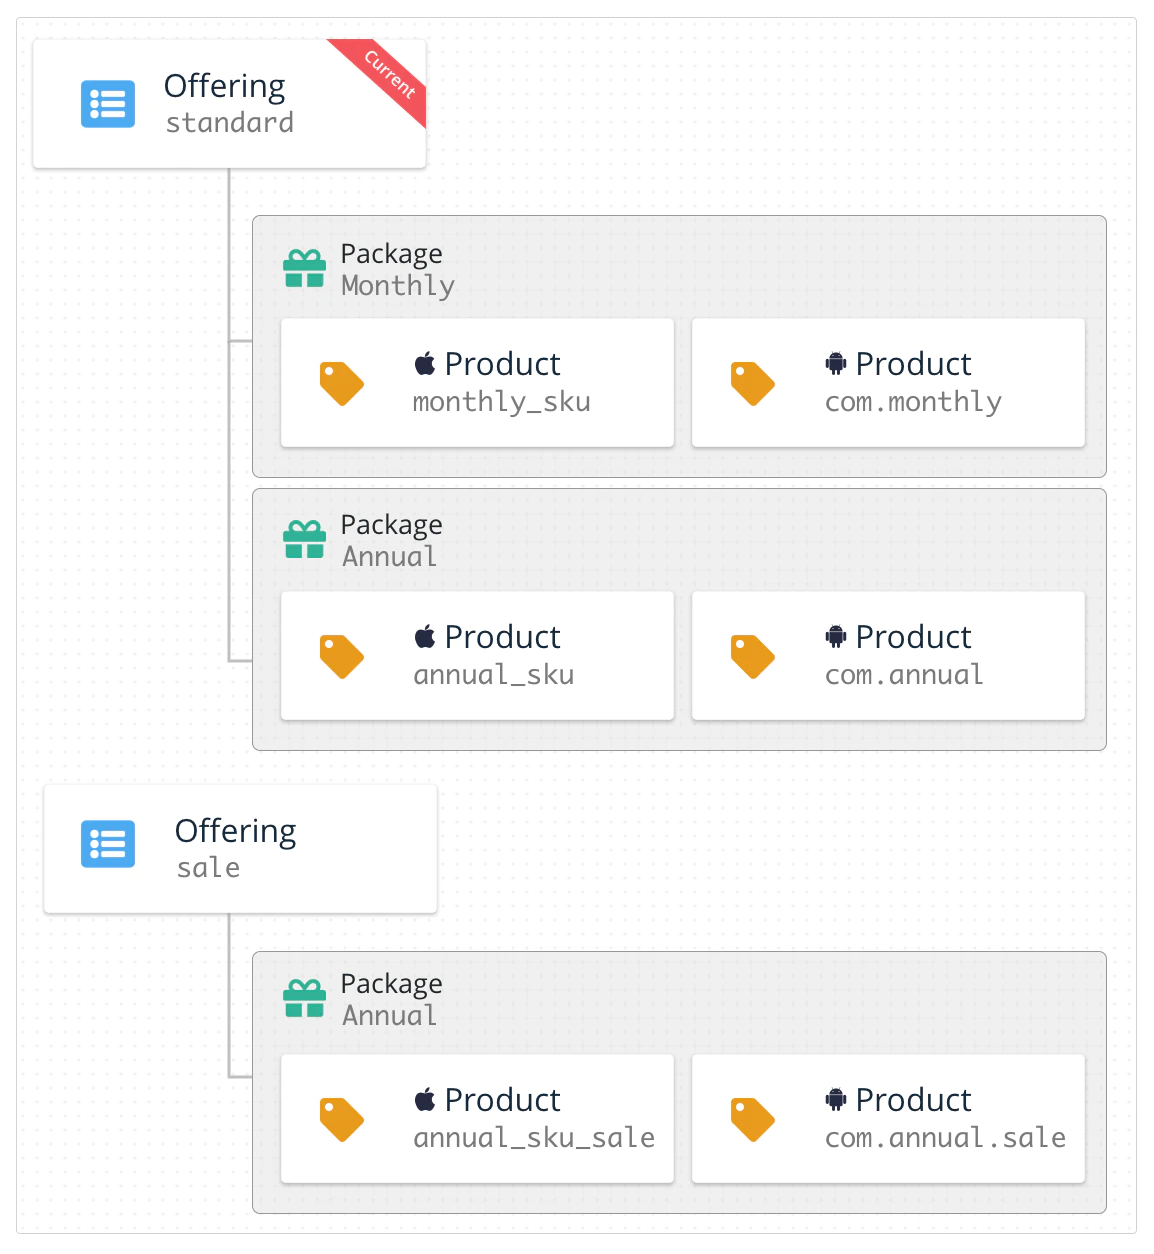
Once your in-app products have been configured in App Store Connect, Google Play Console, Amazon Appstore, or Stripe, you’ll need to copy that configuration into the RevenueCat dashboard. RevenueCat uses an Entitlements’ system to control access to premium features, and Offerings to manage the set of products you offer to customers.
Entitlements are the level of access that a customer is “entitled” to after purchasing a specific product. Offerings are a simple way for you to organize the in-app products you wish to “offer” on your paywall and configure them remotely. RevenueCat recommends utilizing these features to simplify your code and enable you to change products without releasing an app update.
See Configuring Products to set up your products and then organize them into Offerings or Entitlements.
4. Using RevenueCat’s Purchases SDK
RevenueCat SDK seamlessly implements purchases and subscriptions across platforms while syncing tokens with the RevenueCat server.
If you run into issues with the SDK, see Troubleshooting the SDKs for guidance.
📘
Only use your public SDK key to configure Purchases
You can get your public SDK key from the API keys tab under Project settings in the dashboard.
You should only configure the shared instance of Purchases once, usually on app launch. Subsequently, the same instance is shared throughout your app by accessing the .shared instance in the SDK.
See RevenueCat guide on Configuring SDK for more information and best practices.
Make sure you configure Purchases with your public SDK key only. You can read more about the different API keys available in RevenueCat Authentication guide.
import { CapacitorPurchases } from '@capgo/capacitor-purchases'
import { isPlatform } from '@ionic/vue' // use the right one for your framework

CapacitorPurchases.setDebugLogsEnabled({ enabled: import.meta.env.DEV }) // Enable to get debug logs in dev mode
if (isPlatform('ios')) {
    CapacitorPurchases.setup({ apiKey:'appl_******'})
} else if (isPlatform('android')) {
    CapacitorPurchases.setup({ apiKey:'goog_******'})
}
When in development, RevenueCat recommends enabling more verbose debug logs. For more information about these logs, see their Debugging guide.
If you’re planning to use RevenueCat alongside your existing purchase code, refer to their guide on Observer Mode.
📘
Configuring Purchases with User IDs
If you have a user authentication system in your app, you can provide a user identifier at the time of configuration or at a later date with a call to
.logIn(). To learn more, check out RevenueCat guide on Identifying Users.
The SDK will automatically fetch the configured Offerings and retrieve the product information from Apple, Google, or Amazon. Thus, available products will already be loaded when customers launch your purchase screen.
Below is an example of fetching Offerings. You can utilize Offerings to organize your paywall screen. See RevenueCat guide on Displaying Products for more information and best practices.
▶️ Fetch and Display Available Products
📘
Configuring Purchases with User IDs
If you have a user authentication system in your app, you can provide a user identifier at the time of configuration or at a later date with a call to
.logIn(). To learn more, check out RevenueCat guide on Identifying Users.
The SDK will automatically fetch the configured Offerings and retrieve the product information from Apple, Google, or Amazon. Thus, available products will already be loaded when customers launch your purchase screen.
Below is an example of fetching Offerings. You can utilize Offerings to organize your paywall screen. See RevenueCat guide on Displaying Products for more information and best practices.
const { offerings } = await CapacitorPurchases.getOfferings()
if (offerings.current !== null) {
    // Display current offering with offerings.current
}
If fetching your Offerings, products, or available packages are empty, it’s due to some configuration issue in the respective store.
The most common reasons for this in App Store Connect are an out-of-date ‘Paid Applications Agreement’ or products not at least in the ‘Ready To Submit’ state. In GooglePlay this usually occurs when the app is not published on a closed track and a valid test user added.
You can find more info about troubleshooting this issue in RevenueCat Help Center.
▶️ Make a Purchase
The SDK includes a simple method for facilitating purchases. The purchase:package takes a package from the fetched Offering and processes the transaction with the respective app store.
The code sample below shows the process of purchasing a package and confirming it unlocks the “your_entitlement_id” content. More details about the purchase:package method can be found in RevenueCat guide on Making Purchases.
const purchase = async (p: Package): Promise<PurchaserInfo | null> => {
  try {
    // console.log('purchase', p)
    const data = await CapacitorPurchases.purchasePackage({
      identifier: p.identifier,
      offeringIdentifier: p.offeringIdentifier,
    })
    const purchaserInfo = data.purchaserInfo
    // console.log('listenBuy', purchaserInfo)
    if (purchaserInfo.activeSubscriptions.includes(p.identifier)) {
      // set the user as paid
    }
    return purchaserInfo
  }
  catch (e) {
    console.error('listenBuy error', e)
  }
  return null
}
▶️ Check Subscription Status
You can use this method whenever you need to get the latest status, and it’s safe to call this repeatedly throughout the lifecycle of your app. Purchases automatically caches the latest CustomerInfo whenever it updates — so in most cases, this method pulls from the cache and runs very fast.
It’s typical to call this method when deciding which UI to show the user, and whenever the user performs an action that requires a certain entitlement level.
📘
💡 Here’s a tip!
You can access a lot more information about a subscription than simply whether it’s active or not. See RevenueCat guide on Subscription Status to learn if subscription is set to renew, if there’s an issue detected with the user’s credit card, and more.
RevenueCat enables your users to restore their in-app purchases, reactivating any content that they previously purchased from the same store account (Apple, Google, or Amazon account). We recommend that all apps have some way for users to trigger the restore method. Note that Apple does require a restore mechanism in the event a user loses access to their purchases (e.g: uninstalling/reinstalling the app, losing their account information, etc).
  const res = await CapacitorPurchases.restoreTransactions()
  const purchaserInfo = res.purchaserInfo
  const ids: string[] = [] // extract active subscriptions ids
  purchaserInfo.activeSubscriptions.forEach((id) => {
    ids.push(id)
  })
If two different App User IDs restore transactions from the same underlying store account (Apple, Google, or Amazon account). RevenueCat may attempt to create an alias between the two App User IDs and count them as the same user going forward. See RevenueCat guide on Restoring Purchases for more information on the different configurable restore behaviors.
Since the SDK works seamlessly on any platform, changes to a user’s purchase info may come from a variety of sources. You can respond to any changes in a customer’s CustomerInfo by conforming to an optional delegate method, purchases:receivedUpdated:.
This method will fire whenever the SDK receives an updated CustomerInfo object from calls to getCustomerInfo(), purchase(package:), purchase(product:), or restorePurchases().
CustomerInfo updates are not pushed to your app from the RevenueCat backend, updates can only happen from an outbound network request to RevenueCat, as mentioned above.
Depending on your app, it may be sufficient to ignore the delegate and simply handle changes to customer information the next time your app is launched or in the completion blocks of the SDK methods.
CapacitorPurchases.addListener('purchasesUpdate', (data) => {
  console.log('purchasesUpdate', data)
})
👍
You did it!
You have now implemented a fully-featured subscription purchasing system without spending a month writing server code. Congrats!
Sample Apps
To download more complete examples of integrating the SDK, head over to RevenueCat sample app resources.
I will soon publish a sample app using Capacitor and Vue.js.
If you need to move deep usage of the Capacitor SDK check the documentation here.
Next Steps
\
- If you haven’t already, make sure your products are configured correctly by checking out RevenueCat guide on entitlements.
- If you want to use your own user identifiers, read about setting app user IDs .
- If you’re moving to RevenueCat from another system, see RevenueCat guide on migrating your existing subscriptions.
- Once you’re ready to test your integration, you can follow RevenueCat guides on testing and debugging.
- If you qualify for the App Store Small Business Program, check out RevenueCat guide on how to apply and inform RevenueCat
If you need Live update in your app
Join use here 👇
Register here to get your account
Keep going from in app purchases for capacitor
If you are using in app purchases for capacitor to plan payments and purchases, connect it with Capgo Pricing for the product workflow in Capgo Pricing, Payment system for the implementation detail in Payment system, @capgo/native-purchases for the implementation detail in @capgo/native-purchases, Getting Started for the implementation detail in Getting Started, and Revenue Playbook for the implementation detail in Revenue Playbook.


