Hilfe
Native Navigation Tutorial

Mit @capgo/capacitor-native-navigation
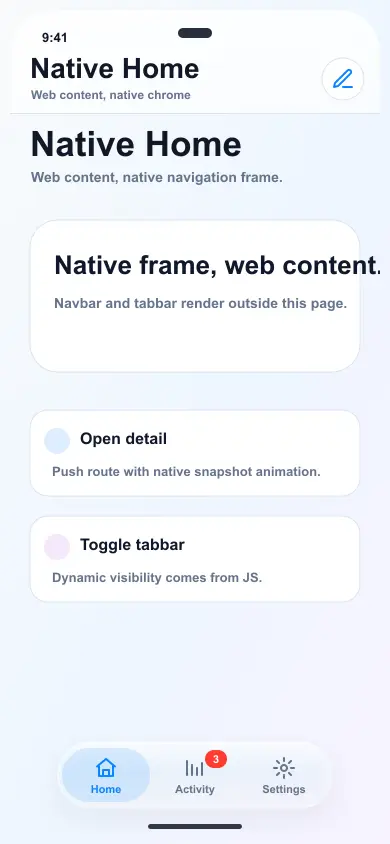
@capgo/capacitor-native-navigation zeigt native Ober- und Unter-Navigation, Tab-UI und Routen-Übergang-Shell über einem einzelnen Vollbild-Capacitor WebView. Ihre Web-Framework besitzt immer noch die Routen und Inhalte, während native die App-Frame besitzt.
Installieren und synchronisieren
npm install @capgo/capacitor-native-navigation
npx cap sync
Konfigurieren Sie das native Frame
import { NativeNavigation } from '@capgo/capacitor-native-navigation';

await NativeNavigation.configure({
  contentInsetMode: 'css',
  animationDuration: 360,
  colors: {
    tint: '#0f172a',
    inactiveTint: '#64748b',
  },
});
Rendern Sie eine native Navbar
await NativeNavigation.setNavbar({
  title: 'Inbox',
  subtitle: 'Native chrome',
  transparent: true,
  backButton: { visible: false },
  rightItems: [
    {
      id: 'compose',
      title: 'Compose',
      icon: {
        svg: '<svg viewBox="0 0 24 24" fill="none" stroke="currentColor" stroke-width="2"><path d="M12 20h9"/><path d="M16.5 3.5a2.12 2.12 0 0 1 3 3L7 19l-4 1 1-4Z"/></svg>',
      },
    },
  ],
});
Rendern Sie eine native Tabbar
await NativeNavigation.setTabbar({
  selectedId: 'inbox',
  labelVisibilityMode: 'selected',
  icons: true,
  colors: {
    dynamic: true,
    tint: '#0f172a',
    inactiveTint: '#64748b',
  },
  tabs: [
    {
      id: 'inbox',
      title: 'Inbox',
      icon: {
        svg: '<svg viewBox="0 0 24 24" fill="none" stroke="currentColor" stroke-width="2"><path d="M4 4h16v16H4z"/><path d="m4 13 4 4h8l4-4"/></svg>',
      },
    },
    {
      id: 'search',
      title: 'Search',
      icon: {
        svg: '<svg viewBox="0 0 24 24" fill="none" stroke="currentColor" stroke-width="2"><circle cx="11" cy="11" r="7"/><path d="m20 20-3-3"/></svg>',
      },
    },
  ],
});
Verbinden Sie native Ereignisse mit Ihrem Router
Native Bars senden eine Absicht. Ihr Router führt immer noch die Routenänderung durch:
await NativeNavigation.addListener('navbarBack', () => {
  router.back();
});

await NativeNavigation.addListener('navbarItemTap', ({ id }) => {
  if (id === 'compose') router.push('/compose');
});

await NativeNavigation.addListener('tabSelect', ({ id }) => {
  router.push(`/${id}`);
});
Animate Route-Änderungen
Verwenden Sie eine Übergangstransaktion um Ihre normale Web-Routen-Update herum:
const transition = await NativeNavigation.beginTransition({
  direction: 'forward',
});

router.push('/message/42');
await router.ready?.();

await NativeNavigation.setNavbar({
  title: 'Message',
  backButton: { visible: true, title: 'Inbox' },
});

await NativeNavigation.finishTransition({
  id: transition.id,
  direction: 'forward',
});
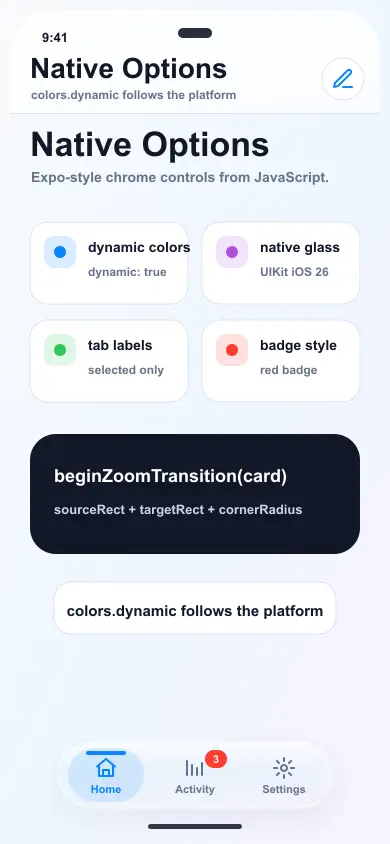
Zoom-Übergang hinzufügen
Verwenden Sie die Zoom-Hilfsmittel für Routen, die von einem Karten-Element, einem Grid-Element oder einem Medien-Vorschau-Element geöffnet werden.
import { beginZoomTransition, finishZoomTransition } from '@capgo/capacitor-native-navigation';

const card = document.querySelector('[data-message-card]');
if (card) {
  const transition = await beginZoomTransition(card, { cornerRadius: 18 });

  router.push('/message/42');
  await router.ready?.();

  await NativeNavigation.setNavbar({
    title: 'Message',
    backButton: { visible: true, title: 'Inbox' },
  });

  await finishZoomTransition(undefined, {
    id: transition.id,
    cornerRadius: 18,
  });
}
Inhalte mit nativen Einstellungen ausrichten
Wenn contentInsetMode ist cssdie Erweiterung schreibt CSS-Variablen für die nativen Balken:
.page {
  padding-top: var(--cap-native-navigation-top);
  padding-bottom: var(--cap-native-navigation-bottom);
}
Icon-Auswahl
Icons sind native Beschreibungen, nicht React- oder Vue-Elemente. Verwenden Sie SVG, wenn Sie native Assets nicht bundeln möchten:
const icon = {
  svg: '<svg viewBox="0 0 24 24"><path d="M3 10.5 12 3l9 7.5"/></svg>',
  template: true,
  ios: { sfSymbol: 'house.fill' },
  android: { resource: 'ic_menu_view' },
};
Inline-SVG unterstützt path, line, polyline, polygon, circleund rectdie
Combine with @capgo/capacitor-transitions
Verwenden Sie Native Navigation für das native Navbar, Tabbar, safe-Area-Einrückungen und native Intent-Ereignisse. Verwenden Sie @capgo/capacitor-transitions für die WebView-Seitenspeicherung unterhalb der native Chrome.
npm install @capgo/capacitor-native-navigation @capgo/capacitor-transitions
npx cap sync
Initialisieren Sie beide Pakete einmal:
import { NativeNavigation } from '@capgo/capacitor-native-navigation';
import '@capgo/capacitor-transitions';
import { initTransitions, setupRouterOutlet, setDirection } from '@capgo/capacitor-transitions/react';

initTransitions({ platform: 'auto' });

const outlet = document.querySelector('cap-router-outlet');
if (outlet) {
  setupRouterOutlet(outlet, { platform: 'auto', swipeGesture: 'auto' });
}

await NativeNavigation.configure({
  contentInsetMode: 'css',
});
Halten Sie die Übergangsausgabe auf den Seiten, nicht Duplikate von Web-Bars:
<cap-router-outlet platform="auto" swipe-gesture="auto">
  <cap-page>
    <cap-content slot="content" fullscreen>
      <main class="page">Inbox content</main>
    </cap-content>
  </cap-page>
</cap-router-outlet>
Steueren Sie beide Pakete von denselben Router-Aktionen:
async function openMessage(id: string) {
  setDirection('forward');
  await router.push(`/messages/${id}`);
  await NativeNavigation.setNavbar({
    title: 'Message',
    backButton: { visible: true, title: 'Inbox' },
  });
}

await NativeNavigation.addListener('navbarBack', () => {
  setDirection('back');
  router.back();
});

await NativeNavigation.addListener('tabSelect', ({ id }) => {
  setDirection('root');
  router.push(`/${id}`);
});
Wählen Sie eine Animationsschicht pro Routenänderung. Lassen Sie @capgo/capacitor-transitions normalen Seitenpushes animieren, und verwenden Sie die Zoom-Helfer von Native Navigation nur für gemeinsame-Element- oder Zoom-Routen.
Vollständige Referenz
- GitHub: https://github.com/Cap-go/capacitor-native-navigation/
- Dokumentation: /docs/plugins/native-navigation/
Fortsetzen von Using @capgo/capacitor-native-navigation
Wenn Sie Mit @capgo/capacitor-native-navigation native Medien und Schnittstellenverhalten planen, verbinden Sie es mit @capgo/capacitor-native-navigation für die Implementierungsdetails in @capgo/capacitor-native-navigation, Einstieg für die Implementierungsdetails in Einstieg, Mit @capgo/capacitor-live-activities für die native Fähigkeit in Mit @capgo/capacitor-live-activities, @capgo/capacitor-live-activities für die Implementierungsdetails in @capgo/capacitor-live-activities, und Mit @capgo/capacitor-video-player für die native Fähigkeit in Verwendung von @capgo/capacitor-Video-Player.