


이 튜토리얼에서, 우리는 새로운 웹 앱을 만들기 위해 시작합니다. Quasar이후에, 우리는 Capacitor를 사용하여 이 웹 앱을 모바일 앱으로 변환하는 방법을 배울 것입니다. 만약 모바일에서 앱이 더 좋게 보이기를 원한다면.
Capacitor를 사용하면 Quasar 웹 앱을 모바일 앱으로 변환할 수 있습니다. 모바일 앱을 만들기 위해 많은 어려운 작업을 하거나 새로운 앱을 만들기 위해 React Native와 같은 새로운 방법을 배울 필요가 없습니다.
이 튜토리얼에서는 Quasar 앱을 새로 만들고 Capacitor를 사용하여 모바일 앱으로 변환하는 과정을 안내합니다. 또한, Capacitor를 사용하여 앱에 실시간 업데이트를 보내는 방법을 배울 것입니다. Capgo __CAPGO_KEEP_0__
About Capacitor
__CAPGO_KEEP_0__를 사용하면 복잡한 설정이나 steep 러닝 커브 없이도 훌륭한 네이티브 모바일 앱을 얻을 수 있습니다. __CAPGO_KEEP_1__와 streamlined 기능은 프로젝트에 쉽게 통합할 수 있도록 합니다. 믿어도 됩니다, __CAPGO_KEEP_2__를 사용하면 완전히 기능하는 네이티브 앱을 쉽게 만들 수 있습니다!
With Capacitor, you get a fantastic native mobile app without any complicated setup or steep learning curve. Its slim API and streamlined functionality make it a breeze to integrate into your project. Trust me, you’ll be amazed at how effortless it is to achieve a fully functional native app with Capacitor!
새로운 Quasar 앱을 만들려면 다음 명령어를 실행하세요:
__CAPGO_KEEP_0__
npm init quasar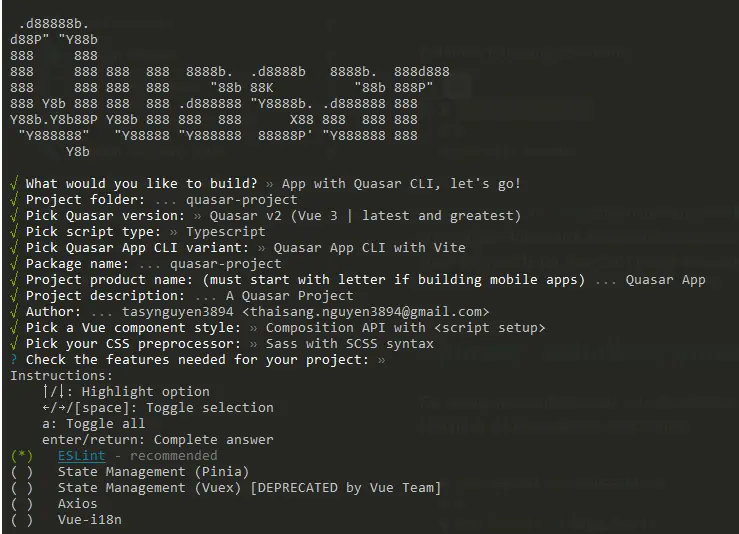
Quasar App with Quasar CLI
native 모바일 앱을 만들기 위해, 우리는 프로젝트의 export export package.json에 간단한 스크립트를 포함하여, 프로젝트를 빌드하고 복사할 수 있도록 해보겠습니다. 명령어를 실행한 후, 프로젝트의 루트 폴더에 새로운 폴더를 찾을 수 있습니다.
{
  "scripts": {
    // ...
    "build": "quasar build"
  }
}
이 폴더는 __CAPGO_KEEP_0__에 의해 나중에 사용될 것입니다. 그러나 현재는 올바르게 설정해야 합니다. generate__CAPGO_KEEP_0__를 Quasar 앱에 추가하는 방법 dist __CAPGO_KEEP_0__
Capacitor
Capacitor
모바일 앱을 네이티브 모바일 컨테이너로 패키징하려면 몇 가지 초기 단계를 따르야 하지만, 그 후에는 단일 명령어만 실행하면 됩니다. sync 첫째로, 우리는 __CAPGO_KEEP_0__ __CAPGO_KEEP_1__를 개발 의존성으로 설치하고 프로젝트 내에서 설정할 수 있습니다. 설정 중에 이름과 번들 ID의 기본값을 수락하려면 '엔터'를 눌러도 됩니다.
__CAPGO_KEEP_0__ Capacitor CLI 다음으로, 우리는 iOS와 Android 플랫폼에 관련된 패키지를 설치해야 합니다.
마지막으로, 우리는 플랫폼을 추가하고 __CAPGO_KEEP_0__는 프로젝트의 루트 디렉토리에 각 플랫폼을 위한 폴더를 생성할 것입니다:
Capacitor
# Install the Capacitor CLI locally
npm install -D @capacitor/cli

# Initialize Capacitor in your Quasar project
npx cap init

# Install the required packages
npm install @capacitor/core @capacitor/ios @capacitor/android

# Add the native platforms
npx cap add ios
npx cap add android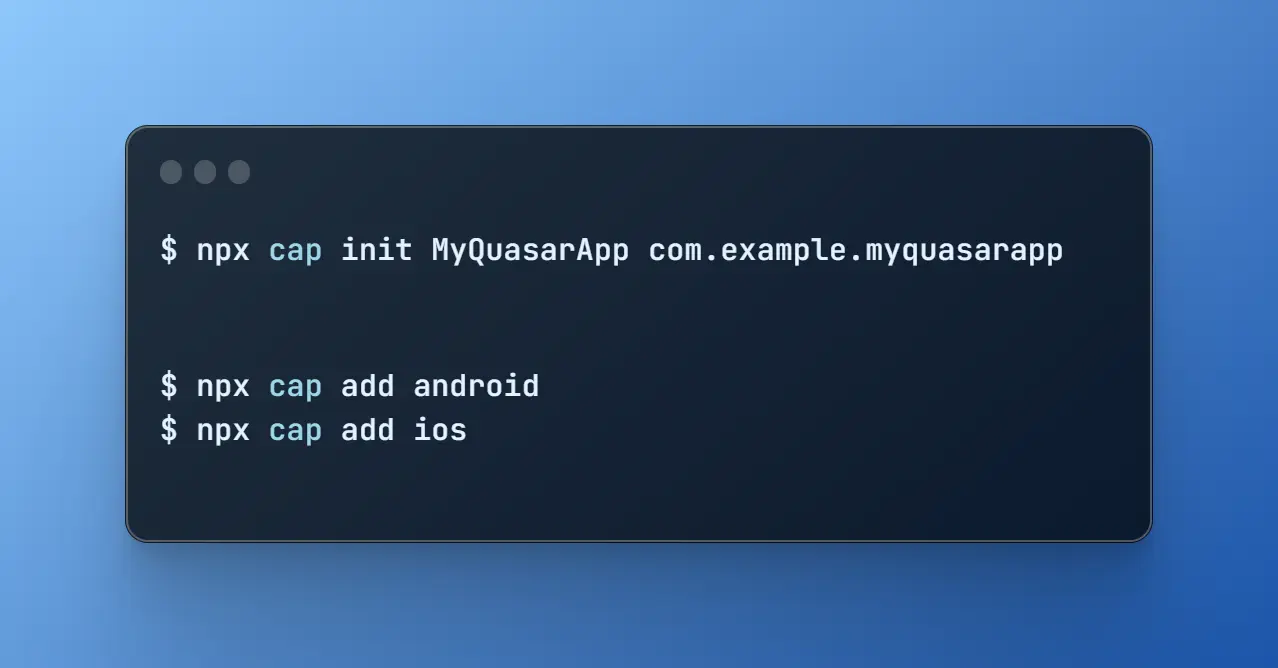
와 android 폴더를 볼 수 있을 것입니다. android Quasar 프로젝트의 폴더입니다.
실제 네이티브 프로젝트입니다!
앱을 나중에 접근하기 위해 Android 프로젝트를 설치해야 합니다. Android StudioiOS의 경우 Mac이 필요하고 Xcode를 설치해야 합니다. Xcode.
또한 프로젝트에서 __CAPGO_KEEP_0__.config.ts 파일을 찾으십시오. capacitor.config.ts file in your project, which contains some fundamental Capacitor settings utilized during the sync. The only thing you need to pay attention to is the 웹 디렉토리현재 정확하지 않습니다.
이 문제를 해결하려면 build 명령어의 결과를 가리키도록 __CAPGO_KEEP_0__.config.ts 파일의 webDir를 수정하십시오. capacitor.config.json 파일과 업데이트 하세요. webDir:
{
  "appId": "com.example.app",
  "appName": "my-app",
  "webDir": "dist"
}
Capgo 솔루션의 Cordova에서 Capacitor로 AI를 사용하는 방법
npm run generate
npx cap sync
You can try it out by executing the following commands: npm run generate 첫 번째 명령어는 npx cap sync will sync all the web code into the right places of the native platforms so they can be displayed in an app.
두 번째 명령어는 웹 Capacitor을 native 플랫폼의 올바른 위치에同步시키기 위해 사용됩니다. 그리고 native 플랫폼을 업데이트하고 플러그인을 설치할 수 있습니다. npx cap sync __CAPGO_KEEP_0__ 플러그인을 설치하면
다시 실행하세요.
native 앱을 빌드하고 배포하세요
iOS 앱을 개발하려면 Xcode 설치되어야 합니다. Android 앱을 개발하려면 Android Studio 설치되어야 합니다. 또한 앱을 스토어에 배포하려면 iOS는 Apple Developer Program에, Android는 Google Play Console에 가입해야 합니다.
If you’re new to native mobile development, you can use the Capacitor CLI to easily open both native projects:
npx cap open ios
npx cap open android
Capacitor
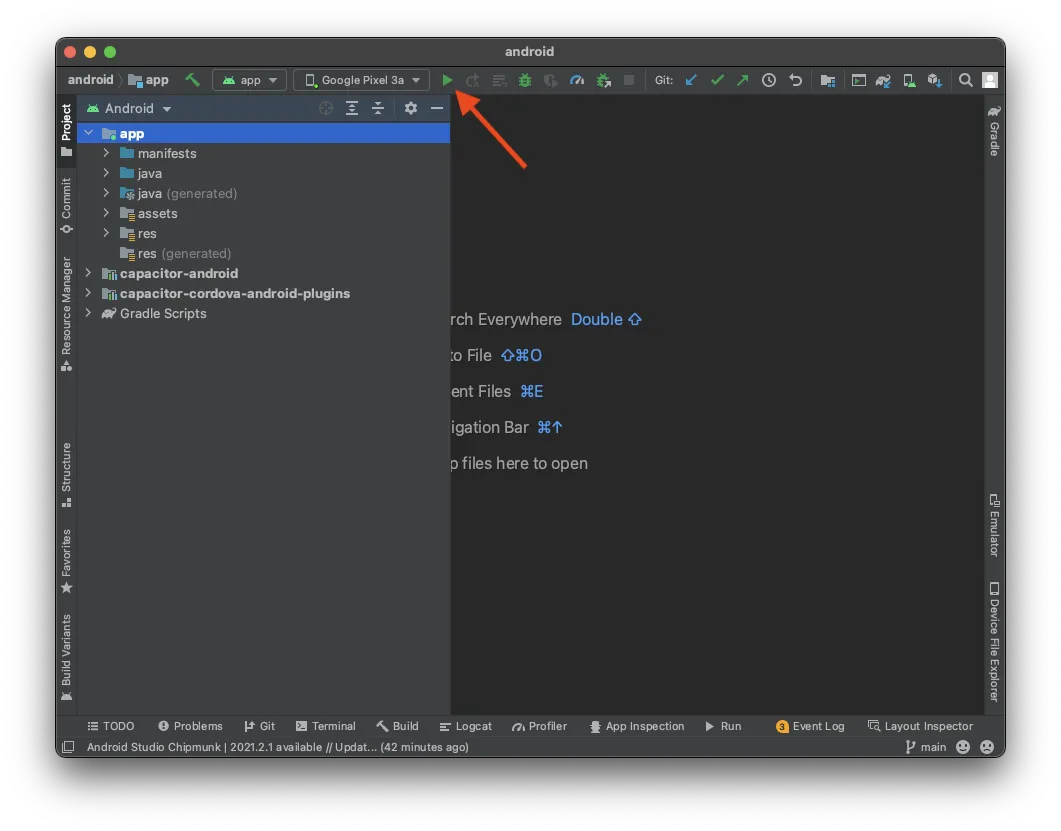
native 프로젝트를 설정한 후 앱을 연결된 기기에서 배포하는 것은 간단합니다. Android Studio에서는 설정을 변경하지 않고도 기기를 연결한 후 앱을 배포할 수 있습니다. 예를 들어:
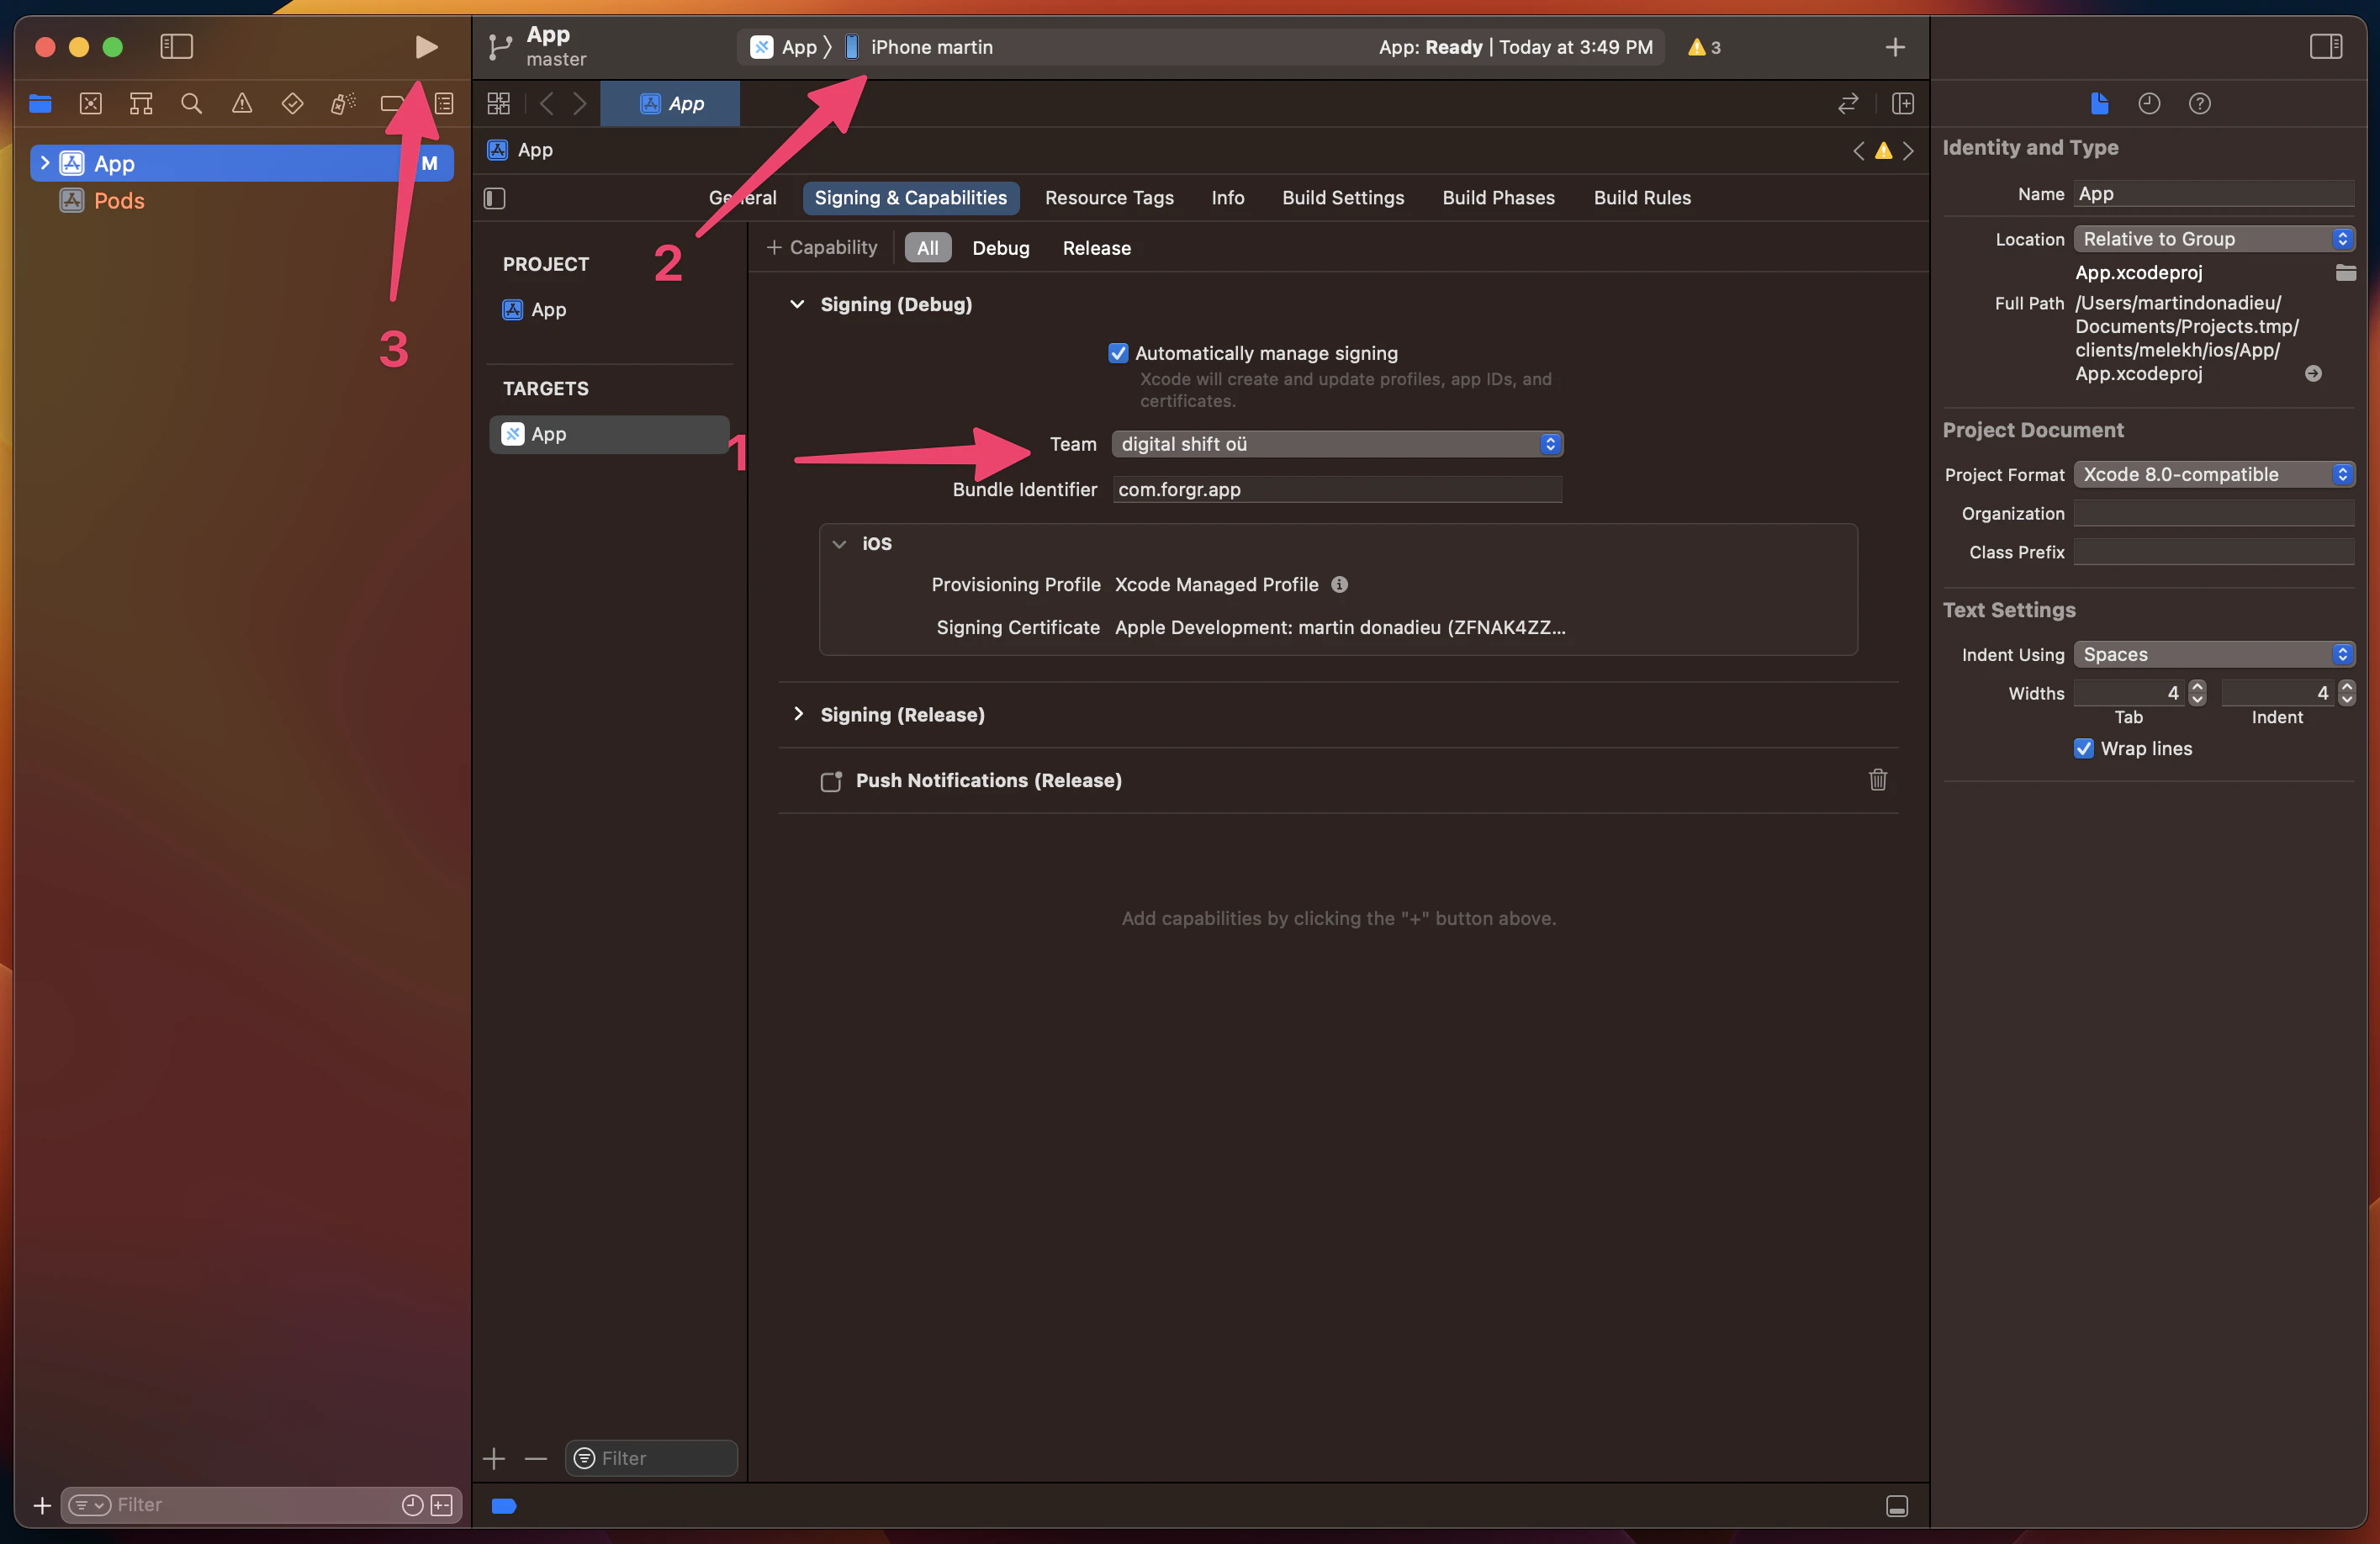
Xcode에서는 실제 기기에서 앱을 배포하려면 서명 계정을 설정해야 합니다. 기기를 시뮬레이터에서만 실행하는 경우, Xcode는 개발자 프로그램에 가입한 경우 개발자 프로그램을 통해 프로세스를 안내합니다. 그 후에, 앱을 연결된 기기에서 실행하려면 단지 플레이 버튼을 클릭하면 됩니다. 기기를 선택하려면 위쪽에서 선택할 수 있습니다. 예를 들어:
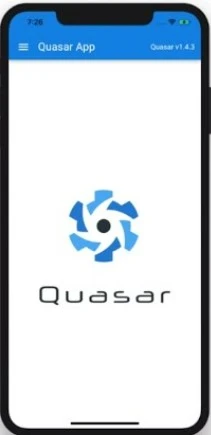
하지만 개발 중에 이 작업을 더 빠르게 하려면…
Capgo Live Update
Capgo Live Update는 개발자들이 앱 업데이트를 전통적인 앱 스토어 제출 프로세스 없이 배포할 수 있는 서비스입니다. 이 방법은 버그를 빠르게 수정하거나 앱에 작은 업데이트를 적용할 수 있는 편리한 방법입니다. 앱 스토어 리뷰 프로세스 기다리지 않고.
Quasar 앱에 Capgo을 통합하는 것은 실시간 라이브 업데이트의 힘을 발휘할 수 있는 간단한 과정입니다. 이 단계별 가이드는 Capgo Live Update의 통합 및 구현을 안내하여 앱 업데이트를 무중단으로 제공할 수 있도록 도와줍니다.
Capgo 계정으로 가입하고 Capgo 대시보드에 접근하세요:
API 키를 받고 첫 번째 버전을 업로드할 준비가 되었습니다! 시작하기 위해 Capgo 계정으로 가입하세요.
Capgo SDK을 설치하세요:
명령 프롬프트에서 Capacitor 앱의 루트 디렉토리에 직접 실행하세요:
npm i @capgo/capacitor-updater && npx cap sync Capacitor 앱에 플러그인을 설치하세요.
code을 CodePush 대신 앱에 추가하세요:
import { CapacitorUpdater } from '@capgo/capacitor-updater'

CapacitorUpdater.notifyAppReady()
이것은 네이티브 플러그인을 설치가 성공했다고 알려줍니다.
Capgo 로그인:
먼저 __CAPGO_KEEP_0__의 all apikey CLI에 있는 계정의 apikey를 사용하여 로그인하세요:
`npx @capgo/cli@latest login YOU_KEY`첫 번째 앱을 추가하세요:
Capgo Cloud에 CLI으로 앱을 생성해 보세요.
npx @capgo/cli@latest app addCapacitor config 파일에 정의된 모든 변수를 사용하여 앱을 생성하세요.
첫 번째 버전을 업로드하세요:
code을 빌드하고 Capgo에 업로드하세요:
npx @capgo/cli@latest bundle upload`기본적으로 버전 이름은 package.json 파일에 있는 이름입니다.
체크인 Capgo 빌드가 존재하는 경우
나의 모바일 샌드박스 앱으로 테스트할 수 있습니다. 채널 기본 설정.
__CAPGO_KEEP_1__으로부터 앱이 업데이트를 받을 수 있도록 하기 위해:
After you have sent your app to Capgo, you need to make your channel default to let apps receive updates from Capgo.
npx @capgo/cli@latest channel set production -s default
업데이트를 확인하기 위해 앱을 구성하세요.:
main JavaScript 파일에 다음 설정을 추가하세요.
import { CapacitorUpdater } from '@capgo/capacitor-updater'

CapacitorUpdater.notifyAppReady()
__CAPGO_KEEP_2__ npm run build && npx cap copy 앱을 업데이트하세요.
__CAPGO_KEEP_3__:
Deploy에서 실시간으로 업데이트를 받기 위해서는 앱을 장치나 에뮬레이터에서 실행해야 합니다. 이 작업을 쉽게 하기 위해, 다음 명령어를 사용하여 로컬 앱을 에뮬레이터나 컴퓨터에 연결된 장치에서 실행하세요.
npx cap run [ios | android]앱을 열고, 배경에 두고 다시 열면, 로그에 업데이트가 된 앱을 볼 수 있습니다.
축하합니다! 🎉 첫 번째 Live Update를 성공적으로 배포했습니다. Live Update는 이것이 시작인만큼 더 많은 것을 할 수 있습니다. 더 알아보기 위해 전체 Live Updates 문서를 참조하세요..
Capacitor 플러그인 사용
Capacitor 플러그인을 사용하는 방법에 대해 살펴보겠습니다. 이에 대해 이전에 몇 번 언급했듯이, 플러그인을 설치하는 방법에 대해 알아보겠습니다. 이를 위해, 간단한 플러그인을 설치할 수 있습니다. 이를 위해, 다음 명령어를 실행하세요:
npm i @capacitor/share이것은 특별한 것은 아닙니다. Share 플러그인하지만, native share dialog를 열 수 있습니다! 이에 대해, 현재는 패키지를 임포트하고, 앱에서 해당 함수를 호출하면 됩니다. 따라서, pages/index.vue를 다음과 같이 변경하세요: share() 앞서 언급했듯이, 새로운 플러그인을 설치할 때, sync 연산을 수행하고, 앱을 다시 배포해야 합니다. 이를 위해, 다음 명령어를 실행하세요: __CAPGO_KEEP_0__ __CAPGO_KEEP_0__
<template>
  <div>
    <h1>Welcome to Quasar and Capacitor!</h1>
    <button @click="share">Share now!</button>
  </div>
</template>

<script setup lang="ts">
import { Share } from '@capacitor/share';

async function share() {
  await Share.share({
    title: 'Open Youtube',
    text: 'Check new video on youtube',
    url: 'https://www.youtube.com',
    dialogTitle: 'Share with friends'
  });
}
</script>
Share
npx cap sync버튼을 클릭한 후, 아름다운 네이티브 공유 대화창을 실제로 경험할 수 있습니다!
다음으로, 앱이 iOS 및 Android에서 더 네이티브하게 느껴지도록 Capgo 네비게이션 및 전환을 사용하고, 일반적인 iOS 레이아웃 문제를 해결하여 수평적 오버플로우 또는 안전 영역이 잘려나가는 문제를 해결할 수 있습니다.
네이티브 느낌의 UI와 Capgo 네이티브 네비게이션 및 전환
수년 동안 Ionic 을 사용하여 크로스 플랫폼 애플리케이션을 개발했지만, 그것을 Quasar와 통합하는 것은 복잡하고 거의 가치가 없는 경우가 많습니다. 이미 Tailwind CSS.
For a native mobile feel in a Quasar + Capacitor app, use Capgo plugins instead of web-only UI kits like Konsta UI:
- Quasar + capgo 앱에서 네이티브 모바일 느낌을 얻으려면, 웹 전용 UI 키트인 Konsta UI와 같은 대신 capacitor 플러그인을 사용하세요: @__CAPGO_KEEP_0__/__CAPGO_KEEP_1__-native-navigation
- @capgo/capacitor-transitions @__CAPGO_KEEP_0__/__CAPGO_KEEP_1__-transitions
설치 BOTH:
npm add @capgo/capacitor-native-navigation @capgo/capacitor-transitions
npmx cap sync
자연스러운 네비게이션을 위해 CSS inset 모드를 사용하여 웹 콘텐츠가 네이티브 바를 존중하도록 구성하십시오:
import { NativeNavigation } from '@capgo/capacitor-native-navigation';

await NativeNavigation.configure({
  contentInsetMode: 'css',
  animationDuration: 360,
  glass: {
    effect: 'liquidGlass',
  },
});
리퀴드 글라스 탭 바를 렌더링하십시오 (iOS는 시스템 소유 렌더링을 사용하고 Android는 흐린 웹뷰 백그라운드 사용):
await NativeNavigation.setTabbar({
  selectedId: 'home',
  labelVisibilityMode: 'labeled',
  icons: true,
  colors: { dynamic: true },
  tabs: [
    { id: 'home', title: 'Home', icon: { svg: '...' } },
    { id: 'settings', title: 'Settings', icon: { svg: '...' } },
  ],
});

await NativeNavigation.addListener('tabSelect', ({ id }) => {
  router.push(`/${id}`);
});
앱 셸에서 네이티브 페이지 전환을 추가하십시오:
<script setup>
import { ref, onMounted } from 'vue';
import { useRouter } from 'vue-router';
import '@capgo/capacitor-transitions';
import { initTransitions, setDirection, setupRouterOutlet } from '@capgo/capacitor-transitions/vue';

initTransitions({ platform: 'auto' });

const router = useRouter();
const outletRef = ref(null);

onMounted(() => {
  if (outletRef.value) {
    setupRouterOutlet(outletRef.value, { platform: 'auto', swipeGesture: 'auto' });
  }
});

const openSettings = () => {
  setDirection('forward');
  router.push('/settings');
};
</script>

<template>
  <cap-router-outlet ref="outletRef">
    <router-view />
  </cap-router-outlet>
</template>
페이지를 감싸고 cap-router-outlet, cap-page그리고 cap-content호출하십시오: setDirection('forward') 또는 setDirection('back') 페이지 전환을 위해 CSS inset 모드를 사용하여 네이티브 바를 존중하십시오. 웹 헤더나 푸터를 중복하지 마십시오.
자세한 가이드를 참조하십시오: Capacitor @capgo/capacitor-네이티브 네비게이션 사용 및 Capacitor @capgo/capacitor-transitions.
안전 영역에 대한 Tailwind
Tailwind CSS에서 장치의 안전 영역을 사용하려면 Capacitor @capgo/tailwind-capacitor (__CAPGO_KEEP_0__에서 발표) tailwind-capacitor npm에서 safe-areas Capacitor가 제공하는 유용성과 다른 Capacitor-친화적인 Tailwind 플러그인:
npm add -D tailwind-capacitorIn src/css/app.scss:
@import 'tailwindcss';
@plugin "@capgo/tailwind-capacitor/platform";
@plugin "@capgo/tailwind-capacitor/safe-areas";
Tailwind의 유용성, pt-safe, pb-safe를 사용하세요. px-safe 대신에 __CAPGO_KEEP_0__를 수동으로 입력하지 마세요. 프로젝트는 활발히 개발되고 있으므로, Quasar 설정에 필요한 것이 빠진다면 env(safe-area-inset-*) __CAPGO_KEEP_0__에서 GitHub PR을 열기.
iOS 레이아웃 문제를 해결하기 (뷰포트, 안전 영역, 가로 스크롤)
iOS에서 콘텐츠가 잘려나거나-shifted되거나 가로 스크롤이 가능하다면 overflow-x: hidden 또는 뷰포트 태그만 조정하는 것만으로도 문제를 해결할 수 없다. 이러한 체크를 순서대로 진행하라.
뷰포트 메타 태그가 올바르게 적용되었는지 확인하라
(또는 Quasar HTML 템플릿에서) 뷰포트 메타 태그를 다음과 같이 설정하라 index.html iOS 안전 영역을 한 개의 루트 wrapper에서만 처리하라 <head>:
<meta name="viewport" content="width=device-width, initial-scale=1, viewport-fit=cover" />싱글 앱 셸을 생성하고 안전 영역 패딩을 거기에 적용하라 — 여러 개의 중첩된 컴포넌트에서 적용하지 마라:
모든 페이지 콘텐츠를 다음과 같이 감싸라
html,
body,
#q-app {
  width: 100%;
  min-height: 100%;
  margin: 0;
  padding: 0;
  overflow-x: hidden;
}

* {
  box-sizing: border-box;
}

.app-shell {
  min-height: 100dvh;
  width: 100%;
  padding-top: env(safe-area-inset-top);
  padding-right: env(safe-area-inset-right);
  padding-bottom: env(safe-area-inset-bottom);
  padding-left: env(safe-area-inset-left);
}
. 중복된 안전 영역 패딩이 헤더, 모달, 레이아웃 wrapper에 적용되어 UI가 잘려나거나 너무 크게 보인다. .app-shell그리고
__CAPGO_KEEP_0__ @capgo/tailwind-capacitor, __CAPGO_KEEP_0__을 사용하여 동일한 패딩을 표현할 수 있습니다. pt-safe pb-safe px-safe 단일 셸에서.
Capacitor을 iOS로 설정합니다. contentInset 첫 번째 never 페이지
, __CAPGO_KEEP_0__을 사용하여 원래의 패딩을 비활성화하고 CSS (또는 Native Navigation의) capacitor.config.ts)가 안전한 영역을 관리하도록 허용합니다. contentInsetMode: 'css'__CAPGO_KEEP_0__의 자동 콘텐츠 인셋과 CSS 패딩을 혼합하는 것은 더블 스페이싱의 일반적인 원인입니다.
const config: CapacitorConfig = {
  appId: 'com.example.myapp',
  appName: 'my-app',
  webDir: 'dist/spa',
  ios: {
    contentInset: 'never',
  },
};
Mixing Capacitor’s automatic content inset with CSS env(safe-area-inset-*) __CAPGO_KEEP_0__
__CAPGO_KEEP_1__
일반적인 원인은 요소가 사용하는 100vw, Tailwind w-screen, 고정 픽셀 너비, 또는 큰 min-width.
Safari Web Inspector에서 실행:
[...document.querySelectorAll('*')]
  .filter(el => el.scrollWidth > document.documentElement.clientWidth)
  .map(el => ({
    el,
    tag: el.tagName,
    class: el.className,
    scrollWidth: el.scrollWidth,
    clientWidth: document.documentElement.clientWidth,
  }));
Tailwind의 경우 w-screen 대신 w-full 가능한 경우. 많은 가로 스크롤 문제는 100vw / w-screen, 중복된 안전 영역 패딩, 또는 고정 너비 컨테이너 — viewport meta 태그 자체에서 아님.
결론
Capacitor은 기존 웹 프로젝트에 기반한 네이티브 애플리케이션을 빌드하는 데 적합한 옵션으로, code을 공유하고 일관된 UI를 유지하는 간단한 방법을 제공합니다.
그리고 __CAPGO_KEEP_0__ Capgo앱에 실시간 업데이트를 추가하는 것이 thậm chí còn dễ dàng, ensuring that 사용자 luôn 액세스 최신 기능 및 버그 수정.
만약 Capgo를 Next.js 앱에 추가하는 방법을 배우고 싶다면, 다음 기사에서 확인하십시오 :
Creating Mobile Apps with live updates, Quasar 및 Capacitor에서 계속 진행하십시오.
만약 __CAPGO_KEEP_0__를 사용하고 있다면 Creating Mobile Apps with live updates, Quasar 및 Capacitor __CAPGO_KEEP_0__ Plugin Directory와 연결하여 Capgo Plugin Directory의 제품 워크플로우 Capgo Plugins by __CAPGO_KEEP_1__ Capacitor Plugins by Capgo의 구현 세부 사항 for the implementation detail in Capacitor Plugins by Capgo, Adding or Updating Plugins의 구현 세부 사항 만약 __CAPGO_KEEP_0__를 사용하고 있다면 Ionic Enterprise Plugin Alternatives Ionic Enterprise Plugin Alternatives를 위한 제품 워크플로우 Capgo Native Builds Capgo Native Builds를 위한 제품 워크플로우