Introduction
Have an existing Next.js web application? In this guide, you’ll learn how to transform it into native iOS and Android mobile apps using Capacitor 8 — the latest version with improved performance and new features.
Capacitor wraps your web app in a native container, giving you access to device APIs like camera, filesystem, and push notifications while keeping your existing React codebase. Unlike React Native, you don’t need to rewrite anything — your Next.js code runs as-is.
What you’ll learn:
- Configure your existing Next.js app for static export
- Add Capacitor 8 with essential native plugins
- Build and test on iOS and Android simulators
- Enable live reload for faster development
- Optionally add Konsta UI for native-looking components
Looking to start a new project from scratch? Check out our guide on Building a Next.js Mobile App from Scratch.
Benefits of Using Next.js and Capacitor
- Code Reusability: Next.js enables you to write reusable components and share code between your web and mobile apps, saving development time and effort.
- Performance: Next.js offers built-in performance optimizations, such as server-side rendering and code splitting, ensuring fast loading times and a smooth user experience.
- Native Capabilities: Capacitor provides access to native device features like the camera, geolocation, and more, allowing you to build feature-rich mobile apps.
- Simplified Development: With Capacitor, you can develop and test your mobile app using familiar web technologies, reducing the learning curve and streamlining the development process.
Prerequisites
Before you begin, make sure you have:
- Node.js 18+ installed
- An existing Next.js 15+ application
- Xcode (for iOS development, macOS only)
- Android Studio (for Android development)
Configuring Your Next.js App for Mobile
The first step is to configure your Next.js app for static export. Capacitor needs static HTML/JS/CSS files to bundle into the native app.
Open your next.config.js (or next.config.ts) file and add the export configuration:
/** @type {import('next').NextConfig} */const nextConfig = {  output: 'export',  images: {    unoptimized: true,  },};
module.exports = nextConfig;
The output: 'export' setting tells Next.js to generate static HTML files, and images: { unoptimized: true } bypasses Next.js image optimization which requires a server.
Important: If you’re using features that require a server (API routes, server components with data fetching, etc.), you’ll need to refactor those to use client-side alternatives or external APIs.
Add mobile-specific scripts to your package.json:
{ "scripts": { "dev": "next dev", "build": "next build", "start": "next start", "lint": "next lint", "mobile": "bun run build && bunx cap sync", "mobile:ios": "bun run mobile && bunx cap open ios", "mobile:android": "bun run mobile && bunx cap open android" }}Test the static export by running:
bun run buildYou should see an out folder at the root of your project. This contains all the static files that Capacitor will bundle into your native app.
Adding Capacitor 8 to Your Project
To package your Next.js app into a native mobile container, follow these steps:
- Install Capacitor core and CLI:
bun add @capacitor/corebun add -D @capacitor/cli- Install common Capacitor plugins you’ll likely need:
bun add @capacitor/app @capacitor/keyboard @capacitor/splash-screen @capacitor/preferencesThese plugins provide essential features:
- @capacitor/app: Handle app lifecycle events (foreground/background, URLs)
- @capacitor/keyboard: Control keyboard behavior on mobile
- @capacitor/splash-screen: Manage the native splash screen
- @capacitor/preferences: Store key-value data persistently
- Initialize Capacitor with your project details:
bunx cap init my-app com.example.myapp --web-dir outReplace my-app with your app name and com.example.myapp with your app ID (reverse domain notation).
- Create or update the
capacitor.config.tsfile with the proper configuration:
import type { CapacitorConfig } from '@capacitor/cli';
const config: CapacitorConfig = {  appId: 'com.example.myapp',  appName: 'my-app',  webDir: 'out',  plugins: {    SplashScreen: {      launchShowDuration: 2000,      launchAutoHide: true,      androidScaleType: 'CENTER_CROP',      showSpinner: false,      splashFullScreen: true,      splashImmersive: true,    },  },};
export default config;- Install native platforms:
bun add @capacitor/ios @capacitor/android- Add the native platform folders:
bunx cap add iosbunx cap add androidCapacitor will create ios and android folders at the root of your project containing the native projects.
To build the Android project, you need Android Studio. For iOS, you need a Mac with Xcode.
- Build and sync your project:
bun run mobileThis runs your custom script that builds the Next.js project and syncs the static files with the native platforms.
Building and Deploying Native Apps
To build and deploy your native mobile app, follow these steps: To develop iOS apps, you need to have Xcode installed, and for Android apps, you need to have Android Studio installed. Moreover, if you plan to distribute your app on the app store, you need to enroll in the Apple Developer Program for iOS and the Google Play Console for Android.
- Open the native projects:
For iOS:
bun run mobile:iosFor Android:
bun run mobile:androidOr directly with Capacitor CLI:
bunx cap open iosbunx cap open android- Build and run the app:
-
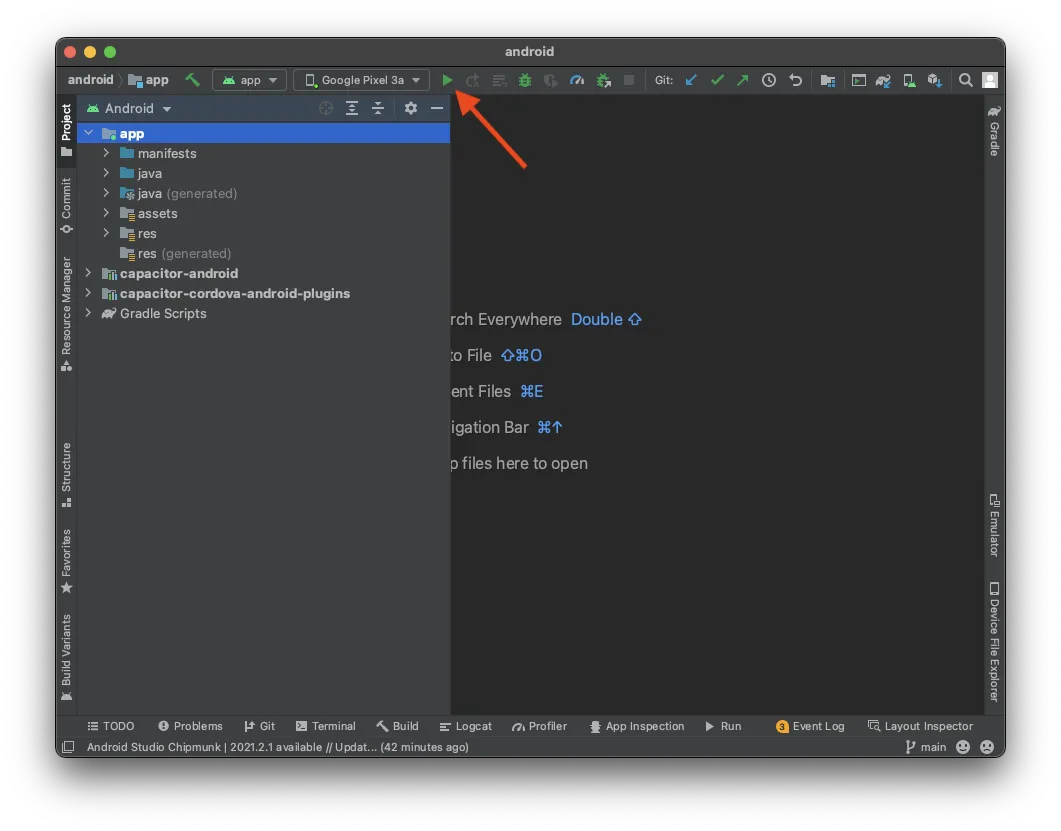
In Android Studio, wait for the project to be ready, and then click on the “Run” button to deploy the app to a connected device or emulator.
-
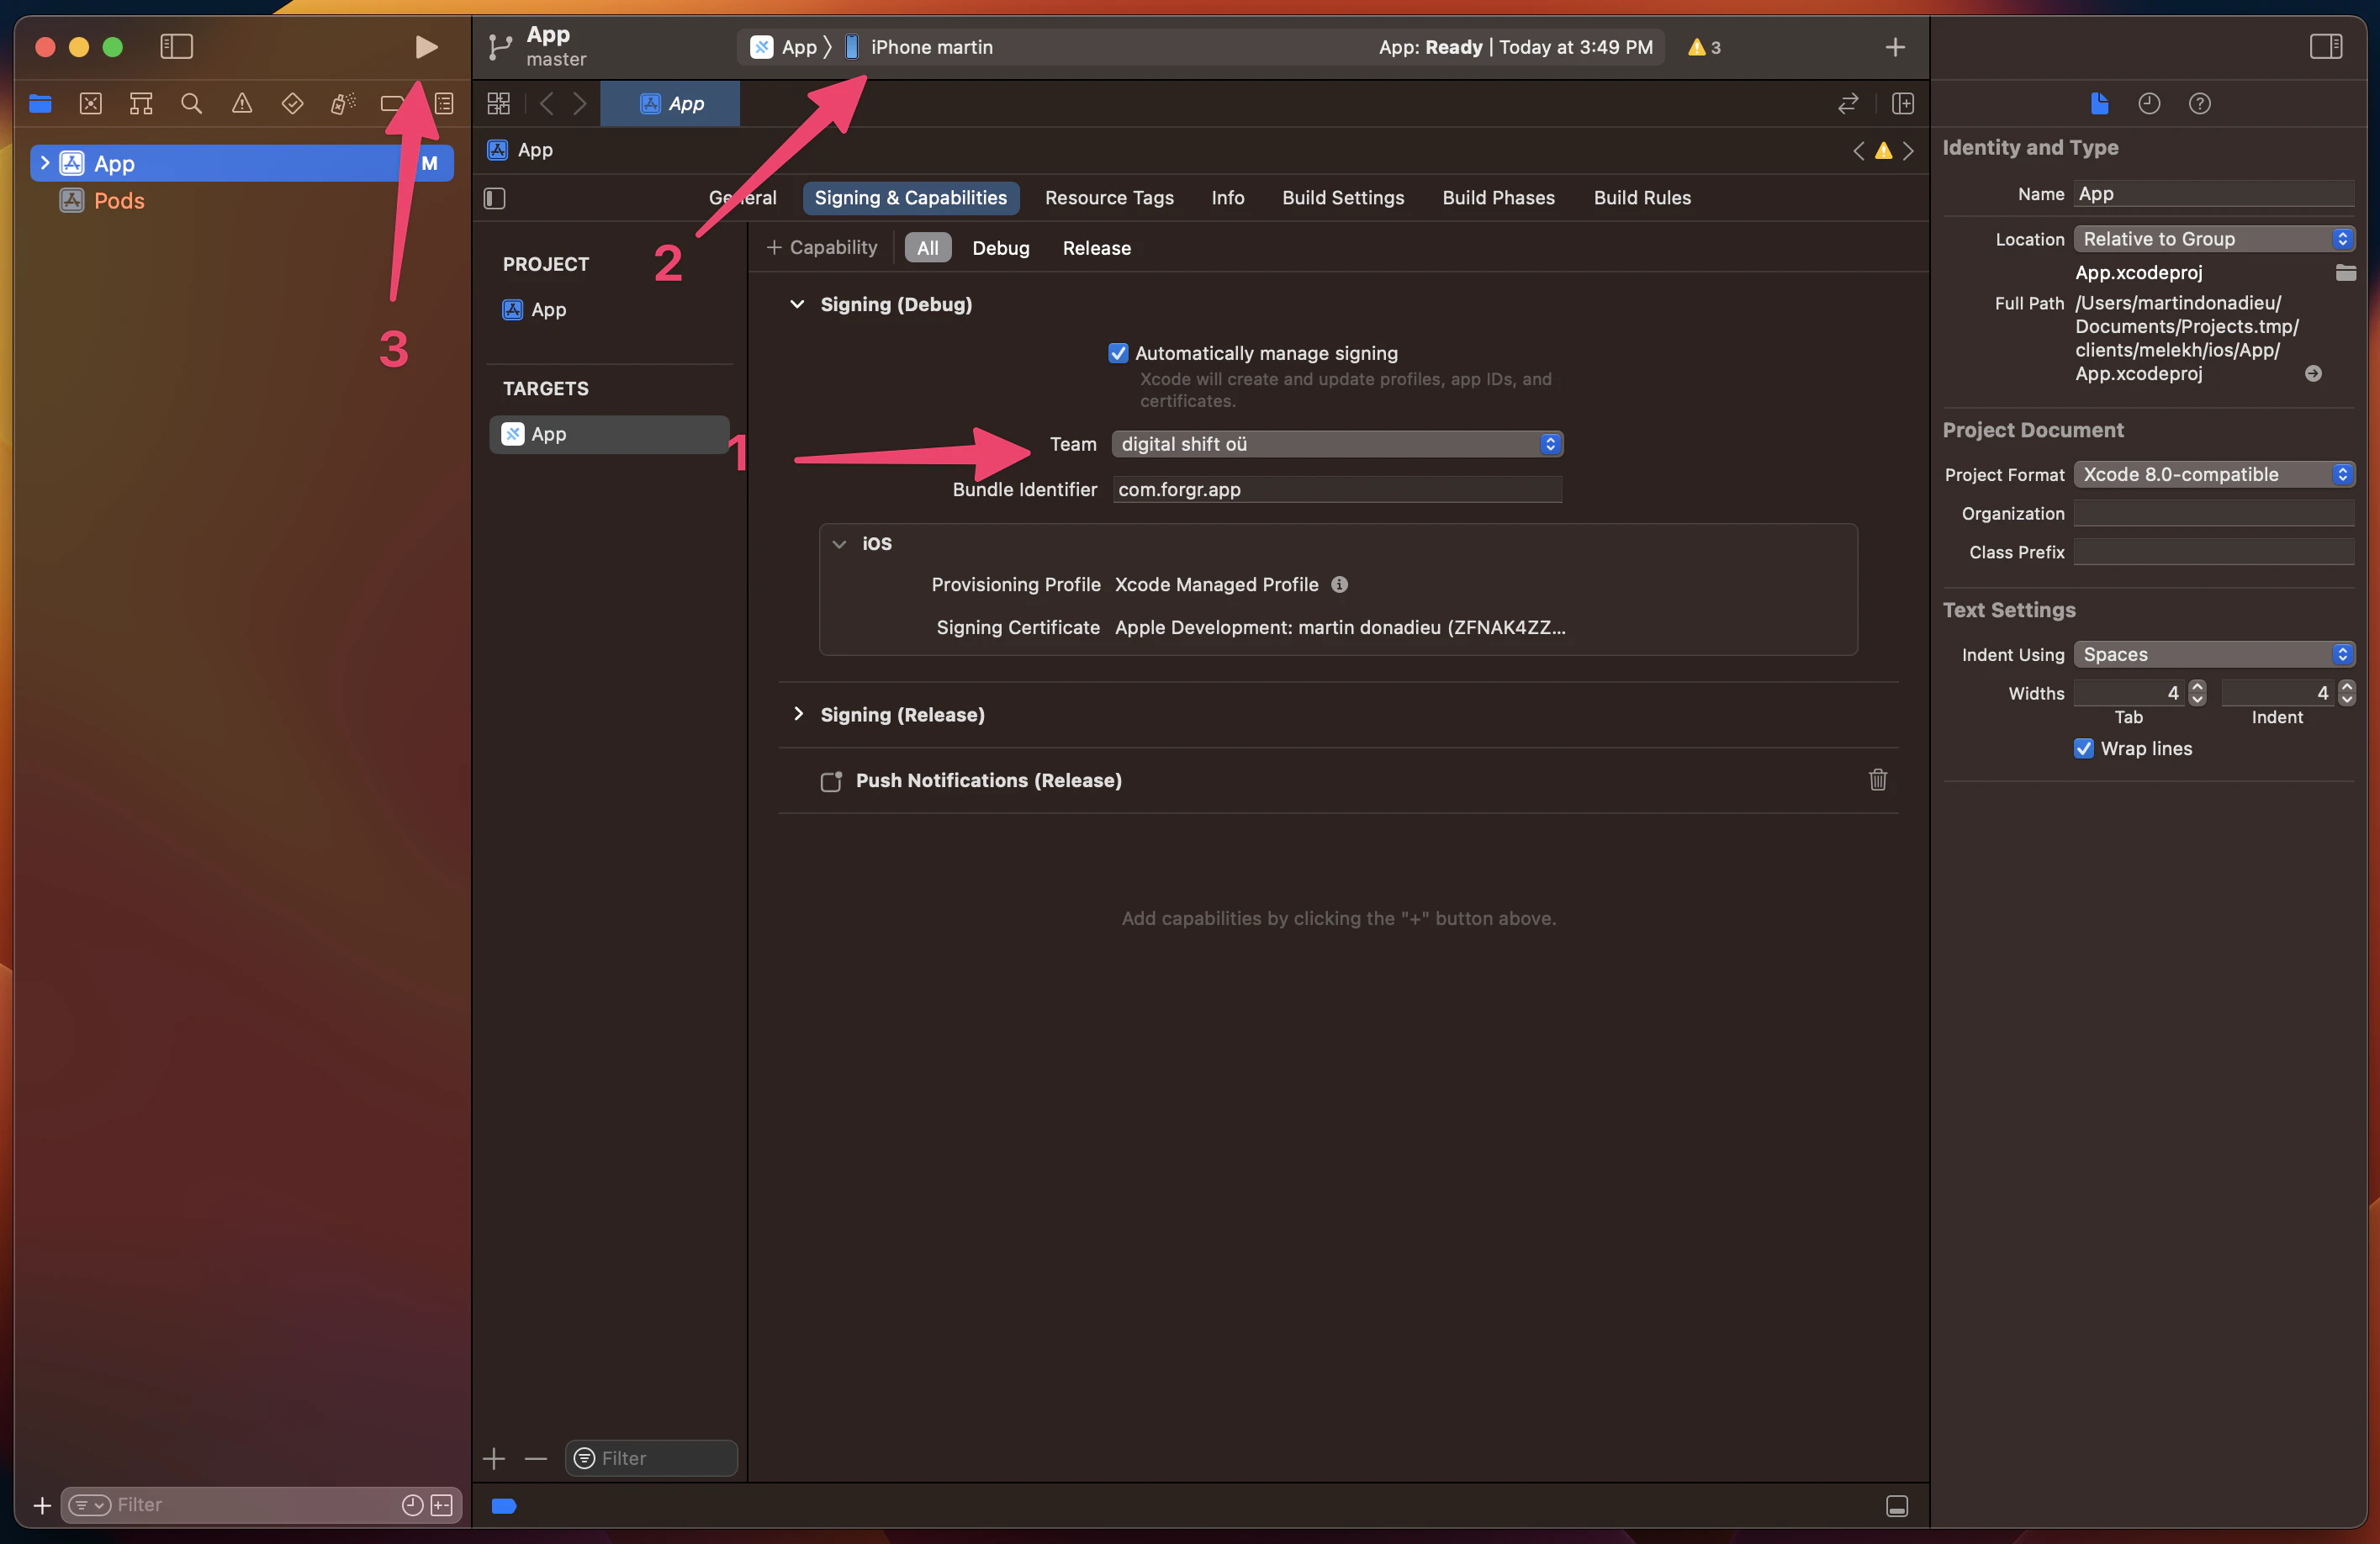
In Xcode, set up your signing account to deploy the app to a real device. If you haven’t done this before, Xcode will guide you through the process (note that you need to be enrolled in the Apple Developer Program). Once set up, click on the “Play” button to run the app on your connected device.
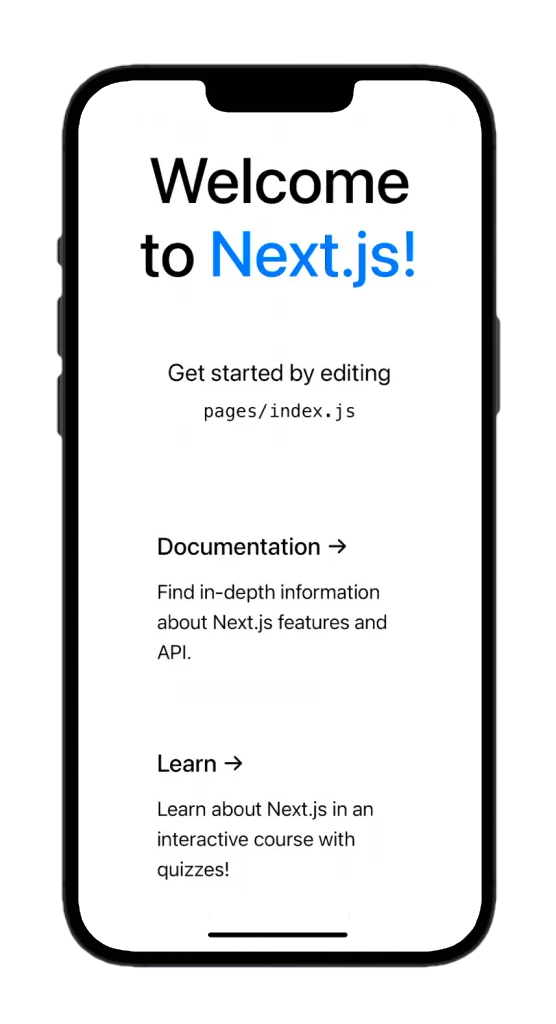
Congratulations! You have successfully deployed your Next.js web app to a mobile device.
Capacitor Live Reload
During development, you can take advantage of live reloading to see changes instantly on your mobile device. To enable this feature, follow these steps:
- Find your local IP address:
-
On macOS, run the following command in the terminal:
Terminal window ipconfig getifaddr en0 -
On Windows, run:
Terminal window ipconfigLook for the IPv4 address in the output.
- Update your
capacitor.config.tsto point to your development server:
import type { CapacitorConfig } from '@capacitor/cli';
const config: CapacitorConfig = {  appId: 'com.example.app',  appName: 'my-app',  webDir: 'out',  server: {    url: 'http://YOUR_IP_ADDRESS:3000',    cleartext: true,  },};
export default config;
Replace YOUR_IP_ADDRESS with your local IP address (e.g., 192.168.1.100).
- Apply the changes to your native project:
bunx cap copyThe copy command copies the web folder and configuration changes to the native project without updating the entire project.
- Rebuild and run the app on your device using Android Studio or Xcode.
Now, whenever you make changes to your Next.js app, the mobile app will automatically reload to reflect those changes.
Note: If you install new plugins or make changes to native files, you’ll need to rebuild the native project since live reloading only applies to web code changes.
Using Capacitor Plugins
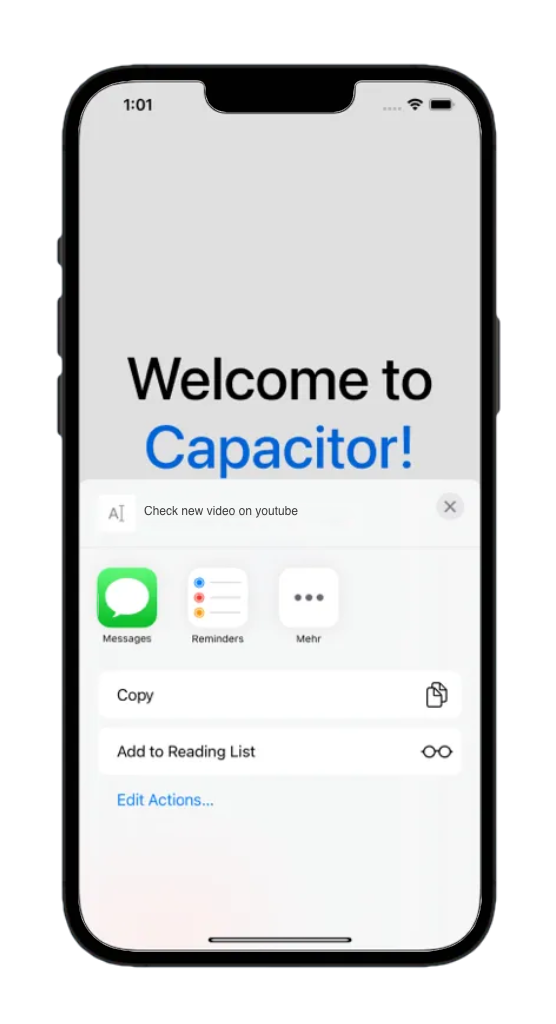
Capacitor plugins allow you to access native device features from your Next.js app. Let’s explore how to use the Share plugin as an example:
- Install the Share plugin:
bun add @capacitor/share- Update the
pages/index.jsfile to use the Share plugin:
import Head from 'next/head';import styles from '../styles/Home.module.css';import { Share } from '@capacitor/share';
export default function Home() {  const share = async () => {    await Share.share({      title: 'Open Youtube',      text: 'Check new video on youtube',      url: 'https://www.youtube.com',      dialogTitle: 'Share with friends',    });  };
  return (    <div className={styles.container}>      <Head>        <title>Create Next App</title>        <meta name="description" content="Generated by create next app" />        <link rel="icon" href="/favicon.ico" />      </Head>
      <main className={styles.main}>        <h1 className={styles.title}>          Welcome to <a href="https://nextjs.org">Capgo!</a>        </h1>
<p className={styles.description}> <h2>Cool channel</h2> <button onClick={() => share()}>Share now!</button> </p> </main> </div> );}- Sync the changes with the native project:
As mentioned earlier, when installing new plugins, we need to perform a sync operation and then redeploy the app to our device. To do this, run the following command:
bun run mobileOr just sync without rebuilding:
bunx cap sync- Rebuild and run the app on your device.
Now, when you click the “Share now!” button, the native share dialog will appear, allowing you to share the content with other apps.
To make the button look more mobile-friendly, we can add some styling using my favorite UI component library for web apps - Next.js (no pun intended).
Adding Konsta UI v5 with Tailwind CSS 4
I’ve worked years with Ionic to build awesome cross platform applications and it was one of the best choices for years. But now i don’t recommend it anymore it’s very hacky to integrate it with Next.js and it’s not really worth it when you have already Tailwind CSS 4.
if you want a really great looking mobile UI that adapts to iOS and Android specific styling i recommend Konsta UI v5.
You need to have Tailwind CSS 4 already installed To enhance the mobile UI of your Next.js app, you can use Konsta UI v5, a mobile-friendly UI component library that adapts to iOS and Android styling. Follow these steps to integrate Konsta UI v5:
- Install the required packages (Konsta UI v5):
bun add konsta- Import Konsta UI theme in your main CSS file (e.g.,
styles/globals.css):
@import 'tailwindcss';/* import Konsta UI v5 theme */@import 'konsta/theme.css';- Configure Tailwind CSS 4 for Next.js (PostCSS):
Create postcss.config.mjs at the project root:
export default { plugins: { '@tailwindcss/postcss': {}, },}Tailwind v4 uses PostCSS directly in Next.js. Keep your global imports in styles/globals.css (already added above).
- Wrap your app with the Konsta UI v5
Appcomponent inpages/_app.js:
import { App } from 'konsta/react';import '../styles/globals.css';
function MyApp({ Component, pageProps }) {  return (    <App theme="ios">      <Component {...pageProps} />    </App>  );}
export default MyApp;
Example Page
Now when everything is set up, we can use Konsta UI v5 React components in our Next.js pages.
- Update the
pages/index.jsfile to use Konsta UI v5 components:
import {  Page,  Navbar,  Block,  Button,  List,  ListItem,  BlockTitle,} from 'konsta/react';
export default function Home() {  return (    <Page>      <Navbar title="My App" />
      <Block strong>        <p>          Here is your Next.js & Konsta UI app. Let's see what we have here.        </p>      </Block>      <BlockTitle>Navigation</BlockTitle>      <List>        <ListItem href="/about/" title="About" />        <ListItem href="/form/" title="Form" />      </List>
<Block strong className="flex space-x-4"> <Button>Button 1</Button> <Button>Button 2</Button> </Block> </Page> );}- Add Roboto font for Material Design theme (required for Konsta UI v5):
In your pages/_document.js or main HTML file, add:
<link rel="preconnect" href="https://fonts.googleapis.com" /><link rel="preconnect" href="https://fonts.gstatic.com" crossorigin /><link href="https://fonts.googleapis.com/css2?family=Roboto:ital,wght@0,400;0,500;0,700;1,400;1,500;1,700&display=swap" rel="stylesheet"/>- Restart the development server and rebuild the app.
Your Next.js app should now have a native-looking mobile UI powered by Konsta UI v5 and styled with Tailwind CSS 4.
Performance Optimization
To ensure optimal performance of your Next.js and Capacitor app, consider the following best practices:
- Minimize the app size by removing unused dependencies and assets.
- Optimize images and other media files to reduce loading times.
- Implement lazy loading for components and pages to improve initial load performance.
- Use server-side rendering (SSR) with Next.js to enhance the app’s loading speed and search engine optimization (SEO).
- Leverage Capacitor’s built-in optimizations, such as web view caching and app bundling.
Conclusion
You’ve successfully converted your existing Next.js web application into native iOS and Android apps using Capacitor 8. Your web codebase now runs natively on mobile devices with access to device APIs.
What you accomplished:
- Configured Next.js for static export
- Added Capacitor 8 with essential plugins
- Built and deployed to iOS and Android simulators
- Enabled live reload for development
- Optionally added Konsta UI for native-looking components
Next steps:
- Set up Capgo for over-the-air updates without app store resubmission
- Add more native plugins like Camera, Geolocation, or Push Notifications
- Configure app icons and splash screens for production
- Prepare your app for App Store and Google Play submission
Starting a brand new project? Check out Building a Next.js Mobile App from Scratch for a guided walkthrough.
Resources
- Next.js Documentation
- Capacitor 8 Documentation
- Konsta UI v5 Documentation
- Capgo - Live Updates for Capacitor Apps
Learn how Capgo can help you build better apps faster, sign up for a free account today.


