Sie drücken eine kleine UI-Änderung vor dem Mittagessen aus. Sie sieht harmlos aus. Eine Schaltflächentext ändert sich, eine bedingte Renderung wird vereinfacht und ein Hilfs-Hook greift eine neue Zweig auf. Der Pull-Request ist sauber, die Überprüfung ist schnell und der Deploy geht raus.
Eine Stunde später meldet sich der Support und berichtet, dass sich der Login auf einer Plattform nicht mehr funktioniert. Web sieht gut aus. Die Desktop-Shell hat einen veralteten Render-Path. Die mobile Build verhält sich anders nach einem asynchronen Zustandswechsel. Niemand hat es bemerkt, weil die code Tests hatten, aber nicht die richtigen Tests und definitiv kein zuverlässiges System um diese Tests herum.
That ist das Hauptproblem bei der Einheitstestung von React in Produktionsteams. Ein paar funktionierende Tests zu schreiben ist nicht schwer. Ein Suite aufzubauen, die dich auch bei Refaktorisierungen, Release-Trainings, Hotfixes und Cross-Plattform-Packaging schützt, ist das schwierige Teil. React-Apps scheitern nicht, weil ein Team vergessen hat, wie man eine Funktion aufruft render(). Sie scheitern, weil sich die Tests in Richtung Implementierungsdetails bewegen, asynchrone Verhaltensweisen überdeckt werden und CI das Testen wie ein Kästchen behandelt, anstatt es als Release-Gateway zu betrachten.
Moderne Einheitstests für React funktionieren, wenn sie wie ein Sicherheitssystem agieren. Schnelle Feedbacks lokal. Deterministische Überprüfungen in CI. Klare Grenzen um das herum, was in einen Einheitstest gehört und was nicht. Das ist noch wichtiger, wenn die gleiche React-Codebasis über Browser, Capacitor-Container oder Electron-Shell geschickt wird.
Inhaltsverzeichnis
- Warum die Einheitstestung von React dein bester Sicherheitsnetz ist
- Einrichten Ihres modernen React-Testumfelds
- Schreiben Sie bedeutungsvolle Komponententests
- Testen Sie benutzerdefinierte Hooks und Anwendungslogik
- Mastern Sie fortschrittliche Techniken, Mocking und Async
- Verbessern Sie die Testqualität und Strategie
- Einbindung von Tests in eine CI/CD Pipeline für mehrere Plattformen
Warum Unit-Testing für React der beste Sicherheitsnetz ist
Einheitstests verdienen ihren Preis, wenn sie den Fehler fangen, den Sie sich nicht vorstellen konnten. In React bedeutet dies normalerweise, dass ein Komponente weiterhin renderet, aber das von einem Benutzer abhängige Verhalten geändert wurde. Ein deaktiver Button wird klickbar. Ein Ladezustand wird nie gelöscht. Ein Fallback-Nachricht verschwindet nach einem Refaktor. Diese Fehler sind klein in code und teuer in der Produktion.
Das React-Testing änderte sich in einer wichtigen Weise, als React Testing Library zum mainstream-Modell für das Testen von Verhalten anstatt von Interna wurde. Dieser Wechsel ist wichtig, weil React __CAPGO_KEEP_0__ ständig umgebaut wird. Hooks werden verschoben. Komponenten werden geteilt. Context wird eingeführt. Ein Test, der an der internen Struktur gebunden ist, bricht während gesunder Refaktoren zusammen. Ein Test, der an sichtbarem Verhalten gebunden ist, überlebt normalerweise. React Native testing overview. That shift matters because React code gets rearranged constantly. Hooks move. components split. Context gets introduced. A test tied to internal structure breaks during healthy refactors. A test tied to visible behavior usually survives.
Was sollte ein Einheitstest schützen?
Ein guter React-Einheitstest schützt einen kleinen Vertrag:
- Ausgegebene Ausgabe: Sieht der Benutzer das richtige Text, Label, Zustand oder Fallback?
- Interaktionsverhalten: Klickt, tippt oder schaltet sich der Benutzer ändern, ändert sich die Benutzeroberfläche richtig?
- Grenzverhalten: Verhält sich das Komponente richtig, wenn es erwartete Eingaben, fehlende Daten oder einen Fehlerpfad erhält?
Ein schwacher Test schützt das falsche Ding:
- Komponenteninternes: Zustandsform, private Methoden, nur für die Implementierung bestimmte Props
- Framework-Mechaniken: Obwohl React eine Hook-Update intern genau so wie erwartet durchgeführt hat
- Kind-Eigenschaften: Markup, das von nicht intendierten, verschachtelten Komponenten besessen wird
Praktische Regel: Wenn Sie das Komponenten ohne Änderung des Benutzererlebnisses oder der Funktionalität umstrukturieren können, sollte der Test ebenfalls nicht geändert werden.
Einheitstests befinden sich in einem umfassenderen Testsystem. Sie versuchen nicht, die gesamte Anwendung von Anfang bis Ende zu beweisen. Sie sind die schnelle Schicht, die Regressionsfehler vor der Notwendigkeit eines Browser- oder Geräte-Level-Validierungspasses aufgreift. Deshalb sind sie die erste Verteidigungslinie in jedem vernünftigen Teststack für Produktionsanwendungen Für React-Teams, die häufig liefern, kommt die Zuversicht aus dieser Aufteilung der Arbeit. Einheitstests fangen lokale Regressionsfehler schnell auf. Integrations-Tests überprüfen die Verbindungen. End-to-End-Tests bestätigen die kritischen Pfade. Wenn Sie die Einheitsschicht auslassen, muss alles langsamer unten zu viel Last tragen..
Einrichten Ihres modernen React-Testumfelds
Ein brüchiges Testumfeld schafft flache Tests, bevor Sie eine einzige Behauptung geschrieben haben. Viele Entwickler beschuldigen Jest, jsdom oder React, wenn das zugrunde liegende Problem eine inkonsistente Konfiguration auf lokalen Maschinen und CI ist. Die Lösung besteht darin, das Umfeld langweilig zu machen. Langweilig ist gut hier.
Ein sauberes Arbeitsumfeld mit einem Computermonitor, der React-Einheitstests __CAPGO_KEEP_0__ in einem __CAPGO_KEEP_1__ Editor anzeigt.

Einheitstests fangen lokale Regressionsfehler schnell auf. Integrations-Tests überprüfen die Verbindungen. End-to-End-Tests bestätigen die kritischen Pfade. Wenn Sie die Einheitsschicht auslassen, muss alles langsamer unten zu viel Last tragen.
Für eine moderne React-Anwendung, insbesondere eine mit Vite erstellte, sollte die Grundkonfiguration umfassen:
- Ein Testrunner: Jest bleibt gängig, insbesondere in älteren React-Codebasen und Unternehmens- CI-Stacks.
- Ein browserartiges Umfeld:
jsdomLassen Sie Komponententests DOM-Ausgaben rendern. - Testing Library-Hilfsmittel:
@testing-library/reactund@testing-library/jest-dom - Eine einzelne Setup-Eintrittspunkt: Ein einzelnes Datei, um Matcher und globale Mocks zu registrieren
Der Schlüsselworkflow, den Reacts Testleitfaden unterstreicht, ist einfach: Rendern Sie das Komponenten in einer jsdom-gestützten Umgebung, verwenden Sie Selektoren wie getByText oder getByRole, interagieren Sie mit der Benutzeroberfläche und bestätigen Sie die DOM-Änderung, wie in der React-Test-Dokumentation. Wenn dieses Workflow nur dann vertrauenswürdig bleibt, wenn jede Maschine das gleiche Testumfeld verwendet.
Eine praktische Jest-Einrichtung sieht normalerweise so aus:
// jest.config.js
module.exports = {
  testEnvironment: 'jsdom',
  setupFilesAfterEnv: ['<rootDir>/src/setupTests.js'],
  moduleNameMapper: {
    '\\.(css|less|scss)$': 'identity-obj-proxy',
    '^@/(.*)$': '<rootDir>/src/$1',
  },
  transform: {
    '^.+\\.(js|jsx|ts|tsx)$': 'babel-jest',
  },
};
Wenn Ihr Team stattdessen SWC anstatt Babel verwendet, ist das in Ordnung. Der Punkt ist nicht der Transformer. Der Punkt ist Konsistenz. Wählen Sie einen Weg und standardisieren Sie ihn im Repository. Wenn Sie eine gute Begleitreferenz für umfassendere JavaScript-Testkonventionen benötigen, ist Capgo’s Ein Leitfaden für Einheitstests in JavaScript ein nützliches Team-Übergabedokument.
Fügen Sie das Einrichtungsdatei hinzu, auf das Ihre Suite angewiesen ist
Ein ordnungsgemäßes setupTests.js spart viel wiederholte Lärm:
import '@testing-library/jest-dom';

Object.defineProperty(window, 'matchMedia', {
  writable: true,
  value: jest.fn().mockImplementation(query => ({
    matches: false,
    media: query,
    onchange: null,
    addListener: jest.fn(),
    removeListener: jest.fn(),
    addEventListener: jest.fn(),
    removeEventListener: jest.fn(),
    dispatchEvent: jest.fn(),
  })),
});
Diese Datei ist der Ort, an dem Sie Umgebungsunterschiede einmal statt in zwanzig Testdateien lösen. Fügen Sie Mocks für APIs hinzu, auf die Ihre UI angewiesen ist, wie z.B. matchMedia, ResizeObserver, oder IntersectionObserver, wenn Ihre Komponentenbibliothek sie erwartet.
Ohne das werden Entwickler globale Variablen ad hoc anpassen. Das führt zu inkonsistenten Tests und schwer zu verfolgenden Fehlern. Ein lokaler Lauf eines Entwicklers funktioniert, weil er eine manuelle Mock-Funktion in einem Datei hinzugefügt hat. Der CI-Fehler tritt auf, weil die Einstellungen nicht geteilt wurden.
Behalten Sie die Lokal- und CI-Verhaltensweise in Einklang
Die lokale Kommandozeilenanweisung sollte der CI-Kommandozeilenanweisung so nahe wie möglich entsprechen. Wenn Entwickler den Watch-Modus mit permissiven Einstellungen ausführen, aber der CI eine strengere Konfiguration ausführt, erhalten Sie Überraschungsfehler nach dem Merge. Halten Sie Skripte explizit:
{
  "scripts": {
    "test": "jest",
    "test:watch": "jest --watch",
    "test:ci": "jest --runInBand --coverage"
  }
}
Ein kurzer Leitfaden hilft neuen Teammitgliedern, sich schnell auf die gleiche Grundlage zu bringen:
Die wichtigste Einstellungswahl ist die Disziplin bei den Standards. Legen Sie Alias in der Konfiguration ab. Legen Sie Umgebungs-Mocks in einer Einstellungsdokumentation ab. Verwenden Sie jsdom für UI-Tests und einen leichten Umgebung für reine Werkzeuge, wenn möglich. Je weniger individuelles Verhalten jeder einzelne Test benötigt, desto zuverlässiger wird Ihr System.
Schreiben Sie Bedeutungsvolle Komponenten-Tests
Organisationen haben kein Problem, Tests zu schreiben. Sie haben ein Problem, Tests zu schreiben, die nach sechs Monaten noch Bedeutung haben.
Die Standardmuster für die Einheitstests von React-Komponenten ist immer noch das richtige: rendern Sie die Komponente, überprüfen Sie die Benutzeroberfläche mit benutzerzentrierten Selektoren, lösen Sie eine Interaktion aus und bestätigen Sie den resultierenden DOM-Änderungen, die Tests von Implementierungsdetails wie Zustand oder Props fernhält, wie in der React-Testanleitung beschrieben. Das Geheimnis besteht darin, dieses Muster mit Beschränkung anzuwenden.
Testen Sie das Akkordeon wie ein Benutzer es verwendet
Nehmen Sie ein grundlegendes Komponenten. Es rendernt einen Button mit einem Titel. Der Inhalt des Panels beginnt versteckt. Klicken Sie auf den Button, um den Inhalt zu enthüllen und die Barrierefreiheit zu aktualisieren. Accordion Das reicht für mehrere nützliche Tests aus:
Die erste Darstellung zeigt den Titel, aber nicht den Inhalt.
- Klicken Sie auf den Auslöser, um den Inhalt zu enthüllen.
- Klicken Sie erneut, um ihn zusammenzufalten.
- Die Barrierefreiheit reflektiert den sichtbaren Zustand.
- Der letzte Punkt wird oft übersehen. Wenn Ihre Komponente ARIA-Attribute, oder eine rollebasierte Struktur verwendet, überprüfen Sie sie. Das sind keine Implementierungsdetails. Sie sind Teil des Benutzerfreundlichkeitsvertrags.
Die besten Komponententests lesen sich wie ein Fehlerbericht, den Sie nie erhalten möchten. aria-expanded, aria-controls__CAPGO_KEEP_0__
__CAPGO_KEEP_0__
Wählen Sie Abfragen basierend auf der Absicht
React Testing Library bietet Ihnen mehrere Abfragemuster, aber sie sind nicht austauschbar. Die falsche Wahl macht die Tests laut oder irreführend.
| Abfrageart | Wenn das Element gefunden wird | Wenn das Element nicht gefunden wird | Beispiel für Verwendung |
|---|---|---|---|
getBy |
Gibt das Element sofort zurück | Würfelt sofort einen Fehler aus | Behaupten Sie, dass ein Button oder ein Überschrift bereits auf dem Bildschirm ist |
queryBy |
Gibt das Element sofort zurück | Gibt zurück null |
Behaupten Sie, dass verstecktes Inhalt vor der Interaktion nicht existiert |
findBy |
Wird aufgelöst, wenn das Element erscheint | Wird nach einer Wartezeit abgelehnt | Behauptet, dass sich der Inhalt nach einer Abfrage oder einer verzögerten Aktualisierung nach einer Weile zeigt |
Ein einfaches mentales Modell hilft:
- Verwenden Sie
getByfür Dinge, die bereits existieren müssen. - Verwenden Sie
queryByfür Dinge, die noch nicht existieren dürfen. - Verwenden Sie
findBywenn sich die Benutzeroberfläche später ändert.
Wenn ein Test mit findBy für alles beginnt, bedeutet es normalerweise, dass der Autor nicht weiß, wann der Komponenten aktualisiert wird. Diese Unsicherheit wird später zu Flakiness.
Ein praktisches Akkordeon-Beispiel
Hier ist ein repräsentatives Komponenten-Beispiel:
function Accordion({ title, children }) {
  const [open, setOpen] = React.useState(false);

  return (
    <section>
      <button
        aria-expanded={open}
        aria-controls="accordion-panel"
        onClick={() => setOpen(prev => !prev)}
      >
        {title}
      </button>
      {open ? (
        <div id="accordion-panel">
          {children}
        </div>
      ) : null}
    </section>
  );
}
Und hier ist die Form der zu behaltenden Tests:
import { render, screen, fireEvent } from '@testing-library/react';

test('renders the accordion title and hides content initially', () => {
  render(<Accordion title="Shipping details">Delivery takes 3 days</Accordion>);

  expect(screen.getByRole('button', { name: /shipping details/i })).toBeInTheDocument();
  expect(screen.queryByText(/delivery takes 3 days/i)).not.toBeInTheDocument();
});

test('reveals content when the trigger is clicked', () => {
  render(<Accordion title="Shipping details">Delivery takes 3 days</Accordion>);

  fireEvent.click(screen.getByRole('button', { name: /shipping details/i }));

  expect(screen.getByText(/delivery takes 3 days/i)).toBeInTheDocument();
});

test('updates aria-expanded when opened', () => {
  render(<Accordion title="Shipping details">Delivery takes 3 days</Accordion>);

  const button = screen.getByRole('button', { name: /shipping details/i });
  expect(button).toHaveAttribute('aria-expanded', 'false');

  fireEvent.click(button);

  expect(button).toHaveAttribute('aria-expanded', 'true');
});
Was fehlt, ist genauso wichtig. Es gibt keine Behauptung gegen den internen Zustand. Keine Überprüfung, ob etwas aufgerufen wurde. Kein Snapshot des gesamten gerenderten Baums. Diese Tests würden die Wartung, nicht die Zuversicht erhöhen. setOpen Einige Gewohnheiten machen die Komponententests stärker:
Präferieren Sie role-basierte Abfragen:
- Schaltflächen, Überschriften, Dialoge, Warnungen und Eingabefelder sollten normalerweise über ihre Rolle gefunden werden. Halten Sie jeden Test eng:
- Ein Benutzer- sichtbarer Verhalten pro Test hält die Fehlerlesbarkeit aufrecht. Benennen Sie Tests nach den Ergebnissen:
- “aktualisiert aria-expanded, wenn geöffnet” ist viel nützlicher als “funktioniert richtig.” __CAPGO_KEEP_0__
Wenn ein Komponente über die DOM schwer zu testen ist, offenbart das oft ein Designproblem. Vielleicht versteckt sie den Zustand an falschem Ort. Vielleicht fehlt es an semantischer Markup. Gute Tests drängen Teams oft zu besseren Komponenten.
Testen von benutzerdefinierten Hooks und Anwendungslogik
React-Anwendungen verbergen eine Menge wichtiger Verhaltensweisen außerhalb von Komponenten. Zustandsübergänge leben in Hooks. Validierung und Formatierung leben in Hilfsfunktionen. Die Datenformierung findet oft vor dem Rendern statt. Wenn Sie nur sichtbare Komponenten testen, werden Sie einen großen Teil der code übersehen, der den Produktionsverhalten noch brechen kann.
Hooks benötigen eine React-beauftragte Garnitur
Ein benutzerdefinierter Hook benötigt immer noch React, um korrekt auszuführen, daher testen Sie ihn mit renderHook und schließen Sie Zustandsänderungen in act().
Ein kleiner useToggle Hook ist ein gutes Beispiel:
import { useState, useCallback } from 'react';

export function useToggle(initialValue = false) {
  const [value, setValue] = useState(initialValue);
  const toggle = useCallback(() => setValue(current => !current), []);
  return { value, toggle };
}
Sein Test sollte sich auf den öffentlichen Vertrag konzentrieren:
import { renderHook, act } from '@testing-library/react';
import { useToggle } from './useToggle';

test('returns the initial value', () => {
  const { result } = renderHook(() => useToggle(true));
  expect(result.current.value).toBe(true);
});

test('toggles the value', () => {
  const { result } = renderHook(() => useToggle(false));

  act(() => {
    result.current.toggle();
  });

  expect(result.current.value).toBe(true);
});
Dieser Test ist nützlich, weil der Hook selbst die Einheit ist. Sie testen nicht die React-Internen. Sie verifizieren das externe Verhalten des Hooks.
Für Produktteams, die wiederholbar UI oder Feature-Primitive bauen, ist dieses Muster sehr wichtig. Hooks werden oft die Schnittstelle, die über Apps, Design-Systeme oder interne Werkzeuge geteilt wird. Wenn Sie mit kommerziellem Absicht wiederholbare Verhaltensweisen entwerfen, sind die Ressourcen zu Hooks für Makers-Produkte wichtig kann dabei Hooks als produktisierte Bausteine anstatt nur als Implementierungsdetails darstellen.
Reine Logik sollte in Tests rein bleiben
Nicht alles benötigt jsdom, React oder Testing Library. Wenn eine Funktion rein ist, test sie mit plain Jest in einem Node-Umgebung.
Beispiel:
export function formatDisplayName(firstName: string, lastName: string) {
  return `${firstName.trim()} ${lastName.trim()}`.trim();
}
Diese Test sollte einfach sein:
import { formatDisplayName } from './formatDisplayName';

test('joins and trims both names', () => {
  expect(formatDisplayName(' Ada ', ' Lovelace ')).toBe('Ada Lovelace');
});

test('handles a missing last name', () => {
  expect(formatDisplayName('Ada', '')).toBe('Ada');
});
Der Gewinn hier ist Geschwindigkeit und Klarheit. Wenn eine Funktion kein gerendertes Baum benötigt, gebe es ihm keinen.
React-spezifische Werkzeuge fügen Überhead hinzu. Halte Geschäftslogik-Tests klein, schnell und nahe an der Funktion, die sie überprüft.
- Ein praktischer Split funktioniert gut: Hooks:
renderHook,act()Verwende - , und Wrapper-Provider, wenn nötig. Verwenden Sie einfach Jest und keine DOM.
- Zustandsbehaftete Schnittstellenlogik: Ziehen Sie es in testbare Hilfsmittel, wenn der Komponententest zu viel tut.
Teams füllen Komponententests oft mit Logikannahmen, die tiefer in der Stacks liegen. Wenn Sie diese Logik herausziehen, erhalten Sie zwei Vorteile. Der Komponententest wird sauberer, und der Logiktest wird schneller.
Meisterung fortgeschrittener Techniken: Mocking und Async
Die meisten unzuverlässigen React-Suiten brechen an zwei Stellen. Sie brechen an Grenzen von Abhängigkeiten und sie brechen um Zeit.
Deshalb ist das asynchrone Testen und das Mocking die Grenze zwischen einem Spielzeug-Test-Suite und einer, die Sie vor der Veröffentlichung vertrauen können. Eine Analyse gibt an, dass 46,5% der Testflüchtigkeit auf Umgebungs- oder Ressourcenbezogene Probleme wie asynchrone Timing zurückzuführen ist in dieser React-Einheitstestanalyse. In React-Anwendungen entspricht dies direkt den Zustandsübergängen, der verzögerten Darstellung, der netzgetriebenen Benutzeroberfläche und den Tests, die statt dessen deterministisch warten.

Mimetiere die Grenzen, nicht jede Schicht
Der schnellste Weg, einen irreführenden Test zu schreiben, ist, die Hälfte deiner Komponentenbaum zu mocken und dann zu behaupten, dass deine eigenen Mocks funktioniert haben.
Für ein Komponenten, das Kontodaten abruft, mocke den Netzwerkclient oder API-Modul. Mocke nicht den Hook, das Kindkomponenten, den Ladeanzeiger und drei Hilfsfunktionen, es sei denn, der Test benötigt tatsächlich eine Isolation an diesen Schnittstellen.
Verwende diese Regelsatz:
- Mock externe Dienste: HTTP-Clients, Analytics, Browser-only-APIs, native Bridges
- Mimetiere unbeständige Plattform-APIs:
matchMediaZeitsteuerungen, Electron-Präloade, Capacitor-Plugins, wenn sie in jsdom nicht verfügbar sind - Vermeide das Mimetieren deiner eigenen Interna standardmäßig: Benutzerdefinierte Hooks, einfache Kinder, lokale Hilfsfunktionen
Wenn ein Test erfolgreich ist, weil alle schwierigen Teile durch Fakes ersetzt wurden, hat es dir nicht viel Vertrauen in die Freigabe gebracht.
Für Teams, die Beispiele und Muster um die Runner-APIs herum haben möchten, bietet Capgo Jest-Kategorie Es ist eine praktische Referenzbibliothek, insbesondere bei der Einarbeitung von Entwicklern, die React kennen, aber noch nicht die Testmechanik.
Asynche Tests scheitern, wenn die Zeitung unbestimmt ist
Asynche Fehlschläge kommen normalerweise von einem der folgenden Fehler:
- Der Test behauptet zu früh.
- Der Test wartet mit willkürlichen Zeitschaltungen.
- Das Komponenten-Update erfolgt mehrmals, aber der Test modelliert nur eine Übergang.
Ein stabiler asyncher Test hat normalerweise diese Form:
test('shows user details after data loads', async () => {
  render(<UserProfile userId="42" />);
  expect(screen.getByText(/loading/i)).toBeInTheDocument();

  expect(await screen.findByText(/account owner/i)).toBeInTheDocument();
});
Oder, wenn Sie auf eine bestimmte Bedingung warten müssen:
await waitFor(() => {
  expect(screen.getByRole('alert')).toBeInTheDocument();
});
Verwenden Sie findBy wenn die Erscheinung eines Elements das Ereignis ist, auf das Sie Wert legen. Verwenden Sie waitFor wenn die Bedingung breiter ist oder der Zustand nicht mit einer einzelnen Abfrage ausgedrückt werden kann. Vermeiden Sie setTimeout in Tests, es sei denn, Sie testen explizit das Timer-Verhalten und verwenden Fake-Timer.
React's Testumgebung erwartet auch, dass Sie die Semantik bei Updates respektieren. act() Testing Library handhabt einiges für Sie, aber wenn Sie den Zustand manuell steuern oder Timer vorwärts setzen, müssen Sie immer noch darüber nachdenken, wann Updates abgeschlossen sind.
Wissen, welches Mocking-Tool Sie erreichen sollten.
Verschiedene Mocking-Tools lösen unterschiedliche Probleme:
| Tool | Beste Verwendung | Häufiger Fehler |
|---|---|---|
jest.fn() |
Stehende Fake-Rückrufe oder injizierte Funktionen | Verwendung, um ein ganzes Modul zu ersetzen, wenn ein einfacher Rückruf ausreicht |
jest.spyOn() |
Beobachten oder überschreiben Sie eine Methode auf einem realen Objekt oder Modul | Vergessen Sie, die ursprüngliche Implementierung wiederherzustellen |
jest.mock() |
Ein Modulabhaengigkeit ersetzen an Importgrenze | Große Module durch Mocking standardmäßig und Verhalten verlieren |
Beispiele helfen:
- Zurückgreifen
jest.fn()wenn ein Komponente einonSubmitEigenschaft übernimmt. - Verwenden
jest.spyOn()wenn Sie die Verifizierung einer Speichermethode oder eines exportierten __CAPGO_KEEP_0__ Aufrufs benötigen.console.error, a storage method, or one exported API call. - wenn der Import eines Moduls ansonsten I/O, native __CAPGO_KEEP_0__, oder Verhalten außerhalb der Einheitengrenze auslösen würde.
jest.mock()when importing a module would otherwise hit I/O, native code, or behavior outside the unit boundary.
Reach for when a component takes an prop.
Verbesserung der Testqualität und Strategie
Viele Teams verfolgen immer noch die Abdeckung wie es dasselbe wäre wie Vertrauen. Es ist nicht.
Man kann ein Abdeckungsziel erreichen und trotzdem die Regressionsfehler verpassen, die zählen. Ein Suite voller oberflächlicher Behauptungen, breiter Szenarien und mockter Interna erzeugt den Schein von Sicherheit und erhöht gleichzeitig den Aufwand für die Wartung.

Abdeckung ist ein Kartenbild, nicht das Ziel
Abdeckungsberichte sind nützlich, wenn sie eine Frage beantworten: welche kritischen Wege haben noch keine Schutz?
Sie sind nicht nützlich, wenn sie Entwickler dazu bringen, trivialen Wrapper, statische Markup oder eine-Linien-Pass-through-Dateien zu testen, nur um einen Prozentsatz zu bewegen. Behandeln Sie die Abdeckung als Entdeckungstool. Wenn der Authentifizierungsstatus, die Abrechnungsaktionen, die Feature-Flags oder die Aktualisierungsanfragen keine Tests haben, ist das ein Signal. Wenn ein präsentatives ikonisches Komponenten keine Tests hat, ist das normalerweise nicht.
Eine gesunde Überprüfungsfrage ist einfach: reduziert dieser Test das Risiko einer Veröffentlichung?
- Ja: Es überprüft die Benutzersichtbarkeit auf einem kritischen Weg.
- Vielleicht: Es schützt die Geschäftslogik, die leicht während einer Refaktorisierung gebrochen werden kann.
- Nein: Es besagt Implementierungsdetails oder dupliziert den Wert eines anderen Tests.
Was nicht getestet werden sollte
Viele React-Leitfäden geben nicht genug Zeit für die Omission auf. Diese Lücke ist wichtig, weil übermäßiges Mocking und Implementierungs-Detail-Testen brüchige Suites erzeugen, die zwar bestehen, aber die Benutzererfahrung immer noch bricht, wie in der BrowserStack-Leitfaden zu "was nicht getestet werden sollte in React" Vermeide oder limitiere diese Muster scharf:.
Internes Zustandsprüfungen:
- Teste nicht direkt, wenn du testen kannst, ob das Panel geöffnet wurde.
isOpenFramework-Verhalten: - Teste nicht, dass React einen Effekt aufgerufen hat. Teste das Ergebnis dessen, was der Effekt ändert. Dritte-Partei-Bibliothek-Internes:
- Vermeide oder limitiere diese Muster scharf: Testen Sie Ihre Integration mit einem Datumsauswahl- oder Routen-Widget, nicht mit der eigenen Renderlogik der Bibliothek.
- Überbrochene Einheiten: Wenn Sie jedes Kind und Hilfsmittel gemockt haben, testen Sie möglicherweise keine bedeutsamen Verhaltensweisen mehr.
Schlechte Tests sind schlimmer als fehlende Tests, wenn sie Refaktorisierungen blockieren und trotzdem keine Produktionsfehler erkennen.
Eine nützliche Heuristik ist die Eigentümerschaft von Grenzen. Testen Sie, was Ihr code besitzt. Testen Sie nicht, was React, der Browser oder eine reife Bibliothek bereits besitzt, es sei denn, Ihre Integrationslayer ändert den Vertrag.
Wo Snapshots helfen und wo sie schaden
Snapshots sind nicht nutzlos. Sie werden einfach leicht missbraucht.
Verwenden Sie sie sparsam für Komponenten mit stabilen, einfachen Ausgaben, wo eine breite strukturierte Differenz bedeutsam ist. Vermeiden Sie sie für interaktive oder hochdynamische Komponenten, da sie Lärm erzeugen. Entwickler lesen sie nicht mehr und beginnen, sie reflexiv zu aktualisieren.
Bessere Alternativen gibt es normalerweise:
- Für bedingte Darstellung, behaupten Sie die Präsenz oder Abwesenheit von Schlüsseltext.
- Für visuelle Zustandsänderungen, behaupten Sie die Rolle, Bezeichnung oder Attribut, das zählt.
- Für Fehler und Fallbacks, behaupten Sie den tatsächlichen Fehlermeldung oder Warnbereich.
If Ihr Team ein umfassenderes Qualitätssicherungsverfahren benötigt, das über Einheitstests hinausgeht, ist ein solider Begleiter ein Qualitätsmanagement-Workflow für Apps der Tests, Release-Checks und Rollback-Planung als ein System behandelt. Das ist der Denkansatz, der die Qualität der Tests am schnellsten verbessert. Hört auf, nachzudenken, wie viele Tests Sie haben. Beginnen Sie stattdessen, nachzudenken, welche Fehler noch auf die Benutzer zukommen könnten.
Integrieren von Tests in einen CI/CD-Pipeline für Cross-Plattform-Anwendungen
Ein Test-Suite, die nur auf einem Entwickler-Laptop läuft, ist nur eine Empfehlung, nicht ein Kontrollpunkt.
Die Suite wird operational, wenn jeder Pull-Request die gleichen Checks in einem sauberen Umfeld ausführt und die Merges blockiert, wenn die Checks fehlschlagen. Das klingt offensichtlich, aber viele Teams lassen immer noch kritische Lücken bestehen. Tests werden manuell ausgeführt. Coverage-Berichte sind optional. Verpackung und Release-Jobs beginnen, bevor die Test-Jobs abgeschlossen sind. Das ist der Weg, auf dem kleine UI-Regressionen in größere Release-Fehler eintauchen.

Ein Pull-Request sollte jeden Mal den gleichen Gate auslösen
Für die Einheitstests von React soll ein Sicherheitsnetz fungieren, CI benötigt ein paar Grundlagen:
- Läuft auf jedem Pull-Request
- Installiert Abhängigkeiten aus Lockfile
- Verwendet den gleichen Test-Befehl jeden Mal
- Schnell scheitern bei Fehlern im Test
- Veröffentliche nur Artefakte, nachdem die Tests erfolgreich waren
Dies ist das Herzstück kontinuierlicher Bereitstellung für App-Teams. Baut Vertrauen vor der Veröffentlichung, nicht danach.
Ein einfacher GitHub Actions-Workflow reicht für viele Teams aus:
name: test

on:
  pull_request:
  push:
    branches:
      - main

jobs:
  react-tests:
    runs-on: ubuntu-latest

    steps:
      - name: Check out code
        uses: actions/checkout@v4

      - name: Set up Node
        uses: actions/setup-node@v4
        with:
          node-version: 20
          cache: npm

      - name: Install dependencies
        run: npm ci

      - name: Run unit tests
        run: npm run test:ci
Das ist nicht besonders, und das ist der Punkt. Die stärksten Pipelines sind meistens die überraschendsten.
Warum ist dies für Capacitor und Electron wichtiger
Cross-platform-React-Apps tragen mehr Risiko bei der Veröffentlichung als Browser-Apps, weil die gleiche UI code oft in verschiedenen Containern mit unterschiedlichen Laufzeitannahmen geliefert wird.
Einige Beispiele zeigen, wo Pipelines helfen:
- Capacitor-Apps: Web code mag lokal erfolgreich sein, aber fehlschlagen, wenn ein Plugin-Brücke, Offline-Zustand oder App-Lifecycle-Randfall das Verhalten nach dem Packen ändert.
- Elektron-Anwendungen: Ein Renderer-Komponent kann auf Präloader-APIs, Fenster-Meldungen oder Desktop-spezifische Zustände angewiesen sein, die bei einer reinen Browser-Testung nicht existieren, es sei denn, sie werden absichtlich nachgemimt.
- Gemeinsame Release-Trainings: Ein schlechter Bundle kann auf mehrere Ziele auswirken, wenn das Bereitstellungsprozess nicht eng an die Veröffentlichung gebunden ist.
Daher sollten Einheitstests vor der Verpackungsaufgabe ausgeführt werden und die Verpackungsaufgabe sollte vor der Verteilungsaufgabe ausgeführt werden. Jeder Schritt reduziert das Risiko. Einheitstests fangen lokale Rückschritte schnell ein. Die Plattform-Verpackung überprüft die Umgebungsannahmen. Eine manuelle Genehmigung oder eine stufenweise Verteilung handhabt die endgültige Vertrauenswürdigkeit.
Ein praktischer GitHub Actions Workflow
Ein reiferer Pipeline teilt üblicherweise Verantwortlichkeiten:
- Testaufgabe: Schnelle Einheitstests und Hook-Tests
- Bauaufgabe: Produktionsbau nur nachdem die Tests bestanden haben
- Verpackungsaufgabe: Capacitor Synchronisierung, Electron-Paketierung oder Artefaktbündelung
- Release-Auftrag: Veröffentlichen Sie nur von genehmigten Branches oder Tags
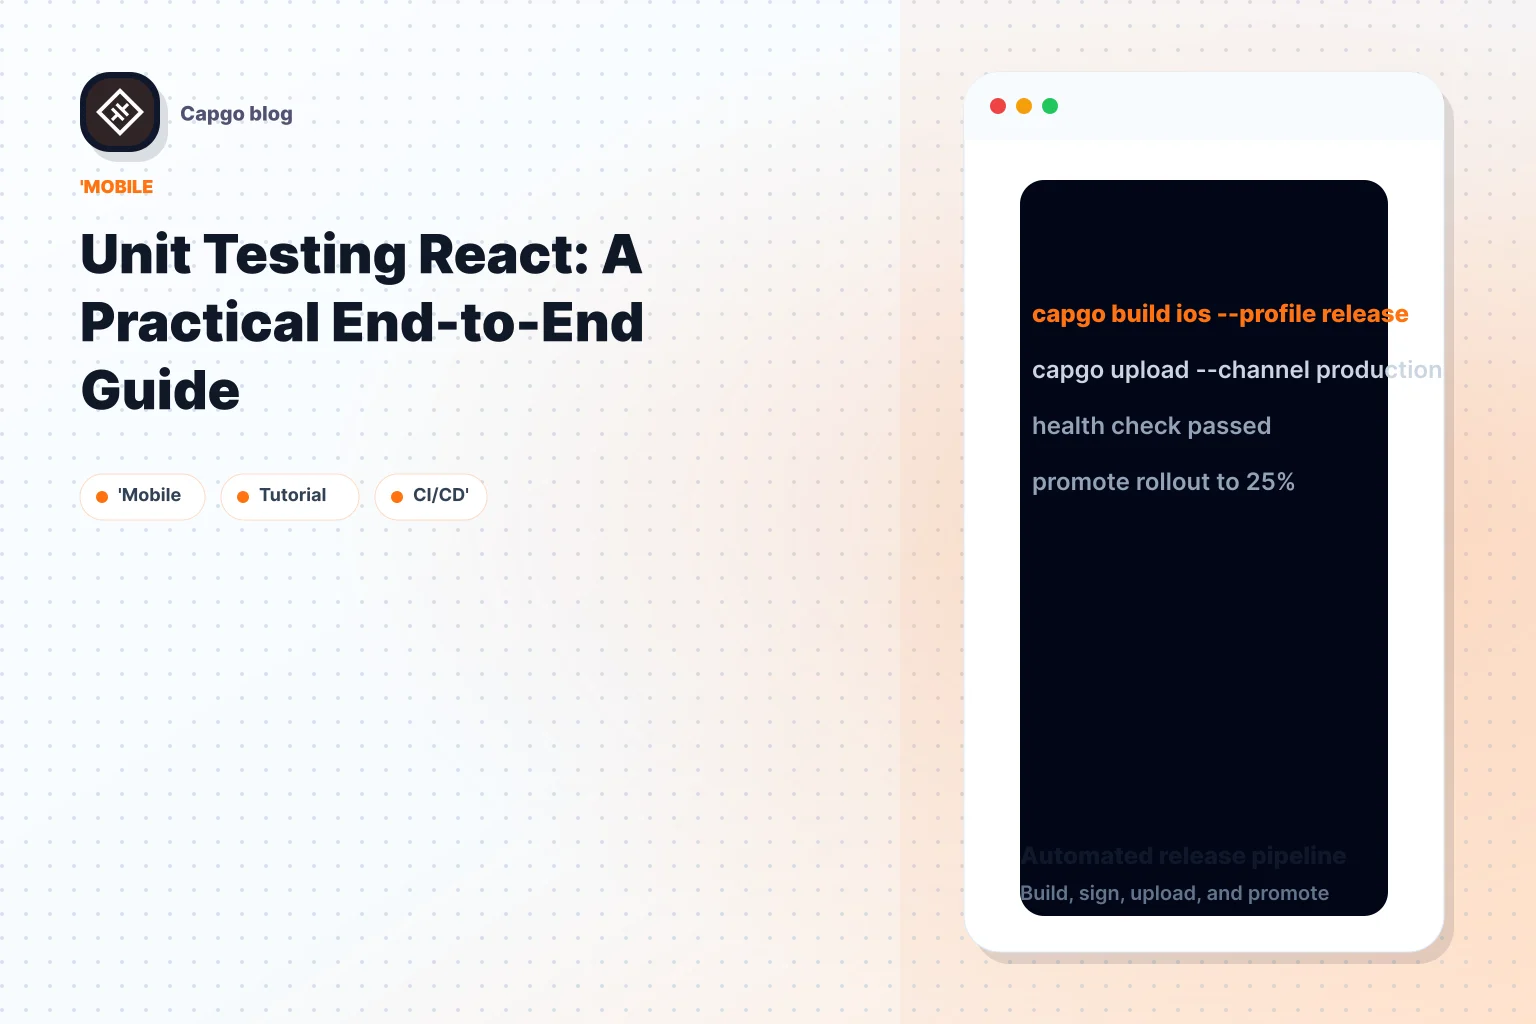
Für Teams, die live Updates an Capacitor oder Electron-Anwendungen liefern, ist dies der Bereich, in dem die Release-Tooling relevant ist. Eine Option in diesem Workflow ist Capgo, die signierte Web-Bundles für CapacitorJS- und Electron-Anwendungen mit Rollback-Unterstützung und kanalbasierten Rollout-Kontrollen veröffentlicht. In der Praxis bedeutet dies, dass Ihr React-Testauftrag als erste harte Schranke vor jeder Web-Bundle-Veröffentlichung auf die Staging- oder Produktionslieferung fungieren kann.
Die betriebsrelevante Regel ist einfach. Lassen Sie die Release-Infrastruktur nicht die schwachen Tests kompensieren. Verwenden Sie die Release-Infrastruktur nach zuverlässigen Tests, die bereits schlechte Änderungen ausgeschlossen haben.
Ein zuverlässiges Testsystem ändert das Teamverhalten. Ingenieure fusionieren mit weniger Hesitation. Rezensenten konzentrieren sich auf Randfälle anstatt die Grundlagen manuell nachzuruntern. Release-Manager behandeln jeden Deploy nicht mehr wie ein Wettbewerb. Das ist das Ergebnis von Unit-Testing von React.
Wenn Ihr Team React über Capacitor oder Electron liefert, hängt die Release-Sicherheit von mehr als grünen lokalen Tests ab. Capgo gibt Teams einen kontrollierten Weg, signierte Web-Updates zu veröffentlichen, Zielrollout-Kanäle anzusteuern und schlechte Bundles ohne Wartezeit auf die Store-Überprüfung zurückzuziehen, was sich natürlich hinter einer CI-Pipeline einfügt, die bereits die Einhaltung von Unit-Tests vor der Bereitstellung erfordert.


