What is Capacitor-updater?
Capacitor-updater, a technology that helps in the delivery of app updates and improvements to the end users instantly.
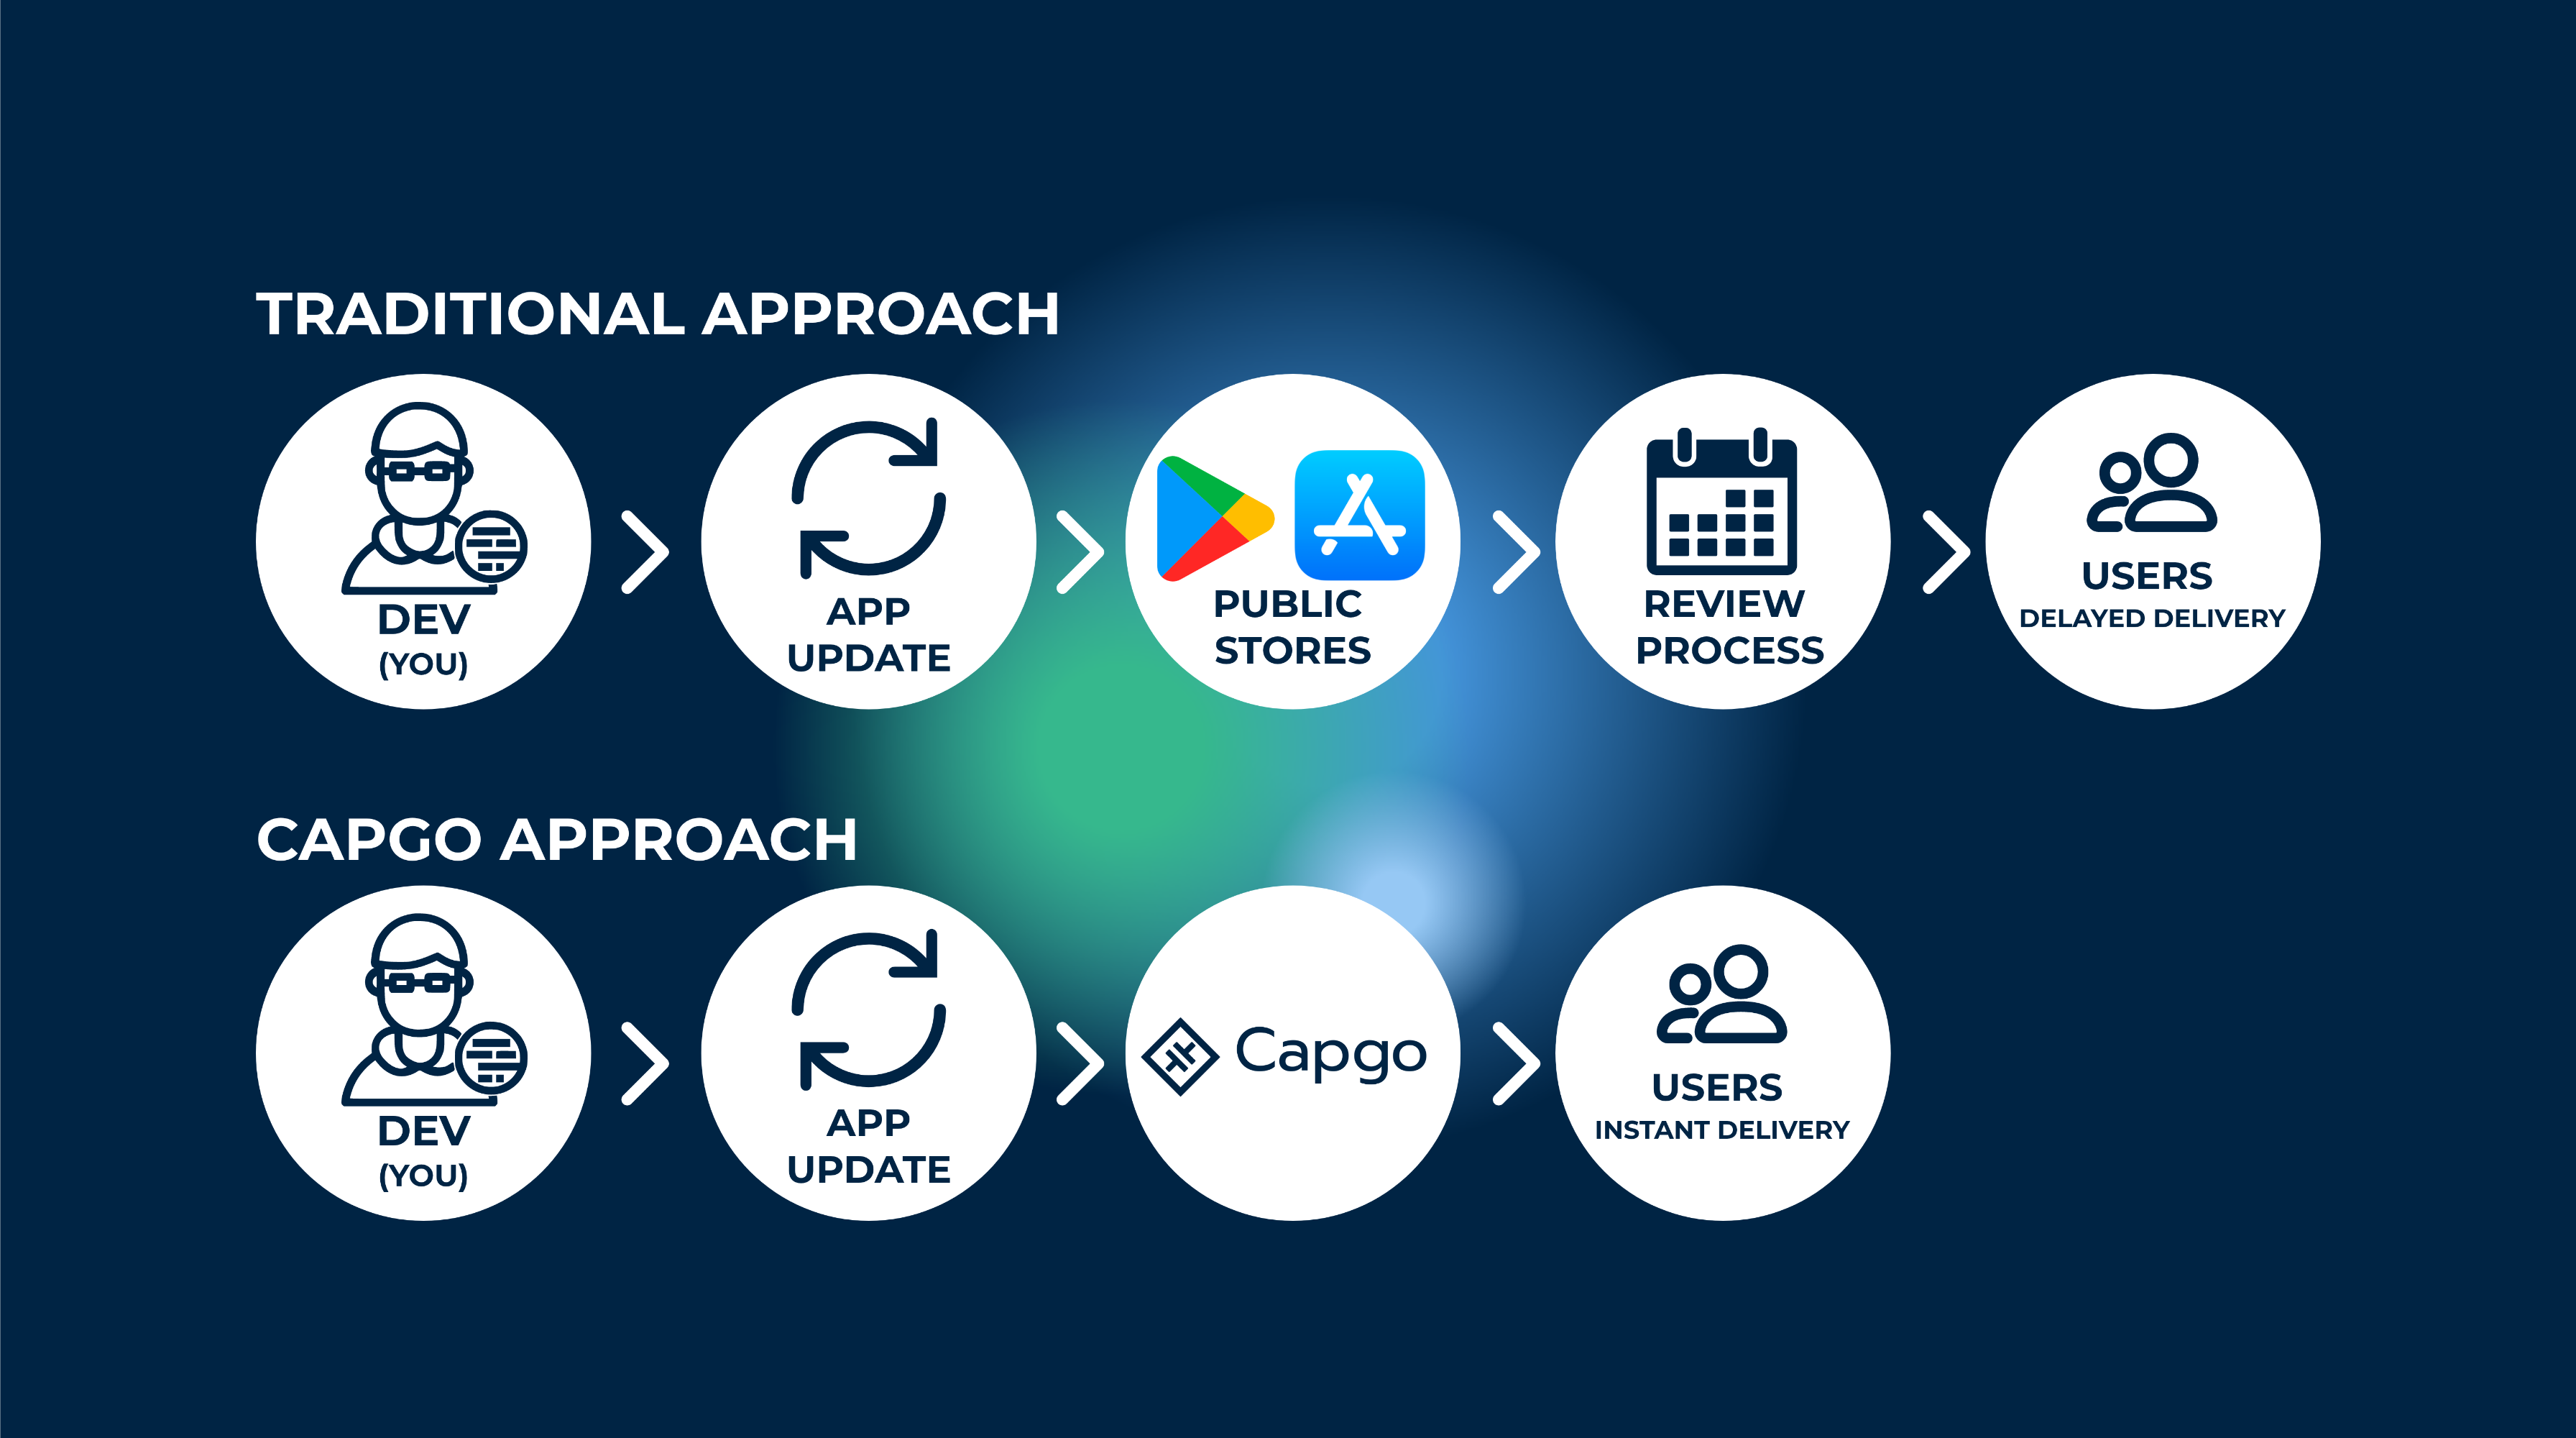
This is especially great if you want to do critical bug fixes and deliver instantly without going through the App Store reviews.
You can think of it as “web-like” agility of side-loading updates as soon as they are available.
Moreover, it provides rollbacks if the new update crashes the app
How does it work?
Capgo keeps your app’s JavaScript bundle in sync with the Capgo server, and every time the user opens the app, it checks with the Capgo server if a new update is available to the bundle. And of course, it comes with tons of awesome configurations which can help you fine-tune your user’s experience.
I use Capgo in all my projects I build. That allows me to put less time in the App Store review process.
You can read more about it here.
Understanding Semantic Versioning with Capgo
Capgo uses semantic versioning (semver) to determine when and how updates should be applied to your app. This ensures that your users only receive compatible updates and prevents breaking changes from being automatically deployed.
Semantic versioning follows the format MAJOR.MINOR.PATCH:
- MAJOR: Breaking changes that require a native app store release
- MINOR: New features that are backward compatible
- PATCH: Bug fixes that are backward compatible
For example, if your app is at version 1.0.0 and you want to update to 1.0.1 (a patch), Capgo will automatically apply this update. However, if you want to update from 1.0.0 to 2.0.0 (a major version), this would require a native app store release since it indicates breaking changes.
Capgo’s channel settings allow you to configure which types of updates are automatically applied:
- Major strategy: Allows all updates (use with caution)
- Minor strategy: Allows minor and patch updates only
- Patch strategy: Only allows patch updates
- Metadata strategy: Requires minimum version requirements to be met
You can test how different version combinations work with Capgo’s update logic using our Semver Tester tool. This tool helps you understand exactly when updates will be applied based on your channel configuration.
Are there any limitations?
As good as it may sound, there are a few things that we need to keep in mind. The first thing is that OTA updates only work with web bundles. You may think that this isn’t really a big limitation because, in Capacitor JS, we write almost all code in JS CSS and HTML. While this may be true, there still are native modules that we install to our app. If a module changes your android or iOS directories, you can’t use OTA to update your app. That’s because these directories’ contents are used to compile Native binaries, which OTA can’t update. Even native app cannot update this part.
But you can set up your CI/CD to handle this part, I made a tutorial on how to do it here for IOS.
Auto Capgo Configuration
It’s time to sign up, and get your API key to upload your first version! Begin by signing up for a Capgo account.
Once you’re logged into Capgo, You will have an onboarding page
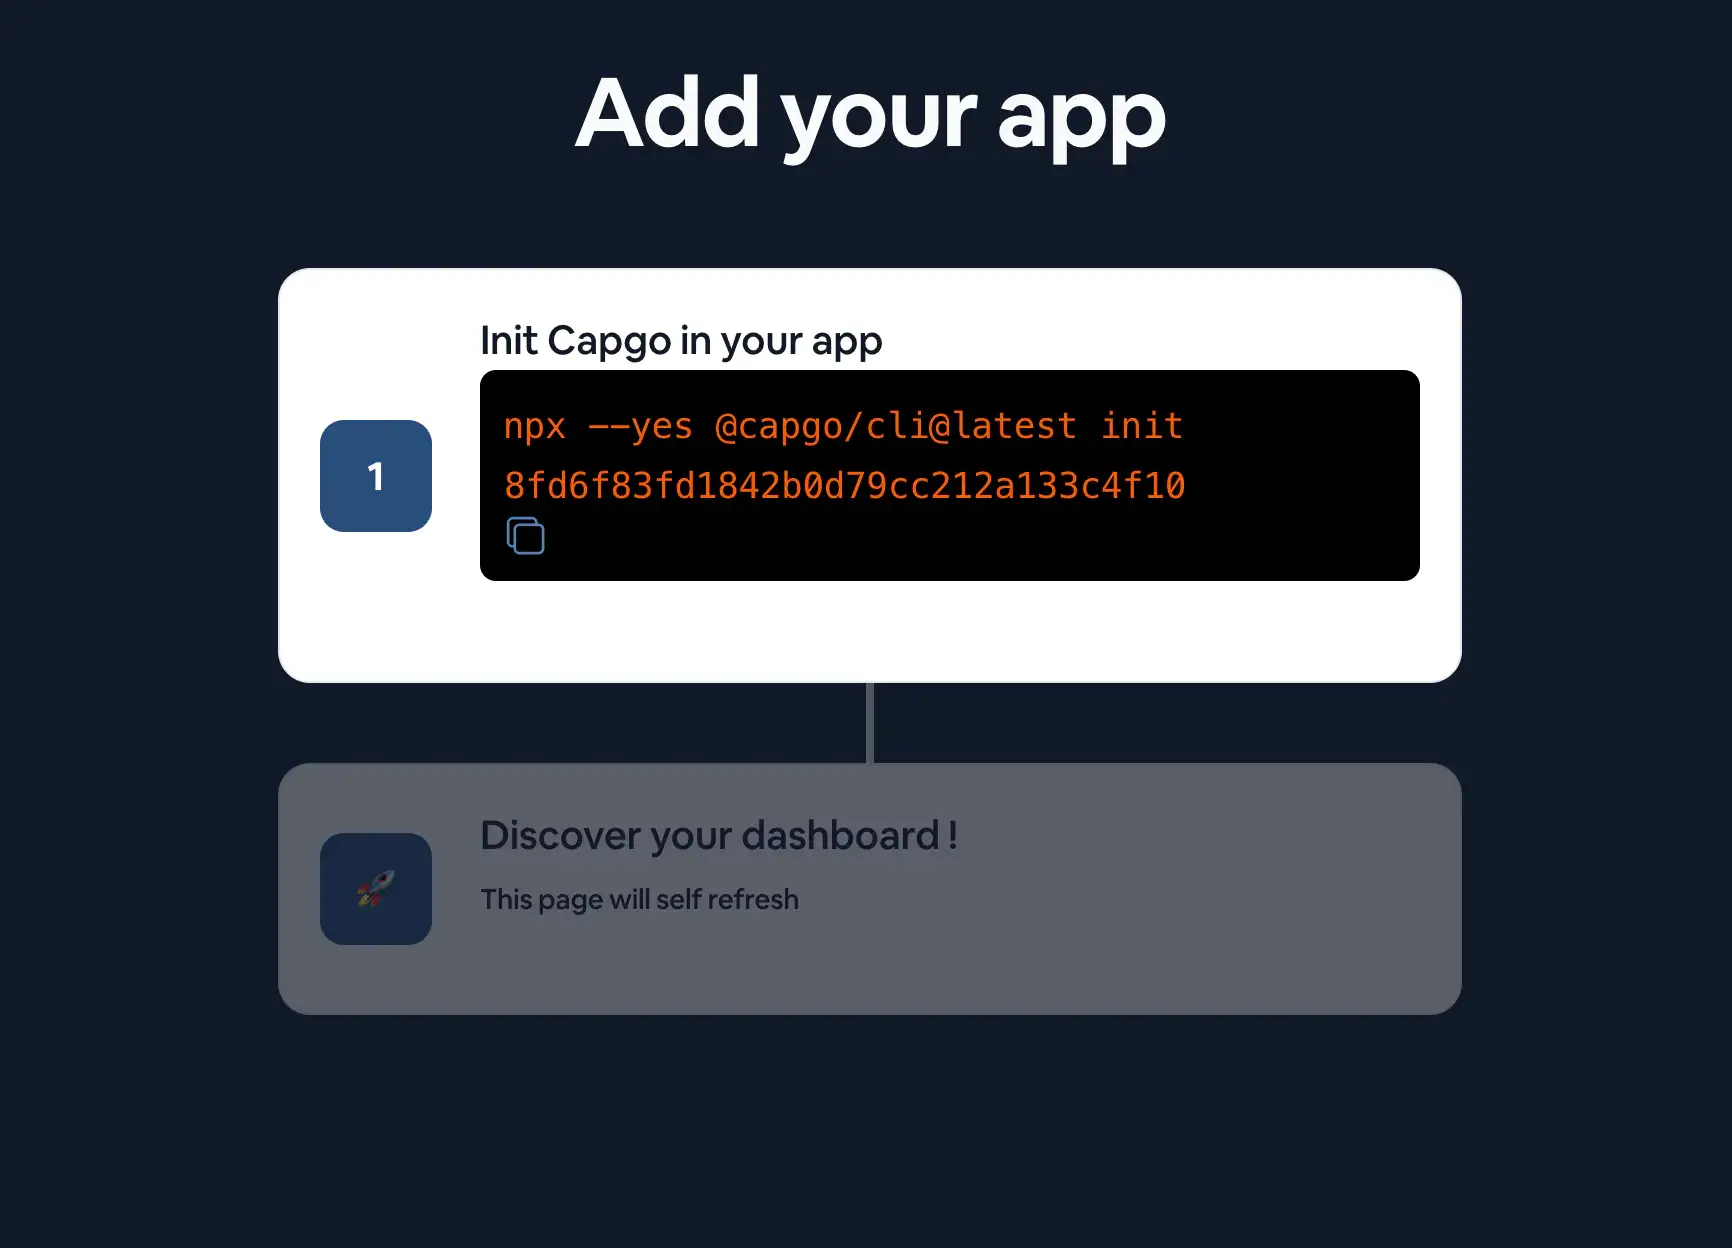
Follow the steps on the onboarding page to add your first app.
Follow the CLI guidance
From a command line, directly into the root of your Capacitor app, run:
npx @capgo/cli@latest init
To install the Capgo into your Capacitor app, the CLI will walk you through the process of setting up your app with Capgo.
If you want to do it manually, you can follow the steps below.
Manual Capgo Configuration
Install the plugin
You should end up with this code added to your app :
npm i @capgo/capacitor-updater && npx cap sync
To install the plugin into your Capacitor app.
And then add to your app this code to notify the native plugin that the JS bundle is healthy (if you don’t do this, the native plugin will rollback to the previous version):
import { CapacitorUpdater } from '@capgo/capacitor-updater'

CapacitorUpdater.notifyAppReady()
This will tell the native plugin the installation as succeeded.
Then do a npm run build && npx cap copy to update your app.
Login to Capgo CLOUD
First, use the all apikey present in your account to log in with the CLI:
npx @capgo/cli@latest login YOU_KEY
Add your first app
Let’s get started by first creating an app in Capgo Cloud with the CLI.
npx @capgo/cli@latest app add
This command will use all variables defined in the Capacitor config file to create the app.
Upload your first version
Run the command to build your code and send it to Capgo with:
npx @capgo/cli@latest bundle upload
By default, the version name will be the one in your package.json file.
Check in Capgo if the build is present.
You can even test it with my mobile sandbox app.
Make channel default
After you have sent your app to Capgo, you need to make your channel default to let apps receive updates from Capgo.
npx @capgo/cli@latest channel set production -s default
Receive a Live Update on a Device
For your application to receive a live update from Deploy, you’ll need to run the app on a device or an emulator. The easiest way to do this is simply to use the following command to launch your local app in an emulator or a device connected to your computer.
npx cap run [ios | android]Open the app, put it in the background and open it again, you should see in the logs the app did the update.
Congrats! 🎉 You have successfully deployed your first Live Update. This is just the start of what you can do with Live Updates. To learn more, view the complete Live Updates docs.
If you need to stop receive in local the update run this command
npx @capgo/cli@latest channel set
Keep going from Update your Capacitor apps seamlessly using Capacitor-updater
If you are using Update your Capacitor apps seamlessly using Capacitor-updater to plan migration and enterprise operations, connect it with Capgo Enterprise for the product workflow in Capgo Enterprise, Ionic Enterprise Plugin Alternatives for the product workflow in Ionic Enterprise Plugin Alternatives, Capgo Alternatives for the product workflow in Capgo Alternatives, Capgo Consulting for the product workflow in Capgo Consulting, and Capgo Premium Support for the product workflow in Capgo Premium Support.


