将您的首次应用提交到App Store或Play Store时,可能会感到沮丧。2026年,指南不断演进,审查更加严格,通过首次提交的应用审查需要细致入微的注意。这个全面指南将带您走过需要了解的所有内容,以便在iOS和Android平台上通过首次提交的应用审查。
了解2026年的审查流程
Both Apple and Google have significantly tightened their review processes in recent years, with particular emphasis on privacy, security, and user experience. Understanding these changes is crucial for first-time developers.
iOS App Store Review Timeline
- 标准审查流程标准审查:24-48小时
- 高峰期高峰期:3-5天(尤其是在节假日季节)
- 周末周末:无审查处理
- 加速审查加速审查:可用于紧急修复bug(必须通过App Store Connect提出请求)
专业提示提交周一或周二(早)以避免周末延迟。周一提交的应用通常在周三被审查。
App Store Connect 状态
- 准备上线: 仍在准备构建或元数据
- 等待审核:苹果已收到您的提交
- 审核中:审核团队正在检查应用
- 待开发者发布:已通过,但等待您的发布选择
- 被拒绝/未解决问题:苹果需要修改才能获得批准
Google Play Store 审核时间线 (2026 年更新)
- Initial Review: 3-7 days (significantly longer than previous years)
- Closed Testing Gate: 14 days minimum for affected new personal Play Console accounts before you can request production access
- Production Review After Testing: Usually another 3-7 days after the closed testing requirement is complete
- Updates to Existing Apps: 1-3 days
- Policy Violations: Can extend to 14+ days if additional review is triggered
Important Update: Google now requires substantially more rigorous testing for some new Play Console accounts, which we’ll cover in detail below.
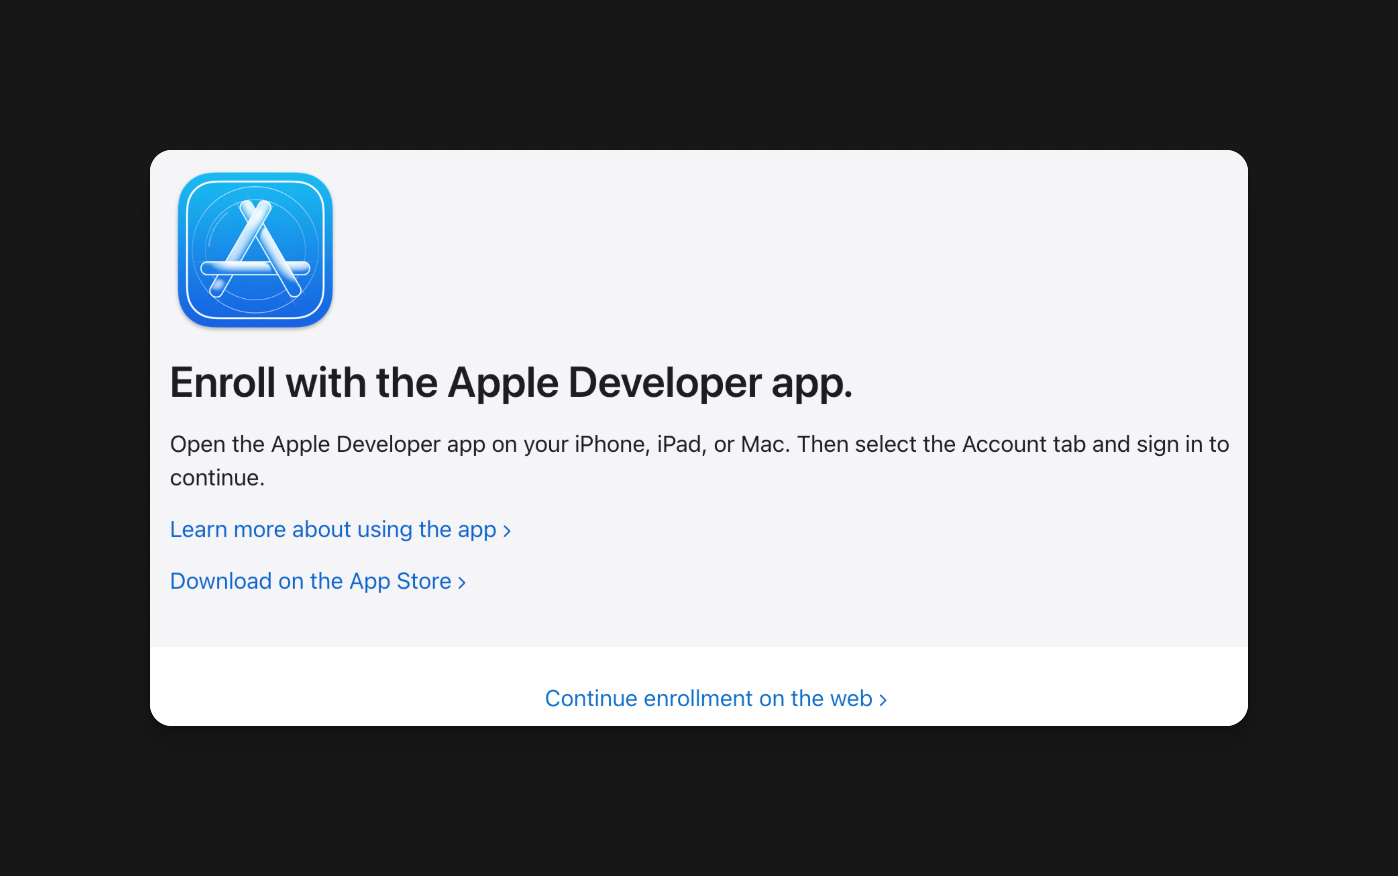
Apple Developer Account Setup
在发布 iOS 应用之前,确保 Apple 端设置正确:
- 加入 Apple Developer Program
- 为用于注册的 Apple 账户开启两因素认证
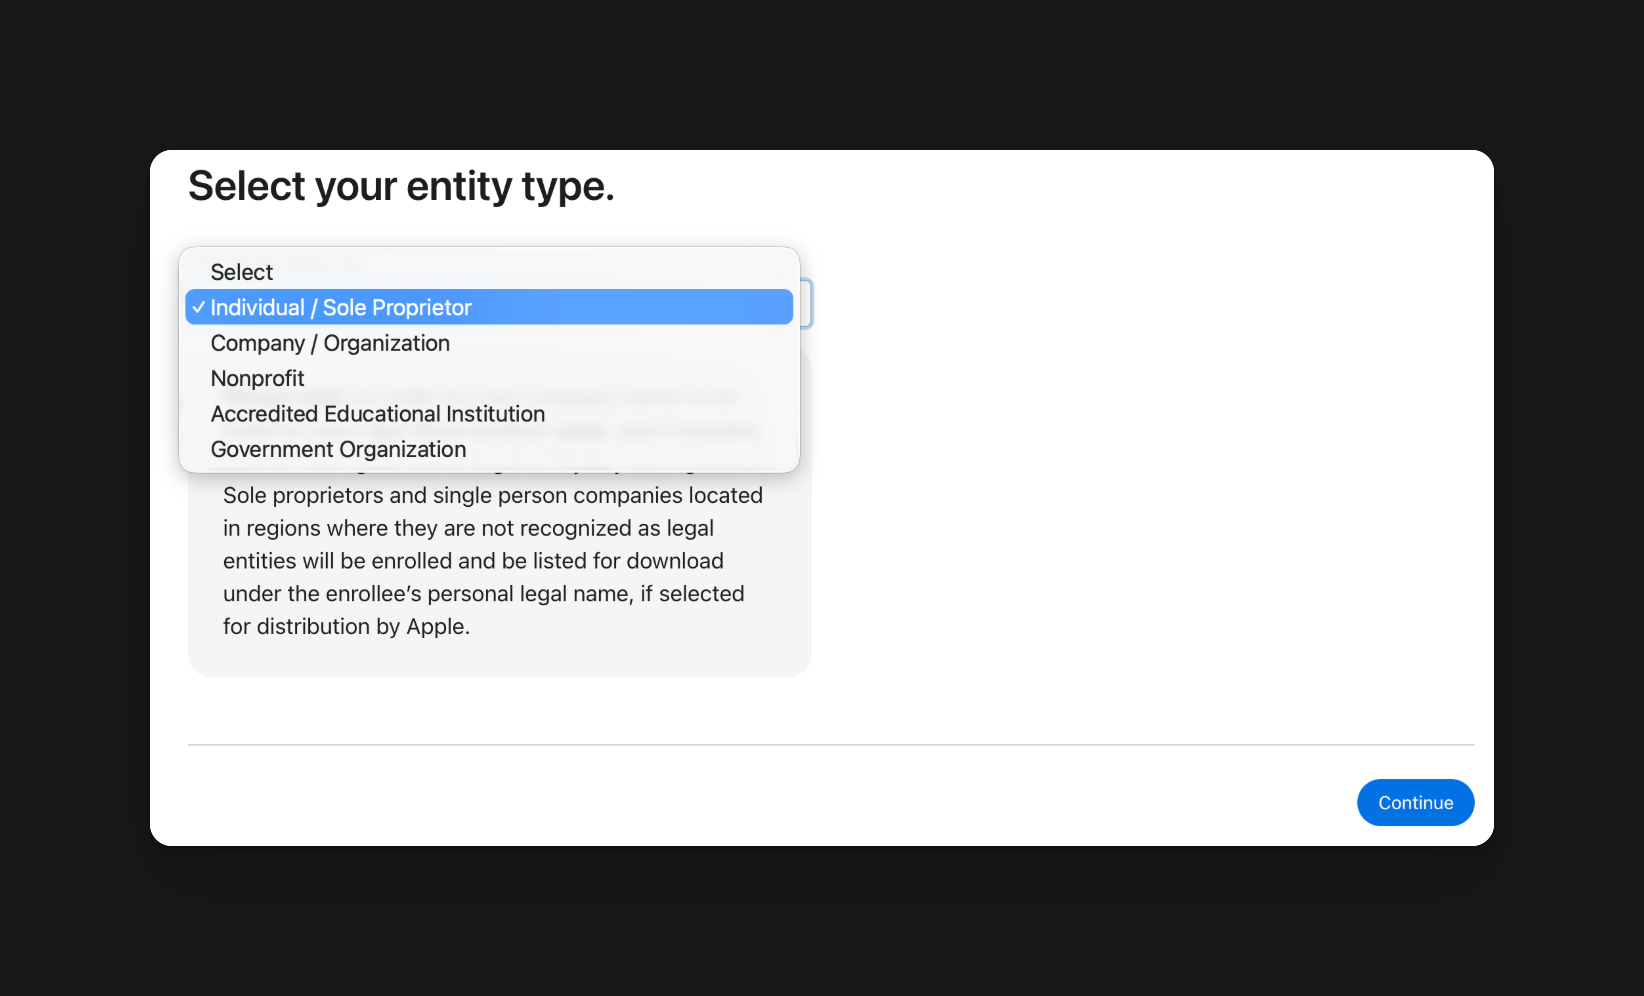
- 选择正确的会员类型:
- 个人/独资企业:您的法律姓名将成为 App Store 的卖家名称
- 组织:需要一个法律实体、D-U-N-S 编号、公共网站和具有权力代表公司与 Apple 协议的个人
- 在注册时使用法律姓名。使用别名或公司名称作为首/末名字段可能会延迟审批
- 注册批准后,登录 App Store Connect 并创建应用记录,使用最终的 bundle ID、应用名称、SKU 和主要语言
重要:Apple 会随着时间的推移而改变最低 SDK 要求。截至 2026 年 4 月 28 日,上传到 App Store Connect 的应用程序必须使用 iOS & iPadOS 26 SDK 或更高版本.
Android 测试要求
这是 Android 首次发布者最容易忽视的变化:
新个人 Android 帐户的 12 个测试者要求
如果您的 Google Play 开发者帐户是 自 2023 年 11 月 13 日之后创建的个人账户您必须完成闭测期后,应用才能上线:
要求:
- 最少 12 名测试者: 您必须招募至少 12 名同意测试的测试者
- 闭测期限: 应用必须连续 14 天保持闭测状态
- 生产环境申请:闭测期后,您仍需要在 Play Console 中申请生产环境访问
- 反馈收集: 您应该记录发现的问题、修复的内容以及测试者如何使用应用
如何设置您的测试跟踪
-
创建一个封闭测试轨迹
- 前往 Google Play Console
- 导航到测试和发布 > 测试 > 封闭测试
- 在封闭测试轨迹中创建一个新版本
- 上传您的 Android App Bundle (
.aab)
-
招募您的测试者
哪里可以找到测试者:
- 朋友和家人(最容易的起点)
- 开发者社区(Reddit 的 /r/androiddev,/r/betatests)
- 社交媒体粉丝
- beta 测试平台(BetaList,BetaTesting.com)
- 大学生(如果您有联系)
重要:确保测试者:
- 拥有有效的Gmail账户
- 实际上使用Android设备
- 在整个14天的时间内保持已选中
-
邀请测试者
- 在Play Console中创建测试者列表
- 添加测试者邮箱地址
- 与测试者分享选入URL
- 确保他们安装并使用应用程序发送提醒
-
监控测试活动
- 在Play Console中检查安装数量
- Track crash reports and ANRs (Application Not Responding)
- 收集测试者的反馈
- 修复任何关键问题之前发布
-
发布到生产环境
- 在14天内有12+测试者参与
- 从Play Console控制台申请生产环境权限
- 查看所有崩溃报告和反馈
- 创建生产环境发布并提交最终审批
为什么Google实施了这个要求
Google推出了这个要求是为了
- 减少低质量应用程序垃圾邮件
- 确保应用程序在发布给用户之前得到适当的测试
- 通过真实世界的使用模式识别恶意应用
- 提高整体应用商店质量
现实检查: 这将至少增加您发布的时间表2-3周。请事先规划并尽早招募测试者。
身份验证和登录要求
最常见的拒绝原因之一是身份验证系统的不当实施,尤其是社交登录。
苹果签名要求(iOS必备)
苹果规则: 如果您的应用提供任何第三方社交登录选项(Google、Facebook、Twitter等), 您 也必须
提供Sign in with Apple作为一个选项。:
- Google Sign-In
- Facebook Login
- Twitter/X Login
- LinkedIn Login
- 任何其他第三方认证服务
这不适用于:
- 仅使用电子邮件/密码认证
- 政府身份认证系统
- 企业SSO系统(当应用程序是为该特定企业开发的)
- 教育提供者认证系统
实现Sign in with Apple
如果您正在使用社交登录,以下是您需要实现的内容:
import { SignInWithApple } from '@capacitor-community/apple-sign-in';

async function signInWithApple() {
  try {
    const result = await SignInWithApple.authorize({
      clientId: 'com.yourapp.service',
      redirectURI: 'https://yourapp.com/auth/callback',
      scopes: 'email name',
      state: '12345',
      nonce: 'nonce',
    });

    // result contains:
    // - identityToken
    // - authorizationCode
    // - email (may be null if user previously authorized)
    // - givenName
    // - familyName

    // Send to your backend for verification
    await verifyAppleToken(result.identityToken);

  } catch (error) {
    console.error('Apple Sign In failed:', error);
  }
}重要注意事项:
-
电子邮件隐私: 用户可以选择隐藏他们的电子邮件。 Apple 提供了一个私有的中继电子邮件(例如,
abc123@privaterelay.appleid.com). 你的应用程序必须处理这个。 -
首次登录 vs 重复登录用户: Apple 只在第一次授权时提供用户详细信息(姓名、电子邮件)。存储此信息,因为随后的登录不会包含它。
-
按钮设计: Apple 提供了严格的设计指南,用于 Sign in with Apple 按钮。使用他们的官方资产。
-
后端验证: 总是在你的后端服务器上验证身份令牌,永远不要信任客户端令牌。
Android 社交登录要求
: 虽然 Android 不需要像 iOS 一样特定的提供者,但 Google 有指南:
Google Sign-In Requirements:
- 必须使用官方的Google Sign-In SDK
- 必须遵循Google的品牌指南
- 如果您提供它,应作为主要选项
最佳实践:跨平台: 在两种平台上提供相同的登录选项以保持一致性:
- 电子邮件/密码
- 使用Apple登录(仅限iOS,或者在Android上如果您支持基于Web的Apple登录)
- 使用Google登录
- 其他社交选项(Facebook,Twitter等)
演示账户要求
对于审阅至关重要如果您的应用程序需要登录,请 必须 在App Review Notes中提供可用的演示凭证。
Demo Account Information:

Username: reviewer@demo.com
Password: ReviewTest123!

OR

Test Phone: +1 555-0123
Test OTP: 123456 (static for review)

Notes:
- This account has full premium features enabled
- All payment flows work in sandbox mode
- Account will reset daily常见错误:
- 提供过期凭证
- 演示账户无法访问所有功能
- 没有说明如何绕过手机验证
- 忘记提到沙盒支付细节
隐私政策和法律要求
两家应用商店现在要求在首次提交前提供可访问的隐私政策和服务条款。 在 您的应用程序首次提交前,需要提供可访问的隐私政策和服务条款。
隐私政策要求
您的隐私政策必须:
-
必须是公开可访问的
- 托管在公共 URL 上(不在登录后面)
- 在标准 Web 浏览器中可加载
- 与您的应用程序相同的语言可用
-
涵盖这些必须话题:
- 您收集的数据(具体说明)
- 您如何使用收集的数据
- 是否与第三方共享数据
- 数据保留的时间
- 用户权利(访问、删除、可移植性)
- Contact information for privacy inquiries
- Children’s privacy (if app is for users under 13/16)
-
Be Linked In-App
- Accessible from settings or account screen
- Must be one tap away (not buried in menus)
- Should open in default browser or in-app browser
Where to Host Your Privacy Policy
Option 1: Your Website (Recommended)
https://yourapp.com/privacy-policy
https://yourapp.com/terms-of-service
Option 2: GitHub Pages (Free)
https://yourusername.github.io/app-privacy-policyOption 3: Privacy Policy Generators (快速入门)
重要: 生成器对于启动是足够的,但确保政策准确反映您的实际数据实践。 不符合您的应用程序的通用模板将被标记为不合规。
条款和条件要求
虽然不总是强制性的,但拥有条款和条件是非常推荐的,并且如果:
- 您提供应用内购买或订阅
- 您有用户生成的内容
- 您提供的任何服务超过基本应用功能
- 您想要法律保护
必须包含:
- 适用条款
- 账户终止条件
- 责任限制
- 知识产权
- 争议解决程序
- 退款政策(特别是IAP)
内购实施
// Settings or Account Screen
function LegalLinks() {
  return (
    <div className="legal-section">
      <h3>Legal</h3>
      <a
        href="https://yourapp.com/privacy-policy"
        target="_blank"
        rel="noopener noreferrer"
      >
        Privacy Policy
      </a>
      <a
        href="https://yourapp.com/terms-of-service"
        target="_blank"
        rel="noopener noreferrer"
      >
        Terms of Service
      </a>
      <a
        href="https://yourapp.com/contact"
        target="_blank"
        rel="noopener noreferrer"
      >
        Contact Us
      </a>
    </div>
  );
}
应用商店元数据要求
两家商店都要求在应用提交时提供隐私政策URL:
iOS - App Store Connect:
- 应用信息 > 一般信息 > 隐私政策URL
- 必须使用 HTTPS (HTTP 将被拒绝)
- 将在您的 App Store 页面上显示
- 添加一个支持 URL,包含用户联系方式
- 在提交前完成年龄等级问卷
Android - Google Play Console:
- 商店存在 > 商店设置 > 隐私政策
- 所有针对儿童的应用都必须填写
- 强烈建议所有应用填写
隐私营养标签 (iOS)
iOS 需要在“营养标签”格式中详细说明隐私披露:
您必须申报的类别:
- 联系方式电子邮件、姓名、电话号码
- 财务信息电子邮件、姓名、电话号码
- 支付信息、信用卡、银行账户位置
- 精确或粗略位置用户内容
- 照片、视频、音频、消息标识符
- 用户ID、设备ID、广告ID使用数据
- 产品交互、广告数据、崩溃日志: 数据崩溃、性能数据
每种数据类型都需要明确:
- 是否收集
- 是否与用户身份关联
- 是否用于跟踪
- 数据收集的目的
常见错误: 说你不收集数据,而你的分析SDK 却在收集。审计所有第三方 SDK 的数据收集
Google Play 数据安全部分
与 iOS 类似,Android 需要一个数据安全声明:
步骤:
- 前往 Play Console > 应用内容 > 数据安全
- 回答有关数据收集的问题
- 指定收集的数据类型
- 解释安全实践(加密等)
- 提供隐私政策链接
重要: 这些信息是法律约束。虚假陈述可能导致应用程序被移除和帐户被暂停。
常见的首次拒绝原因
了解为什么应用程序会被拒绝有助于您避免这些陷阱:
1. 应用程序崩溃或无法启动
为什么会这样:
- 仅在模拟器上测试,而不是在真实设备上
- 缺少网络故障时的错误处理
- 硬编码无法访问的API端点
- 假设特定设备功能(摄像头、GPS)
防止:
// Always implement proper error handling
async function loadData() {
  try {
    const response = await fetch('https://api.yourapp.com/data');

    if (!response.ok) {
      throw new Error(`HTTP ${response.status}`);
    }

    const data = await response.json();
    return data;

  } catch (error) {
    // Show user-friendly error
    showError('Unable to load data. Please check your connection.');

    // Log for debugging
    console.error('Data load failed:', error);

    // Graceful degradation
    return getCachedData();
  }
}测试清单:
- 在真实设备上测试(至少2-3个不同型号)
- 测试网络差(使用网络链路条件器)
- 测试飞行模式
- 测试权限被拒绝
- 测试新安装(无缓存数据)
2. 核心功能缺失或损坏
为什么会这样:
- 截图中显示的功能尚未实现
- 演示账户无法访问广告的功能
- 显示了高级功能但没有实现
- 应用中“即将推出”的占位符
如何防止:
- 只有当广告的所有功能都完成时才提交
- 确保演示账户有完全的访问权限
- 在提交之前移除或禁用不完整的功能
- 更新截图以完全匹配当前构建
3. 不适合年龄等级的内容
为什么会这样:
- 年龄等级设置为4+但应用包含社交功能
- 年龄等级与实际内容不符
- 用户生成的未经审核的内容
- 未经审核的外部链接
设置正确的年龄等级:
iOS年龄等级:
- 4+ (无不适内容)
- 9+ (轻微不适内容)
- 12+ (适量内容)
- 17+ (频繁/强烈内容)
Android内容等级:
- 所有人
- 10岁以上所有人
- 青少年
- 成年人 17+
- 成人仅限 18+
重要: 如果用户可以与其他用户共享内容,您需要:
- 内容管理系统
- 举报/屏蔽功能
- 清晰的社区指南
- 如果需要,请使用年龄限制
4. 欺骗或误导性元数据
为什么会这样:
- 应用程序名称承诺的功能并不存在
- 竞争对手或模拟截图
- 虚假评论或评分操纵
- 描述中没有提供证据的超级词汇
不良元数据的例子:
❌ BAD:
- 应用名称:"最佳健身追踪器 - #1 应用"
- 描述:"这是最令人惊奇、革命性的应用程序之一!"
- 截图:普通的股票照片
✅ GOOD:
- 应用名称:"FitTrack - 训练日志"
- 描述:"使用可定制的日程表和进度图表跟踪您的训练。"
- 截图:当前构建的实际应用屏幕
5. 测试不足(尤其是 Android Closed Testing)
为什么会发生:
- 跳过所需的14天测试期
- 招募测试者不足
- 测试者并没有实际使用应用
- 测试期间没有崩溃监控
如何防止:
- 在计划发布前3-4周开始招募测试者
- 在测试期间使用Firebase Crashlytics或类似工具
- 积极与测试者互动(调查,反馈表单)
- 在发布到生产环境前修复关键问题
6. 权限没有合理的理由
为什么会发生:
- 请求位置但未使用
- 未说明的摄像头权限
- 未明确目的的联系人访问
- 非导航应用的背景位置
如何修复:
iOS - Info.plist:
<key>NSCameraUsageDescription</key>
<string>Camera access is required to scan QR codes for quick login.</string>

<key>NSLocationWhenInUseUsageDescription</key>
<string>Location helps us show nearby fitness centers and outdoor running routes.</string>

<key>NSPhotoLibraryUsageDescription</key>
<string>Photo library access lets you upload a profile picture and share workout photos.</string>
Android - 权限策略:
<!-- Only request what you actually need -->
<uses-permission android:name="android.permission.CAMERA" />

<!-- Use when-in-use rather than always for location -->
<uses-permission android:name="android.permission.ACCESS_FINE_LOCATION" />

<!-- Avoid if possible -->
<!-- <uses-permission android:name="android.permission.ACCESS_BACKGROUND_LOCATION" /> -->运行时权限请求:
import { Camera } from '@capacitor/camera';

async function takePicture() {
  // Request with context
  const permissionStatus = await Camera.requestPermissions();

  if (permissionStatus.camera === 'granted') {
    const photo = await Camera.getPhoto({
      quality: 90,
      allowEditing: true,
      resultType: 'uri'
    });

    return photo;
  } else {
    // Explain why permission is needed
    showDialog(
      'Camera access required',
      'To upload a profile picture, please enable camera access in Settings.'
    );
  }
}
iOS特定要求
App Store 屏幕截图和预览
所需尺寸:
- 6.7“ iPhone:1290 x 2796
- 13“ iPad:2064 x 2752
- 12.9“ iPad:2048 x 2732
重要:如果您的应用程序支持 iPad,必须上传 iPad 截图。不要将 iPhone 截图拉伸到 iPad 插槽中。
截图最佳实践:
- 必须显示实际应用程序内容(无模拟)
- 去除状态栏或显示现实内容
- 针对所有支持语言进行本地化
- 避免过度文本叠加
- 在前 2-3 个截图中显示关键功能
App Store Connect 元数据设置
在提交之前完成这些 App Store Connect 字段:
- 隐私政策链接: 必须用于 iOS 应用
- 支持链接: 必须,且应指向实际联系信息
- 年龄等级: 完成问卷以便发布应用
- 应用评论信息: 添加评论联系方式、登录所需的工作演示凭据以及清晰的评论团队说明
- 出口控制: 回答加密问题,或设置
ITSAppUsesNonExemptEncryption在Info.plist当适当时以免每次上传都重复相同的答案
TestFlight Before App Review
在发布前进行一次真实的TestFlight测试:
- 从TestFlight安装精确的构建
- 使用您打算提供的审查账户登录
- 走过购买、恢复和取消订阅的路径
- 确认审查者可以无需隐藏设置就访问关键功能
- 如果支持则在iPhone和iPad上进行测试
App预览视频(可选但推荐)
要求:
- 15-30秒长度
- 必须显示实际应用程序的画面
- 可以包含简短的文本叠加
- 不含版权问题的音乐
- 截图的分辨率相同
使用 Apple 登录
如果您有社交登录,iOS 评审中非常重要,内容已在上面提到。
内购要求
如果您提供数字产品或服务:
必需的披露:
- 在购买前显示清晰的价格
- 订阅条款明确说明
- 取消指南可见
- 恢复购买按钮
示例符合规范的订阅屏幕:
function SubscriptionOffer() {
  return (
    <div className="subscription-screen">
      <h2>Choose Your Plan</h2>

      <PlanCard>
        <h3>Monthly</h3>
        <p className="price">$9.99/month</p>
        <ul>
          <li>Unlimited workouts</li>
          <li>Personalized plans</li>
          <li>Progress tracking</li>
        </ul>
        <button>Subscribe</button>
      </PlanCard>

      <PlanCard>
        <h3>Annual</h3>
        <p className="price">$79.99/year</p>
        <p className="savings">Save 33%</p>
        <ul>
          <li>Everything in Monthly</li>
          <li>Priority support</li>
        </ul>
        <button>Subscribe</button>
      </PlanCard>

      <div className="subscription-terms">
        <p>
          Subscription automatically renews unless cancelled at least
          24 hours before the end of the current period. Manage your
          subscription in Settings.
        </p>
        <button onClick={restorePurchases}>Restore Purchases</button>
      </div>

      <div className="legal-links">
        <a href="/privacy/">Privacy Policy</a> |
        <a href="/terms">Terms of Service</a>
      </div>
    </div>
  );
}
Android-Specific Requirements
Google Play Console Account Setup
在您发布 Android 应用之前,请确保 Play Console 账户和应用壳存在:
- 创建您的开发者账户在 Play Console 注册
- 在 Play Console 中,转到 Home > 创建应用
- 选择默认语言、应用/游戏类型和支持邮箱
- 接受所需的 Play 政策、导出和 Play App Signing 声明
- 决定应用是否是 免费 或 paid
重要Google允许您将付费应用程序转换为免费应用程序,但一旦应用程序被免费提供后,就无法将其切换为付费应用程序。
应用程序包要求
重要:Google Play要求Android应用程序包(.aab)格式,而不是APK:
# Sync the native Android project first
bunx cap sync android

# Then build the release app bundle
cd android
./gradlew bundleRelease
目标API级别要求
当前要求:新应用程序和应用程序更新必须目标Android 15(API级别35)或更高。
在android/app/build.gradle中更新:
android {
    compileSdkVersion 35

    defaultConfig {
        targetSdkVersion 35
        minSdkVersion 23  // Minimum supported version
    }
}
Google Play数据安全
已经在上面提到,但对于Android的批准来说绝对关键。
[__CAPGO_KEEP_0__] (当前需求)
新创建的个人开发者帐户的这一项是最重要的:详细说明在本指南的前面提到过的12名测试者,14天的需求。
时间线:
- 周1:招募测试者,设置闭源测试
- 周2-3:活跃测试期(至少14天)
- 周4:修复问题,准备生产发布
- 周5:提交生产审核
目标受众和内容评级
内容评级问卷:
- 所有应用程序都需要
- 耗时10-15分钟
- 确定年龄评级(Everyone,Teen,Mature,等)
- 随着您的内容发生变化而影响答案时,更新它
所涵盖的主题:
- 暴力
- 色情内容
- 不雅语言
- 管制物质
- 赌博
- 用户交互功能
重要: 如果您有用户生成的内容或社交功能,则必须披露此信息并实施监管。
应用商店列表要求
必需资产:
- 应用图标 (512 x 512 PNG)
- 功能图标 (1024 x 500 JPG 或 PNG)
- 手机截图 (最少 2 张,最大 8 张)
- 7“ 平板截图 (可选但推荐)
- 10“ 平板截图 (可选但推荐)
描述要求:
- 简要描述 (80 个字符以内)
- 详细描述 (4000 个字符以内)
- 必须准确描述应用功能
- 不能包含联系信息或价格
提交前检查清单
在点击提交之前,仔细检查这个全面清单:
技术要求
- 在真实设备上启动应用成功
- 截图中所有功能正常工作
- 没有占位符或“即将推出”内容
- 所有第三方API密钥都是生产密钥
- 已实现网络错误处理
- 权限请求包含清晰的说明
- 在网络条件差的情况下,应用不会崩溃
- 测试时拒绝权限
- 测试在支持的最低OS版本上
- 检查并修复了内存泄漏
身份验证&登录
- If using social login, with Apple is included (iOS)
- 在审阅笔记中提供的演示账户凭证
- 演示账户具有访问所有功能的权限
- 密码重置流程正常工作
- 注销功能正常工作
- 根据 GDPR/CCPA 需要的账户删除选项可用
法律 & 隐私
- 隐私政策公开可访问
- 将隐私政策 URL 添加到应用商店列表
- 服务条款公开可访问 (如果适用)
- 在应用设置屏幕上链接隐私政策
- iOS 上的隐私营养标签准确
- 数据安全部分已完成(Android)
- 所有数据收集目的已解释
- 第三方SDK数据收集已披露
内容 & 元数据
- 应用名称遵循指南(无关键词填充)
- 描述准确描述了功能性
- 截图显示当前实际应用屏幕
- 截图为所有支持语言本地化
- 描述中未提及竞争对手
- 无超级词汇无证据
- 年龄等级与实际内容相符
- 联系邮箱被监控
iOS 专用
- 如果使用社交登录,已实现 Sign in with Apple
- 已提供所有必需的截图尺寸
- 如果启用 iPad 支持,则已上传真实 iPad 截图
- Info.plist 权限描述清晰
- 已添加支持 URL,包含真实联系方式
- 已添加 App Store Connect 中的隐私政策 URL
- 已完成年龄评级问卷
- 已正确回答出口控制问题
- 已提供 App Review 联系方式和非过期的演示账户
- 目标 iOS 15.0 或更高
- 如果使用 IAP:价格清晰,恢复购买按钮存在
- 不涉及Android或其他平台
Android专用
- 使用App Bundle (.aab)格式
- 目标API 35或更高
- 内容评级问卷已完成
- 功能图标已上传
- 如果您的Play控制台账户需要,则已完成关闭测试(12名测试者,14天)
- 测试期间的崩溃报告已审查并修复
- 不涉及iOS或其他平台
测试(Android当前要求)
- 如果您的Play账户需要关闭测试,则已招募12名测试者
- 已创建关闭测试跟踪
- 14 天的测试完成
- 测试者实际使用了该应用(而不是仅仅安装)
- 测试期间启用了崩溃监控
- 测试中发现的关键错误已修复
- 测试者的反馈已记录
Review Notes: 什么需要包含
好的Review Notes可以使应用在审批时立即通过,而不是被拒绝。以下是需要包含的内容:
Review Notes模板
APP REVIEW INFORMATION

=== Test Account ===
Email: reviewer@testapp.com
Password: TestReview123!
(This account has all premium features enabled)
(This account stays active during review)

=== Review Contact ===
Name: Jane Developer
Email: review@yourapp.com
Phone: +1 555-0100

=== Testing Instructions ===
1. Launch app and tap "Sign In"
2. Enter test credentials above
3. Navigate to "Dashboard" to see main features
4. Tap "Upgrade" to test subscription flow (sandbox mode)
5. Go to Settings > Account to see privacy policy and terms

=== Key Features to Test ===
- Workout tracking (tap "New Workout" on Dashboard)
- Progress charts (Analytics tab)
- Social sharing (Share button on workout details)
- Camera upload for profile picture (Settings > Profile)

=== Third-Party Services ===
- Firebase Authentication (for login)
- Stripe (for payments - sandbox mode)
- AWS S3 (for image uploads)
- Google Maps SDK (for location features)

=== Notes ===
- Location permission is optional, app works without it
- Camera permission only requested when uploading profile picture
- All subscription flows use Apple/Google sandbox environments
- Background location is not used
- Support URL and privacy policy are available from Settings > Account

=== Contact ===
For questions: developer@yourapp.com
Response time: Within 24 hours
iOS专用Review Notes
对于iOS,还需要包含:
=== Device Coverage ===
Tested on: iPhone 15 Pro Max, iPad Pro 13-inch

=== App Store Connect Metadata ===
Support URL: https://yourapp.com/support
Privacy Policy: https://yourapp.com/privacy-policy

=== Submission Notes ===
- iPad screenshots match the current iPad UI
- Export compliance answered for this build
- Sign in with Apple is available on the login screen
Android专用Review Notes
对于Android,还需要包含:
=== Testing Track Information ===
Closed testing period: [Start Date] to [End Date]
Number of active testers: 23
Critical issues found during testing: 2 (both fixed)
Test distribution method: Email invite list

=== Crash Data ===
Testing period crashes: 3 total
Crash rate: 0.8%
All crashes fixed in this build

=== API Levels ===
Target SDK: 35 (Android 15)
Min SDK: 23 (Android 6.0)
Tested on: Android 11, 12, 13, 14, 15
被拒绝后要做什么
不要惊慌 - 拒绝是常见的,尤其是第一次提交。以下是如何处理它:
拒绝后的步骤
-
仔细阅读拒绝理由
- 注意违反的具体指南(例如,4.3,5.1.1)
- 仔细阅读审阅者的评论
- 如果提供了截图,查阅截图
-
理解问题
- 查阅官方文档中的指南
- 在线查找类似案例
- 检查是否是误解还是合理问题
-
修复根源问题
- Don’t just patch - fix properly
- 进行彻底的测试
- 记录你所做的修改
-
适当回应
如果拒绝是正确的:
Thank you for the feedback. I have addressed the issue:

Issue: Missing Sign in with Apple option

Resolution: Added Sign in with Apple as a login option
alongside Google Sign-In. The button appears on the login
screen and follows Apple's design guidelines. You can test
with the provided demo account or by creating a new account
with Apple Sign-In.

Changes made in: v1.0.1 (build 2)
如果你认为这是一个误解:
Thank you for reviewing my app. I believe there may be a misunderstanding regarding [specific issue]: [Explain clearly with screenshots if needed] The functionality exists at: Settings > [specific location] I've added additional detail to the review notes to help locate this feature. -
及时重新提交
- 重新提交通常会在24-48小时内被评估
- 包含更新的评审备注,说明修复
- 如果有帮助,请参考之前的提交
常见拒绝响应
拒绝:‘你的应用程序在启动时会崩溃’
Response:
I sincerely apologize for the crash. I have identified and fixed
the issue:

Root cause: The app attempted to fetch data before network
initialization completed, causing a null reference exception.

Fix: Implemented proper async initialization with error handling
and offline mode. The app now gracefully handles network issues.

Testing: Verified on iPhone 12 (iOS 17), iPhone 14 Pro (iOS 17.1),
tested with WiFi, cellular, and airplane mode.

Build version: 1.0.2 (build 3)
拒绝: “缺少隐私政策”
Response:
Thank you for the feedback. I have added the privacy policy:

URL: https://myapp.com/privacy-policy
Location in app: Settings > Privacy Policy (tappable link)
Also added to: App Store Connect > App Information > Privacy Policy URL

The privacy policy covers all data collection as disclosed in the
Privacy Nutrition Labels.
拒绝: “不符合 4.2 - 最小功能性要求”
这更复杂一些。它意味着您的应用程序没有做足够的事情来值得被作为应用程序。 Response:
Thank you for the feedback. I'd like to clarify the app's
functionality:

Core Features:
1. [Feature 1 with specific details]
2. [Feature 2 with specific details]
3. [Feature 3 with specific details]

The app provides significant utility beyond a simple website by:
- Offline functionality for [specific feature]
- Native camera integration for [specific feature]
- Push notifications for [specific feature]
- Device hardware access for [specific feature]

Test account credentials have been provided to demonstrate all
features. Please let me know if you need additional clarification.
发布后最佳实践
恭喜!您的应用程序已获得批准。以下是如何维持该状态:
发布后监控
关键指标 :
- 崩溃率(保持在 1% 以下)
- ANR 率(Android - 保持在 0.5% 以下)
- 应用商店/Google Play 商店评分
- 查看内容(回复所有评论)
- 用户报告的bug
使用工具:
- Firebase Crashlytics
- App Store Connect Analytics
- Google Play Console Vitals
- Sentry或类似错误跟踪
更新指南
提交更新时:
- 像初次提交一样彻底测试
- 如果UI有重大变化,更新截图
- 如果数据收集有变化,更新隐私标签
- 提供明确的“新功能”描述
- 考虑对重大变化进行分阶段的发布
保持合规
年度要求:
- 每年更新 Android 内容评级(必填)
- 如果实践发生变化,则更新隐私政策
- 如果内容发生变化,则审查和更新年龄评级
- 审查第三方 SDK 以确保合规
持续监控:
- 保持最新的指南变化
- 加入 Apple/Google 开发者新闻
- 参与开发者社区
- 遵循 App Store/Play Store 政策博客
资源和进一步阅读
官方文档
Apple:
Google:
社区资源
- r/androiddev - Android 开发者社区
- r/iOSProgramming - iOS 开发者社区
- Stack Overflow - 技术问题
- Indie Hackers - 独立开发者社区
隐私政策工具
需要帮助您的应用程序审查吗?
如果您感到沮丧或想确保您的应用程序在第一次尝试时通过审查,我们就在这里帮助!
与我们的团队预约电话会议 为以下内容提供个人化帮助:
- 应用商店和Play商店审查准备
- 隐私政策和法律文档审查
- 使用Apple登录的实现
- 测试策略和测试者招募
- 审查笔记准备
- 拒绝响应和上诉
- 完整的应用程序提交流程
我们的团队已经帮助数百名开发者成功地应对应用程序审查流程,并可以节省您数周的试验和错误。
结论
提交您的第一个应用程序可能令人望而生畏,但经过适当的准备,您可以在第一次尝试时通过审查。请记住这些关键点:
- 提前开始: 尤其是对于 Android - 在您计划的发布日期前至少 3 周内招募 12 名测试者
- 隐私优先: 确保您的隐私政策已经准备好,并准确反映您的数据实践
- Apple 登录: 如果您使用任何社交登录,则必须在 iOS 上包含 Sign in with Apple
- 彻底测试: 在真实设备上测试,网络状况差,权限被拒绝
- 诚实是第一步:准确的元数据和隐私披露可以避免拒绝和法律问题
- 详细的审查笔记:帮助审查员快速了解您的应用
当前的Android测试要求会增加流程的时间,但最终会导致更好的应用和更少的发布后问题。为Android提交添加3-4周的计划,并且您将会成功
祝您的应用发布成功!即使您被拒绝,也是学习的机会。大多数成功的应用都经过多轮审查才能获得批准
不想独自面对挑战? 预约咨询 让我们的专家指导您完成流程
需要帮助实现在应用获得批准后实时更新?查看 Capgo的实时更新解决方案 实现应用更新的同时不需要应用商店审查
继续阅读《2026 年首次应用程序审查指南》- iOS 和 Android
如果您正在使用 《2026 年首次应用程序审查指南》- iOS 和 Android 来规划安全性和合规性,连接它与 加密 安全性和合规性 加密 安全性和合规性 Capgo 安全扫描器 Capgo 安全 Capgo 安全性和合规性, Capgo 安全性和合规性, Capgo 信任中心 为产品工作流程在 Capgo 信任中心中使用。


