Swift Package Manager è la direzione predefinita per i progetti Capacitor iOS. Se il tuo app utilizza ancora CocoaPods, puoi migrare l'app stessa a SPM senza ricostruire il tuo progetto JavaScript code, il progetto Android o il flusso di rilascio da zero.
Questa guida è per i team di app. Spiega come migrare un'app Capacitor iOS da CocoaPods a SPM, cosa cambia l'assistente di migrazione, cosa devi ancora controllare in Xcode e come pulire CI dopo che l'app è stata costruita.
Cosa cambia nell'app
Un'app basata su CocoaPods Capacitor dipende da file come:
ios/App/Podfileios/App/Podfile.lockios/App/Pods/ios/App/App.xcworkspace
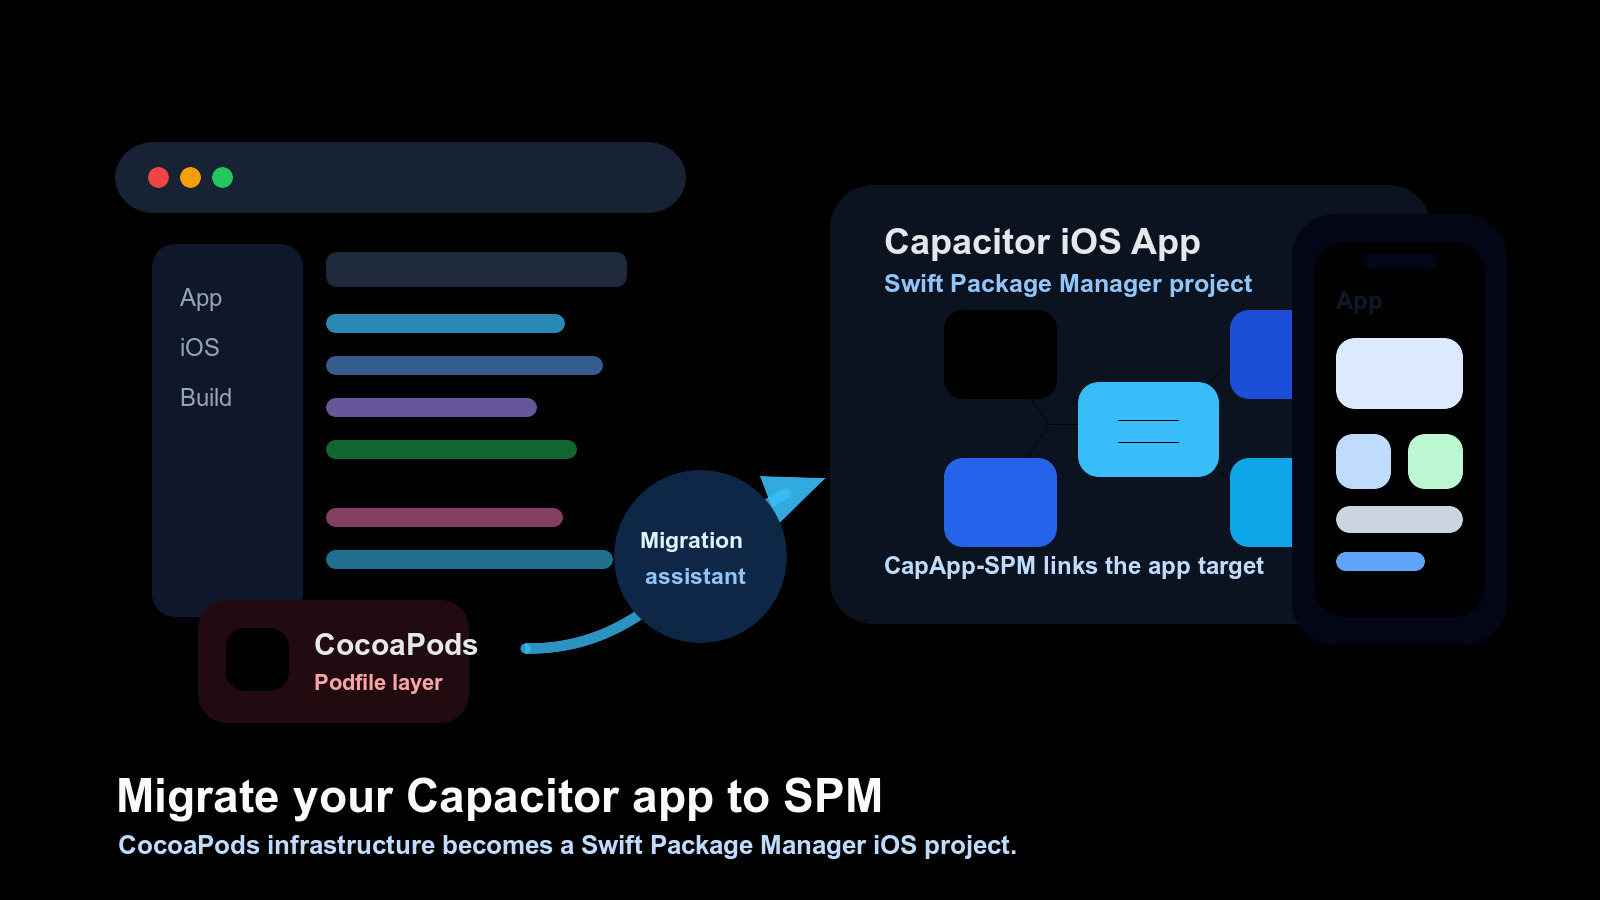
Un'app basata su SPM (Capacitor) sposta la gestione delle dipendenze iOS nel gestore di pacchetti Swift Package Manager. Durante la migrazione, Capacitor crea un pacchetto locale denominato CapApp-SPM e lo utilizza per connettere il target dell'app con Capacitor e le dipendenze native installate.
Il build web funziona ancora nello stesso modo. Si esegue ancora un build web, si sincronizza Capacitor, si apre Xcode e si crea un archivio dell'app. La principale differenza è che CocoaPods non gestisce più il grafo delle dipendenze iOS.
Prima di migrare
Inizia da una branch pulita e assicurati che l'app corrente si compili prima di modificare i gestori di dipendenze:
git status
npm run build
npx cap sync ios
Poi commetti lo stato di lavoro. La migrazione tocca i file di progetto iOS generati, quindi avere un punto di rollback pulito è importante.
Successivamente, esamina cosa il tuo app ha personalizzato sotto ios/App/I file e le impostazioni comuni da preservare includono:
App/Info.plistApp/AppDelegate.swiftApp/SceneDelegate.swift, se presenteApp/Assets.xcassets/App/Base.lproj/App/App.entitlementsApp/GoogleService-Info.plist, se utilizzi Firebase- file personalizzati
.xcconfigfile - impostazioni di firma, identificatore bundle, ID team e profili di provisioning
- estensioni dell'app, file Swift nativi, file Objective-C o framework incorporati
Controlla anche le tue dipendenze Capacitor e Cordova installate. Una migrazione SPM dell'app può essere bloccata da una dipendenza nativa che non ha un percorso SPM compatibile. Aggiorna quei pacchetti prima di migrare quando possibile.
Usa l'assistente di migrazione
Per la maggior parte delle app esistenti, inizia con l'assistente di migrazione ufficiale Capacitor:
npx cap spm-migration-assistantEseguilo dalla radice del tuo progetto Capacitor. CapApp-SPM L'assistente elimina l'integrazione di CocoaPods, crea il pacchetto locale, genera riferimenti di pacchetto per le dipendenze native installate e aggiunge la configurazione generata necessaria al progetto iOS.
Dopo che si è concluso, apri il progetto iOS:
npx cap open iosLeggi l'output dell'assistente prima di chiudere il terminale. Se ti chiede di completare passaggi manuali in Xcode, esegui quei passaggi prima di sincronizzare nuovamente.
Completa i passaggi di Xcode
In Xcode, controlla la configurazione del progetto e del target dell'app:
- Conferma
CapApp-SPMè aggiunto come dipendenza del pacchetto locale. - Conferma che i collegamenti dell'app di destinazione si collegano ai prodotti del pacchetto generato.
- Aggiungi il generato
debug.xcconfigalla configurazione del progetto se l'assistente chiede di farlo. - Risolve eventuali avvisi di pacchetto in Xcode.
- Costruisci l'app una volta da Xcode.
Se Xcode non riesce a risolvere i pacchetti, utilizza File > Pacchetti > Reset Cache dei Pacchettie risolvi i pacchetti nuovamente.
Sync e costruisci nuovamente
Dopo che Xcode è configurato, torna al terminale e sincronizza Capacitor:
npx cap sync iosPoi costruisci nuovamente da Xcode. Non considera la migrazione come completata fino a quando un costruzione pulita funziona da Xcode, perché la firma di rilascio, le autorizzazioni, le estensioni dell'app e la risoluzione dei pacchetti sono validate lì.
If l'applicazione utilizza le notifiche push, i domini associati, i modi di background, i gruppi di app, Firebase o qualsiasi configurazione nativa SDK, esegui quei flussi su un simulatore o dispositivo dopo che il build ha avuto successo.
Alternativa: ricrea l'iOS con SPM
Se il tuo ios/ cartella è vicina alla cartella di default Capacitor, può essere più veloce ricrearla con SPM invece di migrare in loco.
Usa solo questo percorso dopo aver commesso o fatto un backup di ogni file e impostazione nativa che hai bisogno:
rm -rf ios
npx cap add ios --packagemanager SPM
npx cap sync ios
npx cap open ios
Poi ripristina i file e le impostazioni native specifiche dell'app. Questo percorso ti da un progetto SPM pulito, ma è più facile perdere le modifiche personalizzate di Xcode se non le hai inventariate prima.
Per le nuove Capacitor applicazioni, Capacitor 8 crea i progetti iOS con SPM di default:
npx cap add iosPuoi ancora essere esplicito:
npx cap add ios --packagemanager SPMPulisci i residui di CocoaPods
Dopo che l'app SPM è stata costruita, elimina le assunzioni residue di CocoaPods dai script locali e da CI.
Elimina passaggi come:
pod installElimina anche le cache che esistevano solo per CocoaPods:
ios/App/Podsios/App/Podfile.lock- Repository spec CocoaPods
- Chiave di cache CI basata sul Podfile
Un flusso CI di base dopo la migrazione dovrebbe installare le dipendenze JavaScript, costruire l'app web, sincronizzare Capacitor, e costruire con Xcode:
npm ci
npm run build
npx cap sync ios
Se il tuo CI ancora costruisce App.xcworkspace, aggiornalo al percorso del progetto o del workspace che esiste dopo la migrazione. Non tenere i percorsi CocoaPods obsoleti solo perché l'antico lavoro li utilizzava.
Risoluzione dei problemi
L'assistente avverte di un'interdipendenza incompatibile
Aggiorna la dipendenza prima e esegui nuovamente l'assistente. Se non esiste una versione compatibile con SPM, mantieni l'applicazione su CocoaPods fino a quando non sostituisci quella dipendenza o il mantenitore aggiunge il supporto SPM.
Xcode non risolve i pacchetti
Ripristina le cache dei pacchetti in Xcode, assicurati che CapApp-SPM sia presente come pacchetto locale, e esegui npx cap sync ios nuovamente.
L'applicazione si costruisce localmente ma CI fallisce
Cercare vecchie assunzioni di CocoaPods: pod install, Pods/ cache, Podfile.lock chiavi di cache, .xcworkspace.
o comandi di costruzione che puntano a un file eliminato
Modifiche di firma o autorizzazioni
Confronta il target Xcode migrato con il progetto pre-migrazione. Ripristina l'identificatore del bundle, l'equipe, il profilo di provisioning, il file delle autorizzazioni, le capacità e le impostazioni dell'estensione.
Elenco di controllo di migrazione
- Prima della migrazione:
- Creare una branch.
- Confermare che l'applicazione iOS corrente si costruisce.
- Commit dello stato di lavoro attuale.
- Aggiorna le dipendenze native che già dispongono di rilasci più recenti compatibili con SPM.
Durante la migrazione:
- Esegui
npx cap spm-migration-assistant. - Apri il progetto con
npx cap open ios. - Aggiungi
CapApp-SPMin Xcode se richiesto. - Aggiungi
debug.xcconfigin Xcode se richiesto. - Risolve le avvertenze dei pacchetti.
- Esegui
npx cap sync ios.
Dopo la migrazione:
- Costruisci l'applicazione da Xcode.
- Testare le capacità native su un simulatore o dispositivo.
- Eliminare i comandi di CocoaPods dal CI.
- Eliminare i cache di CocoaPods esclusivi.
- Verificare la firma di archiviazione e rilascio.
Utilizzare Capgo Skills per la migrazione
Se utilizzi agenti AI per gestire la migrazione, inizia da Capgo Skills al posto di una richiesta vuota. Le competenze più utili per questo lavoro sono:
capacitor-best-practicesper esaminare la struttura dell'app prima di apportare modificheios/.cocoapods-to-spmper pianificare i passaggi di migrazione dello SPM e le fasi successive di Xcode.capacitor-ci-cdper eliminare le assunzioni di CocoaPods dai flussi di build.debugging-capacitoreios-android-logsinvestigare problemi di dispositivo solo dopo la migrazione.
Utilizzarli prima di modificare il progetto iOS in modo che l'agente esamini i file nativi, CI e compatibilità delle dipendenze al posto di eseguire solo il comando di migrazione.
Conclusioni
Migrare un'app Capacitor a Swift Package Manager è principalmente un cambiamento di gestione delle dipendenze iOS. Il percorso più sicuro è iniziare da una branch pulita, eseguire npx cap spm-migration-assistant, completare i passaggi manuali di Xcode, sincronizzare nuovamente e rimuovere CocoaPods dal CI solo dopo che l'app è stata costruita.
Se il tuo progetto iOS è fortemente personalizzato, migra in loco. Se è vicino al modello di default Capacitor di Capgo, ricreare ios/ con npx cap add ios --packagemanager SPM può essere più pulito.


