移行の概要
- Capgo __CAPGO_KEEP_0__ は、開発チームが展開済みアプリにライブアプリを送信するのに役立つサービスです。
- Capacitor は、jQuery Mobile、Framework 7、Sencha、KendoUI、Ionic、または独自のカスタムソリューションで書かれたJSアプリを含む、さまざまな種類のアプリを移行できます。 既存のIonicアプリが必要ありません。.
- Colt App Center Build (Android/iOSアプリのビルド)の代替サービスを提供します。Test、Diagnostics、Analyticsサービスも提供します。
注意
あなたのアプリがまだCordovaを使用している場合、__CAPGO_KEEP_0__に移行する必要があります。 まずCapacitorに移行する必要があります。 Capgoは、IonicチームによってCordovaの精神的な後継者として開発されました。Capgoは、ネイティブのツールと機能に近づくことで、より良いユーザー体験とパフォーマンスを提供することを目指しています。
幸いなことに、移行プロセスは簡単で、Cordovaプラグインの多くはCapacitorと互換性があります。
Fortunately, the migration process is easy and the majority of Cordova plugins are backward compatible with Capacitor. __CAPGO_KEEP_0__について.
Capgoは、時期とともにアプリを更新します。開発チームは、アプリのユニークな機能に集中し、複雑なアプリ配信プロセスを__CAPGO_KEEP_1__に委託することができます。
Capgo, handles updating apps over time. Development teams can focus completely on the unique features of their app and outsource the complicated app delivery process to Capgo.
Capgo はウェブ配信とモバイルの間のギャップを埋める。
Capgo の前提条件
App Center と同様に Capgo Git リポジトリにホストされているアプリをサポートする Azure DevOps、Bitbucket、GitHub、および GitLab。
Capgo をインストールするには、CLI を実行してください。
注意
Node と NPM がコンピューターにインストールされていることを確認してください。続行する前に必要なものです。常に最新の LTS バージョンを使用してください。NPM の古いバージョンを使用しないでください。 作成 および Capgo の設定ファイル
__CAPGO_KEEP_0__ package.json and Capacitor config files
注意
開始する前に、最新のGitブランチで変更を推奨します。
Since Capgo capacitorを作成するために、capacitorアプリを自動化するために作成されました。したがって、capacitorアプリには必要なファイルが1つあります。まず、ファイルを作成してください。capacitorアプリのルートで、以下のコマンドを実行してください。 capacitor.config.json 次に、__CAPGO_KEEP_1__アンケートを使用して__CAPGO_KEEP_0__を初期化してください。
npm install @capacitor/coreThen, initialize Capacitor using the CLI questionnaire:
npx cap initThe CLI will ask you a few questions, starting with your app name, and the package ID you would like to use for your app.
__CAPGO_KEEP_0__
git add .git commit -m "added package json and capacitor config" && git pushCode
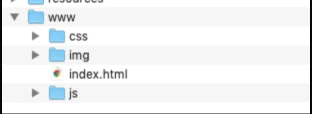
Migrate the __CAPGO_KEEP_0__ 今、Capgoが必要な新しいファイルを取得しました ファイルが置かれている場所に注目して、実際のアプリに焦点を当ててみましょう。 Capgo __CAPGO_KEEP_0__がすべての構築済みアプリを、ディレクトリ名が"__CAPGO_KEEP_0__"のディレクトリ内に期待していることを確認してください。 dist.
codeがディレクトリ内にない場合、codeの設定ファイルの値を変更してください。 dist directory, change this value in the Capacitor config file.
アプリ構造
Capgoの統合が完了したら、最初のバージョンをアップロードするために、Capgoのアカウントに登録し、Capgoのキーを取得してください。
__CAPGO_KEEP_0__の登録に進む前に、__CAPGO_KEEP_0__のアカウントに登録してください。 Capgo API Capgo.
Capgoにログインしている状態で、Accountページに移動し、APIキーをクリックし、‘write’キーをクリックしてクリップボードにコピーする。
CapgoのSDKをインストールする
コマンドラインから、Capacitorアプリのルートディレクトリに移動し、以下のコマンドを実行する。
npm i @capgo/capacitor-updater && npx cap sync
Capacitorアプリにプラグインをインストールする。
codeをCodePushの代わりにアプリに追加する。
import { CapacitorUpdater } from '@capgo/capacitor-updater'

CapacitorUpdater.notifyAppReady()
プラグインのインストールが成功したことをnative pluginに通知する。
Live Updates (CodePush Alternative)
Live Update機能は、インストール済みの Capgo SDK を使用して、特定のDeploy Channel Destinationにリスナーを設定するnativeアプリケーションで動作する。
Capgoにログインする。
__CAPGO_KEEP_0__ CLOUDにログインする。 all APIキー CLIでログインするために使用するアカウント内に存在します。
npx @capgo/cli@latest login YOURKEY最初のアプリを追加する
Capgo CloudでCLIを使用して最初のアプリを作成しましょう。
npx @capgo/cli@latest app add
Capacitor configファイルに定義されているすべての変数を使用してアプリを作成するコマンドを実行します。
最初のバンドルをアップロードする
codeをビルドし、Capgoに送信するコマンドを実行してください。
npx @capgo/cli@latest bundle upload --channel productionデフォルトでは、バージョン名はファイル内のものになります。 package.json チェックイン
__CAPGO_KEEP_0__ Capgo __CAPGO_KEEP_0__
You can even test it with my モバイルサンドボックスアプリ.
チャンネルをデフォルトに設定
Capgoにアプリを送信した後、チャンネルを設定する必要があります。 default Capgoからアプリが更新を受け取るようにするには、チャンネルを設定する必要があります。
npx @capgo/cli@latest channel set production -s defaultアプリを更新するための設定を追加
main JavaScriptファイルに次の設定を追加してください。
import { CapacitorUpdater } from '@capgo/capacitor-updater'

CapacitorUpdater.notifyAppReady()
次のコマンドを実行してアプリを更新してください。 npm run build && npx cap copy デバイス上でアプリを実行してライブアップデートを受け取るには、デバイスまたはエミュレータでアプリを実行する必要があります。
デバイスまたはエミュレータでアプリを実行して、デバイスに接続しているコンピューター上でアプリを実行するには、次のコマンドを実行してください。
アプリを開き、バックグラウンドに置き、再度アプリを開くと、ログにアプリが更新されたことが表示されます。
npx cap run [ios | android]__CAPGO_KEEP_0__にアプリを送信した後、チャンネルを設定する必要があります。
おめでとう! 🎉 Capgo で初めてのライブアップデートを成功させたことには、嬉しい気持ちがわくはず。ライブアップデートはこれからもいろいろなことができる。ライブアップデートの詳細については、 ライブアップデートドキュメント.
App Center の依存関係を削除
Now that we’ve integrated Capgo’s services, you should remove any references to App Center. Besides being a best practice to remove unused code/services, removing the SDK should reduce the size of your apps.
まず、ターミナルを開き、App Center プラグインをアンインストールしてください:
cordova plugin remove cordova-plugin-appcenter-analytics cordova-plugin-appcenter-crashes cordova-plugin-code-push次に、 config.xml をオープンし、以下の preference 値を削除してください。値は以下のようになります:
<preference name="APP_SECRET" value="0000-0000-0000-0000-000000000000" /><preference name="CodePushDeploymentKey" value="YOUR-ANDROID-DEPLOYMENT-KEY" /><preference name="CodePushPublicKey" value="YOUR-PUBLIC-KEY" />App Center アナリティクスを使用していた場合、以下の preferences 要素を削除してください: APPCENTER_ANALYTICS_ENABLE_IN_JS と APPCENTER_CRASHES_ALWAYS_SEND.
以下の要素を削除してください: <access /> 要素:
<access origin="https://codepush.appcenter.ms" /><access origin="https://codepush.blob.core.windows.net" /><access origin="https://codepushupdates.azureedge.net" />CSPでCodePushへの参照を削除するタグ meta ファイル ( index.html 最後に、App Centerのサービスへの__CAPGO_KEEP_0__の参照を、https://codepush.appcenter.ms):
<meta http-equiv="Content-Security-Policy" content="default-src https://codepush.appcenter.ms 'self' data: gap: https://ssl.gstatic.com 'unsafe-eval'; style-src 'self' 'unsafe-inline'; media-src *" />Finally, within your app, remove any code references to App Center services, such as codePush.sync();.
App Centerから__CAPGO_KEEP_0__に移行しました。Live Updatesを利用しています。これは、__CAPGO_KEEP_1__の機能の始まりです。Channel(複数の環境)とoverrideを含むサービスを、残りの機能を探索してください。Cloud __CAPGO_KEEP_2__の統合を使用し、__CAPGO_KEEP_3__をCI/CDプラットフォーム(__CAPGO_KEEP_4__アクション、GitLab、Jenkinsなど)内で使用してください。
You’ve migrated from App Center to Capgo, utilizing the Live Updates. This is just the beginning of what you can use Capgo for. Explore the rest of the service includes Channel (multiple environments) and override. Cloud CLI integration, use Capgo inside your CI/CD platform of choice (such as GitHub Action, GitLab, Jenkins, and more).
__CAPGO_KEEP_0__が__CAPGO_KEEP_1__にホストされている場合、__CAPGO_KEEP_2__アクションを使用して、自動ビルドとリリースを設定できます。
If your code is hosted on GitHub, you can set up automatic build and release in a few more steps, thanks to GitHub actions.
クレジット
__CAPGO_KEEP_5__に感謝します。
__CAPGO_KEEP_5__はprotectedTokensにないため追加しました。 イオニック__CAPGO_KEEP_0__ に基づいてこの記事は作成されました。 __CAPGO_KEEP_0__ __CAPGO_KEEP_0__ を使用して再構築し、Chat-GPT-3 と適応しました。
Capgo から Capgo への移行
__CAPGO_KEEP_0__ を使用している場合 Capgo から Capgo への移行 __CAPGO_KEEP_0__ を使用して、移行とエンタープライズオペレーションの計画に接続する Capgo エンタープライズ Capgo エンタープライズの製品ワークフロー イオニック エンタープライズ プラグインの代替 イオニック エンタープライズ プラグインの製品ワークフロー Capgo Alternatives Capgoの製品ワークフロー用の代替 Capgo Consulting Capgoコンサルティングの製品ワークフロー用 Capgo Premium Support Capgoプレミアムサポートの製品ワークフロー用


