


이동 요약
- Capgo Capgo가 개발 팀에게 앱을 실시간으로 배포하는 데 도움을 주는 서비스입니다.
- Capacitor jQuery Mobile, Framework 7, Sencha, KendoUI, Ionic 및 사용자 정의 솔루션으로 작성된 JavaScript 앱은 모두 이관될 수 있습니다. Ionic 앱이 이미 존재하지 않아도 됩니다..
- 콜트 콜트는 App Center Build (Android/iOS 앱 빌드)과 같은 서비스를 제공합니다. 테스트, 디아그노스틱스 및 분석 서비스.
주의
앱이 아직 Cordova를 사용하고 있다면 __CAPGO_KEEP_0__으로 먼저 이동해야 합니다. Cordova에서 Capacitor으로 이동하기 전에 Capacitor으로 이동해야 합니다. Cordova의 영적 후계자로 Ionic 팀에서 개발한 Capgo은 Cordova와 같은 기능을 제공하면서 native tooling과 기능을 사용할 수 있도록 개발을 가속화하여 사용자 경험과 성능을 향상시키기 위해 개발되었습니다.
幸い하게, Cordova 플러그인 대부분은 Capacitor과 호환되며, 이로 인해 개발이 용이해졌습니다.
이동 프로세스는 간단하고 대부분의 Cordova 플러그인은 Capacitor와 호환됩니다. __CAPGO_KEEP_0__.
About Capgo
Capgo은 앱을 시간에 따라 업데이트하는 것을 처리합니다. 개발 팀은 앱의 고유한 기능에만 집중할 수 있으며, 복잡한 앱 배포 프로세스를 Capgo에게 외주할 수 있습니다.
Capgo은 웹 배포와 모바일 배포 사이의 빈틈을 채우는 역할을 합니다.
Capgo prerequisite
App Center과 마찬가지로 Capgo Azure DevOps, Bitbucket, GitHub, GitLab에서 호스팅되는 앱을 지원합니다.
Capgo CLI 설치
주의
Node.js와 NPM가 컴퓨터에 설치되어 있어야 합니다. 진행하기 전에 항상 최신 LTS 버전을 사용하세요. __CAPGO_KEEP_0__는 이전 버전을 사용하지 마세요. Capgo 이전 버전을 사용하지 마십시오.
Create package.json and Capacitor config files
주의
이 작업을 시작하기 전에, 새로운 Git branch에서 변경 사항을 적용하는 것을 추천합니다.
이유는 Capgo capacitor capacitor.config.json __CAPGO_KEEP_0__
npm install @capacitor/core그 다음으로, Capacitor을 초기화하기 위해 CLI 설문조사를 사용하세요.
npx cap initCLI
__CAPGO_KEEP_0__
git add .git commit -m "added package json and capacitor config" && git pushCode
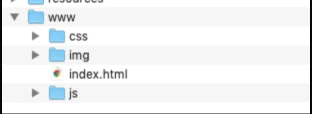
__CAPGO_KEEP_0__ Capgo __CAPGO_KEEP_0__ Capgo 전체 빌드 앱이 포함된 디렉토리 이름 dist.
빌드된 code이 디렉토리 안에 없으면 dist 디렉토리, Capacitor 설정 파일에서 이 값을 변경하세요.
이 값을 __CAPGO_KEEP_0__ 설정 파일에서 변경하세요.
Capgo 설정
__CAPGO_KEEP_0__ 설정 Capgo 앱이 통합 준비가 되면 API 키를 받고 업로드할 첫 번째 버전을 업로드할 수 있습니다. 시작하려면 API 계정에 가입하세요. Capgo 계정에 로그인한 후 계정 페이지로 이동한 후 __CAPGO_KEEP_1__ 키를 클릭한 후 '쓰기' 키를 클릭하여 클립보드에 복사하세요..
Once you’re logged into Capgo, navigate to the Account page then click on API key, then click on the ‘write’ key to copy it to your clipboard.
Capgo Capgo SDK 설치
명령 프롬프트에서 Capacitor 앱 폴더의 루트 디렉토리에서 다음 명령어를 실행하세요.
npm i @capgo/capacitor-updater && npx cap sync
Capacitor 앱에 플러그인을 설치합니다.
그리고 code을 CodePush 대신 앱에 추가하세요.
import { CapacitorUpdater } from '@capgo/capacitor-updater'

CapacitorUpdater.notifyAppReady()
이것은 네이티브 플러그인에 설치가 성공적으로 완료되었다는 것을 알려줍니다.
Live Update (CodePush 대체)
Live Update 기능은 설치된 (Feature is shortened to fit the ±3 word limit) Capgo SDK __CAPGO_KEEP_0__ CLOUD 로그인
먼저 Capgo apikey
__CAPGO_KEEP_0__ apikey all apikey 계정에 있는 CLI으로 로그인할 수 있습니다:
npx @capgo/cli@latest login YOURKEY첫 번째 앱을 추가하세요
Capgo Cloud에서 CLI으로 앱을 생성하기 위해 시작해 보세요.
npx @capgo/cli@latest app add
Capacitor config 파일에 정의된 모든 변수를 사용하는 명령어로 앱을 생성합니다.
첫 번째 배포 파일을 업로드하세요
code을 빌드하고 Capgo으로 보내려면 다음 명령어를 실행하세요:
npx @capgo/cli@latest bundle upload --channel production기본적으로 버전 이름은 파일에 있는 것입니다. package.json file.
__CAPGO_KEEP_0__ Capgo 마이 __CAPGO_KEEP_0__에서 테스트할 수 있습니다
마이 __CAPGO_KEEP_0__ 모바일 샌드박스 앱.
기본 채널 설정
Capgo으로 앱을 제출한 후 채널을 설정해야 합니다. default Capgo에서 앱이 업데이트를 받을 수 있도록 설정해야 합니다.
npx @capgo/cli@latest channel set production -s default업데이트를 검증하는 앱을 구성하십시오.
main JavaScript 파일에 이 설정을 추가하십시오.
import { CapacitorUpdater } from '@capgo/capacitor-updater'

CapacitorUpdater.notifyAppReady()
그 다음으로 npm run build && npx cap copy __CAPGO_KEEP_0__를 받는 기기
Live Update을 기기에서 받습니다.
For your application to receive a live update from Deploy, you’ll need to run the app on a device or an emulator. The easiest way to do this is simply to use the following command to launch your local app in an emulator or a device connected to your computer.
npx cap run [ios | android]축하합니다! 🎉 첫 번째 __CAPGO_KEEP_0__를 성공적으로 배포했습니다. Live Updates의 기능을 더 많이 사용할 수 있습니다. 더 많은 정보를 얻으려면, 완전한
Live Update를 참조하십시오. 실시간 업데이트 문서.
앱 센터 종속성 제거
Now that we’ve integrated Capgo’s services, you should remove any references to App Center. Besides being a best practice to remove unused code/services, removing the SDK should reduce the size of your apps.
첫 번째 단계로 터미널을 열고 앱 센터 플러그인을 제거하세요:
cordova plugin remove cordova-plugin-appcenter-analytics cordova-plugin-appcenter-crashes cordova-plugin-code-push다음으로 config.xml 를 열고 preference 다음 값을 제거하세요. 그들은 다음과 같은 형태를 띕니다:
<preference name="APP_SECRET" value="0000-0000-0000-0000-000000000000" /><preference name="CodePushDeploymentKey" value="YOUR-ANDROID-DEPLOYMENT-KEY" /><preference name="CodePushPublicKey" value="YOUR-PUBLIC-KEY" />앱 센터 분석을 사용하는 앱이 있다면, 다음 요소를 제거하세요: preferences 그리고 APPCENTER_ANALYTICS_ENABLE_IN_JS and APPCENTER_CRASHES_ALWAYS_SEND.
context <access /> 그리고
<access origin="https://codepush.appcenter.ms" /><access origin="https://codepush.blob.core.windows.net" /><access origin="https://codepushupdates.azureedge.net" />CodePush 참조 제거 meta 태그 index.html 파일 (https://codepush.appcenter.ms):
<meta http-equiv="Content-Security-Policy" content="default-src https://codepush.appcenter.ms 'self' data: gap: https://ssl.gstatic.com 'unsafe-eval'; style-src 'self' 'unsafe-inline'; media-src *" />마지막으로, 앱 내에서 App Center 서비스에 대한 code 참조를 제거하세요. codePush.sync();.
다음 단계
You’ve migrated from App Center to Capgo, utilizing the Live Updates. This is just the beginning of what you can use Capgo for. Explore the rest of the service includes Channel (multiple environments) and override. Cloud CLI integration, use Capgo inside your CI/CD platform of choice (such as GitHub Action, GitLab, Jenkins, and more).
App Center에서 __CAPGO_KEEP_0__로 마이그레이션했습니다. Live Updates를 사용하여 __CAPGO_KEEP_1__의 기능을 tận dụng하세요. __CAPGO_KEEP_2__ 채널 (여러 환경)과 오버라이드, Cloud __CAPGO_KEEP_3__ 통합, CI/CD 플랫폼 (예: __CAPGO_KEEP_4__ 액션, GitLab, Jenkins 등) 내에서 __CAPGO_KEEP_5__를 사용하세요.
If your code is hosted on GitHub, you can set up automatic build and release in a few more steps, thanks to GitHub actions.
제 2 번째 글을 작성하여 여러분이 이 글을 읽을 수 있도록 했습니다.
두 번째 글을 작성했습니다.
크레딧 Ionic이 기사는 이 기사 Chat-GPT-3와 함께 다시 쓰고 adapting했습니다.
Keep going from Migrating from App Center to Capgo
App Center에서 Capgo로 이주하는 경우 Migrating from App Center to Capgo Capgo Enterprise Capgo 기업 Capgo 기업 워크플로우를 위한 Capgo Alternatives Capgo Alternatives Capgo 대안 Capgo 제품 워크플로우에 대한 Capgo 대안 Capgo 컨설팅 Capgo 제품 워크플로우에 대한 Capgo 컨설팅 및 Capgo 프리미엄 지원 Capgo 제품 워크플로우에 대한 Capgo 프리미엄 지원.





