


本教程重点介绍了 GitHub 主机,但您可以轻松适应任何其他 CI/CD 平台。
前言
Be sure you have added your Capacitor app first to Capgo, this tutorial just focuses on the upload phase. If you need to add your app to Capgo, you can follow this 教程
提交约定
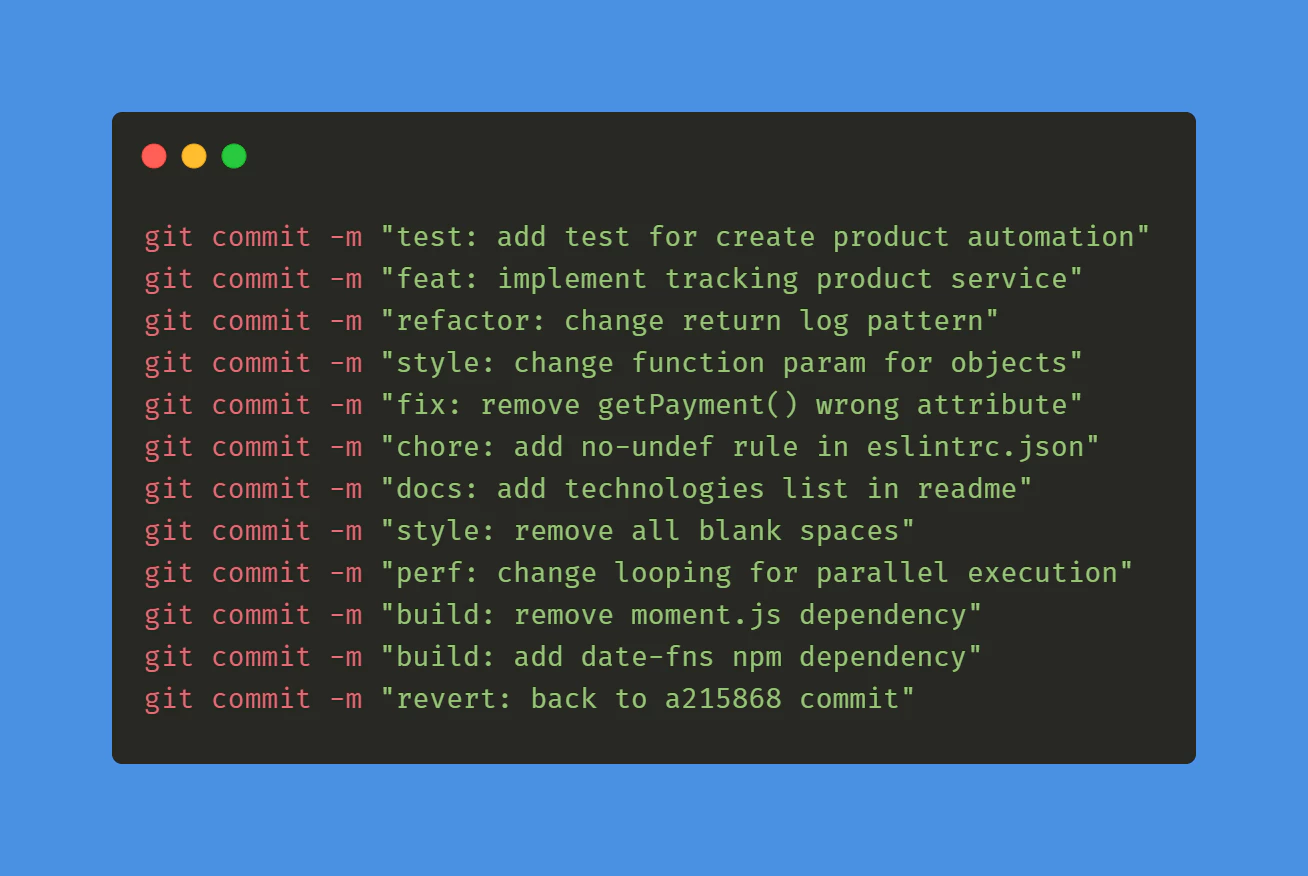
首先您需要遵循提交规范 规范提交 ` 这将有助于工具了解如何升级版本号,学习它只需5分钟。
GitHub 为标签
然后您需要创建第一个 GitHub 动作来自动构建和创建标签。
创建一个文件在这个路径: .github/workflows/bump_version.yml
内容如下:
name: Bump version

on:
  push:
    branches:
      - main

jobs:
  bump-version:
    if: "!startsWith(github.event.head_commit.message, 'chore(release):')"
    runs-on: ubuntu-latest
    name: "Bump version and create changelog with standard version"
    steps:
      - name: Check out
        uses: actions/checkout@v6
        with:
          fetch-depth: 0
          filter: blob:none
          token: '${{ secrets.PERSONAL_ACCESS_TOKEN }}'
      - name: Git config
        run: |
          git config --local user.name "github-actions[bot]"
          git config --local user.email "github-actions[bot]@users.noreply.github.com"
      - name: Create bump and changelog
        run: npx capacitor-standard-version
      - name: Push to origin
        run: |
          CURRENT_BRANCH=$(git rev-parse --abbrev-ref HEAD)
          remote_repo="https://${GITHUB_ACTOR}:${{ secrets.PERSONAL_ACCESS_TOKEN }}@github.com/${GITHUB_REPOSITORY}.git"
          git pull $remote_repo $CURRENT_BRANCH
          git push $remote_repo HEAD:$CURRENT_BRANCH --follow-tags --tags
这将为每个主分支的提交发布一个标签,并为主分支的每个提交添加一个更改日志条目。 CHANGELOG.md.
如果您没有这个文件,不用担心,它将为您创建。
要使其工作,请创建一个 个人访问令牌 并将其添加到您的GitHub 密钥 作为 PERSONAL_ACCESS_TOKEN.
这有必要让CI提交changelog。
当您创建令牌时,请选择过期时间为 never 并将范围设置为 repo.
最后,设置您的 package.json 文件中的版本号,同步它与您的本机版本号,这将有助于,然后下一步。
这只需要第一次,然后工具将保持最新状态。
您现在可以提交这两个文件并看到您的第一个标签出现在GitHub!
两者本机和web平台都会在每次提交后将版本号更新。
GitHub GitHub 动作
在此路径创建一个文件: .github/workflows/build.yml
内容如下:
name: Build source code and send to Capgo

on:
  push:
    tags:
      - '*'

jobs:
  deploy:
    runs-on: ubuntu-latest
    name: "Build code and release"
    steps:
      - name: Check out
        uses: actions/checkout@v6
      - name: Install dependencies
        id: install_code
        run: npm i
      - name: Build
        id: build_code
        run: npm run build
        env: # Remove both lines  if you don't need it
          FIREBASE_CONFIG: ${{ secrets.FIREBASE_CONFIG }} # Example of env var coming from a secret
      - name: Create Release
        id: create_release
        run: npx @capgo/cli@latest bundle upload -a ${{ secrets.CAPGO_TOKEN }} -c production
这将安装并构建您的依赖项,然后将其发送到 Capgo。
如果您的构建命令不同,您可以在步骤中进行更改。 build_code step.
为了使其工作,您需要获取您的API密钥并将其添加到Capgo中。 你的GitHub仓库的秘密 as CAPGO_TOKEN.
GitHub
__CAPGO_KEEP_1__
code
前往您的 Capgo 控制台,查看刚刚出现的构建,您现在已经拥有了 CI/CD 系统。
如果您希望所有用户在更新可用时都能获得更新,请转到您的频道并将其设置为 public.
您还可以通过遵循此教程添加本机构建您的 Ionic Capacitor JavaScript 应用
继续使用自动构建和发布应用程序的 Github 动作
如果您正在使用 自动构建和发布应用程序的 Github 动作 来规划 CI/CD 自动化,请将其与 Capgo 自动化构建和发布 Capgo CI/CD Capgo 原生构建 Capgo 原生构建 Capgo 集成 为 Capgo 集成 CI/CD 集成 为 CI/CD 集成的实现细节 GitHub 动作集成 为 GitHub 动作集成的实现细节





