Introduction
Bolt.new is an innovative AI-powered development platform that can generate full-stack web applications using various frameworks like React, Vue, Svelte, and more. But what if you want to bring your Bolt.new creation to mobile devices? In this comprehensive tutorial, we’ll show you how to export your Bolt.new project and transform it into native mobile apps using Capacitor.
Whether your Bolt.new project uses React, Vue, or another supported framework, this guide will help you create native iOS and Android apps with access to device features like camera, storage, and push notifications.
Before You Start: Requirements & Time
Estimated Time: 3-5 hours for complete setup
System Requirements:
- iOS Development: Mac with macOS 12.0+ (required, no workaround)
- Android Development: Any OS (Windows/Mac/Linux)
- Free Space: 20-30GB for development tools
- Memory: 8GB RAM minimum, 16GB recommended
Budget Needed:
- Apple Developer: $99/year (for iOS App Store)
- Google Play: $25 one-time fee
- Cursor Pro: $20/month (optional, speeds up development)
What We’ll Install:
- Node.js & npm
- Xcode (Mac only, for iOS)
- Android Studio (for Android)
- Various command-line tools
Why Transform Your Bolt.new App to Mobile?
- Cross-Platform Reach: Deploy your AI-generated app to mobile app stores
- Native Device Access: Use camera, GPS, file system, and other native features
- Improved Performance: Native container provides better performance than web views
- Offline Capabilities: Work offline with native storage solutions
- Push Notifications: Engage users with native push notification support
Why Capacitor Over Expo?
If you’re considering mobile development options, Capacitor offers significant advantages over Expo, especially for web-first development:
- One Codebase, Three Platforms: Your existing React, Next.js, or Vue.js website becomes iOS, Android, AND web app with zero conversion needed
- No Rebuilding Required: Take your Bolt.new project as-is - no need to rewrite for a different framework like Expo requires
- True Web-First Approach: Unlike Expo which is mobile-first and clunky on web, Capacitor treats web as a first-class citizen
- Seamless Development: Continue using your familiar web development tools and workflows
- Framework Freedom: Works with any web framework (React, Vue, Svelte, Next.js, etc.) - not locked into React Native like Expo
The Key Difference:
- With Capacitor: Build your website → Add mobile support (same codebase)
- With Expo: Build for mobile → Try to make web work (different approach, often clunky)
Since your Bolt.new project is already a web application, Capacitor lets you extend it to mobile without changing a single line of code. Expo would require rebuilding your entire project for their framework.
Step 1: Set Up Your Development Environment
Get Cursor - Your AI-Powered Code Editor
To work efficiently with your Bolt.new project, we’ll use Cursor, an intelligent code editor that simplifies development:
- Head to cursor.sh and grab the installer for your OS
- Run through the installation process
- Launch Cursor once it’s ready
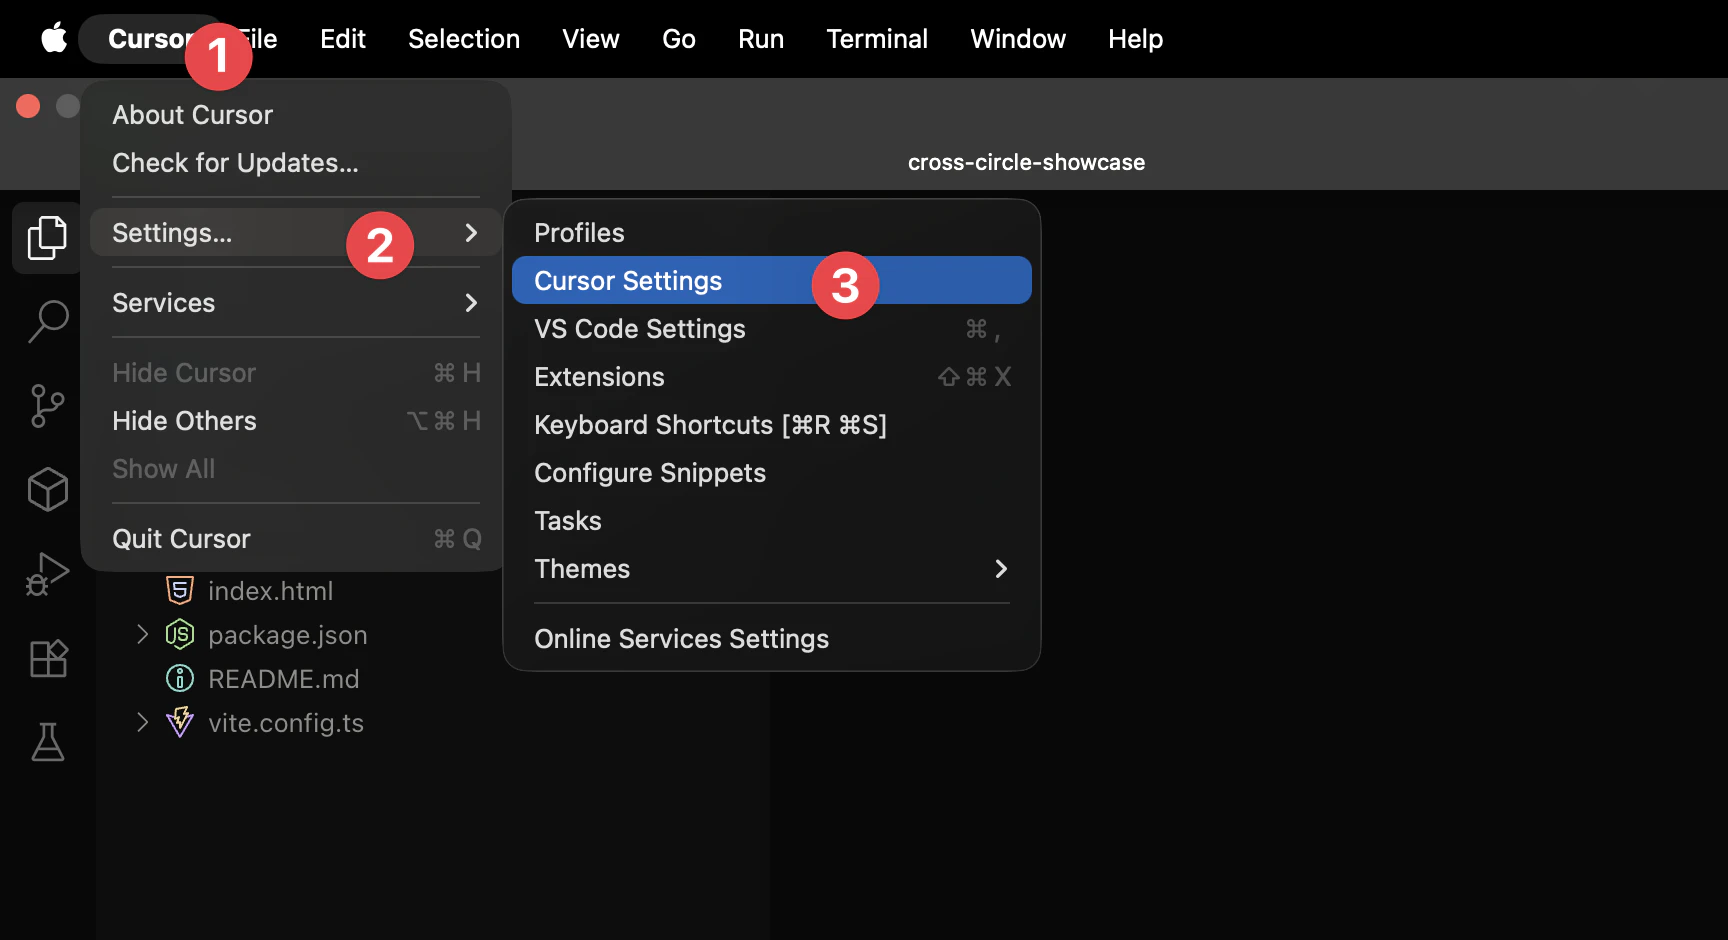
Configure Cursor for Maximum Productivity
Getting the most out of Cursor requires some initial setup:
-
Consider Getting Cursor Pro - The free version works, but Pro ($20/month) unlocks:
- Unlimited AI assistance
- Premium models (GPT-4, Claude)
- Instant responses
- Premium support
-
Access Settings with
Command+,(Mac) orCtrl+,(Windows)
- Activate AI Features - Ensure AI assistance is turned on:
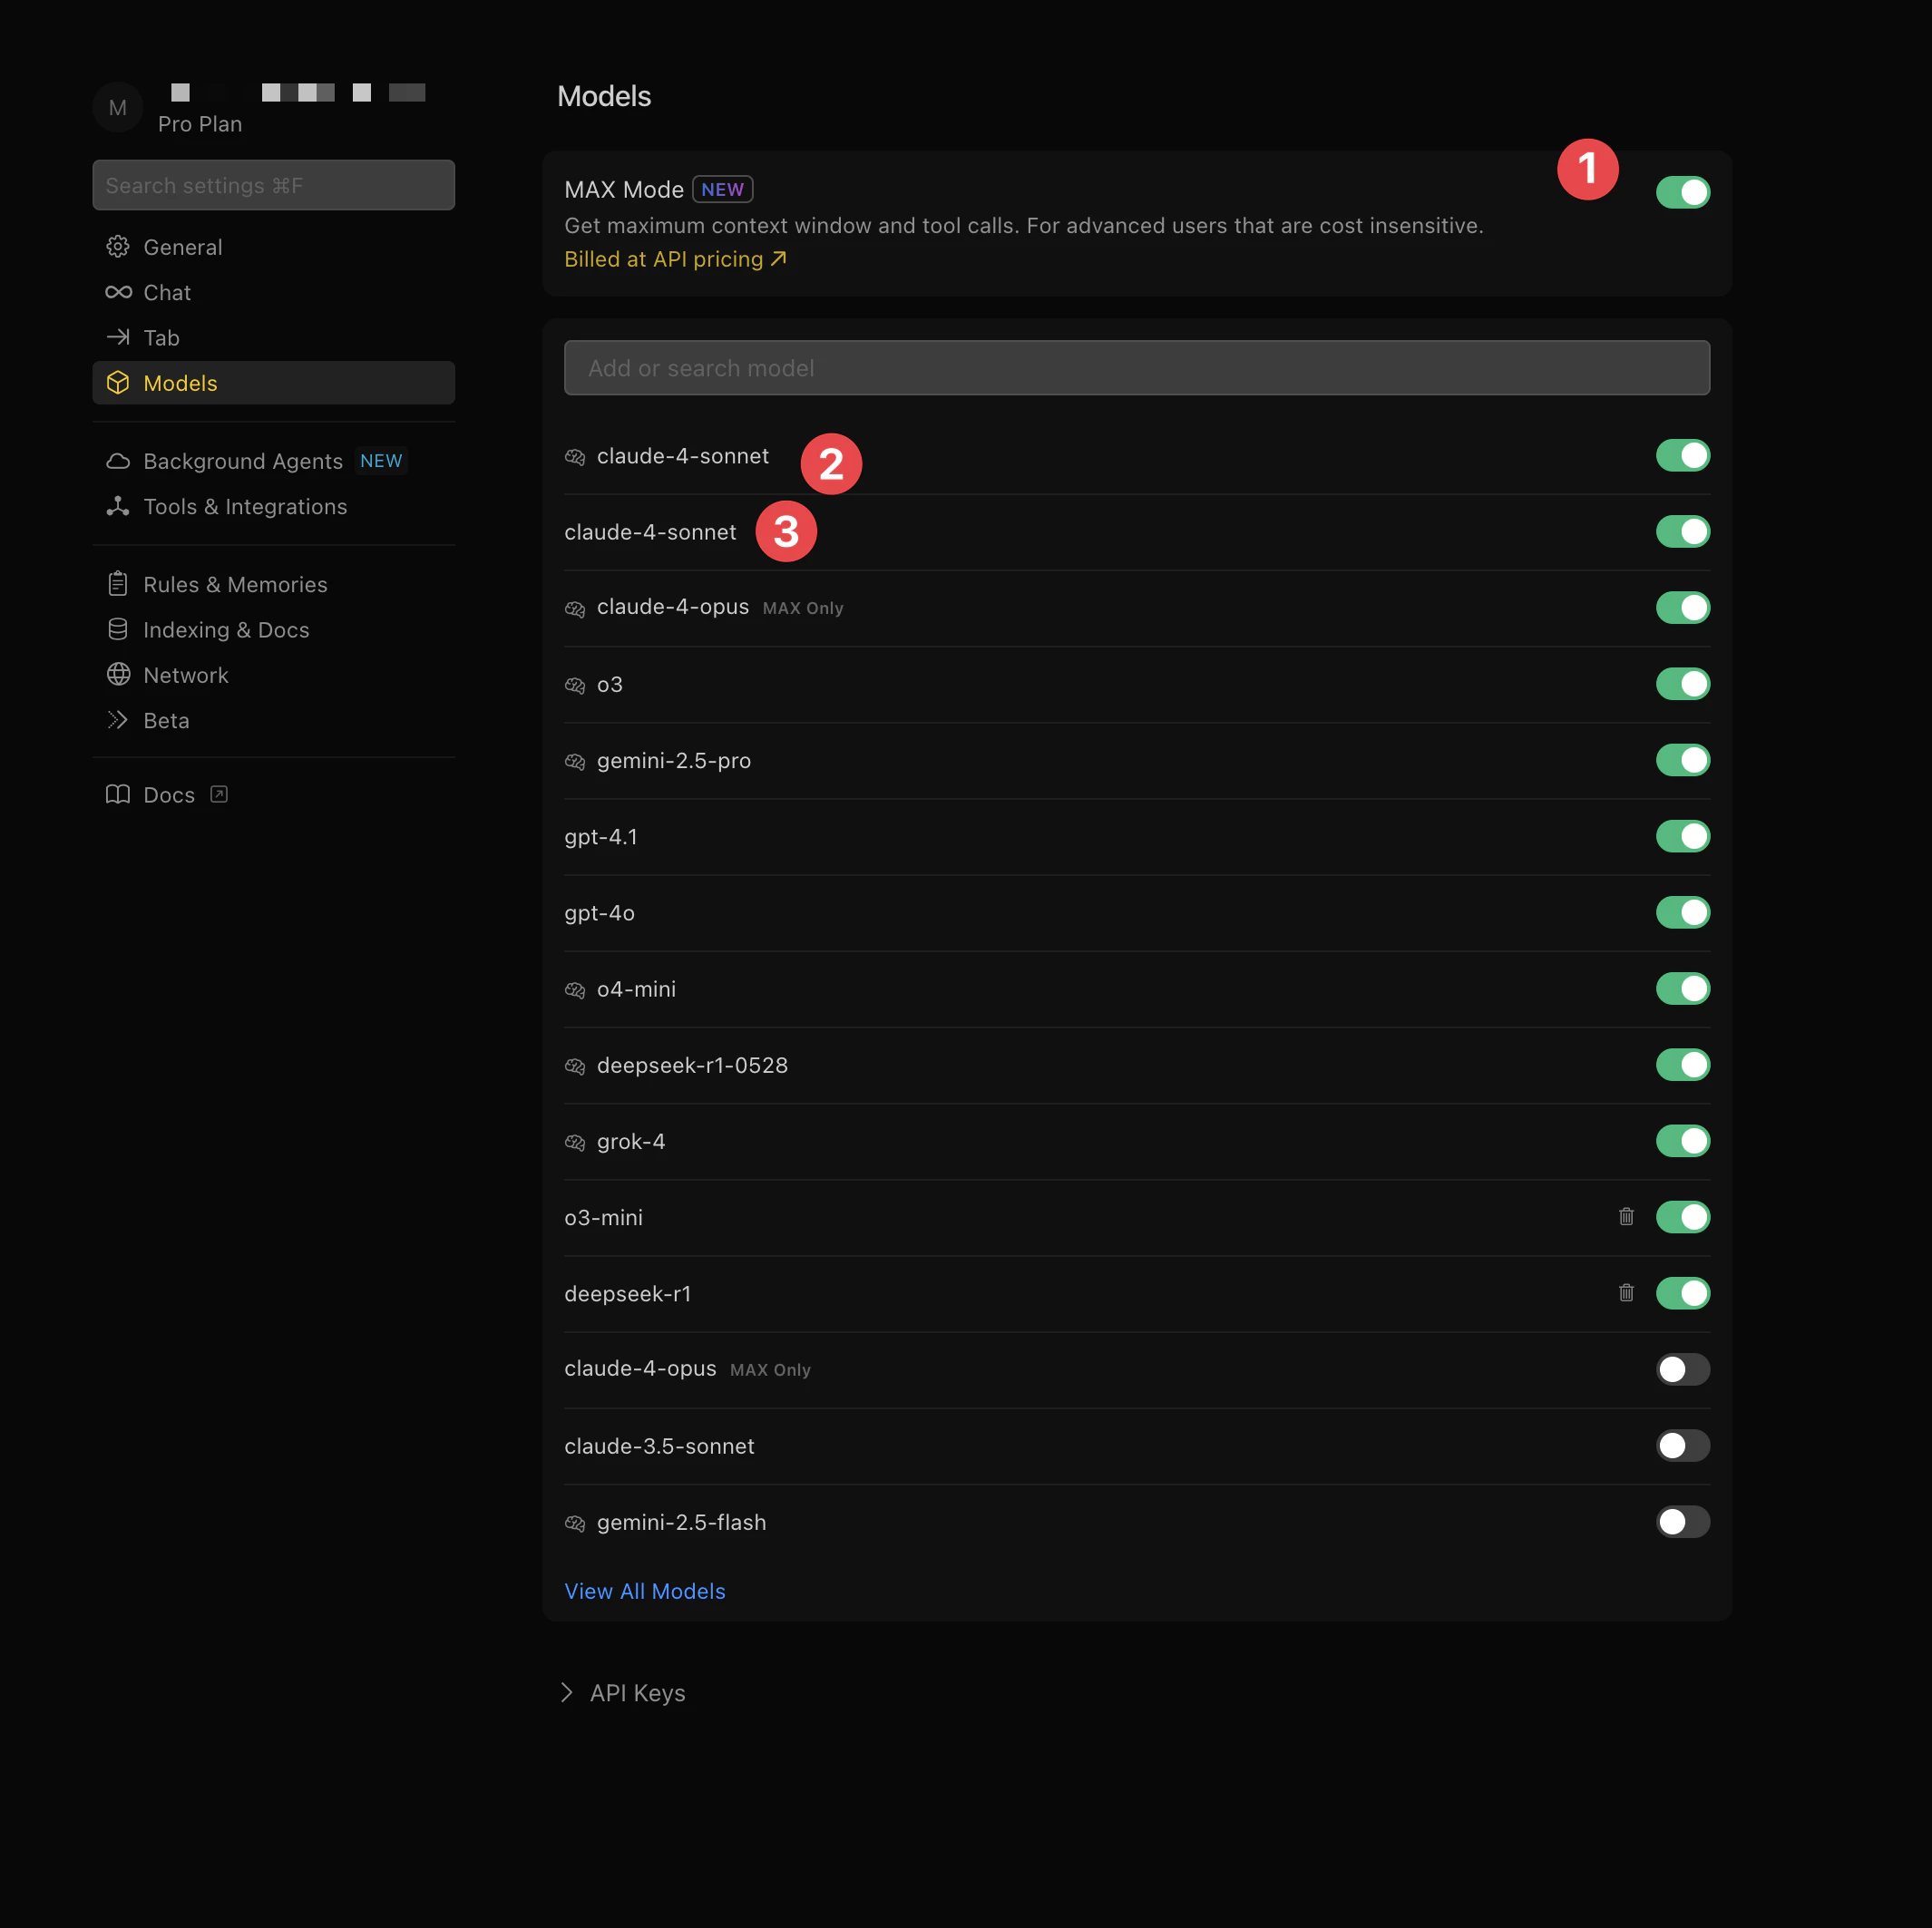
- Pick Your AI Model - We recommend Claude or GPT-4:
- Enable Command Running - Let Cursor execute commands automatically:
Step 2: Export Your Bolt.new Project
Now let’s bring your Bolt.new project into Cursor.
Download Your Project
- Navigate to your Bolt.new project in your browser
- Find the Download or Export button in Bolt’s interface
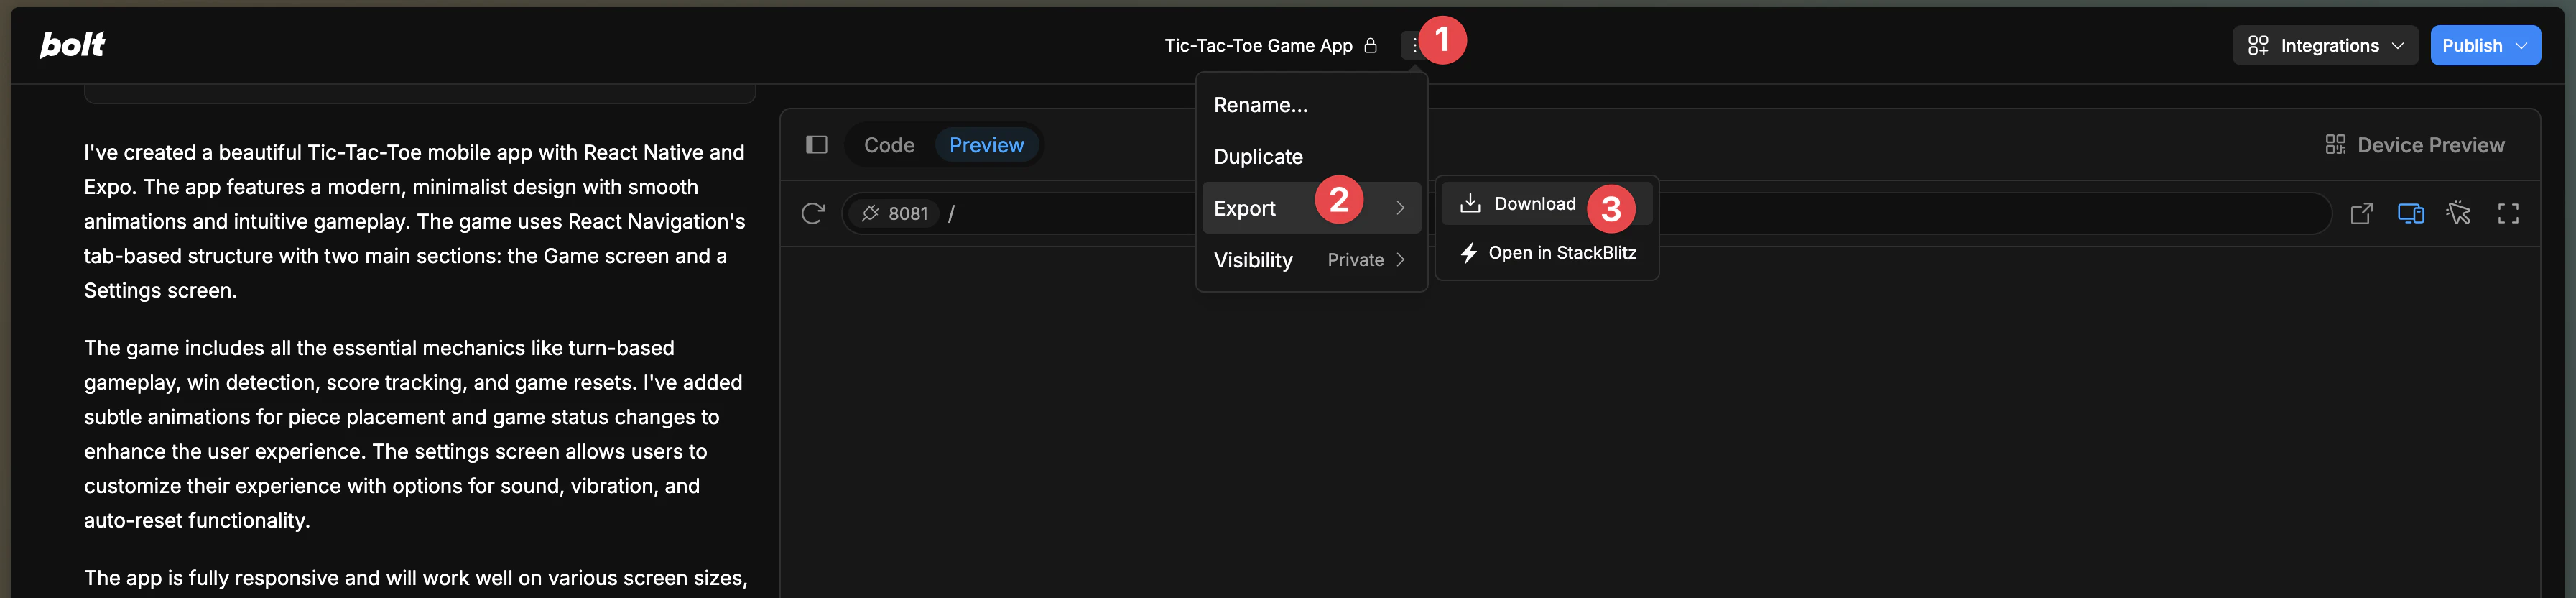
- Download the ZIP file containing your project
- Extract it to a folder on your computer

Open in Cursor
Once extracted, open the project in Cursor:
- Use
File > Open Folderin Cursor - Select your extracted Bolt.new project folder
- Cursor will load your project
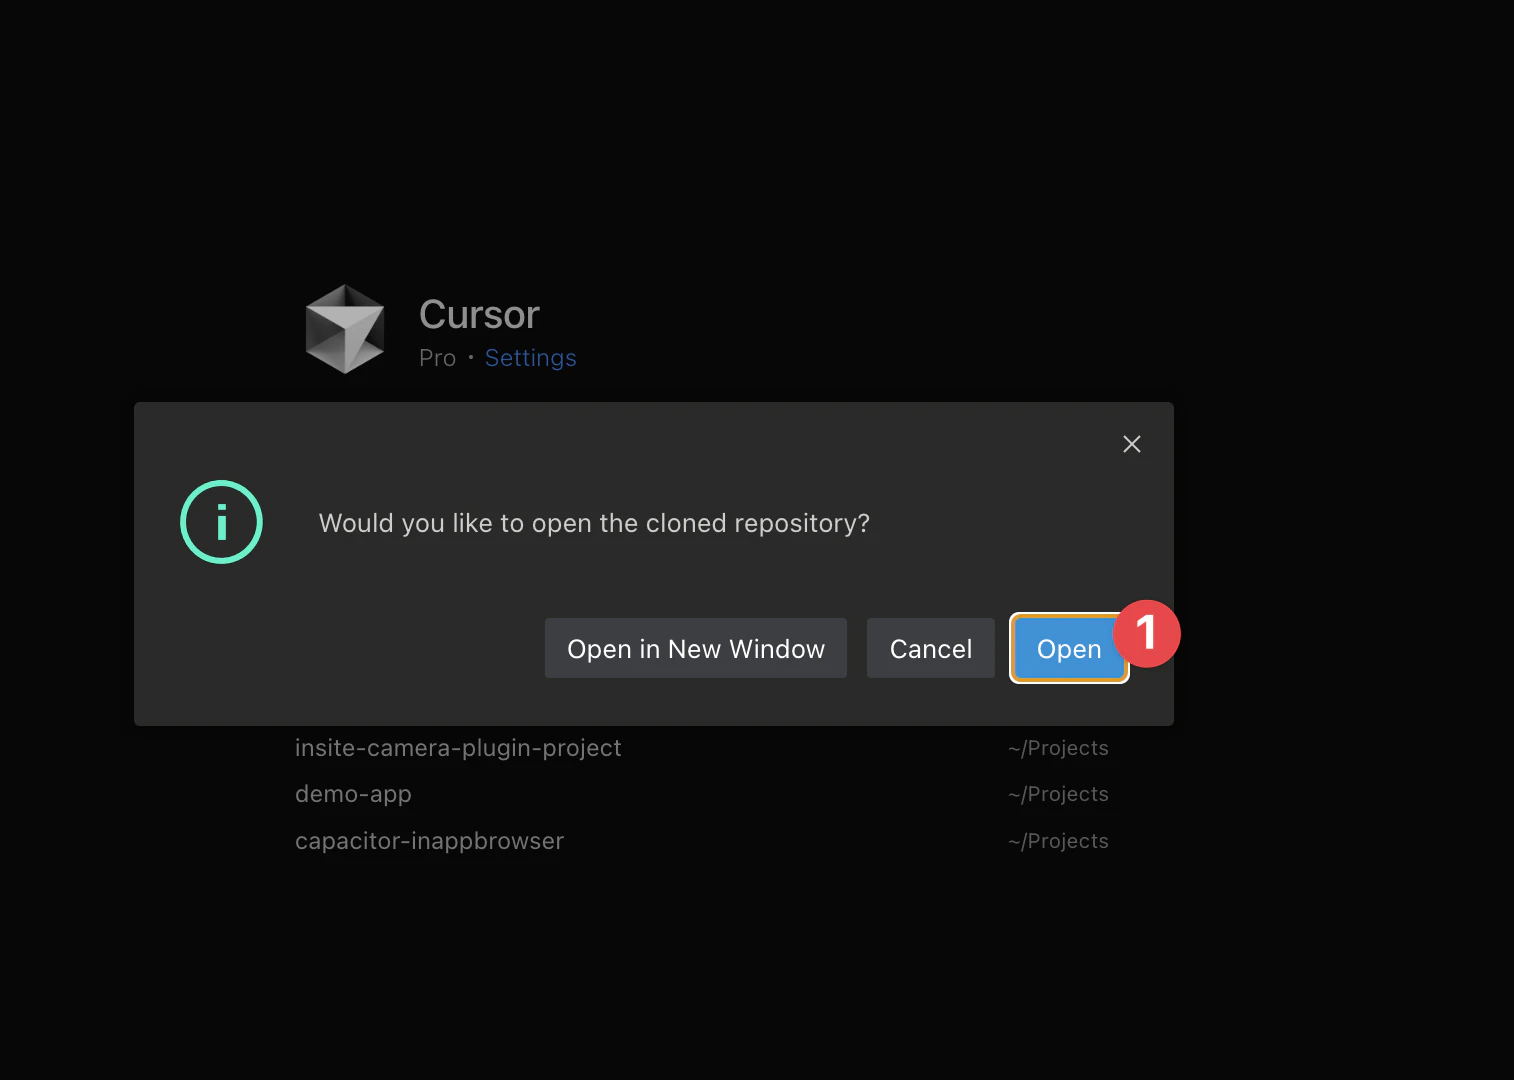
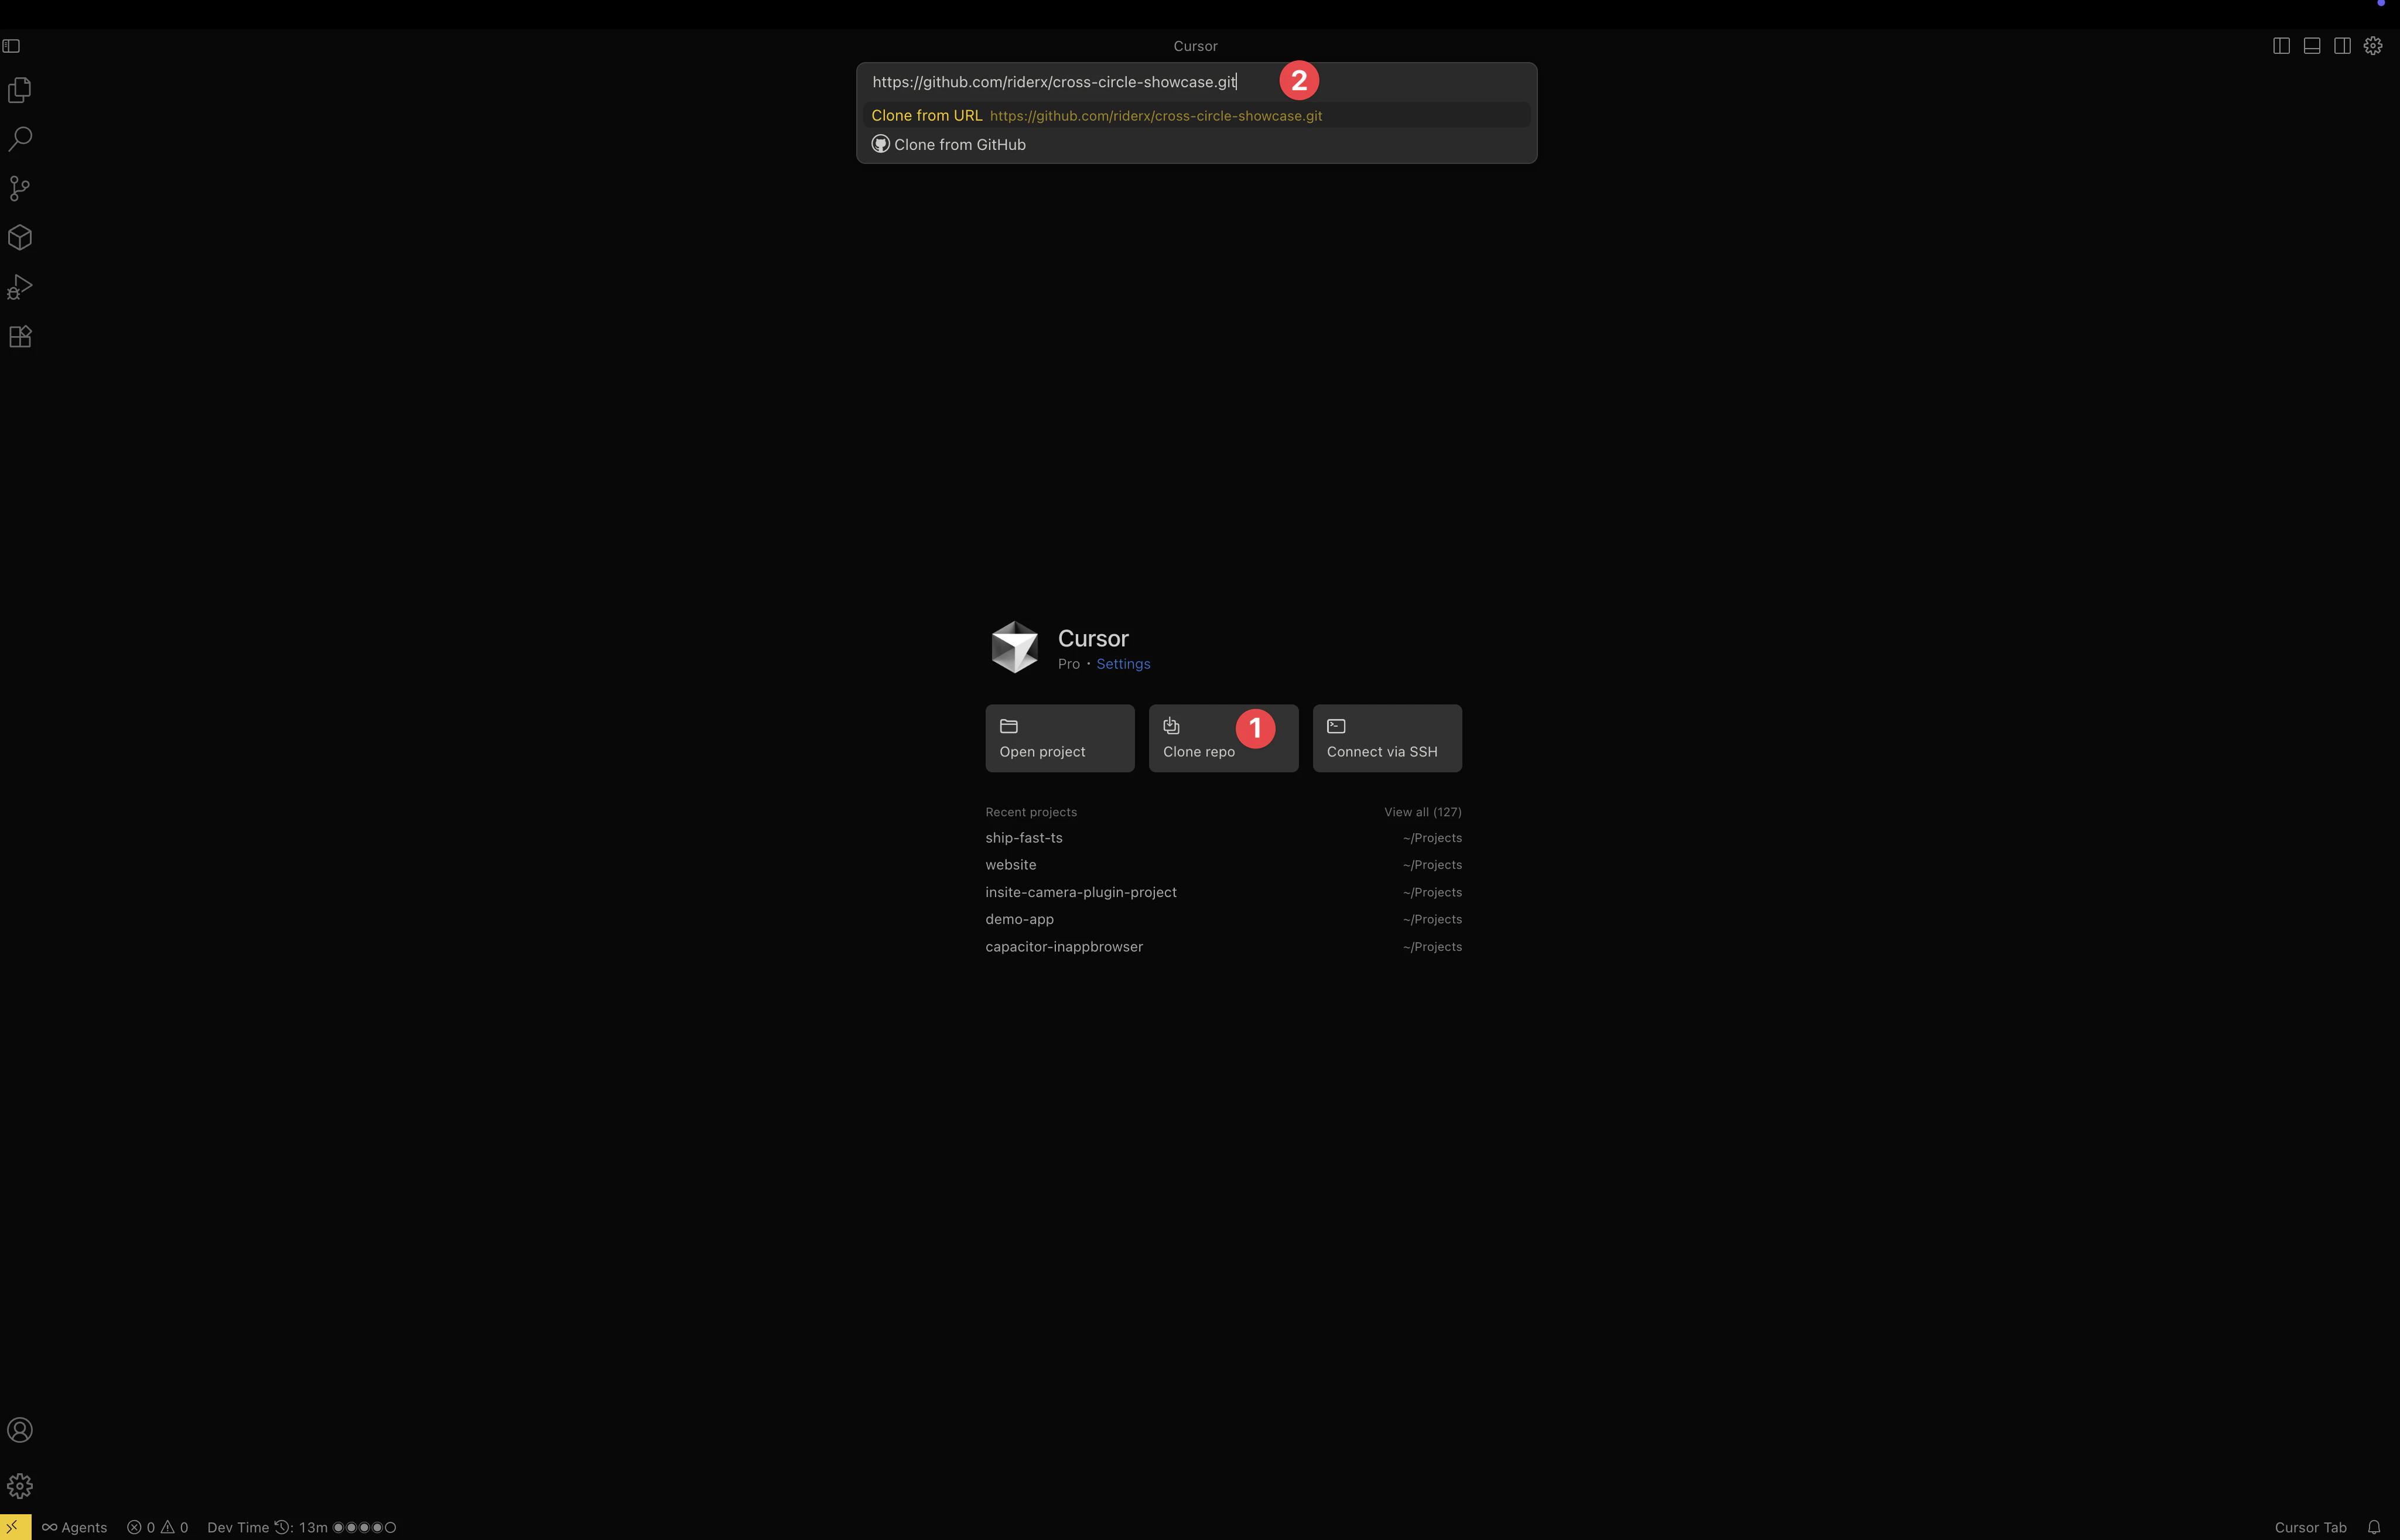
Alternative: Clone from GitHub
If you’ve connected Bolt.new to GitHub:
- Press
Shift+Command+P(Mac) orShift+Ctrl+P(Windows) - Search for “Git: Clone”
- Enter your repository URL
- Pick a location to save it
Step 2: Identify Your Project Framework
Bolt.new can generate projects using different frameworks. Let’s identify what you’re working with:
Check package.json
Open package.json to see what framework your project uses:

Common Bolt.new project types:
- React + Vite: Most common setup
- Vue + Vite: Vue.js applications
- Svelte: Svelte applications
- Next.js: Full-stack React apps
- Vanilla JS: Plain JavaScript apps
Step 3: Install Development Tools
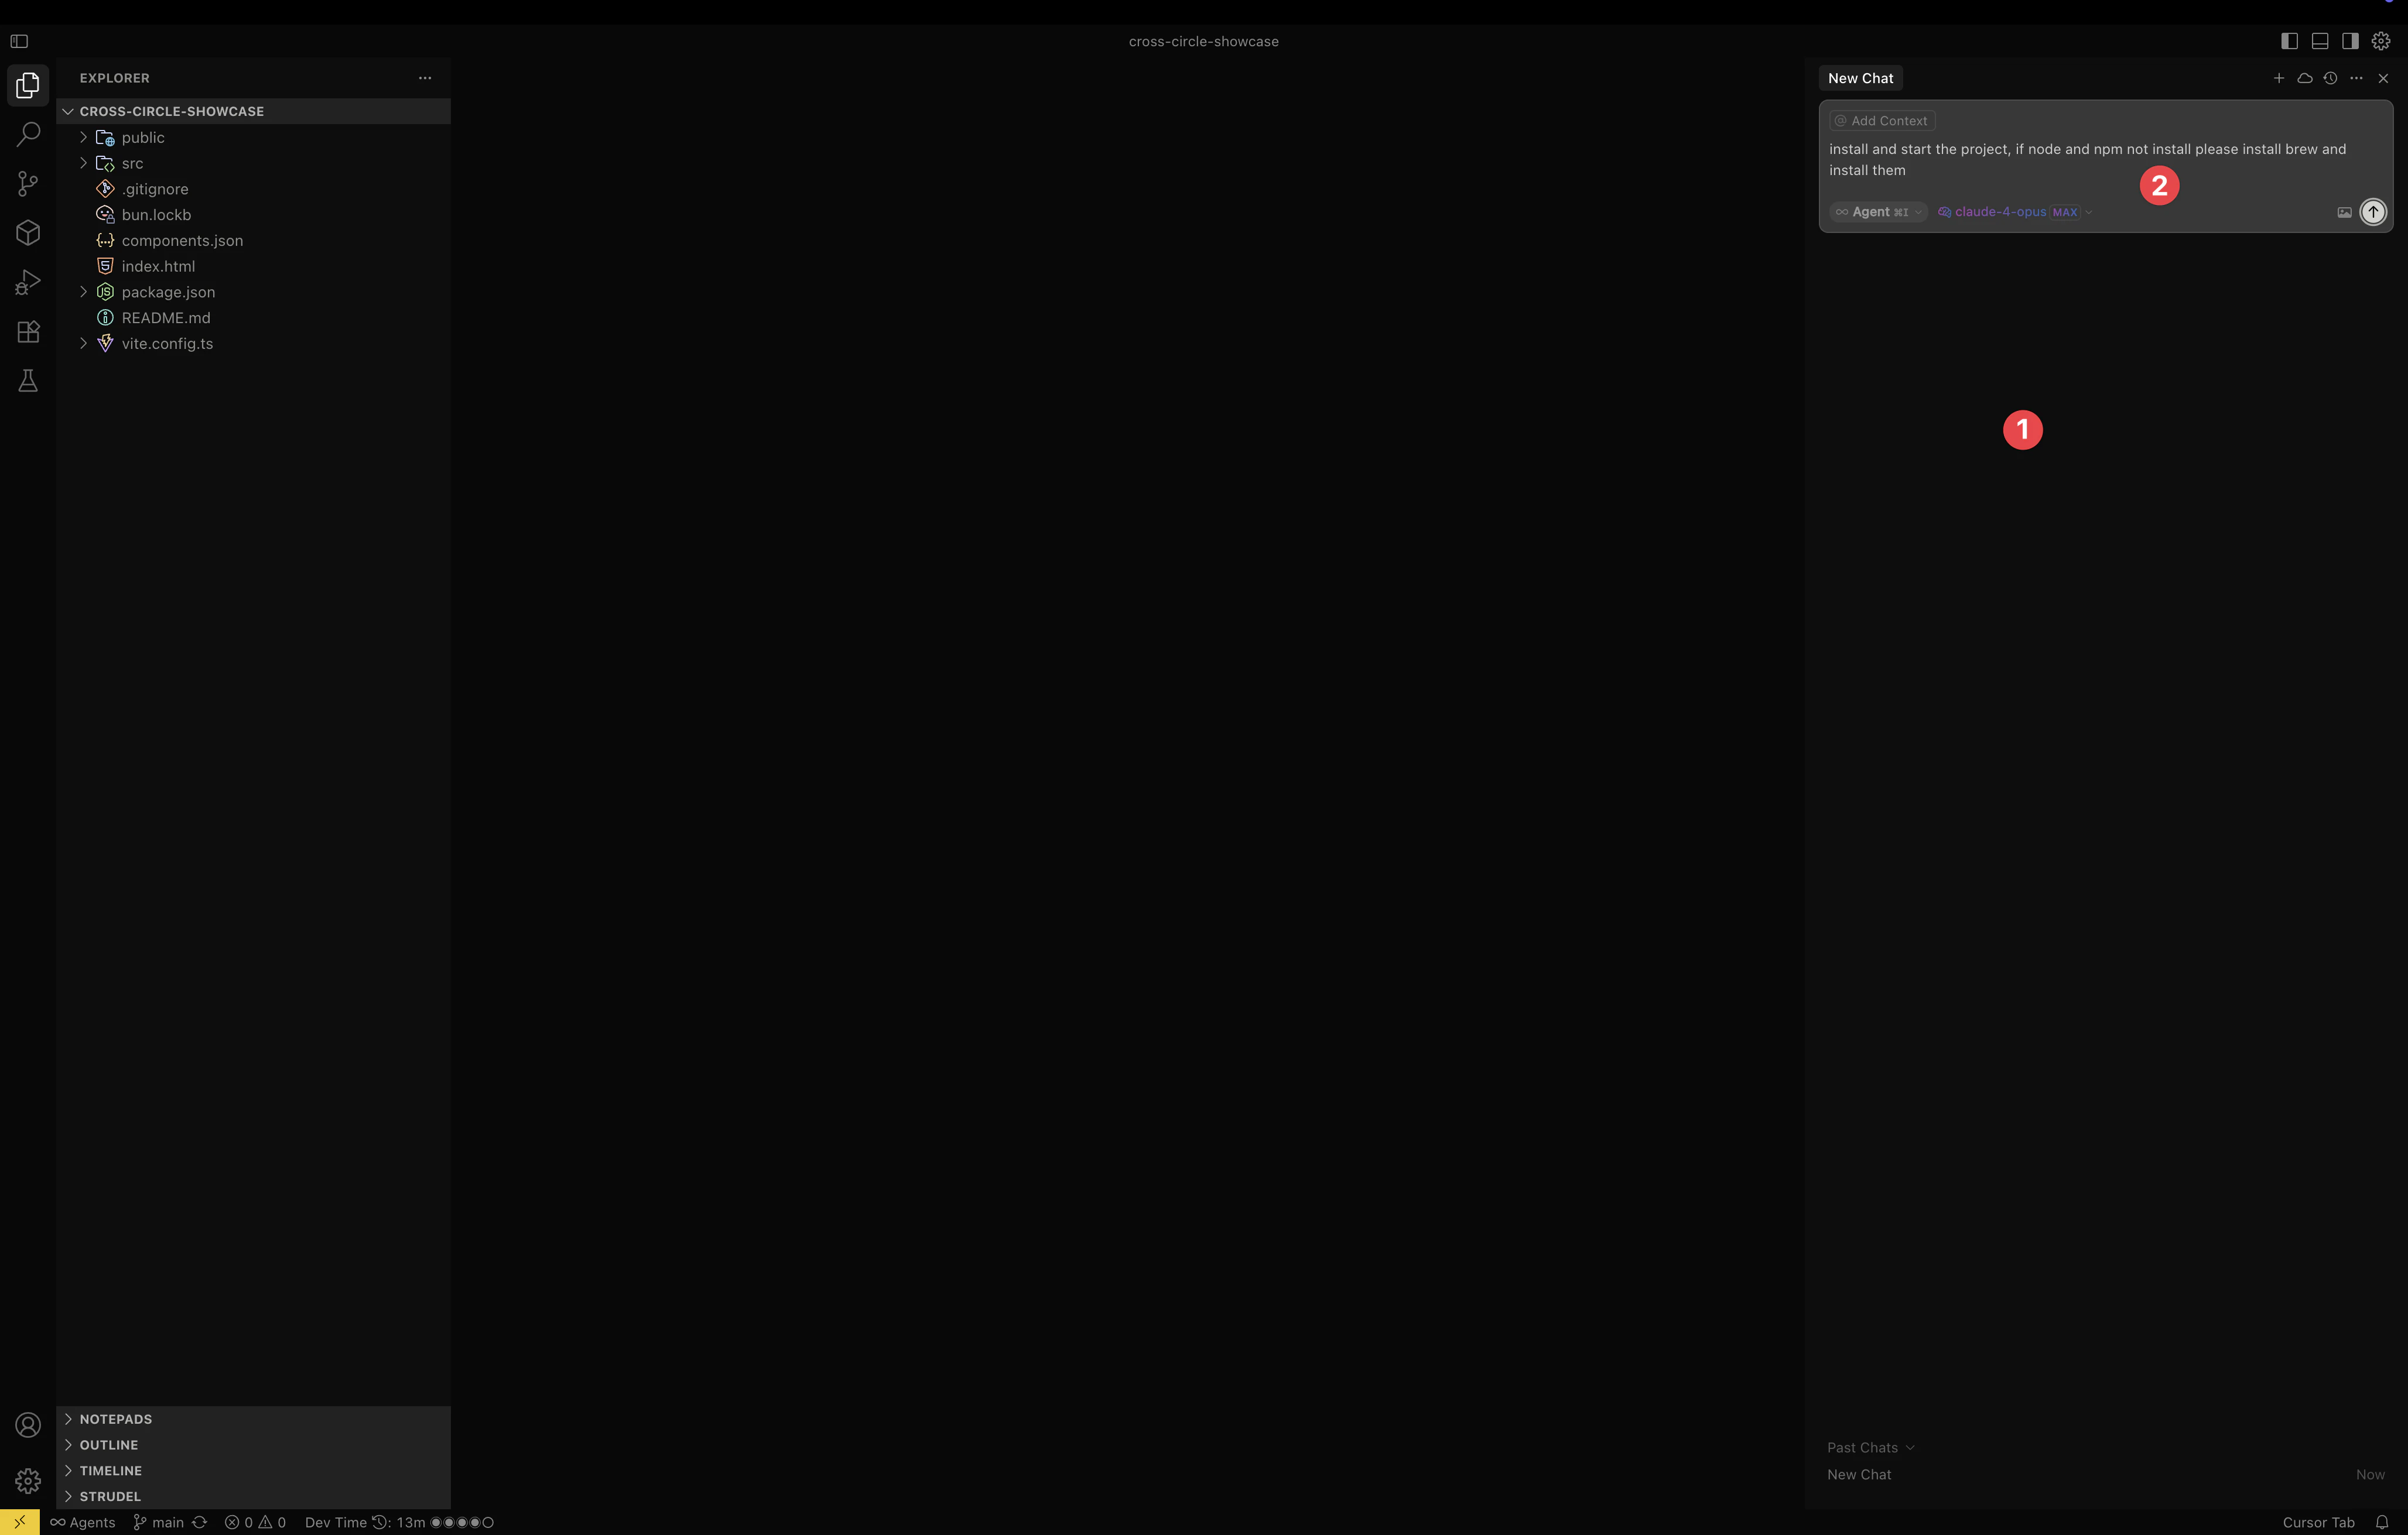
Option A: Let Cursor AI Handle Everything
- Press
Command+K(Mac) orCtrl+K(Windows) in Cursor - Type this request:
Install all necessary development tools including Node.js, then install project dependencies and start the dev server
Cursor AI will automatically:
- Install Node.js and npm if needed
- Set up Homebrew on macOS
- Install all project dependencies
- Launch your development server
Option B: Manual Installation Process
If you prefer manual control or the AI approach encounters issues:
First, open Cursor’s terminal with Shift+Command+T (Mac) or Shift+Ctrl+T (Windows)
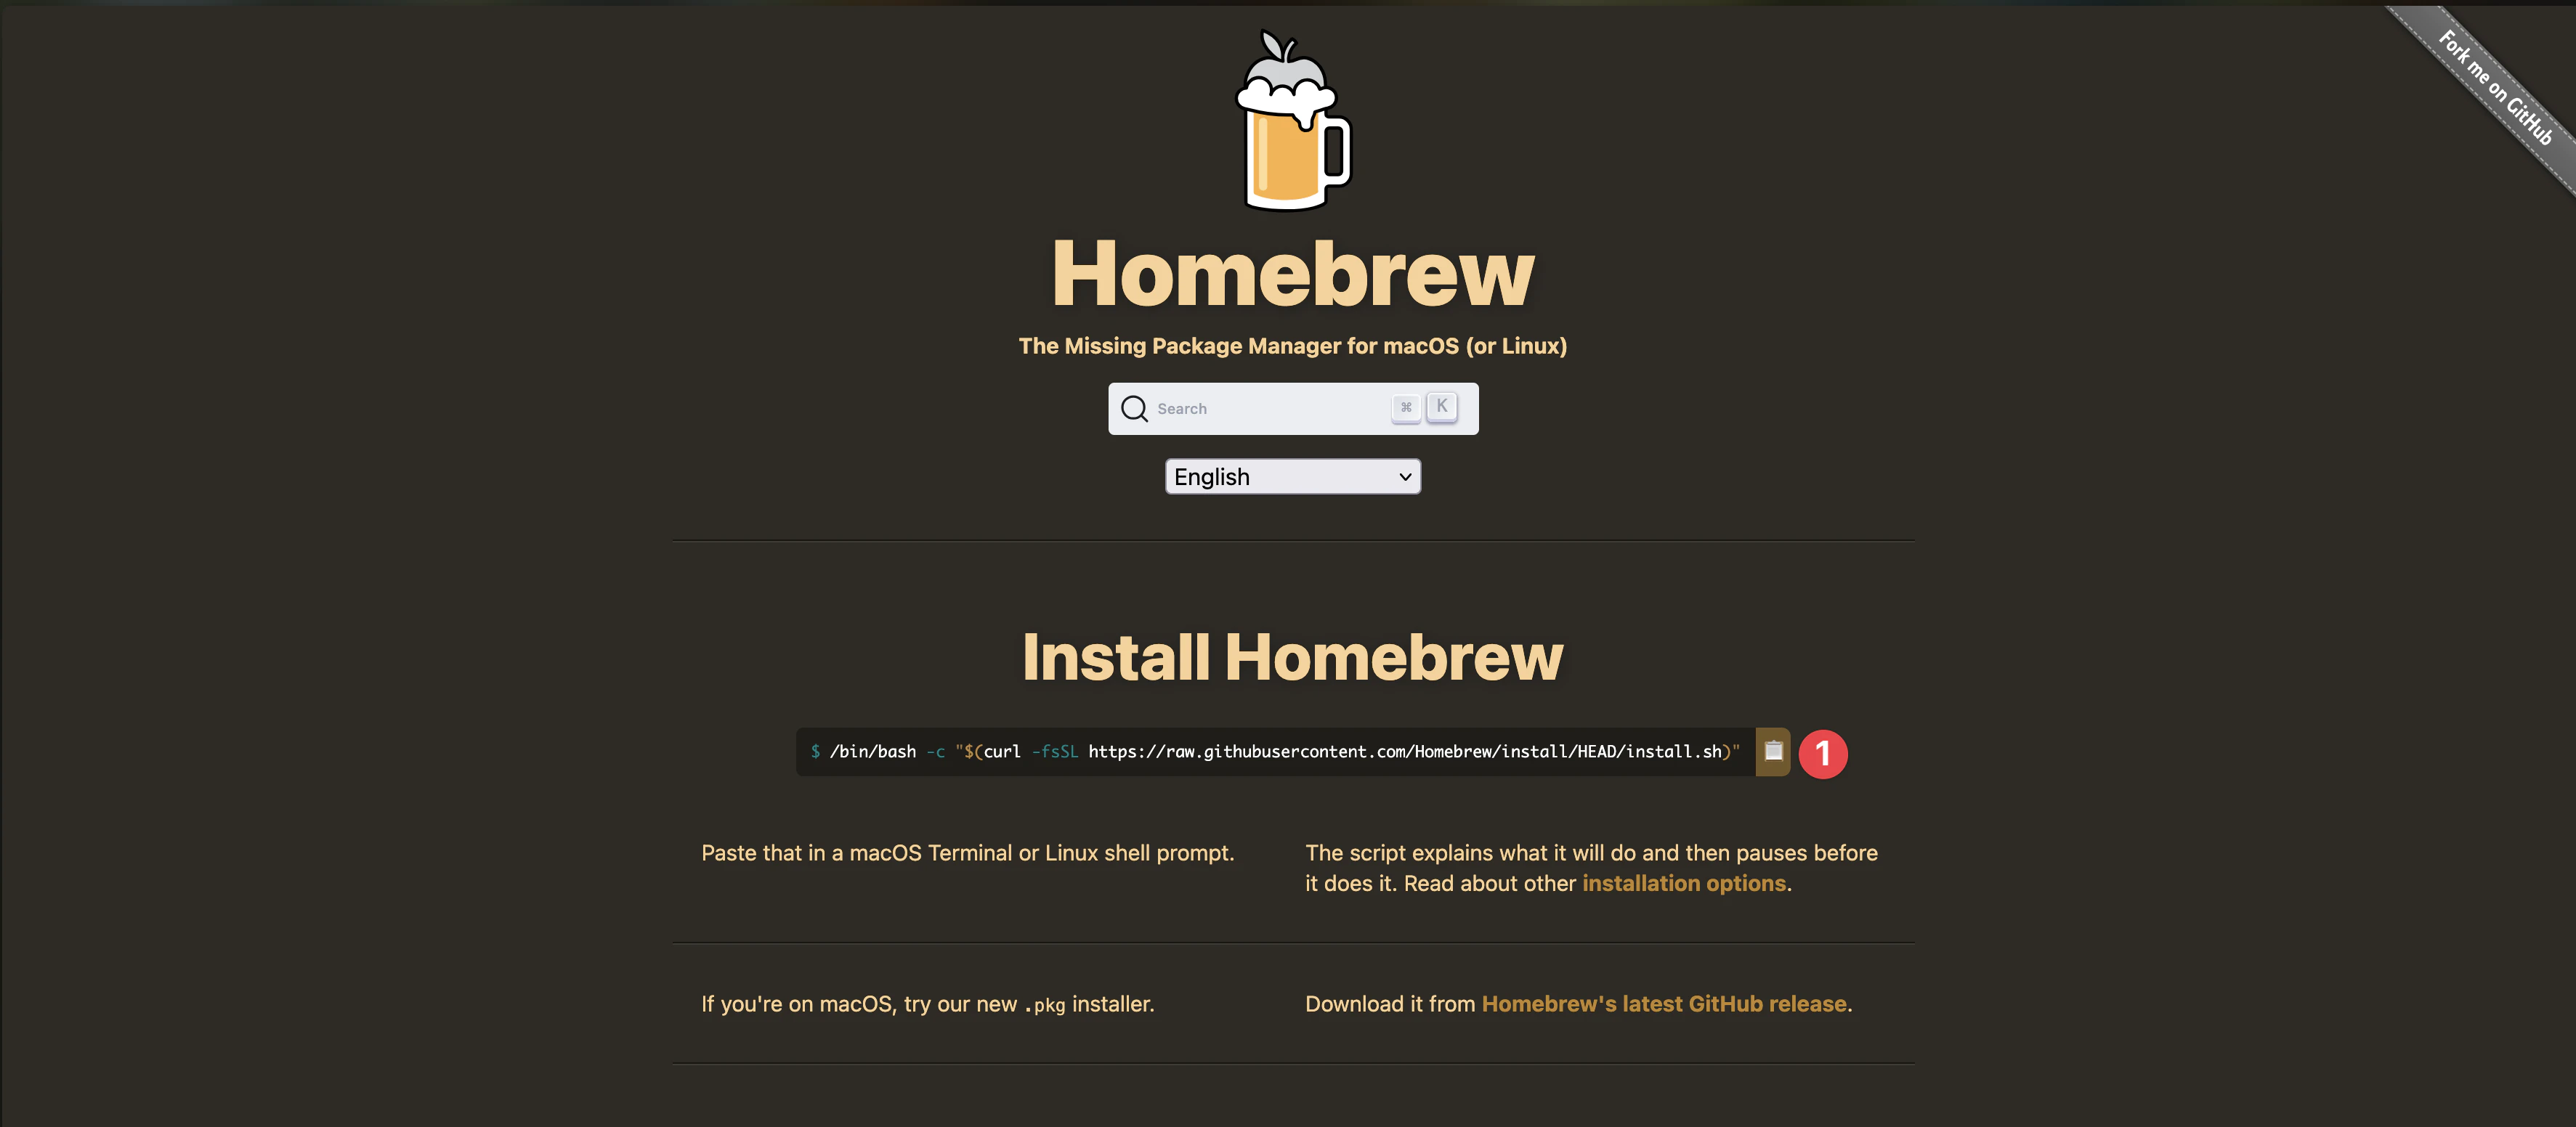
For macOS users:
# Get Homebrew package manager/bin/bash -c "$(curl -fsSL https://raw.githubusercontent.com/Homebrew/install/HEAD/install.sh)"
# Install Node.js via Homebrewbrew install node
# Move to your project foldercd your-bolt-project
# Install project packagesnpm install
# Launch development servernpm run dev
For Windows users:
- Download Node.js installer from nodejs.org
- Complete the installation wizard
- In Cursor’s terminal:
cd your-bolt-projectnpm installnpm run dev
Your Bolt.new app should now be running (typically at http://localhost:5173 for Vite projects).
Step 4: Configure Build for Mobile
Your configuration will vary based on your project framework.
Option A: Automatic Configuration with Cursor AI
Ask Cursor AI to handle the configuration:
Configure my Bolt.new project for mobile deployment with proper build settingsCursor will detect your framework and apply the right configuration.
Option B: Manual Configuration by Framework
For React + Vite Projects:
Edit vite.config.js:
import { defineConfig } from 'vite'import react from '@vitejs/plugin-react'
export default defineConfig({  plugins: [react()],  base: './',  build: {    outDir: 'dist',    assetsDir: 'assets',    rollupOptions: {      output: {        manualChunks: undefined,      },    },  },})
For Vue + Vite Projects:
Modify vite.config.js:
import { defineConfig } from 'vite'import vue from '@vitejs/plugin-vue'
export default defineConfig({  plugins: [vue()],  base: './',  build: {    outDir: 'dist',    assetsDir: 'assets',  },})
For Next.js Projects
Add to your package.json scripts:
{ "scripts": { "dev": "next dev", "build": "next build", "start": "next start", "static": "next build && next export" }}Update next.config.js:
/** @type {import('next').NextConfig} */const nextConfig = {  output: 'export',  trailingSlash: true,  images: {    unoptimized: true,  },}
module.exports = nextConfig
Step 5: Build Your Project
Time to create the production build of your Bolt.new app.
Option A: Build with Cursor AI
Simply ask Cursor:
Build my Bolt.new project for production deploymentCursor will run the appropriate build command based on your framework.
Option B: Build Manually
For Vite-based Projects (React/Vue/Svelte):
npm run build
For Next.js Applications:
npm run staticConfirm Build Success
Ensure your build generated the correct output:
- Vite projects: Look for a
distdirectory - Next.js projects: Check for an
outdirectory

Step 6: Add Capacitor to Your Bolt.new Project
Let’s transform your web application into native mobile apps.
Option A: Quick Setup with Cursor AI
Press Command+K (Mac) or Ctrl+K (Windows) and request:
Add Capacitor to my project and set up iOS and Android platformsCursor AI will handle the entire setup process.
Option B: Step-by-Step Manual Setup
Install Capacitor’s command-line tools:
npm install -D @capacitor/cliInitialize your Capacitor project:
npx cap init
You’ll be prompted for:
- App name: Your Bolt.new project name
- Bundle ID: Format like
com.yourcompany.yourapp
Continue with manual setup - install essential packages:
npm install @capacitor/core @capacitor/ios @capacitor/androidAdd mobile platform support:
npx cap add iosnpx cap add android
What Just Happened?
Your Bolt.new project structure now looks like:
your-bolt-project/├── src/ # Your app source (React/Vue/etc)├── public/ # Static files├── dist/ # Build output (Vite)├── out/ # Build output (Next.js)├── ios/ # iOS Xcode project (NEW!)├── android/ # Android Studio project (NEW!)├── capacitor.config.ts # Mobile configuration└── package.json # DependenciesImportant Notes:
- Your web code stays in
src/- edit there ios/andandroid/are generated - don’t edit- After changes, always run
npx cap sync - Each platform has its own build process
Step 7: Configure Capacitor
Time to configure Capacitor for your specific framework.
Option A: Auto-Configuration with Cursor
Request Cursor’s help:
Configure capacitor.config.ts for my Bolt.new project build outputOption B: Manual Configuration
For Vite-Based Applications:
import { CapacitorConfig } from '@capacitor/cli';
const config: CapacitorConfig = {  appId: 'com.yourcompany.yourapp',  appName: 'Your Bolt App',  webDir: 'dist',  bundledWebRuntime: false,  server: {    androidScheme: 'https'  }};
export default config;
For Next.js Applications:
import { CapacitorConfig } from '@capacitor/cli';
const config: CapacitorConfig = {  appId: 'com.yourcompany.yourapp',  appName: 'Your Bolt App',  webDir: 'out',  bundledWebRuntime: false,  server: {    androidScheme: 'https'  }};
export default config;
Step 8: Build and Sync
Prepare your app for mobile deployment.
Option A: Using Cursor AI
Tell Cursor:
Build my project and sync it with Capacitor for mobile deploymentOption B: Manual Process
Execute these commands in sequence:
npm run buildnpx cap sync
Step 9: Open Native IDEs
Access the native development environments for your app.
iOS Development
Option A: Via Cursor AI
Open my iOS project in XcodeOption B: Terminal Command
npx cap open ios
Android Development
Option A: Via Cursor AI
Open my Android project in Android StudioOption B: Terminal Command
npx cap open android
Step 10: Build and Run Your Mobile App
Running on iOS
Setting Up Xcode (First Time)
-
Choose Your Target:
- Next to the Play button, click the device selector
- For testing: Choose any iPhone simulator
- For real device: Connect your iPhone via USB
-
Configure Code Signing:
- Click your project name in left sidebar
- Go to “Signing & Capabilities” tab
- Enable “Automatically manage signing”
- Sign in with your Apple ID
- Note: Real devices require Apple Developer Program ($99/year)
-
Build Your App:
- Click the ▶️ Play button
- First build: 5-10 minutes (be patient!)
- Watch the progress bar at top
Troubleshooting iOS:
- “No account found”: Add Apple ID in Xcode > Settings > Accounts
- “Failed to build”: Clean build folder (Shift+Command+K) and retry
- Simulator issues: Restart simulator via Device > Restart

Running on Android
Setting Up Android Studio (First Time)
-
SDK Setup (automatic):
- Android Studio will detect missing components
- Click “Install missing SDK” when prompted
- This downloads ~2-3GB of files
-
Create Virtual Device:
- Open AVD Manager (phone icon in toolbar)
- Click ”+ Create Virtual Device”
- Select “Pixel 6” (good default)
- Download system image when prompted
- Finish setup with default options
-
Run Your App:
- Select your emulator from dropdown
- Click green ▶️ Run button
- First build: 10-15 minutes
- Emulator starts automatically
Troubleshooting Android:
- “Gradle sync failed”: Try File > Invalidate Caches
- Slow emulator: Enable hardware acceleration in AVD settings
- Build errors: Update Gradle via suggested fixes

Verification Checklist
After successful build, verify:
✅ App launches without crashing ✅ Your Bolt.new content displays correctly ✅ Buttons and interactions work ✅ Console shows no red errors
Still having issues? The error messages usually tell you exactly what’s wrong - read them carefully!
Step 11: Enable Live Reload (Development)
Speed up your development workflow with hot reloading.
Option A: Automatic Setup with Cursor
Ask Cursor:
Enable live reload for my Capacitor app developmentCursor will configure everything automatically.
Option B: Manual Configuration
- Get your local IP address:
# macOSipconfig getifaddr en0
# Windowsipconfig- Update your
capacitor.config.ts:
import { CapacitorConfig } from '@capacitor/cli';
const config: CapacitorConfig = {  appId: 'com.yourcompany.yourapp',  appName: 'Your Bolt App',  webDir: 'dist', // or 'out' for Next.js  bundledWebRuntime: false,  server: {    url: 'http://YOUR_IP_ADDRESS:5173', // or 3000 for Next.js    cleartext: true,  },};
export default config;- Apply the configuration:
npx cap copy
Step 12: Add Native Features
Enhance your Bolt.new app with device-specific capabilities.
Option A: AI-Powered Integration
Request from Cursor:
Add native share, camera, and geolocation features to my Bolt.new appCursor will install plugins and create the integration code.
Option B: Manual Plugin Installation
Install popular native plugins:
npm i @capacitor/share @capacitor/camera @capacitor/geolocationCreate a utilities file for React projects:
import { Share } from '@capacitor/share';import { Camera, CameraResultType } from '@capacitor/camera';import { Geolocation } from '@capacitor/geolocation';
export const shareContent = async (title, text, url) => {  await Share.share({    title,    text,    url,    dialogTitle: 'Share with friends',  });};
export const takePicture = async () => {  const image = await Camera.getPhoto({    quality: 90,    allowEditing: true,    resultType: CameraResultType.Uri  });  return image;};
export const getCurrentPosition = async () => {  const coordinates = await Geolocation.getCurrentPosition();  return coordinates;};
Use in Your Components
// For React componentsimport React from 'react';import { shareContent, takePicture } from '../utils/capacitor';
function MyComponent() {  const handleShare = () => {    shareContent('My Bolt App', 'Check out this amazing app!', 'https://your-app.com');  };
  const handleCamera = async () => {    try {      const photo = await takePicture();      console.log('Photo taken:', photo);    } catch (error) {      console.error('Camera error:', error);    }  };
  return (    <div>      <button onClick={handleShare}>Share App</button>      <button onClick={handleCamera}>Take Photo</button>    </div>  );}
export default MyComponent;
Sync Changes
With Cursor AI:
Sync my native feature changes to all platformsManual command:
npx cap sync
Step 13: Optimize for Production
App Icons and Splash Screens
Option A: Cursor AI Setup
Request:
Create app icons and splash screens for my mobile appOption B: Manual Asset Creation
- Get the assets tool:
npm install -D @capacitor/assets-
Prepare your graphics:
- Create
assets/icon.png(1024x1024px) - Create
assets/splash.png(2732x2732px)
- Create
-
Generate all sizes automatically:
npx capacitor-assets generate
Optimize Build
For Vite projects, optimize your build:
export default defineConfig({ plugins: [react()], // or vue() base: './', build: { outDir: 'dist', minify: 'terser', terserOptions: { compress: { drop_console: true, drop_debugger: true, }, }, rollupOptions: { output: { manualChunks: { vendor: ['react', 'react-dom'], // adjust for your framework }, }, }, },})Final Build
Option A: Build with Cursor AI
Create the final production build and prepare for app store deploymentOption B: Manual Build Process
npm run buildnpx cap syncnpx cap copyTroubleshooting Common Issues
Framework-Specific Issues
React/Vite Projects
- Ensure
base: './'is set in Vite config - Check that all imports use relative paths
- Verify that the
distfolder is generated correctly
Vue Projects
- Make sure Vue Router uses hash mode for mobile
- Check that assets are properly referenced
- Verify component lazy loading works in mobile context
Next.js Projects
- Ensure static export is configured correctly
- Check that dynamic imports work in static context
- Verify that API routes are not used (or properly handled)
Build Errors
If you encounter build errors:
- Clear node_modules and reinstall:
rm -rf node_modules package-lock.jsonnpm install- Check Bolt.new project dependencies for mobile compatibility
- Ensure all relative paths are correct for mobile deployment
Missing Assets
For asset loading issues:
- Verify all assets are in the public folder
- Use relative paths for images and files
- Check that the build process copies all necessary assets
Conclusion
Congratulations! You’ve successfully transformed your Bolt.new project into native mobile applications. Your AI-generated web app can now:
- Run natively on iOS and Android devices
- Access device features like camera, GPS, and storage
- Be distributed through app stores
- Provide an optimized mobile user experience
Next Steps
- Live Updates: Implement Capgo for instant over-the-air updates
- Analytics: Add mobile analytics to track user behavior
- Performance: Monitor and optimize your app’s mobile performance
- Testing: Test your app on various devices and screen sizes
Your Bolt.new creation is now ready for the mobile ecosystem!
Resources
- Bolt.new Platform
- Capacitor Documentation
- Vite Mobile Deployment Guide
- Capgo - Live Updates for Capacitor Apps
Learn how Capgo can help you deliver instant updates to your mobile app, sign up for a free account today.


