


This tutorial focuses on the GitLab CI, but you can adapt it with a little tweak to any other CI/CD platform.
Preface
Be sure you added your app first to Capgo, this tutorial just focuses on the upload phase
Commit convention
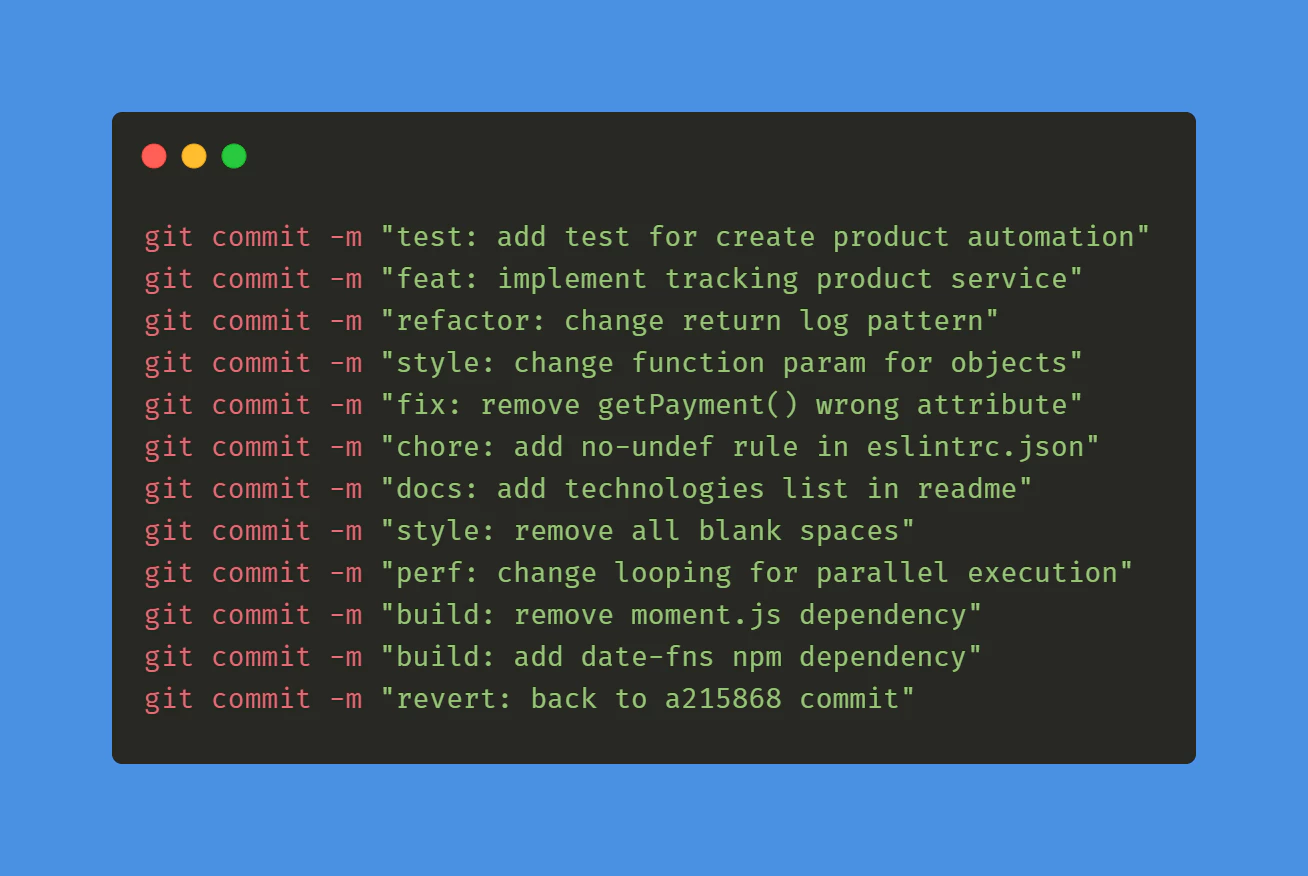
First you need to start following the commit convention conventional commits` this will help the tooling understand how to upgrade the version number, it’s 5 min to learn it.
GitLab CI for tag
Then you need to create your first GitLab to automatically build and create tag.
Create a file at this path: .github/workflows/bump_version.yml
with this content:
name: Bump version

on:
  push:
    branches:
      - main

jobs:
  bump-version:
    if: "!startsWith(github.event.head_commit.message, 'chore(release):')"
    runs-on: ubuntu-latest
    name: "Bump version and create changelog with standard version"
    steps:
      - name: Check out
        uses: actions/checkout@v6
        with:
          fetch-depth: 0
          filter: blob:none
          token: '${{ secrets.PERSONAL_ACCESS_TOKEN }}'
      - name: Git config
        run: |
          git config --local user.name "github-actions[bot]"
          git config --local user.email "github-actions[bot]@users.noreply.github.com"
      - name: Create bump and changelog
        run: npx capacitor-standard-version
      - name: Push to origin
        run: |
          CURRENT_BRANCH=$(git rev-parse --abbrev-ref HEAD)
          remote_repo="https://${GITHUB_ACTOR}:${{ secrets.PERSONAL_ACCESS_TOKEN }}@github.com/${GITHUB_REPOSITORY}.git"
          git pull $remote_repo $CURRENT_BRANCH
          git push $remote_repo HEAD:$CURRENT_BRANCH --follow-tags --tags
This will release a tag for every commit in your main branch. And add a changelog entry for each commit in the main branch in CHANGELOG.md.
Don’t worry if you don’t have this file, it will be created for you.
To make this work, create a PERSONAL ACCESS TOKEN and add it to your GitLab CI/CD variables as PERSONAL_ACCESS_TOKEN.
This is necessary to let the CI commit the changelog.
When you create the token, choose expiration as never and the scope as repo.
Lastly, to let the tool understand where your version is saved, you have to create the file .cz.toml at the root of your repository.
And add this inside :
[tool.commitizen]
name = "cz_conventional_commits"
tag_format = "$major.$minor.$patch$prerelease"
version = "0.11.5"
version_files = [
    "package.json:version",
    ".cz.toml"
]
Set the version in this file as the same you have in your package.json file.
This is only necessary the first time, then the tools will keep it up to date.
You can now commit this both files and see your first tag appear in GitHub!
GitHub actions for build
Create a file at this path: .github/workflows/build.yml
with this content:
name: Build source code and send to Capgo

on:
  push:
    tags:
      - '*'

jobs:
  deploy:
    runs-on: ubuntu-latest
    name: "Build code and release"
    steps:
      - name: Check out
        uses: actions/checkout@v6
      - name: Install dependencies
        id: install_code
        run: npm i
      - name: Build
        id: build_code
        run: npm run build
        env: # Remove both lines  if you don't need it
          FIREBASE_CONFIG: ${{ secrets.FIREBASE_CONFIG }} # Example of env var coming from a secret
      - name: Create Release
        id: create_release
        run: npx @capgo/cli@latest bundle upload -a ${{ secrets.CAPGO_TOKEN }} -c production
This will install and build your dependency before sending it to Capgo.
If your command for build is different, you can change it in the build_code step.
To make this work, you need to get your API key for Capgo, add it in the secret of your GitHub repository as CAPGO_TOKEN.
You can now commit this both files and see your first tag appear in GitHub!
Add the commit will generate a new build for the production channel.
You should add your test in the build step to ensure your code is working.
Go To your Capgo dashboard and check your build who just appeared, you now have your CI/CD system.
If you want to let all of your users get the update whenever it’s available, go to your channel and set it to public.
Keep going from Automatic build and release with Gitlab
If you are using Automatic build and release with Gitlab to plan CI/CD automation, connect it with Capgo CI/CD for the product workflow in Capgo CI/CD, Capgo Native Builds for the product workflow in Capgo Native Builds, Capgo Integrations for the product workflow in Capgo Integrations, CI/CD Integration for the implementation detail in CI/CD Integration, and GitHub Actions Integration for the implementation detail in GitHub Actions Integration.





