
Apple 로그인
설치
IOS에서 Apple 로그인 설정을 위해 필요한 것을 나열해 보겠습니다.
-
앱의 기능을 구성하세요.
이 작업을 수행하려면 Xcode를 열어 주세요, 클릭하여
App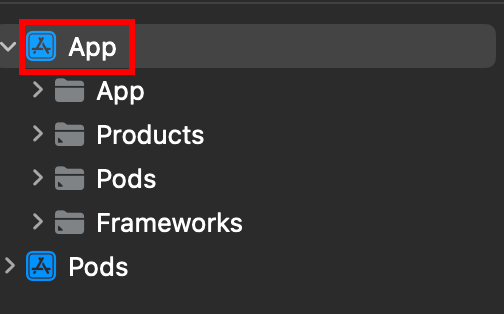
-
올바른 대상이 선택되어 있는지 확인하세요.
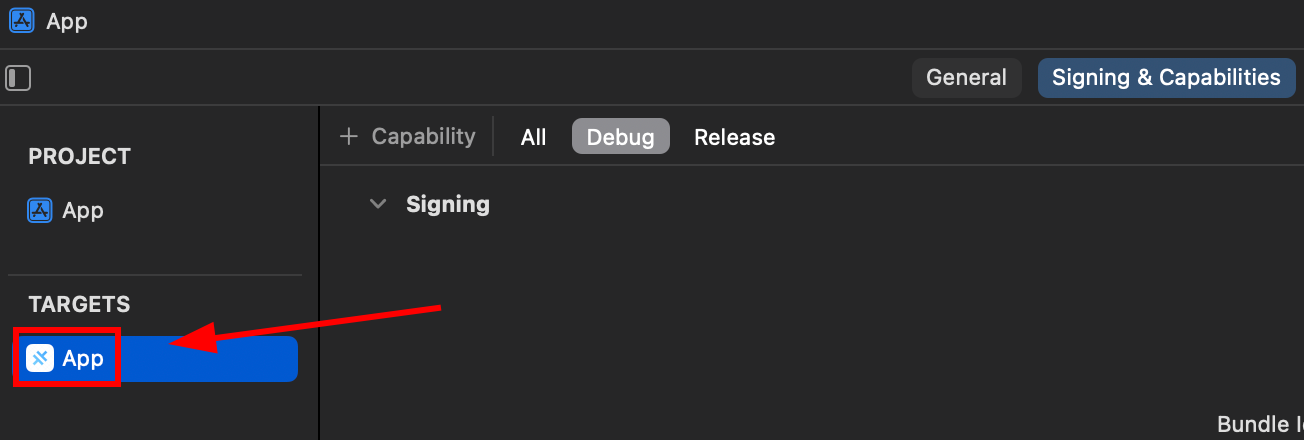
-
앱에 다음을 추가하십시오.
Sign in with Apple능력입니다.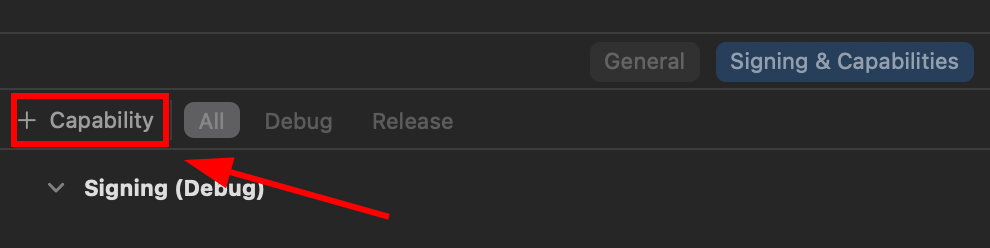
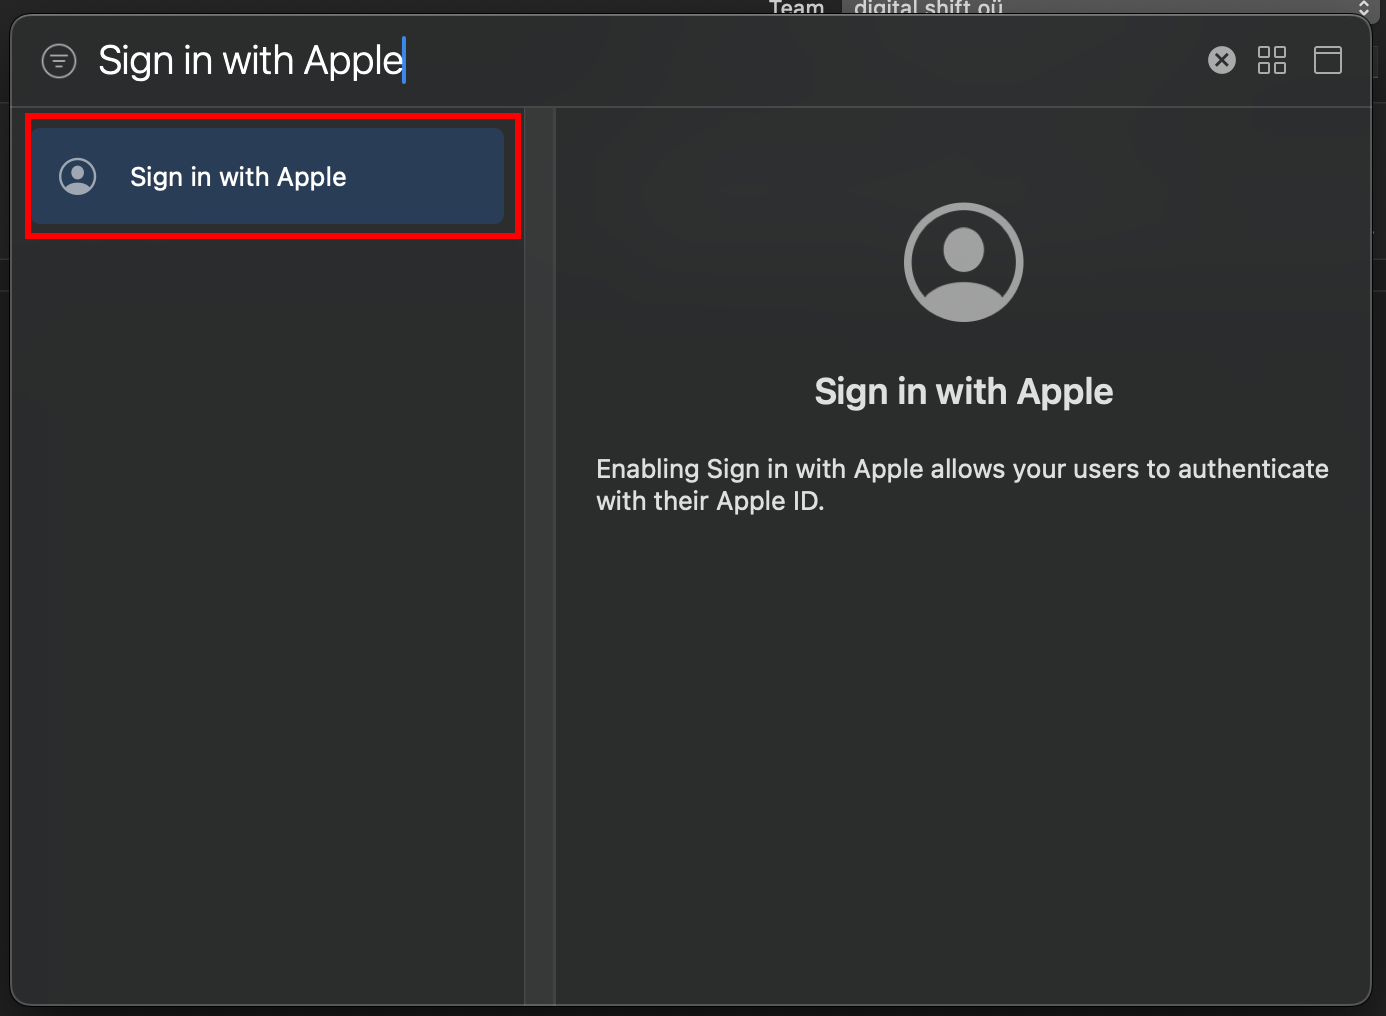
-
참고
// onMounted is vue specificonMounted(() => {SocialLogin.initialize({apple: {}})}); -
로그인 프로세스를 시작할 버튼을 만들겠습니다.
버튼이 호출할 함수는 다음과 같습니다.
async function loginApple() {const res = await SocialLogin.login({provider: 'apple',options: {}}) -
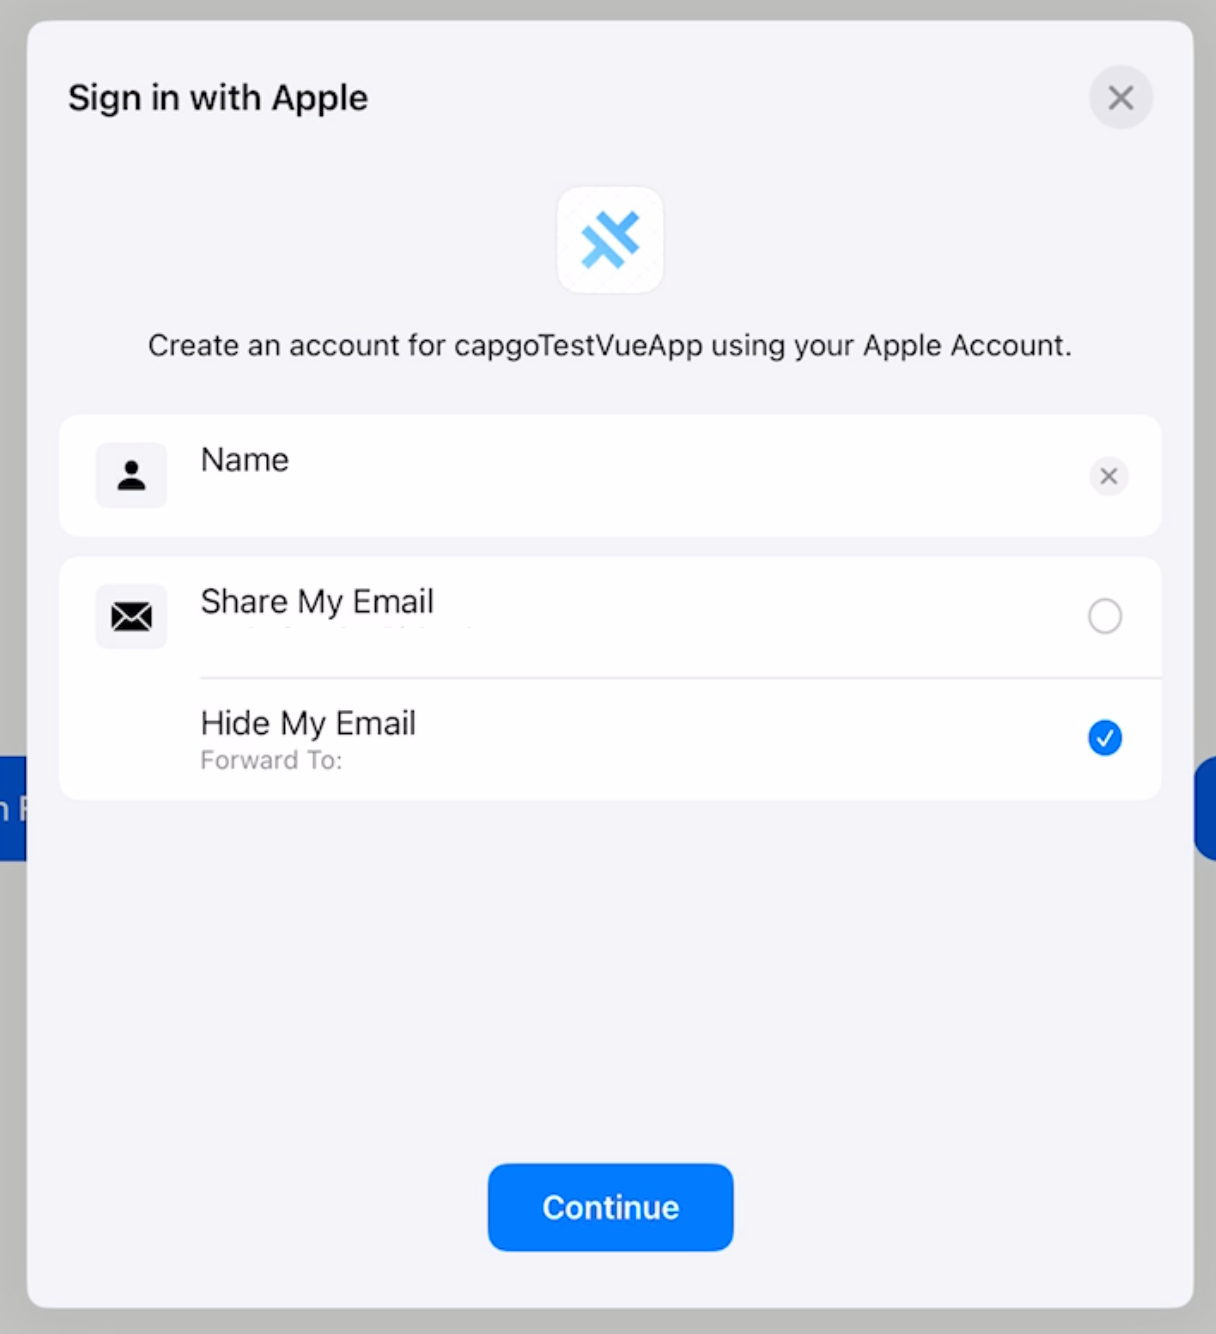
실제 기기에서 앱을 실행하고 테스트하세요. PHYSICAL 정확하게 따라오셨다면 버튼을 클릭한 후 다음 화면을 볼 수 있을 것입니다.
iOS 기기에서 Apple Sign In 프롬프트
Apple 로그인을 초기화하세요
제목이 'Apple 로그인을 초기화하세요'인 섹션
Copy to clipboardCall initialize with the apple provider before login. iOS에서 clientId is not used by the operating system directly; the plugin uses it to know which provider to initialize.
await SocialLogin.initialize({  apple: {    clientId: 'your-client-id',  },});
const res = await SocialLogin.login({  provider: 'apple',  options: {    scopes: ['email', 'name'],  },});
Apple 로그인에서 계속
Section titled “Apple 로그인에서 계속”If you are using Apple 로그인 to plan authentication and account flows, connect it with Using @capgo/capacitor-social-login for the native capability in Using @capgo/capacitor-social-login, @capgo/capacitor-social-login for the implementation detail in @capgo/capacitor-social-login, @capgo/capacitor-passkey for the implementation detail in @capgo/capacitor-passkey, @capgo/capacitor-native-biometric for the implementation detail in @capgo/capacitor-native-biometric, and 두 단계 인증 두 단계 인증에 대한 구현 세부 사항