Google 로그인 설정
__CAPGO_KEEP_0__ 설정을 위한 설치 단계와 전체 마크다운 가이드를 복사하세요.
In this guide, you will learn how to setup Google Login with Capgo Social Login. You will need the following in order to setup Google Login:
- Google 계정
일반 설정
__CAPGO_KEEP_0____CAPGO_KEEP_4__
- __CAPGO_KEEP_5__ __CAPGO_KEEP_6__
- __CAPGO_KEEP_7__
- __CAPGO_KEEP_9__ __CAPGO_KEEP_10__.
- __CAPGO_KEEP_11__
New project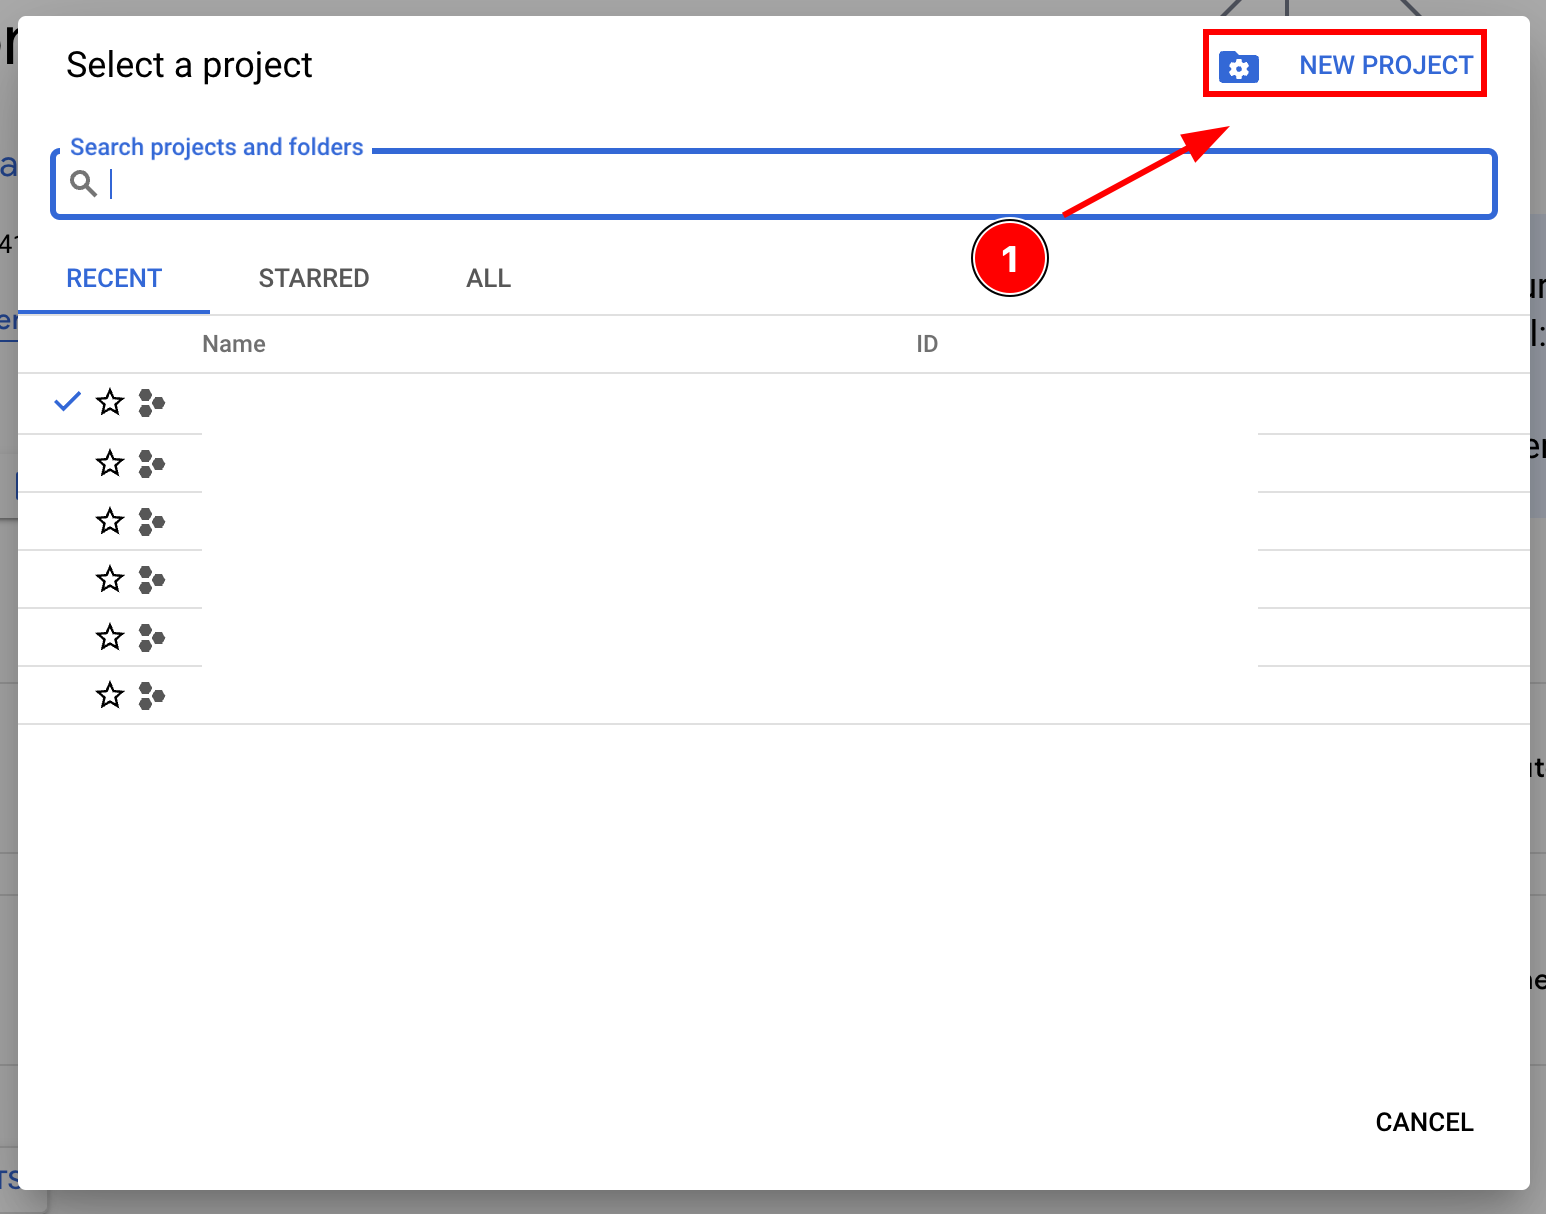
- 프로젝트 이름을 입력하고 클릭하세요.
Create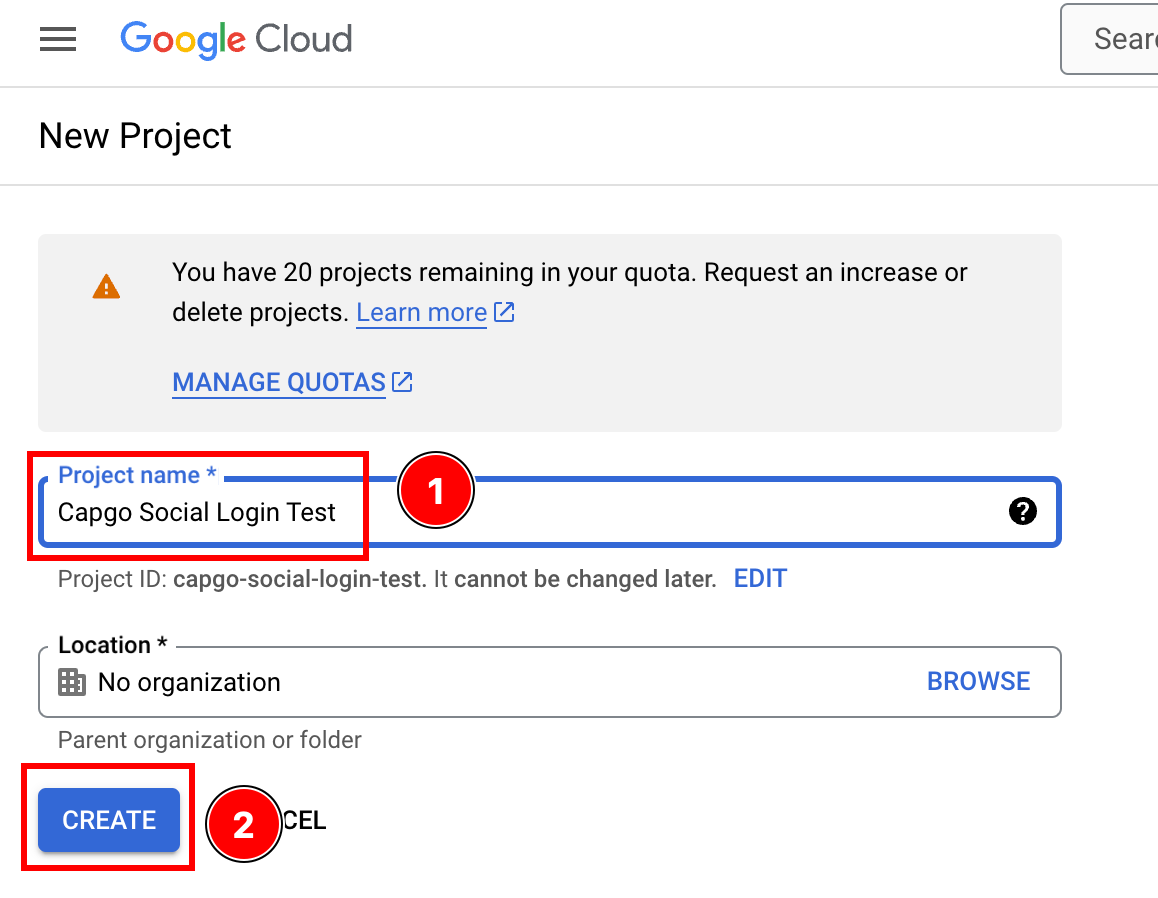
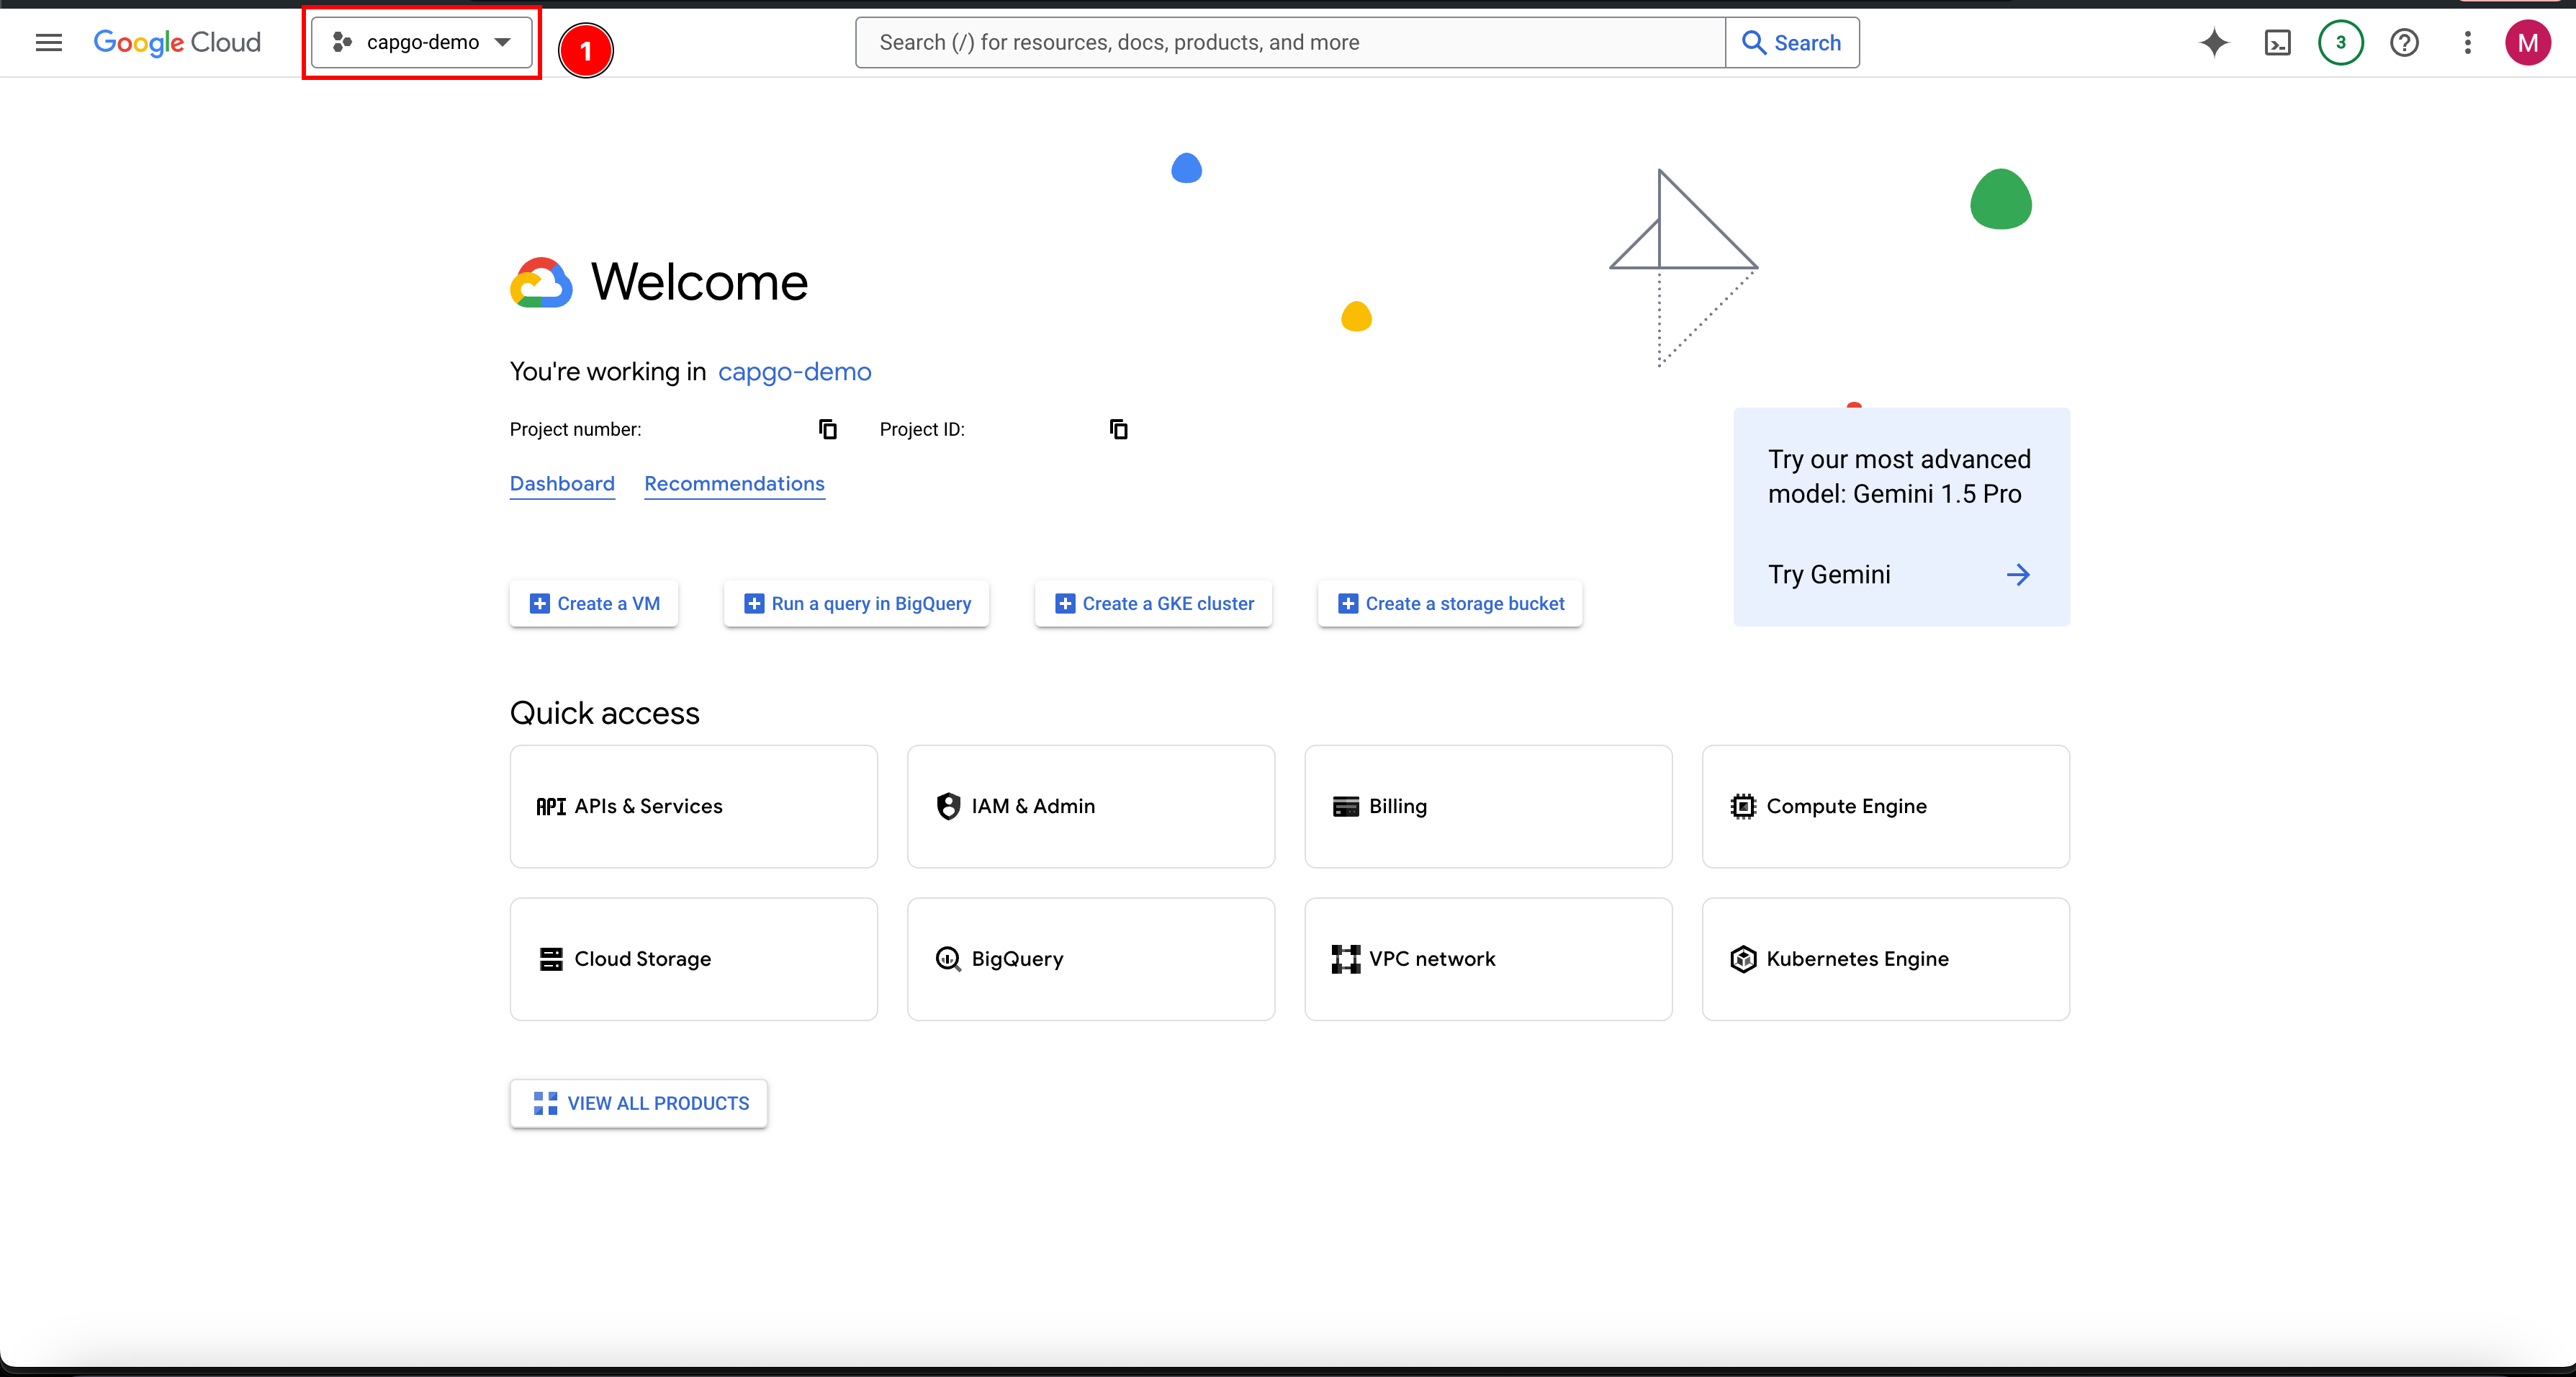
- 오른쪽 프로젝트가 선택되어 있는지 확인하세요.
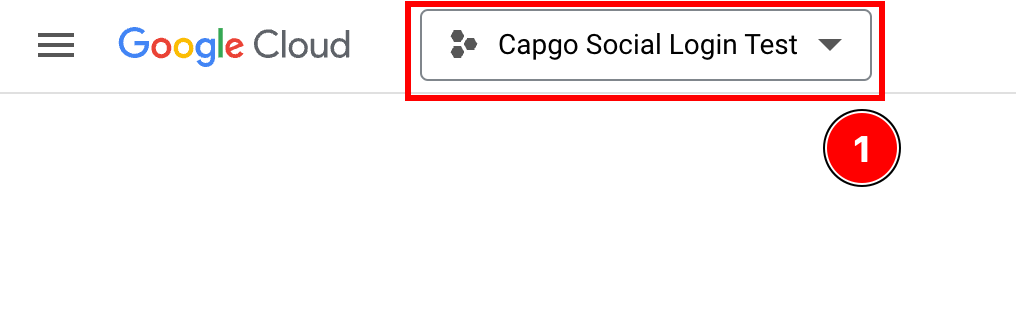
- __CAPGO_KEEP_11__
- 구성을 시작하세요.
OAuth consent screen-
검색바를 클릭하세요.

-
Google Console에서
OAuth consent screen를 검색하세요.
-
OAuth 동의 화면 설정 옵션을 보여줍니다.
외부 및 내부 옵션을 가진 OAuth 동의 화면 사용자 유형 선택
create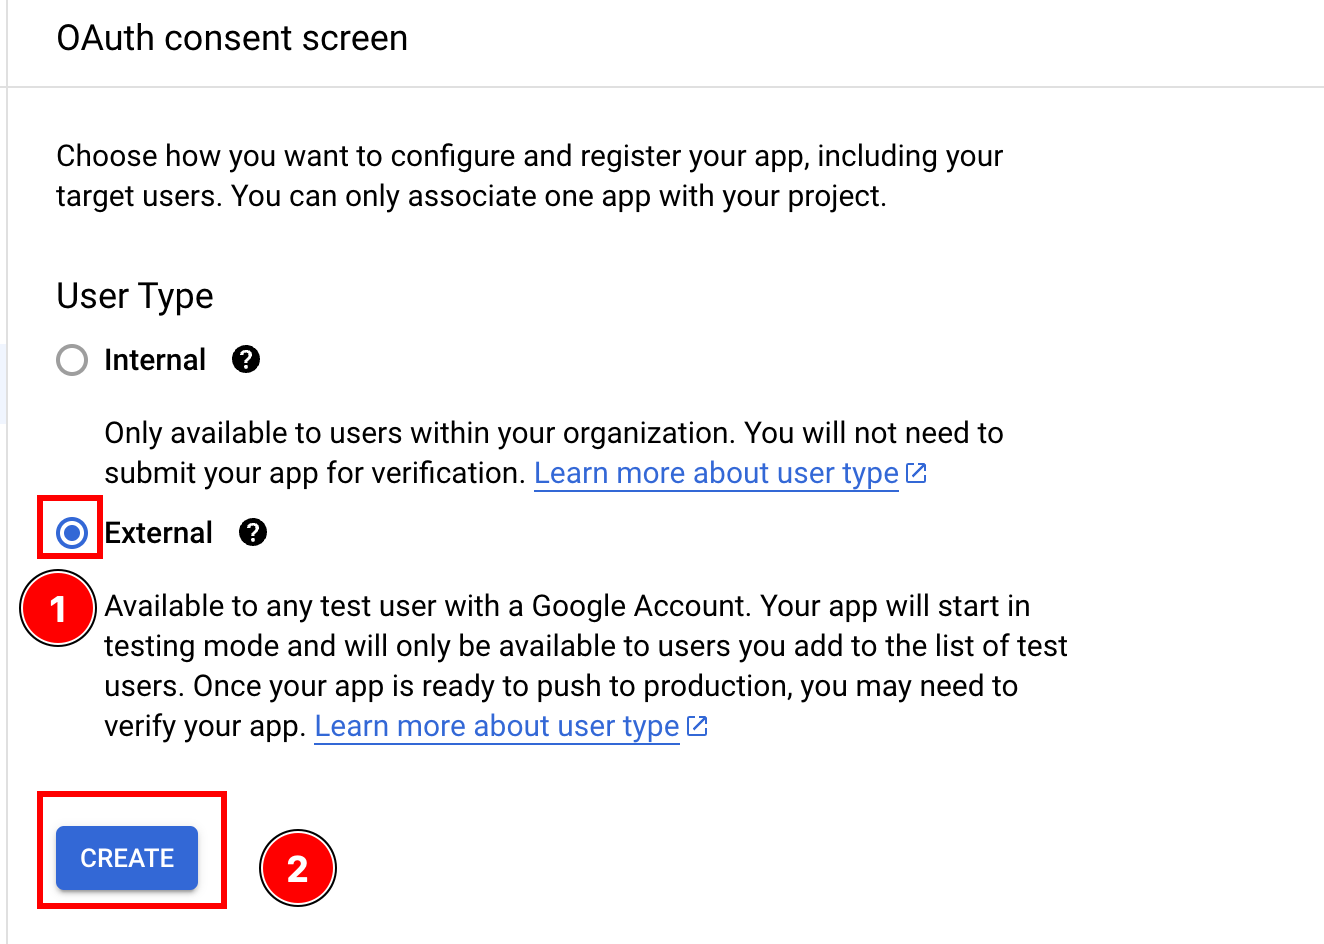
-
- 앱 정보 섹션에서 시작해 보겠습니다. 앱 이름과 사용자 지원 이메일 필드가 있습니다.
-
앱 이름과 사용자 지원 이메일을 입력해 주세요
App Information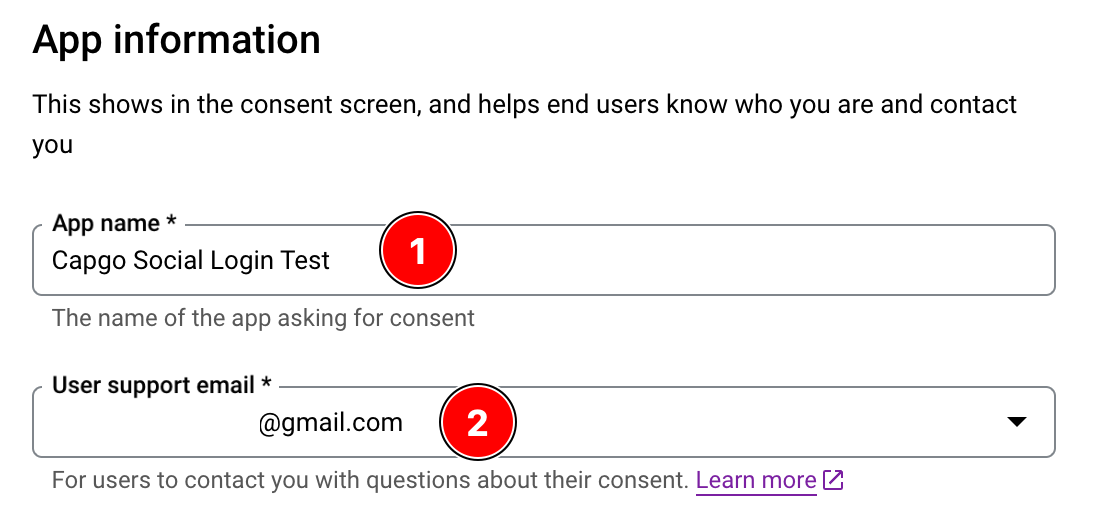
- 주의
App Name - __CAPGO_KEEP_0__를 입력하세요.
user support email
-
__CAPGO_KEEP_1__ __CAPGO_KEEP_2__ __CAPGO_KEEP_3__
-
당신 해야 한다 설정
App domain
-
__CAPGO_KEEP_0__ __CAPGO_KEEP_1__ __CAPGO_KEEP_0__을 제공하세요.
-
__CAPGO_KEEP_0__을 클릭하세요.
save and continue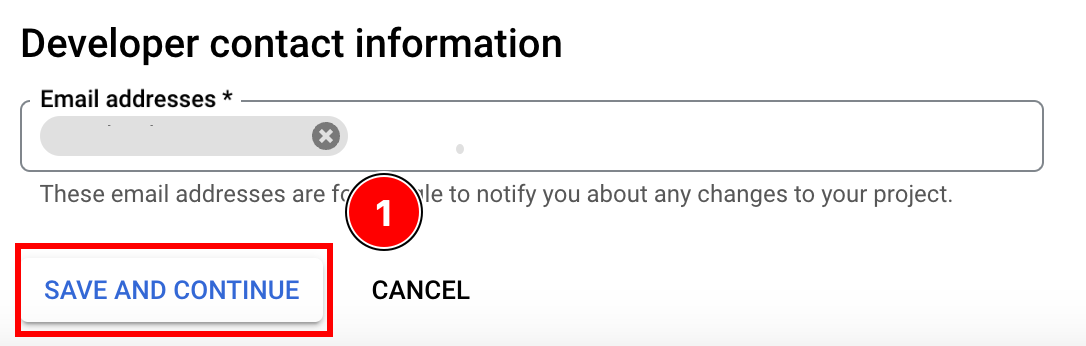
- 주의
-
- __CAPGO_KEEP_0__을 구성하세요.
-
__CAPGO_KEEP_0__을 클릭하세요.
add or remove scopes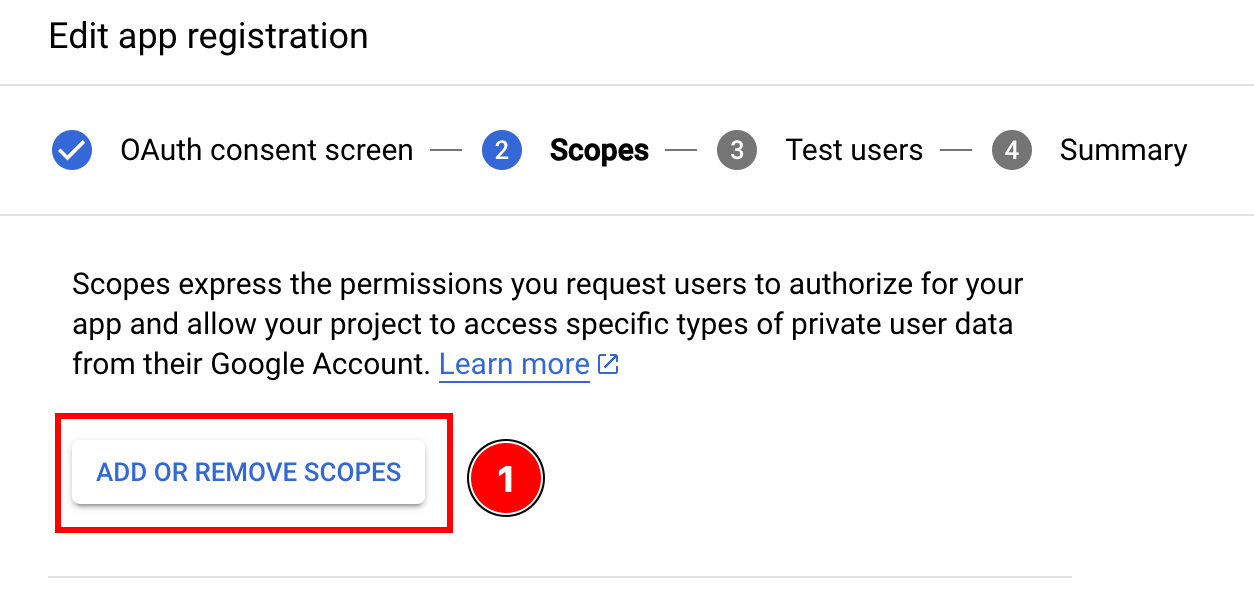
-
이메일 및 프로필 범위를 선택한 __CAPGO_KEEP_0__ 대화 상자
update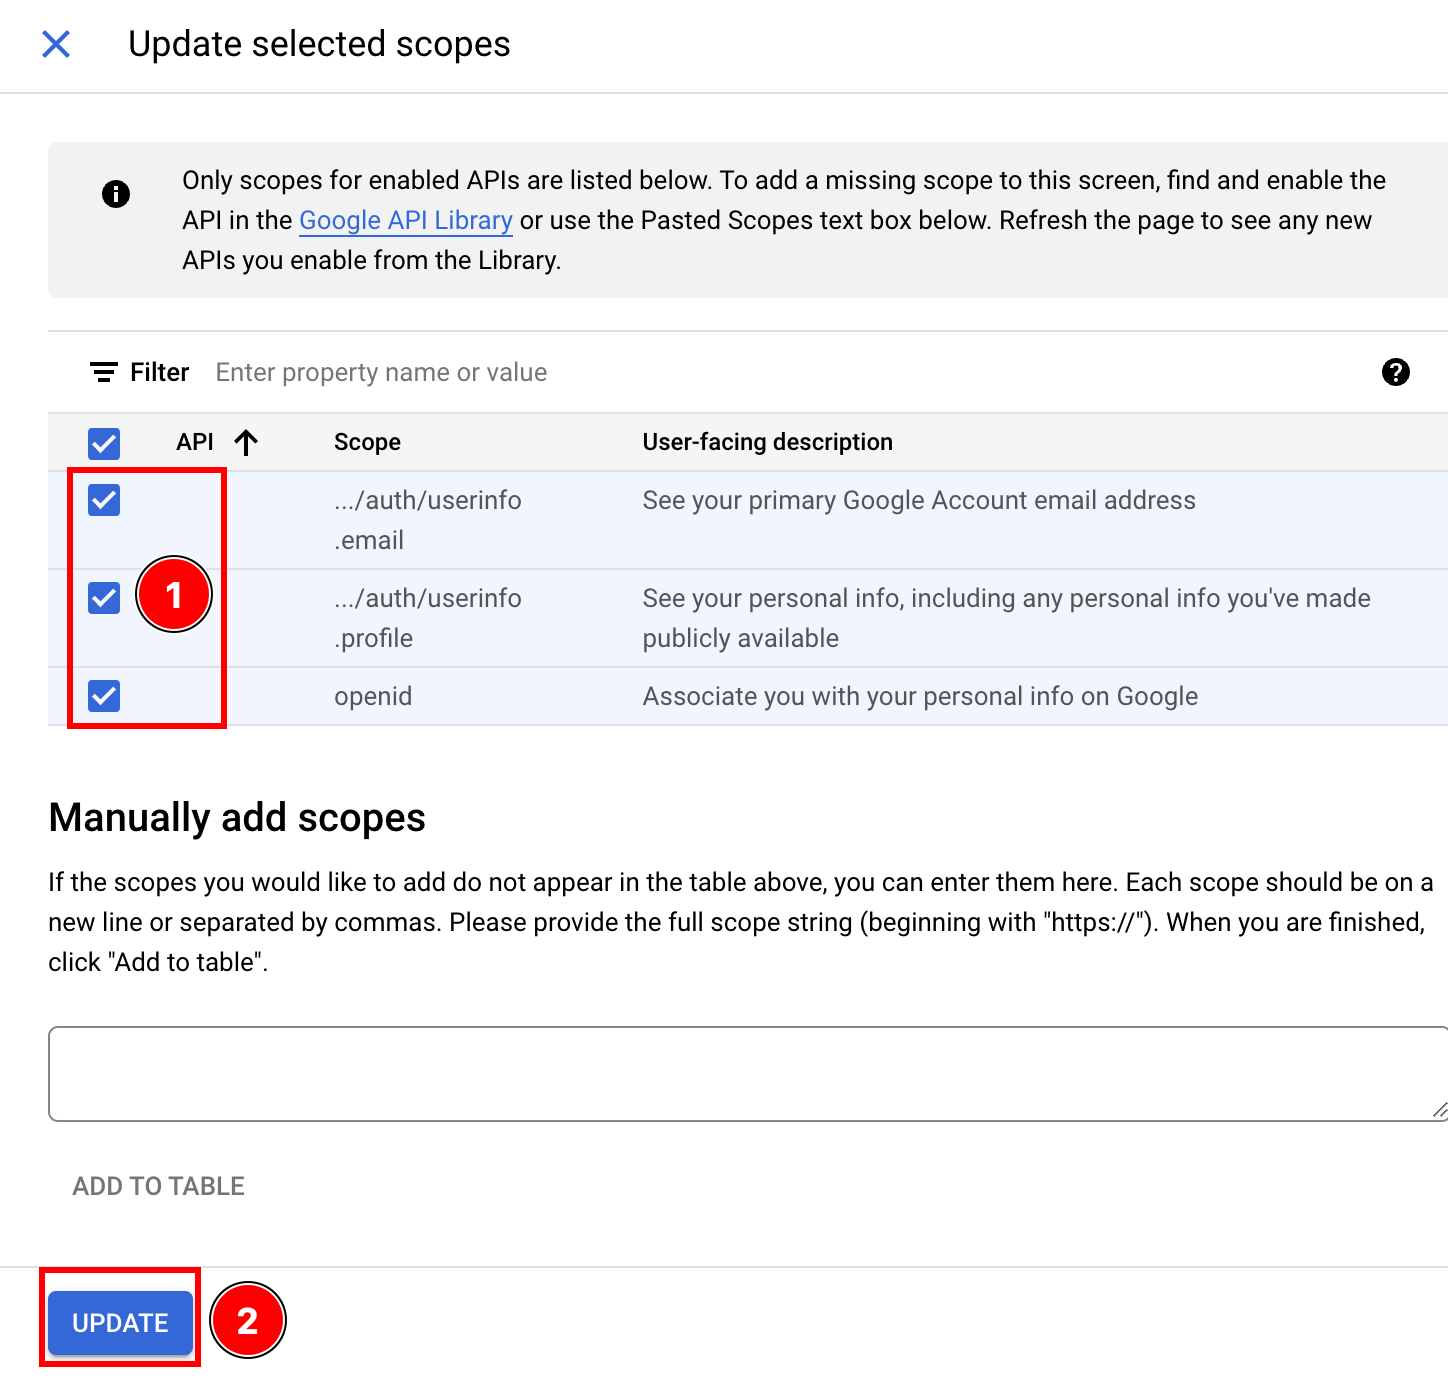
-
__CAPGO_KEEP_0__ 버튼을 클릭하여 범위 화면에서 저장하세요.
save and continue
-
- __CAPGO_KEEP_0__을 클릭하세요.
- 클릭하세요
add users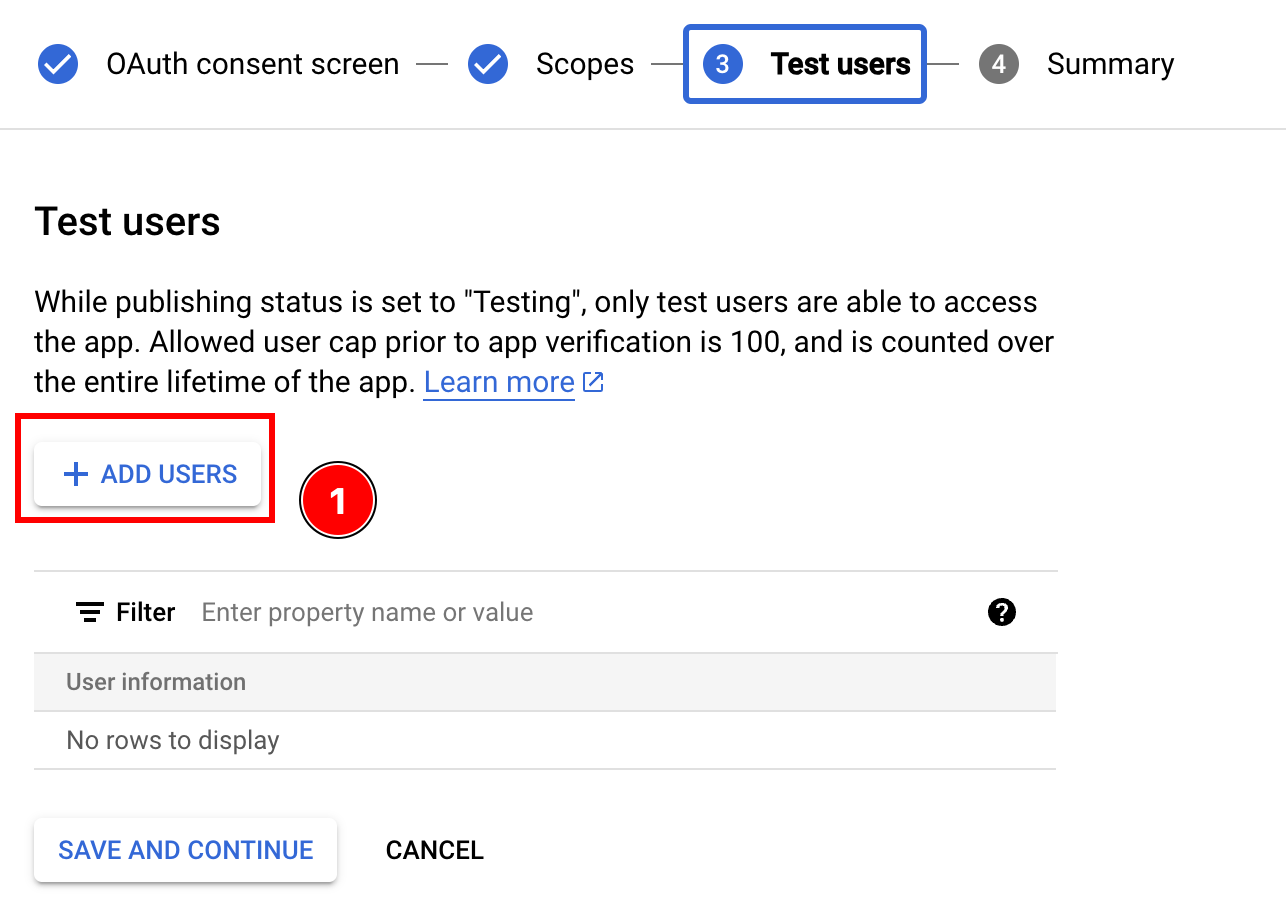
- Google 이메일을 입력하고 Enter 키를 누르세요. 그리고 클릭하세요
add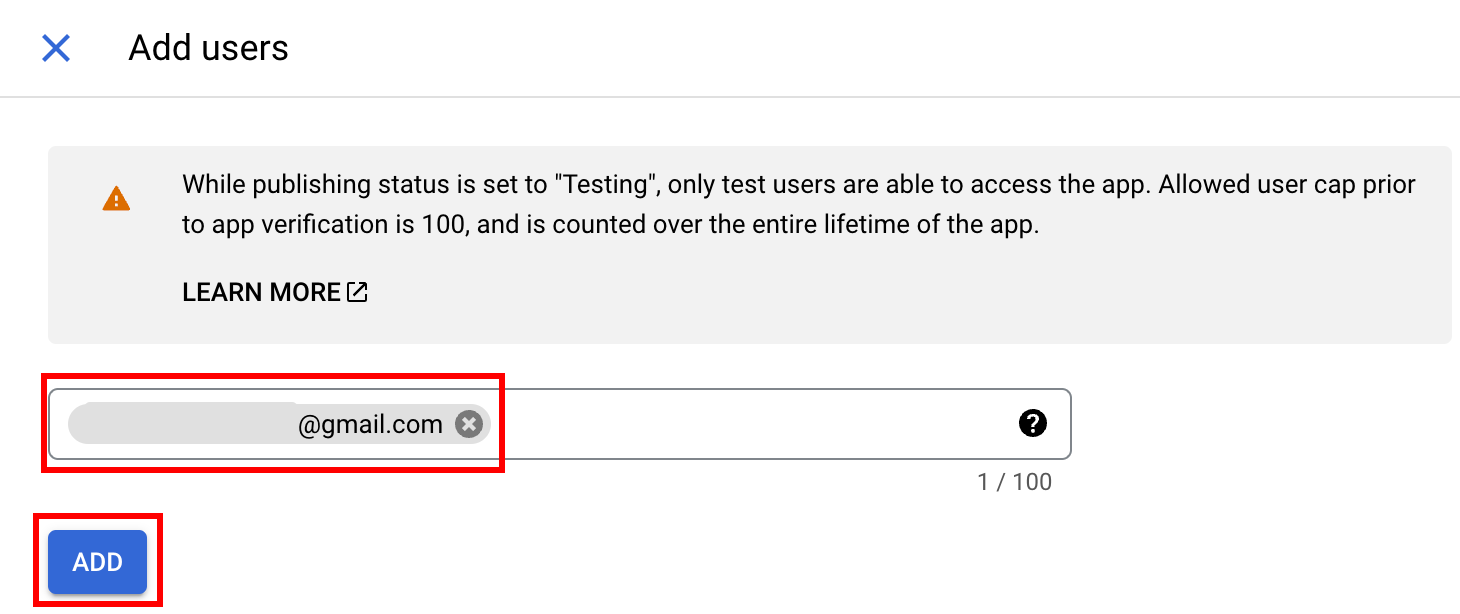
- 클릭하세요
save and continue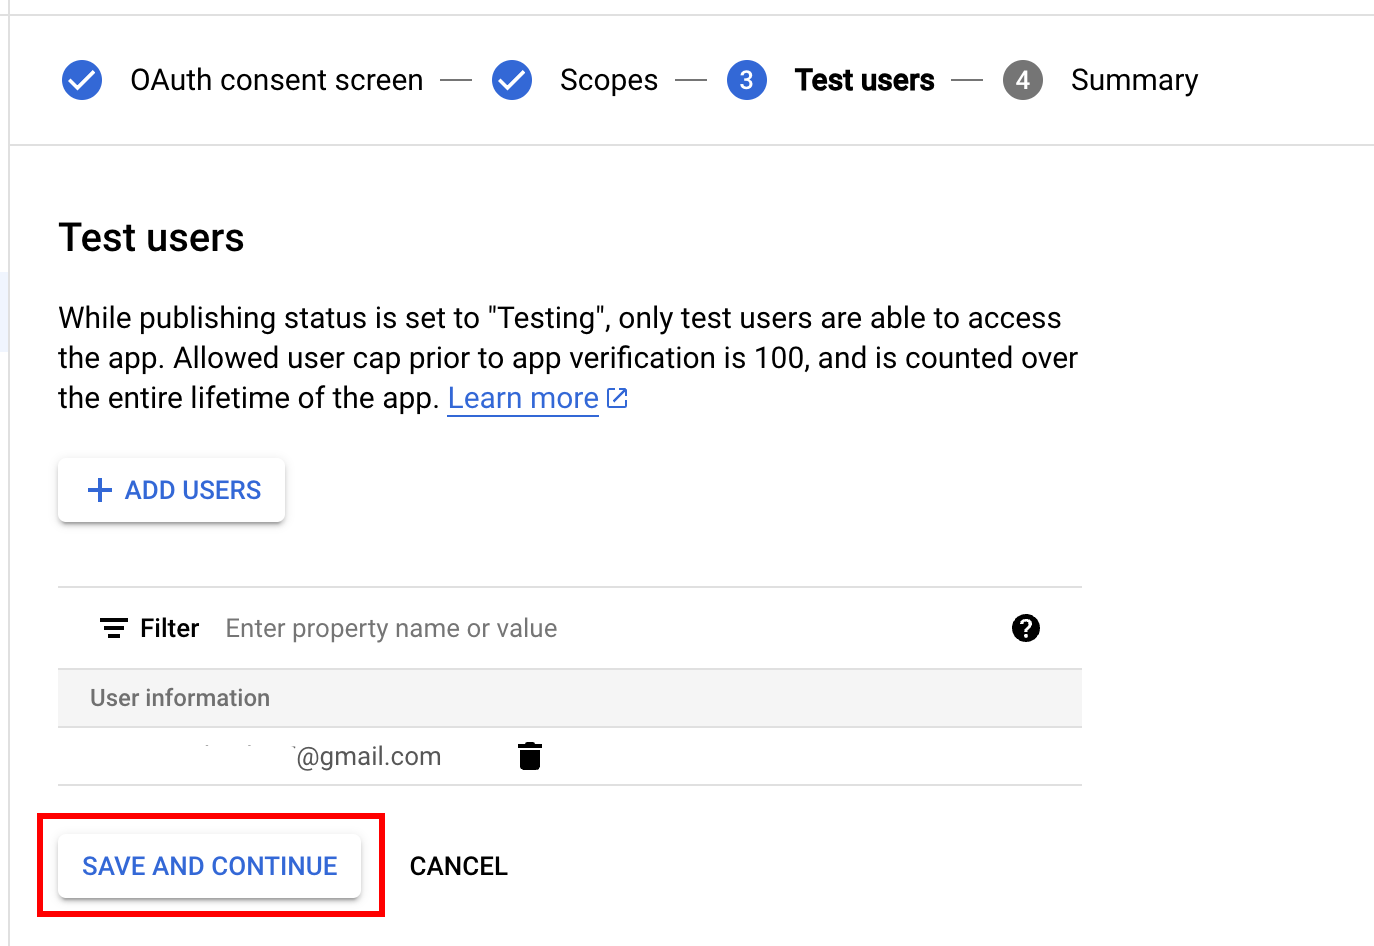
- 클릭하세요
- 클릭하세요
back to dashboard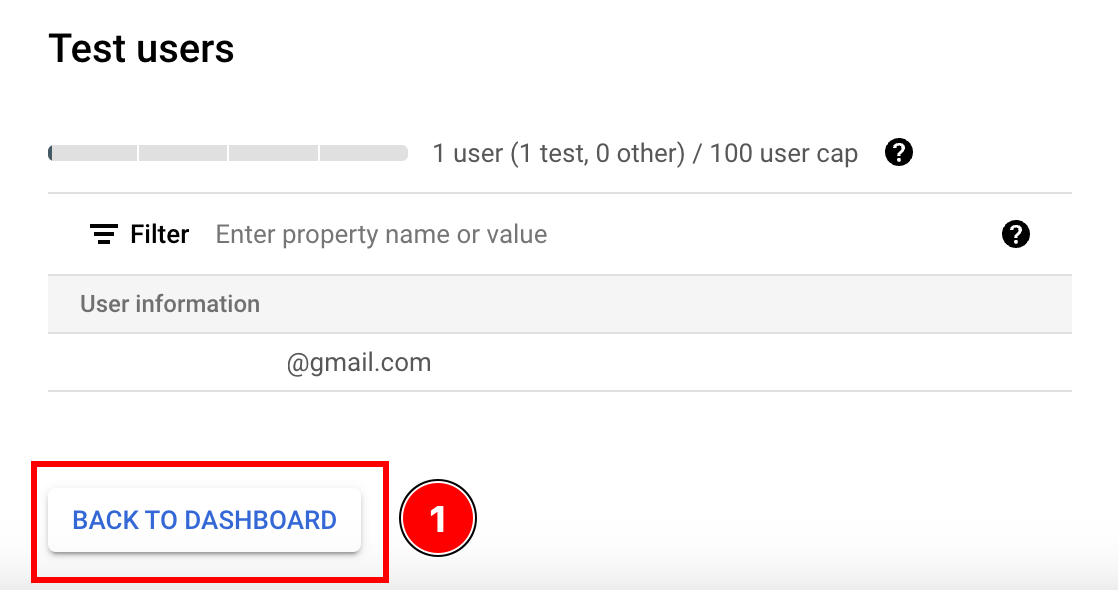
- 인증을 위해 앱을 제출하세요
온라인 접근과 오프라인 접근의 차이점
온라인 접근과 오프라인 접근의 차이점구글 로그인과 Capacitor을 사용하는 방법은 여러 가지입니다. 두 가지 방법의 차이점을 비교한 표를 아래에示합니다.
| 온라인 접근 | 오프라인 접근 | |
|---|---|---|
| 백엔드가 필요합니다 | ❌ | ✅ |
| 장기적인 접근 토큰 | ❌ | ✅ |
| 쉽게 설정할 수 있습니다 | ✅ | ❌ |
아직도 어떤 것을 선택해야 할지 모르시면, 다음 시나리오를 고려해 보세요:
-
사용자가 로그인할 때, 즉시 사용자에게 커스텀 JWT를 발급하고 싶다면, 앱은 Google API를 호출하지 않습니다.
이 경우 온라인 접근을 선택하세요.
-
앱이 클라이언트에서 Google API를 호출하지만 백엔드에서 호출하지 않는 경우
이 경우 온라인 접근을 선택하세요.
-
앱이 백엔드에서 Google API를 호출하지만 사용자가 앱을 사용하고 있지 않을 때 호출하지 않는 경우
이 경우 온라인 접근을 선택하세요.
-
앱이 사용자가 앱을 사용하지 않을 때도 사용자의 캘린더를 주기적으로 확인하고 싶다면
이 경우 오프라인 접근을 선택하세요.
온라인 접근을 위한 예시 백엔드
온라인 접근을 위한 예시 백엔드이 튜토리얼의 이 부분에서, 나는 사용자의 인증을 backend에서 어떻게 확인하는지 보여줄 것이다.
이 예제는 매우 간단하고, 다음 기술에 기반할 것이다.
이 예제의 code를 여기서 찾을 수 있다. 보시다시피:
VS __CAPGO_KEEP_0__에서 Google 인증 __CAPGO_KEEP_1__이 토큰을 검증하는 것을 볼 수 있다.
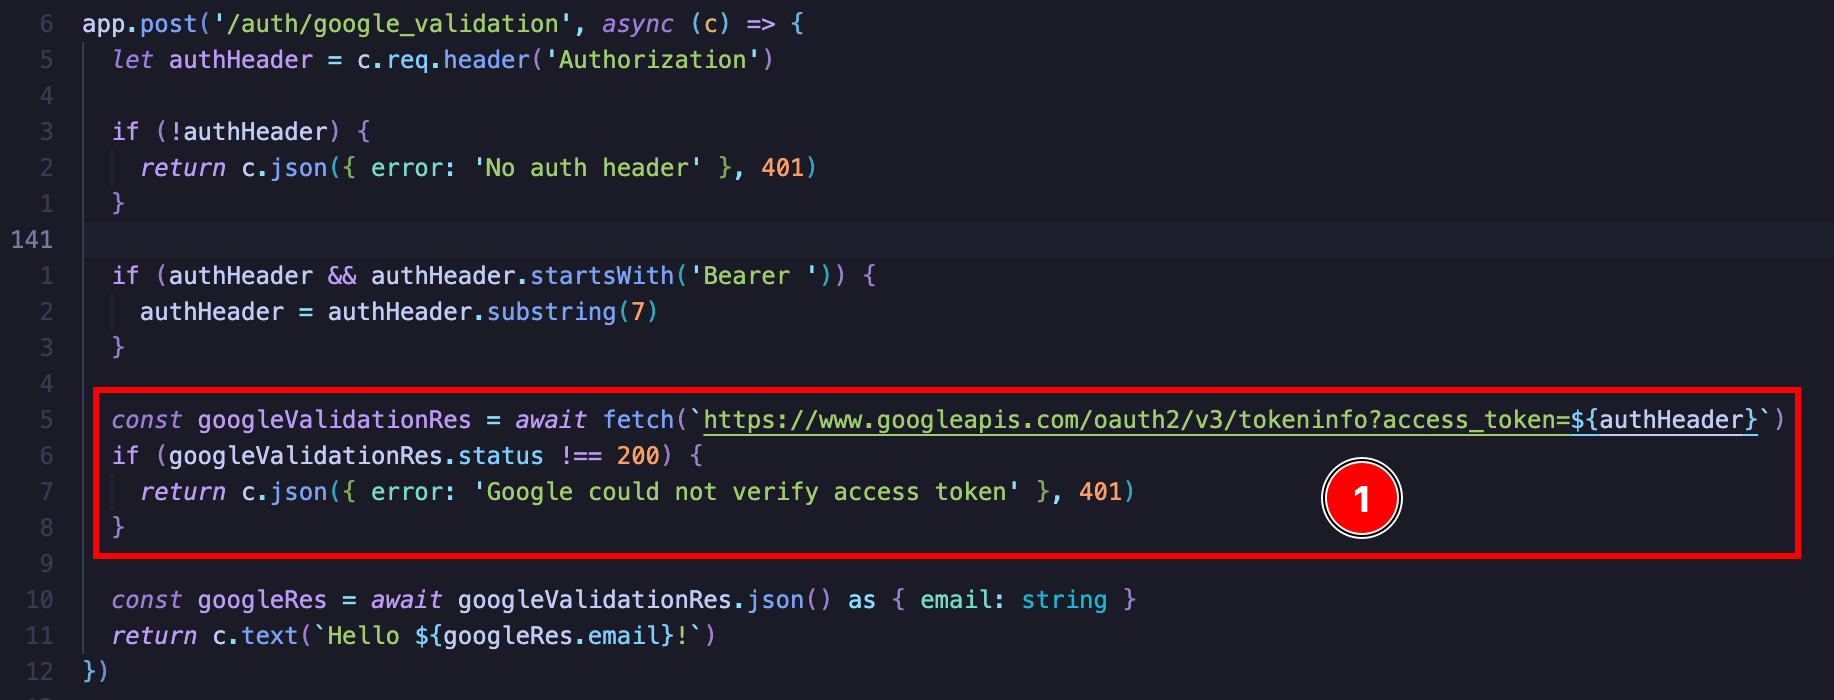
The idea is rather simple. You send a simple GET request to https://www.googleapis.com/oauth2/v3/tokeninfo and this returns you whether the token is valid or not and if it it is, it gives you the email of the user. It also gives you some other info about the user token

그곳에서 사용자에게 자체 JWT를 발급하거나 세션 쿠키를 발급하는 등의 다양한 방법이 있습니다. 최종 인증 구현의 경우에는 무궁무진한 선택이 있습니다.
Google API를 호출하고 싶다면, 나는 강력히 추천합니다. Google의 OAuth 2.0 Playground그곳에서 쉽게 어떤 API를 호출할 수 있는지 확인할 수 있습니다.
자체 백엔드와 함께 오프라인 접근 사용
자체 백엔드와 함께 오프라인 접근 사용오프라인 접근을 사용하려면 다음이 필요합니다.
- HTTP 서버
이 예제에서는 다음 기술을 사용하여 앱 내에서 오프라인 접근을 제공하기 위해 사용할 것입니다.
-
LowDb (__CAPGO_KEEP_0__)
code 여기
이 클라이언트 code은 다음과 같습니다.
import { Capacitor } from '@capacitor/core';import { GoogleLoginOfflineResponse, SocialLogin } from '@capgo/capacitor-social-login';import { usePopoutStore } from '@/popoutStore'; // <-- specific to my app
const baseURL = "[redacted]";
async function fullLogin() {  await SocialLogin.initialize({    google: {      webClientId: '[redacted]',      iOSClientId: '[redacted]',      iOSServerClientId: 'The same value as webClientId',      mode: 'offline' // <-- important    }  })  const response = await SocialLogin.login({    provider: 'google',    options: {      forceRefreshToken: true // <-- important    }  })
  if (response.provider === 'google') {    const result = response.result as GoogleLoginOfflineResponse    const res = await fetch(`${baseURL}/auth/google_offline`, {      headers: {        "Content-Type": "application/json"      },      body: JSON.stringify({        serverAuthCode: result.serverAuthCode,        platform: Capacitor.getPlatform()      }),      method: "POST"    })
    if (res.status !== 200) {      popoutStore.popout("Full google login failed", "check console");      return    }
    const { jwt } = await res.json();    const userinfo = await fetch(`${baseURL}/auth/get_google_user`, {      headers: {        Authorization: `Bearer ${jwt}`      }    })    if (userinfo.status !== 200) {      popoutStore.popout("Full google (userinfo) login failed", "check console");      return    }    popoutStore.popout("userinfo res", await userinfo.text());  }}
주의하십시오. 이 앱에는 호출이 없습니다. 그 이유는 Google 오프라인 모드에서 리프레시가 백엔드에서 리프레시 토큰을 안전하게 저장한 후에 발생하기 때문입니다. SocialLogin.refresh() Google 로그인 설정에서 계속 진행하세요 serverAuthCode __CAPGO_KEEP_0__
(__CAPGO_KEEP_0__)
Google 로그인 설정에서 계속하기__CAPGO_KEEP_0__에서 __CAPGO_KEEP_1__-social-login을 사용하는 경우 Google 로그인 설정 인증 및 계정 흐름을 계획하고 연결하려면 capgo/capacitor-social-login을 사용하여 capgo/capacitor-social-login capgo/capacitor-social-login의 구현 세부 정보를 위해 capgo/capacitor-passkey capgo/capacitor-passkey의 구현 세부 정보를 위해 capgo/capacitor-native-biometric capgo/capacitor-native-biometric의 구현 세부 정보를 위해 for the implementation detail in @capgo/capacitor-native-biometric, and 두 단계 인증 두 단계 인증 구현 세부 사항에 대한 구현 세부 사항.