
Google Login設定
このプラグインのインストール手順と完全なマークダウンガイドを含む設定プロンプトをコピーできます。
概要
概要Capgo Social LoginとGoogleログインの設定
- __CAPGO_KEEP_0__ Social LoginとGoogleログインの設定
このガイドでは、__CAPGO_KEEP_0__ Social LoginとGoogleログインを設定する方法を学びます。Googleログインを設定するには、以下のものが必要です。
Googleアカウント注意
- このステップは、どのプラットフォームを使用するかを決定することに関係なく、必須です。 このセクションでは、Googleによって表示されるログイン画面を設定します。
- プロジェクト セレクターをクリックしてください
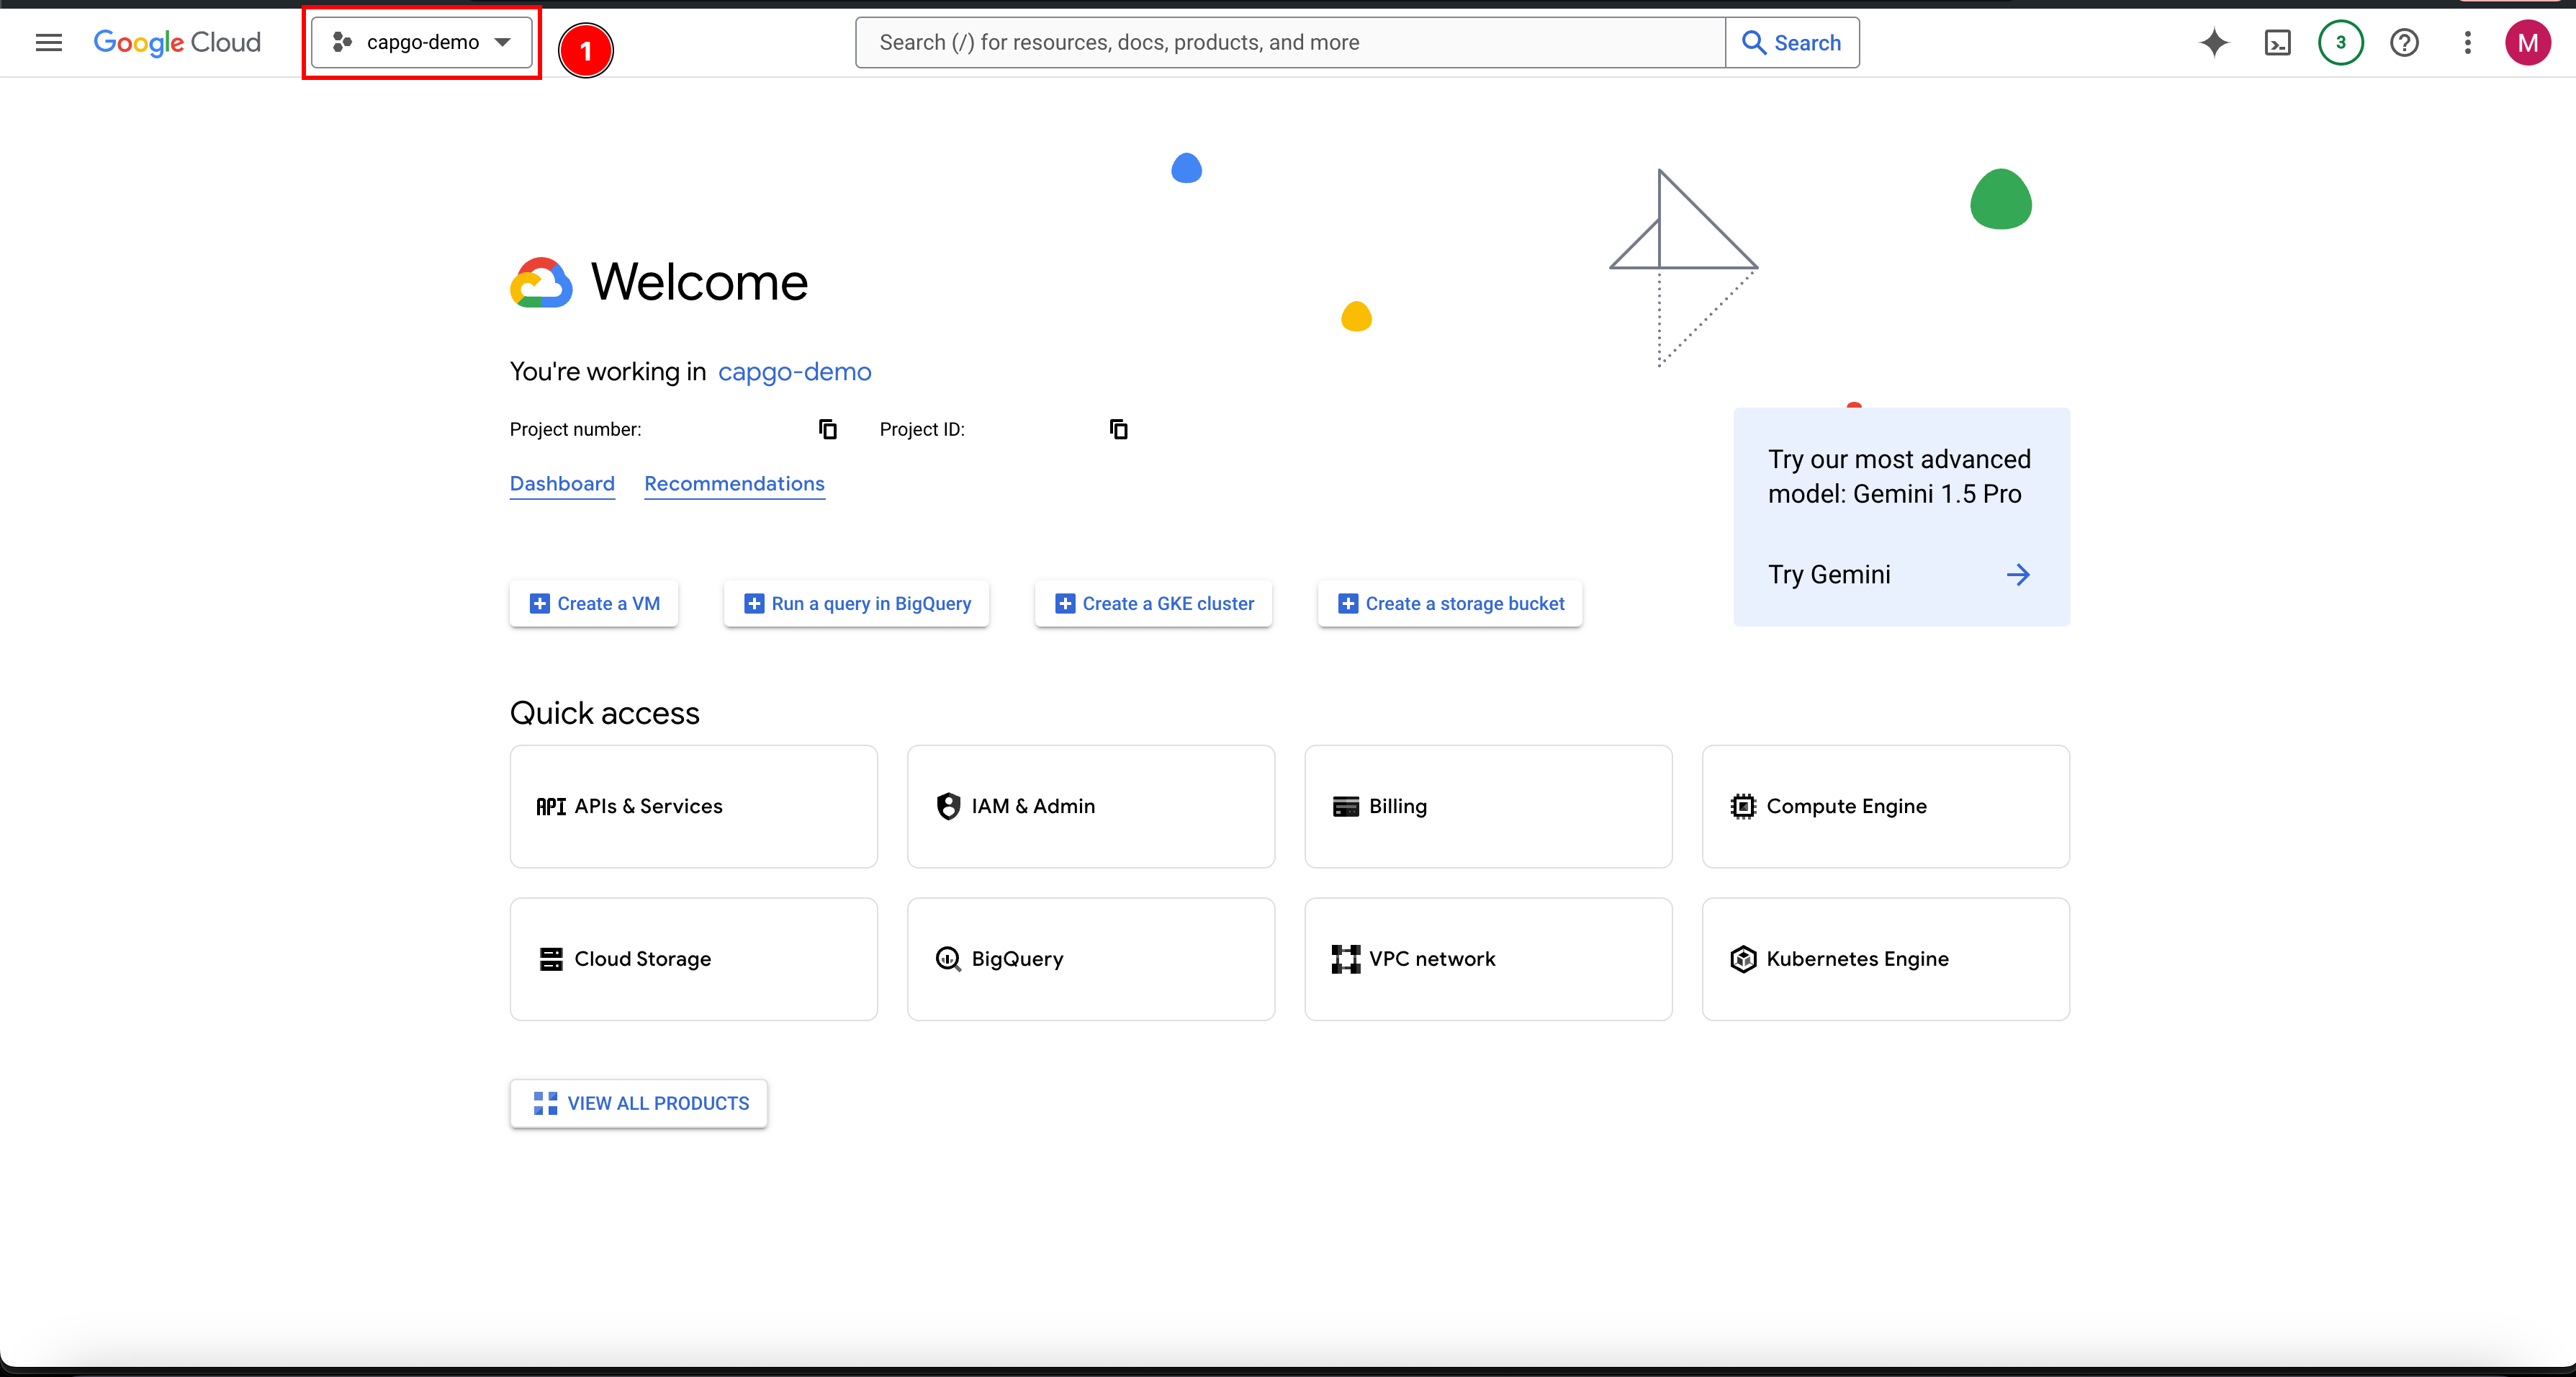
- プロジェクトがすでに存在しない場合は、 新しいプロジェクトを作成してください.
- クリックしてください
New project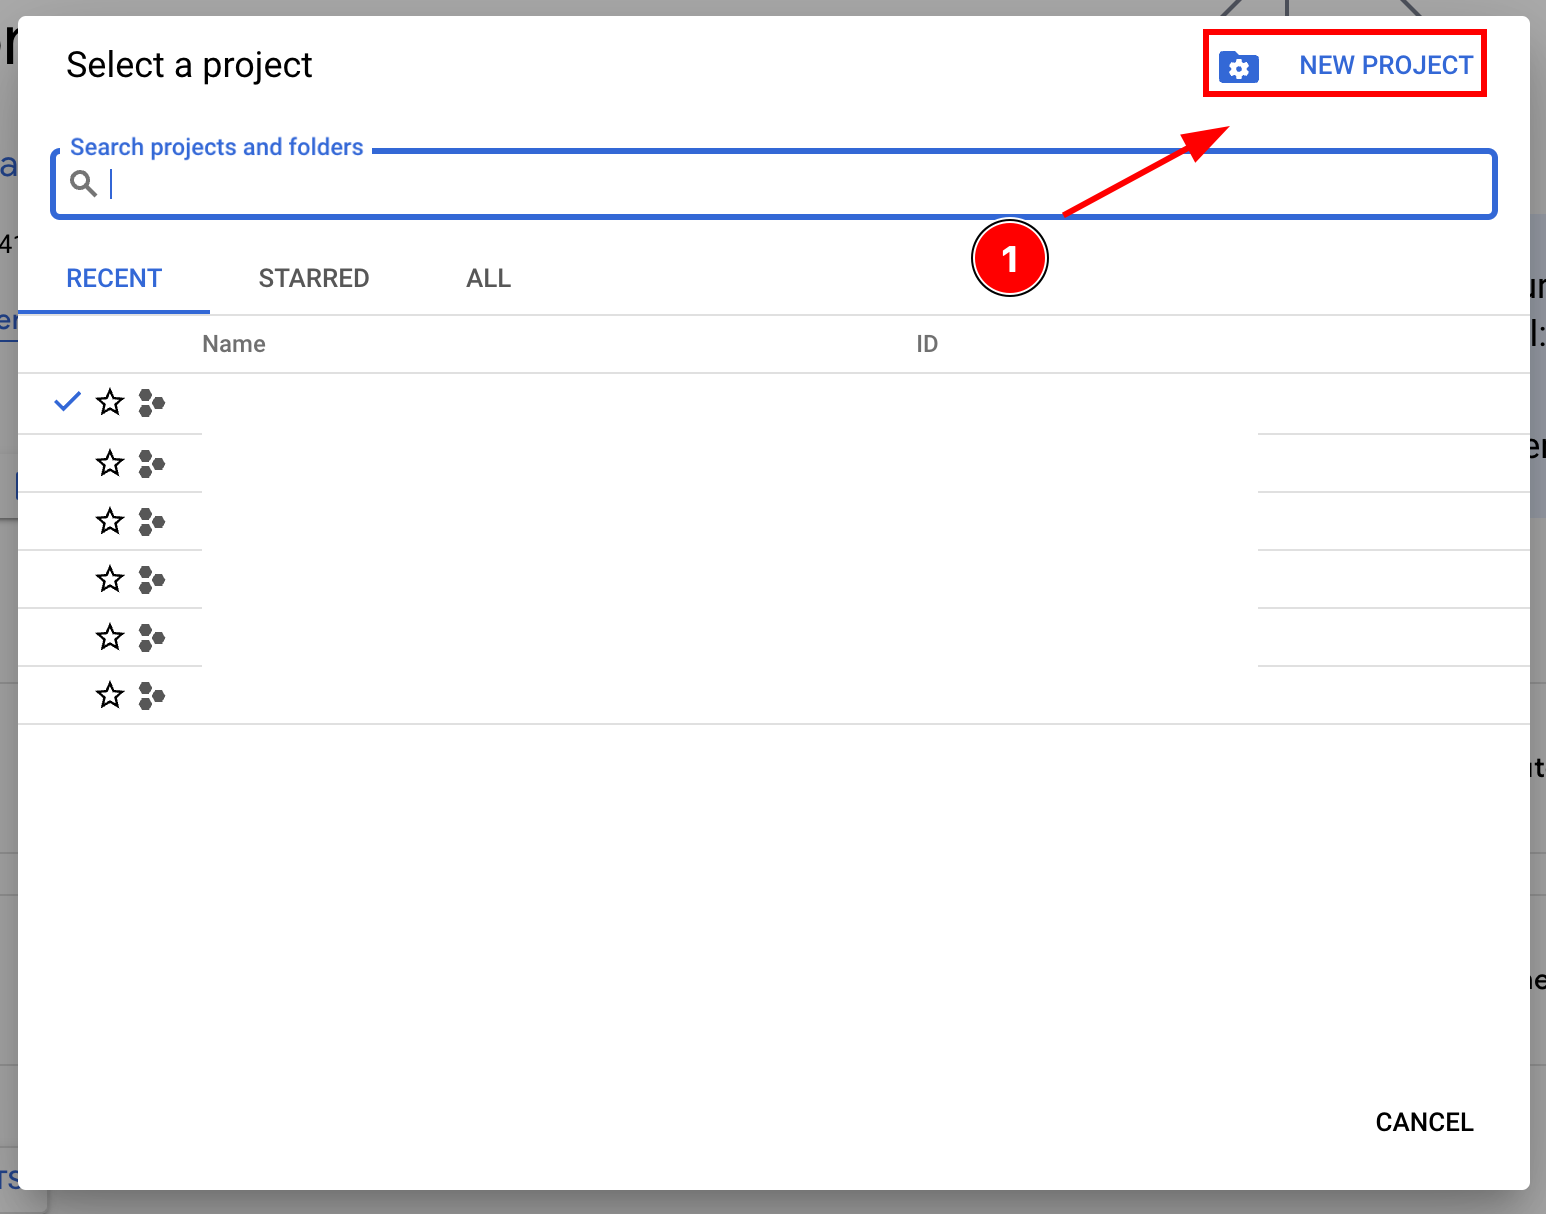
- プロジェクト名を入力し、
Create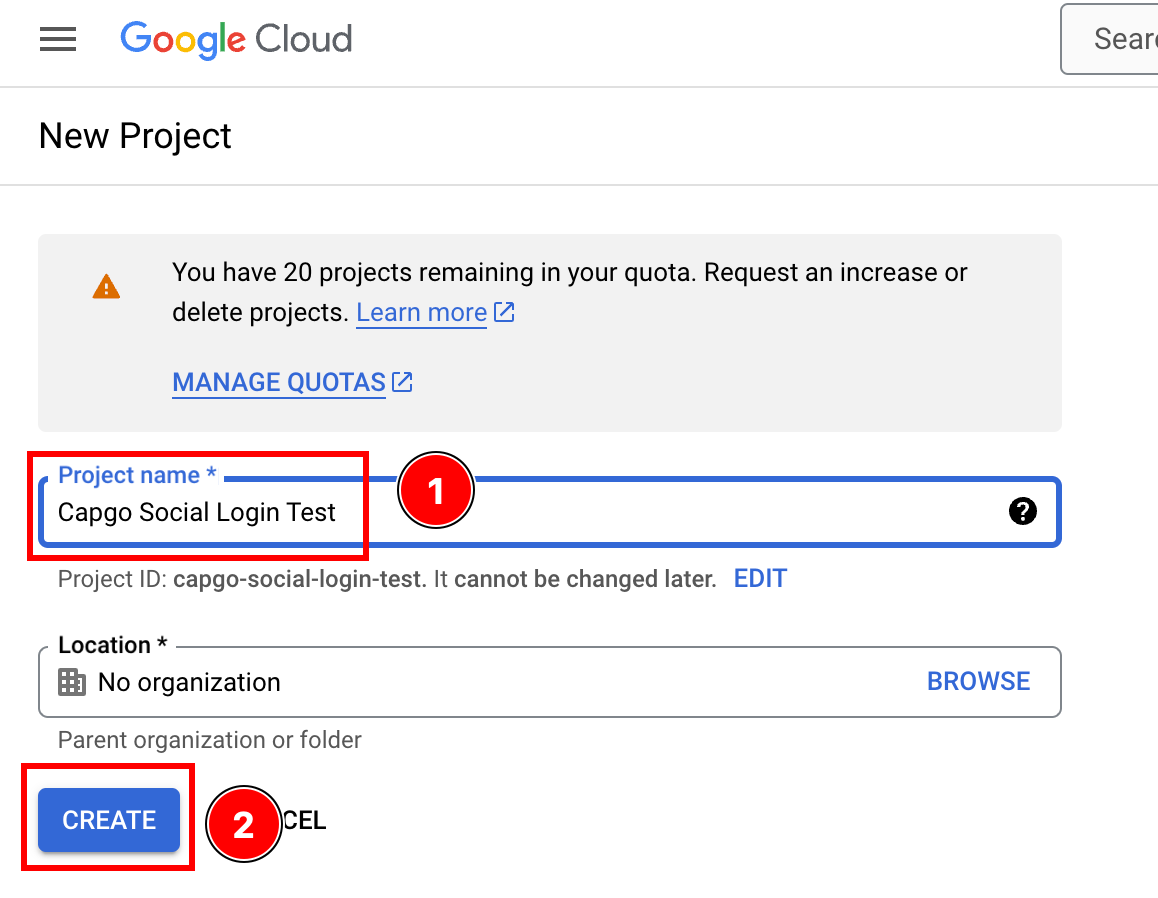
- 正しいプロジェクトにアクセスしていることを確認してください
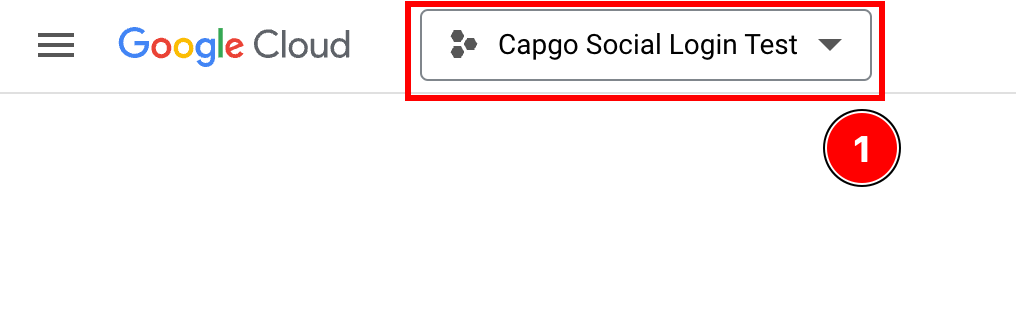
- クリックしてください
- 設定を開始してください
OAuth consent screen-
検索バーをクリックしてください

-
検索してください
OAuth consent screenそしてクリックしてください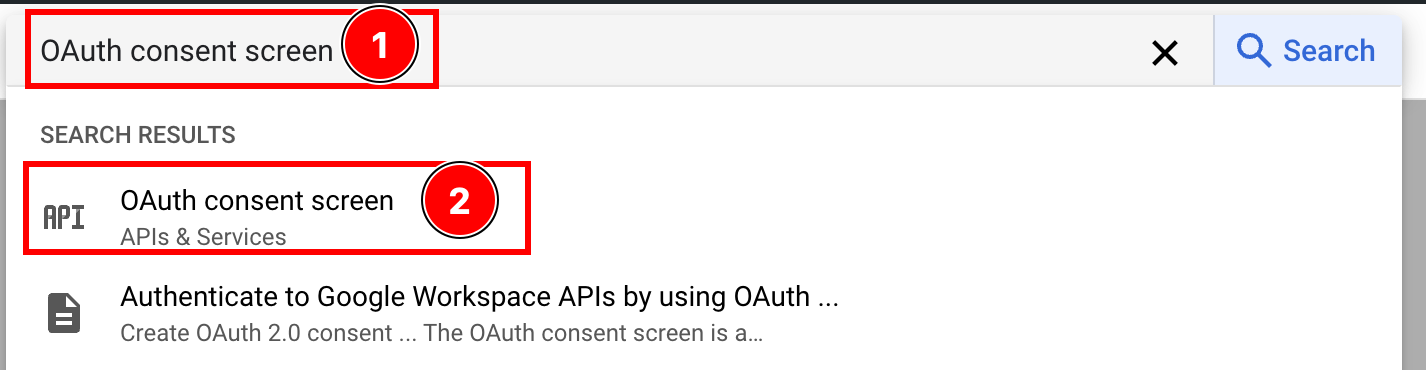
-
同意画面を設定する
クリックしてください
create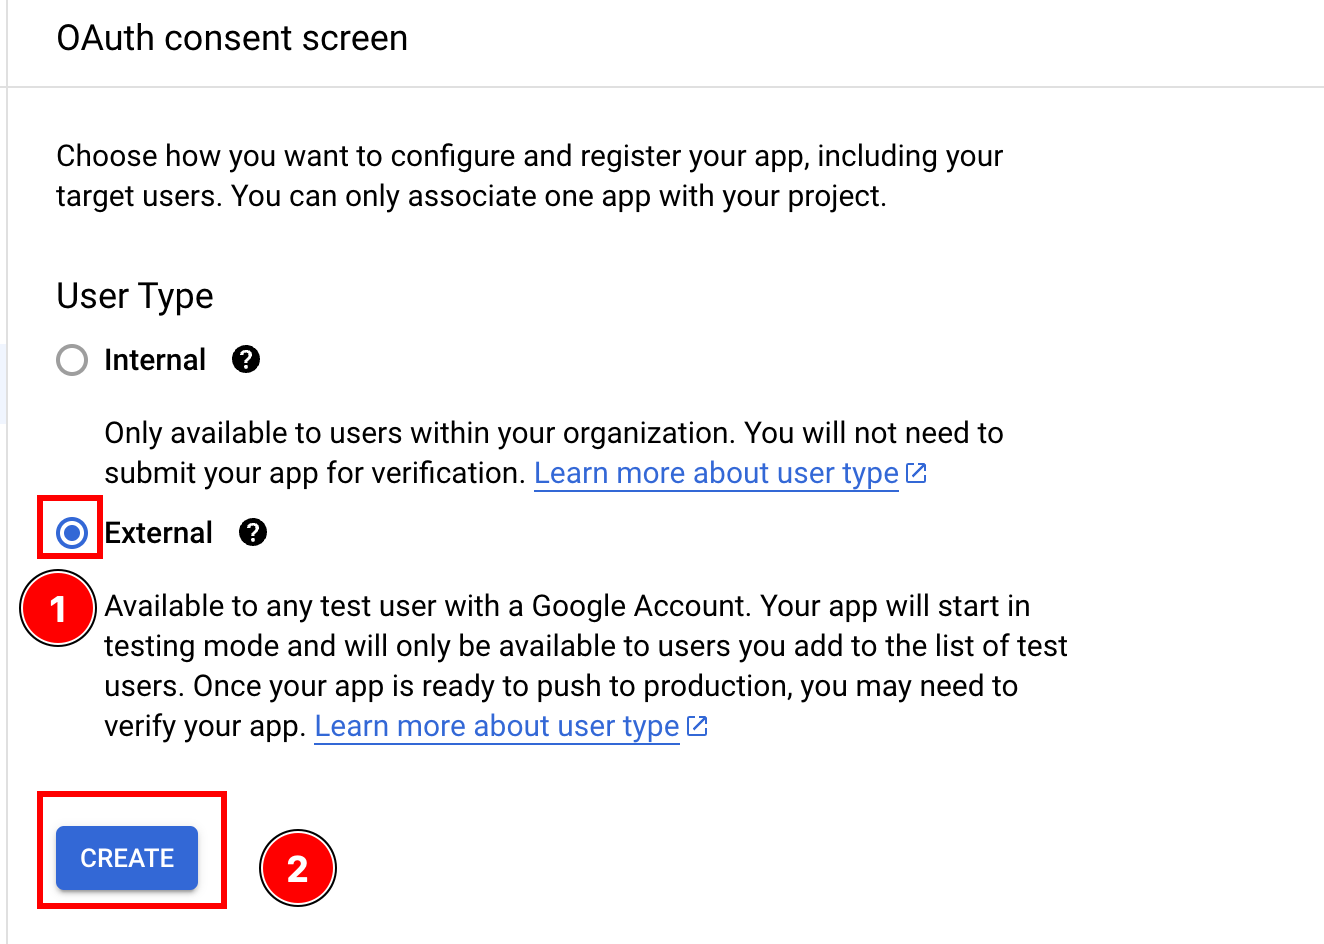
-
- アプリの情報を入力してください
-
はじめに
App Information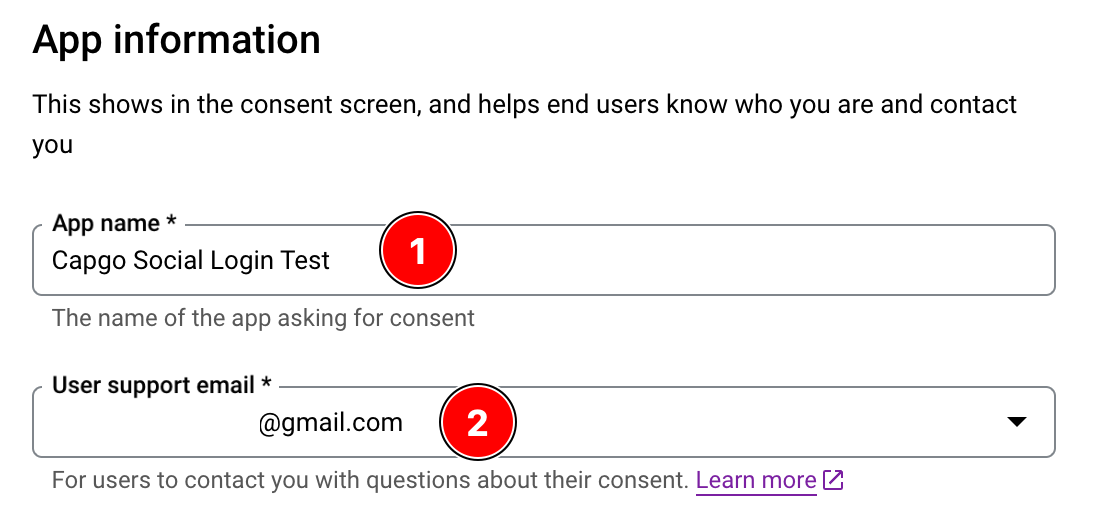
- メールアドレスを入力してください
App Name - ここに表示されます
user support email
-
You CAN アプリロゴを追加してください。
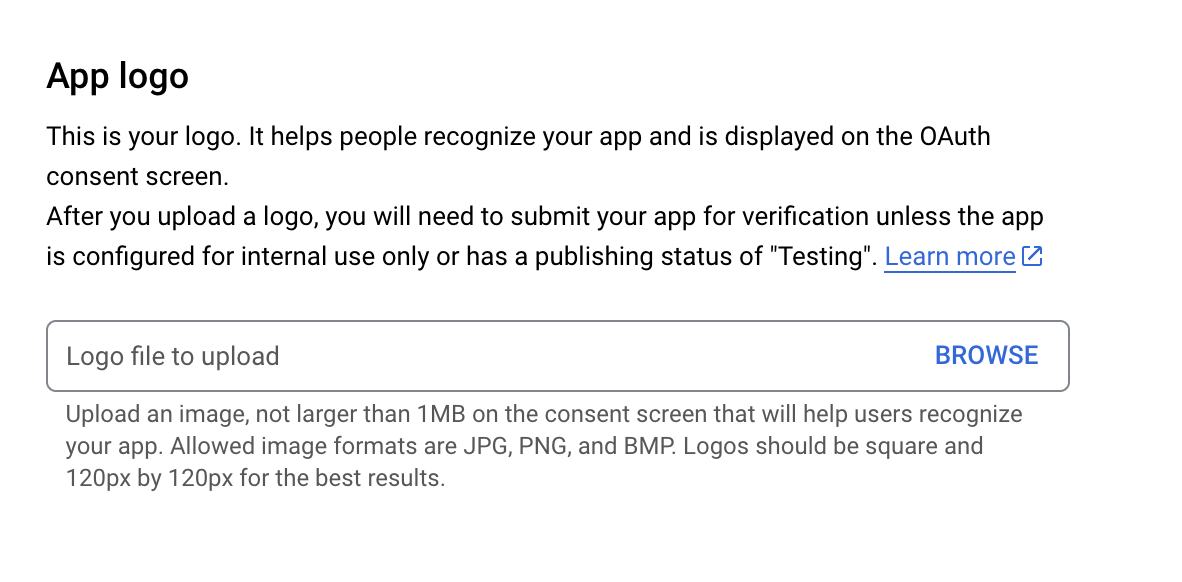
-
あなた SHOULD SHOULD
App domain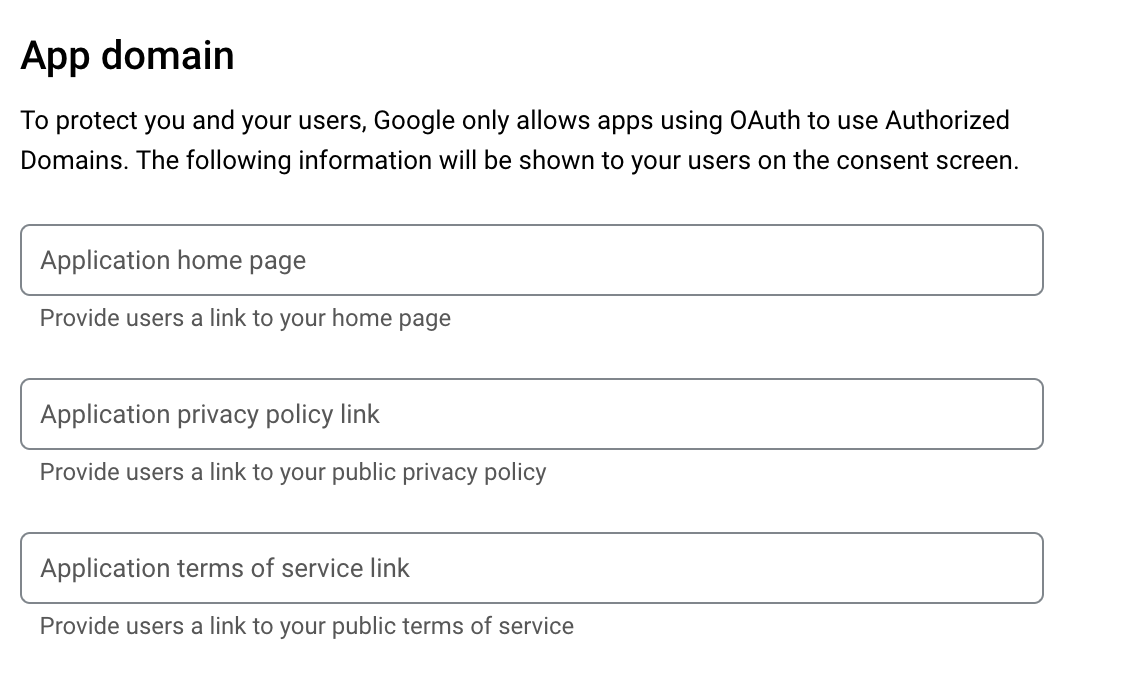
-
あなたは context HTML text fragment from a longer Capgo UI string (parent key `you_definition`). Page/area: Capgo marketing website. Role: Long marketing or legal paragraph. Seen in: page disclaimer.astro, page return.astro. Message key `you_definition` (You Definition).
-
クリックして
save and continue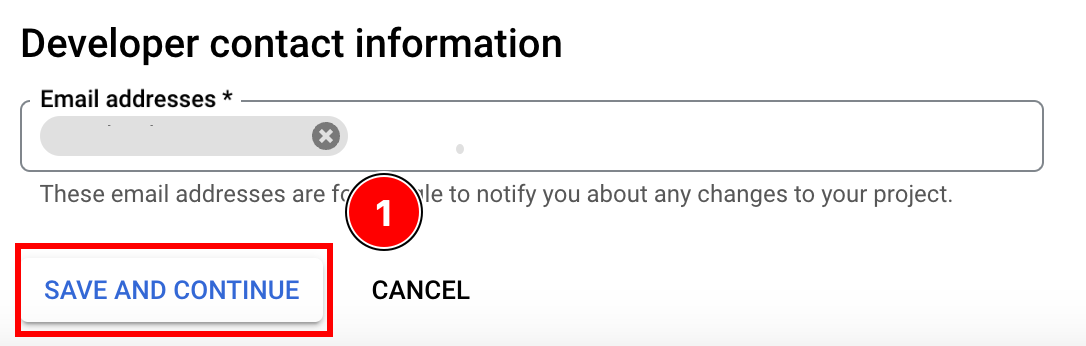
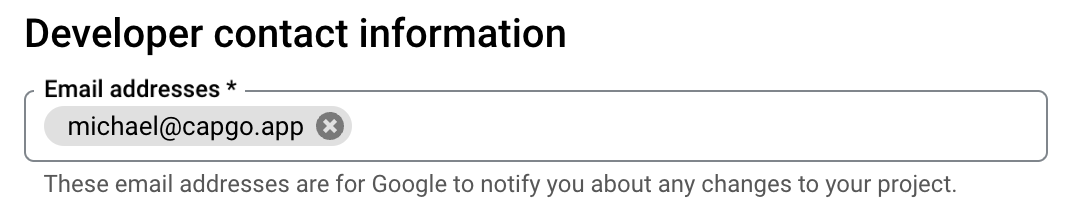
- メールアドレスを入力してください
-
- ここをクリックしてください。
-
クリックして
add or remove scopes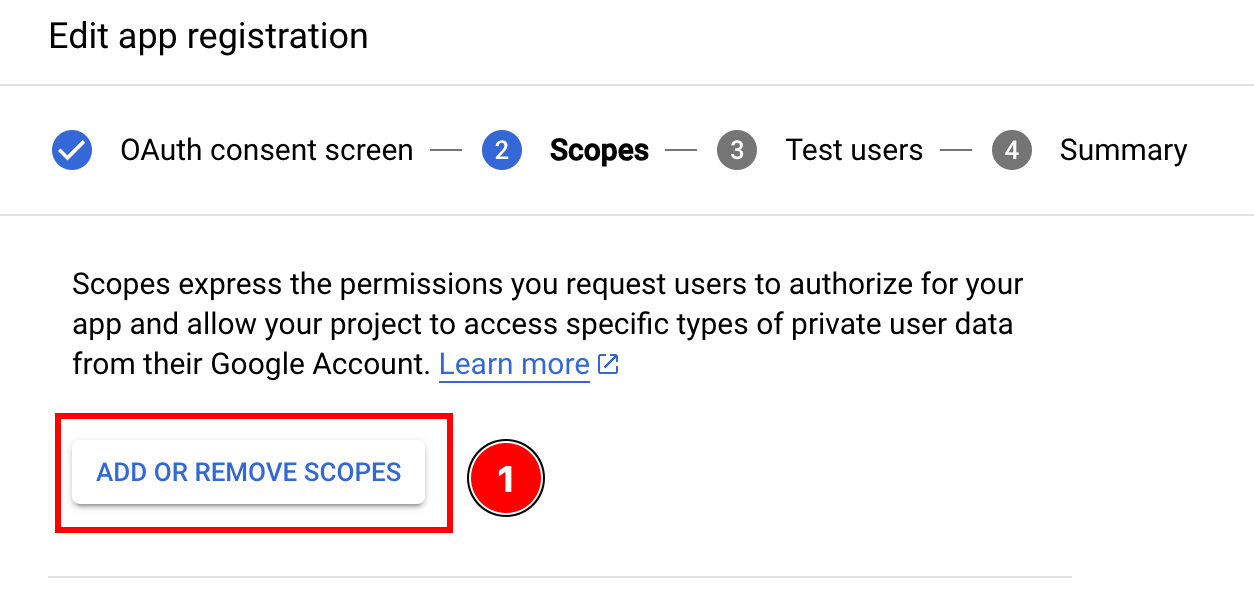
-
以下のスコープを選択してクリック
update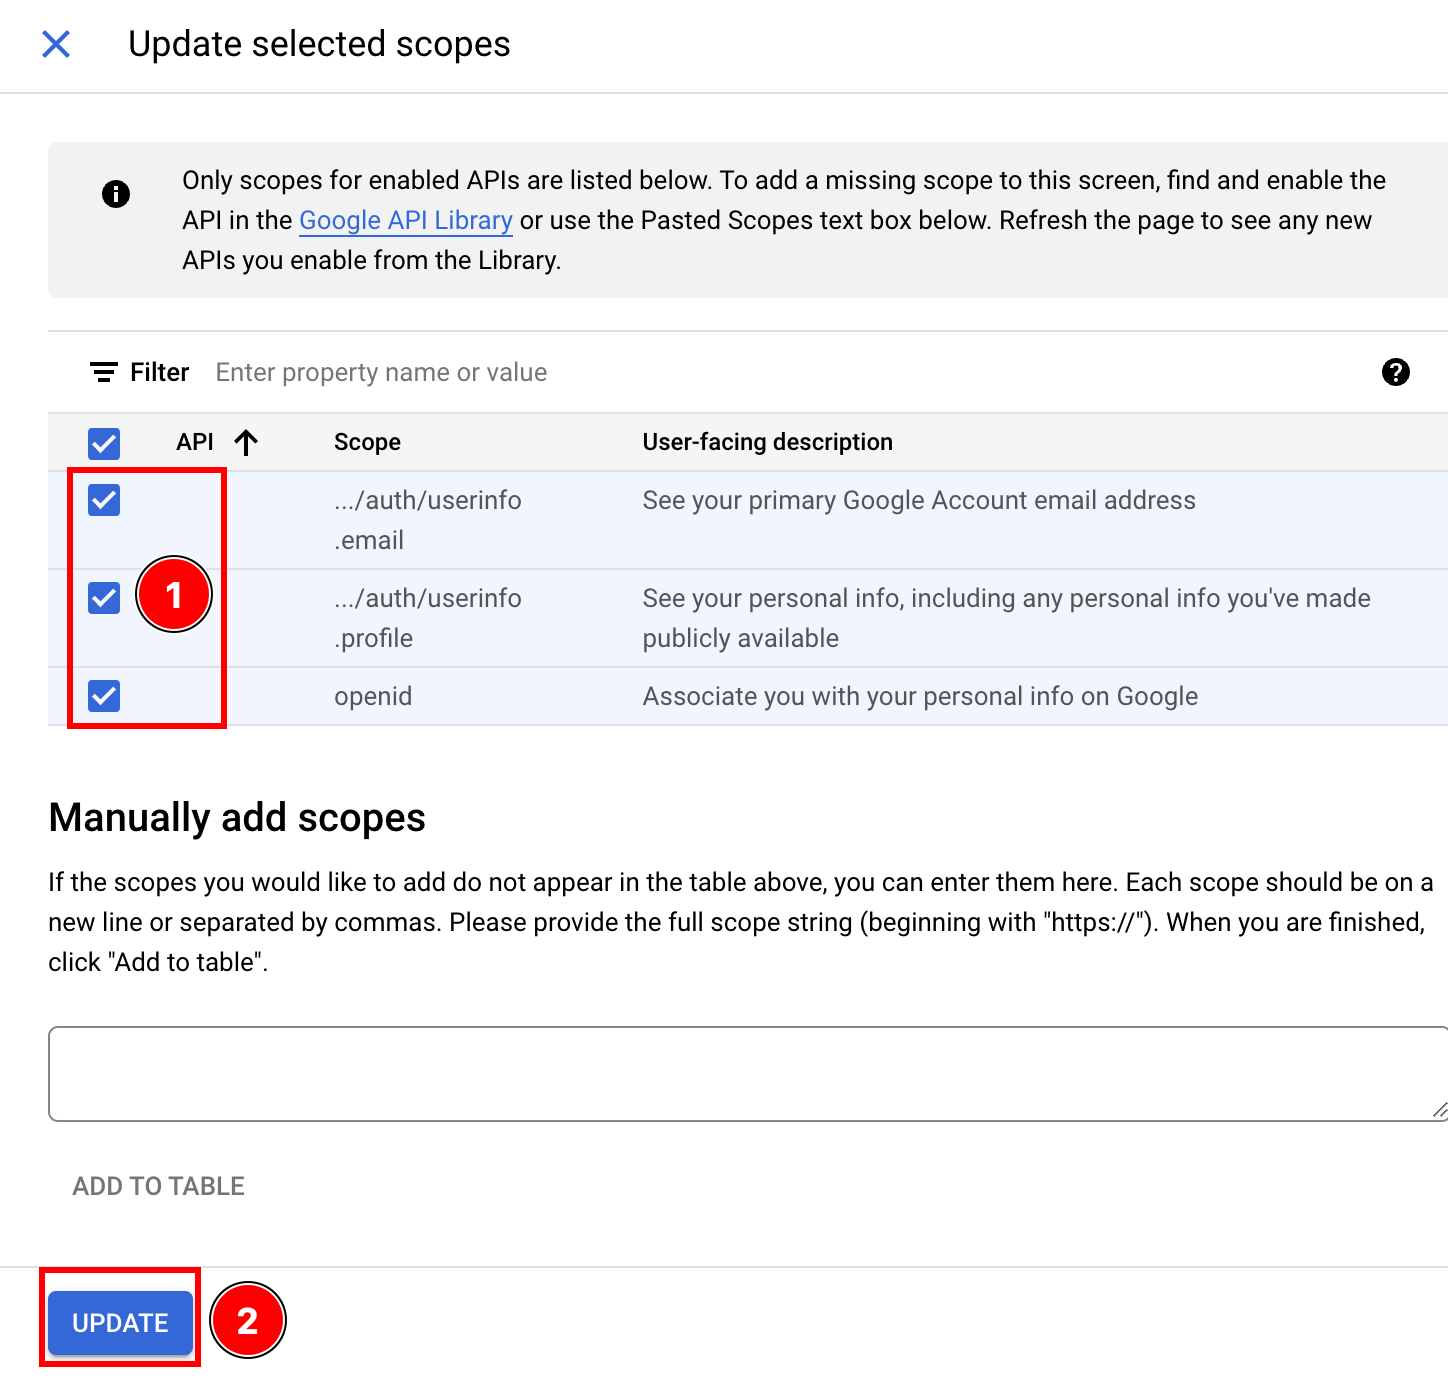
-
クリック
save and continue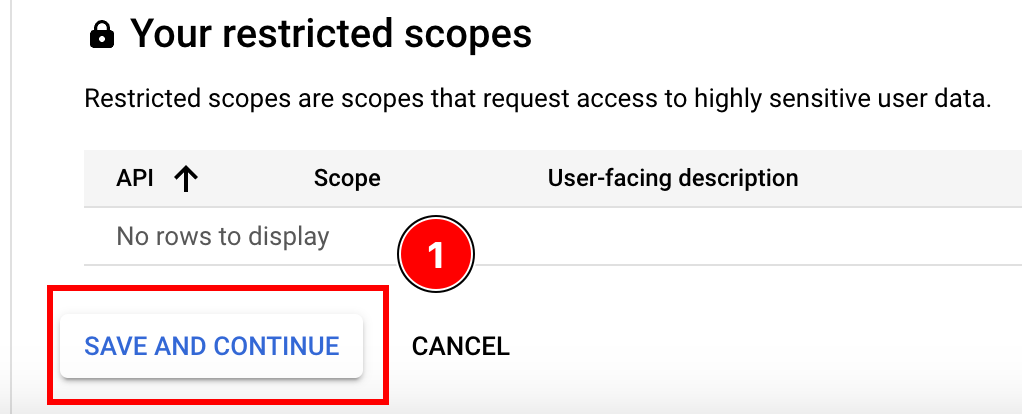
-
- テストユーザーを追加
- クリックして
add users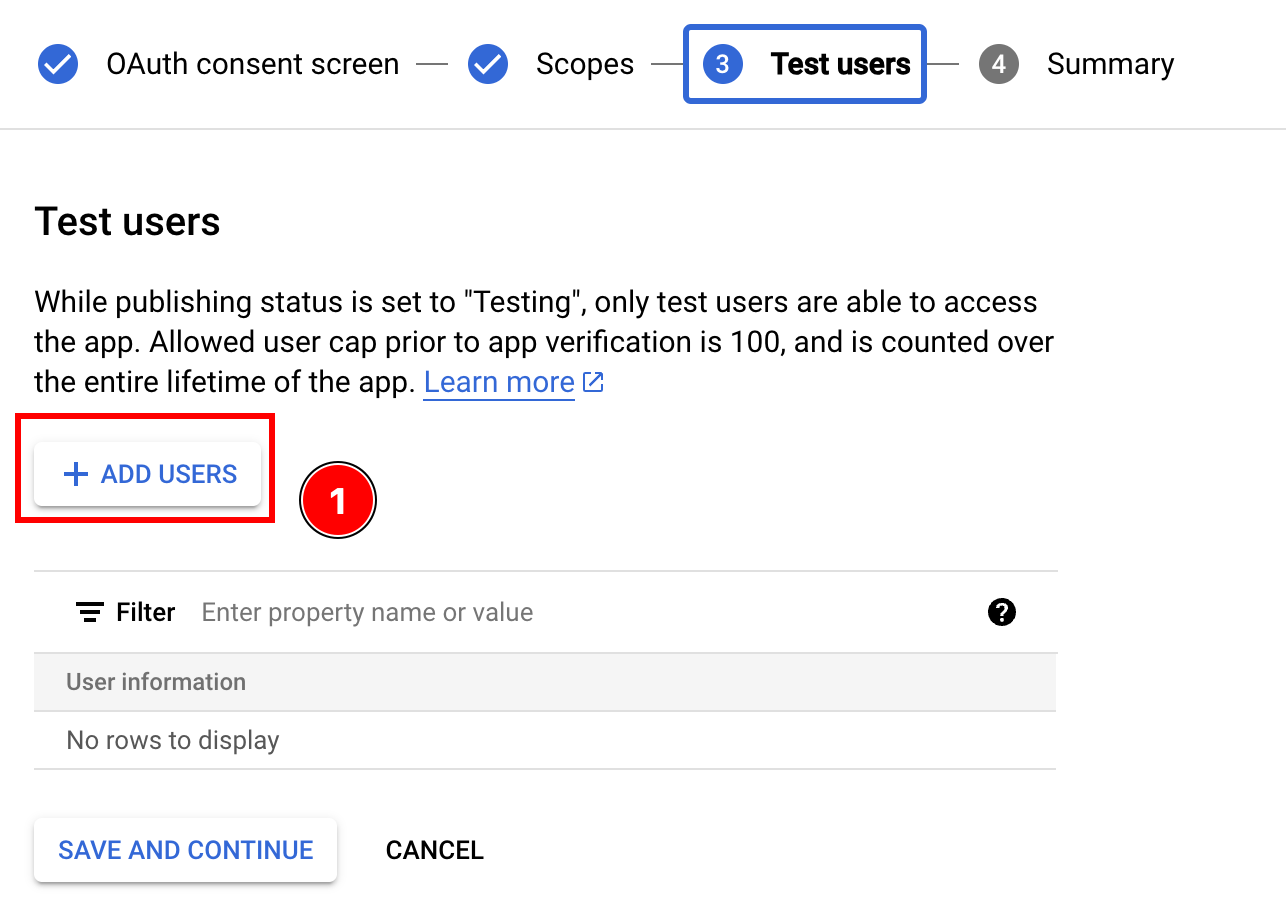
- テストユーザー画面のメールアドレス入力フィールドと「ユーザーを追加」ボタン
add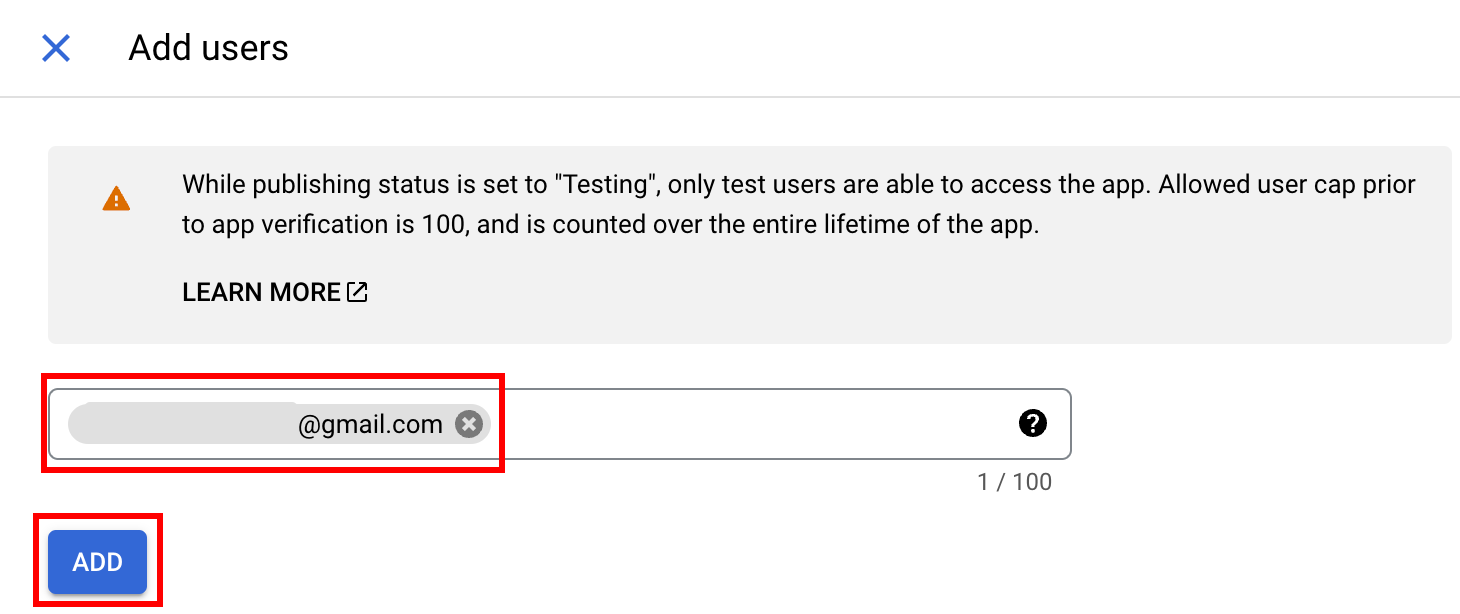
- クリック
save and continue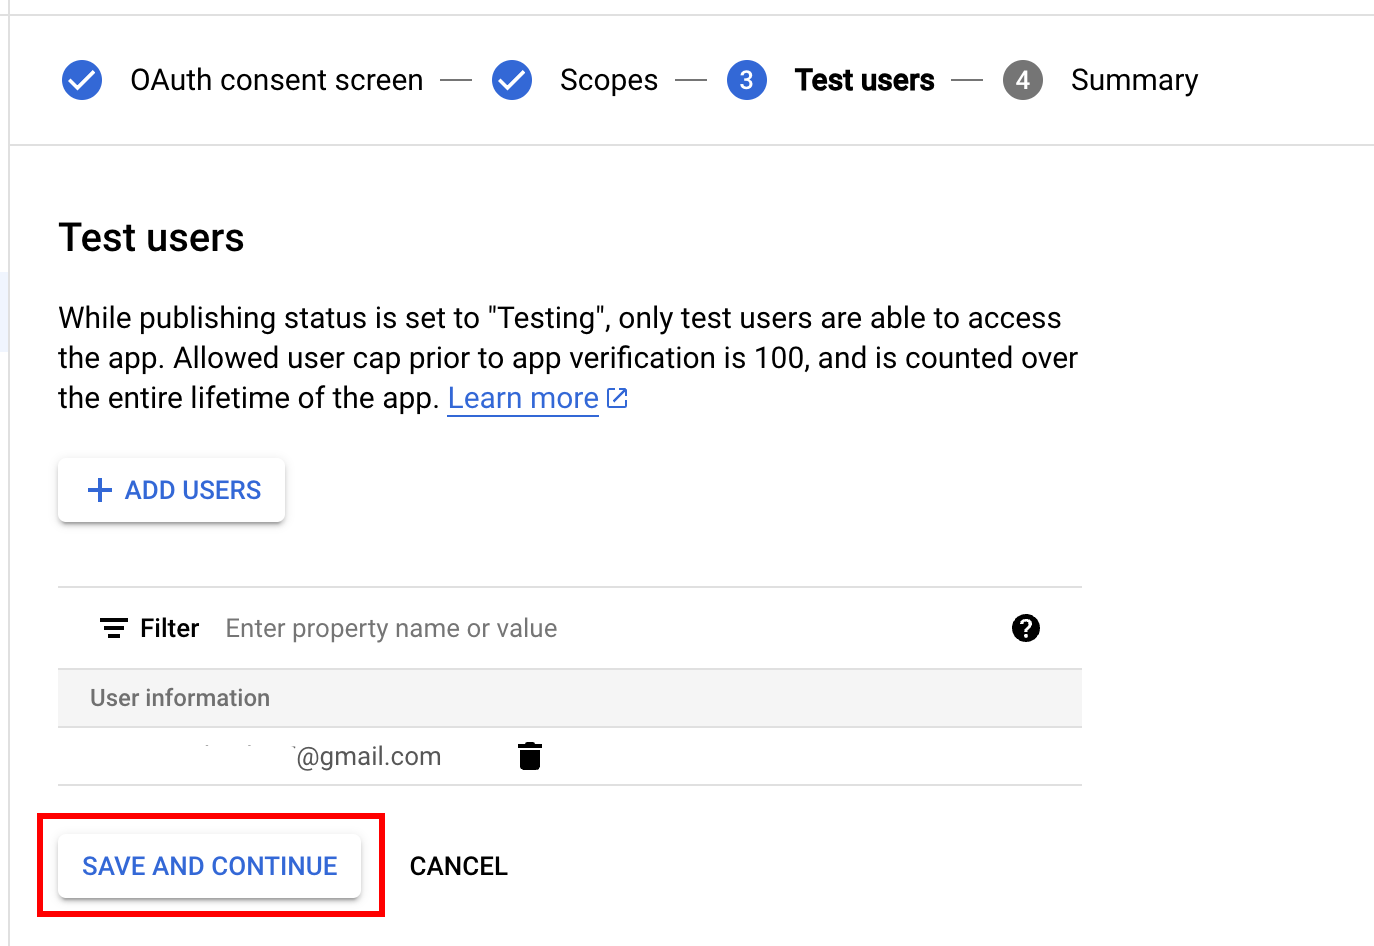
- クリックして
- クリック
back to dashboard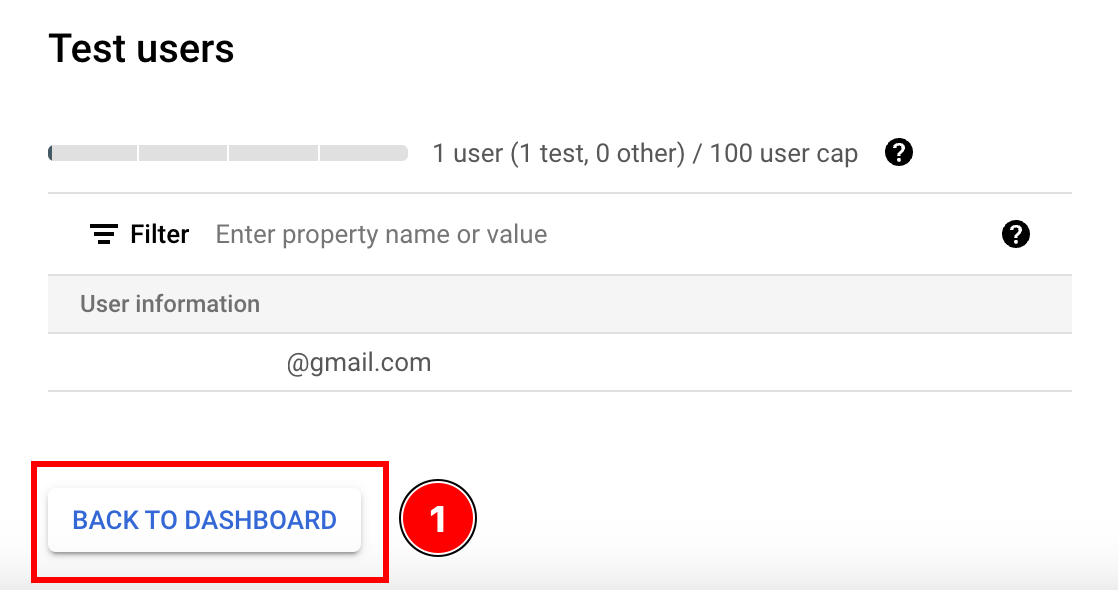
- アプリを検証申請する
オンラインアクセスとオフラインアクセスの違い
オンラインアクセスとオフラインアクセスの違いGoogle Login を使用する方法は複数あります。Capacitor の使用方法を以下の表にまとめました。
| オンラインアクセス | オフラインアクセス | |
|---|---|---|
| バックエンドが必要 | ❌ | ✅ |
| 長期アクセストークン | ❌ | ✅ |
| 簡単なセットアップ | ✅ | ❌ |
を取得し、更新トークンを取得する必要があります。
-
がわからない場合は、以下のシナリオを考慮してください。
オンラインアクセスを選択してください。
-
この場合、オンラインアクセスを選択してください。
アプリはクライアントからGoogle APIを呼びますが、バックエンドから呼びません。
-
この場合もオンラインアクセスを選択してください。
この場合、オンラインアクセスを選択してください
-
アプリは、ユーザーがアプリを使用していなくても、定期的にユーザーのカレンダーを確認します
この場合、オフラインアクセスを選択してください
オンラインアクセスの例
「オンラインアクセスの例」このチュートリアルのこの部分では、ユーザーをバックエンドで検証する方法を示します。
この例は非常に単純で、以下の技術に基づいています:
この例のcodeはこちらで見つけることができます ここ
あなたは見ることができます。
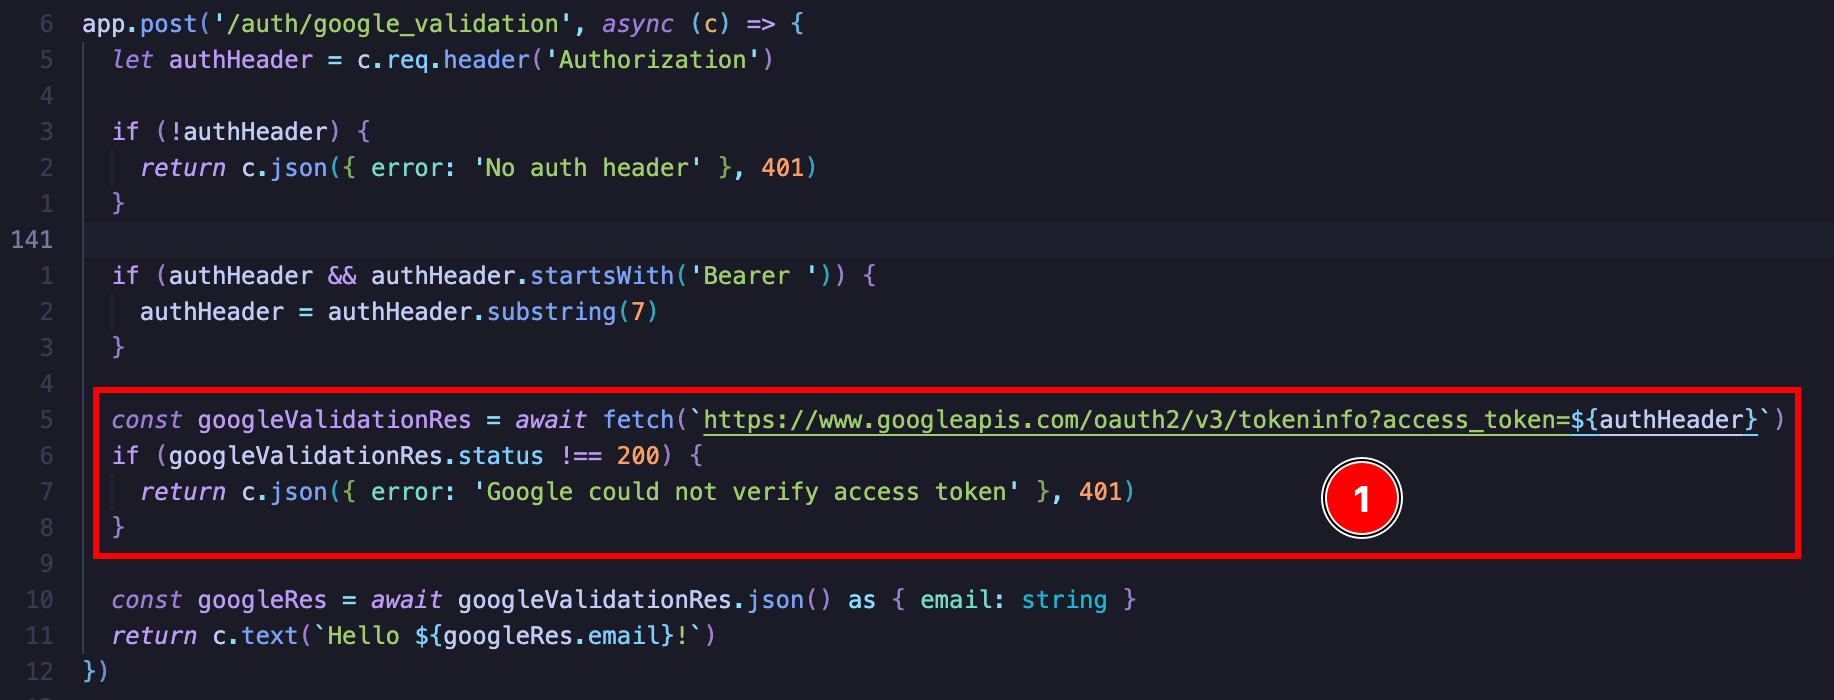
アイデアは比較的単純です。ユーザーに簡単なリクエストを送信し、Google にアクセス許可を求めます。 GET リクエストを送信します。 https://www.googleapis.com/oauth2/v3/tokeninfo Google の API を呼び出します。

Google OAuth Playground でトークン情報のレスポンスを表示します。
Google の API を呼びたい場合は、強くお勧めします。 Google の API を呼び出す場合は、強くお勧めします。Google の OAuth 2.0 Playground を参照してください。
ここから、呼び出せる API を簡単に確認できます。
独自のバックエンドでオフラインアクセスを使用します。オフラインアクセスを使用するには、以下が必要です。
- HTTPサーバー
この例では、以下の技術を使用してアプリでオフラインアクセスを提供します。
-
LowDb (シンプルなデータベース)
この例の code はこちらで見つけることができます。 here
クライアントcodeはこちらのようになっています。
import { Capacitor } from '@capacitor/core';import { GoogleLoginOfflineResponse, SocialLogin } from '@capgo/capacitor-social-login';import { usePopoutStore } from '@/popoutStore'; // <-- specific to my app
const baseURL = "[redacted]";
async function fullLogin() {  await SocialLogin.initialize({    google: {      webClientId: '[redacted]',      iOSClientId: '[redacted]',      iOSServerClientId: 'The same value as webClientId',      mode: 'offline' // <-- important    }  })  const response = await SocialLogin.login({    provider: 'google',    options: {      forceRefreshToken: true // <-- important    }  })
  if (response.provider === 'google') {    const result = response.result as GoogleLoginOfflineResponse    const res = await fetch(`${baseURL}/auth/google_offline`, {      headers: {        "Content-Type": "application/json"      },      body: JSON.stringify({        serverAuthCode: result.serverAuthCode,        platform: Capacitor.getPlatform()      }),      method: "POST"    })
    if (res.status !== 200) {      popoutStore.popout("Full google login failed", "check console");      return    }
    const { jwt } = await res.json();    const userinfo = await fetch(`${baseURL}/auth/get_google_user`, {      headers: {        Authorization: `Bearer ${jwt}`      }    })    if (userinfo.status !== 200) {      popoutStore.popout("Full google (userinfo) login failed", "check console");      return    }    popoutStore.popout("userinfo res", await userinfo.text());  }}
ページに表示されているのは何もありません。アプリ内では呼び出されません。 SocialLogin.refresh() アプリ内では呼び出されません。Googleオフラインモードでは、バックエンドがリフレッシュトークンを安全に保存するまでリフレッシュが実行されます。 serverAuthCode Googleログイン設定から続けてください。
Googleログイン設定から続けてください。
Googleログイン設定を使用している場合、Googleログイン設定を使用して認証とアカウントフローの計画を行っている場合、 @__CAPGO_KEEP_0__/__CAPGO_KEEP_1__-social-loginを使用して@__CAPGO_KEEP_0__/__CAPGO_KEEP_1__-social-loginのネイティブ機能を実装します。 @__CAPGO_KEEP_0__/__CAPGO_KEEP_1__-social-login @capgo/capacitor-social-login @capgo/capacitor-social-login @capgo/capacitor-ソーシャルログイン Capgoの実装詳細については@capgo/capacitor-social-loginを参照してください。 @capgo/capacitor-パスキー Capgoの実装詳細については@capgo/capacitor-passkeyを参照してください。 @capgo/capacitor-native-biometric Capgoの実装詳細については@capgo/capacitor-native-biometric、 2要素認証 Capgoの実装詳細については2要素認証を参照してください。
Capacitorアプリを配信 コンテキスト: Capgoのマーケティングウェブサイト。役割: 短いUIラベルまたはナビゲーションアイテム。見つける場所: component doc/SignupCta.astro, component Hero.astro。Capgoの製品/ブランドと開発者用語をそのまま保存する。メッセージキー `hero_title_line1` (Hero Title Line1)。
待たなくて済む


ビジネス需要がありますか? チームとお話しましょう