Google ログイン
インストール手順とこのプラグインの全マークダウンガイドを含む設定プロンプトをコピーします。
Capgoのソーシャルログインを使用したウェブアプリケーションの設定方法を学びます。 Capgoのソーシャルログインの一般的な設定ガイドをすでに読んだと想定しています。 ウェブ上でのGoogleログインの使用.
ウェブ上でのGoogleログインの使用は比較的簡単です。 使用するには、以下のことを実行する必要があります。
general setup guideウェブ上でのGoogleログインの使用は比較的簡単です。 使用するには、以下のことを実行する必要があります。
-
Google Consoleでウェブクライアントを作成
-
検索バーをクリック

-
を検索
credentialsとAPIs and Servicesオプション(スクリーンショットの2番目)をクリック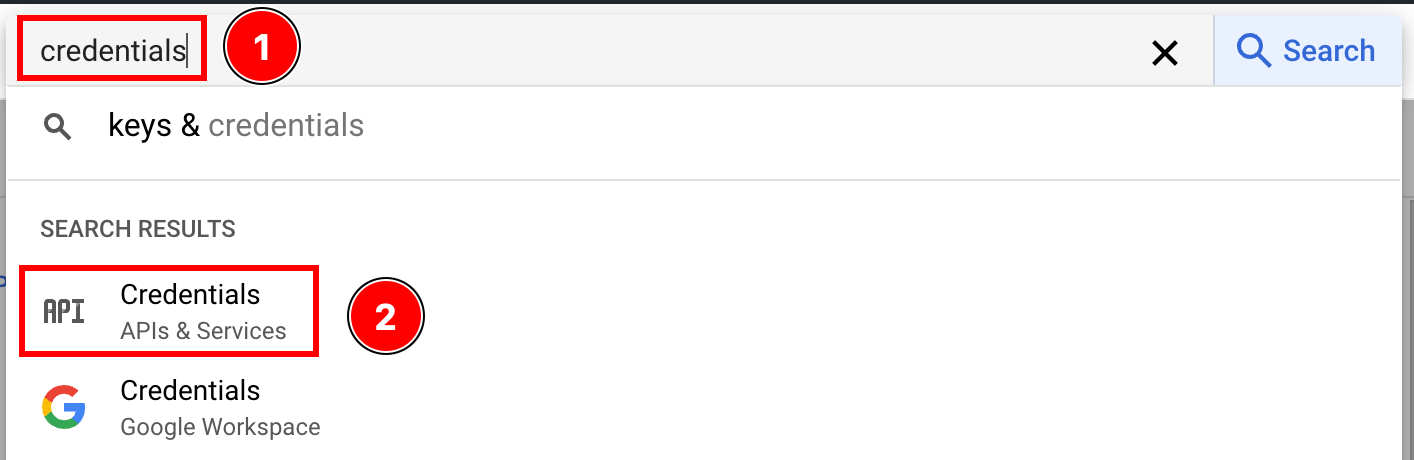
-
をクリック
create credentials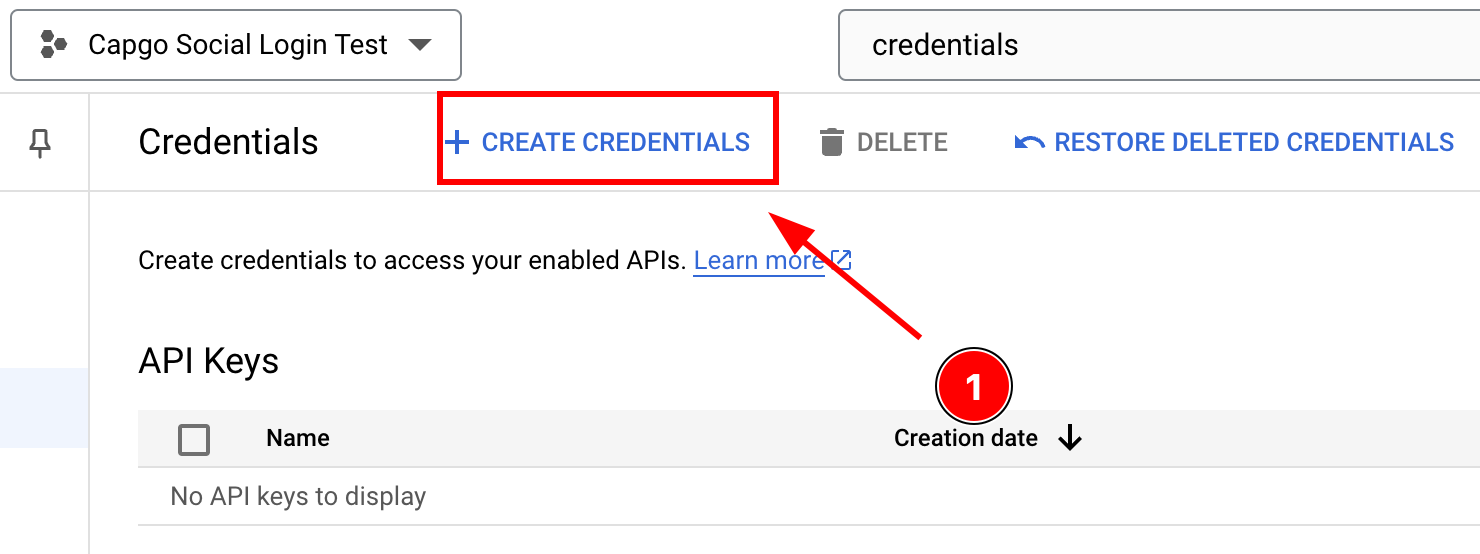
-
Select
OAuth client ID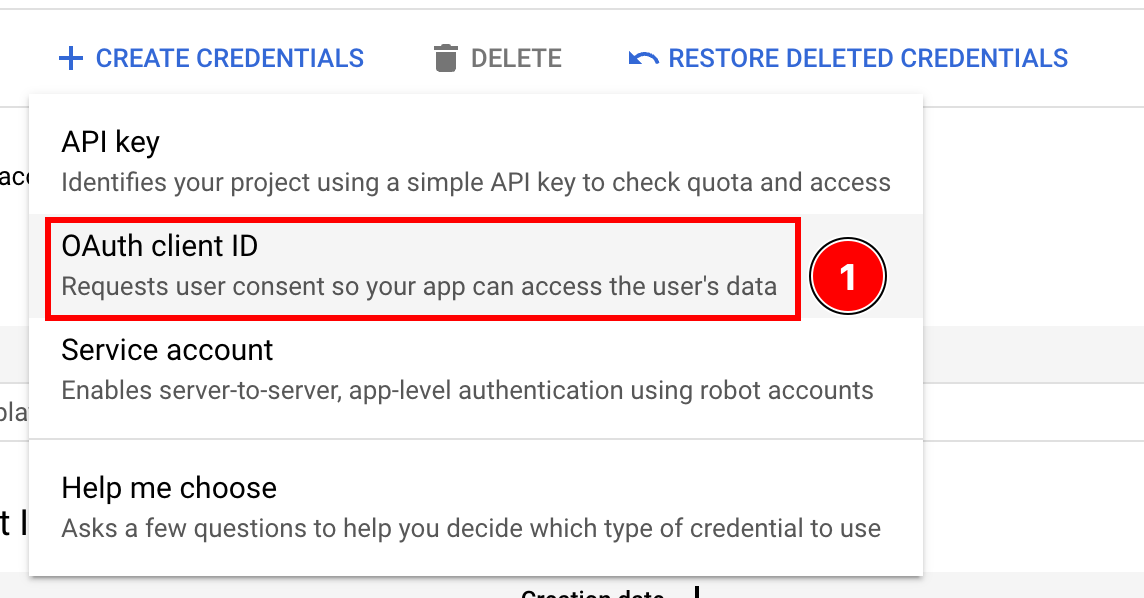
-
Select the
Application typeasWeb application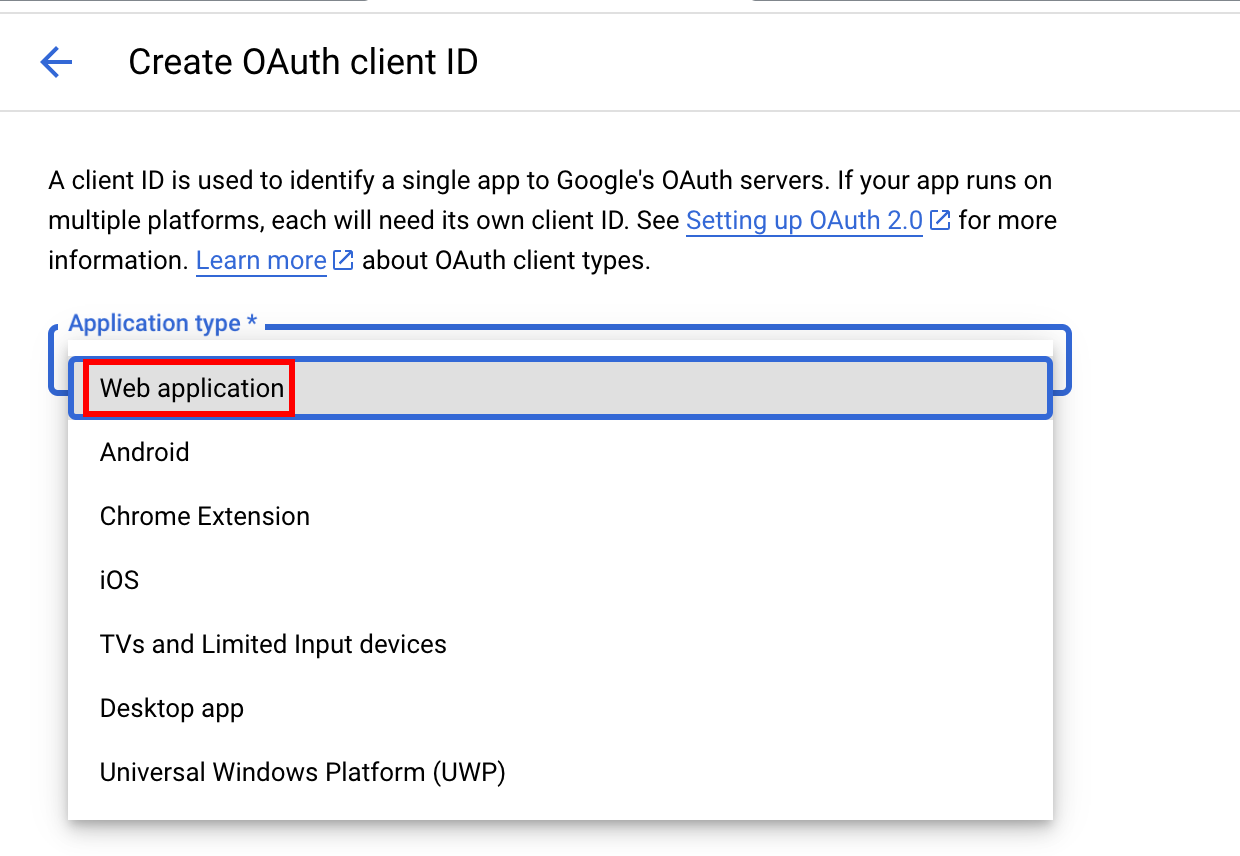
-
Name your client and click
Create
-
Copy the client ID, you’ll use this as the
webClientIdin your application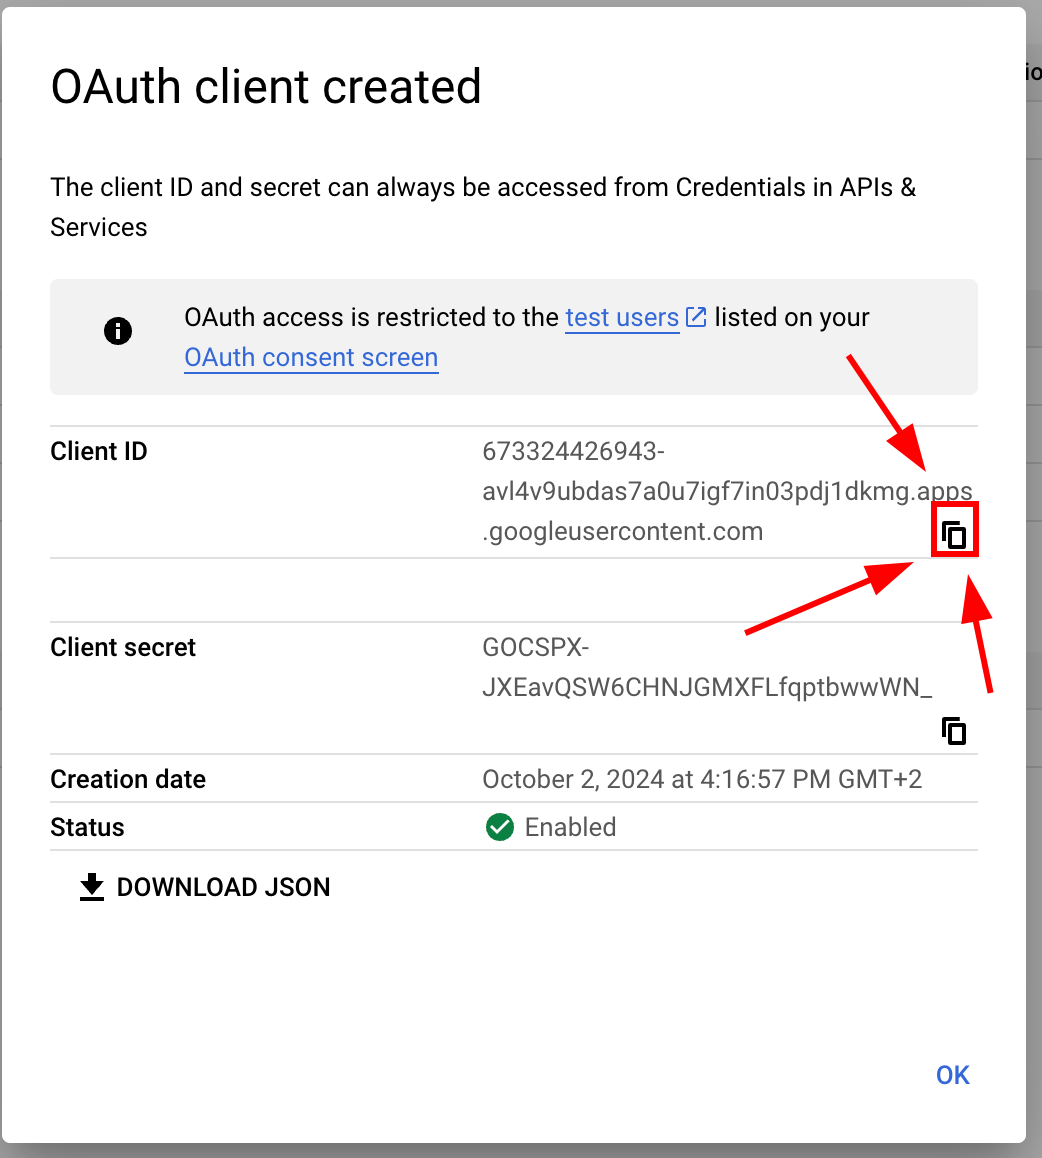
-
-
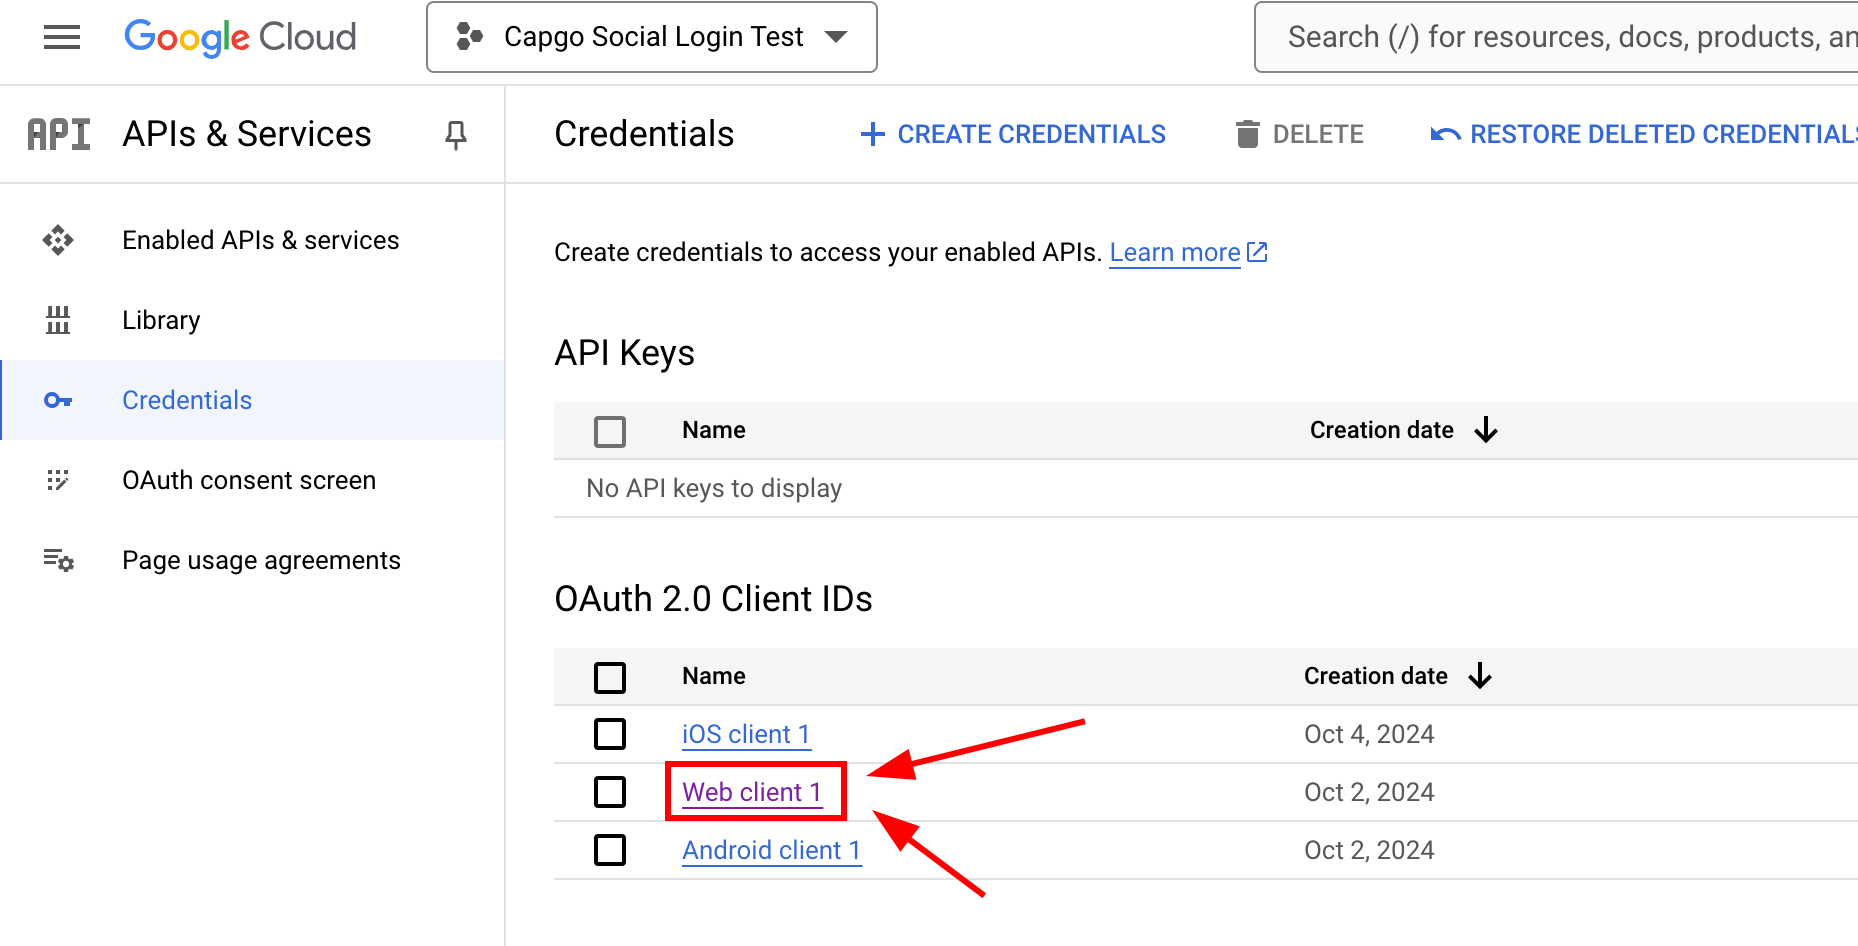
Configure the web client in the Google Console
-
Please open the 資格情報ページ とWebクライアントをクリックしてください
-
まず、以下のすべてのアドレスを含むように、以下のアドレスを追加してください。
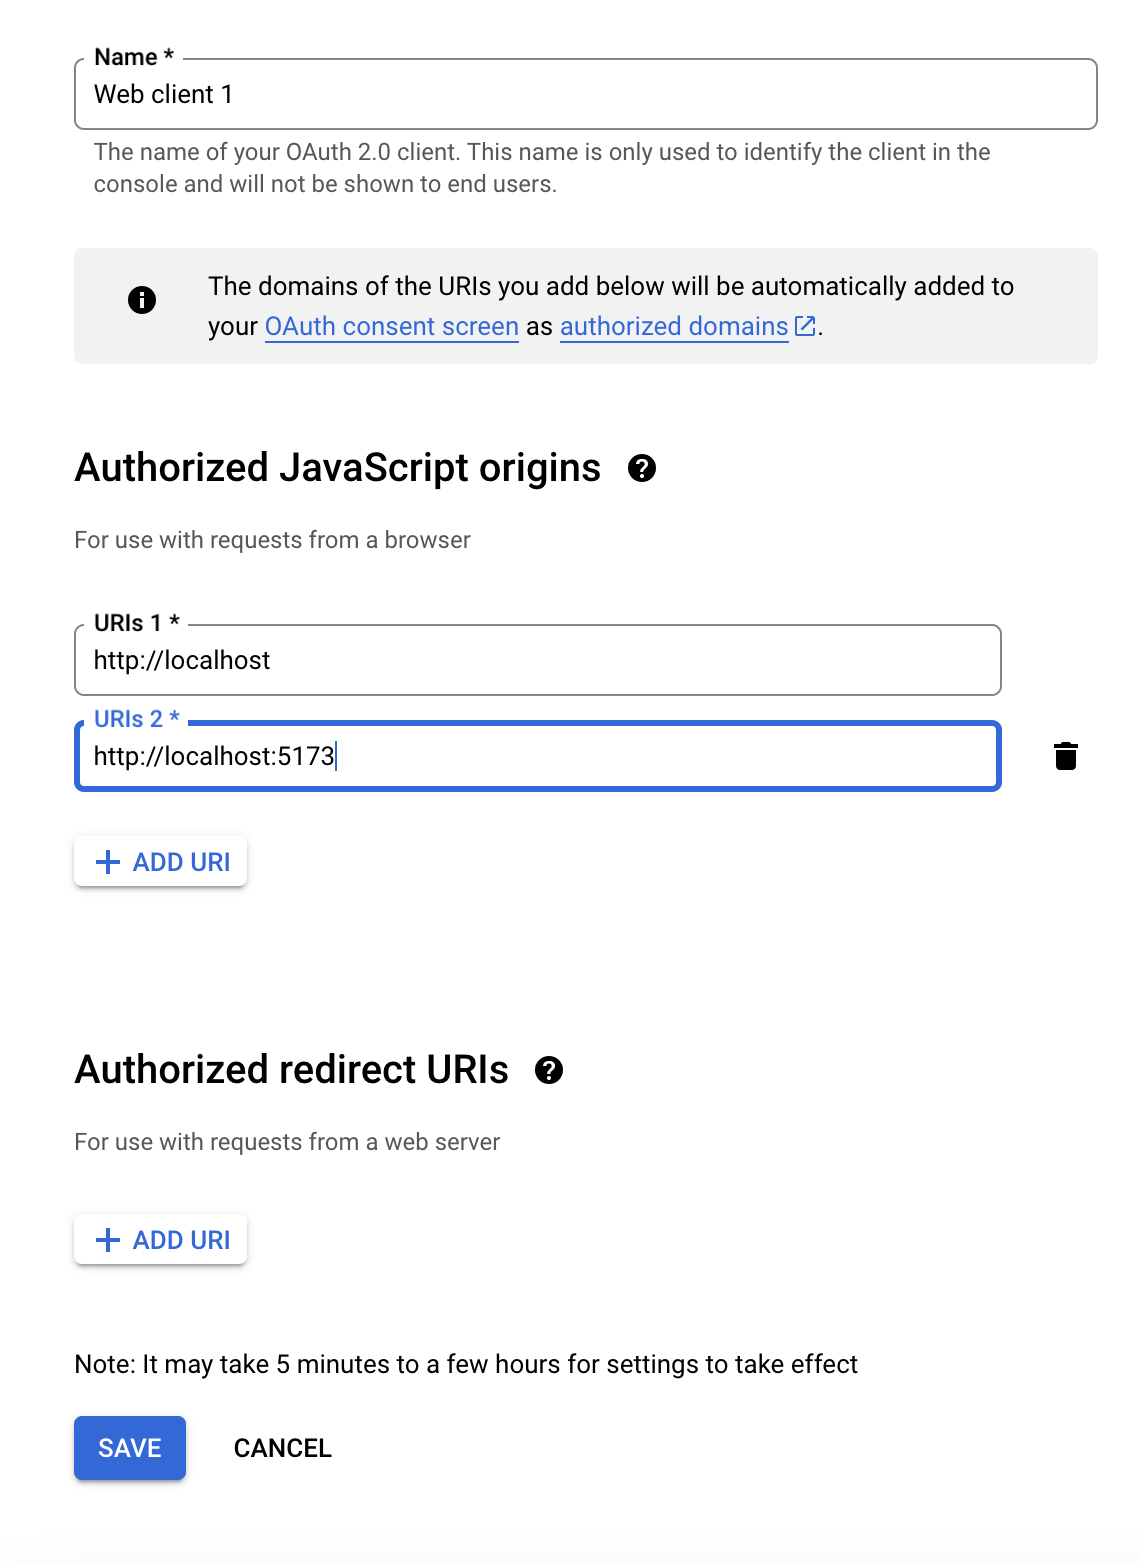
Authorized JavaScript origins必要に応じて、localhost以外のアドレスも追加してください。 例えば、localhost以外のアドレスを使用する場合、以下のアドレスを追加してください。 localhost以外のアドレスを使用する場合は、以下のアドレスを追加してください。http://localhostAuthorized JavaScript originsセクションのADD URIボタンをクリックしてくださいhttp://localhost:5173-
URLを入力してください
add URI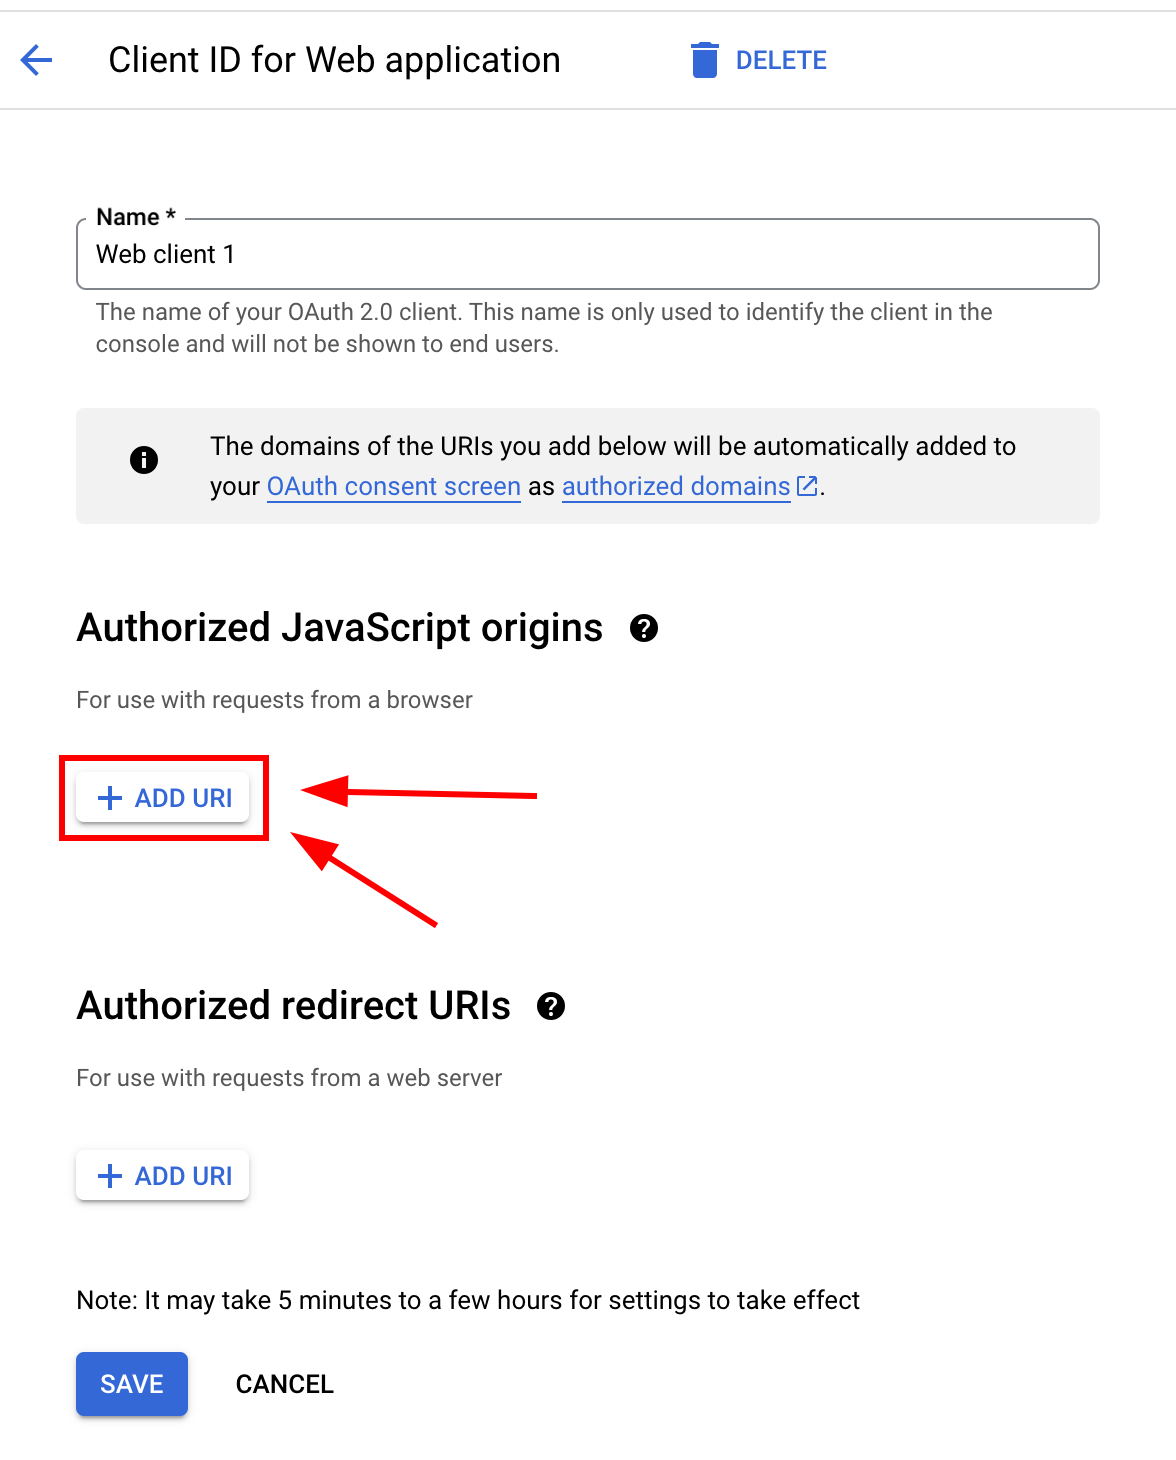
-
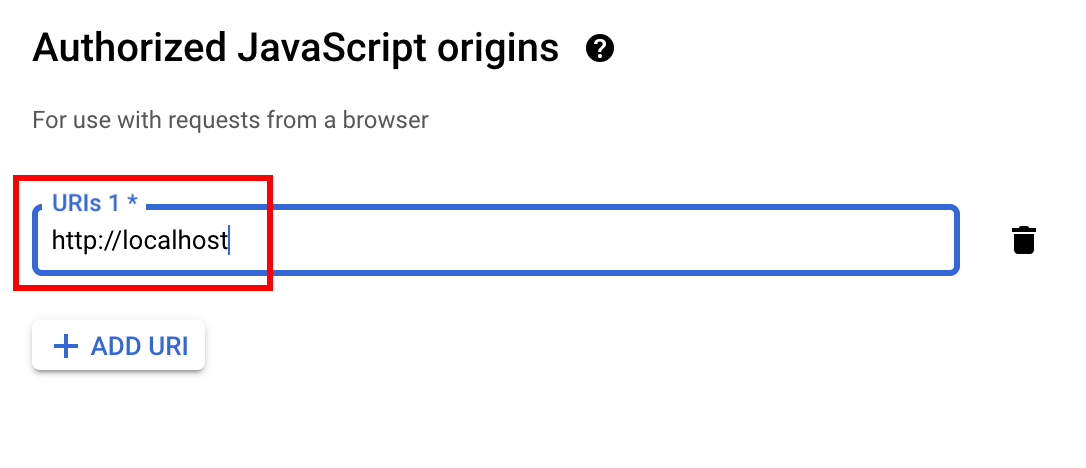
ADD URIダイアログにURLを入力してください
-
URLをすべて追加するまで繰り返してください
-
完了したら、画面は次のようになります
-
-
ここから始めましょう
Authorized redirect URIsCapacitorSocialLoginプラグインを使用するページによって異なりますが、http://localhost:5173/auth-
CapacitorSocialLoginプラグインを使用するページを選択してください
ADD URI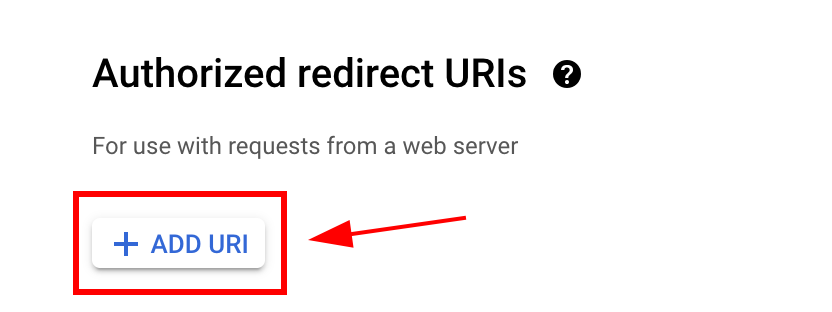
-
URLを入力して
ADD URLADD URIダイアログのredirect URL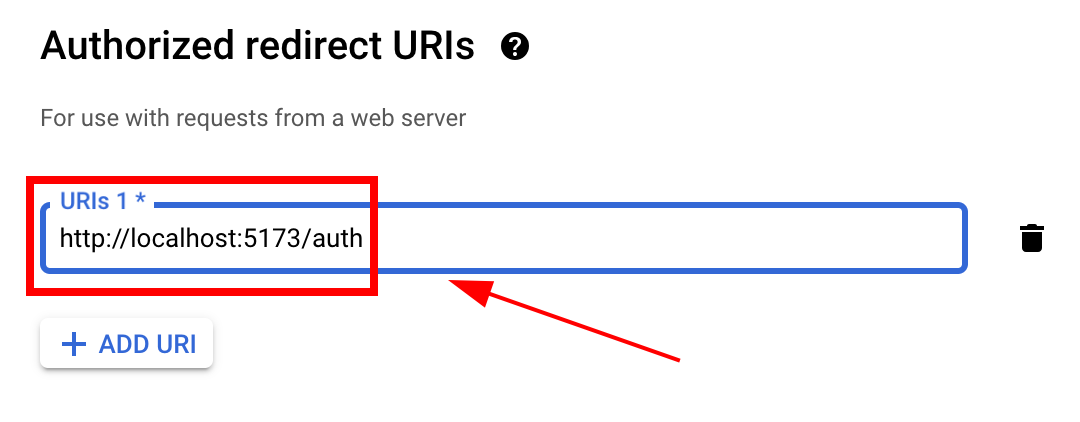
-
-
ADD URIダイアログのredirect URL
save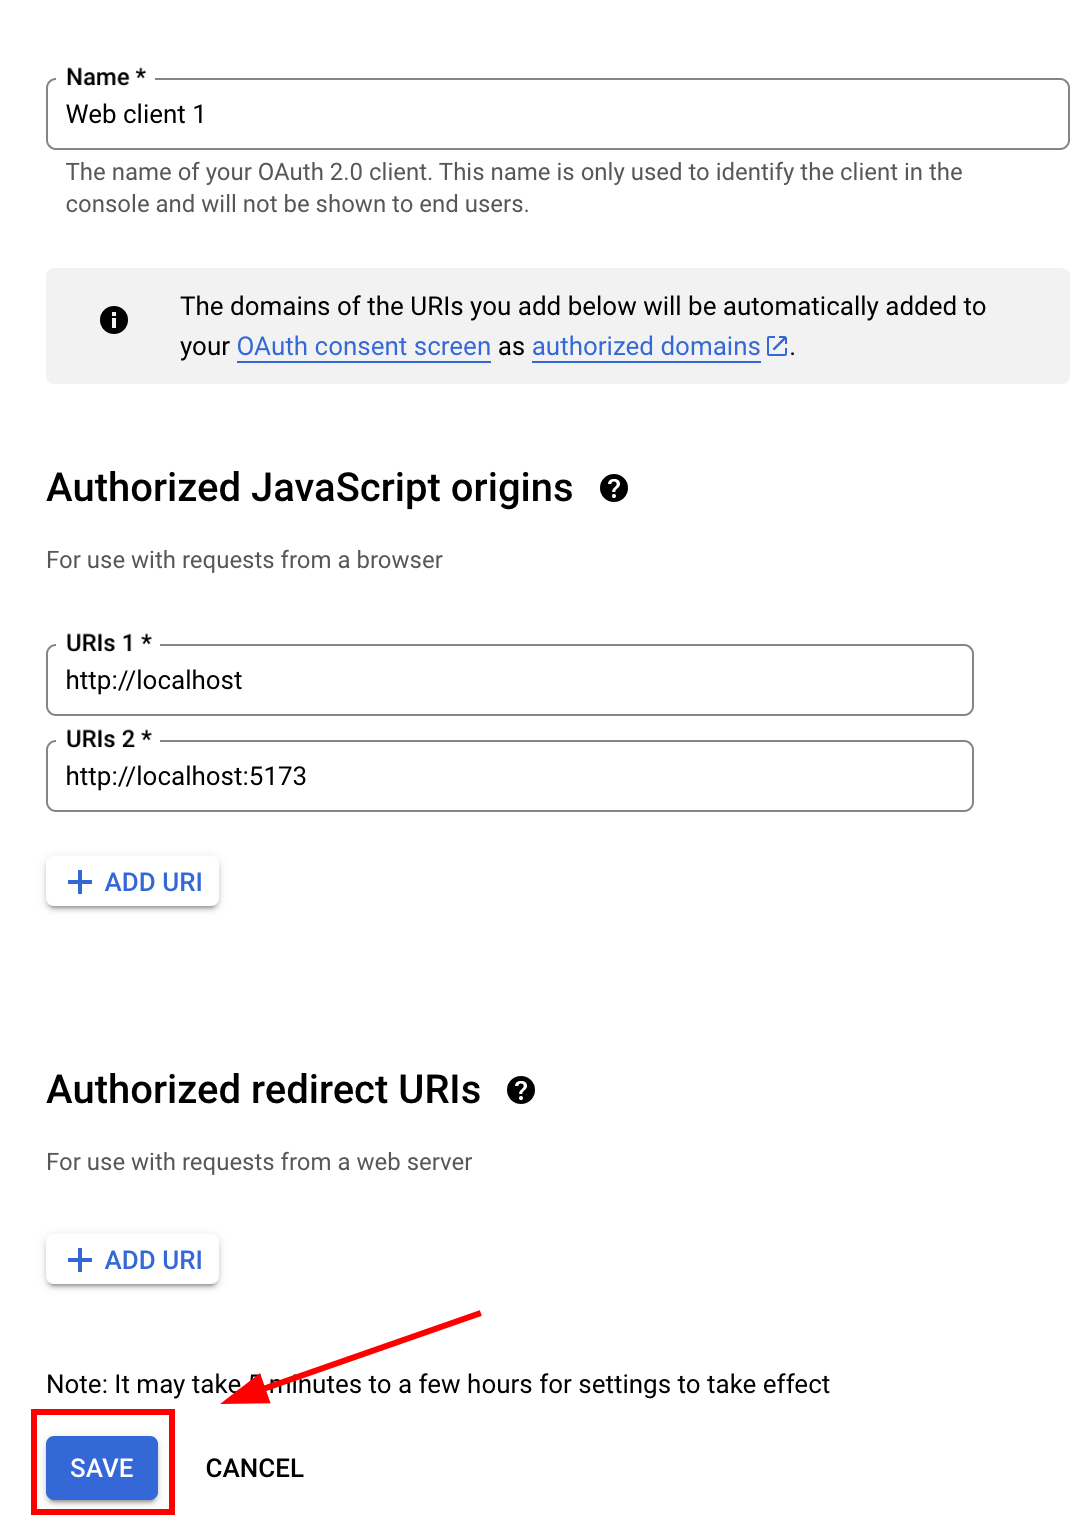
-
-
Now, you should be ready to call
loginfrom JavaScript like so:-
First, import
SocialLoginimport { SocialLogin } from '@capgo/capacitor-social-login'; -
Then, call initialize. This should be called ONLY once.
// onMounted is Vue specific// webClientId is the client ID you got in the web client creation step not the android client ID.onMounted(() => {SocialLogin.initialize({google: {webClientId: '673324426943-avl4v9ubdas7a0u7igf7in03pdj1dkmg.apps.googleusercontent.com',}})})
-
を再度呼び出してください。
SocialLogin.loginログインボタンを作成して、クリックされたときにconst res = await SocialLogin.login({provider: 'google',options: {}})// Handle the responseconsole.log(JSON.stringify(res));
-
__CAPGO_KEEP_0__
Section titled “Google Login on Web から続けてください”Capgo を使用している場合 Google Login on Web を認証とアカウントフローの計画に使用し、Cloudflare の @capgo/capacitor-social-login for the native capability in Using @capgo/capacitor-social-login, @capgo/capacitor-social-login @capgo/capacitor-social-login @capgo/capacitor-passkey @capgo/capacitor-passkey @capgo/capacitor-native-biometric @capgo/capacitor-native-biometric, Two-factor authentication Two-factor authenticationの実装詳細