
웹에서 Google 로그인
이 플러그인의 설치 단계와 전체 마크다운 가이드를 포함하여 설정 지시를 복사하세요.
소개
소개 섹션이 가이드에서 Google 로그인을 Capgo 웹 애플리케이션에 대한 Social Login에 설정하는 방법을 배울 것입니다. 이 가이드를 읽기 전에 이미 일반 설정 가이드를 읽었다고 가정합니다. 일반 설정 가이드.
웹에서 Google 로그인 사용
웹에서 Google 로그인 사용 섹션웹에서 구글 로그인을 사용하는 것은 상당히 간단합니다. 이 기능을 사용하려면 다음 단계를 수행해야 합니다.
-
Google Console에서 웹 클라이언트를 생성하세요.
-
검색 바를 클릭하세요.

-
검색어를 입력하세요.
credentials검색 결과에서APIs and ServicesAPIs 및 Services가 강조된 자격 증명 옵션을 클릭하세요.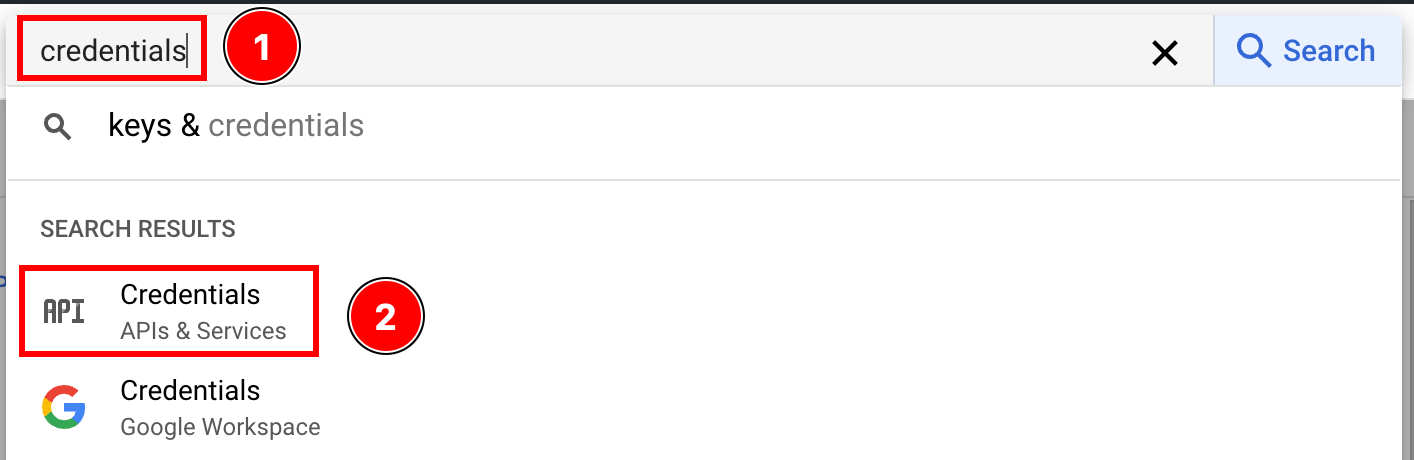
-
자격 증명 옵션을 클릭하세요.
create credentials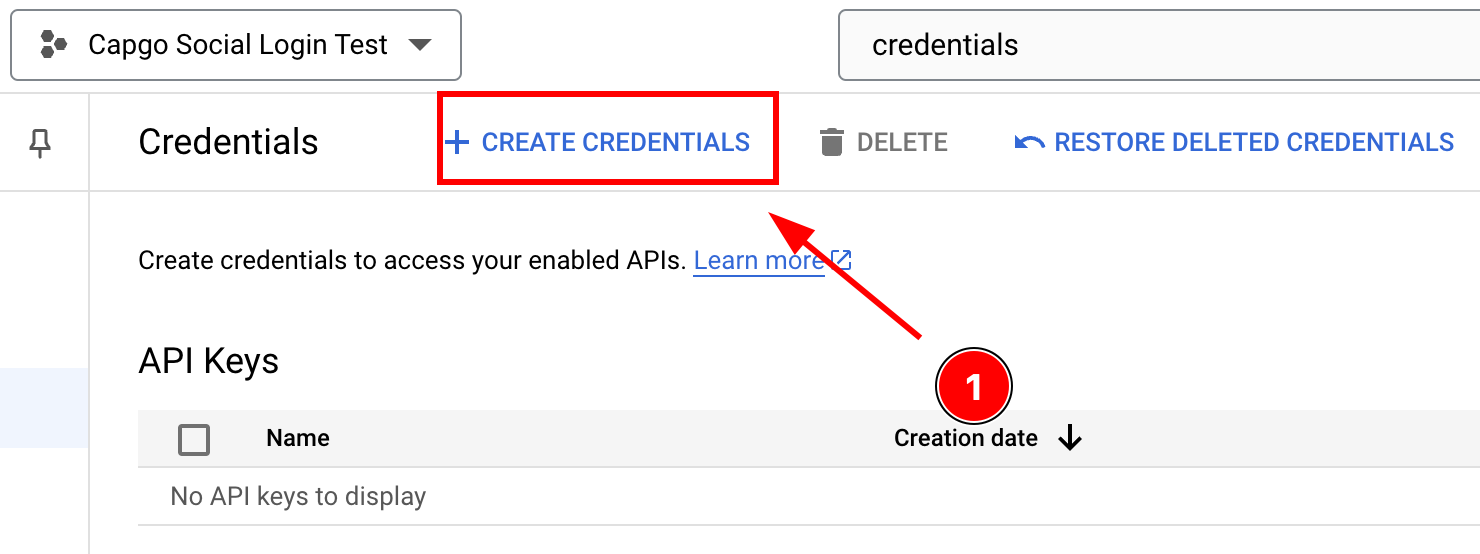
-
선택
OAuth client ID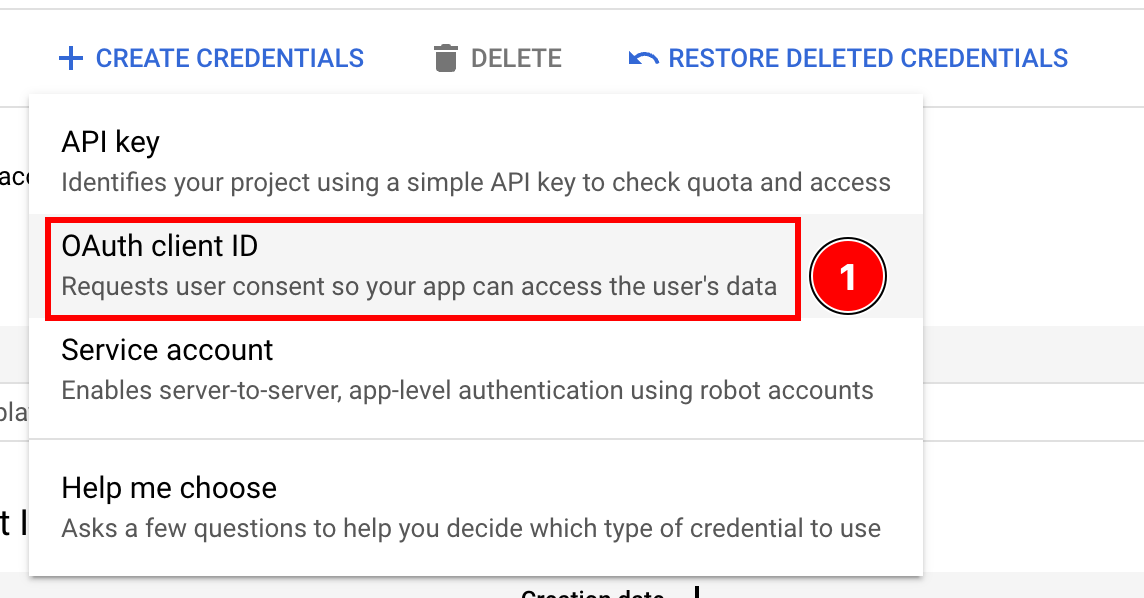
-
선택한
Application type으로Web application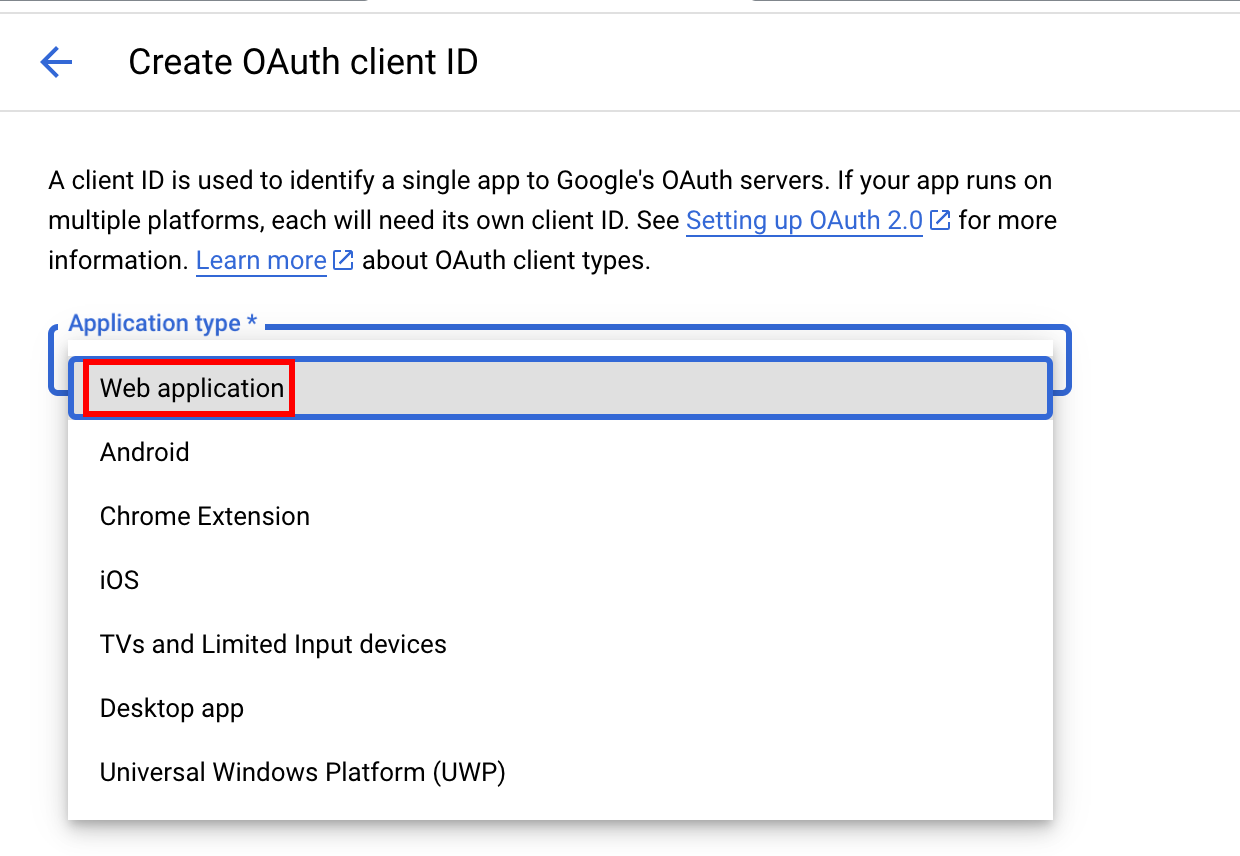
-
클라이언트 이름을 입력하고 클릭하세요.
Create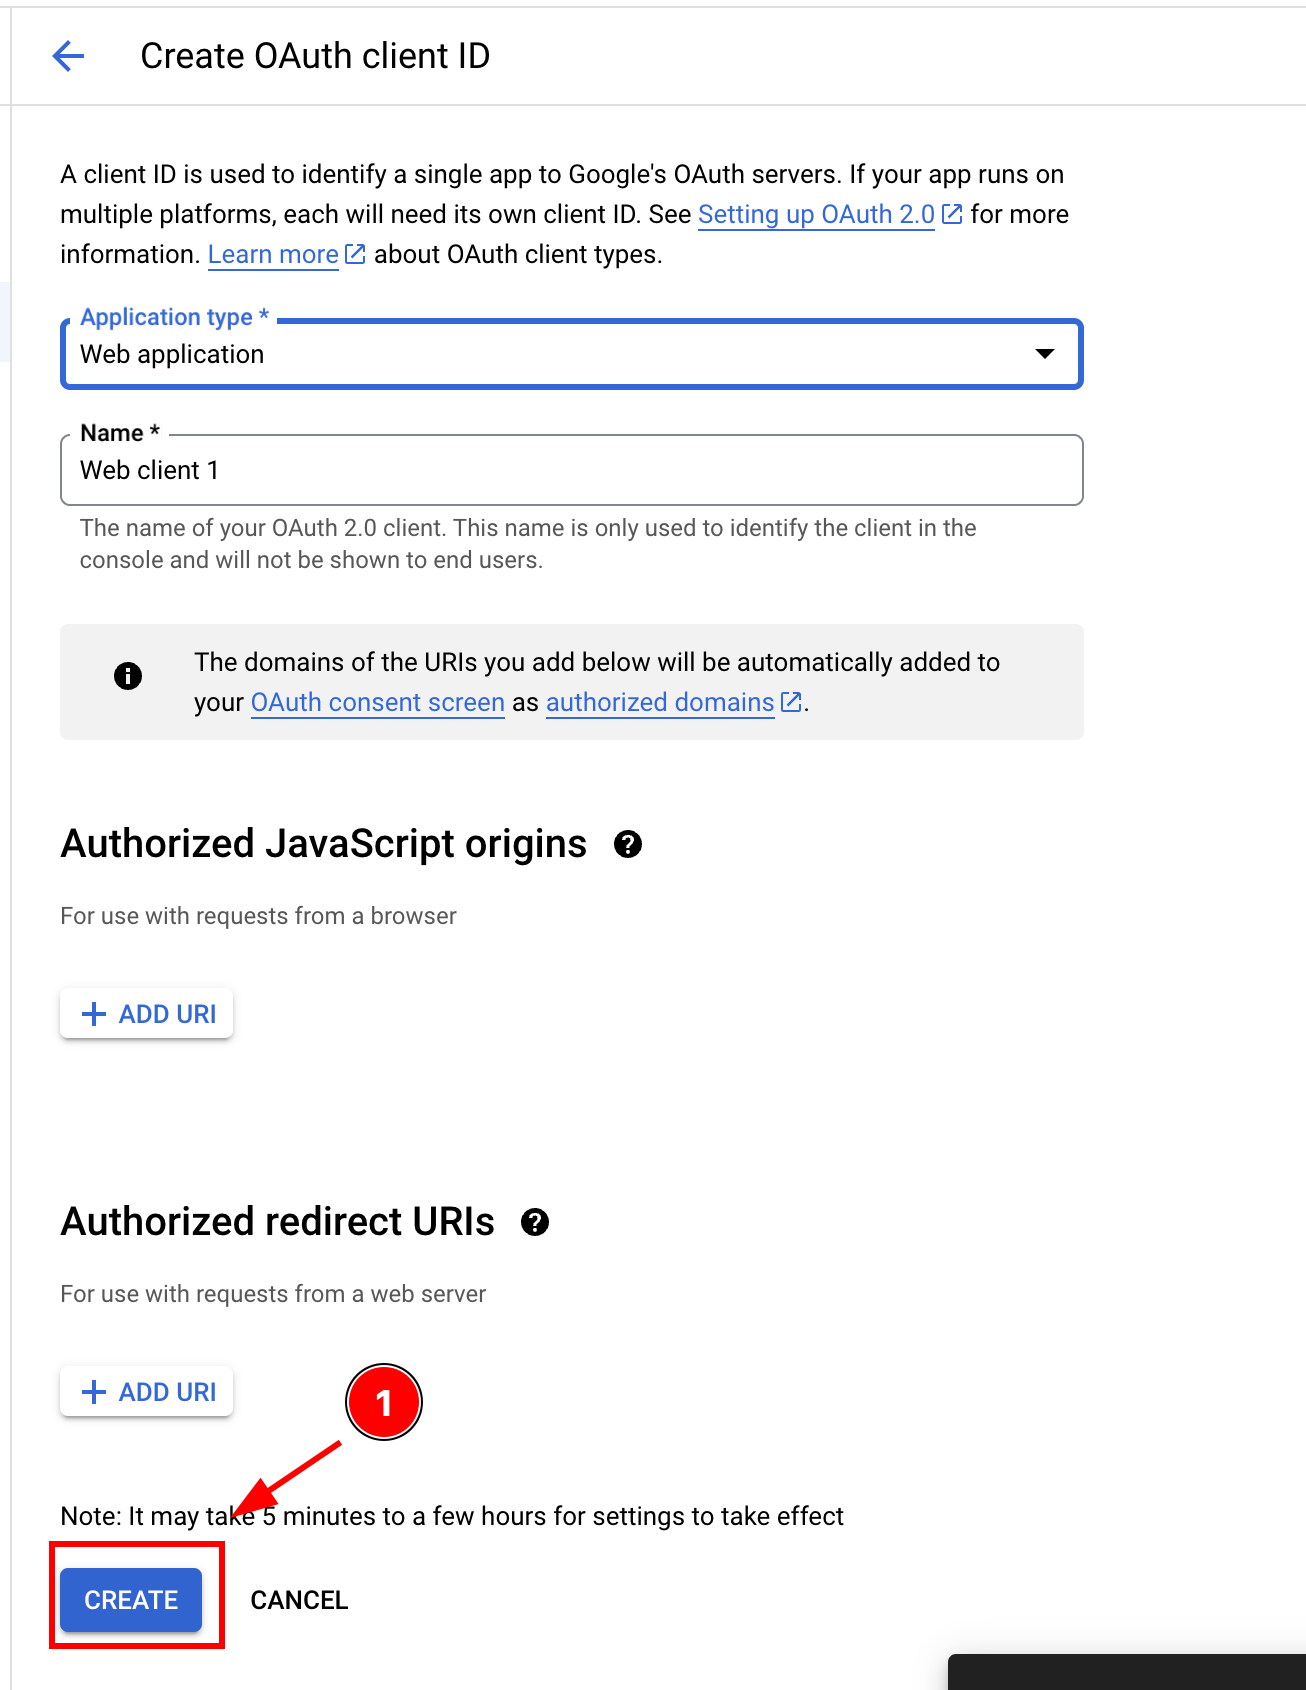
-
클라이언트 ID를 복사하세요. 이 ID를 애플리케이션에서 사용합니다.
webClientId애플리케이션에서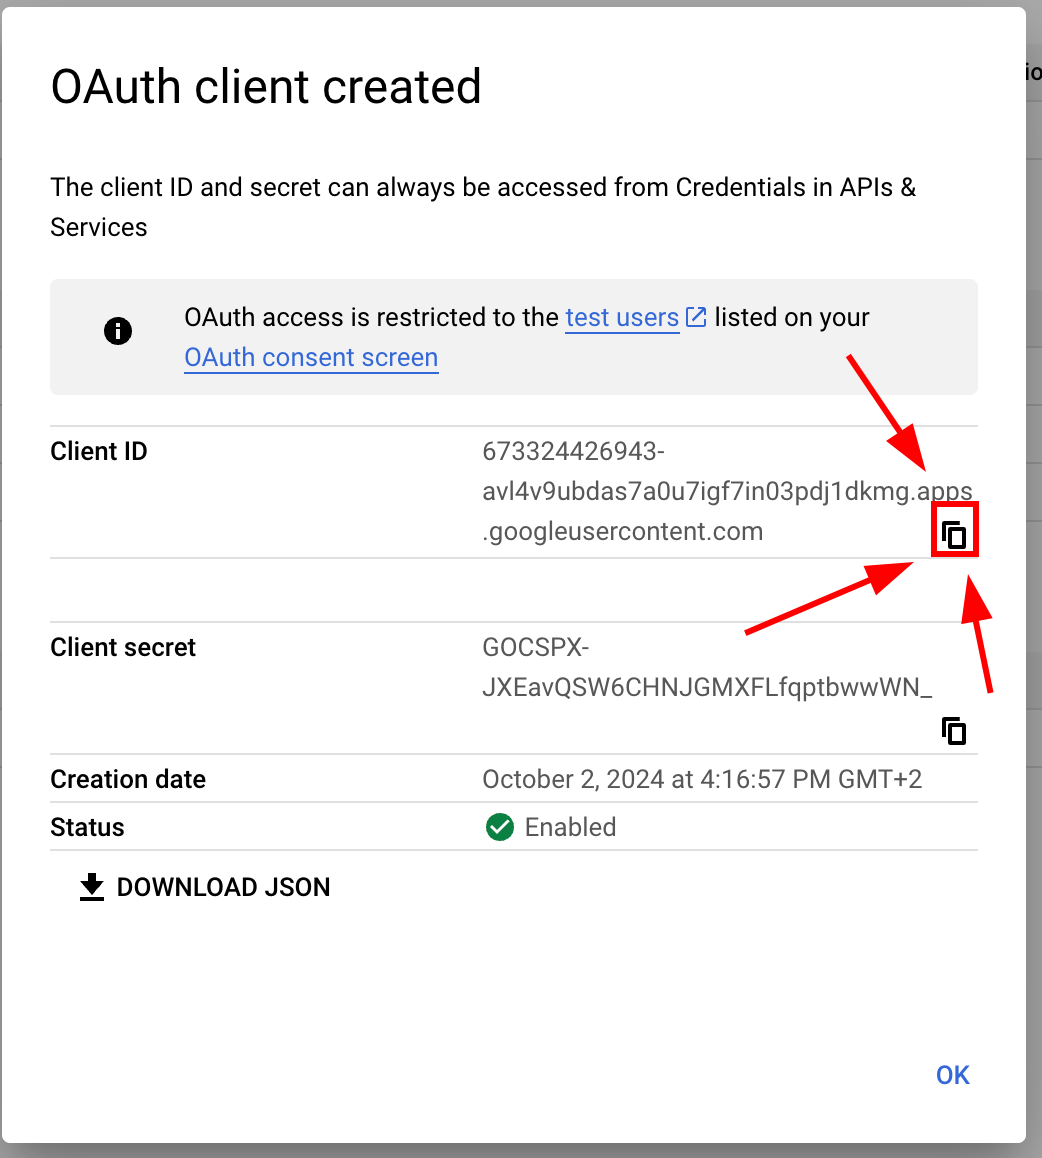
-
-
클라이언트 ID 세부 사항을 표시합니다. 웹 클라이언트 ID를 복사하세요.
-
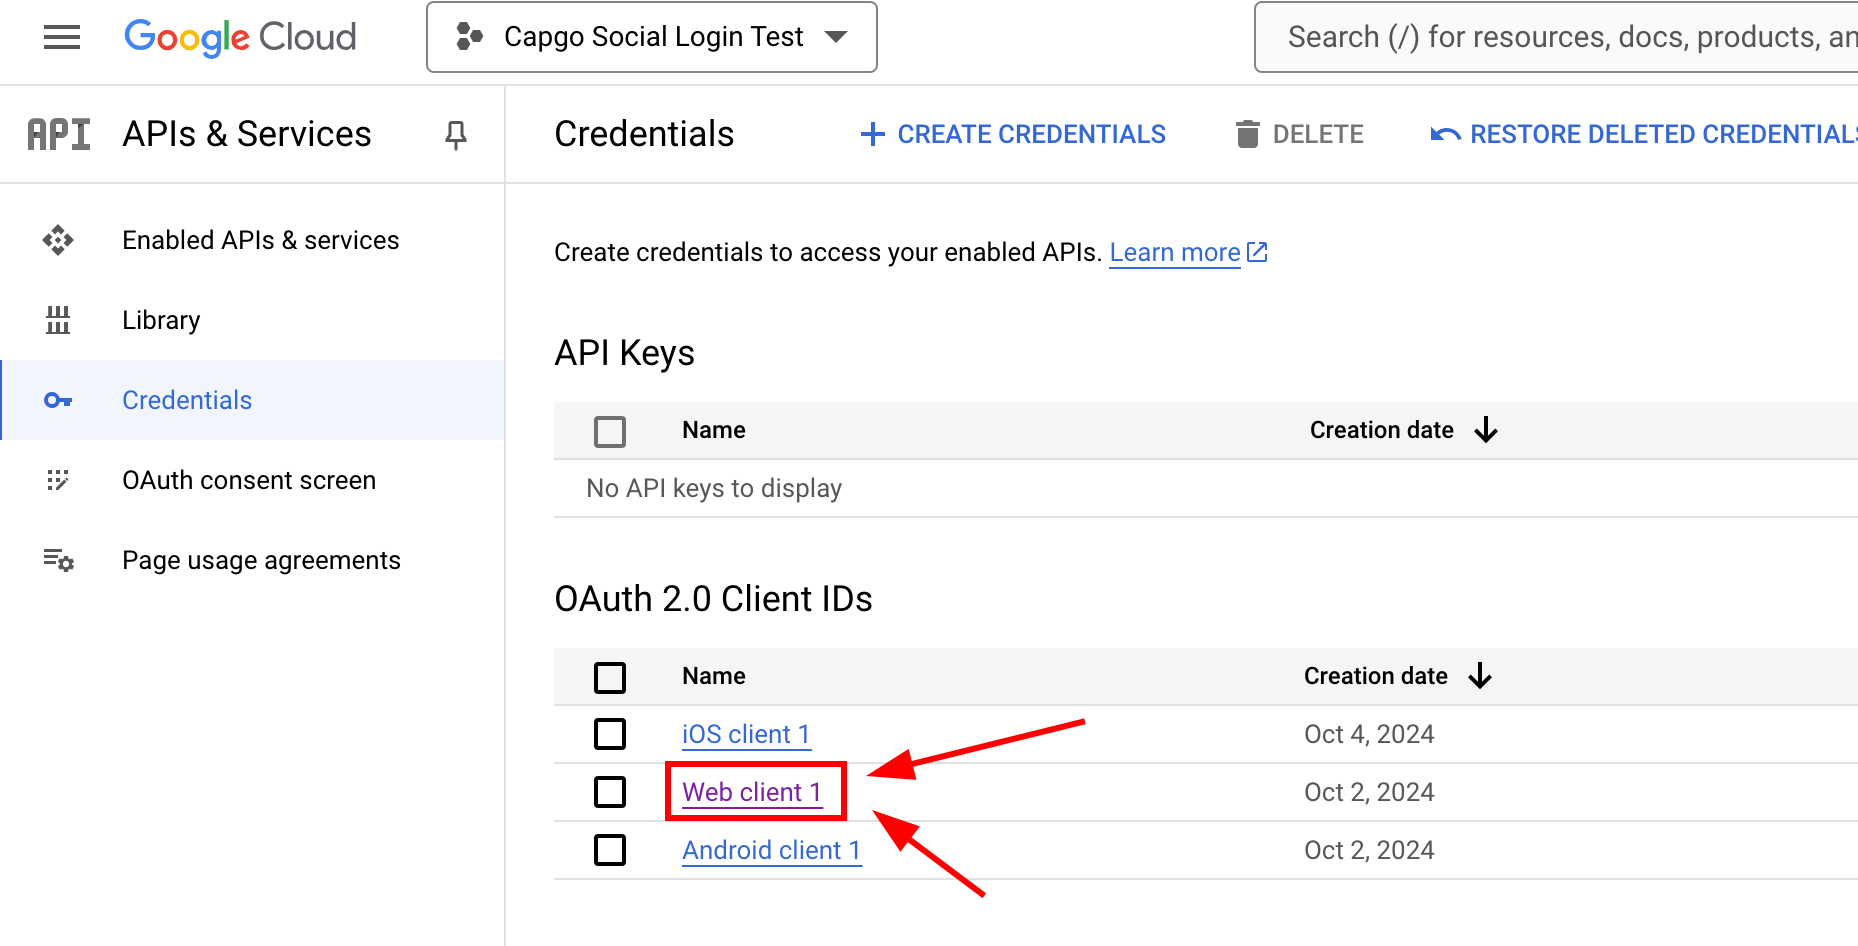
이러한 기능을 사용하려면 인증 정보 페이지를 열어 주세요 웹 클라이언트를 클릭하세요
-
이제 다음 단계로 이동해 주세요
Authorized JavaScript origins이 URL을 추가해 주세요. 이에 포함된 주소는 앱을 사용할 때 사용할 수 있는 모든 주소입니다. 사용하지 않습니다. localhost만 사용합니다.http://localhostandhttp://localhost:5173-
localhost와 함께 사용합니다.
add URI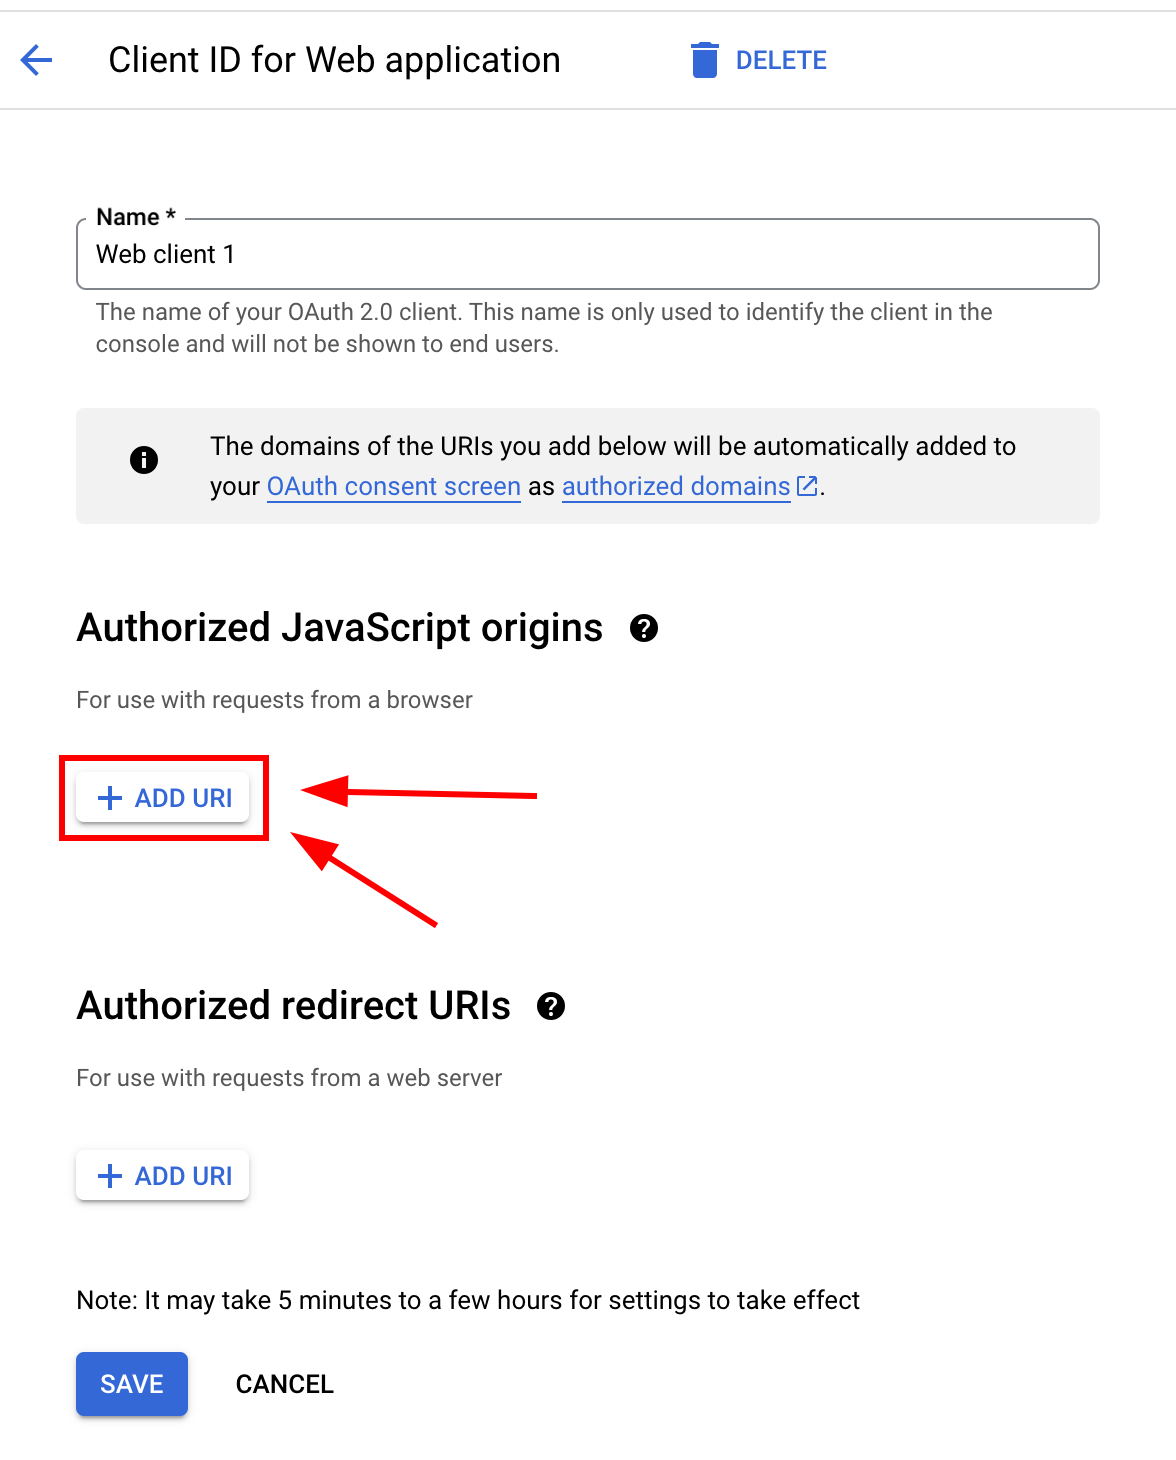
-
URL을 입력하세요
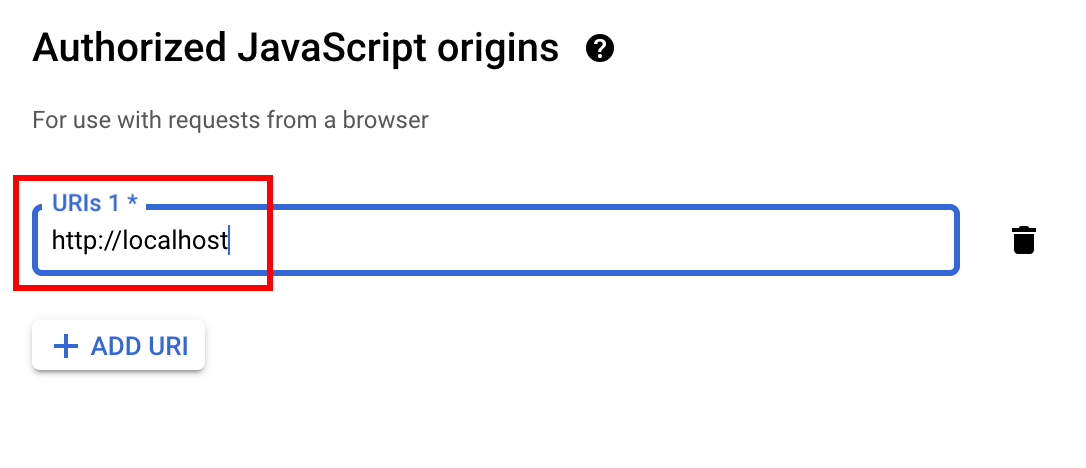
-
모든 URL을 추가할 때까지 다시 반복해 주세요
-
작업을 마치면 화면은 다음과 같이 보일 것입니다
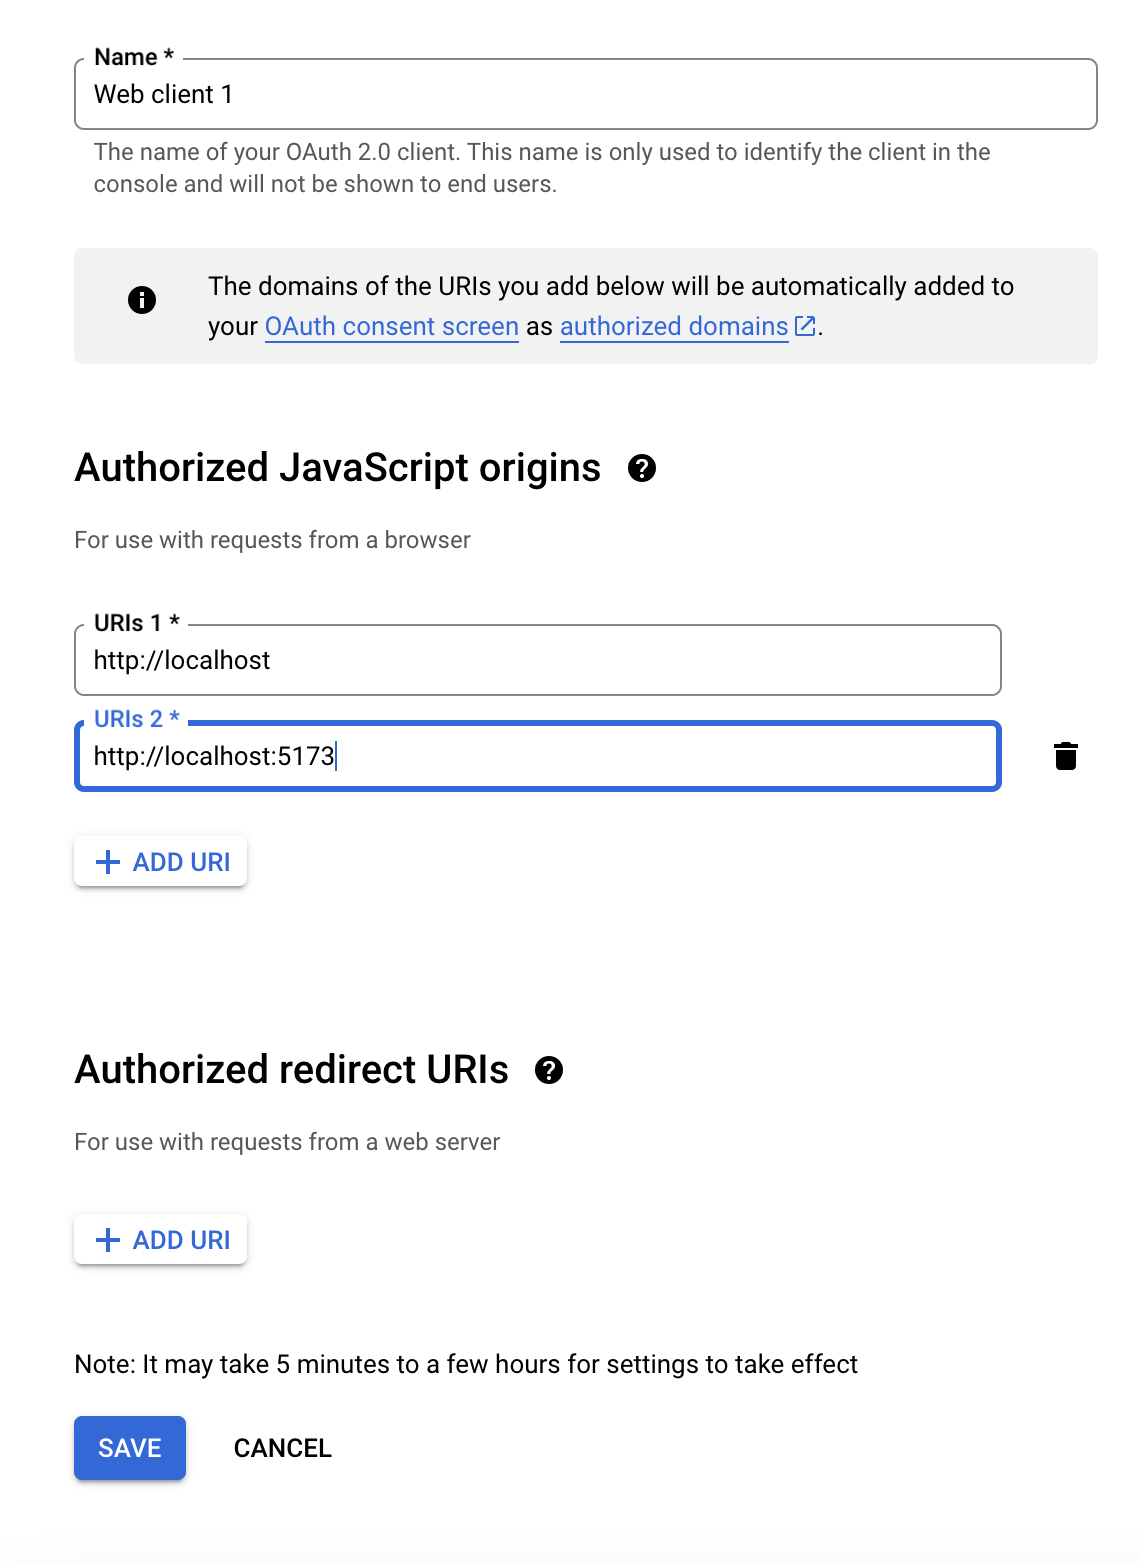
-
-
다음과 같은 URL을 추가해 주세요
Authorized redirect URIsCapacitorSocialLogin 플러그인을 사용할 페이지에 따라 다를 수 있습니다. 저는 이 플러그인을 사용할 페이지는http://localhost:5173/auth-
클릭해 주세요
ADD URI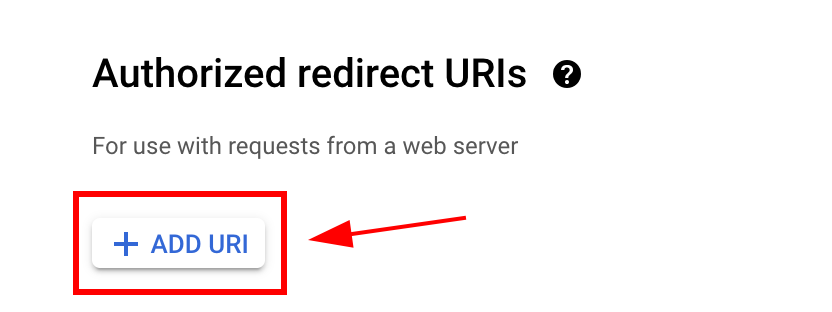
-
URL을 입력하고 다시 클릭해 주세요
ADD URLagain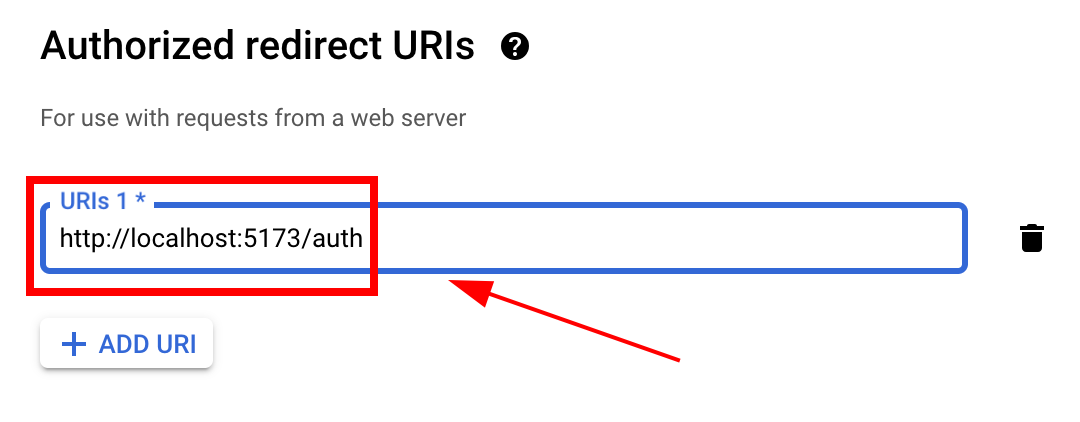
-
-
클릭
save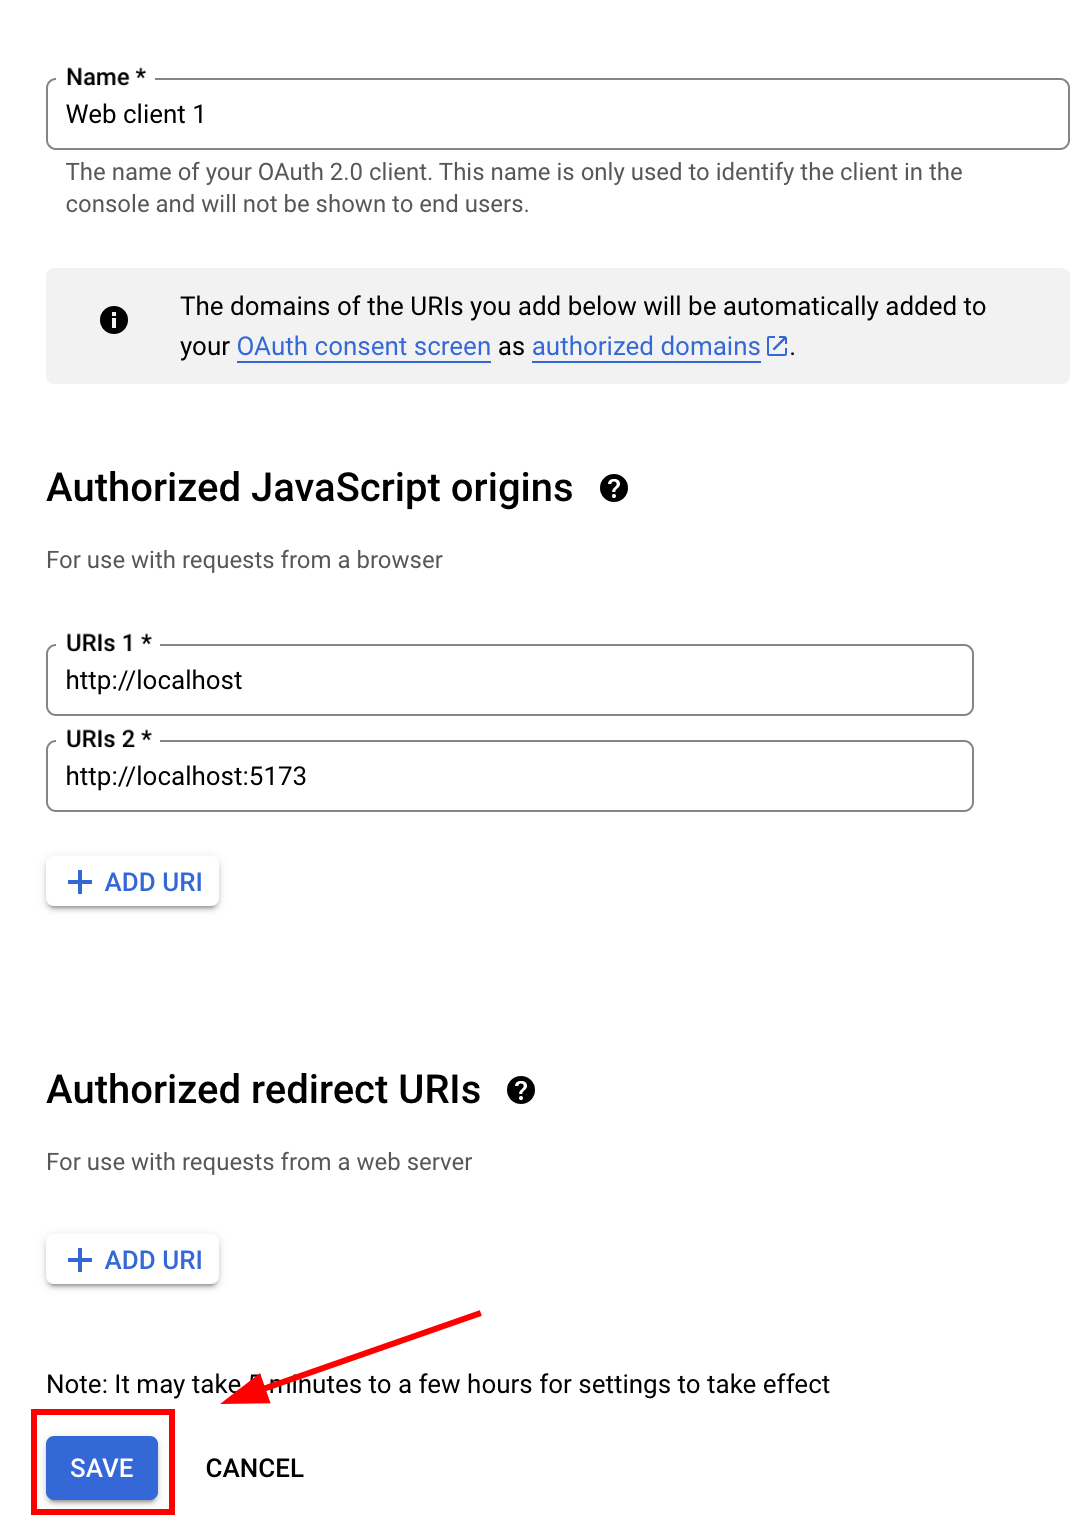
-
-
웹 클라이언트 설정 하단의 저장 버튼
login자바스크립트에서 호출할 준비가 되었어야 합니다.-
from 자바스크립트와 같이 호출합니다.
SocialLoginimport { SocialLogin } from '@capgo/capacitor-social-login'; -
클립보드에 복사
// onMounted is Vue specific// webClientId is the client ID you got in the web client creation step not the android client ID.onMounted(() => {SocialLogin.initialize({google: {webClientId: '673324426943-avl4v9ubdas7a0u7igf7in03pdj1dkmg.apps.googleusercontent.com',}})})
-
이용자
SocialLogin.login- both will trigger the redirect handling:const res = await SocialLogin.login({provider: 'google',options: {}})// Handle the responseconsole.log(JSON.stringify(res));
-
구글 로그인 웹에서 계속
구글 로그인 웹에서 계속이 경우 구글 로그인 웹 인증 및 계정 흐름을 계획하고 사용하는 경우 @capgo/capacitor-social-login Using @capgo/capacitor-social-login Using @capgo/capacitor-social-login Using @capgo/capacitor-passkey Using @capgo/capacitor-passkey Using @capgo/capacitor-native-biometric Using @capgo/capacitor-social-login for capgo capacitor-native-biometric 구현 세부사항에 대해 두 단계 인증 구글 소셜 로그인 플러그인 구현 세부 정보
Capacitor 앱을 배포하세요 Capgo 앱을 배포하세요
Capgo와 함께 AI 코딩 에이전트를 사용하여, 사용자에게 수정 사항을 푸시하고, Mac 없이 iOS 및 Android 앱을 빌드하고, 한 번의 클릭으로 되돌아가세요.


14일 동안 무제한 무료试用. 신용 카드가 필요하지 않습니다. 기업용 요구 사항이 있나요?