
Android 빌드
설치 단계와 이 플러그인의 전체 마크다운 가이드를 포함한 설정 지시어를 복사하세요.
Android 앱을 Google Play Store에 제출하기 위해 Capgo의 전용 인프라를 사용하세요.
이러한 것을 배울 것입니다
제목 "이러한 것을 배울 것입니다"- Capgo Native 빌드를 통해 앱을 업로드하는 방법을 배울 것입니다
- Capgo Native 빌드의 인증 정보를 구성하는 방법을 배울 것입니다
필수 조건
제목 "필수 조건"- 활성 Google Developer 계정이 필요합니다
- Android Studio가 설치되어야 합니다
- Android Studio로 앱을 성공적으로 빌드할 수 있어야 합니다
수동 온보딩은 __CAPGO_KEEP_0__가 하드웨어 아래에서 정확히 무엇을 하는지 이해하고 싶거나, 자체적으로 인증서를 설정하고 싶은 사람들만 읽어보세요.
첫 번째 수동 빌드Before we can start thinking about building the app with Capgo, we should first set it up, and do a first Android build by hand. There are some advantages to doing a manual build first:
- Capgo 이후에 빌드에 필요한 인증 정보를 준비하십시오.
- 앞으로의 __CAPGO_KEEP_0__ 빌드에 인증서를 준비합니다.
앱을 수동으로 Android Studio로 빌드하는 방법
“Android Studio로 앱을 수동으로 빌드하는 방법”앱을 Capgo으로 빌드하기 전에, Android Studio로 앱을 수동으로 빌드해야 합니다.
-
Android Studio를 열어
실행
bunx cap open android안드로이드 스튜디오 프로젝트를 열기 위해. -
클릭하세요
Build->Generate Signed App Bundles / APKs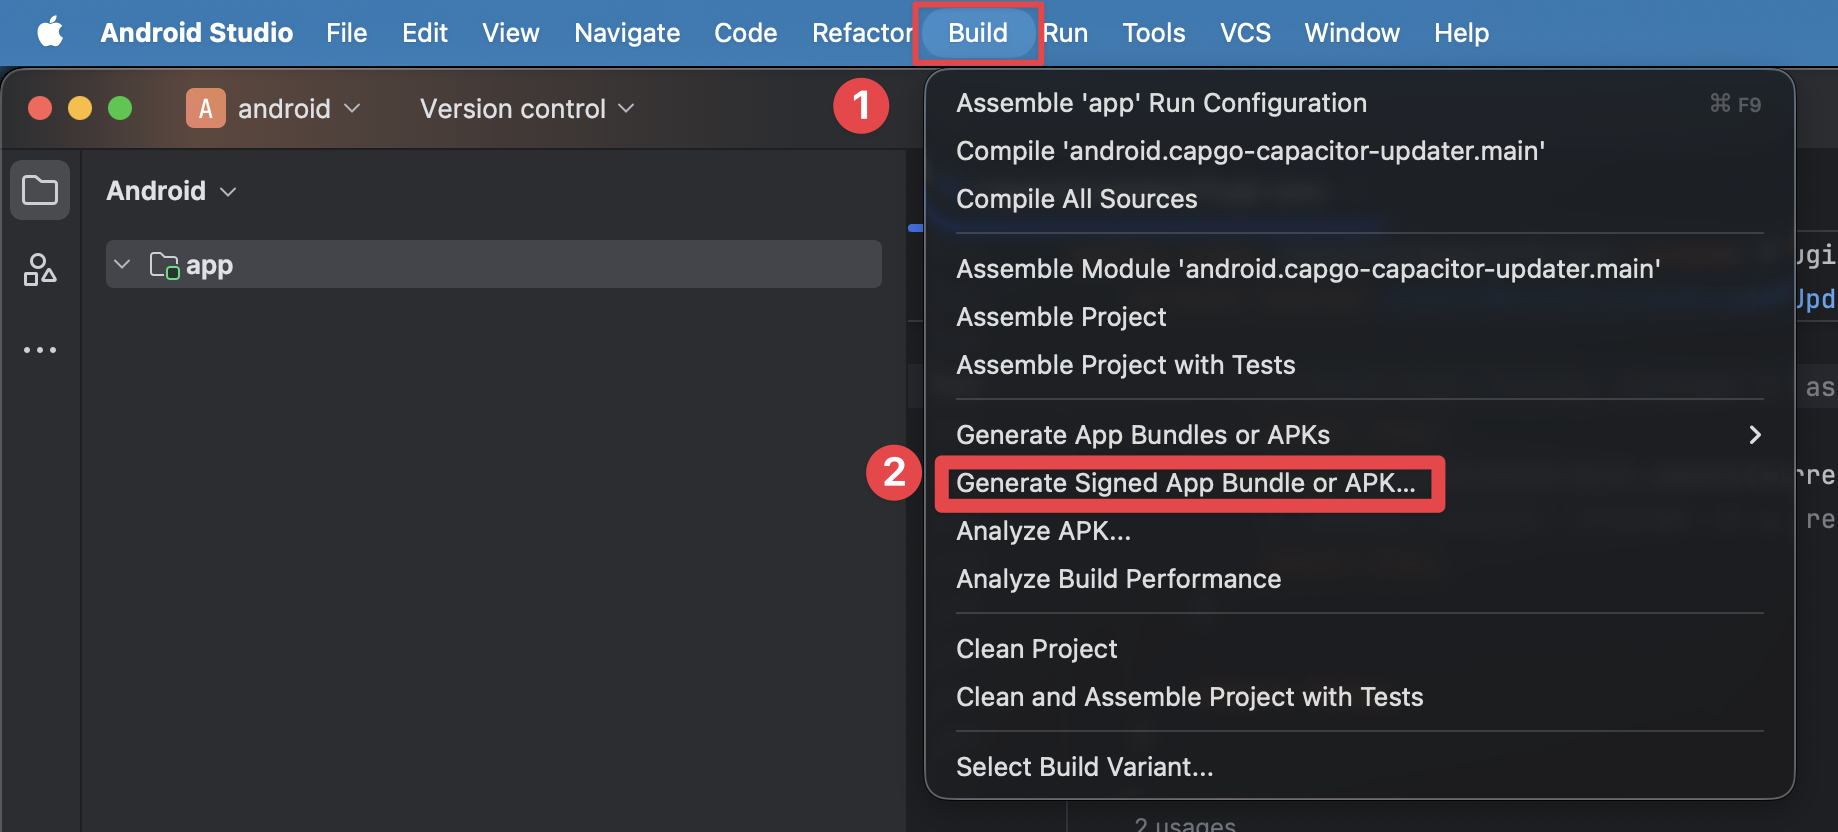
-
Select
Android App Bundle선택Next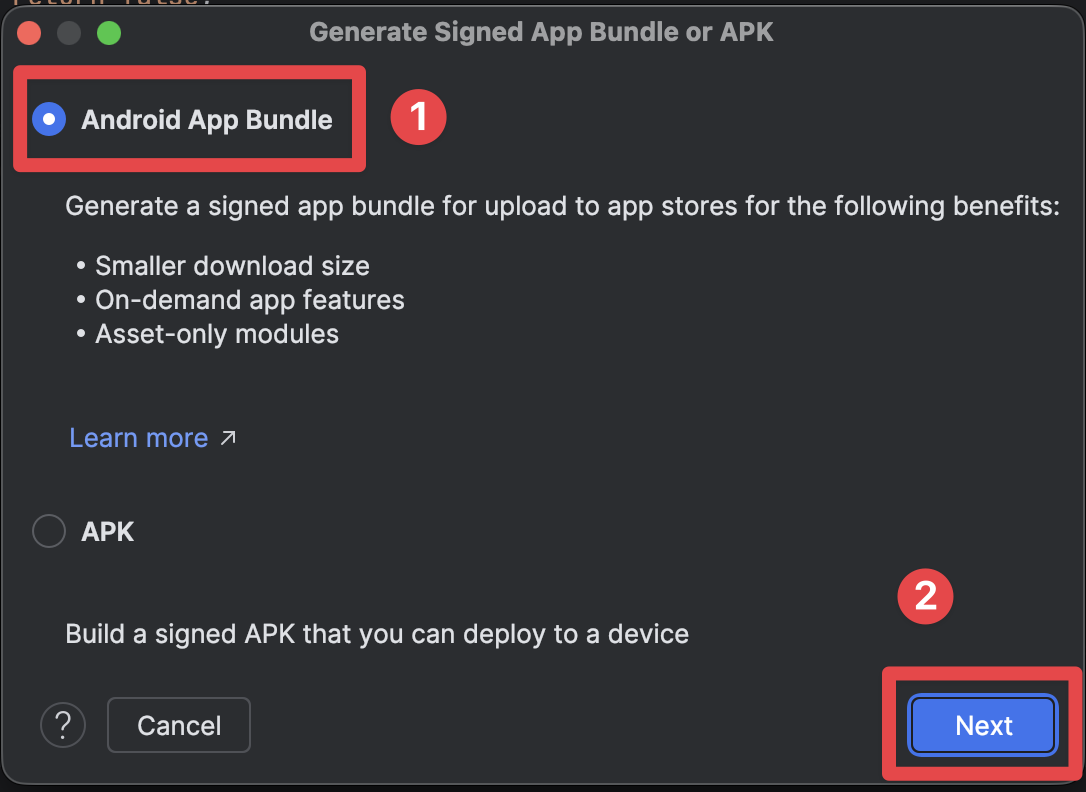
Android Studio에서 Android 앱 번들을 선택하십시오.Keystore를 생성하십시오.
Section titled “Keystore를 생성하는 방법”현재, 앱을 서명하기 위해 사용하는 키 스토어 파일이 없습니다. 이 파일은 Google이 앱을 개발한 사람임을 알리기 위해 사용됩니다. 키 스토어 파일을 생성하기 위해, 우리는 Android Studio에서 제공하는 GUI 방법을 사용할 것입니다. 명령 줄을 사용하여도 가능하지만, 이 튜토리얼에서 다루지 않을 것입니다.
-
클릭하세요
Create new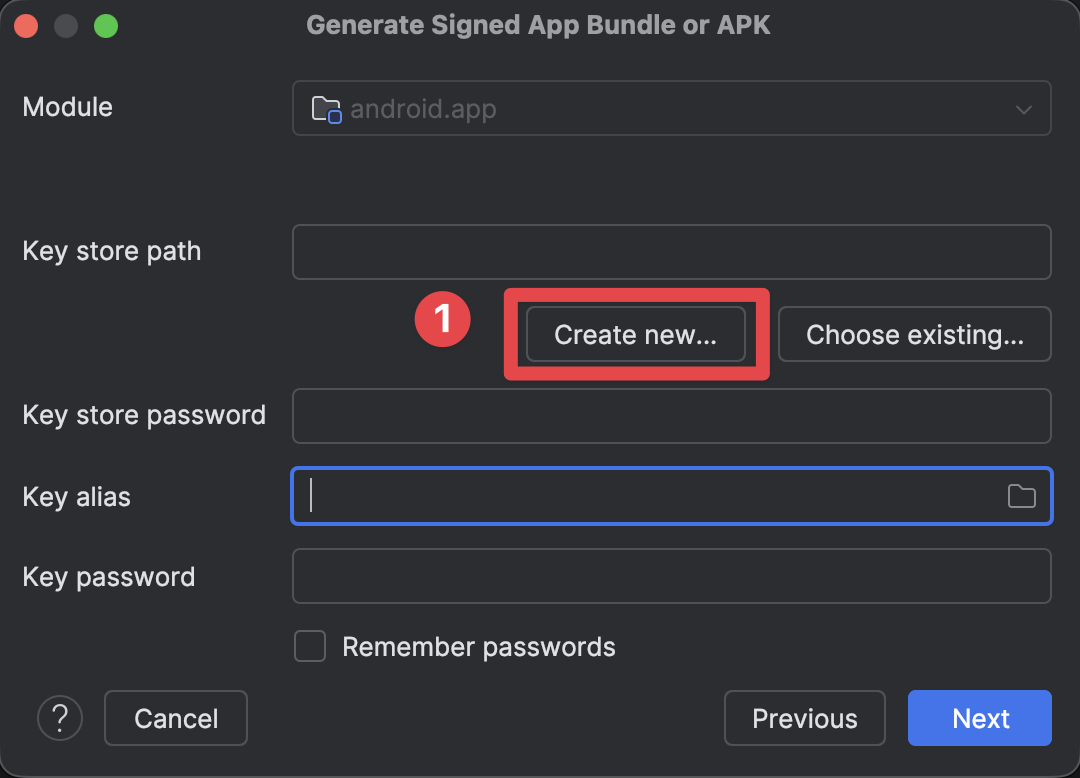
-
키 스토어 경로를 입력하세요
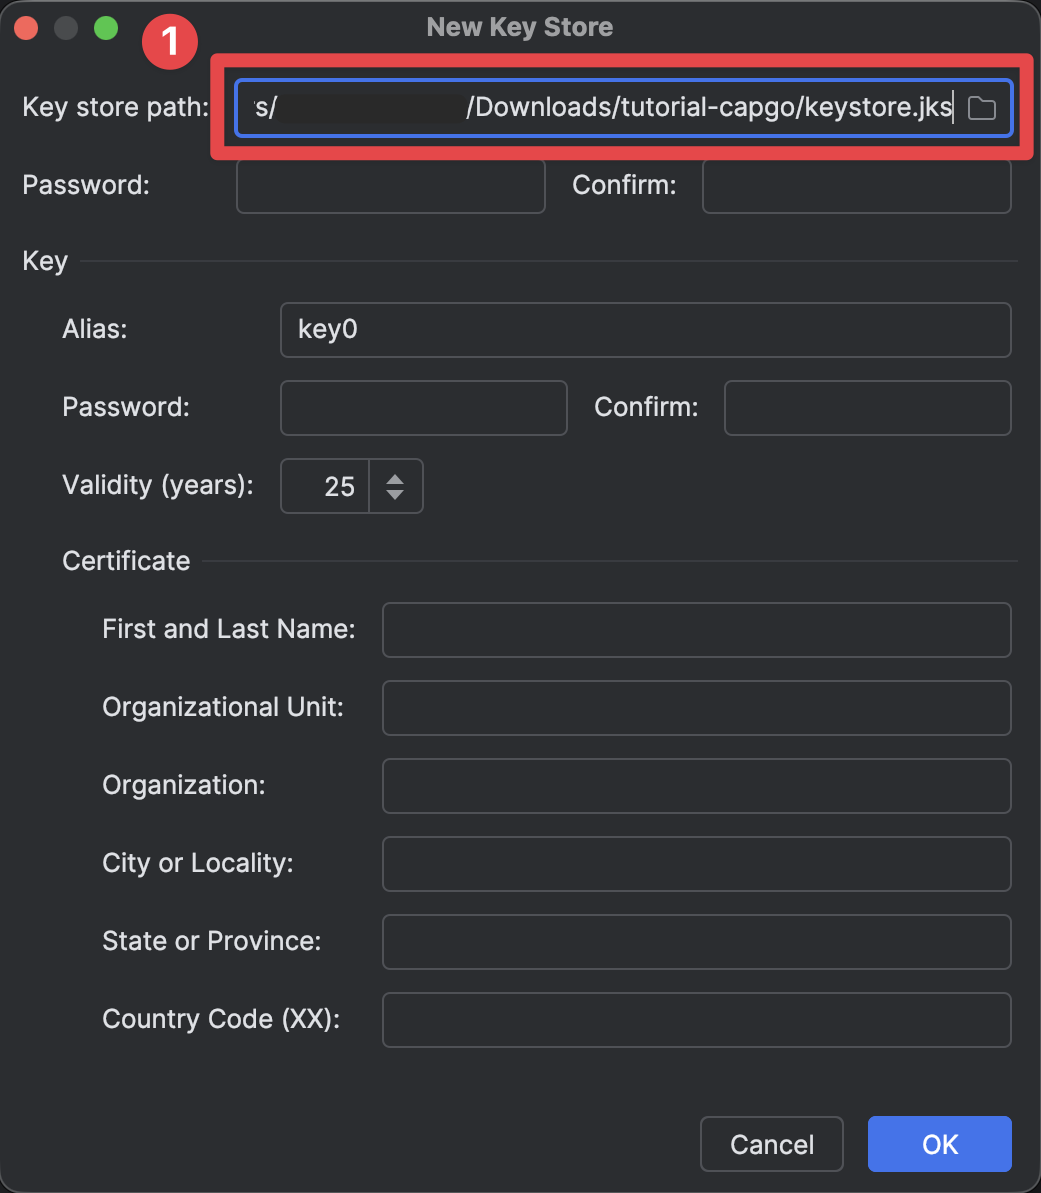
-
키 스토어 비밀번호를 설정하세요
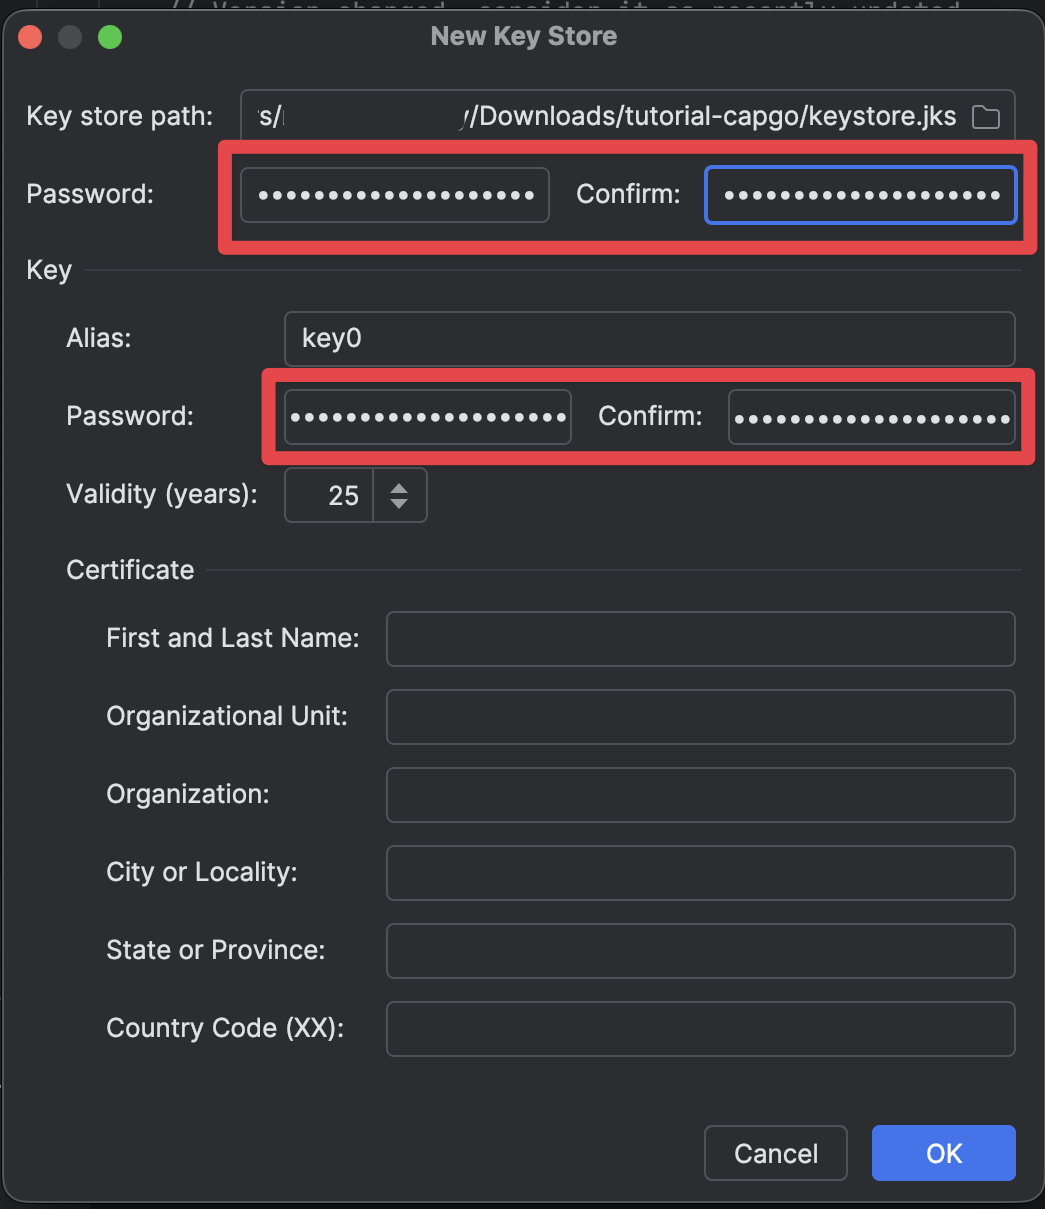
-
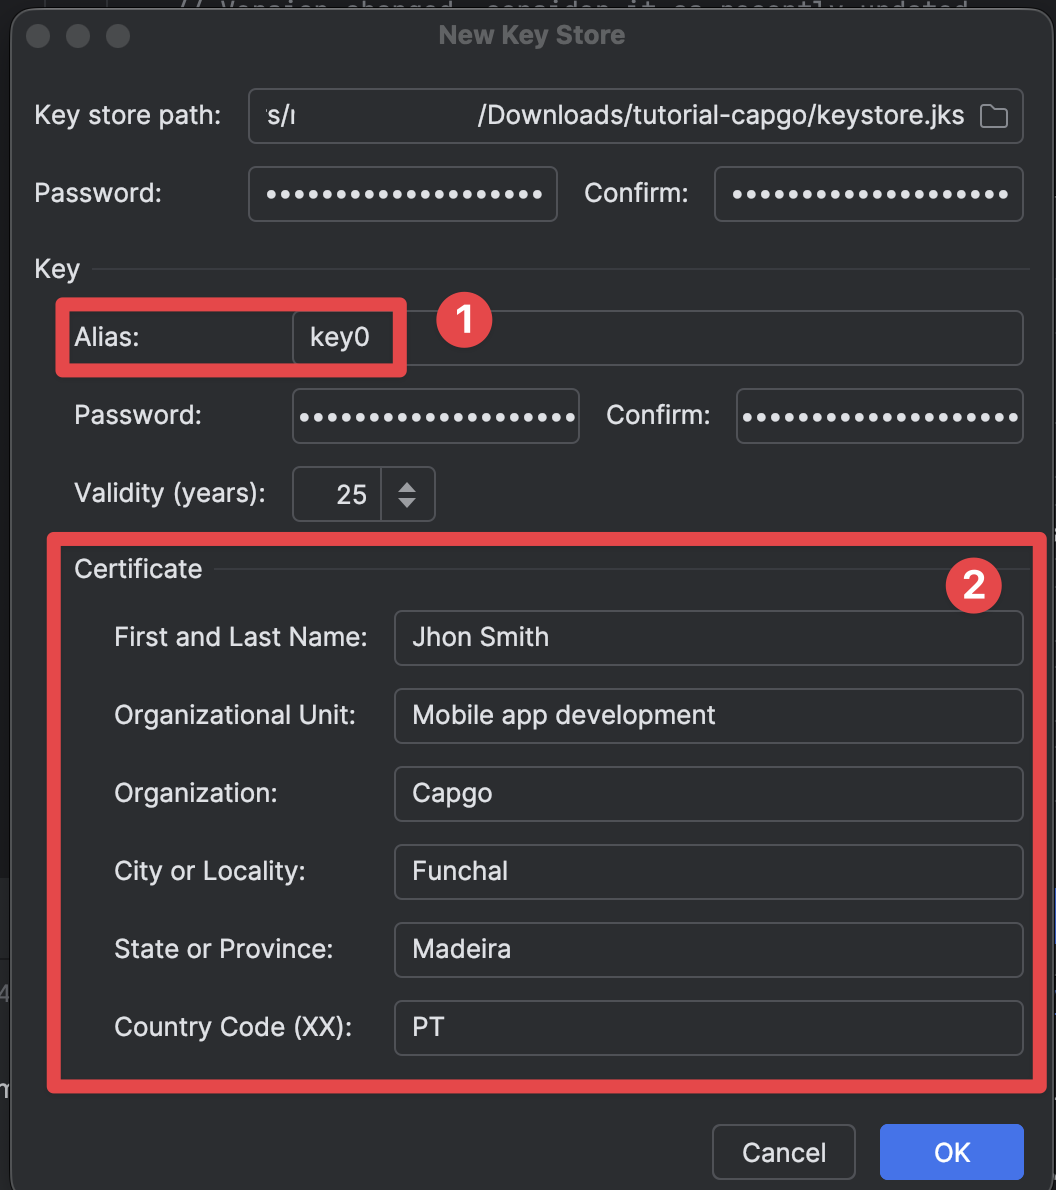
키 별칭은 그대로 유지하세요 (key0)
- 인증서 세부 사항을 채우세요. 나는 가짜 세부 사항으로 채웠지만, 당신은 당신의 세부 사항으로 채우세요.
- 이것은
-
클릭하세요
OK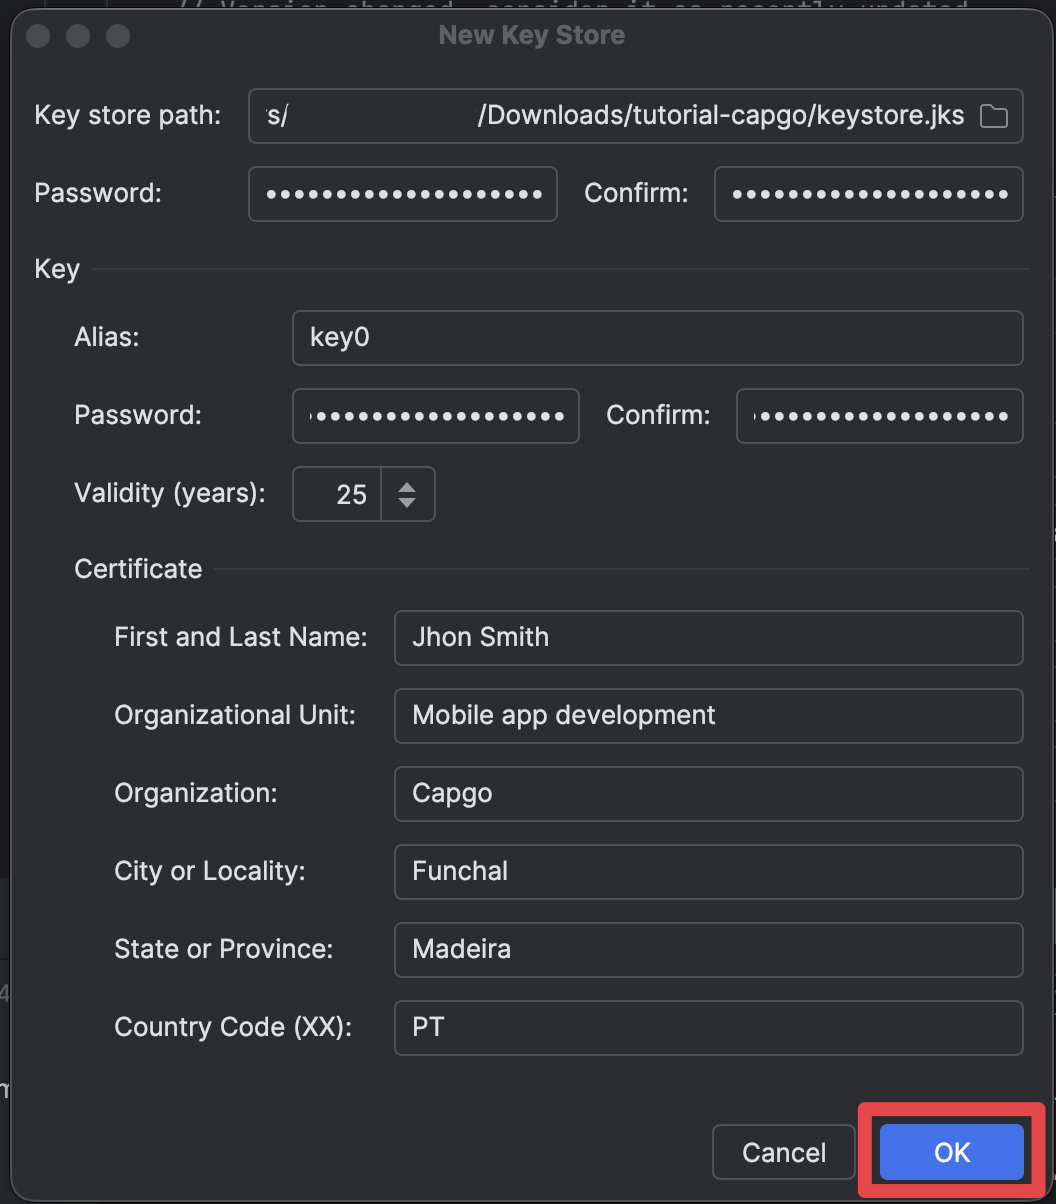
수동 빌드 완료
수동 빌드 완료 섹션-
키 스토어의 모든 세부 정보가 정확하게 입력되었는지 확인하고 클릭하세요
Next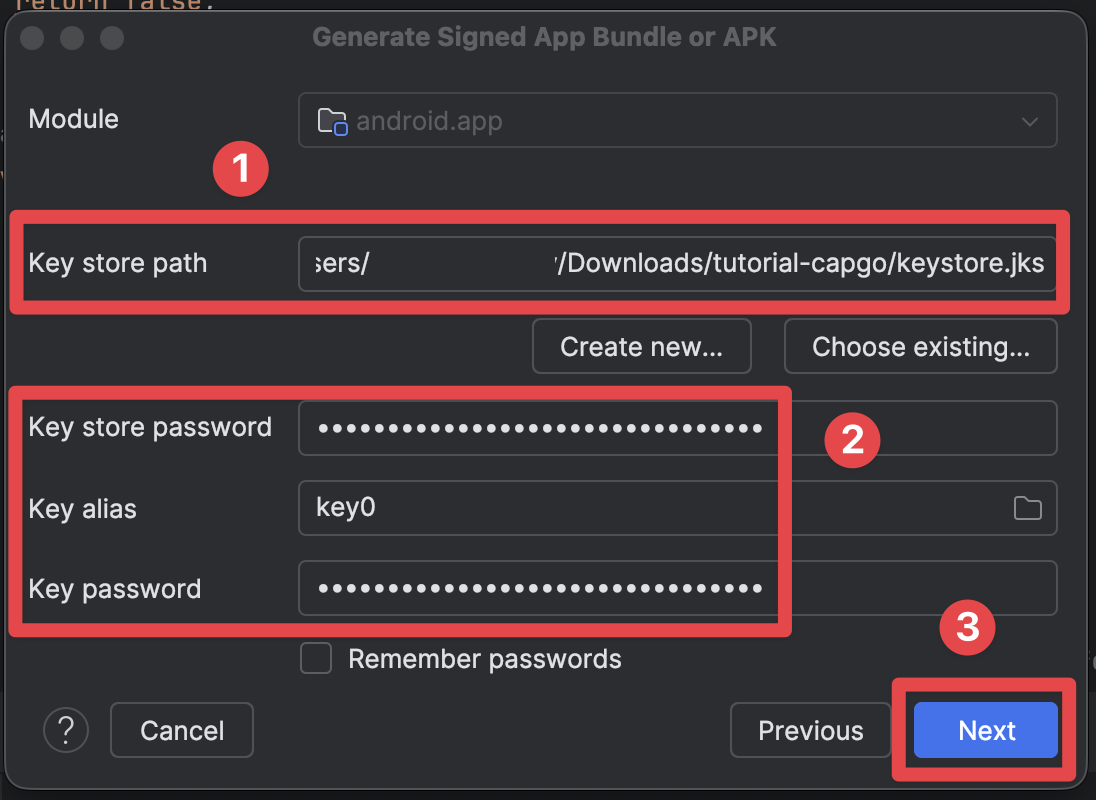
-
릴리즈 빌드 버전을 선택하세요
release릴리즈 빌드 버전을 선택하고 클릭하세요Create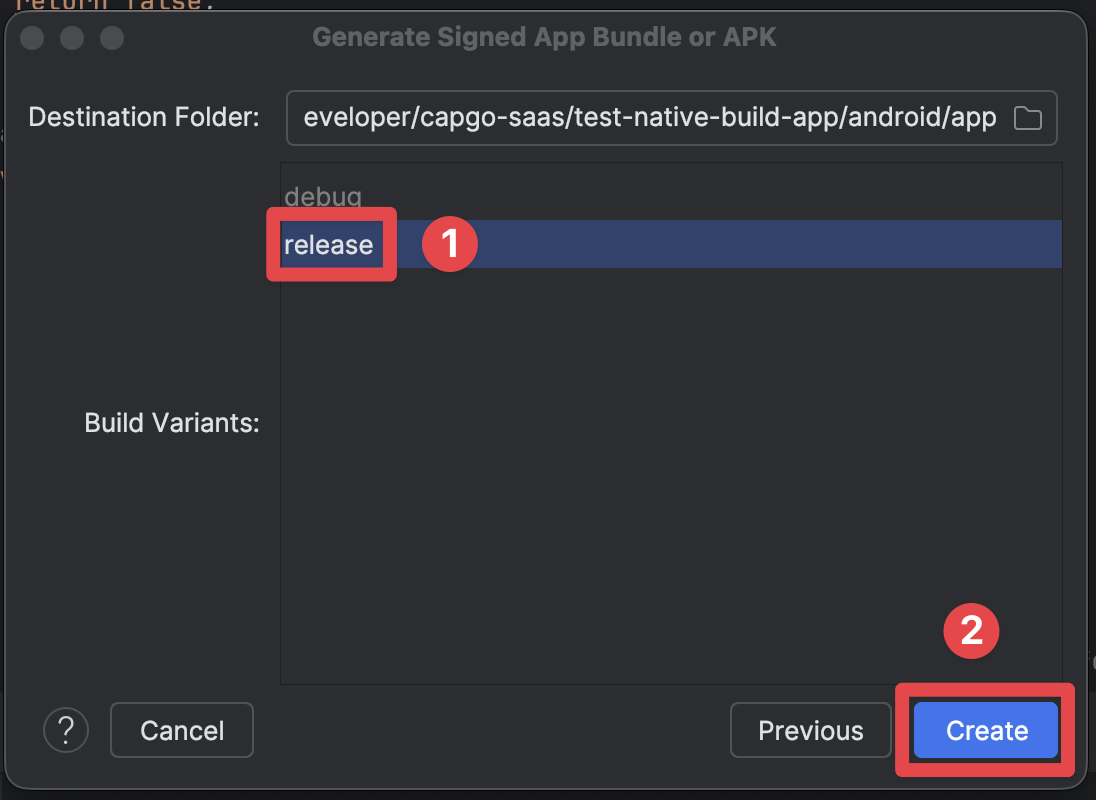
-
안드로이드 스튜디오에서 빌드가 성공하면 다음 화면을 볼 수 있습니다
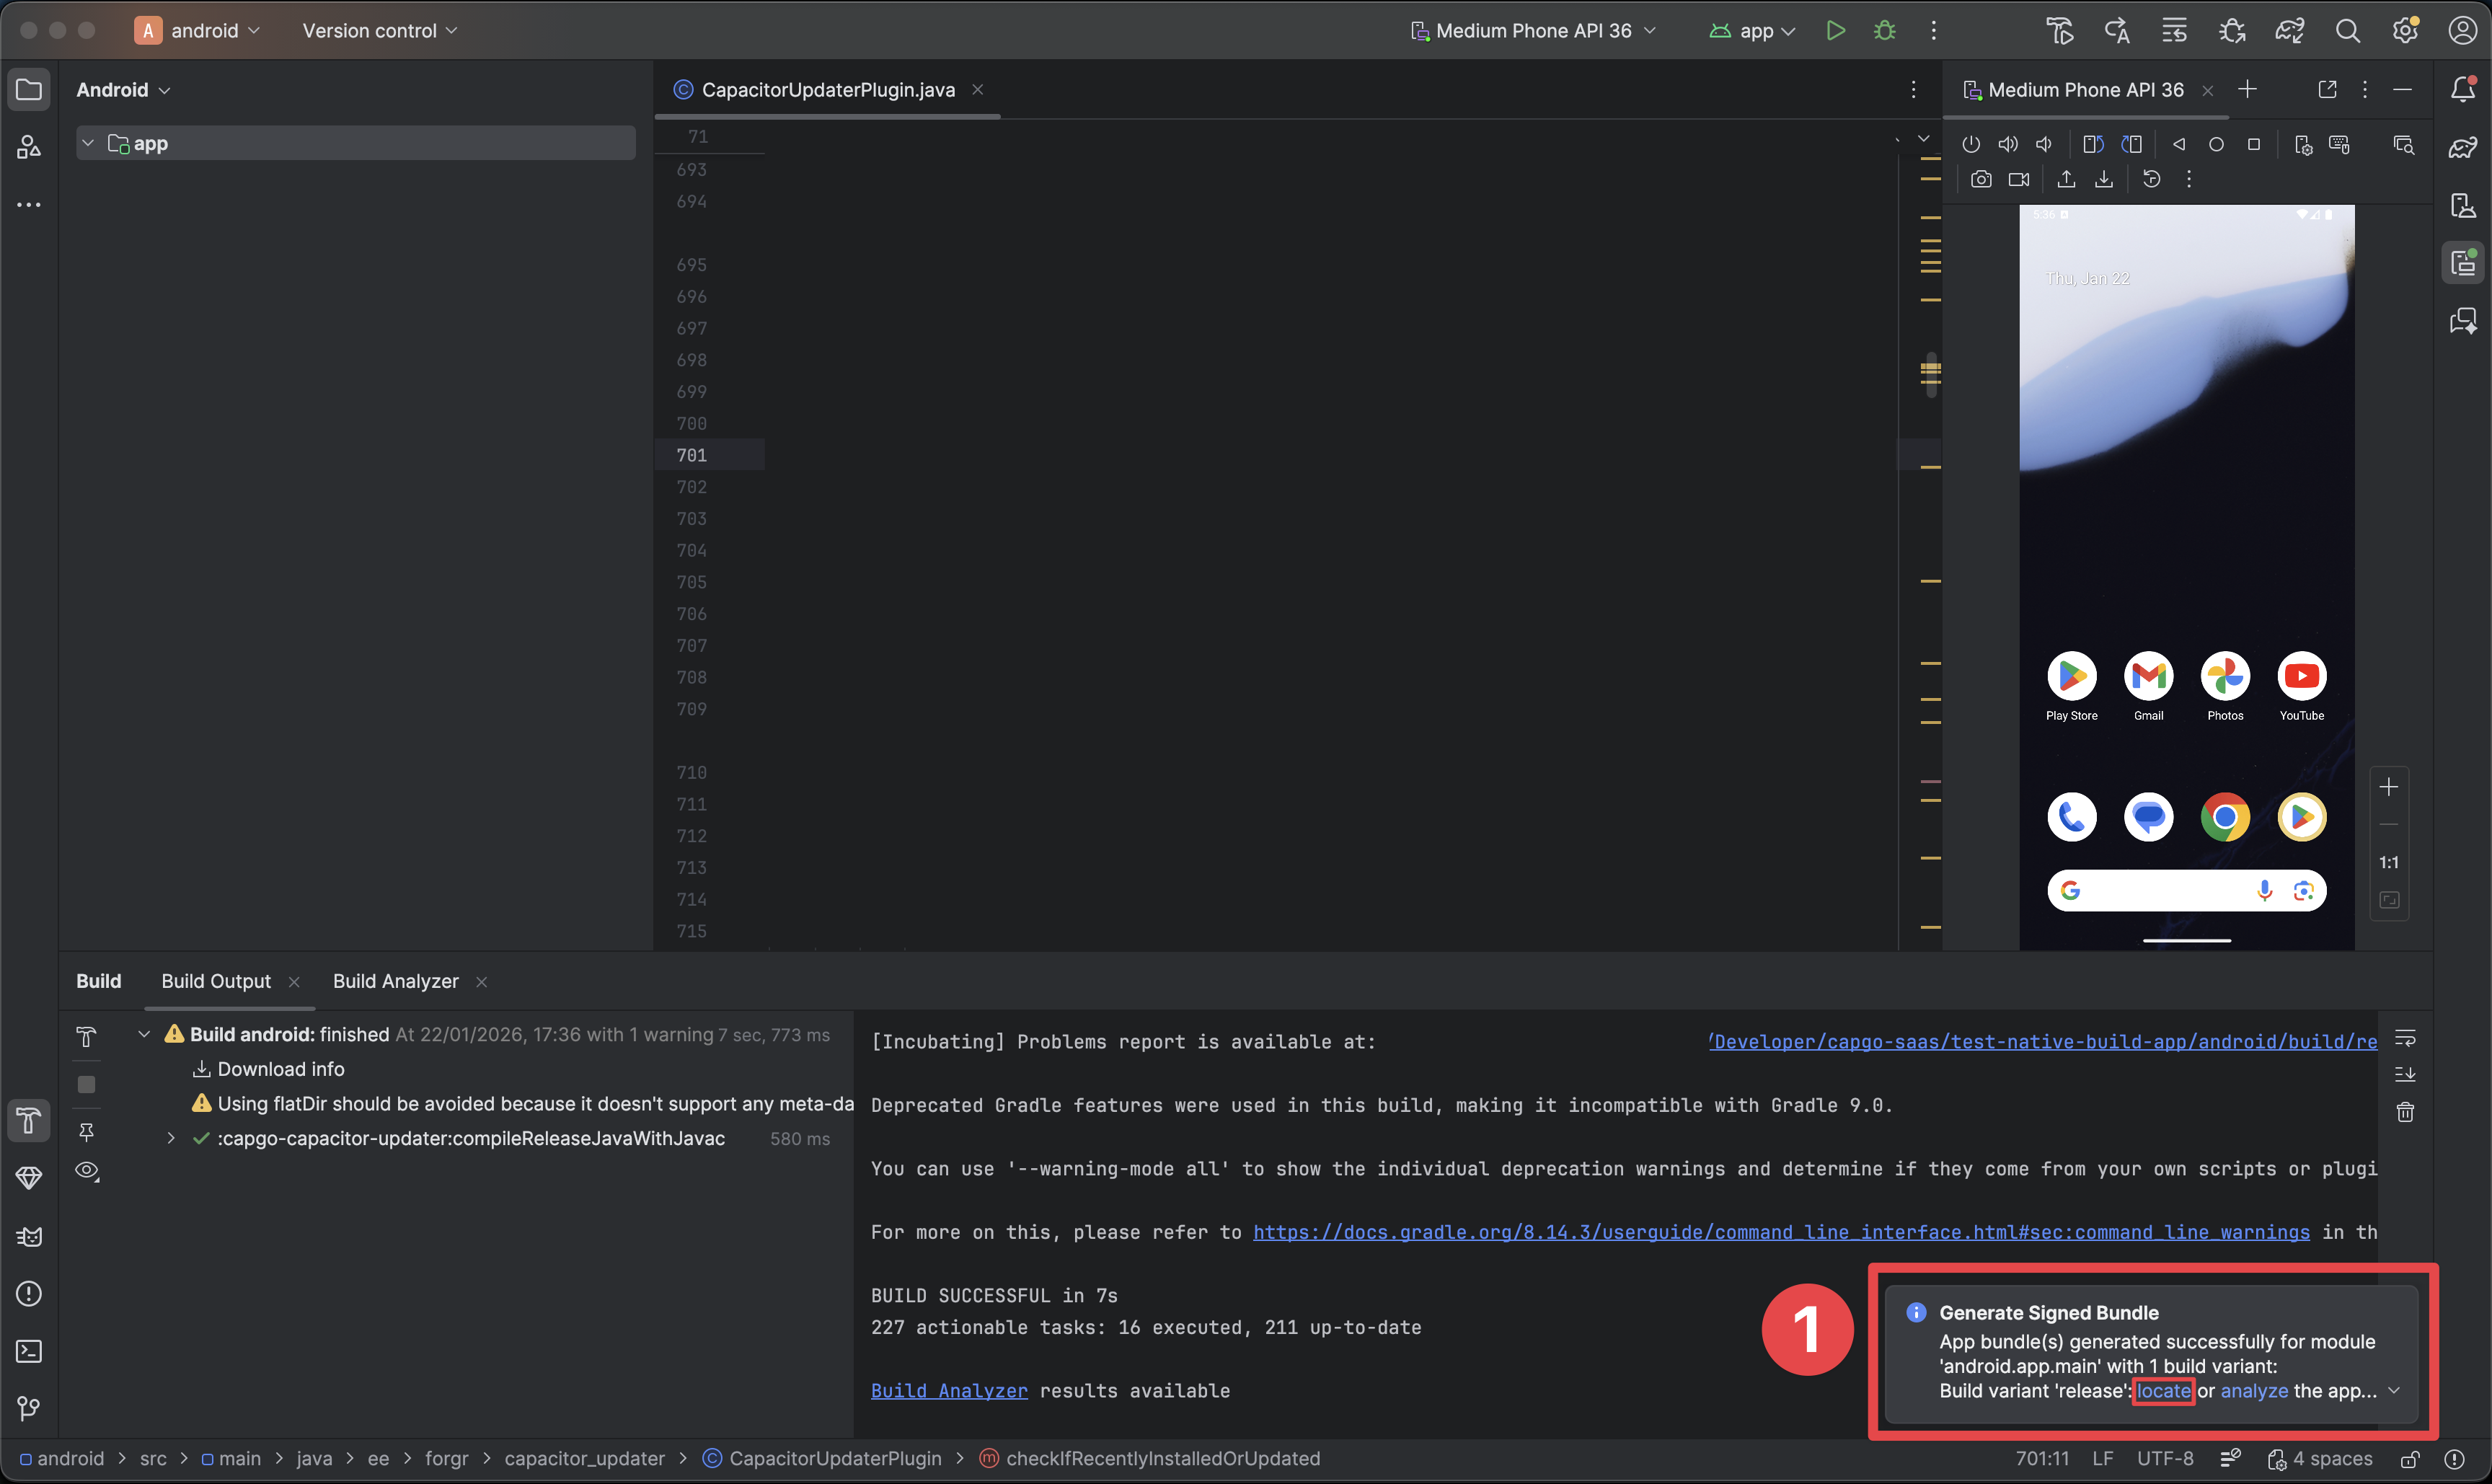
- 이 팝업은 빌드가 성공했다는 것을 나타냅니다.
- 버튼을 클릭하세요 - 이 버튼을 클릭하면 파일 탐색기를 열고 빌드를 볼 수 있습니다.
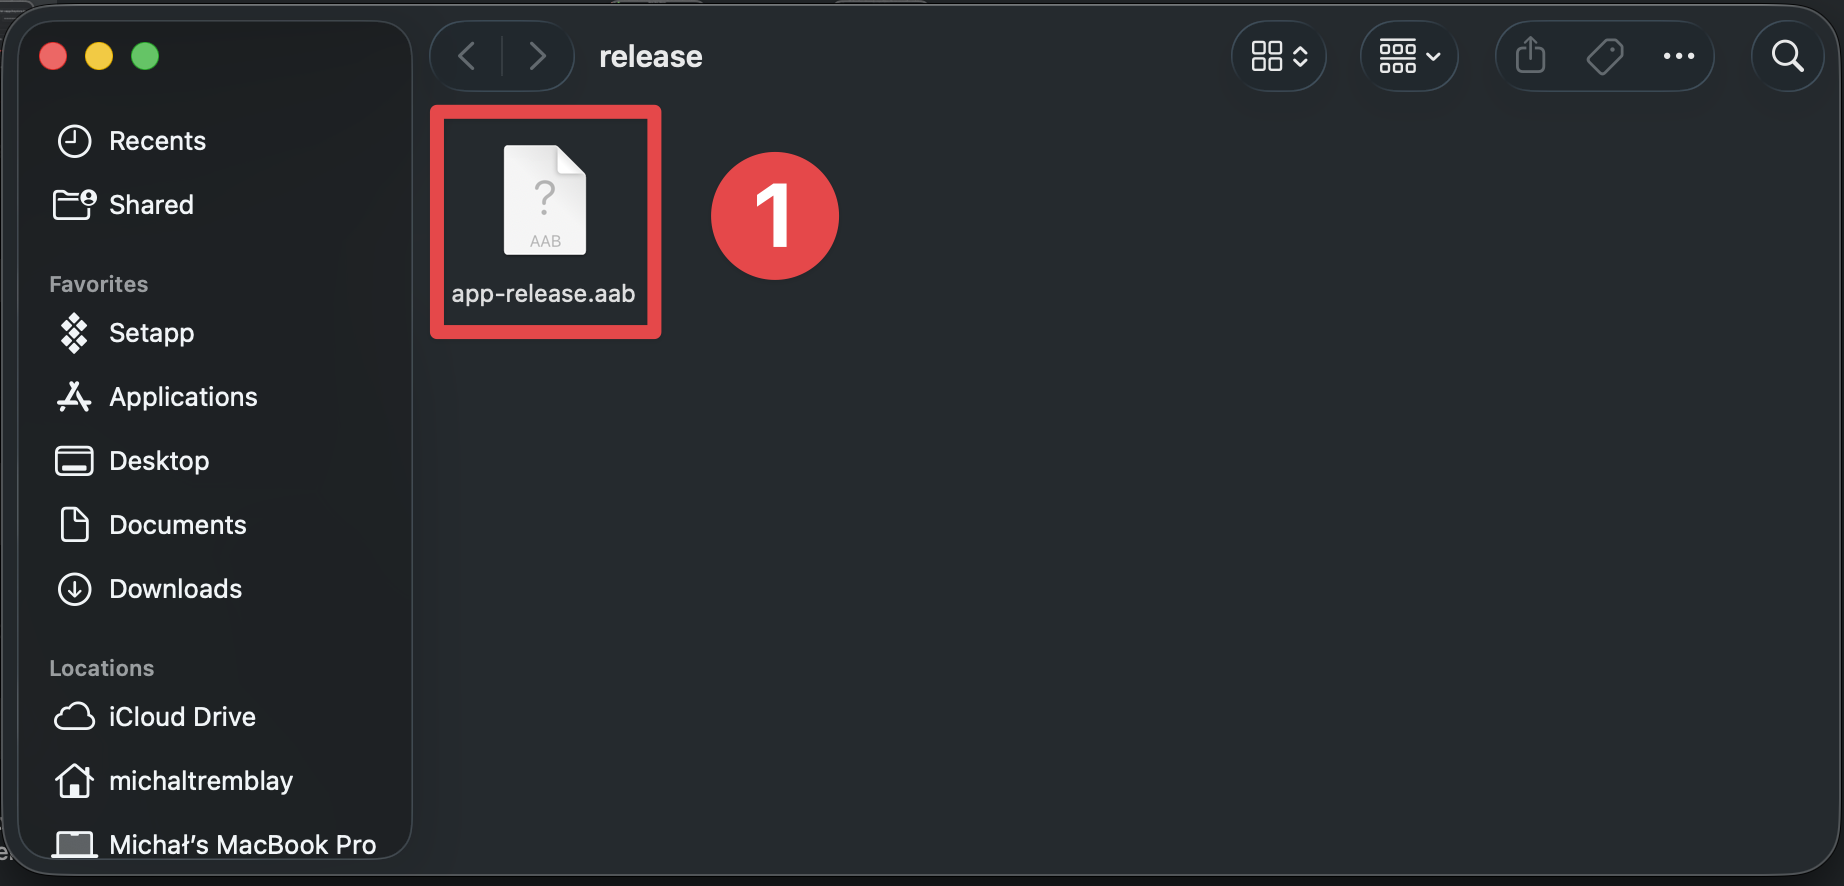
locate파일 탐색기에 빌드가 보이도록 확인하세요
-
Android Studio에서 파일 탐색기에 빌드가 보이도록 확인하세요
Play Store 콘솔에서 앱을 생성하는 방법
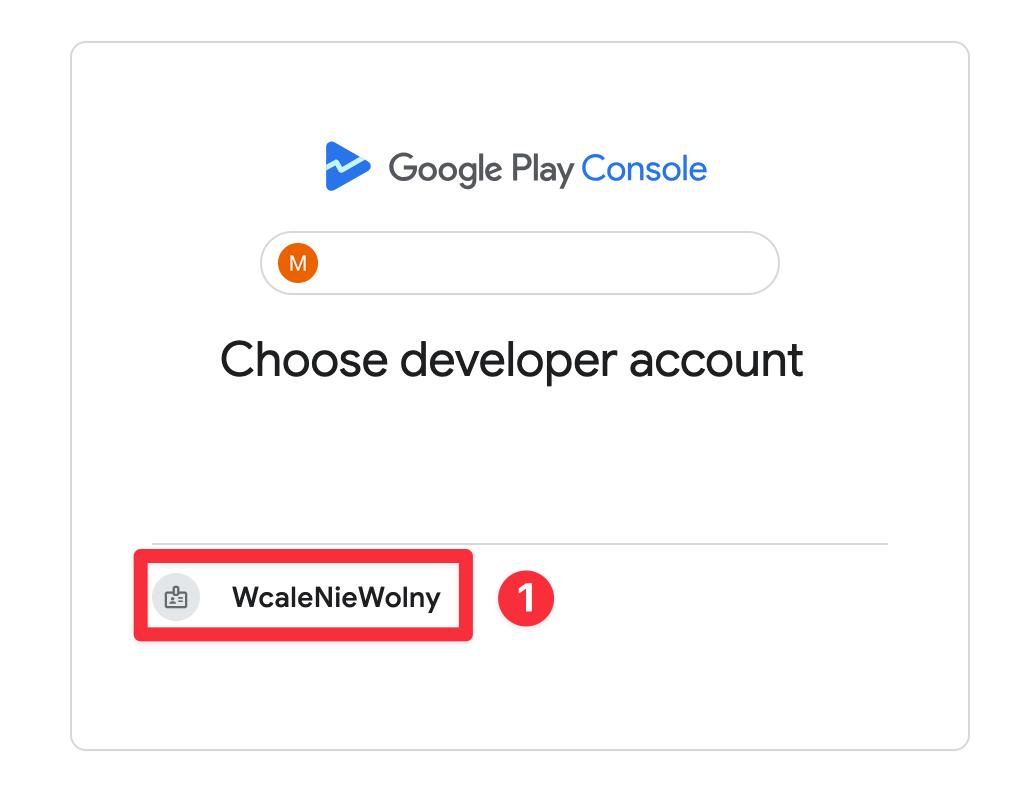
Google Play 콘솔로 이동하세요-
개발자 계정 선택 Google Play 콘솔에서 개발자 계정 선택
-
버튼을 클릭하세요
-
버튼을 클릭하세요
Create app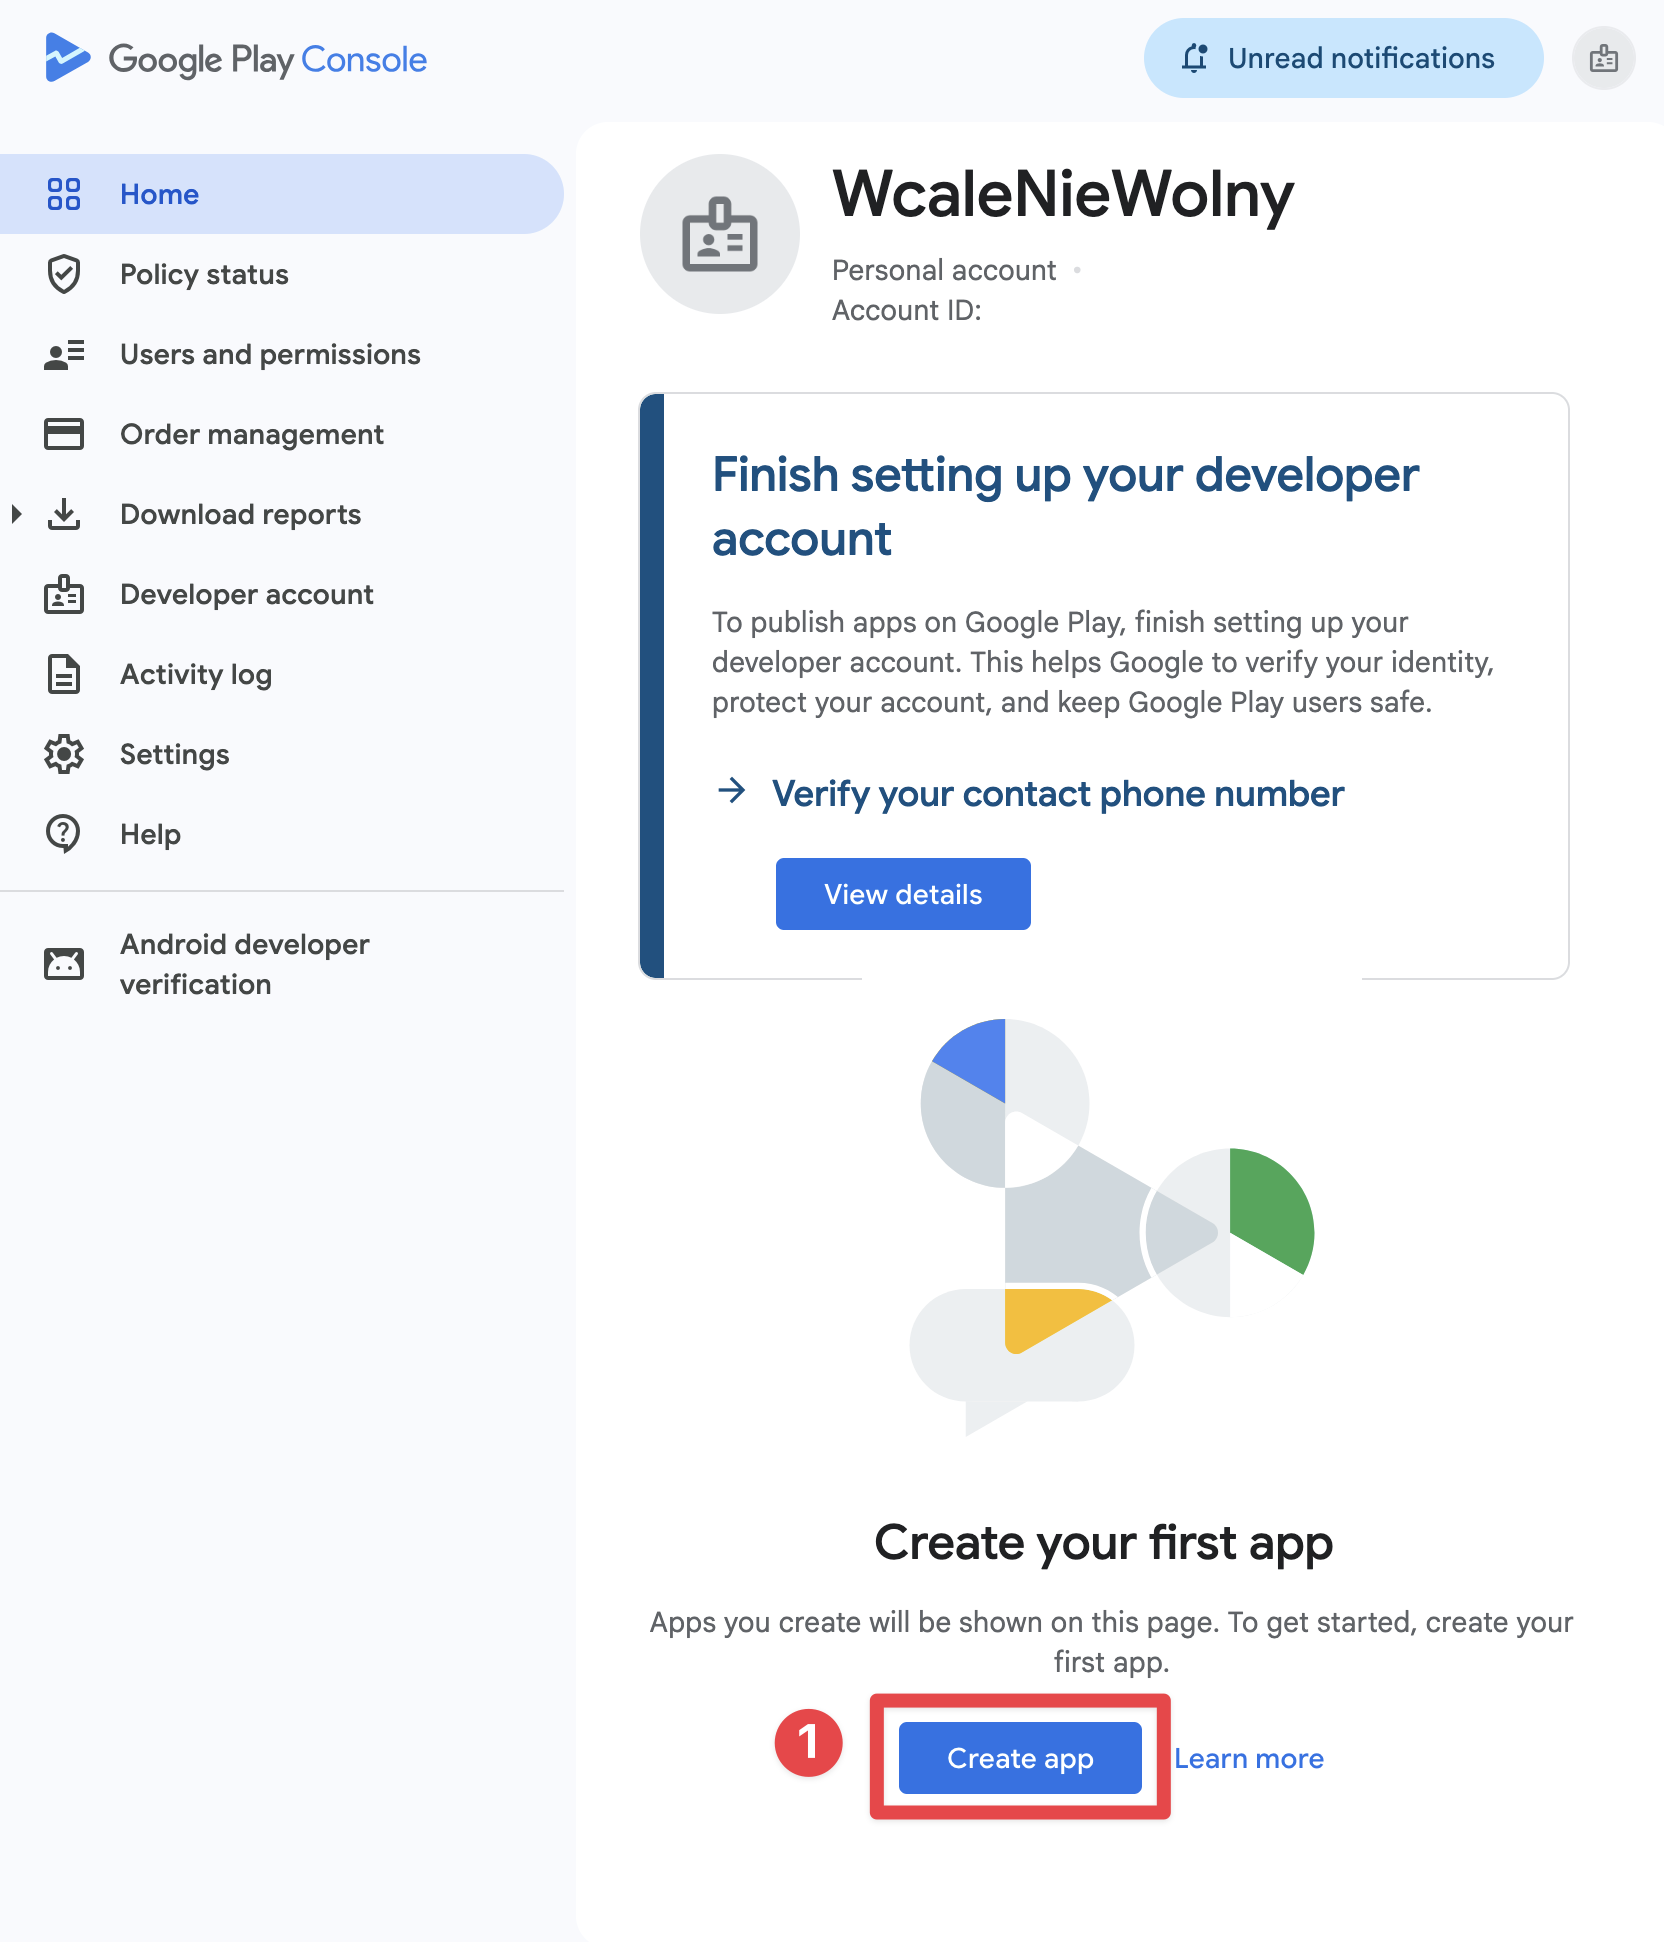
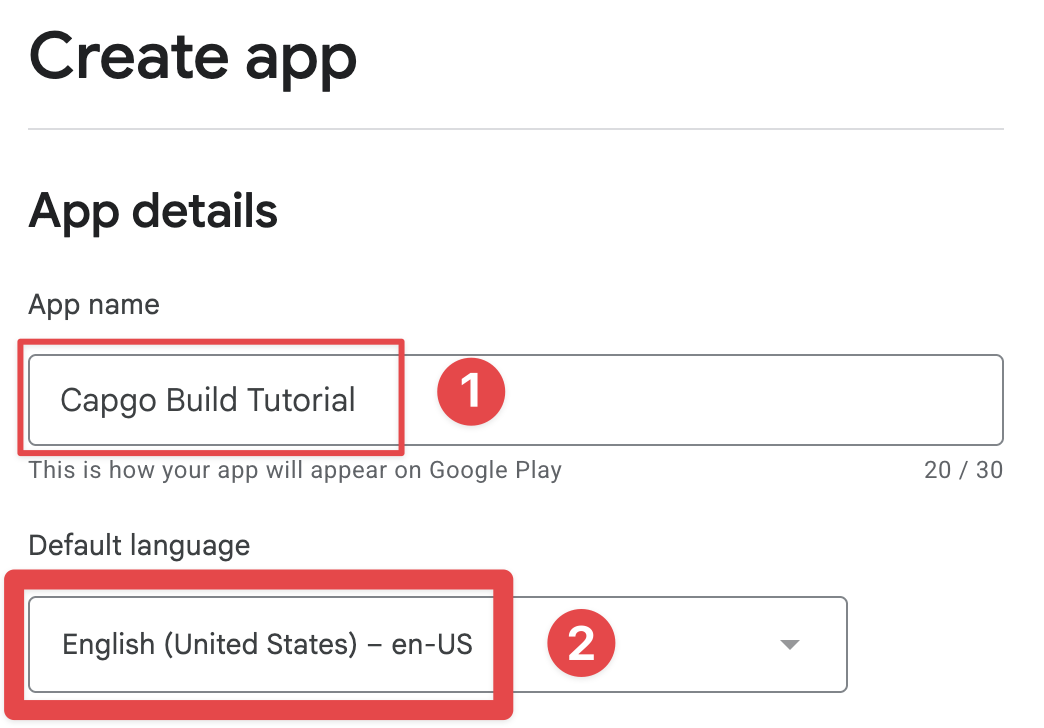
-
앱 이름과 언어를 선택하세요
-
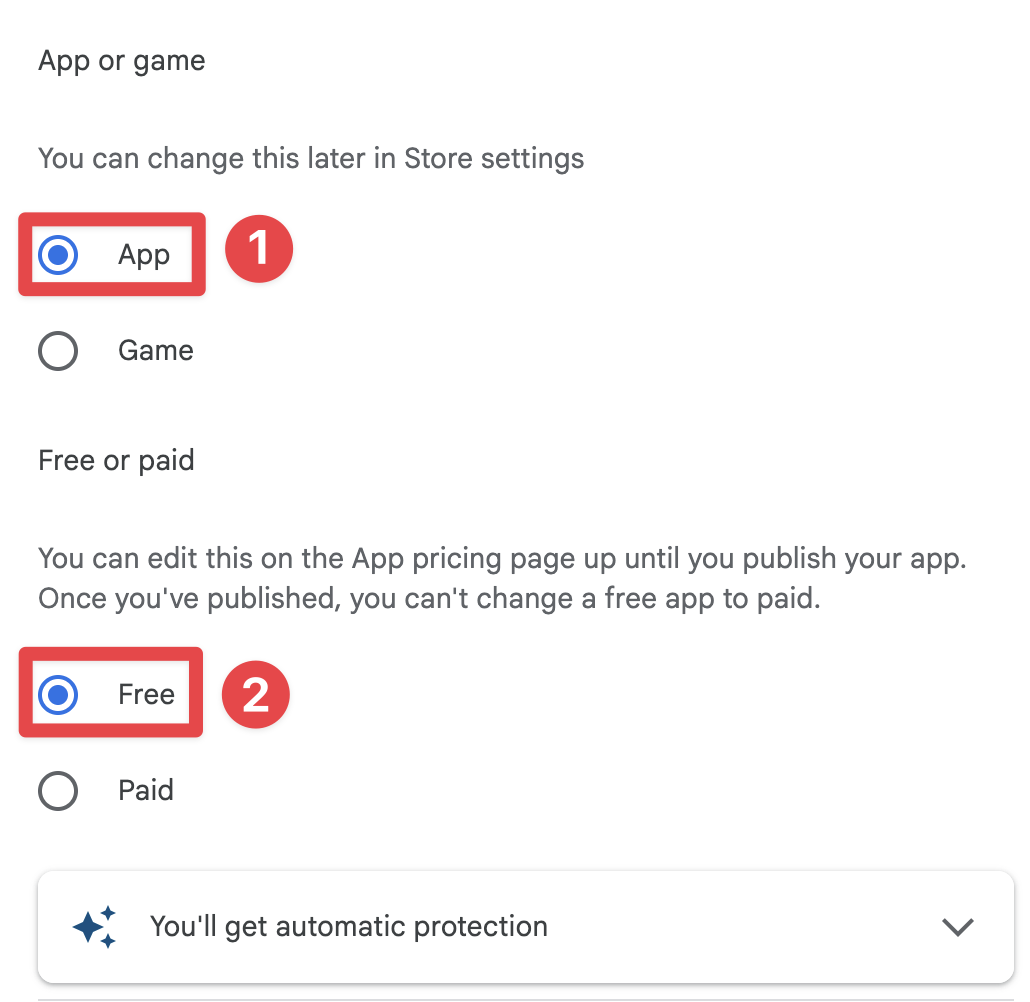
앱 카테고리와 앱이 유료인지 무료인지 선택하세요
-
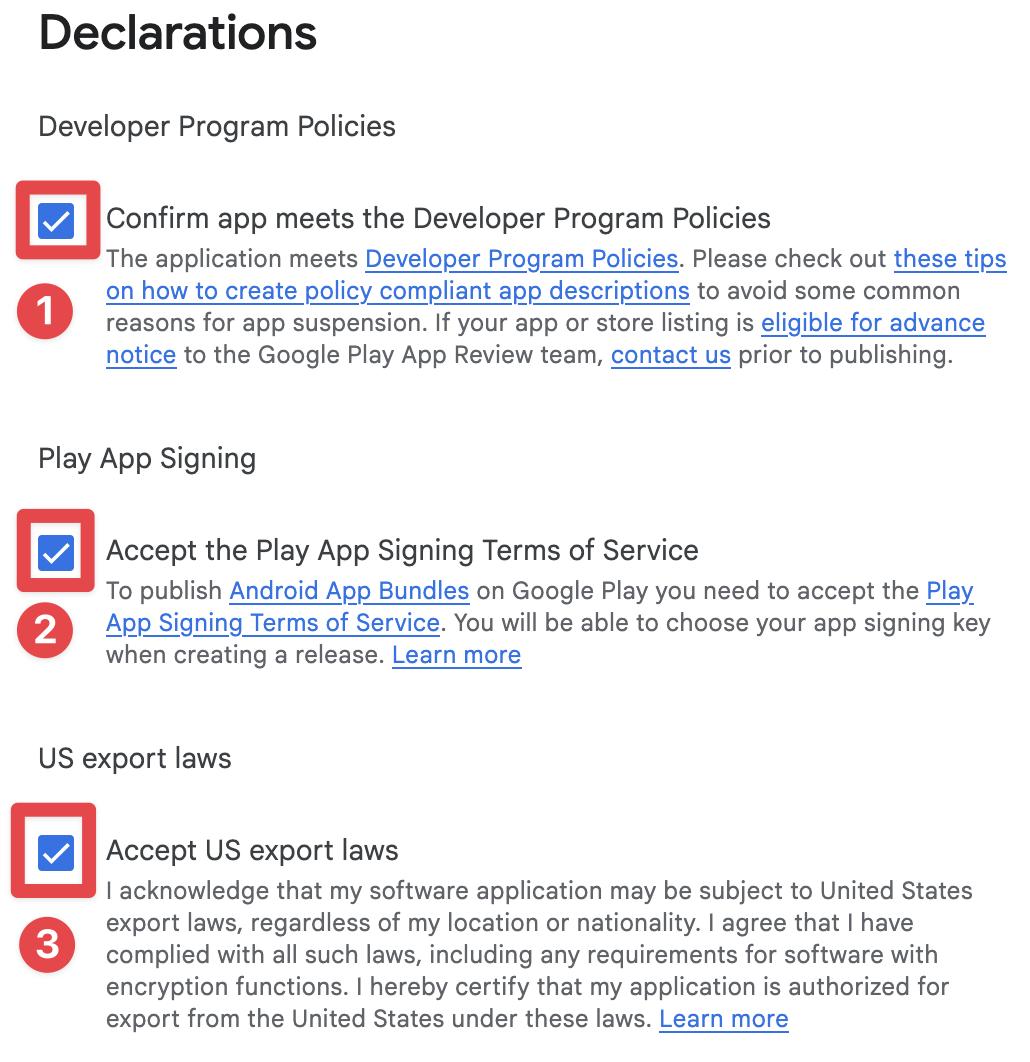
약관과 조건을 수락하세요
-
클릭
Create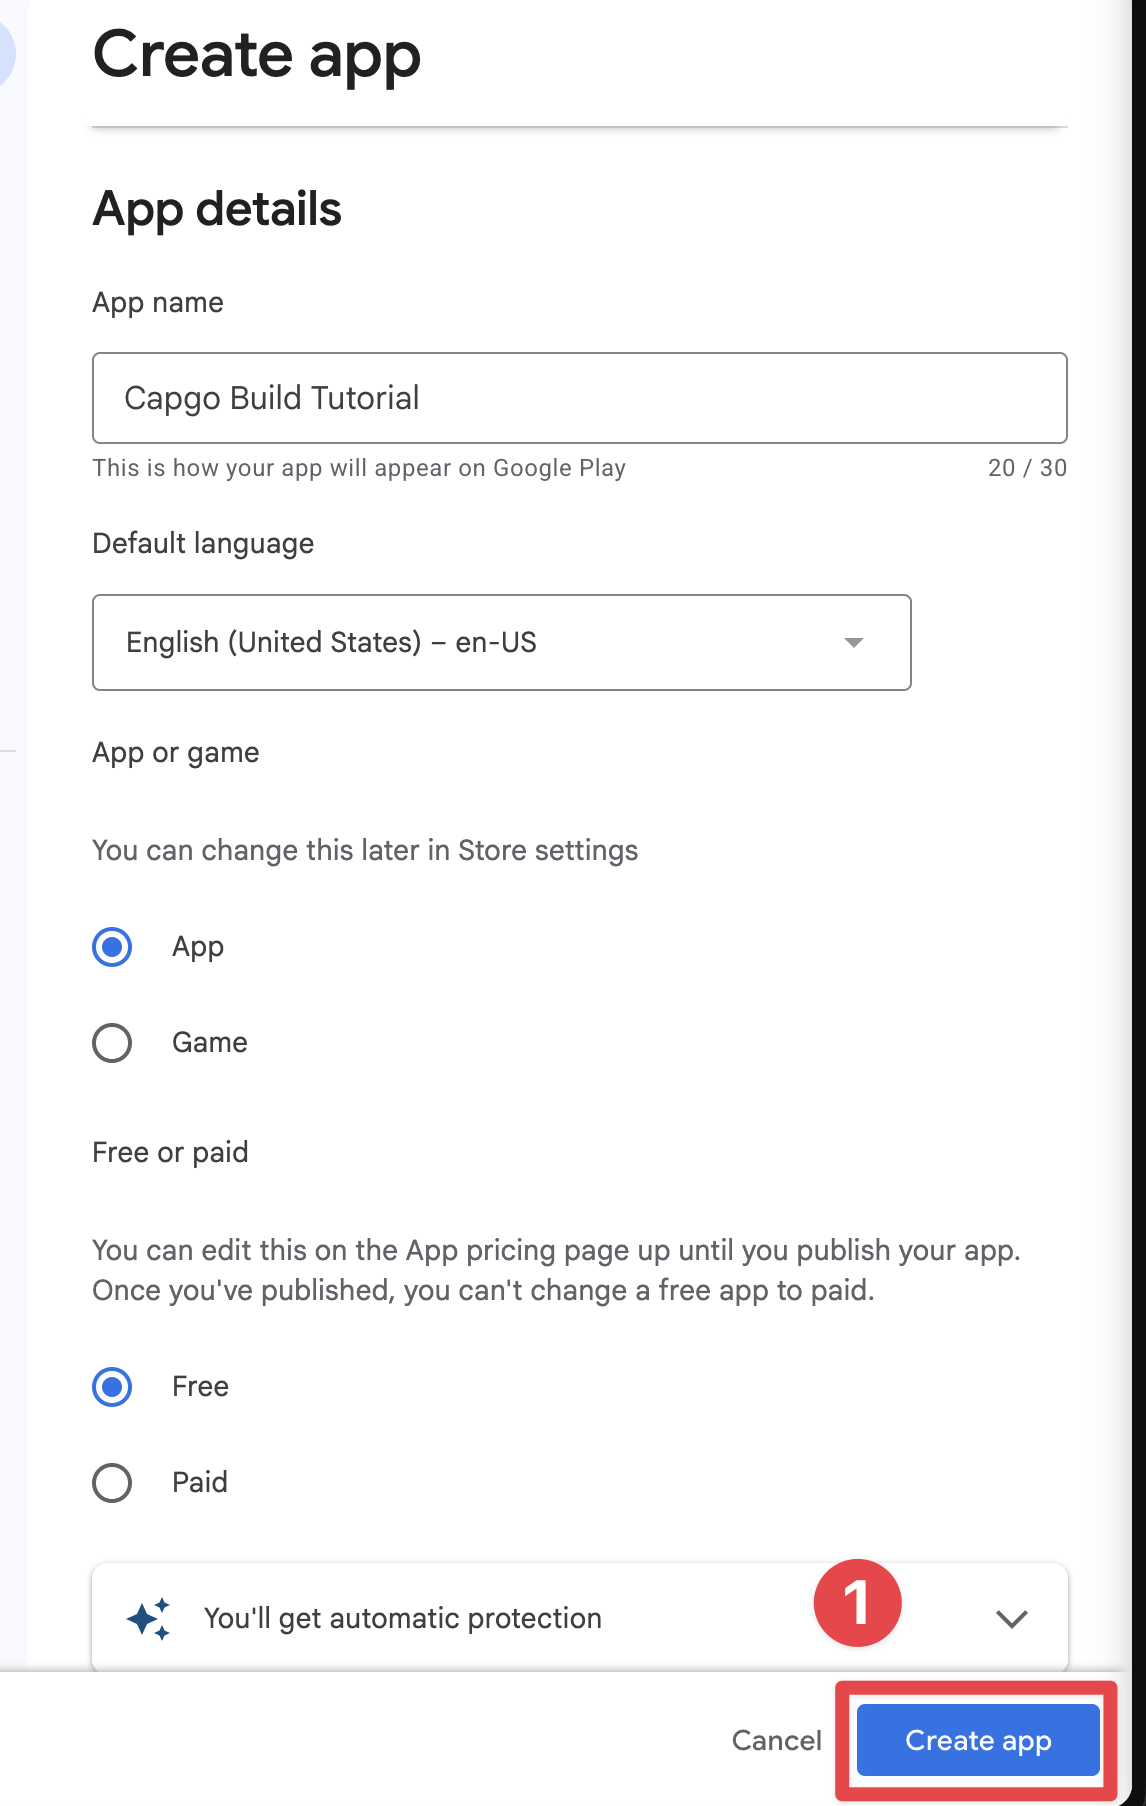
내부 테스트 그룹 만들기
내부 테스트 그룹 만들기앱을 만들었습니다. 이제 내부 테스트 그룹을 만들 수 있습니다. 내부 테스트 그룹을 만들 이유는 Play Store에 앱을 공개하지 않기 때문입니다.
-
가장
internal testing클릭하세요Test and release->Testing->Internal testing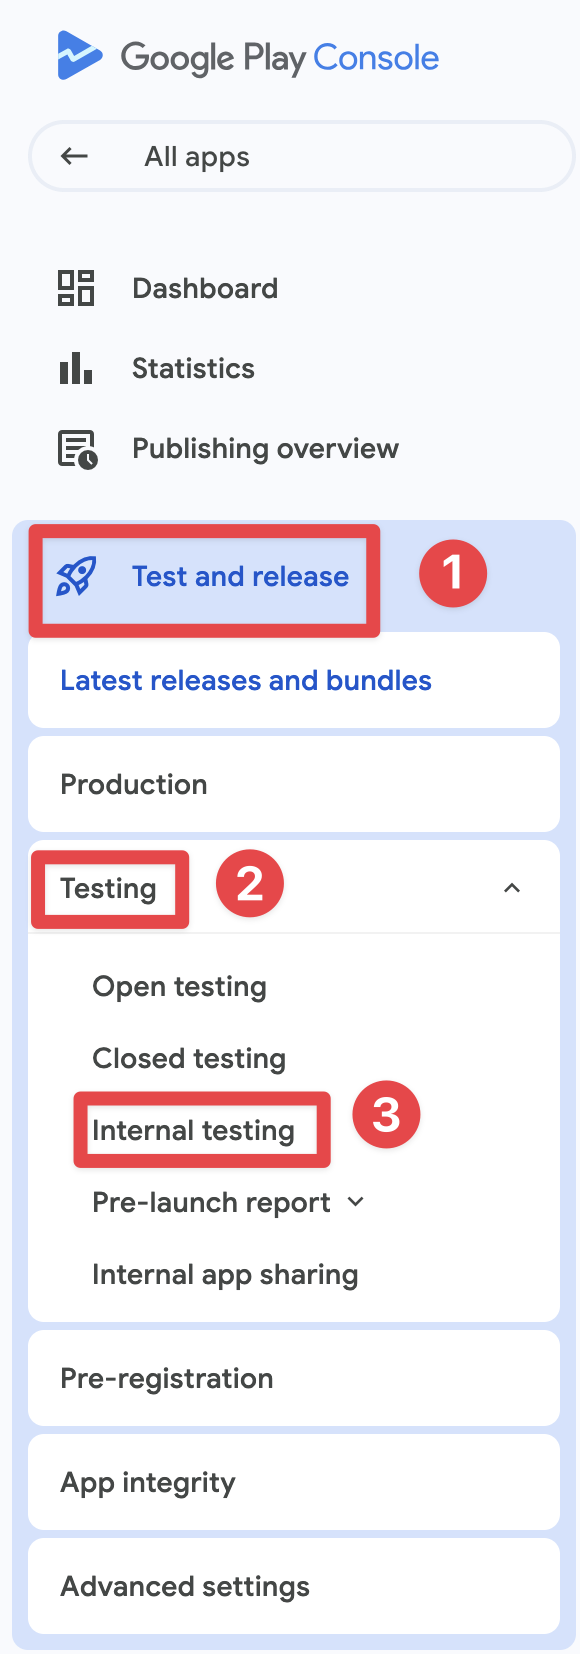
-
Android 빌더
Testers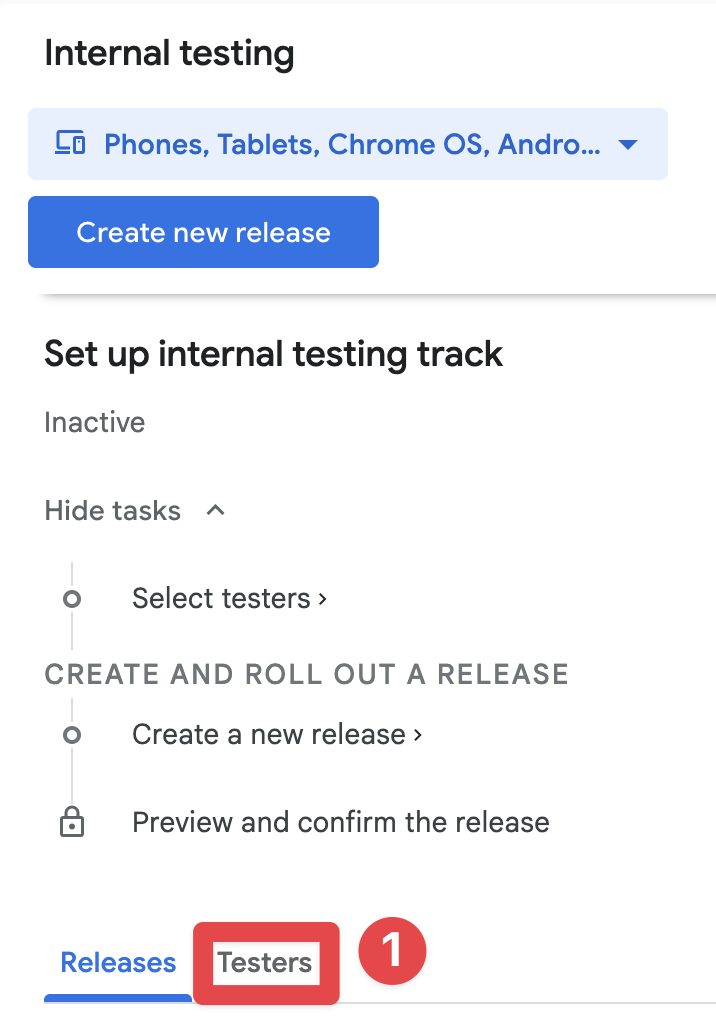
-
Android 빌더
Create email list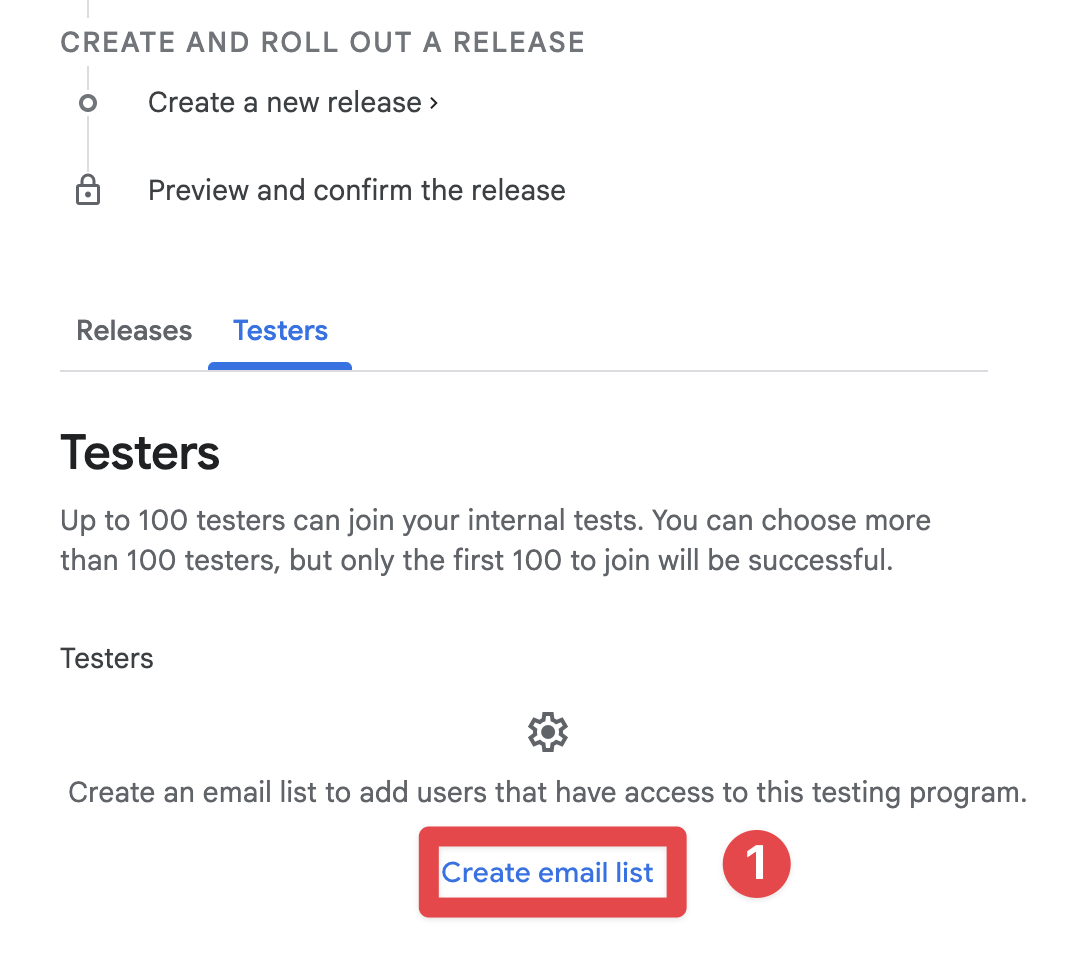
-
이메일 목록 이름
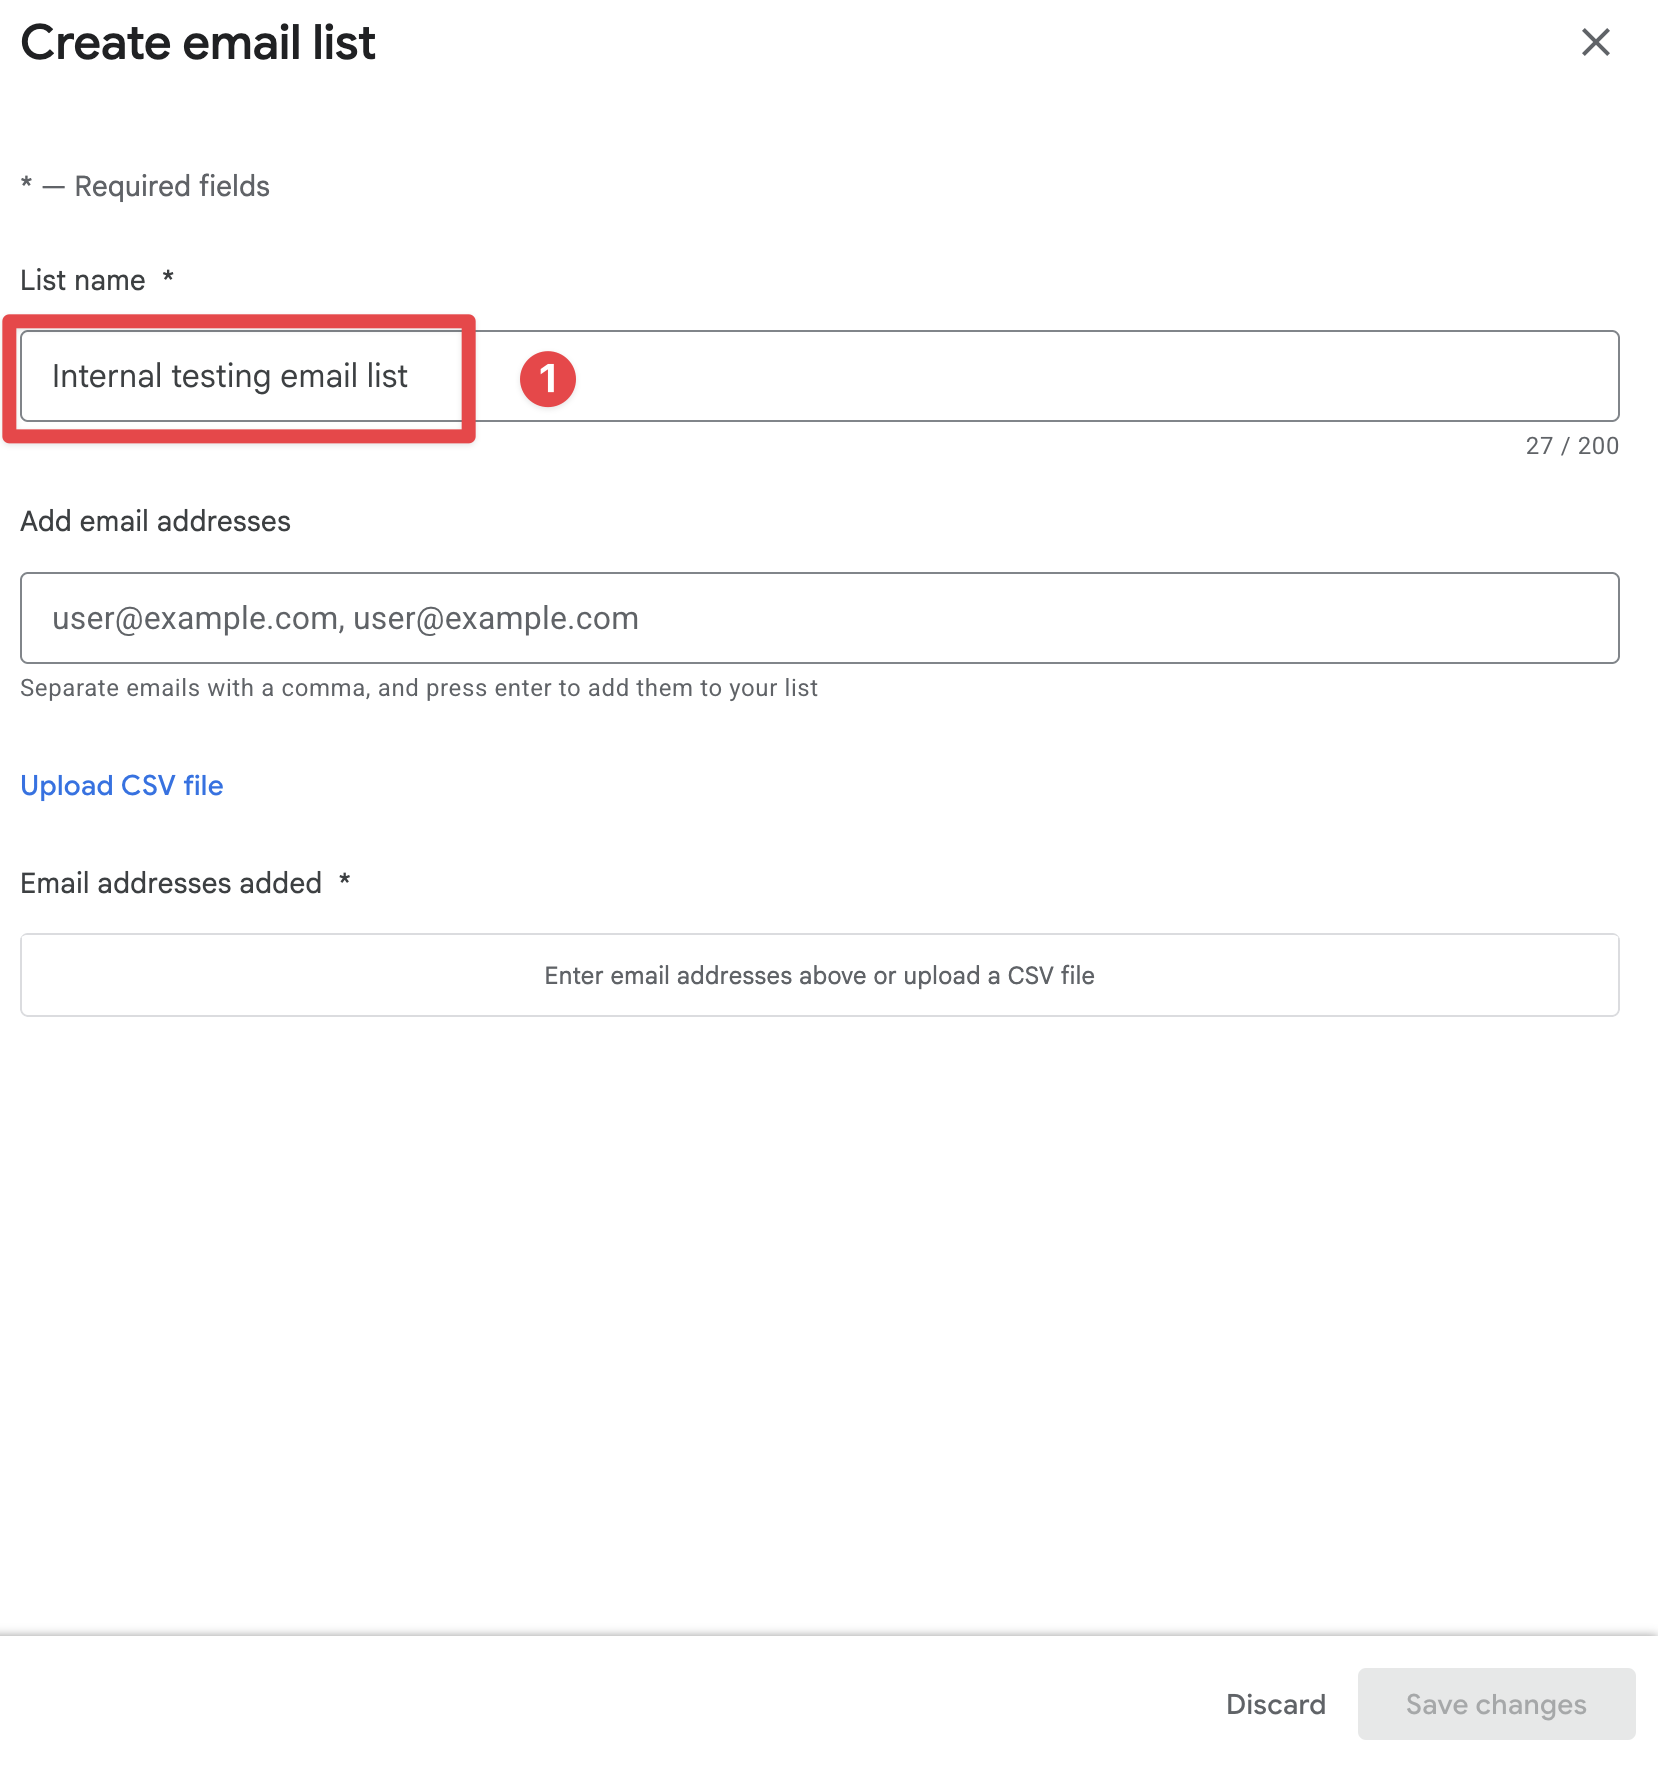
-
테스터의 이메일 주소 추가
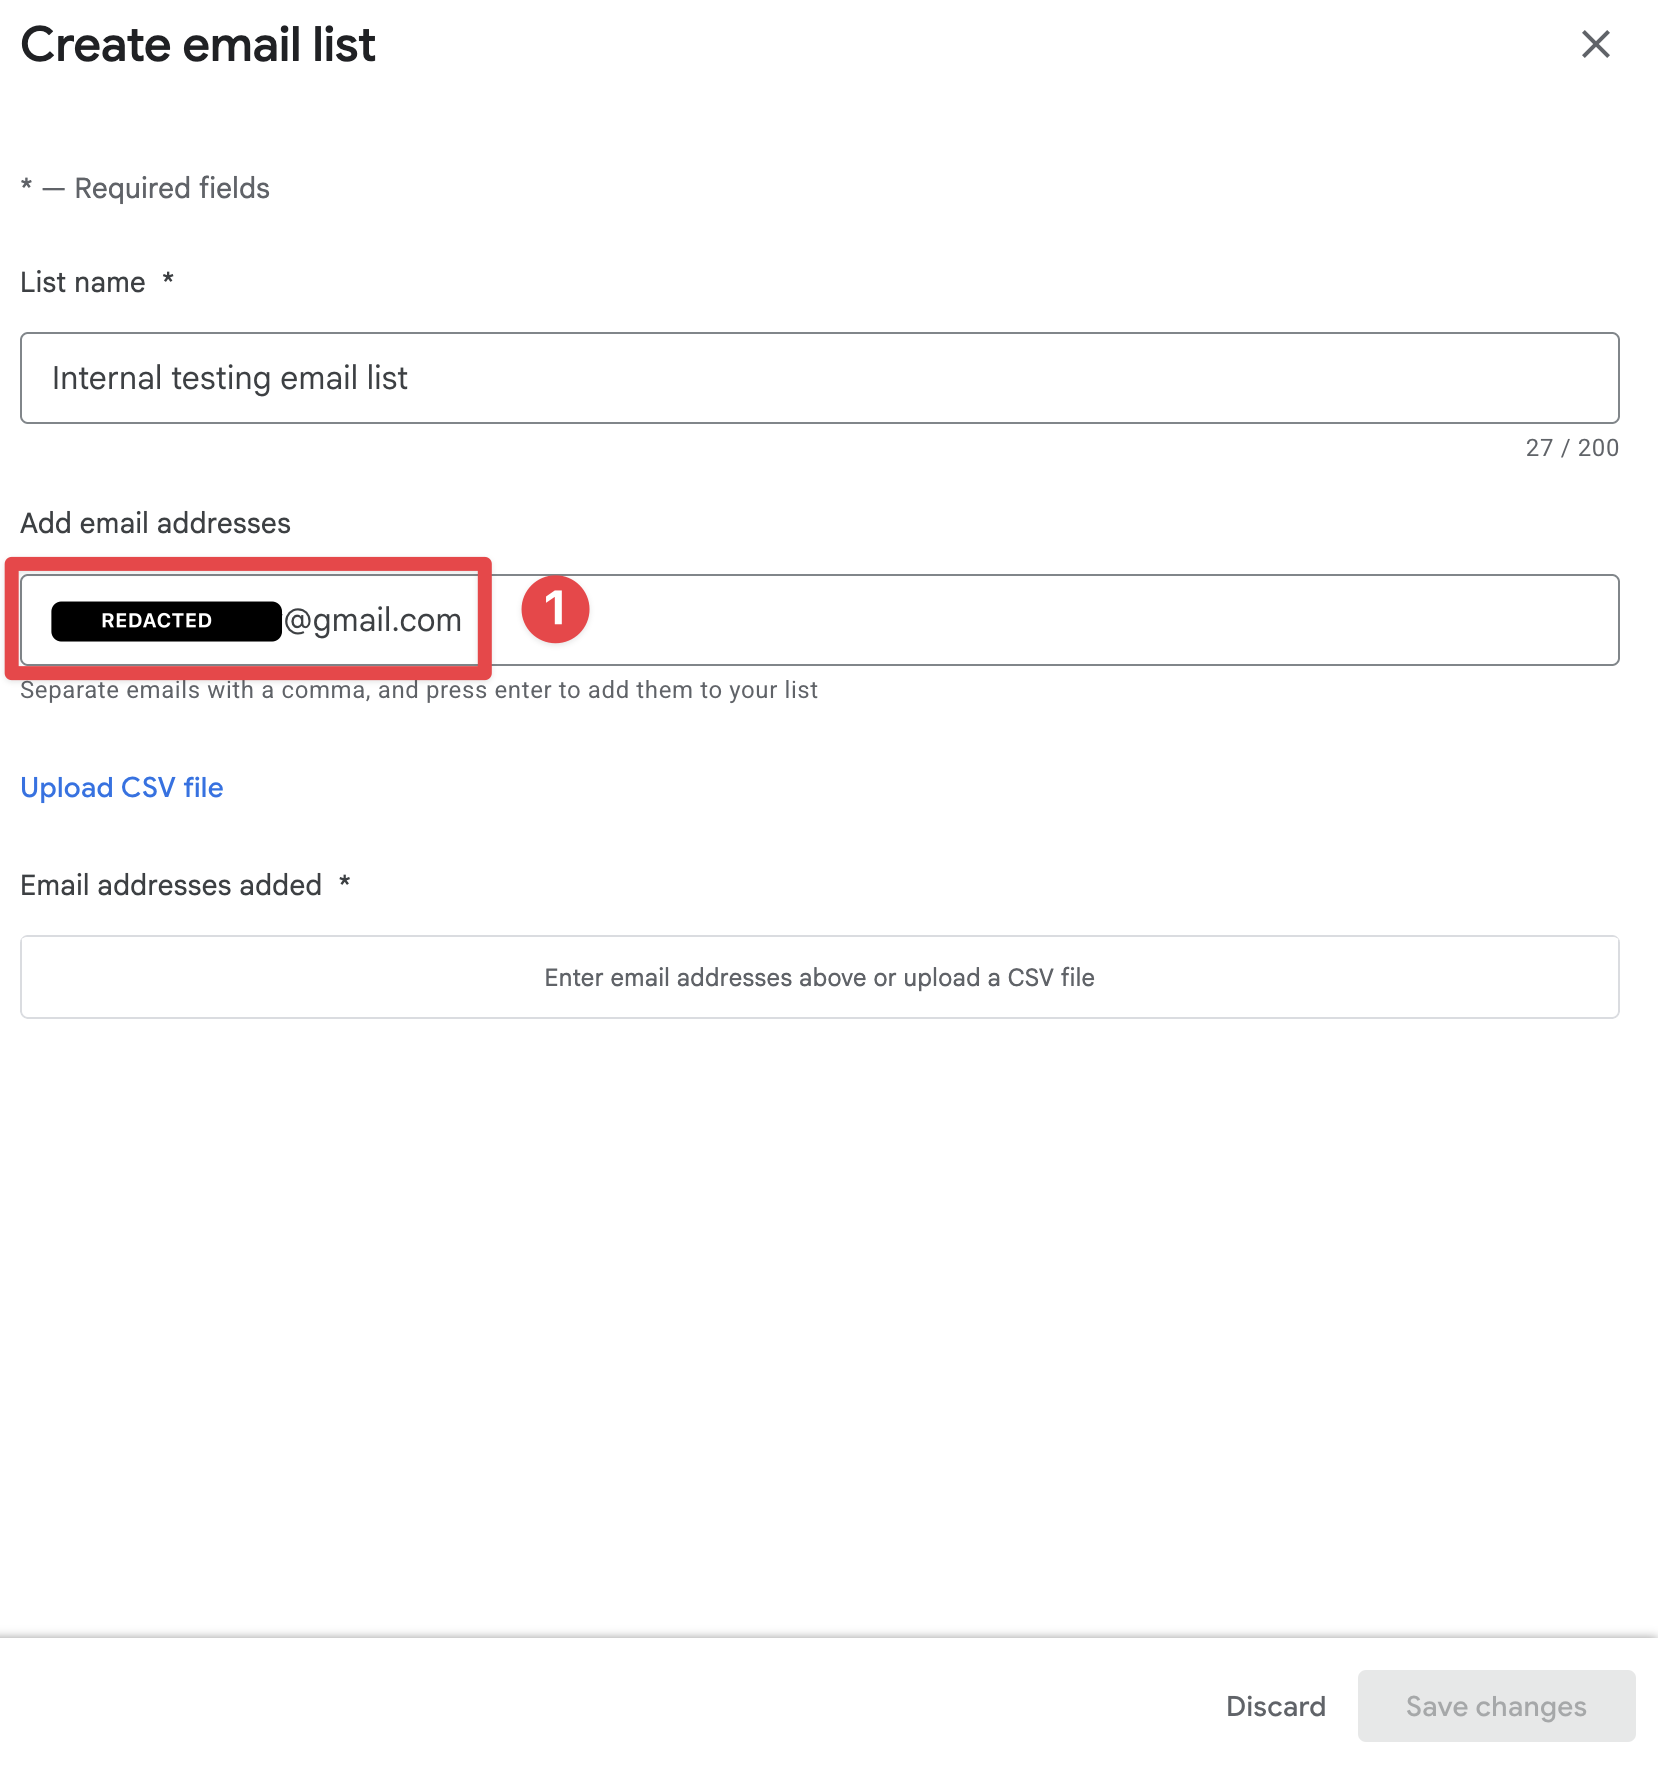
-
클릭
Enter및 클릭Save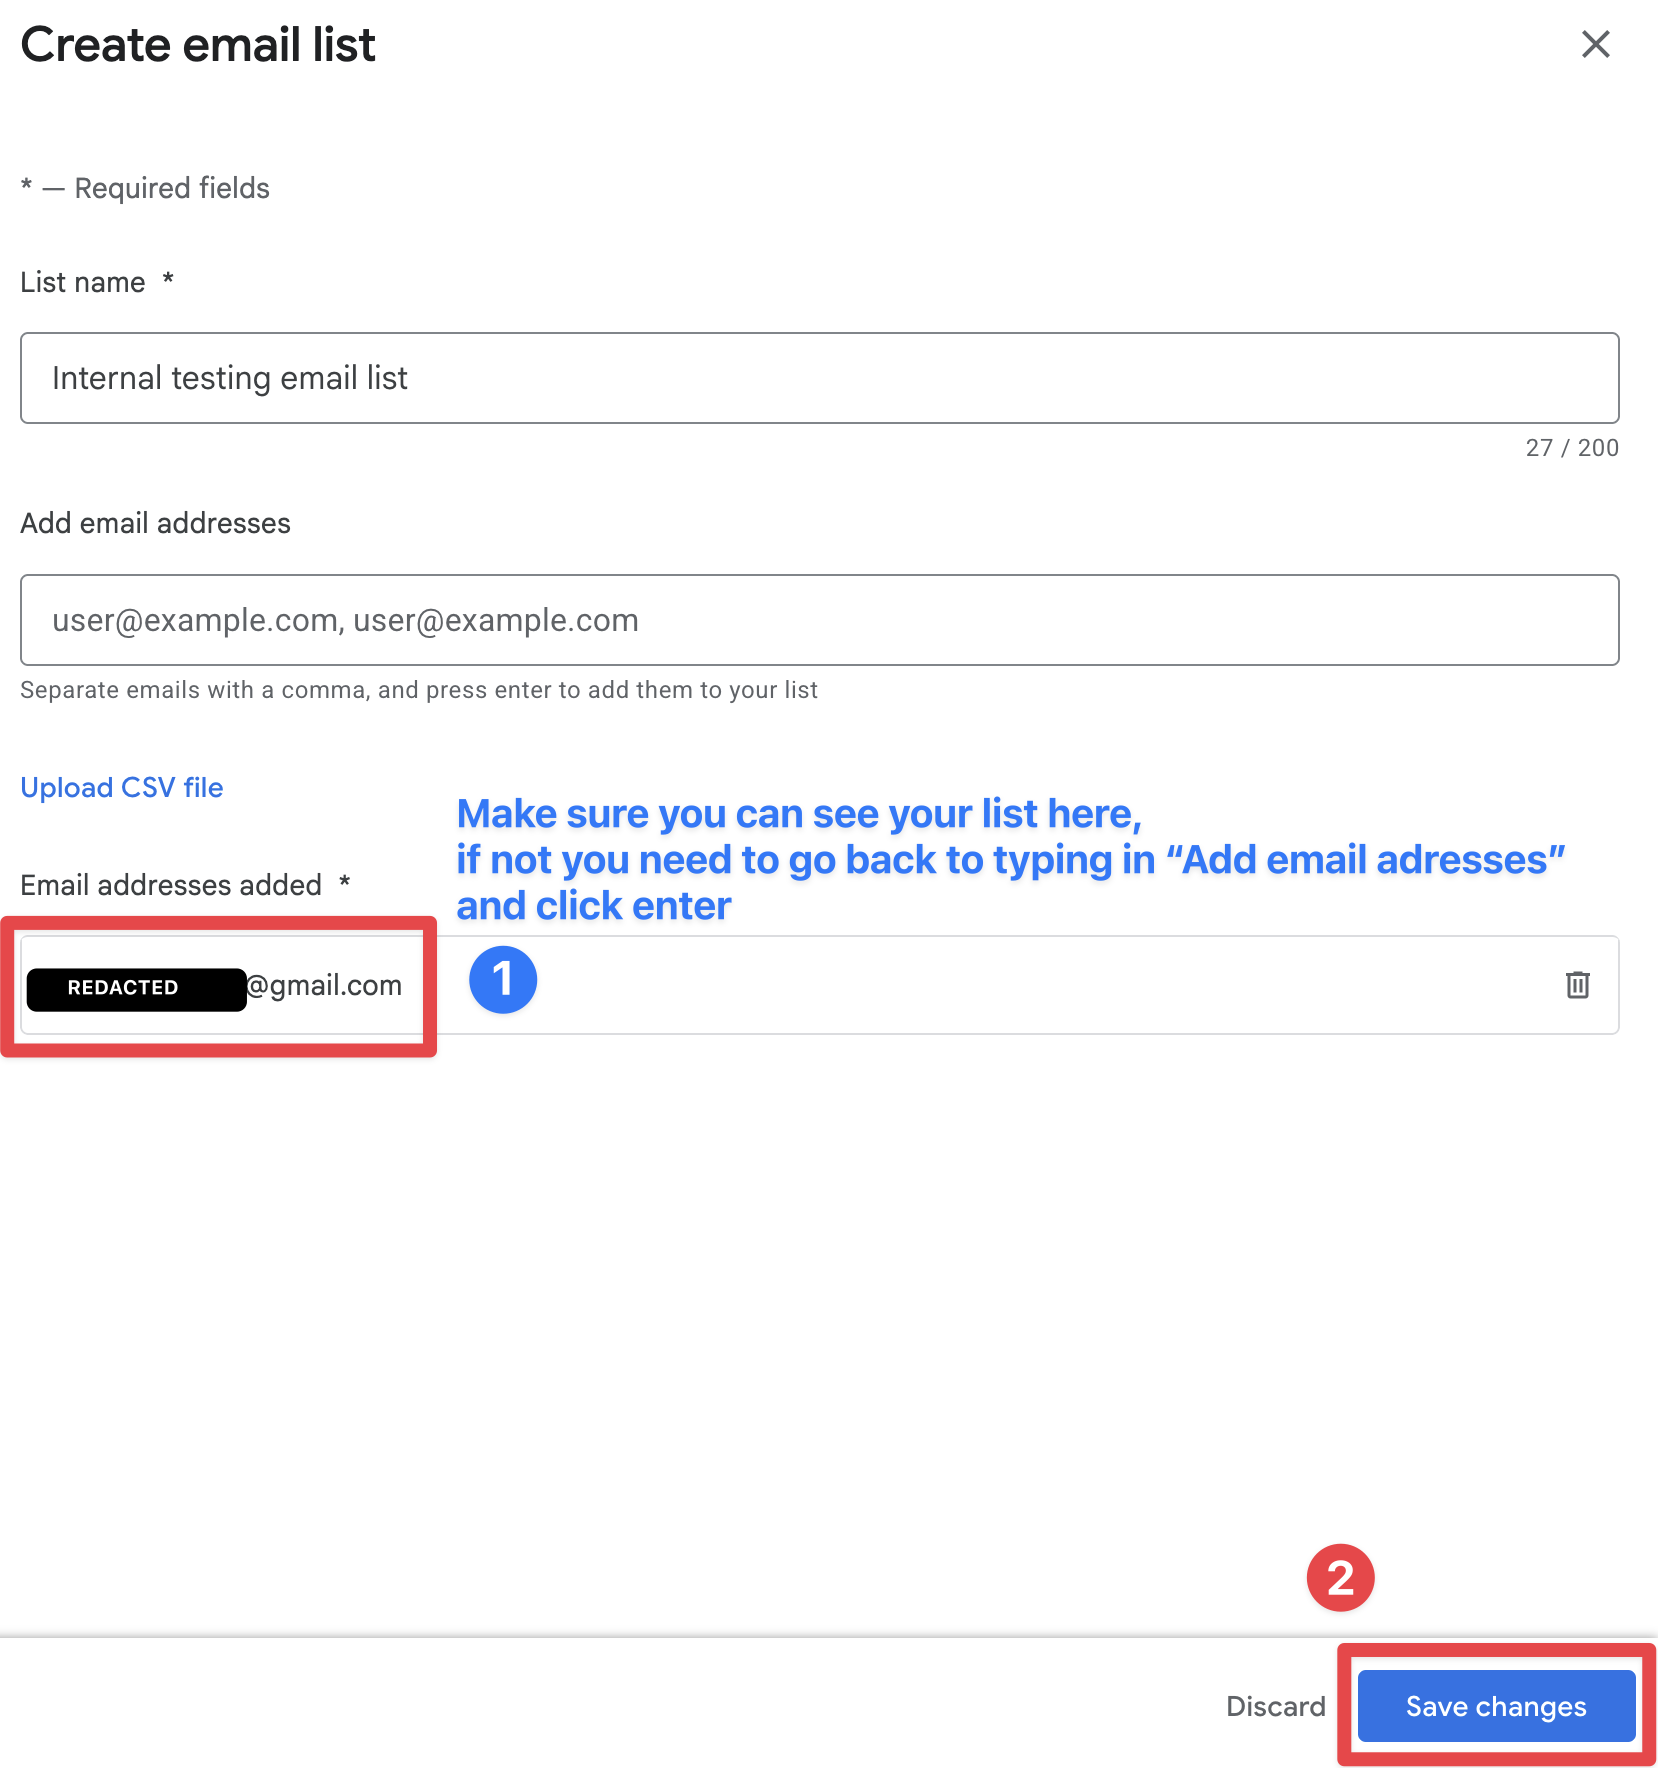
-
Android 빌더
Create group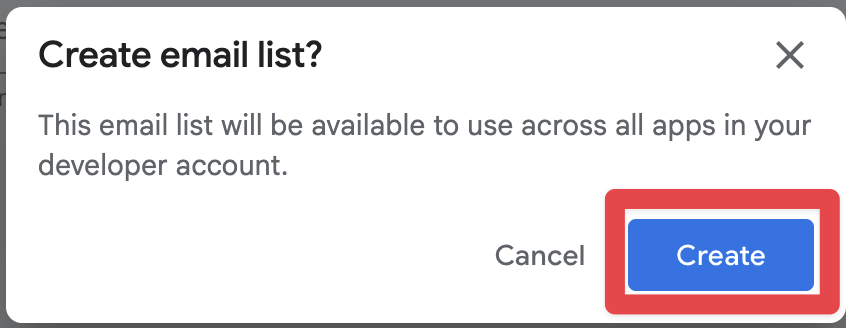
-
새 목록이 선택되어 있는지 확인하고
Save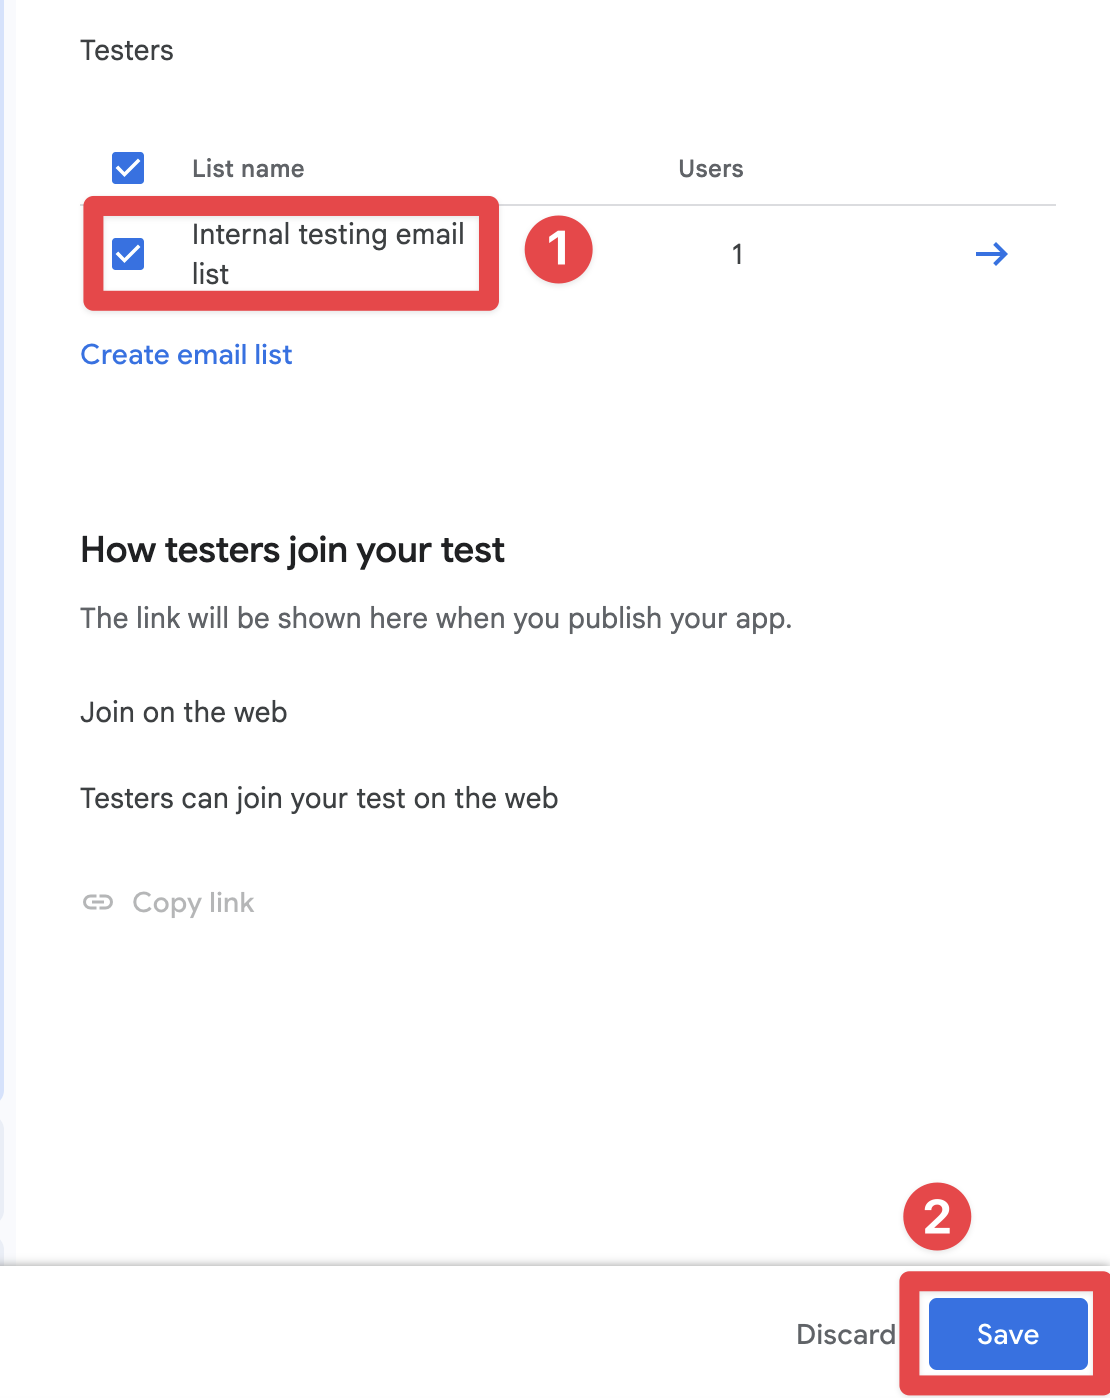
내부 테스트 그룹에 앱 업로드
내부 테스트 그룹에 앱 업로드내부 테스트 그룹을 만들었습니다. 이제 내부 테스트 그룹에 앱을 업로드할 수 있습니다.
-
가장
Test and release->Testing->Internal testing -
클릭
Releases버튼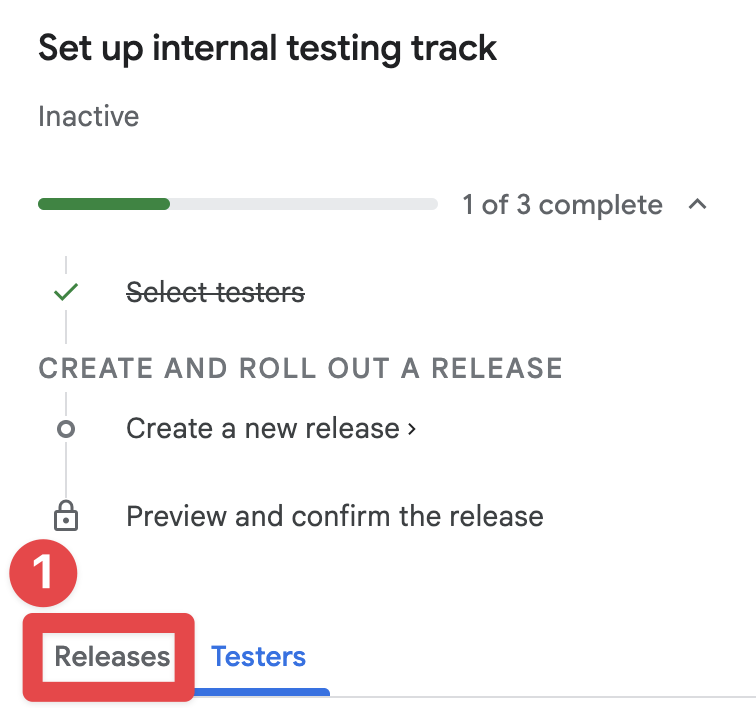
-
클릭
Create new release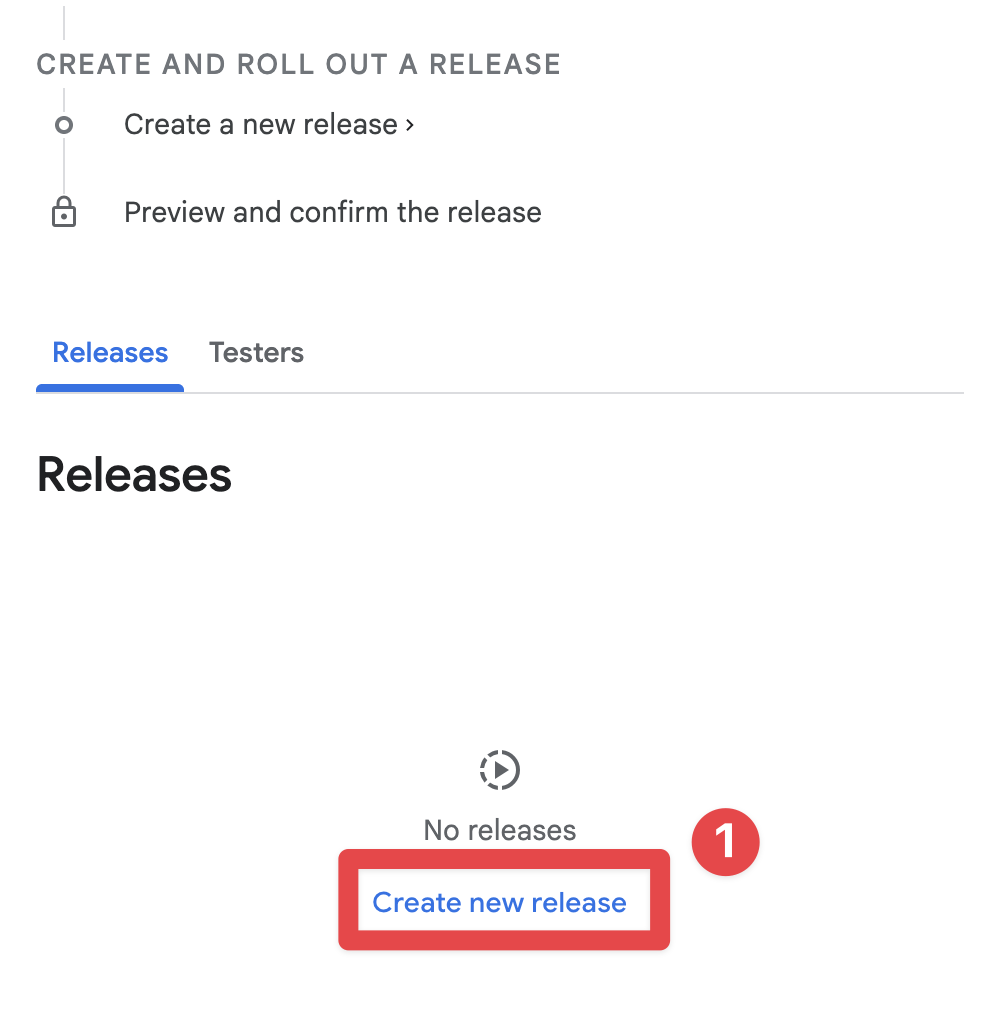
-
클릭하세요.
Upload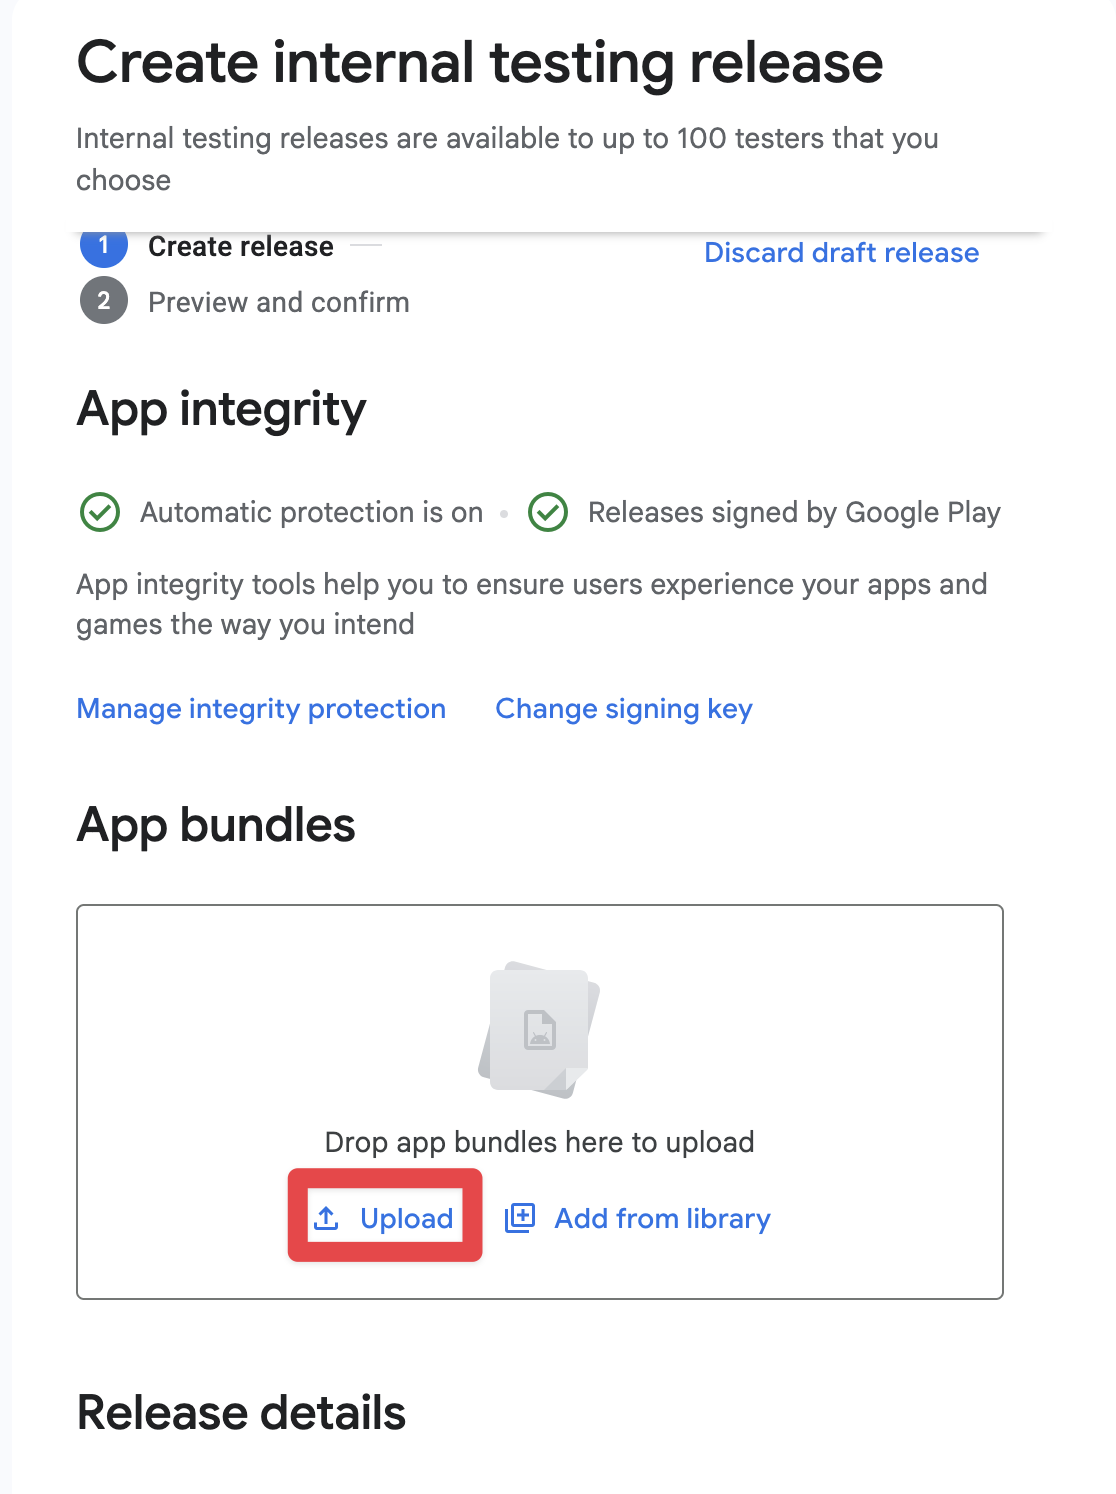
-
AAB 파일을 선택하세요.
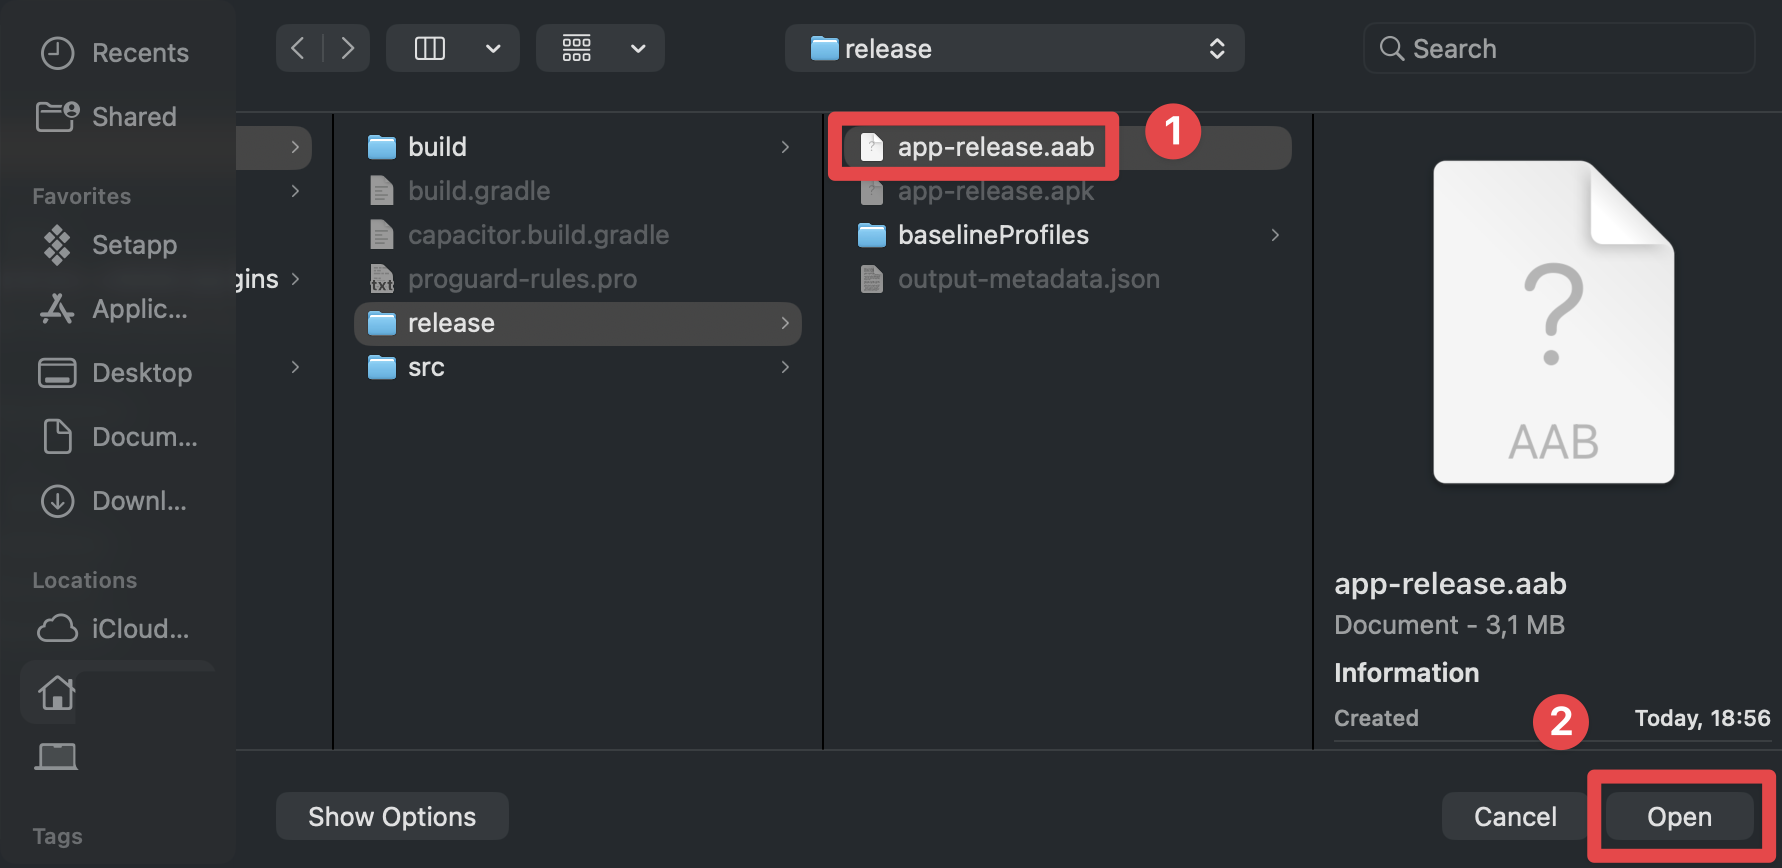
-
AAB 파일이 업로드될 때까지 기다리세요.
-
클릭하세요.
Next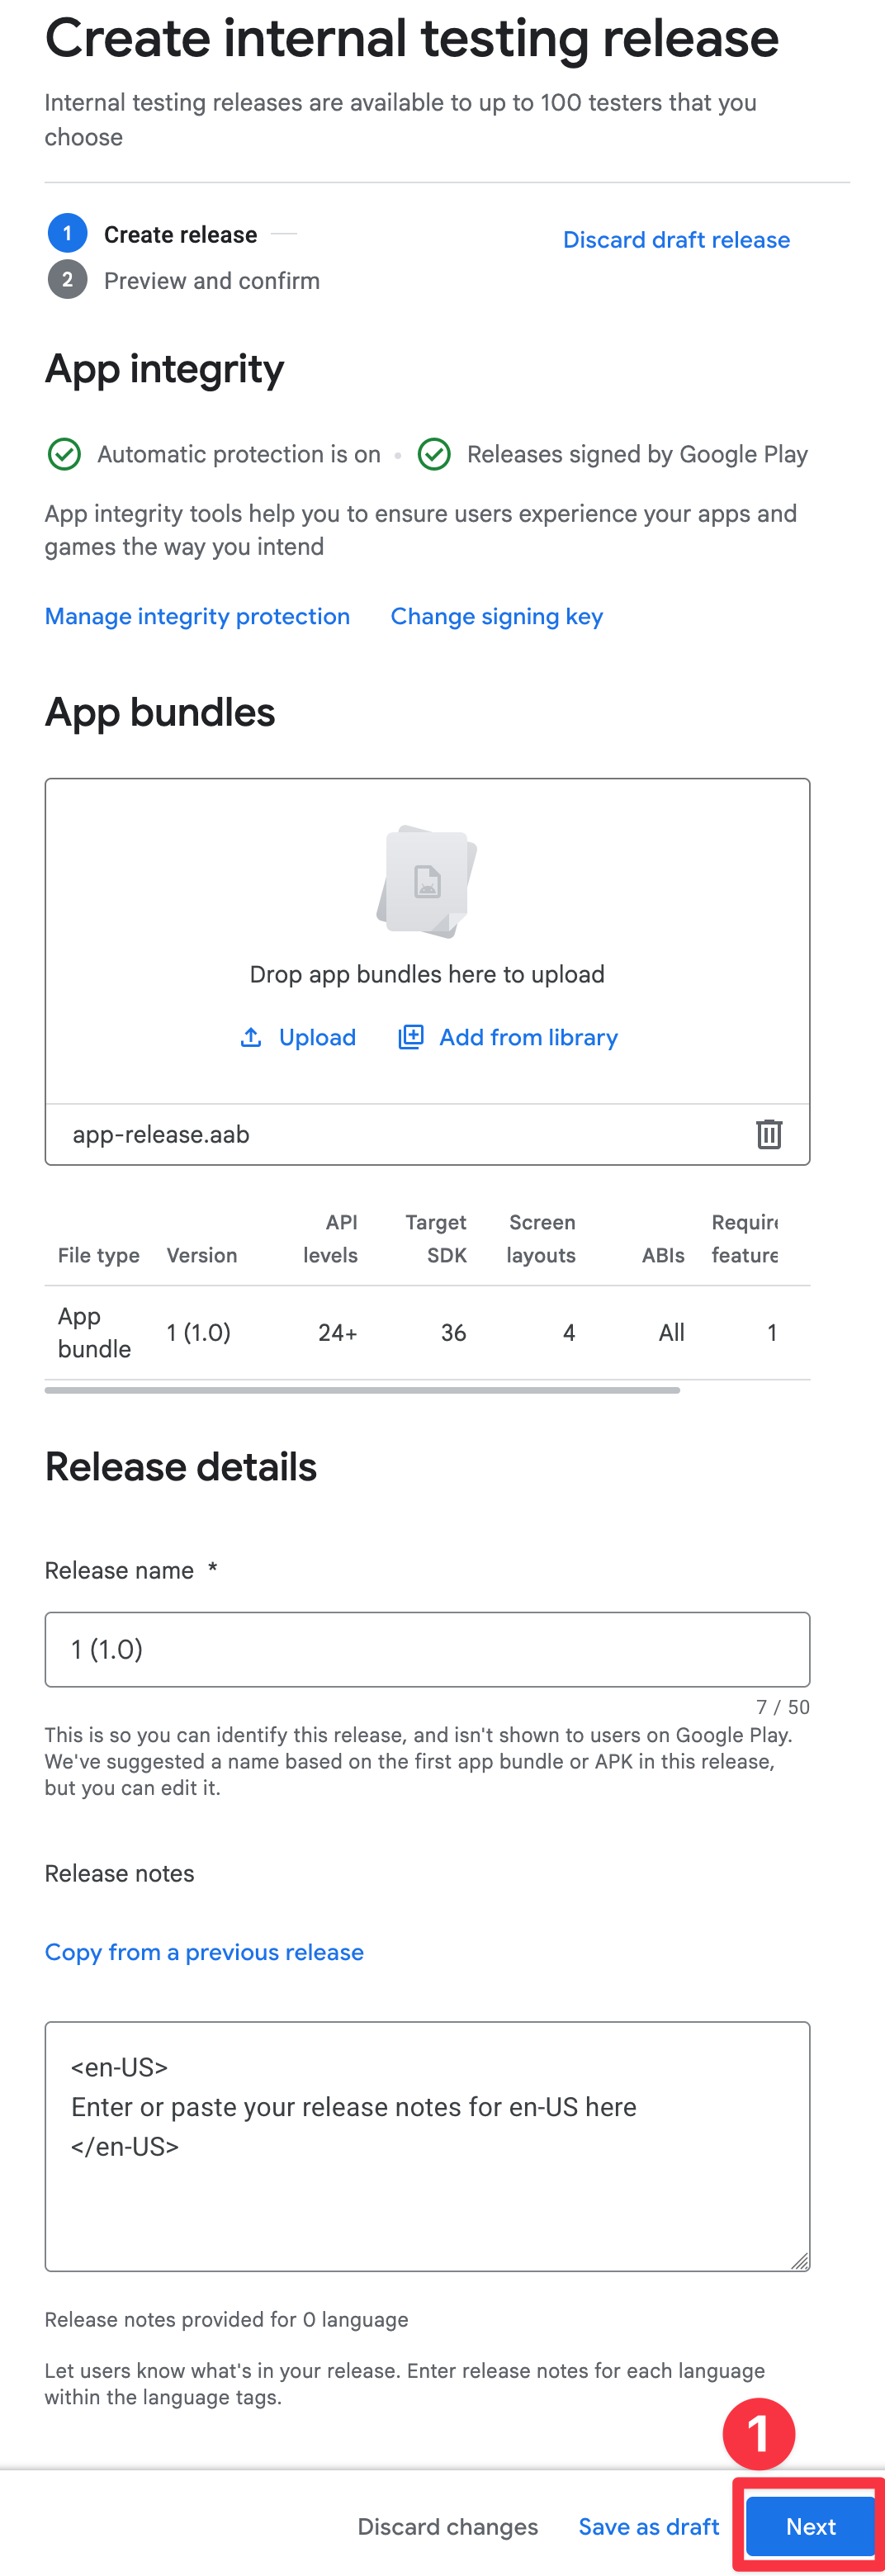
-
오류를 수정하세요.
개인적으로, 이 단계에서 나는 이 오류를 보는 중입니다.
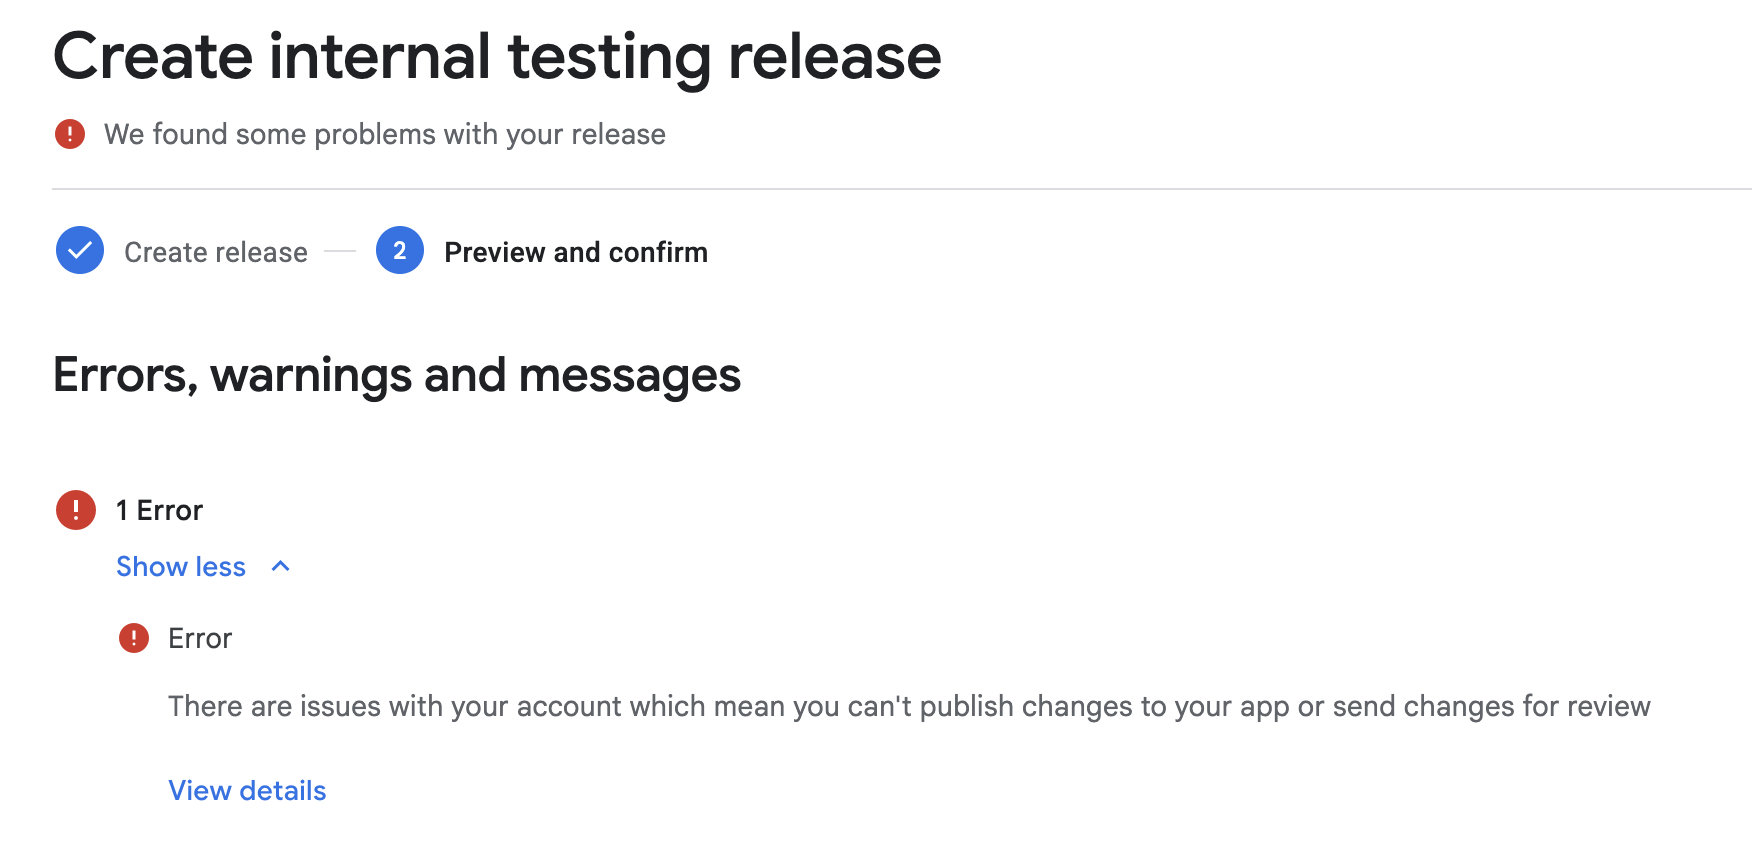
이는 아직 휴대폰 번호를 확인하지 않았기 때문입니다. 번호를 확인하고 튜토리얼을 계속 진행하겠습니다.
-
클릭하세요
Save and publish이것은 내부 테스트 그룹에 앱을 게시합니다.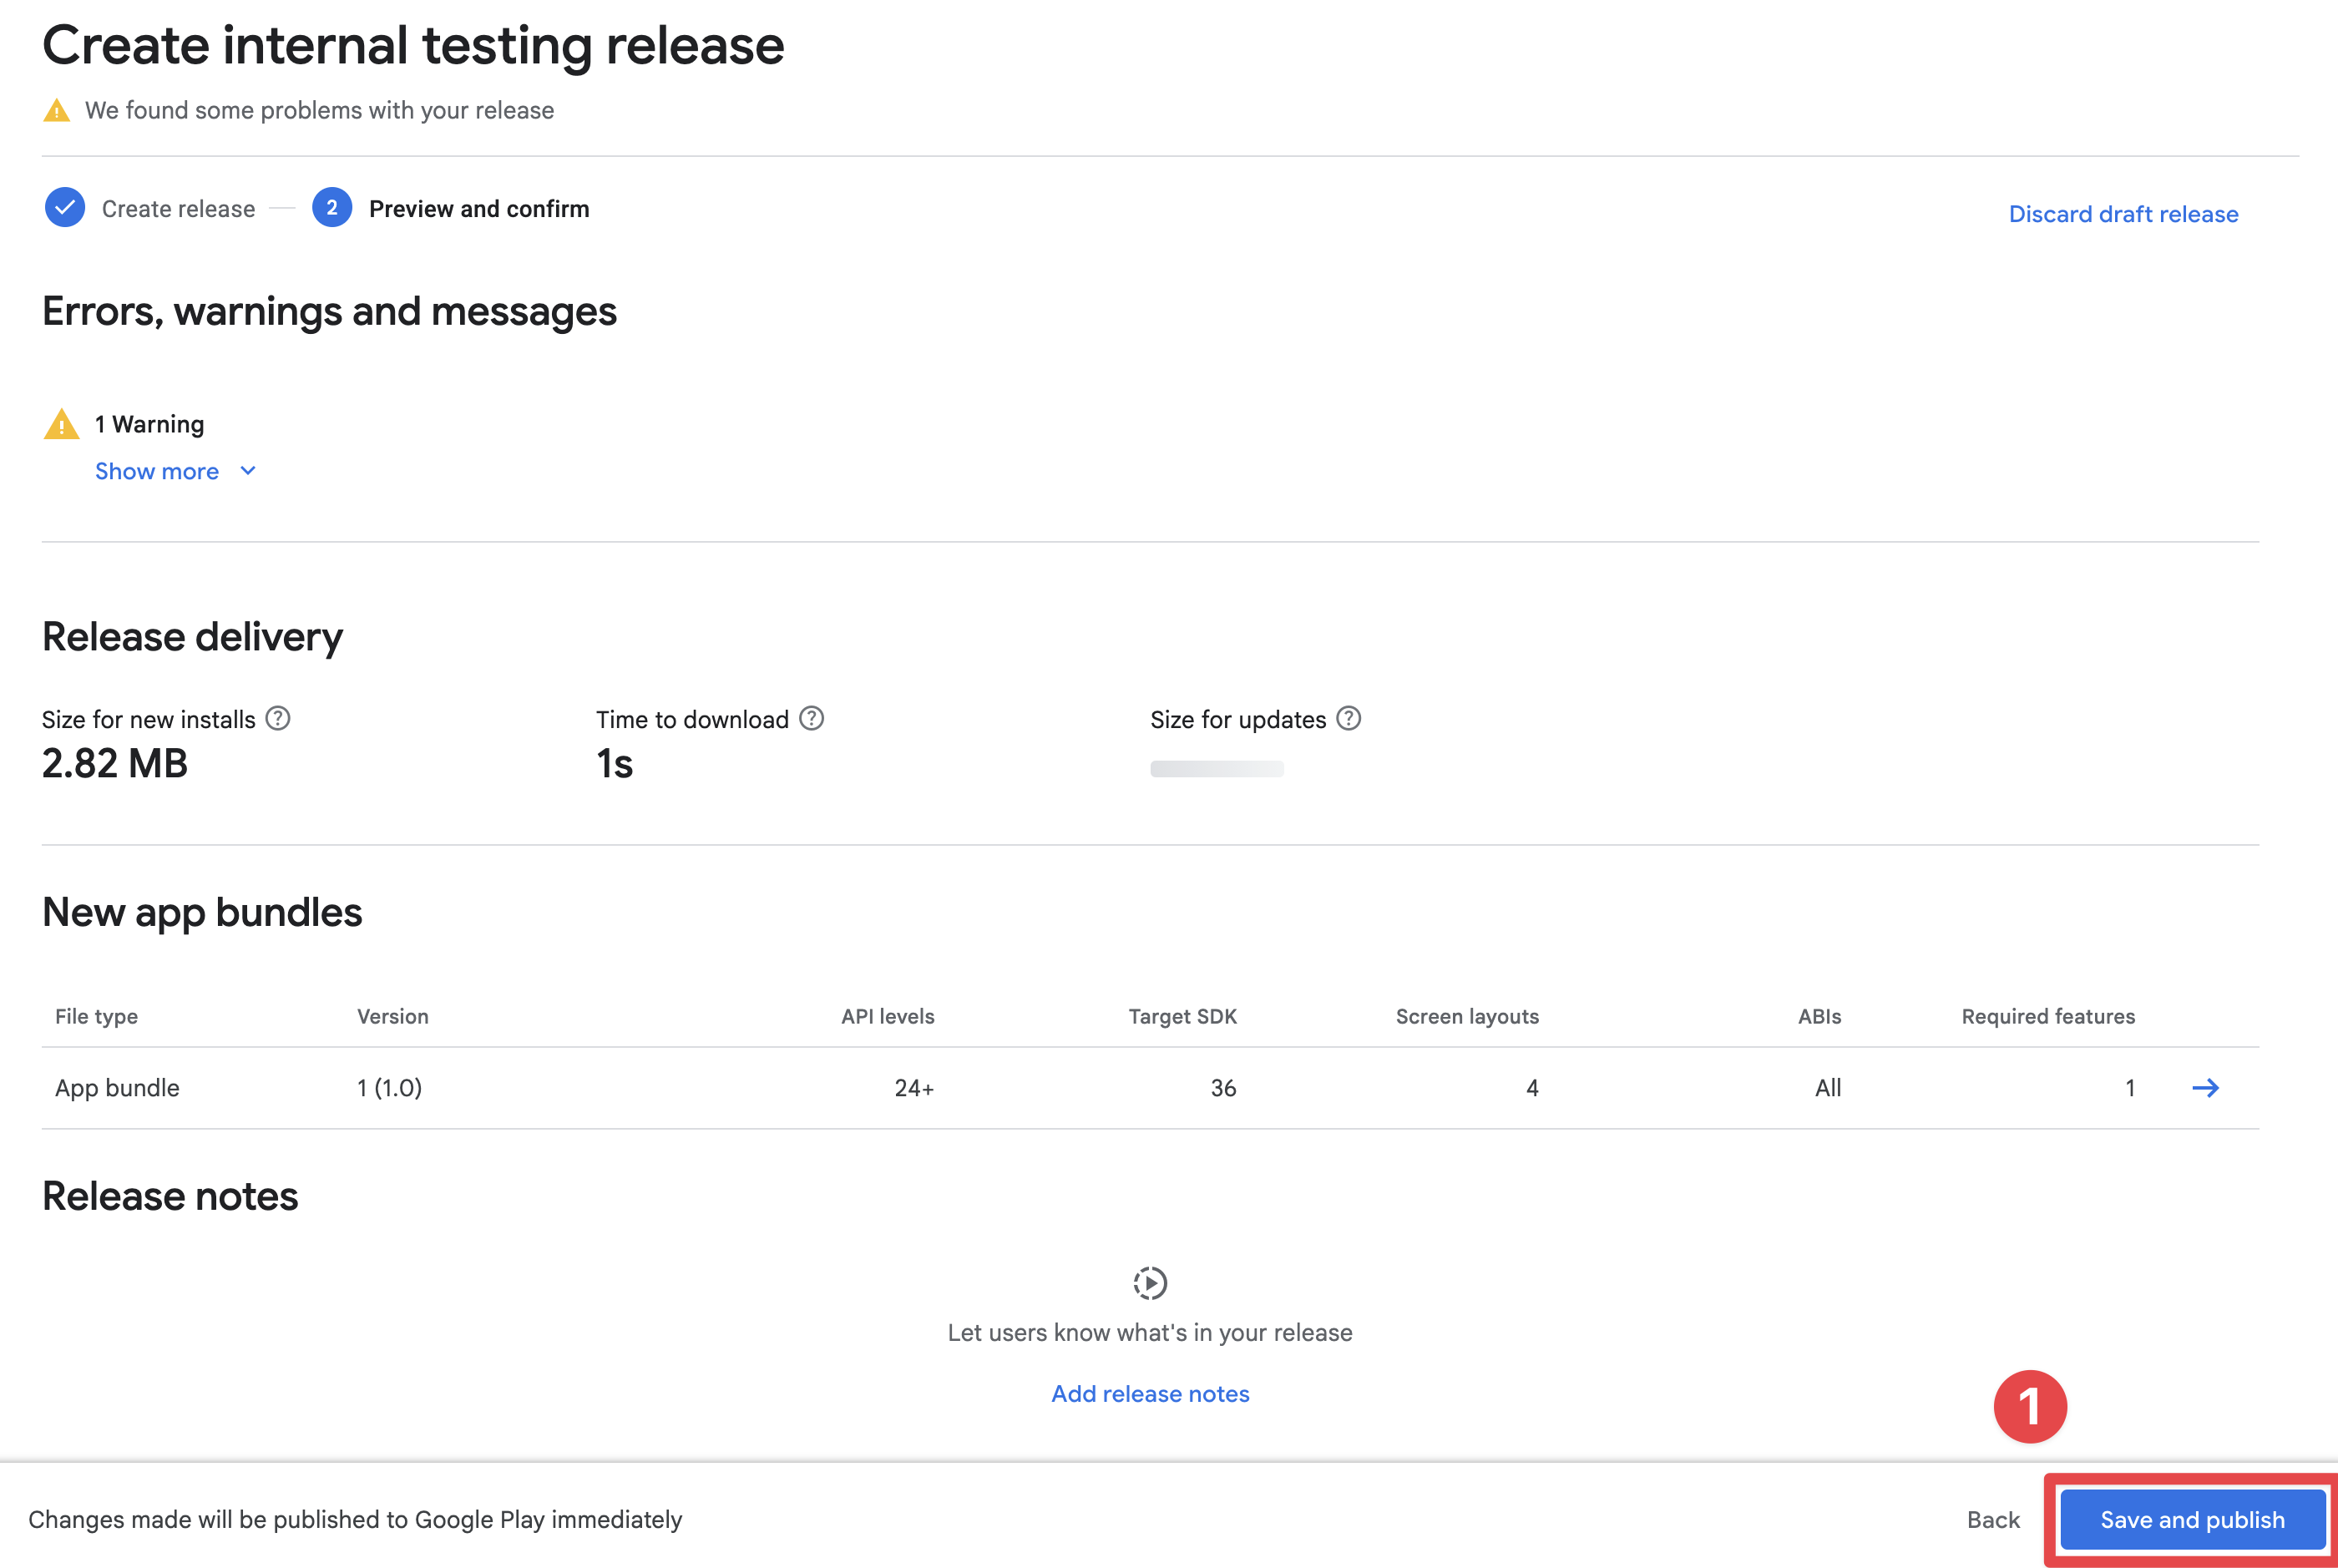
-
게시를 확인하세요
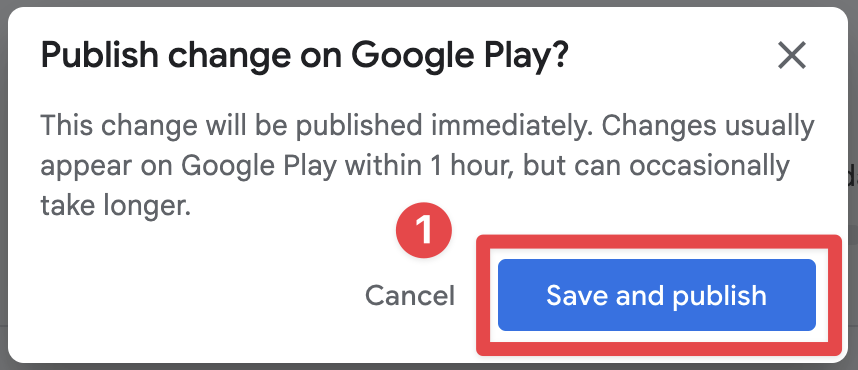
-
앱이 게시되었는지 확인하세요
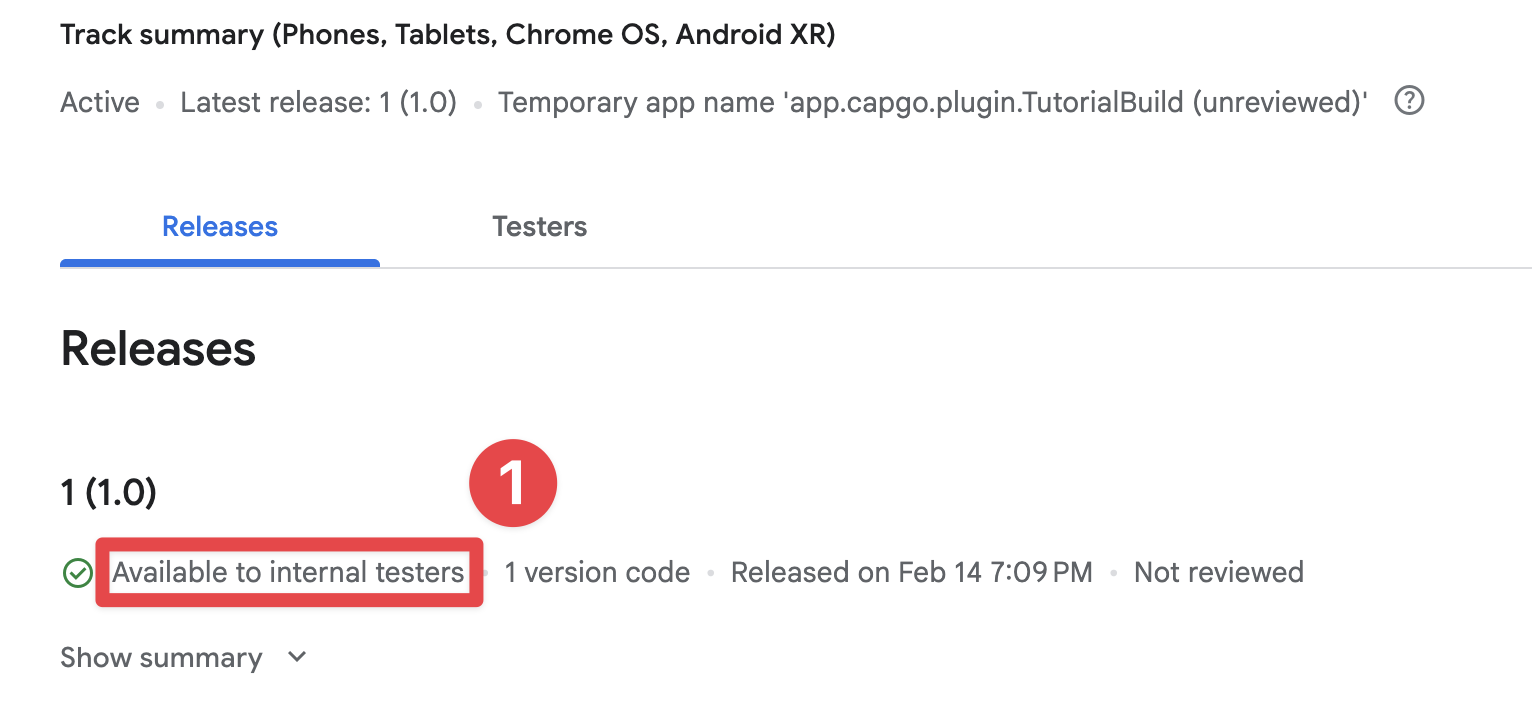
-
임시 앱 이름을 가져오세요
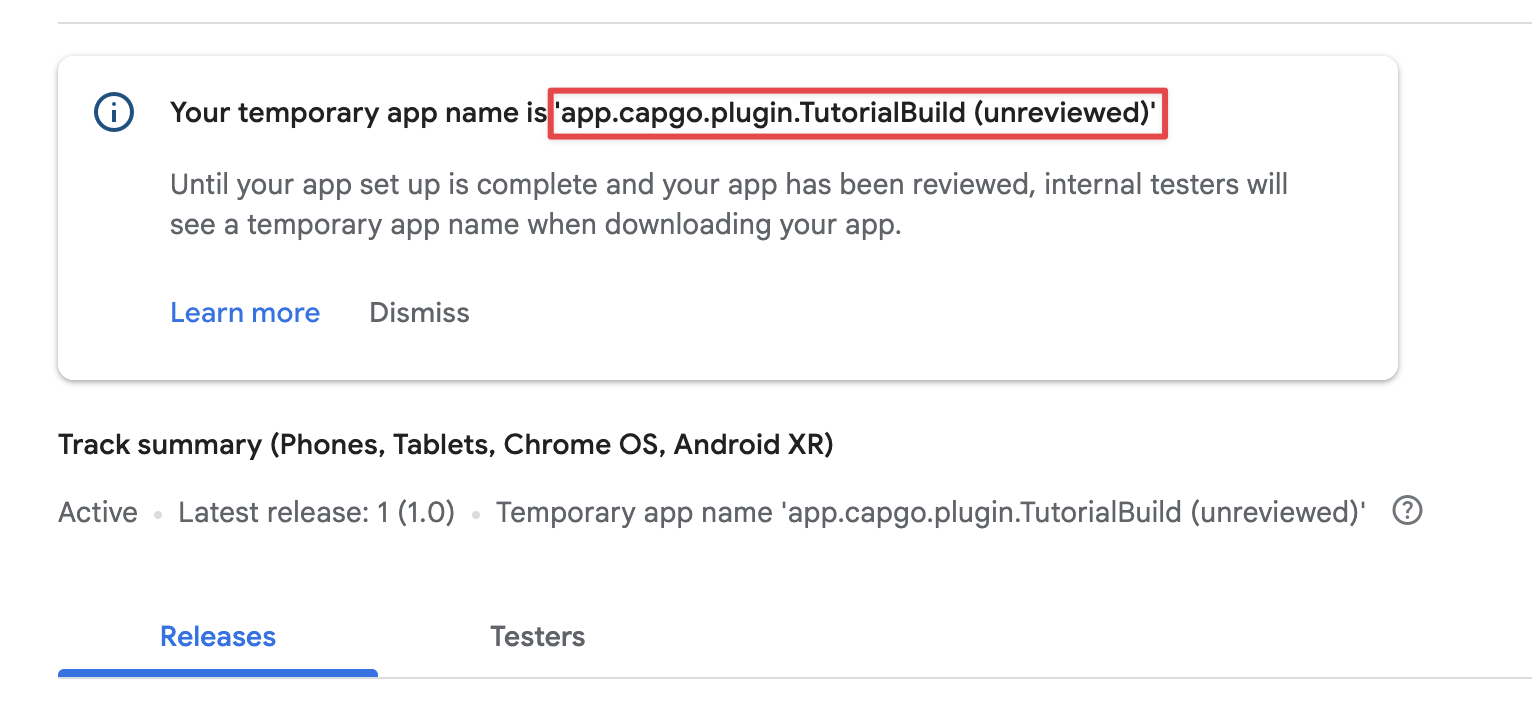
내부 테스트 그룹에 대한 초대 수락
내부 테스트 그룹에 대한 초대 수락 섹션앱을 내부 테스트 그룹에 업로드한 후 내부 테스트 그룹에 대한 초대 수락이 가능합니다.
-
가기
Test and release->Testing->Internal testing -
클릭
Testers -
클릭
Copy link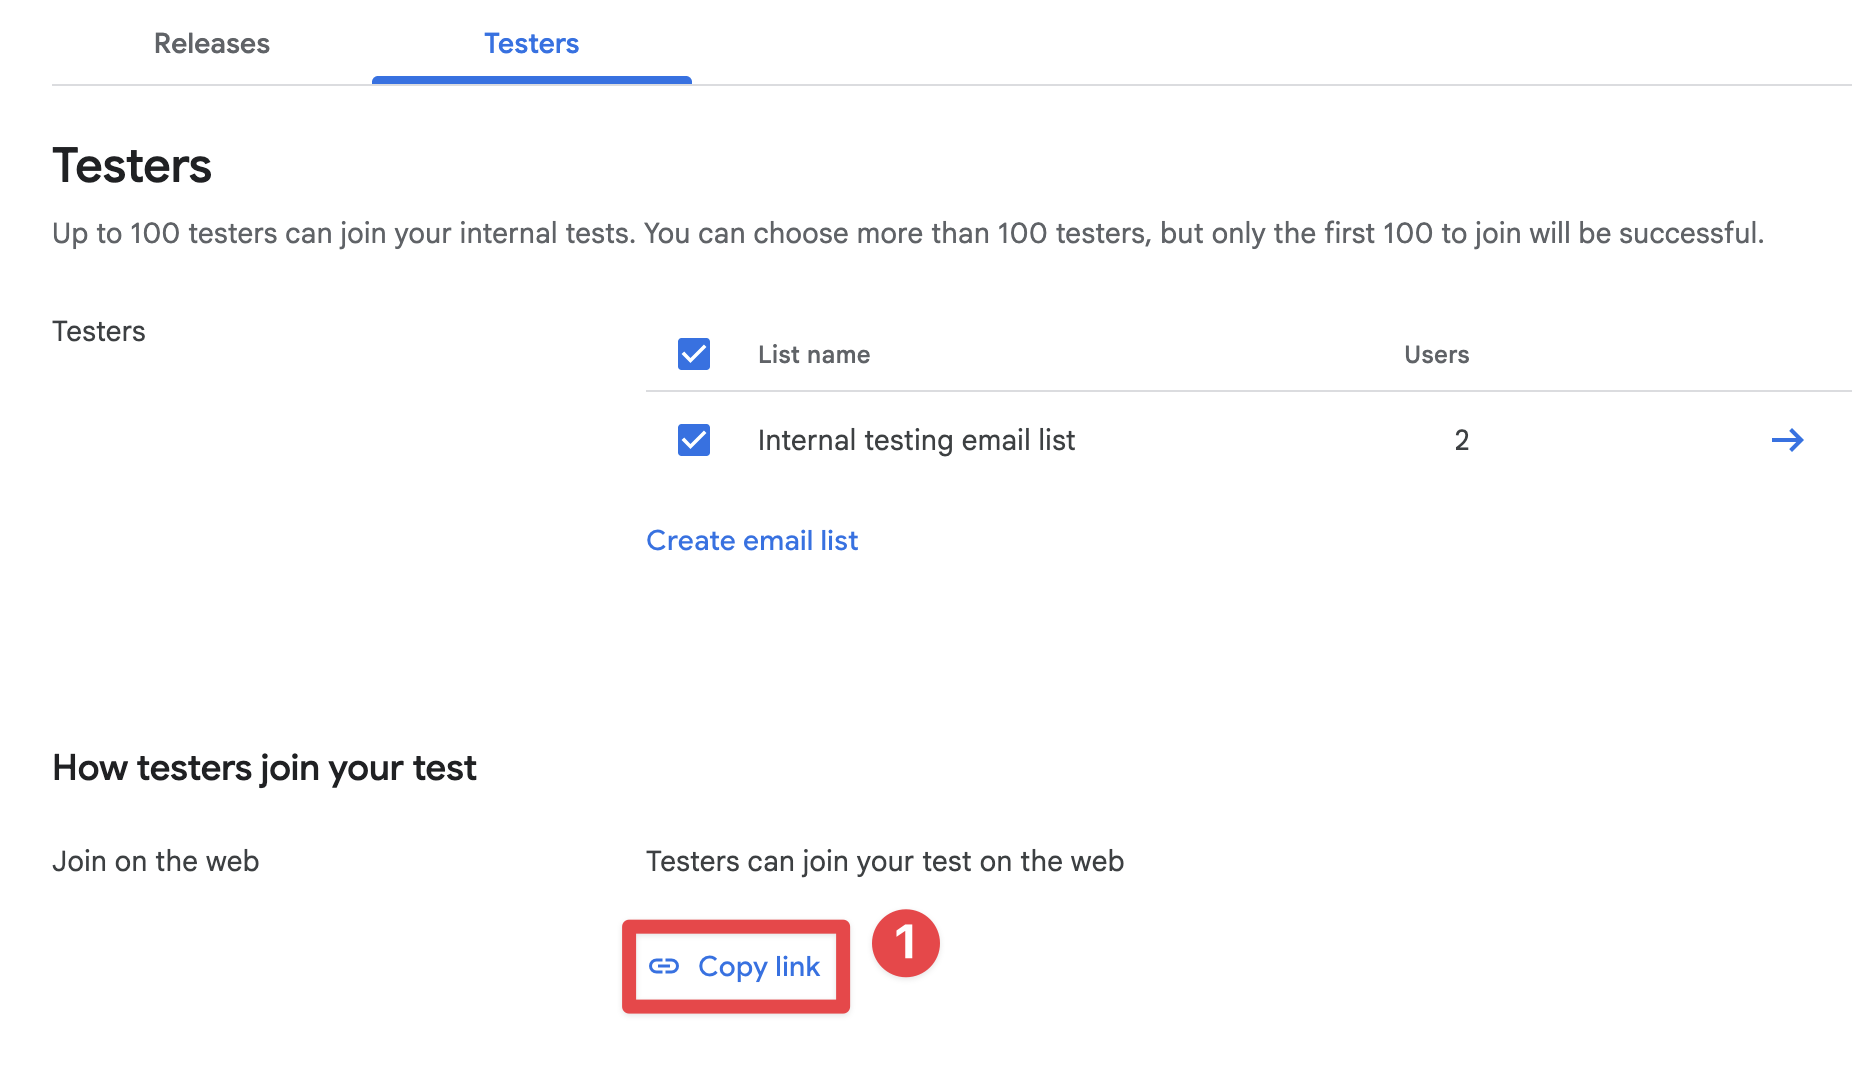
-
휴대폰으로 링크를 보내고 브라우저에서 열어 클릭
Accept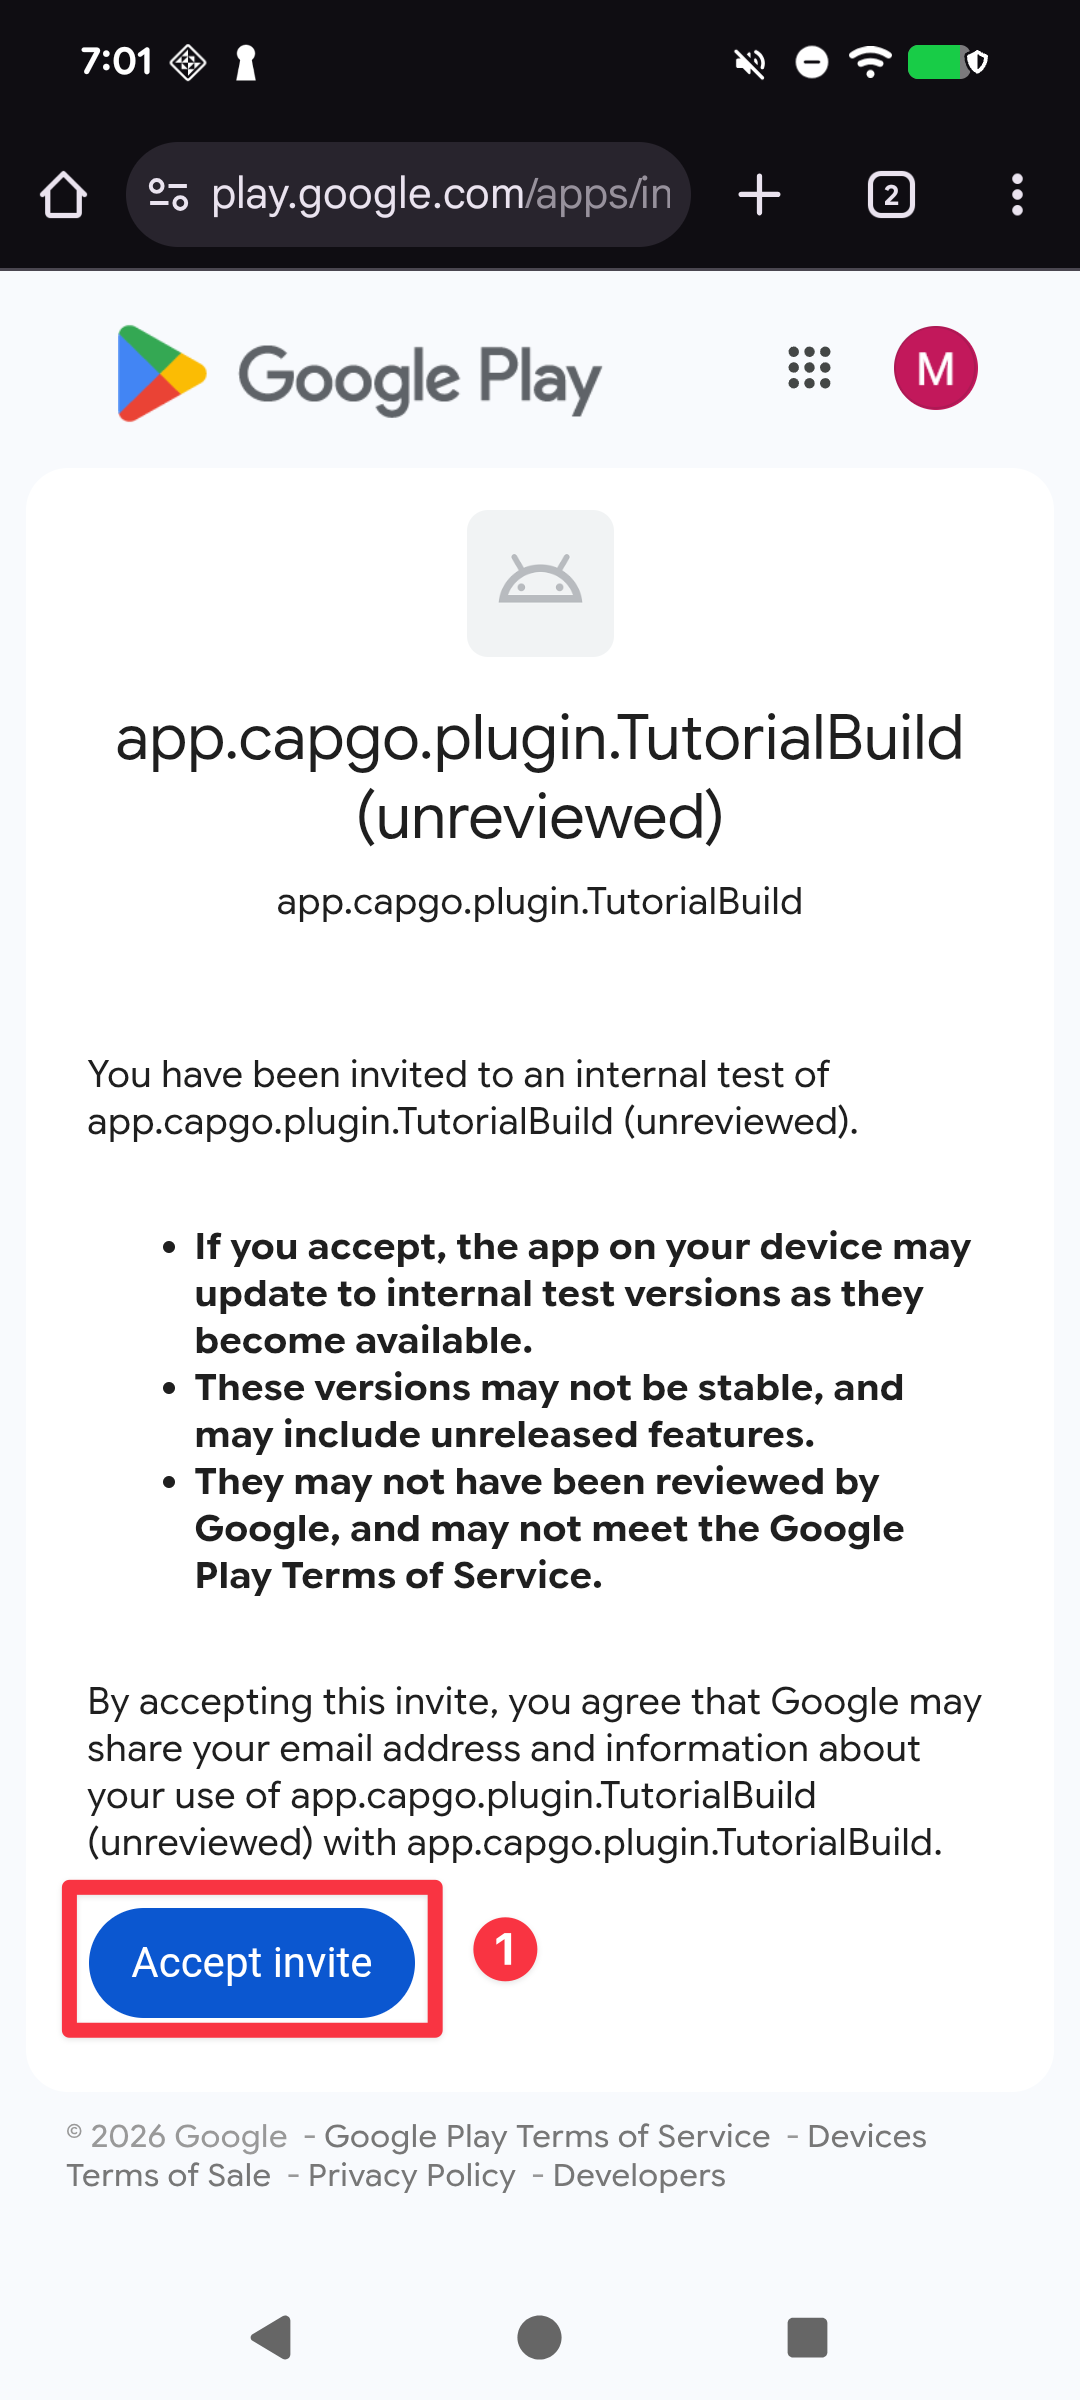
-
초대 수락이 확인되었는지 확인하고 "Play Store에서 다운로드" 클릭
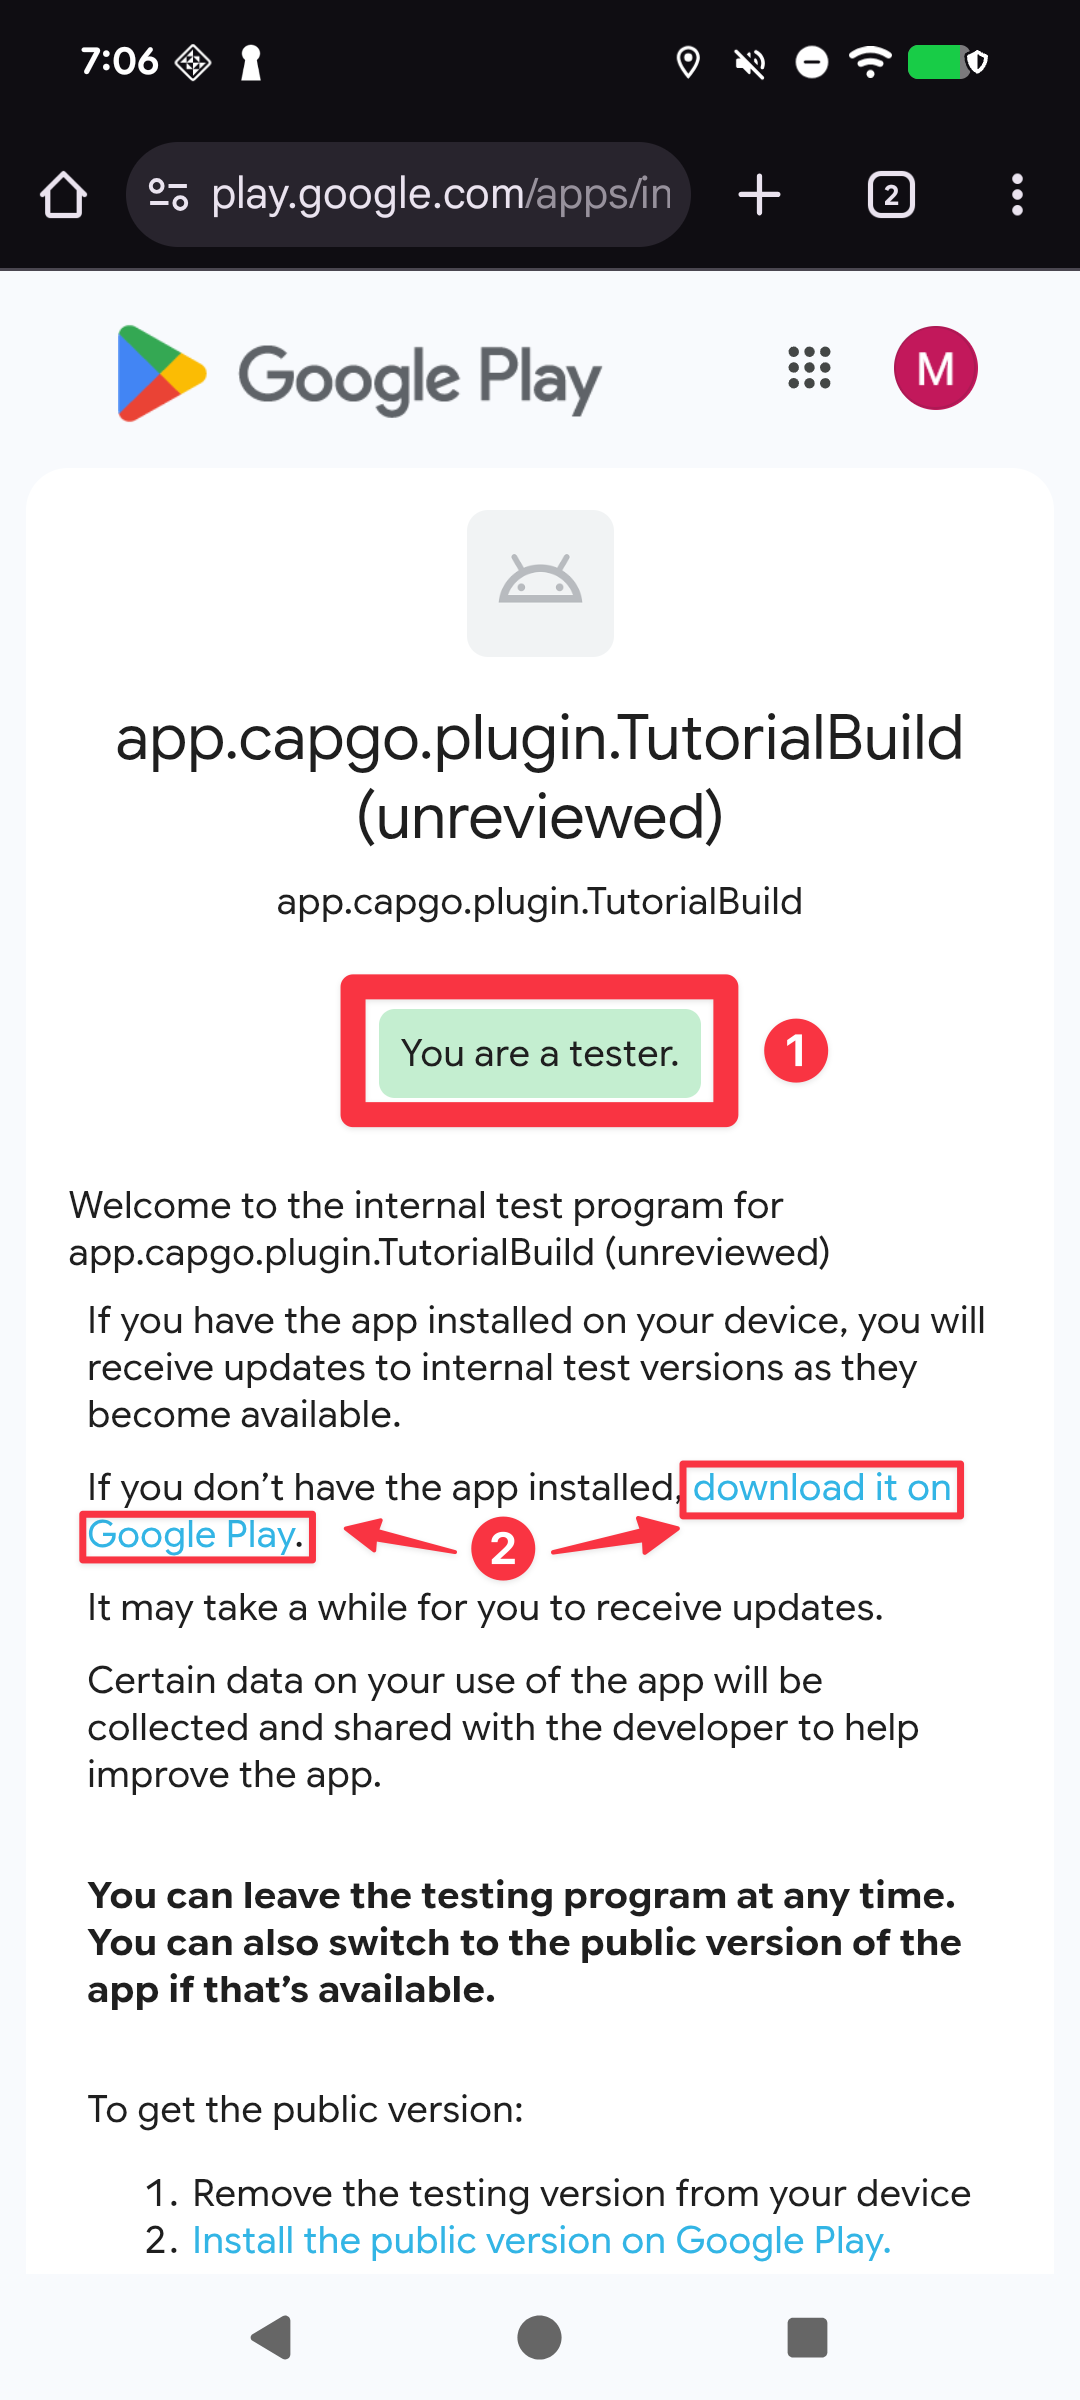
-
앱을 설치하세요.
- Android Studio를 사용하기 전에 이미 앱을 설치한 경우 Android Studio에서
uninstall버튼을 클릭하세요.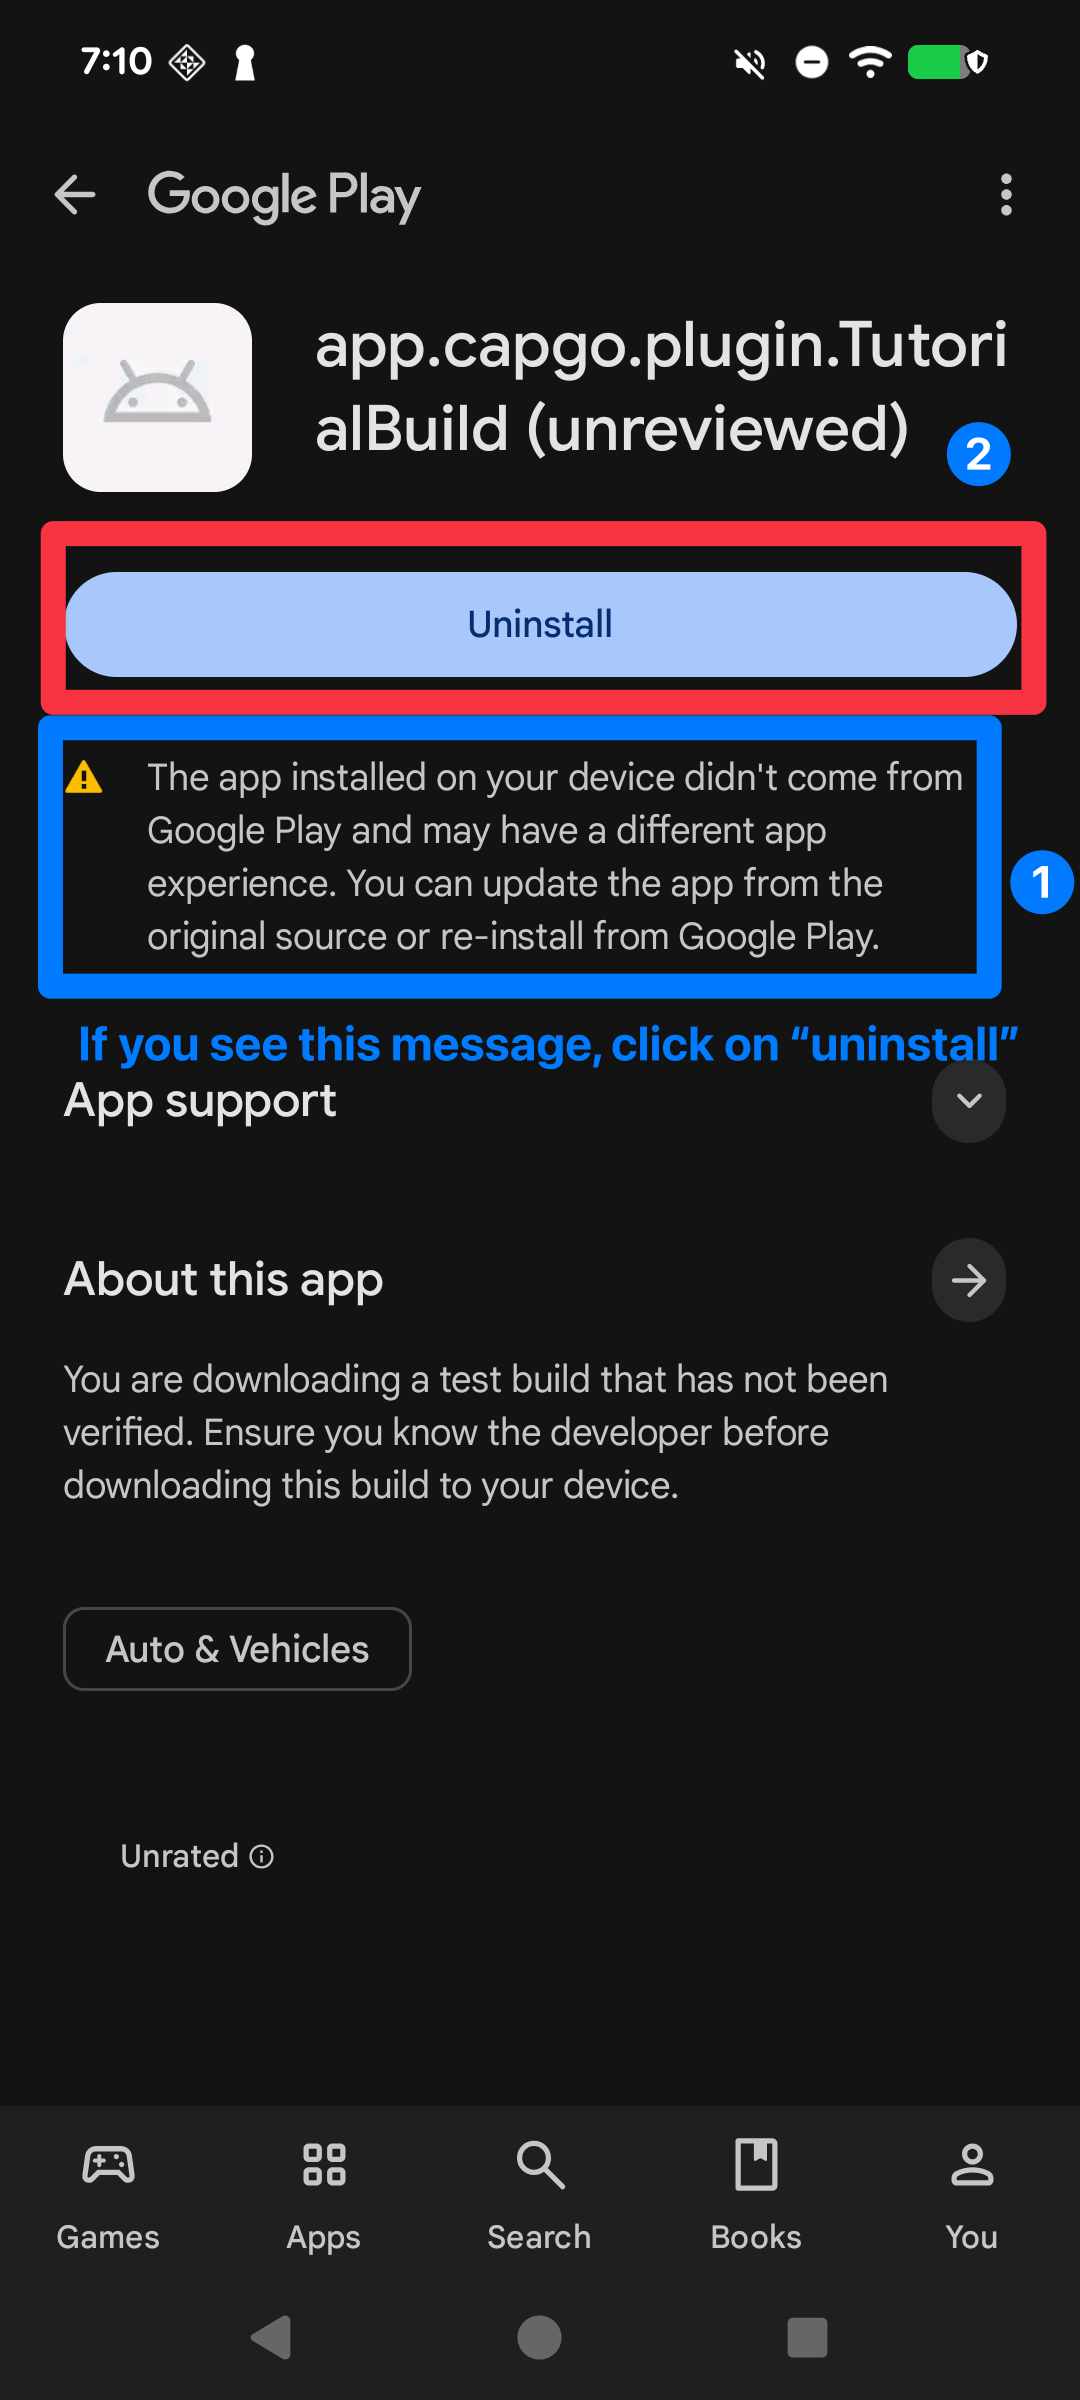
- Google Play Console에서
install버튼을 클릭하세요.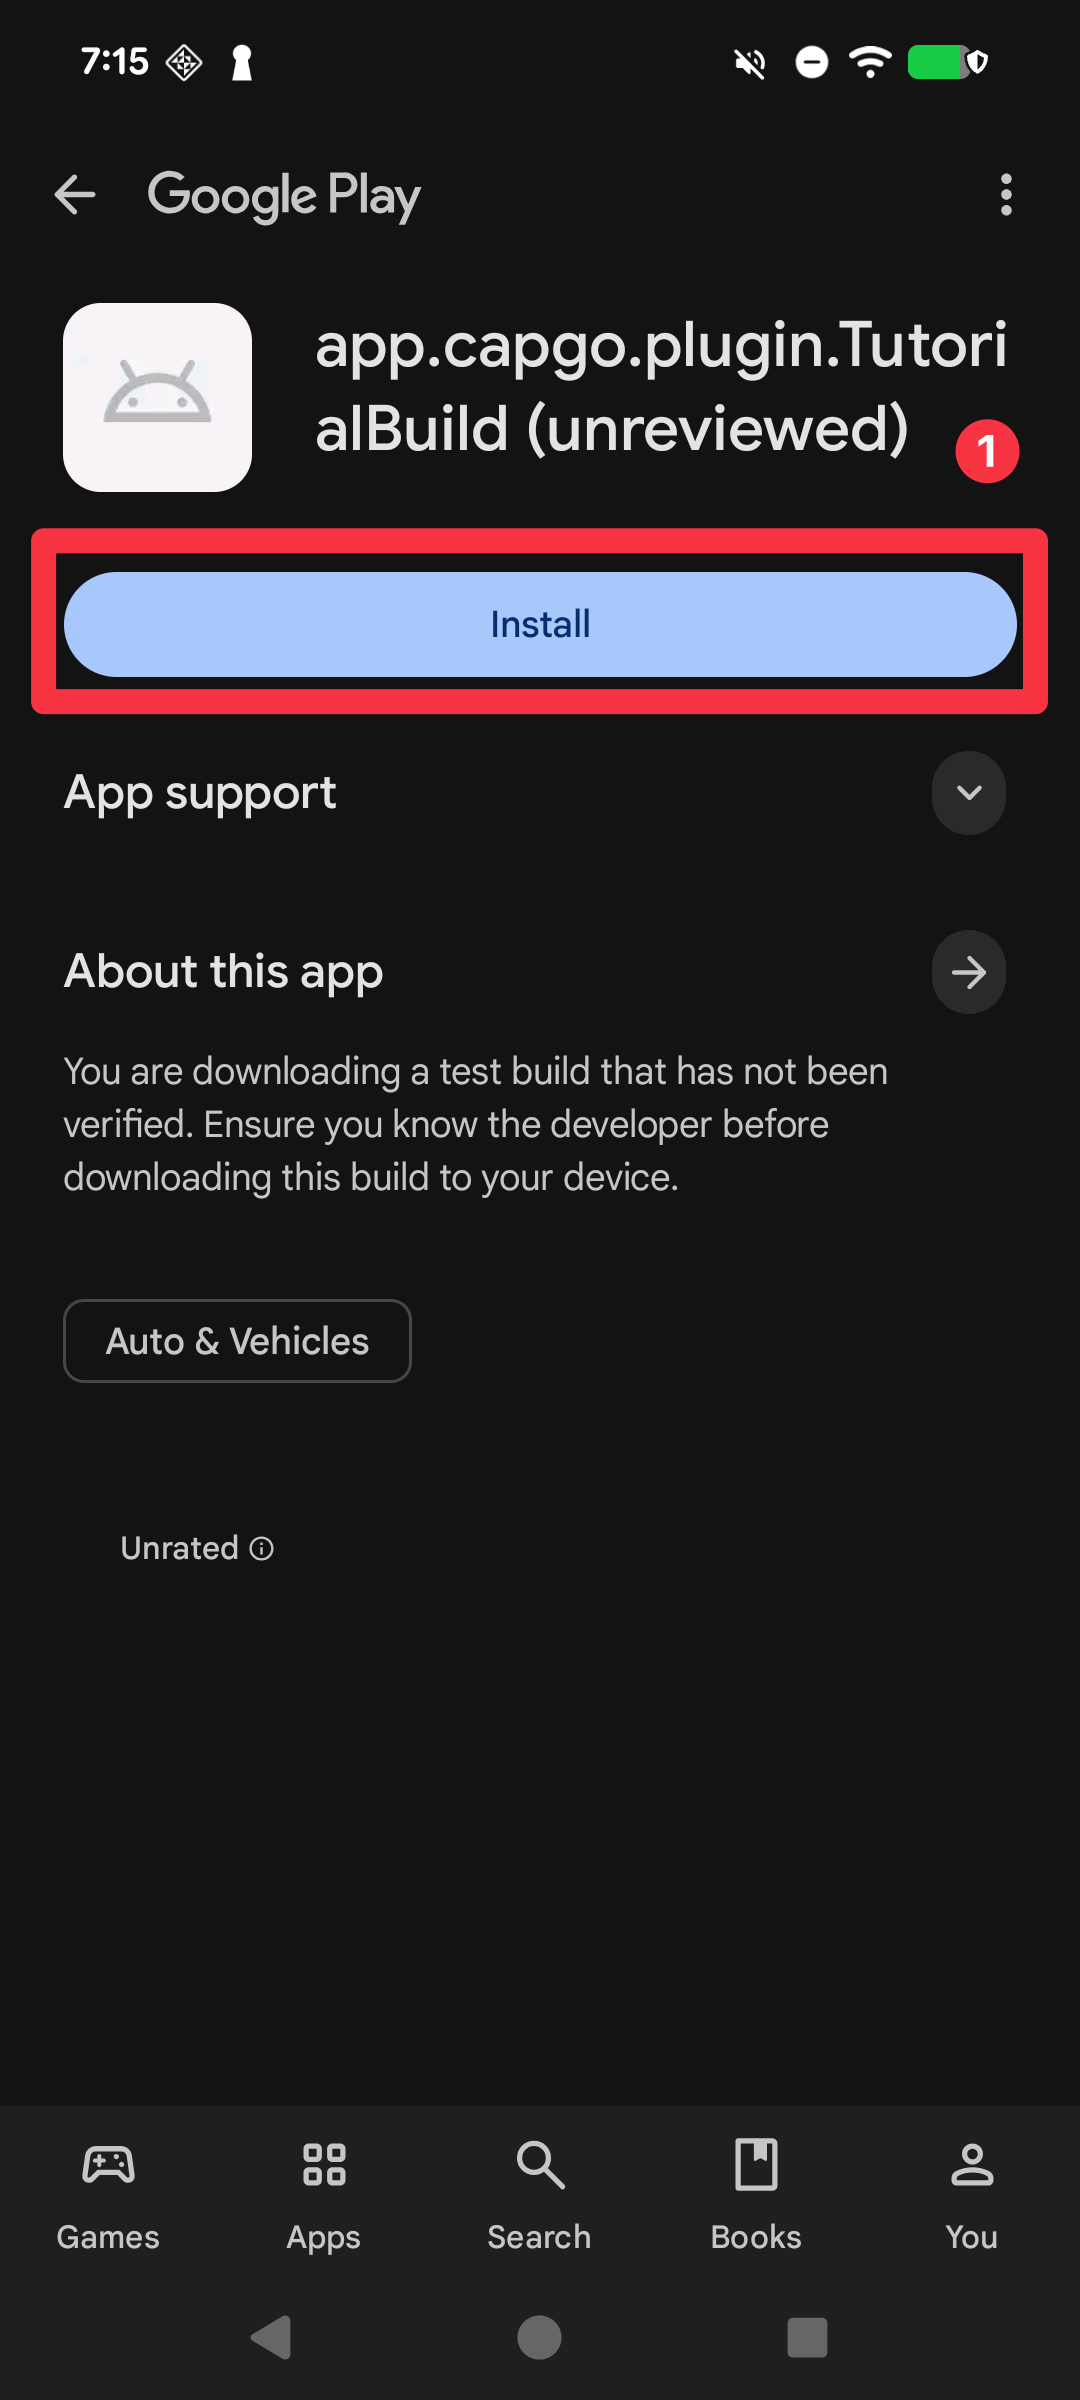
- 앱을 열고 다운로드가 성공적으로 완료되었는지 확인하세요.
- Android Studio를 사용하기 전에 이미 앱을 설치한 경우 Android Studio에서
Configuring Capgo Native Build (Android)
Capgo 안드로이드 네이티브 빌드 구성Capgo 네이티브 빌드 구성이 준비되었습니다. 시작하기를 축하합니다!
| 필수 조건 | 플래그 | 설명 | 필수 |
|---|---|---|---|
| Keystore 파일 | --keystore <path> | Keystore 파일 경로 .jks/.keystore 파일을 사용하여 APK/AAB에 서명합니다. | 네 |
| __CAPGO_KEEP_0__ | --keystore-alias <alias> | __CAPGO_KEEP_0__ | 네 |
| __CAPGO_KEEP_0__ | --keystore-key-password <password> | __CAPGO_KEEP_0__ | __CAPGO_KEEP_0__ |
| __CAPGO_KEEP_0__ | --keystore-store-password <password> | __CAPGO_KEEP_0__ | __CAPGO_KEEP_0__ |
| __CAPGO_KEEP_0__ | --play-config <path> | __CAPGO_KEEP_0__ | 네 |
bunx @capgo/cli@latest build credentials save --platform android \ --keystore ./path/to/keystore.jks \ --keystore-alias "your-alias" \ --keystore-key-password "key-password" \ --keystore-store-password "store-password" \ --play-config ./play-store-service-account.json키스토어, 키스토어 암호, 키스토어 키 암호, 키스토어 별칭
키스토어, 키스토어 암호, 키스토어 키 암호, 키스토어 별칭만약에 수동 빌드 지침을 따랐다면, 키스토어가 이미 생성되어야 합니다. 만약 지침을 따르지 않았다면, 지침을 따르시어 키스토어를 생성하십시오. Copy to clipboardNote
Google Play 서비스 계정
Google Play 서비스 계정 섹션Google Play 서비스 계정을 생성하는 것은 수동적이고 복잡한 과정입니다. 그럼에도 불구하고, 앱을 Google Play에 업로드하려면 필수적입니다. 다음 사항을 참고하세요:
- 당신 context be 필요합니다당신
- 개발자 계정의
소유자여야 합니다. 그렇지 않으면 서비스 계정을 설정할 수 없습니다.
-
프로젝트 선택 버튼을 클릭하세요.
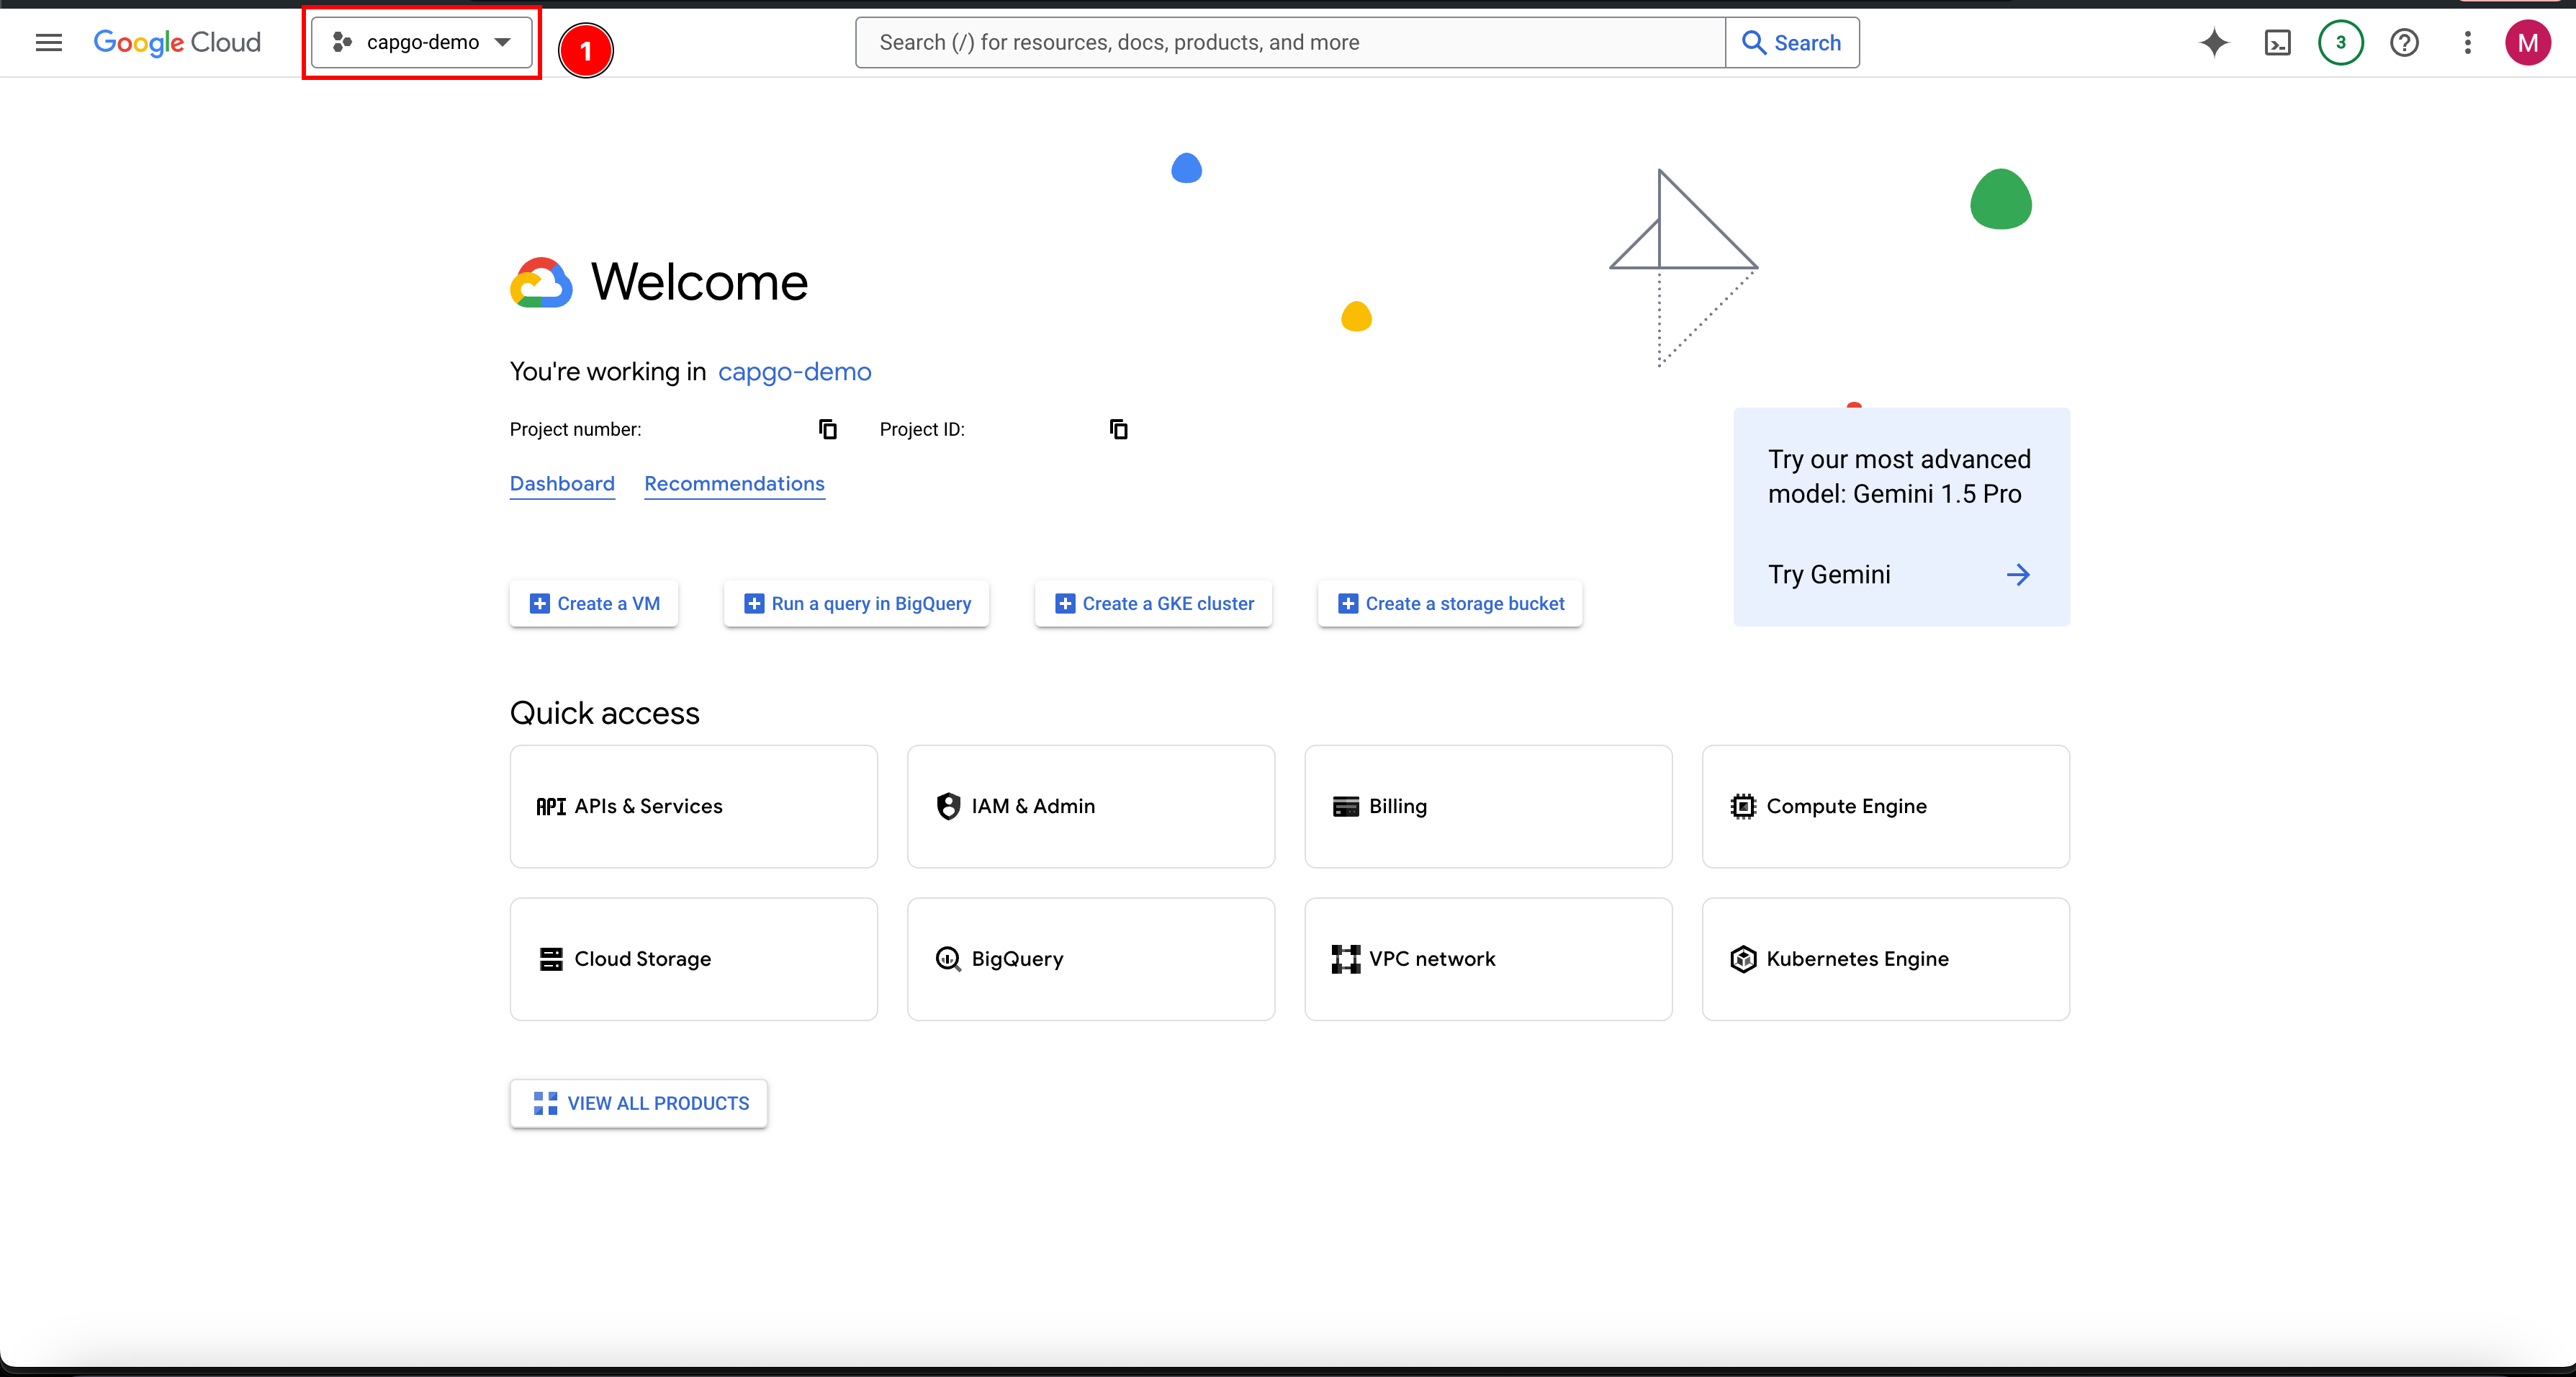
-
프로젝트가 이미 있으면 선택하세요. 없으면 새로운 프로젝트를 생성하세요:
- 클릭
New project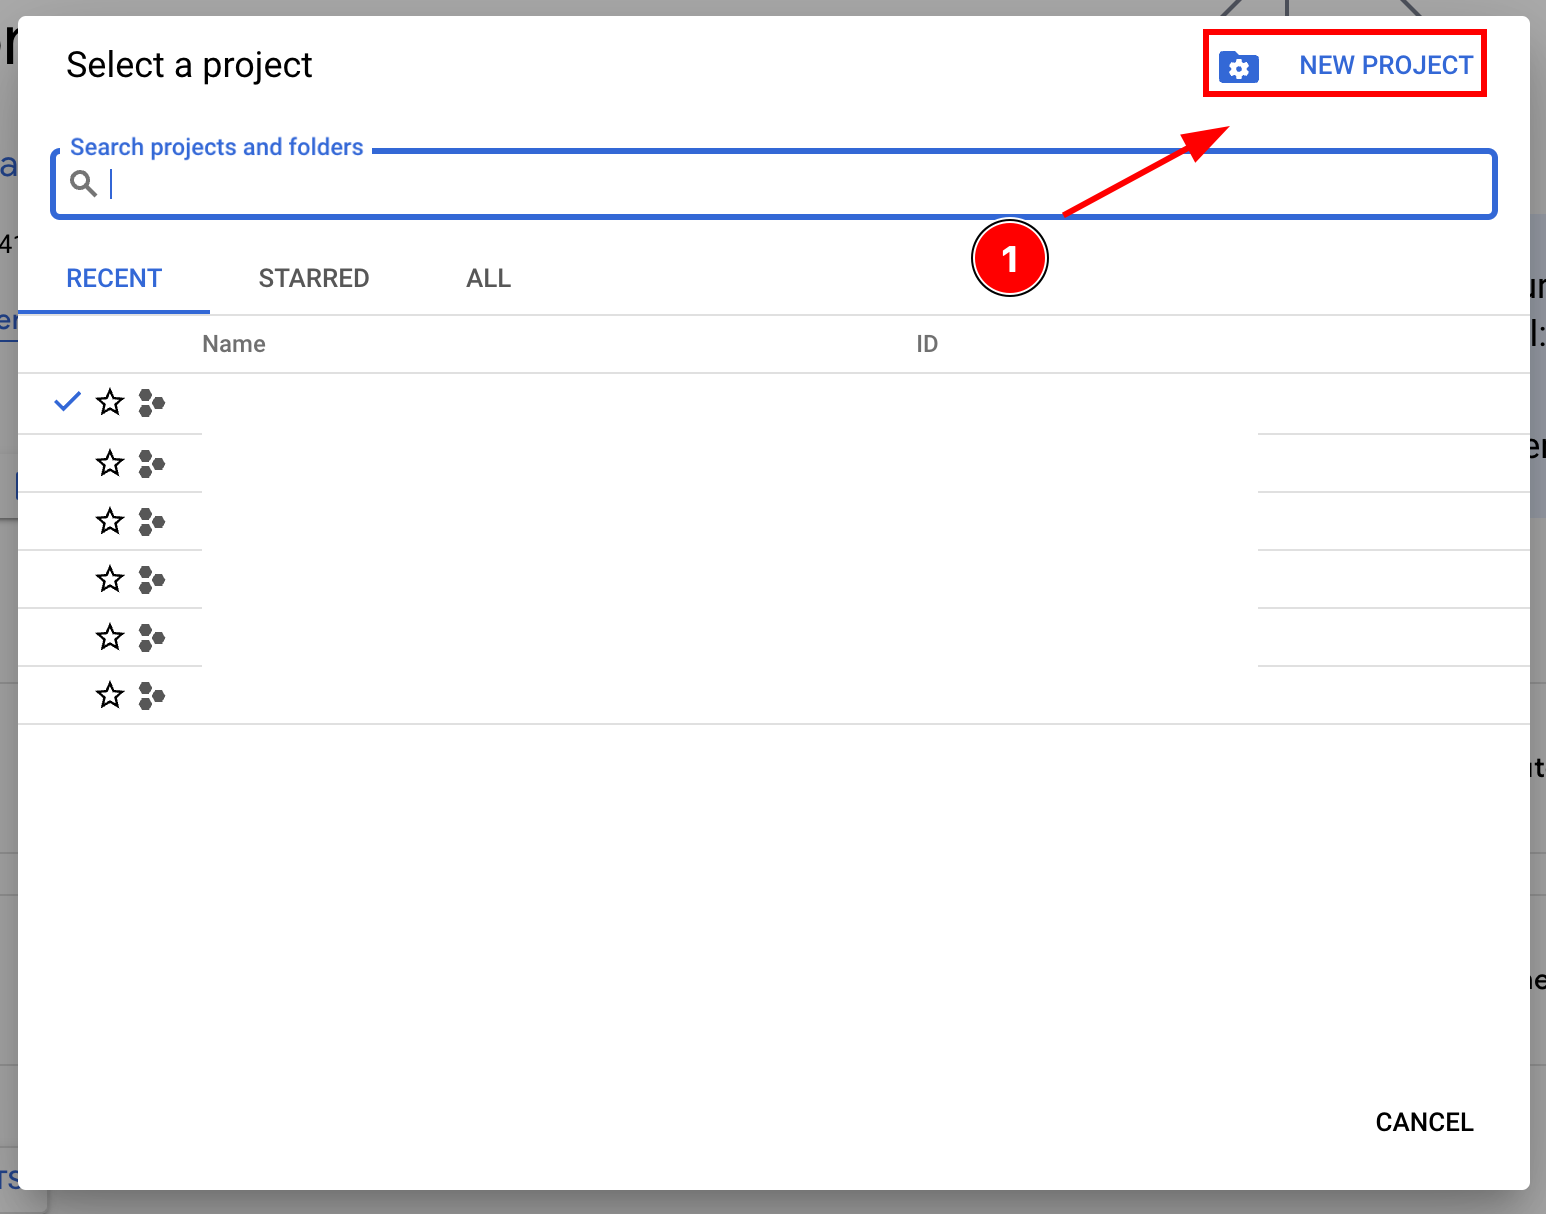
- 프로젝트 이름을 입력하고 클릭
Create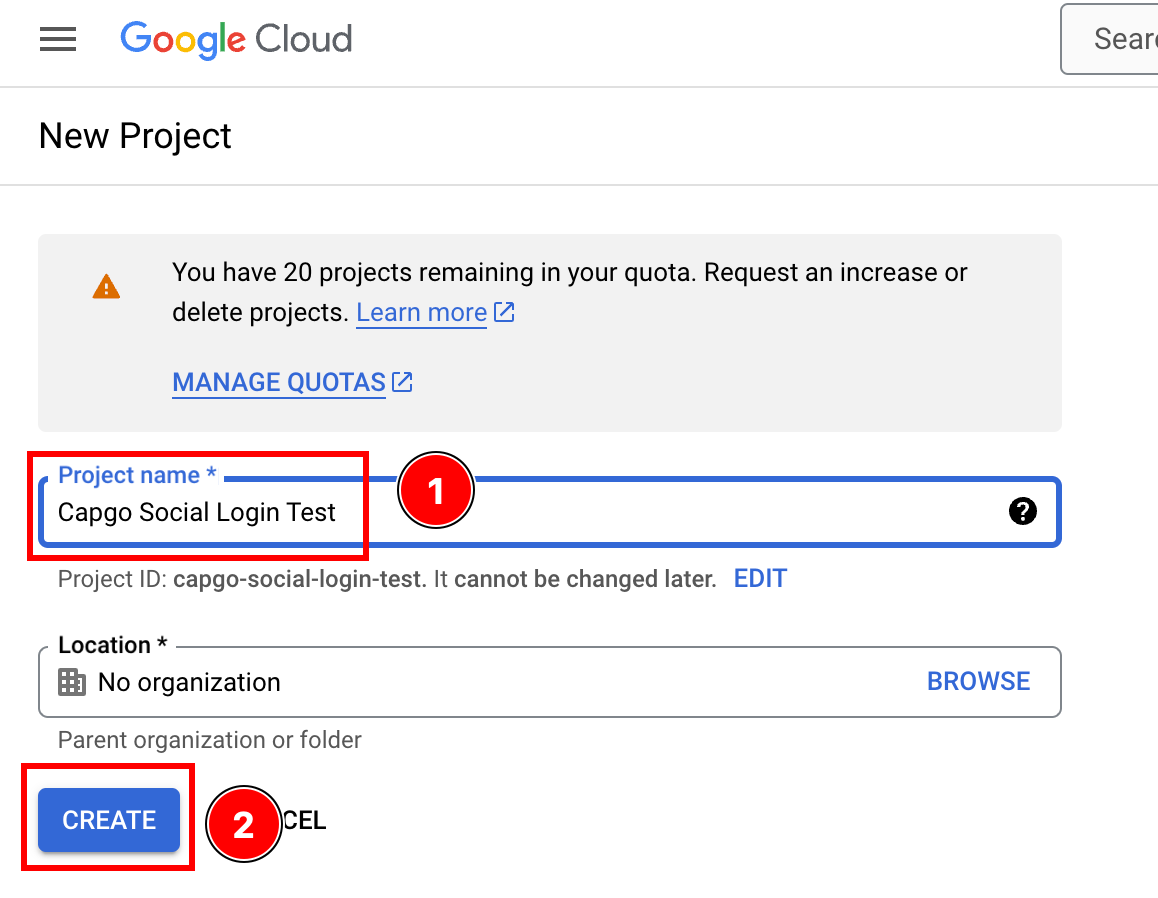
- 올바른 프로젝트가 선택되었는지 확인하세요
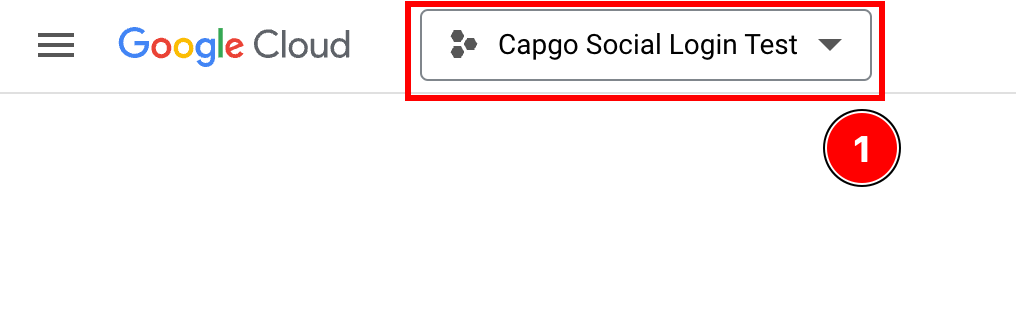
- 클릭
-
클릭하여 검색 바를 클릭하고
service accounts그리고 클릭하세요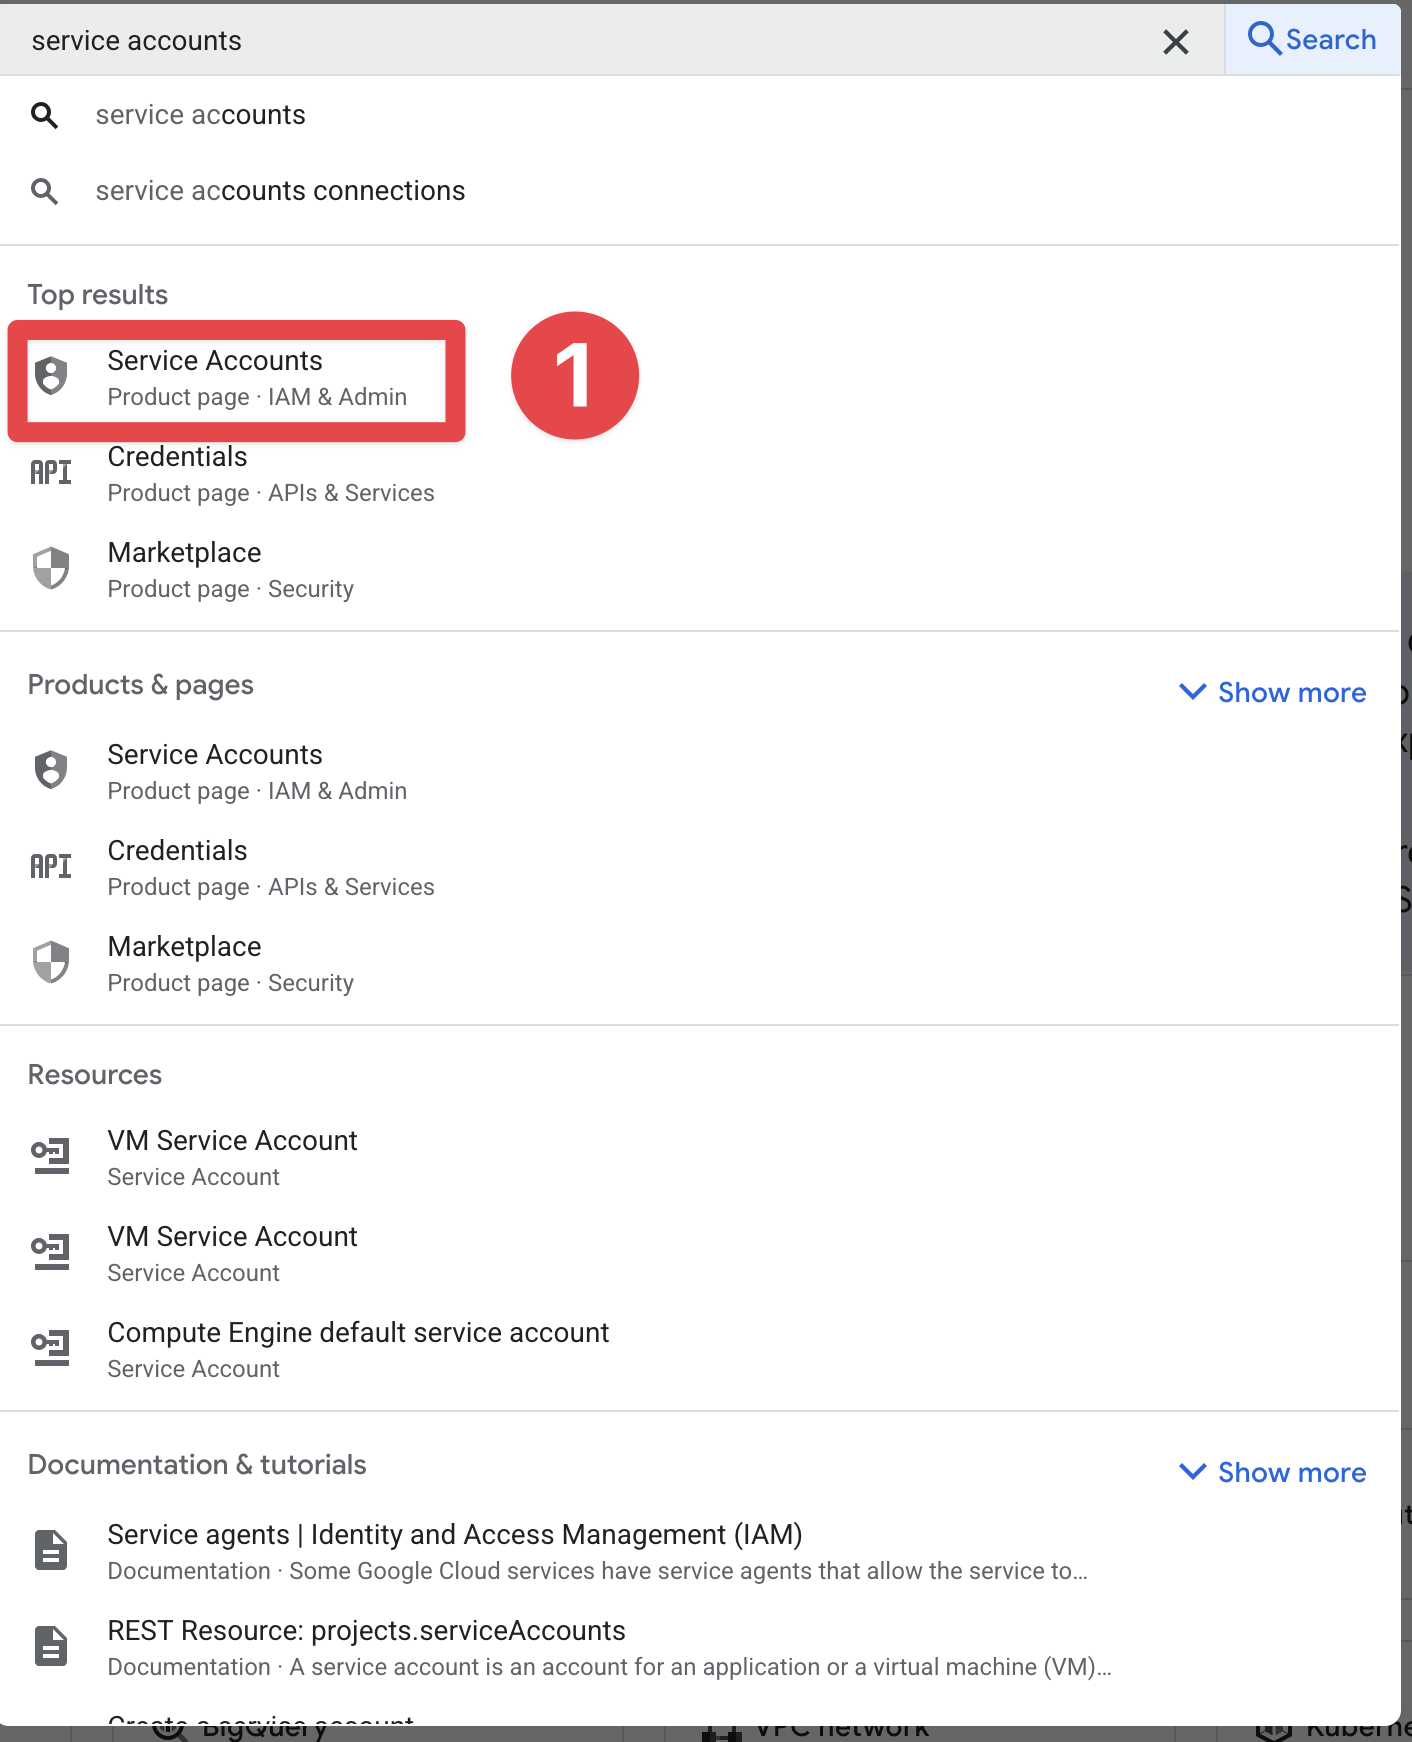
-
클릭하여
Create service account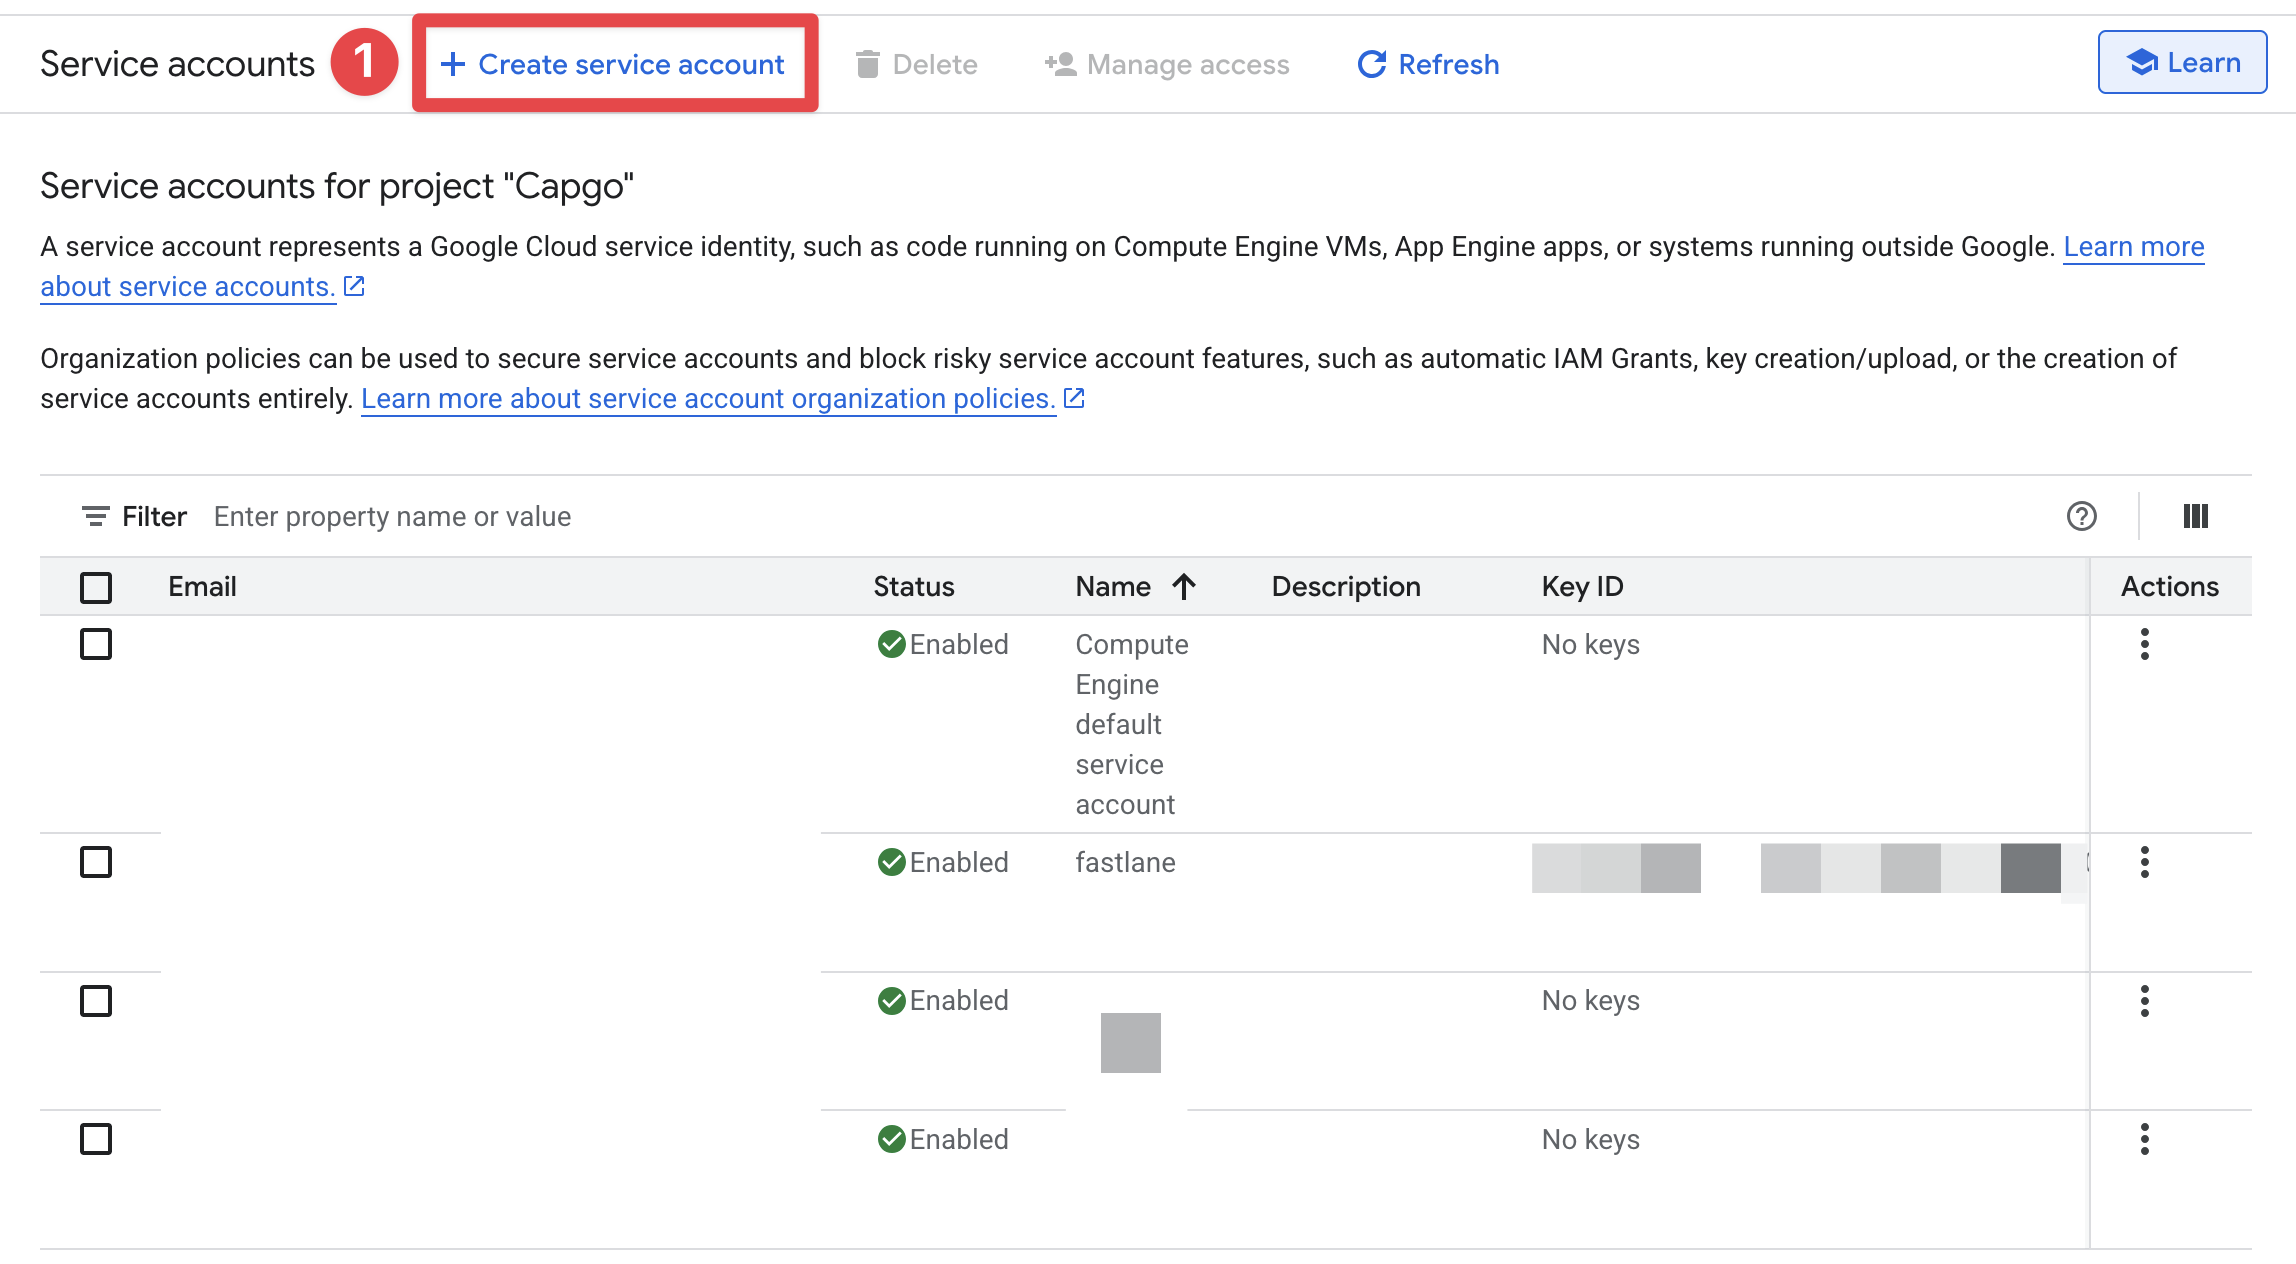
-
서비스 계정에 대한 양식을 완성하고 클릭하세요
Done- 서비스 계정 이름을 설정하는 것을 추천합니다
Capgo Native Build Service Account - 서비스 계정 ID를 설정하는 것을 추천합니다
capgo-native-build-service-acc - 설명란에 대해서는 채우지 않아도 되지만 채우기를 추천합니다
Allows Capgo Native Build to build and submit the app to the Play Store
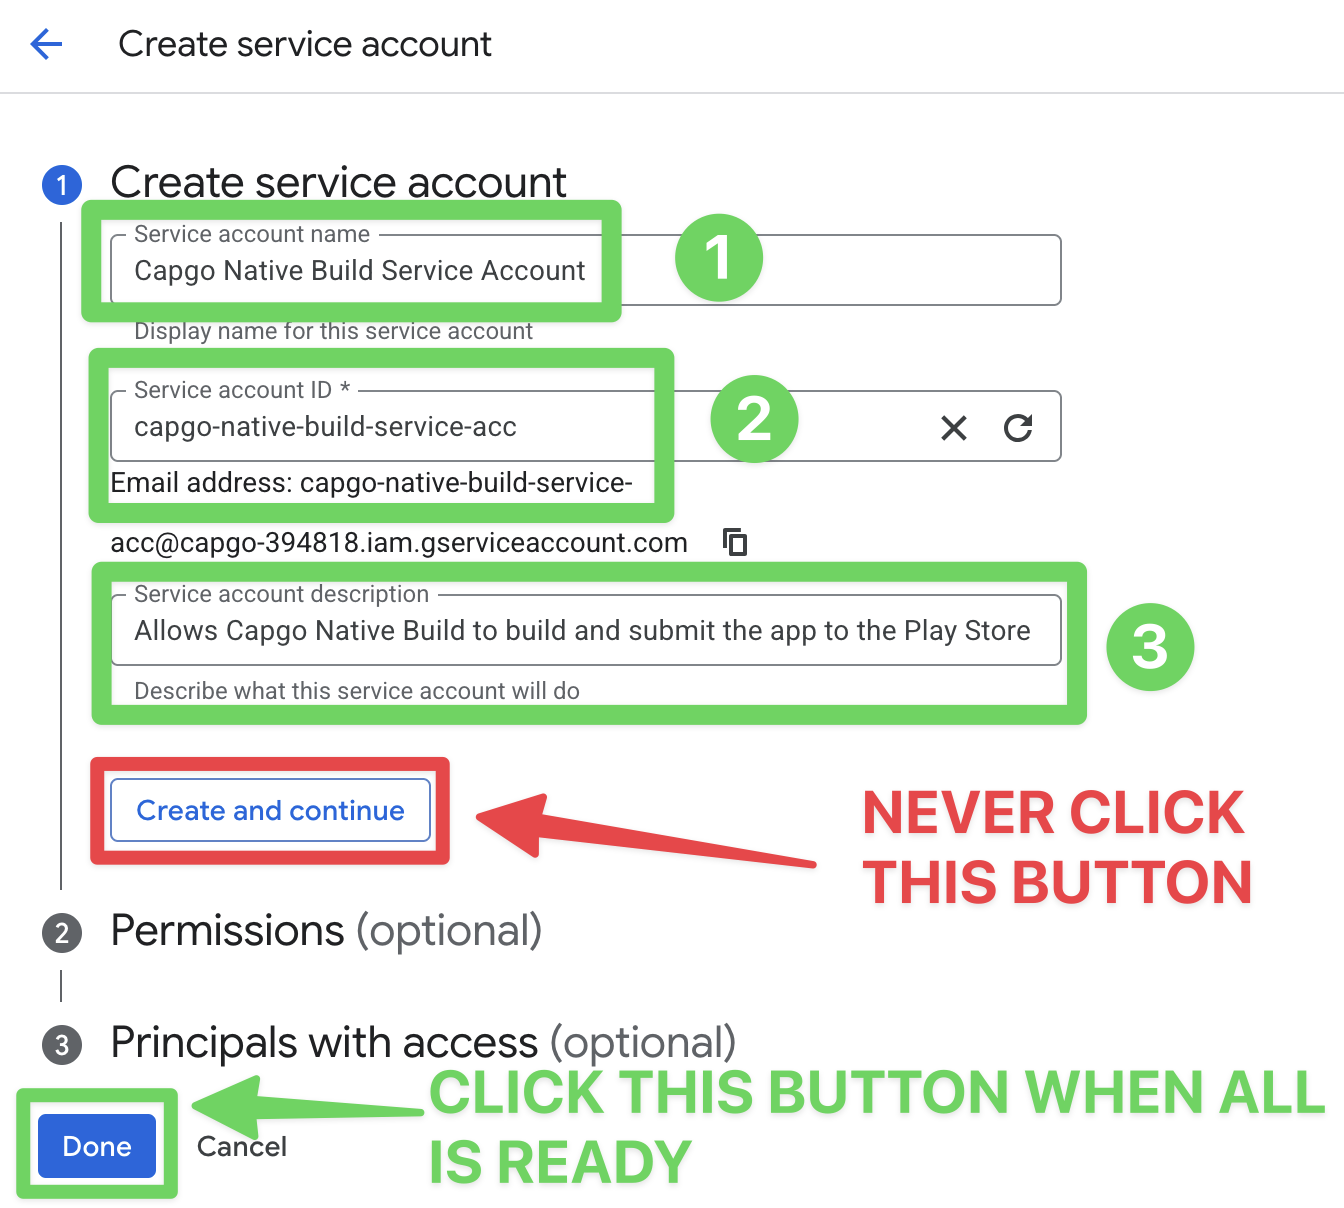
- 서비스 계정 이름을 설정하는 것을 추천합니다
-
새로 생성된 서비스 계정을 클릭하세요 리스트에서 새로 생성된 서비스 계정을 확인하실 수 있습니다. 클릭하세요.
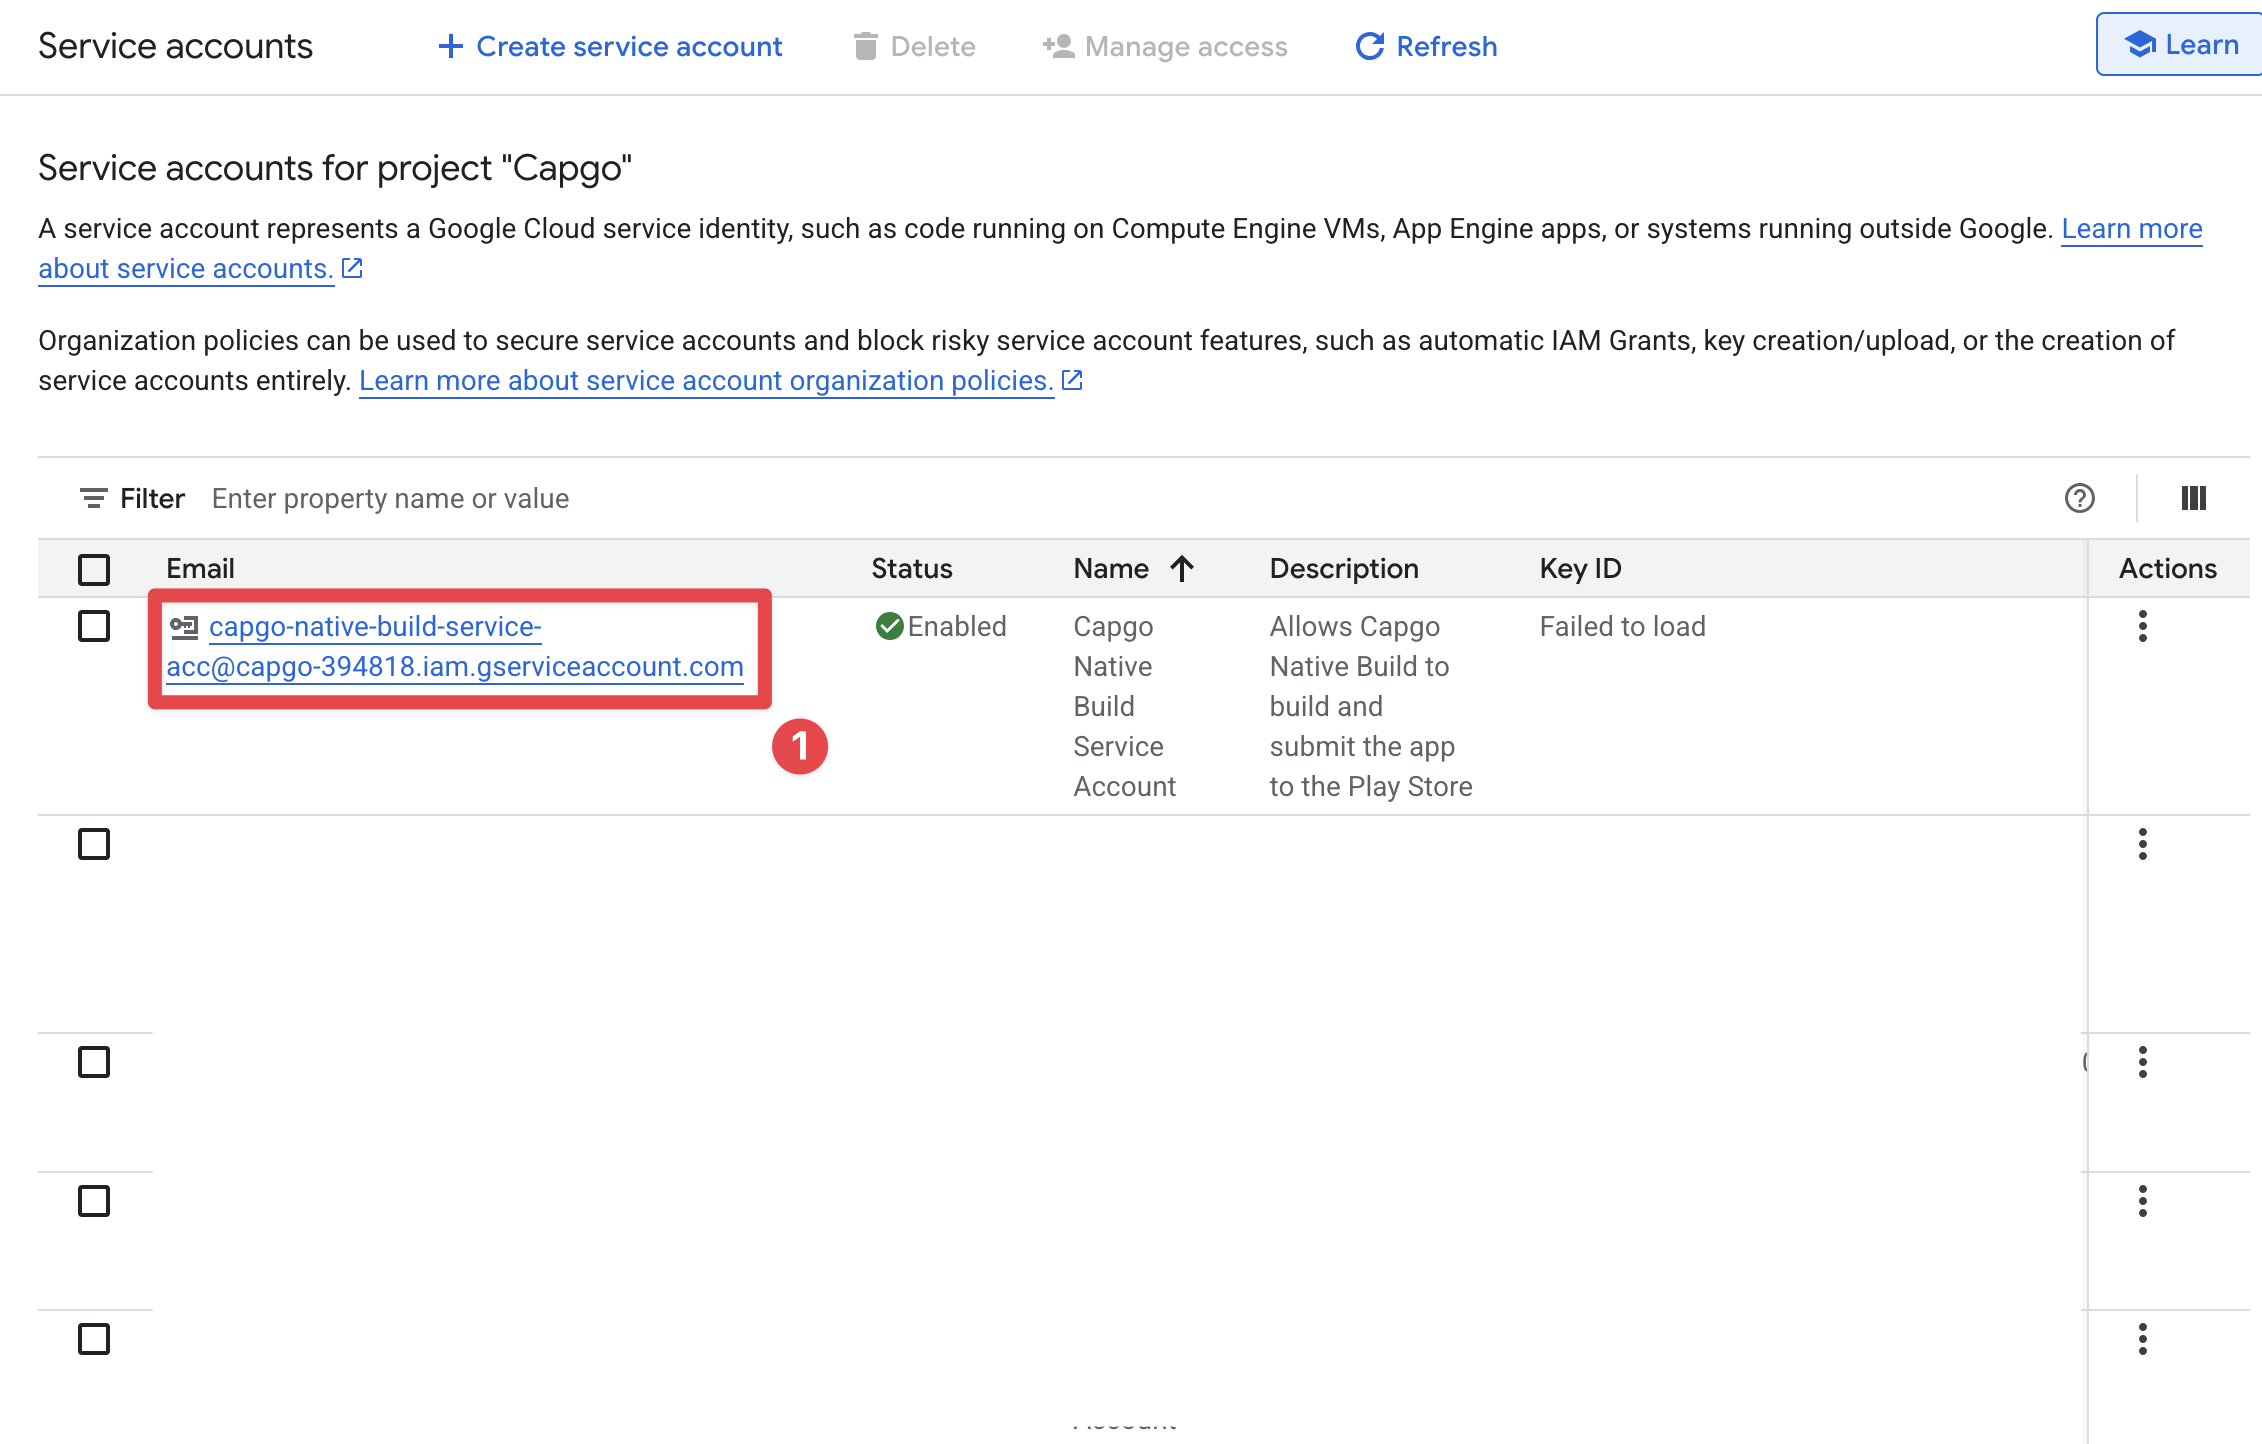
-
클릭
Keys탭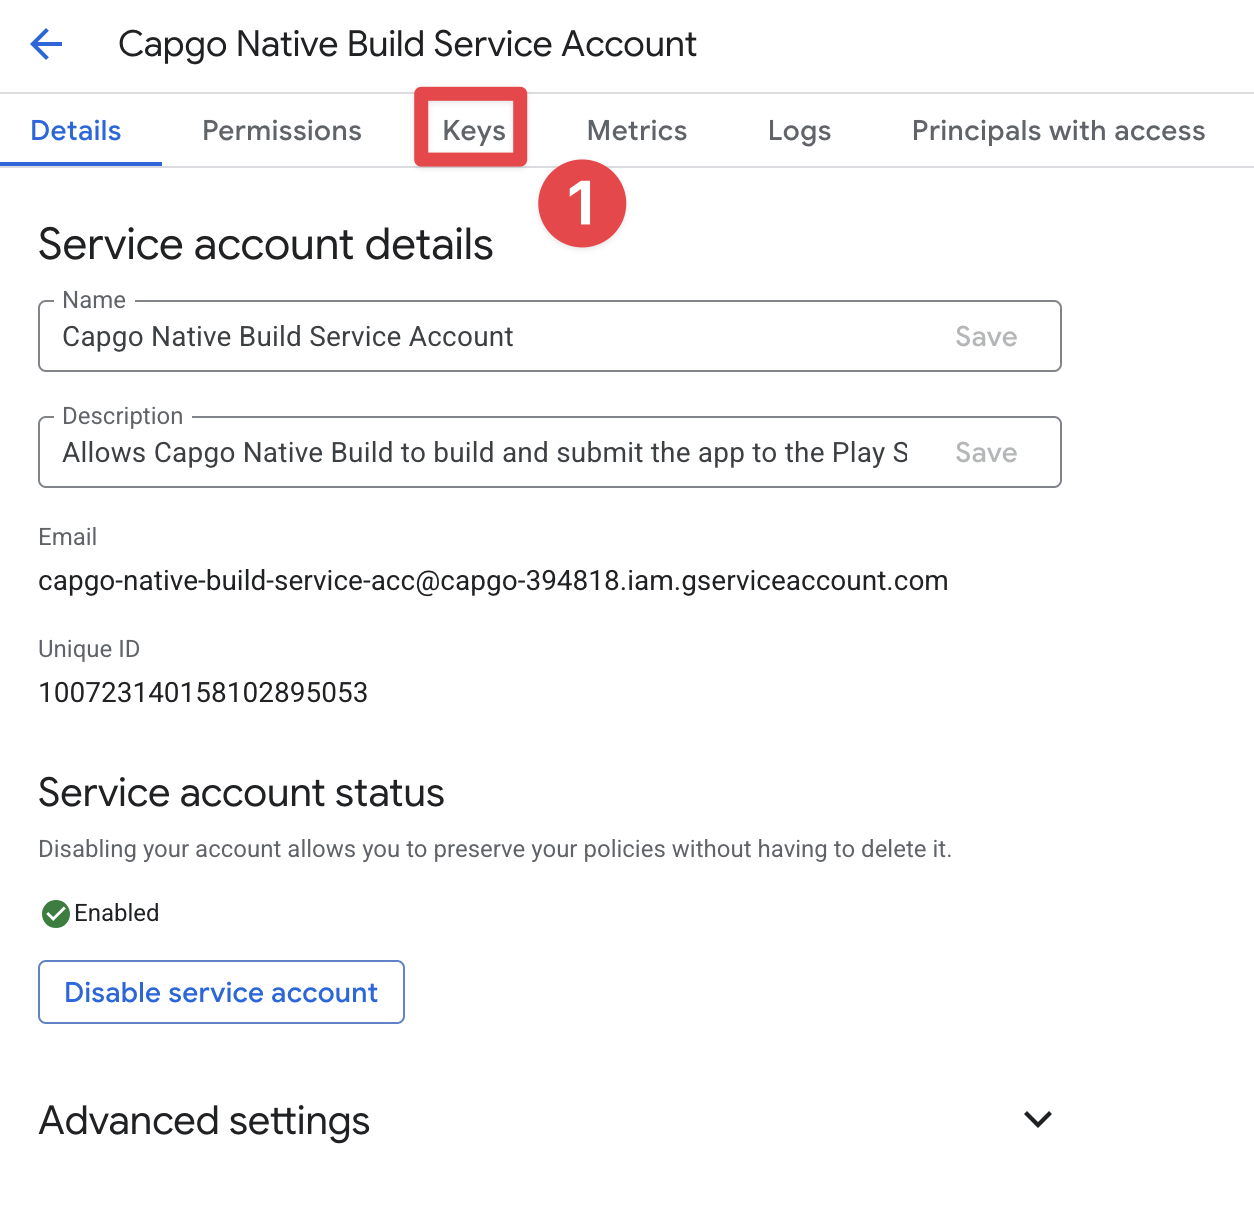
-
클릭
Add KeyandCreate new key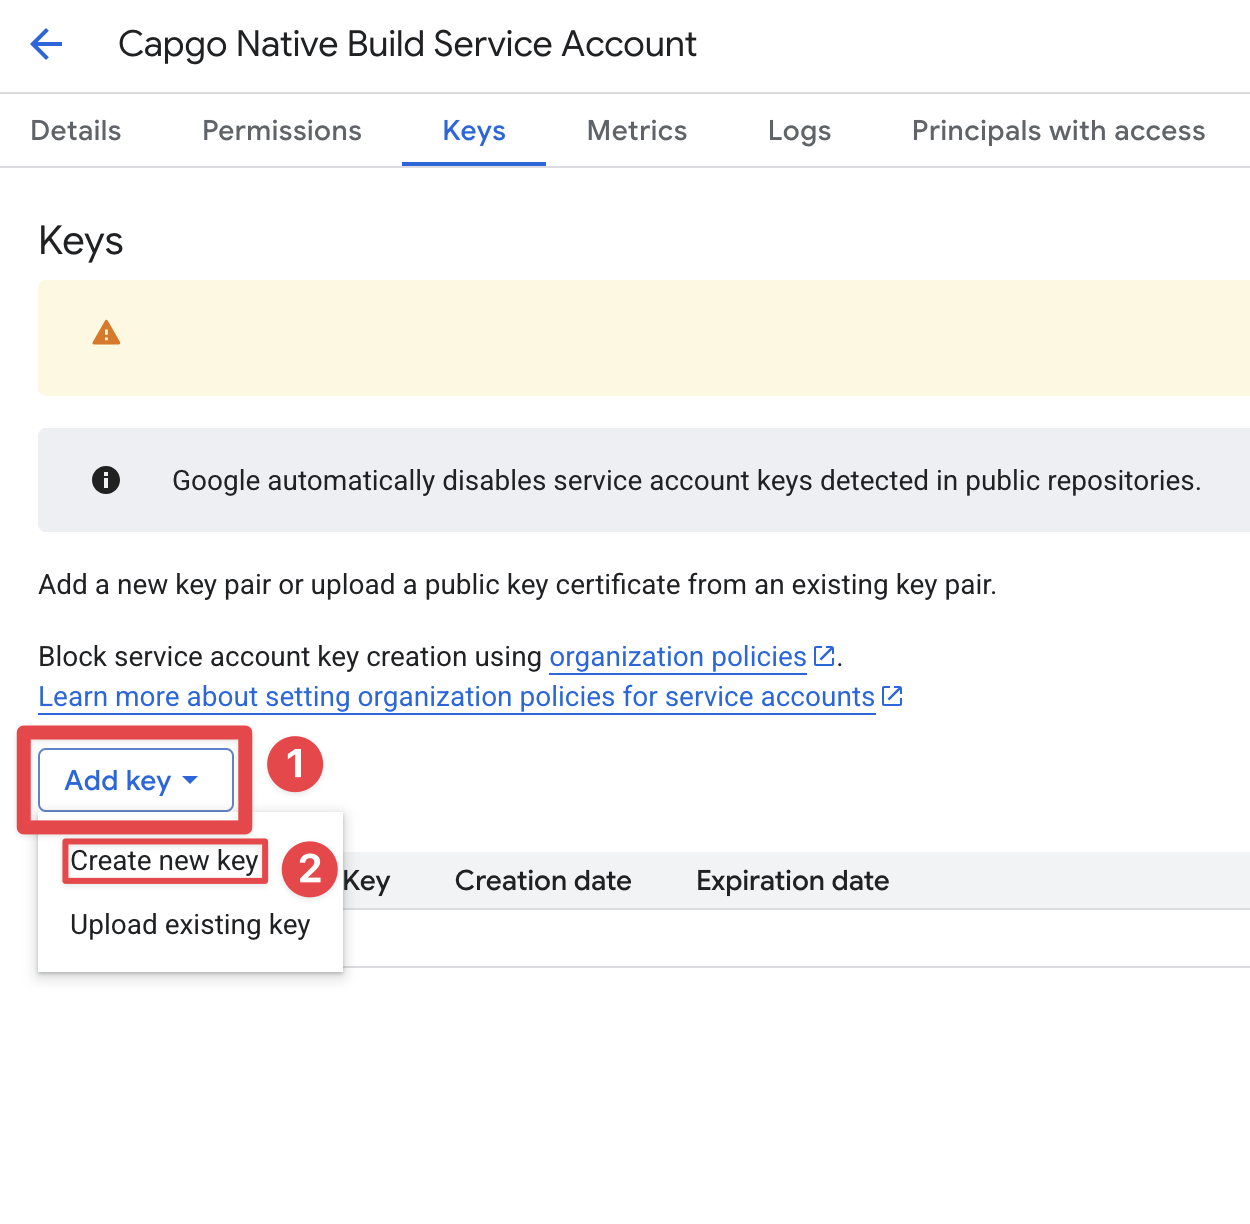
-
클릭
JSONandCreate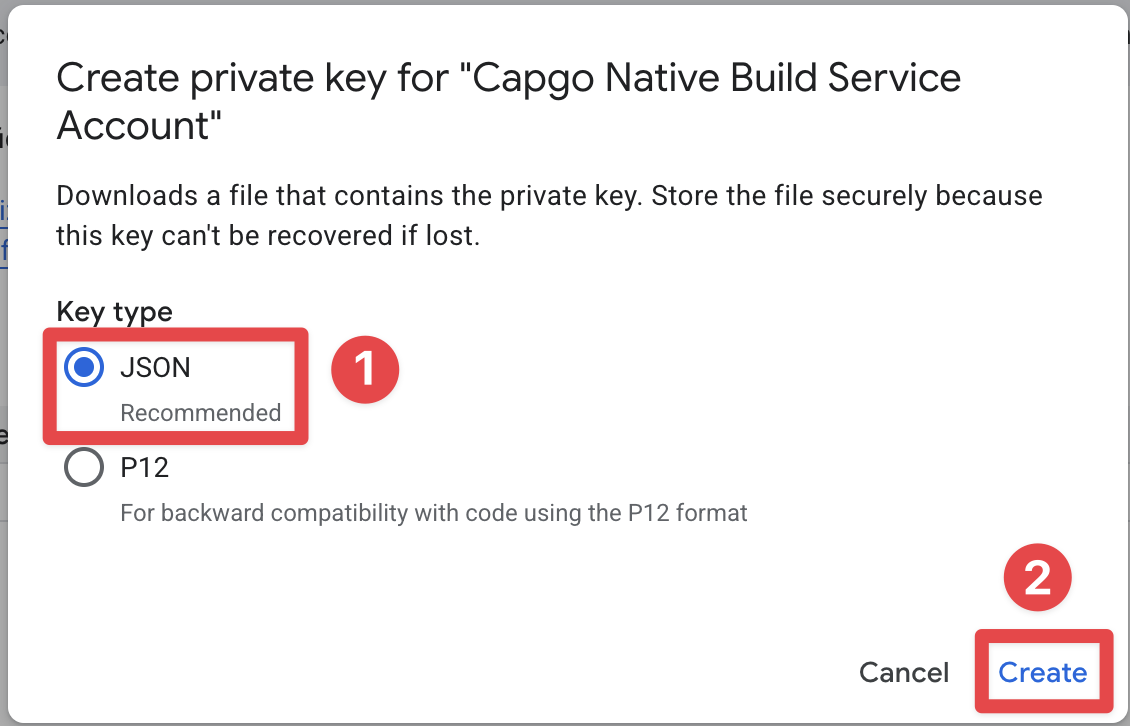
-
Google Console 다운로드 키
close서비스 계정에 Play Store __CAPGO_KEEP_0__ 접근 권한 부여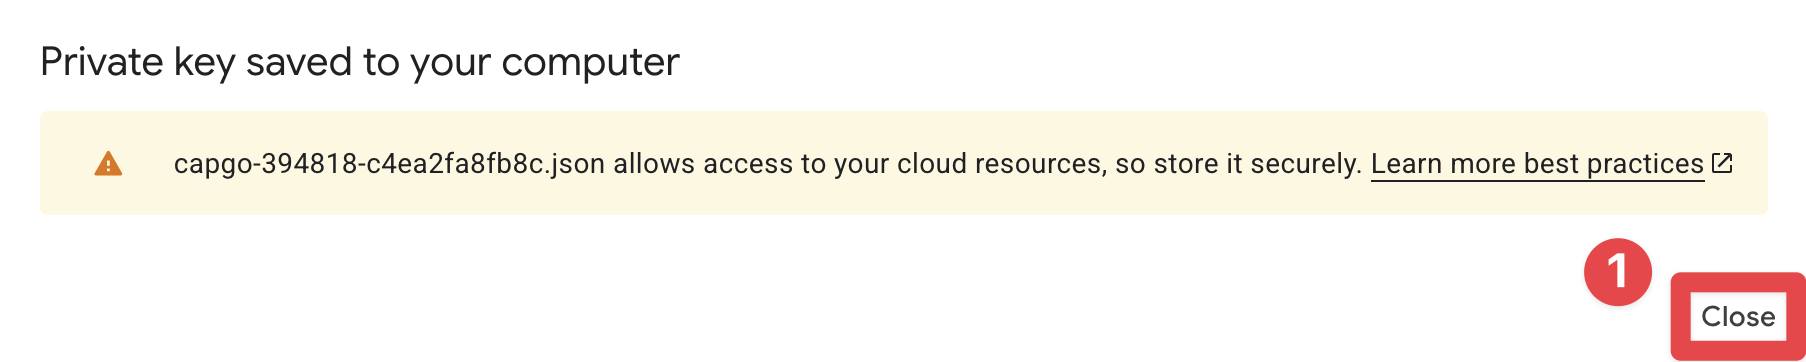
Section titled “서비스 계정에 Play Store API 접근 권한 부여”
Granting Play Store API access to the service account새로 생성된 서비스 계정은 아직 Play Store에 접근할 수 없습니다. API. 이를 허용하려면 Play Store 콘솔로 이동하세요.
- 가장 구글 플레이 콘솔
- 정확한 개발자 계정을 선택하세요
- 클릭하여
Users and permissions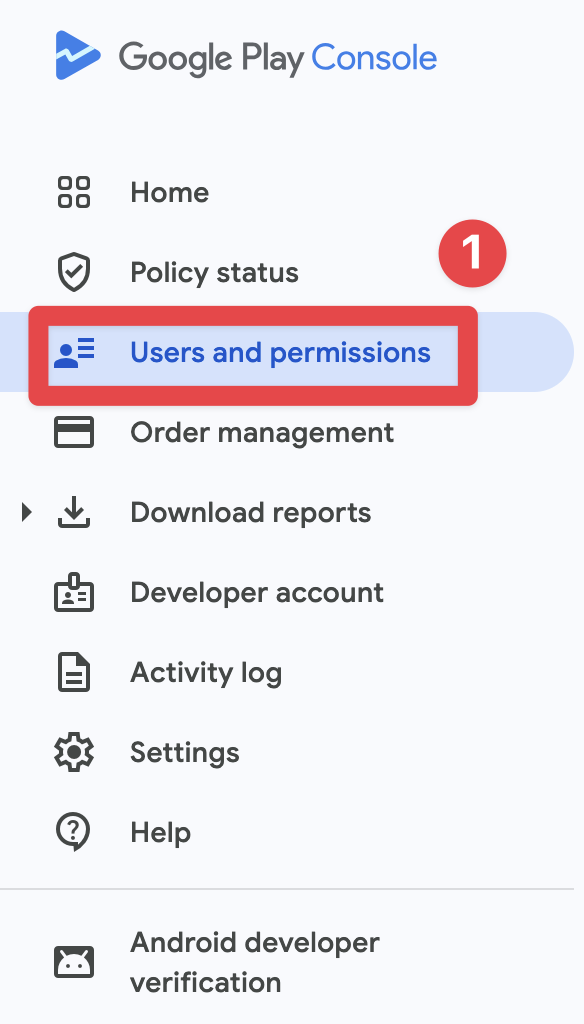
- 클릭하여
Invite new users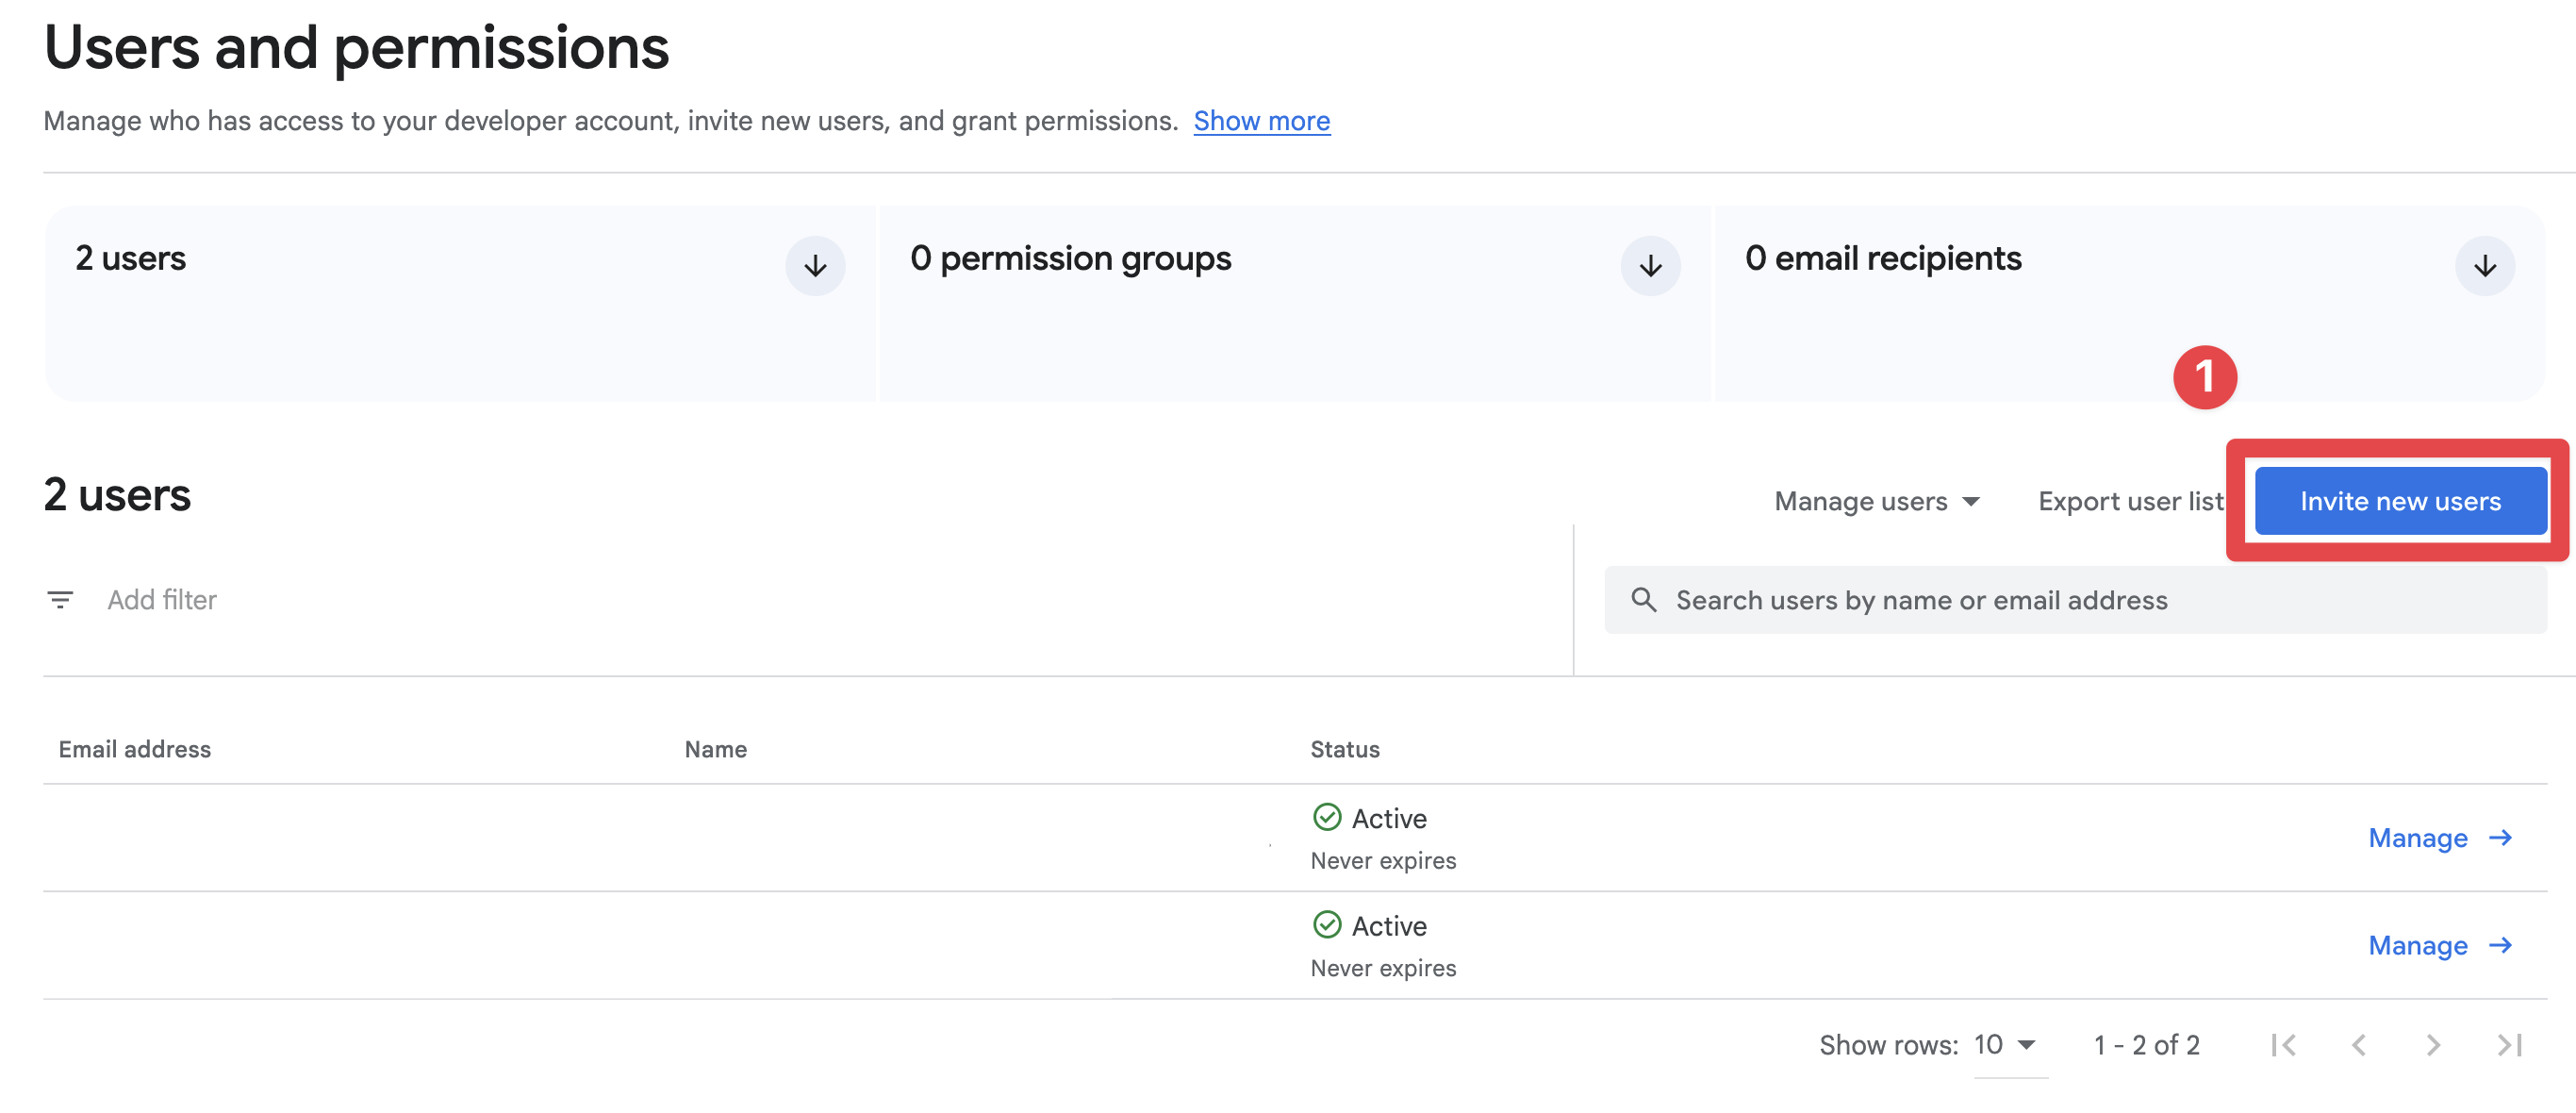
- 서비스 계정의 이메일 주소를 복사하세요
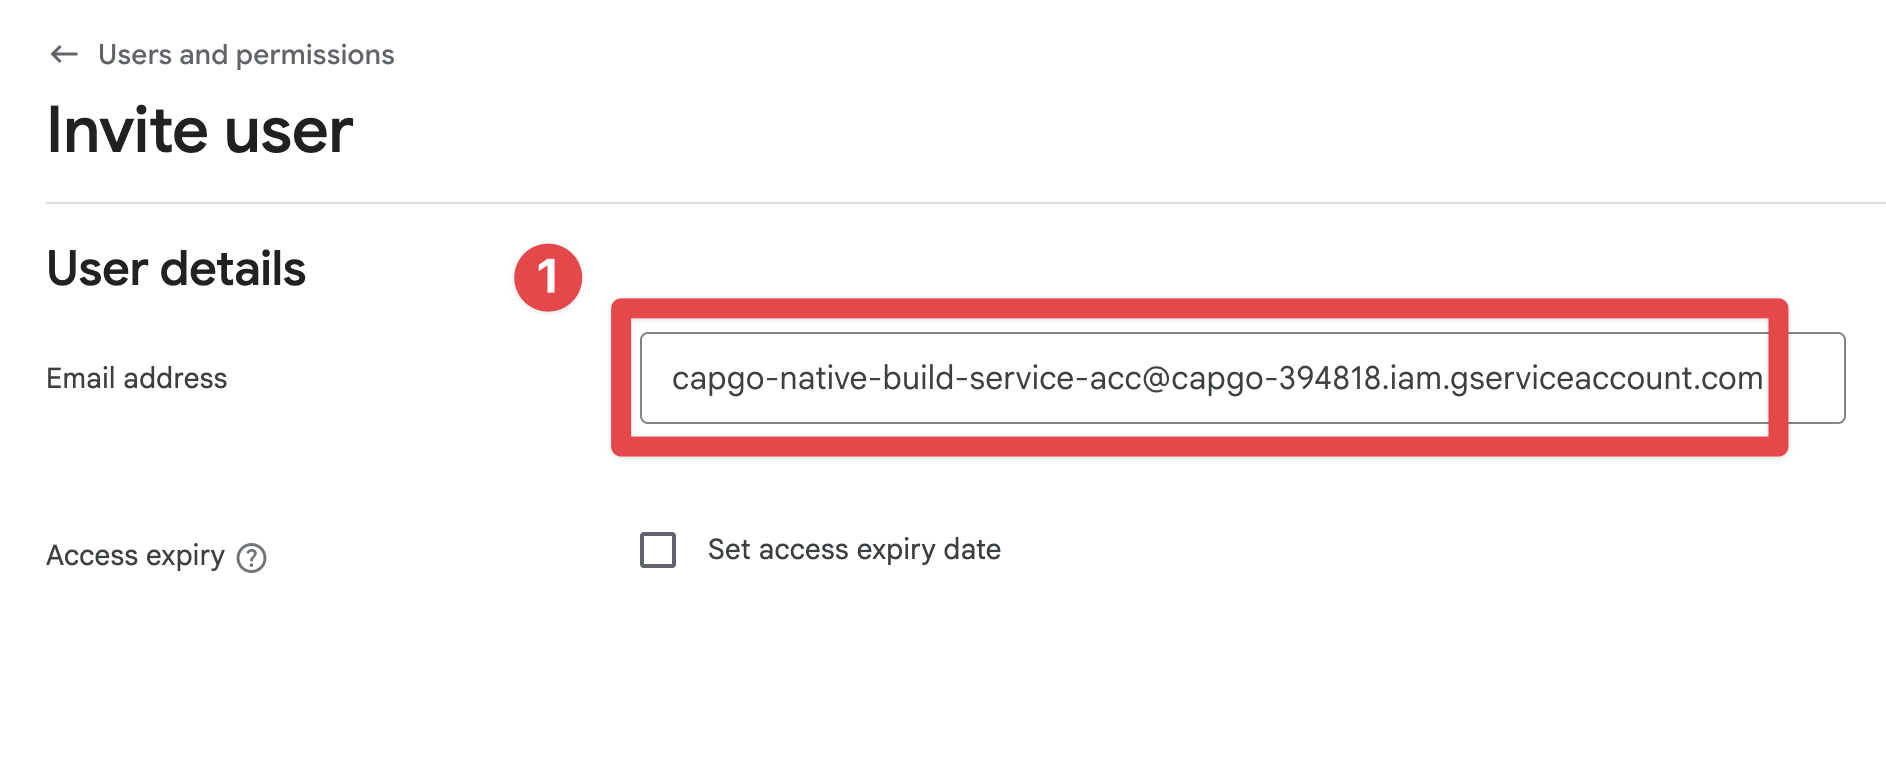
- 가장
Account permissions그리고 최소 권한이 필요한 권한을 부여하십시오:- In
App permissions, 앱에 대한 접근 권한을 부여하십시오. - In
Releases, enableCreate, edit, and roll out releases. - 권한이 무엇인지 확실하지 않다면,
- 설정 중에만 사용하고 나중에 권한을 줄이십시오.
AdminGoogle Play Console에서 권한을 부여하십시오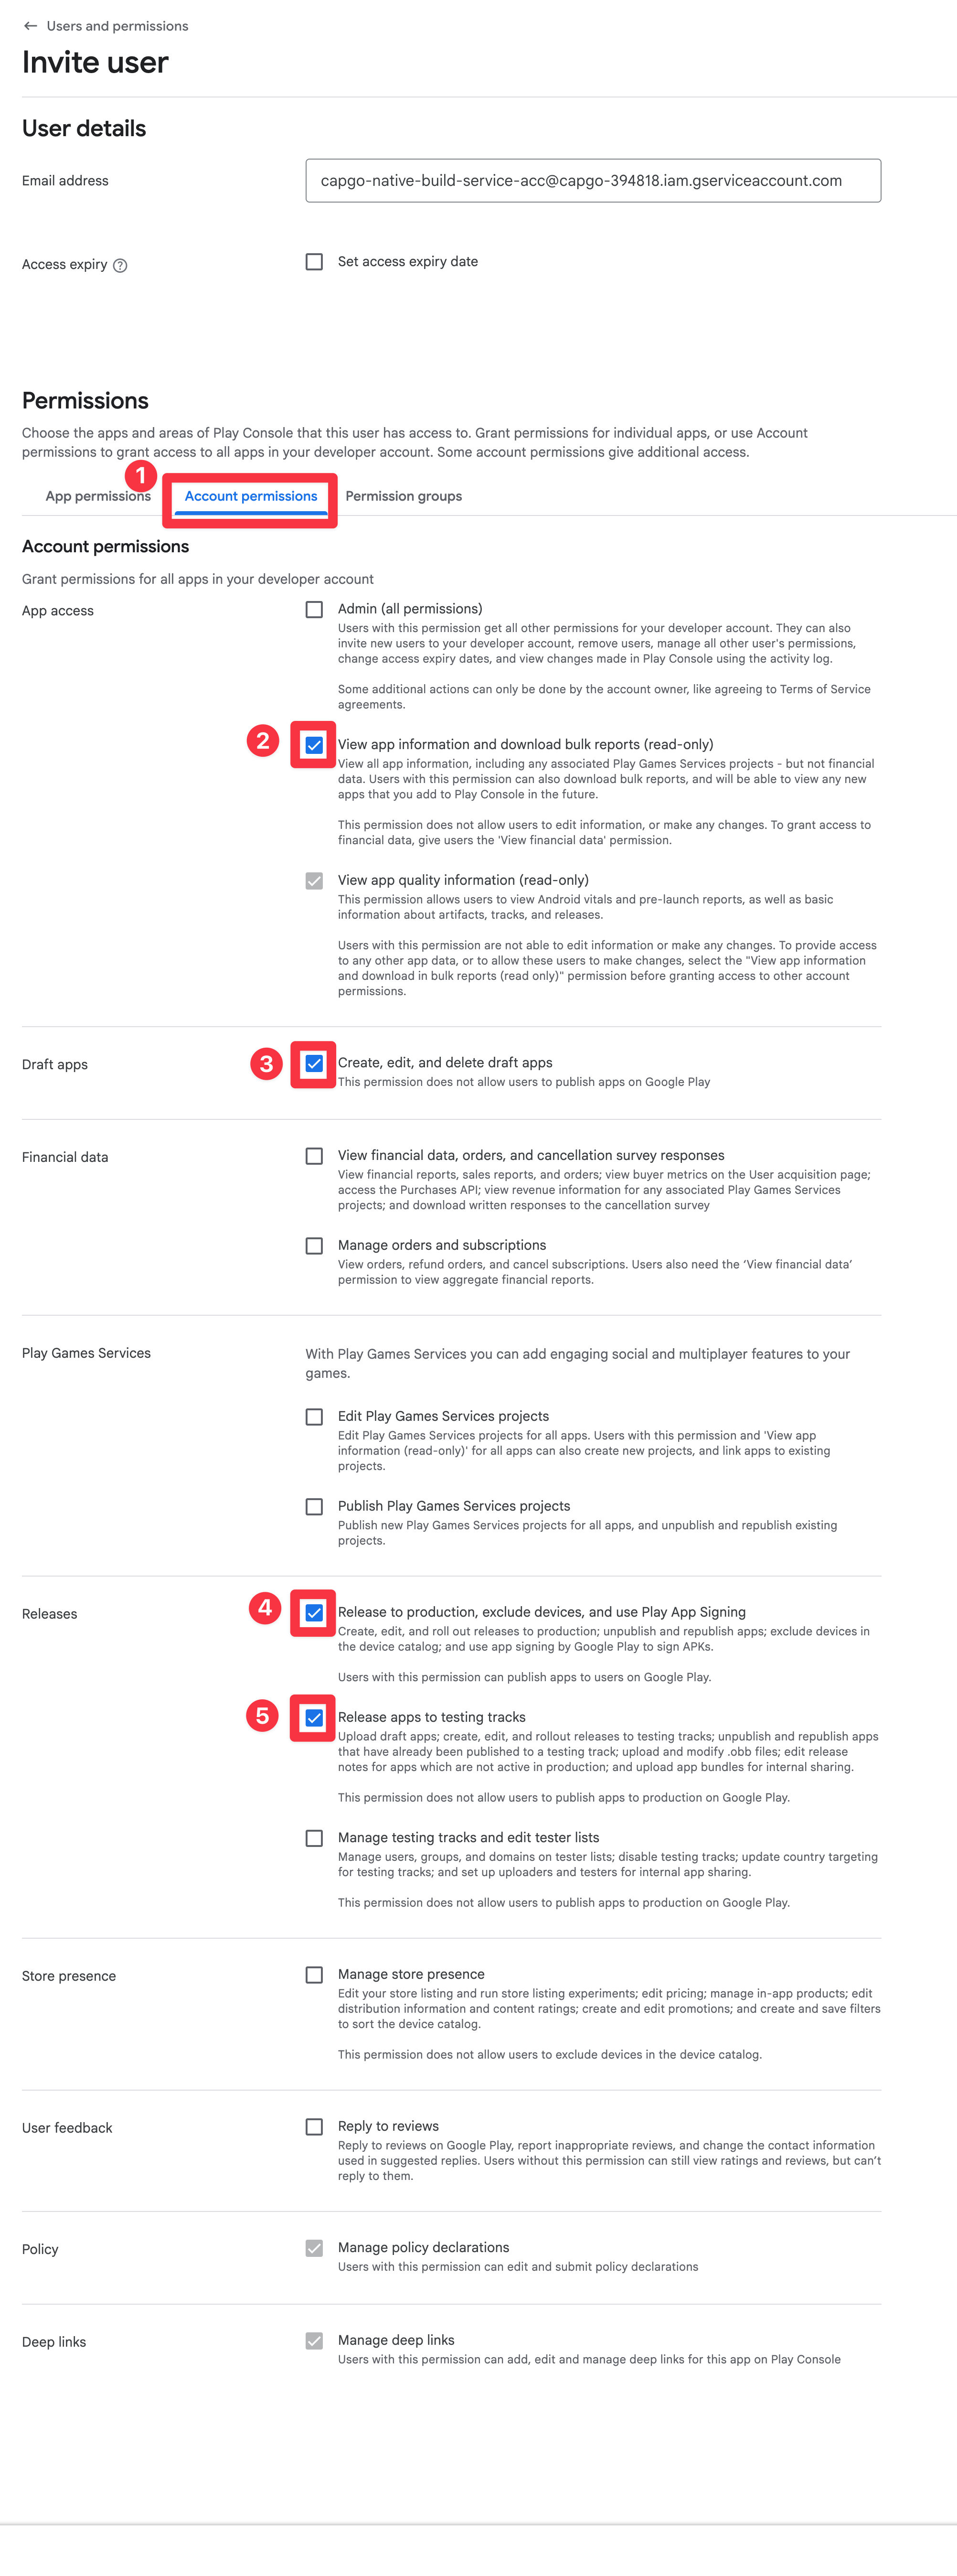
- In
- 클릭하세요
Invite user
- If your workflow uses Play App Signing, enable the related signing permission.
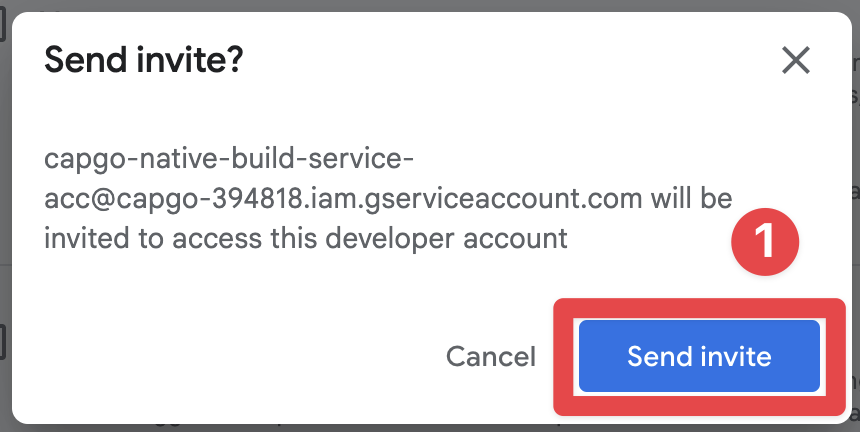
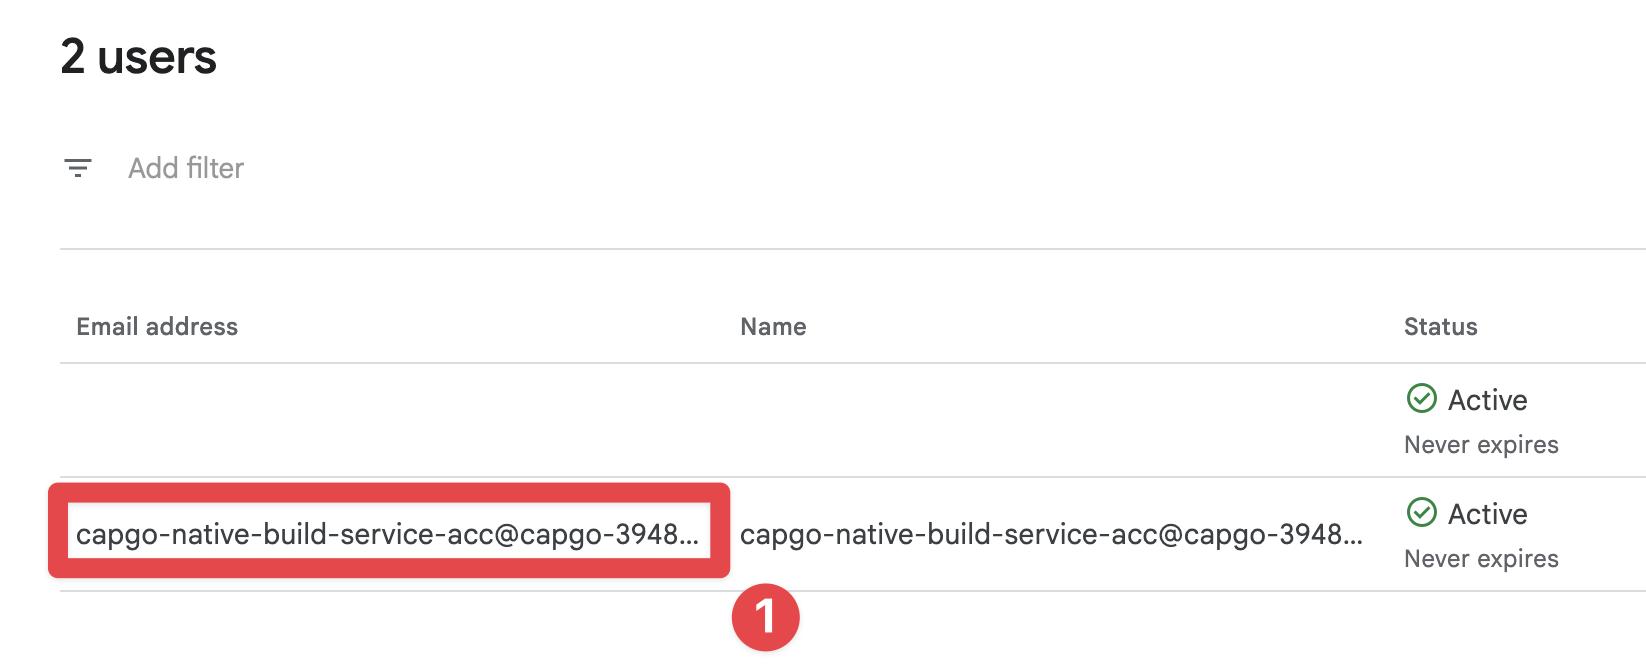
- 사용자가 초대받았는지 확인하세요
인증서 저장
인증서 저장 섹션인증서를 저장하고 첫 번째 빌드를 실행할 준비가 되었습니다. 인증서를 저장하려면 다음 명령어를 사용하세요:
bunx @capgo/cli@latest build credentials save --platform android \ --keystore ./path/to/keystore.jks \ --keystore-alias "your-alias" \ --keystore-key-password "key-password" \ --keystore-store-password "store-password" \ --play-config ./play-store-service-account.jsonCI/CD 설정 (GitHub Actions)
CI/CD 설정 (GitHub 액션)CI/CD 설정 섹션 (__CAPGO_KEEP_0__ 액션) 이미 완료한 경우 및 구글 플레이 서비스 계정CI/CD를 위한 모든 것이 이미 준비되어 있습니다. 이 섹션에서는 credential 파일을 GitHub Actions 비밀과 환경 변수로 전달하는 방법에 대해 설명합니다.
1) credential 파일을 단일 줄 base64로 변환합니다.
1) credential 파일을 단일 줄 base64로 변환하기# Android keystore (.jks or .keystore)base64 -i ./path/to/keystore.jks | tr -d '\n' > keystore_base64.txt
# Google Play service account JSONbase64 -i ./play-store-service-account.json | tr -d '\n' > play_config_base64.txt2) 저장소 비밀을 생성합니다.
2) 저장소 비밀을 생성하는 방법In GitHub > Repository > Settings > Secrets and variables > Actions, 추가:
| 비밀 이름 | 값 |
|---|---|
CAPGO_TOKEN | Your Capgo API 토큰 |
APP_ID | Your Capgo 앱 ID (예시: com.example.app) |
ANDROID_KEYSTORE_FILE | 내용 keystore_base64.txt |
KEYSTORE_KEY_ALIAS | Keystore alias Keystore, Keystore 비밀번호, Keystore 키 비밀번호, Keystore alias |
KEYSTORE_KEY_PASSWORD | Keystore 키 비밀번호 |
KEYSTORE_STORE_PASSWORD | Keystore 저장소 비밀번호 |
PLAY_CONFIG_JSON | 내용 play_config_base64.txt |
3) GitHub Actions 워크플로우에서 환경 변수를 사용하세요
3) GitHub Actions 워크플로우에서 환경 변수를 사용하세요name: Android Cloud Build
on: workflow_dispatch: push: branches: [main]
jobs: android-build: runs-on: ubuntu-latest steps: - uses: actions/checkout@v6 - uses: oven-sh/setup-bun@v2 with: bun-version: latest - name: Request Android build with Capgo run: bunx @capgo/cli@latest build request ${{ secrets.APP_ID }} --platform android env: CAPGO_TOKEN: ${{ secrets.CAPGO_TOKEN }} ANDROID_KEYSTORE_FILE: ${{ secrets.ANDROID_KEYSTORE_FILE }} KEYSTORE_KEY_ALIAS: ${{ secrets.KEYSTORE_KEY_ALIAS }} KEYSTORE_KEY_PASSWORD: ${{ secrets.KEYSTORE_KEY_PASSWORD }} KEYSTORE_STORE_PASSWORD: ${{ secrets.KEYSTORE_STORE_PASSWORD }} PLAY_CONFIG_JSON: ${{ secrets.PLAY_CONFIG_JSON }}실행 중인 빌드
제목: 실행 중인 빌드축하합니다! 🎉! 이제 첫 번째 빌드를 실행할 준비가 되었습니다.
실행:
bunx @capgo/cli@latest build request com.example.app --platform android이 빌드 프로세스를 시작합니다 🍾🥂
이것이 빌드 프로세스를 시작합니다 🍾🥂
Play 릴리스 제출제목: Play 릴리스 제출 --submit-to-store-review 기본적으로 Android 릴리스 빌드는 Google Play로 업로드되고 Play 콘솔에서 릴리스를 완료할 때까지 비활성화됩니다. CI 릴리스에서 Play 릴리스를 자동으로 제출하려면 다음을 실행하세요:
npx @capgo/cli@latest build request com.example.app \ --platform android \ --build-mode release \ --submit-to-store-review \ --android-track production \ --store-release-name "1.2.3" \ --store-release-notes "General improvements" \ --store-release-notes-locale "en-US=General improvements" \ --store-release-notes-locale "nl-NL=Algemene verbeteringen" \ --store-release-notes-locale "fr-FR=Ameliorations generales"이것은 Google Play 서비스 계정 설정과 동일한 일반 업로드 경로 (PLAY_CONFIG_JSON CI 또는 로컬 Android 자격 증명을 저장하는 경우)가 필요합니다. --store-release-name Google Play version_name. --store-release-notes Google Play --store-release-notes-locale "locale=notes" entry는 해당 지역의 Play changelog를 지역화하여 기록합니다. Capgo은 Play 릴리스를 전송합니다. completed __CAPGO_KEEP_0__은 Play 릴리스를 --android-release-status기본 Play 변경 로그이며,
; Managed Publishing이 Play 콘솔에서 활성화되어 있으면 Google은 승인 후에도 수동으로 업로드를 기다릴 수 있습니다.
Android 빌드에서 계속 진행하세요Android 빌드에서 계속 진행하세요 Android 빌드 Android 빌드 Capgo CI/CD Capgo 제품 워크플로우 Capgo 네이티브 빌드 Capgo 제품 워크플로우 Capgo 통합 Capgo 제품 워크플로우 CI/CD 통합 __CAPGO_KEEP_0__ CI/CD 통합 구현 GitHub 액션 통합 구현 GitHub
Capacitor 기다리지 마세요
AI 코딩 에이전트와 함께 빌드하고, 사용자에게 수정을 푸시하는 데 몇 분만 걸리고, Mac 없이 iOS 및 Android 앱을 빌드하고, 한 번의 클릭으로 되돌아가세요.


기업용이 필요하세요? 우리 팀과 대화하세요