
Android 构建
复制一个包含安装步骤和本插件完整 Markdown 指南的设置提示。
使用Capgo专属的基础设施,构建并提交 Android 应用到 Google Play 商店。
您将学到什么
标题:您将学到什么- 您将学习如何通过 Capgo 原生构建上传您的应用
- 您将学习如何配置 Capgo 原生构建的凭证
前提条件
标题:前提条件- 您需要有一个活跃的Google开发者账户
- 您需要安装Android Studio
- 您的应用必须能够在Android Studio中成功构建
第一个手动构建
第一个手动构建在我们开始使用Capgo构建应用之前,我们应该首先设置它,并手动完成第一个Android构建。 手动构建有几个优势:
- 您将为后续Capgo构建准备凭证
- 您将在Play Store控制台上创建一个记录
手动在 Android Studio 中构建应用
手动在 Android Studio 中构建应用在我们开始使用 Capgo 构建应用之前,我们需要手动在 Android Studio 中构建应用。
-
打开 Android Studio
运行
bunx cap open android为了打开 Android Studio 项目,我们需要手动在 Android Studio 中构建应用。 -
点击
Build->Generate Signed App Bundles / APKs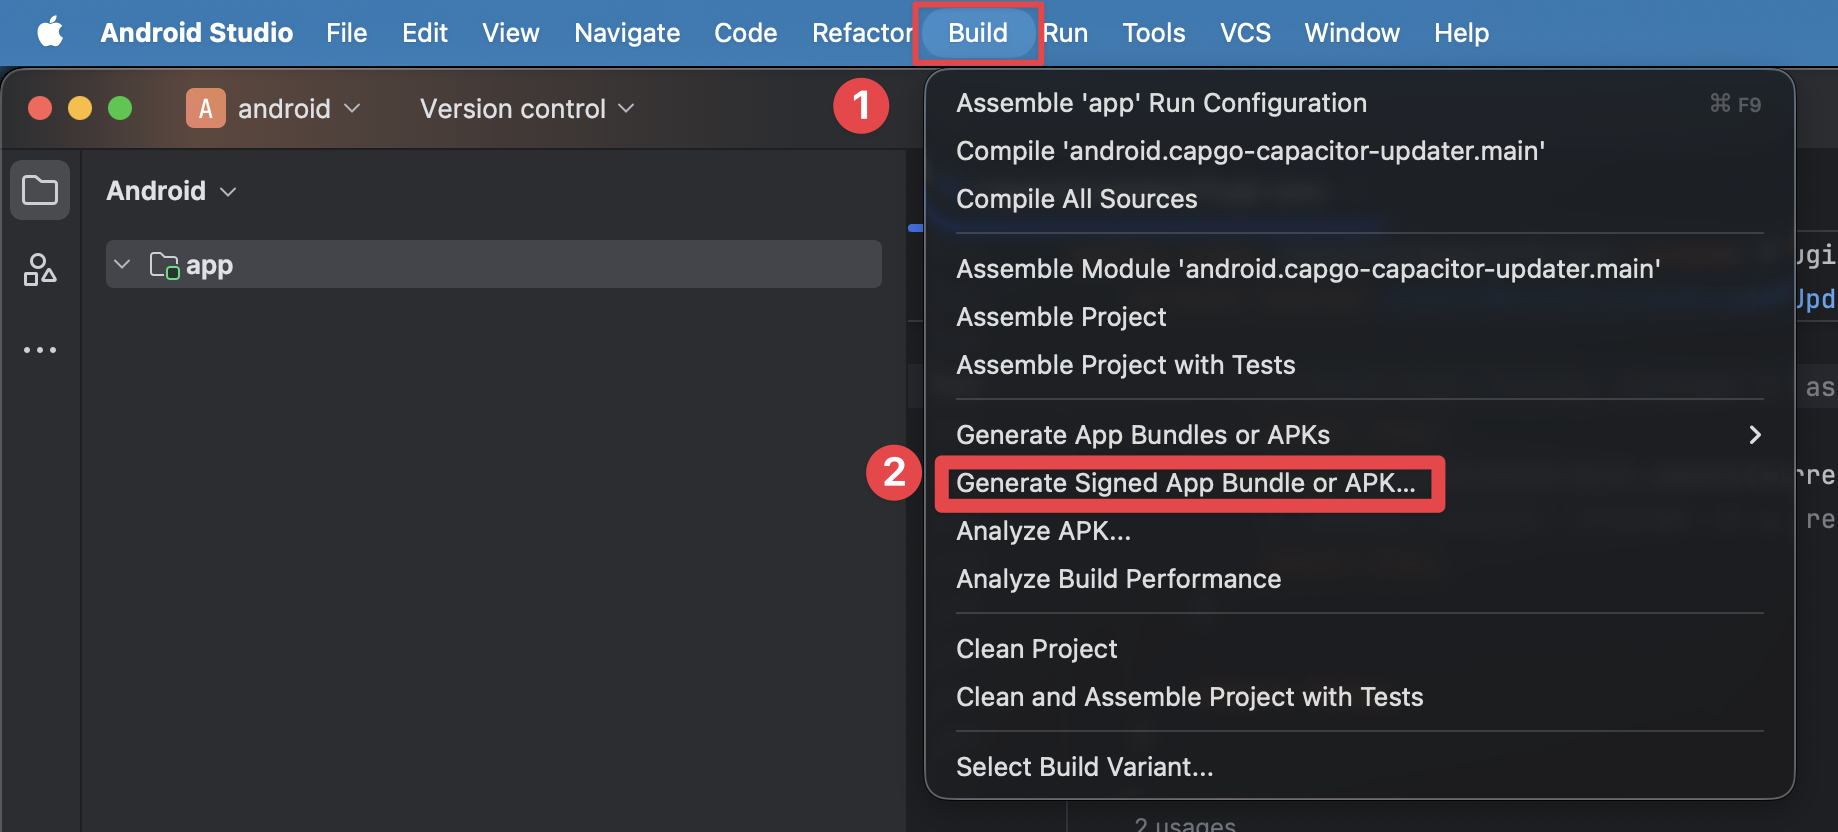
-
选择
Android App Bundle点击Next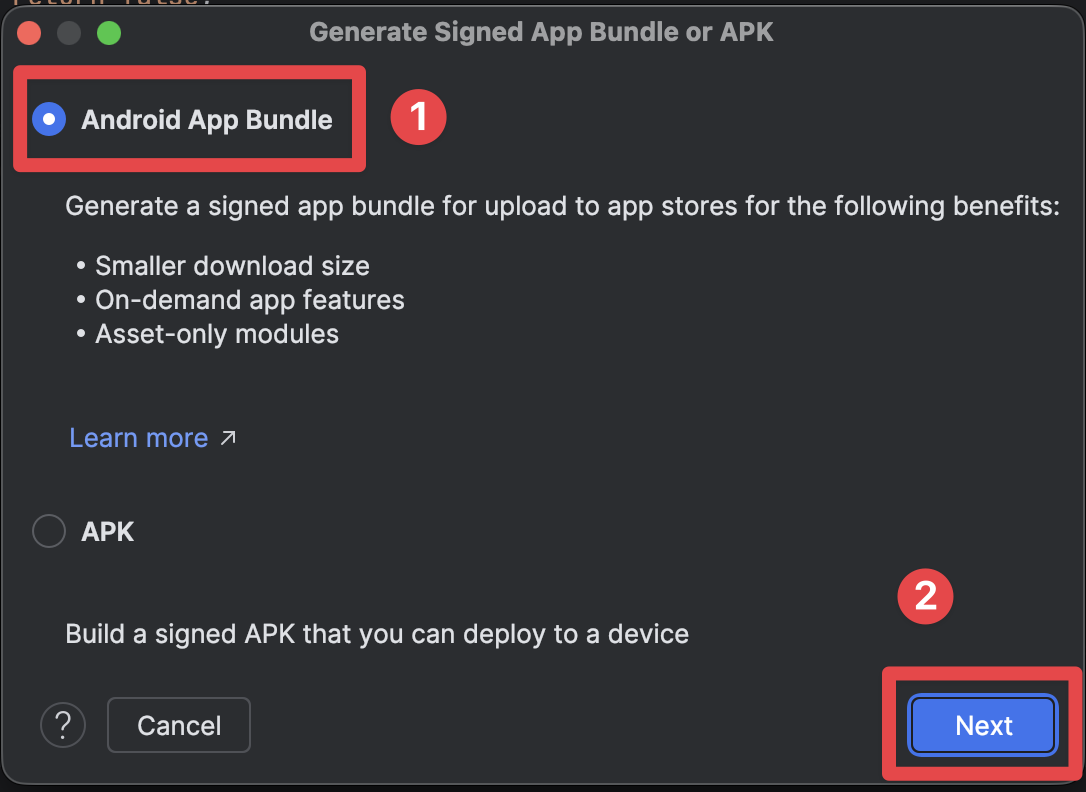
创建一个 Keystore
创建密钥库您当前缺少密钥库文件。该文件用于签署您的应用程序,使Google知道是您开发了该应用程序。 要生成它,我们将使用Android Studio提供的GUI方法。 还有一种使用命令行的方法,但我们不会在本教程中介绍它。
-
点击
Create new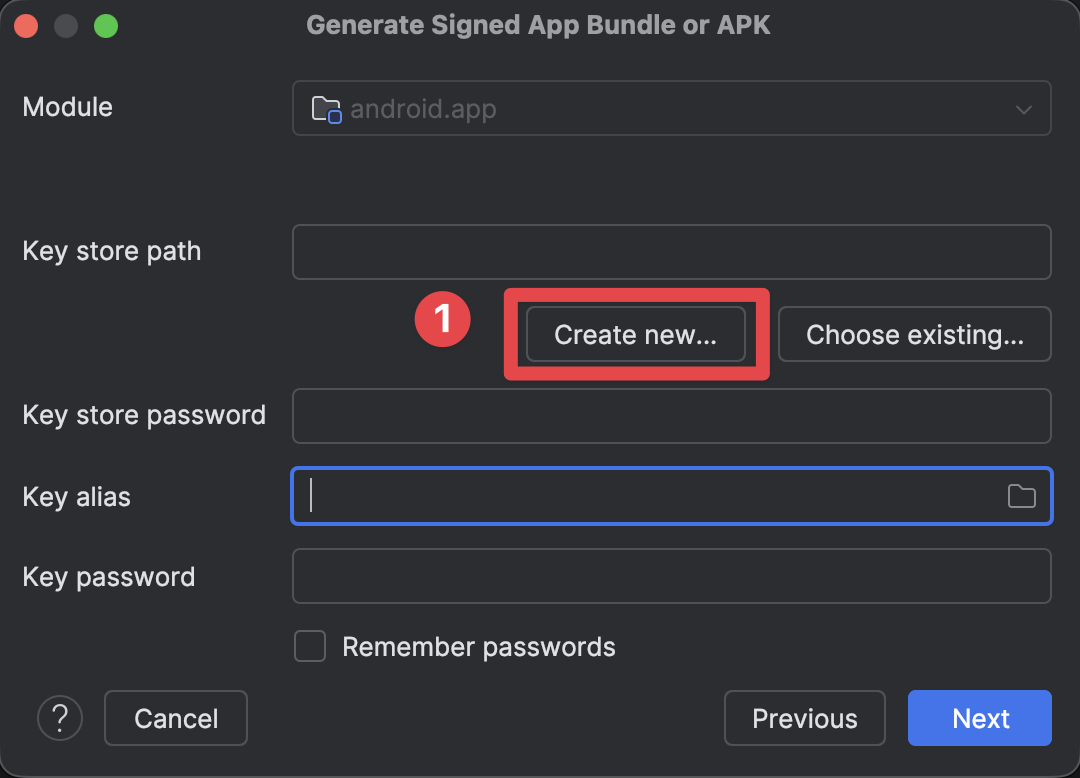
-
密钥库路径
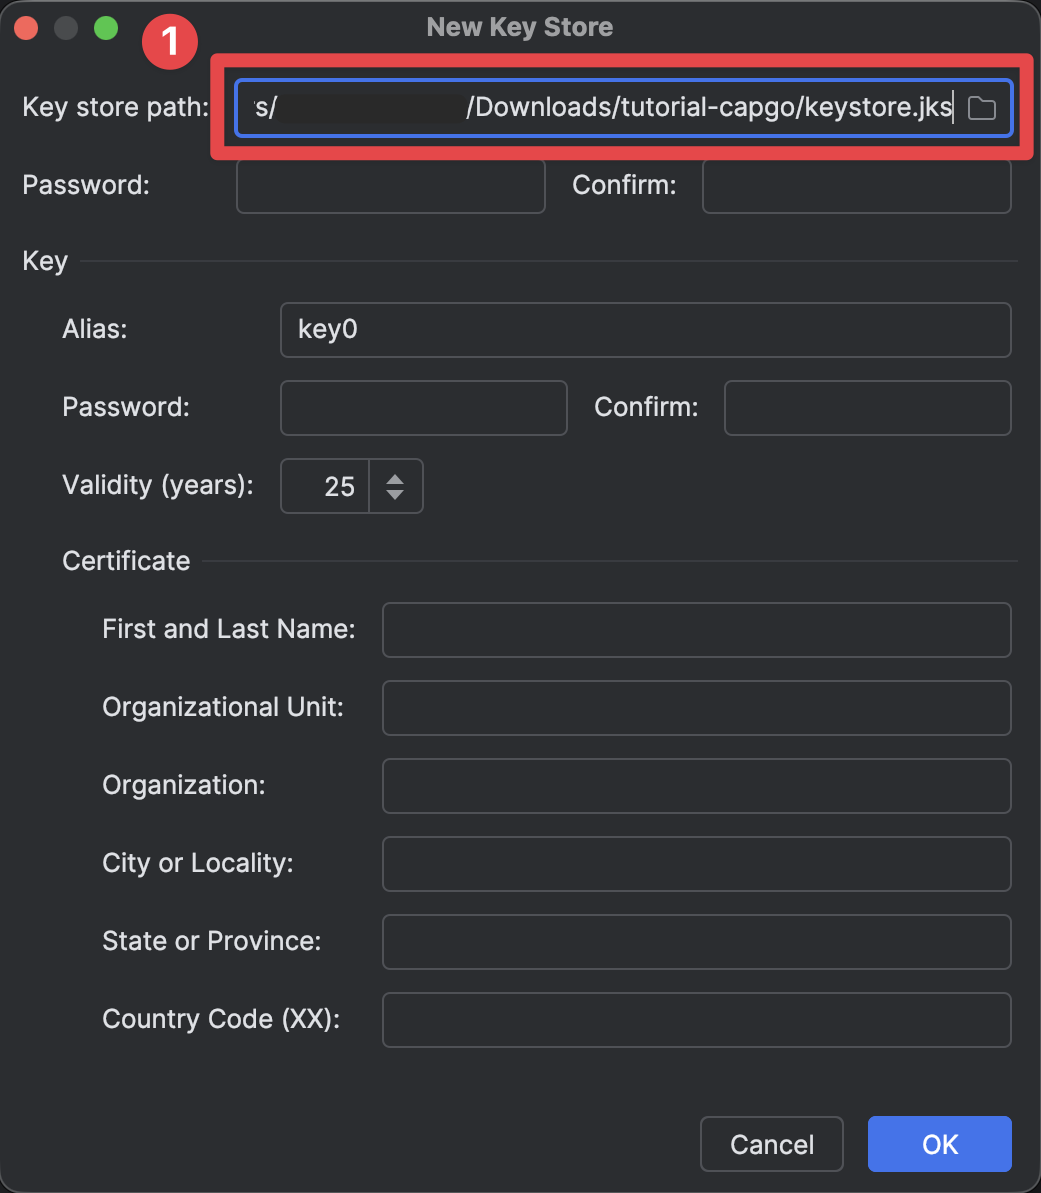
-
设置密钥库密码
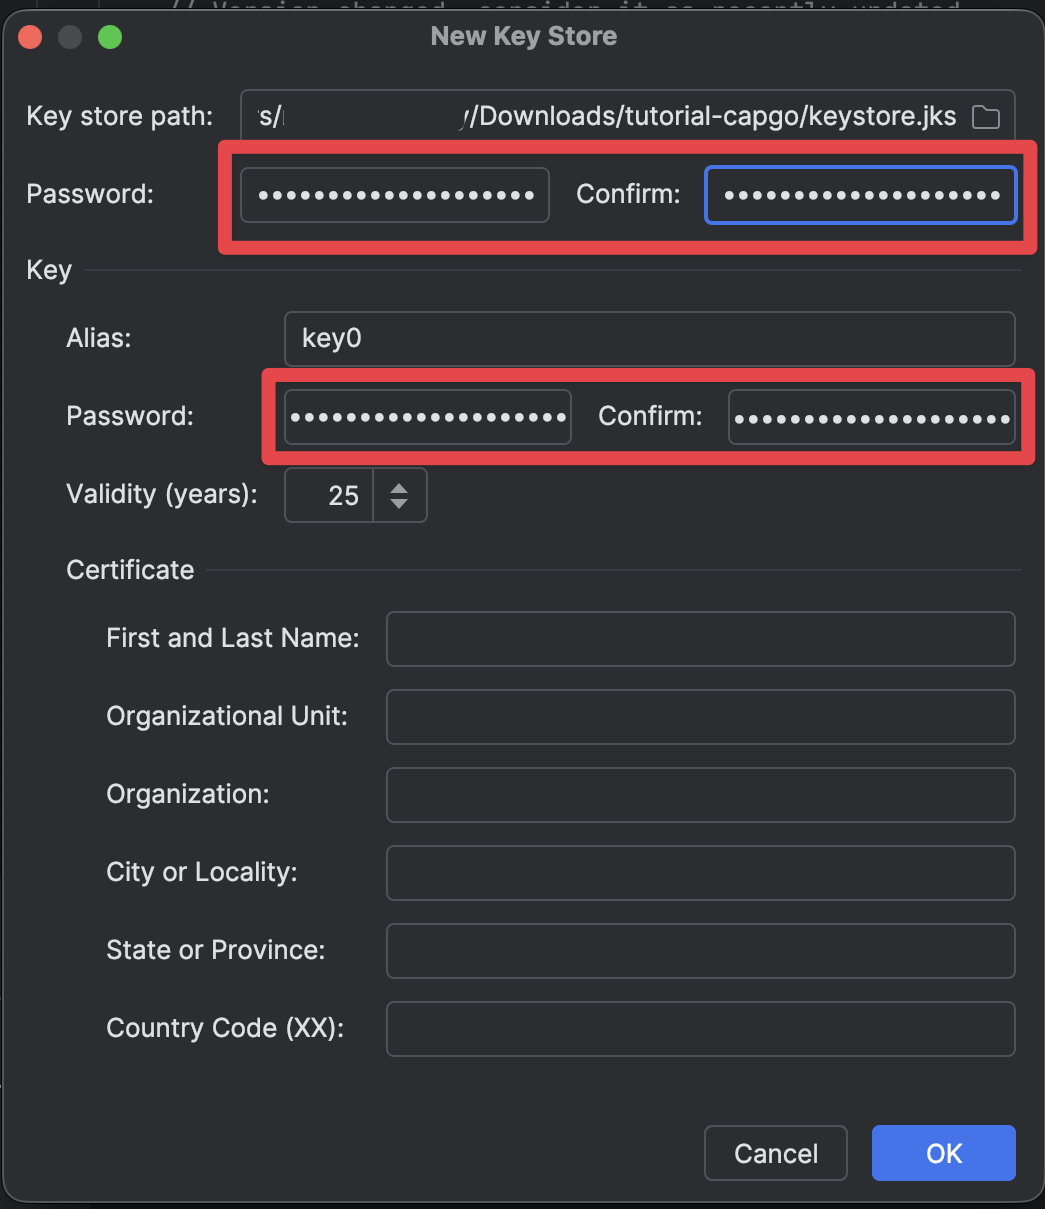
-
填写剩余表单
- 保持密钥别名不变 (key0)
- 填写证书详细信息。 我已经用假数据填充了它,但您应该用自己的数据填充它
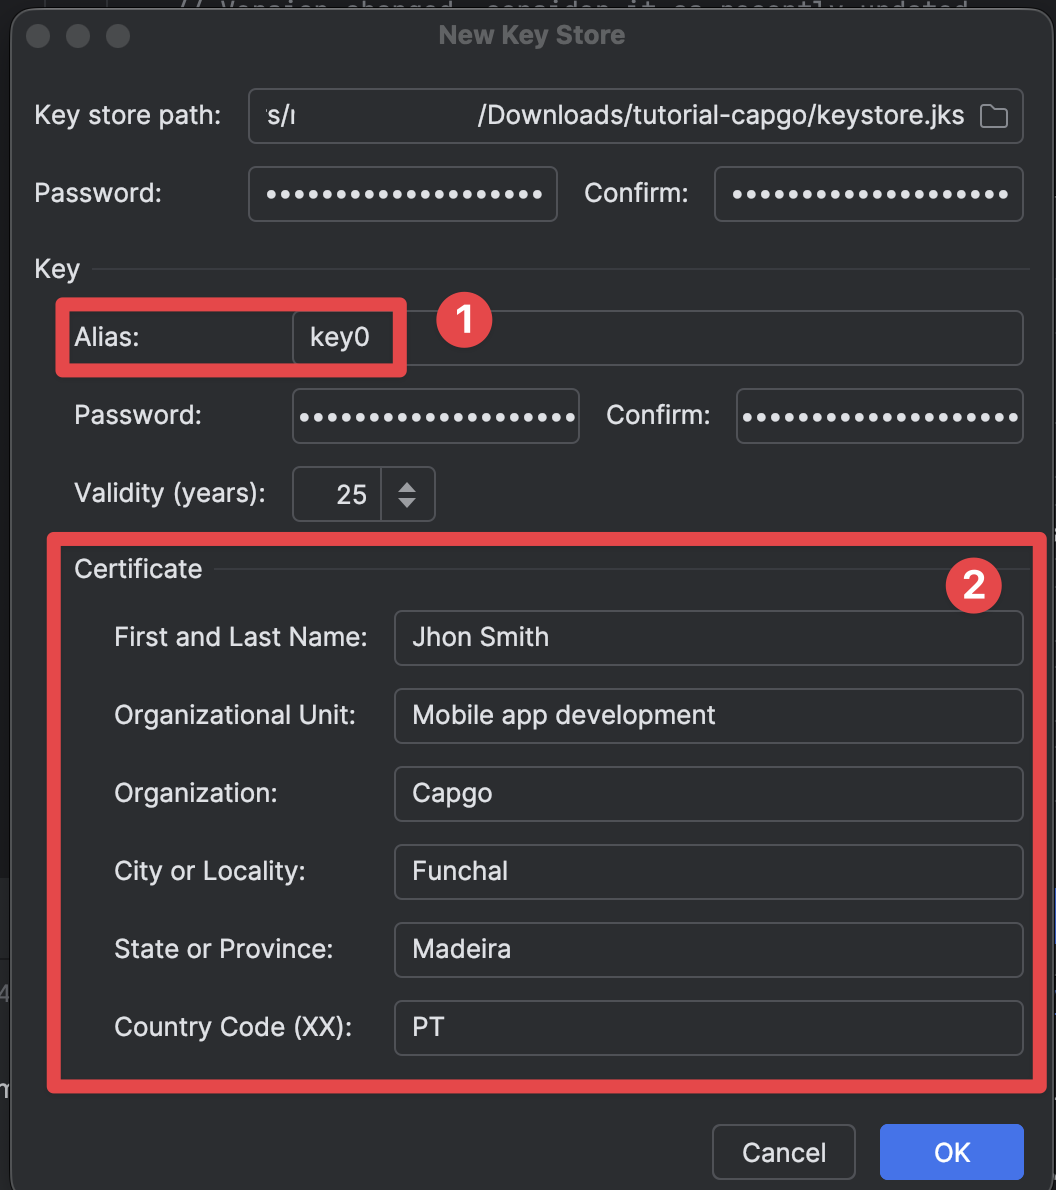
-
点击
OK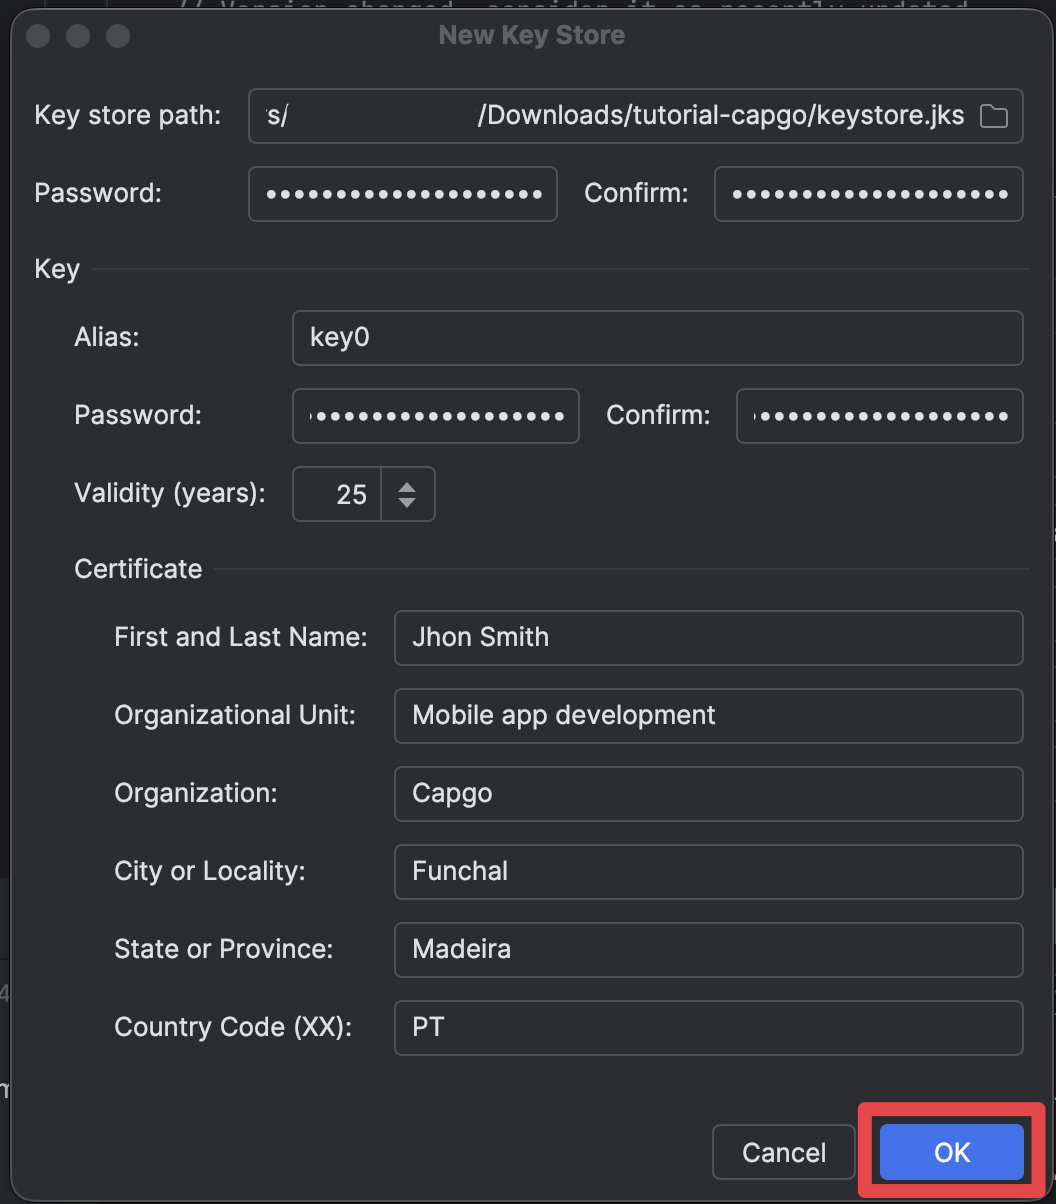
手动构建的最后一步
标题:手动构建的最后一步-
确保所有 keystore 详情都已正确填写并点击
Next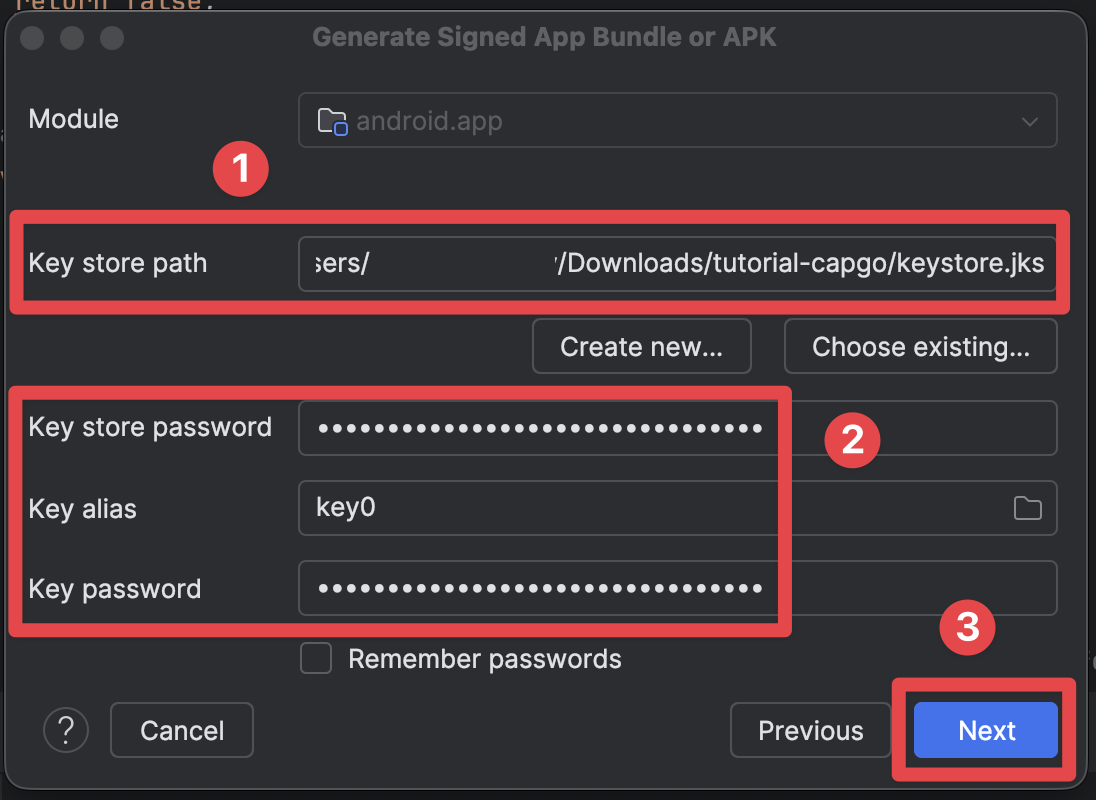
-
选择
release构建变体并点击Create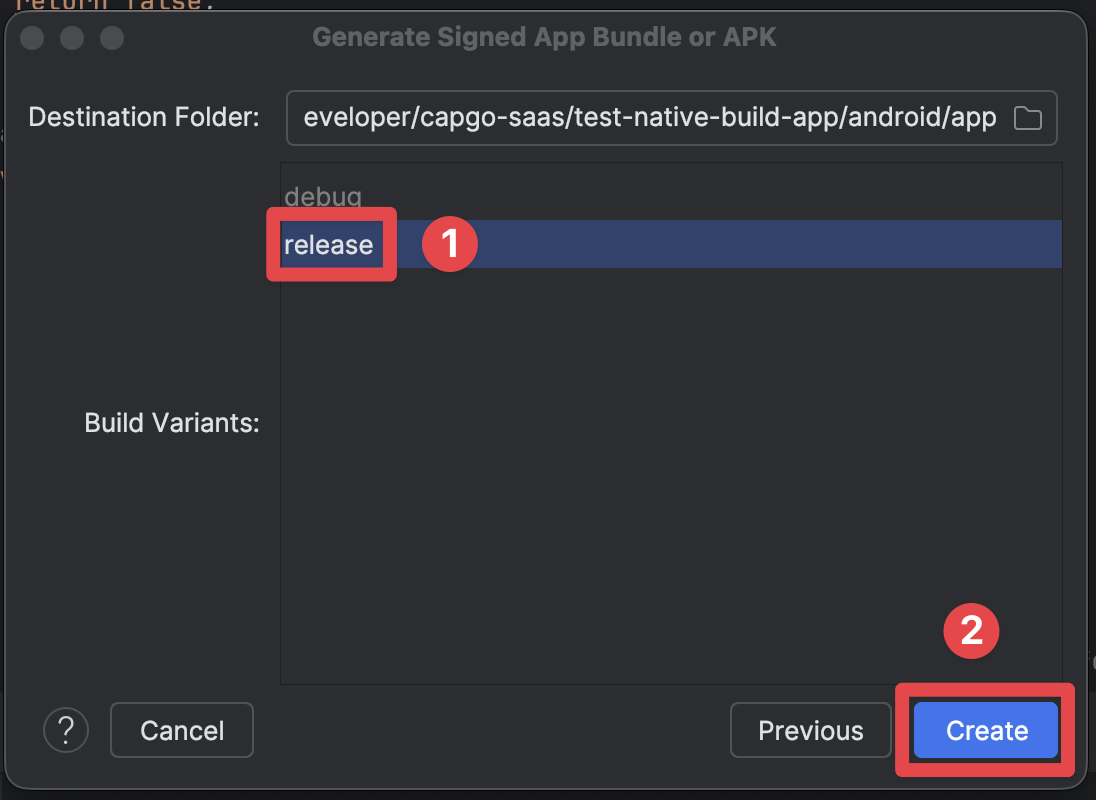
-
构建成功后,您应该看到以下屏幕
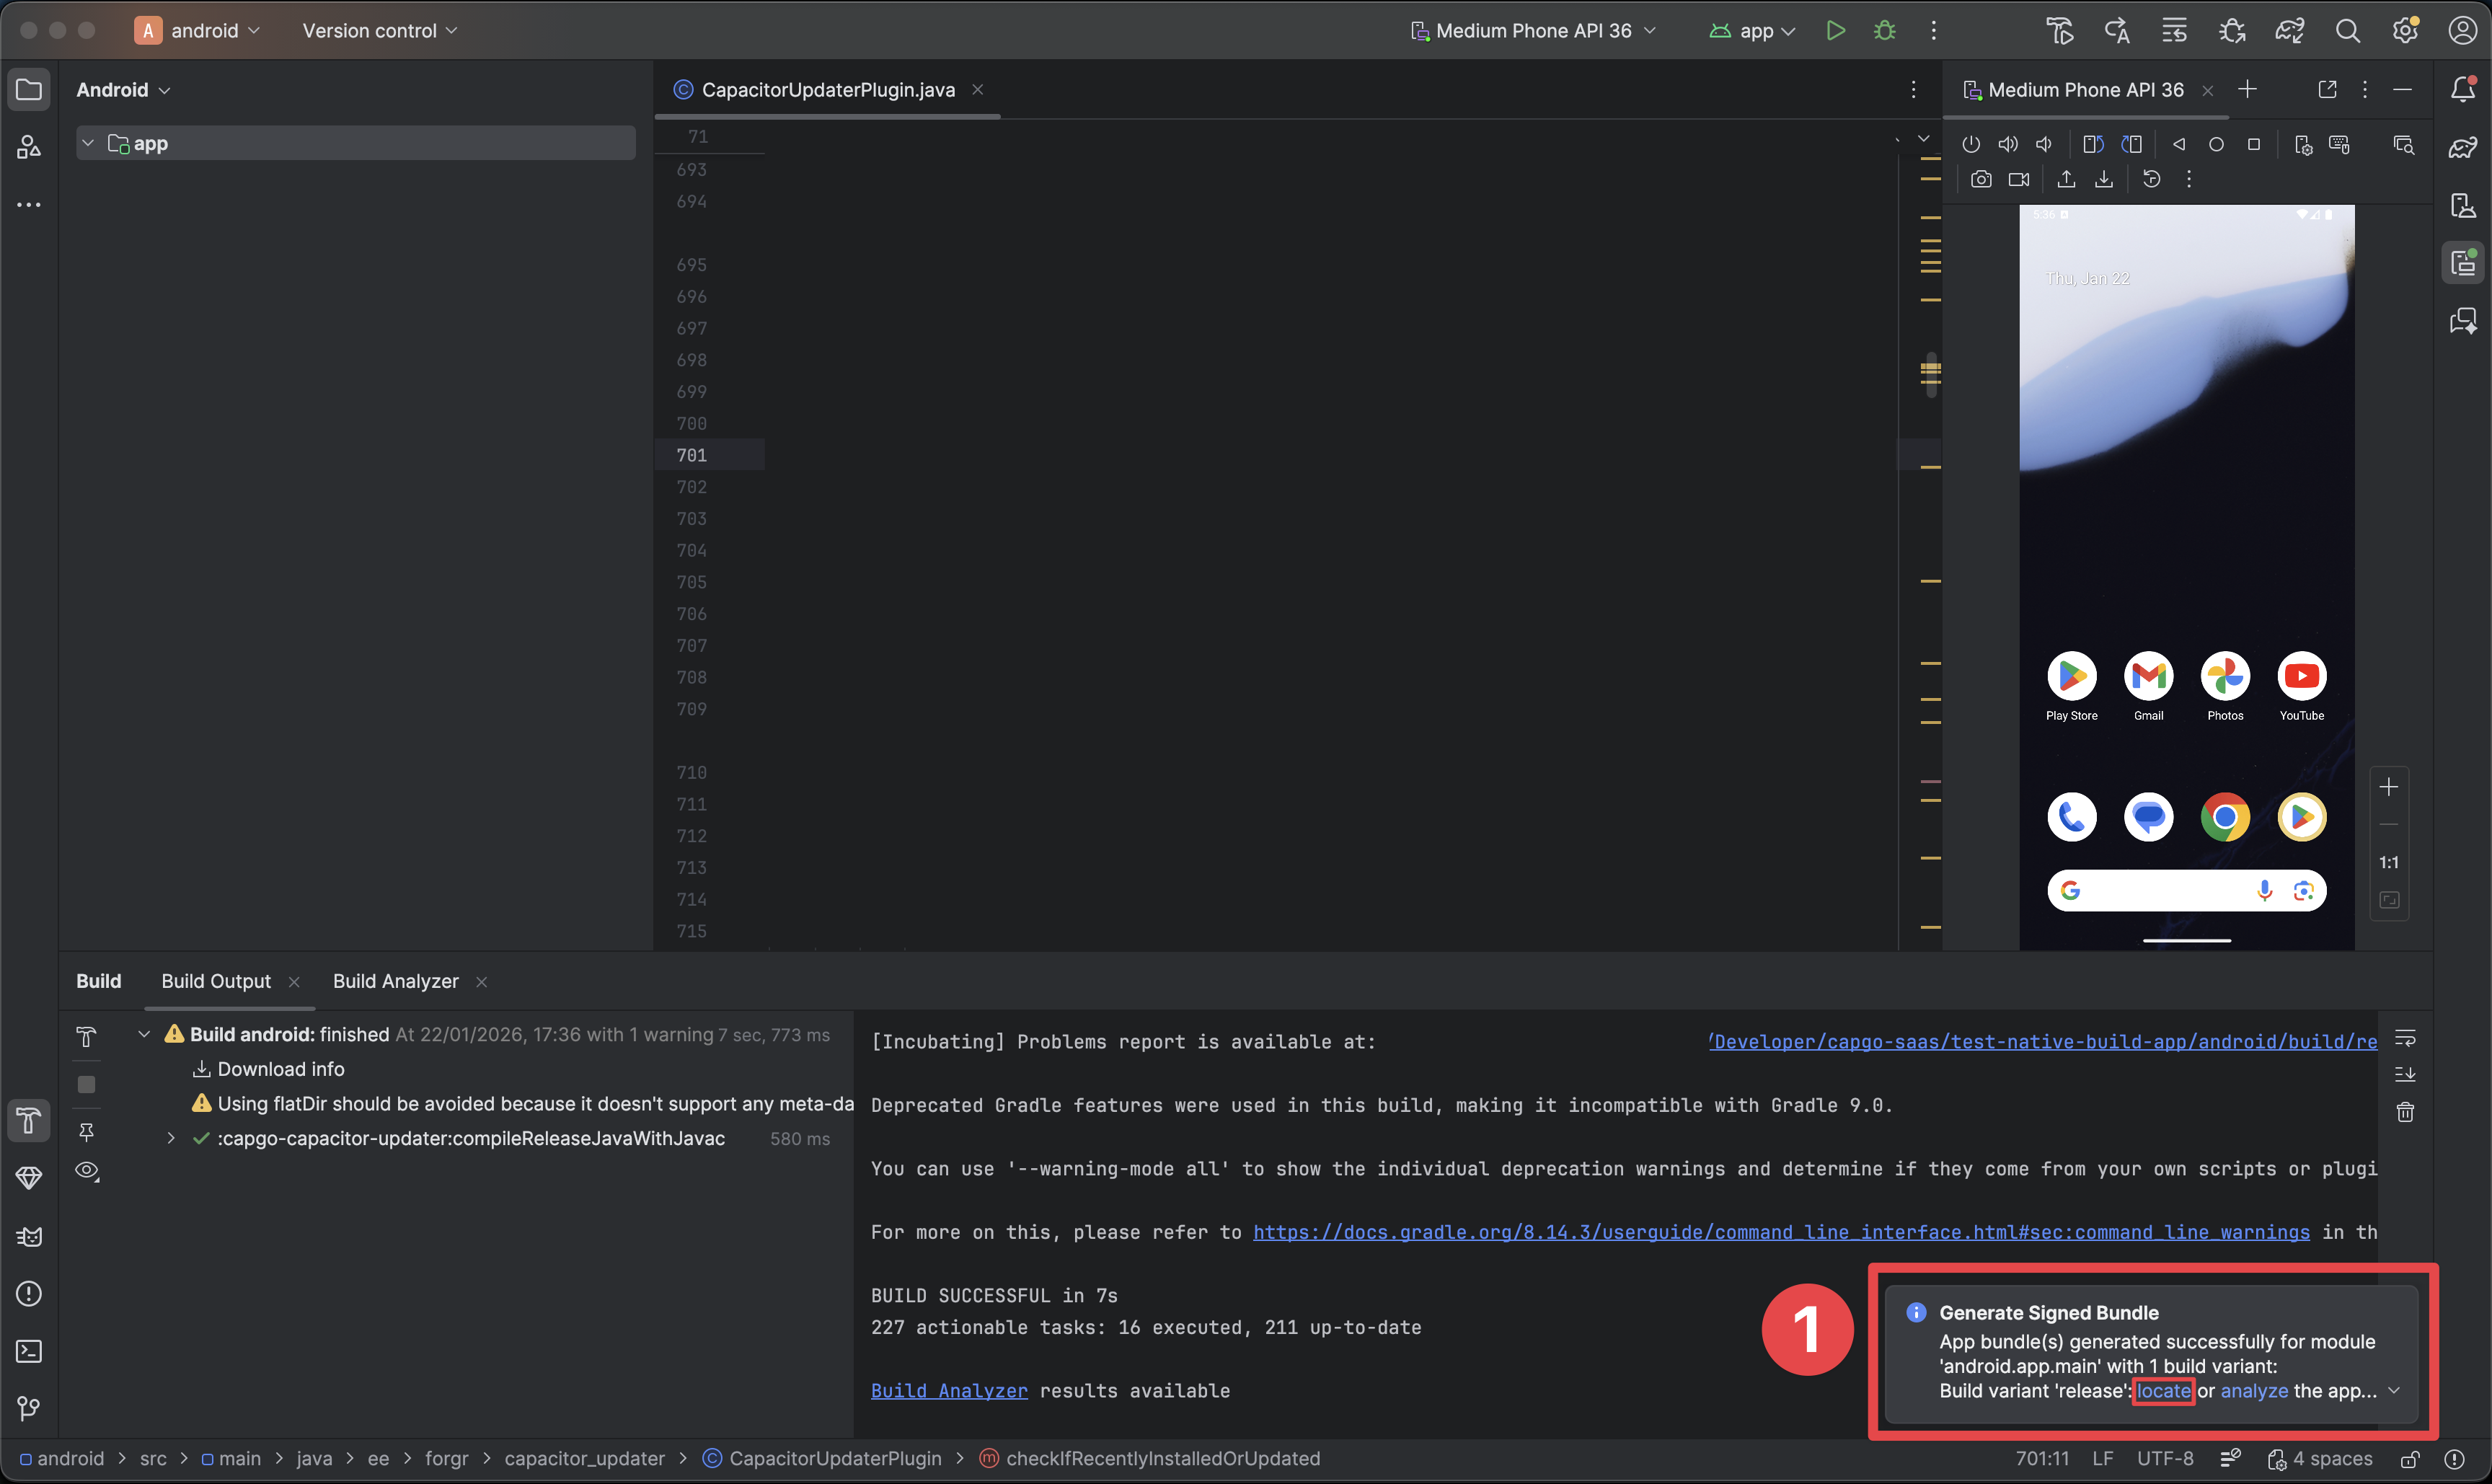
- 本弹出窗口表示构建成功。
- 点击
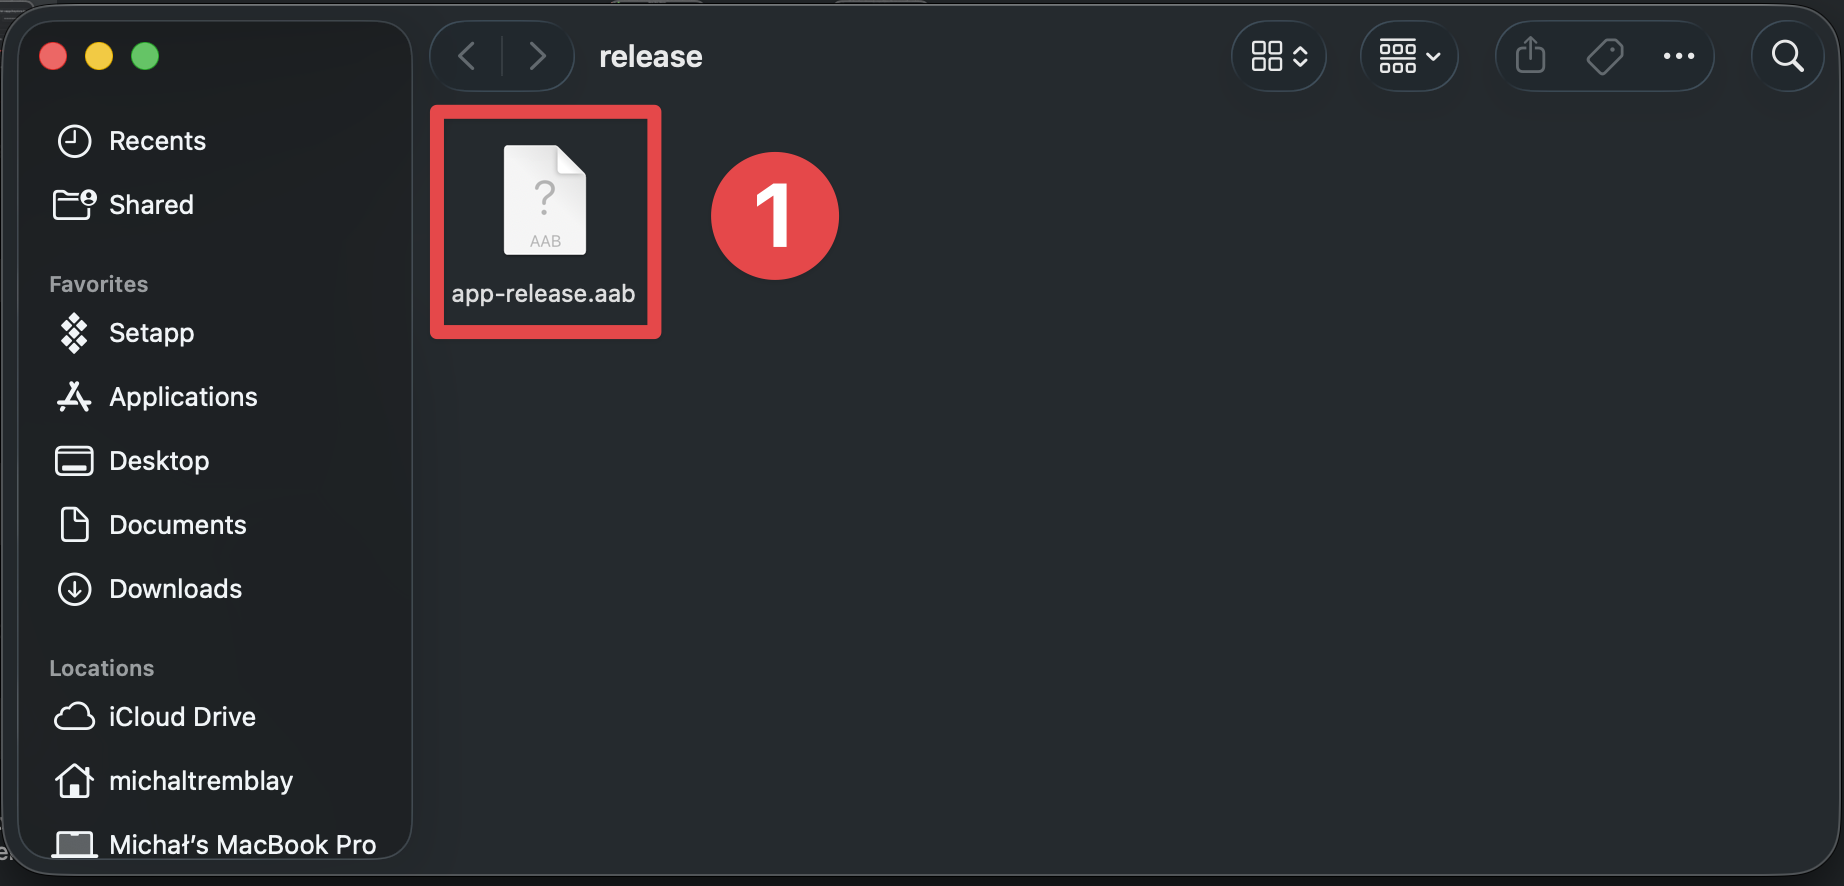
locate按钮 - 这将打开文件浏览器,您应该在其中看到构建。
-
确保您可以在文件浏览器中看到构建
在 Google Play 商店控制台创建应用
标题:在 Google Play 商店控制台创建应用-
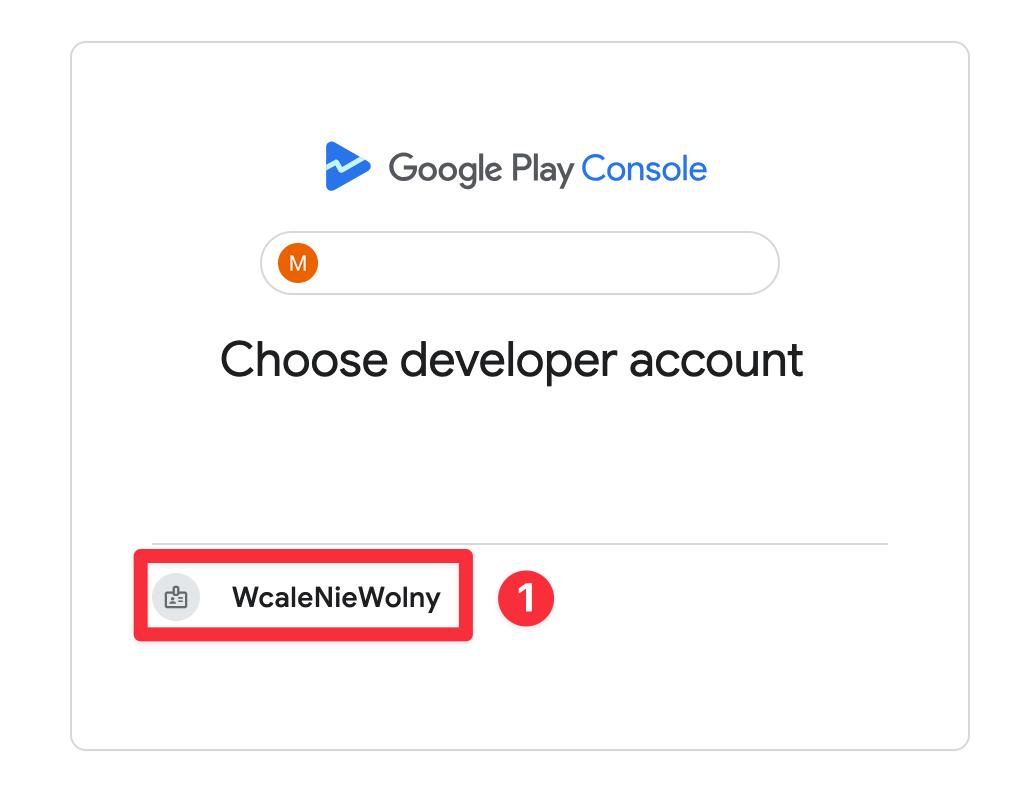
选择正确的开发者账户
-
点击
Create app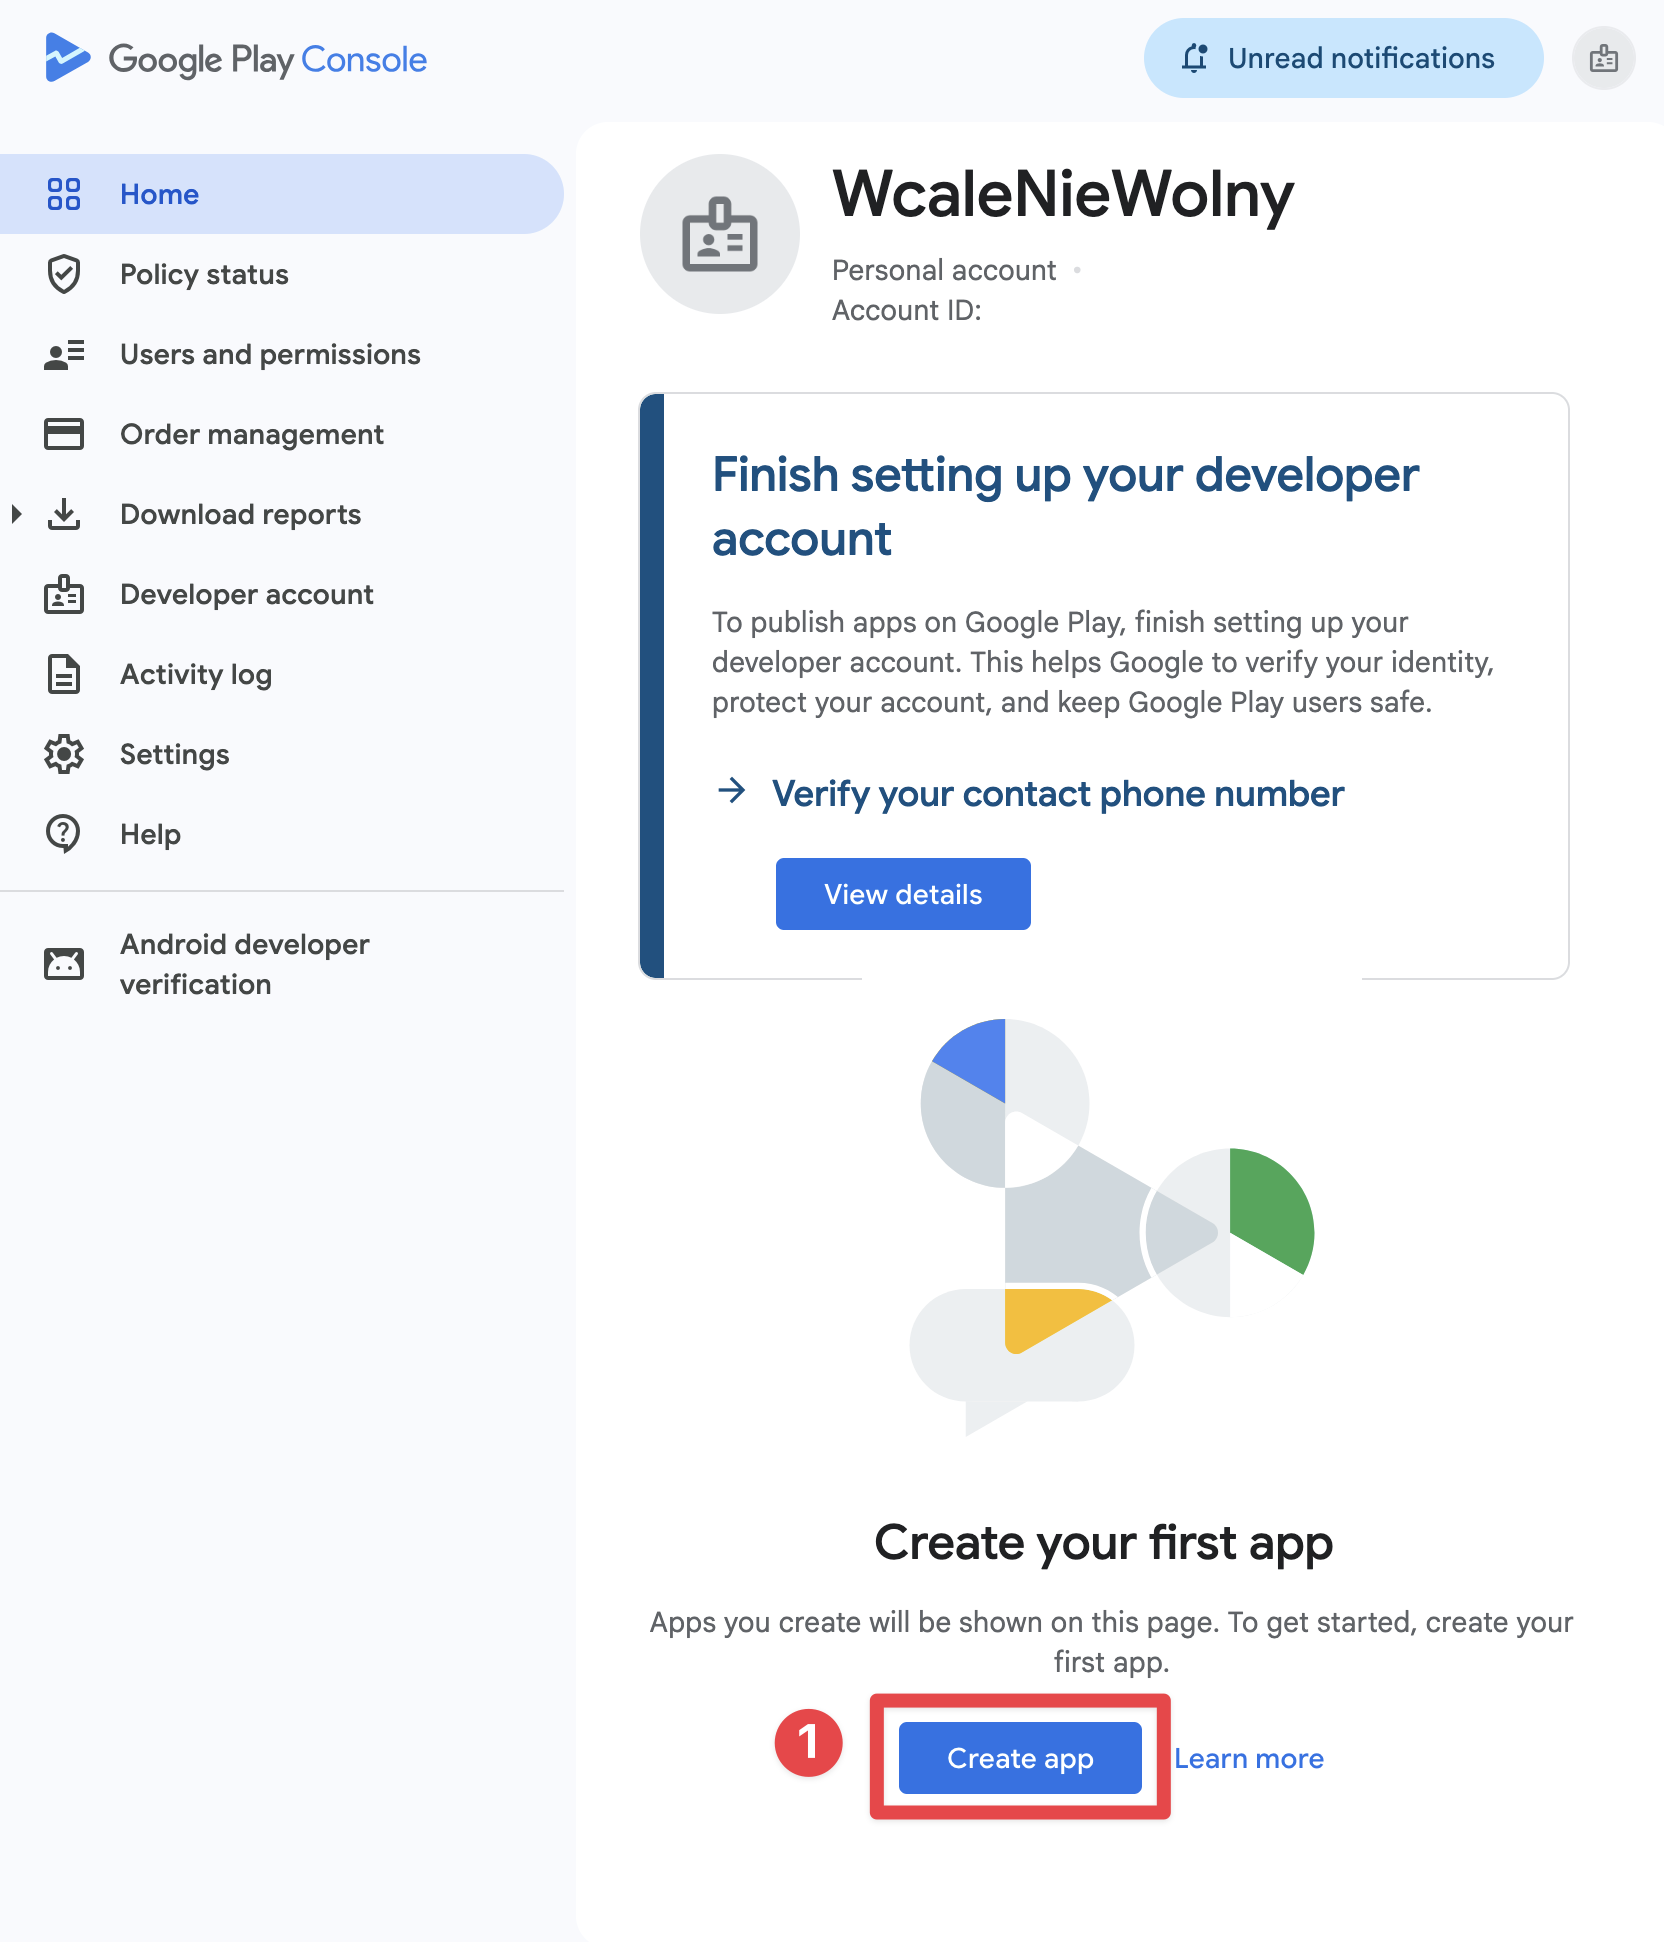
-
选择应用名称和语言
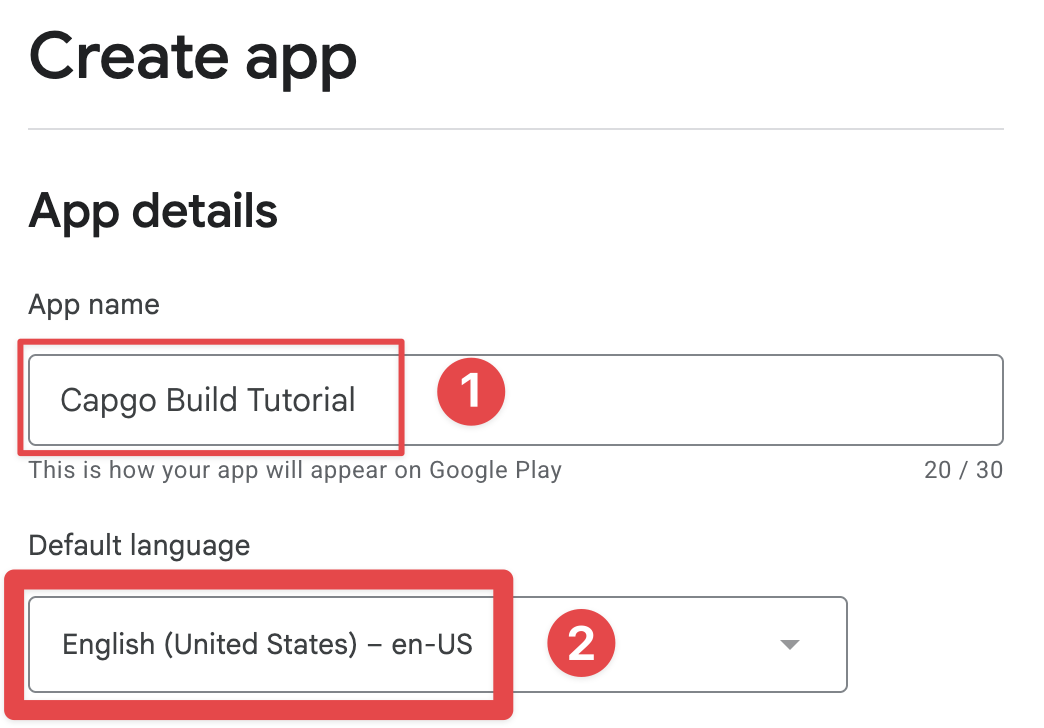
-
选择应用类别并确定应用是否收费或免费
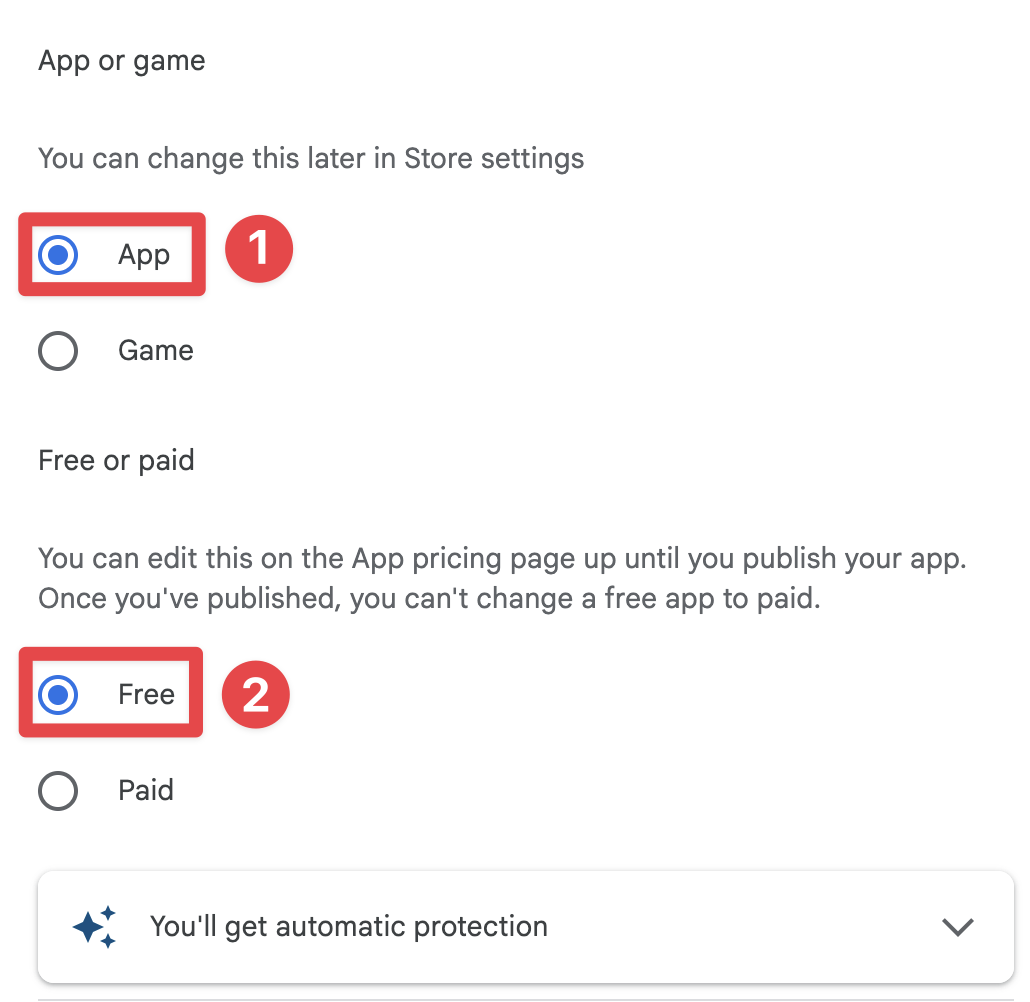
-
接受条款和条件
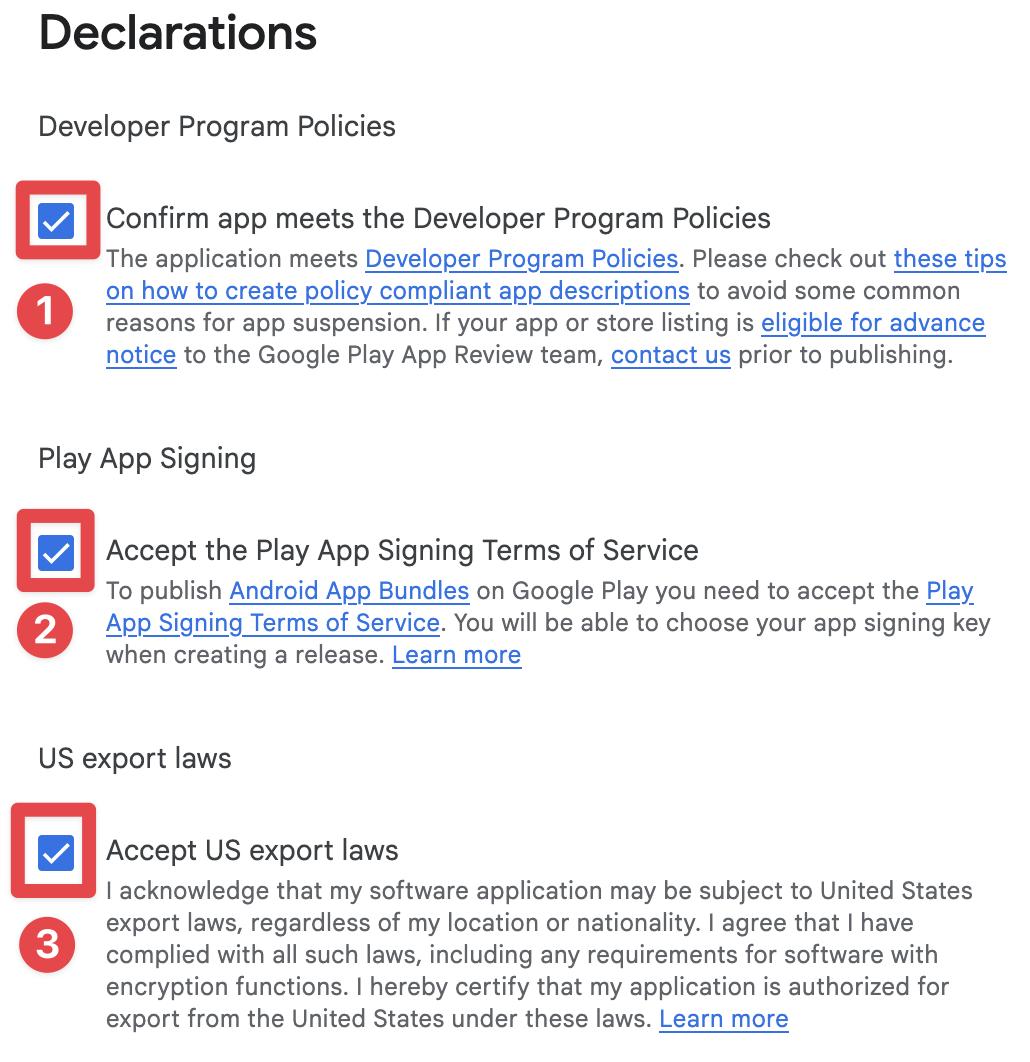
-
点击
Create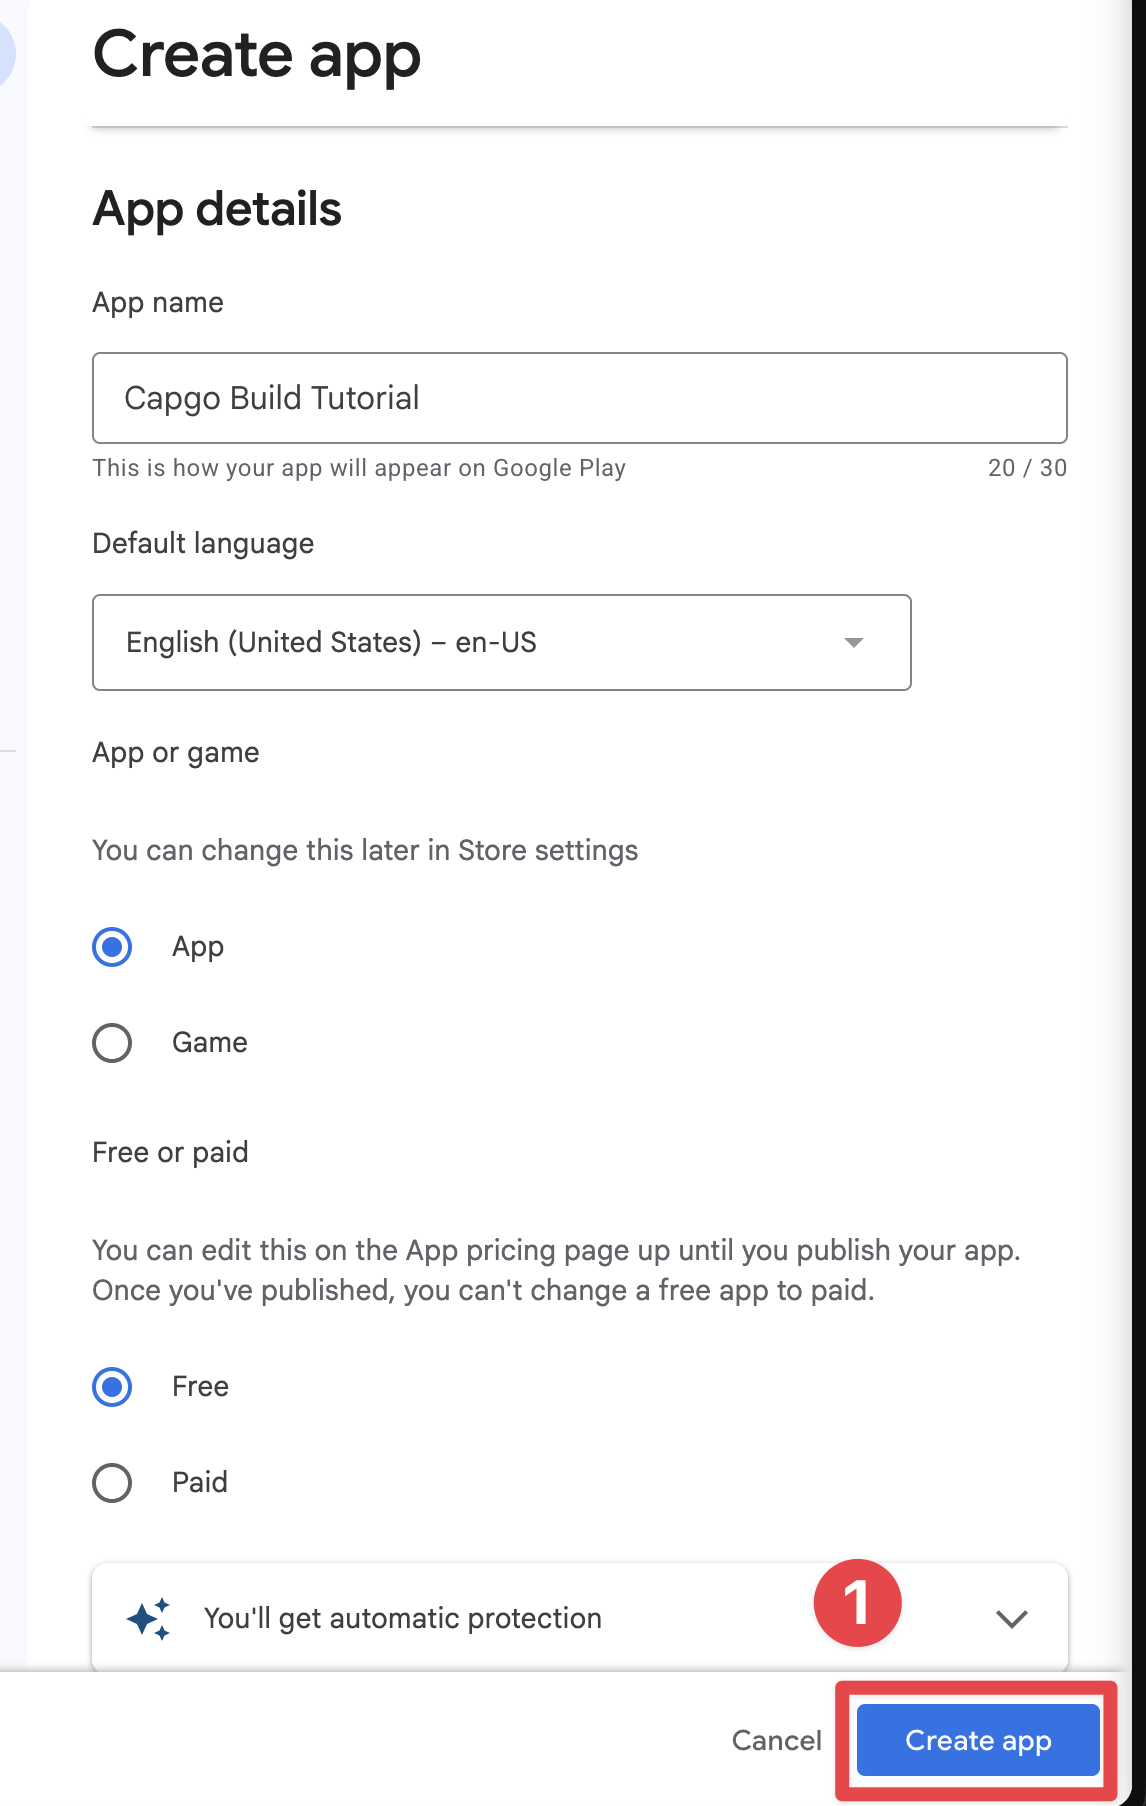
创建内部测试组
创建内部测试组现在你已经创建了应用,你可以创建一个内部测试组。由于我不会实际在Play Store上发布应用,所以我需要创建一个内部测试组。
-
前往
internal testing点击Test and release->Testing->Internal testing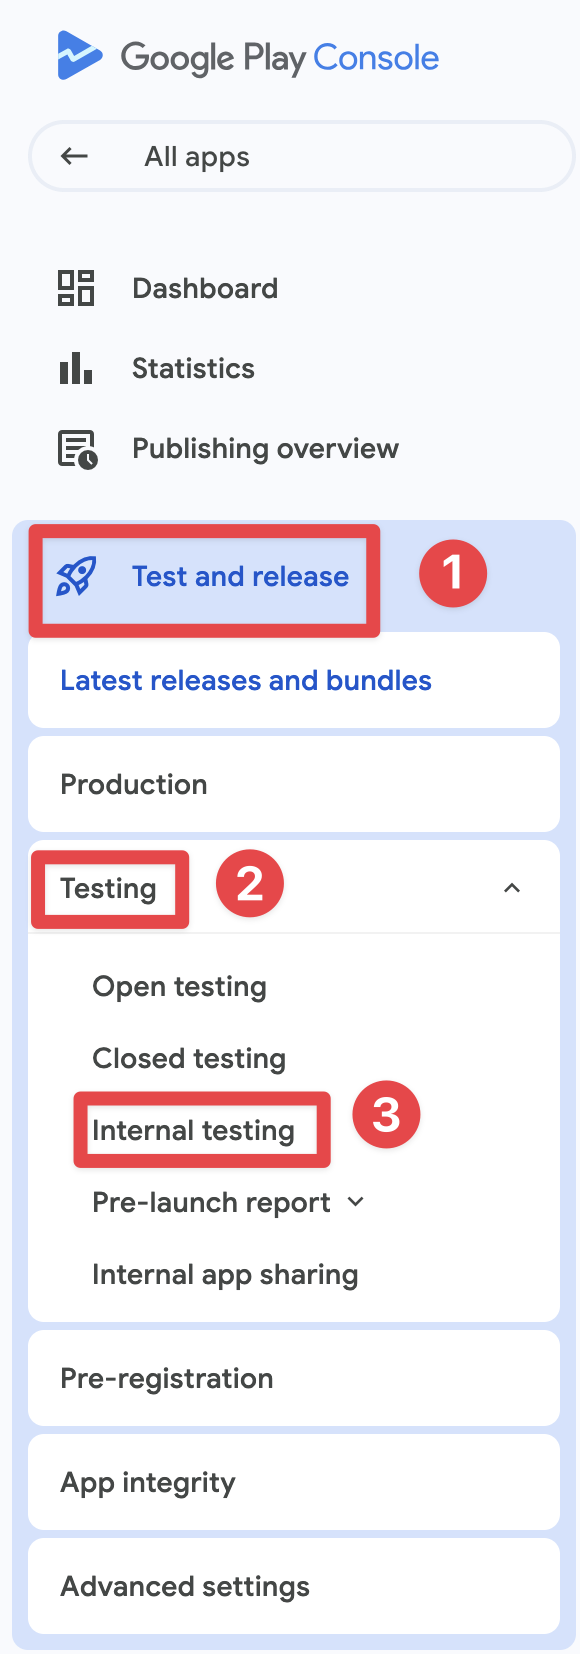
-
点击
Testers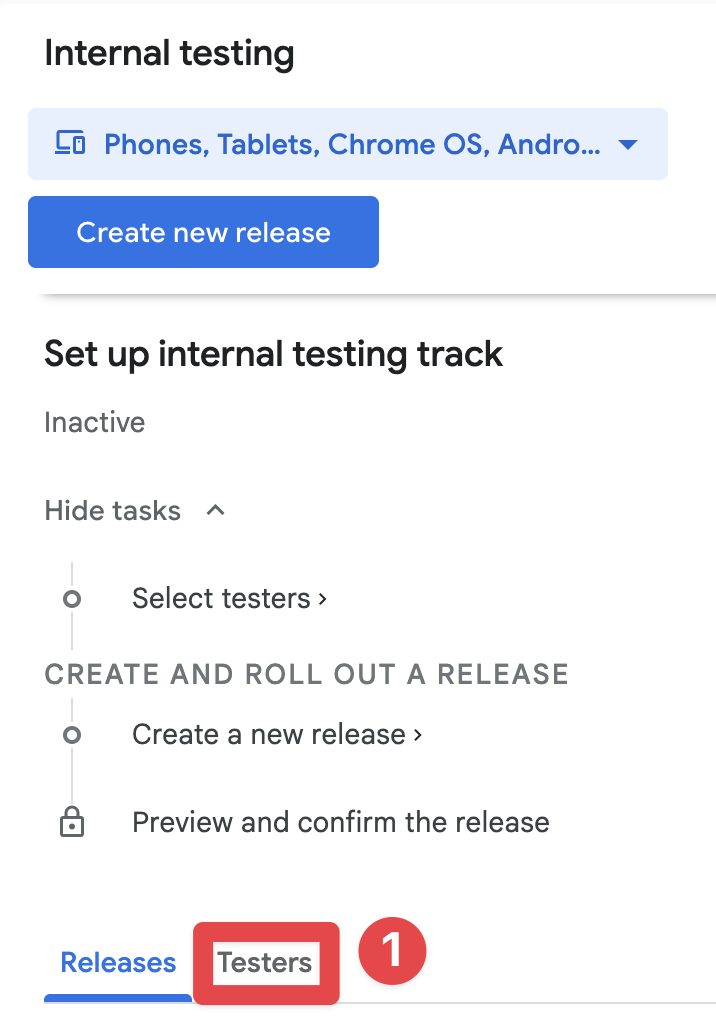
-
点击
Create email list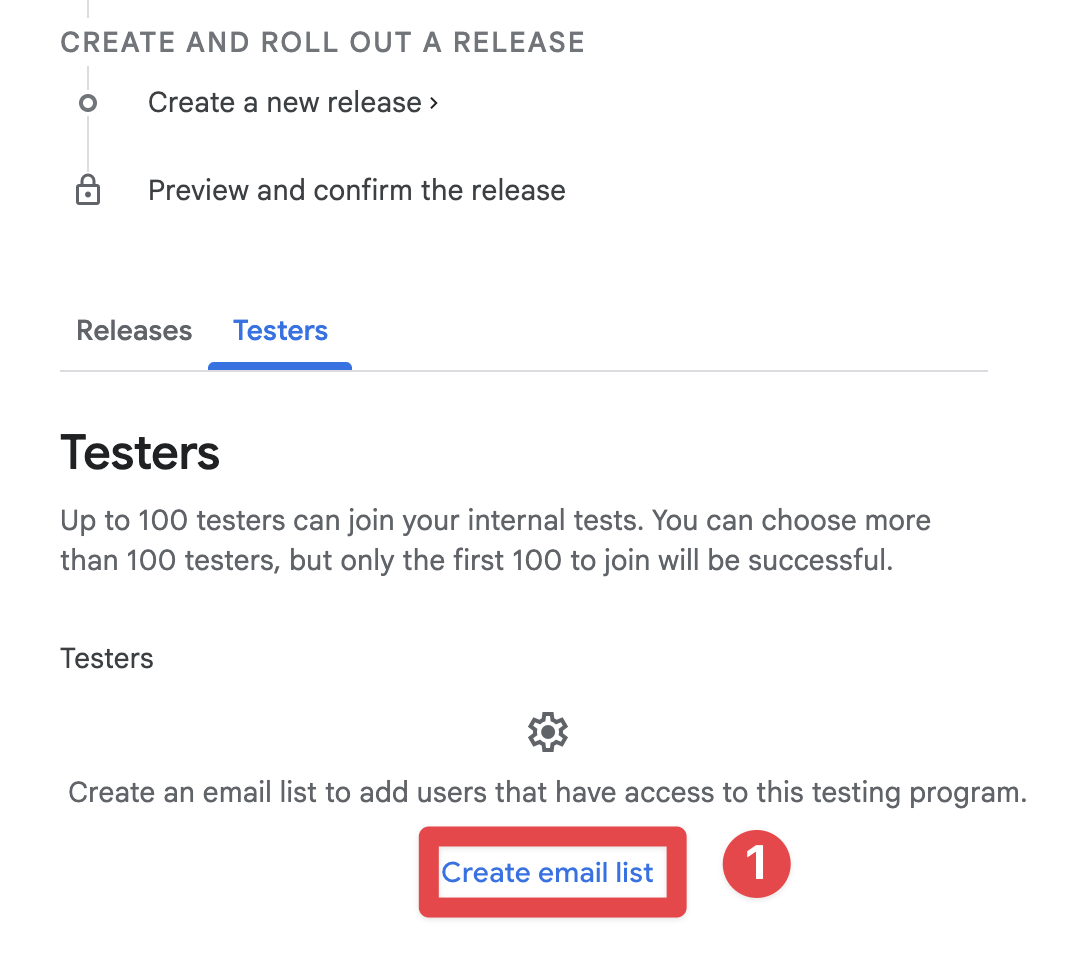
-
命名邮件列表
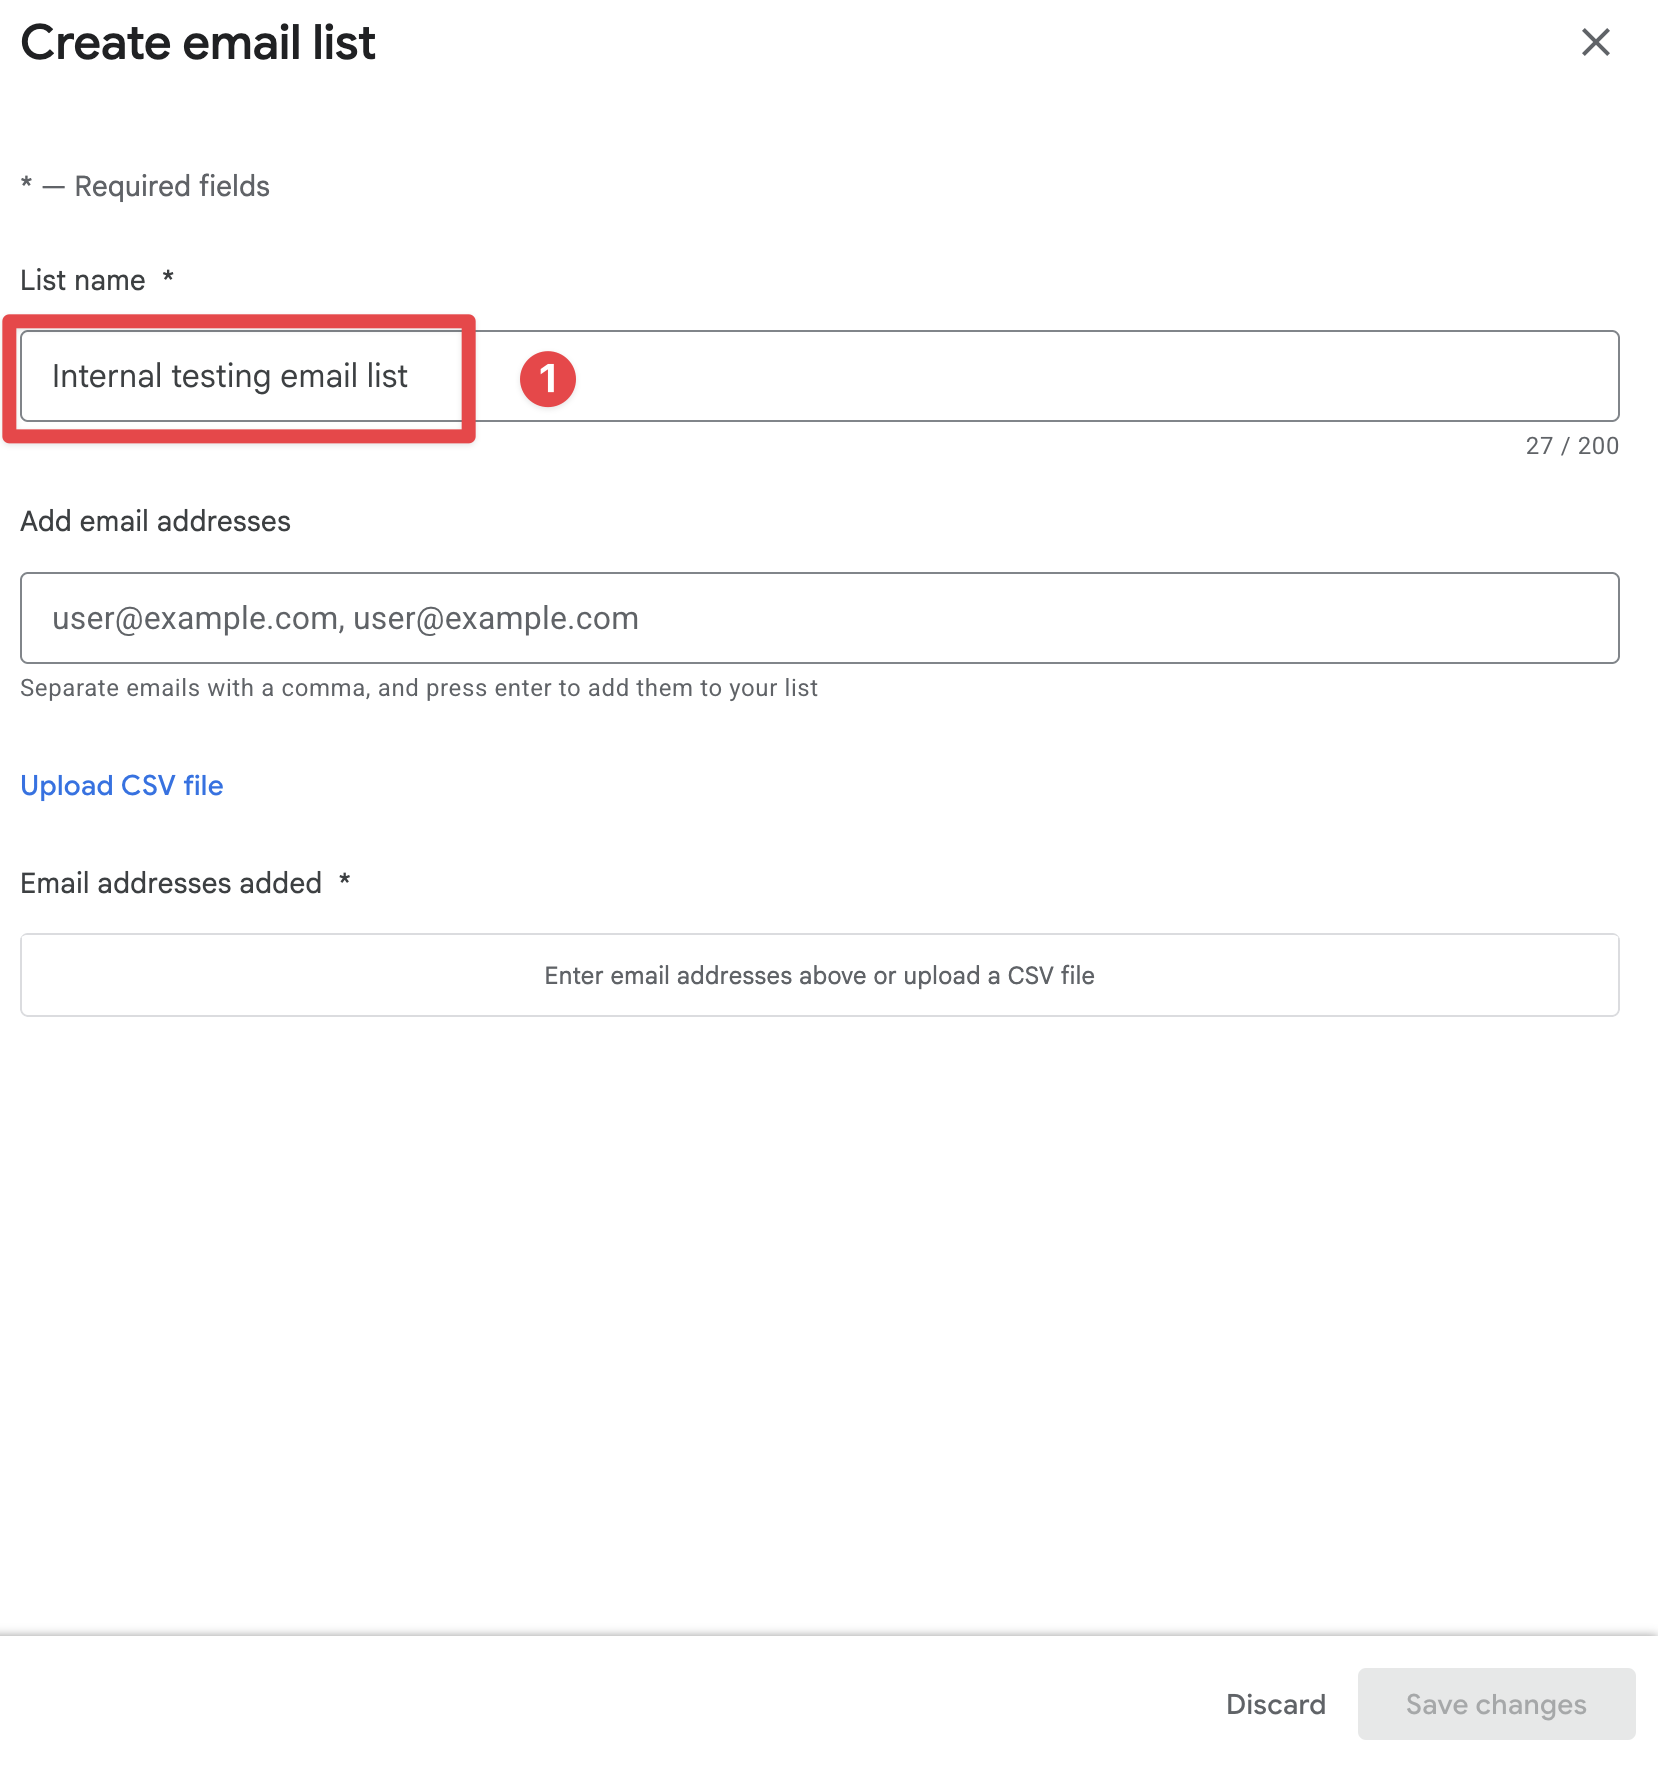
-
添加测试者的电子邮件地址
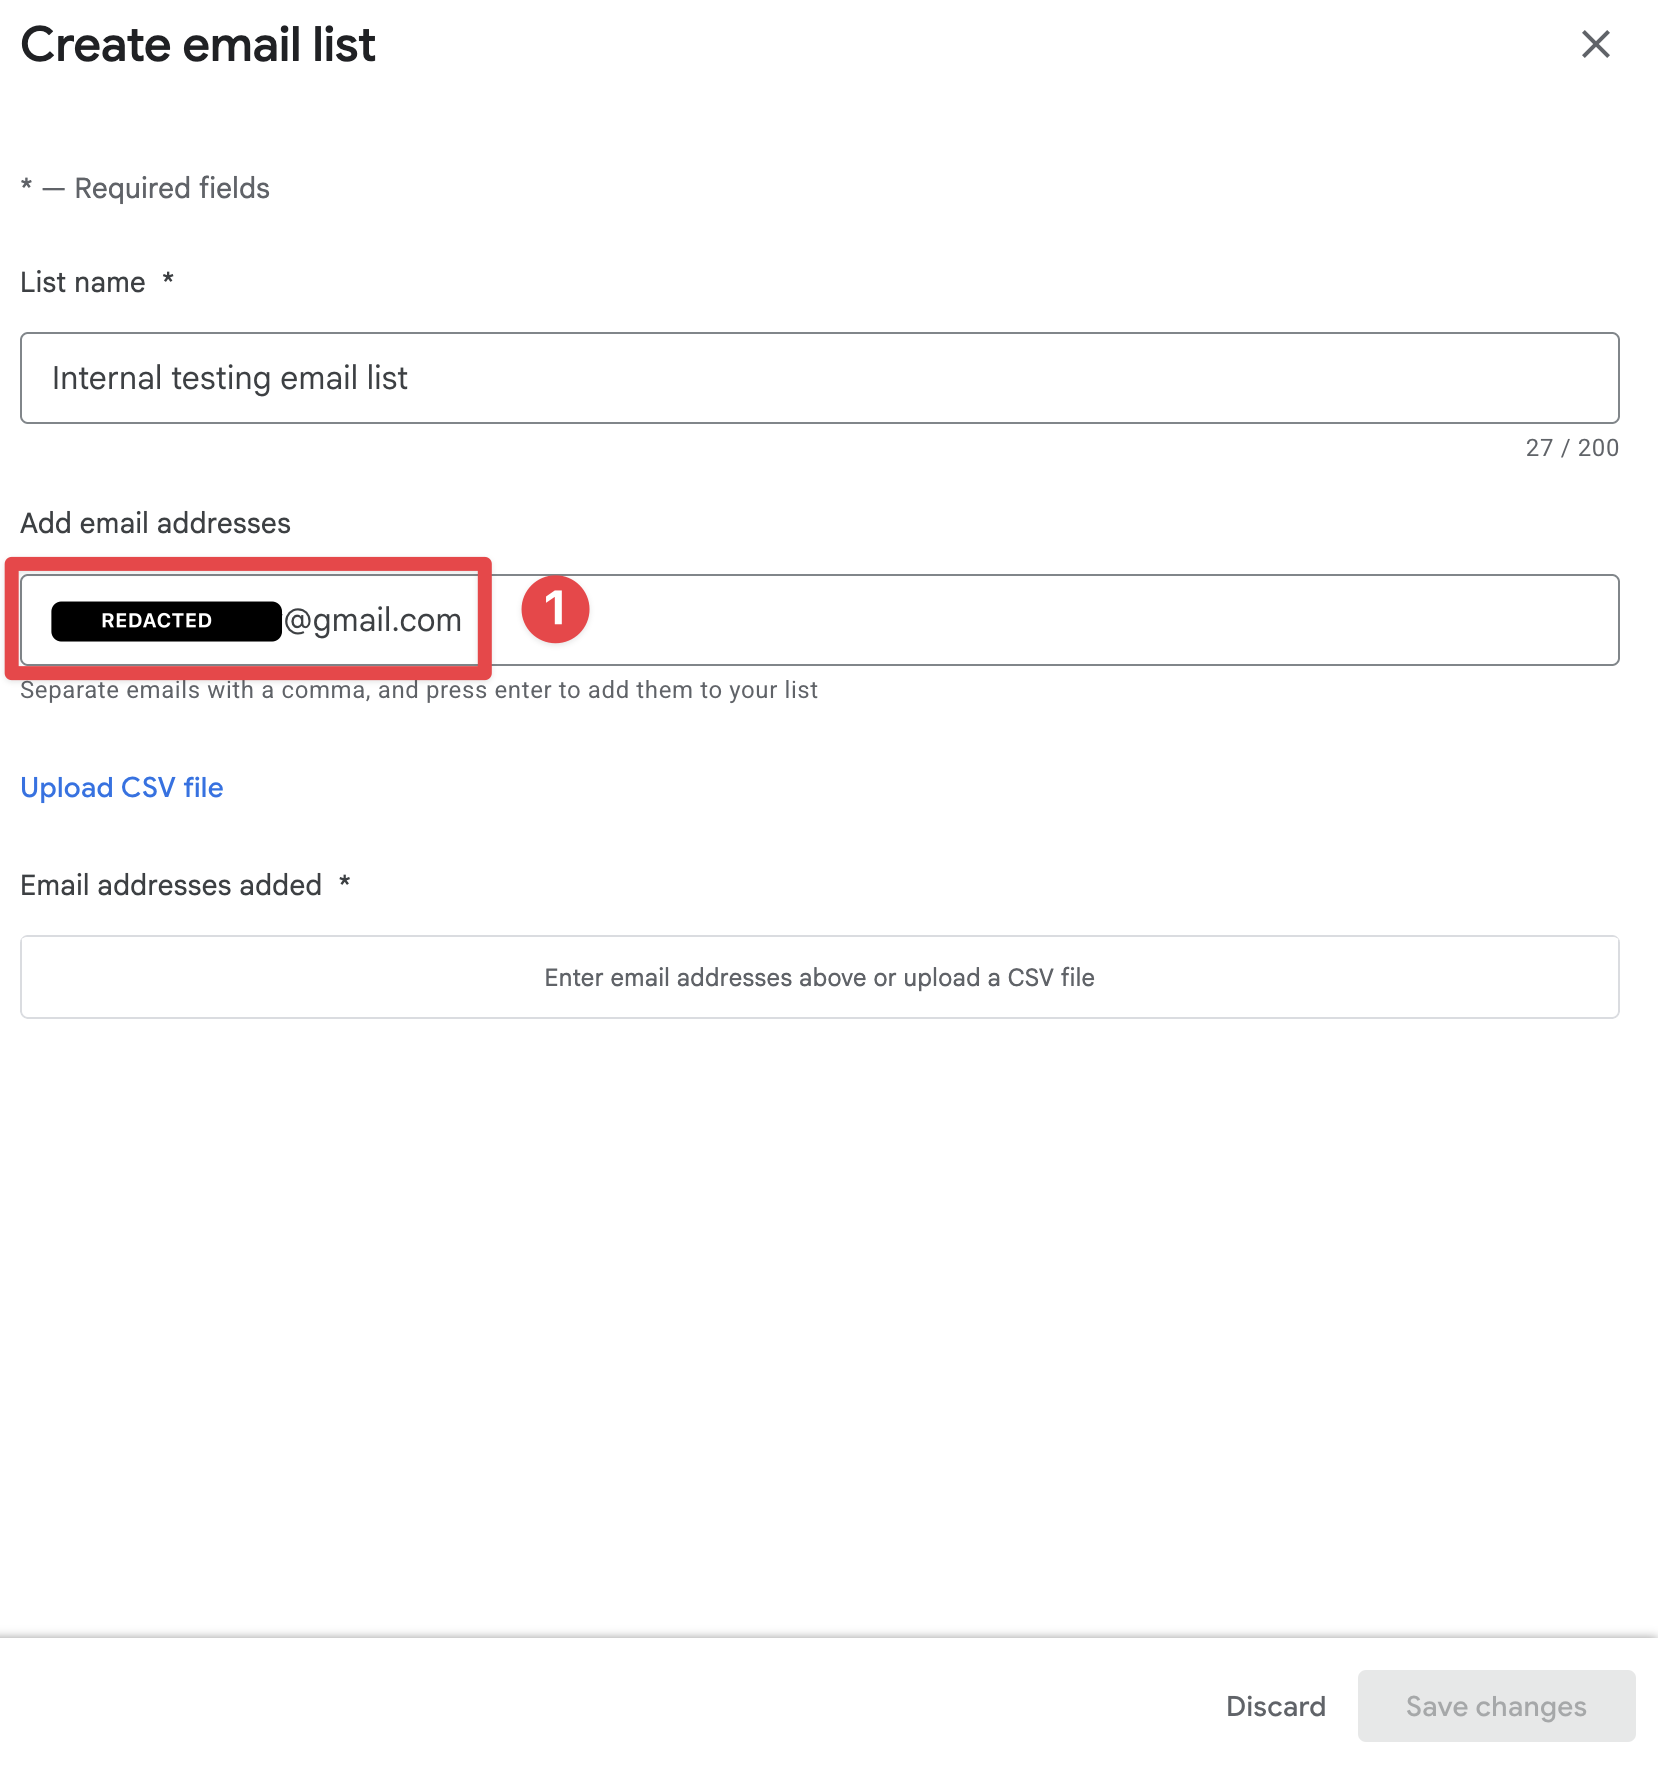
-
按
Enter并点击Save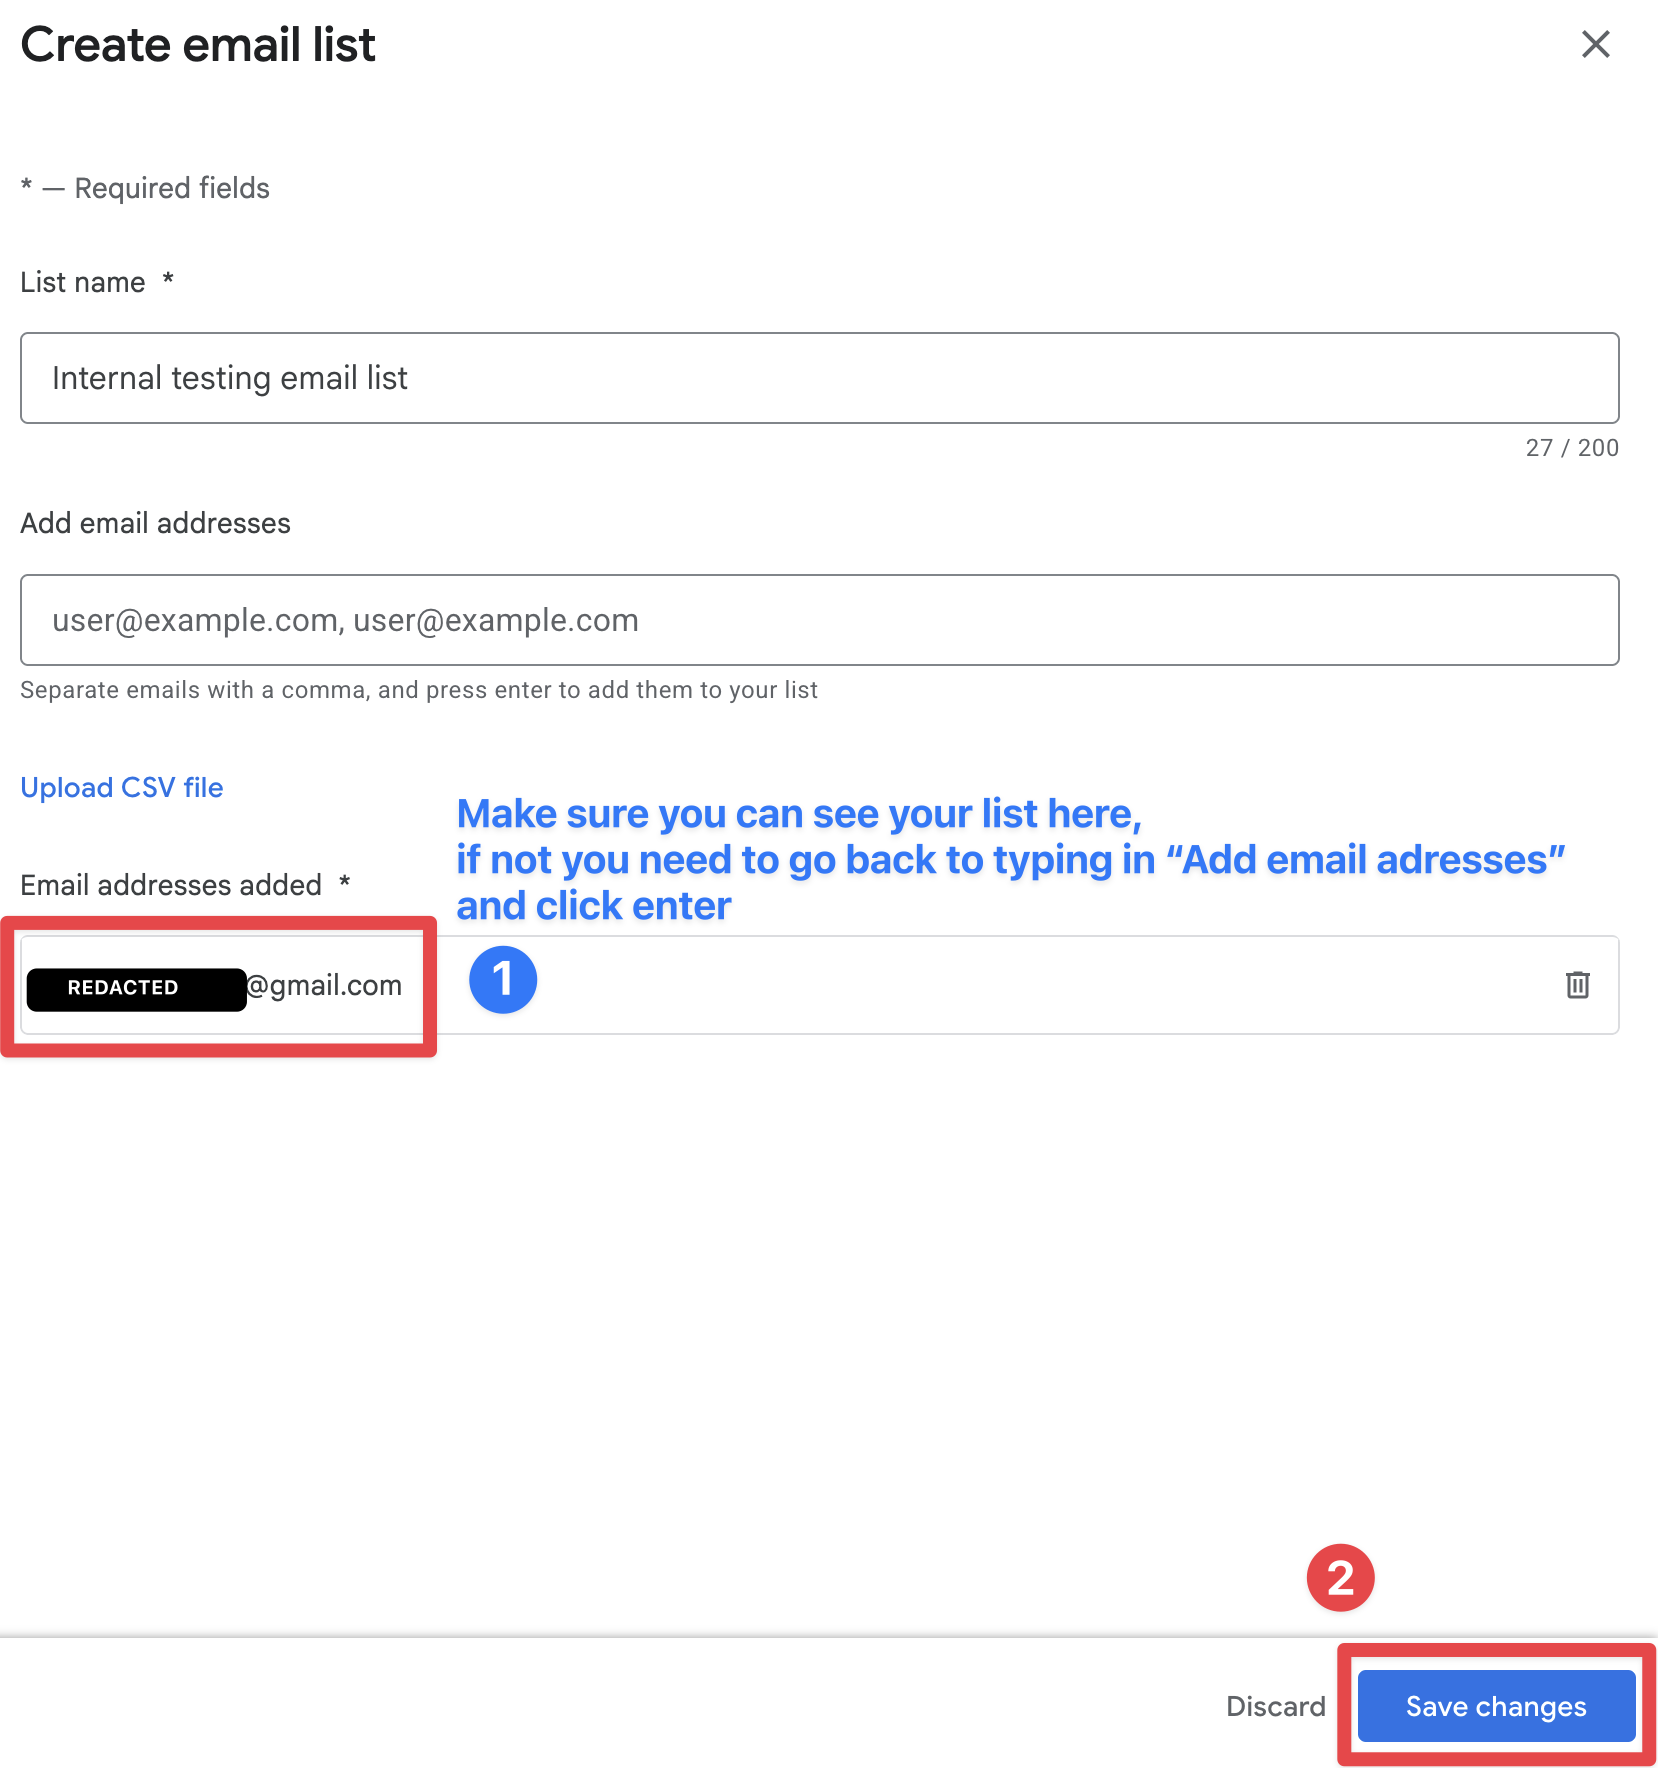
-
点击
Create group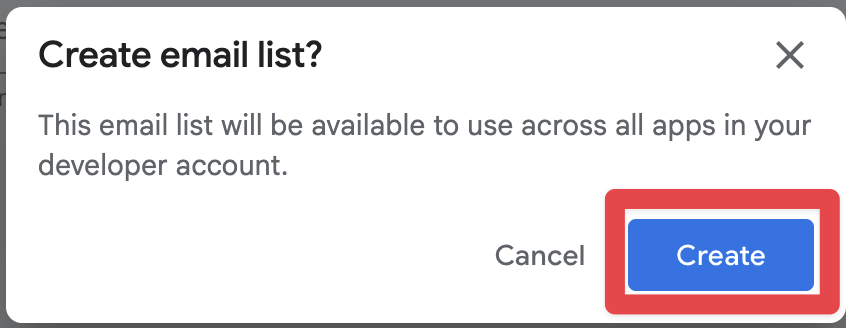
-
确保新列表被选中并点击
Save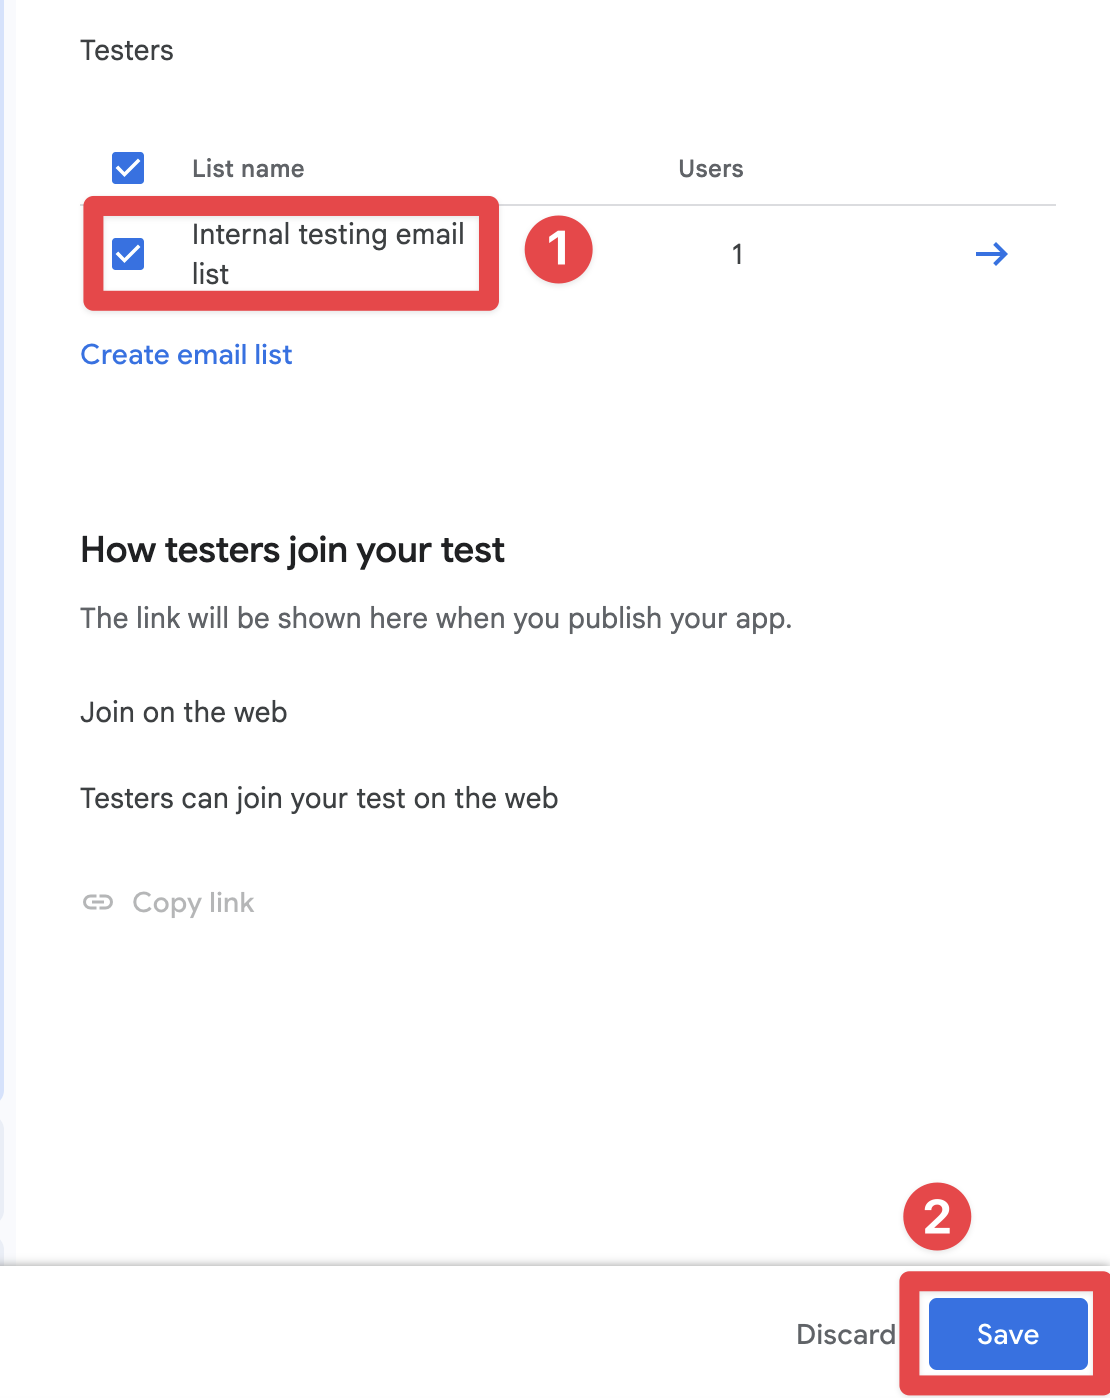
将应用程序上传到内部测试组
标题:将应用程序上传到内部测试组现在您已经创建了内部测试组,可以将应用程序上传到内部测试组。
-
前往
Test and release->Testing->Internal testing -
点击
Releases按钮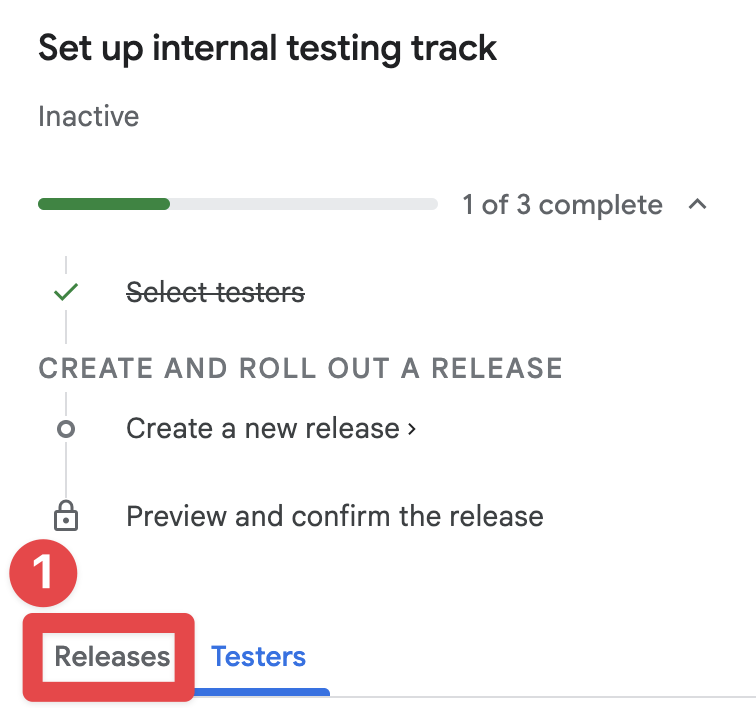
-
点击
Create new release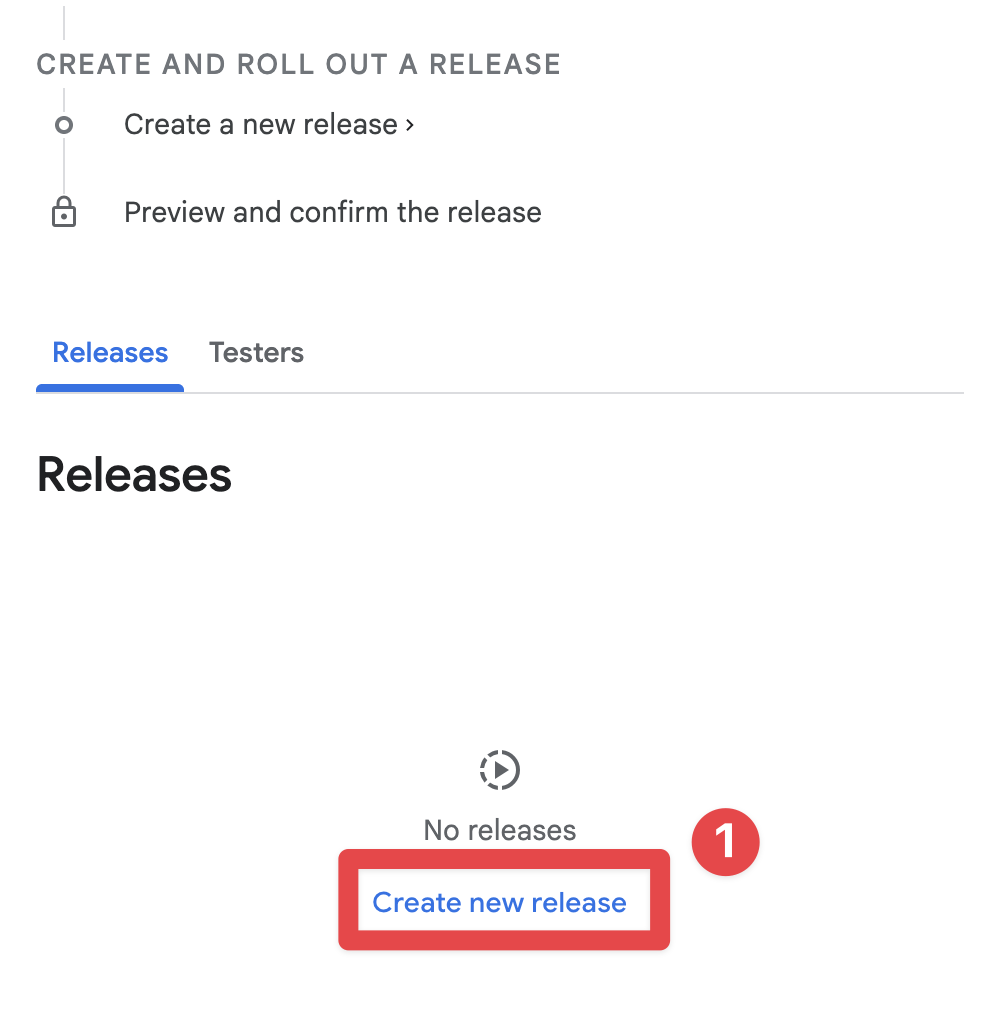
-
点击
Upload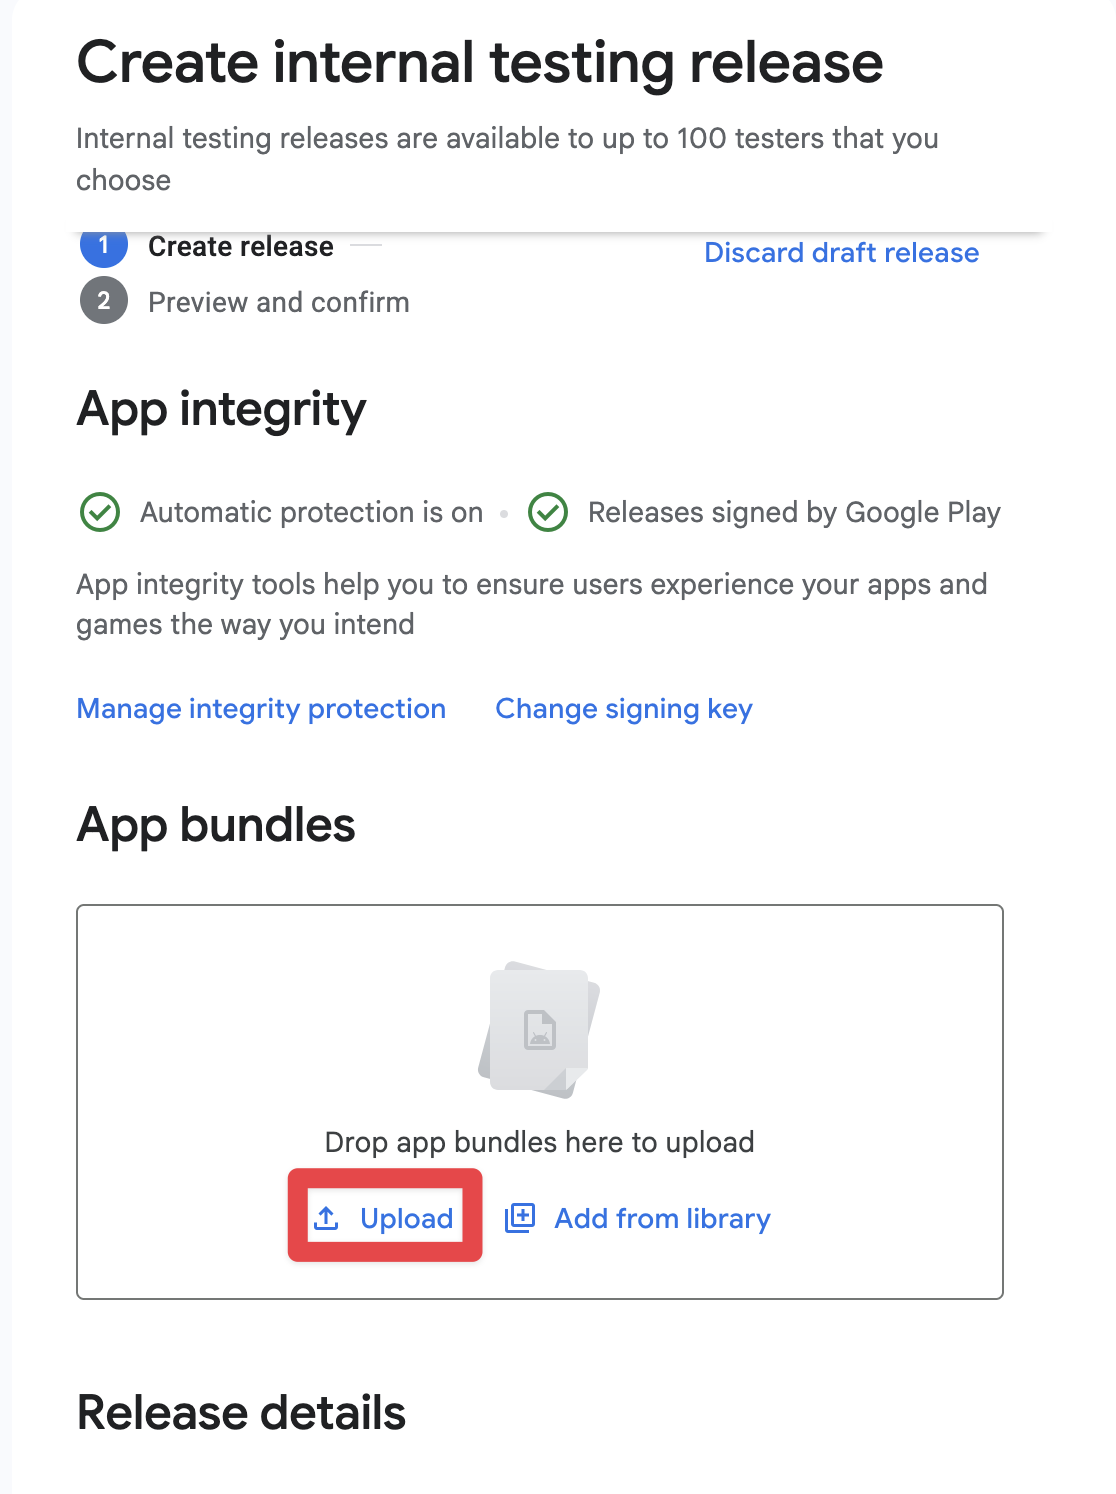
-
选择 AAB 文件
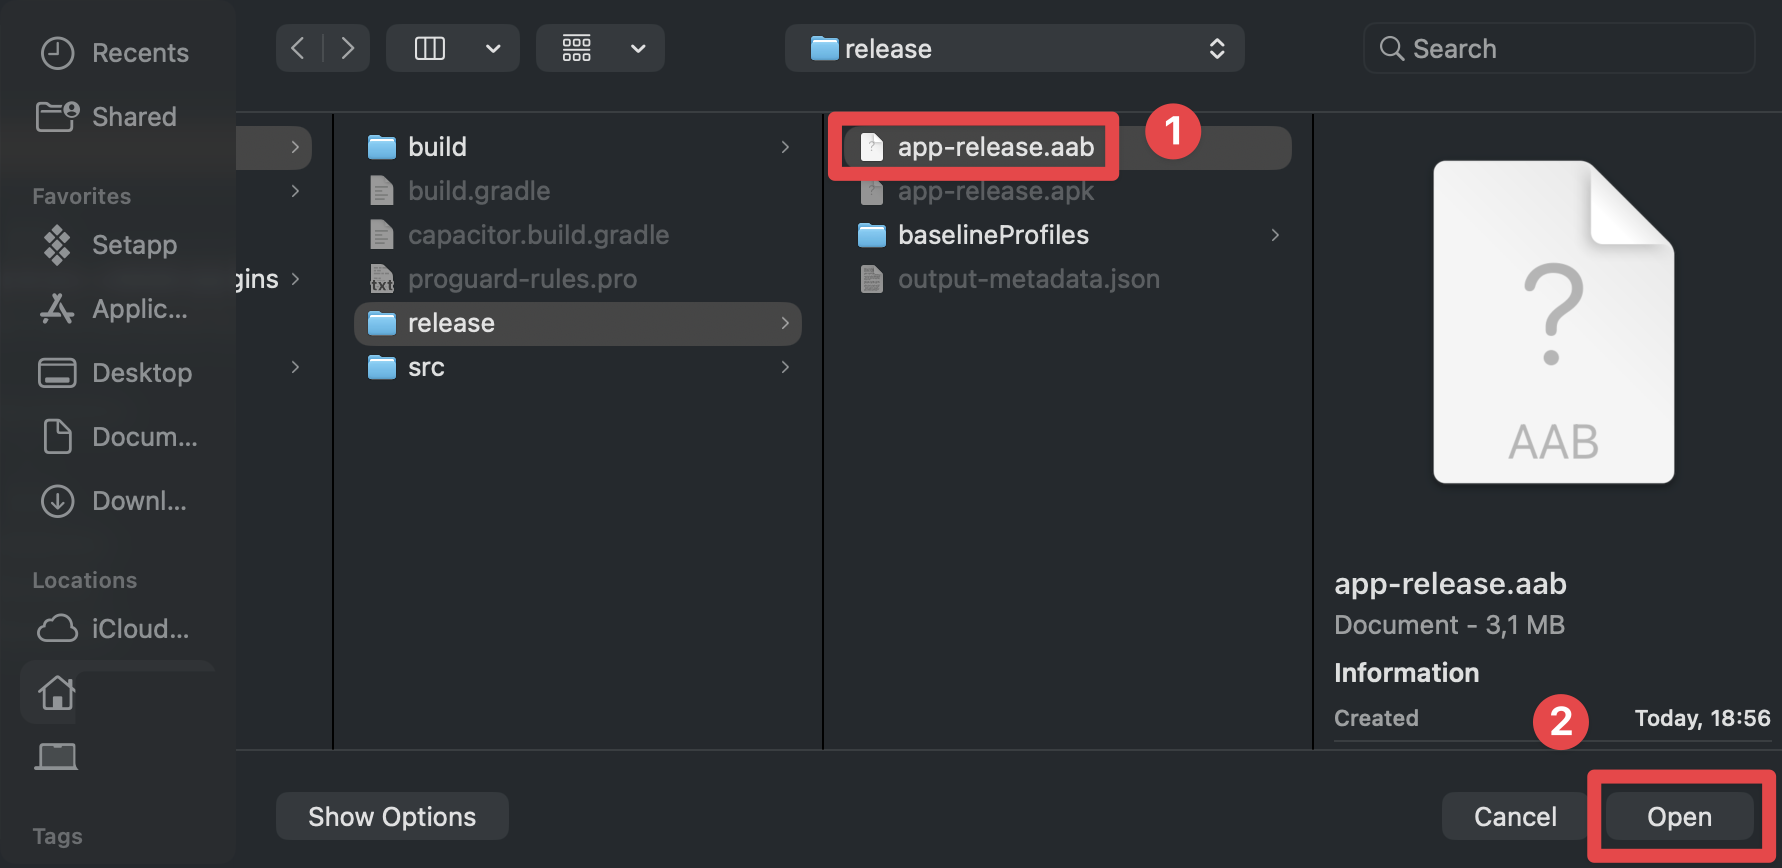
-
等待 AAB 文件上传
-
点击
Next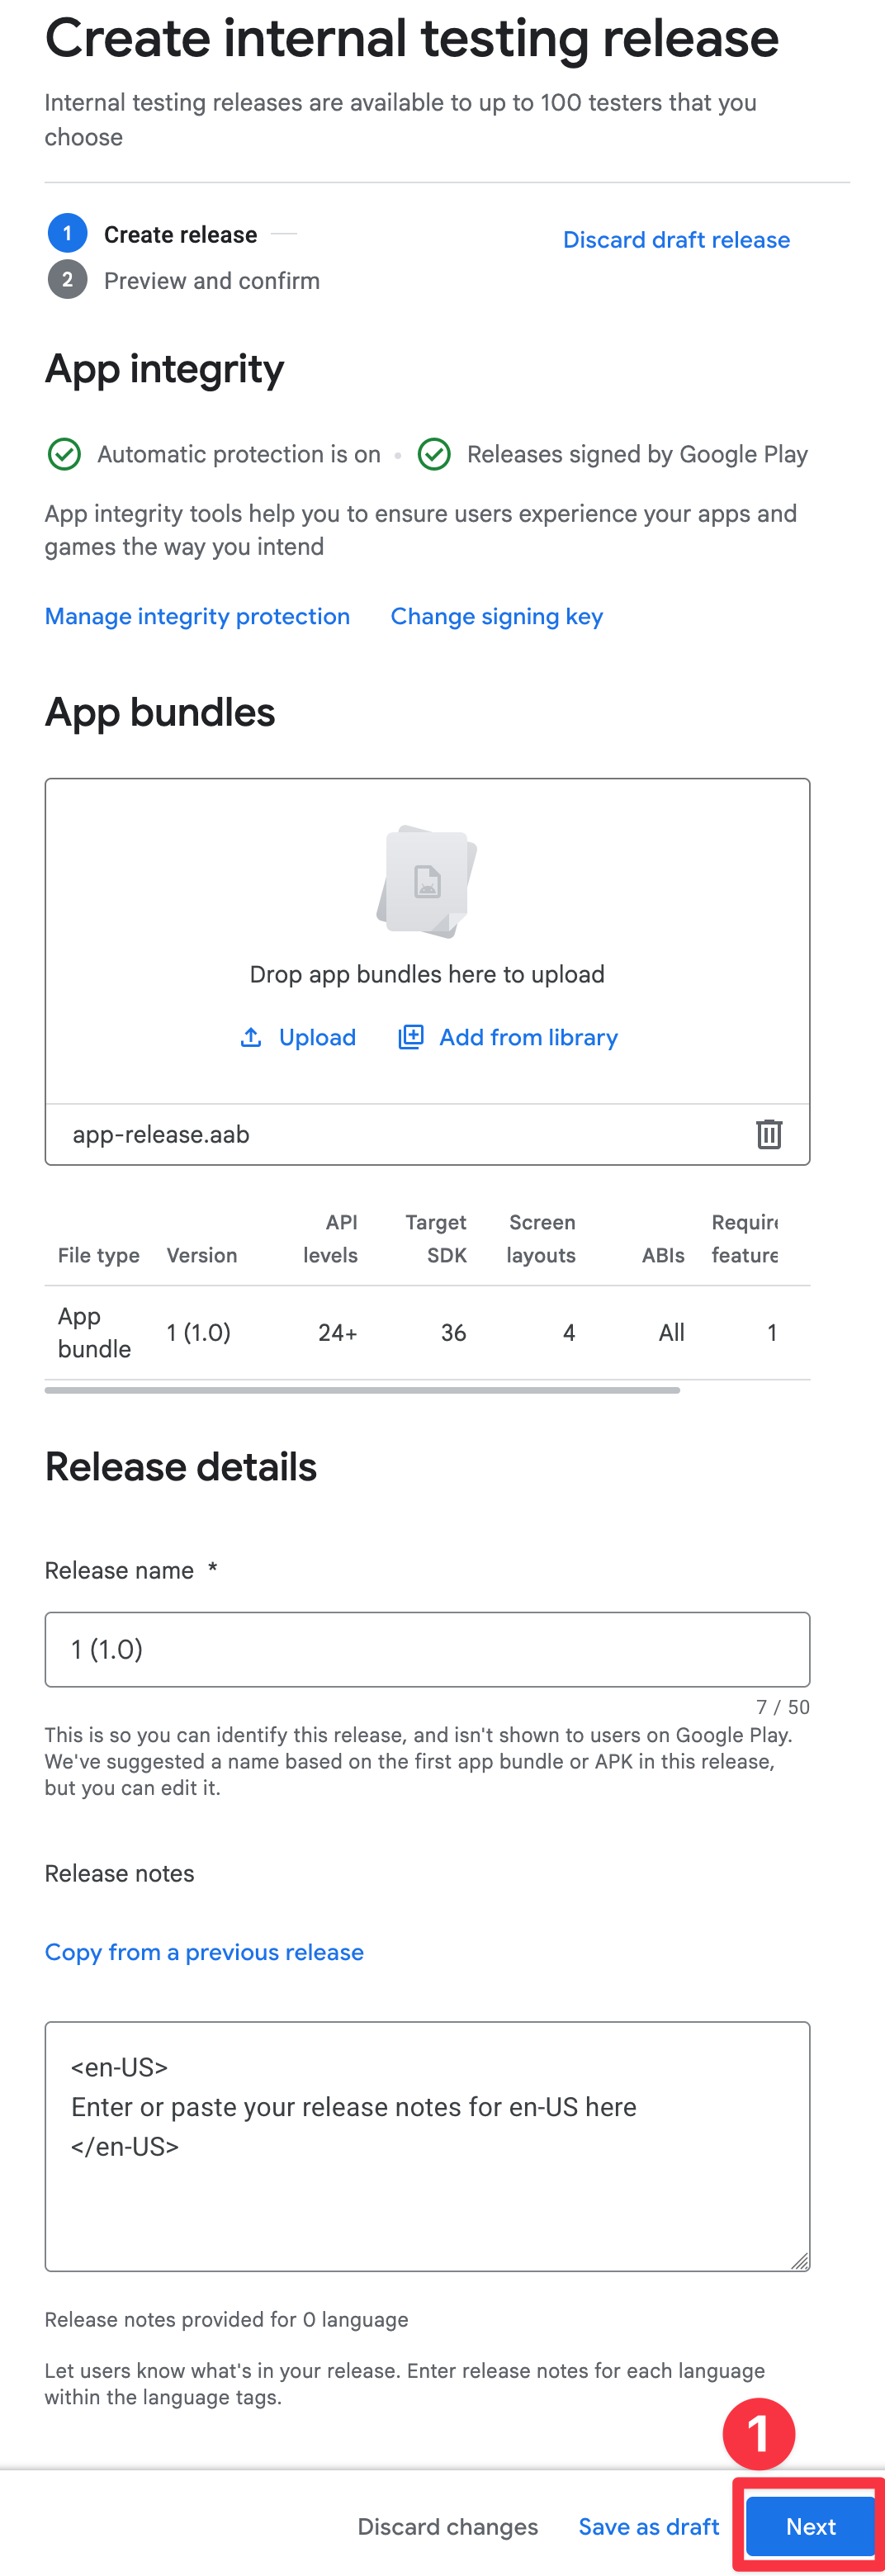
-
修复错误
我个人认为,这个阶段我看到这个错误
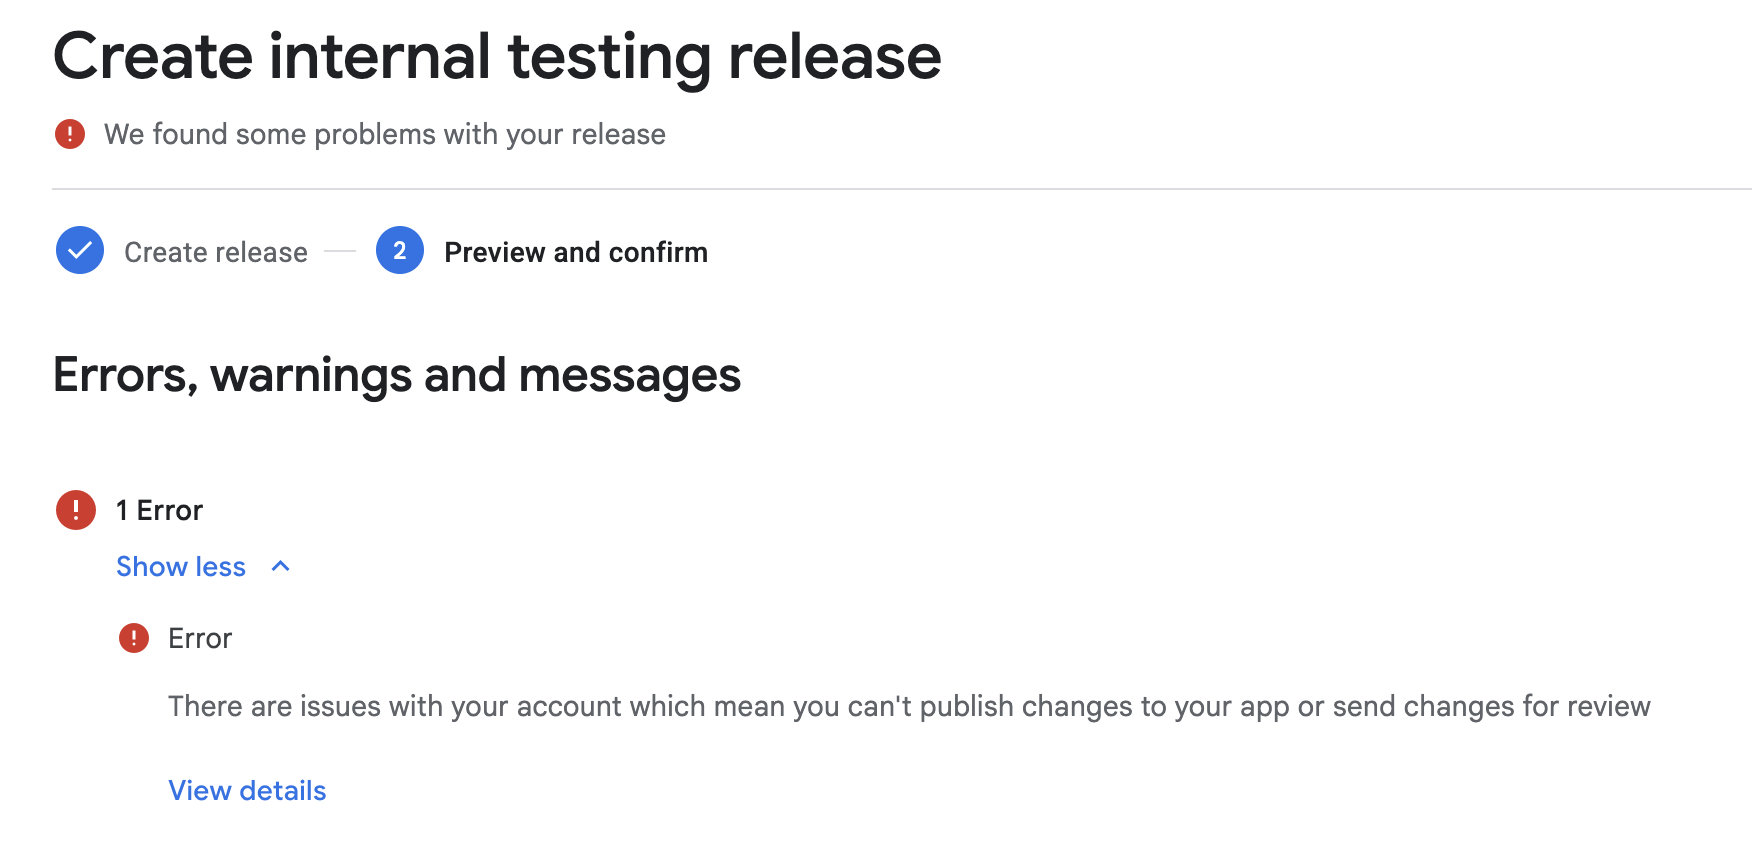
这是因为我还没有验证我的手机号码。 我会做到这一点并继续教程
-
点击
Save and publish这将发布应用到内部测试组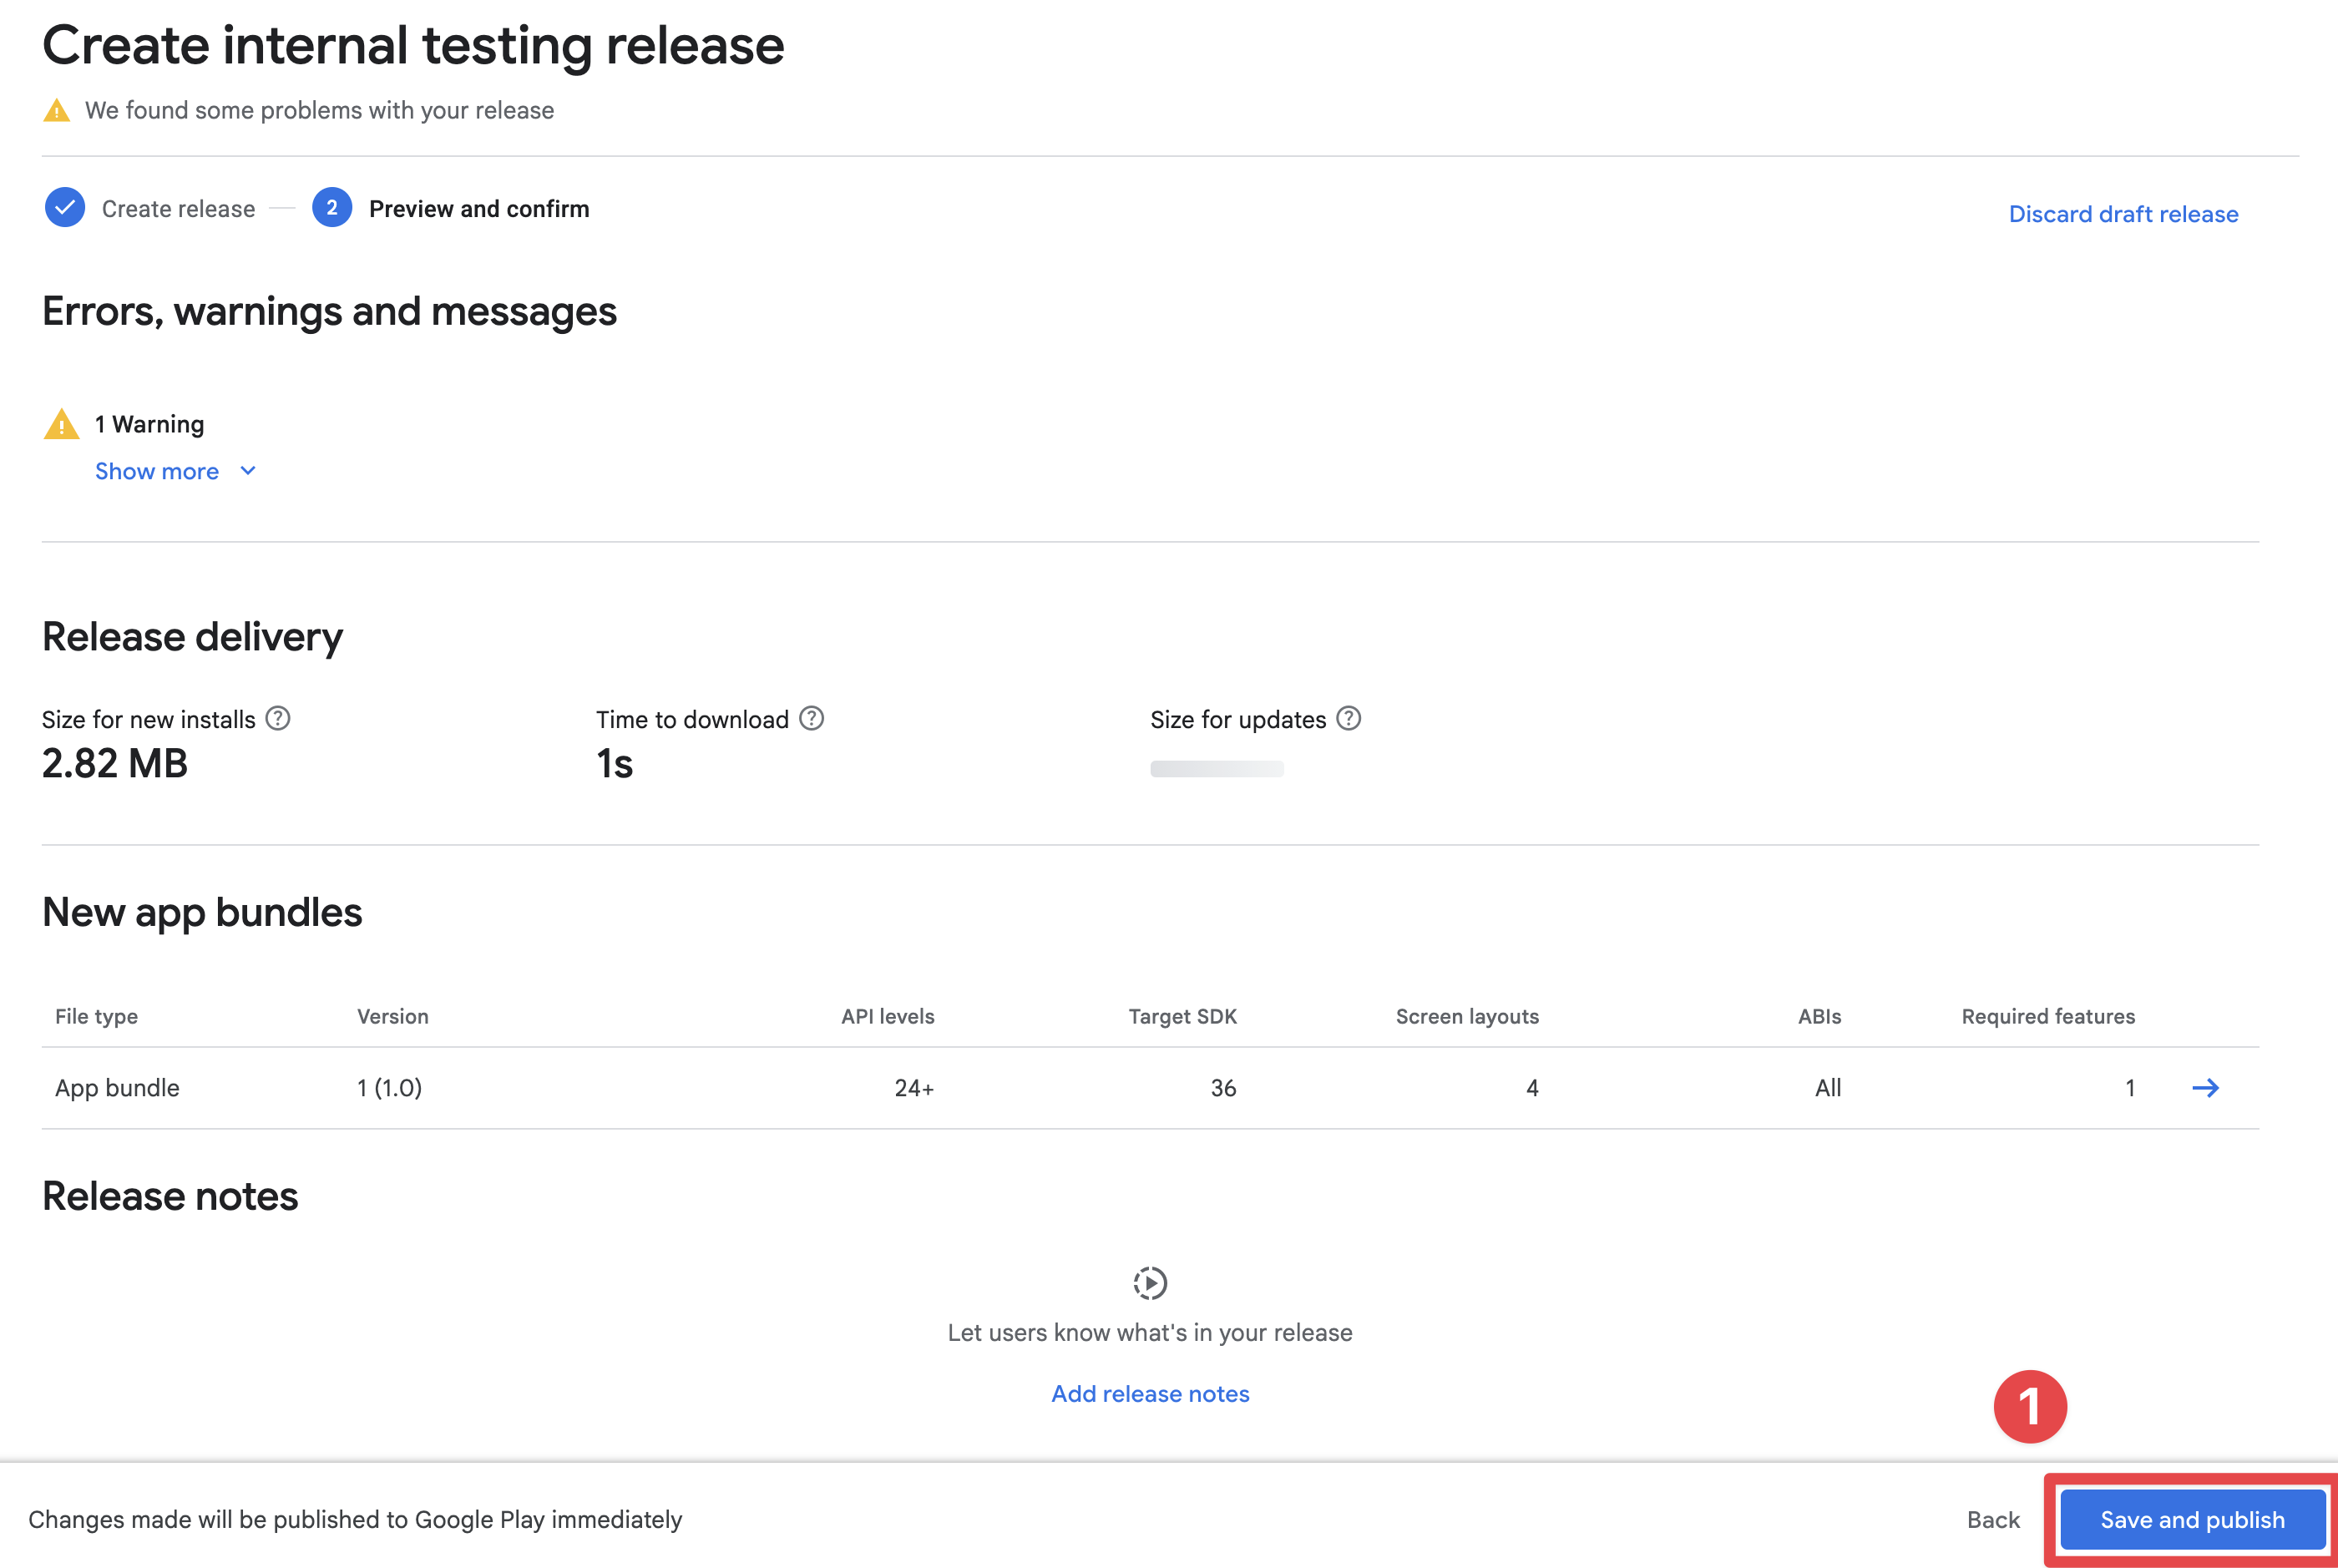
-
确认发布
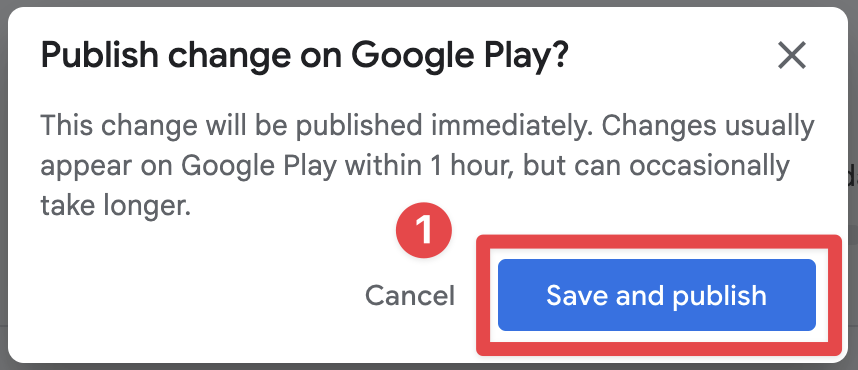
-
确保应用已发布
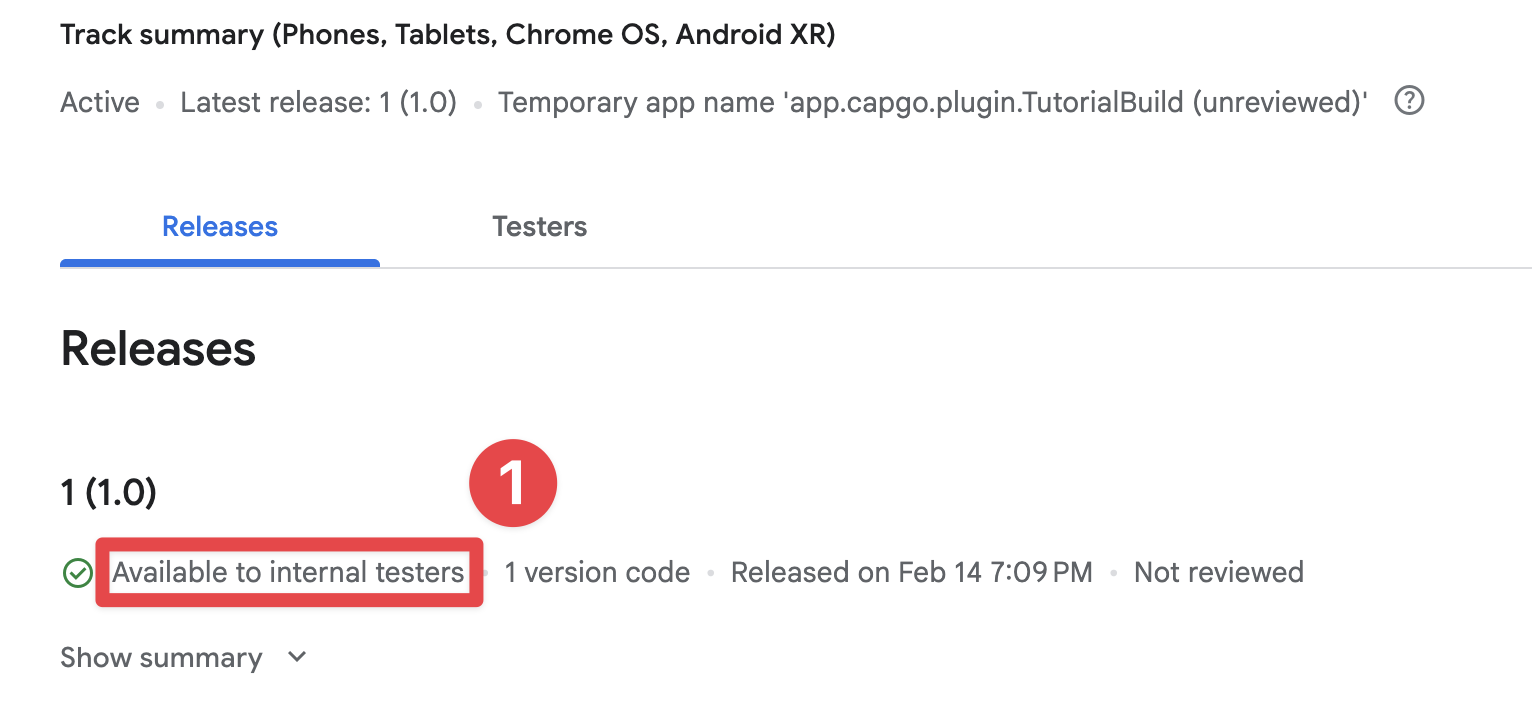
-
获取您的临时应用名称
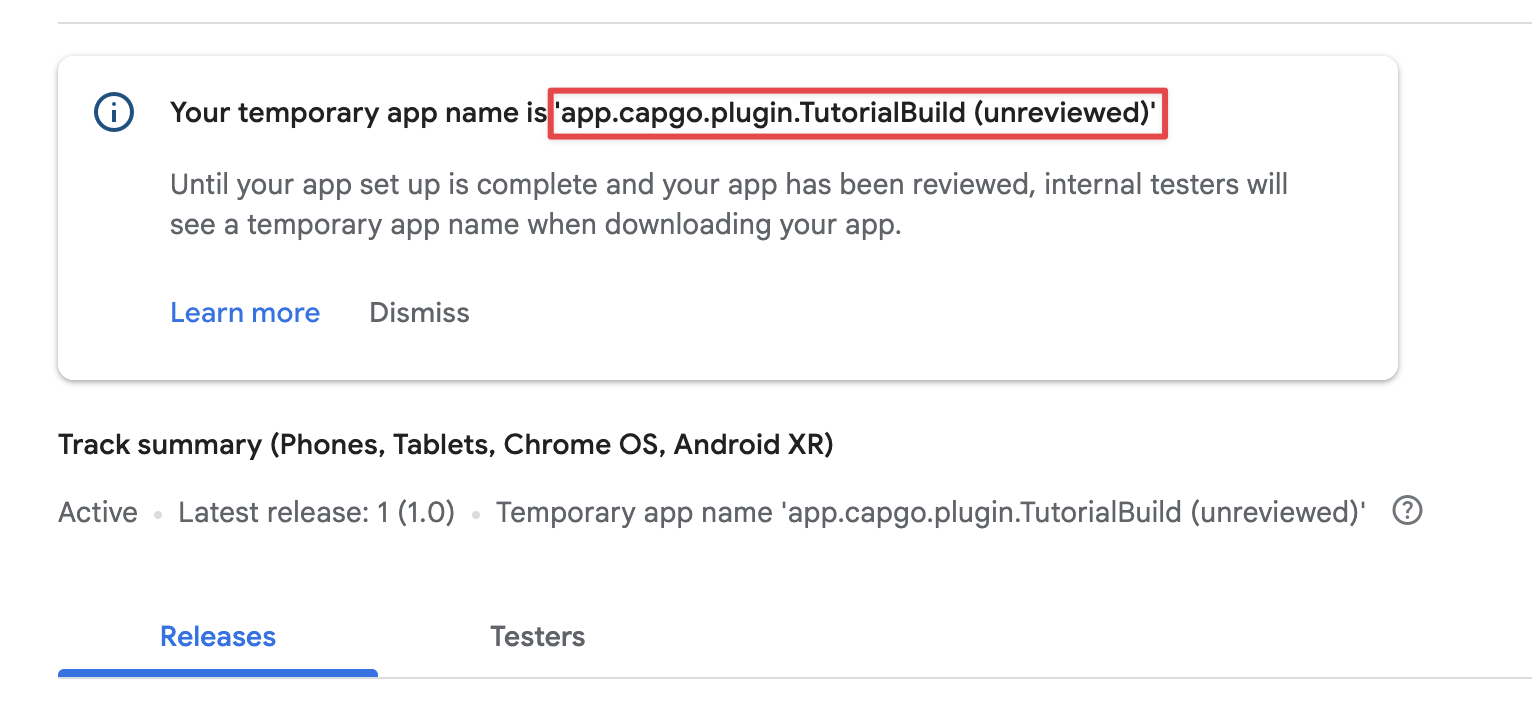
接受内部测试组的邀请
内部测试组邀请您已将应用程序上传到内部测试组,现可接受内部测试组的邀请。
-
前往
Test and release->Testing->Internal testing -
点击
Testers -
点击
Copy link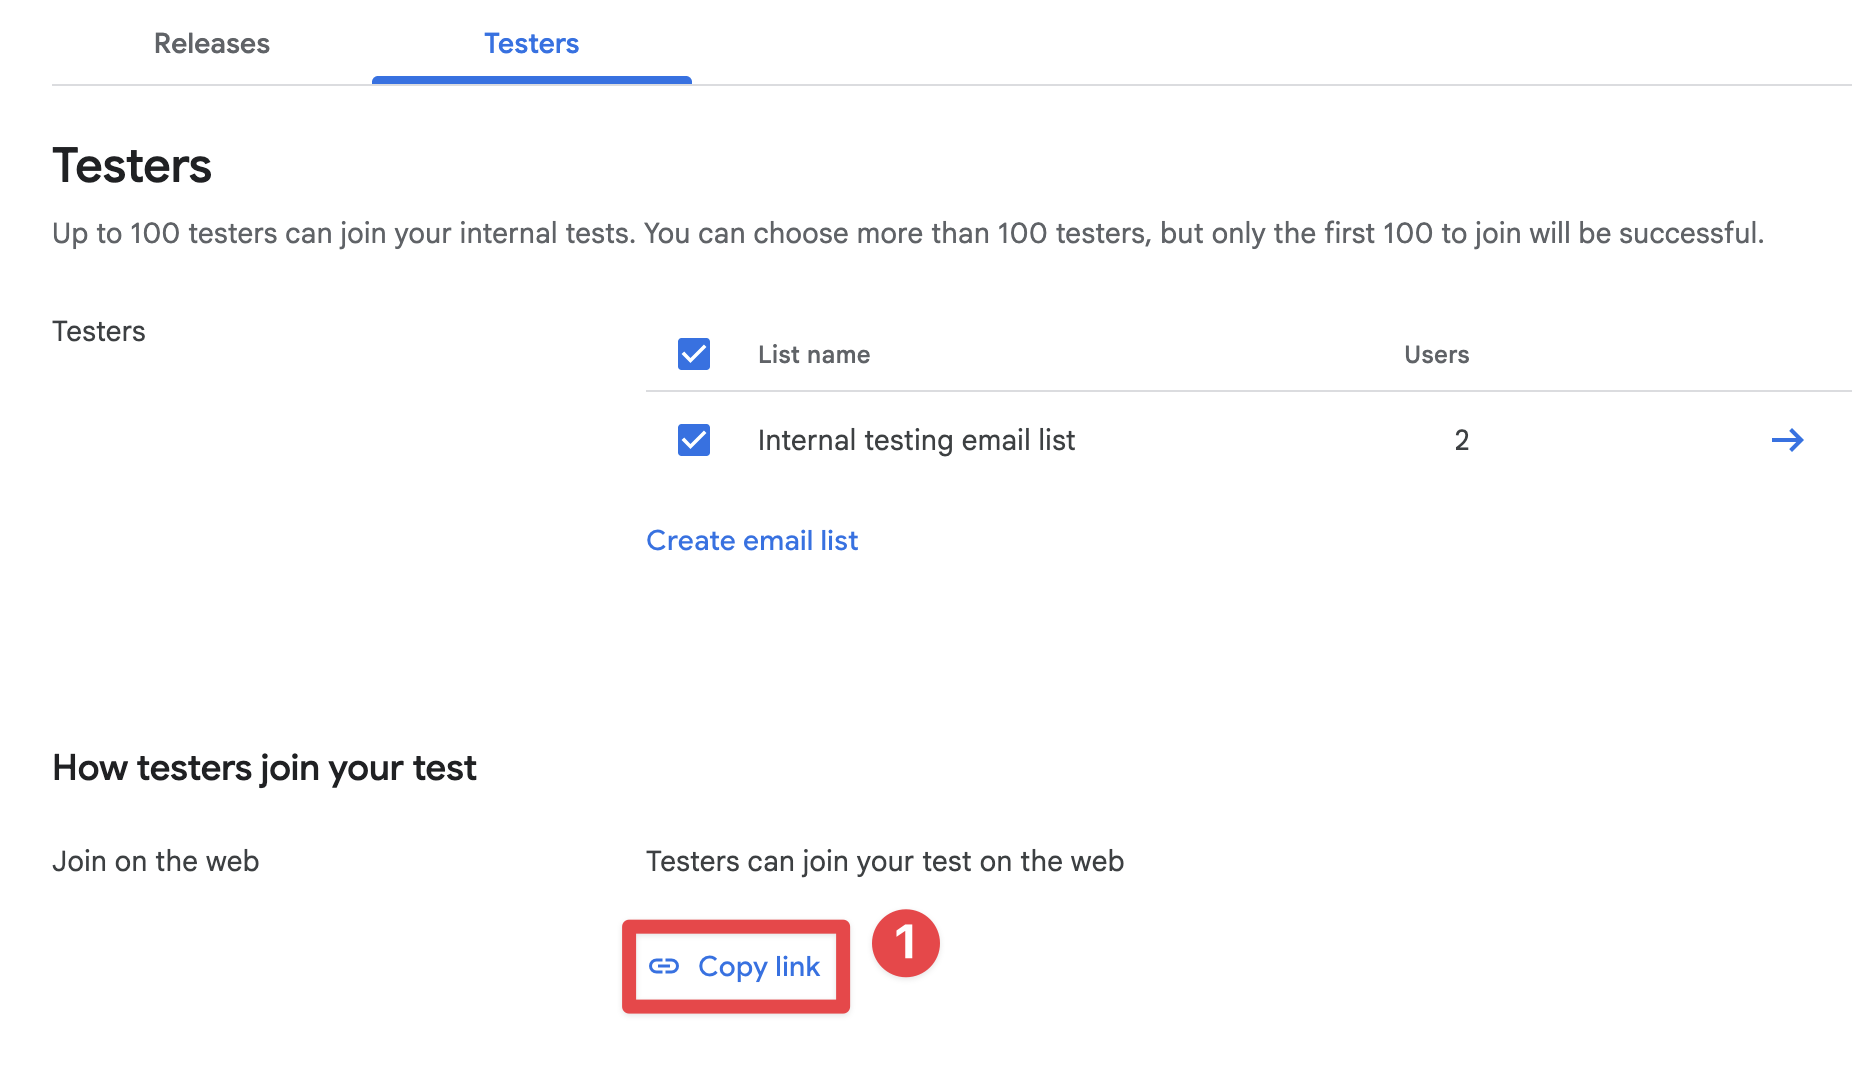
-
将链接发送到您的手机,打开浏览器并点击
Accept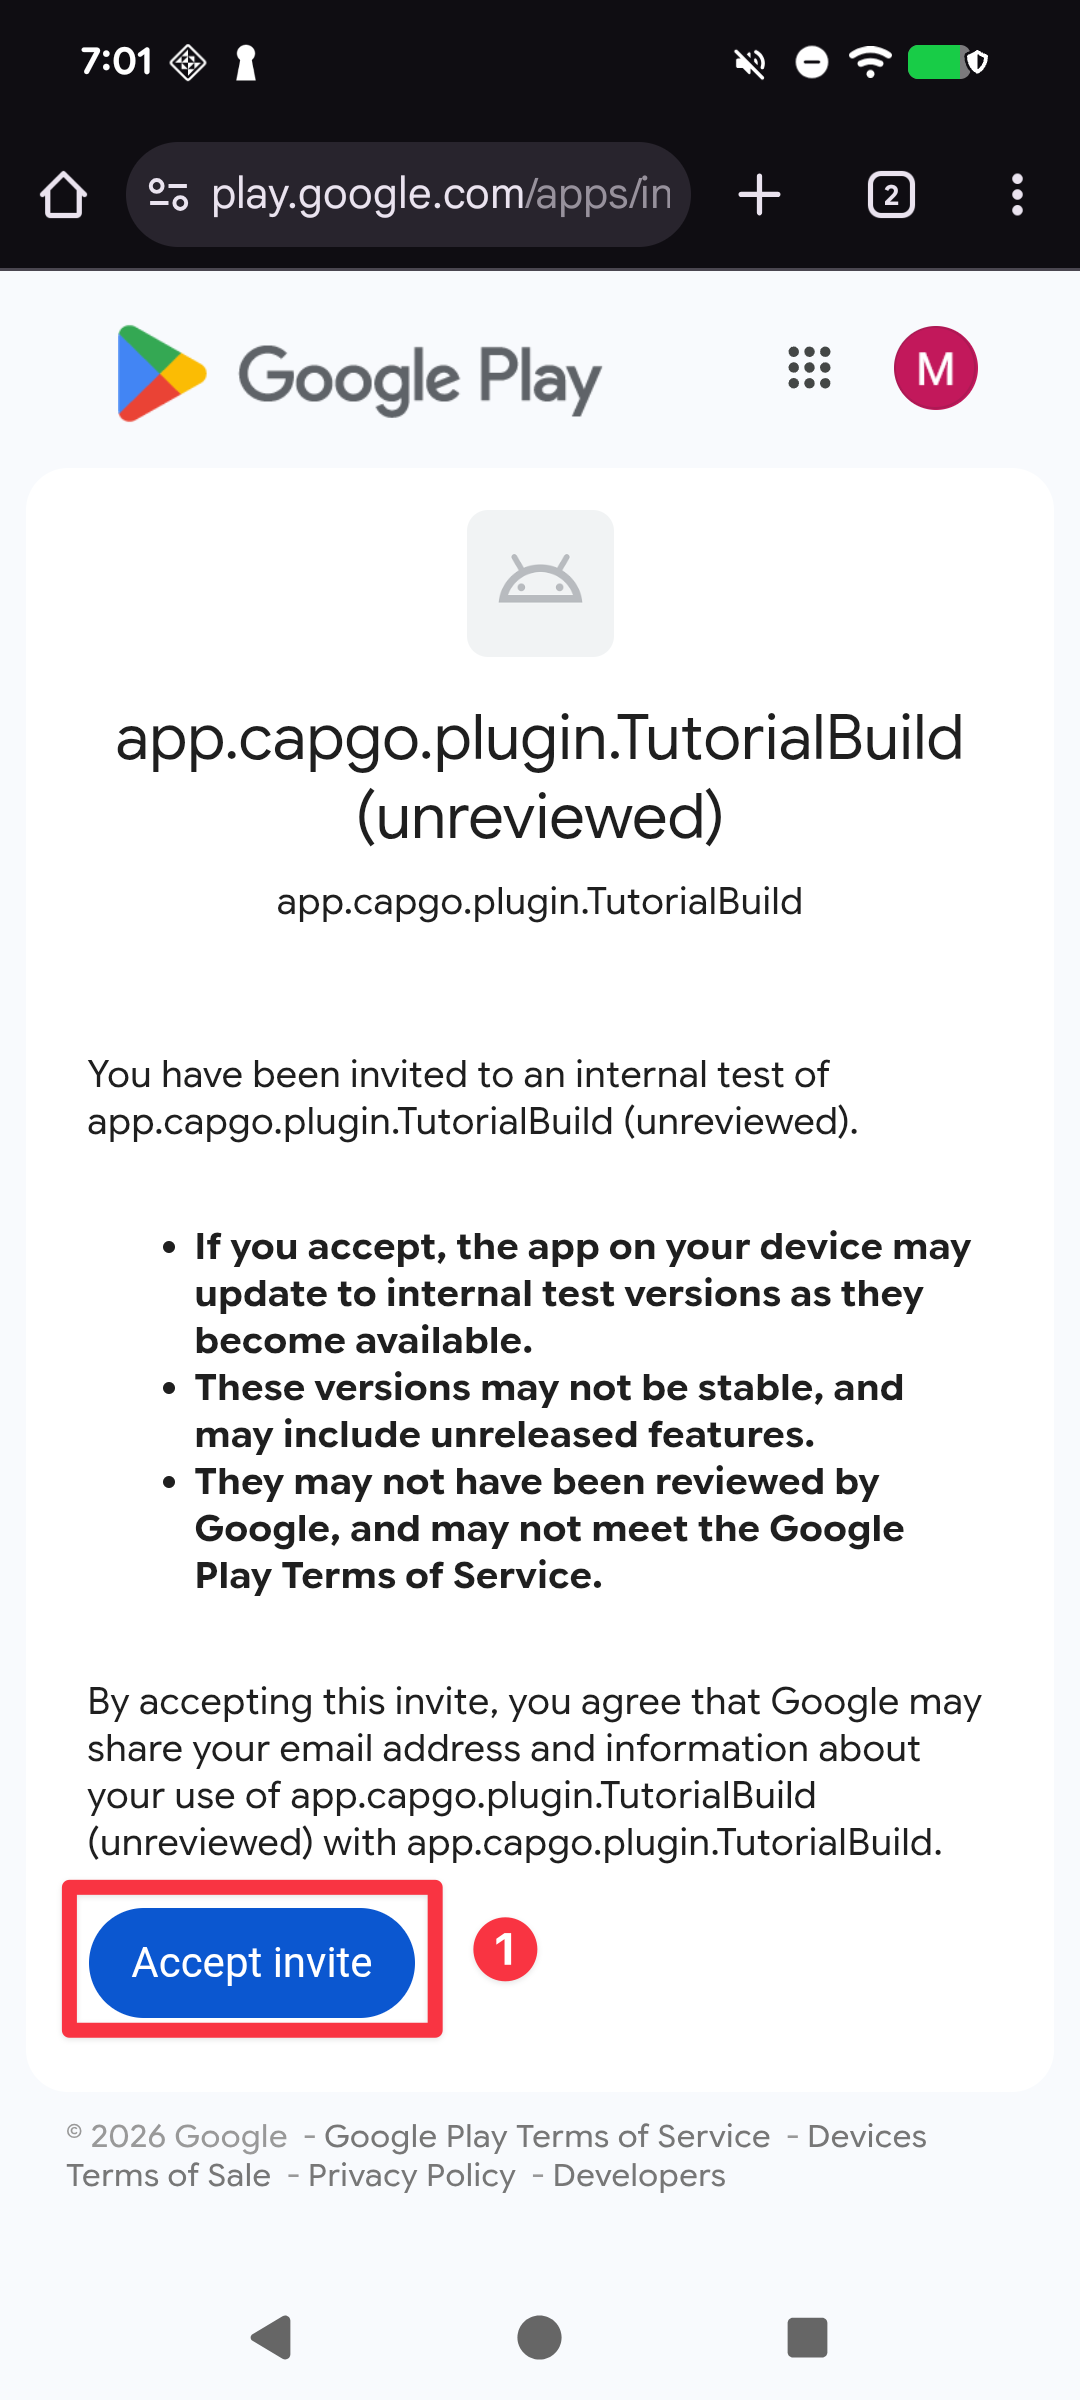
-
确认邀请已被接受并点击“在Play Store下载它”
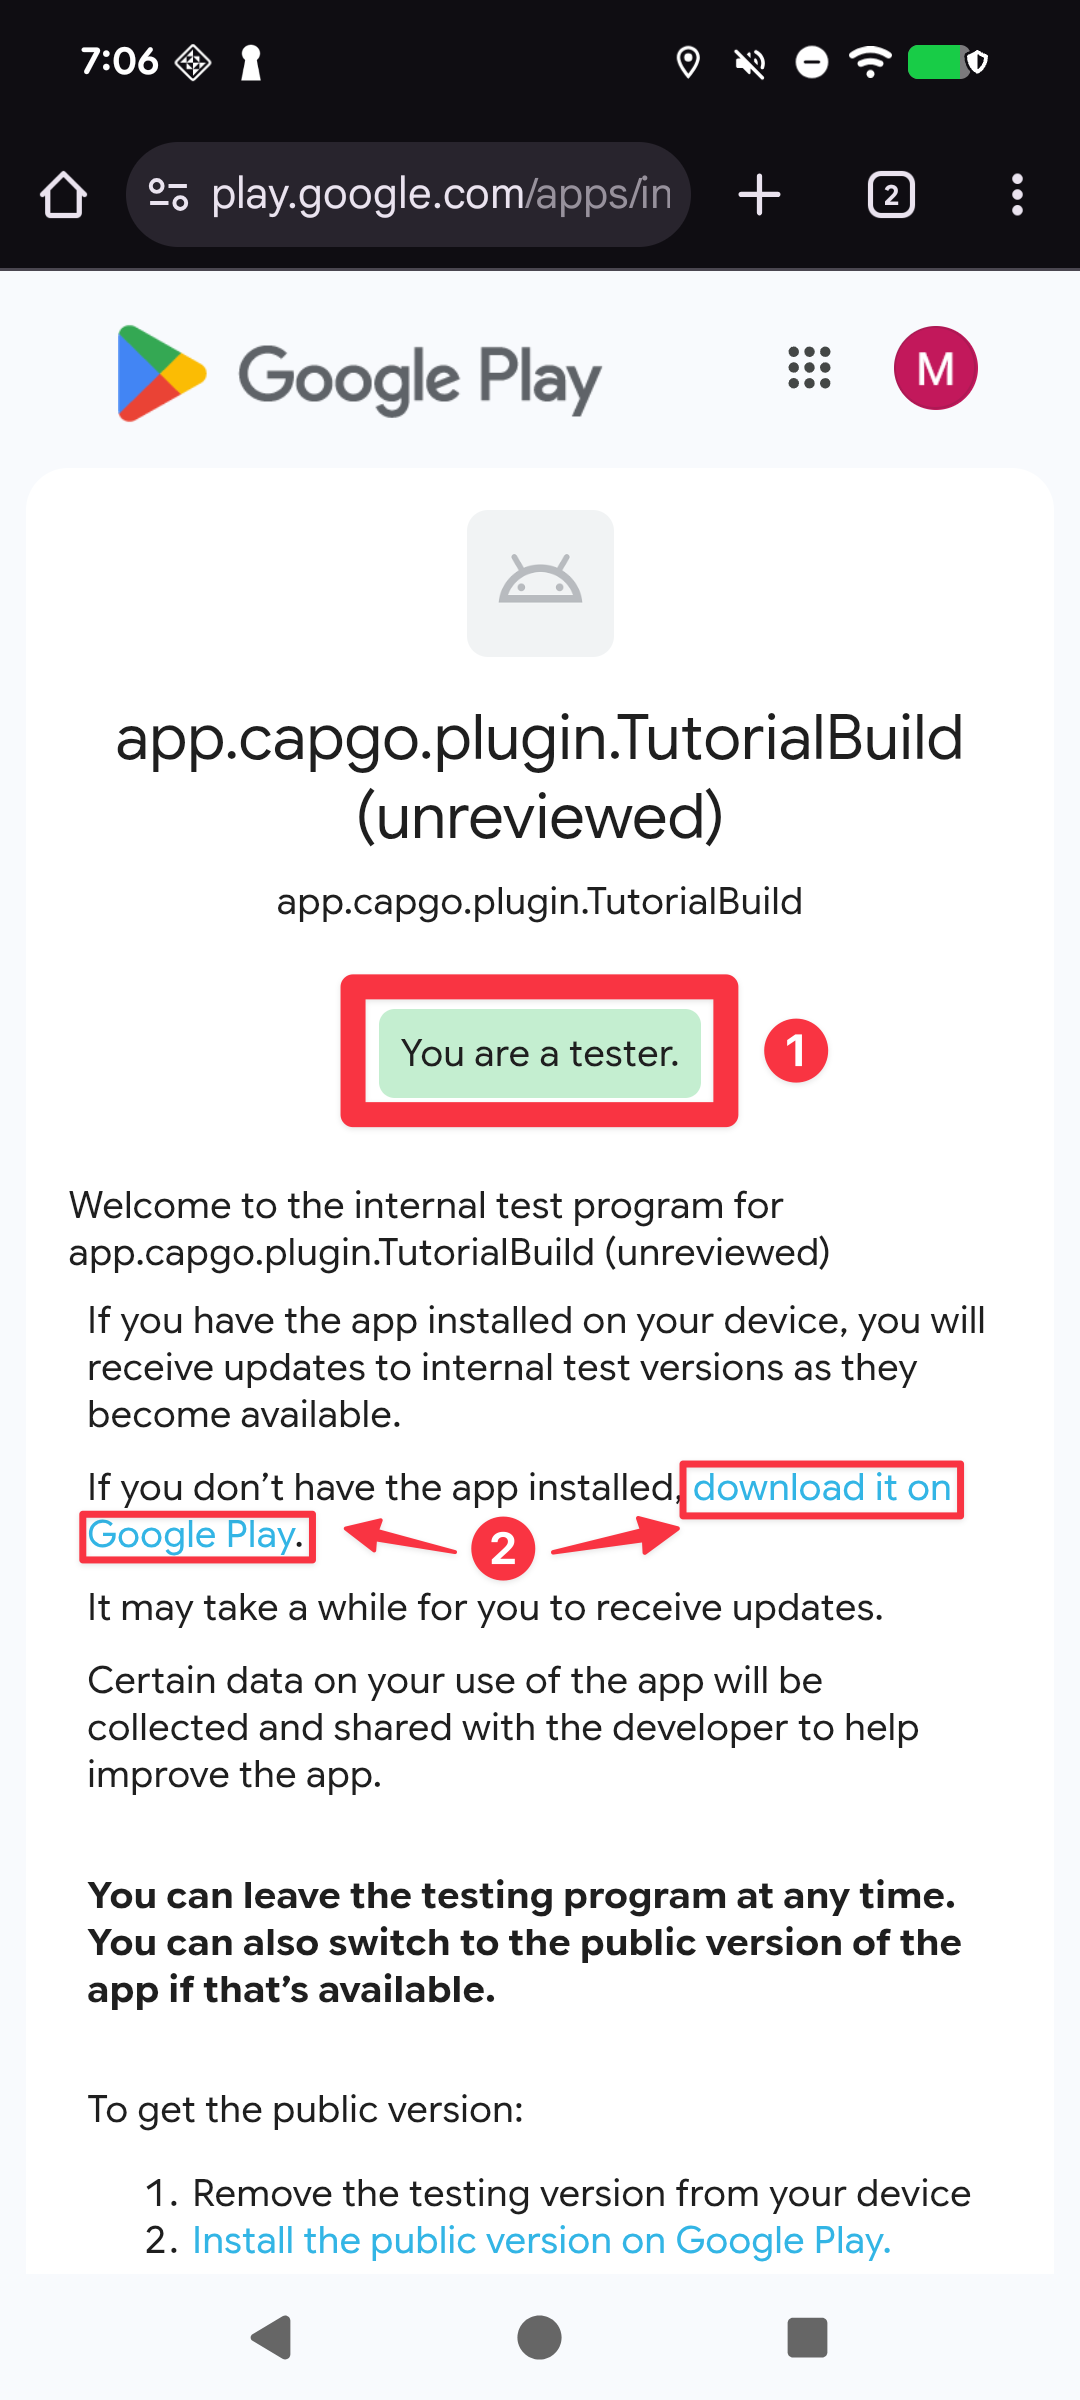
-
安装应用
- 如果您在使用 Android Studio 之前已经安装了应用,请点击
uninstall按钮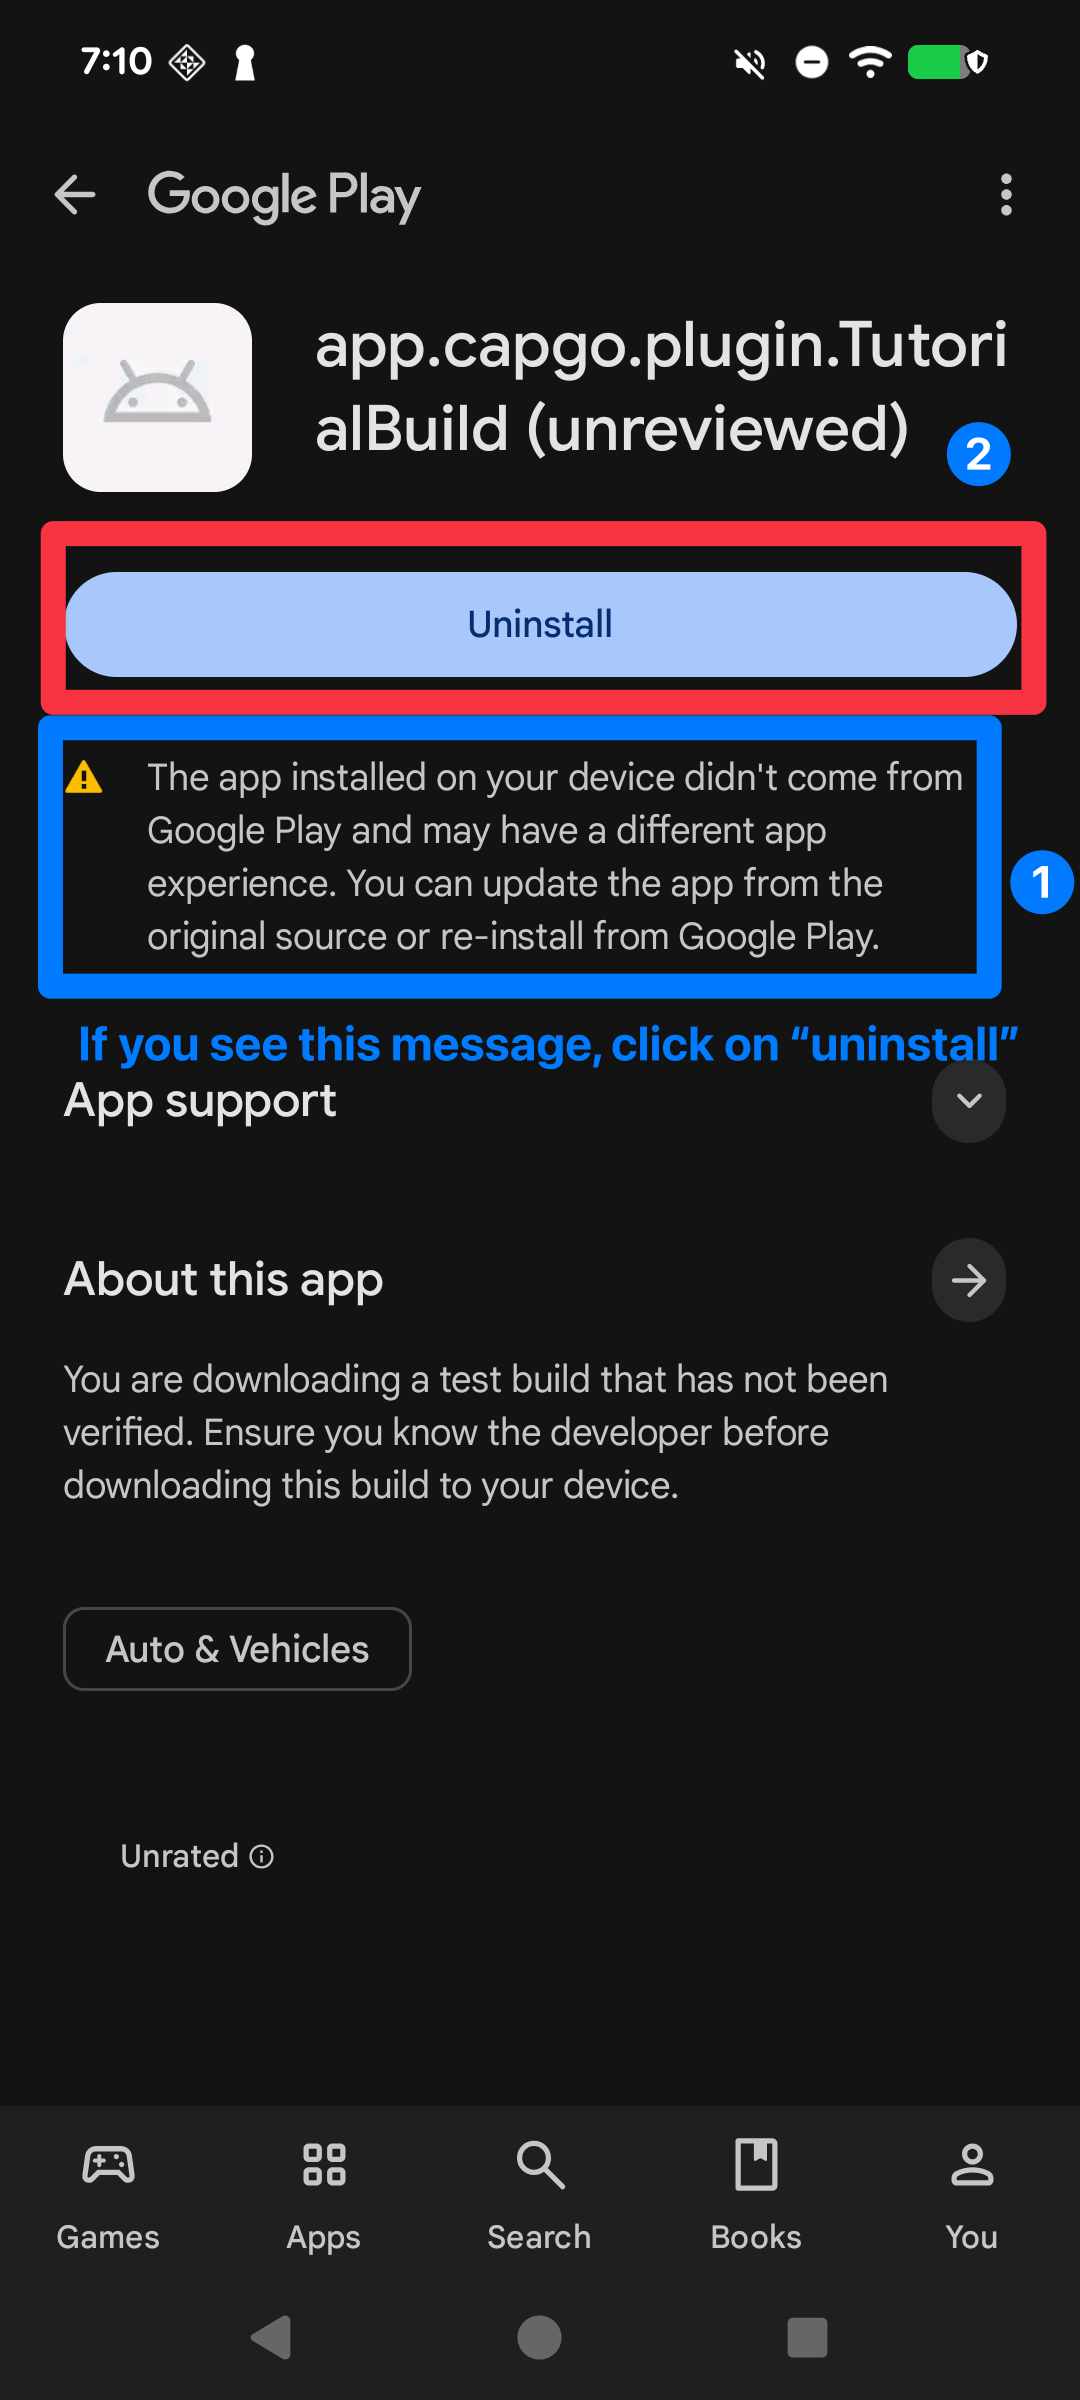
- 点击
install按钮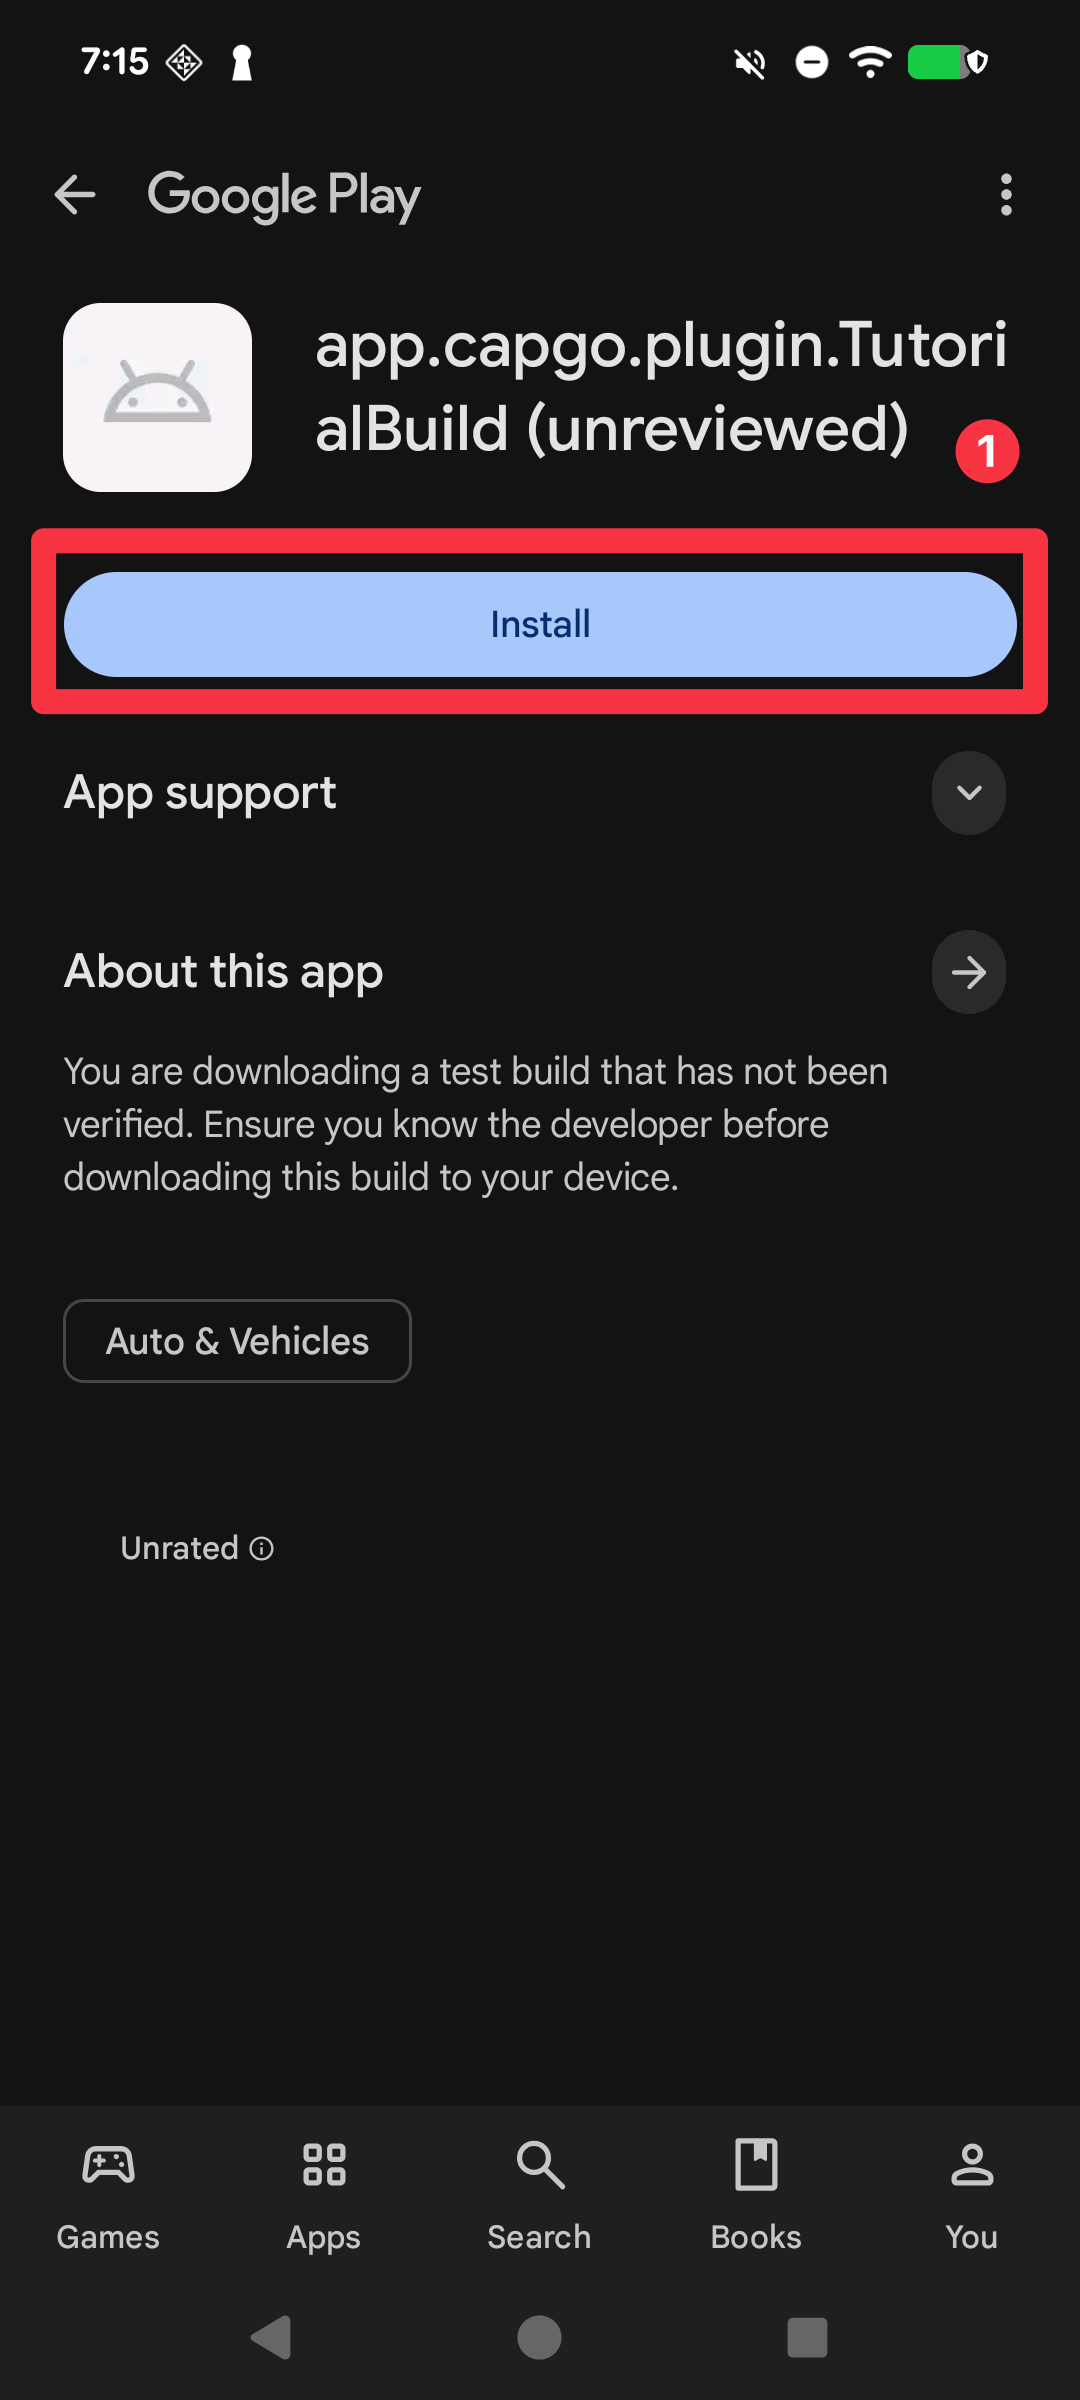
- 打开应用并确认已成功下载
- 如果您在使用 Android Studio 之前已经安装了应用,请点击
配置Capgo原生构建(Android)
标题:配置Capgo原生构建(Android)现在,您已经准备好开始Capgo原生构建的设置了。祝贺!
| 要求 | 标志 | 描述 | 必需 |
|---|---|---|---|
| Keystore文件 | --keystore <path> | 您的 .jks/.keystore 用于签署APK/AAB的文件路径。 | 是 |
| 密钥库别名 | --keystore-alias <alias> | 密钥库别名的名称 | 是 |
| 密钥库密码 | --keystore-key-password <password> | 查看下面的说明 | 密钥库存储密码 |
| Google Play服务账户 | --keystore-store-password <password> | 用于Play Store上传的JSON服务账户文件 | 密钥库存储密码 |
| Google Play 服务账户 | --play-config <path> | Play Store 上传 JSON 服务账户文件。 | 是 |
bunx @capgo/cli@latest build credentials save --platform android \ --keystore ./path/to/keystore.jks \ --keystore-alias "your-alias" \ --keystore-key-password "key-password" \ --keystore-store-password "store-password" \ --play-config ./play-store-service-account.json密钥库、密钥库密码、密钥库密钥密码、密钥库别名
如果您已经遵循了手动构建指南您应该已经生成了密钥库。 如果您没有遵循指南,请遵循指南生成密钥库。 如果密钥和存储密码相同,请只提供一个终端窗口
Google Play 服务账户
Google Play 服务账户生成 Google Play 服务账户是一个手动且复杂的过程。 然而,它是必须的才能将您的应用程序上传到 Google Play。请记住以下几点:
- 您 context 成为 需要成为
- 开发者账户
的
-
拥有者 否则,您将无法设置服务账户。
-
点击项目选择器
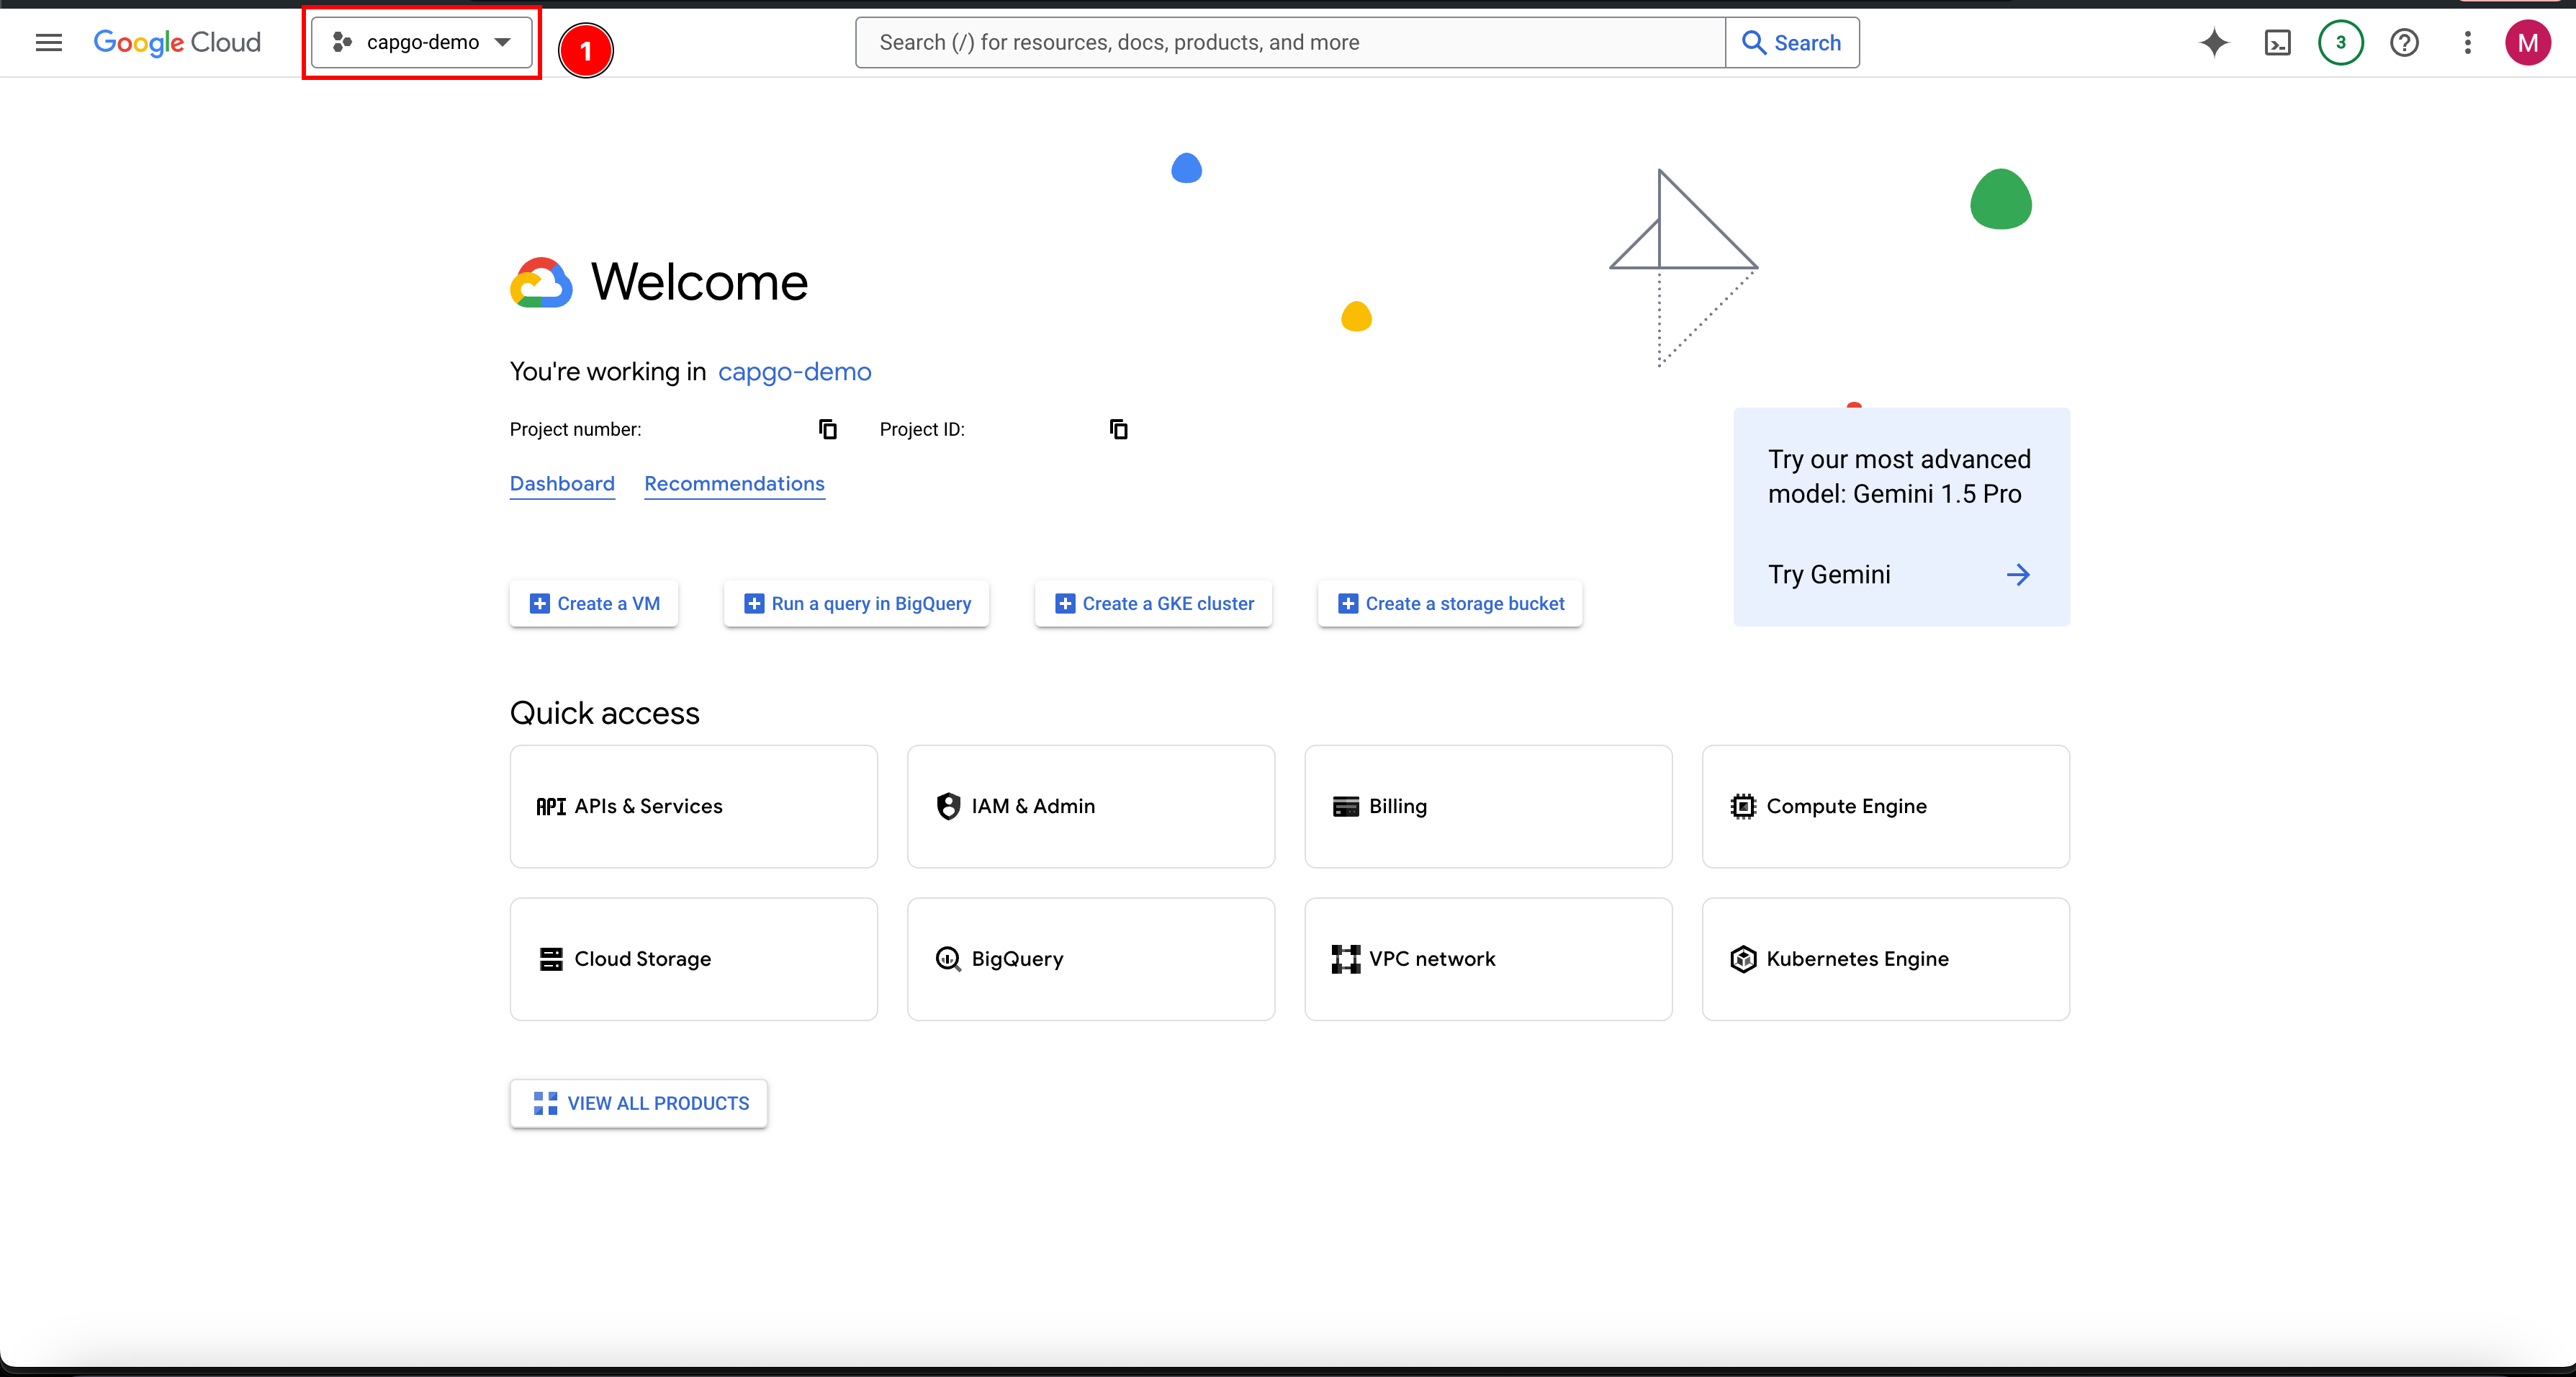
-
如果您已经有一个项目,请选择它。否则,请创建一个新项目:
- 点击
New project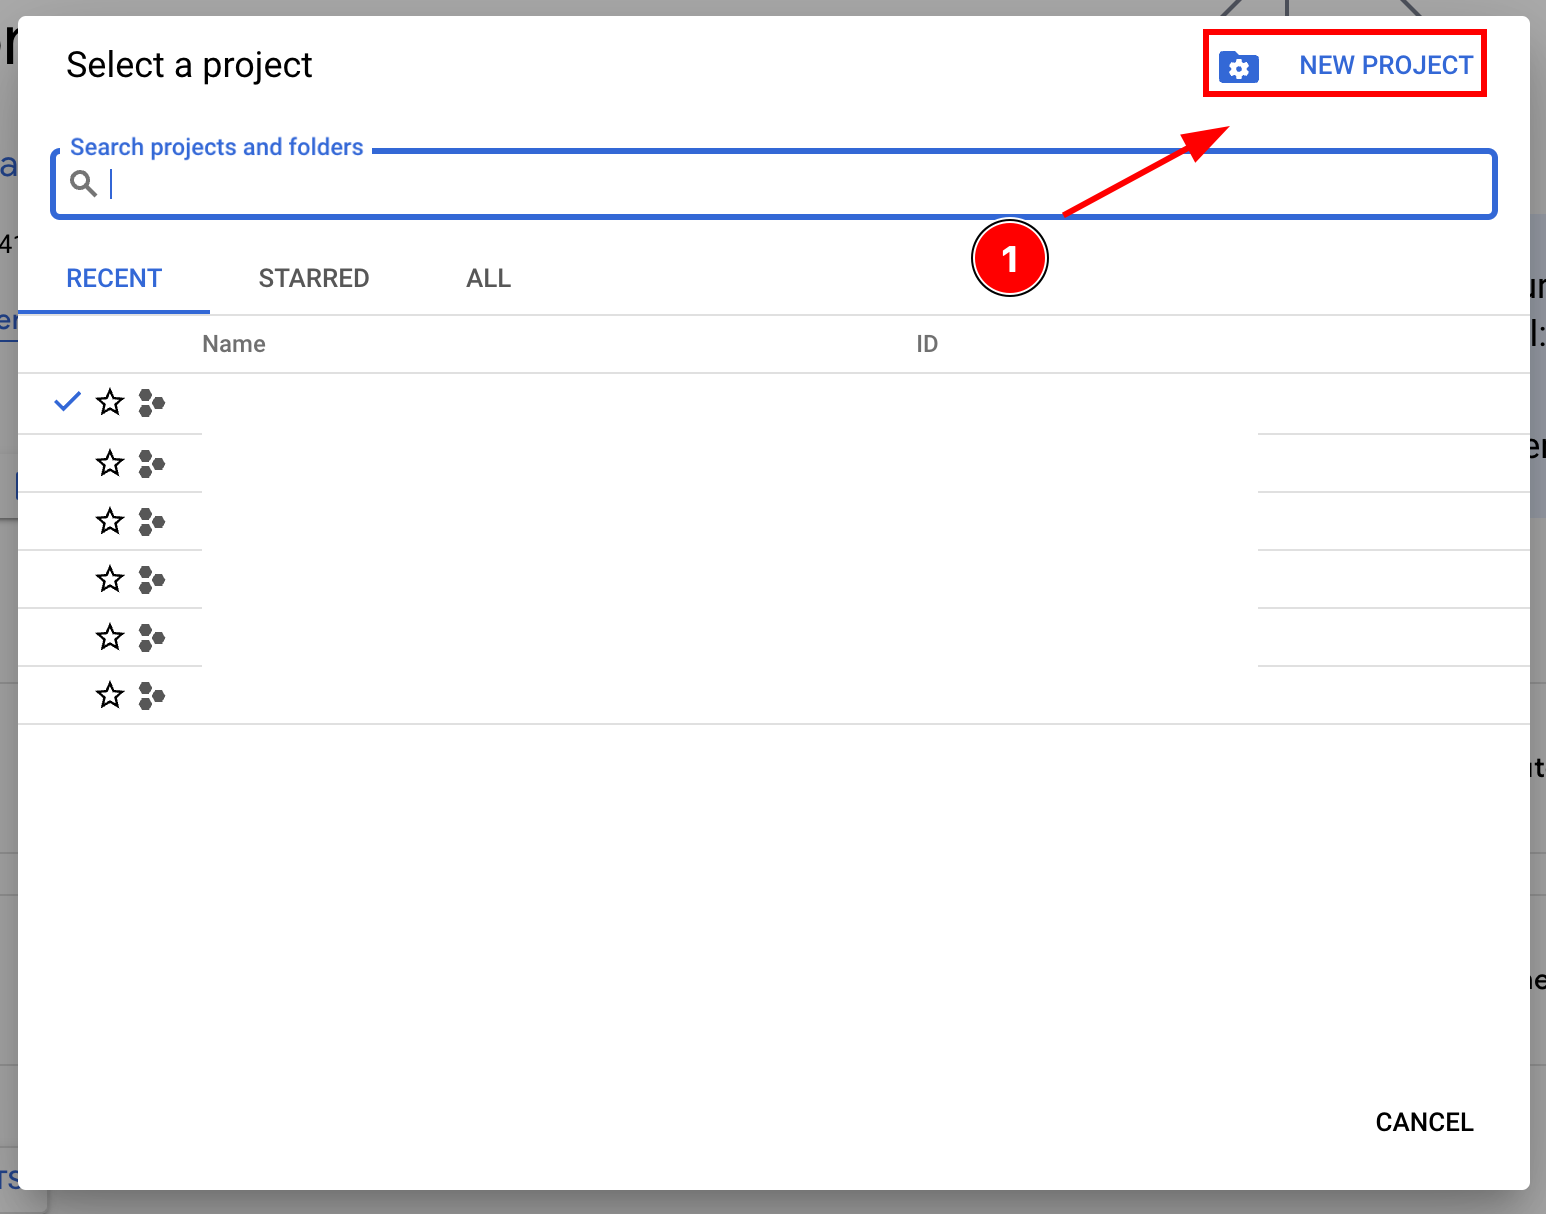
- 为您的项目命名并点击
Create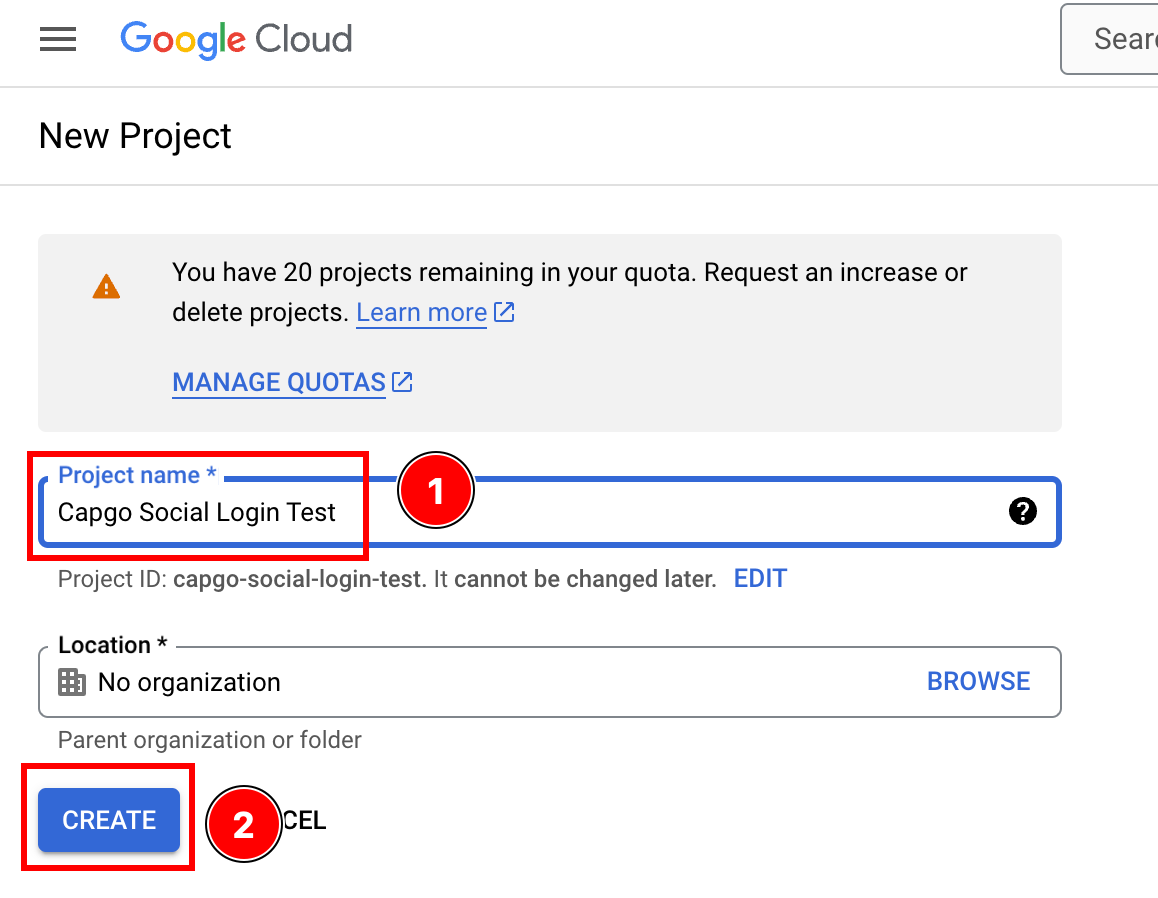
- 确保您在正确的项目
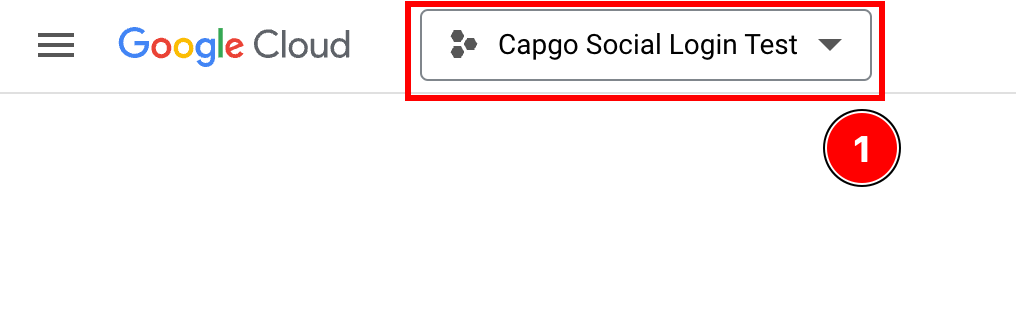
- 点击
-
点击搜索栏并搜索
service accounts点击它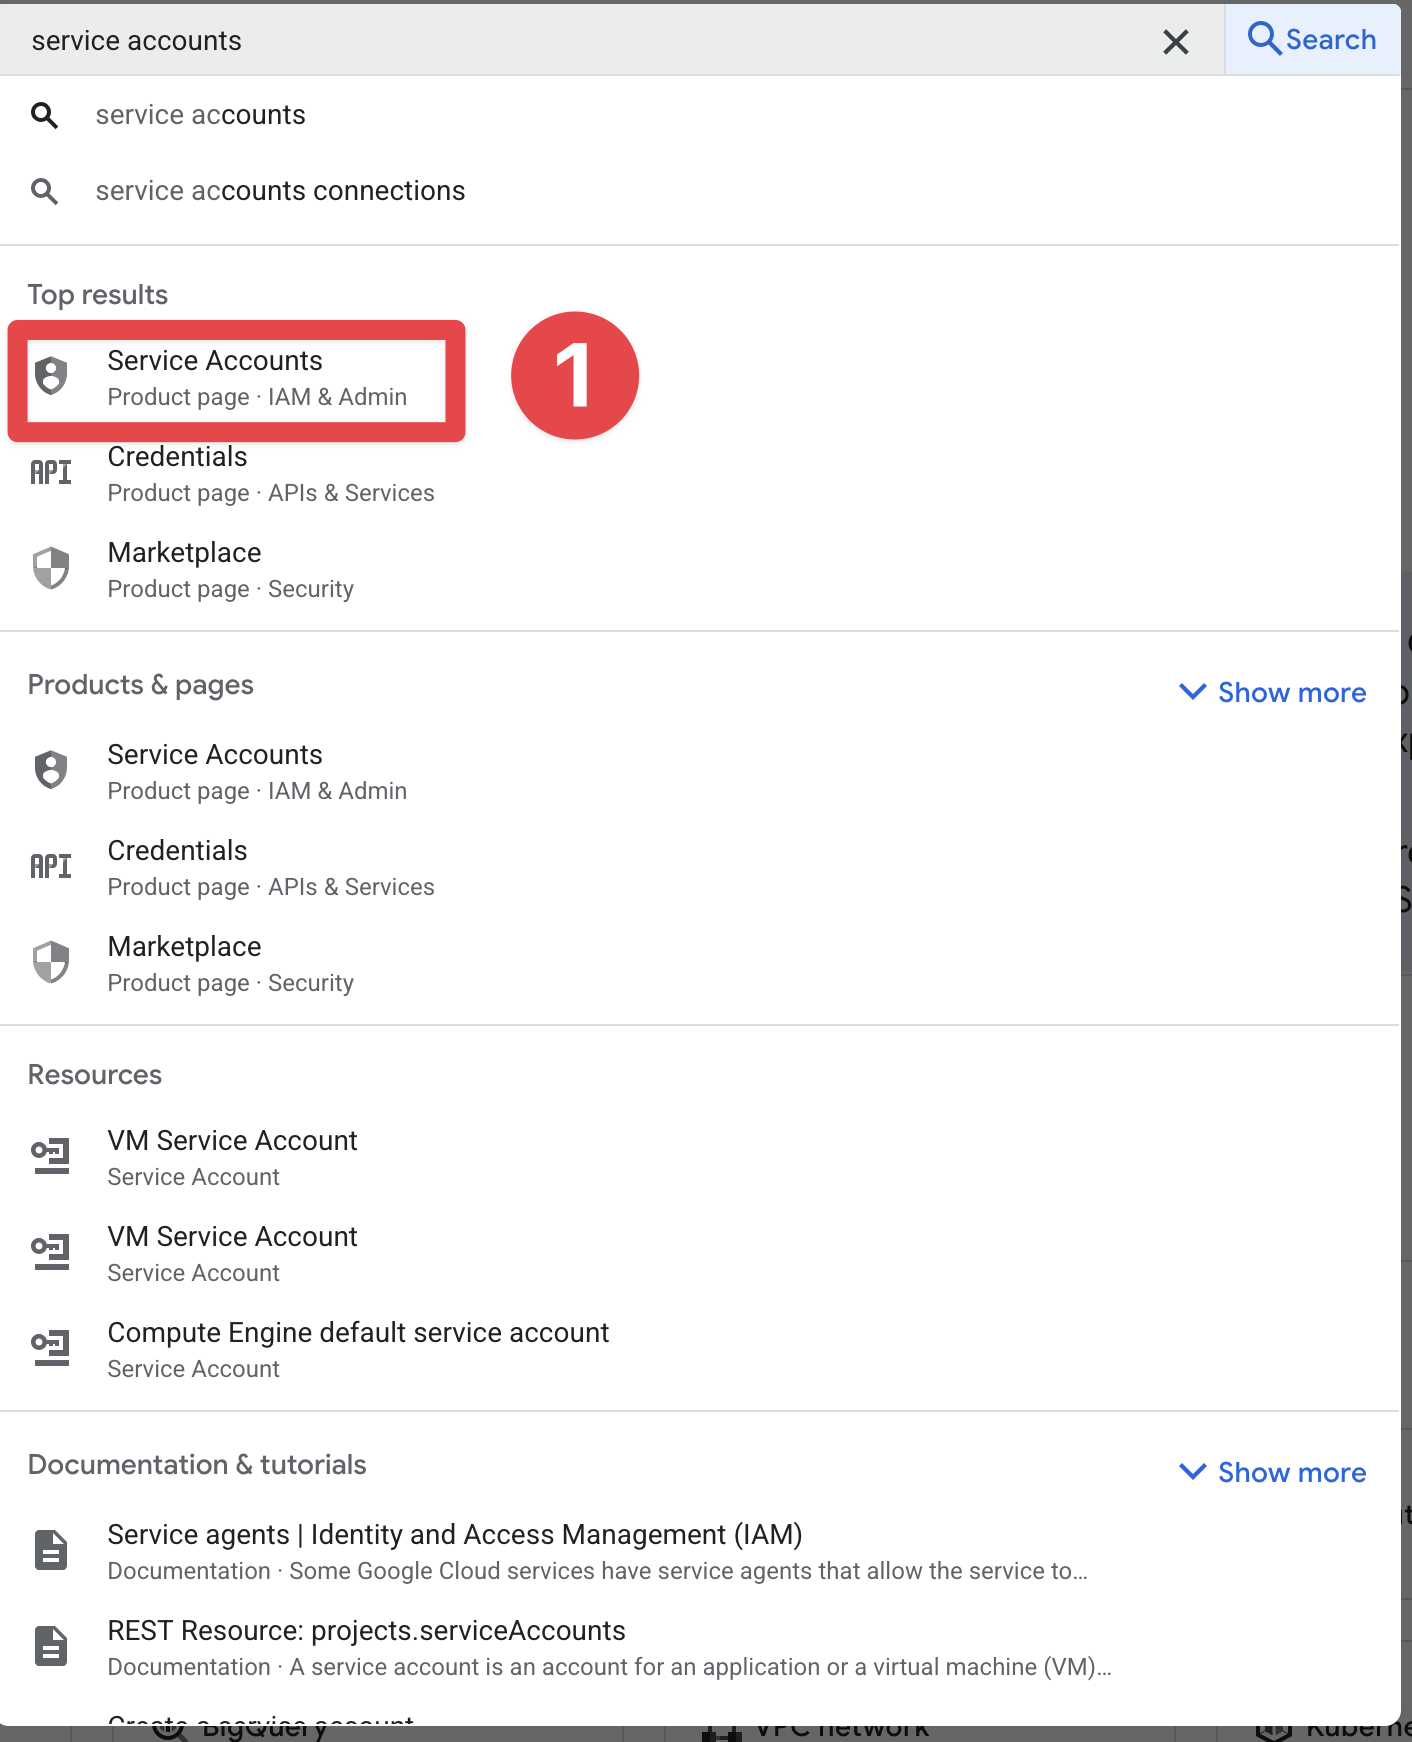
-
点击
Create service account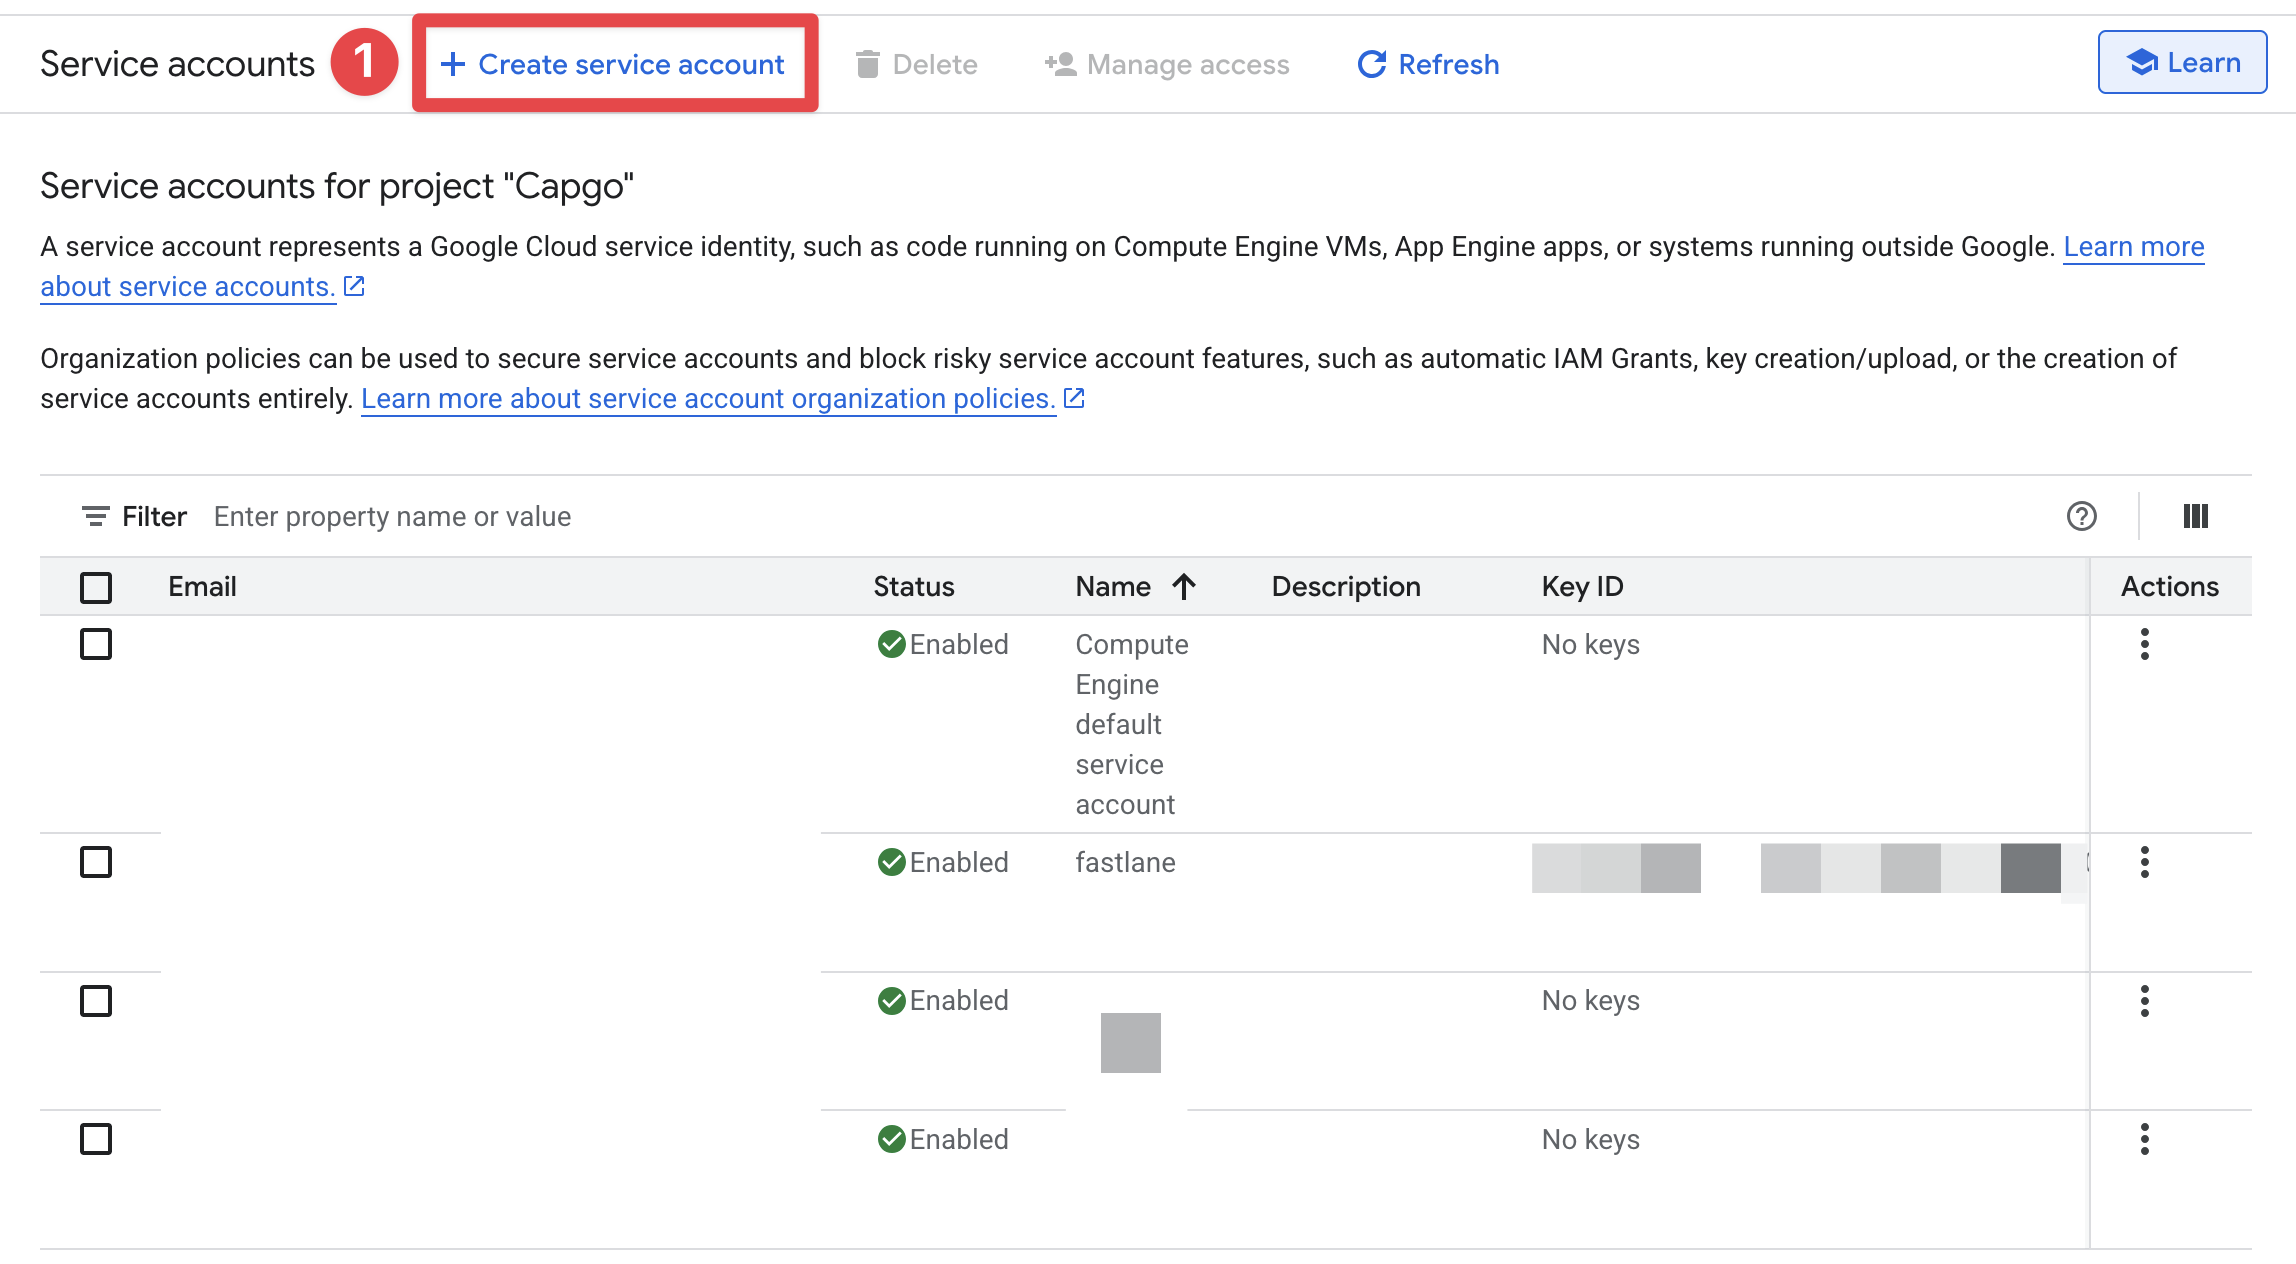
-
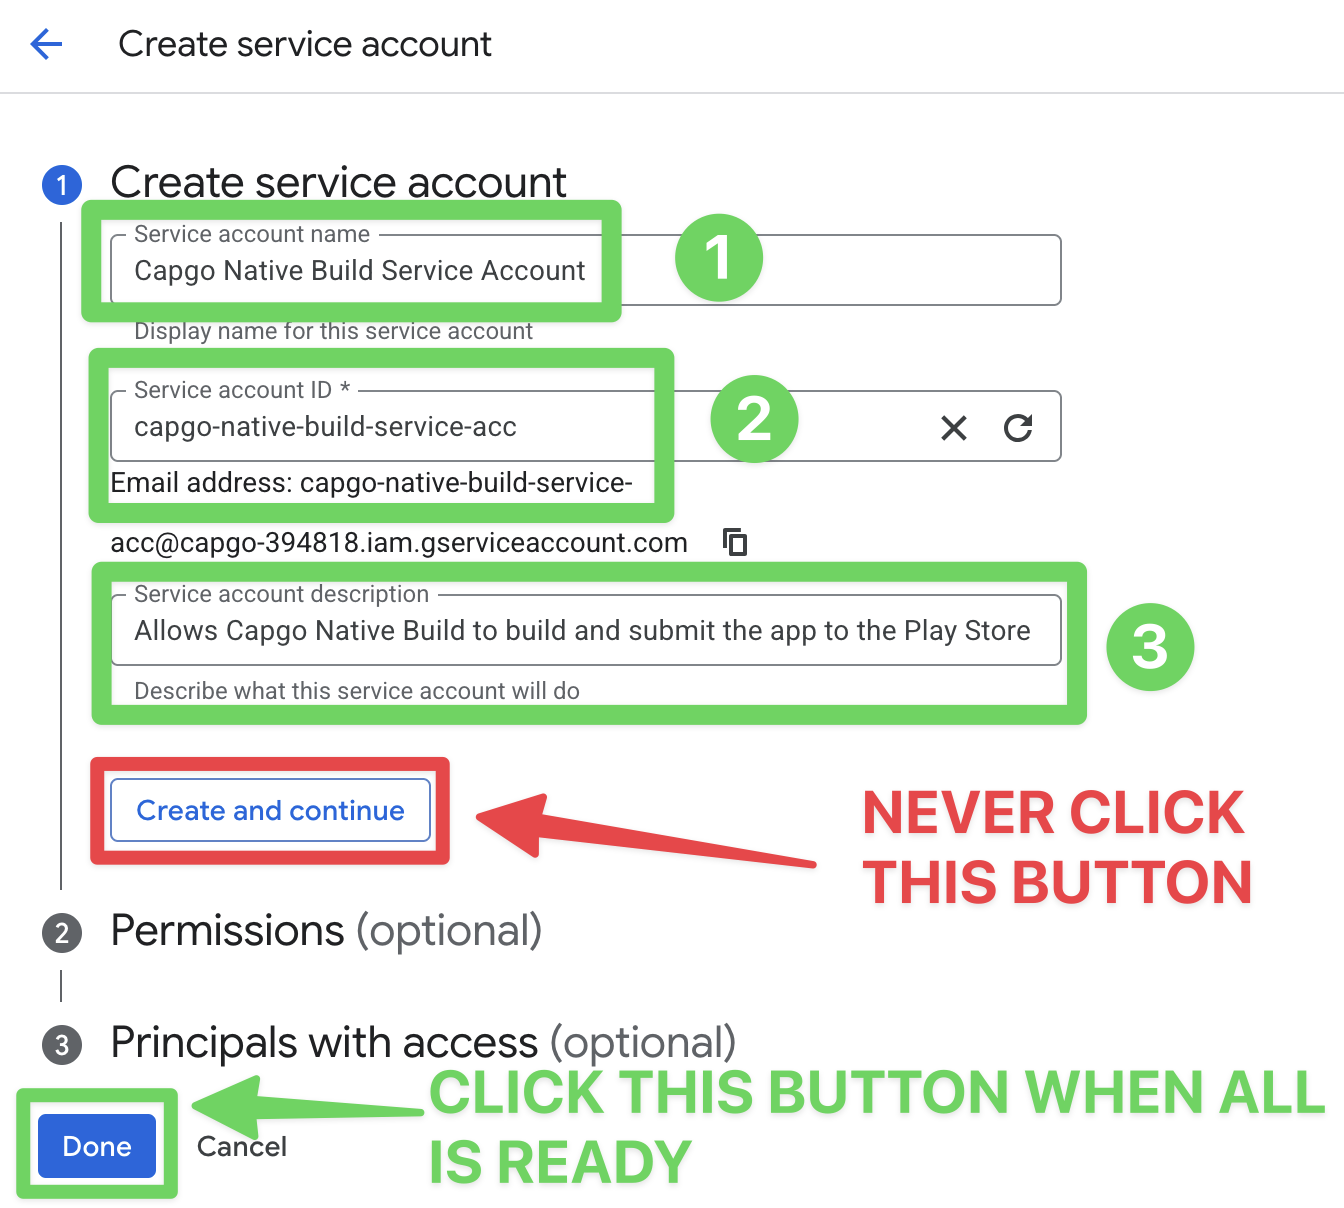
填写服务账户的表单并点击
Done- 我建议将名称设置为
Capgo Native Build Service Account - 对于服务账户 ID,我建议将其设置为
capgo-native-build-service-acc - 对于描述,您不必填写,但我建议填写
Allows Capgo Native Build to build and submit the app to the Play Store
- 我建议将名称设置为
-
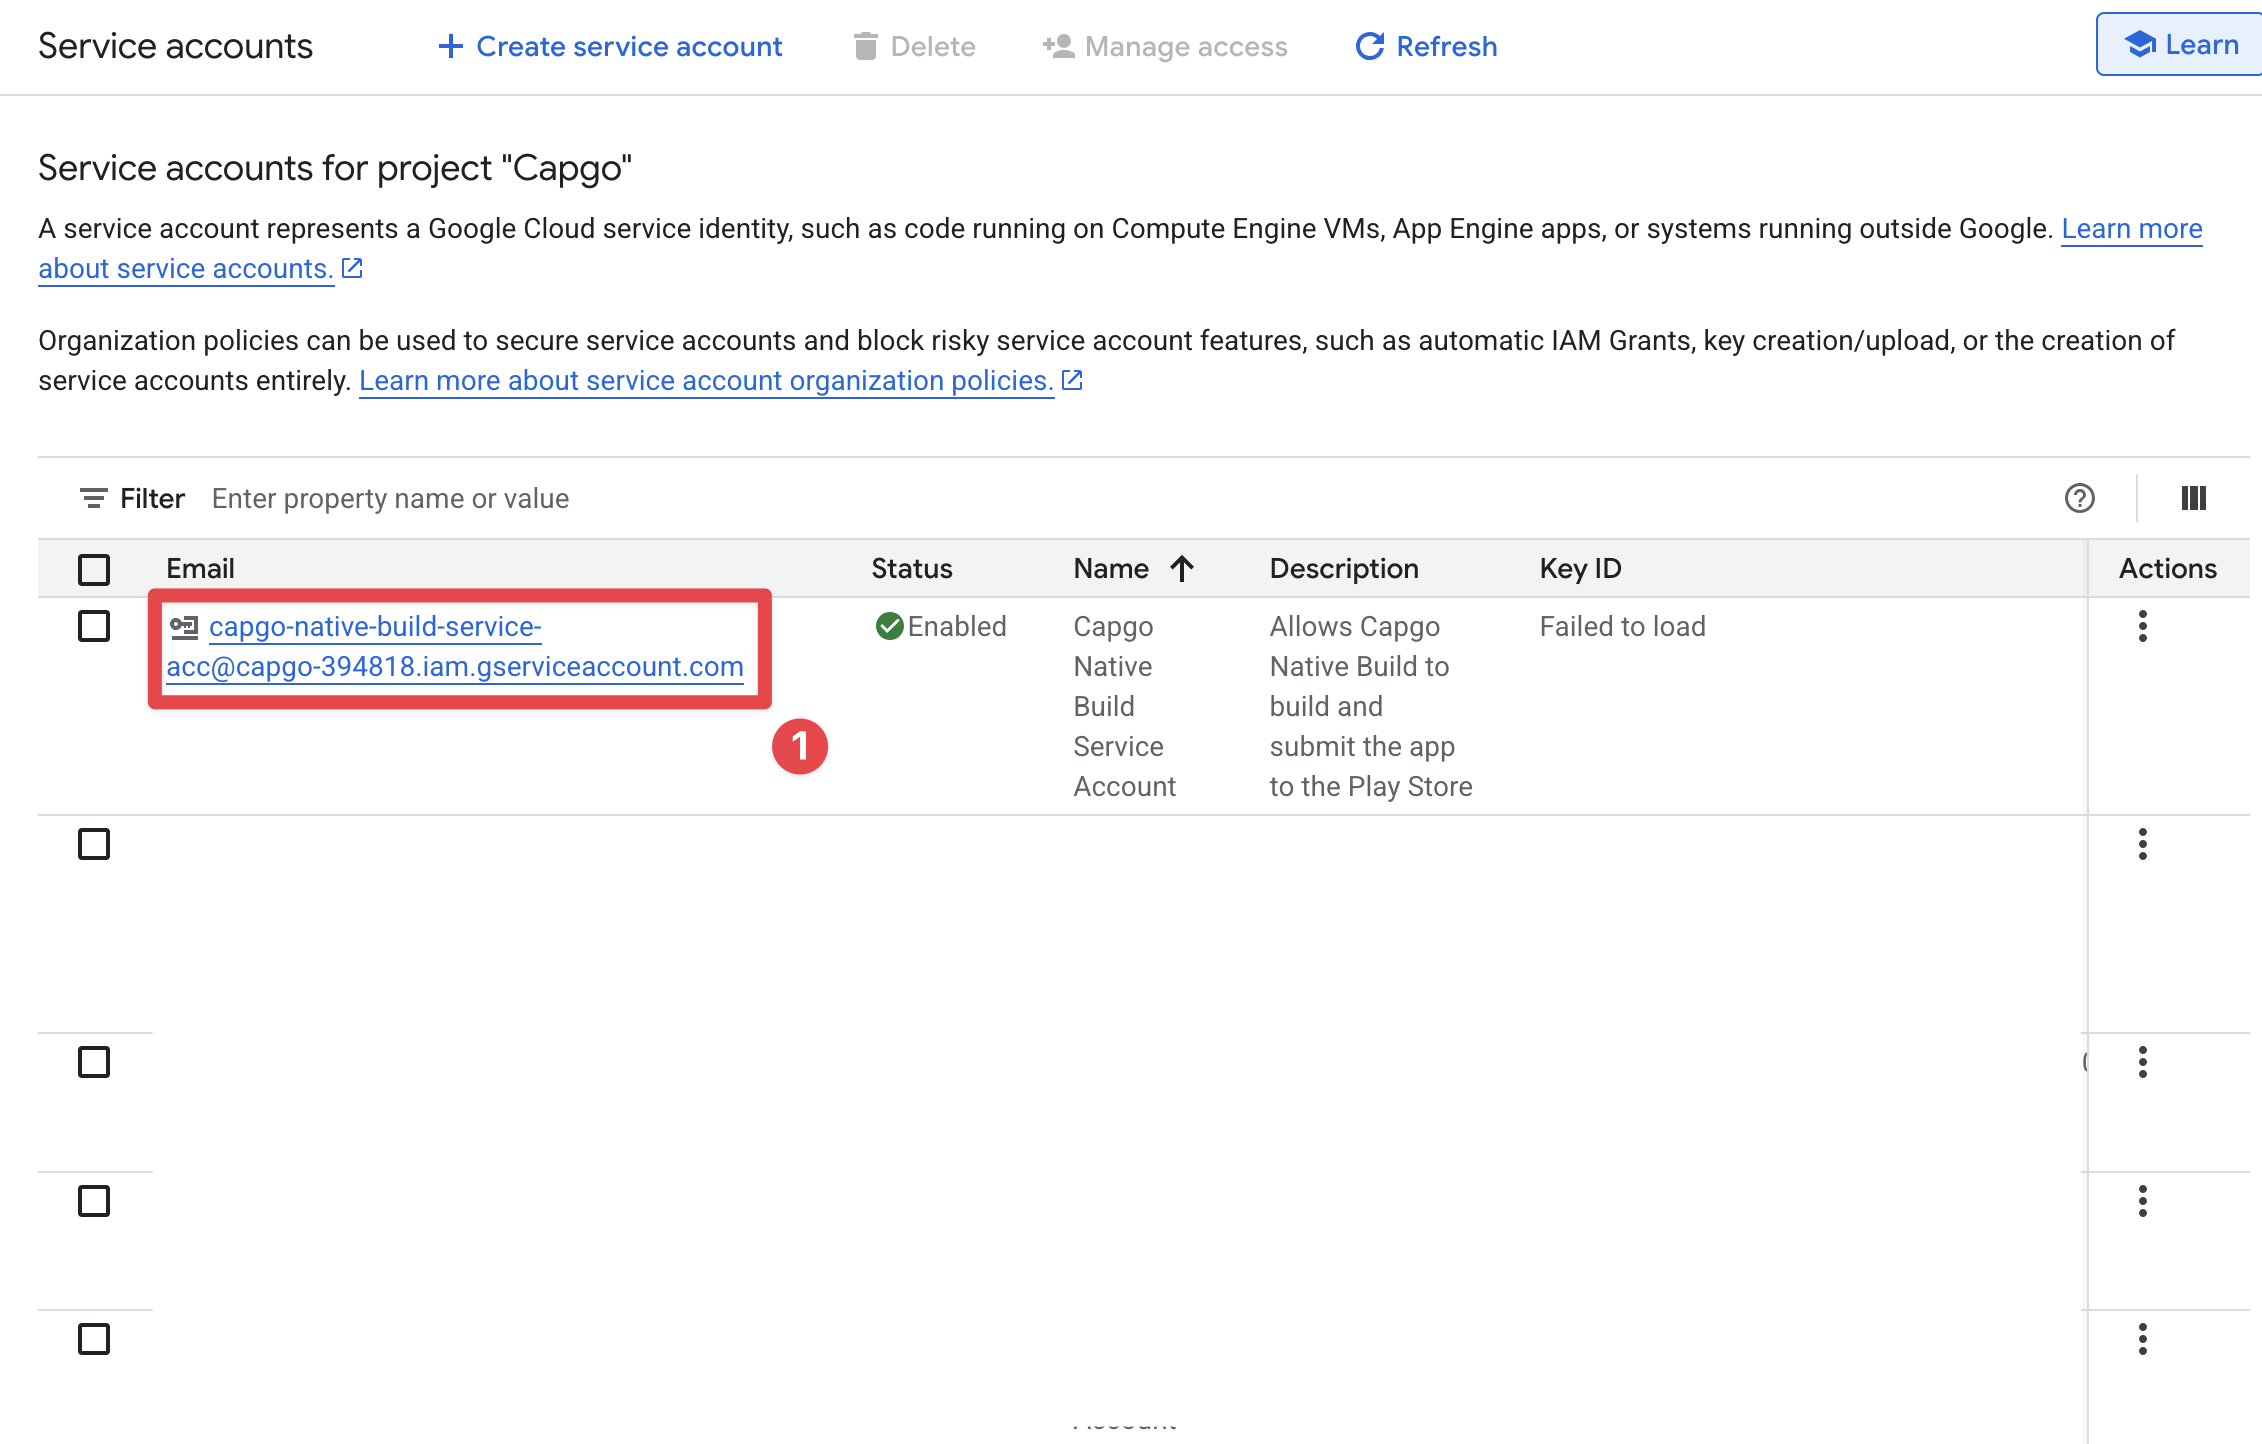
点击新创建的服务账户 您现在应该在列表中看到新创建的服务账户。点击它。
-
点击
Keys标签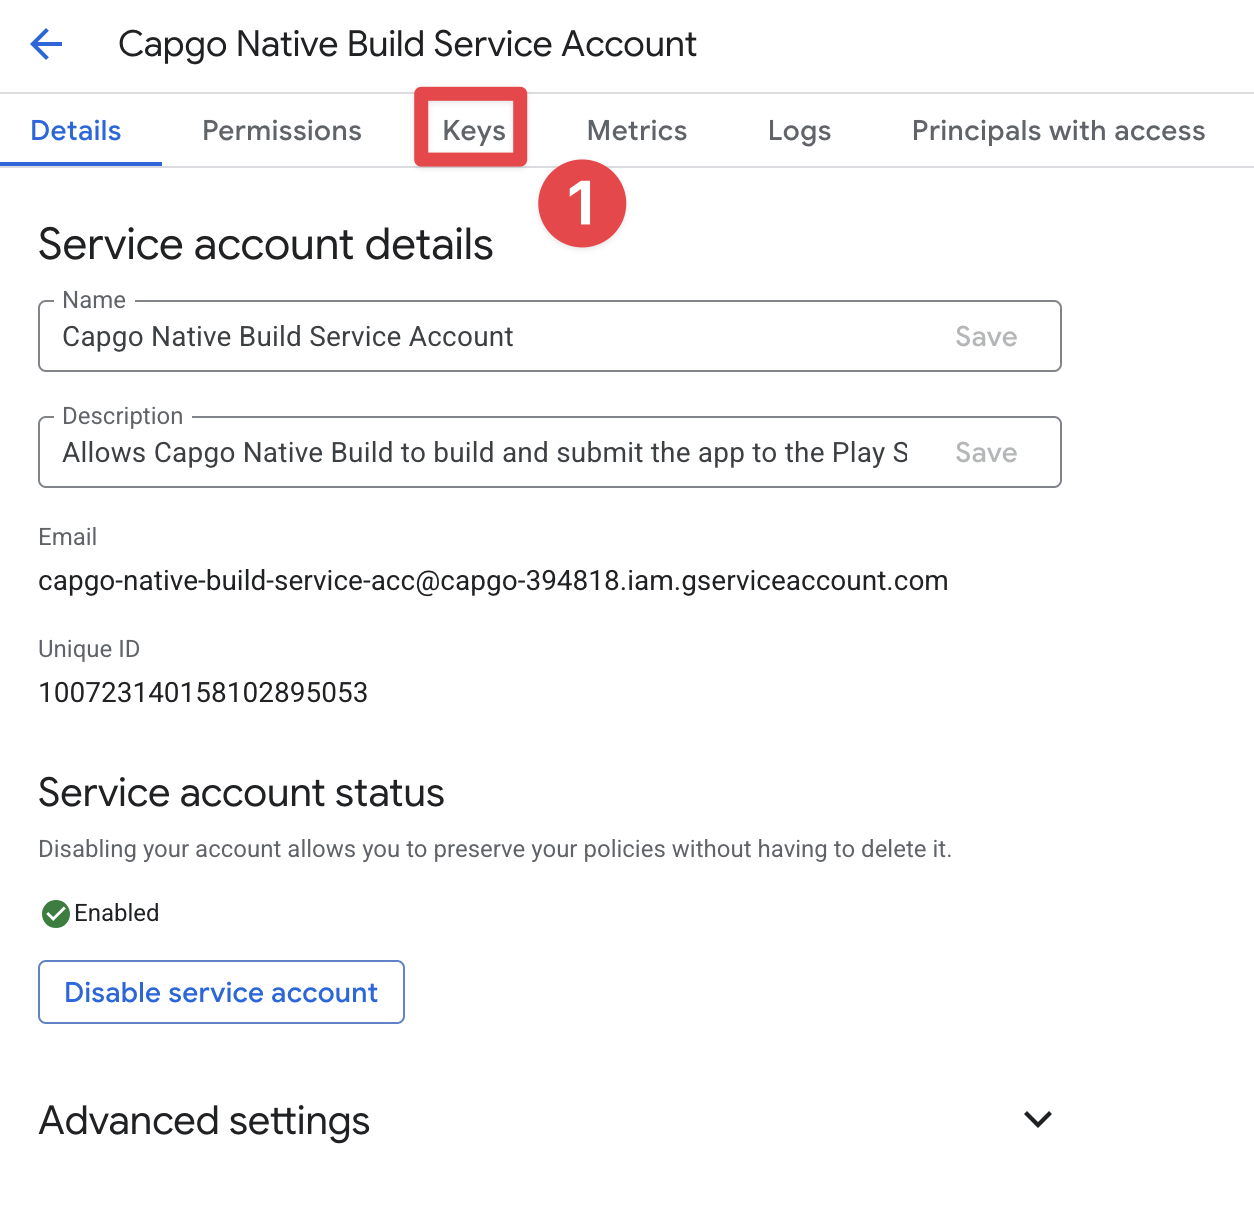
-
点击
Add Key并Create new key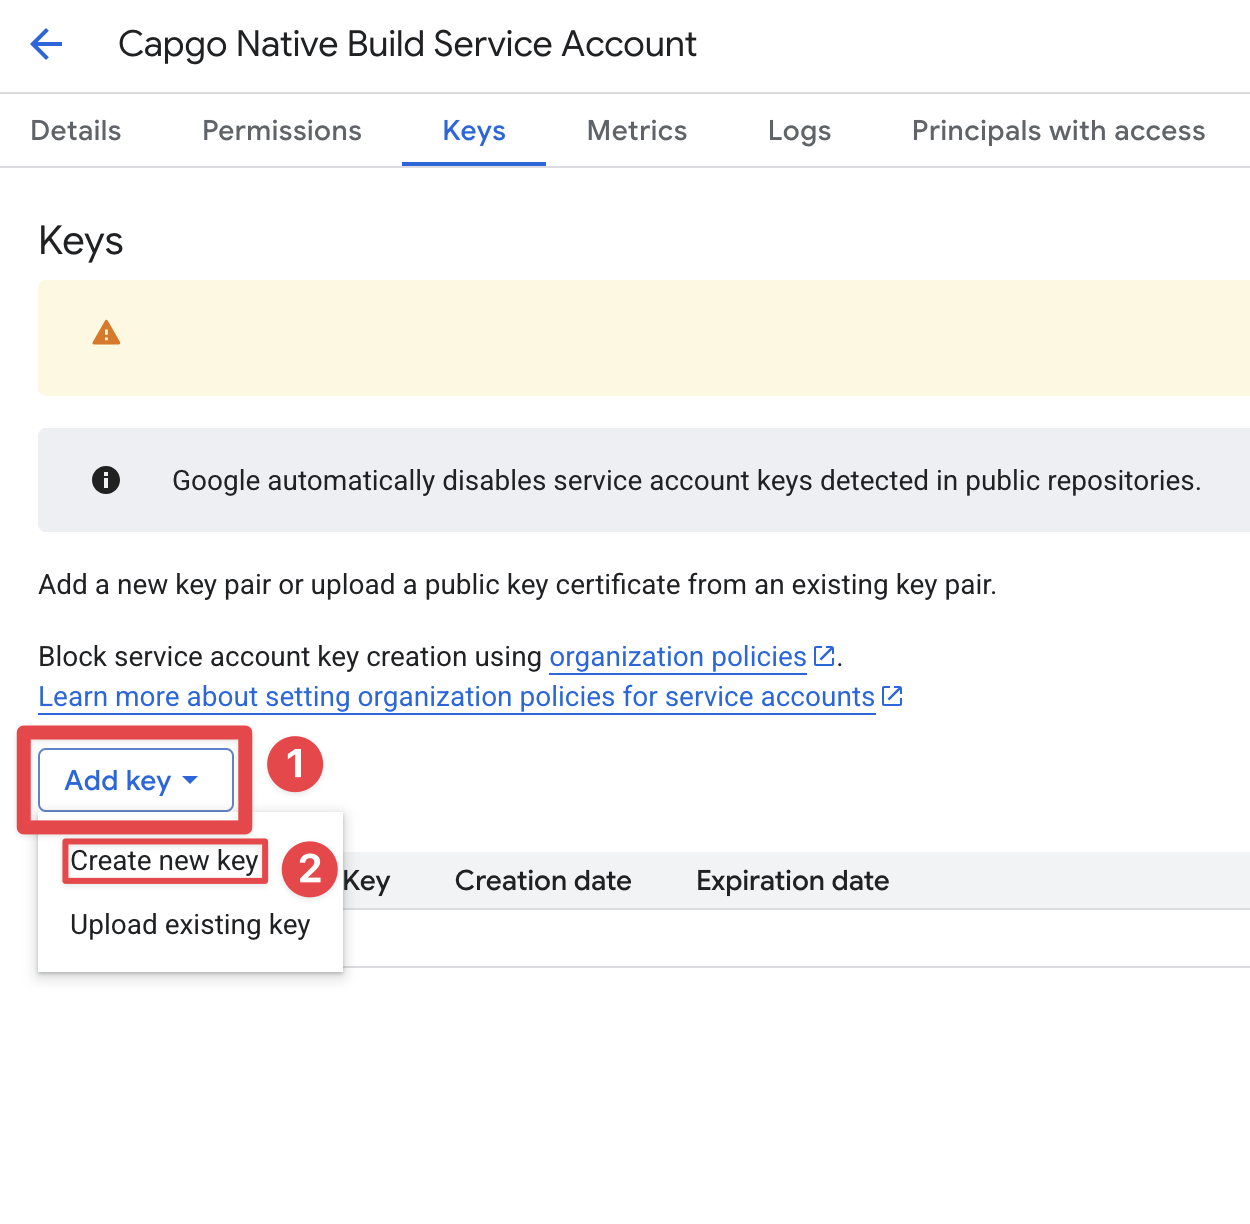
-
点击
JSON并Create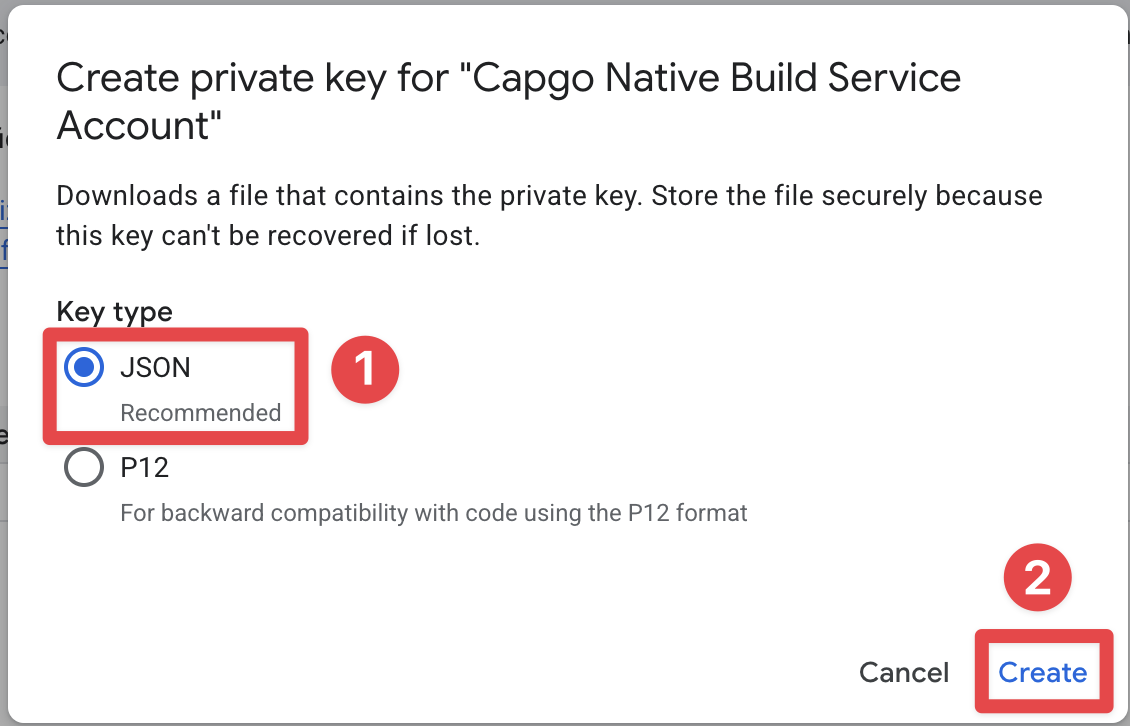
-
下载 JSON 文件 JSON 文件应该已经自动下载。您可以点击
close关闭窗口。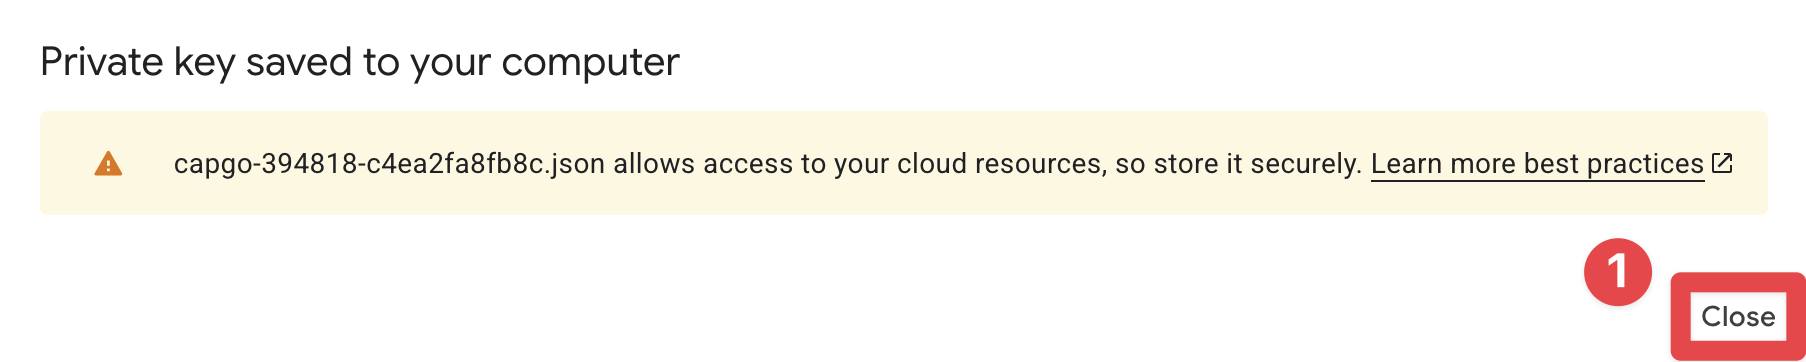
授予 Play Store API 访问服务帐户
授予 Play Store API 访问服务帐户新创建的服务帐户尚未获得Play商店的访问权限 API. 为授予它,请前往Play商店控制台。
- 前往 Google Play控制台
- 选择正确的开发者帐户
- 点击
Users and permissions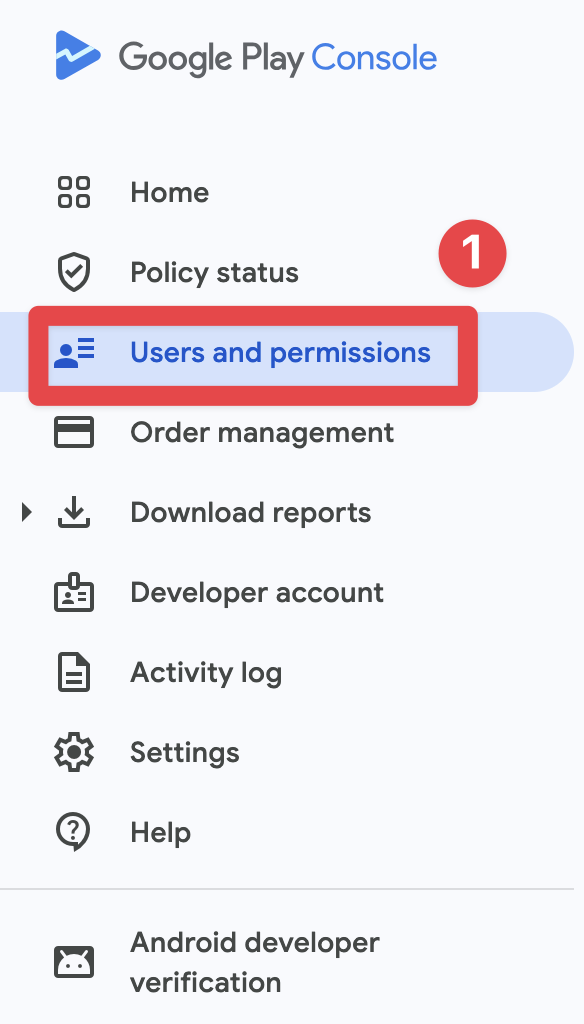
- 点击
Invite new users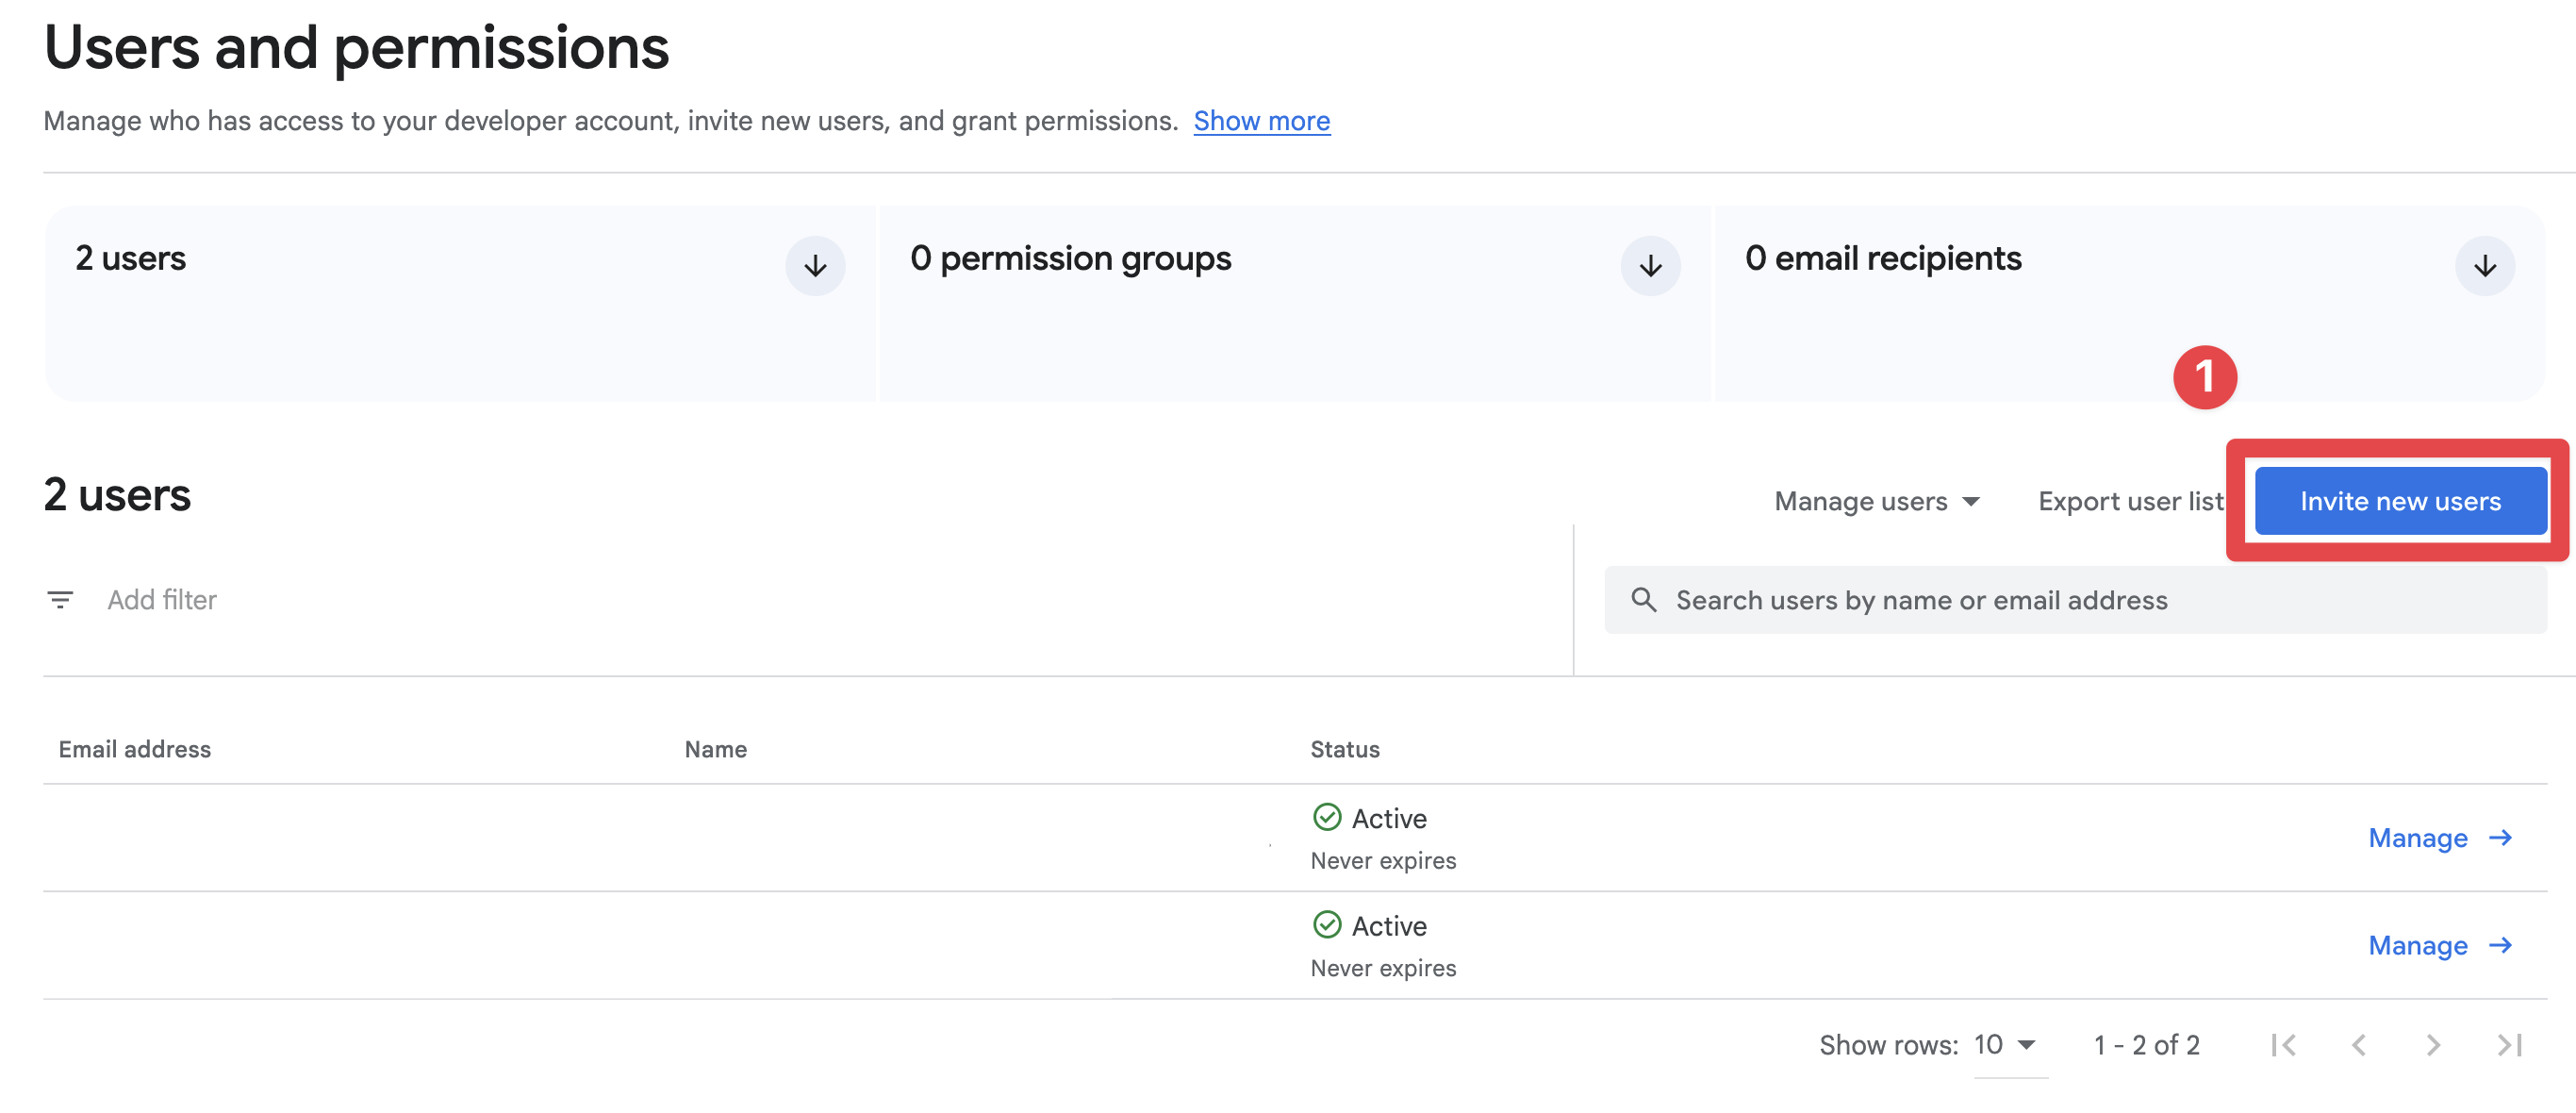
- 复制服务帐户的电子邮件地址
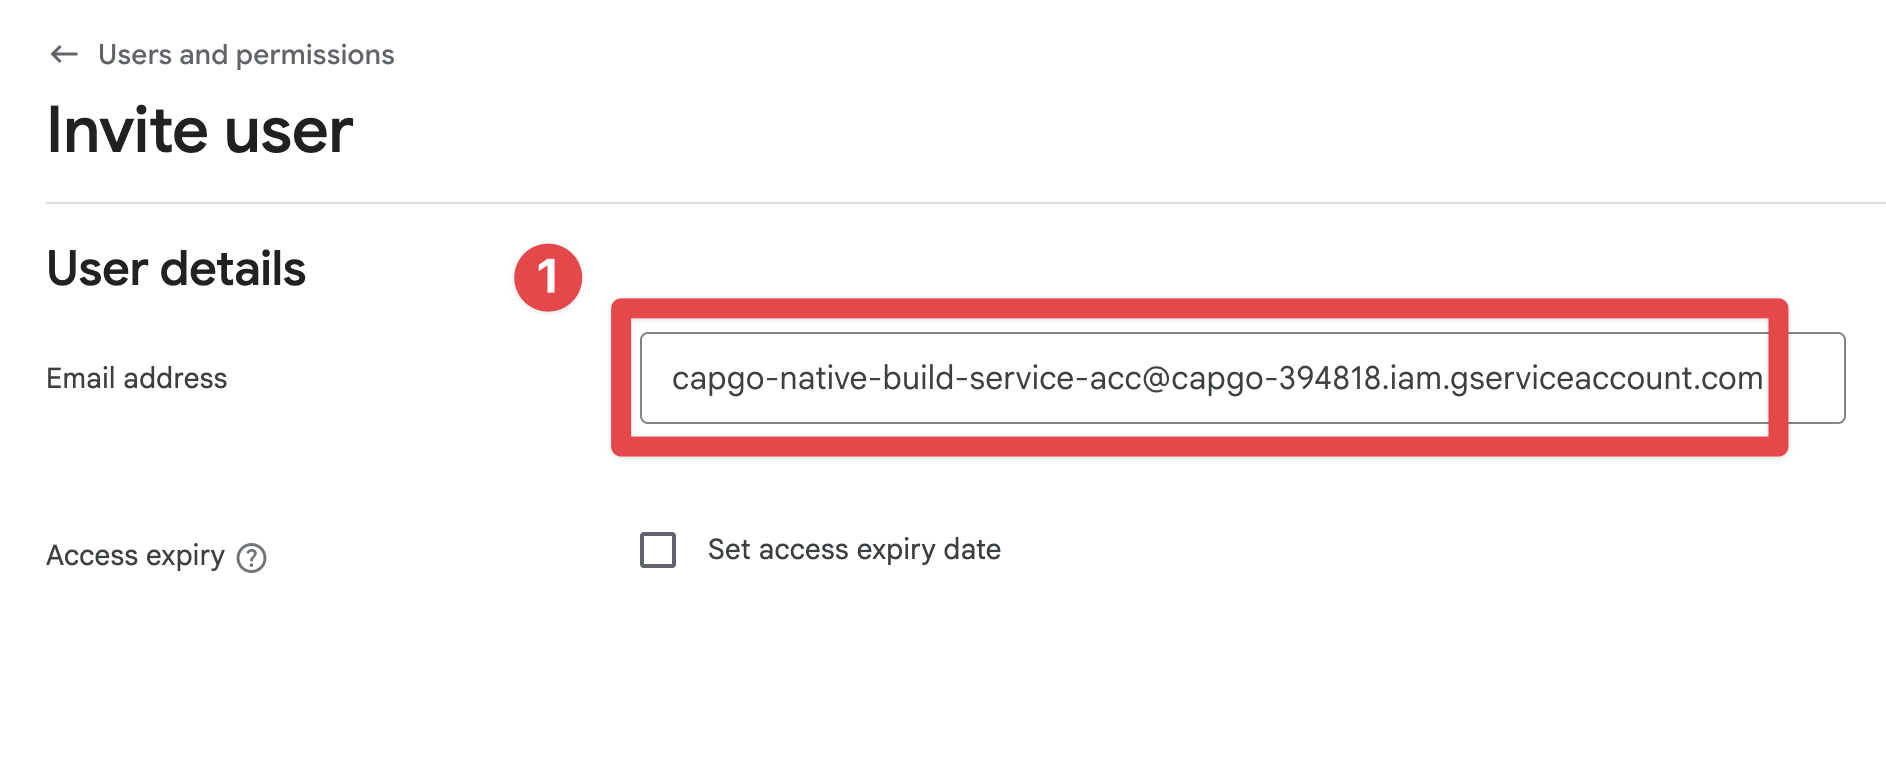
- 前往
Account permissions并且授予所需的最低权限:- 在
App permissions, 授予对您的应用程序的访问权限。 - 在
Releases, 启用Create, edit, and roll out releases. - 如果您的工作流程使用 Play App Signing,启用相关的签名权限。
- 如果您不确定,请使用
Admin仅在设置期间使用,然后在之后减少权限。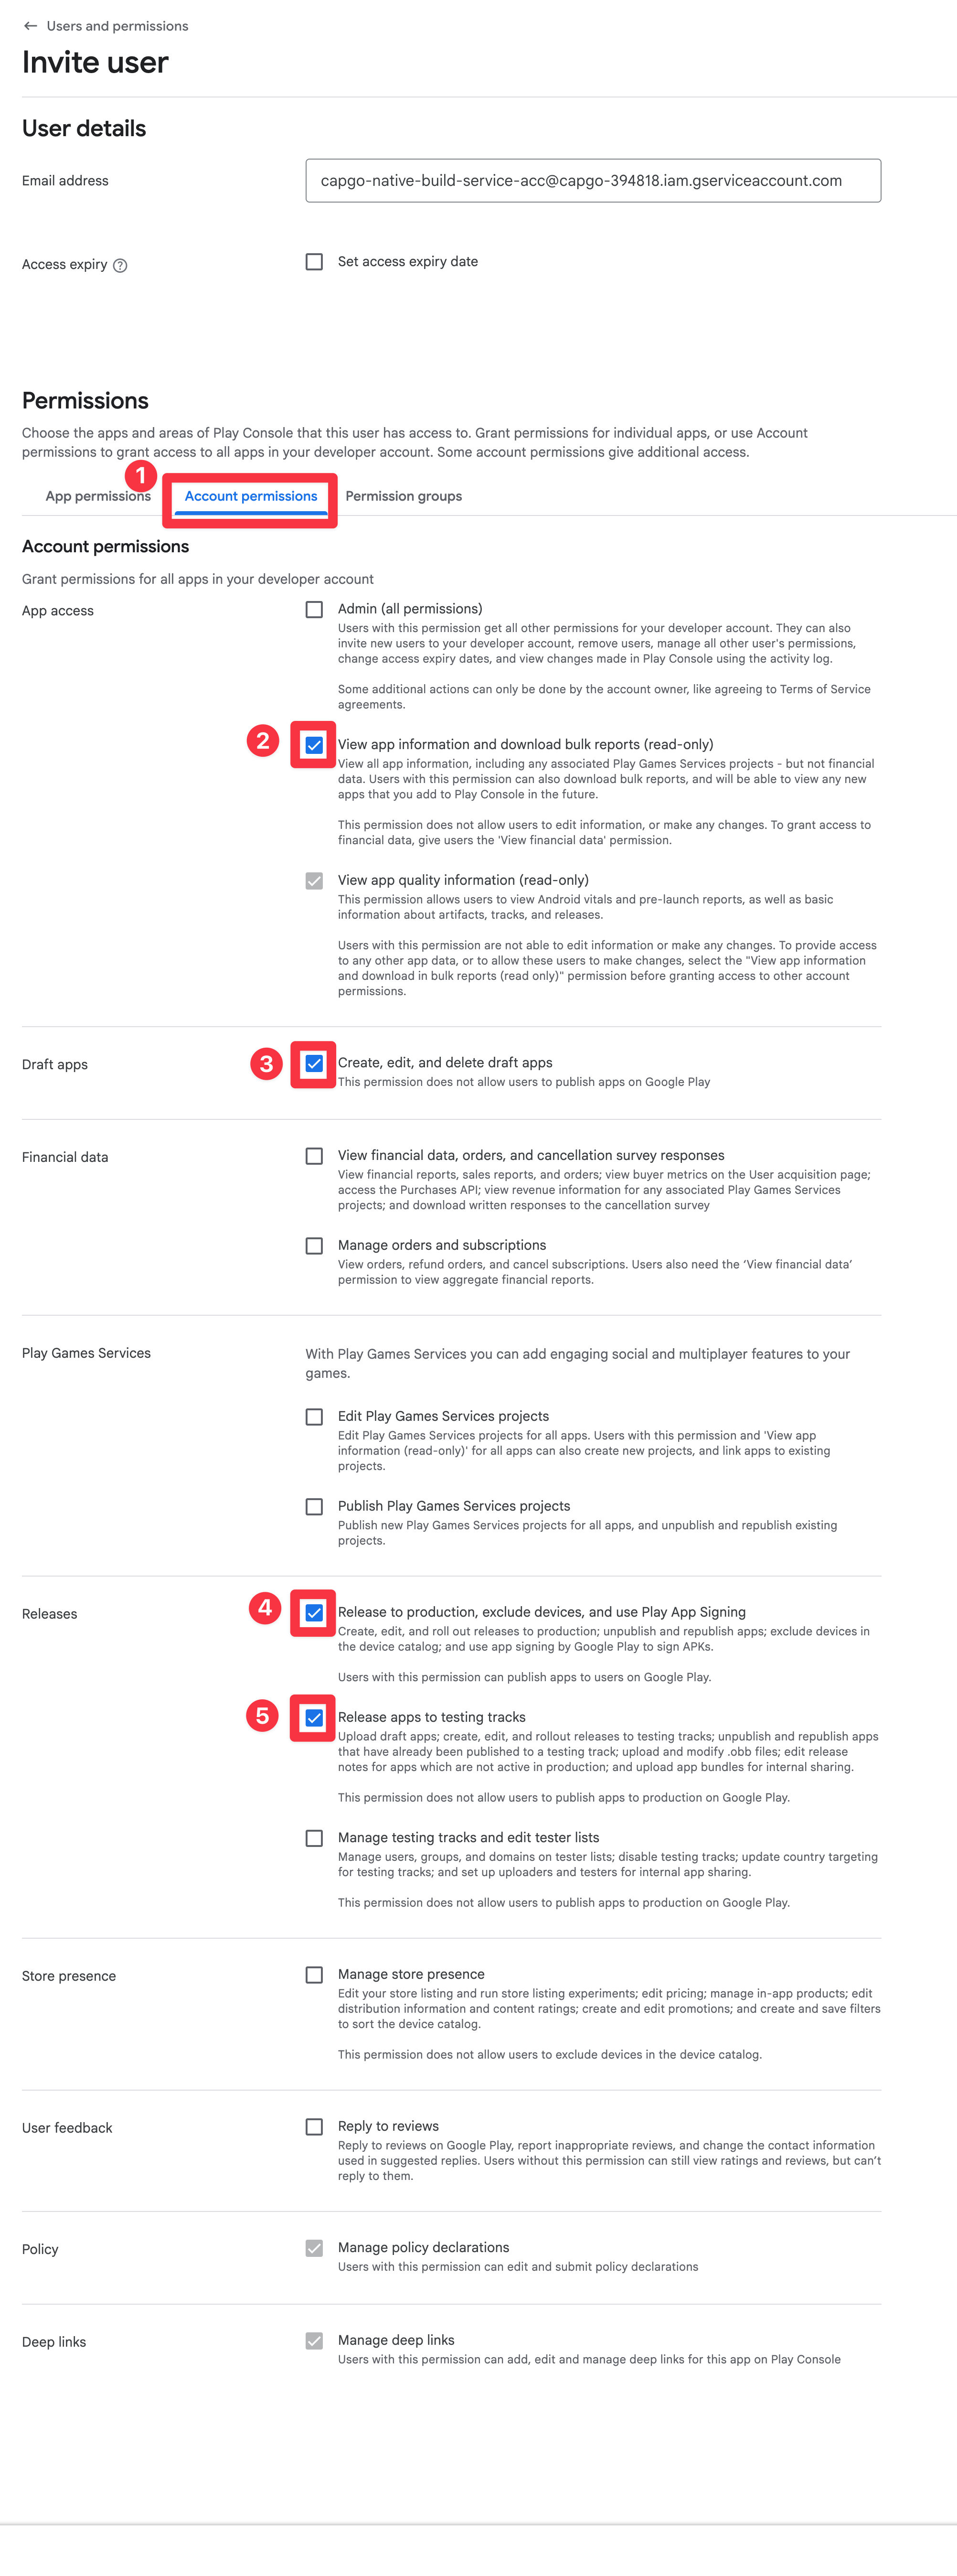
- 在
- 点击
Invite user
- 确认邀请
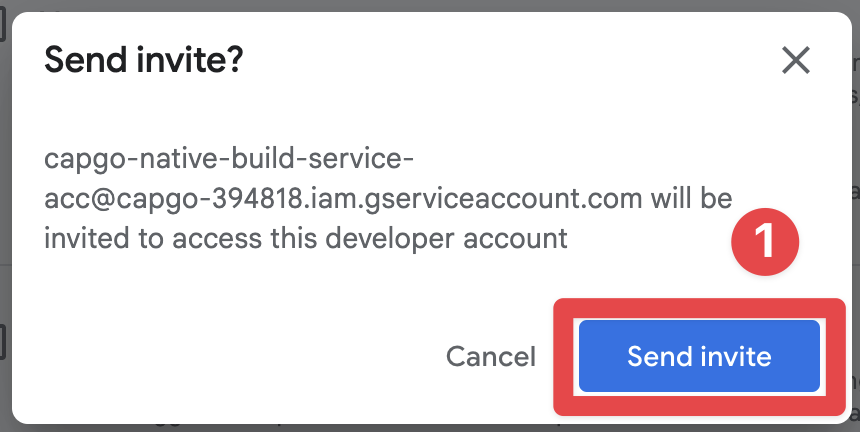
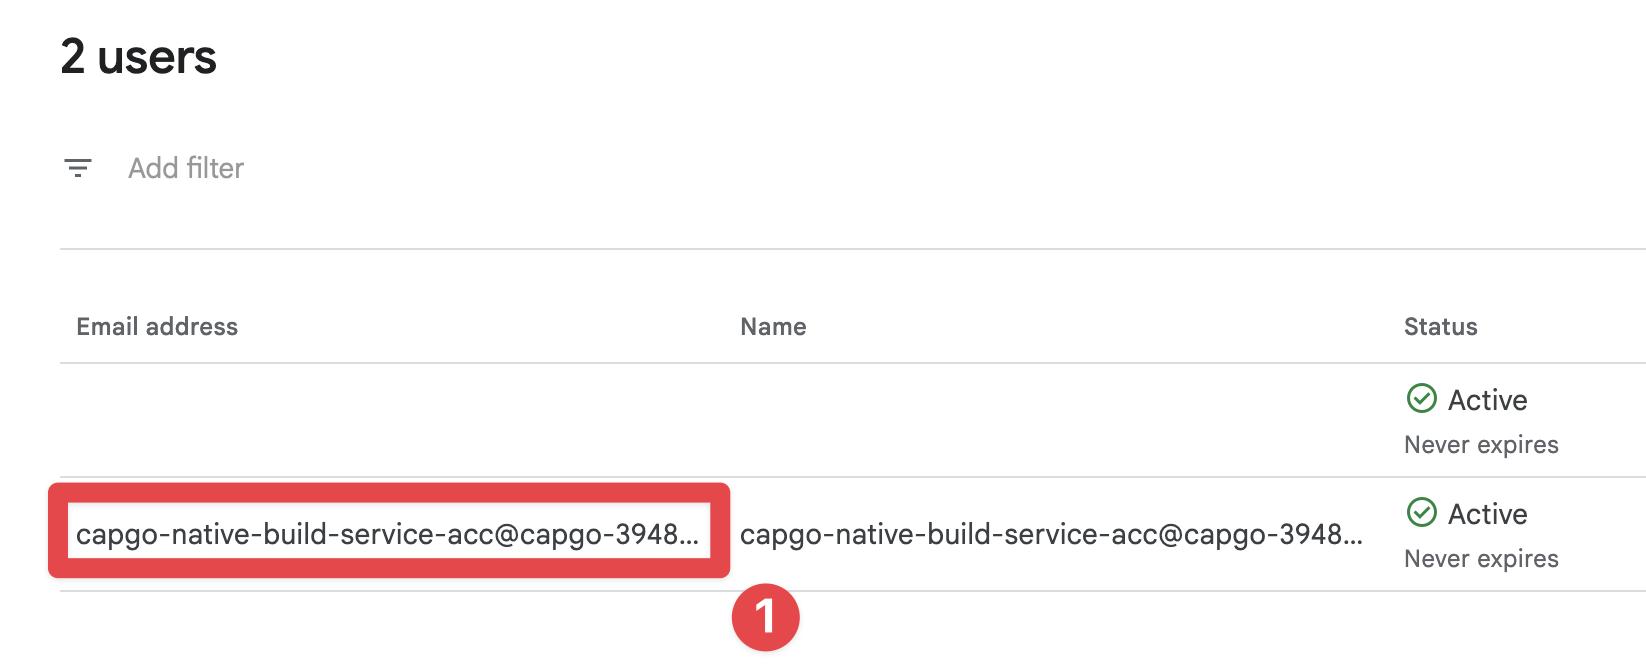
- 确认用户已被邀请
保存凭据
标题:保存凭据您现在准备好保存凭据并运行第一个构建。 您可以使用以下命令保存凭据:
bunx @capgo/cli@latest build credentials save --platform android \ --keystore ./path/to/keystore.jks \ --keystore-alias "your-alias" \ --keystore-key-password "key-password" \ --keystore-store-password "store-password" \ --play-config ./play-store-service-account.jsonCI/CD 设置(GitHub Actions)
CI/CD设置(GitHub Actions)标题:CI/CD设置(__CAPGO_KEEP_0__ Actions) 如果您已经完成了 和 Google Play服务账户,您已经具备了CI/CD所需的所有内容。 本节仅介绍如何将这些值作为GitHub Actions机密和环境变量传递。
1)将凭据文件转换为单行base64
1)将凭据文件转换为单行base64# Android keystore (.jks or .keystore)base64 -i ./path/to/keystore.jks | tr -d '\n' > keystore_base64.txt
# Google Play service account JSONbase64 -i ./play-store-service-account.json | tr -d '\n' > play_config_base64.txt2)创建仓库机密
Section titled “2) 创建仓库密钥”在 GitHub > Repository > Settings > Secrets and variables > Actions, 添加:
| 密钥名称 | 值 |
|---|---|
CAPGO_TOKEN | 您的 Capgo API 令牌 |
APP_ID | 您的 Capgo 应用程序 ID(示例: com.example.app) |
ANDROID_KEYSTORE_FILE | 内容 keystore_base64.txt |
KEYSTORE_KEY_ALIAS | 从 密钥库别名 |
KEYSTORE_KEY_PASSWORD | 密钥库、密钥库密码、密钥库密钥密码、密钥库别名 |
KEYSTORE_STORE_PASSWORD | 密钥库密钥密码 |
PLAY_CONFIG_JSON | 内容 play_config_base64.txt |
3) 在您的GitHub Actions工作流中使用环境变量
3) 在您的GitHub Actions工作流中使用环境变量name: Android Cloud Build
on: workflow_dispatch: push: branches: [main]
jobs: android-build: runs-on: ubuntu-latest steps: - uses: actions/checkout@v6 - uses: oven-sh/setup-bun@v2 with: bun-version: latest - name: Request Android build with Capgo run: bunx @capgo/cli@latest build request ${{ secrets.APP_ID }} --platform android env: CAPGO_TOKEN: ${{ secrets.CAPGO_TOKEN }} ANDROID_KEYSTORE_FILE: ${{ secrets.ANDROID_KEYSTORE_FILE }} KEYSTORE_KEY_ALIAS: ${{ secrets.KEYSTORE_KEY_ALIAS }} KEYSTORE_KEY_PASSWORD: ${{ secrets.KEYSTORE_KEY_PASSWORD }} KEYSTORE_STORE_PASSWORD: ${{ secrets.KEYSTORE_STORE_PASSWORD }} PLAY_CONFIG_JSON: ${{ secrets.PLAY_CONFIG_JSON }}运行构建
构建运行恭喜你!你现在可以运行第一个构建了。
运行:
bunx @capgo/cli@latest build request com.example.app --platform android并且这将启动构建过程。
这将启动构建过程
提交Play发布到审核默认情况下,Android发布构建将上传到Google Play并保持不活动状态,直到您在Play控制台完成发布。如果您的CI发布应该自动提交Play发布,请传递 --submit-to-store-review 带有发布构建:
npx @capgo/cli@latest build request com.example.app \ --platform android \ --build-mode release \ --submit-to-store-review \ --android-track production \ --store-release-name "1.2.3" \ --store-release-notes "General improvements" \ --store-release-notes-locale "en-US=General improvements" \ --store-release-notes-locale "nl-NL=Algemene verbeteringen" \ --store-release-notes-locale "fr-FR=Ameliorations generales"需要使用相同的Google Play服务帐户设置,和正常的上传路径(在CI或本地保存Android凭据)PLAY_CONFIG_JSON 用于Google Play --store-release-name 用于Google Play version_name. --store-release-notes 每个条目将为该区域写入本地化的Play更改日志 --store-release-notes-locale "locale=notes" entry 为该地区生成一个本地化的 Play changelog。 Capgo 发送 Play 发布 completed 除非您覆盖 --android-release-status如果在Play控制台启用了管理发布,Google仍然可以等待您的手动发布后审批
继续从Android Builds
标题:继续从Android Builds如果您正在使用 安卓构建 来规划CI/CD自动化,连接它 Capgo CI/CD 为产品工作流程在 Capgo CI/CD 中 Capgo 原生构建 为产品工作流程在 Capgo 原生构建 中 Capgo 集成 为产品工作流程在 Capgo 集成 中 CI/CD 集成 为 CI/CD 集成的实现细节 GitHub 动作集成 为 GitHub 动作集成的实现细节


