Firebase Google 登录 on iOS
复制一个包含安装步骤和本插件的完整 Markdown 指南的配置提示。
本指南将帮助您在 iOS 上将 Google Sign-In 与 Firebase Authentication 集成。假设您已经完成了 通用 Firebase Google 设置.
设置步骤
标题为“设置步骤”的部分-
前往您的项目概览 console.cloud.google.com
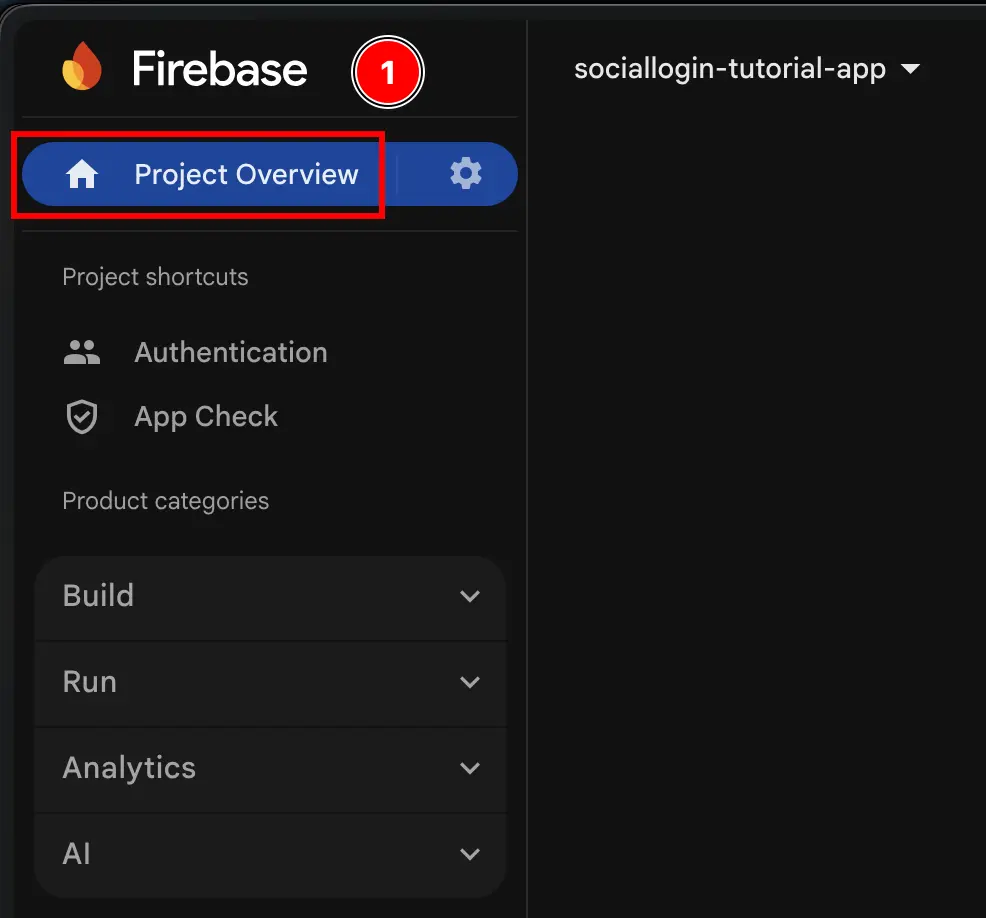
-
点击
Add appbutton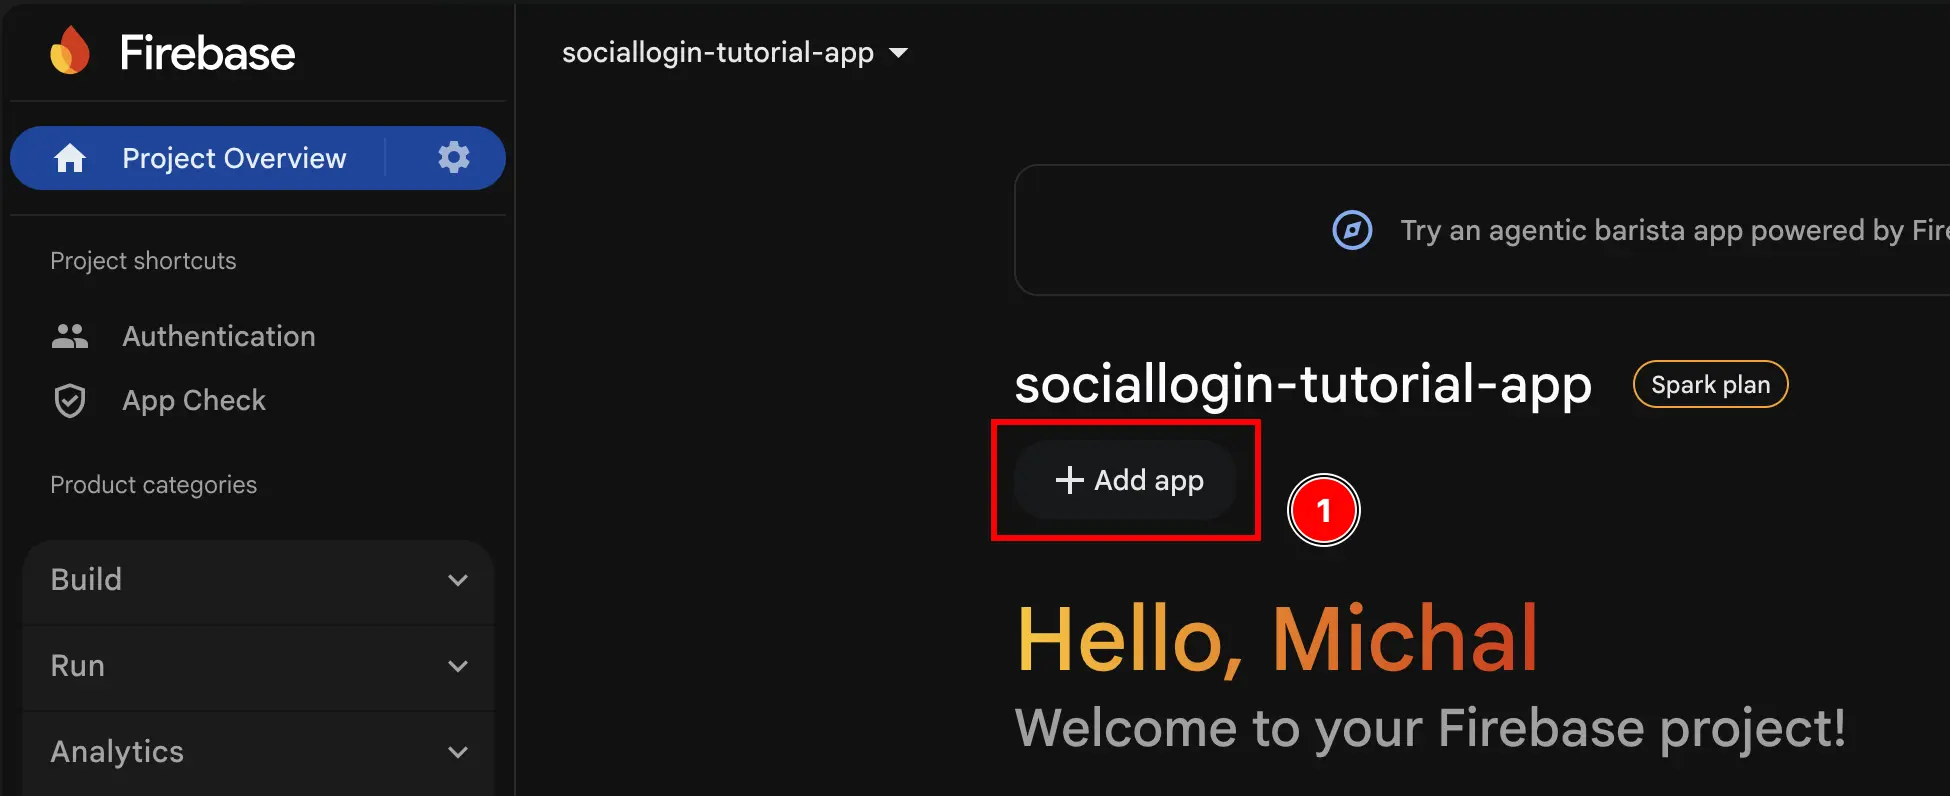
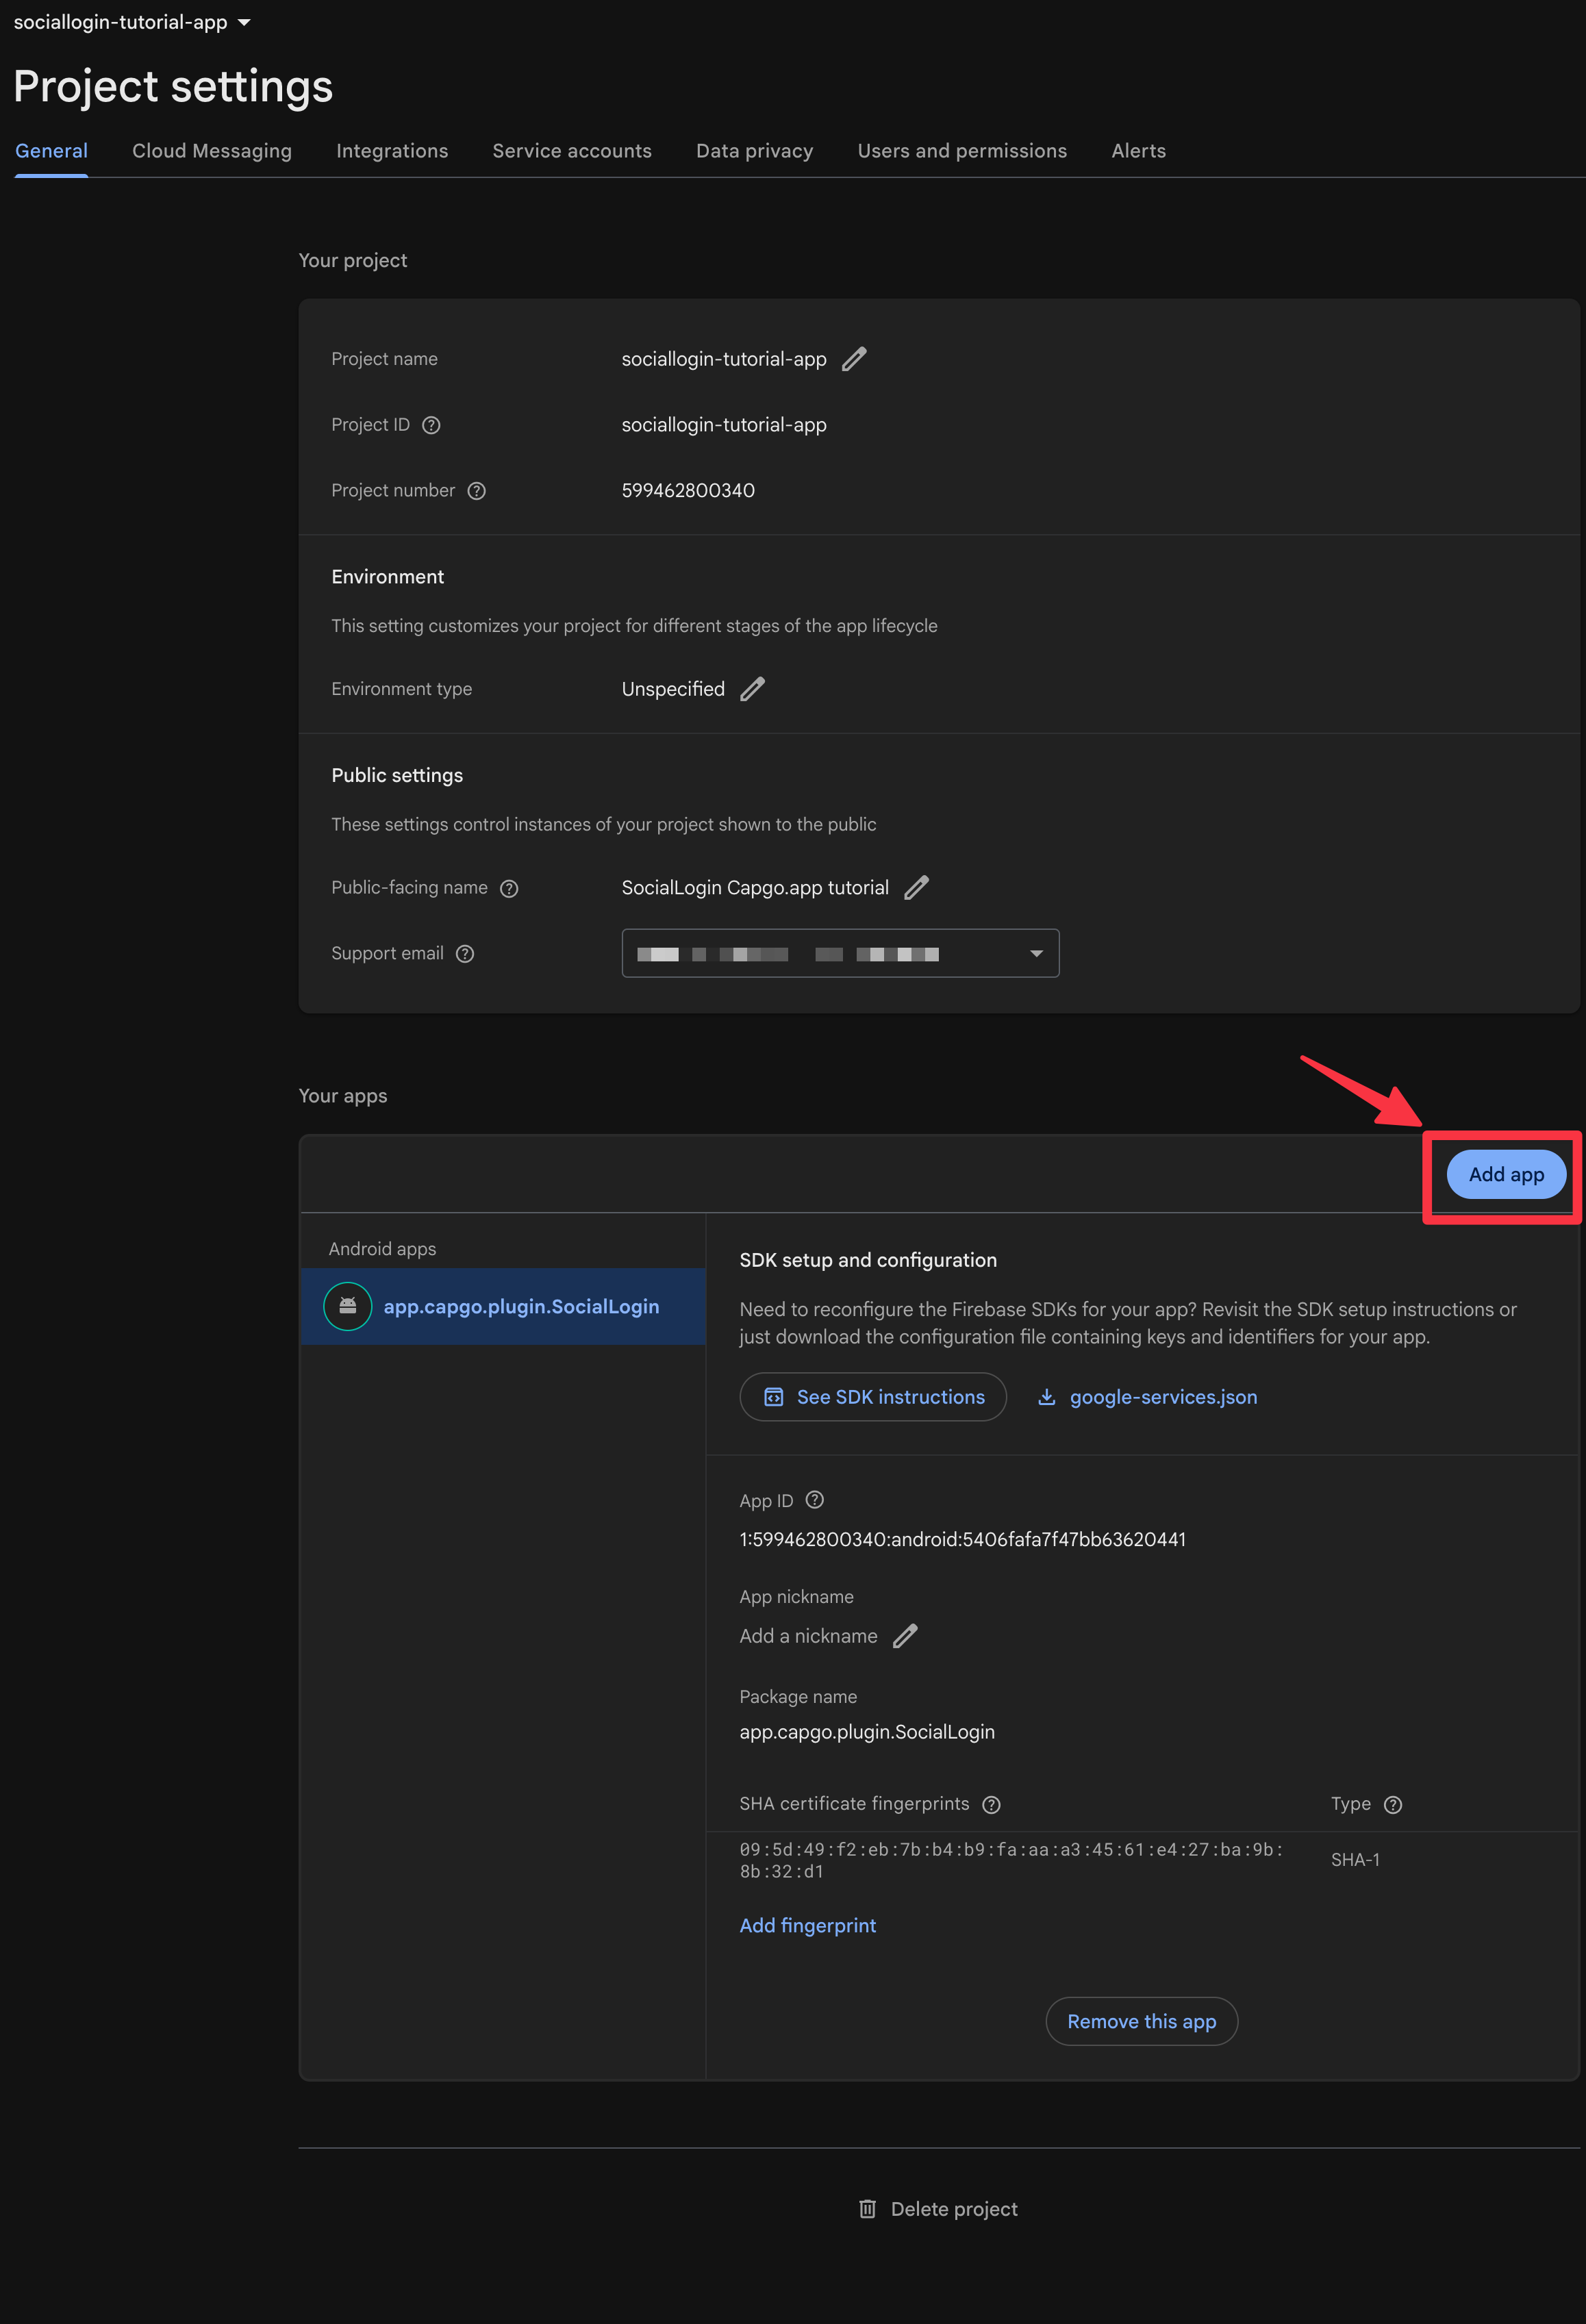
-
选择
iOS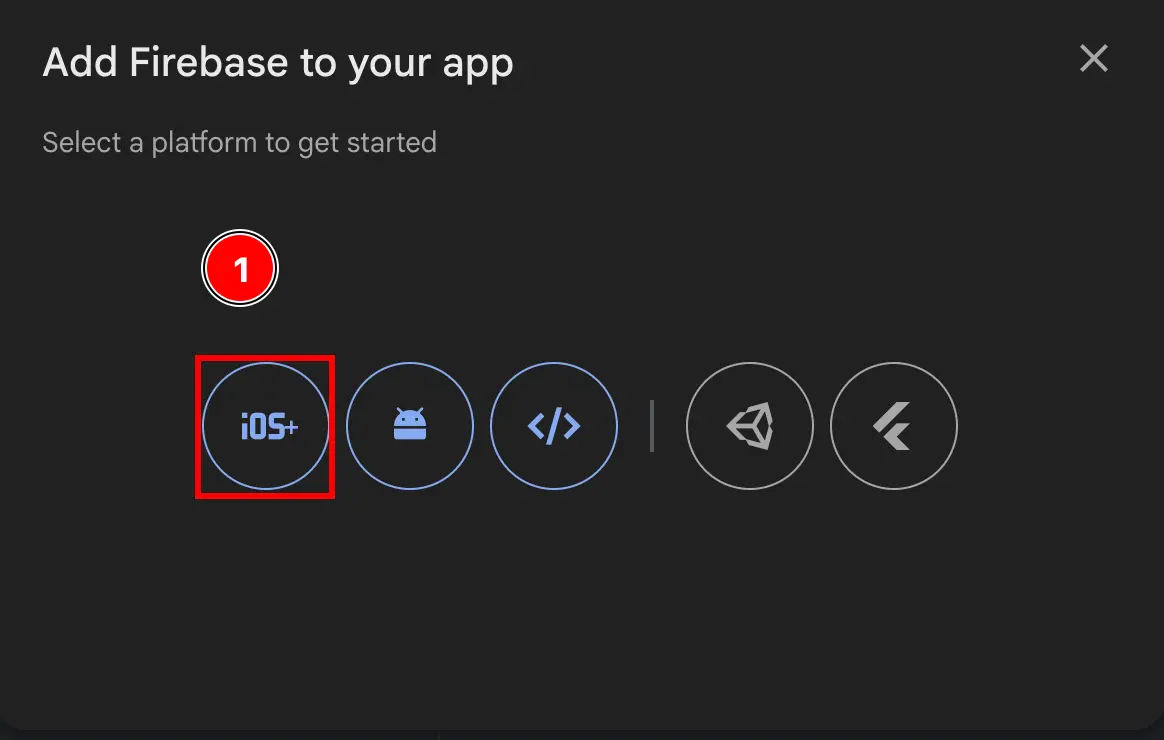
-
填写表单的第一部分
- 填写
Apple bundle ID- 打开 Xcode 并在您的应用程序中使用
npx cap open ios - 双击
App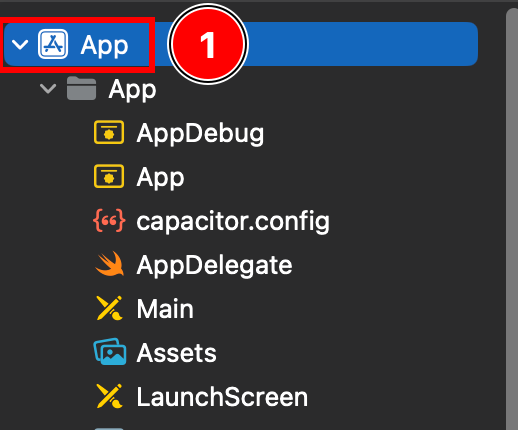
- 确保您在
Targets -> App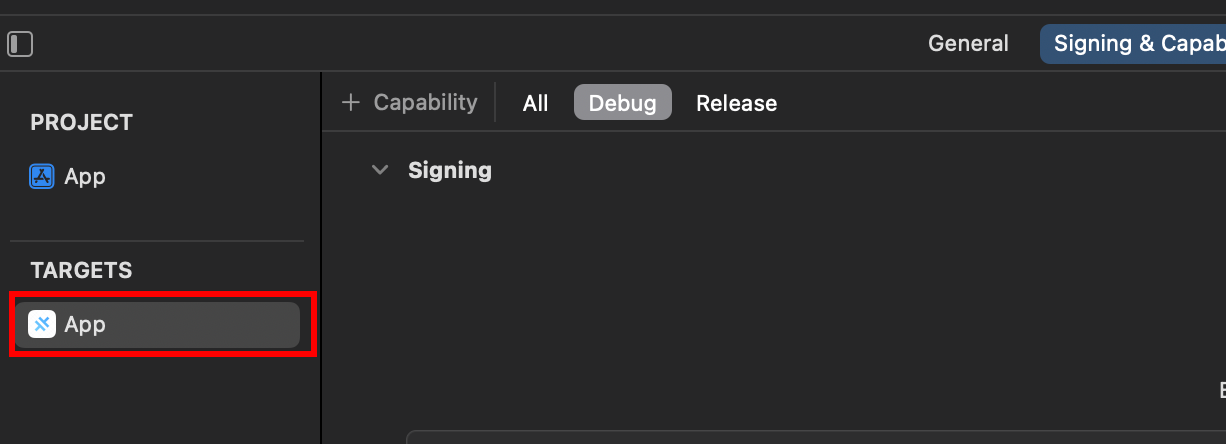
- 找到
Bundle Identifier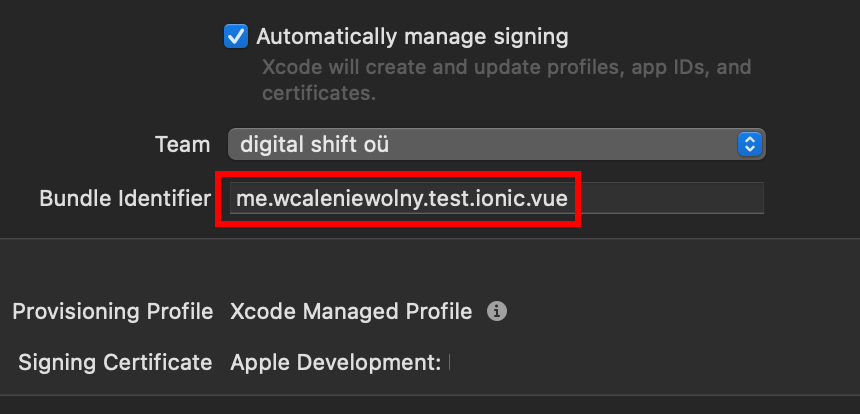
- 复制
Bundle Identifier并将其粘贴到 Firebase 控制台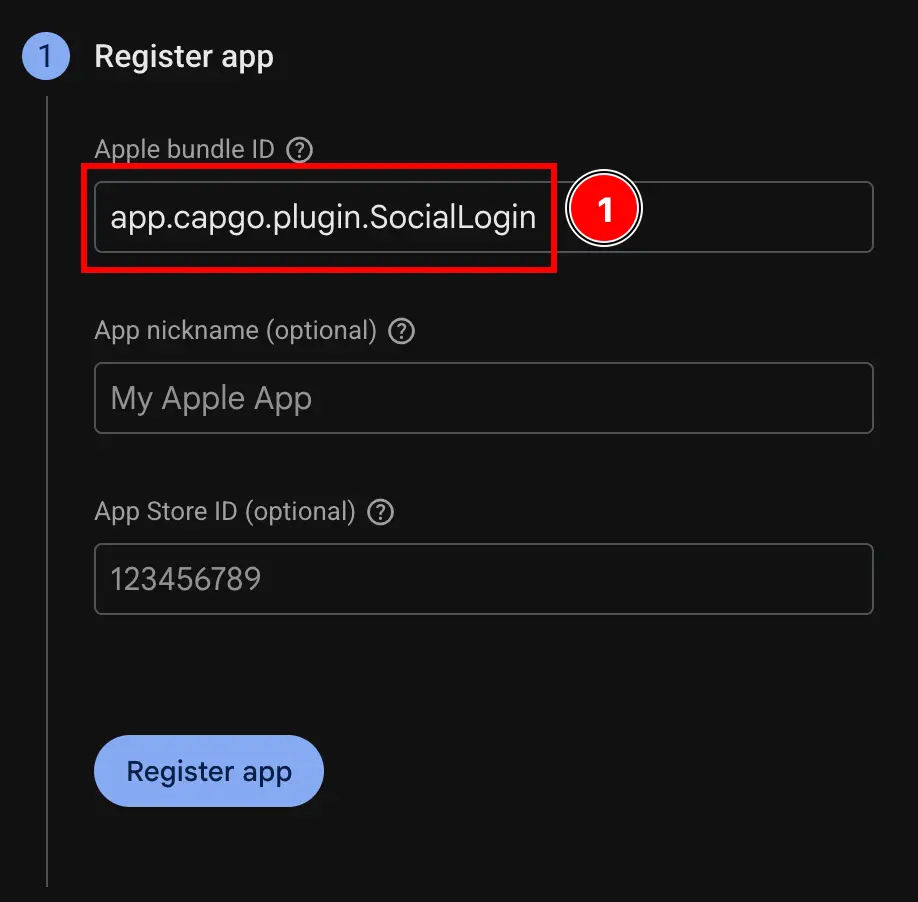
- 打开 Xcode 并在您的应用程序中使用
- 点击
Register app按钮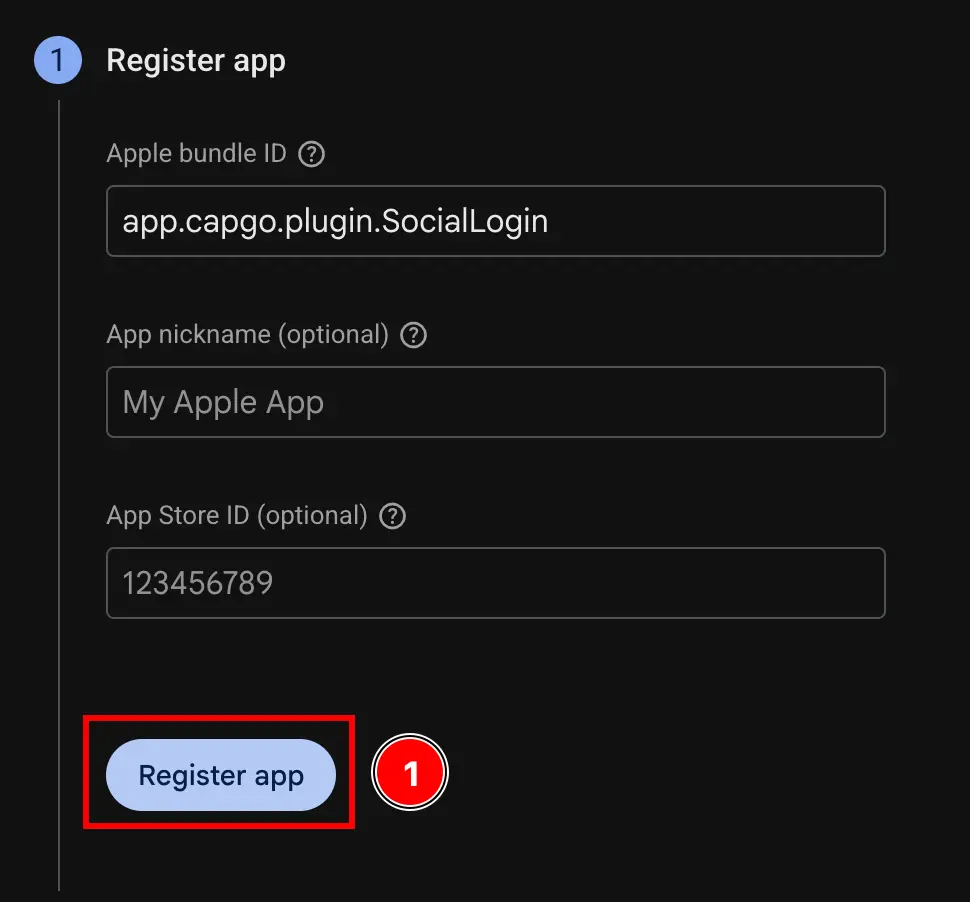
- 填写
-
跳过
Download config file步骤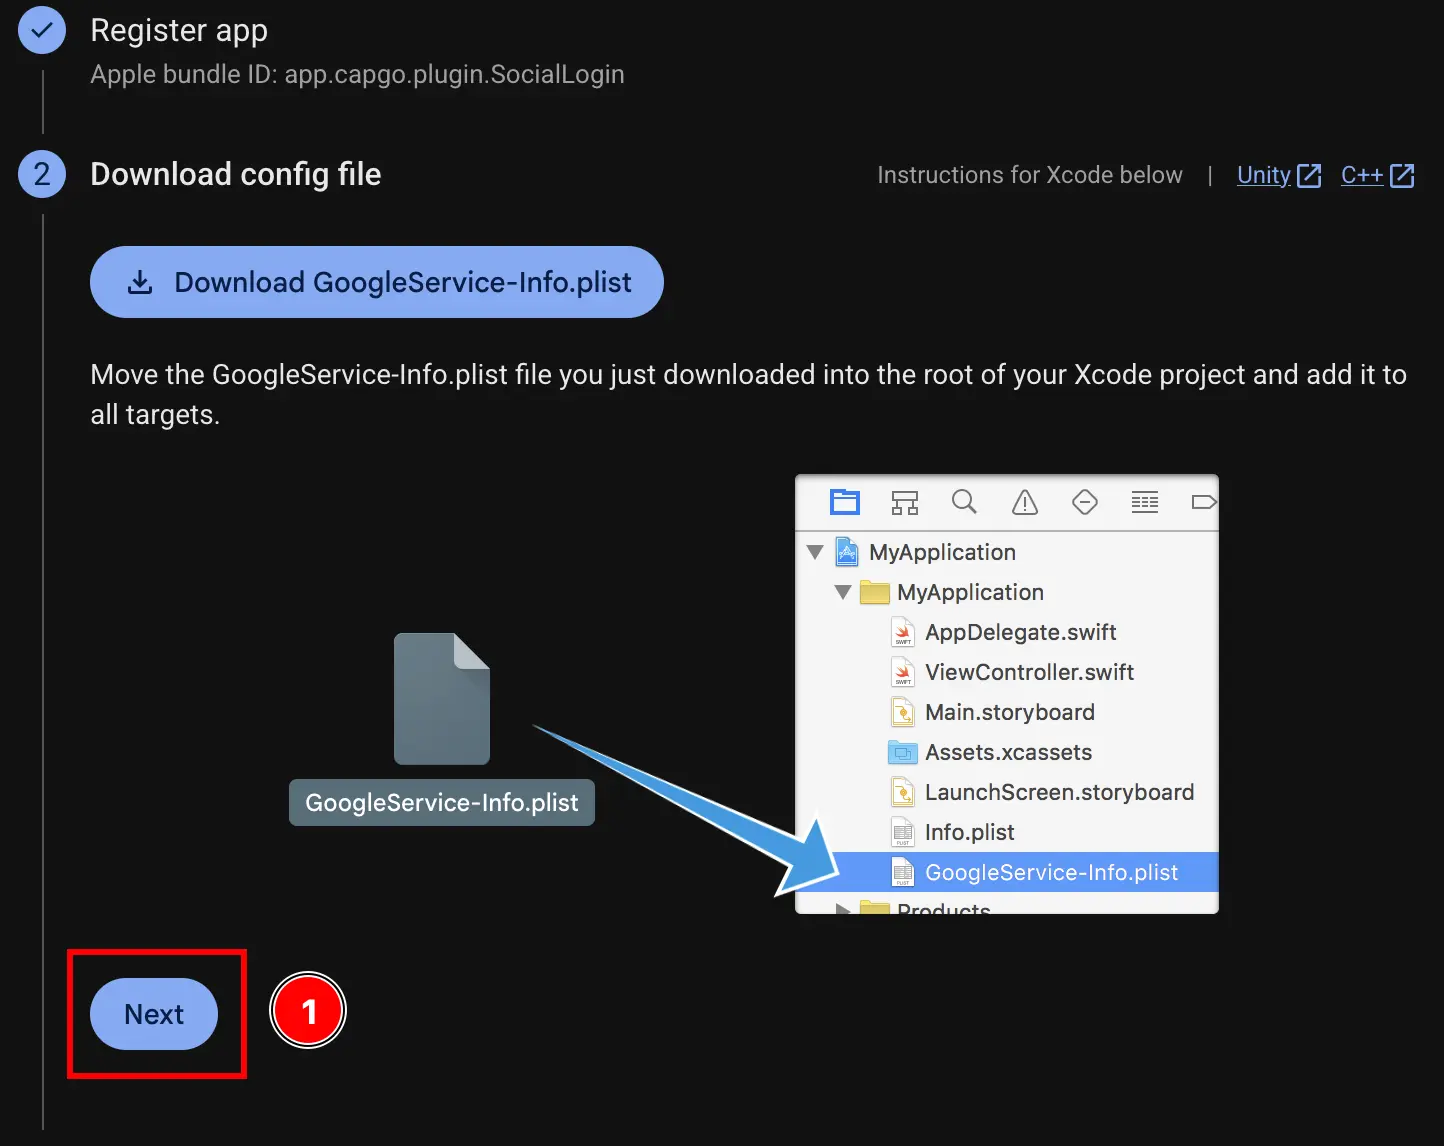
-
跳过
Add firebase SDK步骤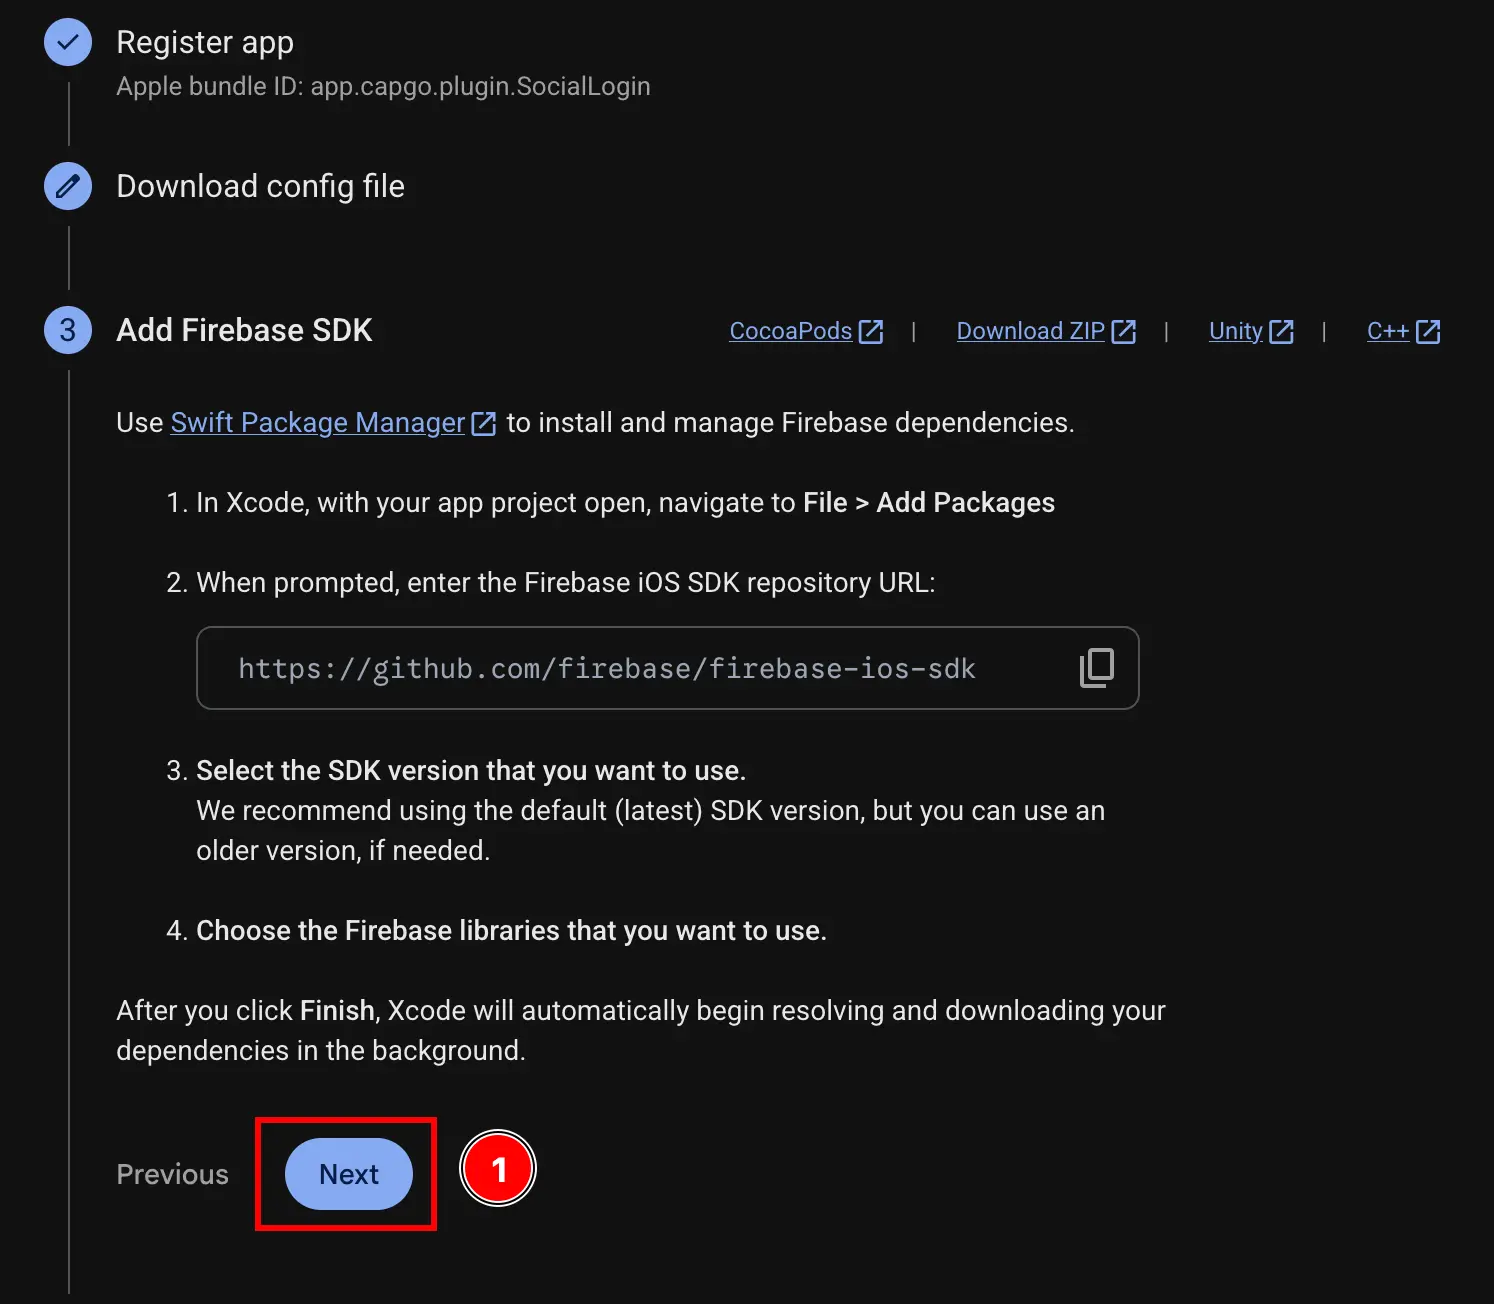
-
跳过
Add initialization code步骤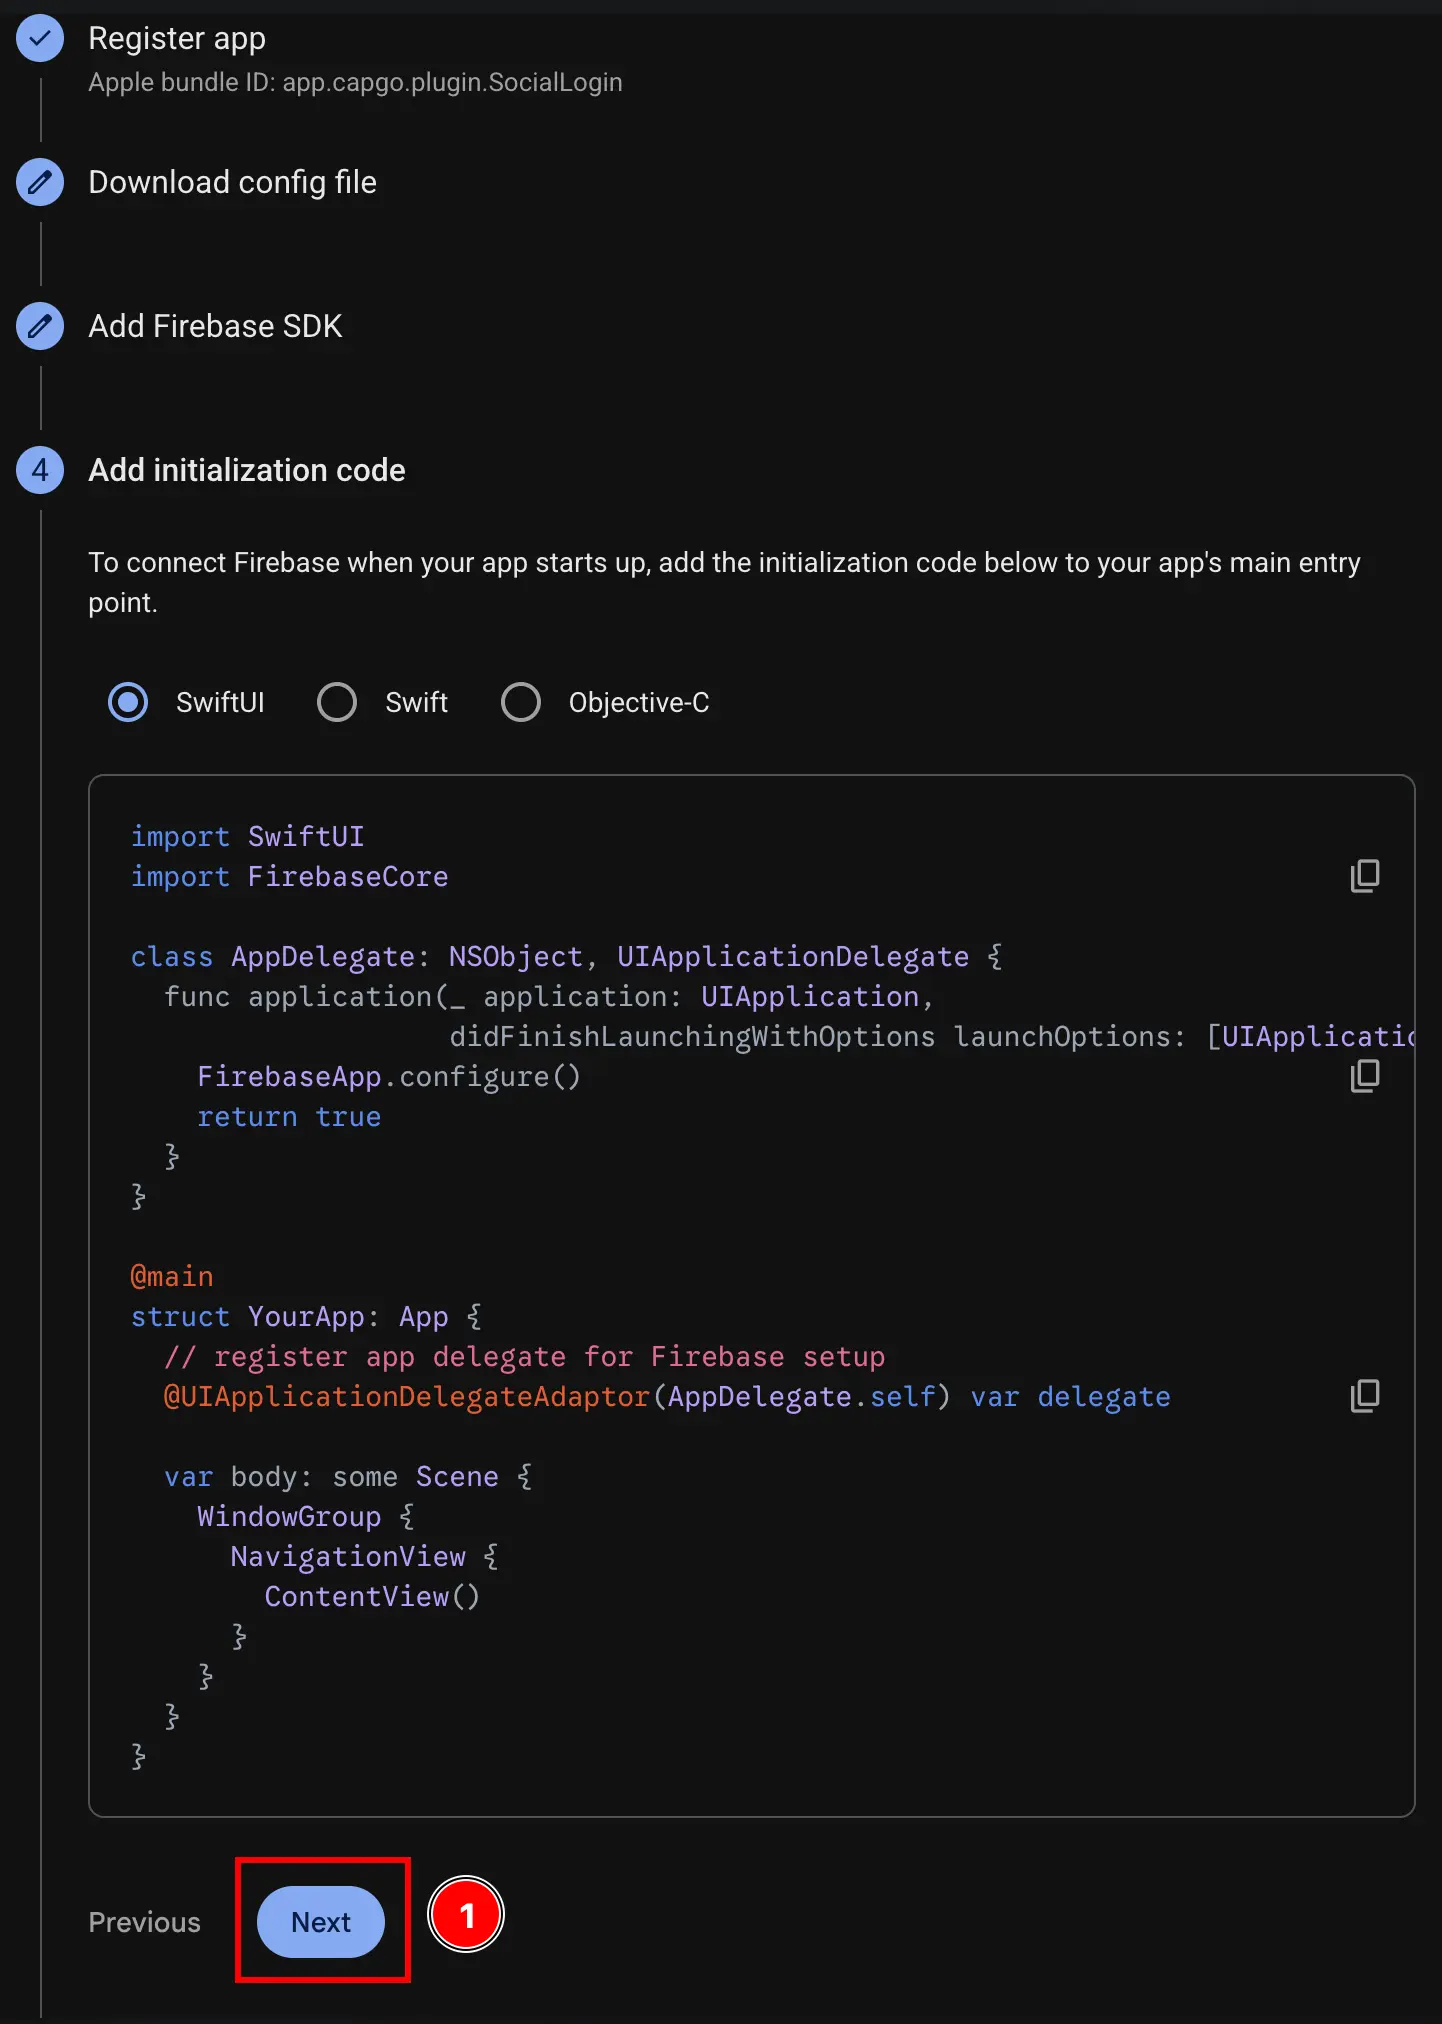
-
点击
Continue to console按钮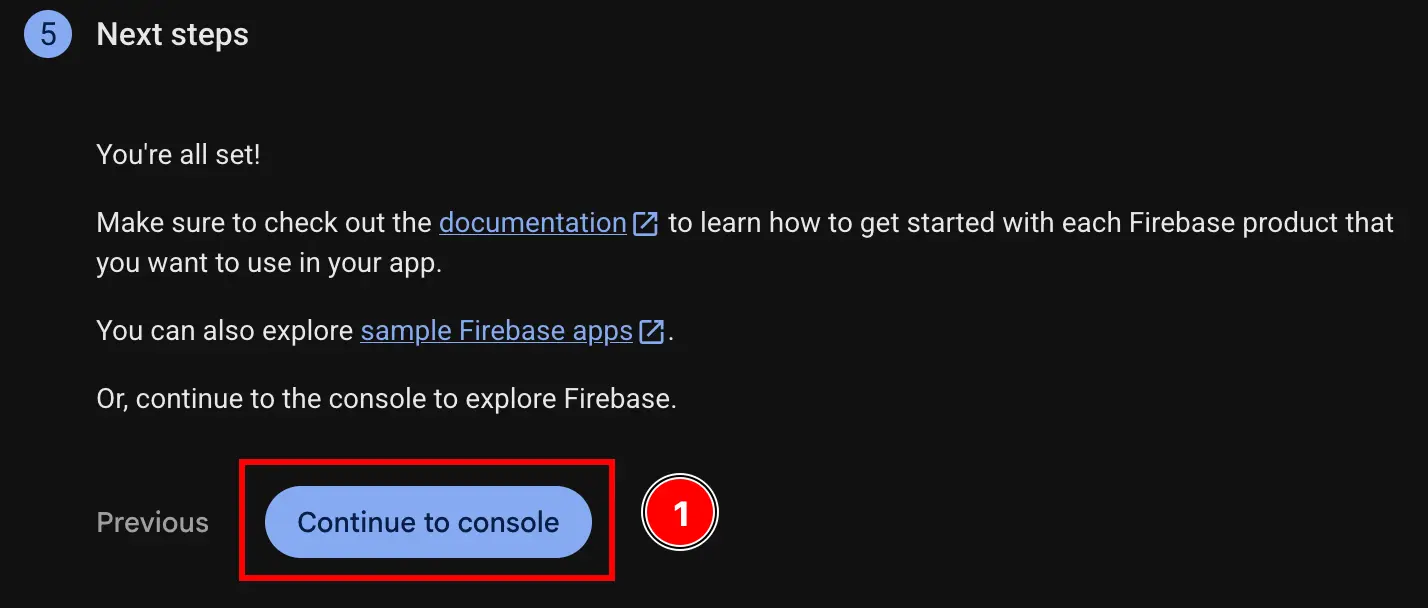
-
获取您的 iOS 客户端 ID 和您的
YOUR_DOT_REVERSED_IOS_CLIENT_ID-
前往 Google Cloud 控制台 console.cloud.google.com
-
找到您的项目
- 点击项目选择器
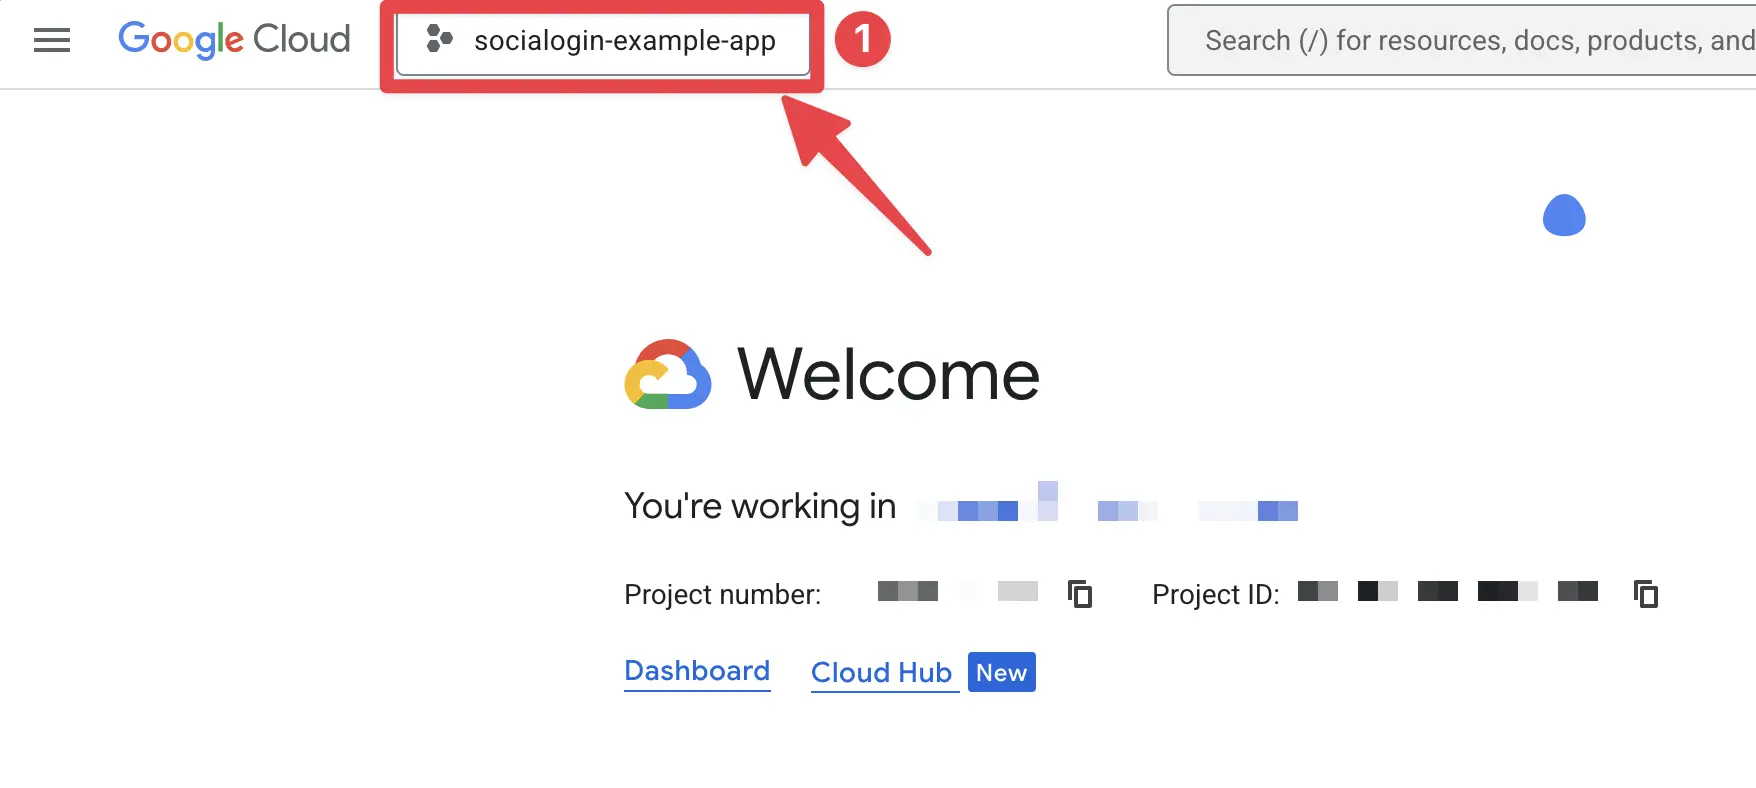
- 在 Google Cloud Console 中,搜索 Firebase 项目的准确名称,然后点击它。在我的情况下,它是
sociallogin-tutorial-app.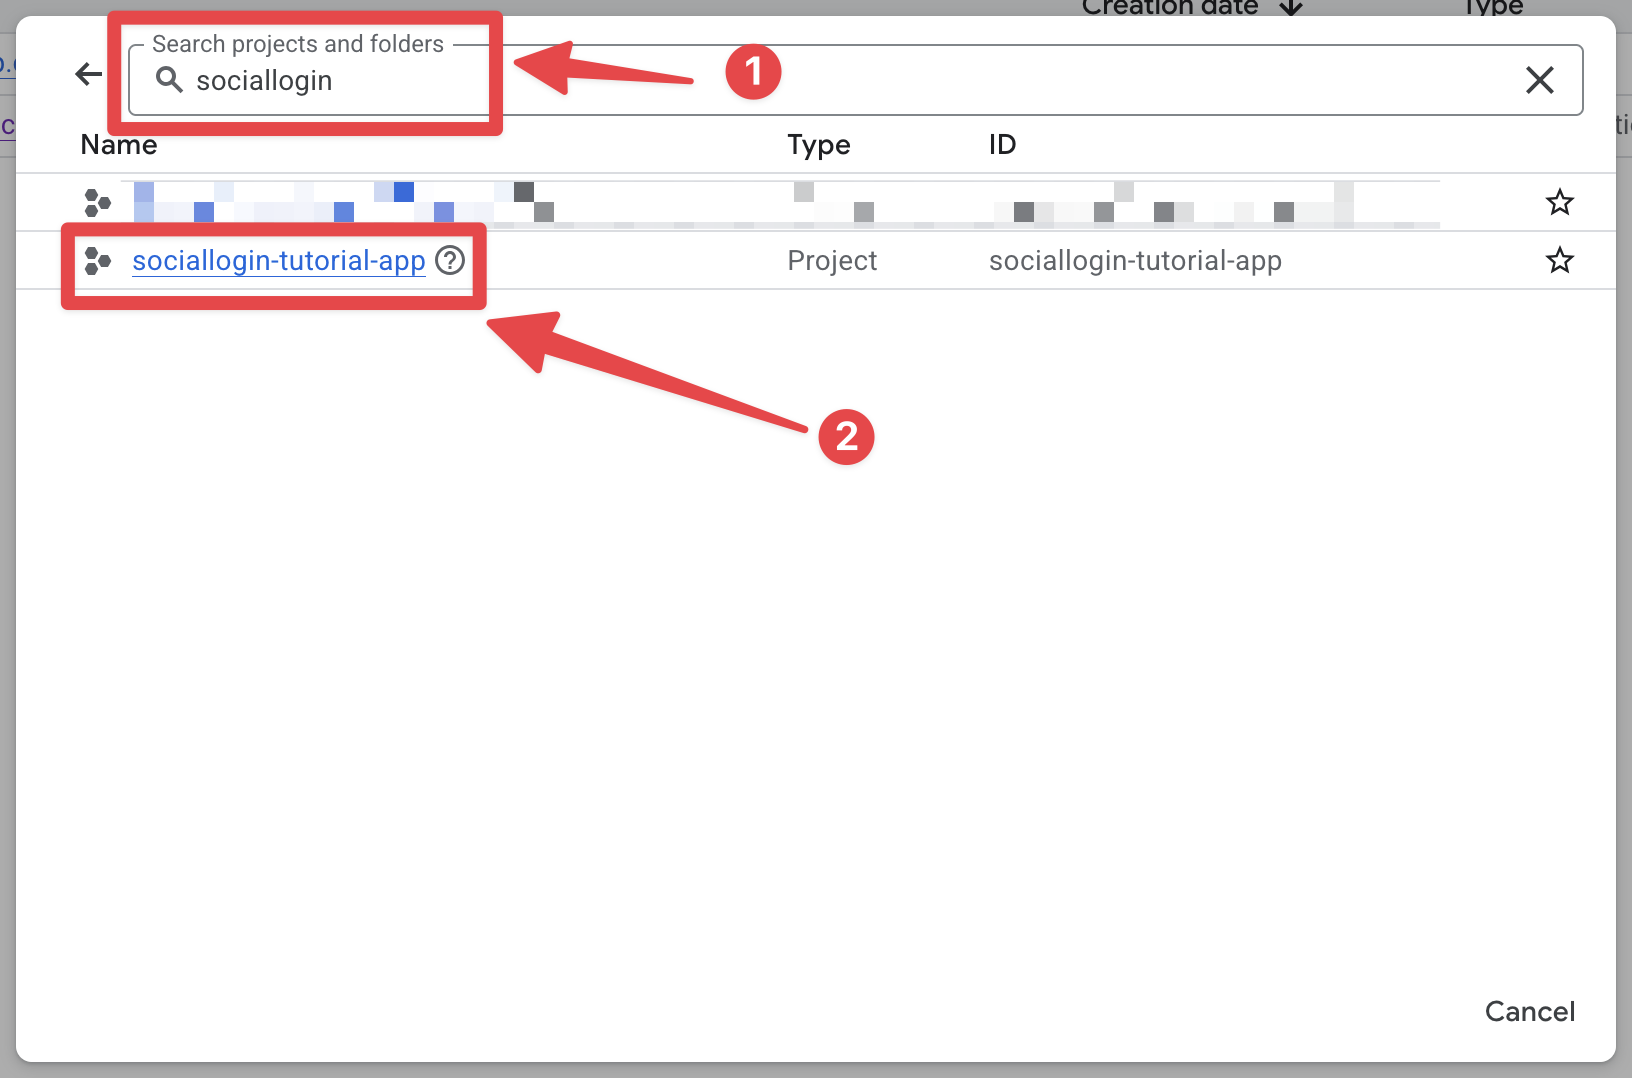
- 点击项目选择器
-
打开搜索栏并打开
credentials- 打开搜索栏
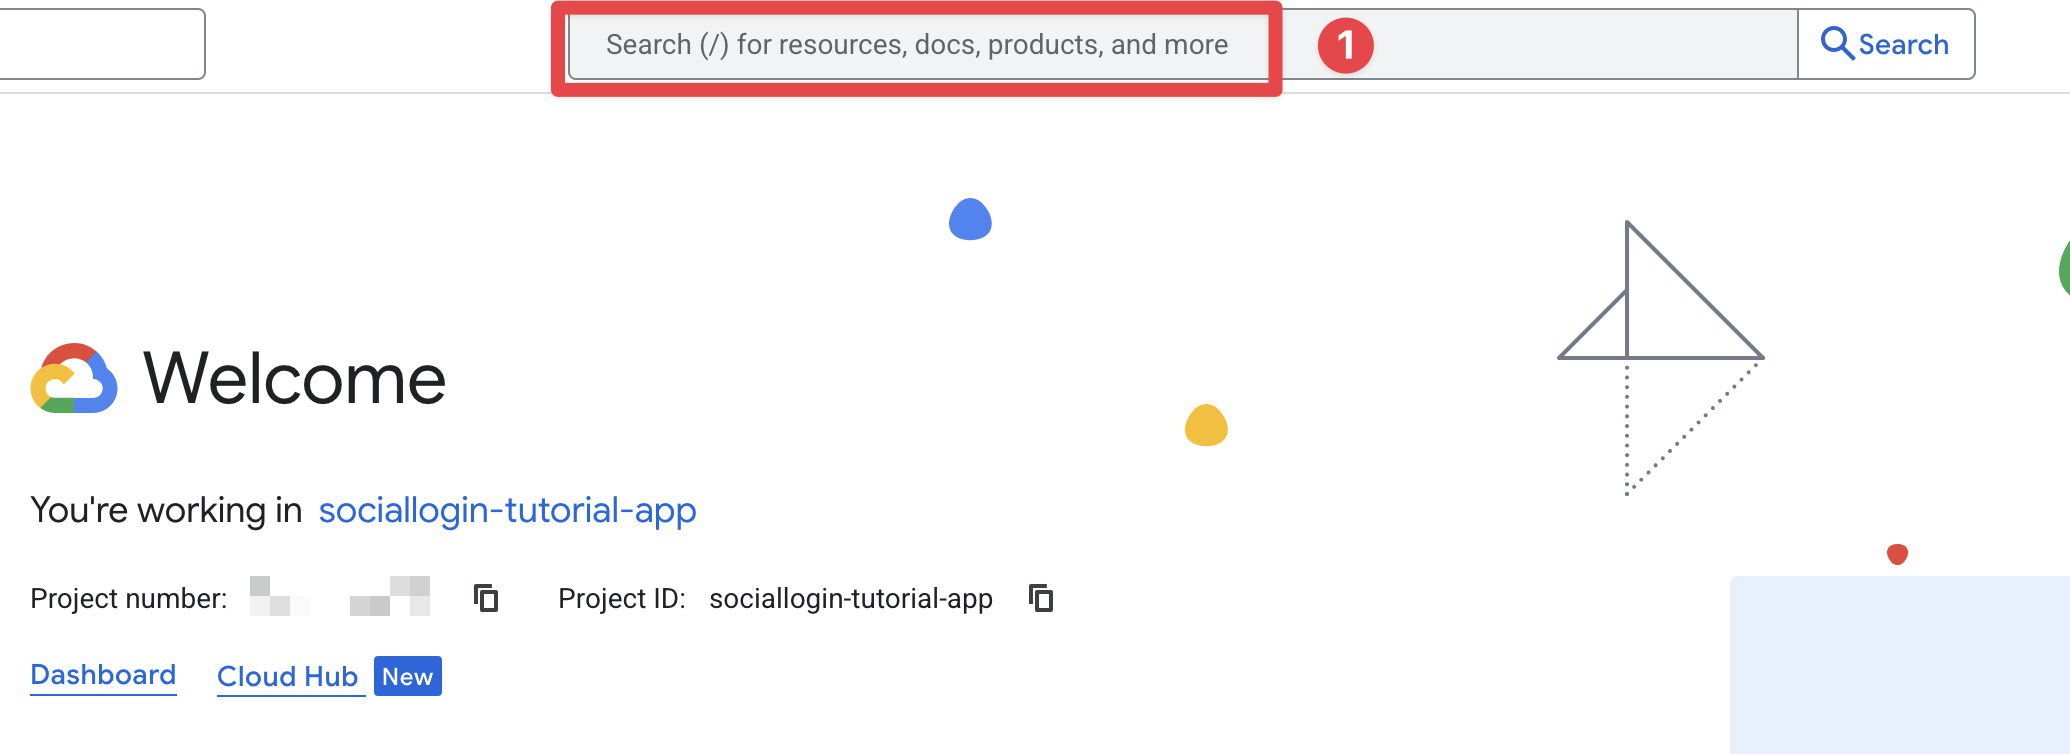
- 搜索
credentials然后点击APIs and Services第一个(截图中的第 2 个)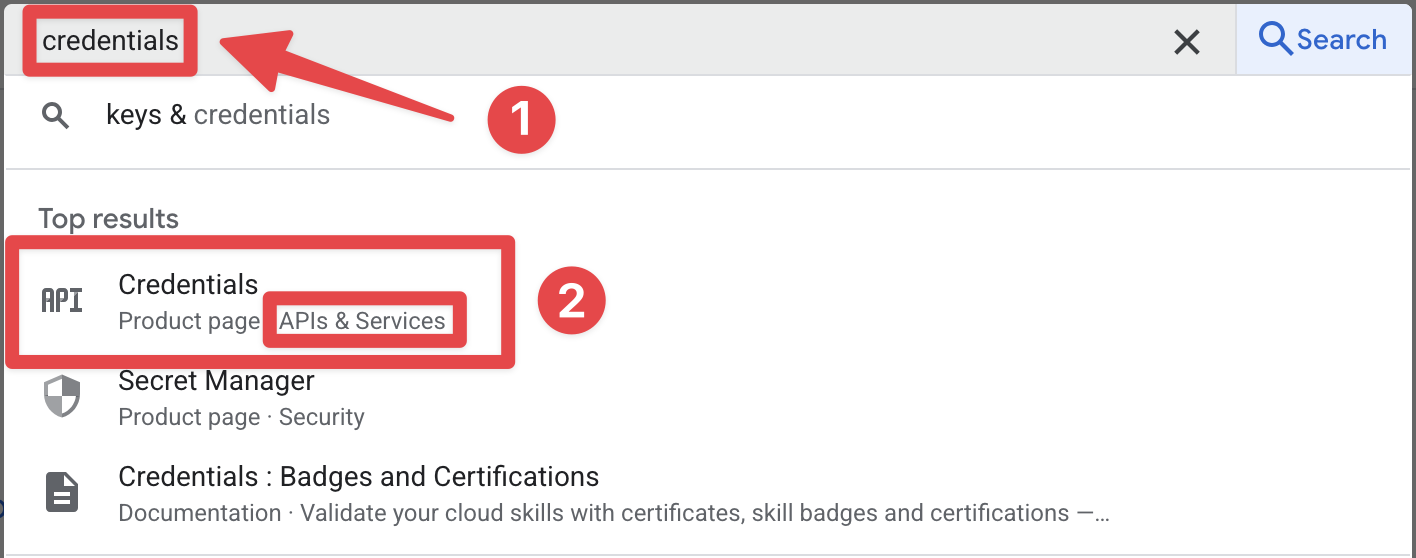
- 打开搜索栏
-
点击
iOS client for [YOUR_APP_ID] (auto created by Google Service)第一个。在我的情况下,它是sociallogin-tutorial-app.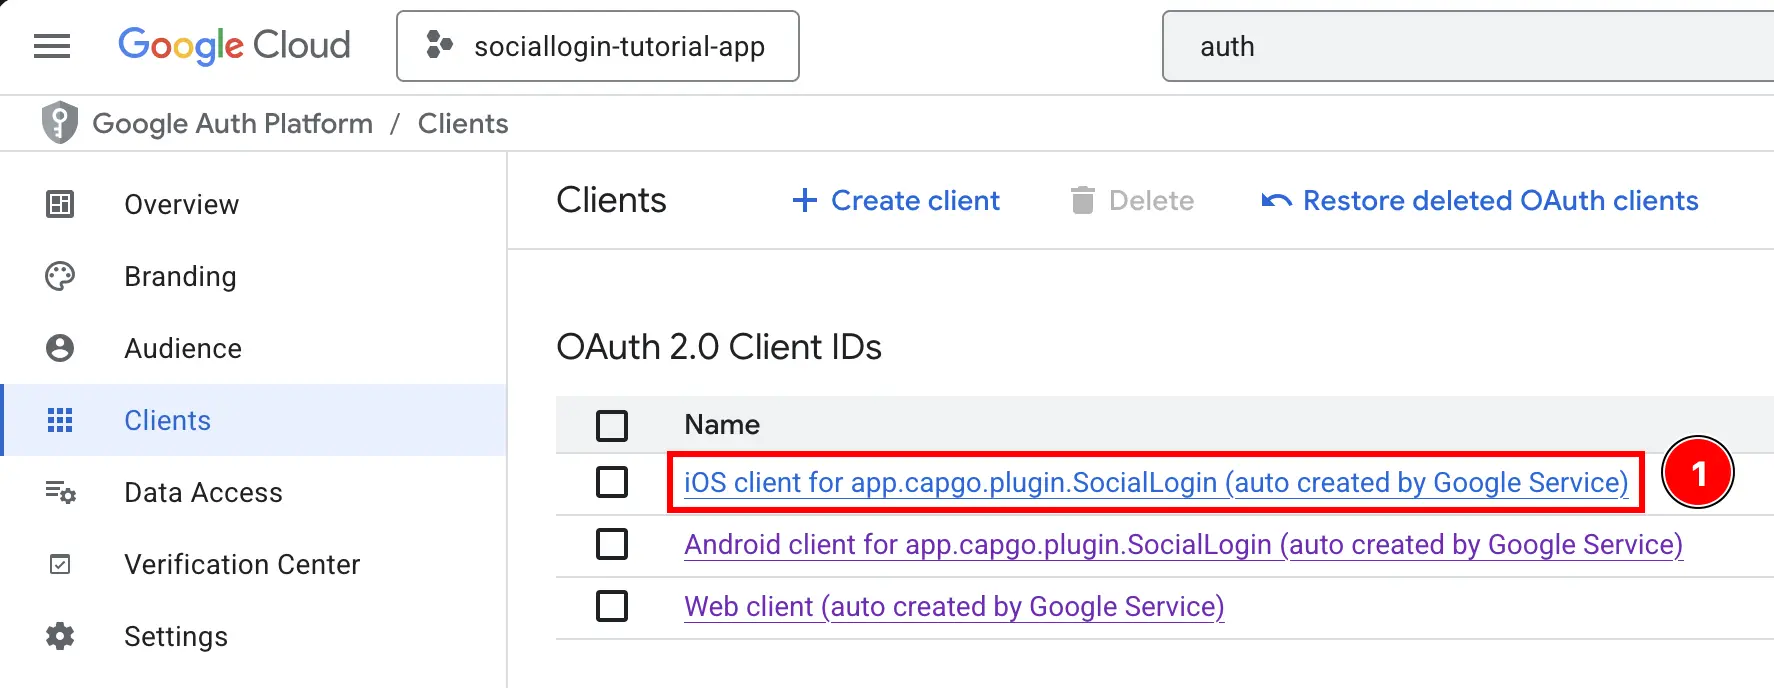
-
复制
Client ID以及iOS URL scheme这将分别是您的iOSClientId和YOUR_DOT_REVERSED_IOS_CLIENT_ID.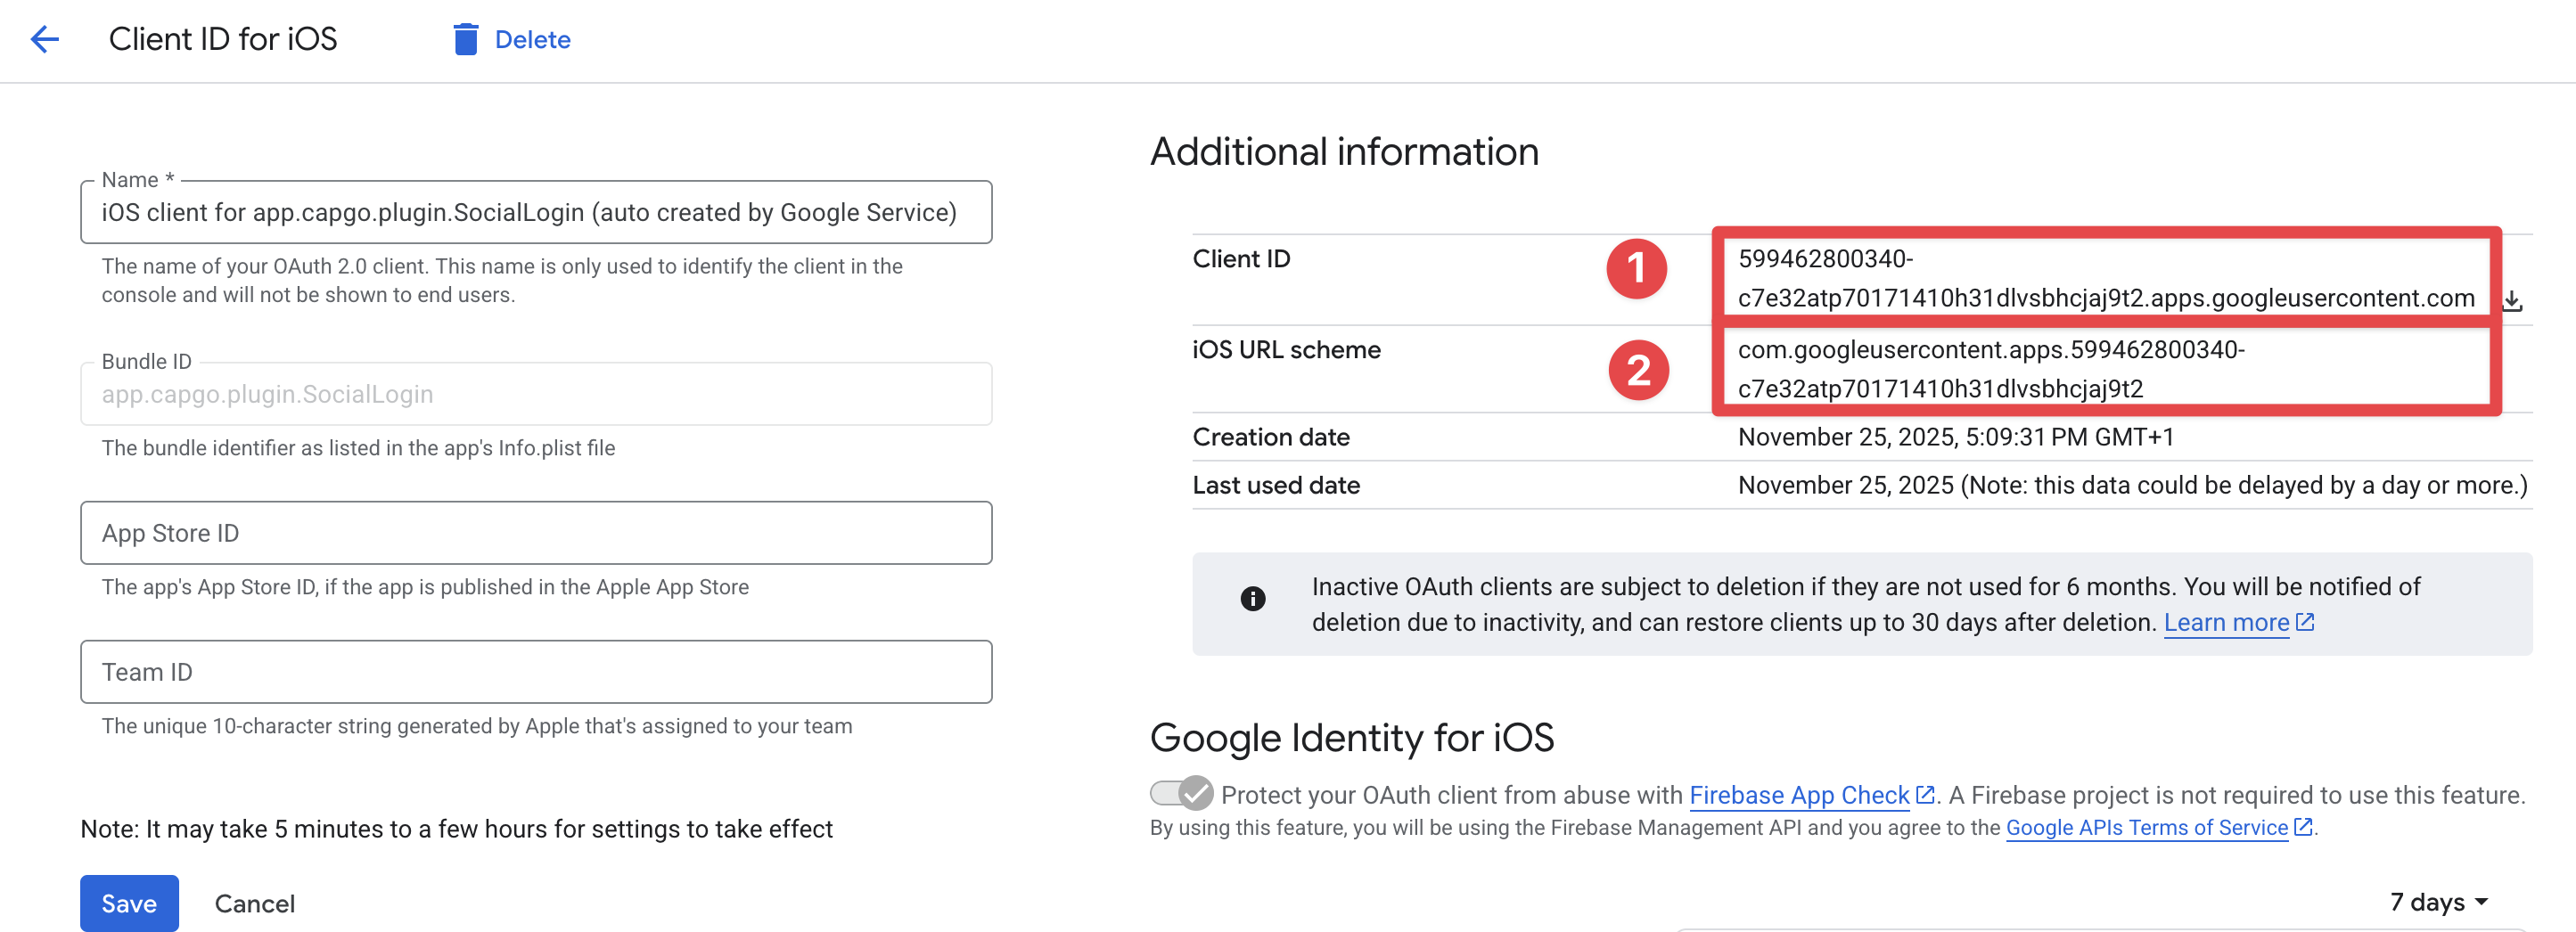
-
-
获取您的 Web 客户端 ID
- 返回 Firebase 控制台,转到
Build->Authentication
- 点击
Sign-in method按钮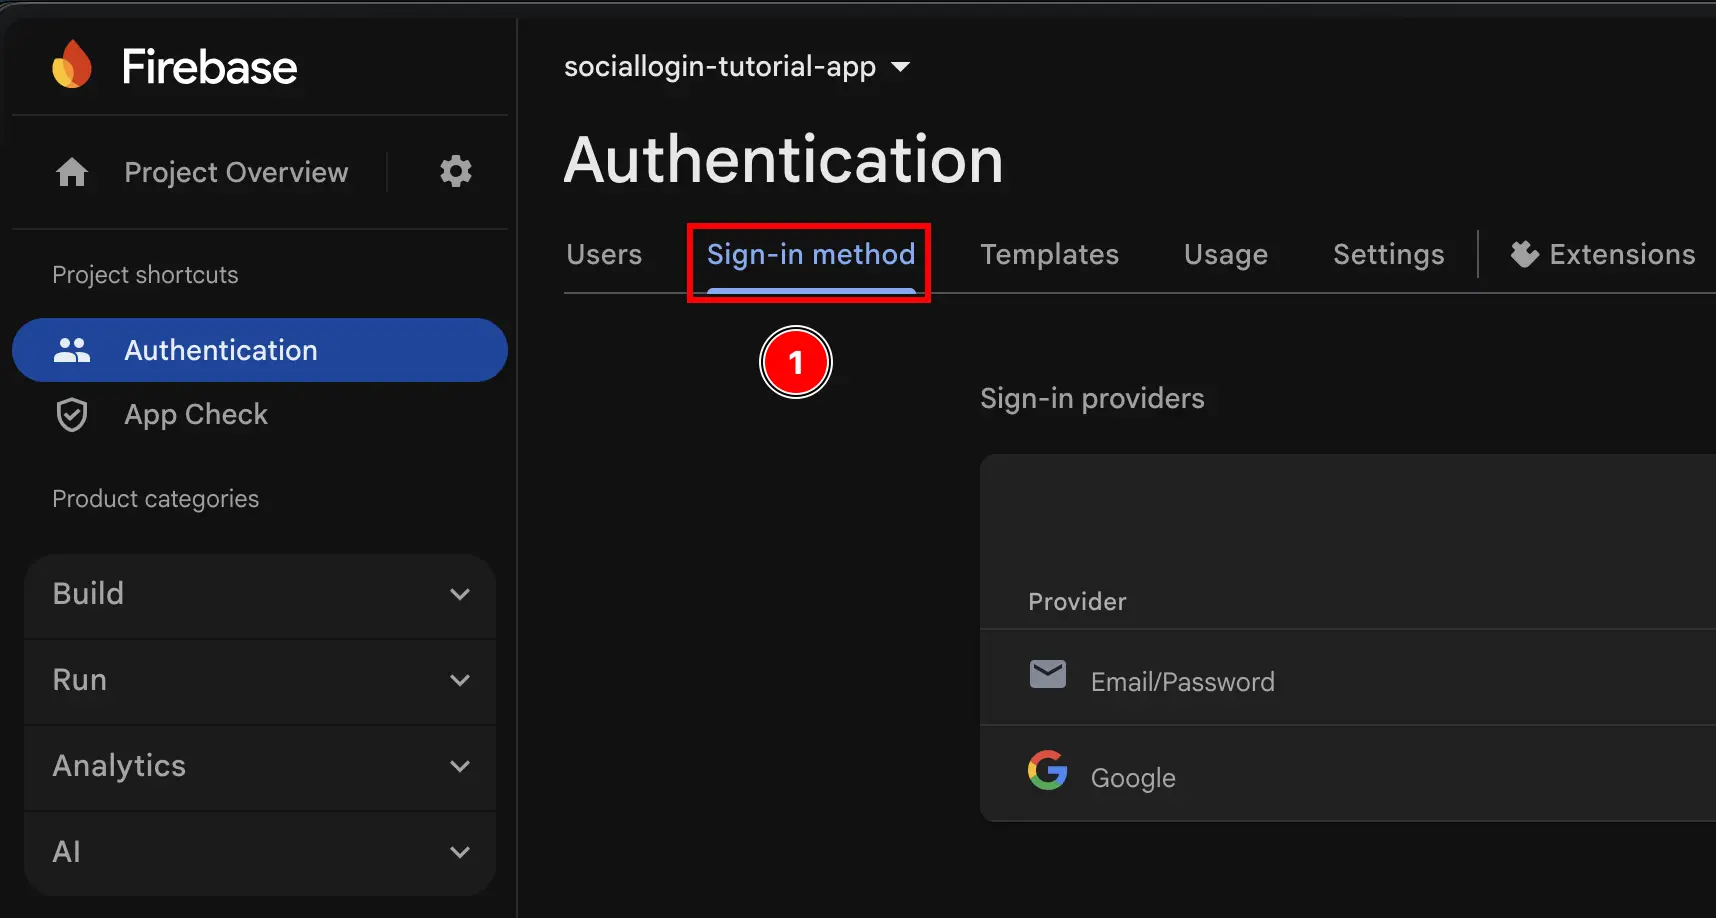
- 点击
Google提供者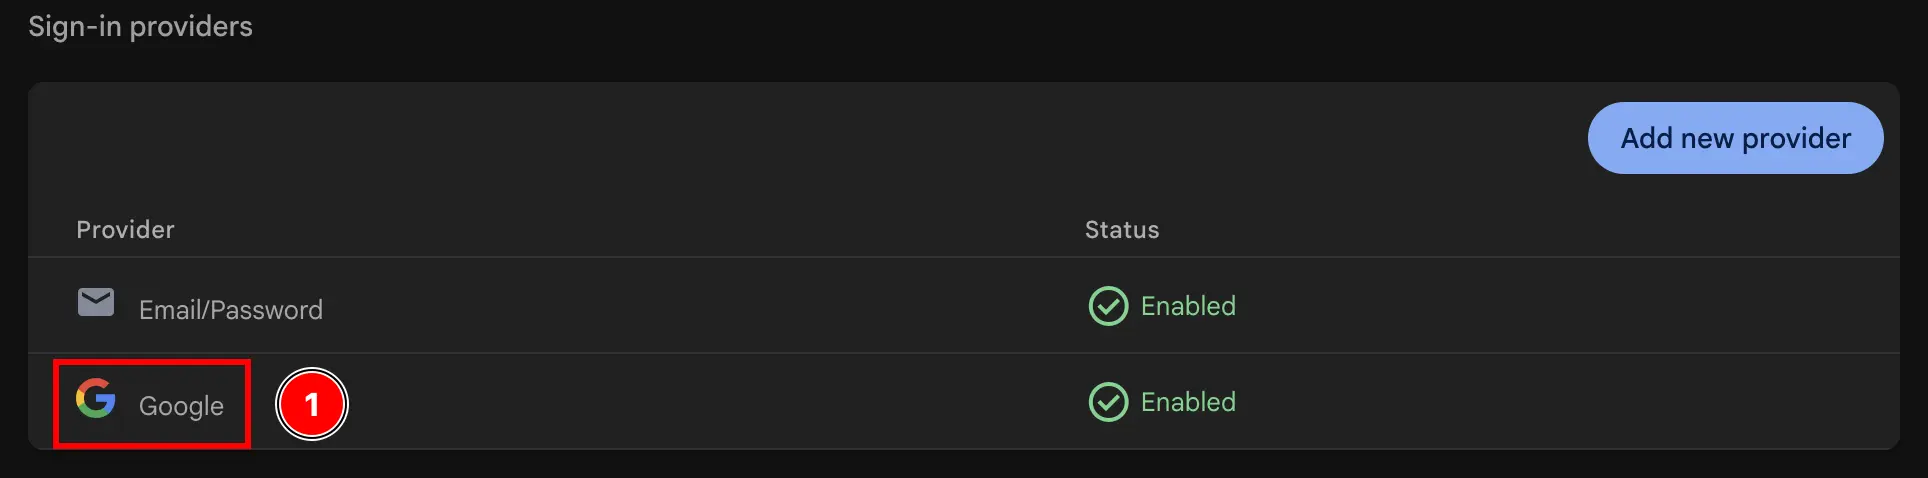
- 点击
Web SDK configuration按钮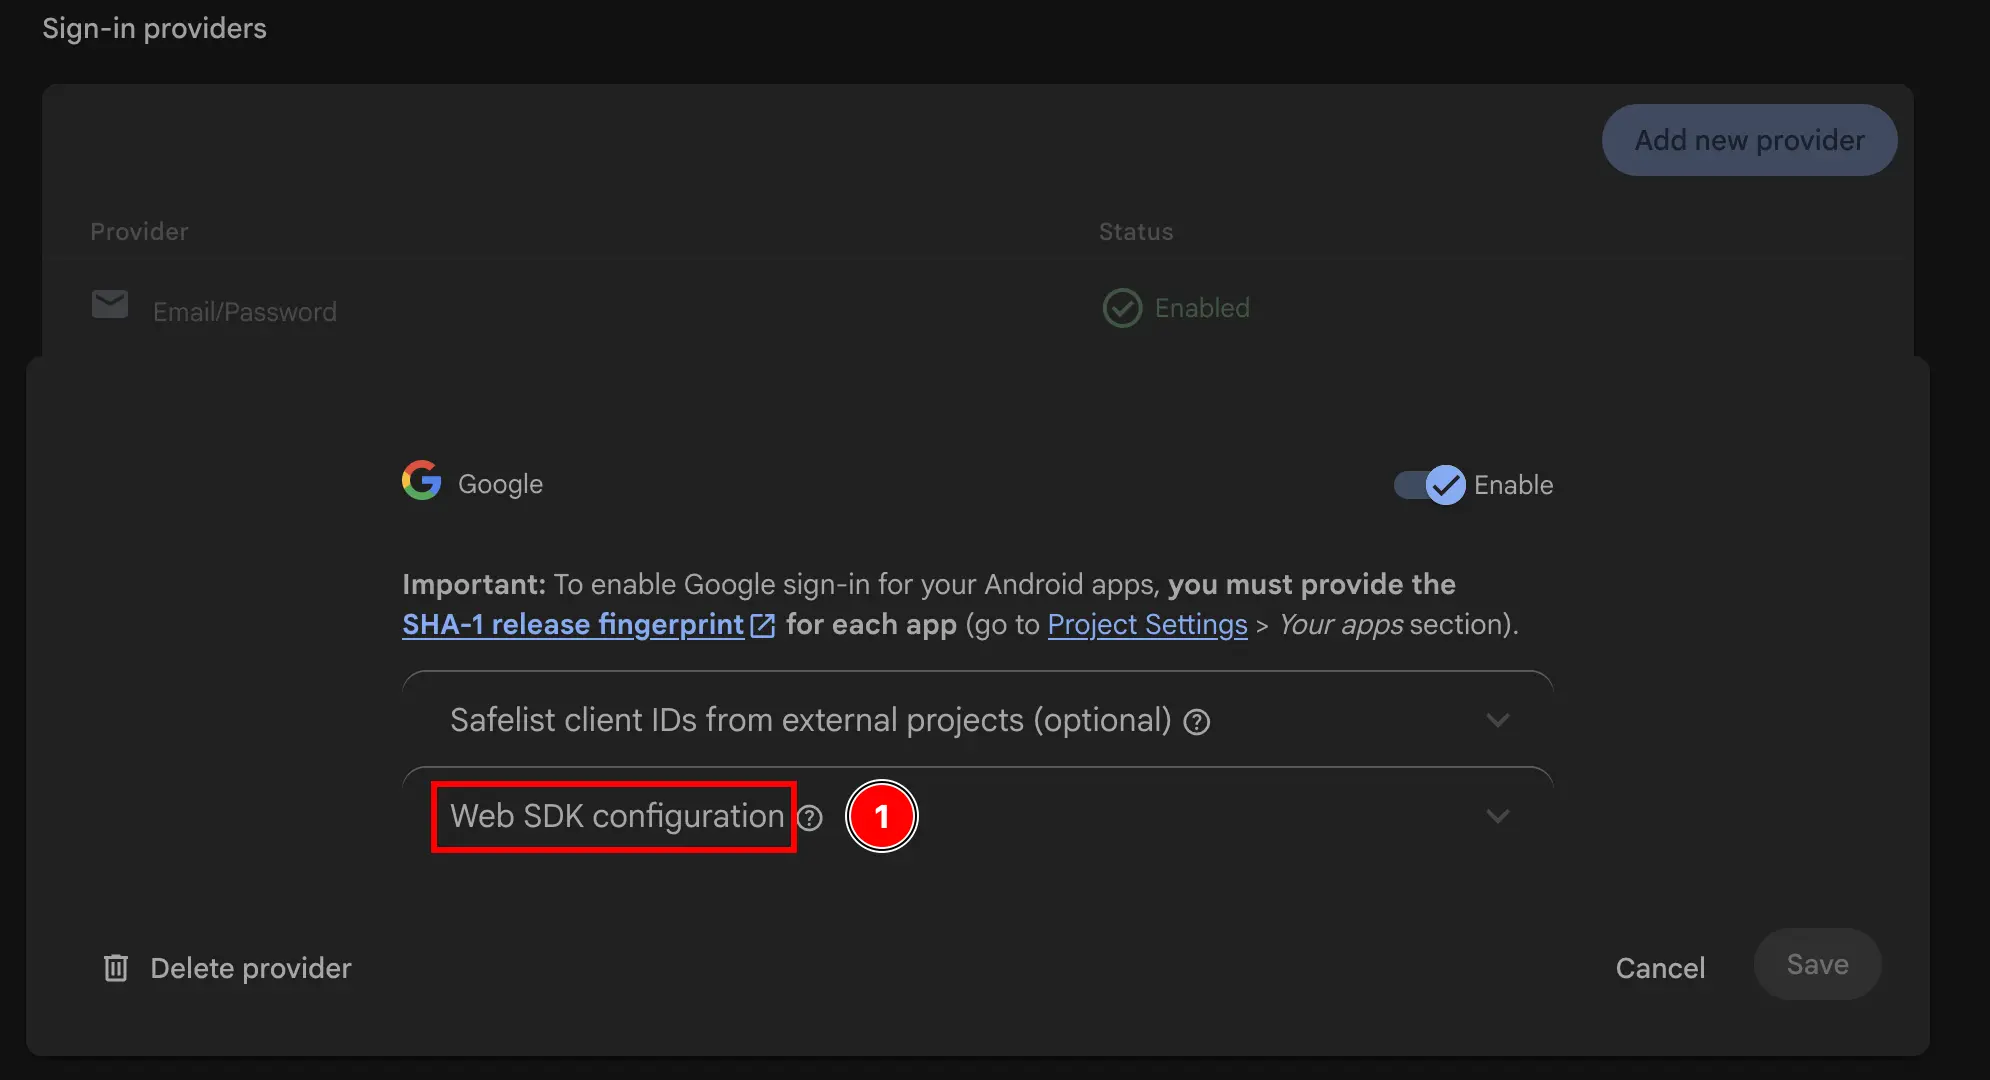
- 复制
Web client ID。 这将是你的webClientId在initialize插件的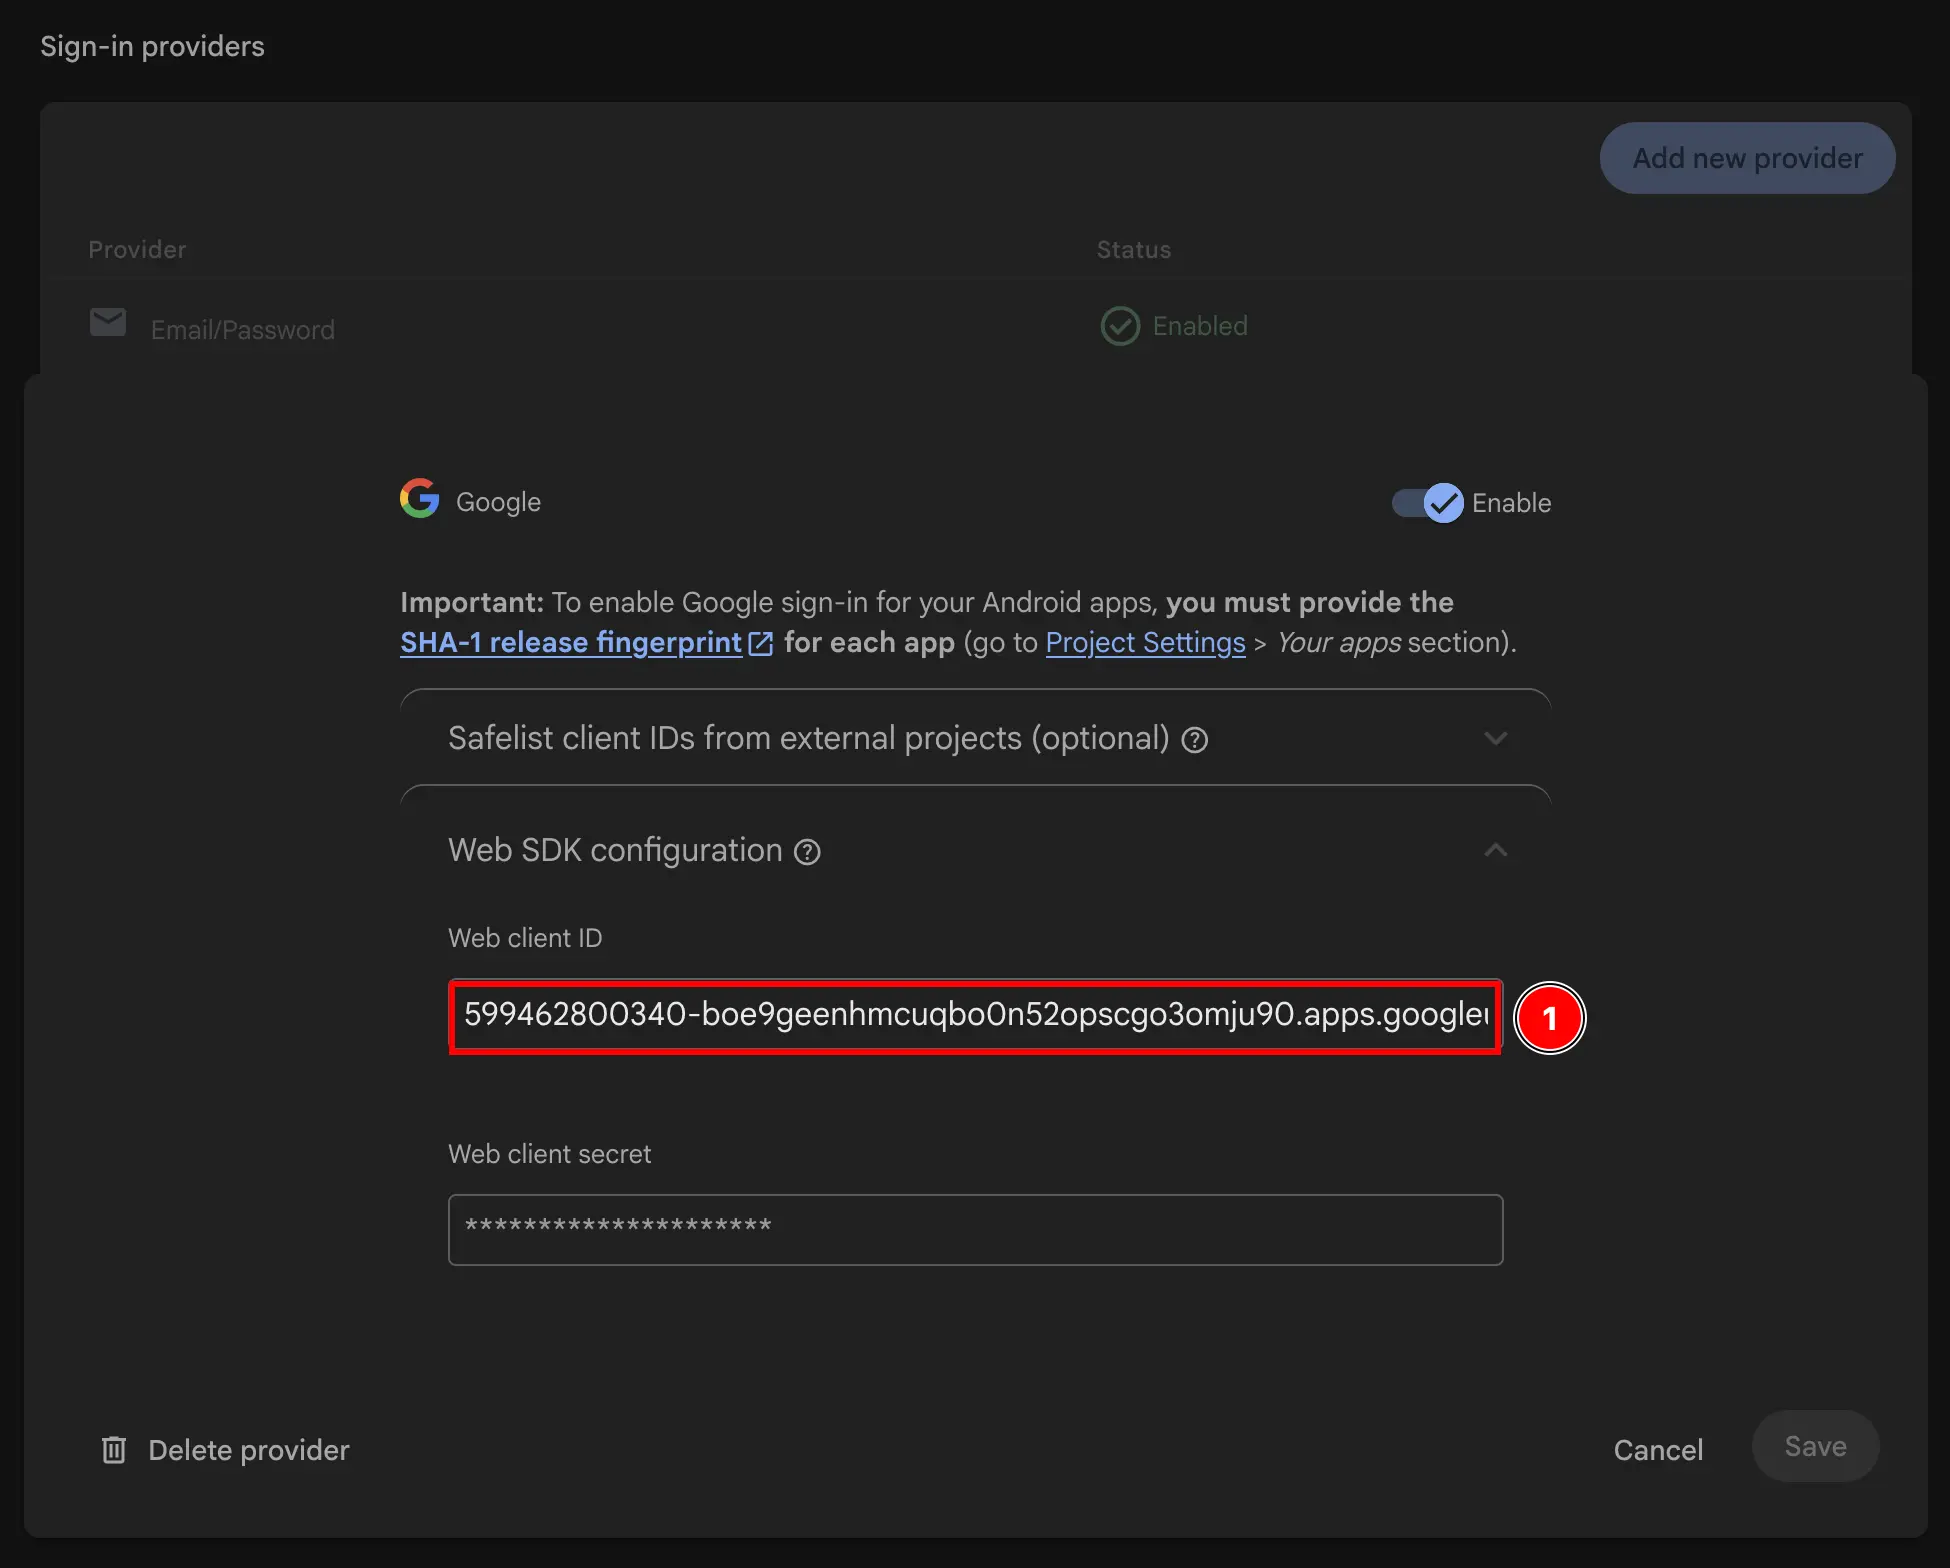
- 返回 Firebase 控制台,转到
-
修改你的应用程序的 Info.plist
-
打开 Xcode 并找到
Info.plist文件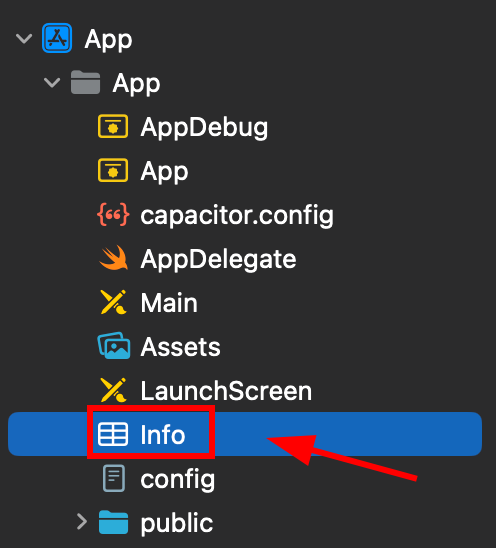
-
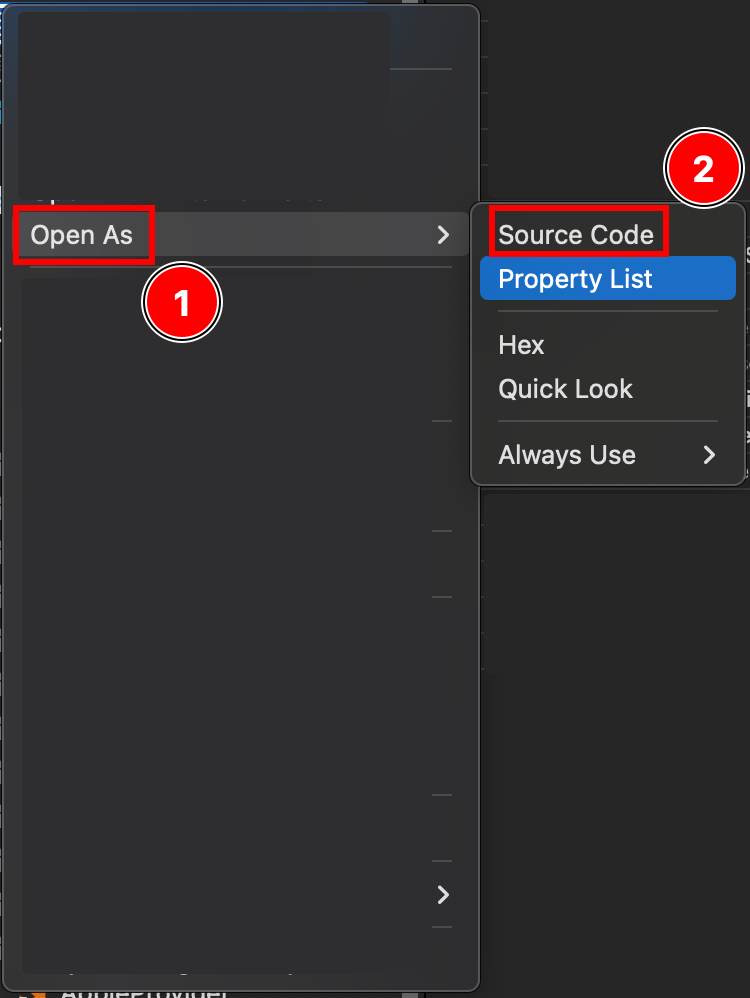
Right click this file and open it as source code
-
在文件底部,您会看到一个
Plist标签</dict>Info.plist 文件中的关闭字典标签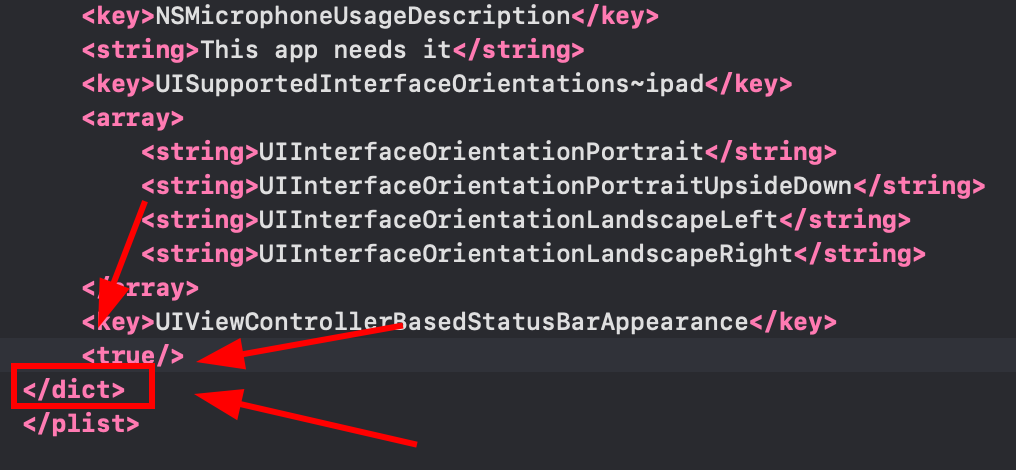
-
Info.plist 文件,包含 URL 方案 __CAPGO_KEEP_0__
</dict>复制到剪贴板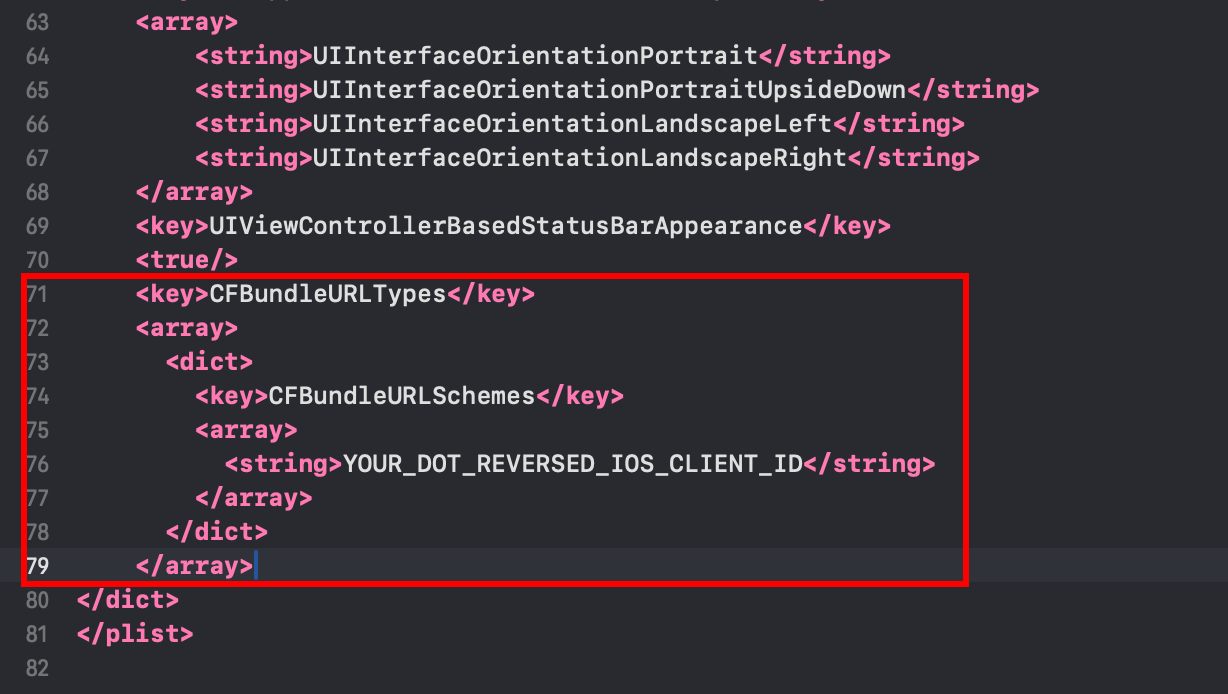 <key>CFBundleURLTypes</key><array><dict><key>CFBundleURLSchemes</key><array><string>YOUR_DOT_REVERSED_IOS_CLIENT_ID</string></array></dict></array><key>GIDClientID</key><string>YOUR_IOS_CLIENT_ID.apps.googleusercontent.com</string>
 -
Info.plist 文件,包含实际的反向客户端 ID
YOUR_DOT_REVERSED_IOS_CLIENT_ID注意事项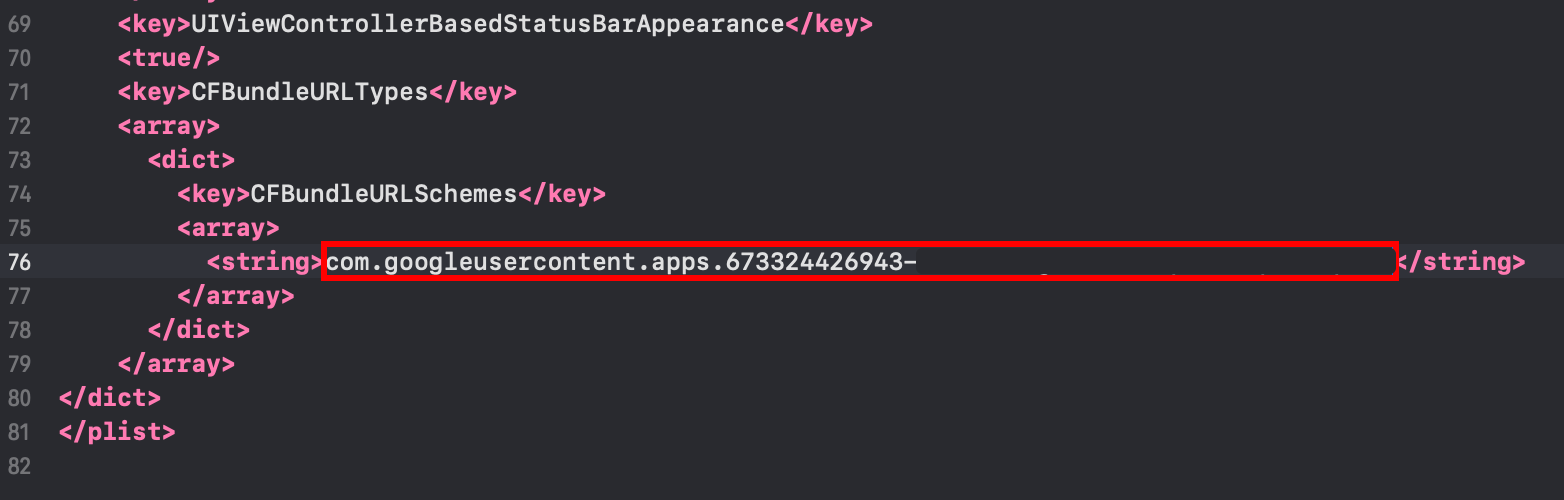
-
-
更改
YOUR_IOS_CLIENT_ID更改为您在第 9 步中复制的 iOS Client ID -
以
Command + S -
修改
AppDelegate.swift-
打开
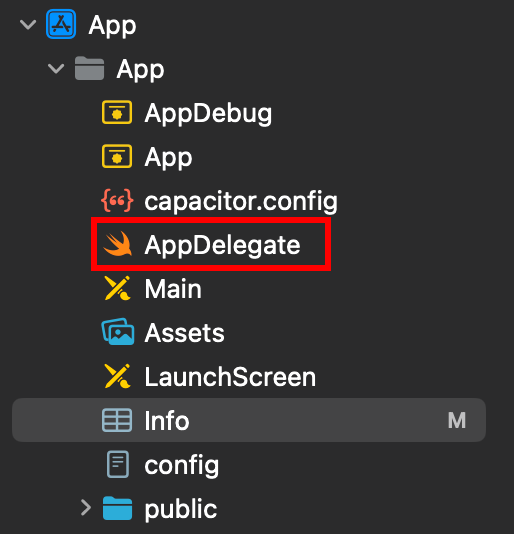
-
在文件顶部
import GoogleSignIn插入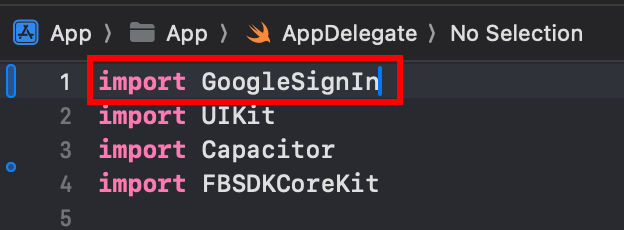
-
找到
func application(_ app: UIApplication, open url: URL, options: [UIApplication.OpenURLOptionsKey: Any] = [:])函数
-
修改函数使其类似于此
func application(_ app: UIApplication, open url: URL, options: [UIApplication.OpenURLOptionsKey: Any] = [:]) -> Bool {// Called when the app was launched with a url. Feel free to add additional processing here,// but if you want the App API to support tracking app url opens, make sure to keep this callvar handled: Boolhandled = GIDSignIn.sharedInstance.handle(url)if handled {return true}return ApplicationDelegateProxy.shared.application(app, open: url, options: options)}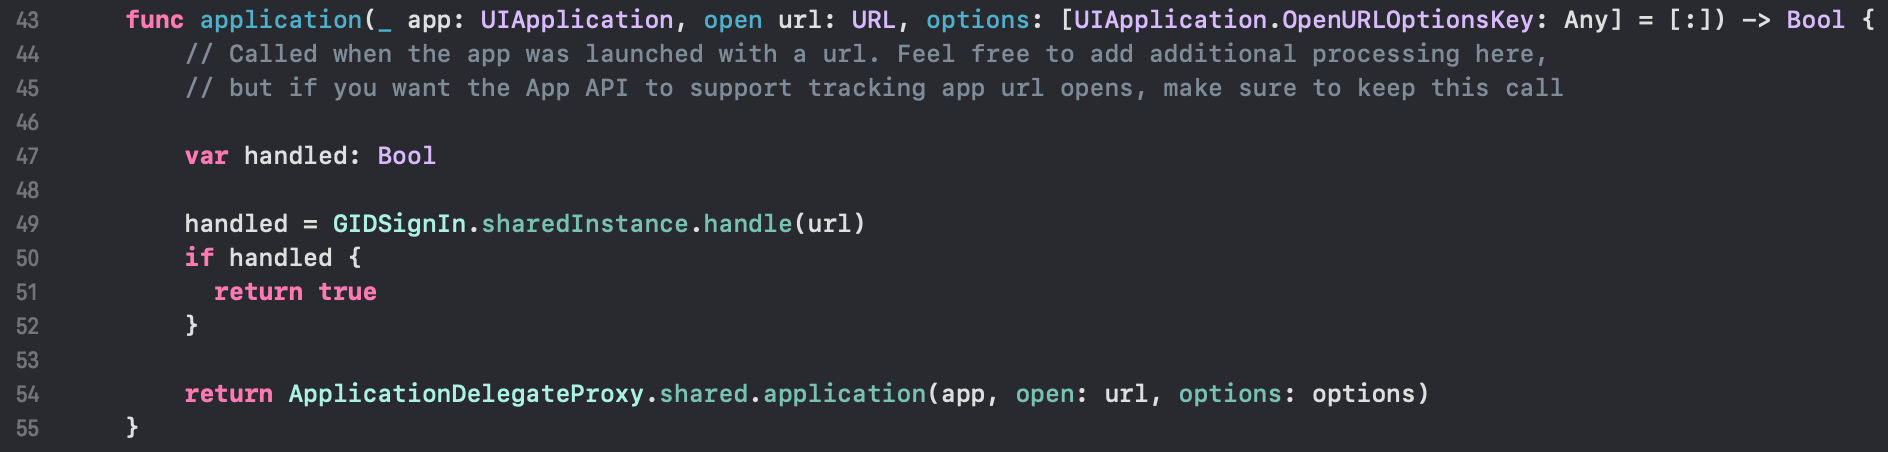
-
保存文件
Command + S
-
-
在应用中使用 Google 登录
在这个步骤中,您已经准备好在应用中使用 Google 登录。 请使用 authUtils.ts 示例应用中的文件来使用 Google 进行身份验证
用户将在首次登录时自动在 Firebase Auth 中创建
故障排除
故障排除如果身份验证卡住或失败:
- 验证
idToken您的 Firebase Web 客户端 ID 与 - 检查 Firebase 控制台中是否启用了 Google Sign-In
- 确保 Info.plist 中的 URL 方案和 GIDClientID 正确
- 验证
iOSServerClientId与您的 Web 客户端 ID 匹配 - 查看 示例应用程序 code 参见参考
从 Firebase Google Login on iOS 中继续
标题:从 Firebase Google Login on iOS 中继续如果您正在使用 Firebase Google Login on iOS 来规划身份验证和帐户流程,连接它到 使用 @capgo/capacitor-social-login 为在使用 @capgo/capacitor-social-login 中的原生能力 @capgo/capacitor-social-login 为在 @capgo/capacitor-social-login 中的实现细节 @capgo/capacitor-passkey 为在 @capgo/capacitor-passkey 中的实现细节 @capgo/capacitor-native-biometric 查看@capgo/capacitor-native-biometric的实现细节 双因素认证 查看双因素认证的实现细节