iOS에서 Firebase Google 로그인
이 플러그인의 설치 단계와 전체 마크다운 가이드가 포함된 설정 프롬프트를 복사하세요.
이 안내서에서는 iOS에서 Google Sign-In을 Firebase Authentication과 통합하는 방법을 설명합니다. iOS 앱을 Firebase Console에 등록한 경우를 가정합니다. 일반적인 Firebase Google 설정을 완료한 것으로 가정합니다..
설정 단계
제목이 '설정 단계'인 섹션-
프로젝트 개요로 이동하세요. console.cloud.google.com
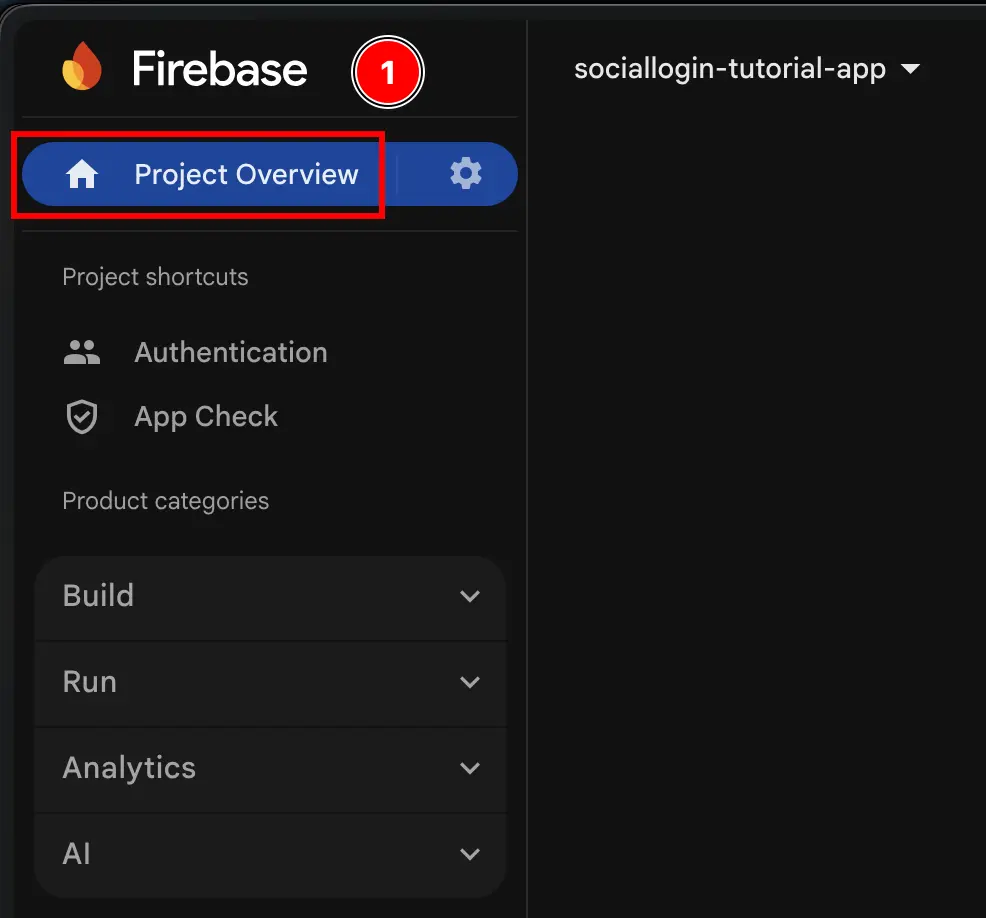
-
버튼을 클릭하세요.
Add app버튼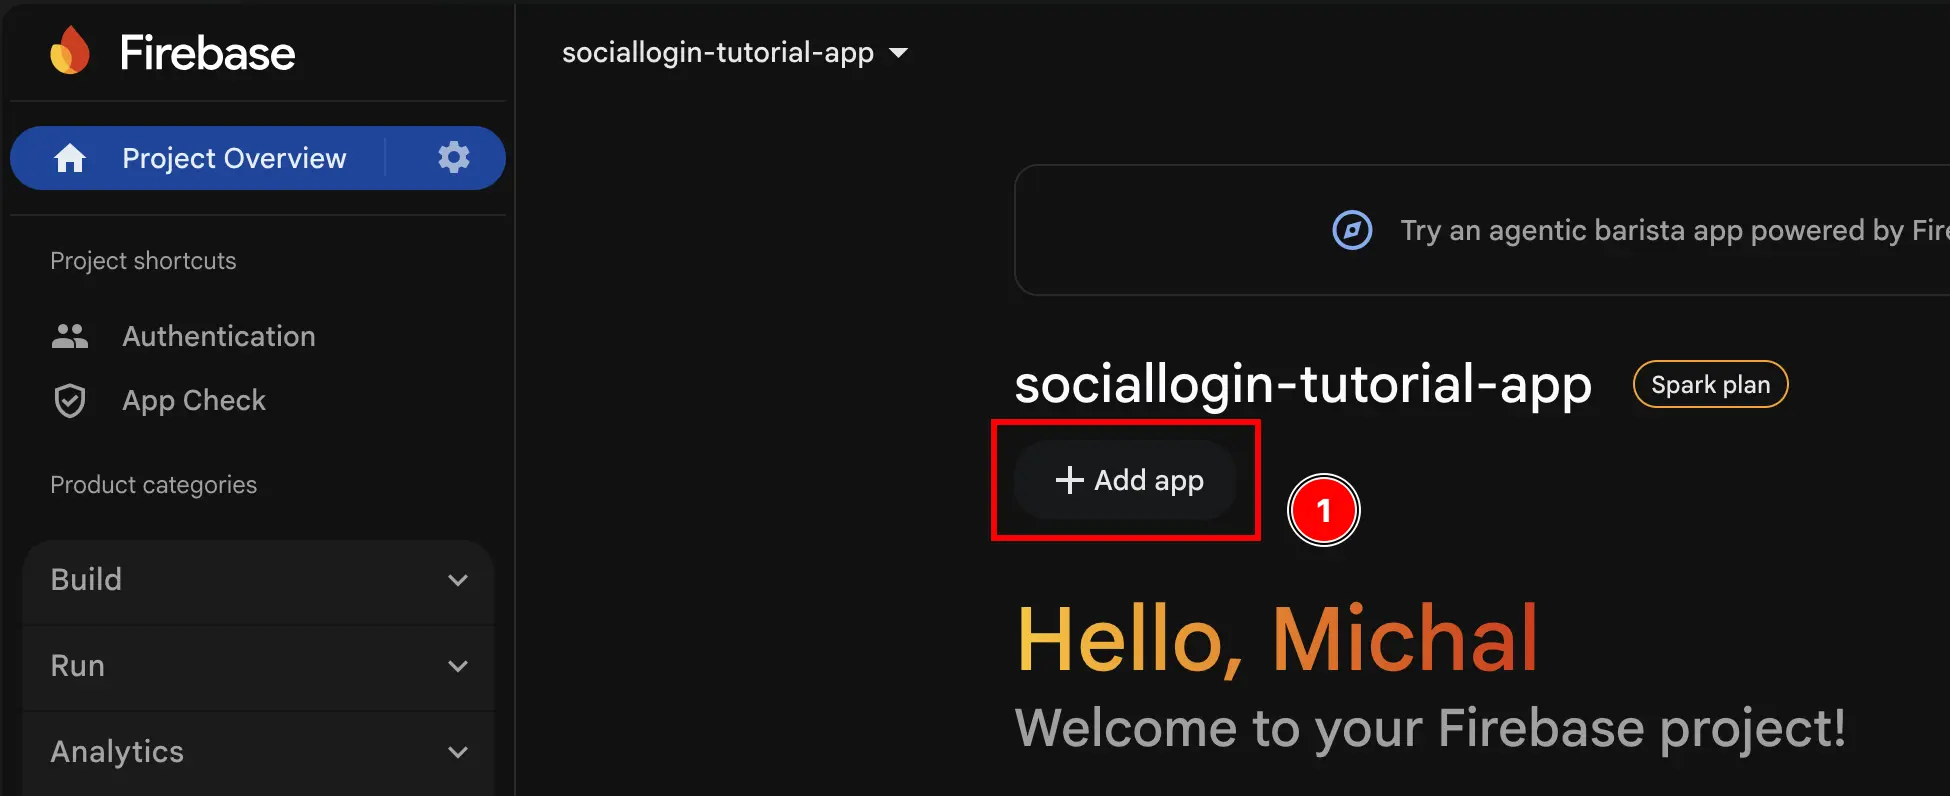
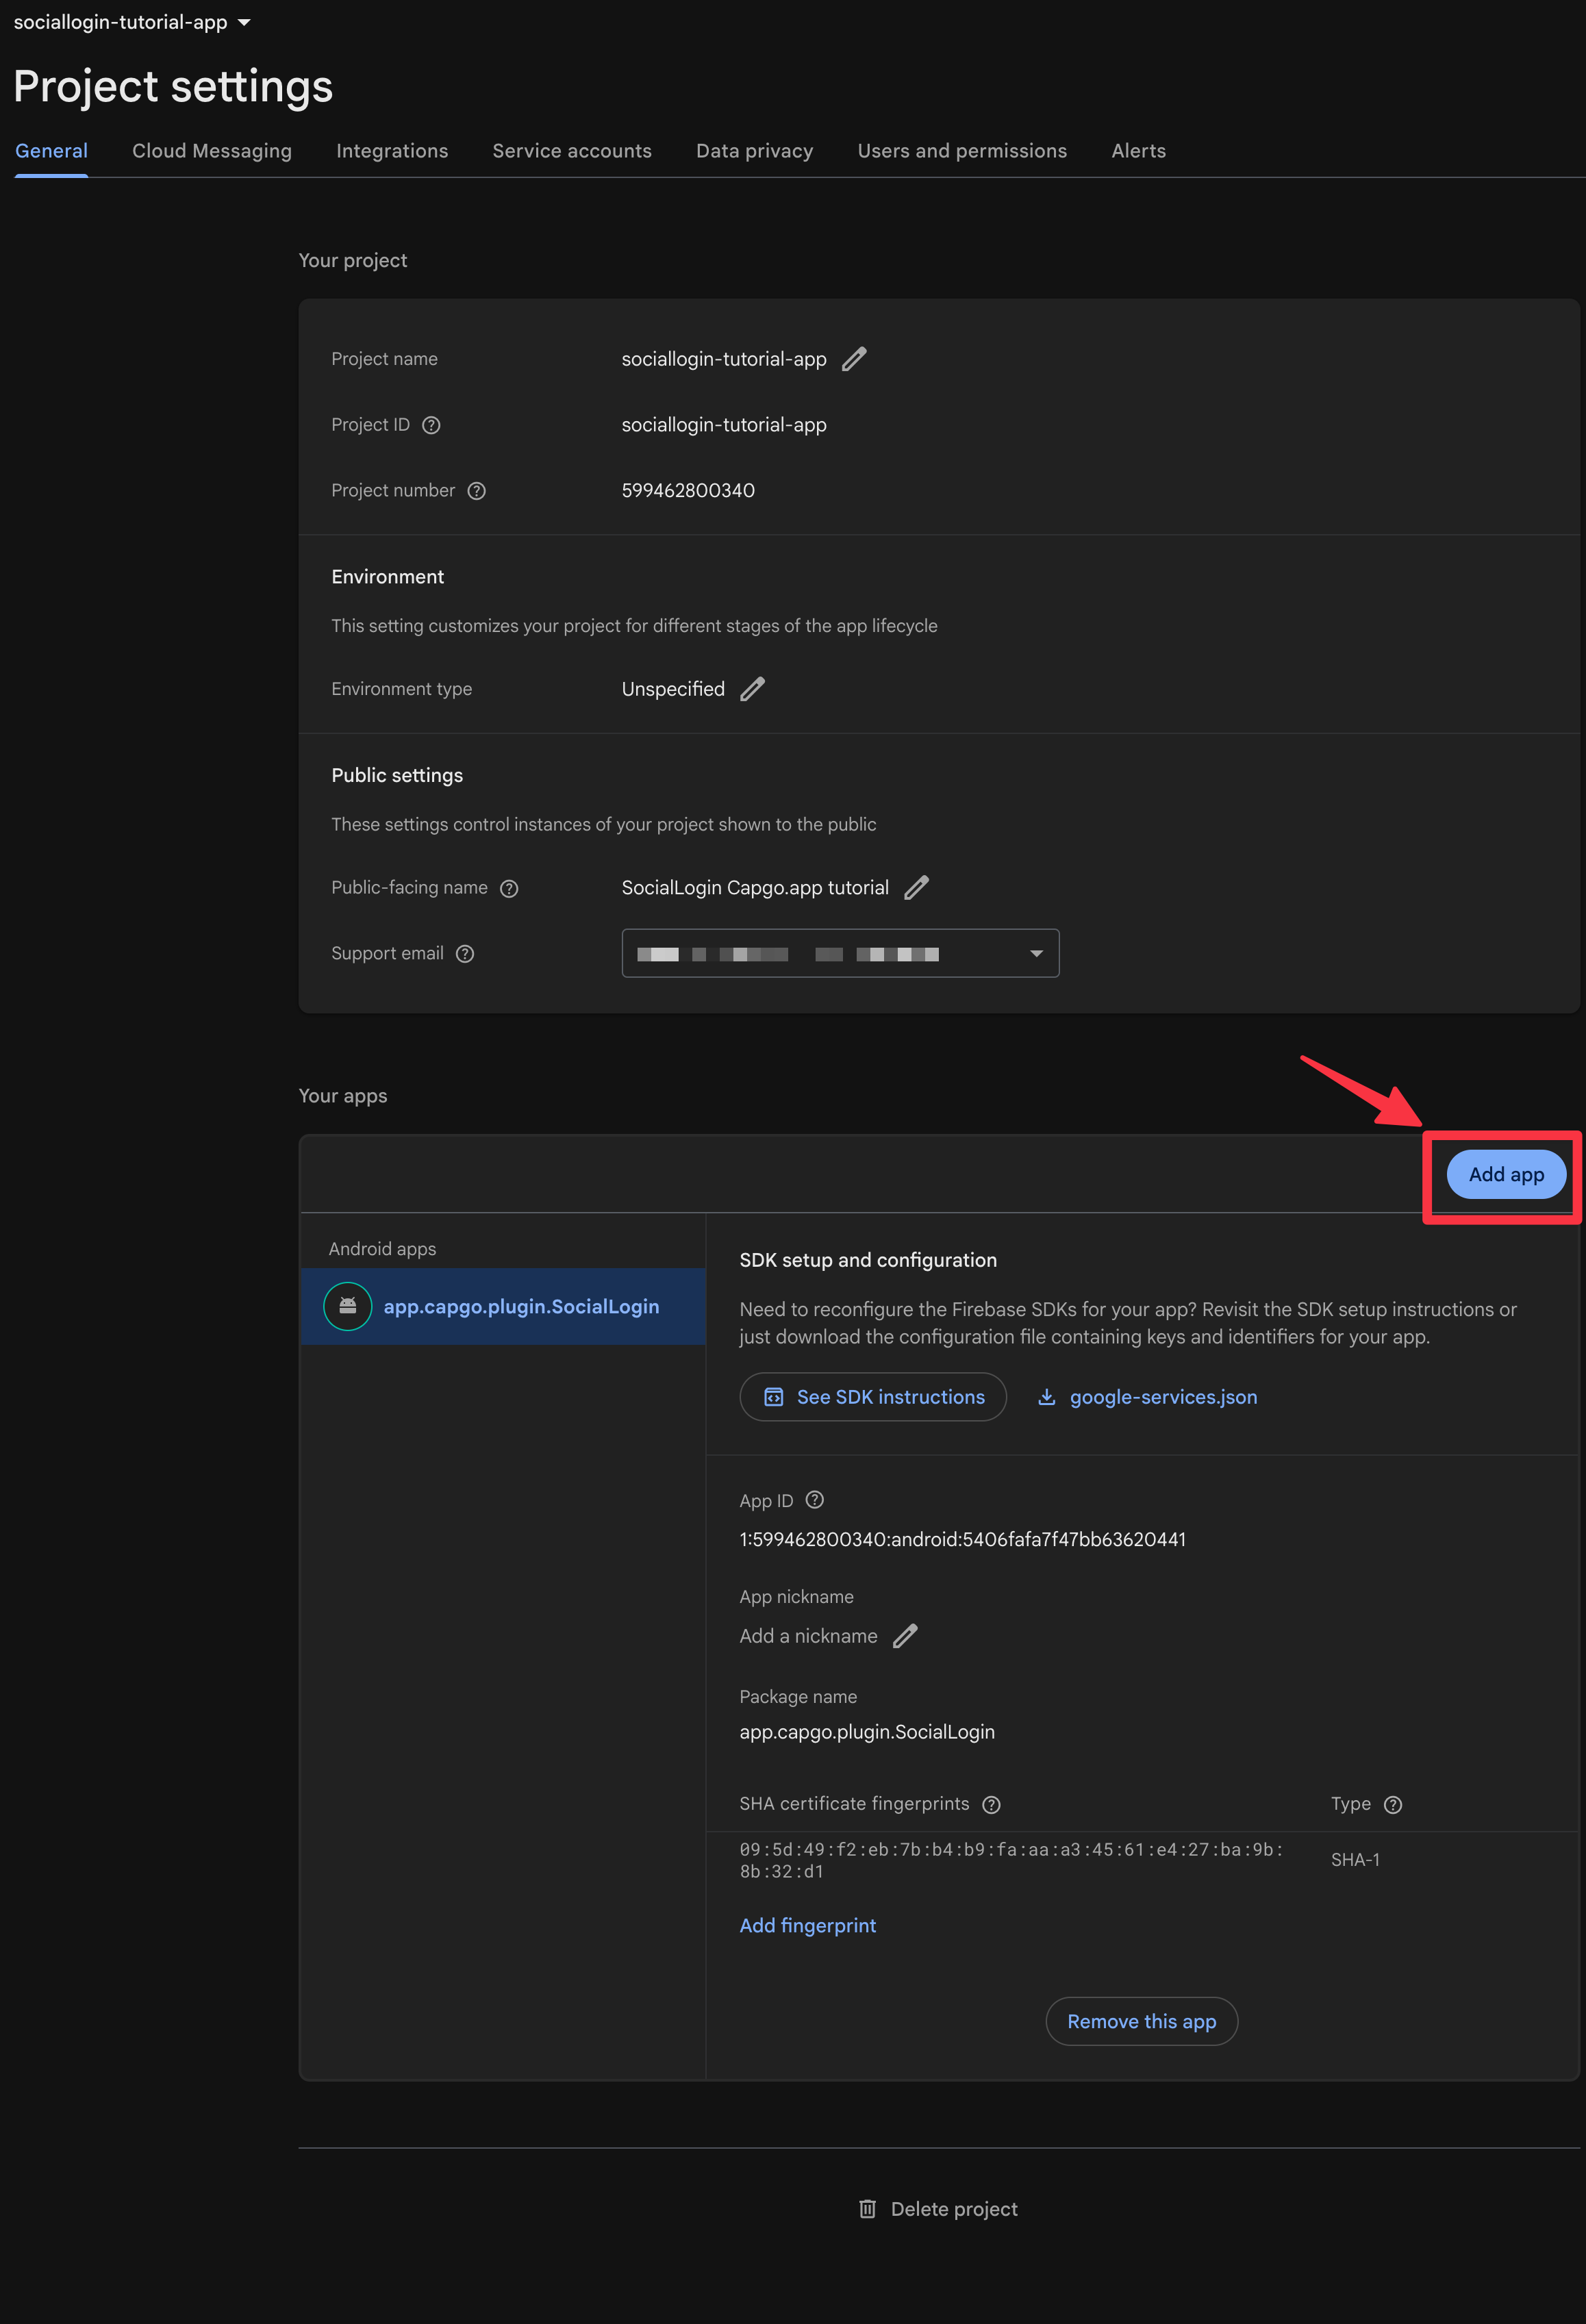
-
선택하세요.
iOS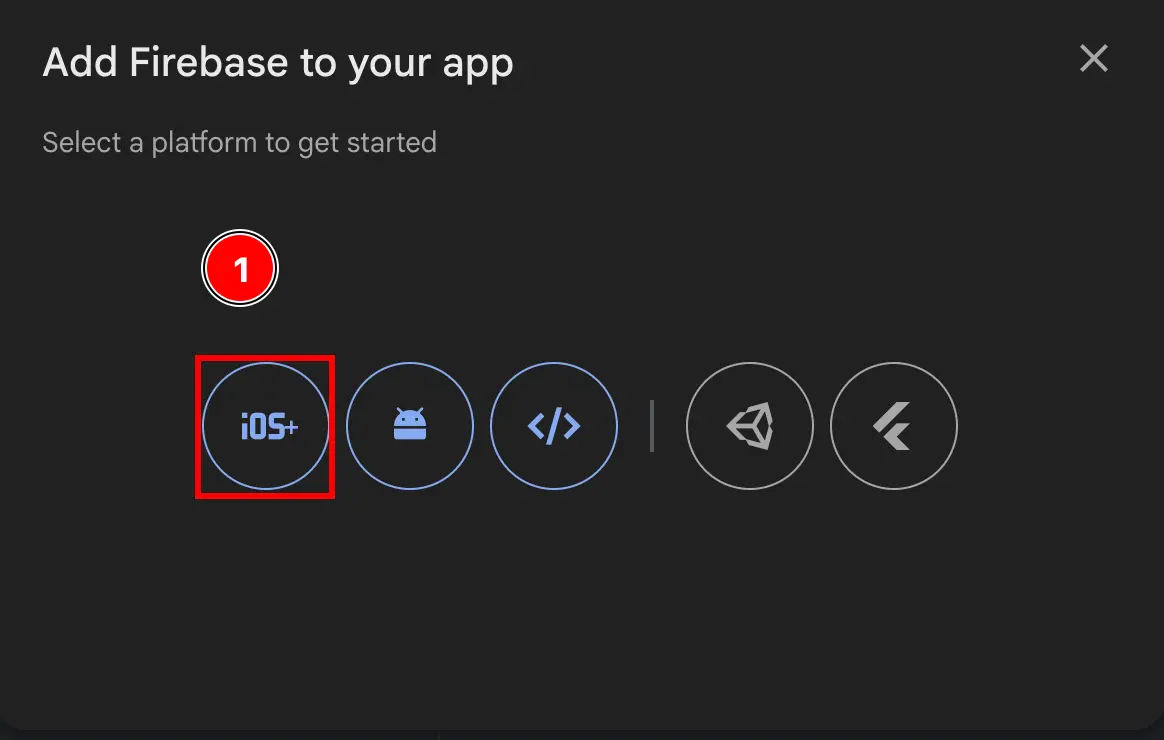
-
첫 번째 양식을 완성하세요
- 첫 번째
Apple bundle ID- 앱을 사용하는 Xcode를 열어주세요
npx cap open ios - Xcode 프로젝트 탐색기에서
App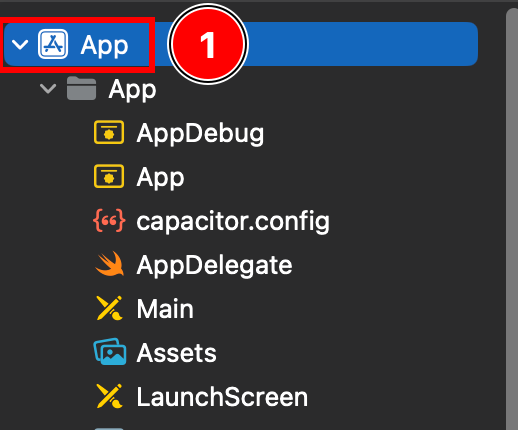
- App이 선택된 Xcode의 Targets 섹션에 있습니다
Targets -> App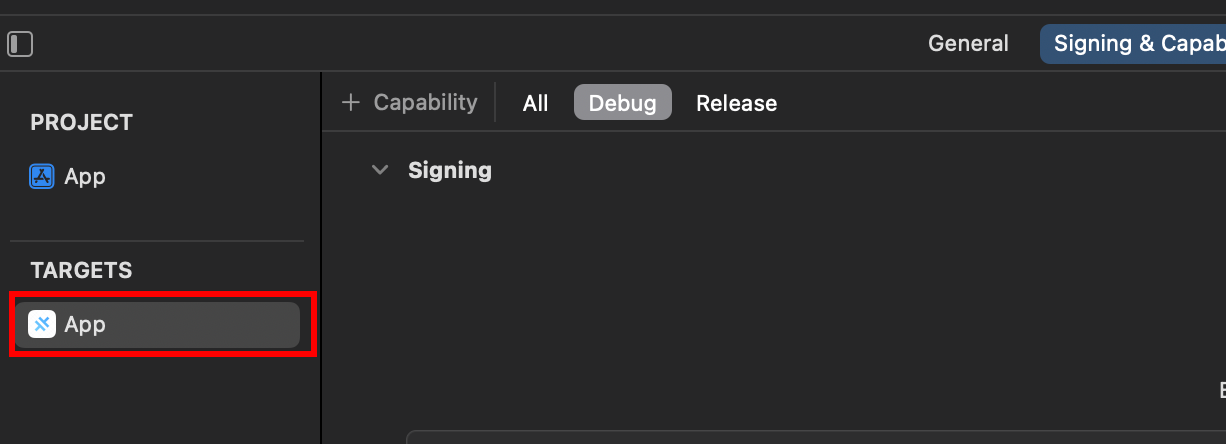
- Bundle Identifier field를 찾으세요
Bundle Identifier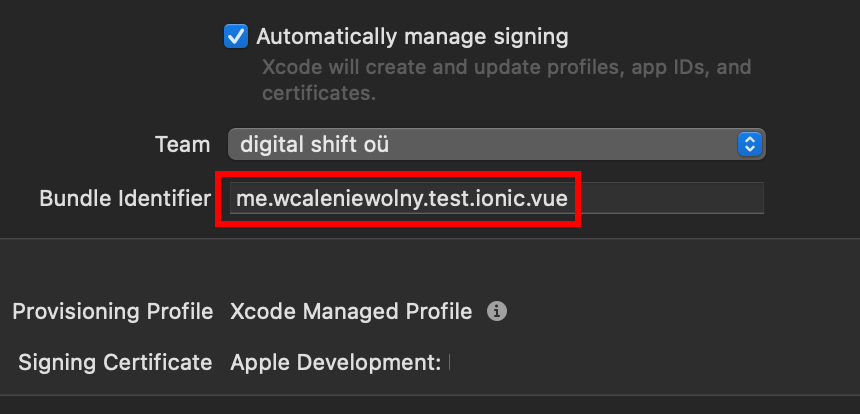
- Copy the
Bundle Identifier그리고 Firebase 콘솔에 붙여넣기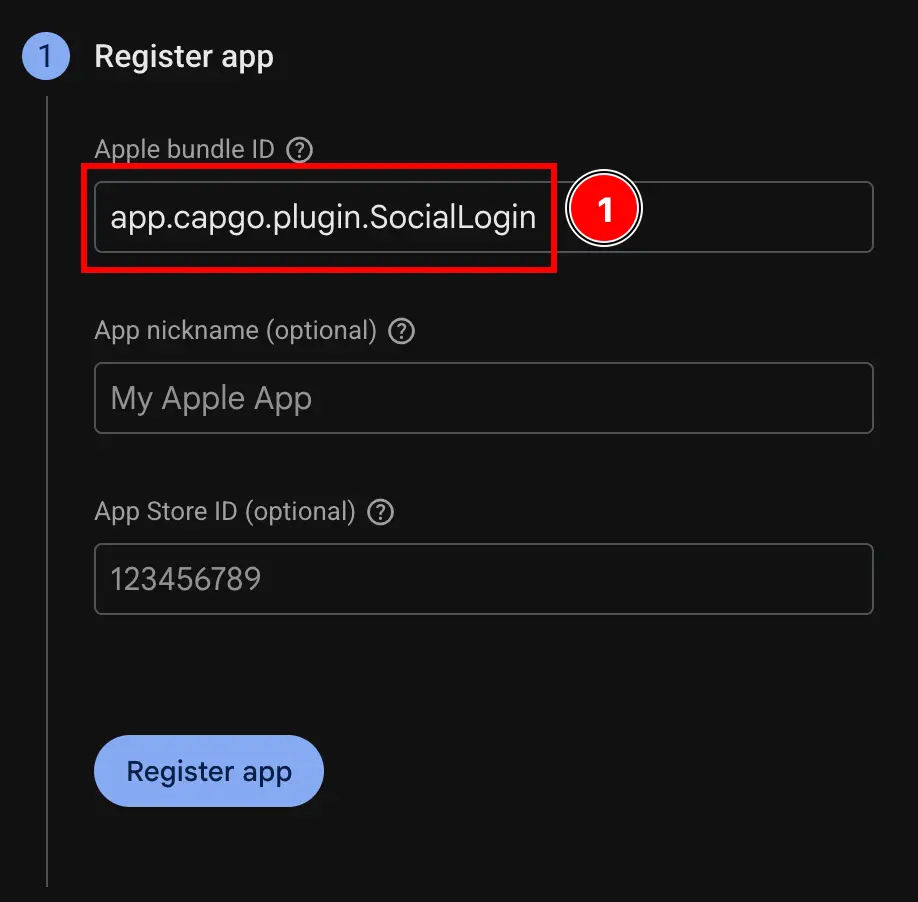
- 앱을 사용하는 Xcode를 열어주세요
- 버튼을 클릭하세요.
Register app버튼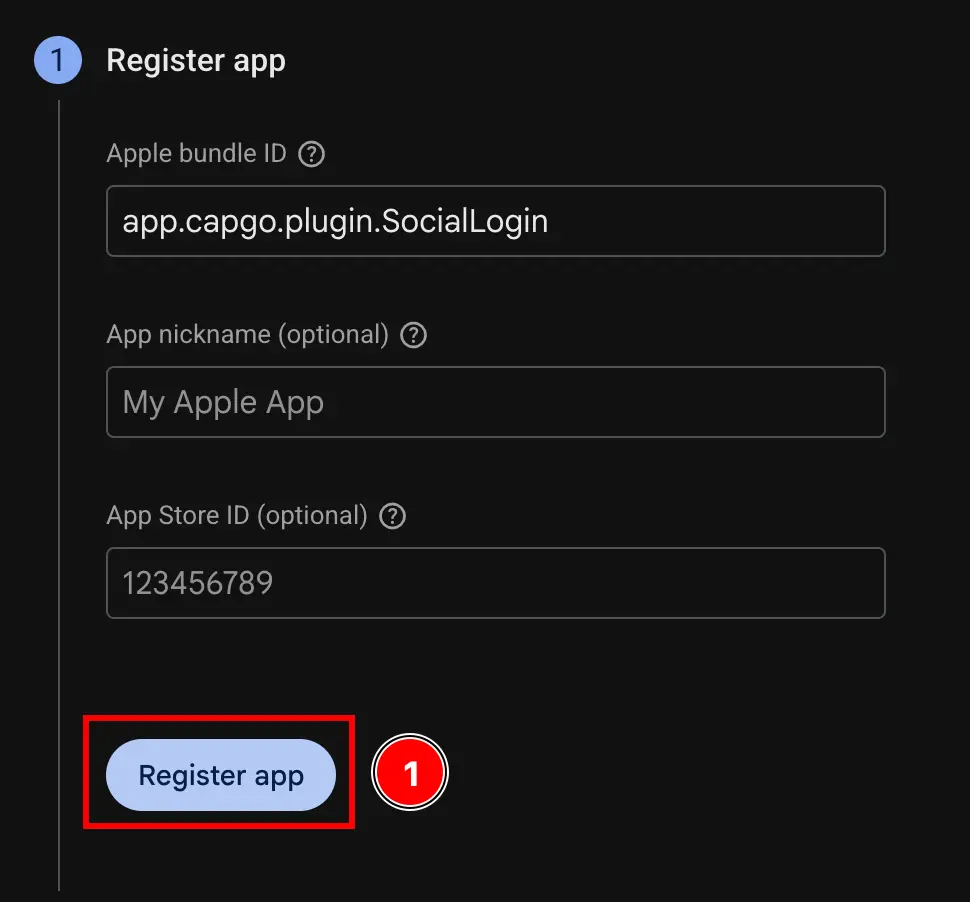
- 첫 번째
-
스텝을 건너 뛰세요.
Download config fileFirebase Add App iOS Skip Download Button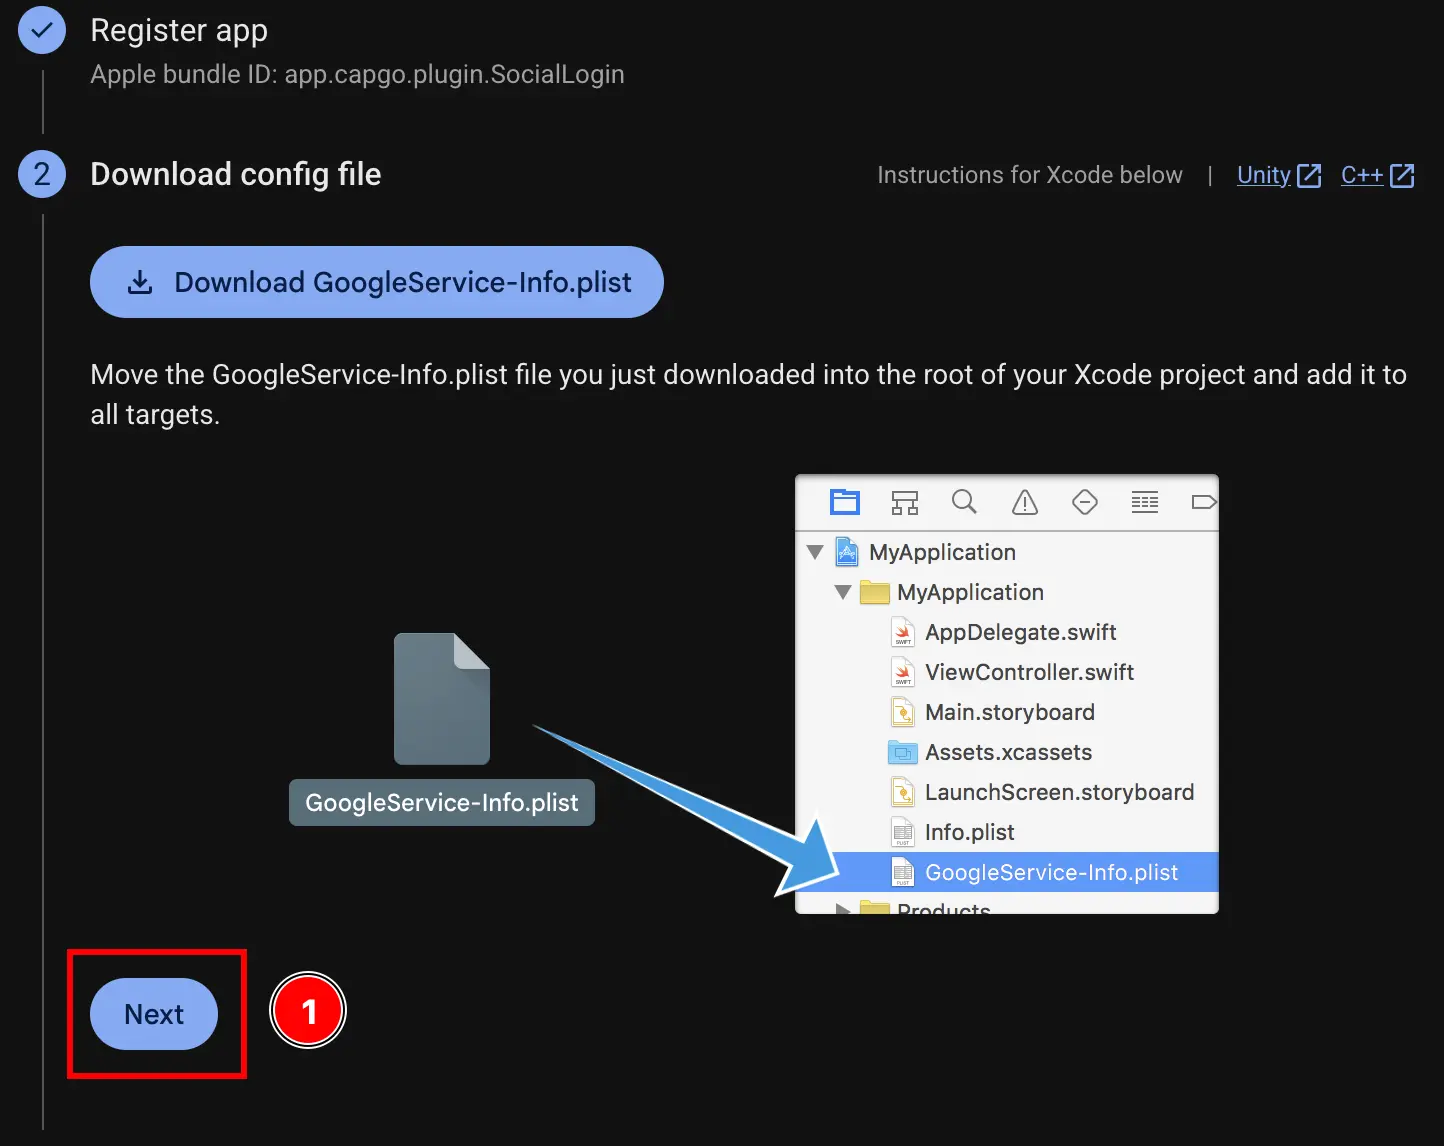
-
step
Add firebase SDKstep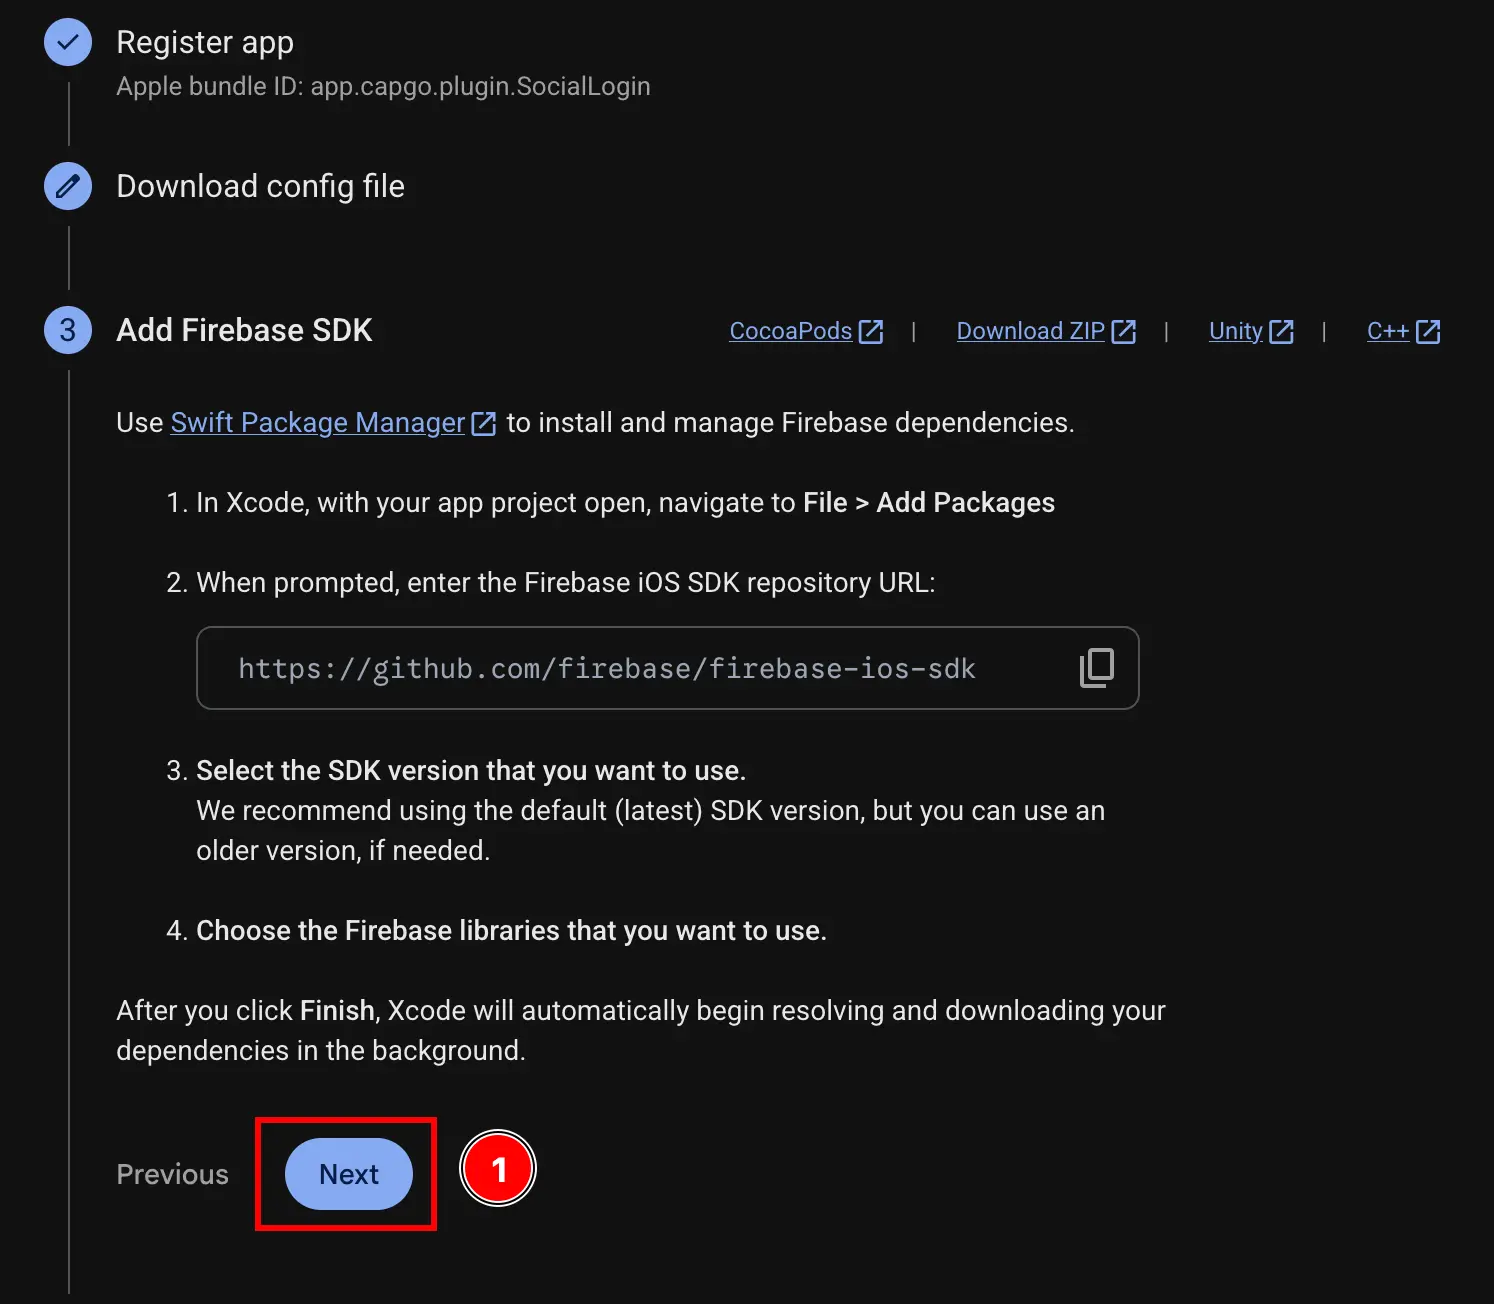
-
단계 건너뛰기
Add initialization codeiOS Firebase 추가 앱 건너뛰기 초기화 __CAPGO_KEEP_0__ 버튼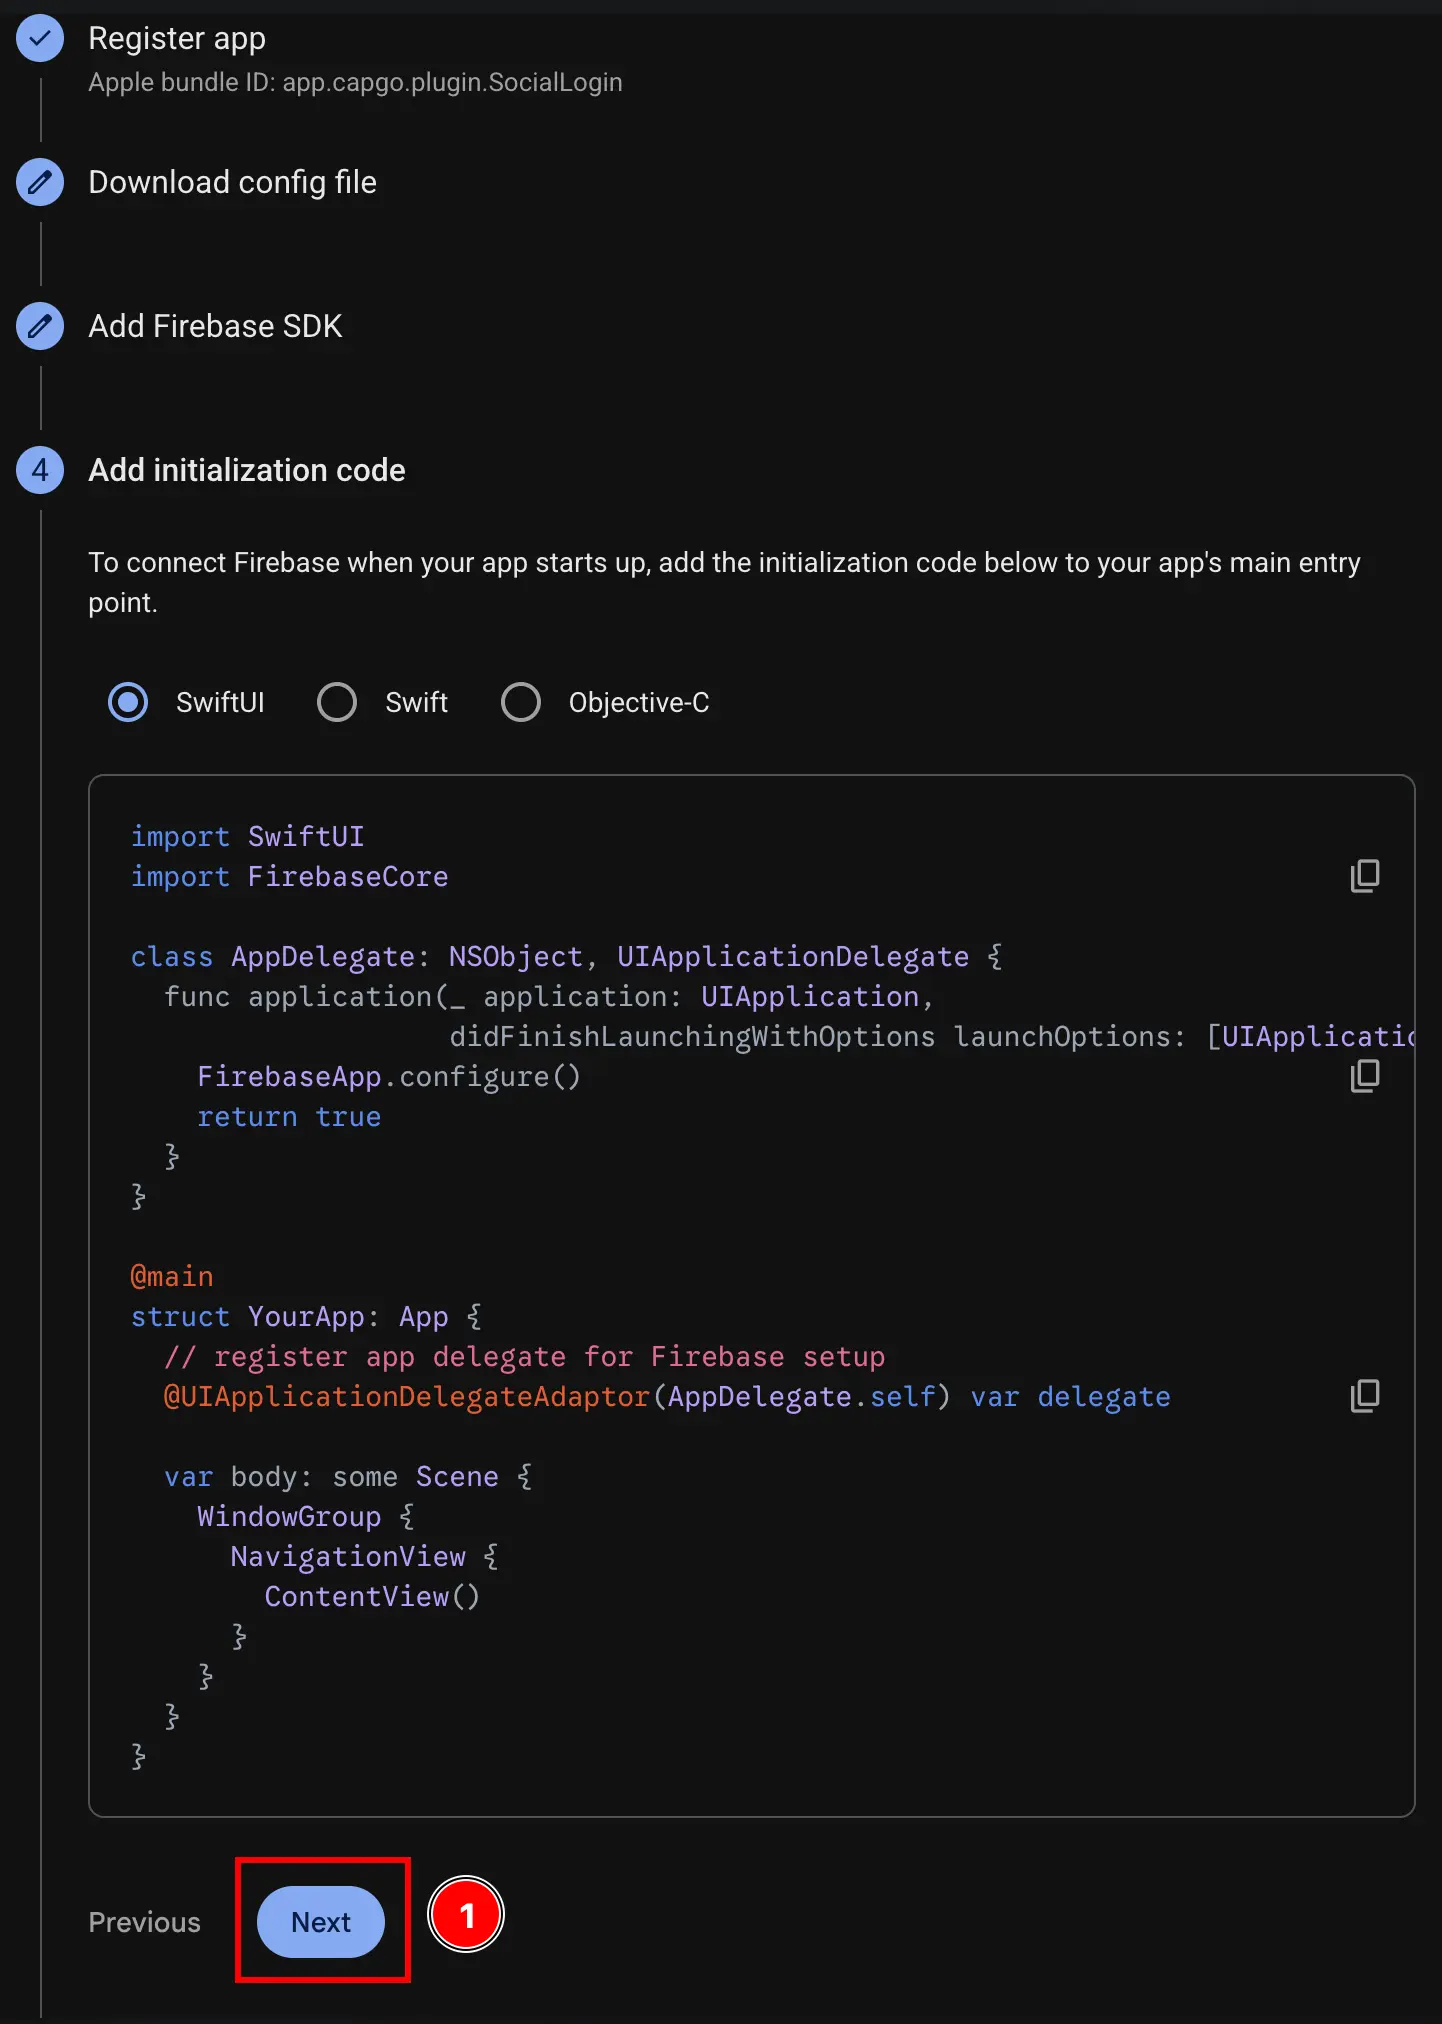
-
iOS Firebase 추가 앱 건너뛰기 버튼
Continue to consoleiOS Firebase 추가 앱 건너뛰기 콘솔로 계속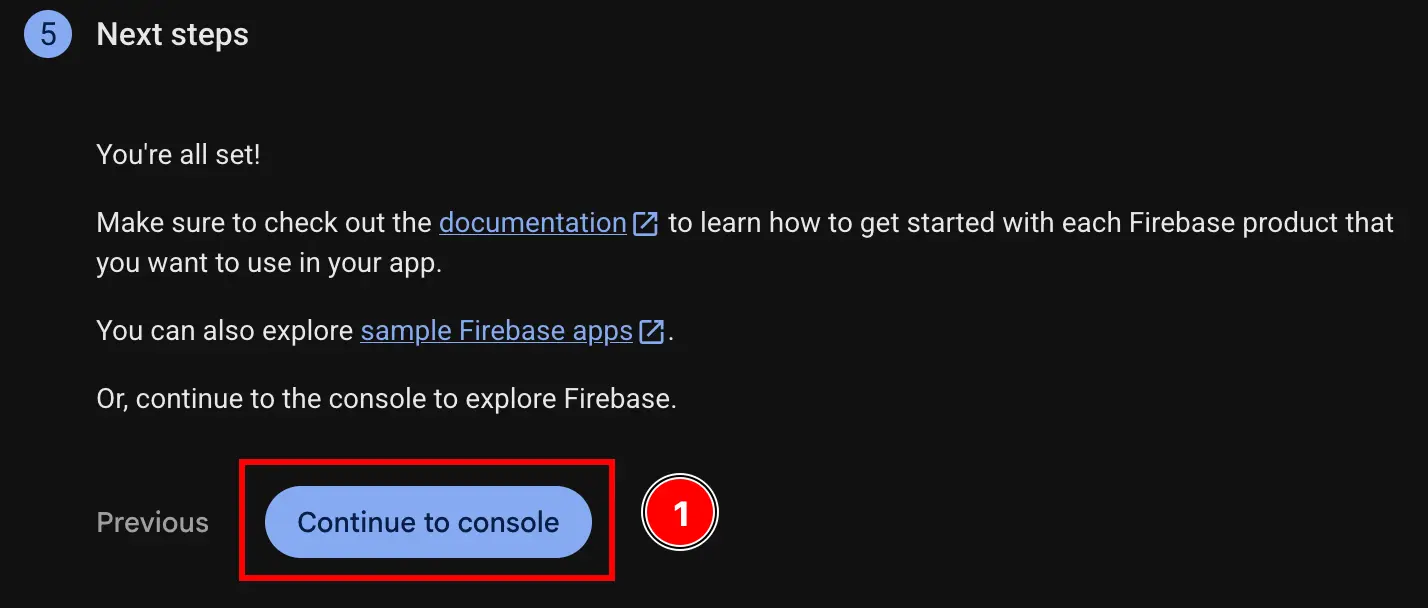
-
Google Cloud Console로 이동
YOUR_DOT_REVERSED_IOS_CLIENT_ID-
console.cloud.google.com 프로젝트 찾기
-
프로젝트 선택자 클릭
- iOS Firebase 추가 앱 건너뛰기
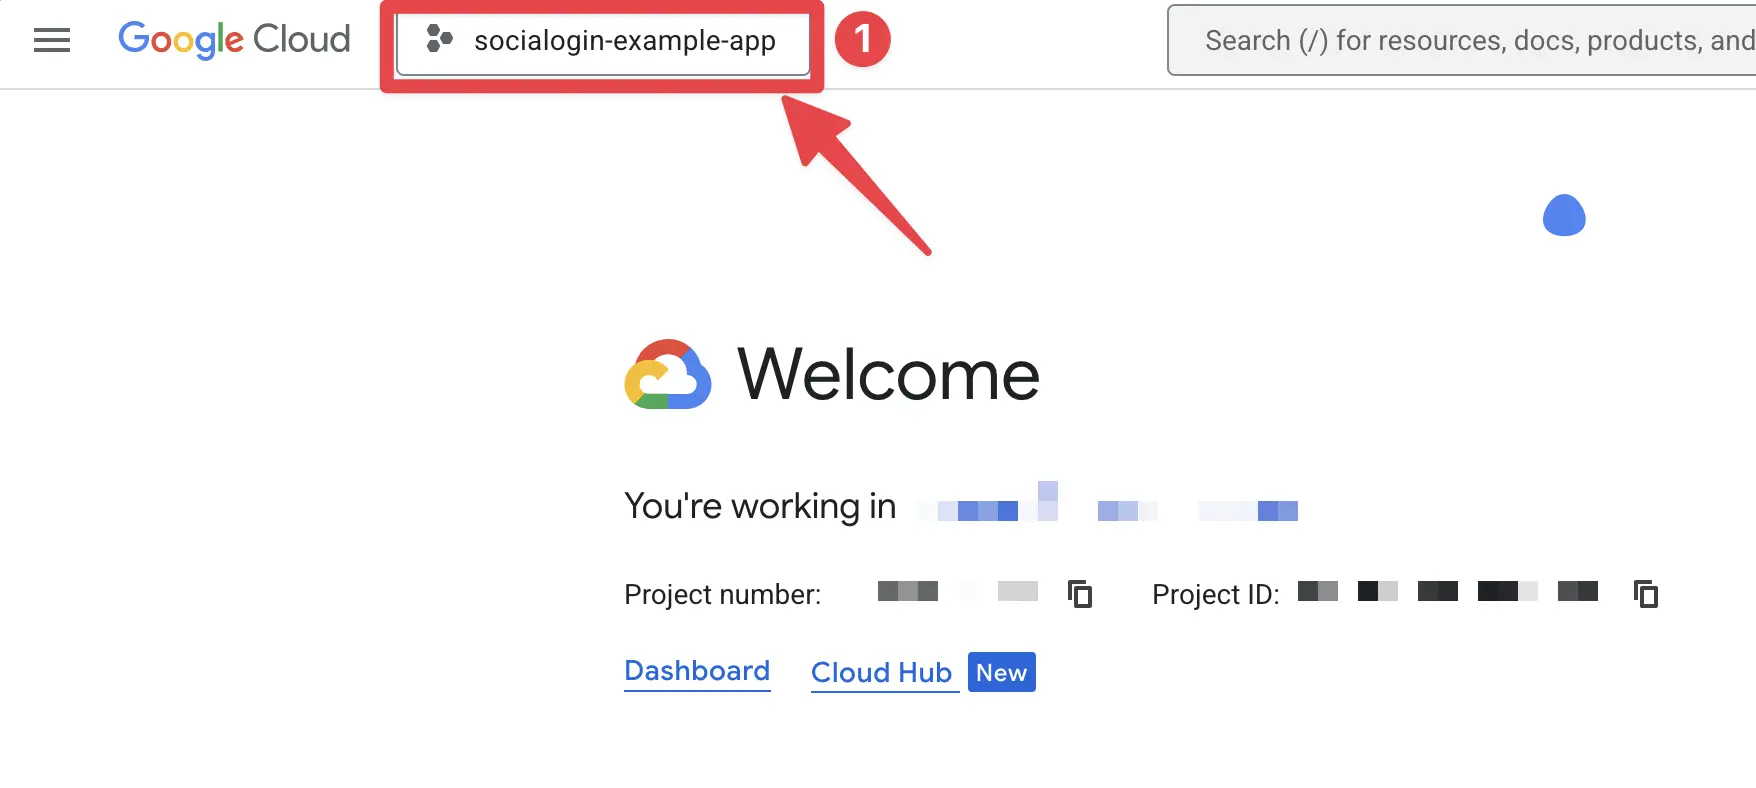
- Firebase 프로젝트의 정확한 이름을 검색하여 클릭하세요. 나의 경우는
sociallogin-tutorial-app.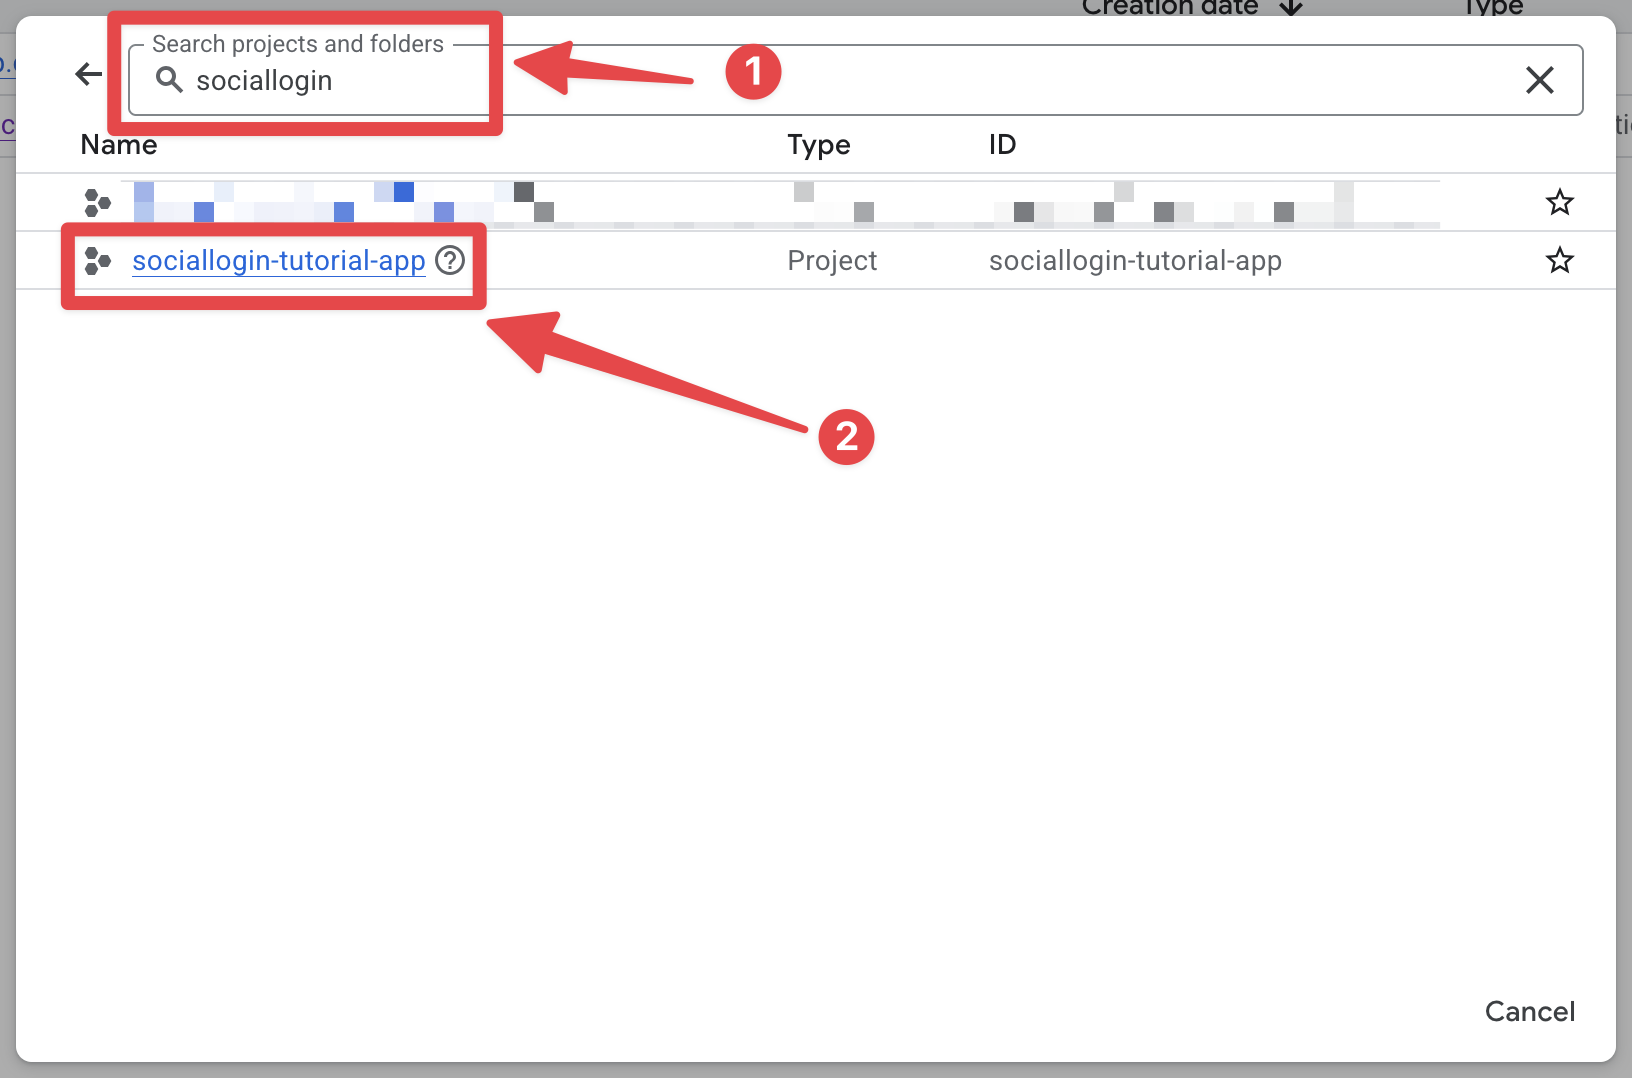
- iOS Firebase 추가 앱 건너뛰기
-
검색 바를 열고
credentials- 검색 바를 열기
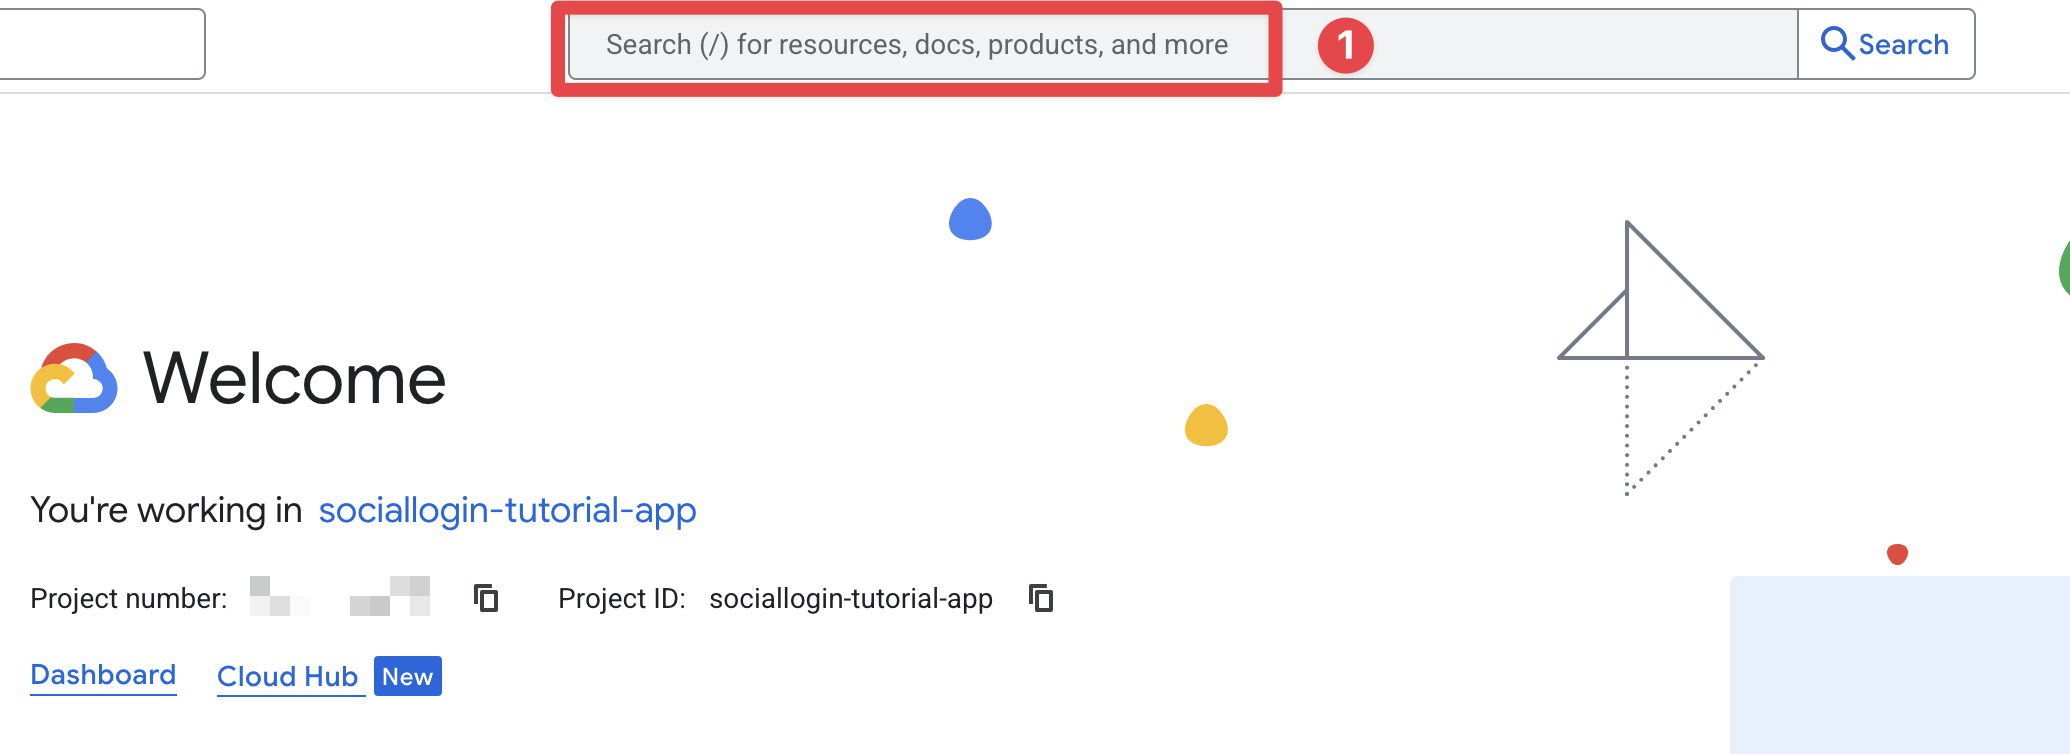
- 를 검색하세요.
credentials와 클릭하세요.APIs and Services(스크린샷의 번호 2에 해당하는) 하나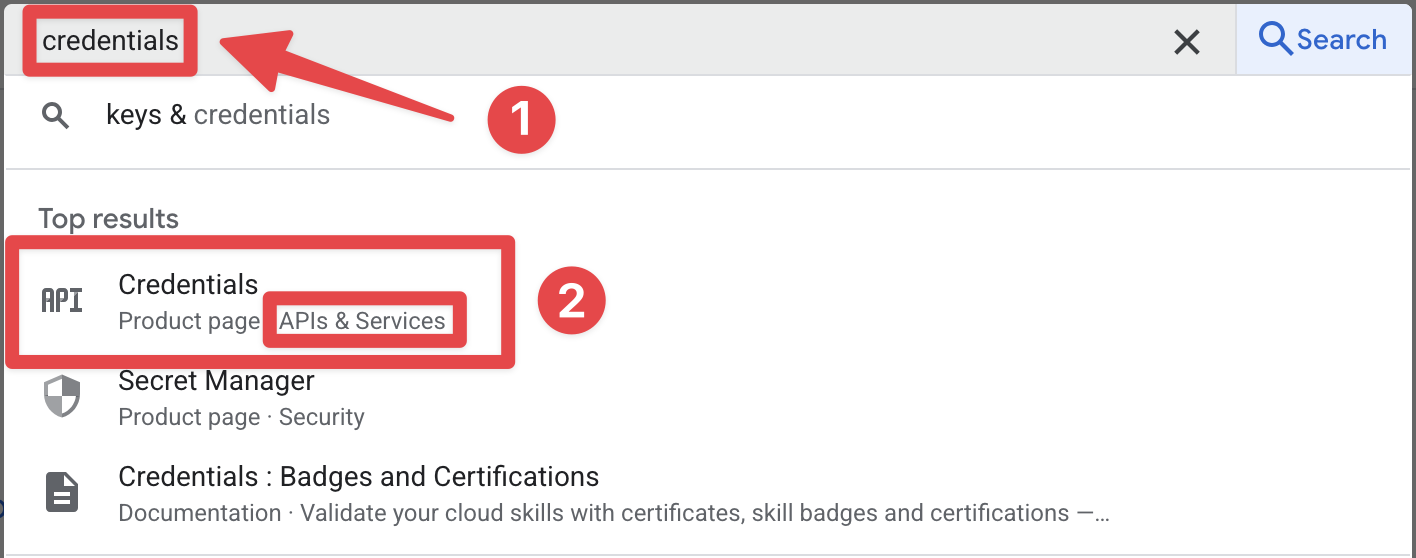
- 검색 바를 열기
-
클릭하세요.
iOS client for [YOUR_APP_ID] (auto created by Google Service)하나. 나의 경우는sociallogin-tutorial-app.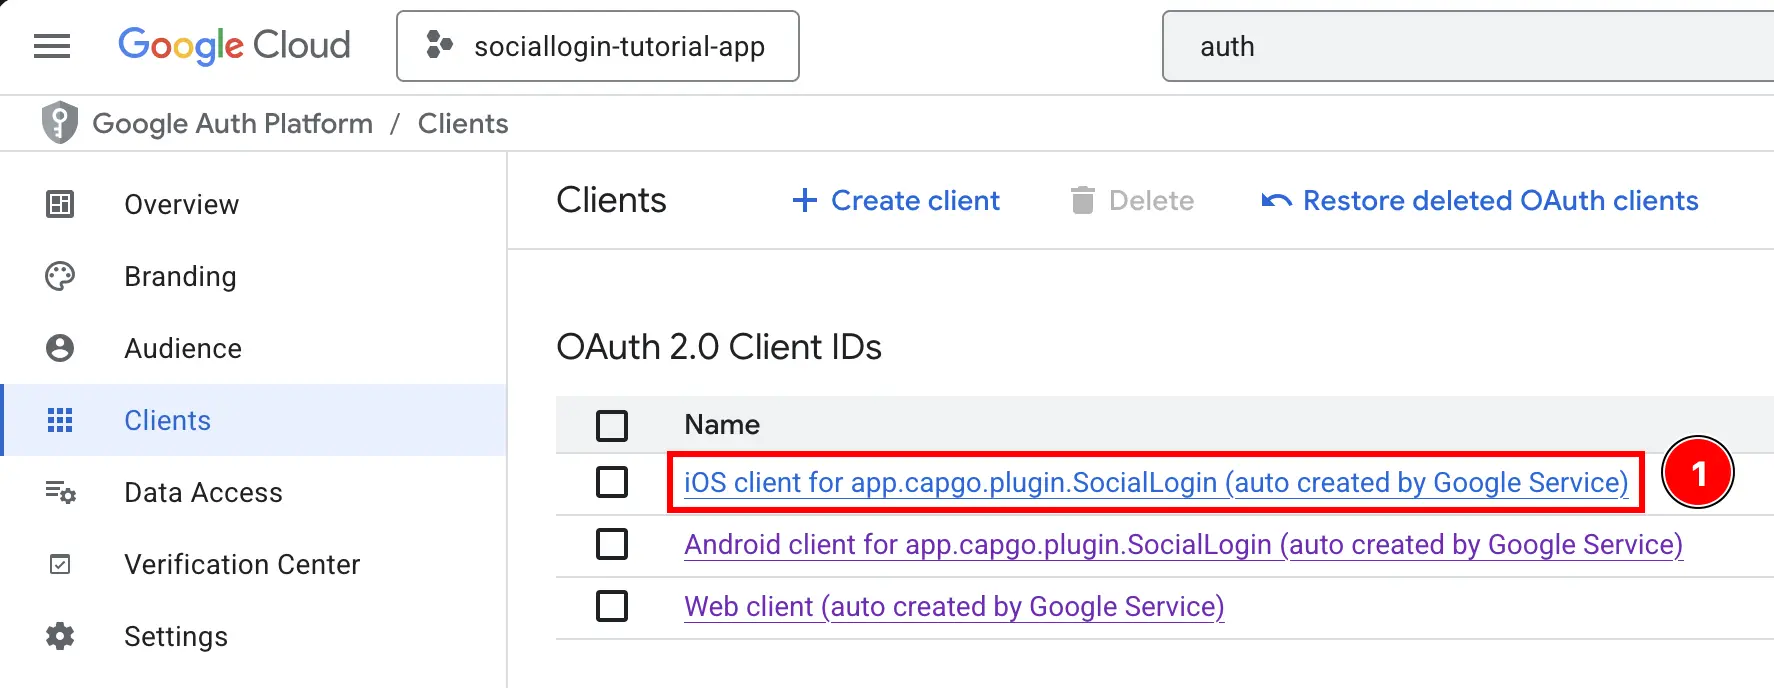
-
__CAPGO_KEEP_0__을 복사하세요.
Client ID__CAPGO_KEEP_1__도 복사하세요.iOS URL scheme. 이 각각은 당신의 __CAPGO_KEEP_2__iOSClientId__CAPGO_KEEP_3__YOUR_DOT_REVERSED_IOS_CLIENT_ID.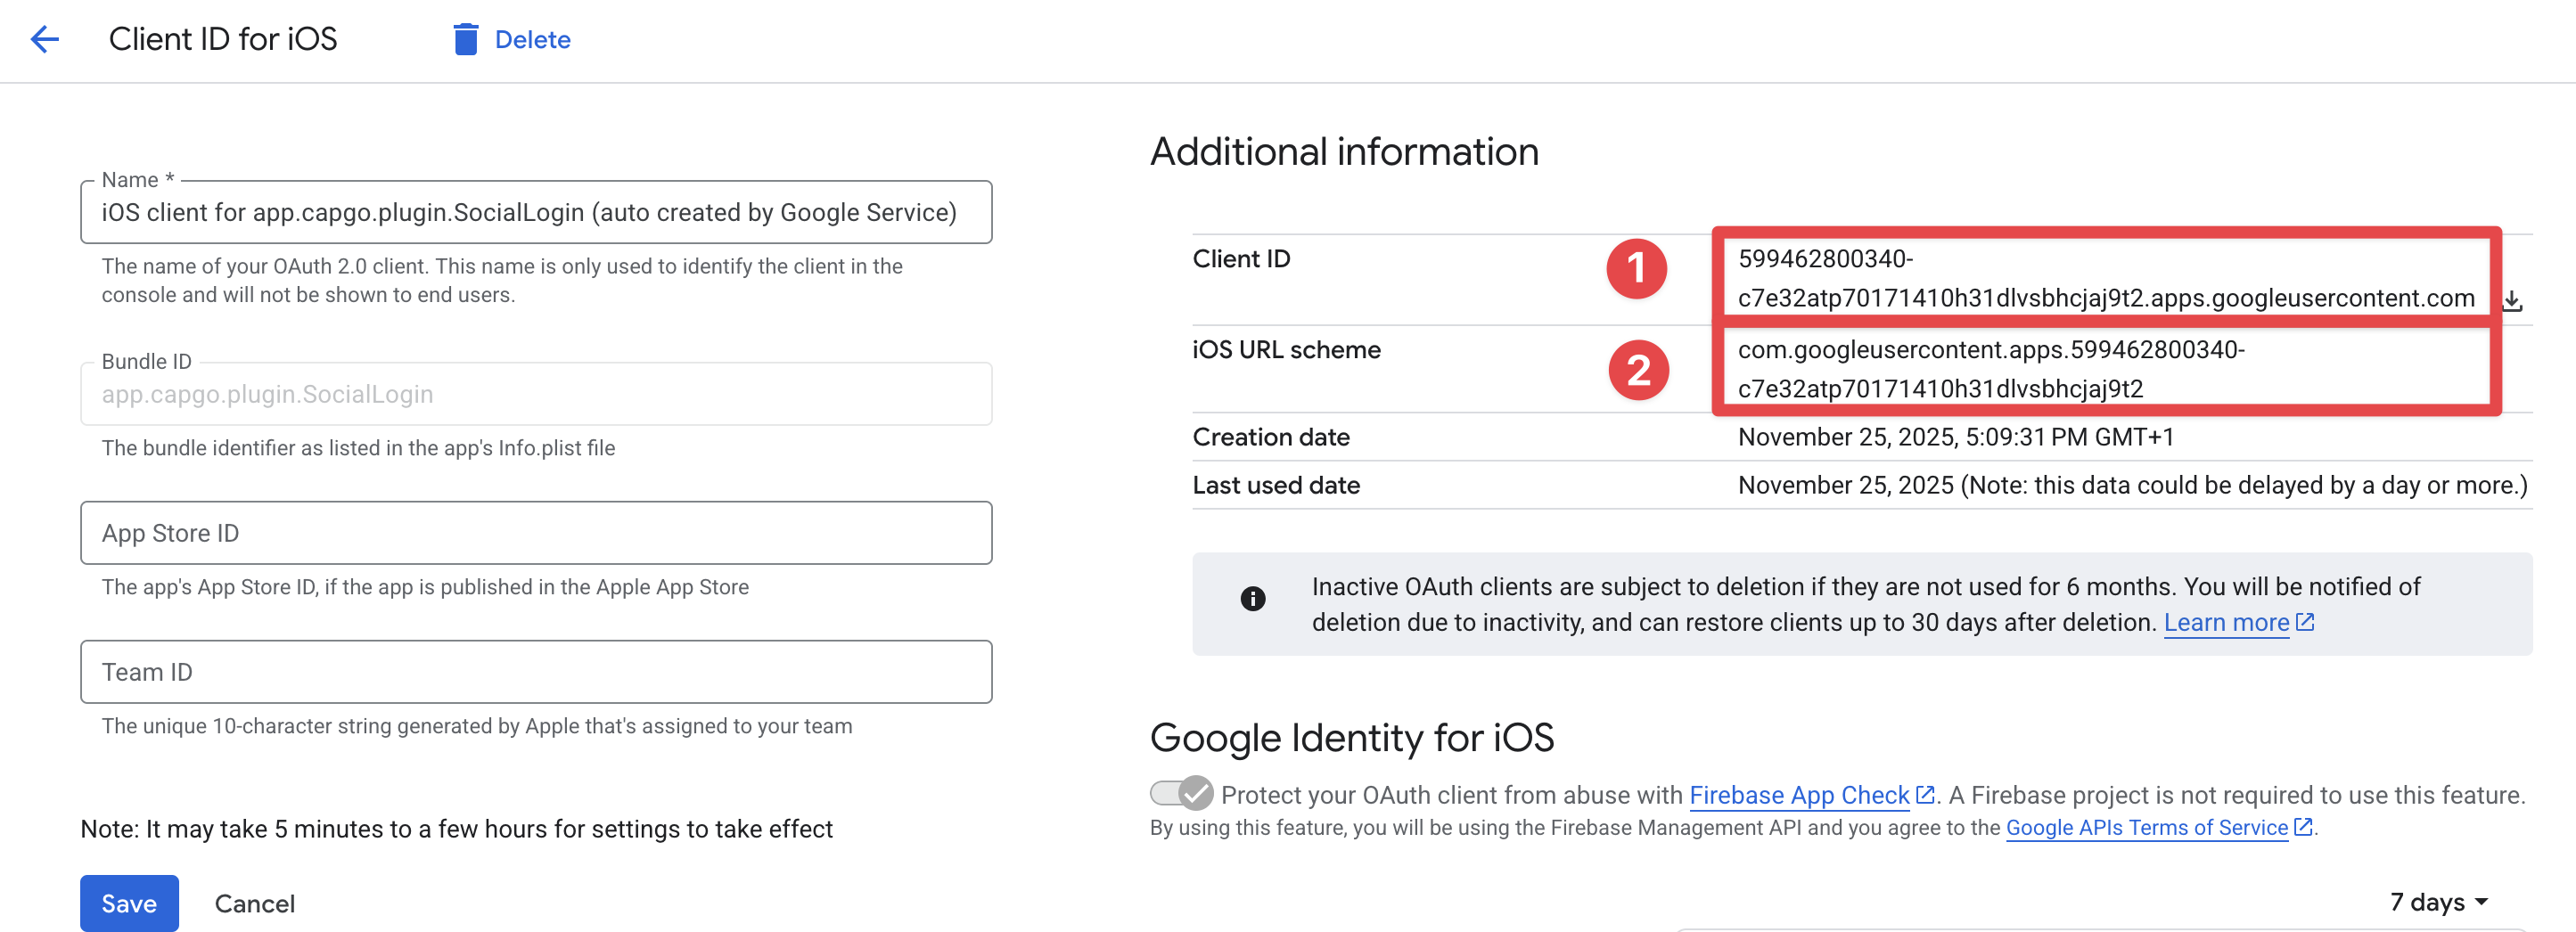
-
-
웹 클라이언트 ID를 가져오세요
- Firebase 콘솔로 돌아가서
Build->Authentication
- 버튼 클릭
Sign-in methodFirebase 인증 로그인 방법 버튼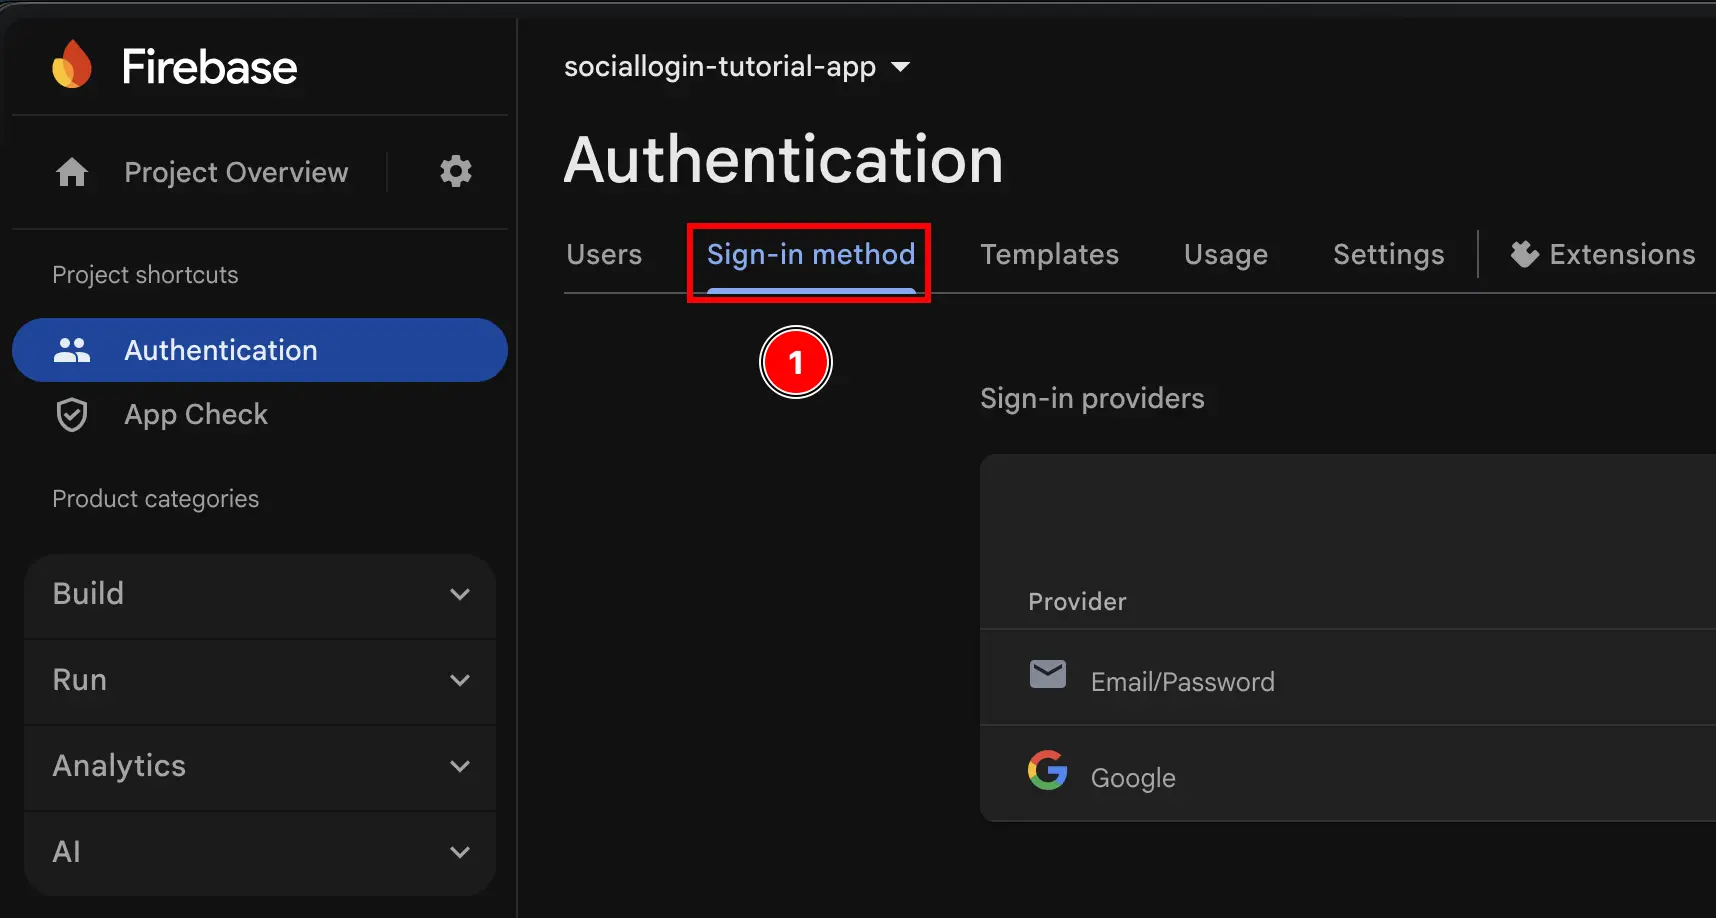
- 제공자 클릭
GoogleFirebase 인증 로그인 방법 Google 제공자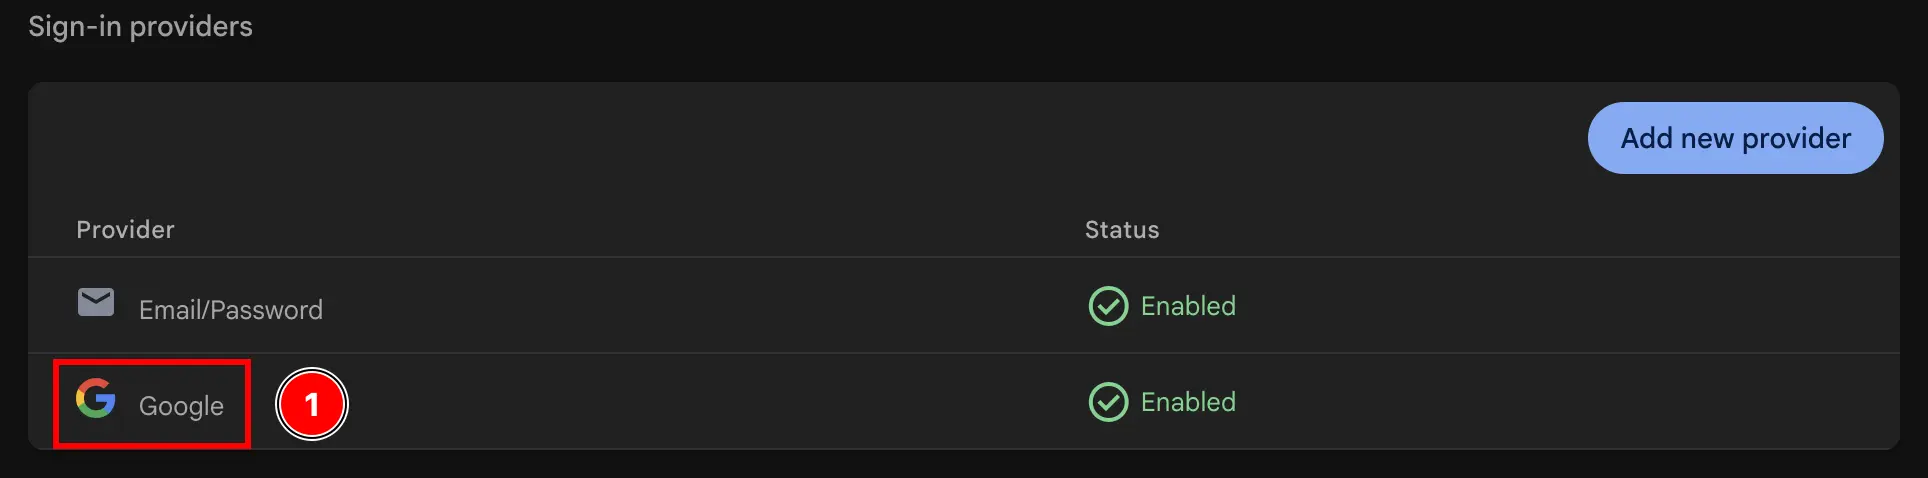
- 버튼 클릭
Web SDK configurationFirebase 콘솔로 돌아가서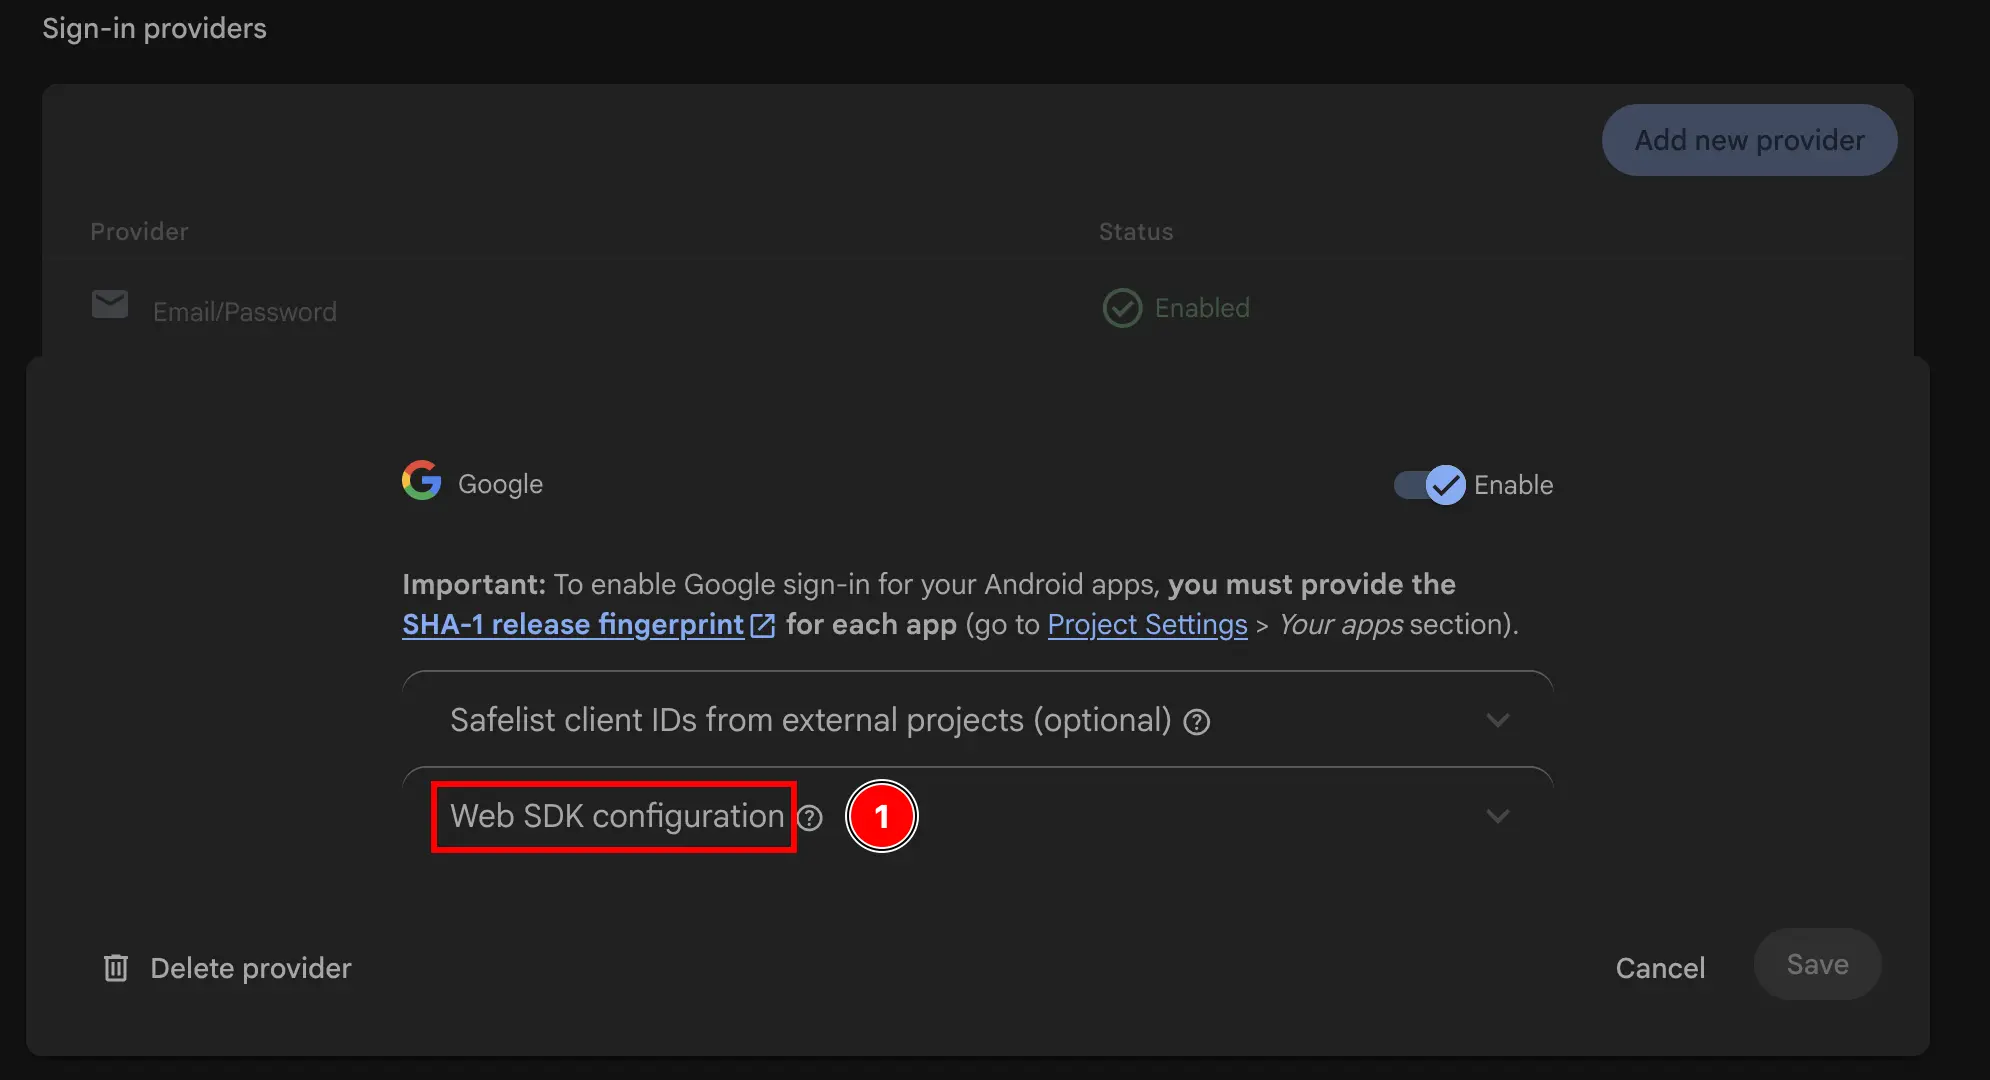
- 복사하세요. 이가 당신의
Web client IDFirebase 인증 Sign-in 방법 Web __CAPGO_KEEP_0__ 설정 Web Client IDwebClientId앱의 Info.plist를 수정하세요.initializeXcode를 열고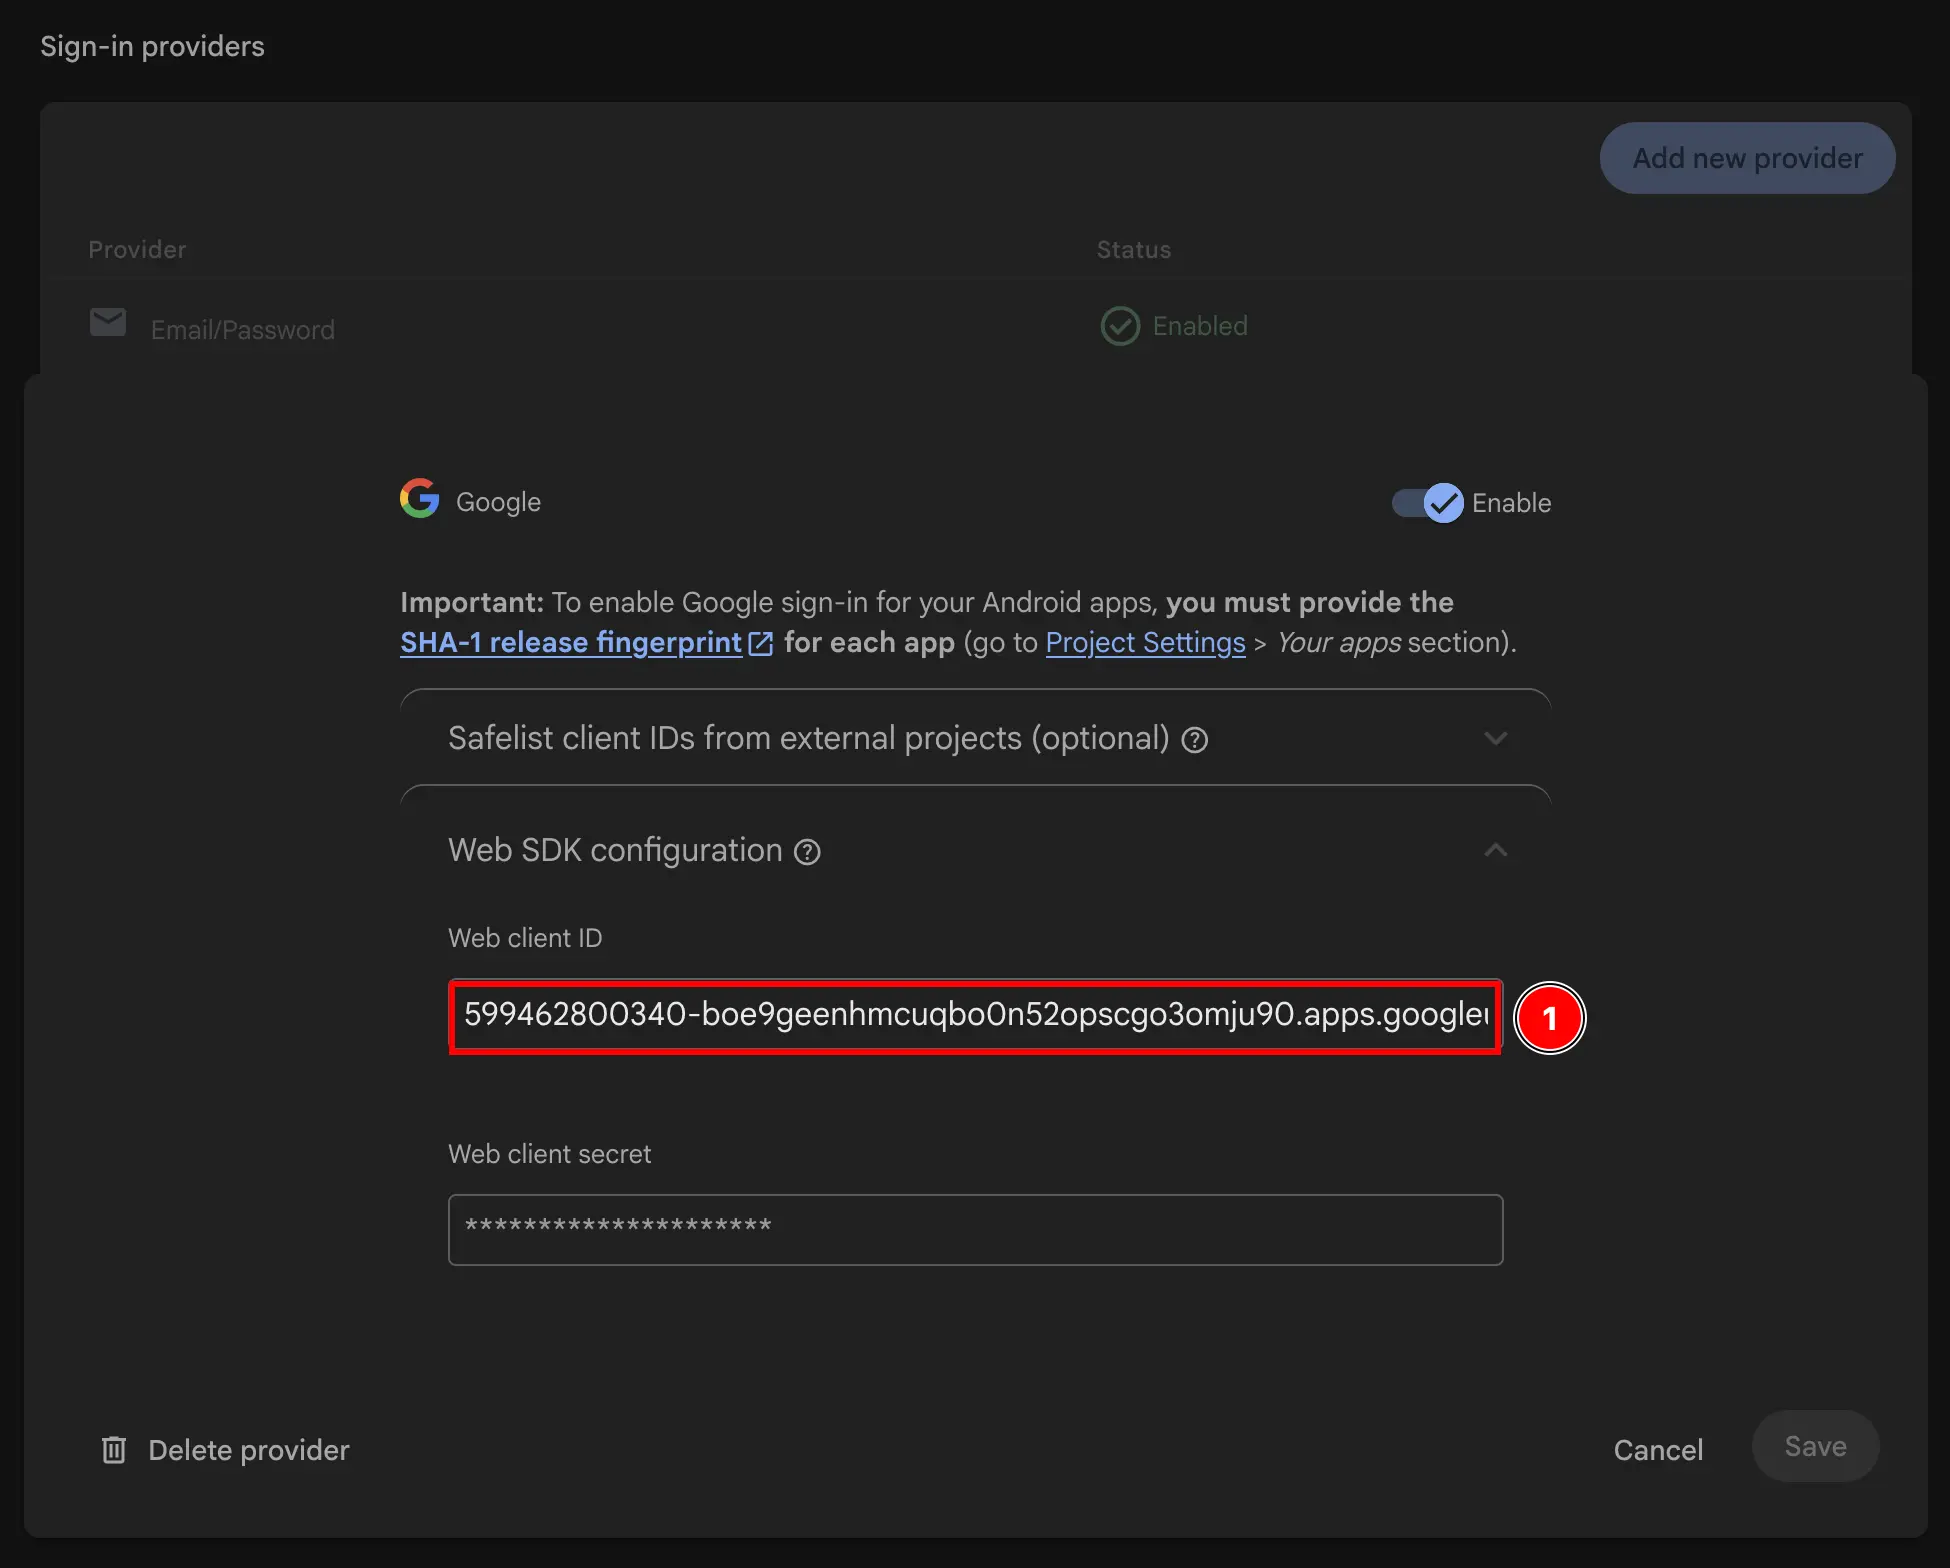
- Firebase 콘솔로 돌아가서
-
Xcode 프로젝트 탐색기에서 Info.plist 파일을 찾으세요.
-
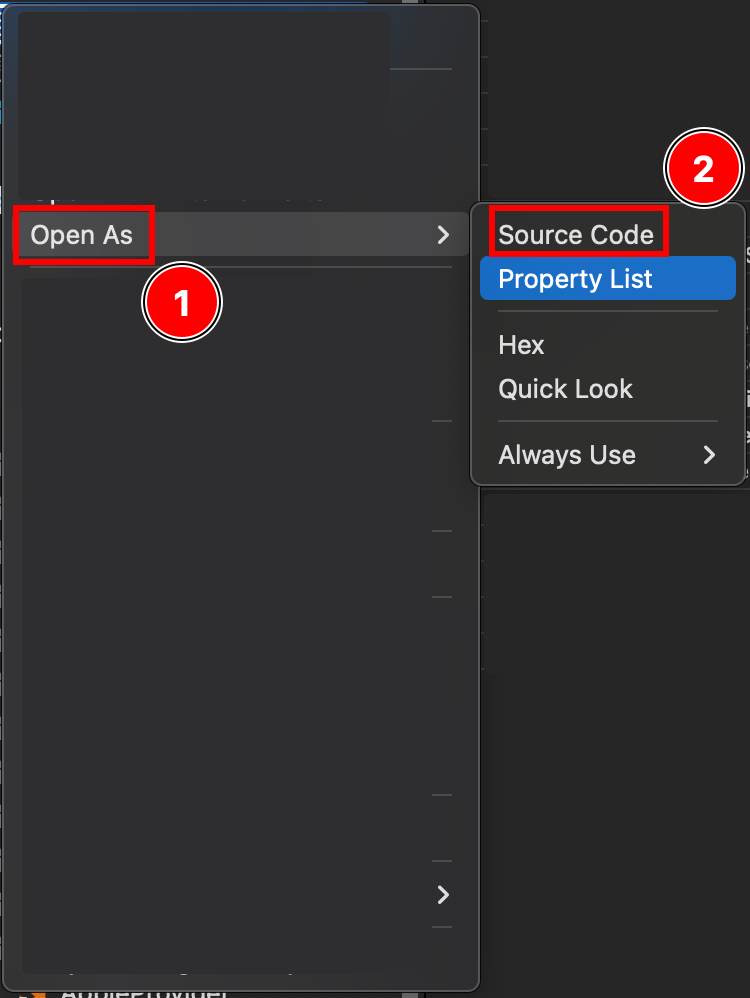
이 파일을 오른쪽 클릭하고 소스 __CAPGO_KEEP_0__로 열으세요.
Info.plist소스 __CAPGO_KEEP_0__로 열기 옵션을 보여주는 오른쪽 클릭 메뉴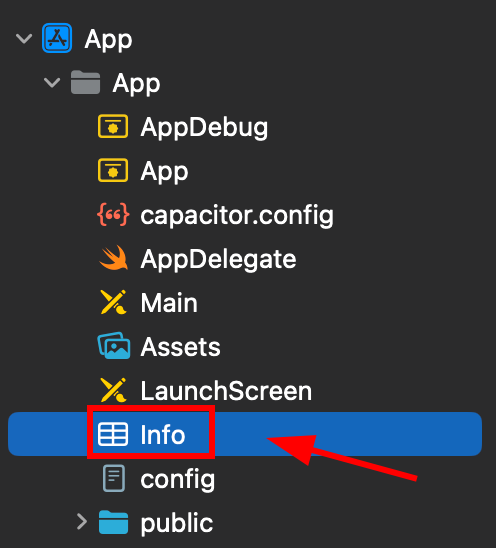
-
소스 code로 열기 옵션
-
파일의 하단에서
Plist태그를 찾을 수 있습니다.</dict>태그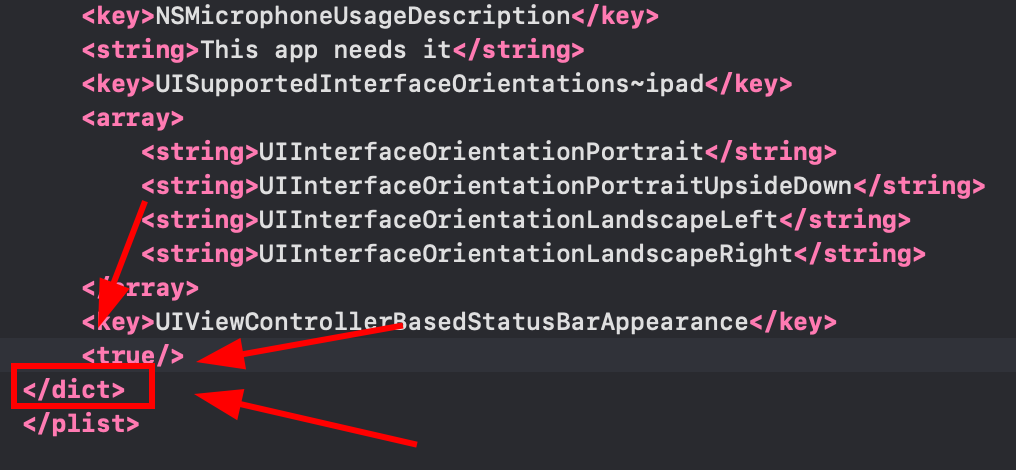
-
닫는 딕셔너리 태그 바로 앞에 다음 프래그먼트를 삽입하세요.
</dict>URL 스키마 __CAPGO_KEEP_0__이 실제로 닫는 딕셔너리 태그에 삽입된 Info.plist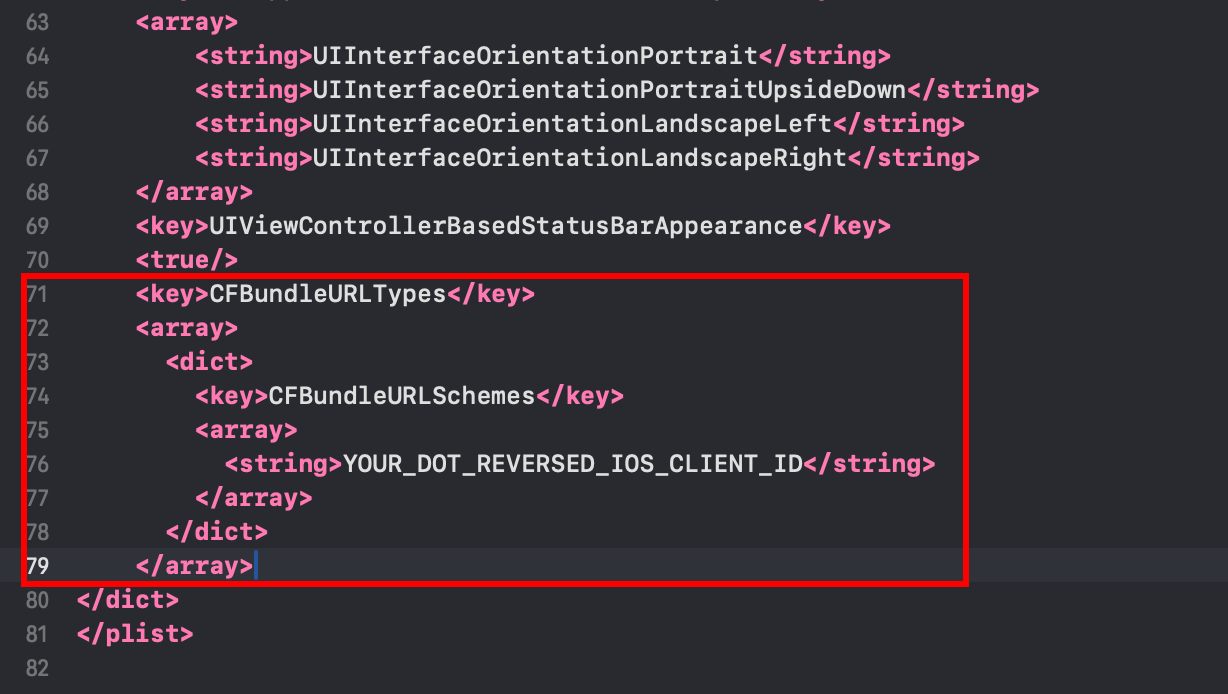 <key>CFBundleURLTypes</key><array><dict><key>CFBundleURLSchemes</key><array><string>YOUR_DOT_REVERSED_IOS_CLIENT_ID</string></array></dict></array><key>GIDClientID</key><string>YOUR_IOS_CLIENT_ID.apps.googleusercontent.com</string>
 -
URL 스키마에 실제로 역전된 클라이언트 ID가 삽입된 Info.plist
YOUR_DOT_REVERSED_IOS_CLIENT_ID주의: 클라이언트 ID를 역전한 후에 URL 스키마에 삽입해야 합니다.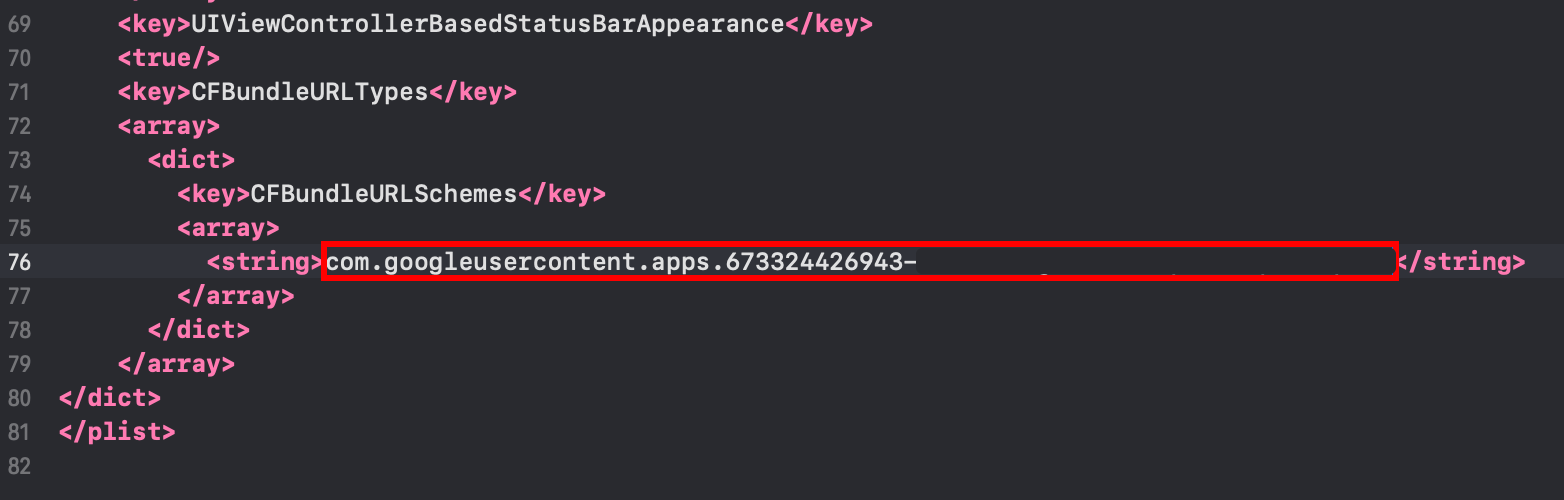
-
-
를
YOUR_IOS_CLIENT_IDiOS Client ID를 9번 단계에서 복사한 것을 -
파일을
Command + S -
수정
AppDelegate.swift-
AppDelegate를
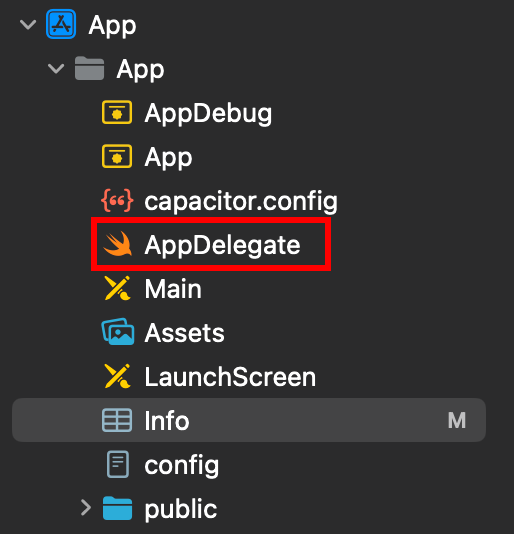
-
위에
import GoogleSignIn삽입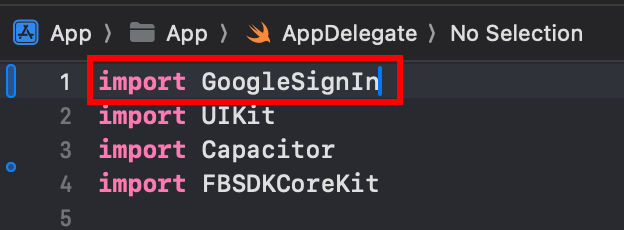
-
찾아보세요.
func application(_ app: UIApplication, open url: URL, options: [UIApplication.OpenURLOptionsKey: Any] = [:])함수
-
함수를 다음처럼 수정하세요.
func application(_ app: UIApplication, open url: URL, options: [UIApplication.OpenURLOptionsKey: Any] = [:]) -> Bool {// Called when the app was launched with a url. Feel free to add additional processing here,// but if you want the App API to support tracking app url opens, make sure to keep this callvar handled: Boolhandled = GIDSignIn.sharedInstance.handle(url)if handled {return true}return ApplicationDelegateProxy.shared.application(app, open: url, options: options)}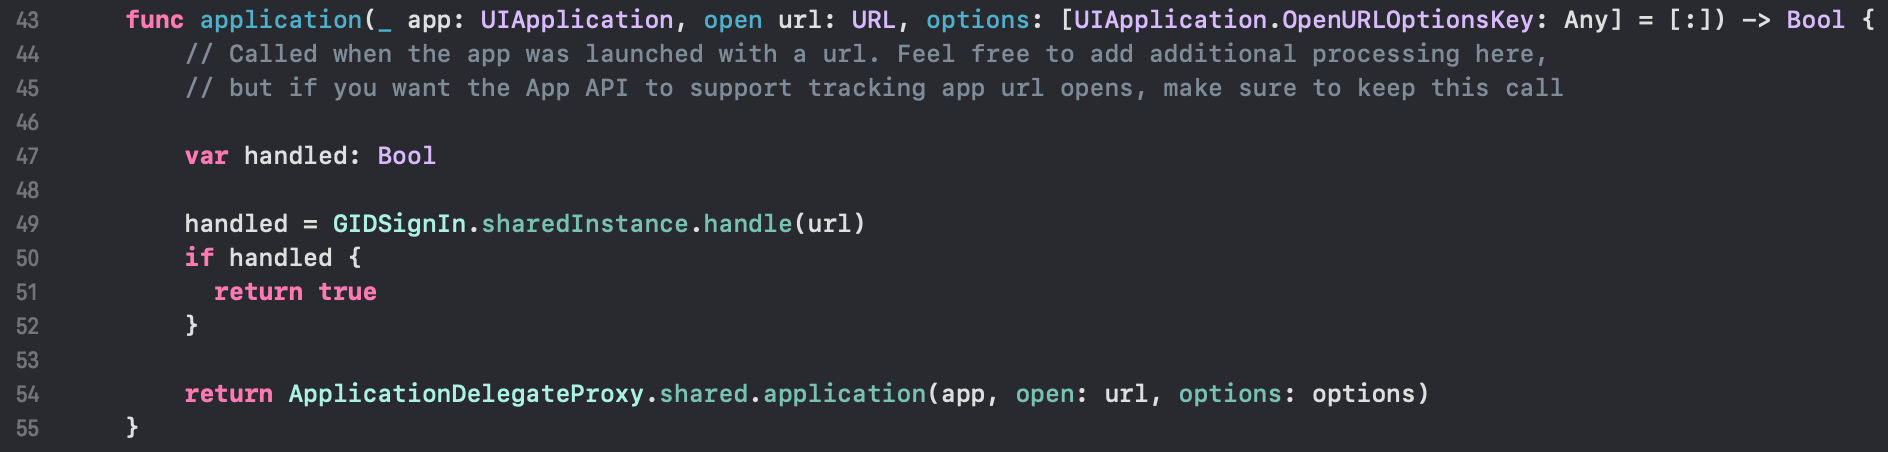
-
파일을
Command + S
-
-
앱에서 Google 로그인을 사용하는 방법
이 단계에서는 앱에서 Google 로그인을 사용할 준비가 되었습니다. Google 로그인을 사용하려면 예제 앱의 authUtils.ts 파일을 사용하여 Google과 인증하세요. authUtils.ts
The user will be automatically created in Firebase Auth on first sign-in
문제 해결
제목: 문제 해결인증이 지연되거나 실패하는 경우:
- 인증 대상이 Firebase 웹 클라이언트 ID와 일치하는지 확인하십시오.
idTokenFirebase 콘솔에서 Google Sign-In이 활성화되어 있는지 확인하십시오. - Info.plist에서 올바른 URL 스키마와 GIDClientID가 설정되어 있는지 확인하십시오.
- 인증 대상이 웹 클라이언트 ID와 일치하는지 확인하십시오.
- 예시 앱 __CAPGO_KEEP_0__
iOSServerClientIdVerify the audience matches your Firebase web client ID - Check that Google Sign-In is enabled in Firebase Console example app code for reference
iOS에서 Firebase Google Login을 계속 진행하세요
iOS에서 Firebase Google Login을 계속 진행하세요iOS에서 Firebase Google Login을 사용 중이라면 iOS에서 Firebase Google Login을 사용 중이라면 Firebase Google Login을 사용하여 인증 및 계정 흐름을 계획하고 @capgo/capacitor-social-login을 사용하여 iOS에서 Firebase Google Login과 연결하세요 @capgo/capacitor-social-login을 사용하여 iOS에서 Firebase Google Login의 네이티브 기능을 구현하세요 @capgo/capacitor-social-login을 사용하여 iOS에서 Firebase Google Login의 구현 세부 정보를 확인하세요 @capgo/capacitor-passkey을 사용하여 iOS에서 Firebase Google Login의 구현 세부 정보를 확인하세요 @capgo/capacitor-passkey을 사용하여 iOS에서 Firebase Google Login의 구현 세부 정보를 확인하세요 @capgo/capacitor-passkey을 사용하여 iOS에서 Firebase Google Login의 구현 세부 정보를 확인하세요 @capgo/capacitor-native-생체인식 for the implementation detail in @capgo/capacitor-native-생체인식, and 두 단계 인증 for the implementation detail in 두 단계 인증.