애플 로그인 on Android
설치 단계와 이 플러그인의 전체 마크다운 가이드를 포함한 설정 프롬프트를 복사하세요.
__CAPGO_KEEP_3__ Sign in with Apple __CAPGO_KEEP_4__
__CAPGO_KEEP_5__
- __CAPGO_KEEP_6__
- __CAPGO_KEEP_7__
__CAPGO_KEEP_8__
__CAPGO_KEEP_9____CAPGO_KEEP_10__
flowchart TD
    A("await SocialLogin.login()") -->|Handled in the plugin|B(Generate the login URL)
    B --> |Pass the link| C(Open the Chrome browser)
    C --> D(Wait for the user to login)
    D --> |Apple redirects to your backend|E(Handle the data returned from Apple)
    E --> F(Redirect back to the app)
    F --> G(Return to JS)
이제 문제와 흐름을 이해하셨다면, 설정을 시작해 보겠습니다.
서비스 ID를 생성합니다.
서비스 ID를 생성하는 방법-
로그인하여 애플 개발자 포털.
-
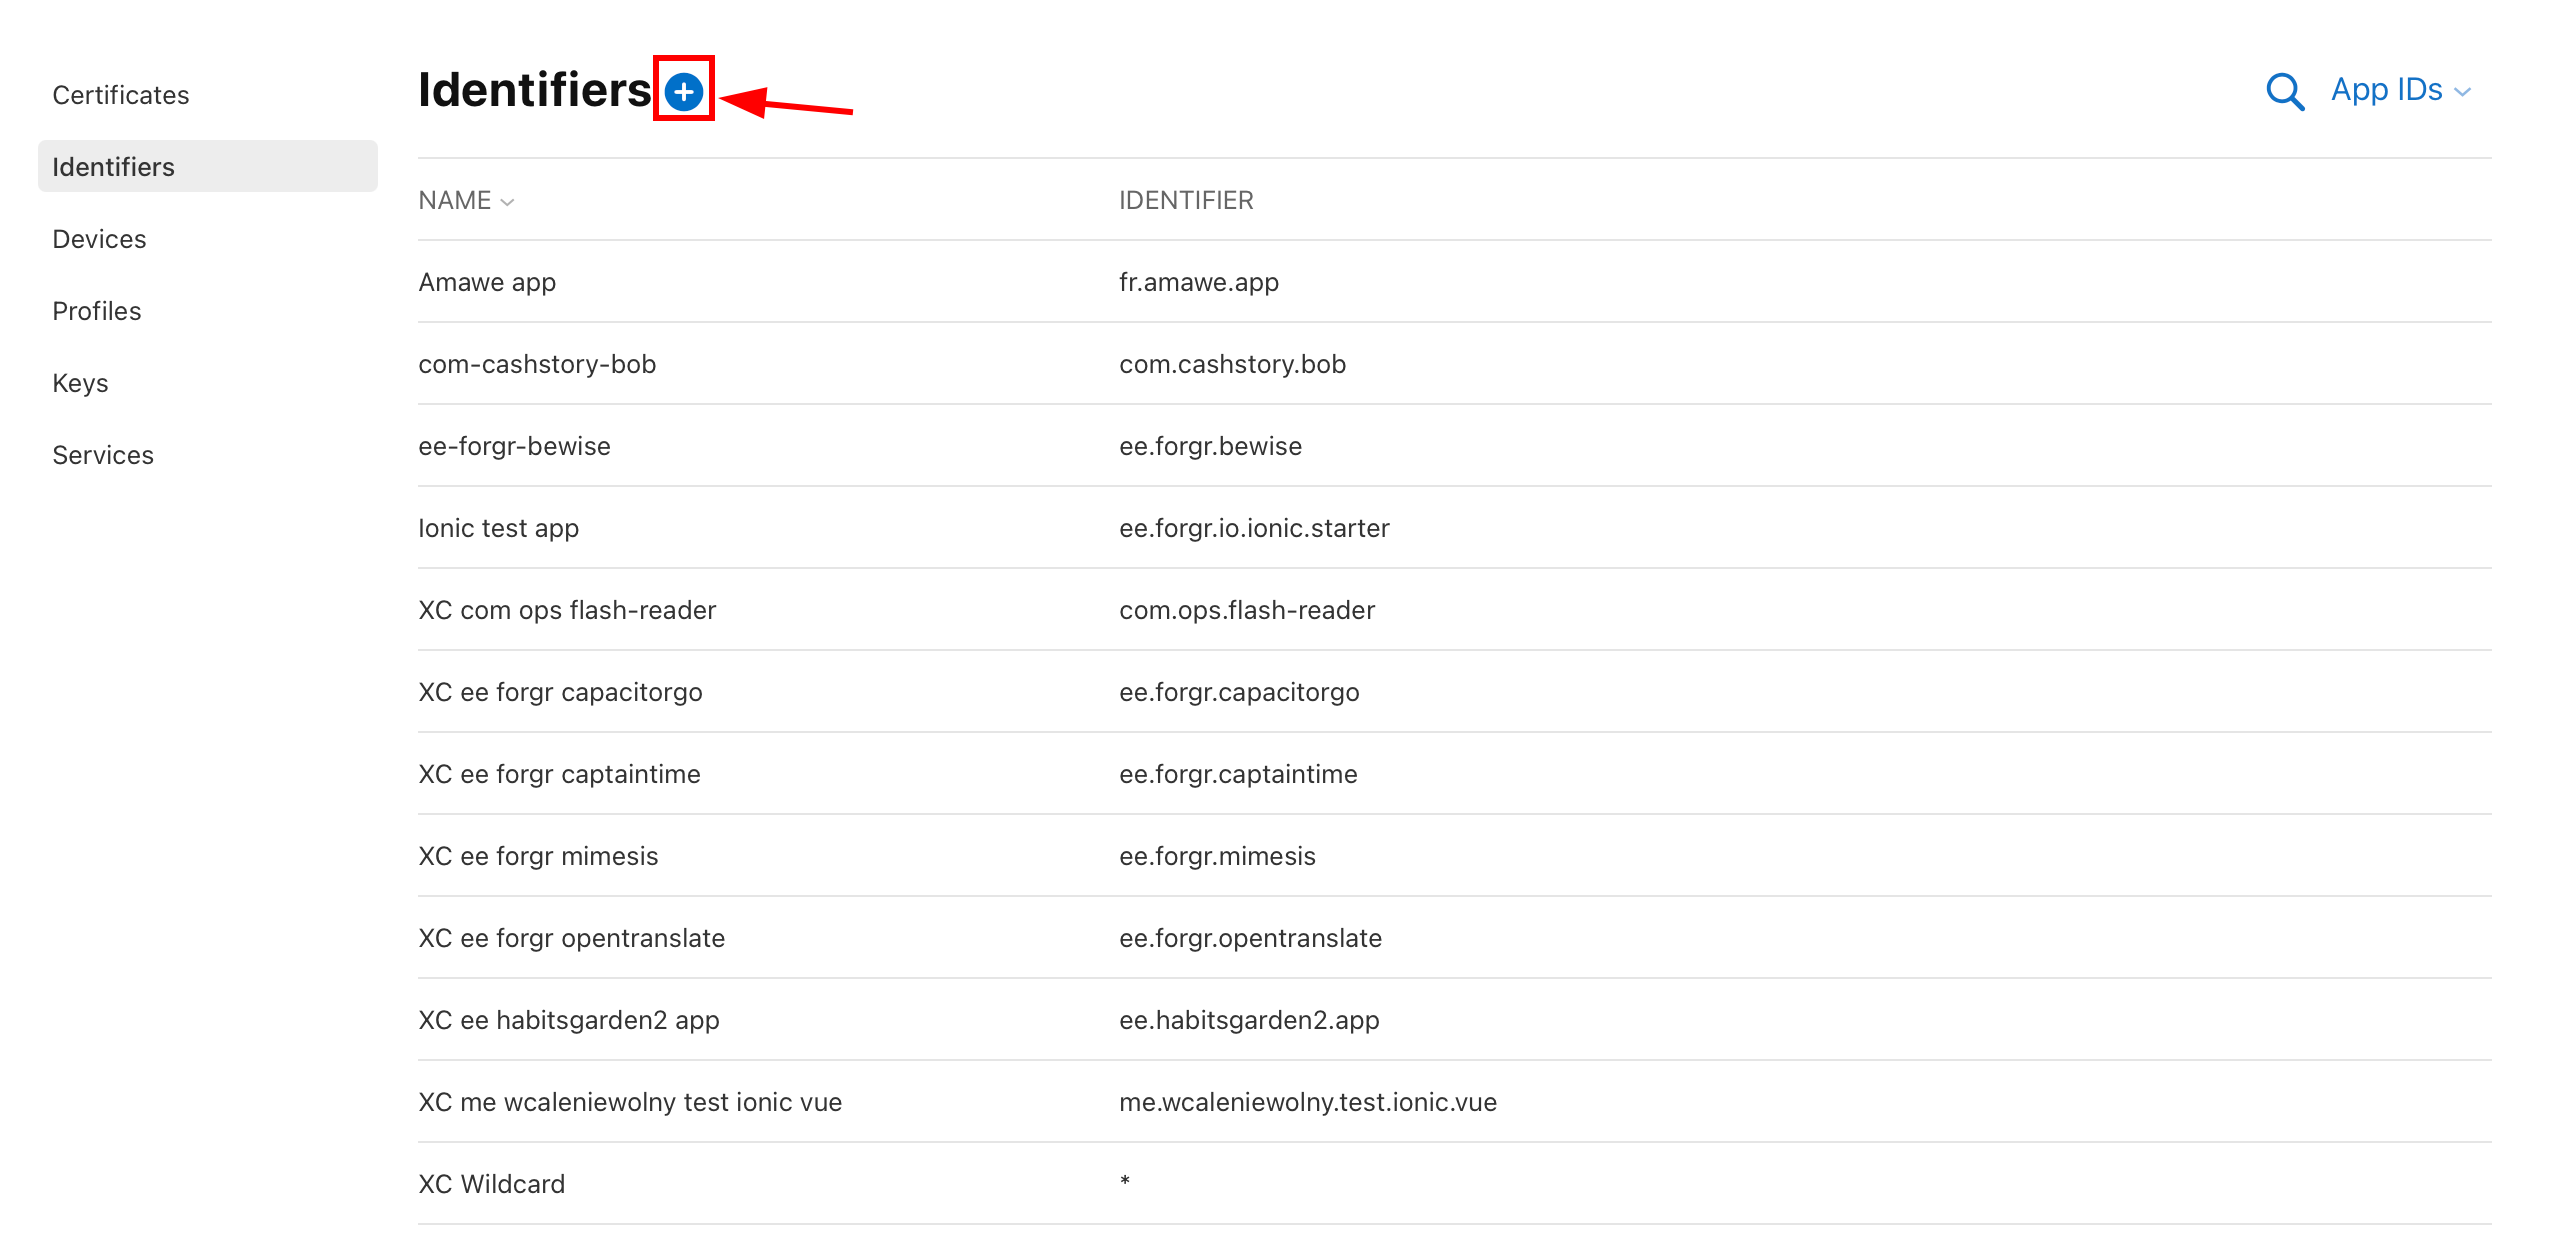
애플 개발자 포털 Identifiers 섹션
Identifiers.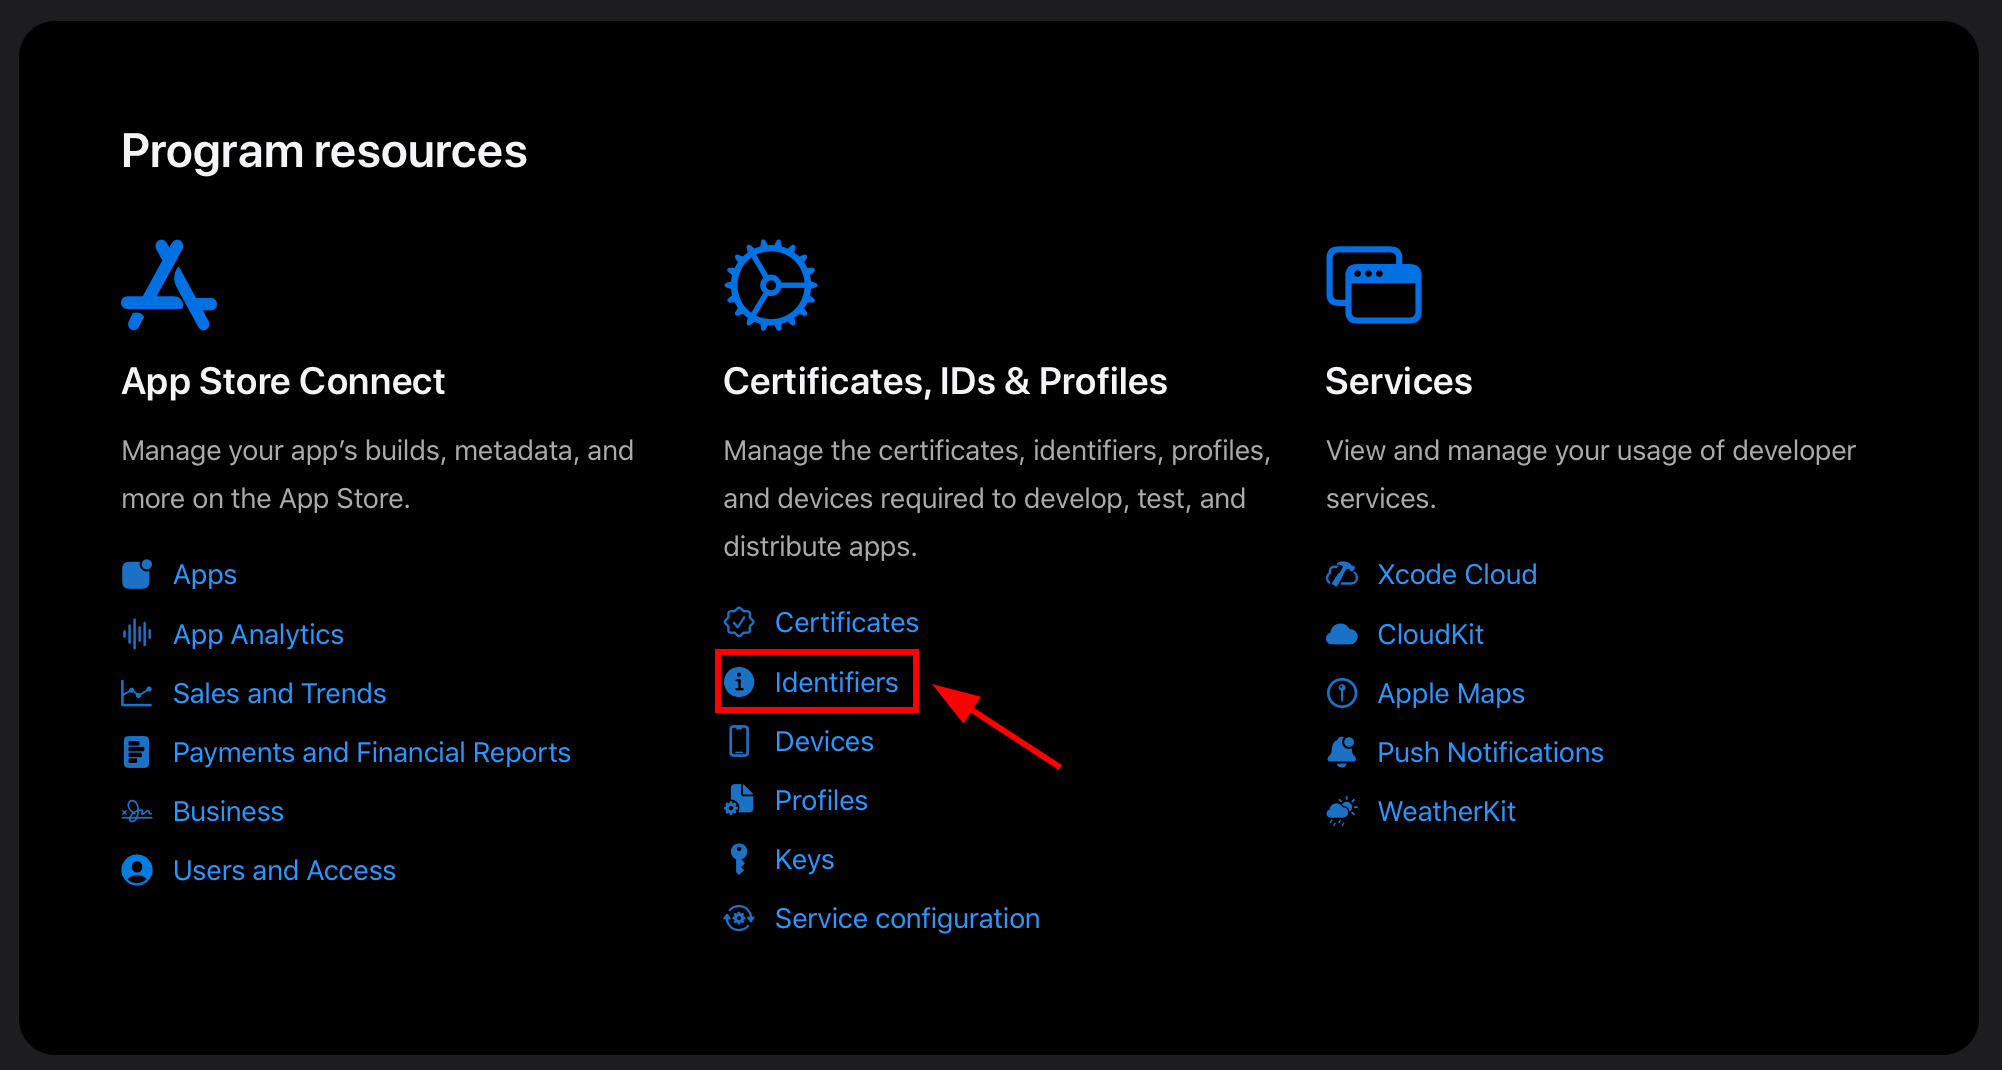
애플 개발자 포털 Identifiers 화면
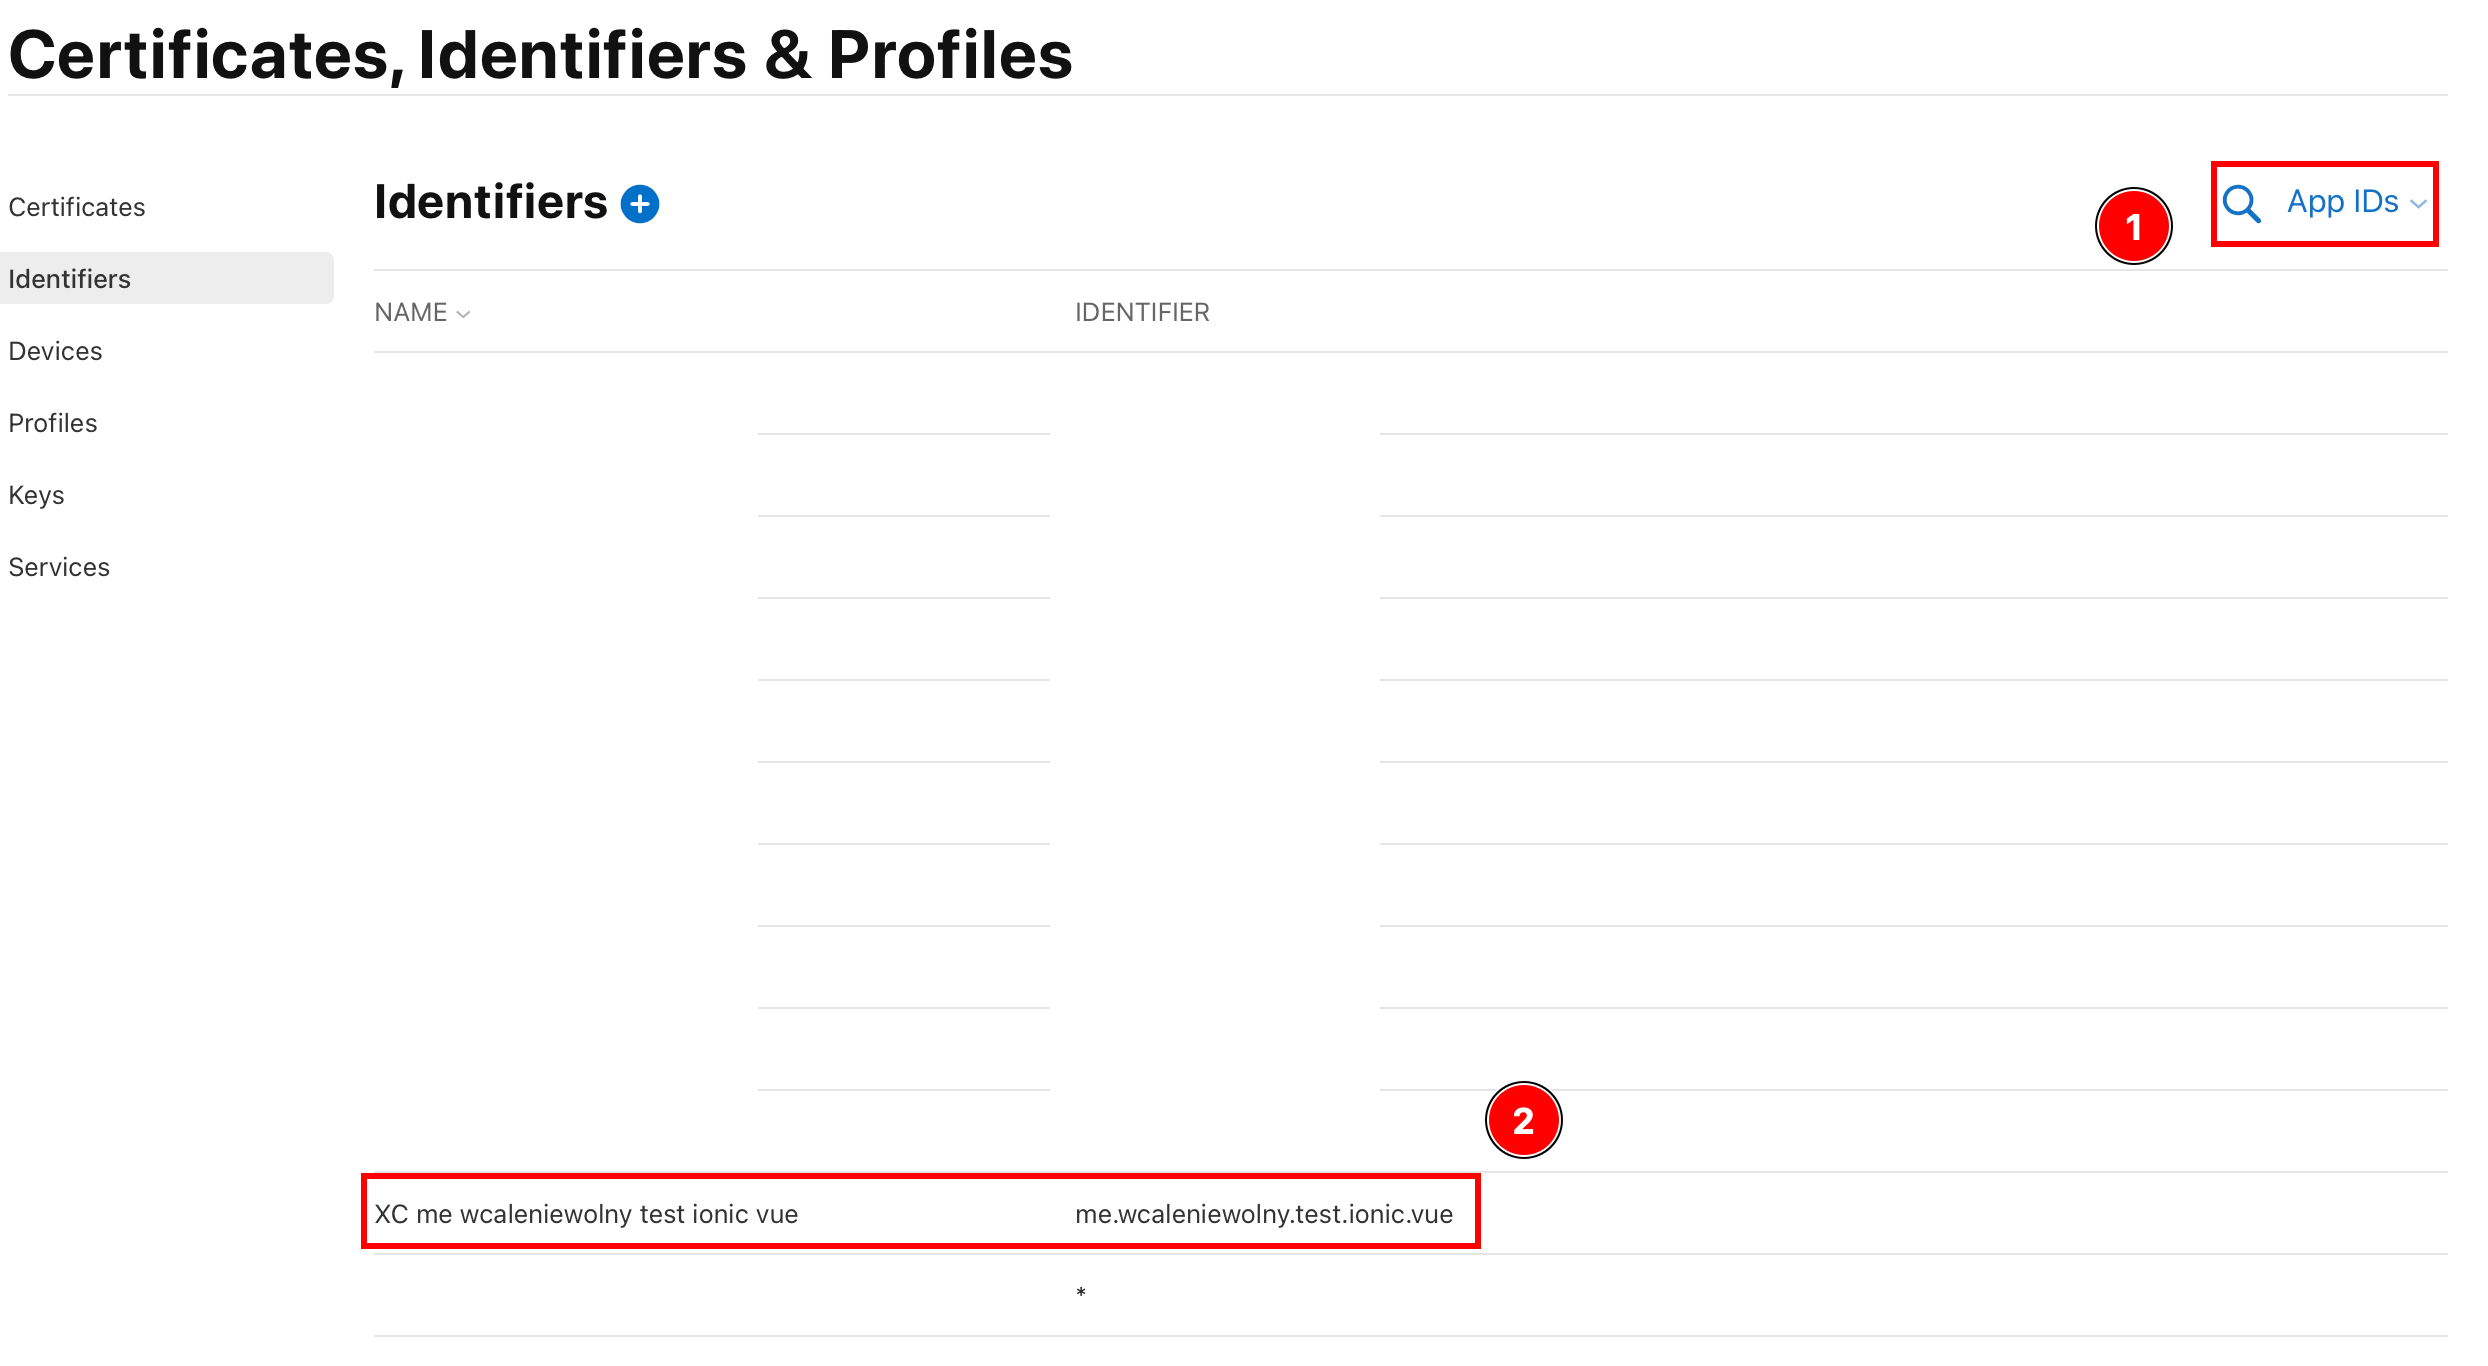
- 앱 ID를 찾을 수 있는지 확인해 보세요.
App IDs - 앱 ID를 찾을 수 있는지 확인해 보세요.
- 앱 ID를 찾을 수 있는지 확인해 보세요.
-
앱에 대한
Sign in with Applecapability이 활성화되어 있어야 합니다.- Click on your app
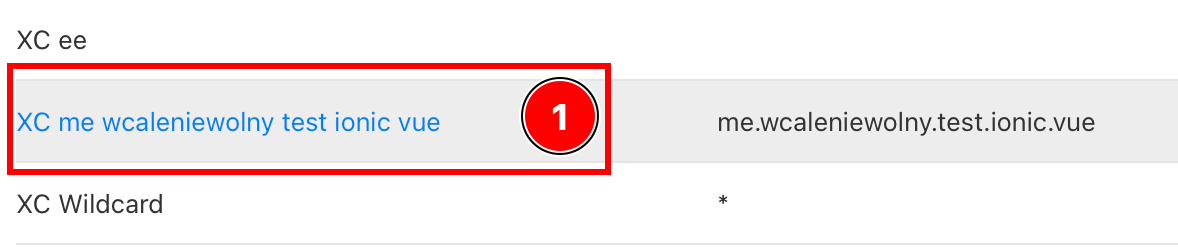
- Ensure that the
Sign in with Applecapability이 활성화되어 있어야 합니다.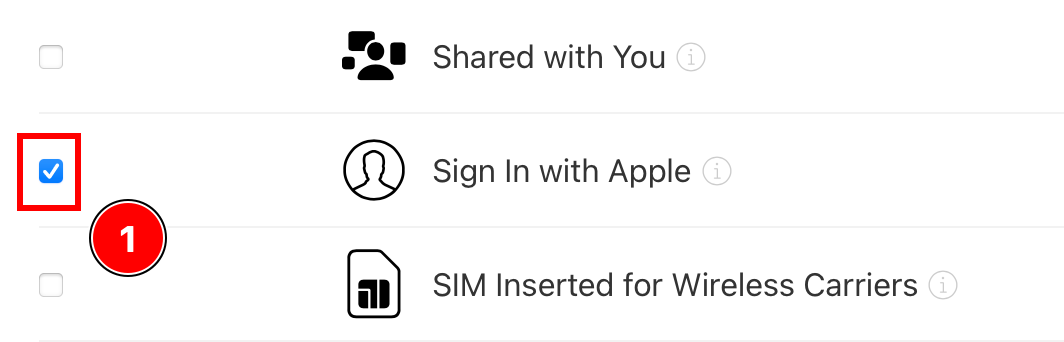
- capability이 활성화되어 있지 않다면, 활성화하세요.
- Click on your app
-
이전으로 돌아가기
All Identifiers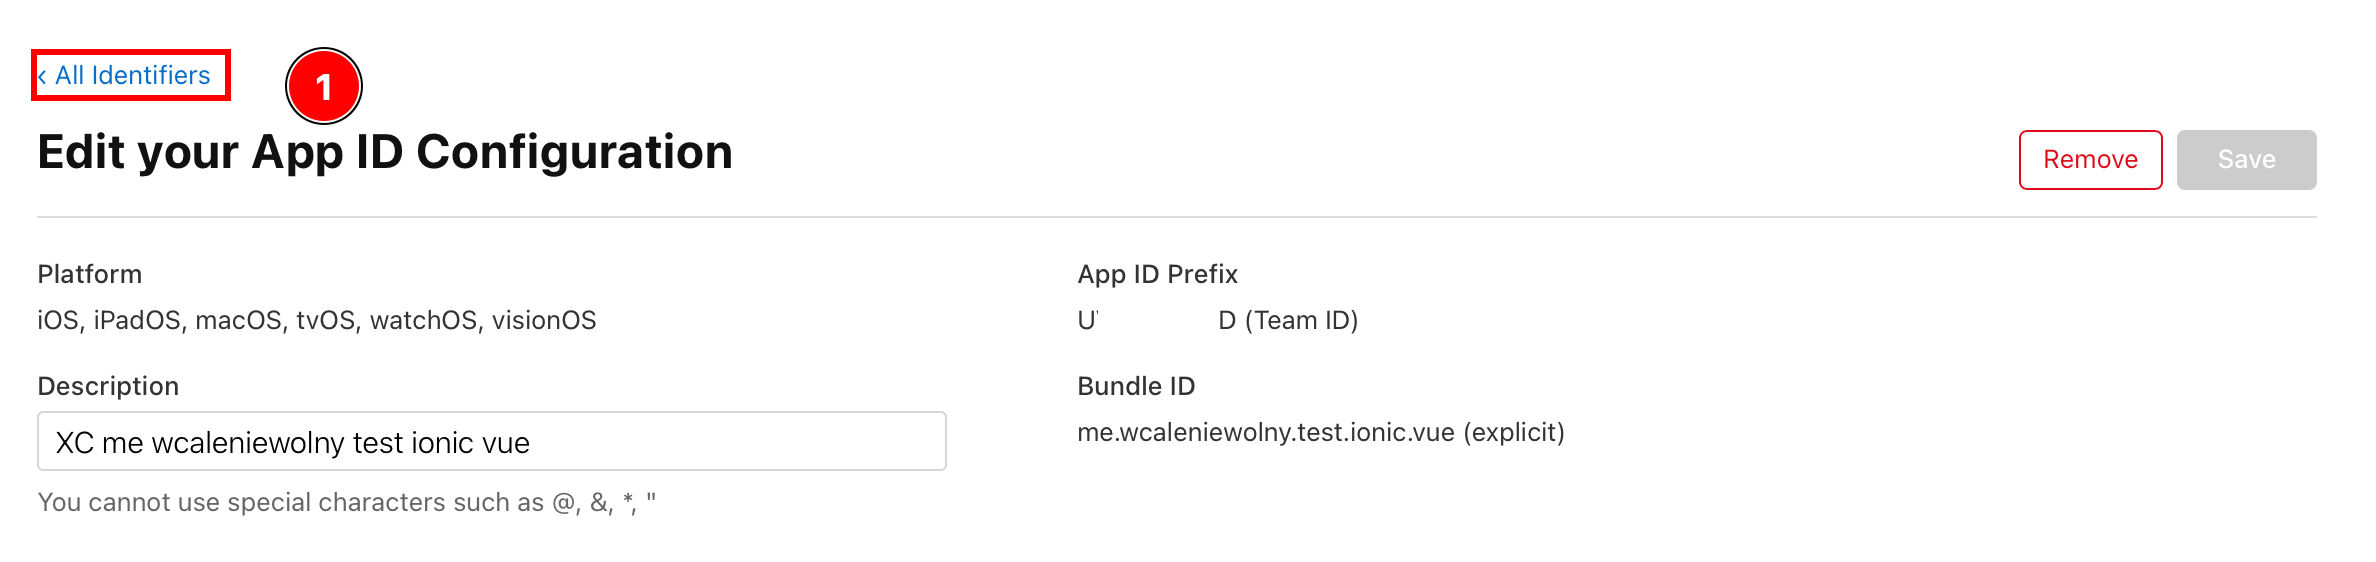
-
클릭하여
App Ids및 이동Services IDs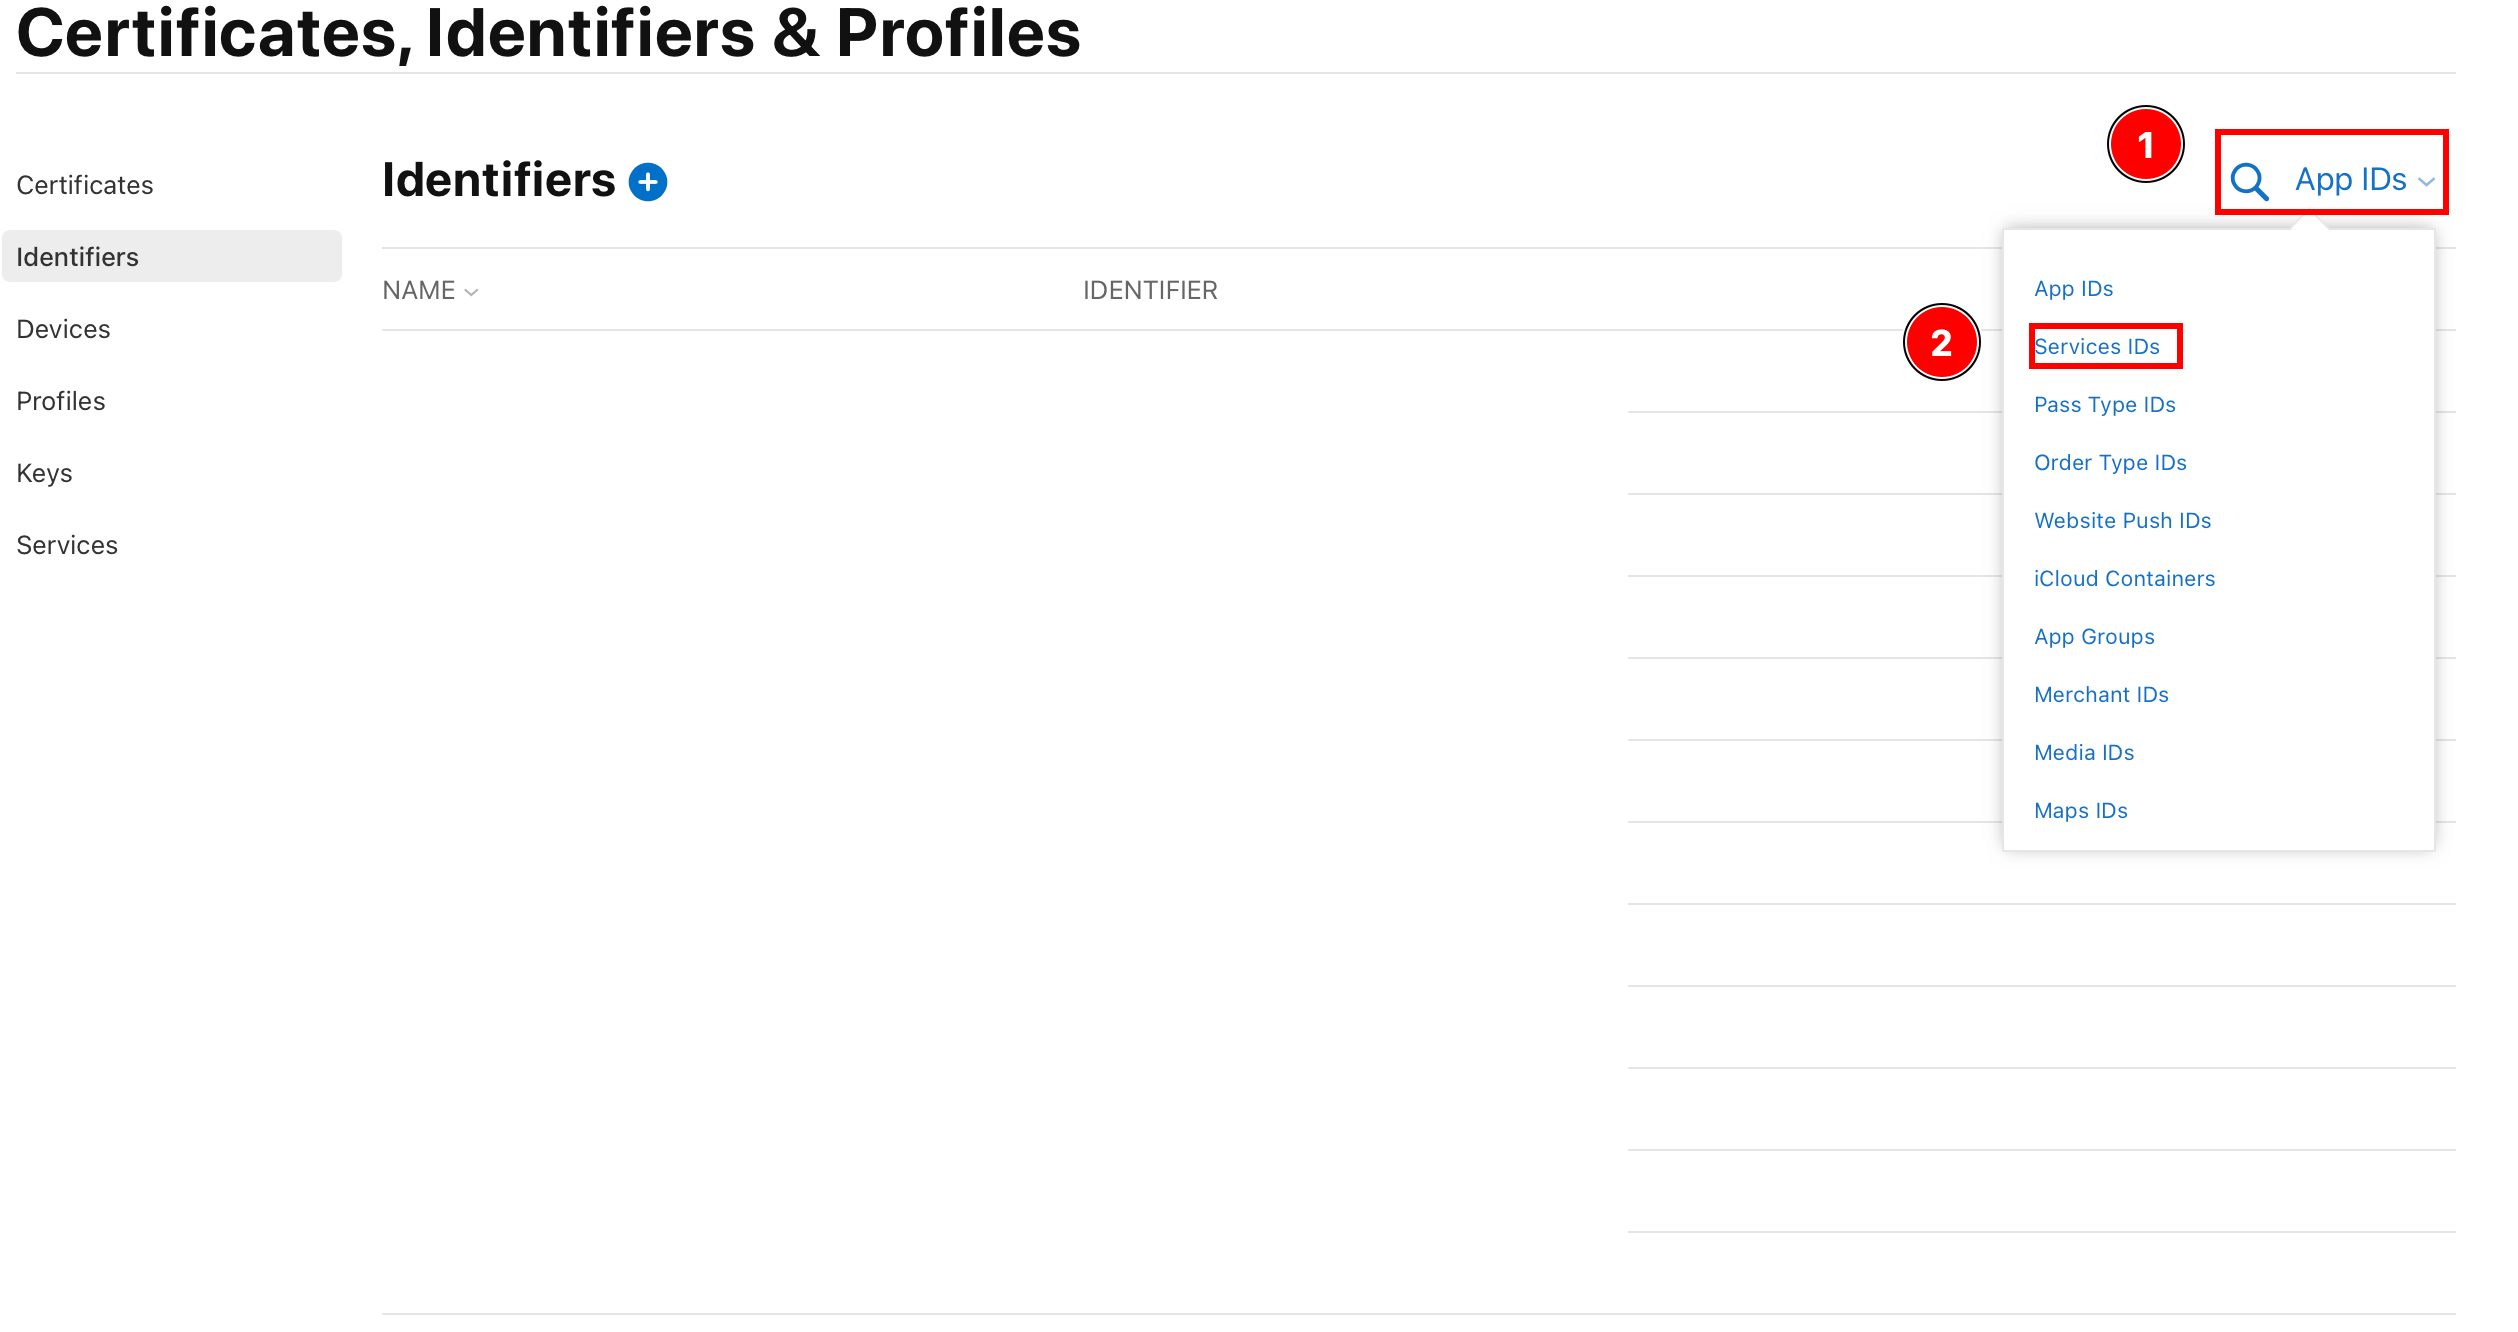
-
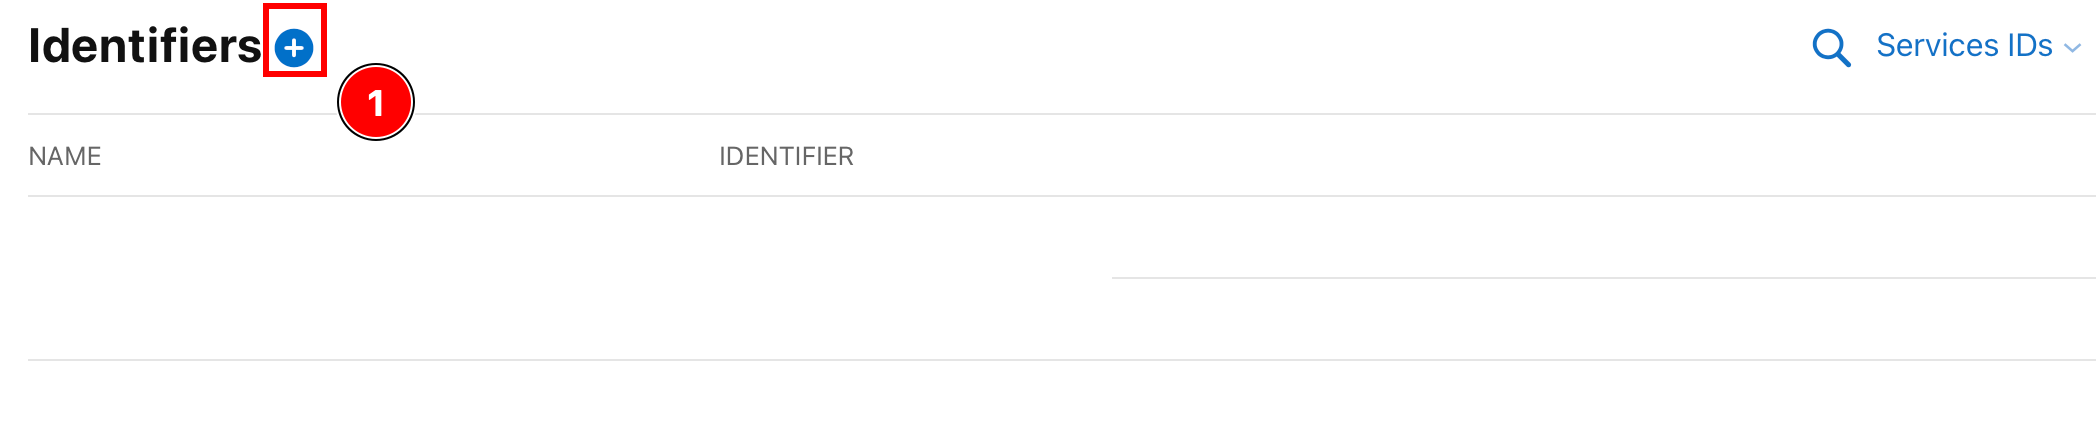
새로운 식별자 만들기
-
플러스 버튼 클릭
-
선택
Servcice IDs및 클릭Continue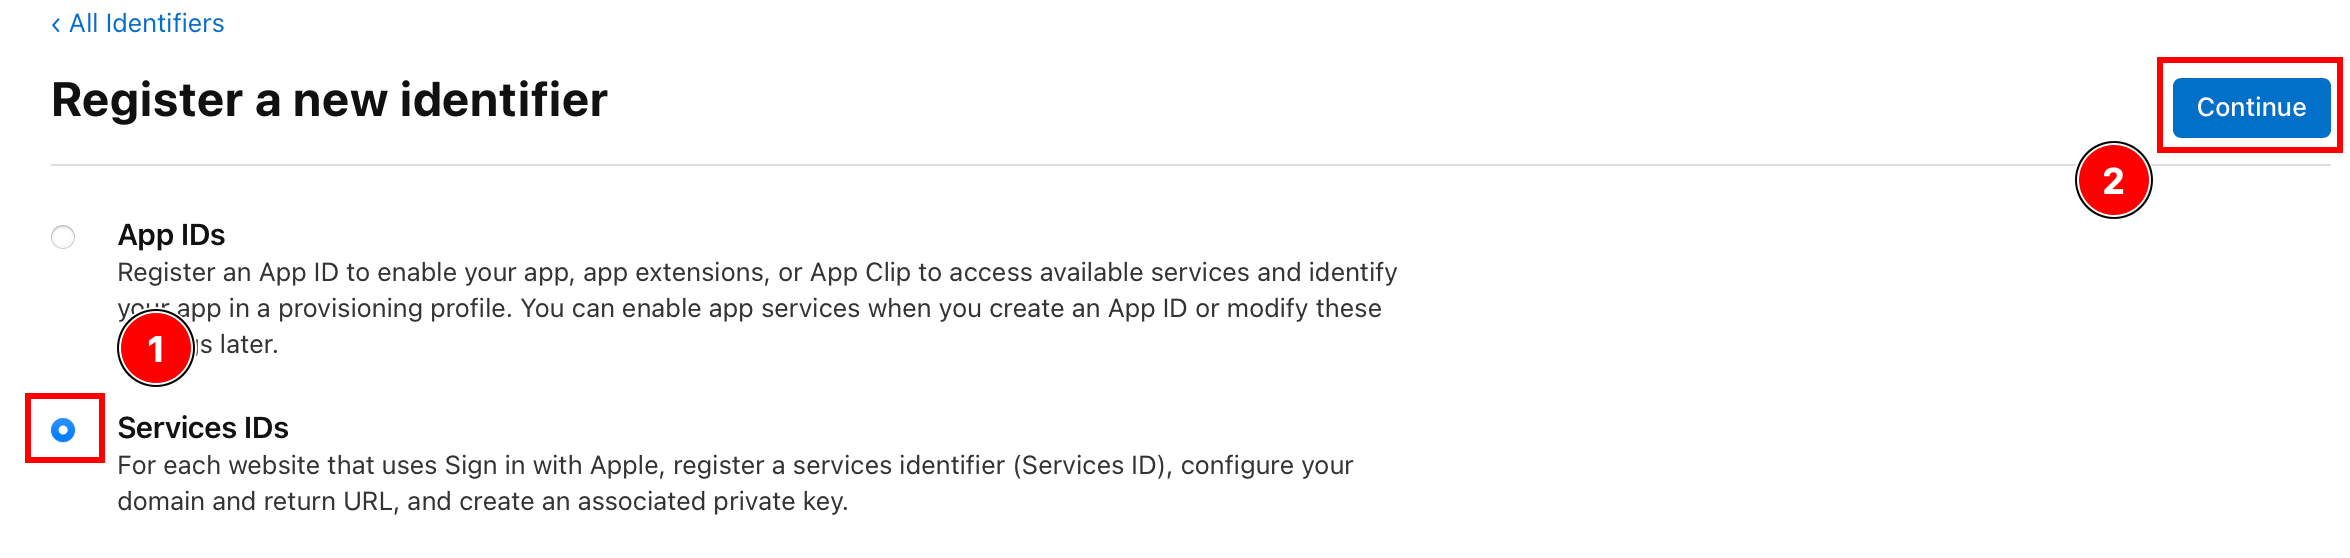
-
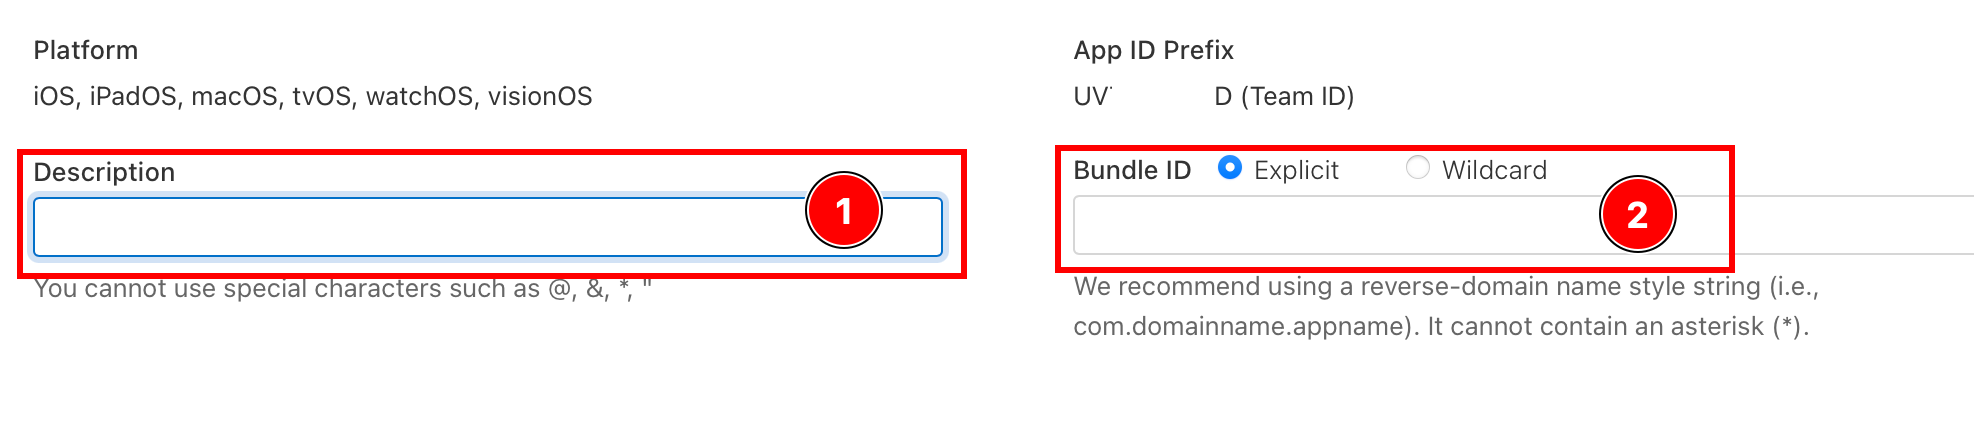
설명과 식별자 입력 후 클릭
Continuie.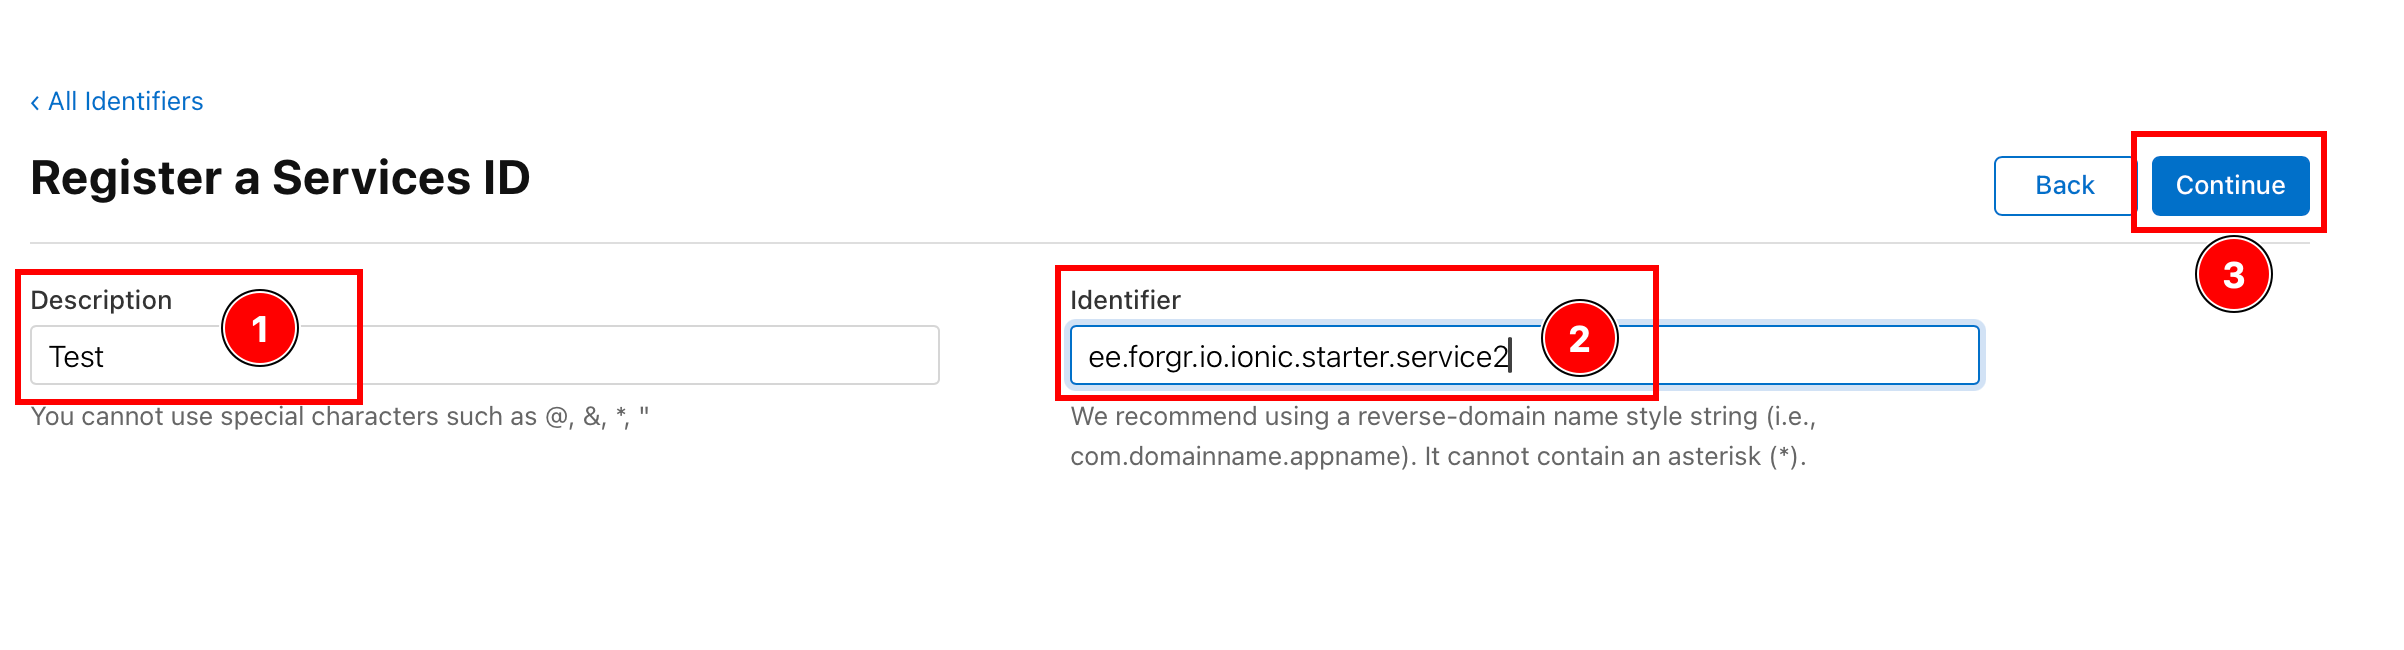
-
세부 사항을 확인하고 클릭하세요.
Register
-
새로 생성된 서비스를 클릭하세요.

-
기능을 활성화하세요.
Sign in with Apple기능을 활성화하는 중입니다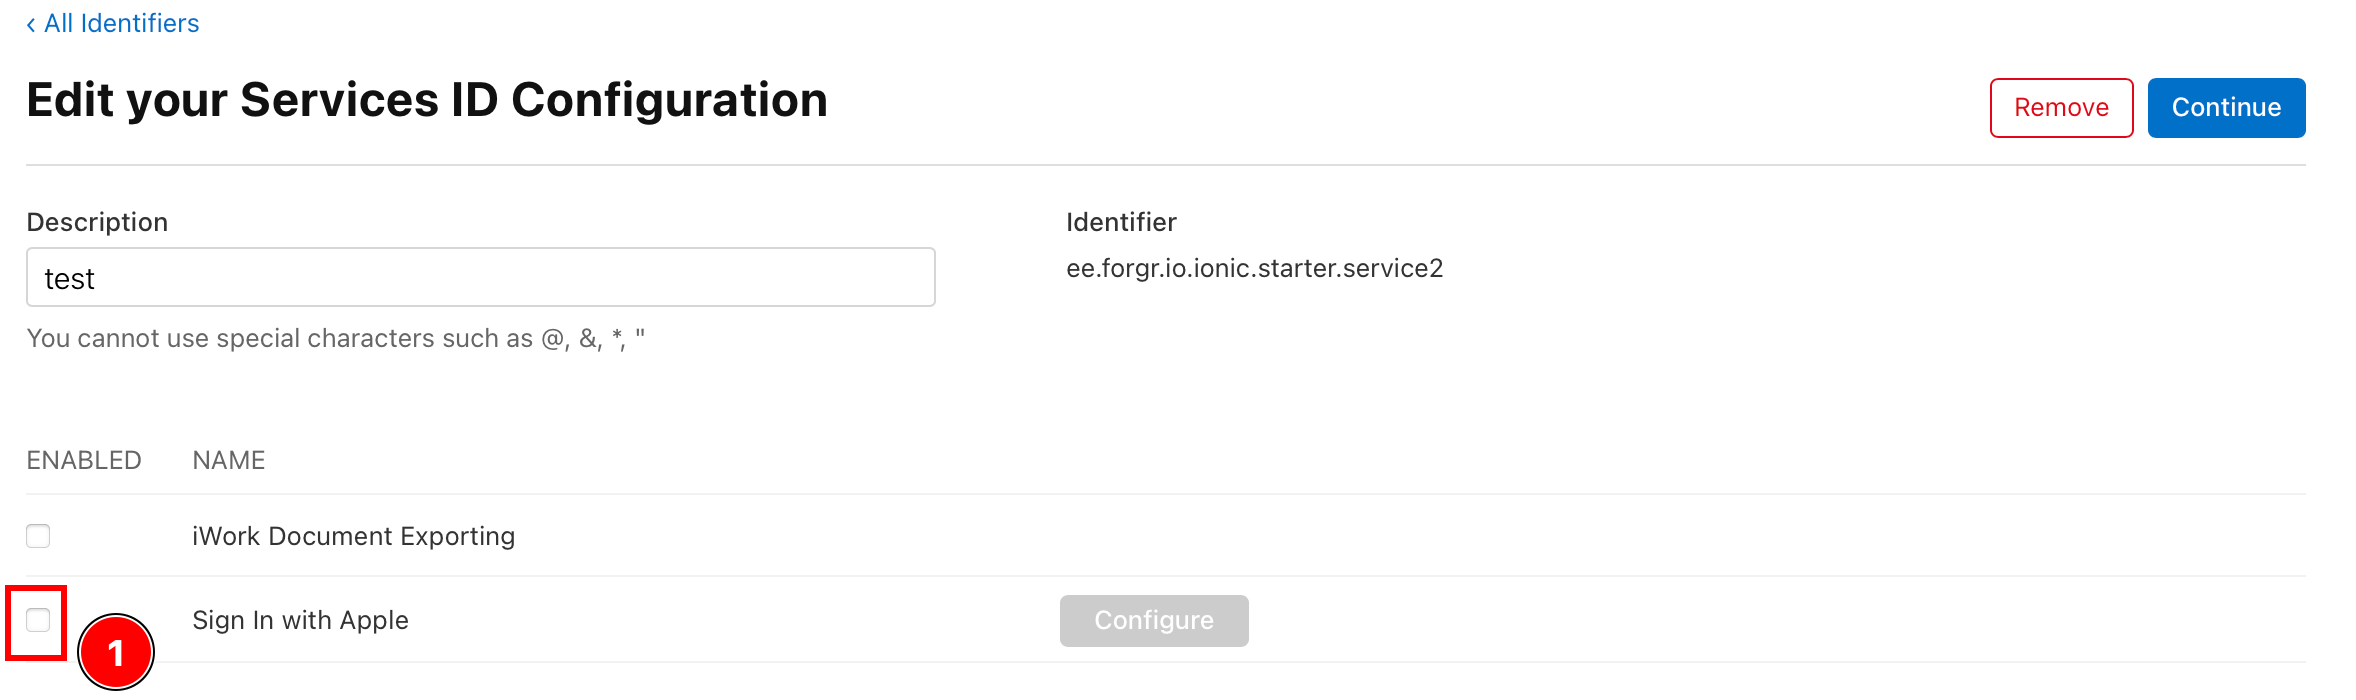
-
Sign in with Apple을 설정하는 중입니다
Sign In with Apple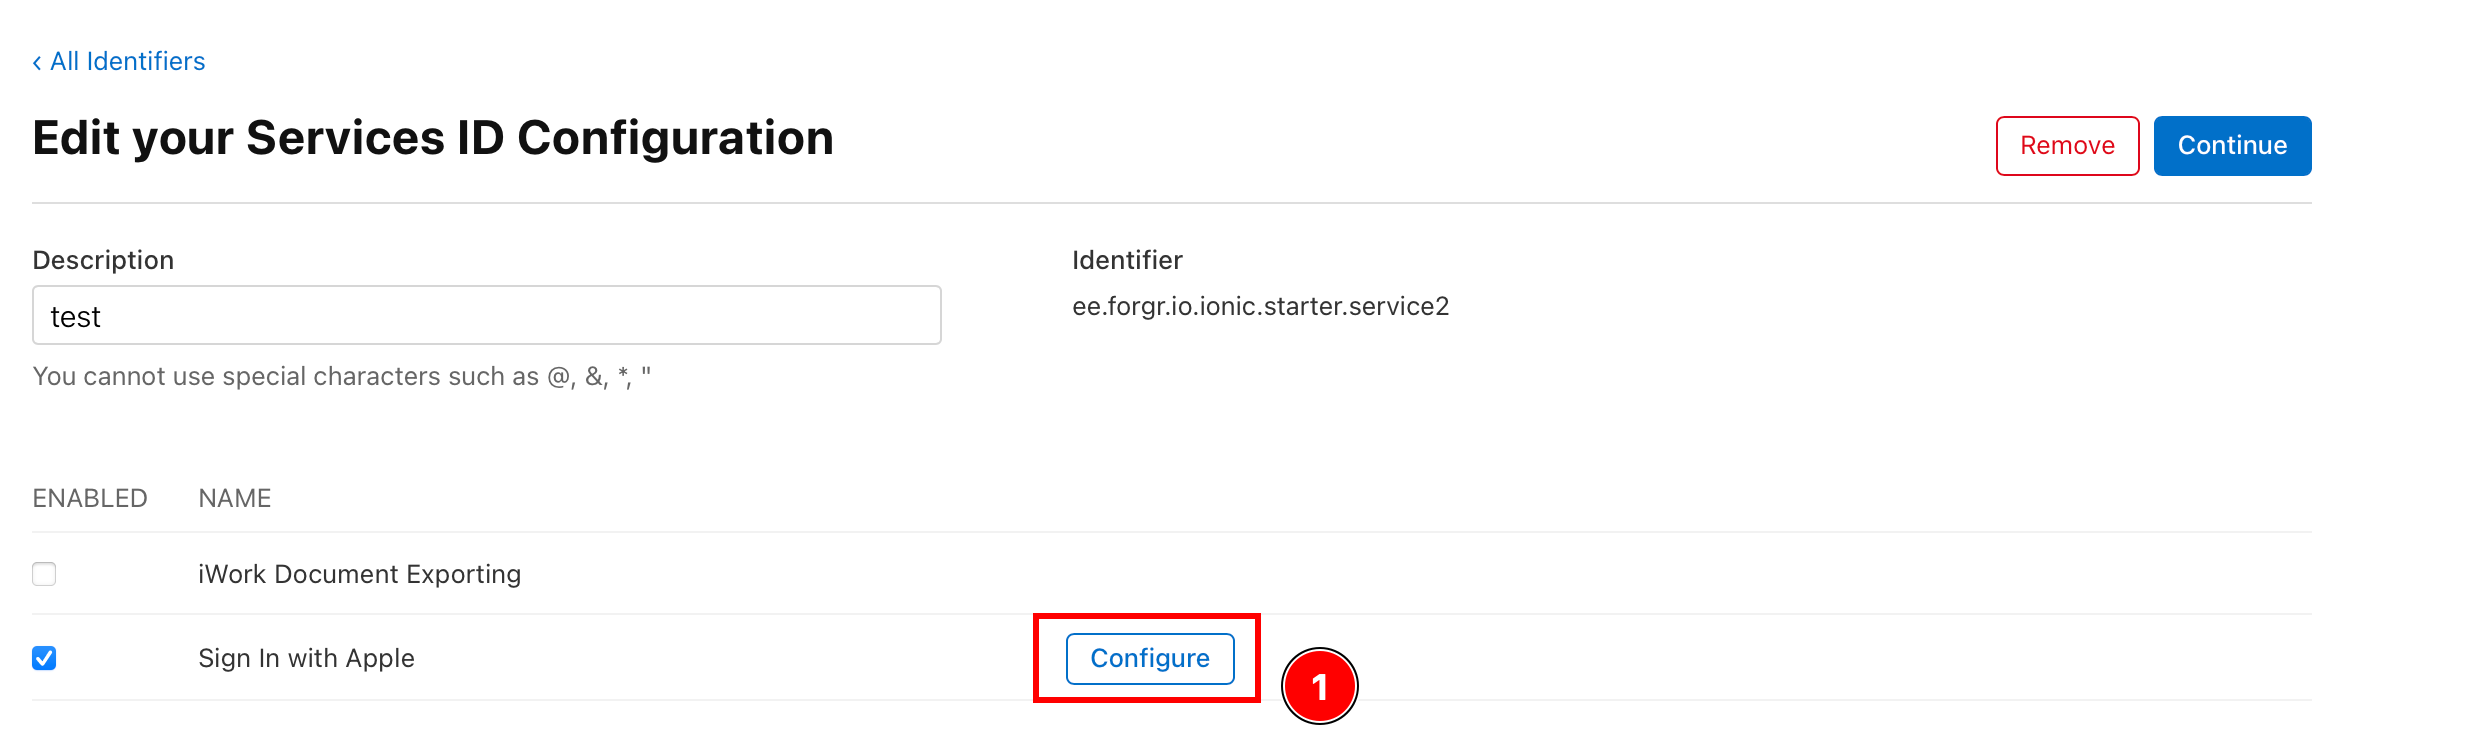
-
이러한 것을 보장하기 위해
Primary App ID는 이전 단계에서 구성된 App ID로 설정되어야 합니다.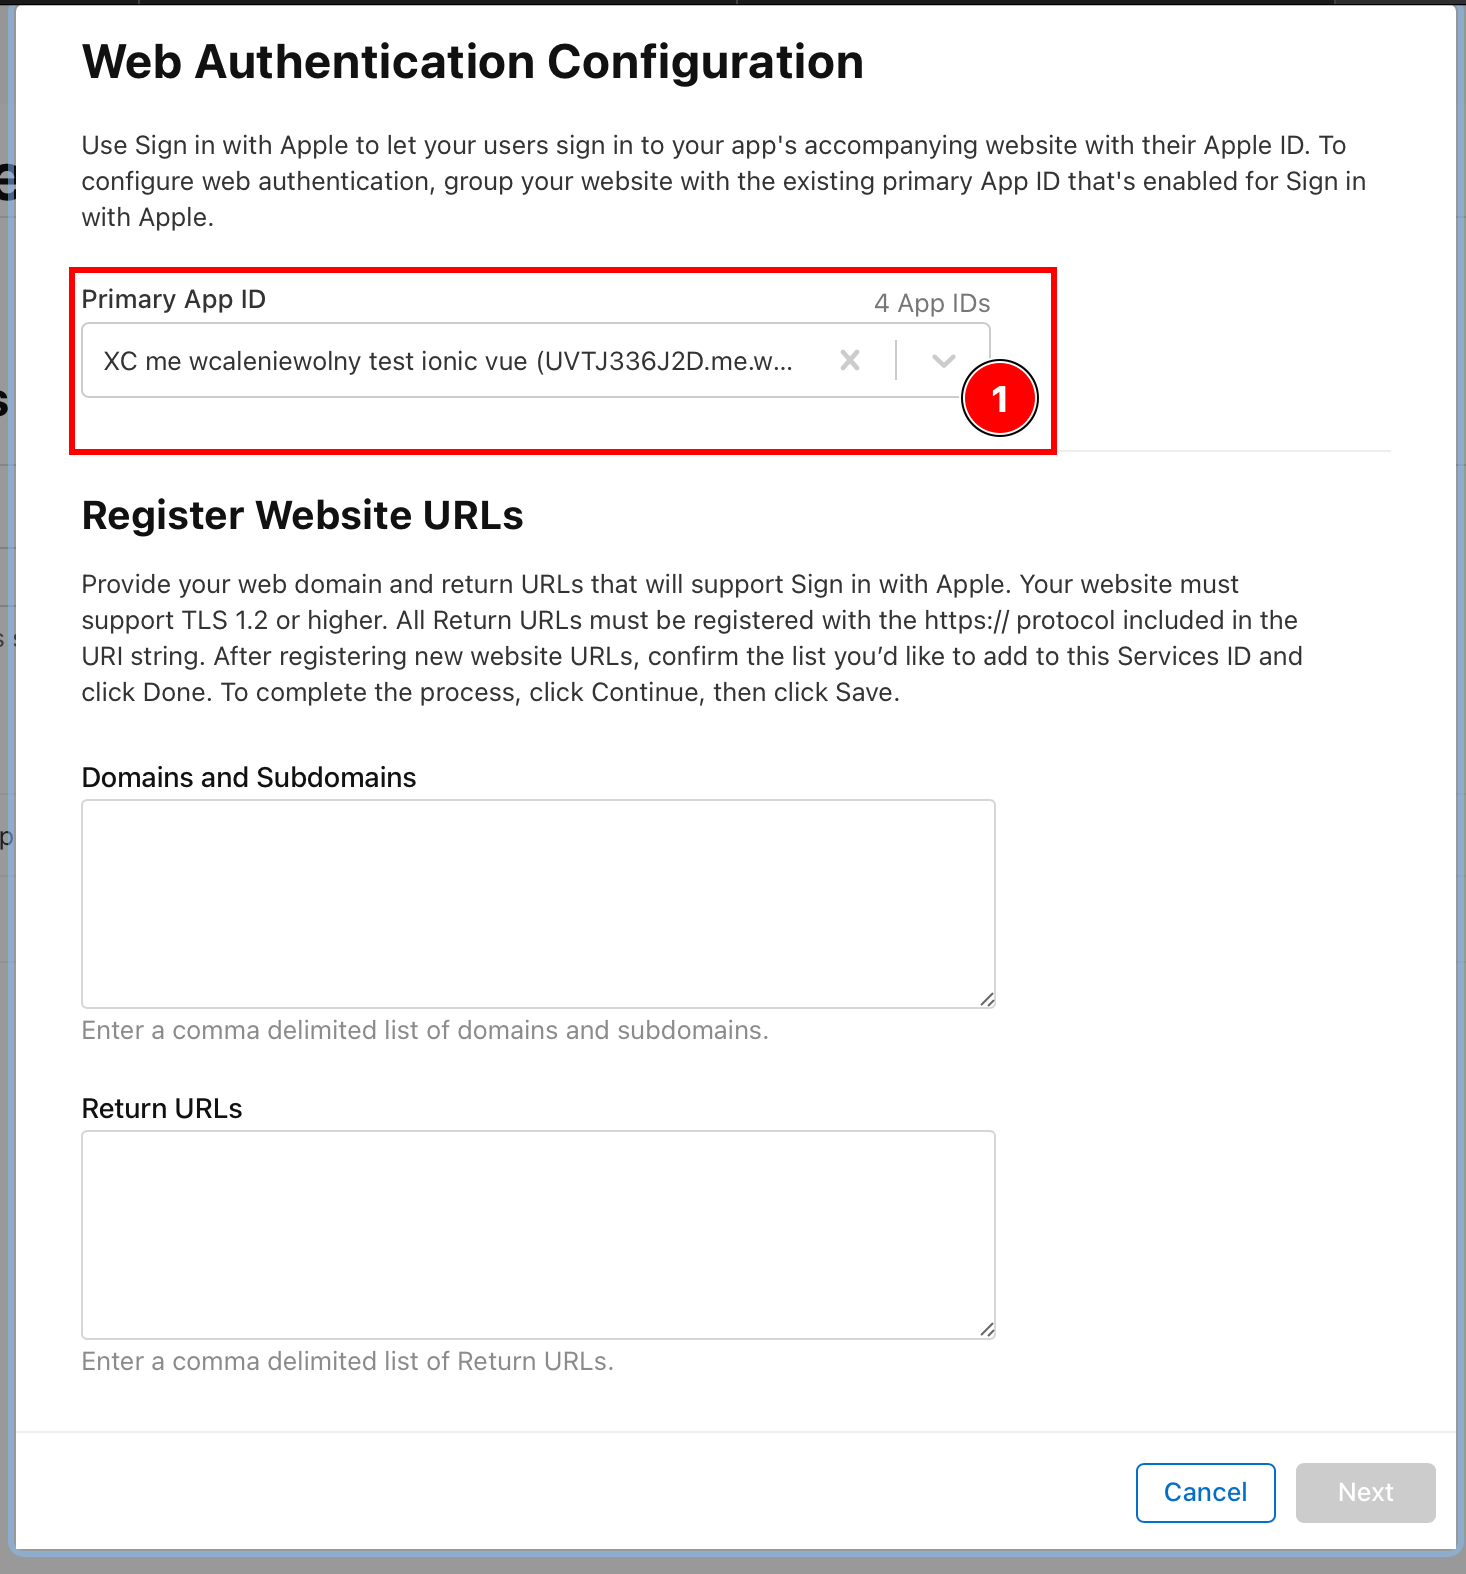
-
백엔드가 호스팅 될 도메인을 추가하세요.
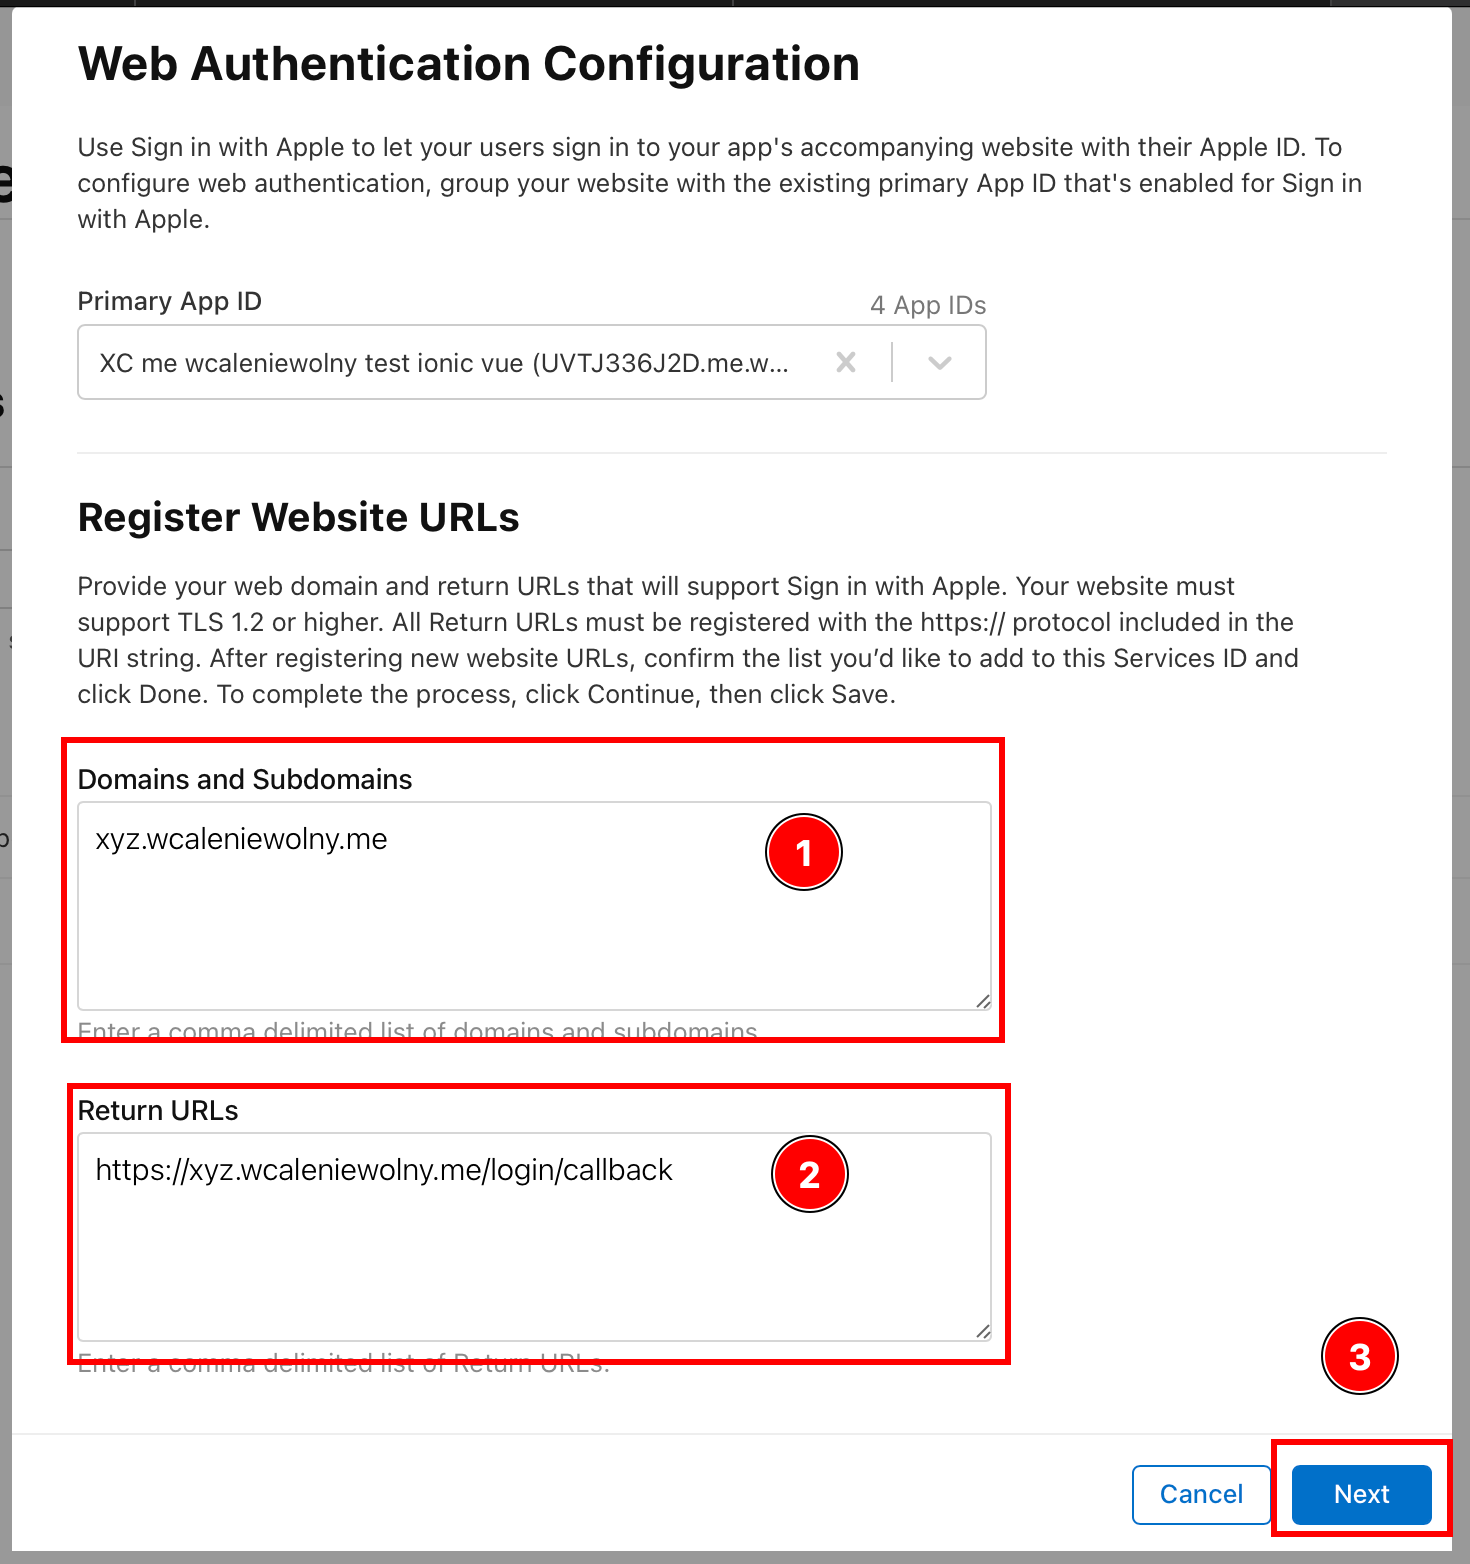
-
데이터를 확인하고 클릭하세요.
Done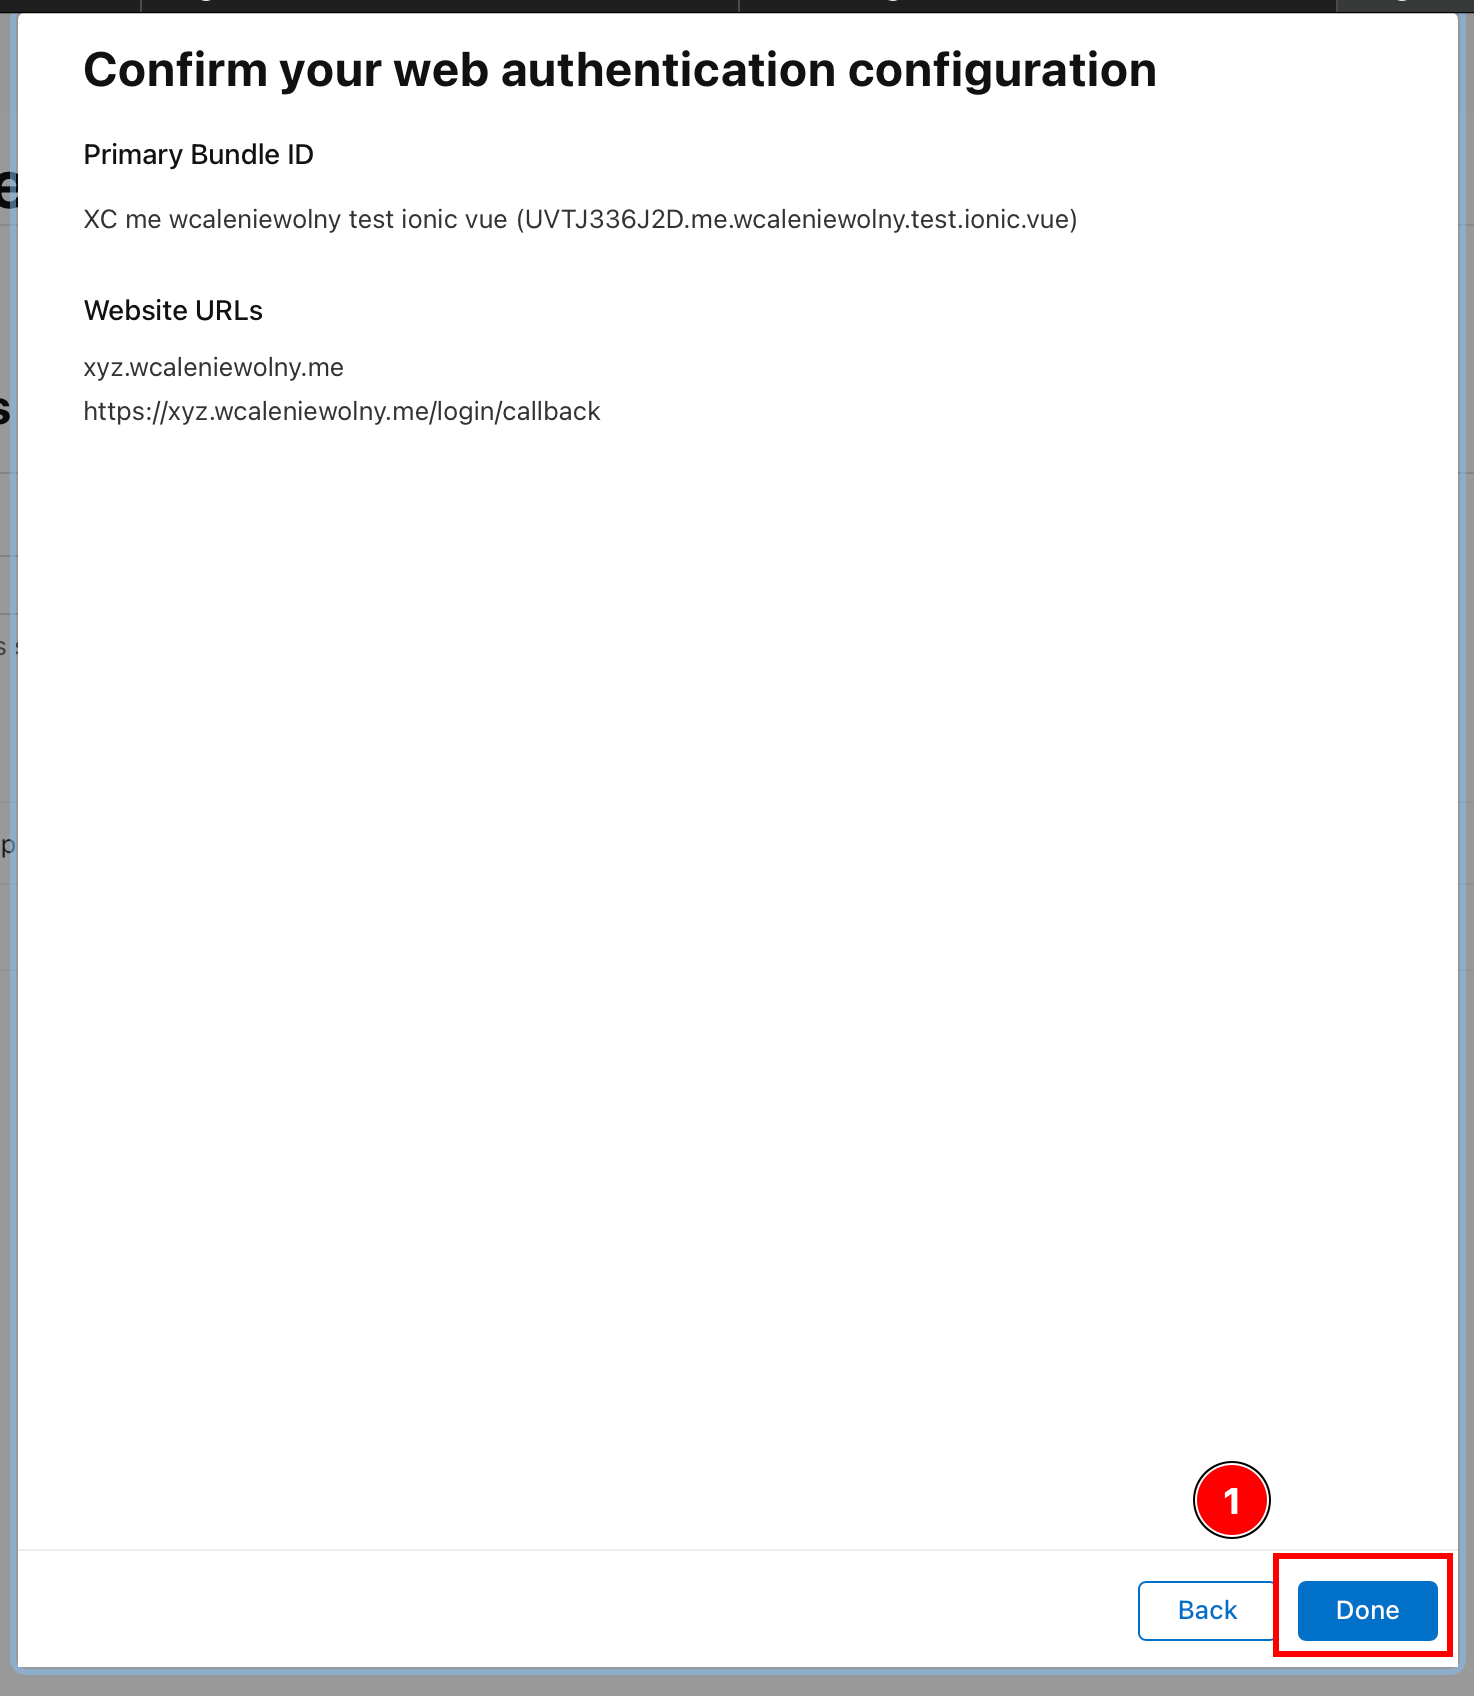
-
서비스 설정을 위해
Continue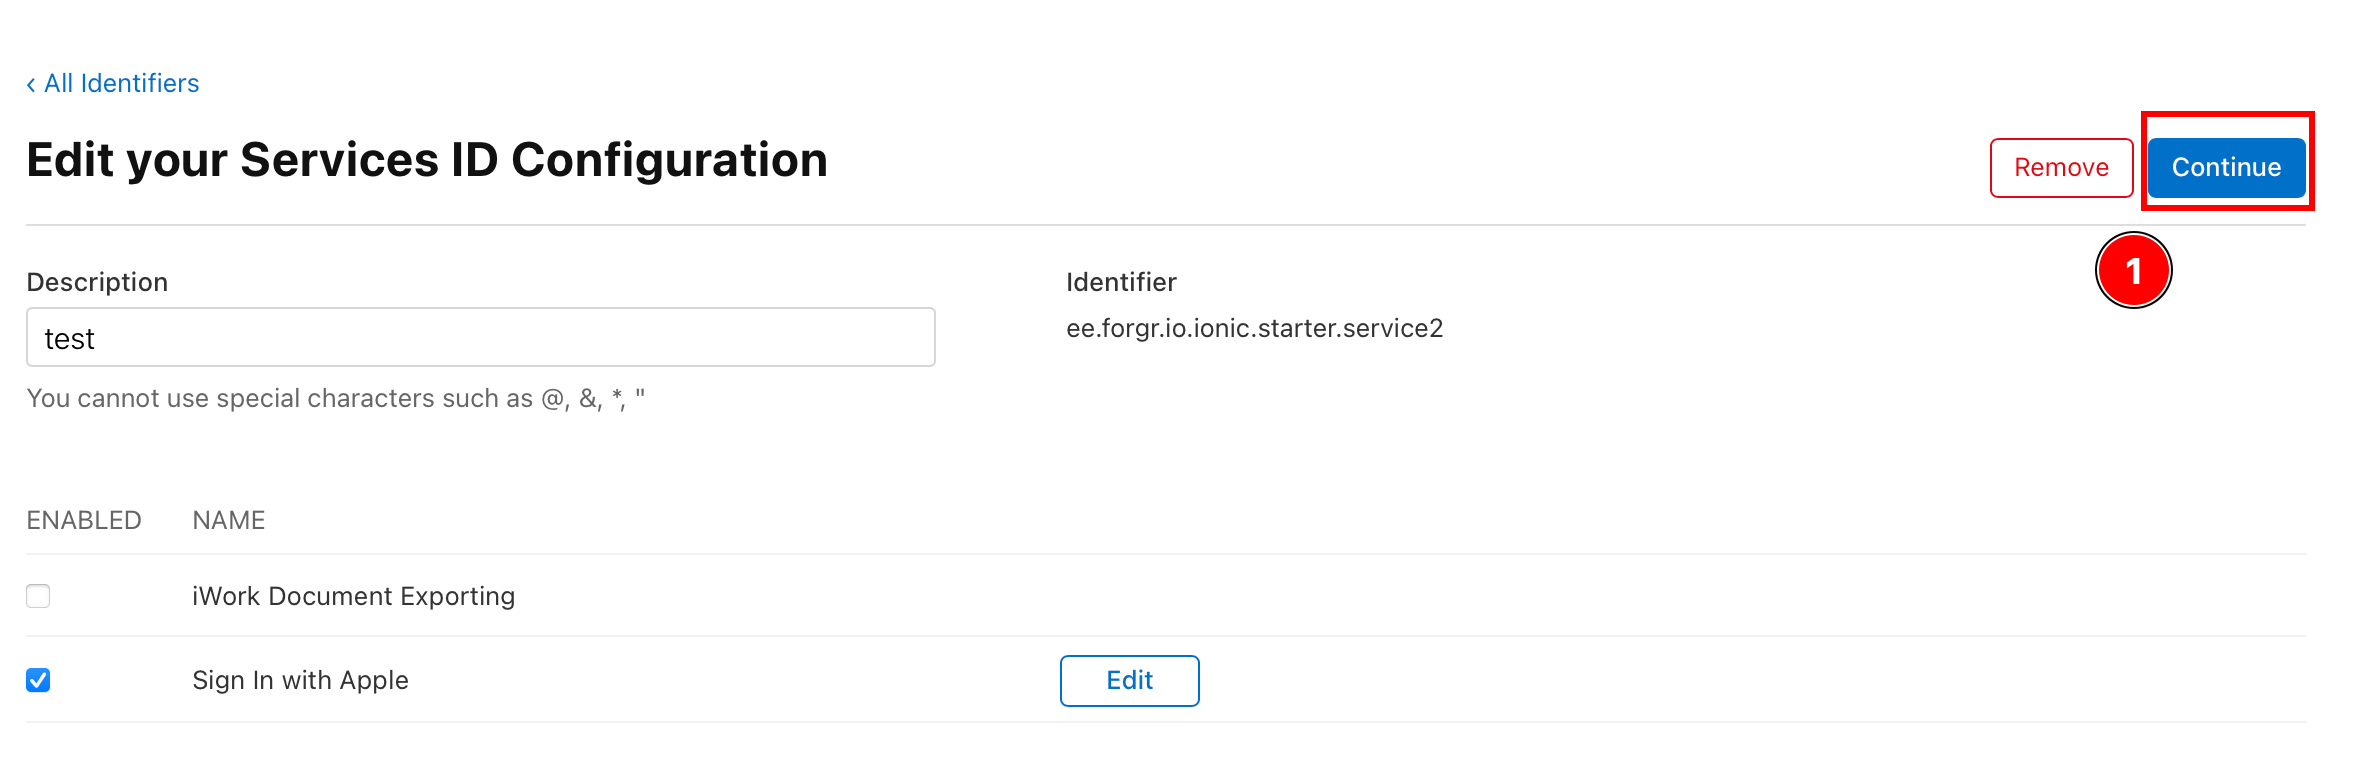
-
설정 완료를 위해
Save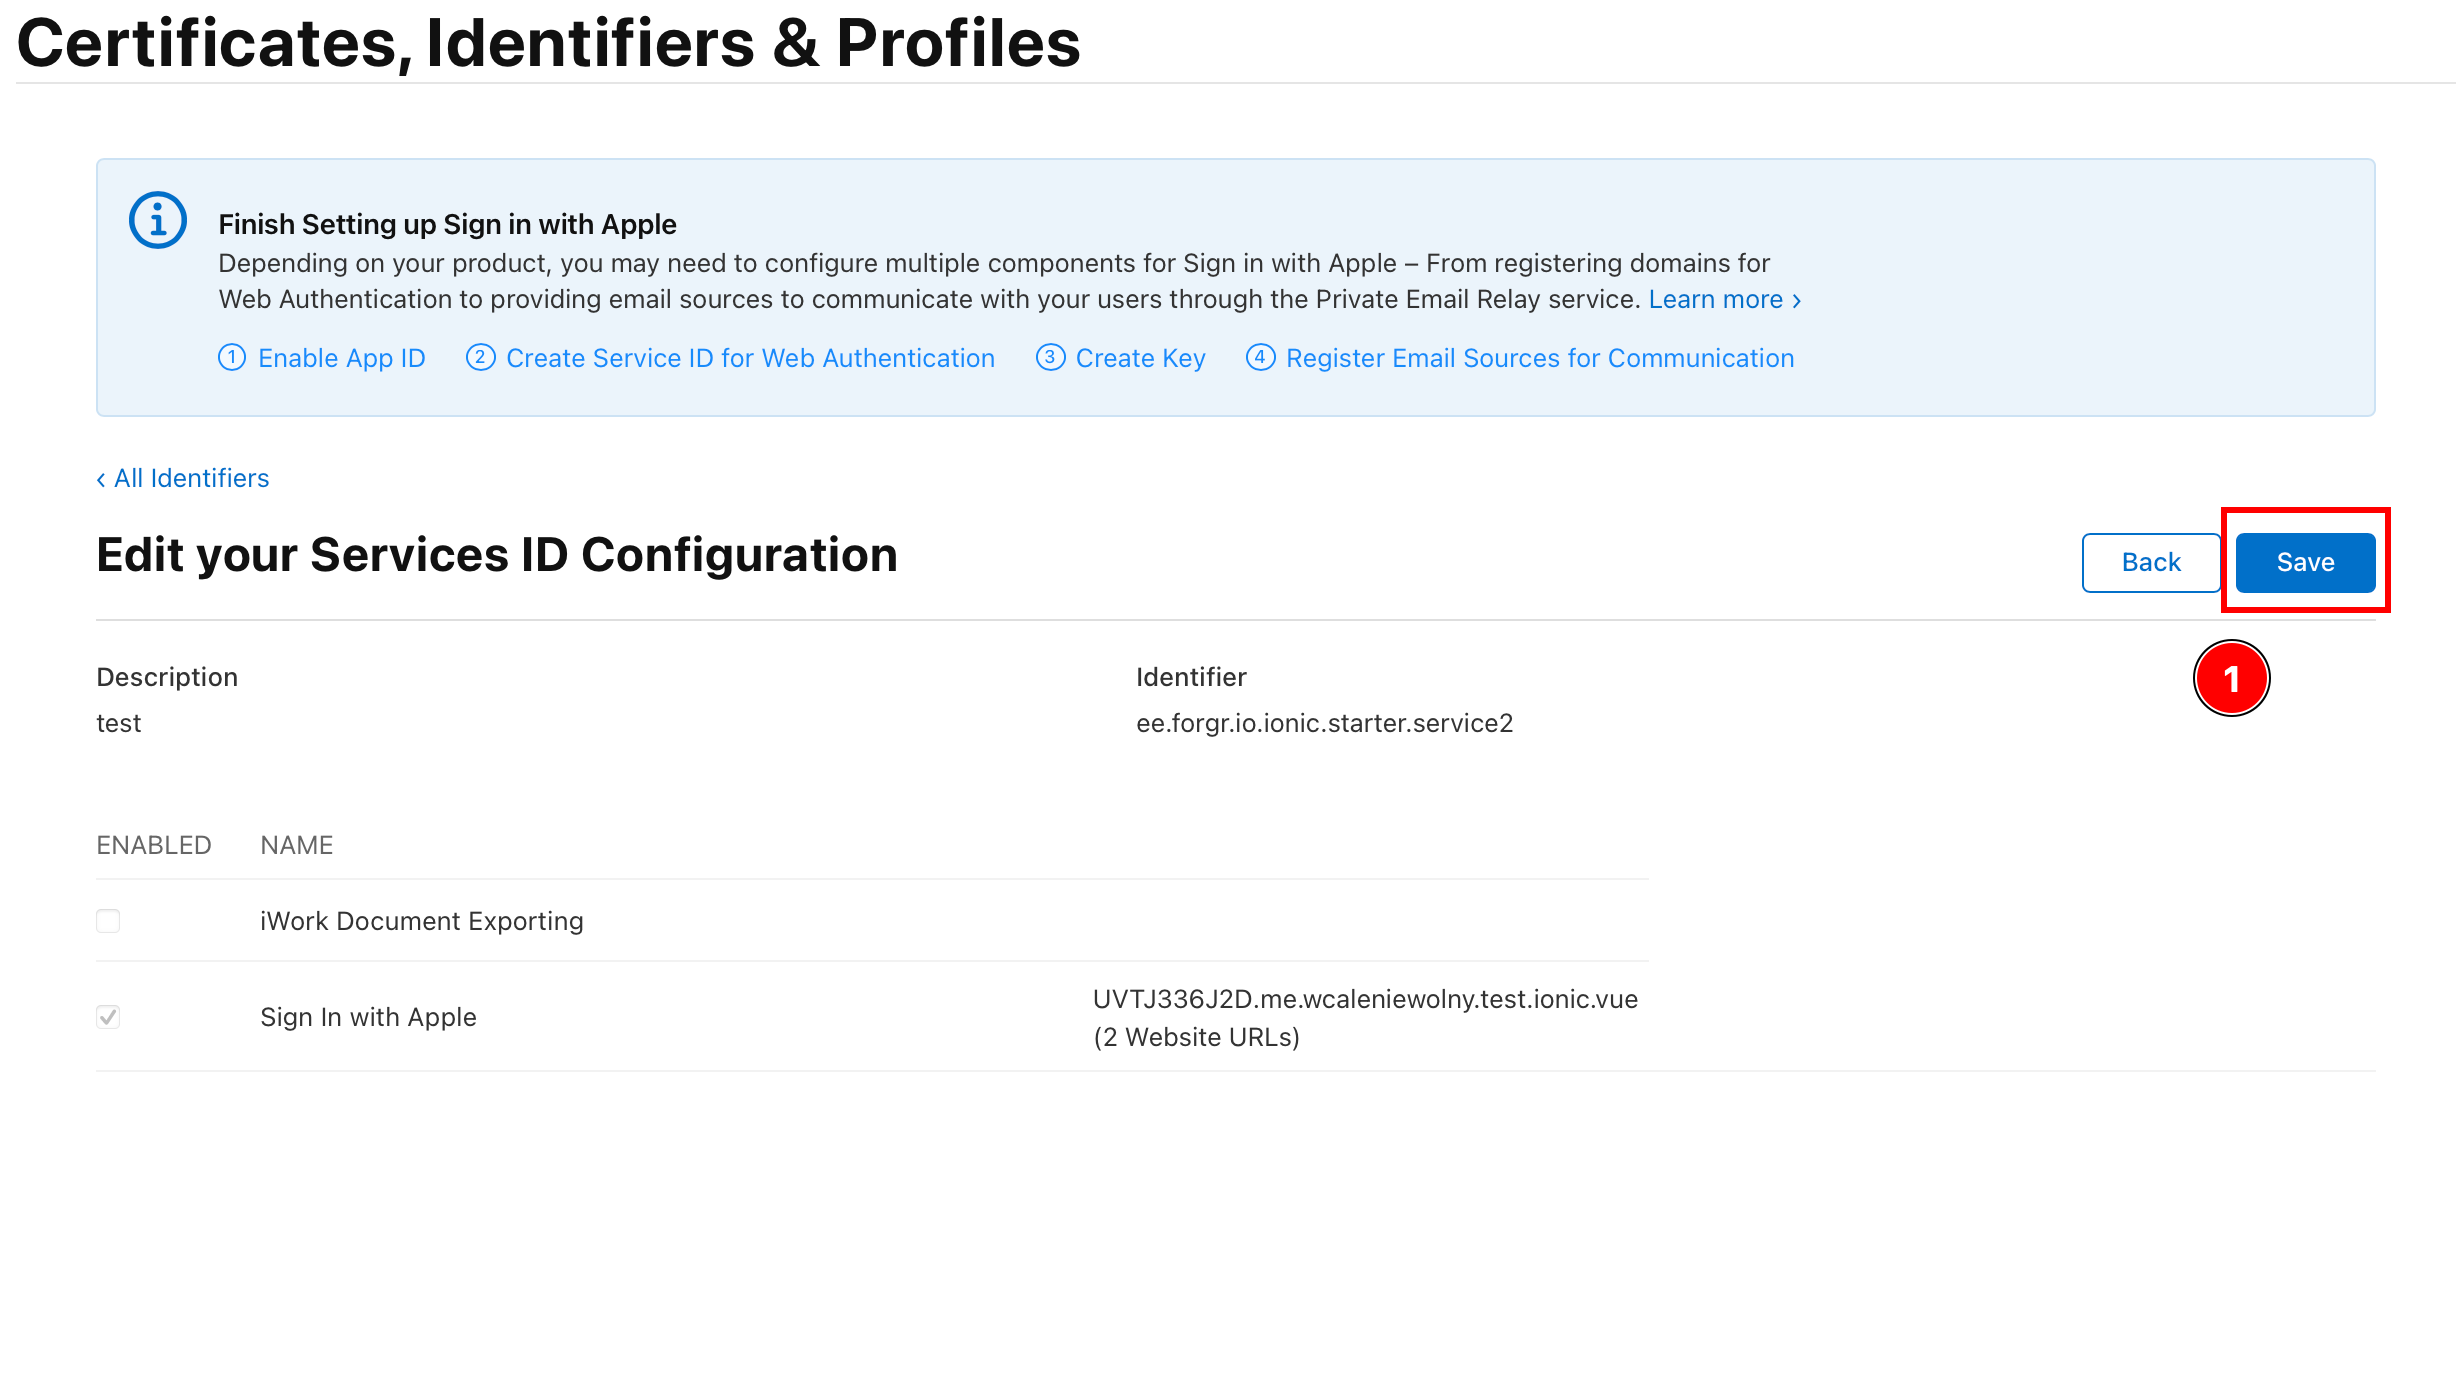
-
키 생성 중입니다.
키 생성을 위한 섹션입니다.-
모두로 돌아가기
All Identifiers
-
설정 완료를 위해 클릭하세요.
Keys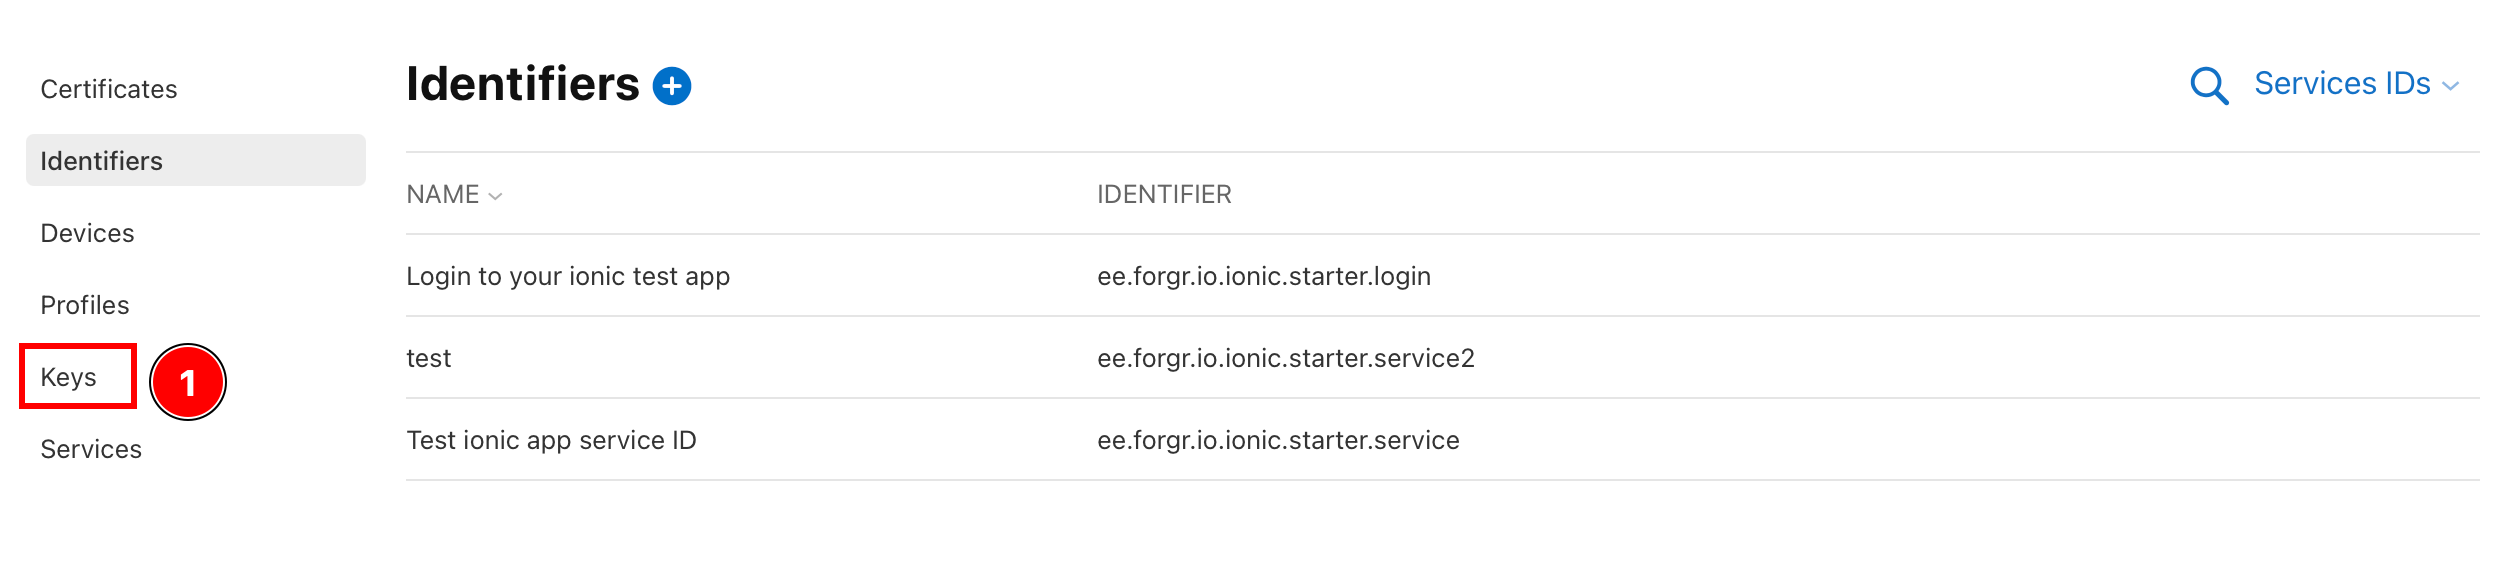
-
플러스 아이콘을 클릭하세요.
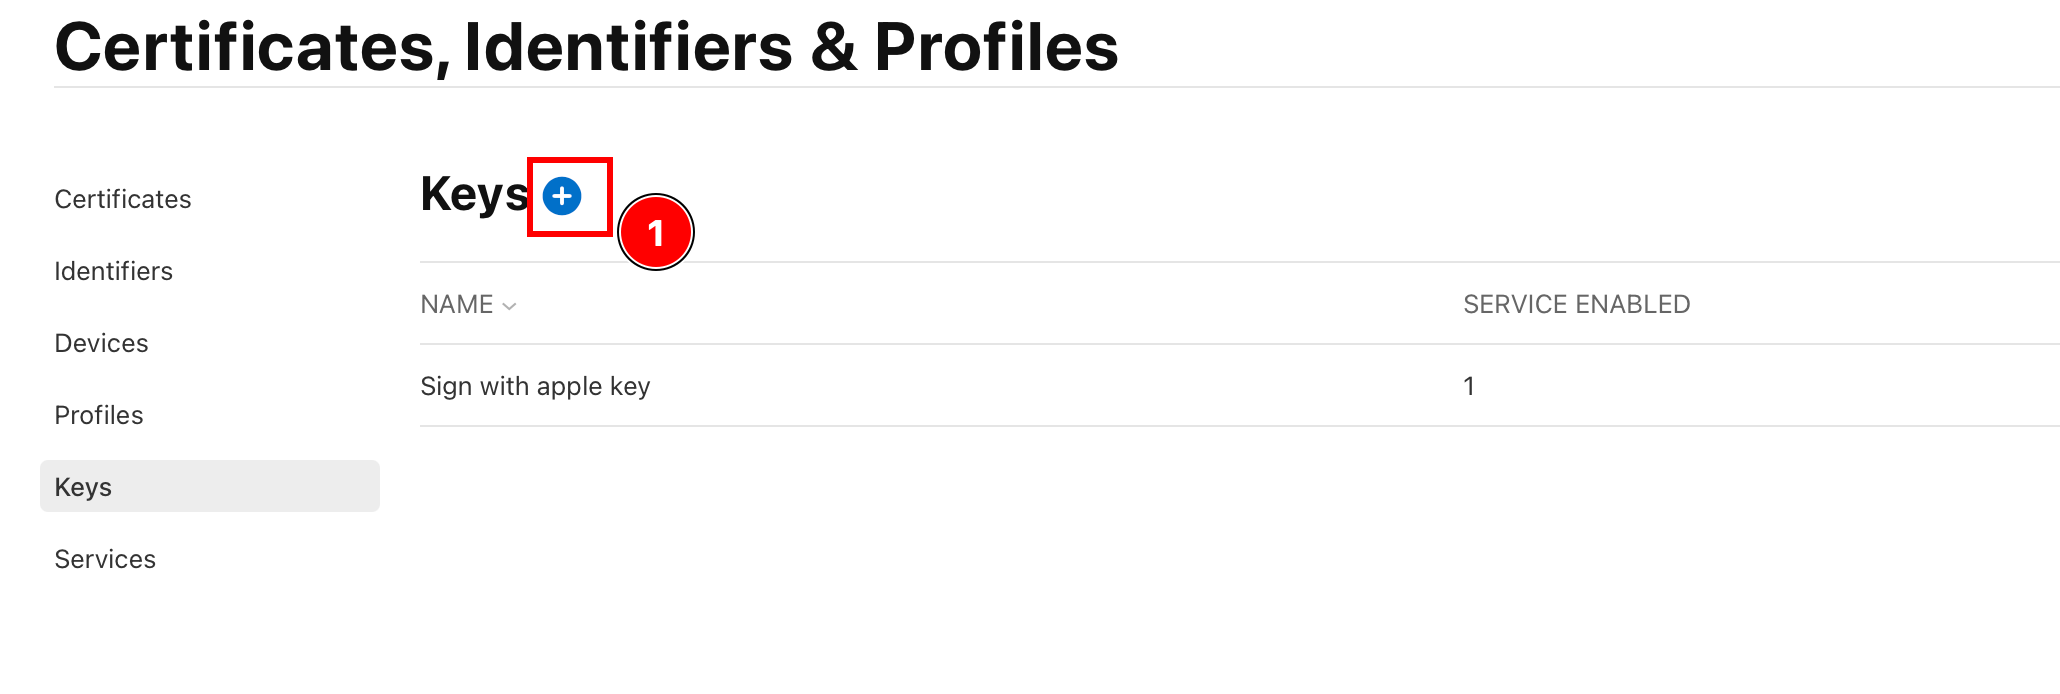
-
키 이름을 입력하세요.

-
클릭
Sign in with AppleApple Sign in 키를 사용하도록 설정하고 구성하는 방법Configure
-
__CAPGO_KEEP_0__
Save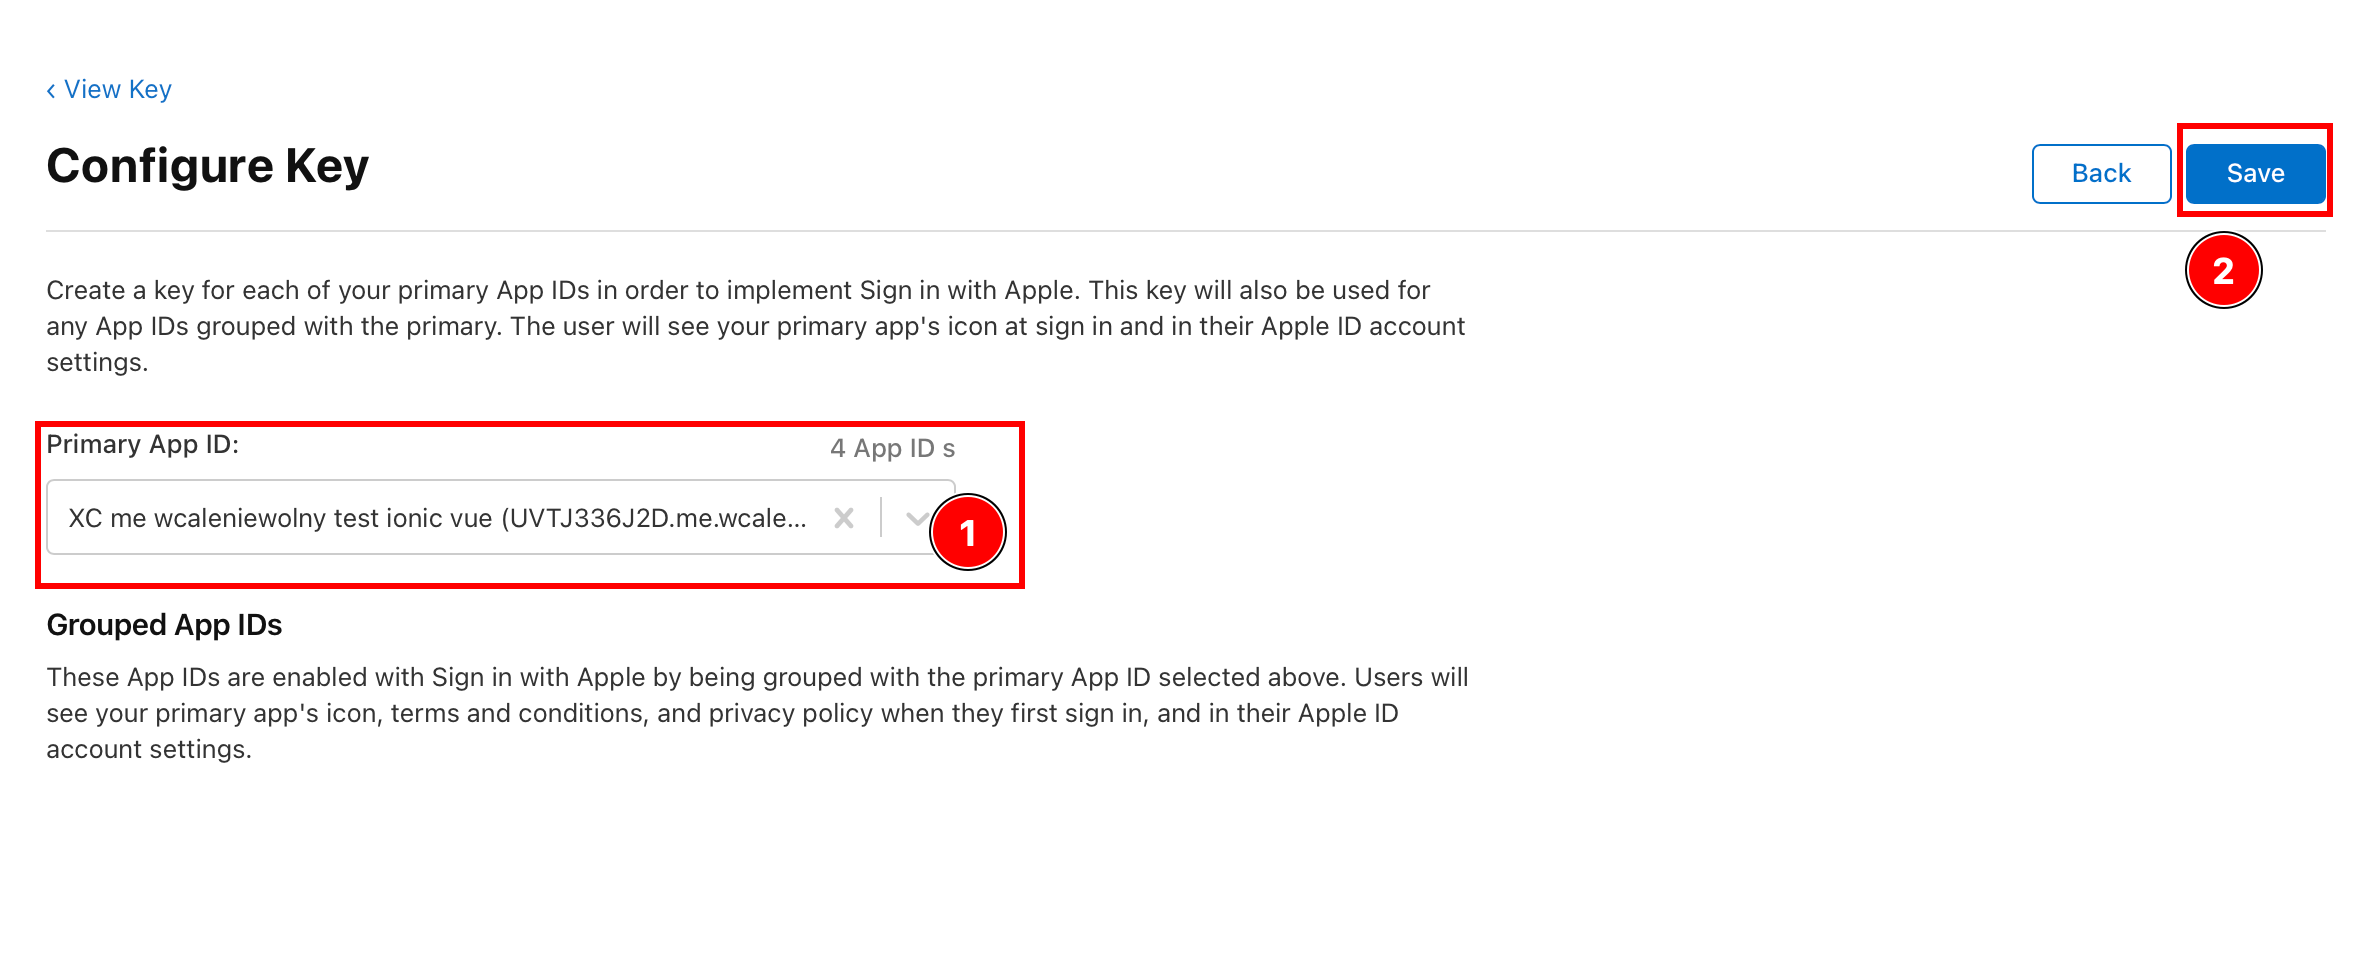
-
클릭하여
Continue
-
클릭하여
Register
-
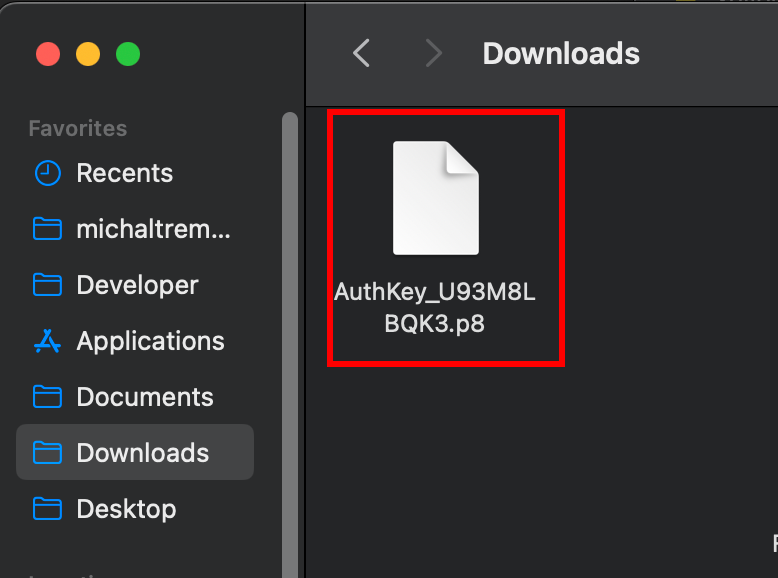
키 ID를 복사하고 키를 다운로드하세요.
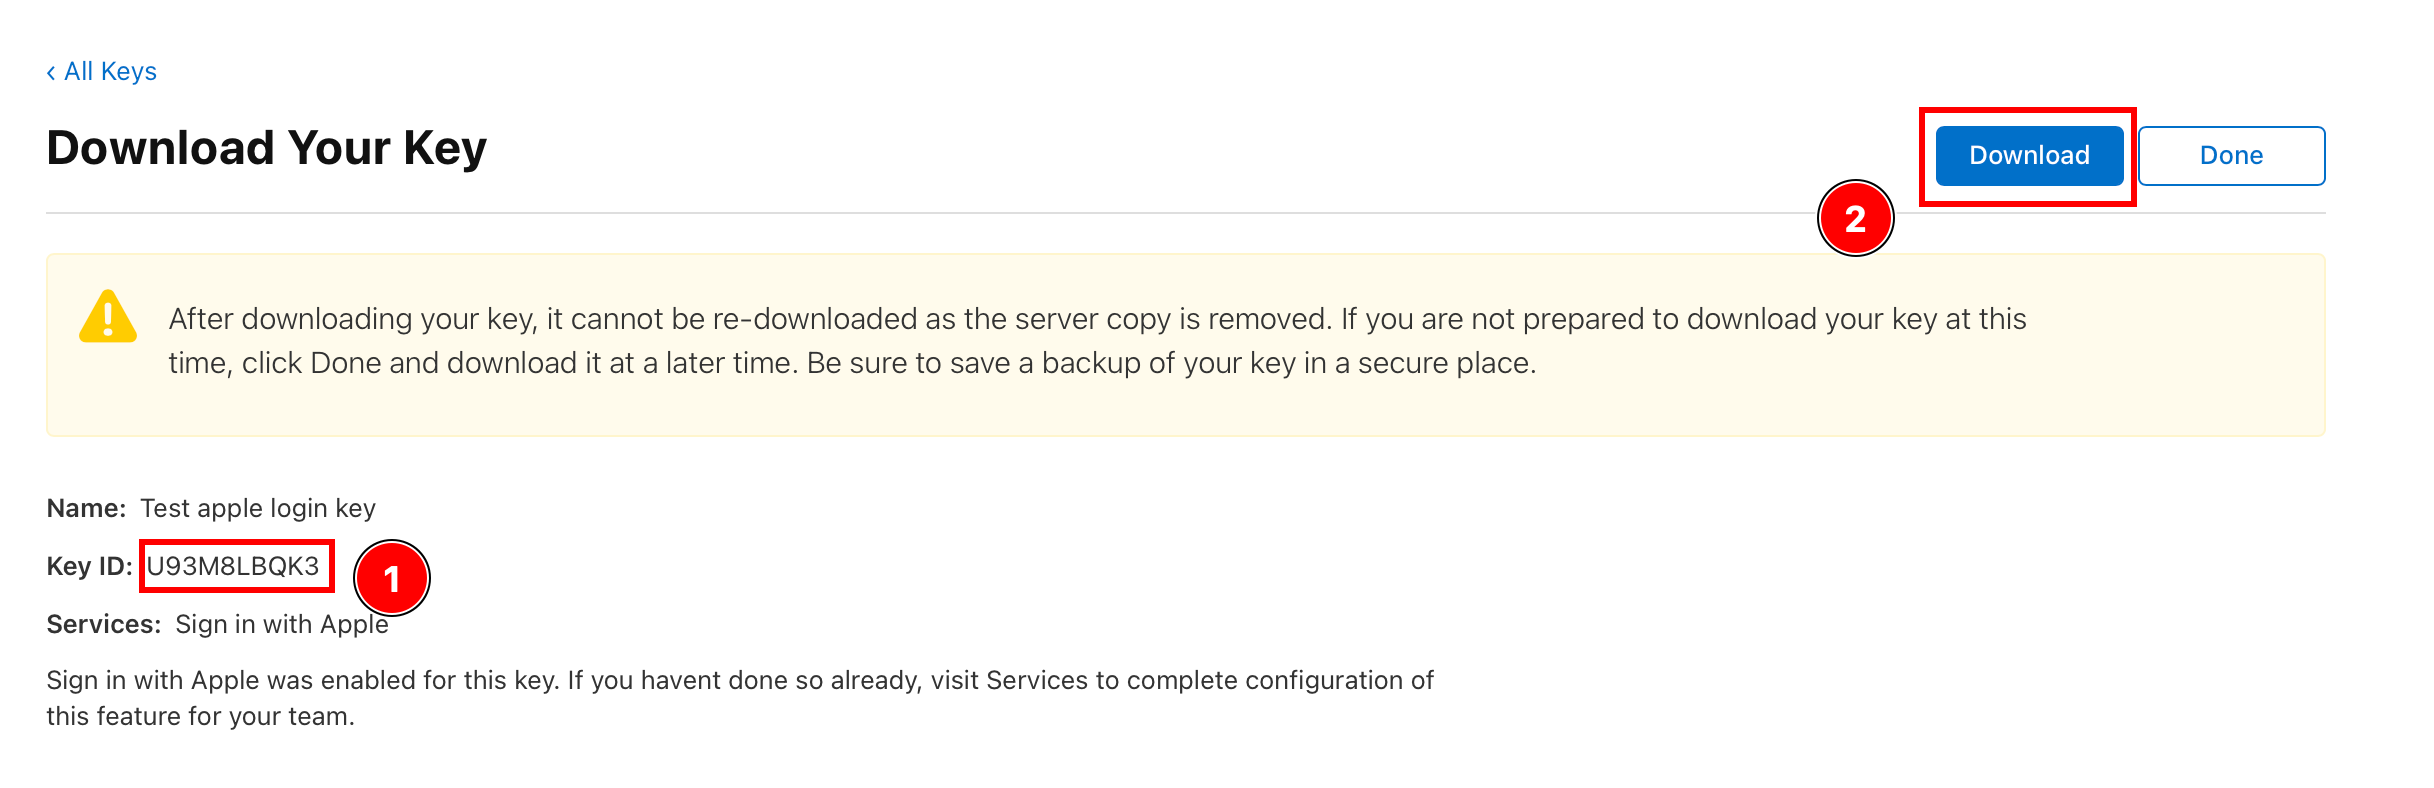
-
다운로드 한 키를 찾으시고 백엔드 폴더에 저장하세요.
팀 ID를 얻는 방법
팀 ID를 얻는 방법사용하기 위해 Login with Apple 안드로이드에서 사용하기 위해 Team ID. 백엔드에서 사용됩니다.
-
팀 ID를 얻으려면 이 웹사이트로 가세요 __CAPGO_KEEP_0__
-
__CAPGO_KEEP_0__
Team ID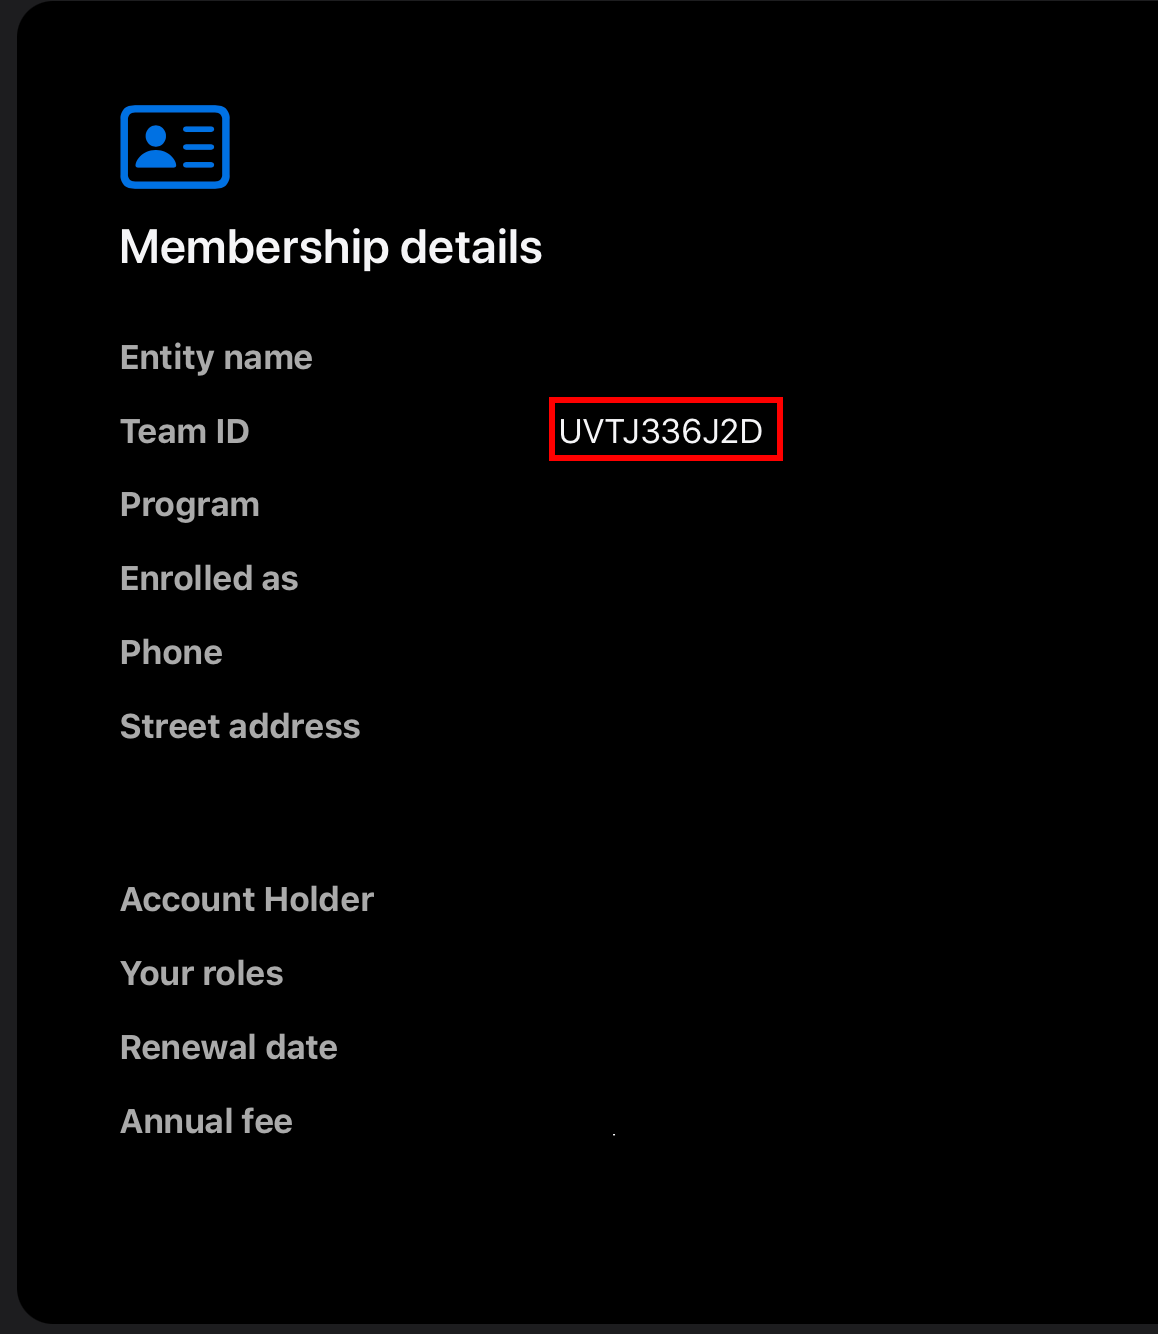
__CAPGO_KEEP_0__
__CAPGO_KEEP_0____CAPGO_KEEP_0__ Redirect back to the app__CAPGO_KEEP_0__
- __CAPGO_KEEP_0__
AndroidManifest.xml-
__CAPGO_KEEP_0__
AndroidStudio
-
__CAPGO_KEEP_0__
MainActivity__CAPGO_KEEP_0__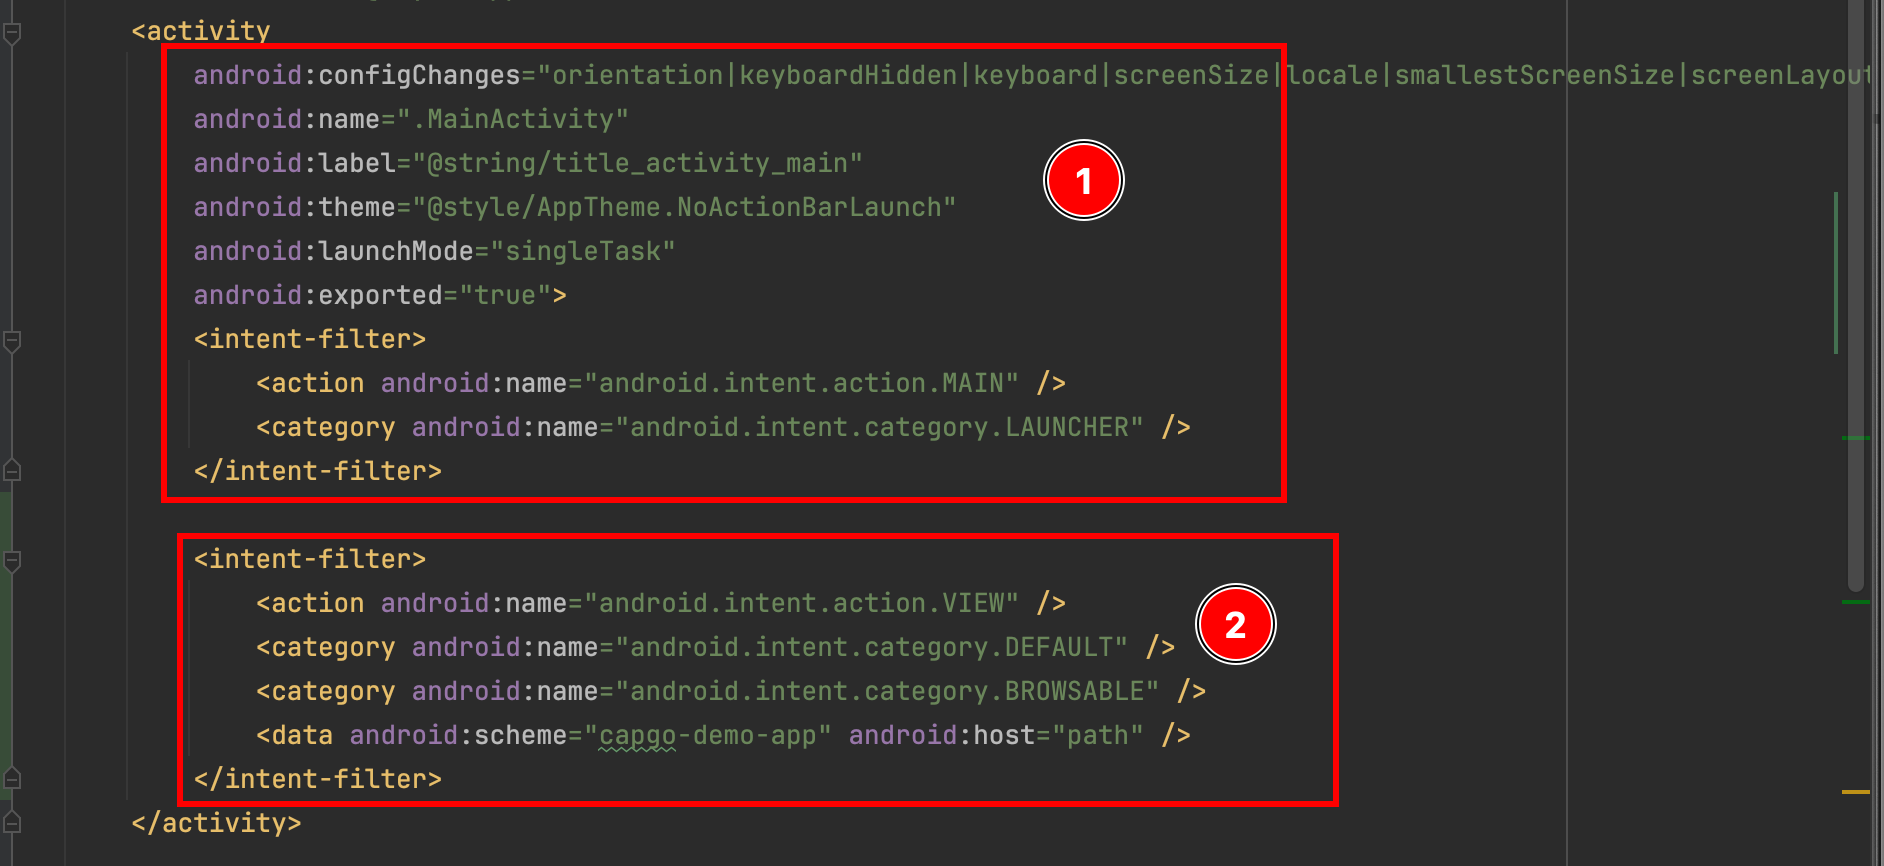 <intent-filter><action android:name="android.intent.action.VIEW" /><category android:name="android.intent.category.DEFAULT" /><category android:name="android.intent.category.BROWSABLE" /><data android:scheme="capgo-demo-app" android:host="path" /></intent-filter>
-
- 수정하기
MainActivity-
__CAPGO_KEEP_0__를 열어주세요
MainActivity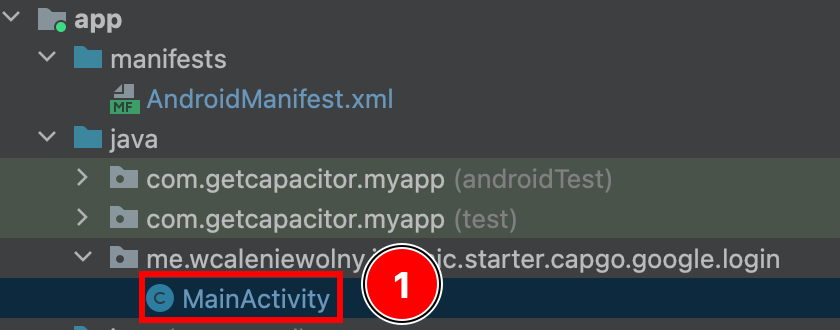
-
다음과 같이 code를 추가하세요.
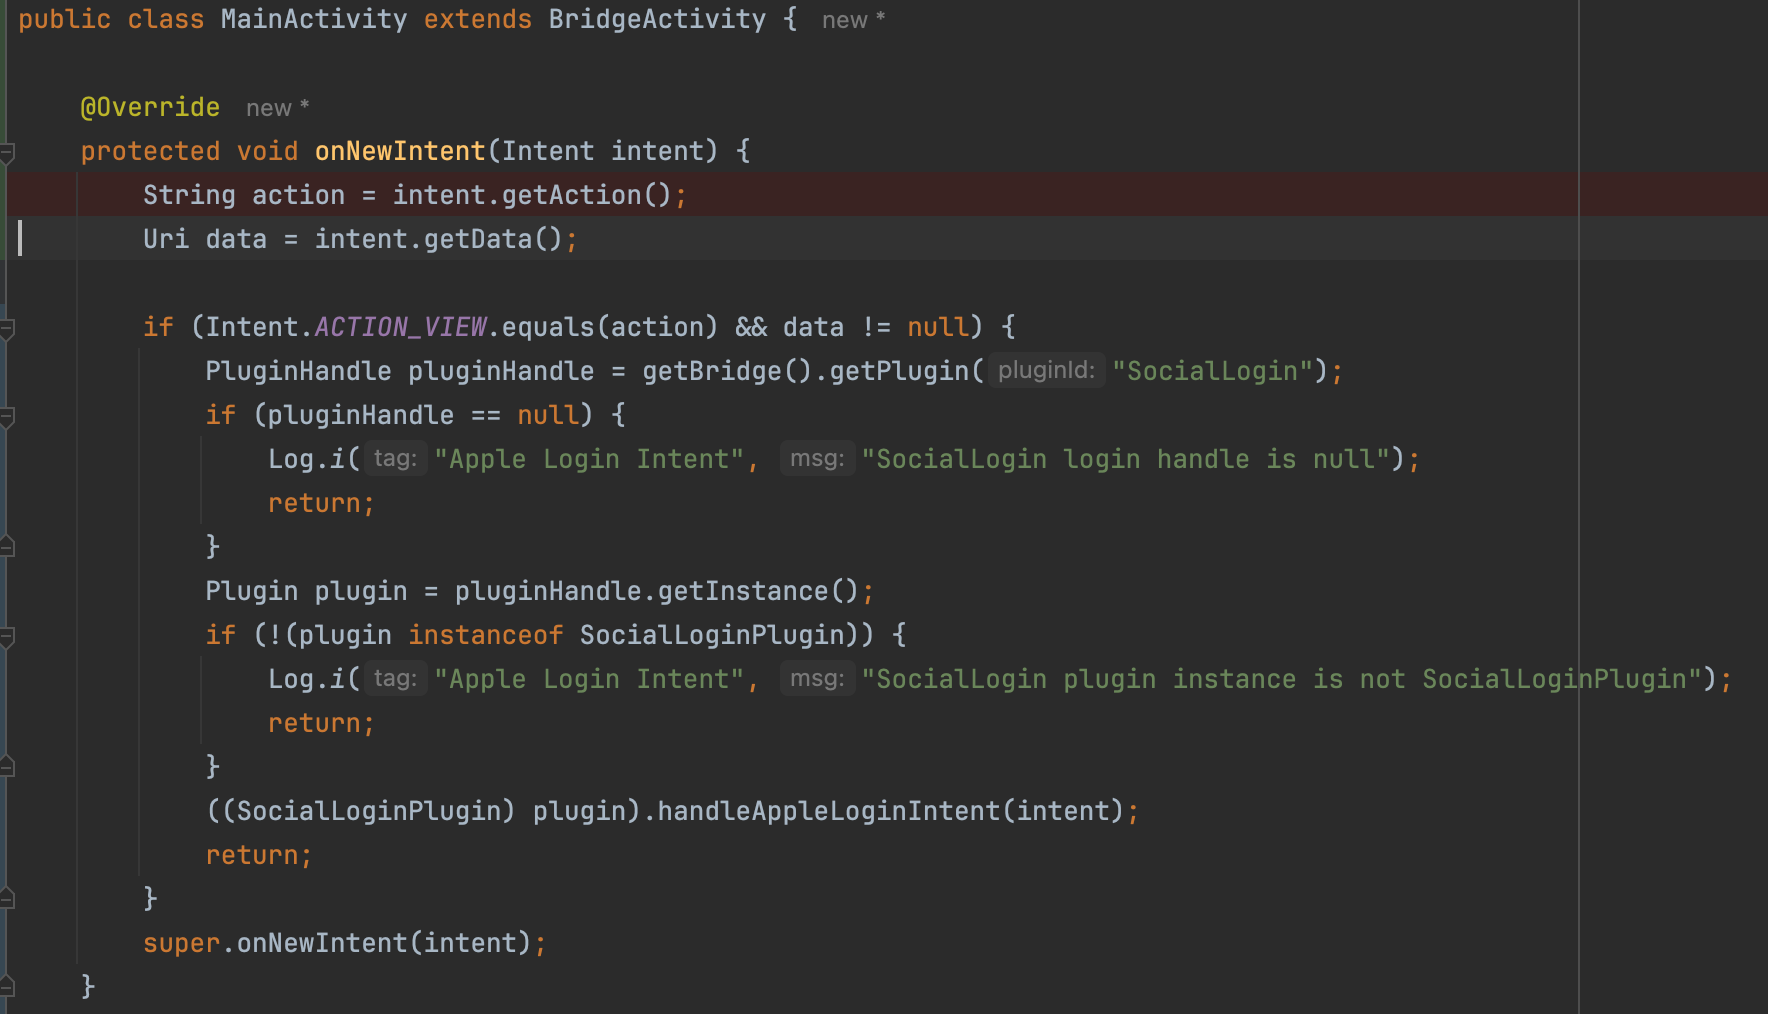 @Overrideprotected void onNewIntent(Intent intent) {String action = intent.getAction();Uri data = intent.getData();if (Intent.ACTION_VIEW.equals(action) && data != null) {PluginHandle pluginHandle = getBridge().getPlugin("SocialLogin");if (pluginHandle == null) {Log.i("Apple Login Intent", "SocialLogin login handle is null");return;}Plugin plugin = pluginHandle.getInstance();if (!(plugin instanceof SocialLoginPlugin)) {Log.i("Apple Login Intent", "SocialLogin plugin instance is not SocialLoginPlugin");return;}((SocialLoginPlugin) plugin).handleAppleLoginIntent(intent);return;}super.onNewIntent(intent);}
-
백엔드 설정
백엔드 설정안드로이드에는 백엔드가 필요하지만 백엔드를 구성하면 IOS에도 영향을 미칩니다. 예를 들어, 다음과 같은 백엔드가 제공됩니다. 여기
이 예제는 다음을 제공합니다:
- A simple JSON database
- Apple 서버에서 JWT를 요청하는 방법
- A simple JWT verification
이 튜토리얼에서 설명한 모든 것을 고려한 env 부분은 다음과 같습니다:
ANDROID_SERVICE_ID= 서비스 IDIOS_SERVICE_ID= 앱 ID
env: { PRIVATE_KEY_FILE: "AuthKey_U93M8LBQK3.p8", KEY_ID: "U93M8LBQK3", TEAM_ID: "UVTJ336J2D", ANDROID_SERVICE_ID: "ee.forgr.io.ionic.starter.service2", IOS_SERVICE_ID: "me.wcaleniewolny.test.ionic.vue", PORT: 3000, REDIRECT_URI: "https://xyz.wcaleniewolny.me/login/callback", BASE_REDIRECT_URL: "capgo-demo-app://path"}플러그인 사용
플러그인 사용기능 사용 방법 login 기능 사용 방법은 IOS와 동일합니다. 더 많은 정보를 확인하려면 해당 섹션을 참조하세요. 그러나메서드의 initialize 클립보드 복사
await SocialLogin.initialize({ apple: { clientId: 'ee.forgr.io.ionic.starter.service2', redirectUrl: 'https://appleloginvps.wcaleniewolny.me/login/callback' }})앱을 만들기 위해
Section titled “앱을 만들기 위해”-
앱 ID가 아직 없는 경우 플러스 버튼을 클릭하십시오
-
선택
App IDs계속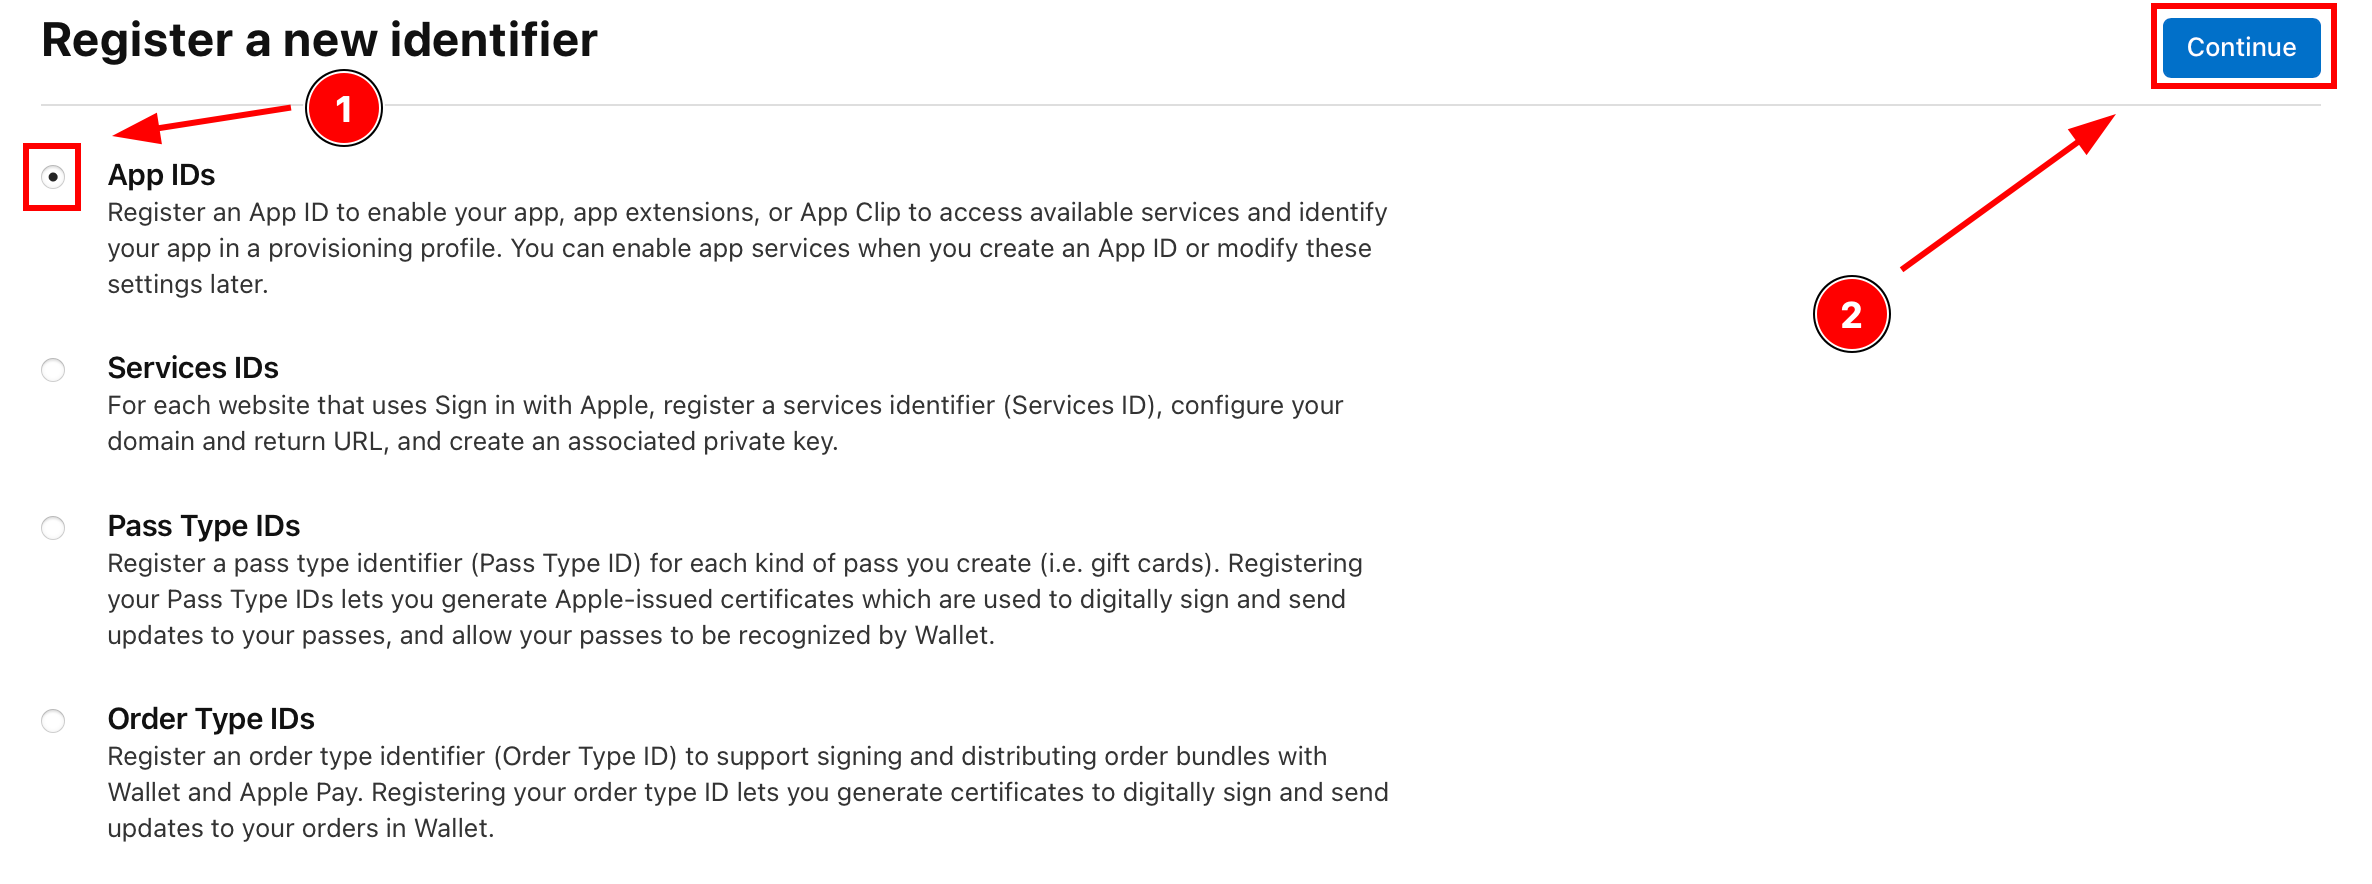
-
타입 클릭
App클릭Continue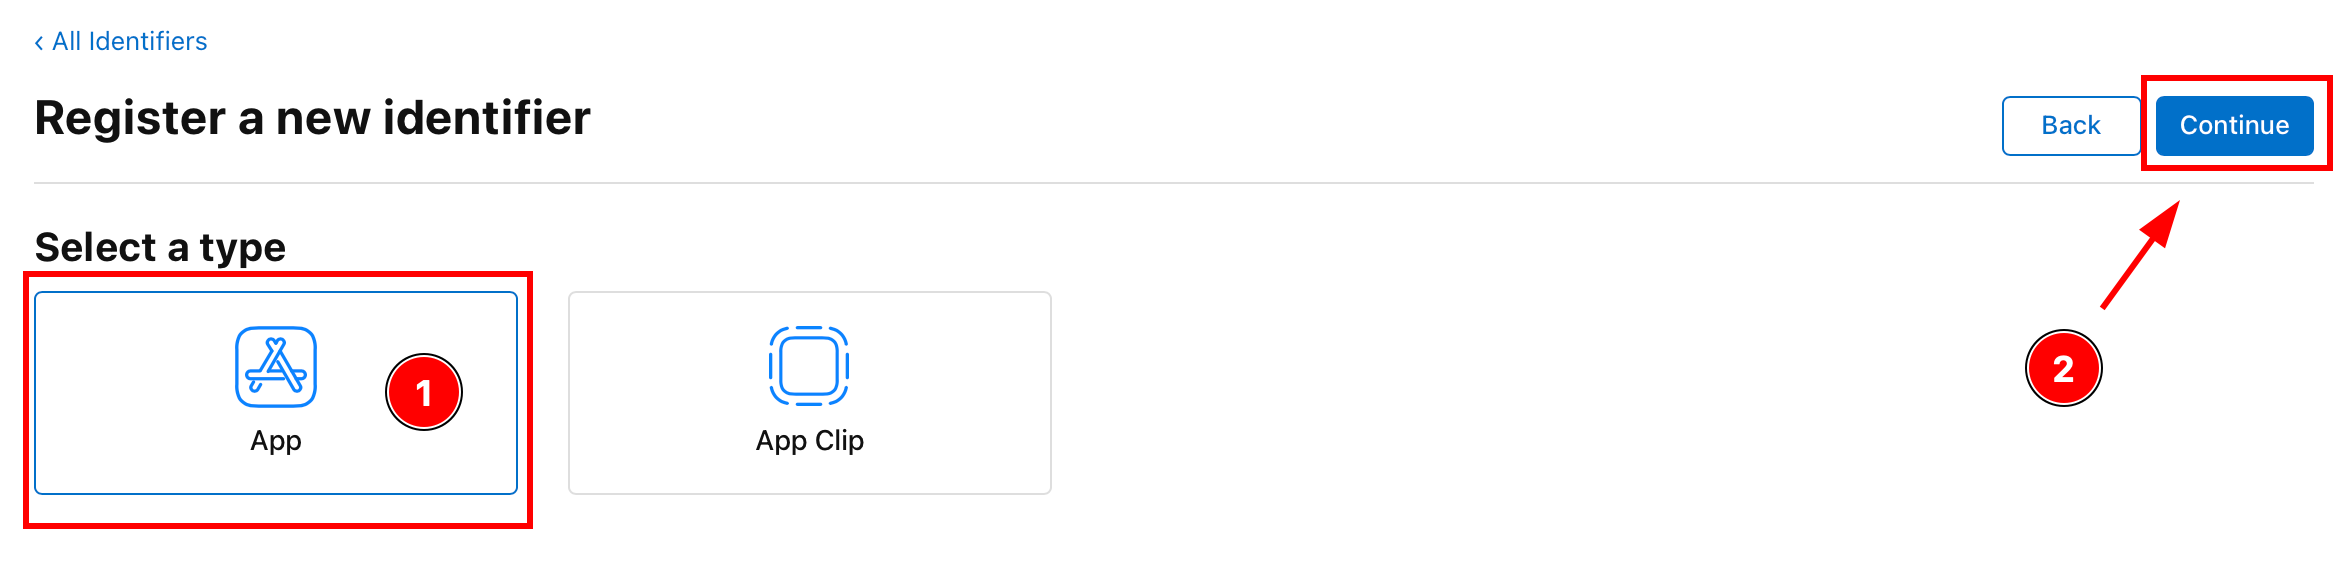
-
설명과 앱 ID를 입력하세요
-
활성화
Sign with Apple기능
-
클릭
Continue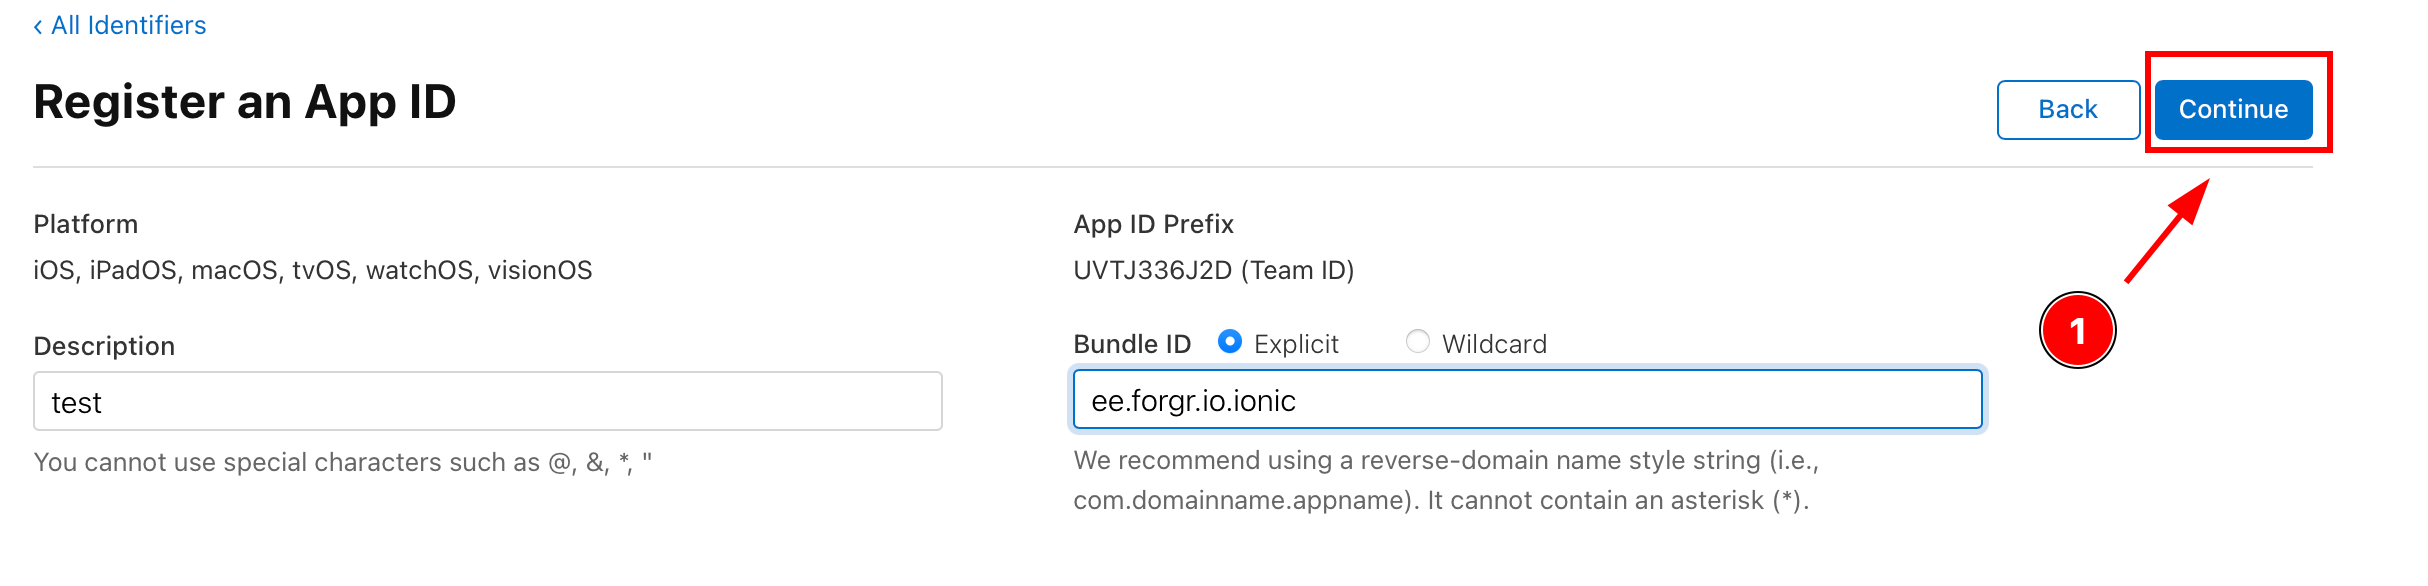
-
확인
Register
애플 로그인에서 계속하기
애플 로그인에서 계속하기애플 로그인 on Android를 사용 중이시면 애플 로그인 on Android 인증 및 계정 흐름을 계획하고 싶으시다면 @capgo/capacitor-social-login을 사용하여 @capgo/capacitor-social-login @capgo/capacitor-social-login @capgo/capacitor-passkey @capgo/capacitor-passkey @capgo/capacitor-passkey @capgo/capacitor-native-biometric capgo/capacitor-native-biometric 구현 세부 사항에 대해 Two-factor authentication Two-factor authentication 구현 세부 사항에 대해