Organization
Copy a setup prompt with the install steps and the full markdown guide for this plugin.
What is the organization?
Section titled “What is the organization?”The organization lets you share apps with your team while controlling exactly who can do what. Every Capgo account belongs to at least one organization, and you can create as many organizations as you need.
Access is managed through role-based access control (RBAC). Each team member is assigned a role — either at the organization level or scoped to a specific app — that determines what they can see and do. Channel access can be further fine-tuned with per-channel permission overrides.
Organization Settings Overview
Section titled “Organization Settings Overview”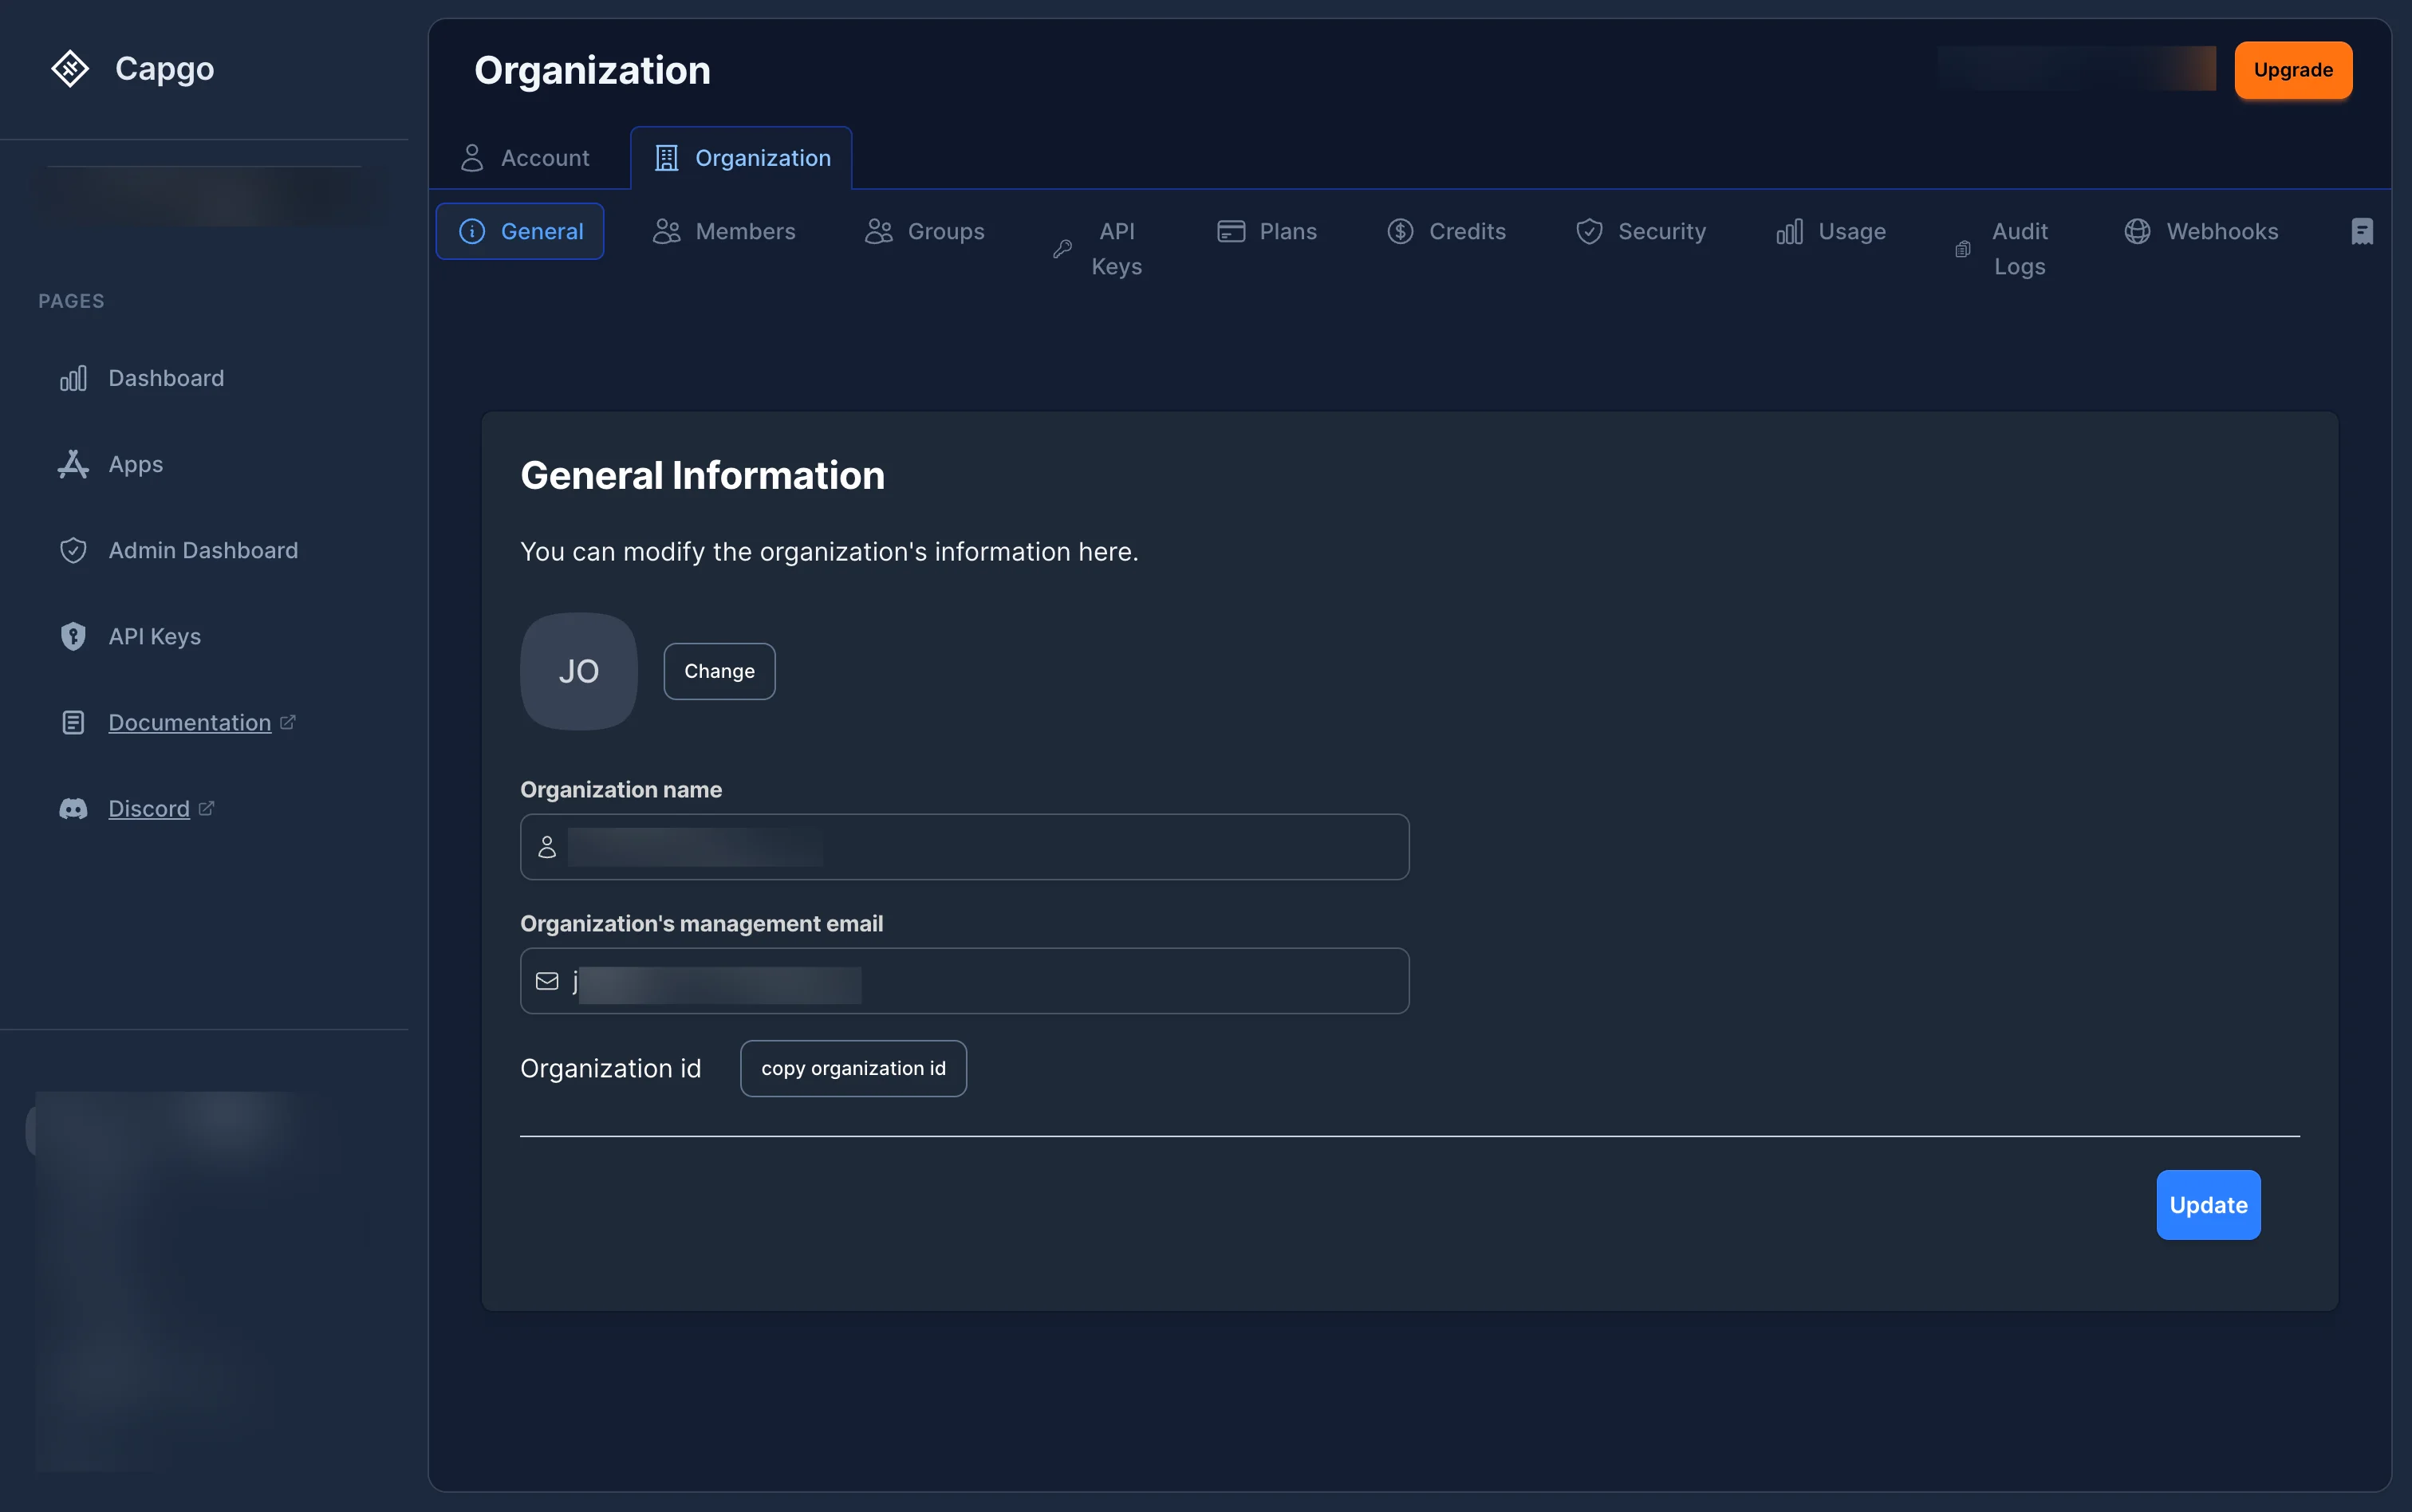
The Organization settings page is accessed by clicking Settings in the left sidebar, then selecting the Organization tab at the top. From there, you can navigate between the following sections:
| Tab | Description |
|---|---|
| General | View and edit organization name, logo, and management email |
| Members | Manage team members and their permissions |
| Groups | Create and manage groups of users for bulk role assignment |
| API Keys | Manage API keys for programmatic access |
| Plans | View and manage your subscription plan |
| Credits | View and purchase additional credits |
| Security | Configure security policies (2FA, password requirements) |
| Usage | Monitor your organization’s usage statistics |
| Audit Logs | View activity logs for your organization |
| Webhooks | Configure webhook integrations |
| Billing | Manage billing information and invoices |
How to switch organizations
Section titled “How to switch organizations”Click on the organization selector dropdown near the top left of the sidebar to view and switch between organizations you have access to.
Managing Members
Section titled “Managing Members”Viewing members
Section titled “Viewing members”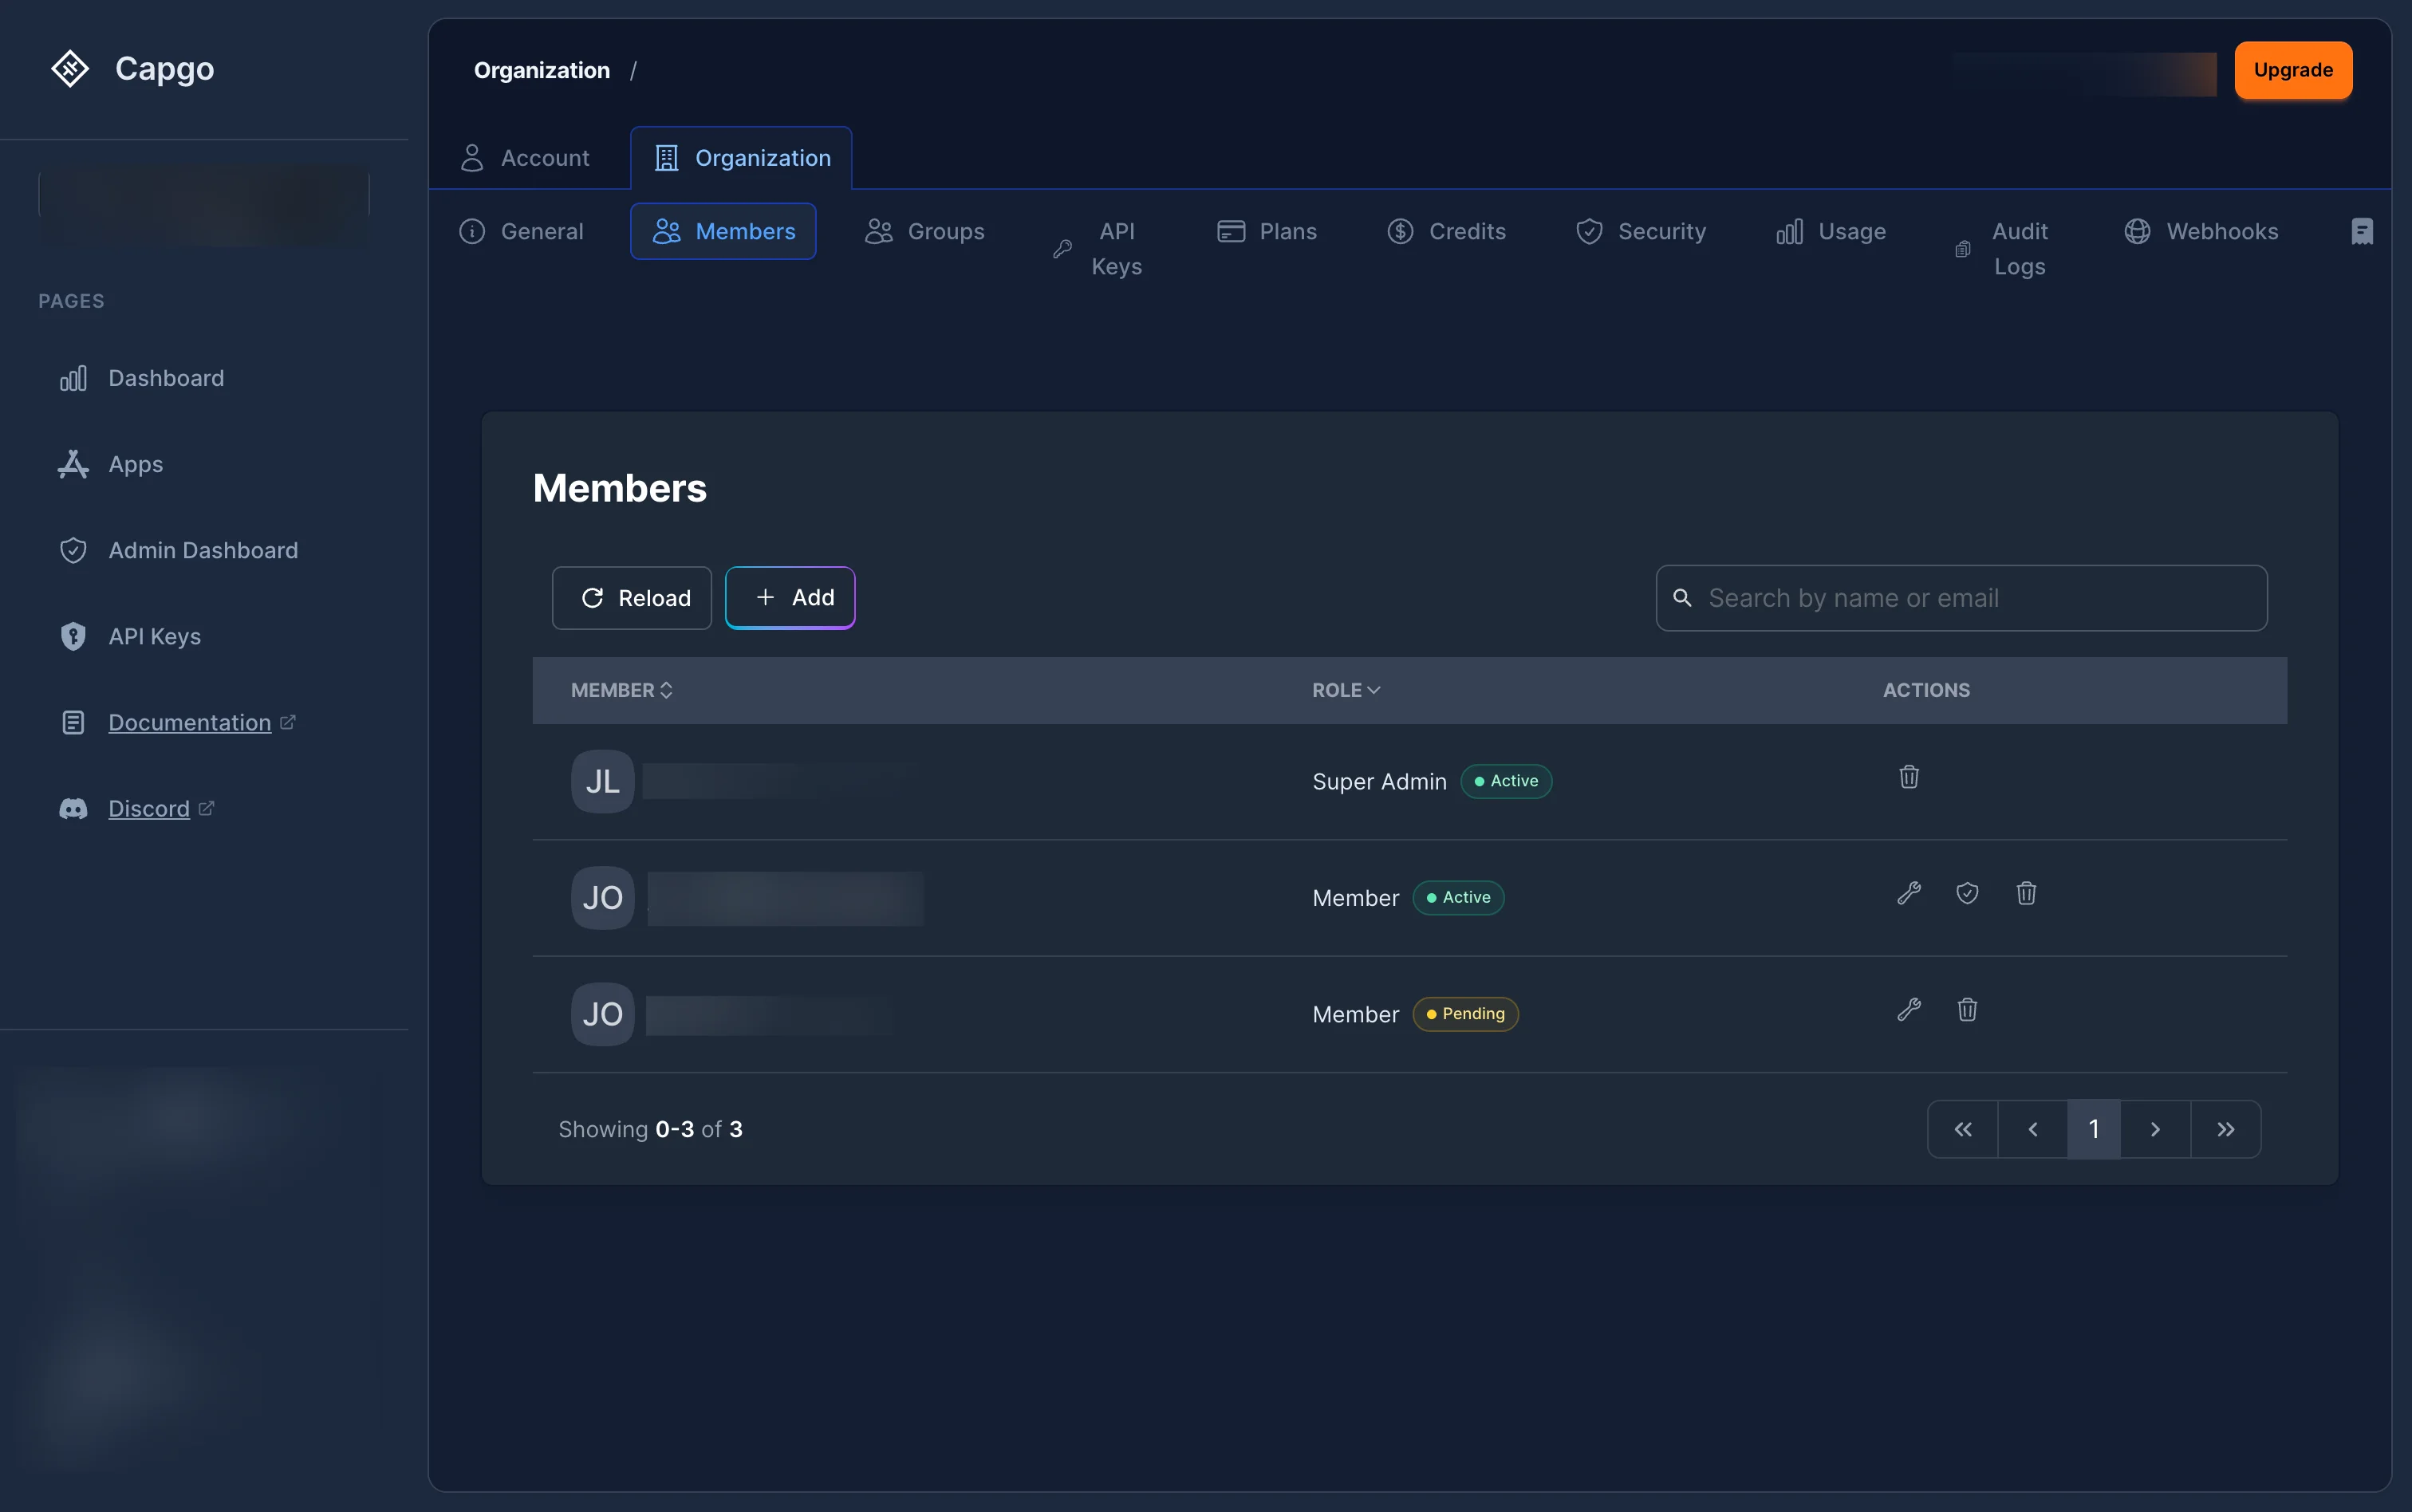
The Members section displays all users who have access to your organization with their:
- Member: Avatar and name
- Role: Current role (Super Admin, Admin, Billing Manager, or Member) with an Active or Pending badge
- Actions: Edit role, manage app-level access, or remove from organization
Active members are sorted by role priority. Pending invitations appear with an orange Pending badge.
Inviting a member
Section titled “Inviting a member”- Click the + Add button in the Members section
- A Select a role modal will appear — choose the org-level role for the new member:
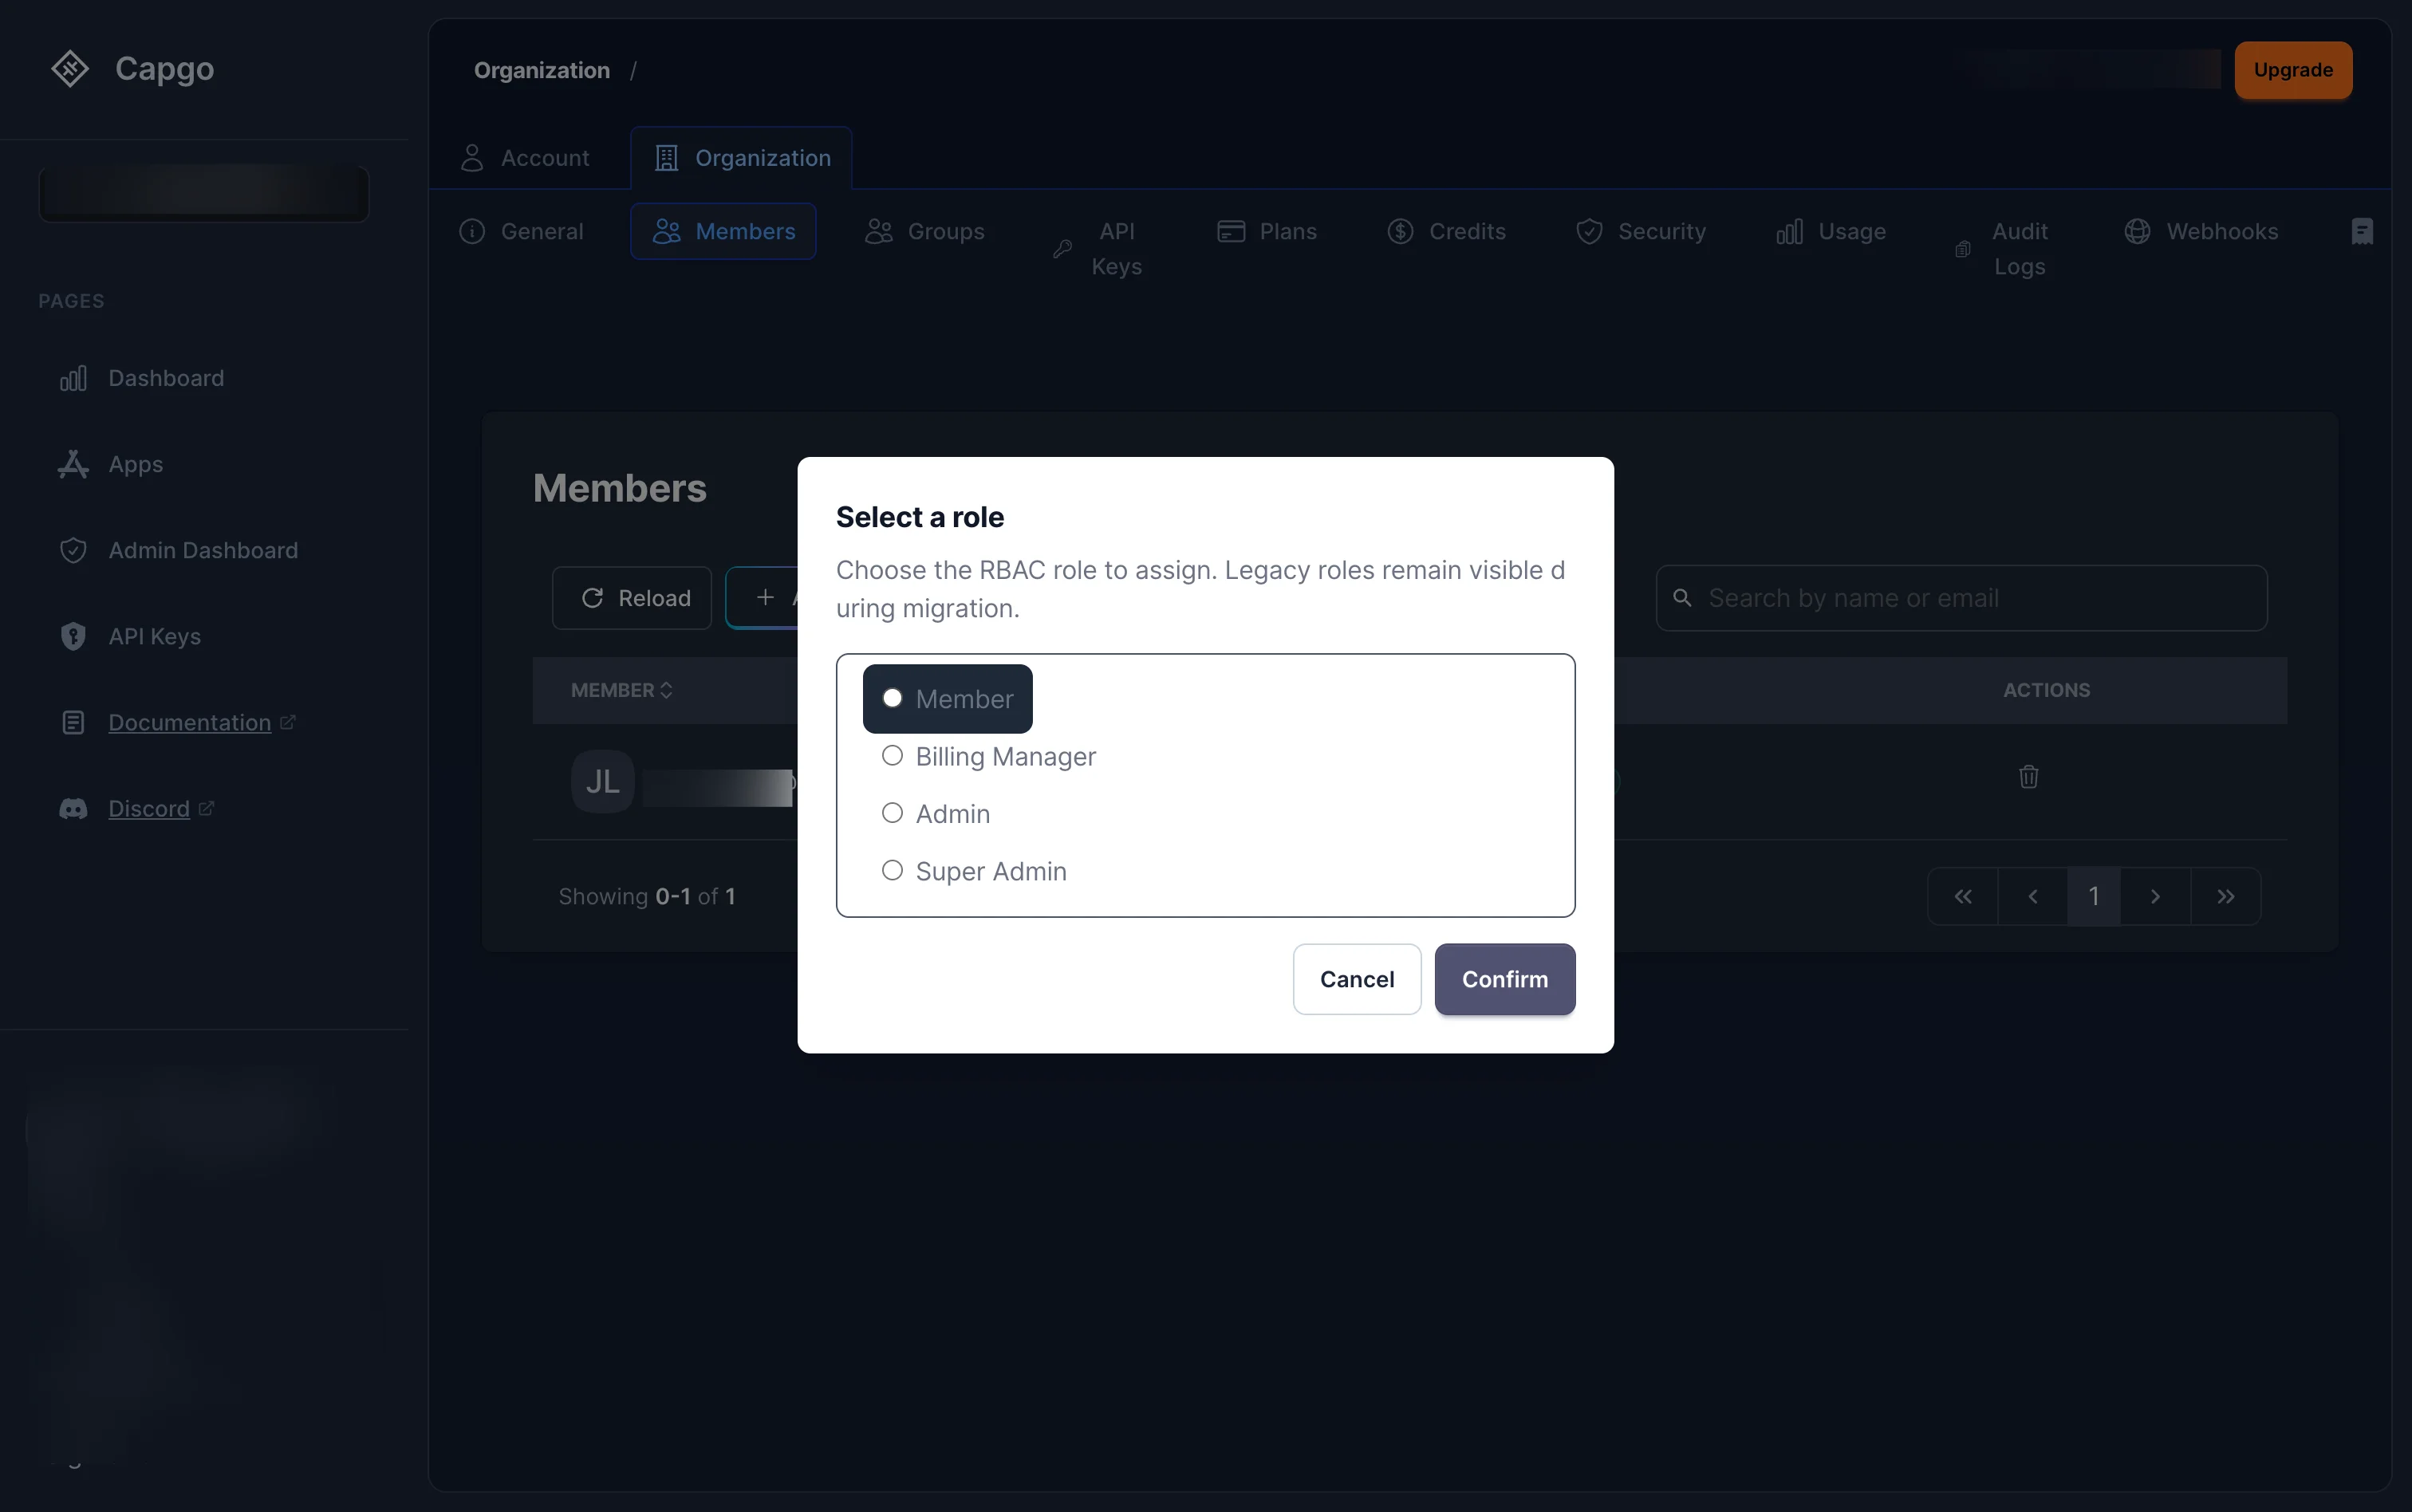
The available org-level roles are:
- Member — Read-only access
- Billing Manager — Billing-only access
- Admin — Full administration (no billing, no deletion)
- Super Admin — Complete control
- Click Confirm, then fill in the invitation form (email, optional first/last name, captcha) and click Send invitation.
The invited user will receive an email with a magic link. When they accept, they will be added to the organization with the selected role.
Assigning app-level roles
Section titled “Assigning app-level roles”Beyond the org-level role, you can give a member access to specific apps with a more targeted role. Click the Access Control button (shield icon) next to a member to open the app access modal:
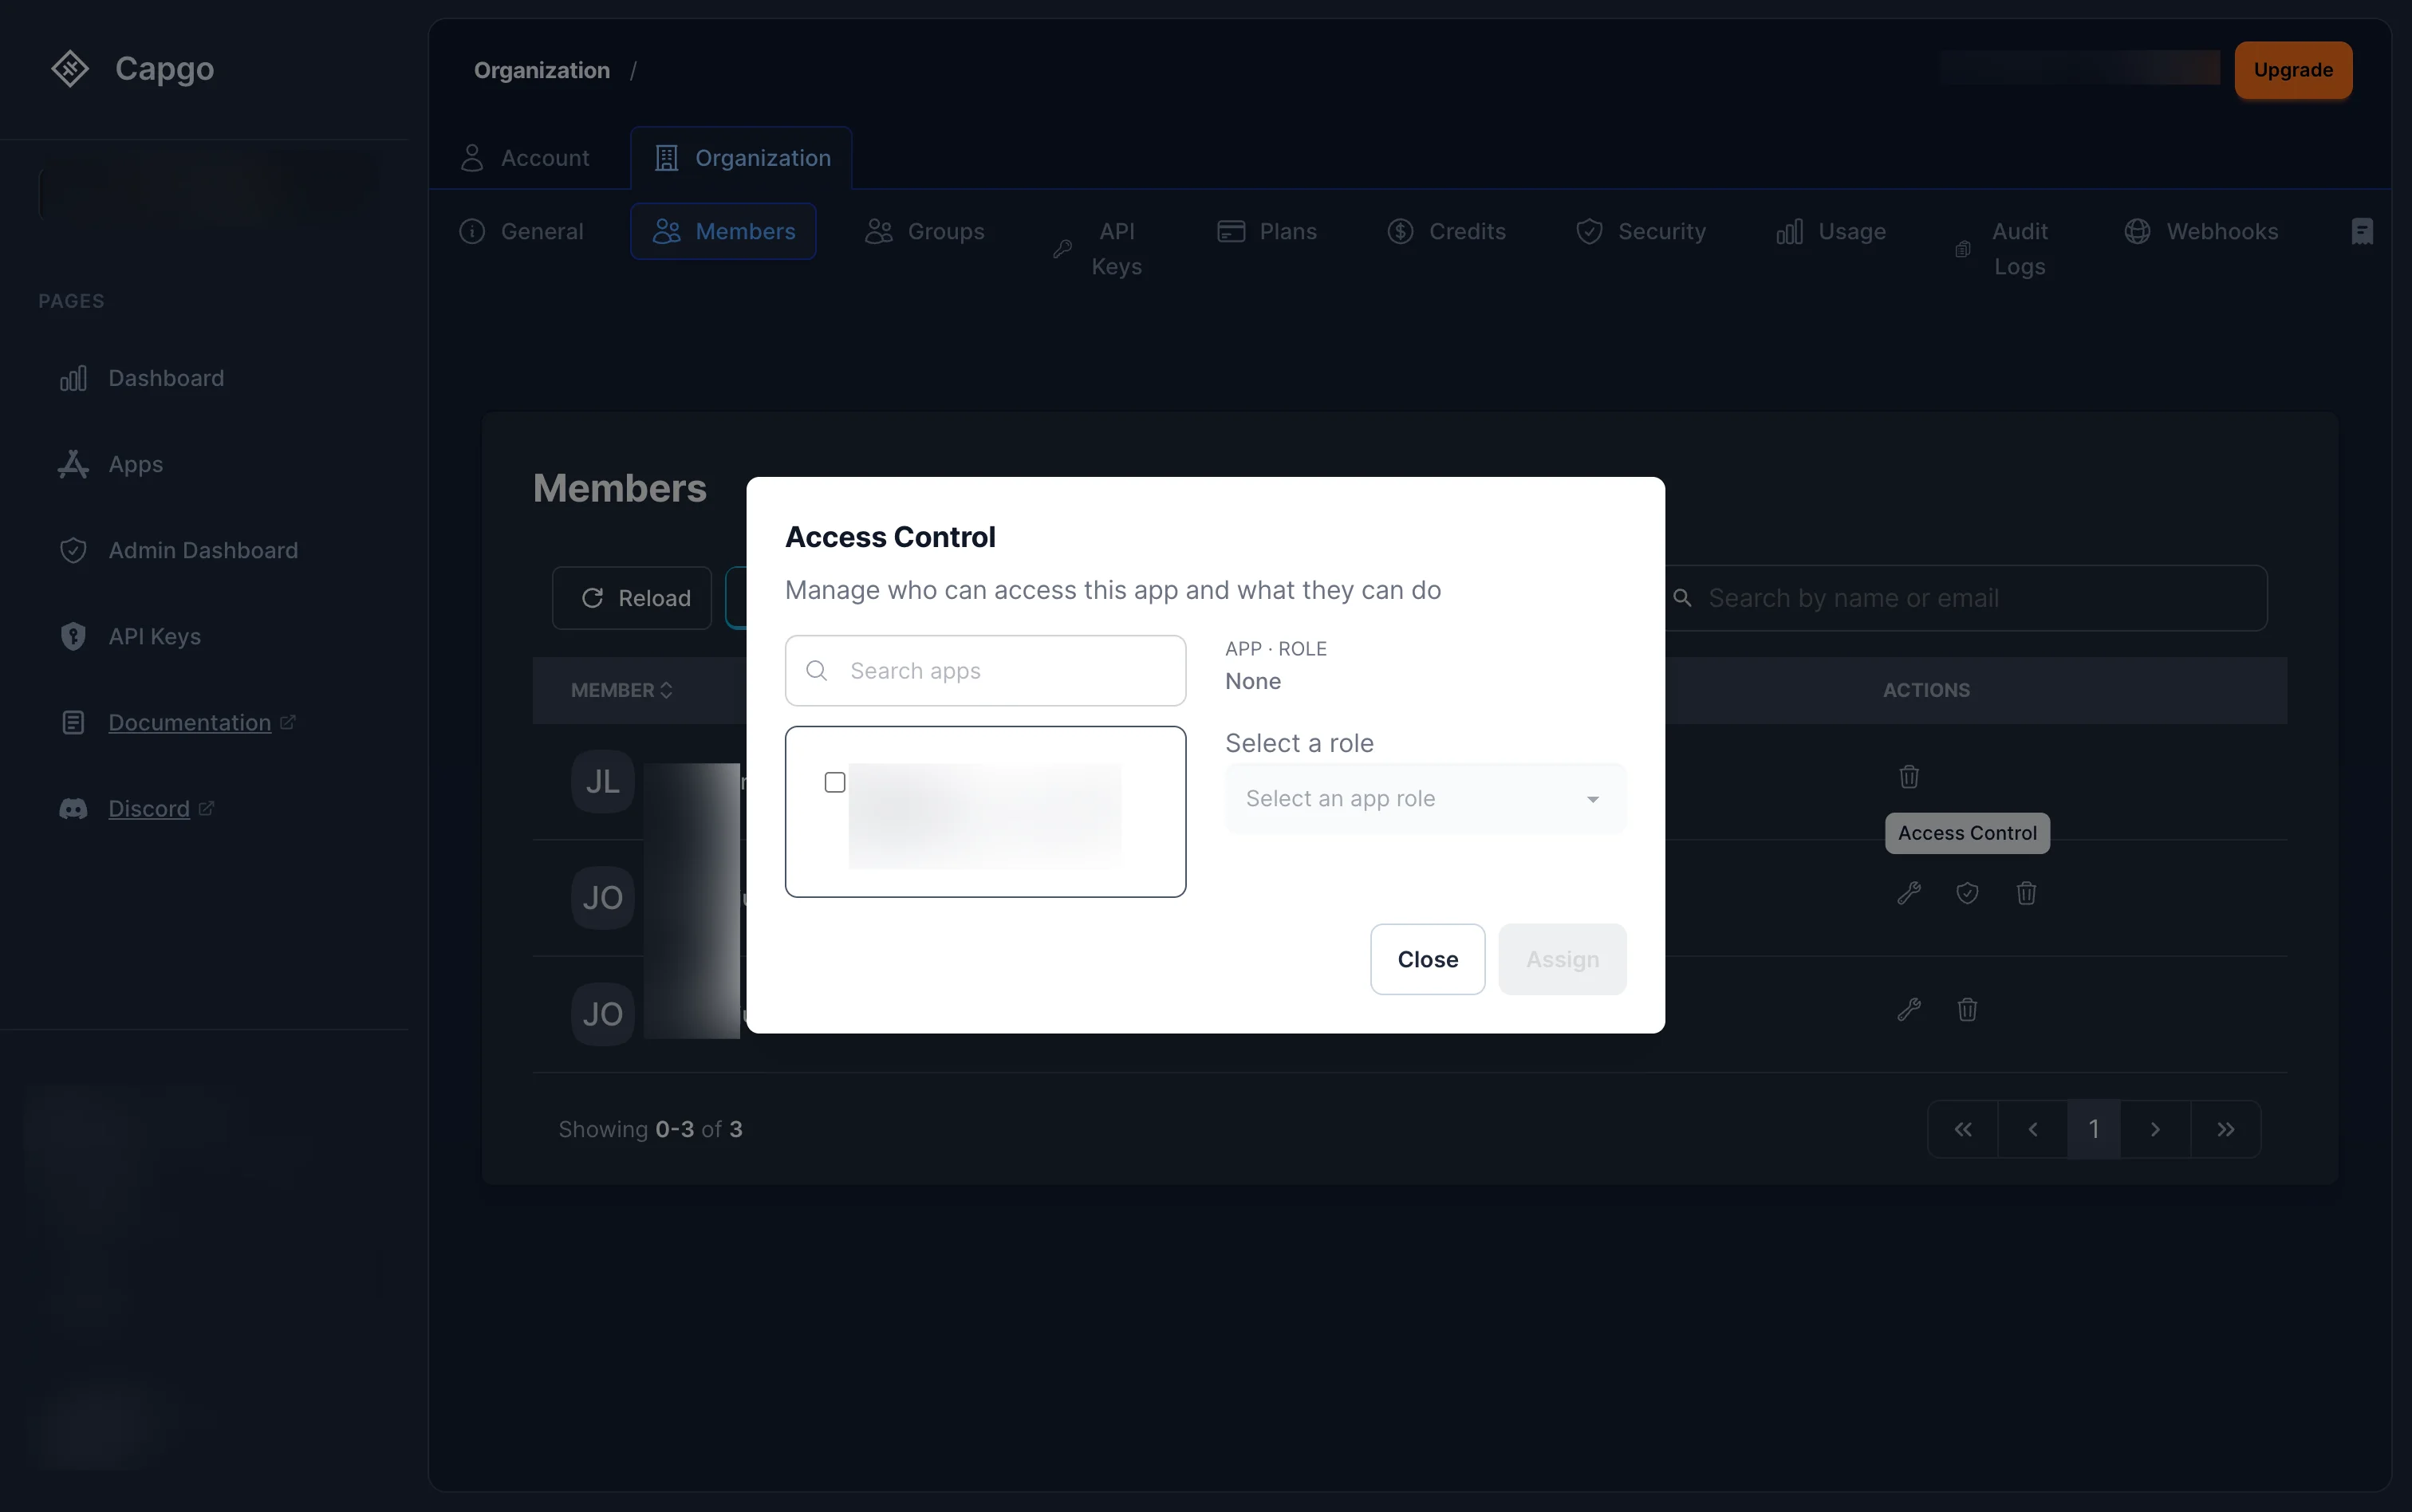
From this modal you can:
- Search and select an app
- Choose an app-level role from the dropdown
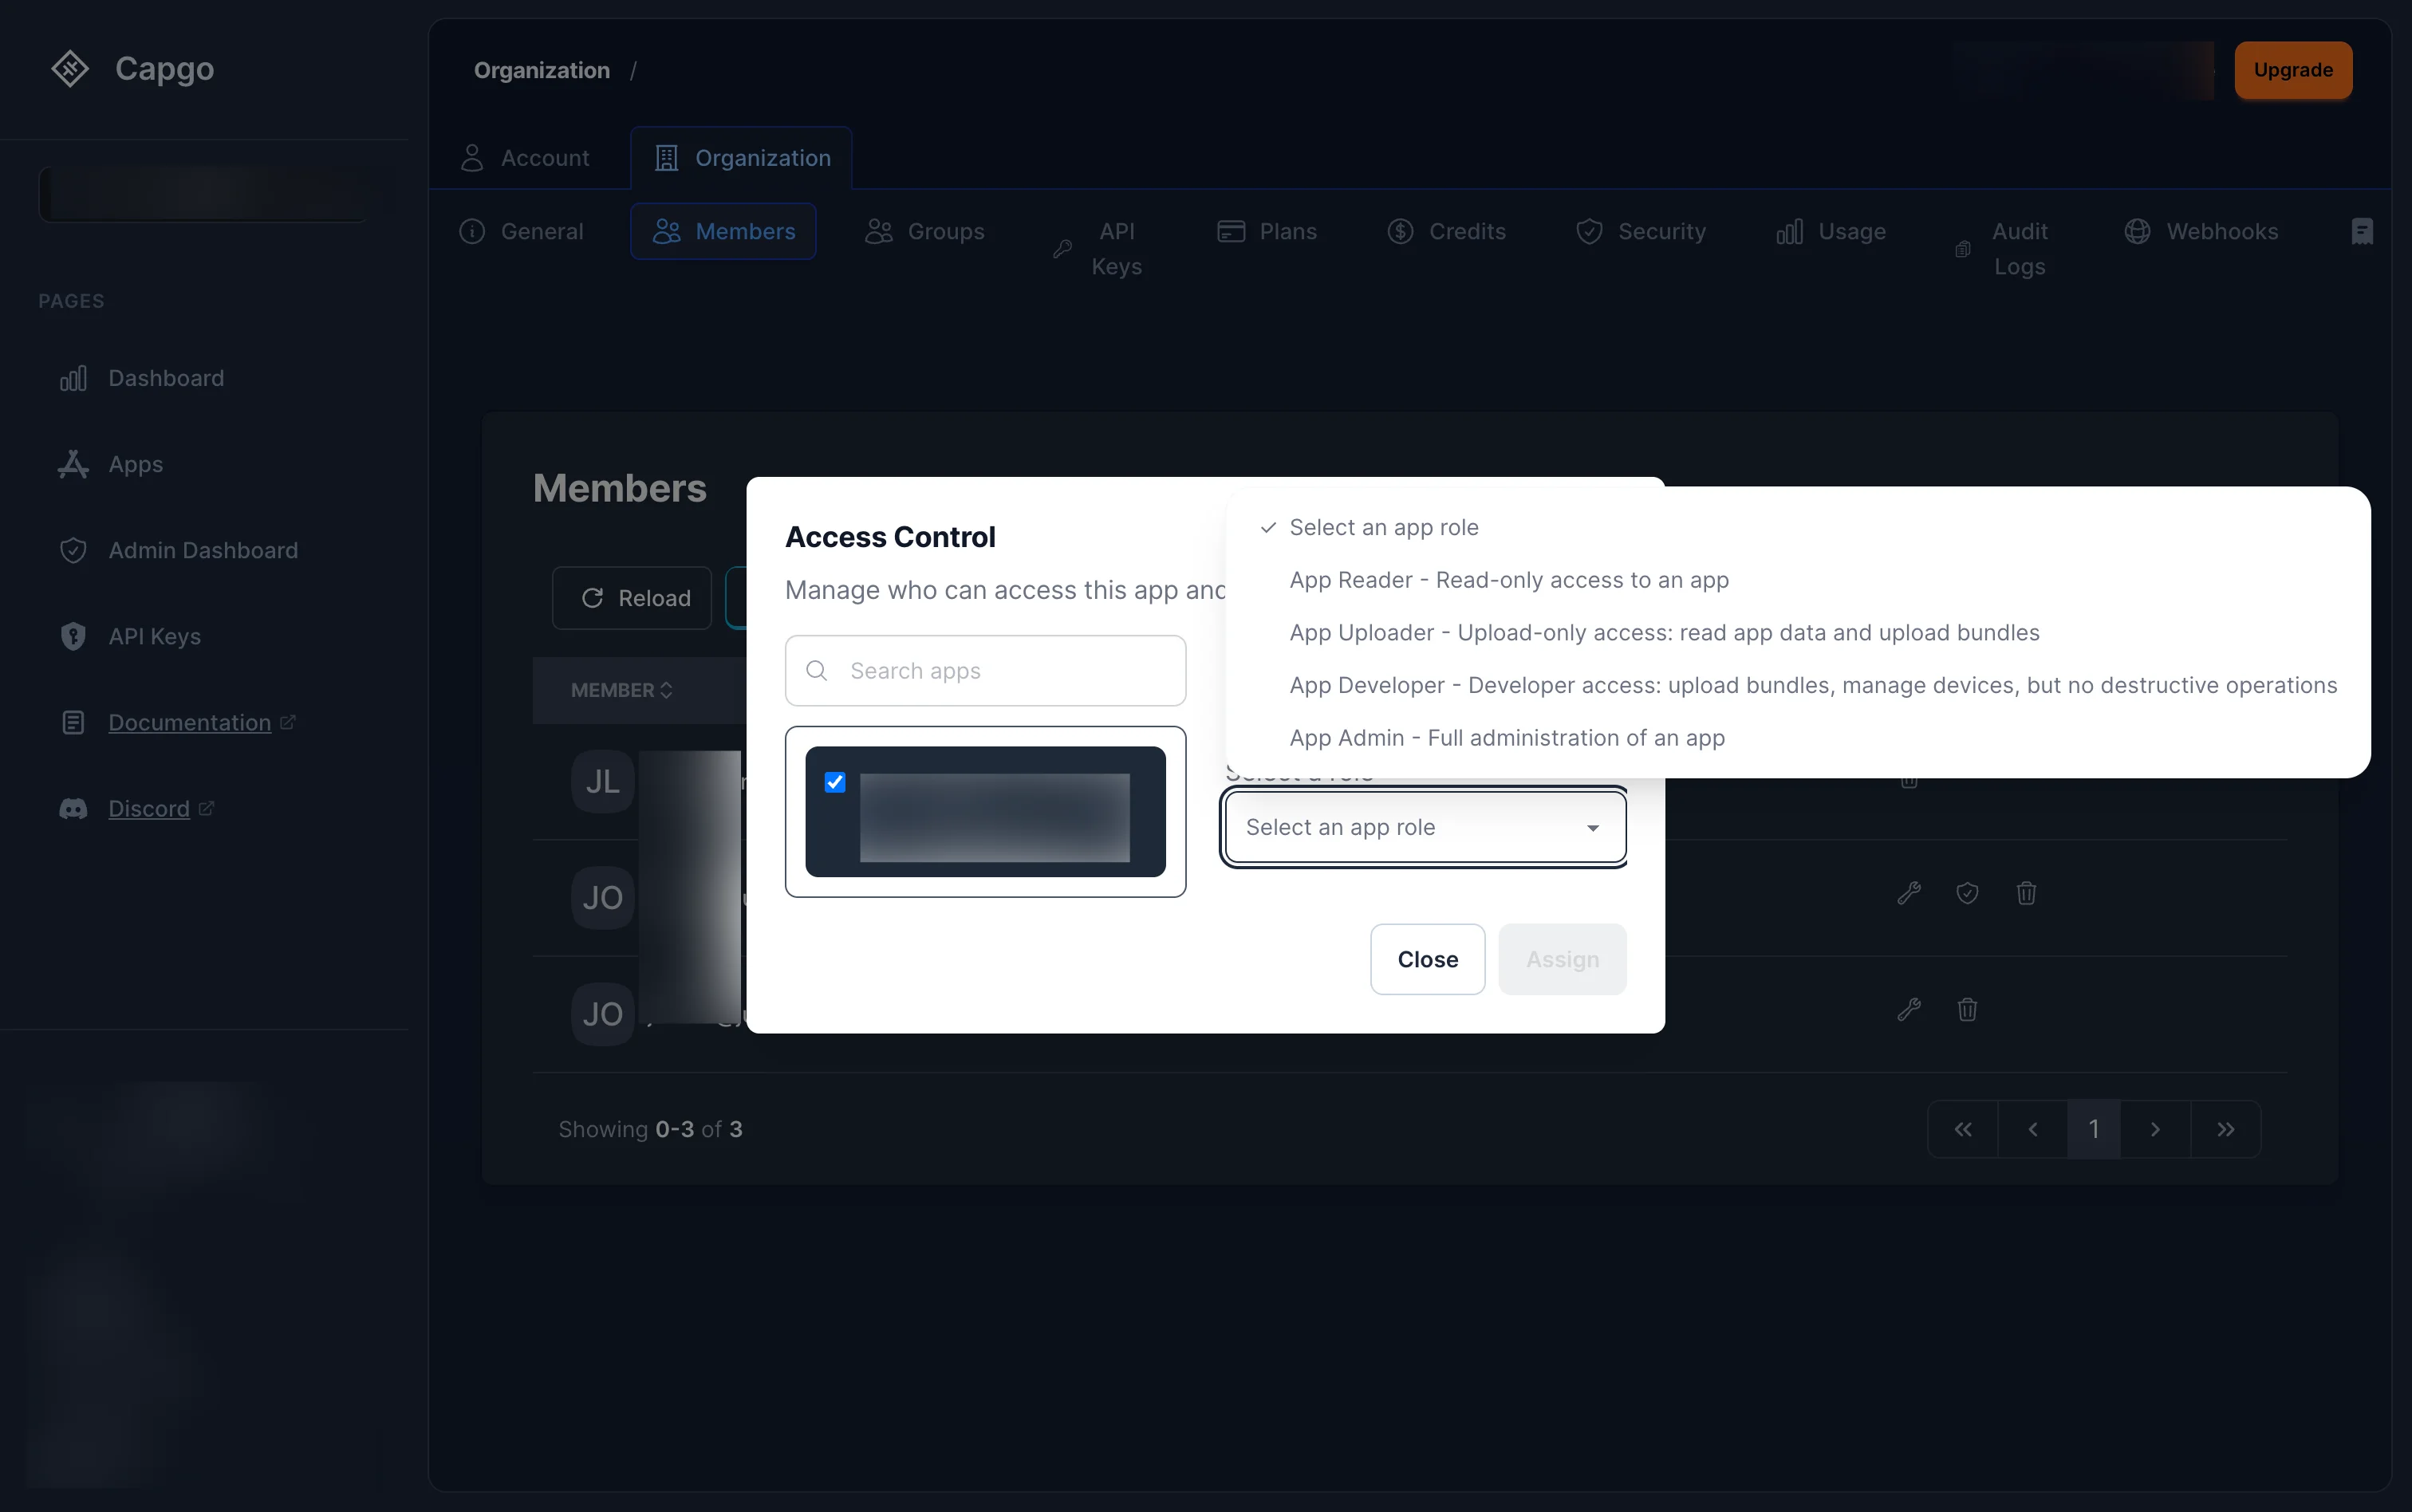
The available app-level roles are:
- App Admin — Full administration of an app
- App Developer — Upload bundles, manage devices, but no destructive operations
- App Uploader — Read app data and upload bundles
- App Reader — Read-only access to an app
- Click Assign to grant the role.
Editing a member’s role
Section titled “Editing a member’s role”Click the edit button (wrench icon) next to a member to change their org-level role. The same Select a role modal will appear with the current role pre-selected.
Constraints:
- You cannot change the role of the organization creator
- You cannot remove the last Super Admin — there must always be at least one
- Promoting or demoting a Super Admin requires you to be a Super Admin yourself
Removing a member
Section titled “Removing a member”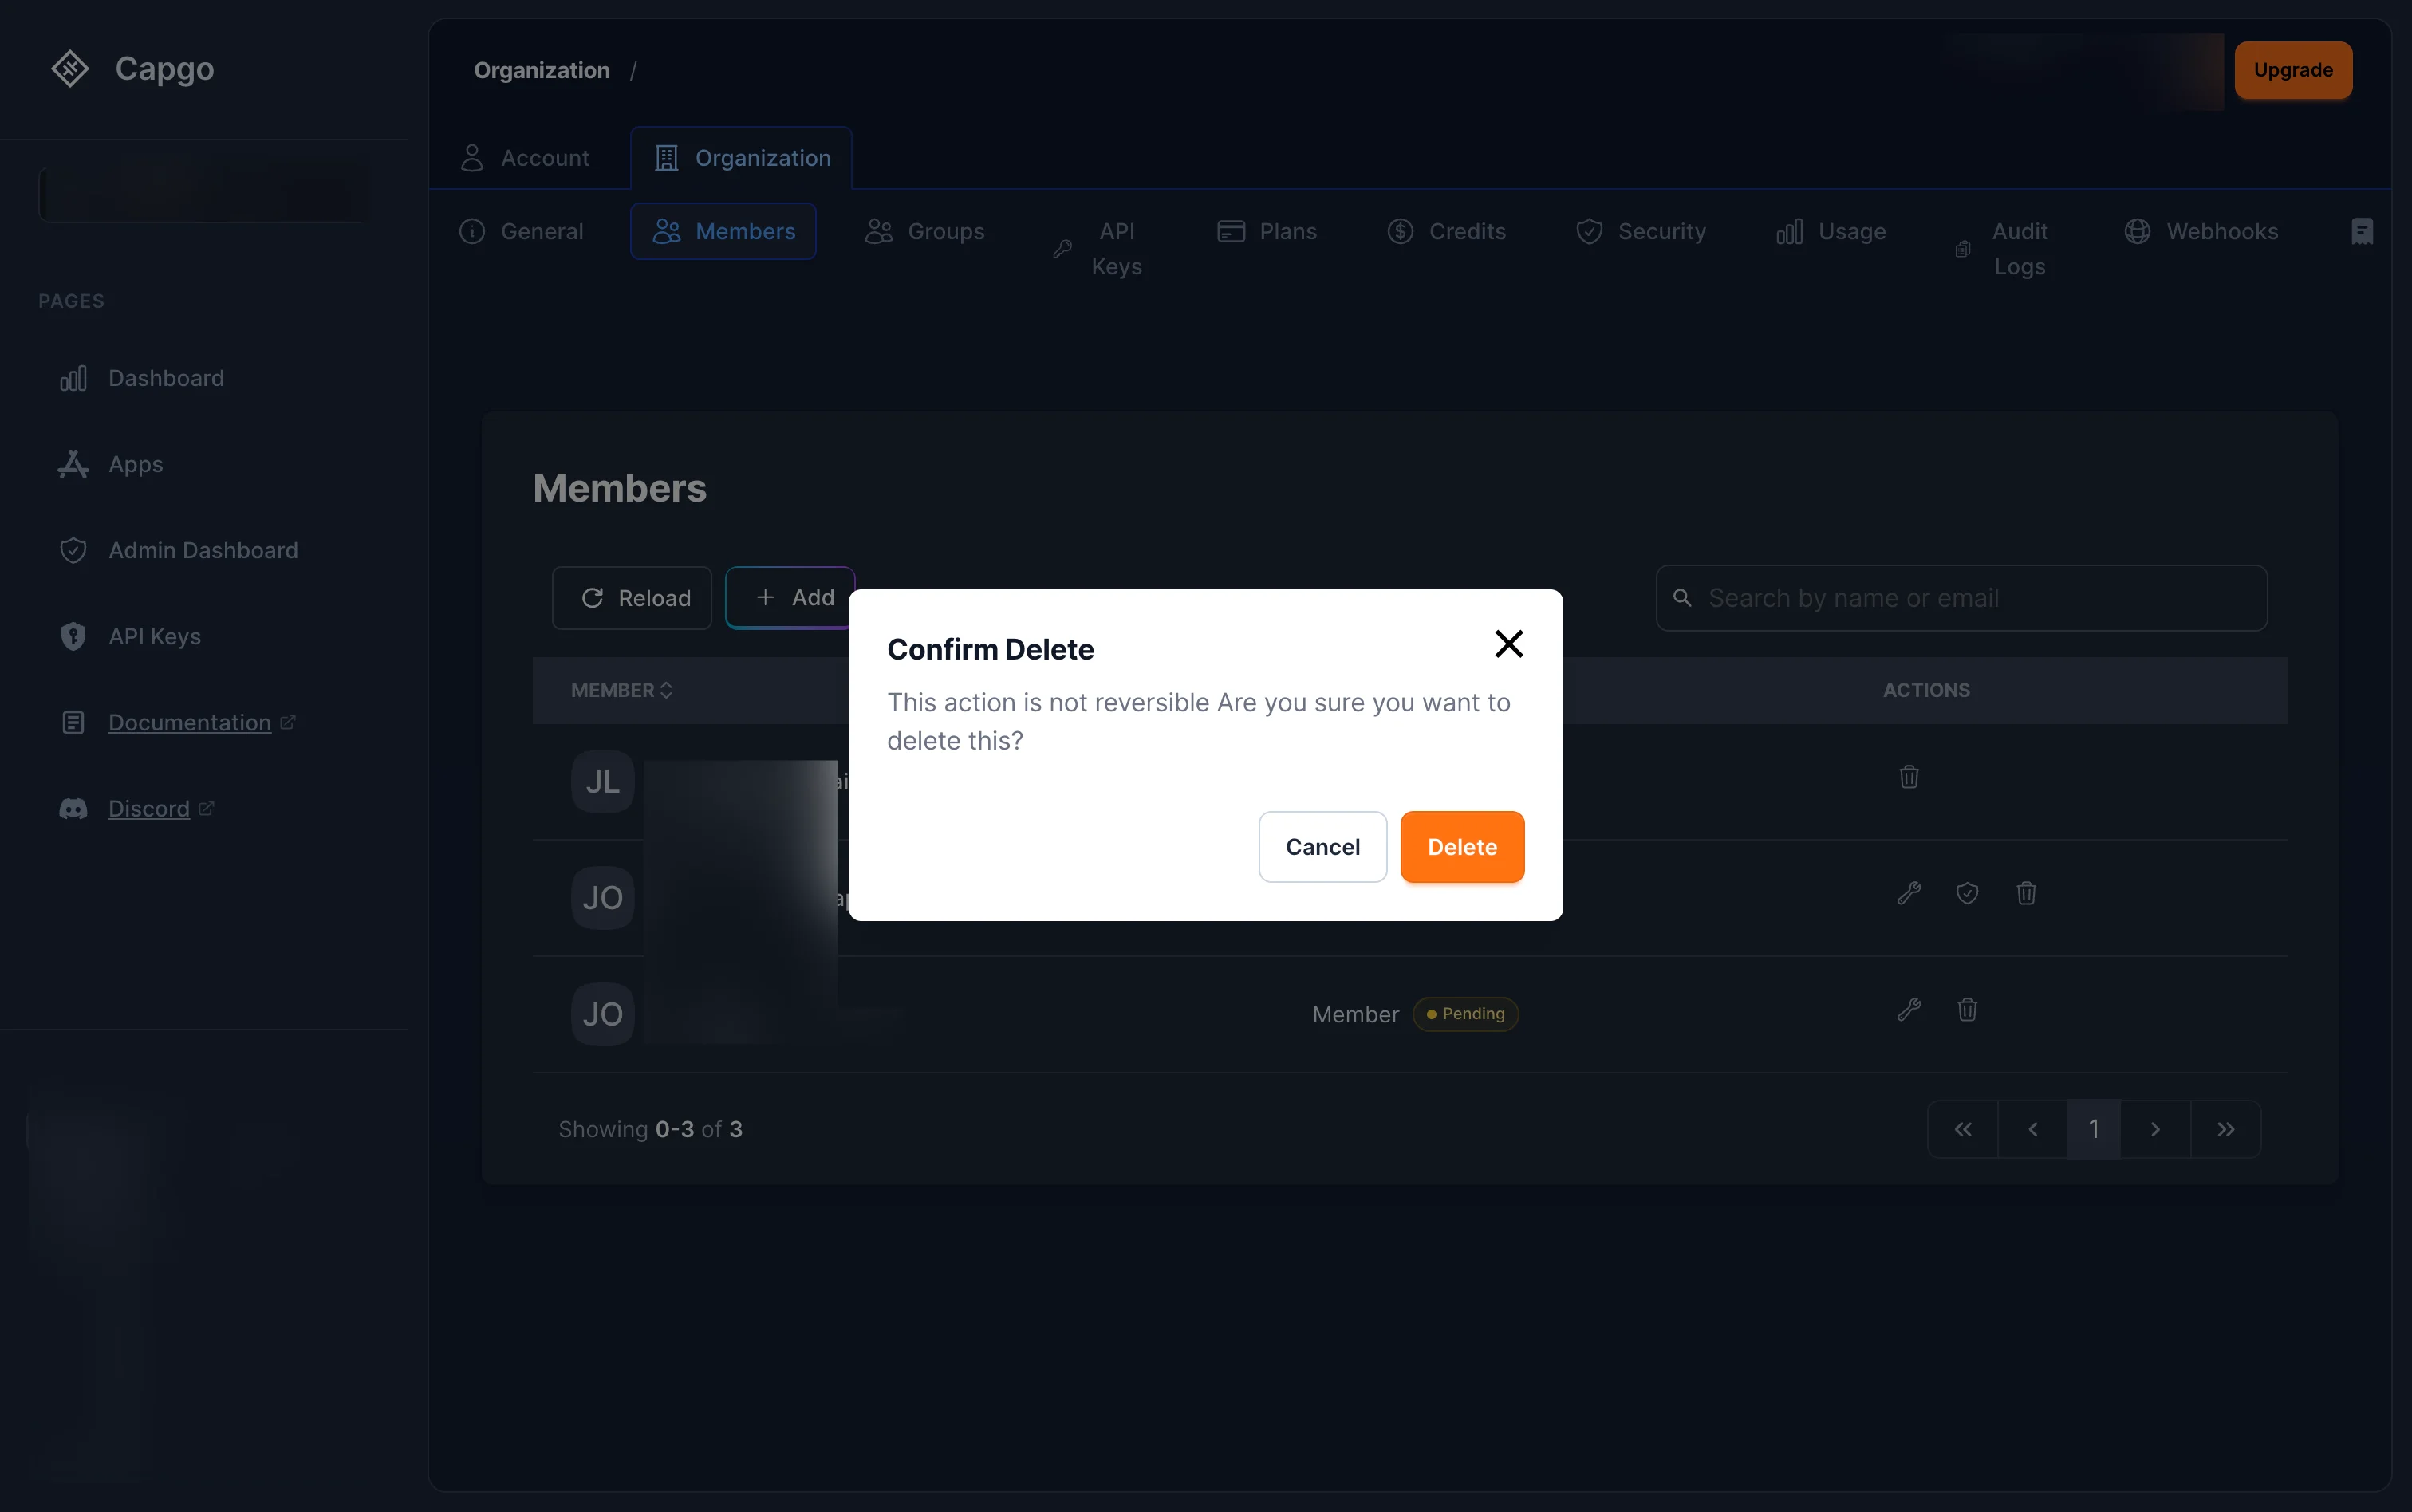
Click the delete button (trash icon) next to a member. A confirmation dialog will appear warning that this action is not reversible. Click Delete to confirm. This revokes all their access to the organization, its apps, and its channels immediately.
Roles overview
Section titled “Roles overview”Capgo uses role-based access control with roles organized by scope. You can assign a role at the organization level (access to everything), or scope it down to a single app. Channel access can be further customized with per-channel permission overrides.
Organization roles
Section titled “Organization roles”Assigned when you invite a member. They apply across the entire organization.
| Role | Internal name | Description |
|---|---|---|
| Super Admin | org_super_admin | Full control — billing, deletion, transfer. Automatically granted to the org creator. |
| Admin | org_admin | Full administration — manage members, apps, channels. No billing, no deletion. |
| Billing Manager | org_billing_admin | Billing only — view/update payment, invoices, billing audit. No access to apps or members. |
| Member | org_member | Read-only access across the org and all its apps. |
App roles
Section titled “App roles”Scoped to a single app. Use these when a team member should only work on one app, not the whole organization.
| Role | Internal name | Description |
|---|---|---|
| App Admin | app_admin | Full control of one app — channels, devices, team. Cannot delete or transfer the app. |
| App Developer | app_developer | Upload bundles, manage devices, trigger builds, update channels. No deletion or settings changes. |
| App Uploader | app_uploader | Read access + upload new bundle versions. |
| App Reader | app_reader | Read-only — stats, bundles, channels, logs, devices. |
Channel permission overrides
Section titled “Channel permission overrides”By default, channel access is inherited from the app role. You can override specific channel permissions per user or group — for example, allowing an App Reader to also associate bundles on the staging channel. See App-level access management below for how to configure this.
App-level access management
Section titled “App-level access management”Each app has a dedicated Access tab where you can manage who has access to the app and what they can do — including app roles and per-channel permission overrides.
Viewing app access
Section titled “Viewing app access”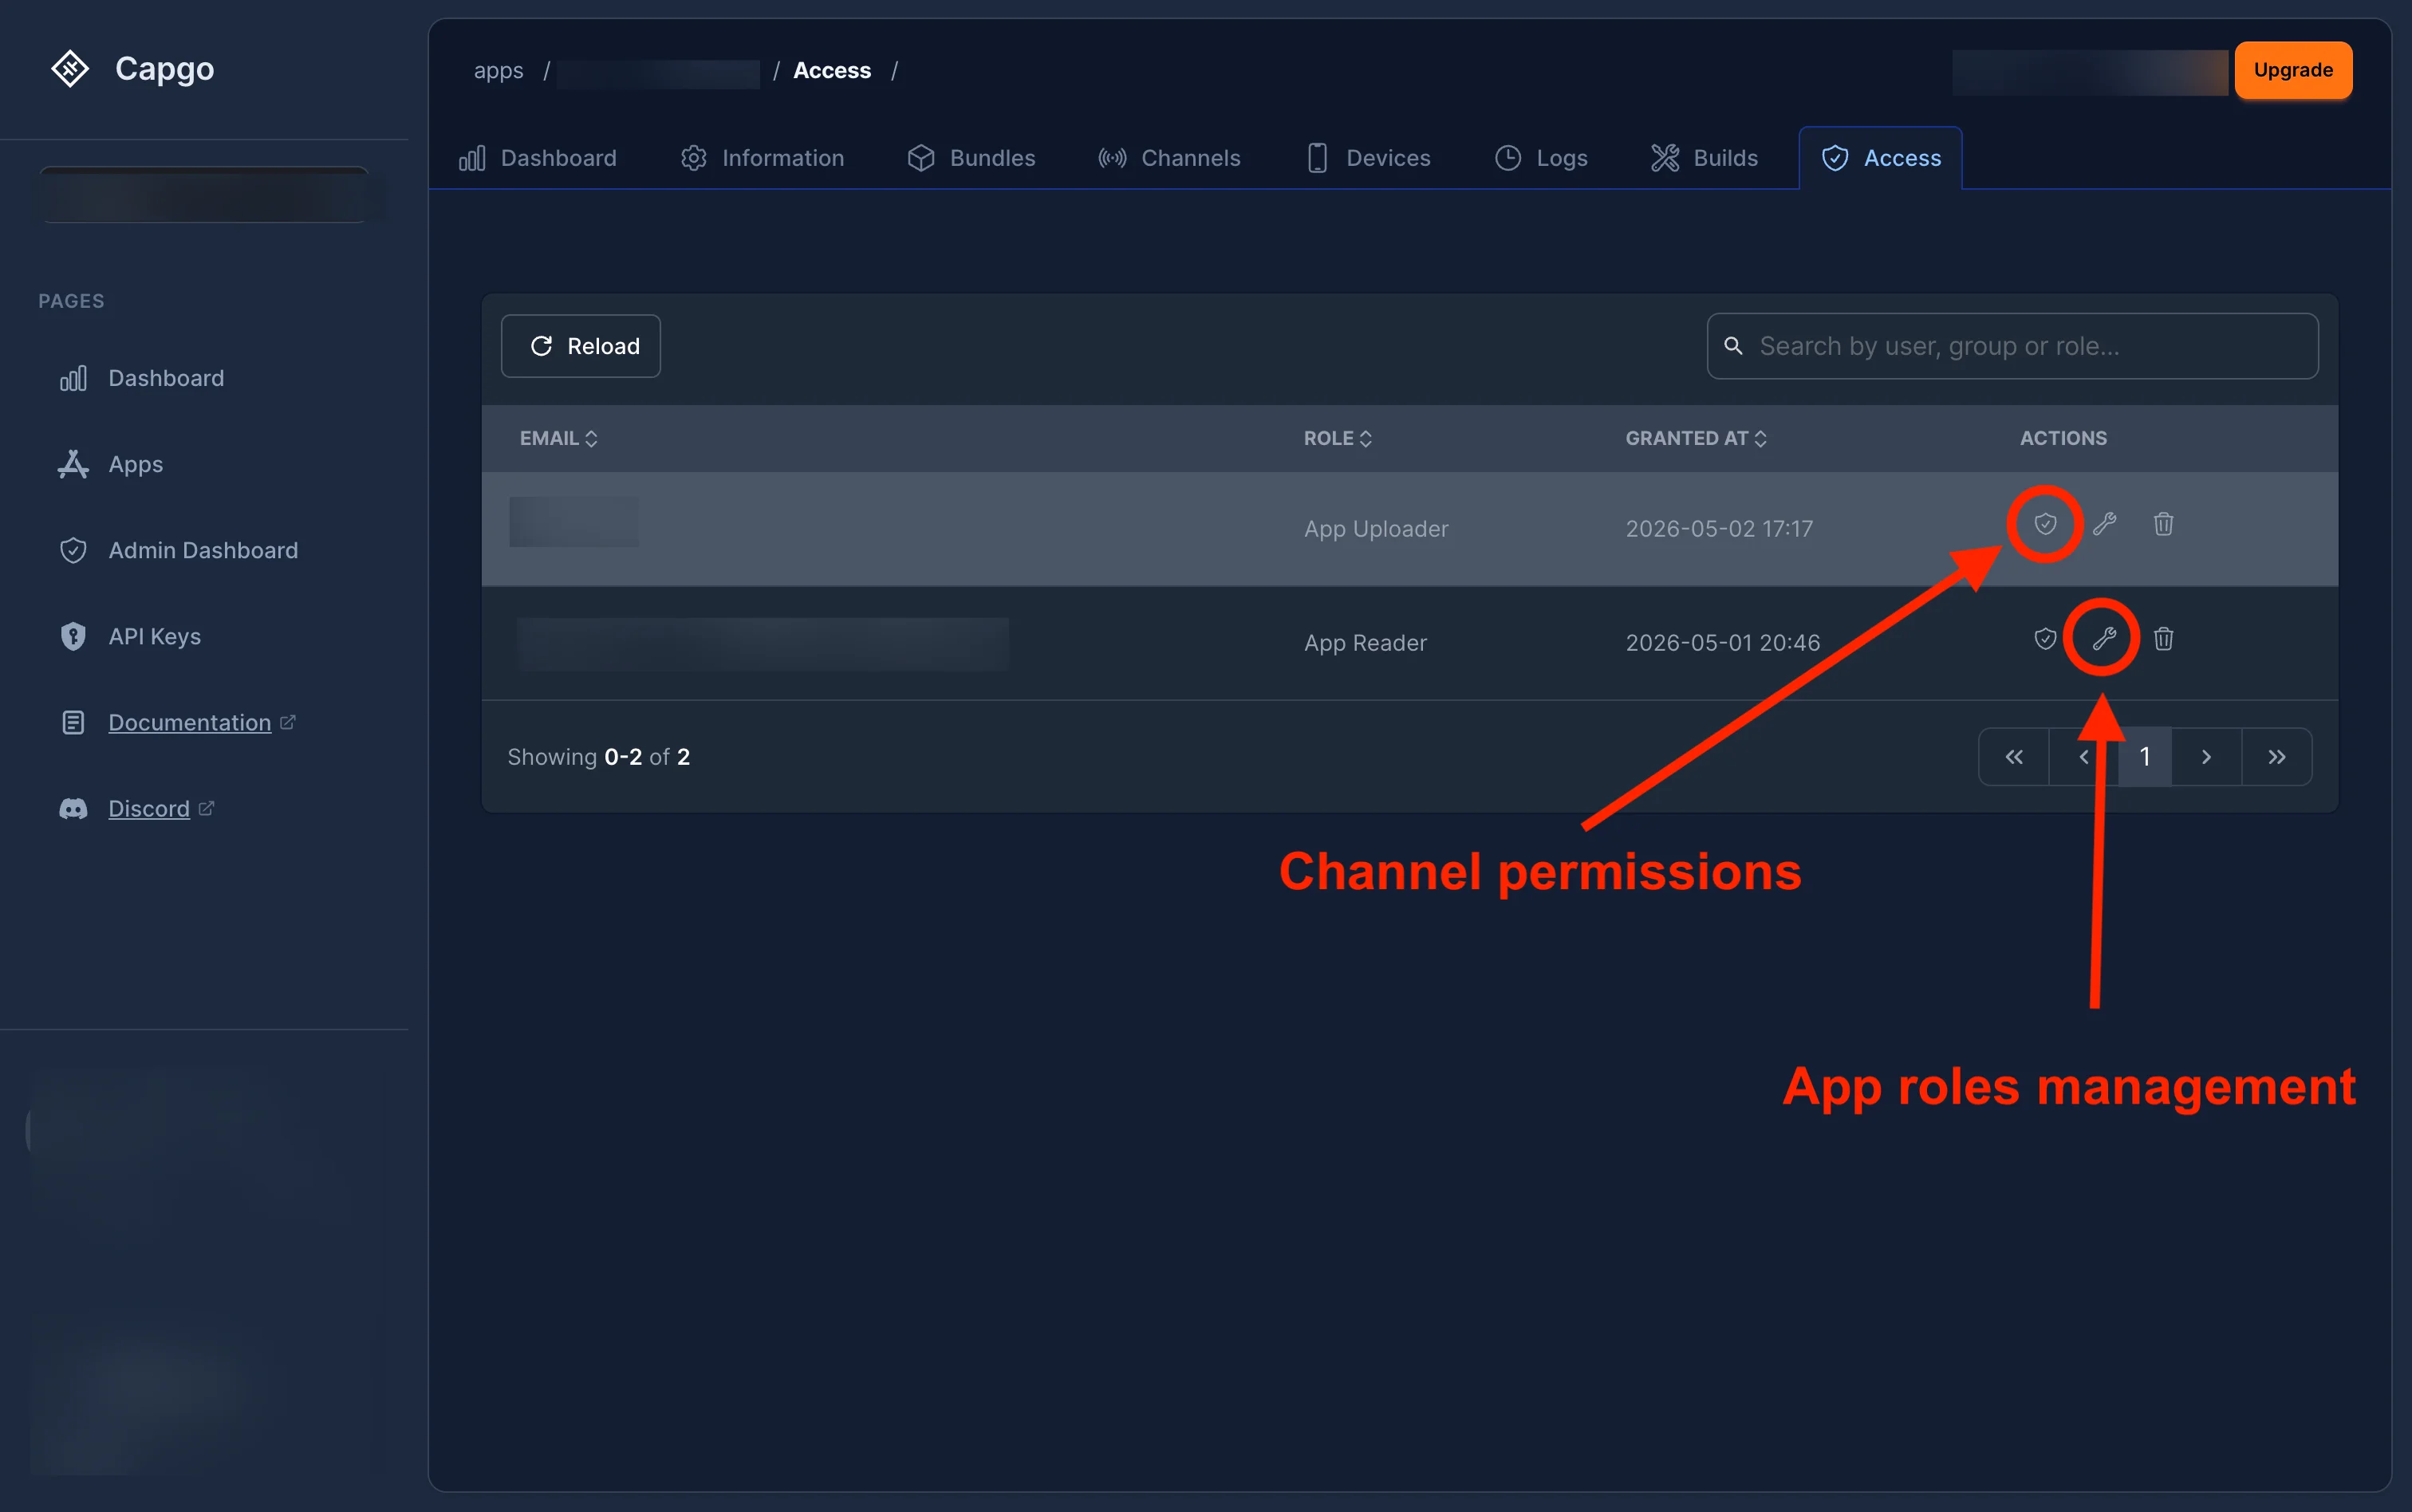
Navigate to your app and click the Access tab. The access list shows each user or group with their:
- Email — the user’s email (or group name)
- Role — their app-level role (App Admin, App Developer, App Uploader, or App Reader)
- Granted at — when the role was assigned
- Actions — channel permissions (shield icon), edit role (wrench icon), and remove (trash icon)
Changing an app role
Section titled “Changing an app role”Click the edit button (wrench icon) next to a user to change their app-level role:
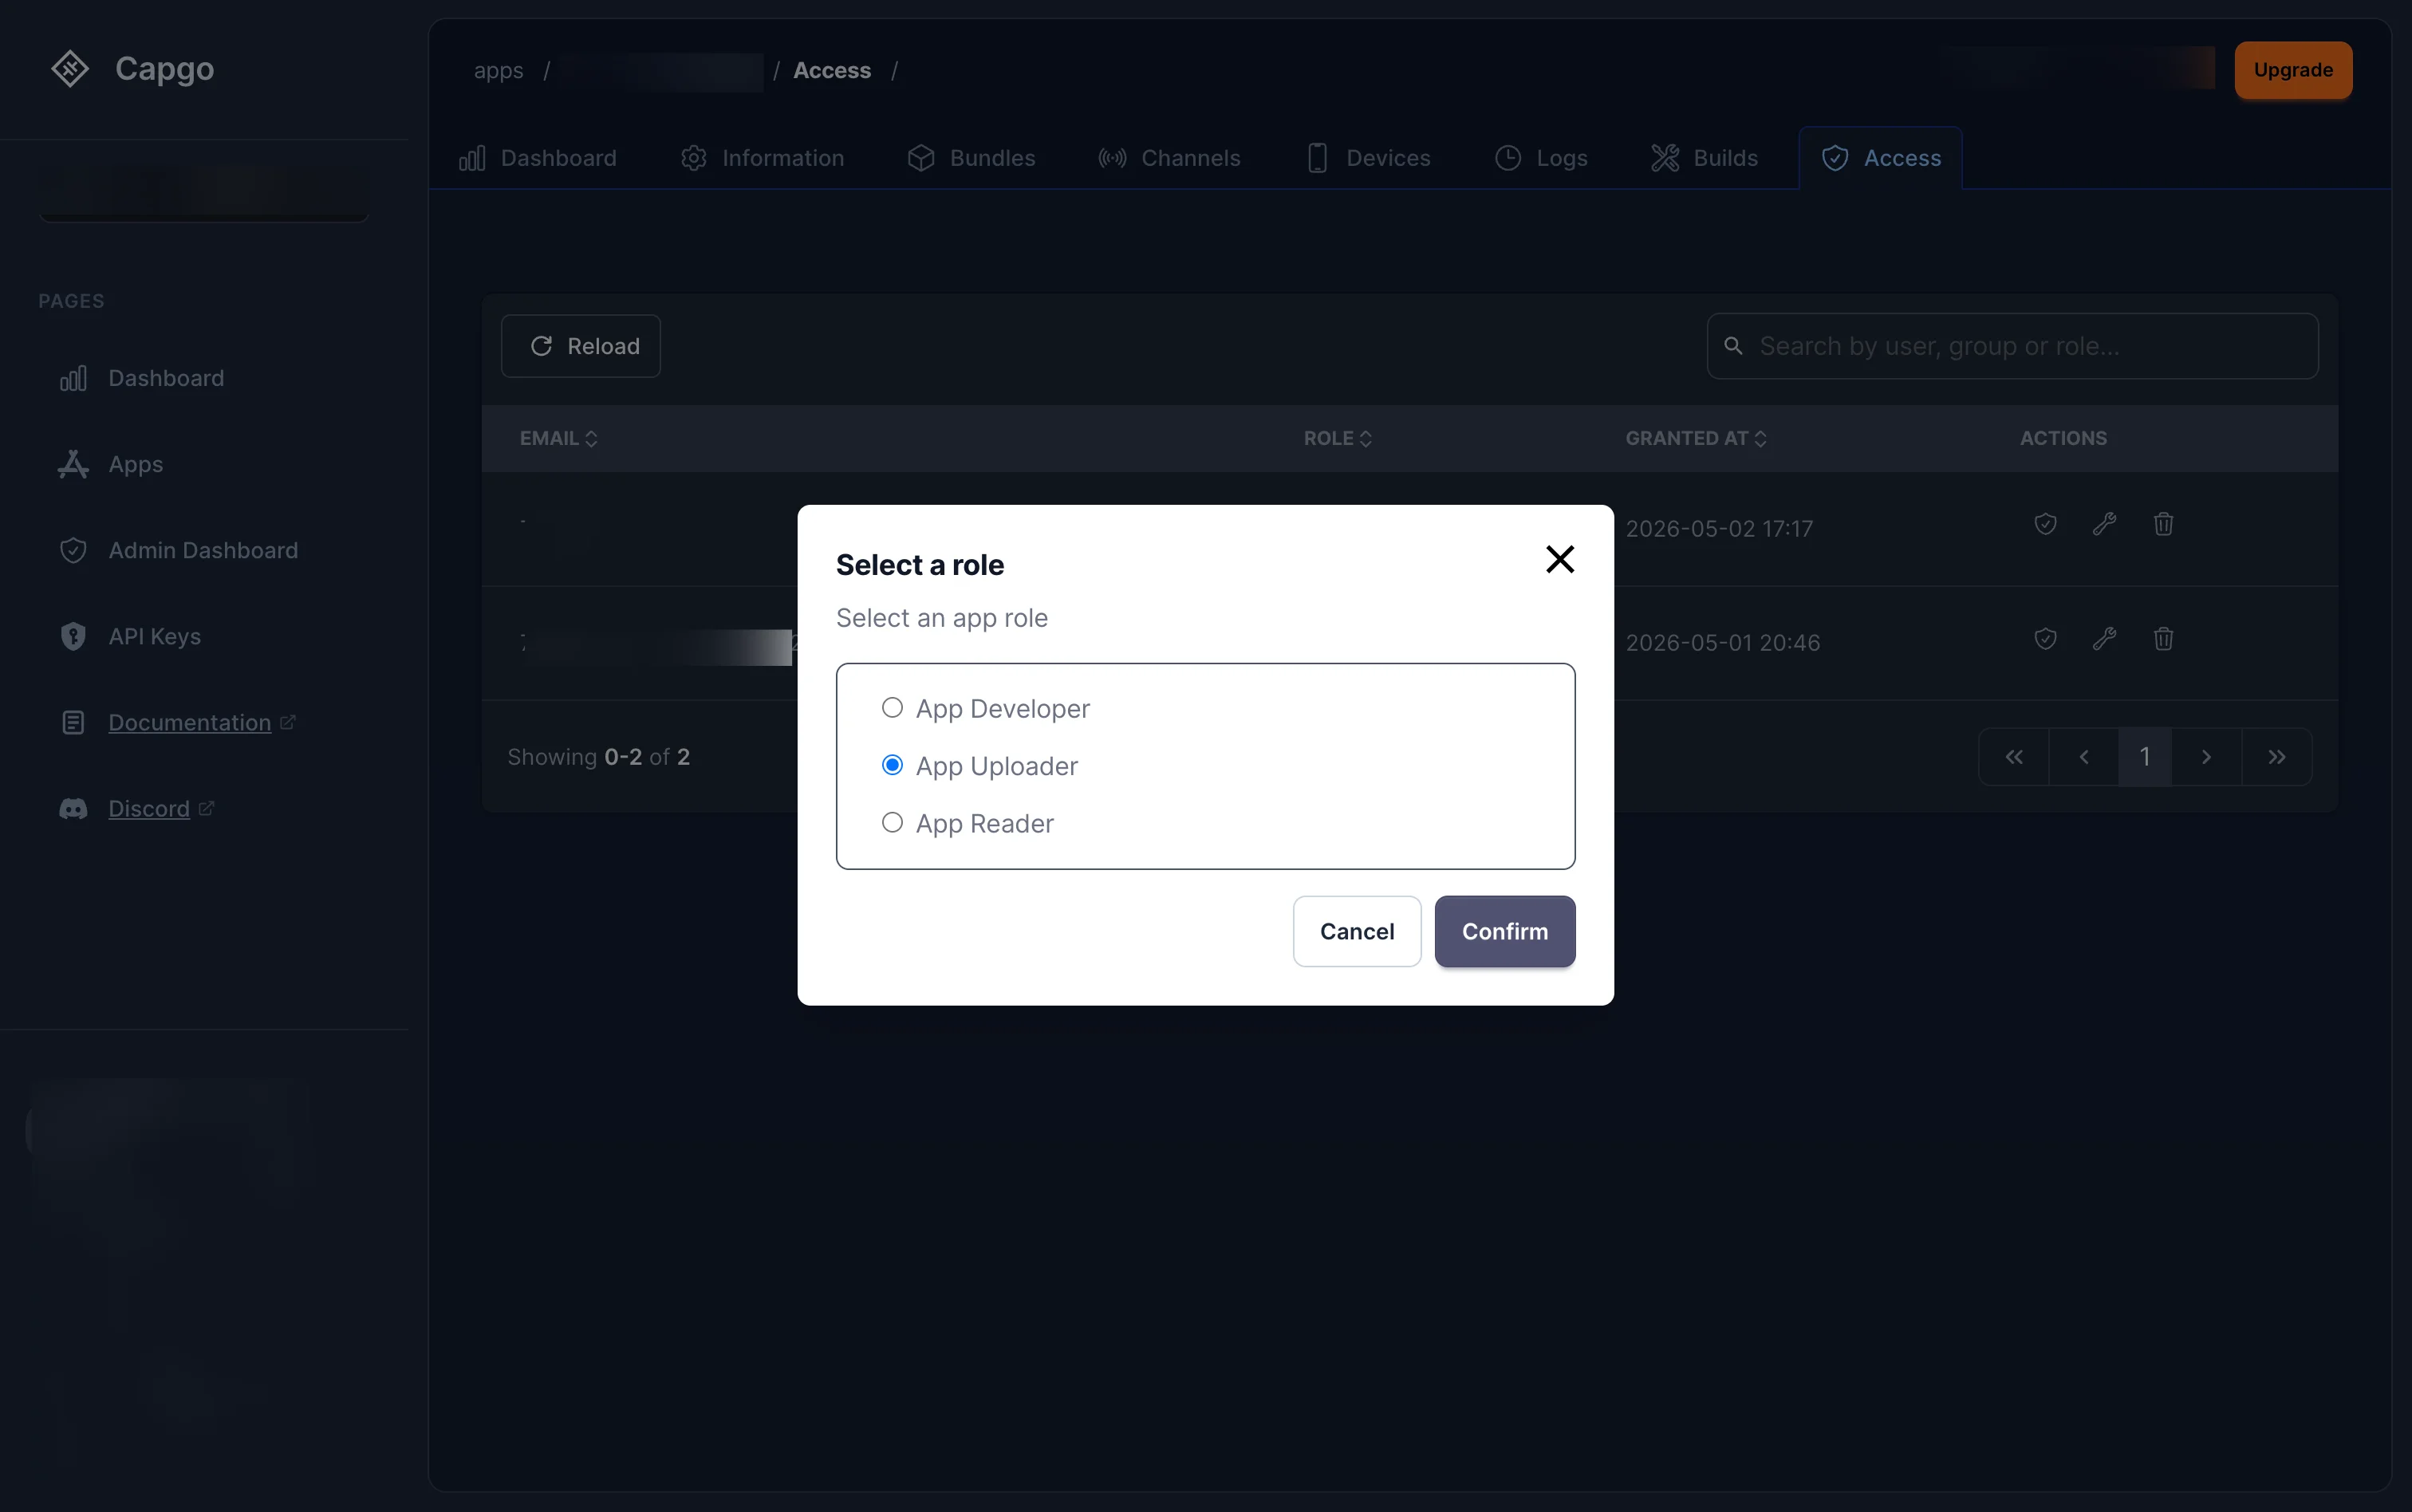
Select the new role and click Confirm. The available roles are:
- App Developer — Upload bundles, manage devices, but no destructive operations
- App Uploader — Read app data and upload bundles
- App Reader — Read-only access
Overriding channel permissions
Section titled “Overriding channel permissions”Click the channel permissions button (shield icon) next to a user to override their default channel permissions:
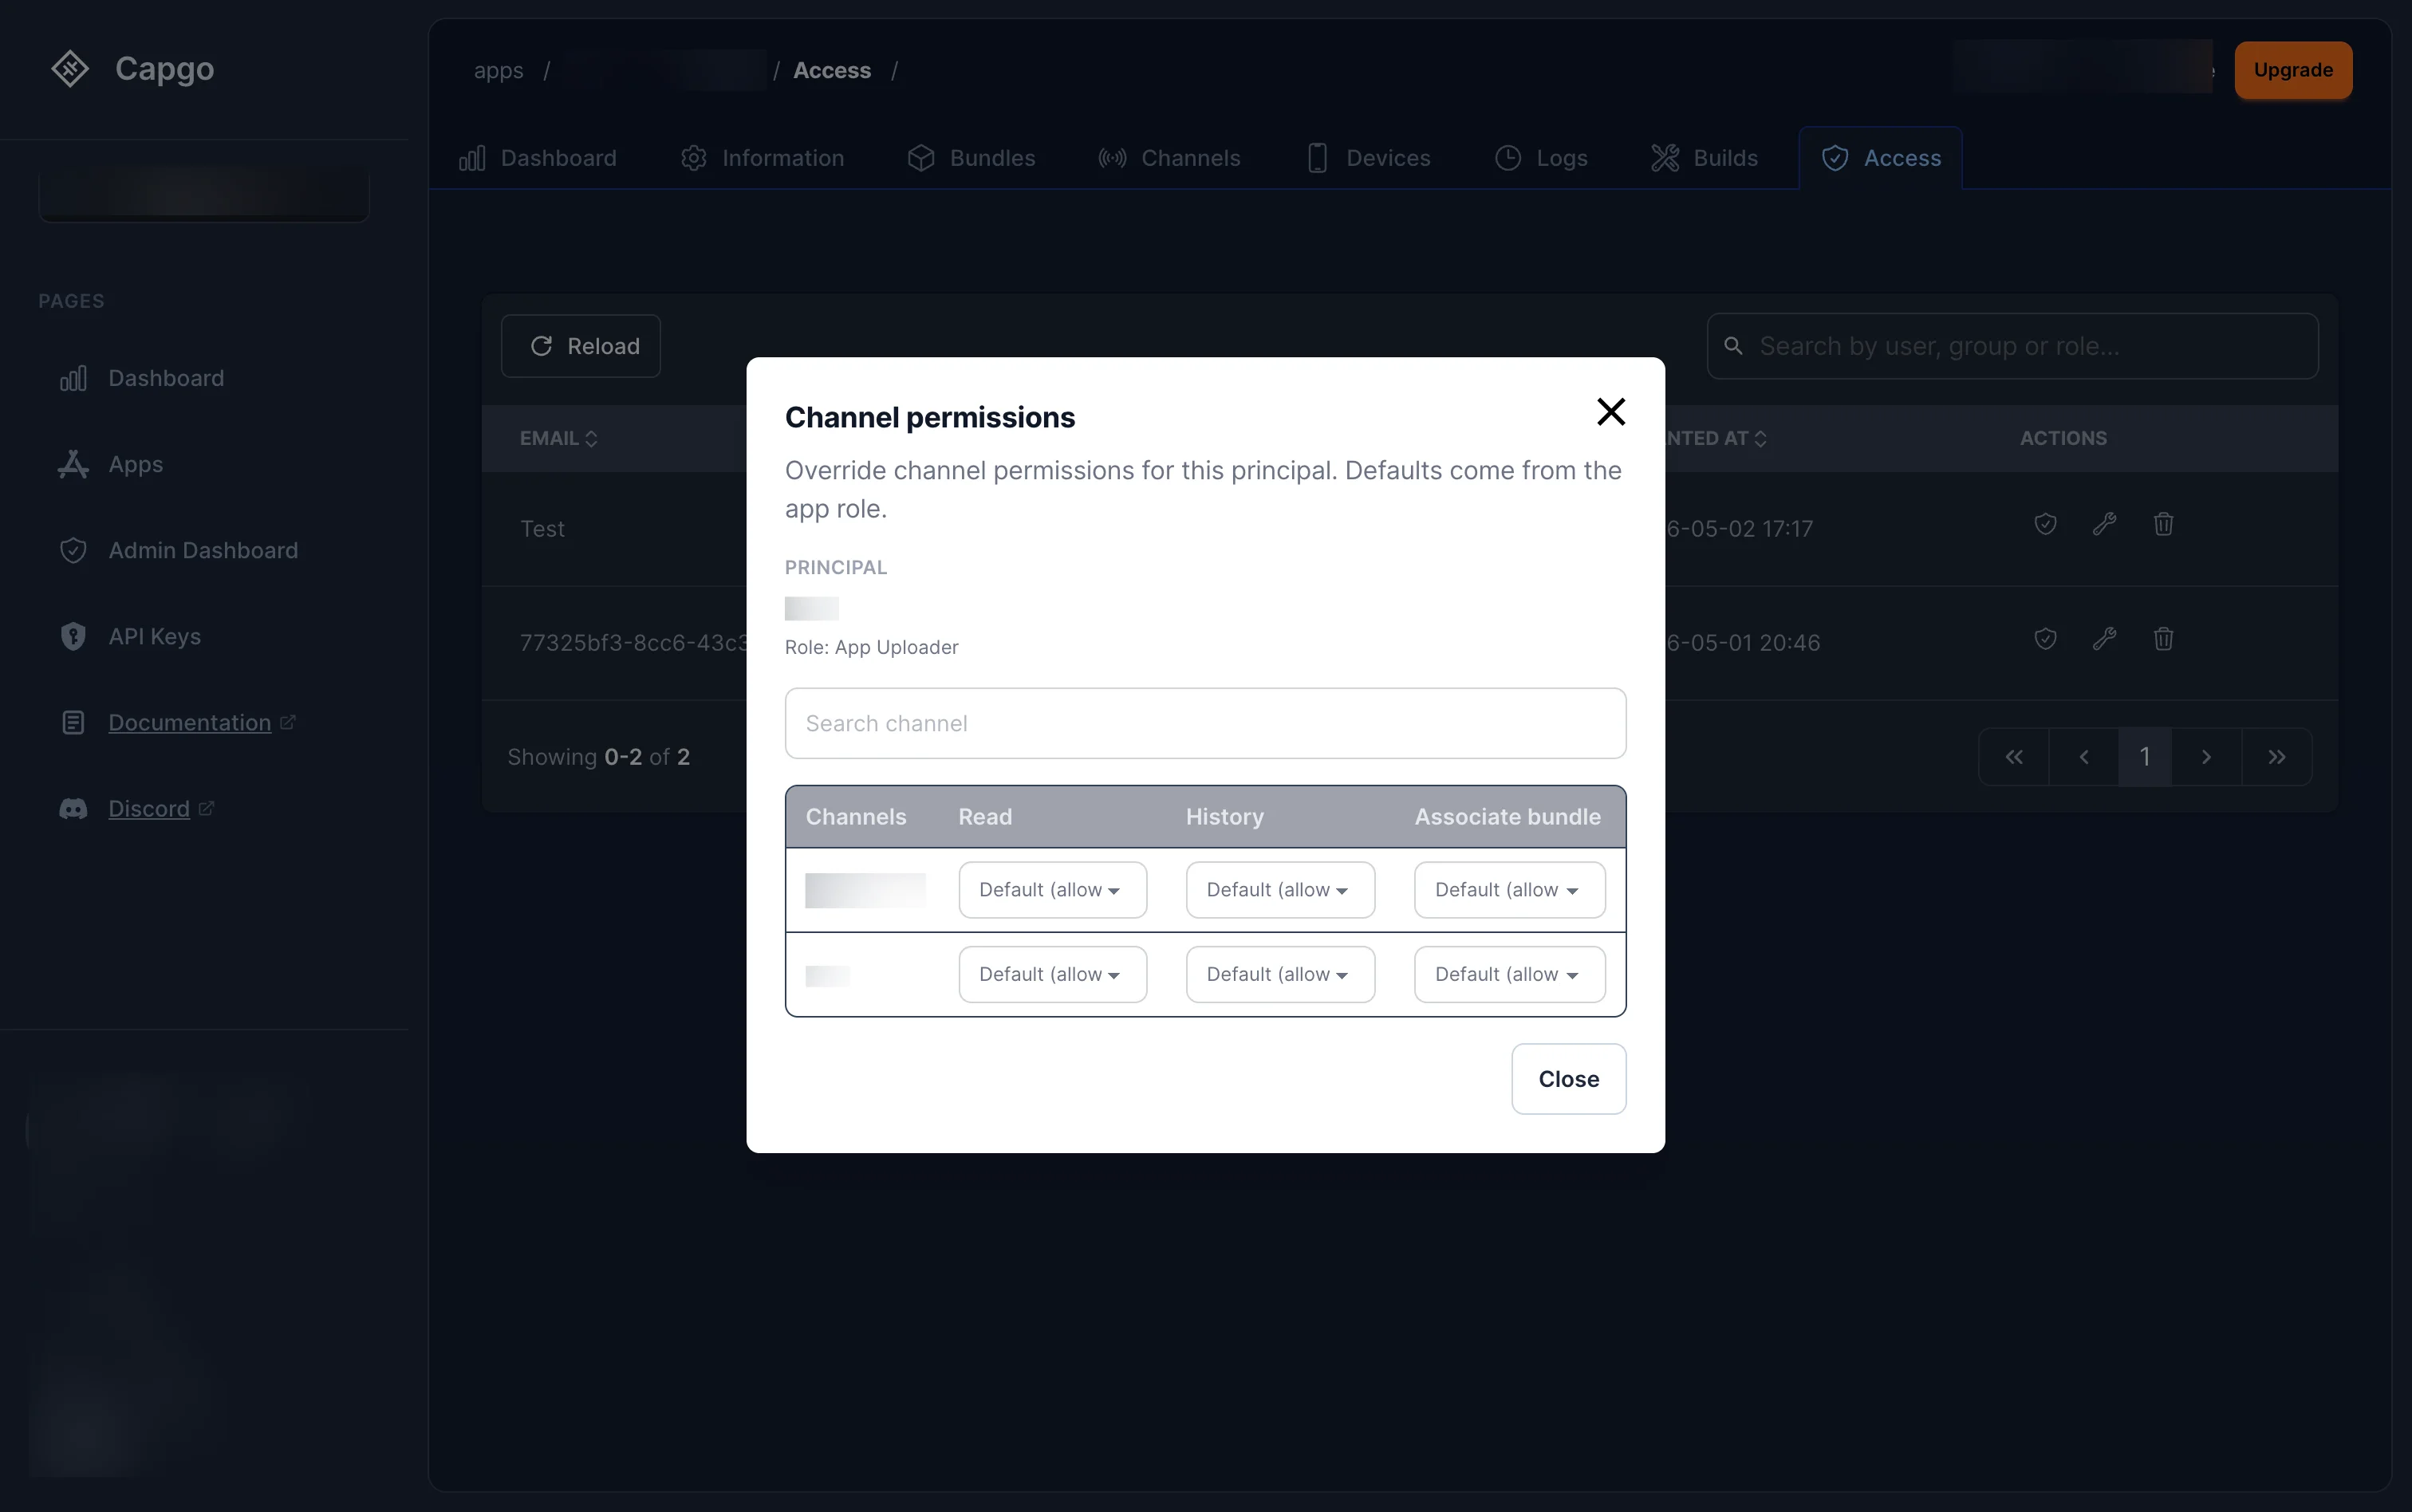
The modal shows the user’s current app role and lists all channels with three permissions that can be overridden individually:
| Permission | Description |
|---|---|
| Read | View the channel and its current bundle |
| History | View the bundle assignment history |
| Associate bundle | Set or change the active bundle on the channel |
Each permission defaults to Default (allow) — meaning it inherits from the app role. You can change any permission to explicitly Allow or Deny for a specific channel, giving you fine-grained control without changing the user’s overall app role.
Groups
Section titled “Groups”Groups let you assign roles to a set of users at once instead of managing each member individually. A group belongs to an organization and can hold role bindings at any scope — org or app.
Example: Create a “QA Team” group, assign it the App Developer role on your production app, and every member of that group instantly gets Developer access to that app. When someone joins or leaves the team, just add or remove them from the group — no need to touch individual role bindings.
How groups work
Section titled “How groups work”- A group is org-scoped — it belongs to one organization and cannot span multiple orgs.
- You assign roles to a group the same way you assign roles to a user — the group appears as a principal in role bindings.
- When a user’s permissions are checked, their group memberships are automatically resolved. If any of their groups hold a role that grants the required permission, access is granted.
- A user can belong to multiple groups, and permissions from all groups are combined.
Viewing groups
Section titled “Viewing groups”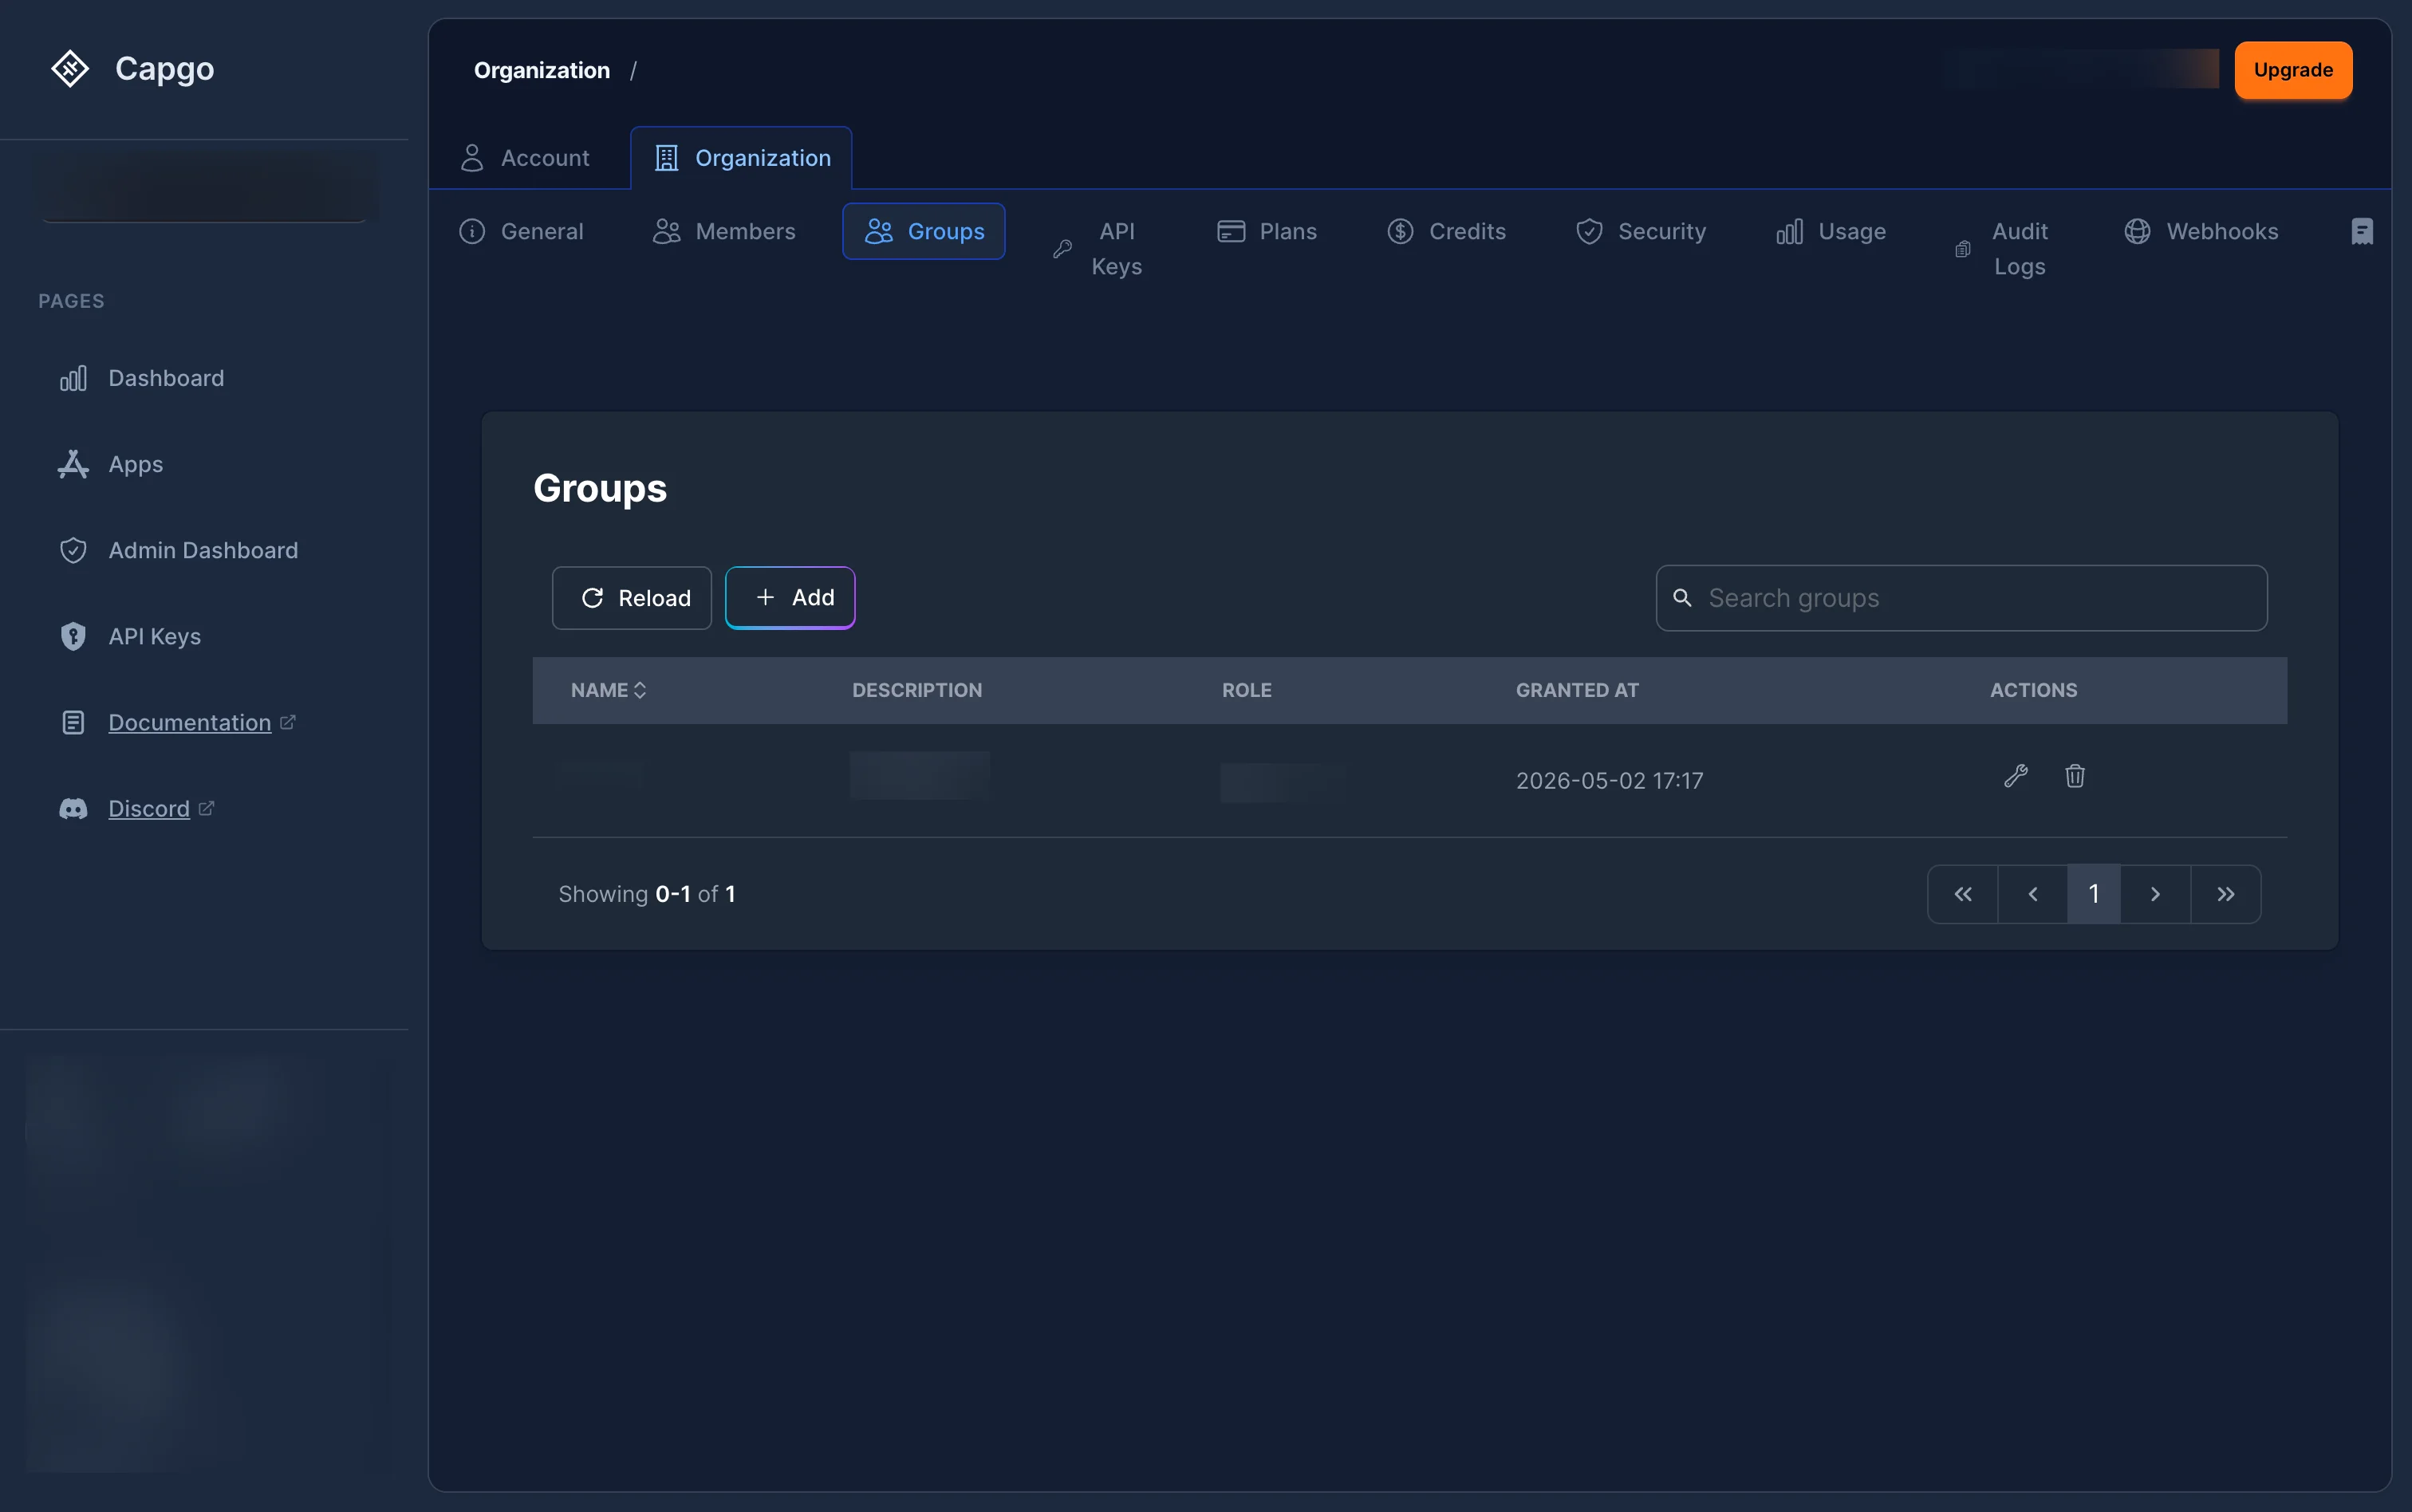
Navigate to the Groups tab in your organization settings. The groups list shows each group’s name, description, role, creation date, and actions (edit or delete).
Creating a group
Section titled “Creating a group”Click the + Add button to open the group creation page:
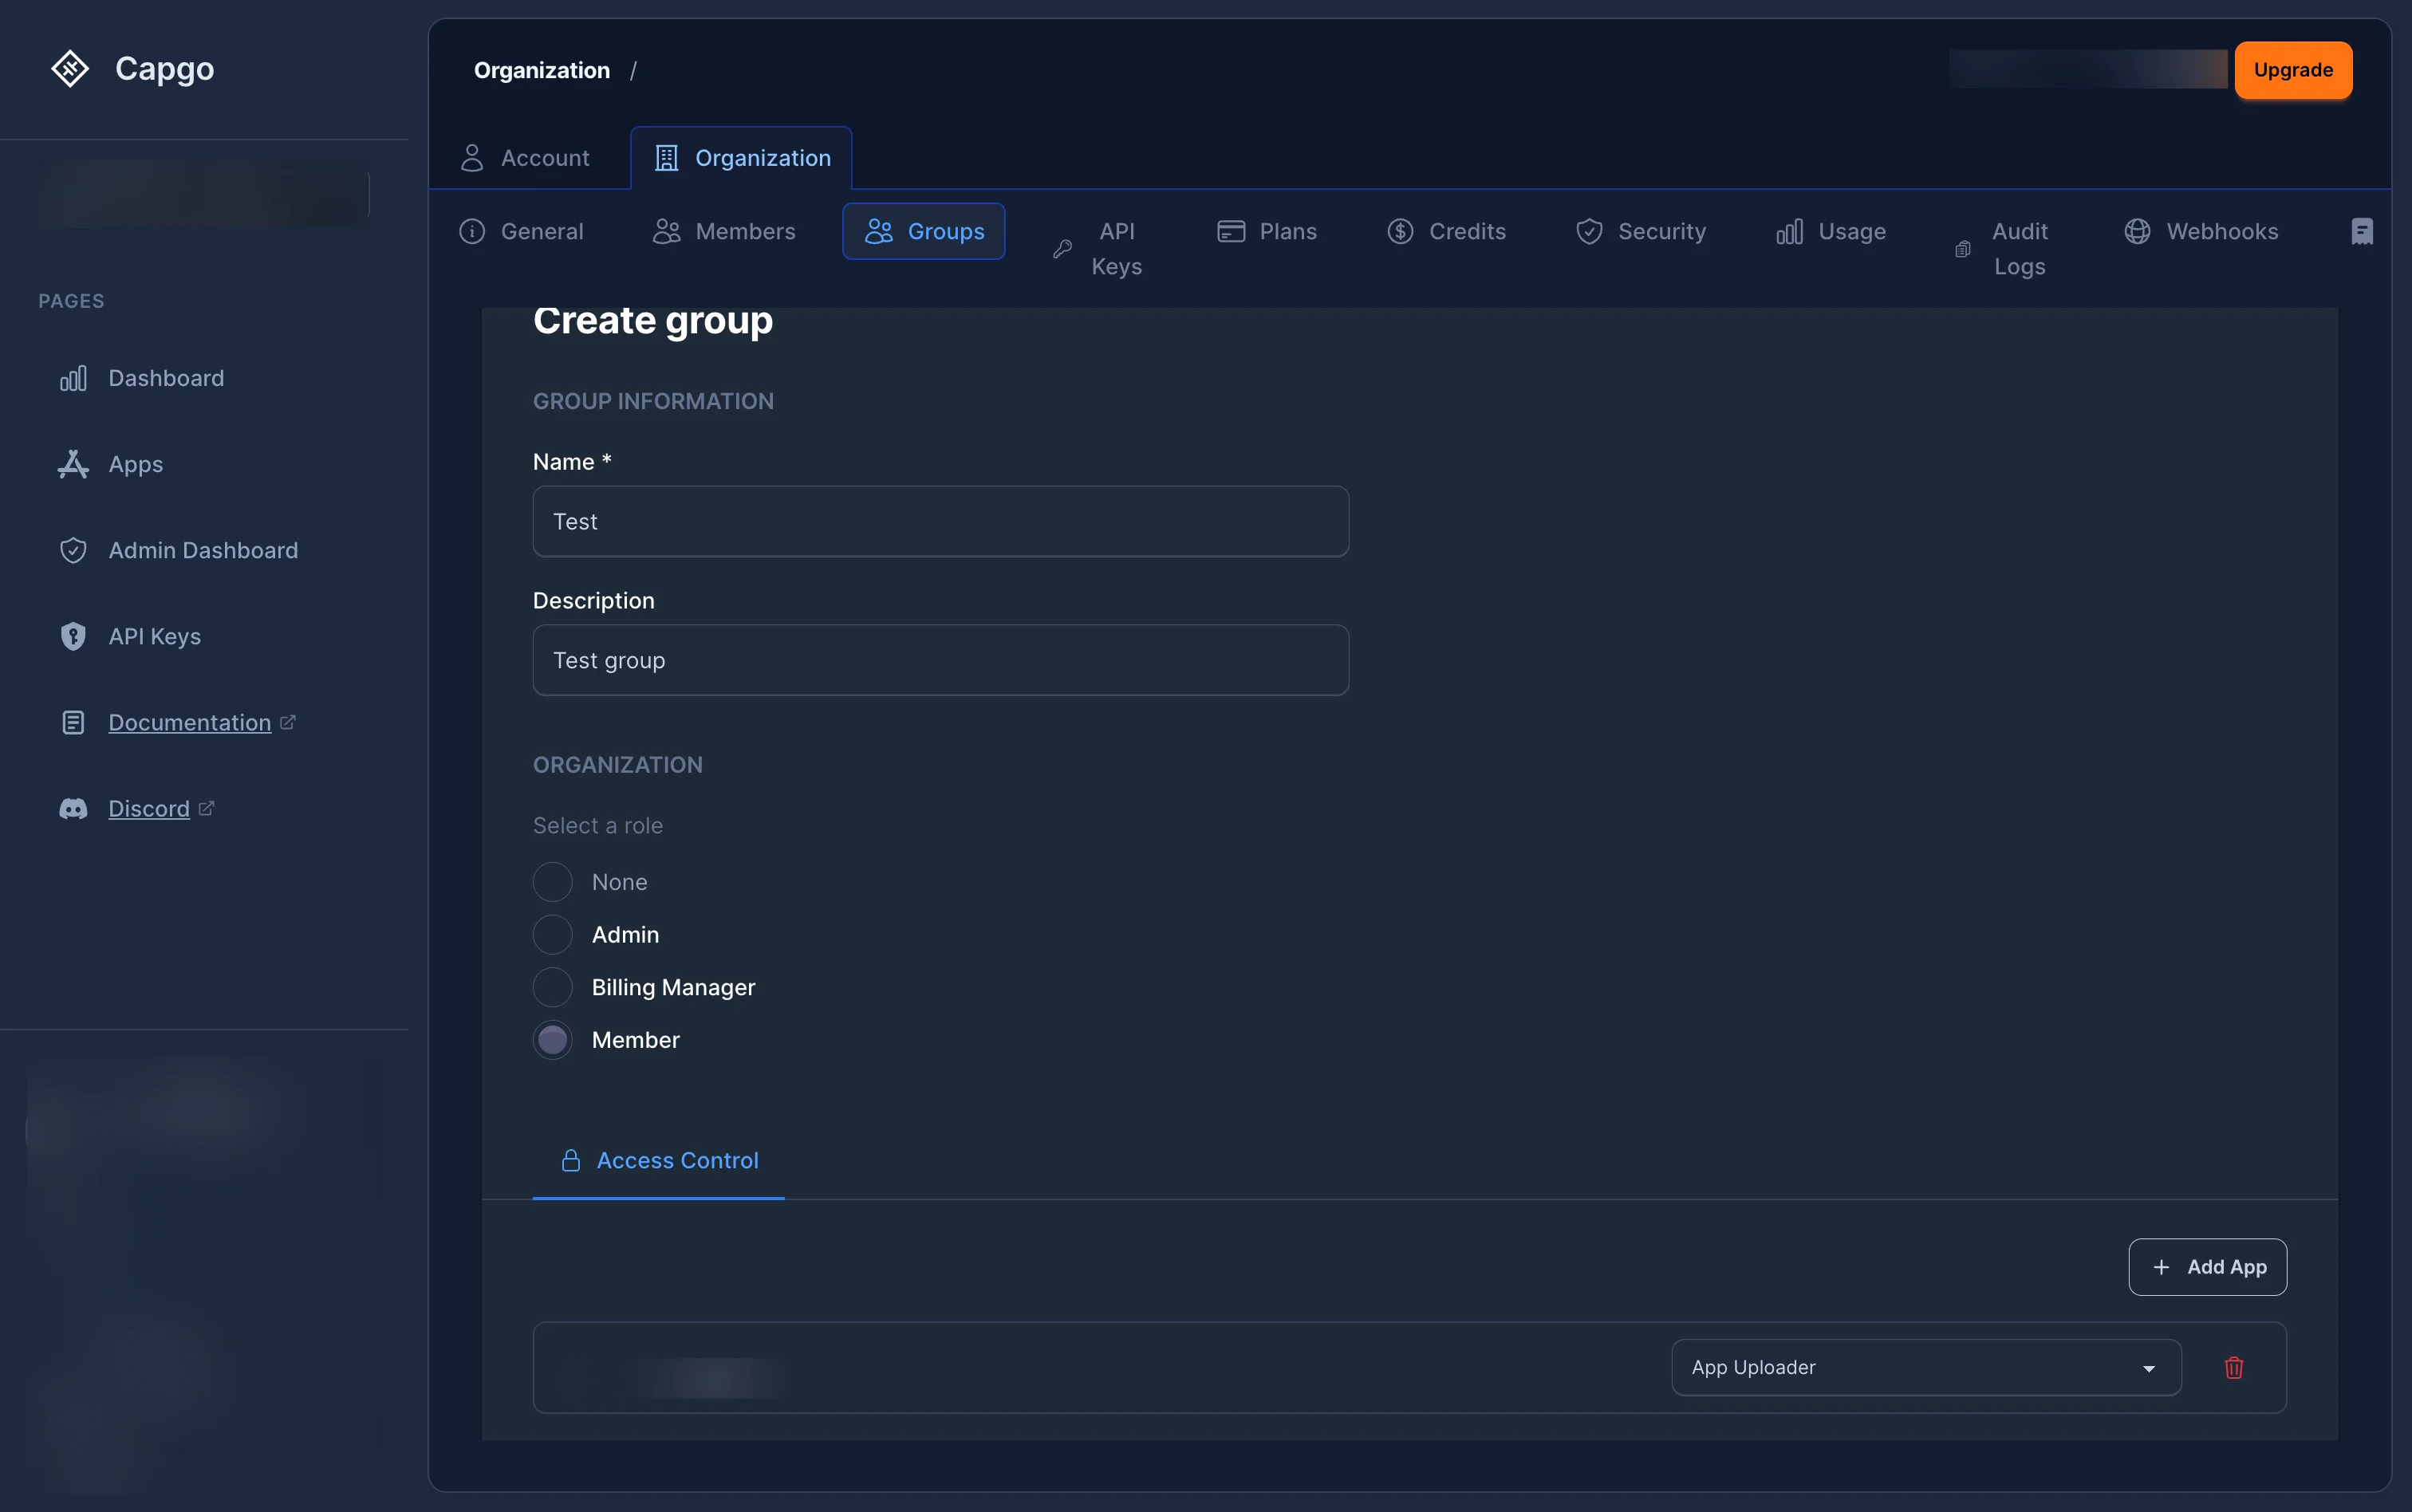
Fill in:
- Name (required) and Description (optional)
- Organization role — optionally assign an org-level role (None, Admin, Billing Manager, or Member)
- Access Control tab — assign app-level roles by clicking + Add App, selecting an app, and choosing a role (e.g. App Uploader, App Developer)
You need Super Admin or Admin to create groups.
Managing group members
Section titled “Managing group members”Click on a group to open its detail view. Switch to the Members tab:
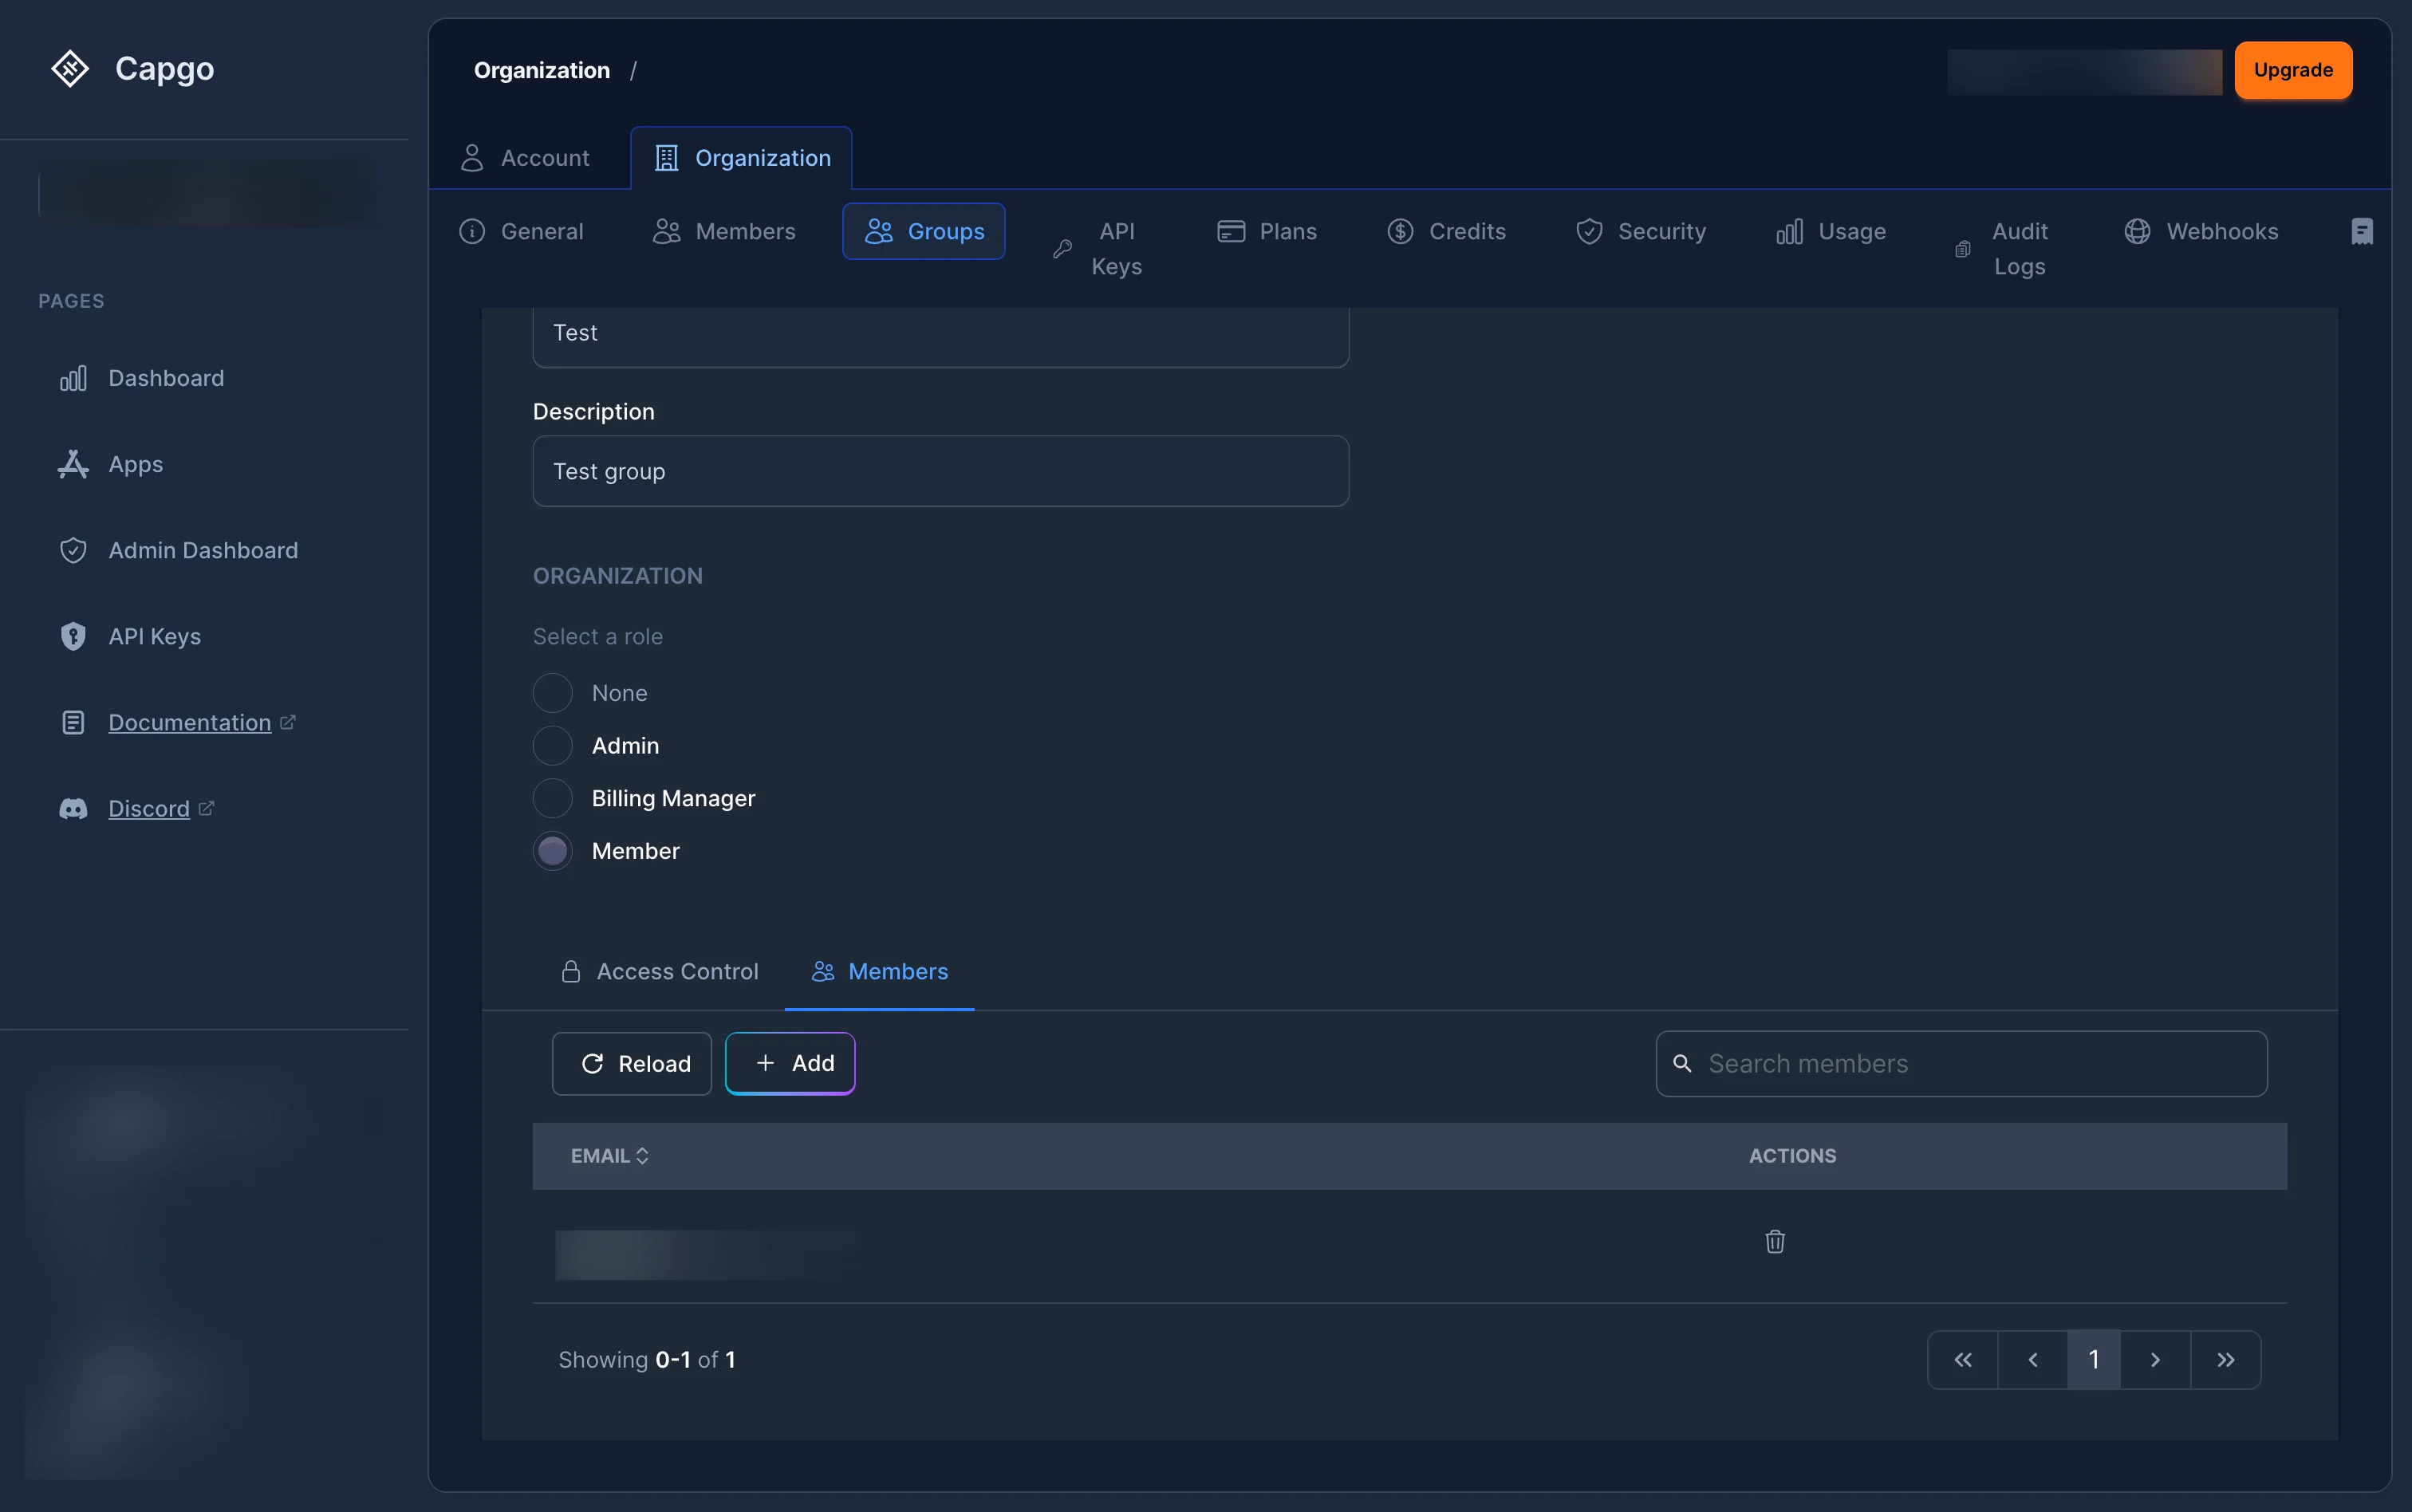
From here you can view current members and their emails. Click + Add to add members:
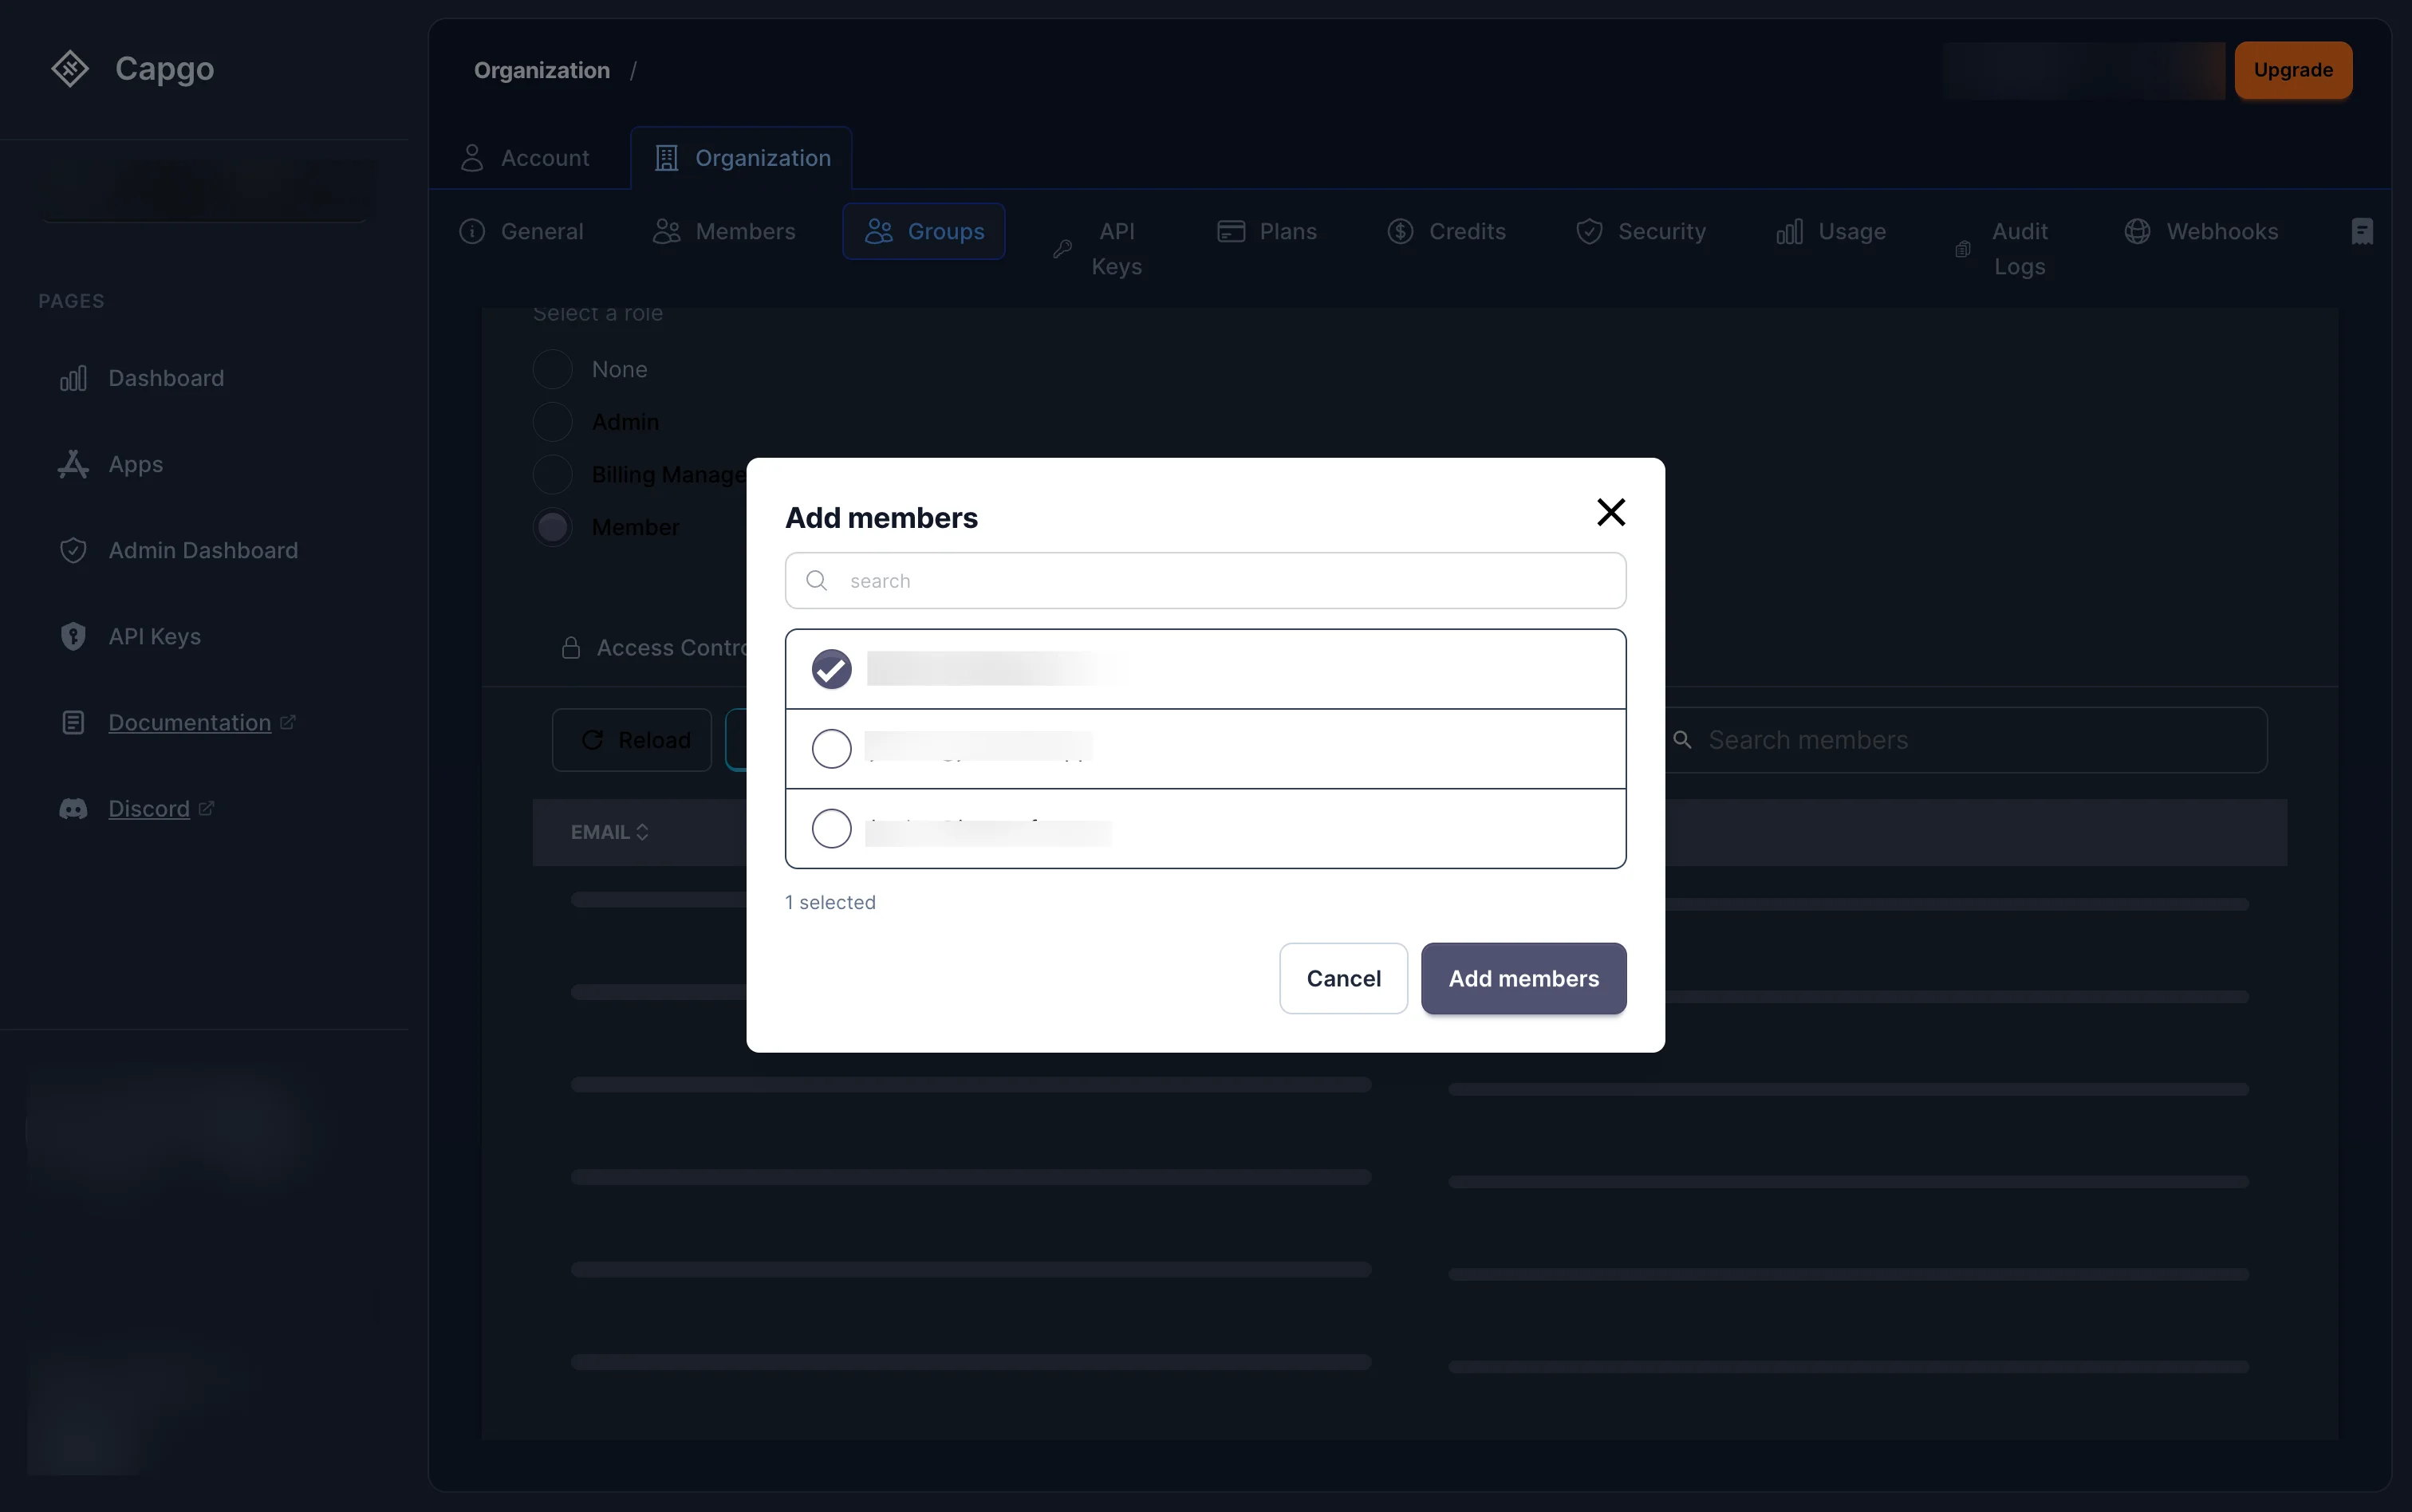
The modal shows all organization members. Search by name, check the members you want to add, and click Add members.
Billing
Section titled “Billing”Only Super Admin (org_super_admin) and Billing Manager (org_billing_admin) can manage billing. Plans are linked to an organization, not to your personal account.
Can I create more than one organization?
Section titled “Can I create more than one organization?”Yes. You can create as many organizations as you need and switch between them using the organization selector in the sidebar.
How do I configure security policies?
Section titled “How do I configure security policies?”Super Admins can configure 2FA enforcement, password policies, and API key security from the Security tab. See Organization Security for details.
Can I give someone access to only one app or channel?
Section titled “Can I give someone access to only one app or channel?”Yes — assign them an app-scoped role (like App Developer or App Reader) via the Members page or the app’s Access tab. You can further fine-tune their access per channel using channel permission overrides. See Access Control Reference for the full list of roles.
What is the difference between Admin and App Admin?
Section titled “What is the difference between Admin and App Admin?”Admin (org_admin) has authority over the entire organization — all apps, all channels, all members. App Admin (app_admin) has the same level of control but only over one specific app and its channels. Use App Admin when you want to delegate full control of an app without giving access to the rest of the org.
Keep going from Organization
Section titled “Keep going from Organization”If you are using Organization to plan dashboard and API operations, connect it with API Overview for the implementation detail in API Overview, Introduction for the implementation detail in Introduction, API Keys for the implementation detail in API Keys, Devices for the implementation detail in Devices, and Bundles for the implementation detail in Bundles.