Apple login for web browsers
Copy a setup prompt with the install steps and the full markdown guide for this plugin.
Configuring the web login is not trivial. It’s more difficult than setting up Sign in with Apple on iOS but more difficult than setting up Sign in with Apple on Android.
Generating the service
Section titled “Generating the service”Please follow the guide here to generate the service.
Configuring the Return URLs
Section titled “Configuring the Return URLs”-
Go to your Service ID configuration
In the Apple Developer Portal, navigate to
Identifiers>Services IDsand click on your service ID. -
Configure Sign in with Apple
Click on
Configurenext toSign in with Apple.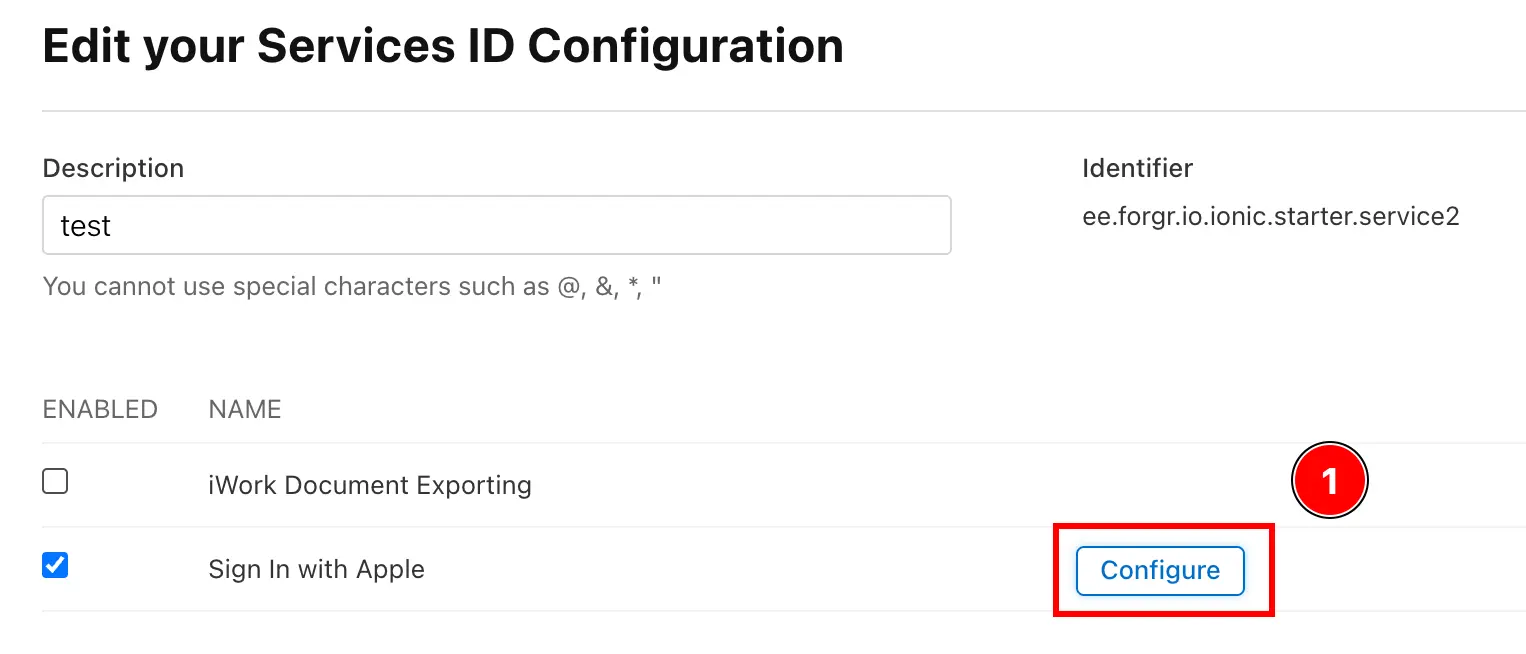
-
Add the Return URLs
Click on the
+button to add a new return URL.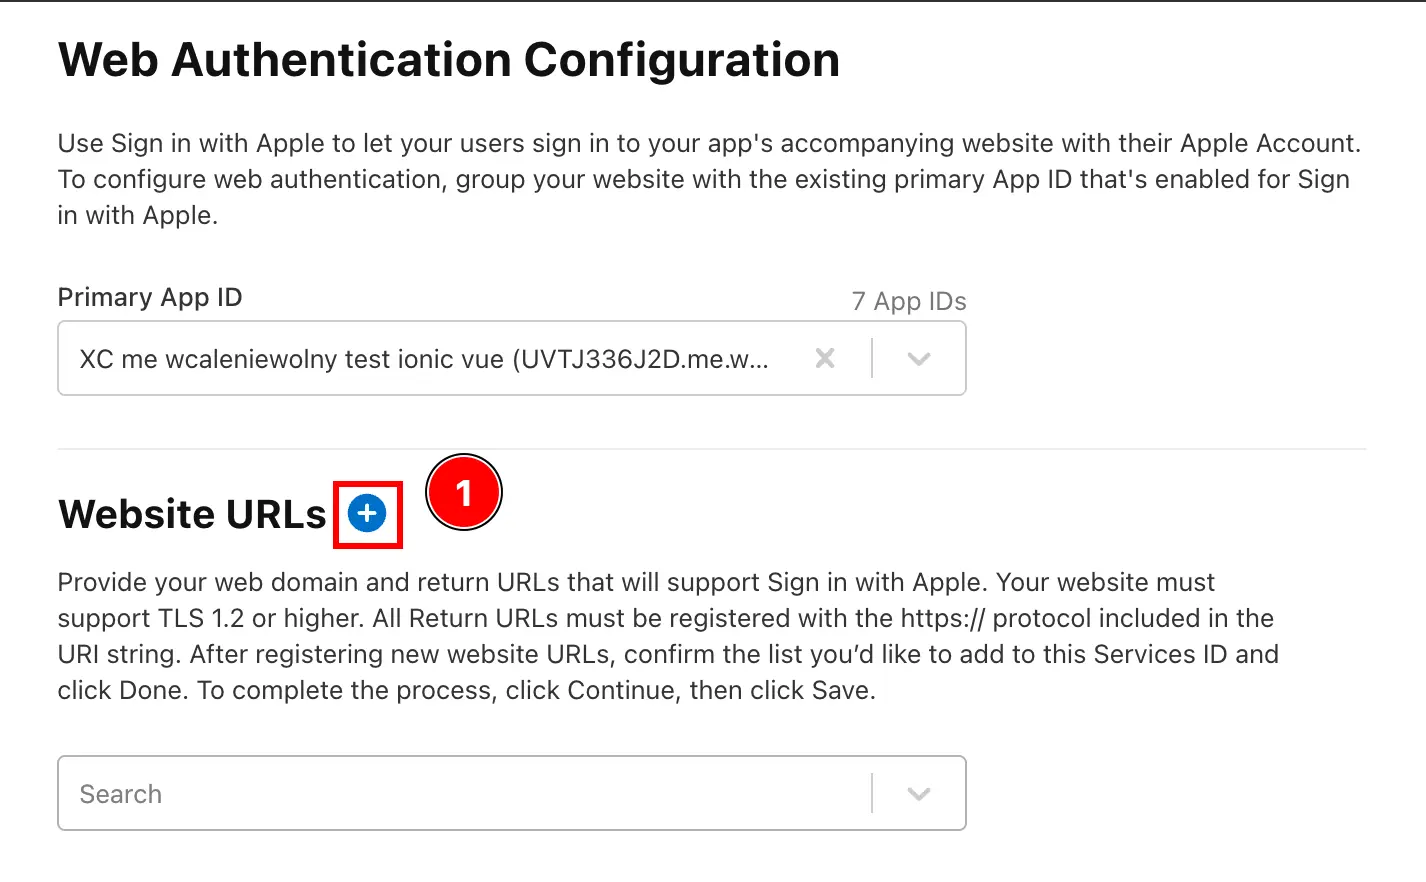
-
Add the Return URLs
Add your domain for your web application in
Domains and Subdomains.Then, add your domain with the
https://prefix and the path from which you will call Apple Login. For example, if your domain ishttps://my-app.comand you will call Apple Login from/login, you should addhttps://my-app.com/loginas the return URL.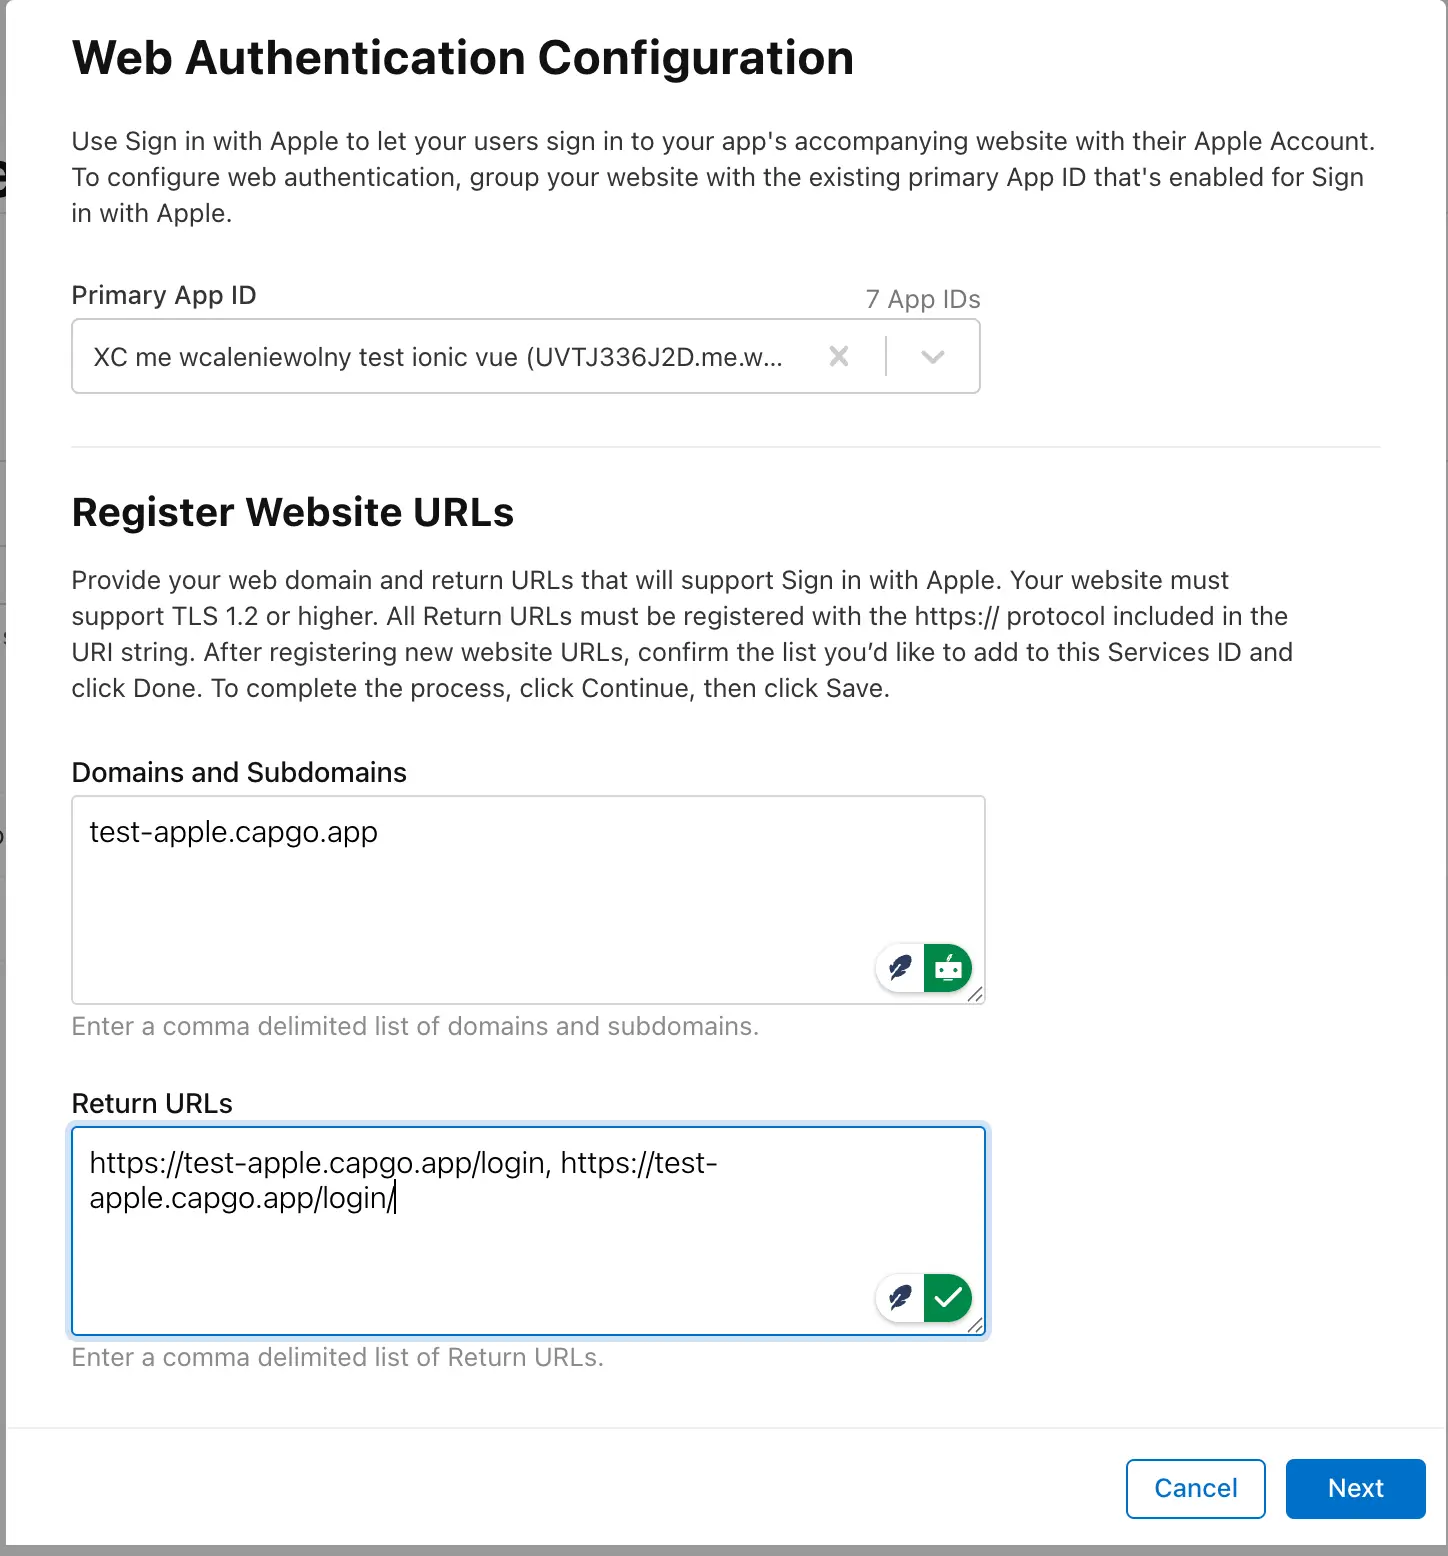
-
Save the changes
- Click on the
Nextbutton to save the changes. - Click on the
Savebutton to save the changes.
- Click on the
-
You should be ready to test the login for JavaScript. Please note that you cannot test from localhost.
Keep going from Apple login for web browsers
Section titled “Keep going from Apple login for web browsers”If you are using Apple login for web browsers to plan authentication and account flows, connect it with Using @capgo/capacitor-social-login for the native capability in Using @capgo/capacitor-social-login, @capgo/capacitor-social-login for the implementation detail in @capgo/capacitor-social-login, @capgo/capacitor-passkey for the implementation detail in @capgo/capacitor-passkey, @capgo/capacitor-native-biometric for the implementation detail in @capgo/capacitor-native-biometric, and Two-factor authentication for the implementation detail in Two-factor authentication.