Configure Android Sandbox Testing
Copy a setup prompt with the install steps and the full markdown guide for this plugin.
Testing in-app purchases requires proper configuration in Google Play Console. This guide will walk you through setting up sandbox testing for your Android app.
Use the right build for the job
Section titled “Use the right build for the job”Before you start, separate these three Android build types:
- Local debug/dev build: Good for checking UI and native integrations on your device.
- Signed release AAB uploaded to Play Console: Required for realistic Google Play billing tests.
- Play-installed testing build: The build your testers install from an internal or closed track. Use this for purchase QA.
If you only sideload an APK from Android Studio or adb, Google Play Billing may not behave the same way it does in production. For subscription and in-app purchase validation, always test with a build installed from Google Play.
Prerequisites
Section titled “Prerequisites”- A Google Play Console developer account. If you have not created one yet, start at Play Console signup.
- An app record created in Play Console with your final Android package name
- Your in-app products or subscriptions created in Play Console
- A test Gmail account that you can add to license testing
- A signed release build ready for upload
Before you spend time on billing setup, create the app in Play Console and decide whether it will be free or paid. Google lets you move a paid app to free later, but once an app has been offered for free, it cannot be switched to paid.
Use an Android App Bundle (.aab) for new Play Store apps:
bunx cap sync androidcd android./gradlew bundleReleaseMake sure your Android release signing is already configured before you run bundleRelease. If your keystore, signing config, or release passwords are not set yet, create the signed bundle from Android Studio with Build > Generate Signed App Bundle / APK, which prompts you for those values.
Setup Process
Section titled “Setup Process”-
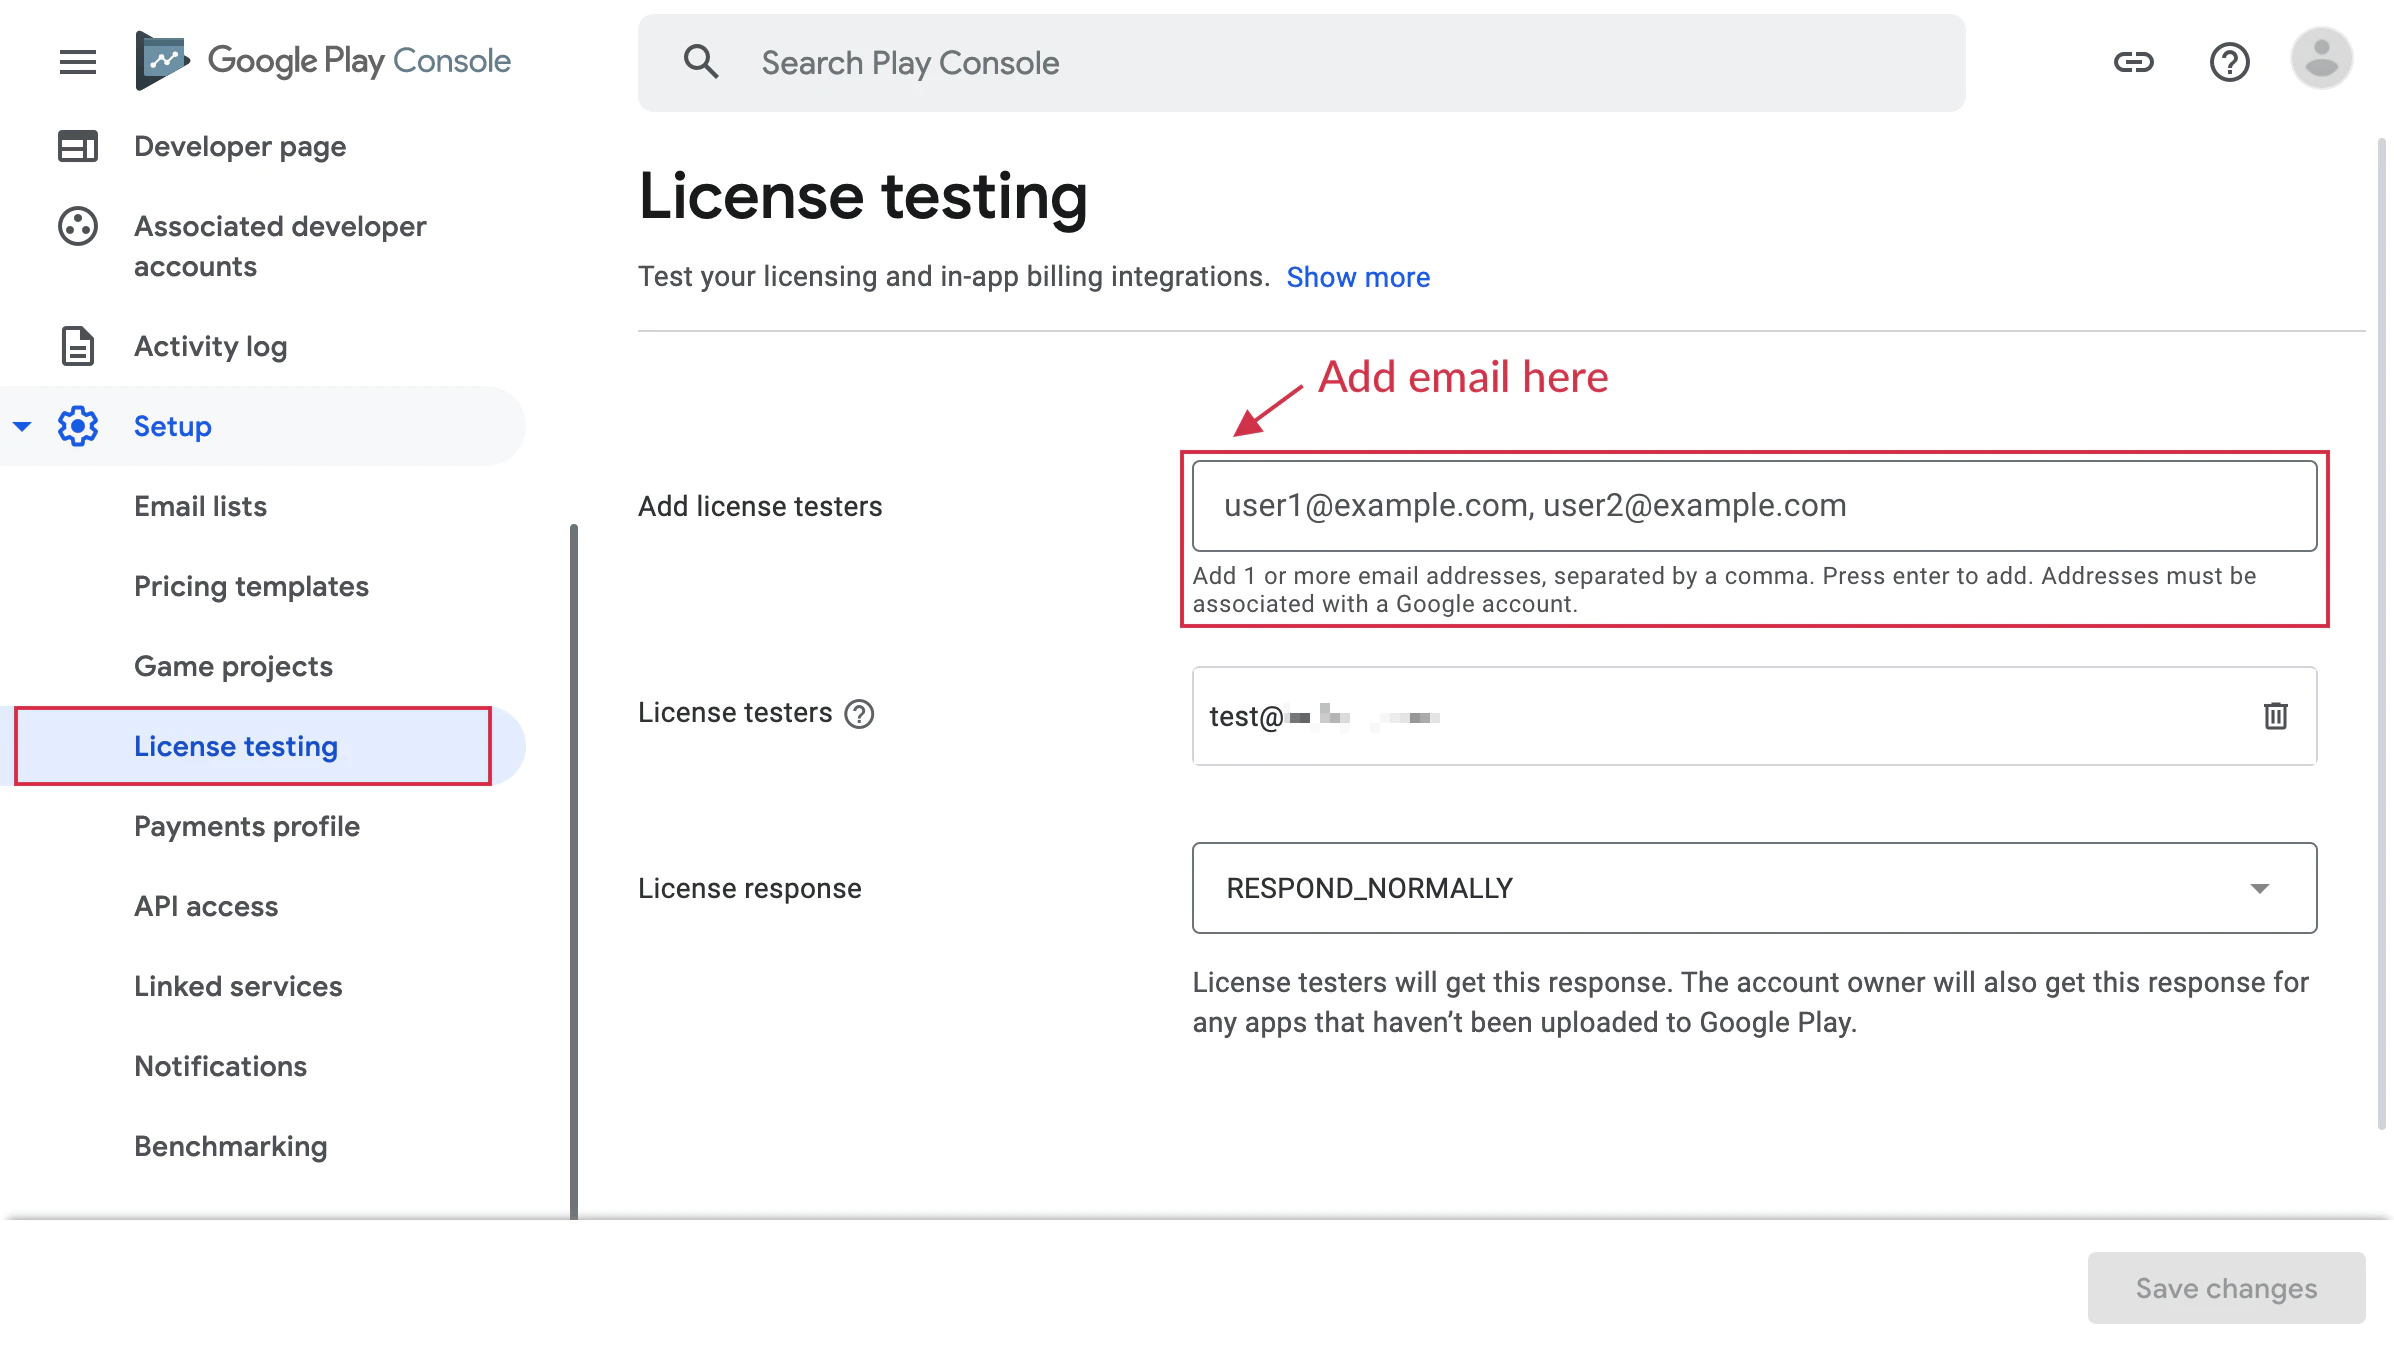
Add Testing Account
In Play Console, open Settings > License testing and add the primary Google account used on your Android test device.
This ensures purchases show the Play sandbox flow instead of attempting a real charge.
-
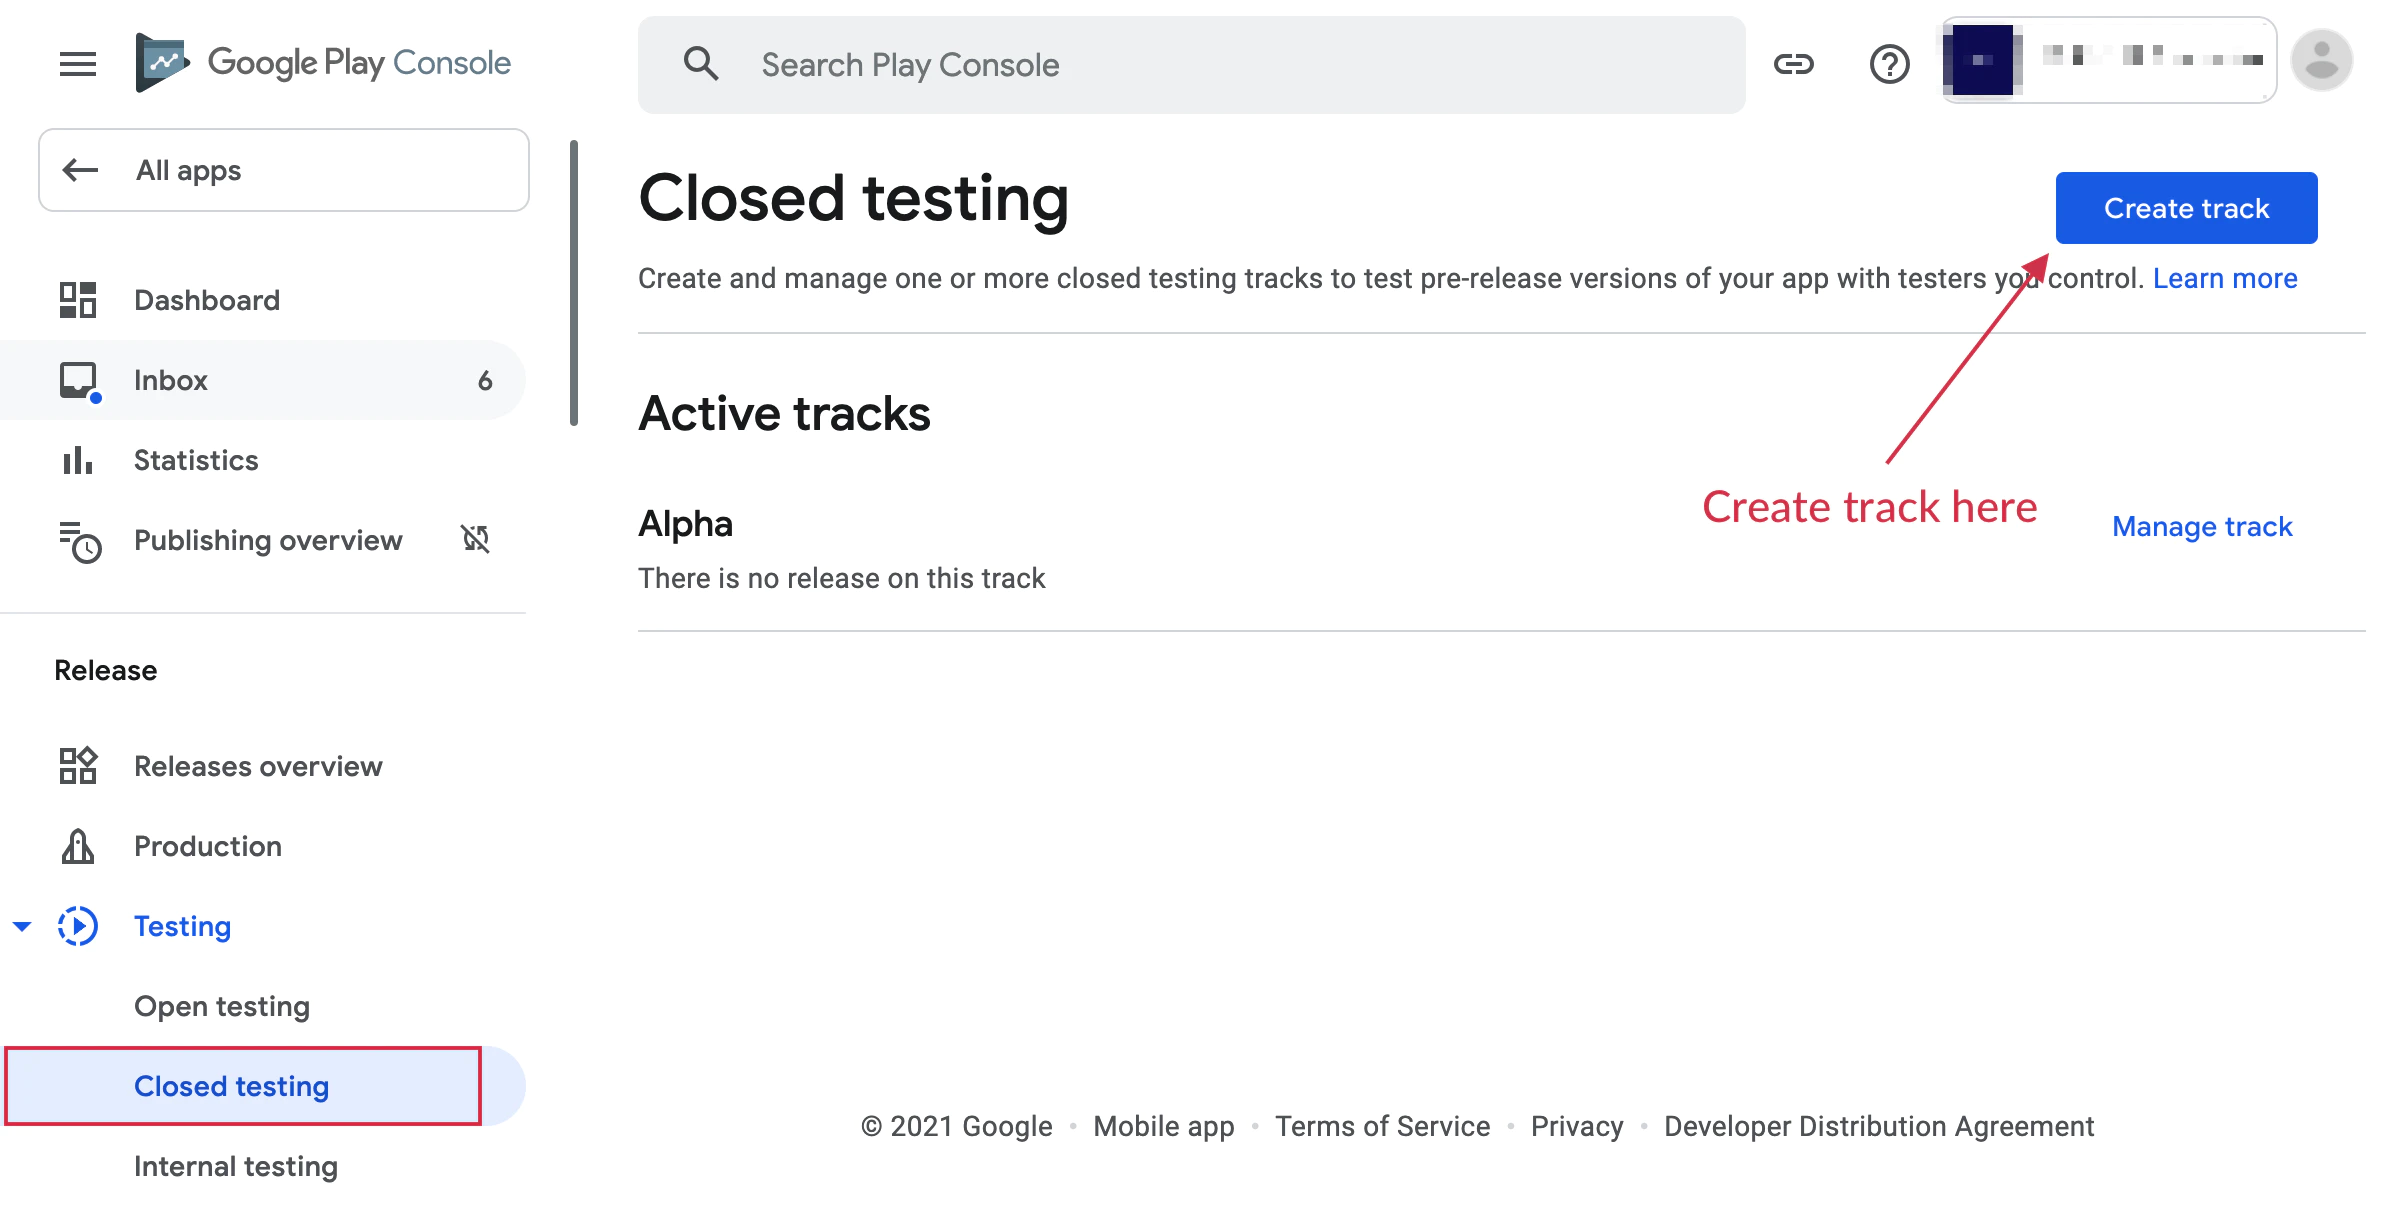
Choose a Testing Track
Go to Test and release > Testing and choose one of these tracks:
- Internal testing: Fastest path for QA and billing smoke tests. New bundles are normally available within minutes.
- Closed testing: Better for broader testing, and required before production for personal developer accounts created after November 13, 2023.
For a first release, Play may show a temporary app name and listing information to internal testers for up to 48 hours.
-
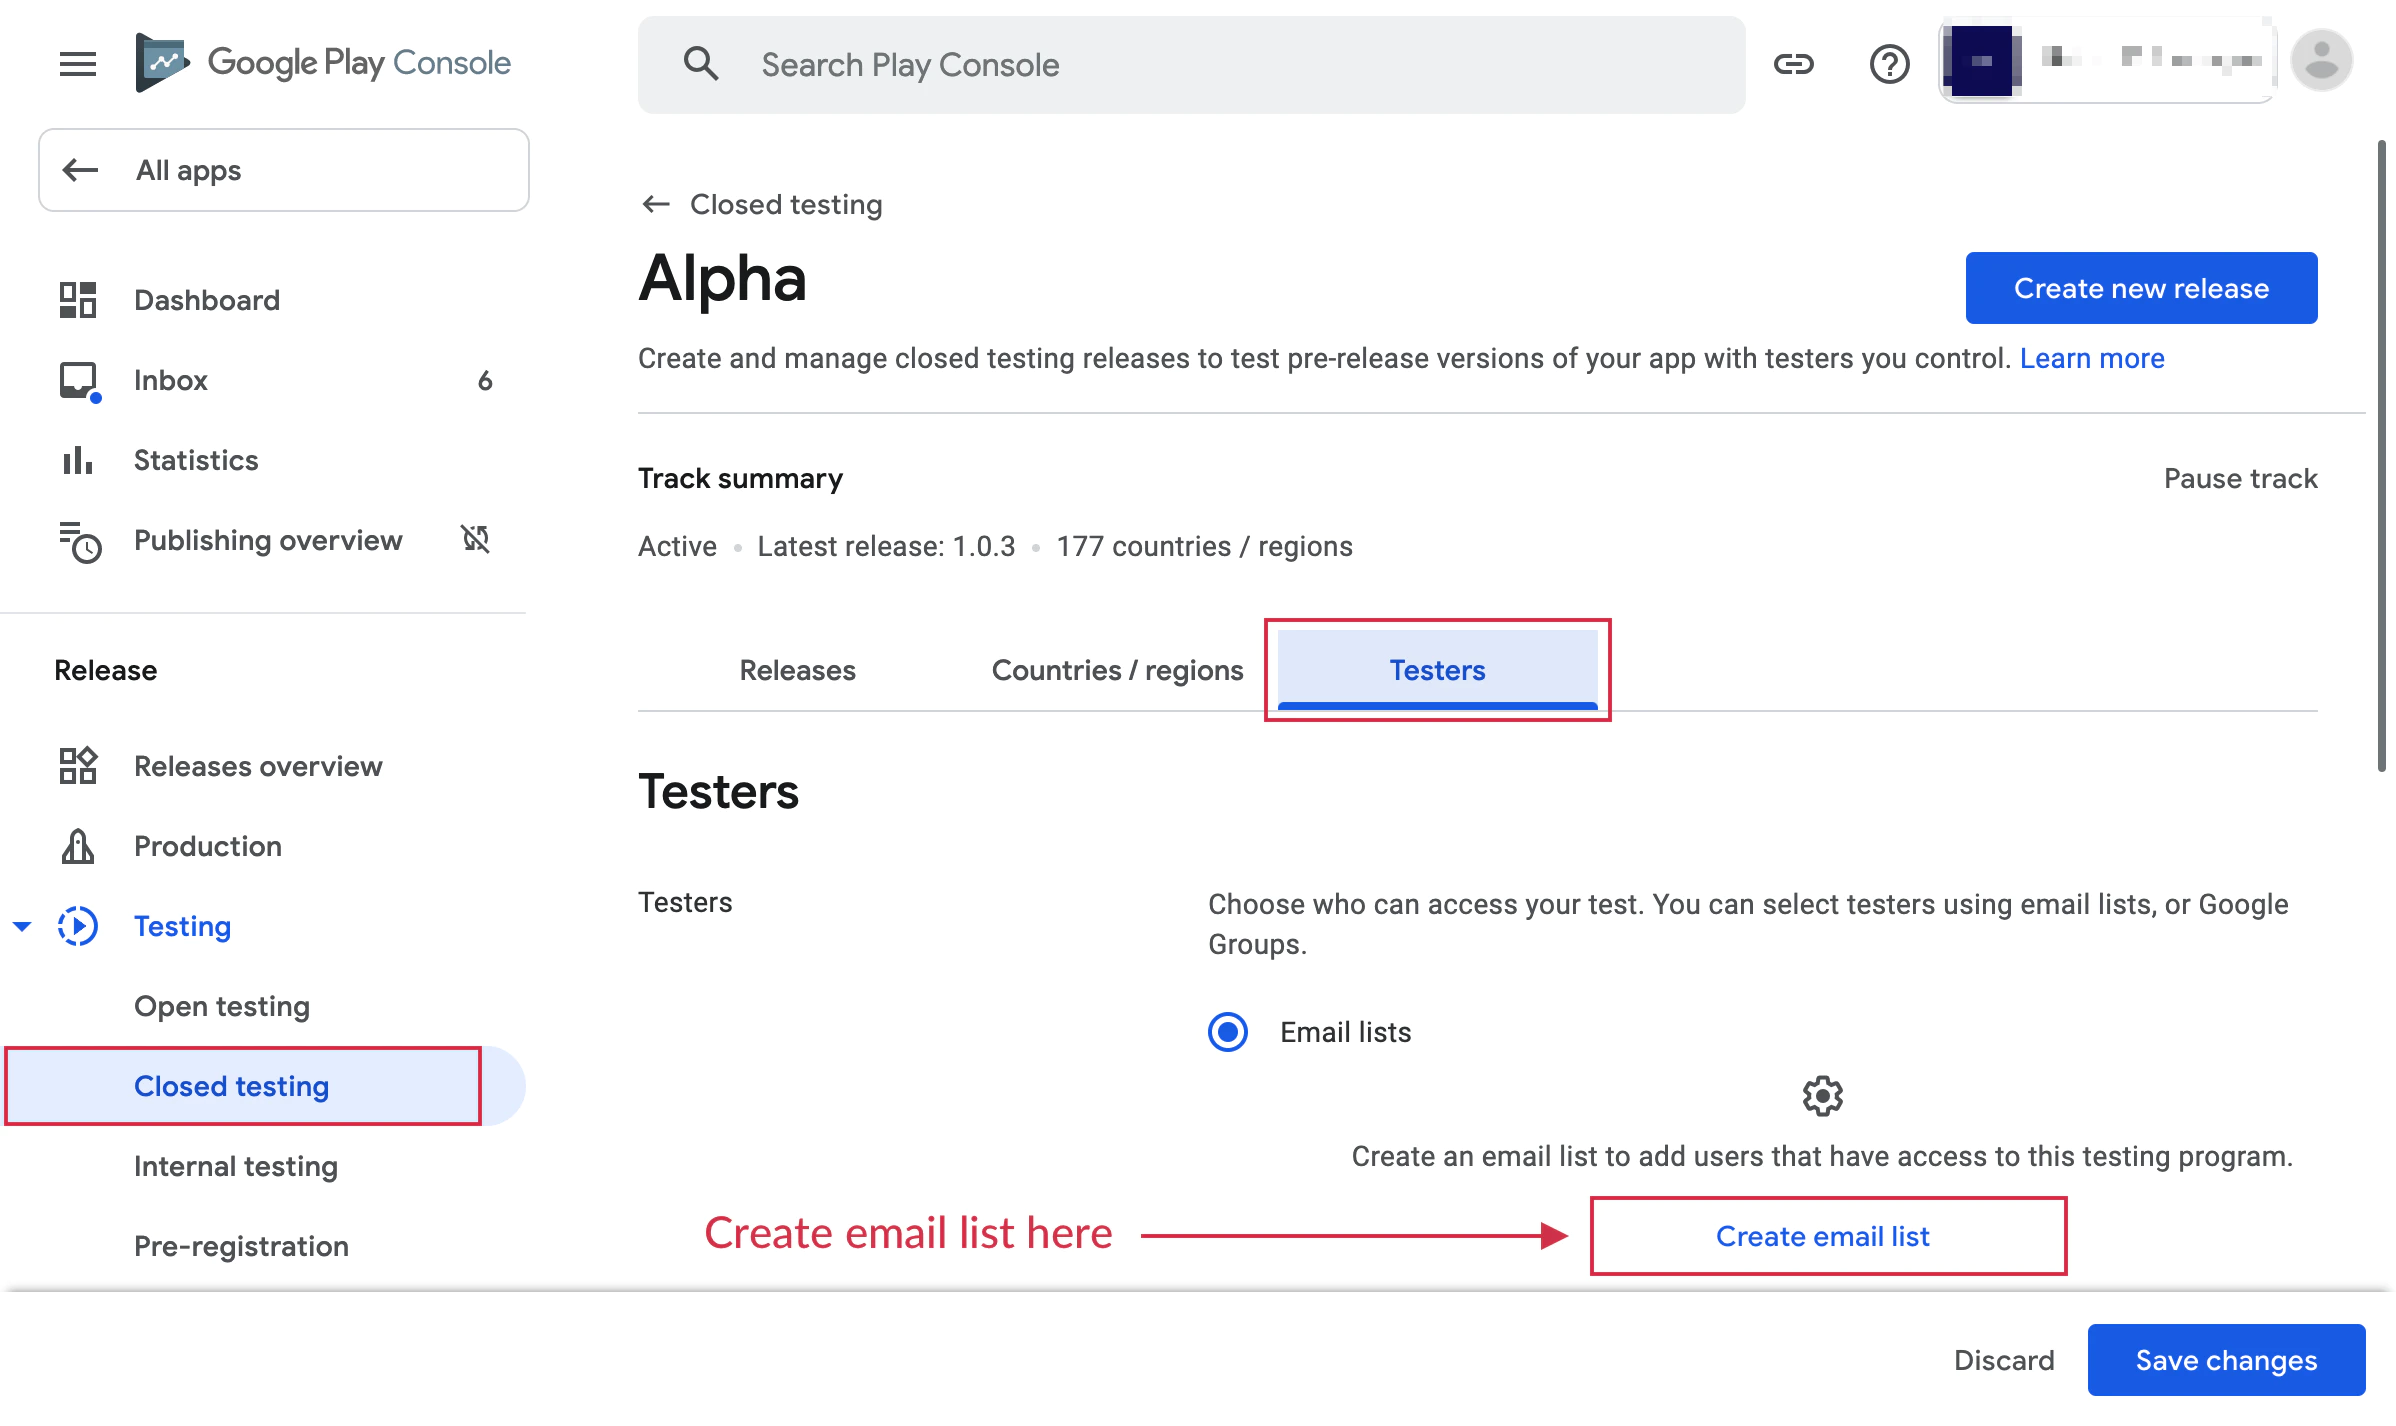
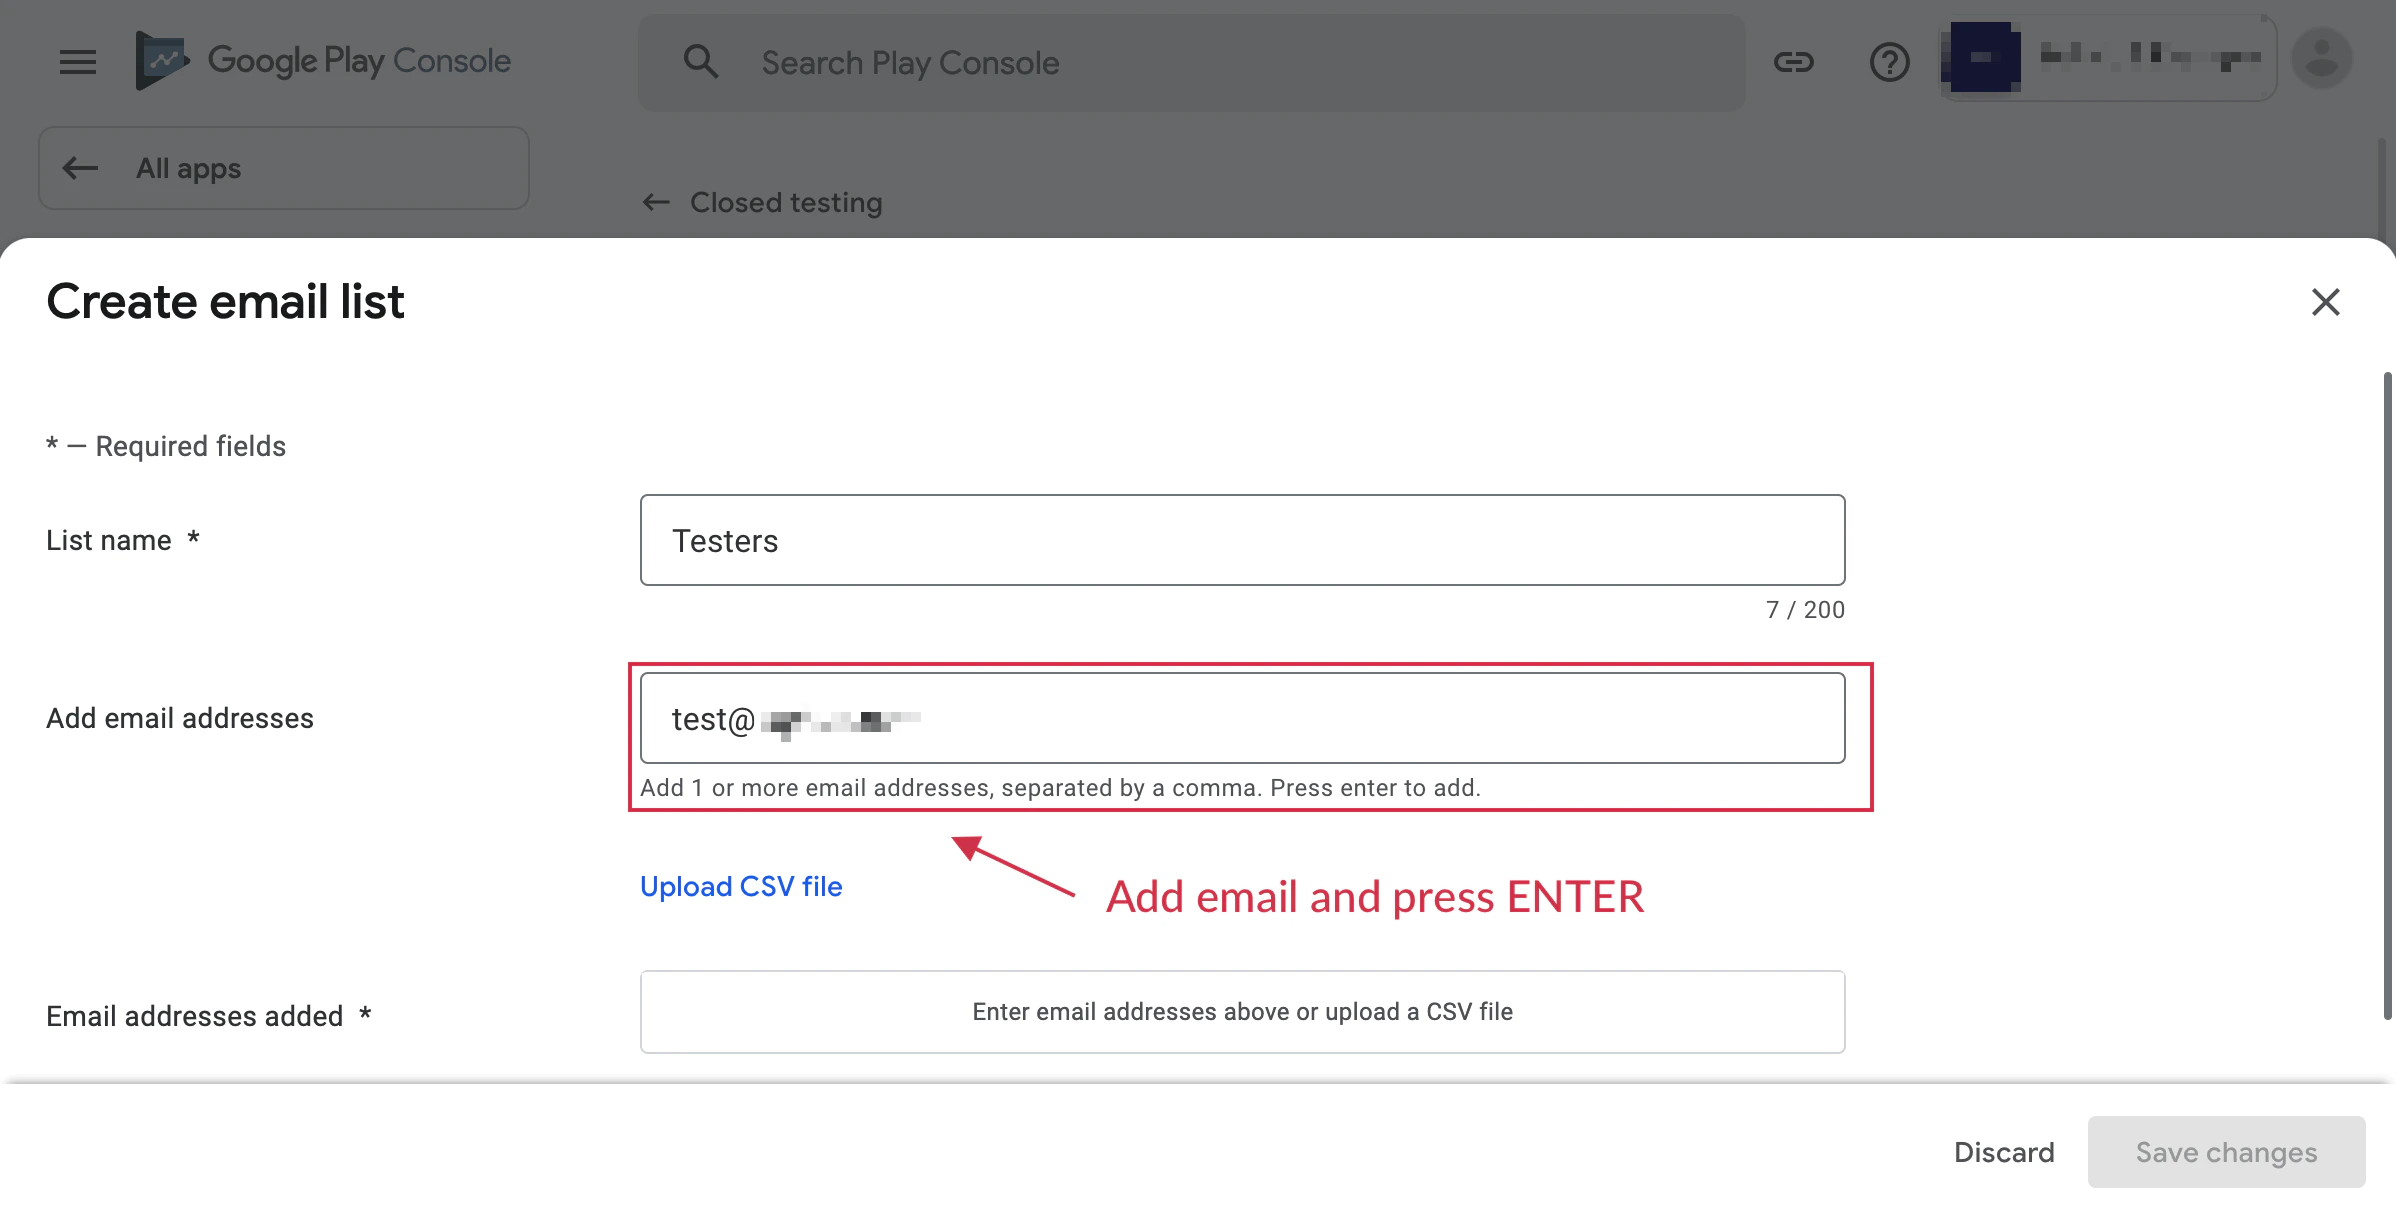
Create Tester List
After opening your track, create a tester list and add the Google accounts that should receive the build.
If you are working toward production access on a newly created personal account, make sure you use closed testing and keep at least 12 testers opted in for 14 consecutive days.
-
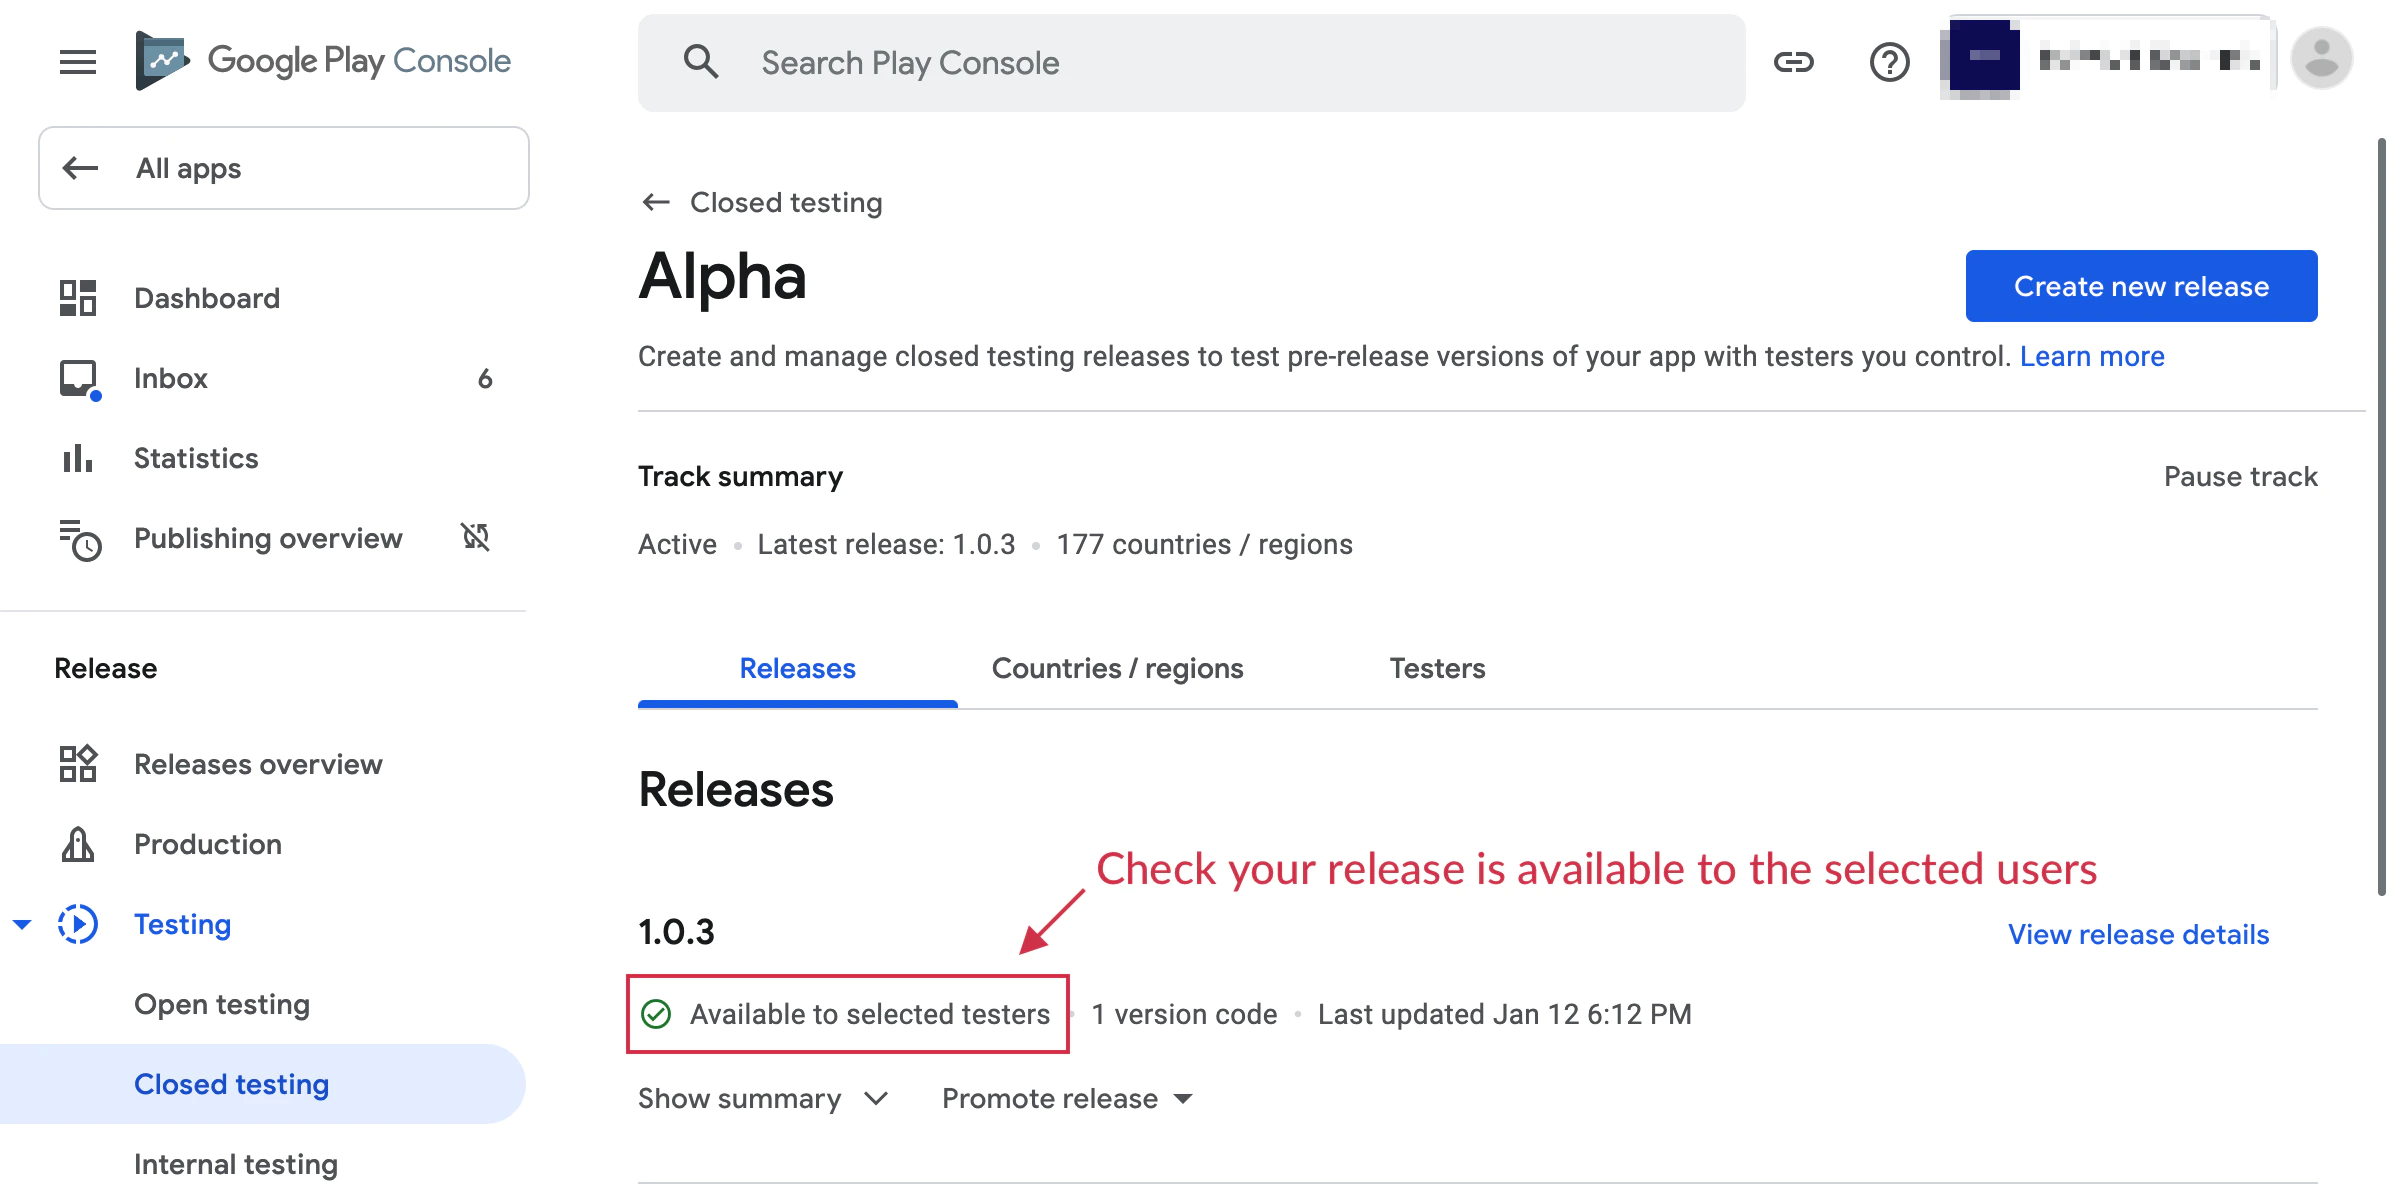
Upload a Signed Release Build
Create a new release in the selected testing track and upload your signed
.aab.New Google Play apps should use an Android App Bundle rather than an APK. After upload, save the release, fix any policy or store listing blockers Play flags, then publish the release to the testing track.
-
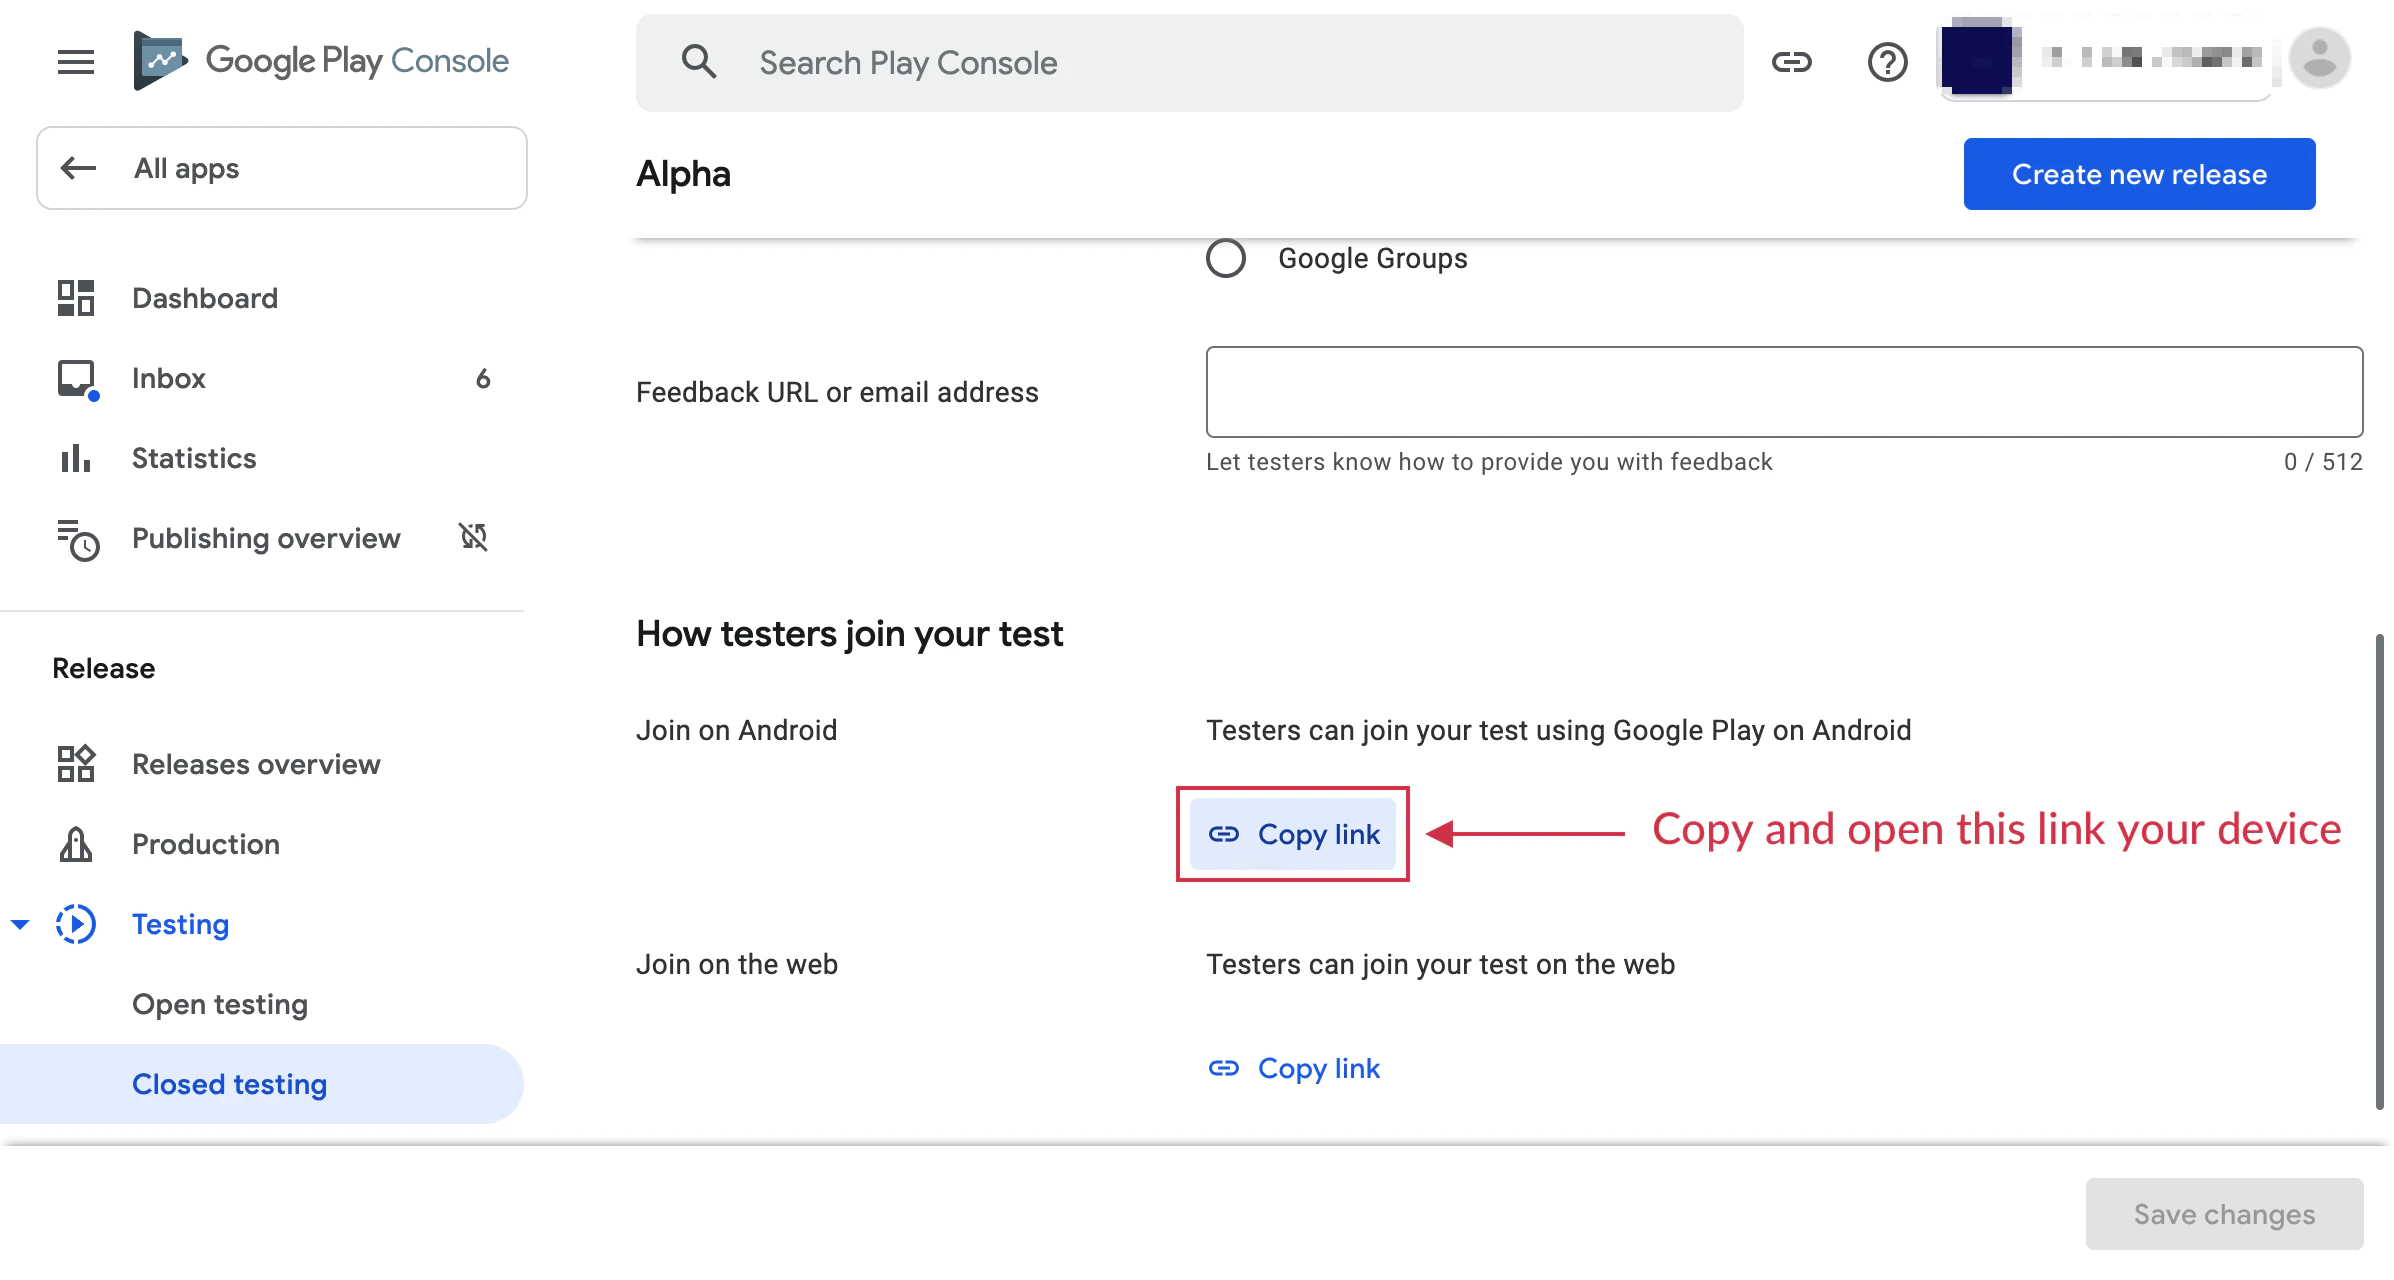
Join the Testing Program
Open the opt-in URL from your test device and click the “Become a tester” button to enroll.
Install the app from the Play Store listing created by that opt-in flow, not from a locally exported APK.
-
Build and Test
Launch the Play-installed build on the test device and attempt a purchase. You should see a message like:
“This is a test order; you will not be charged.”
Important Notes
Section titled “Important Notes”- For billing QA, uninstall any sideloaded copy of the app before installing the Play testing build.
- Internal testing is great for fast smoke tests, but closed testing is the track that matters for new personal-account production access.
- Test accounts will not be charged for purchases
- Test purchases use the same flow as production purchases
- You can test all subscription features including trials and introductory offers
- Test subscriptions have accelerated renewal periods for faster testing
- Use the same Google account for all three places: the Play Store on the device, the tester opt-in flow, and License testing
Troubleshooting
Section titled “Troubleshooting”Products not showing in test mode:
- Ensure your app is uploaded to a testing track
- Verify the test account is added to License testing
- Check that products are active in Google Play Console
- Confirm the build was installed from Google Play, not sideloaded locally
“Item not available” error:
- Wait 2-3 hours after creating products for them to become available
- Ensure your app’s package name matches the one in Play Console
- Verify you’re signed in with a test account
- Confirm you uploaded the signed release build that points at the same package name and product catalog
Test purchases showing as real charges:
- Double-check the account is added to License testing
- Ensure you’re using the build from the testing track
- Verify the testing banner appears during purchase
Additional Resources
Section titled “Additional Resources”- Test purchases with Google Play Billing
- Set up an open, closed, or internal test
- Testing requirements for new personal developer accounts
Keep going from Configure Android Sandbox Testing
Section titled “Keep going from Configure Android Sandbox Testing”If you are using Configure Android Sandbox Testing to plan store approval and distribution, connect it with Using @capgo/native-purchases for the native capability in Using @capgo/native-purchases, @capgo/capacitor-in-app-review for the implementation detail in @capgo/capacitor-in-app-review, Using @capgo/capacitor-in-app-review for the native capability in Using @capgo/capacitor-in-app-review, @capgo/capacitor-native-market for the implementation detail in @capgo/capacitor-native-market, and Using @capgo/capacitor-native-market for the native capability in Using @capgo/capacitor-native-market.