Channels
Copy a setup prompt with the install steps and the full markdown guide for this plugin.
How Capgo chooses a channel (precedence)
Section titled “How Capgo chooses a channel (precedence)”When a device asks Capgo for an update, the channel it will use is decided in the following order (highest priority first):
- Forced device mapping: If the device ID is explicitly forced to a channel (see the Forced devices list inside the channel settings), that channel always wins.
- Cloud override (created by
setChannel()or Webapp action): CallingsetChannel(or changing a device’s channel in the dashboard) writes a persistent override in the cloud tied to that device ID. That override is consulted after forced mapping but before any defaults. Re‑installing the app does not clear it; deleting the device entry does. - Capacitor config
defaultChannel(test build default): For internal / beta / test builds you can setdefaultChannel(legacy keychannel) incapacitor.config.*so test devices start on a pre-release channel (e.g.beta,pr-123). If absent, the device will proceed to the cloud default. Production builds usually leave this unset. - Cloud Default Channel (primary strategy for ~99% of users): The main production channel virtually all real users land on. Any new device without a force, without an override, and without a config
defaultChanneluses this. Changing it rolls out (or rolls back) for everyone in seconds—no new binary.
Why the cloud default is the main path:
- Instant rollout or rollback without rebuilding or re‑publishing native binaries.
- One place to manage iOS, Android, and Electron behavior.
- Safer: you can confirm bundles exist and settings are correct before switching default.
- Auditable changes (team members can see who changed what in the UI / logs). Design principle: Layers above (force / override / config) are exceptions (debug single user, QA switching, test build defaults). Normal users flow to the cloud default.
Changing the cloud default channel affects new normal devices that:
- Are not forced
- Do not already have a cloud override
- Do not have an app-level
defaultChanneldefined
If a test build ships with defaultChannel: 'beta' and you later change the cloud default to production, devices that started on beta via the config stay there until you: (a) override them with setChannel(), (b) force them, or (c) delete the device entry.
Devices stay on their current channel unless you:
- Force them to another channel.
- Call
setChannel()(creating/replacing the cloud override) or change it manually in the dashboard. - Remove / archive the channel they are on (then they will fall back through the precedence again at next check).
If a channel is disabled for a platform (see iOS / Android / Electron toggles) and would otherwise have been selected, the selection skips it and falls back to the next rule.
Note: Setting
defaultChannelmeans changing it requires a new binary; use it intentionally for test/QA, not for general production control.
Capacitor config example
Section titled “Capacitor config example”// Example: a TestFlight or internal QA build defaults to the beta channel.const config = { plugins: { Capgo: { defaultChannel: 'beta', // Test build default. Omit in production so users attach to cloud default. // legacy key: channel }, },};export default config;If you later change the dashboard default to production, devices already on another channel (via config, override, or force) will NOT move automatically; only fresh devices (or those whose override/force you clear) pick it up.
Managing channels
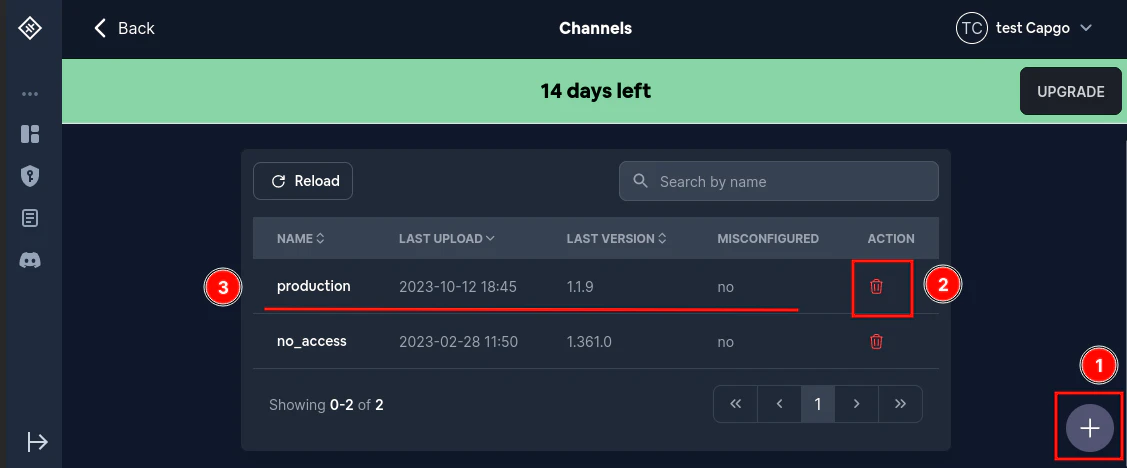
Section titled “Managing channels”First, let’s take a look at the channels page. You can access it by clicking on your app and then clicking on the channels tab.
Creating a channel
Section titled “Creating a channel”As you can see, there exists a plus button in the lower right corner. (1 in the image) Clicking on it will open a modal where you can create a new channel.
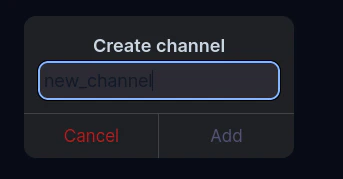
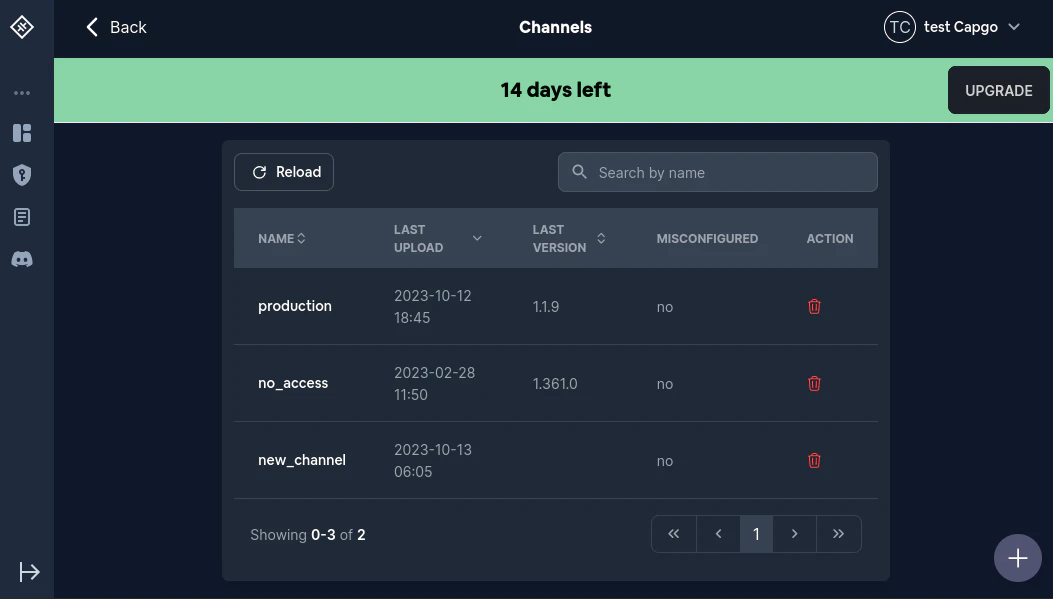
Then after you click on Add a new channel should appear in the list.
What does misconfigured mean?
Section titled “What does misconfigured mean?”Sometimes the configuration of a channel is not valid. In that case, you will get a big warning and the Misconfigured column will say Yes for one or more of the channels.
You can learn more about it here
Deleting a channel
Section titled “Deleting a channel”To delete a channel from the web app, open the Channels tab for your app and find the channel row. In the Action column, click the trash icon, then click Delete in the confirmation dialog.
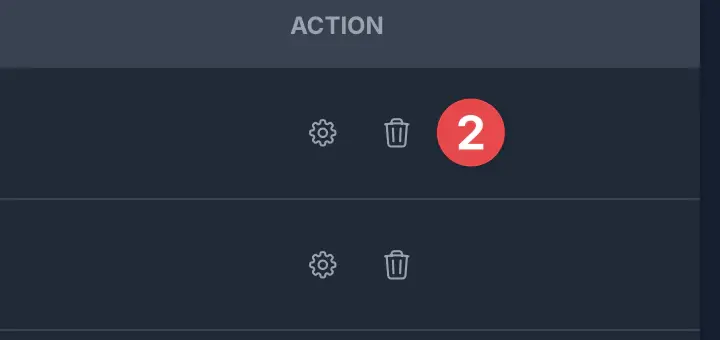
If the trash icon is not visible, your account does not have the channel.delete permission for that app. Ask an organization or app admin to grant a role that can delete channels, or delete the channel with an API key that has permission:
npx @capgo/cli@latest channel delete <channel-name> <app-id>Managing a channel
Section titled “Managing a channel”Clicking on the channel name will open a modal where you can manage the channel settings. (3 in the image)
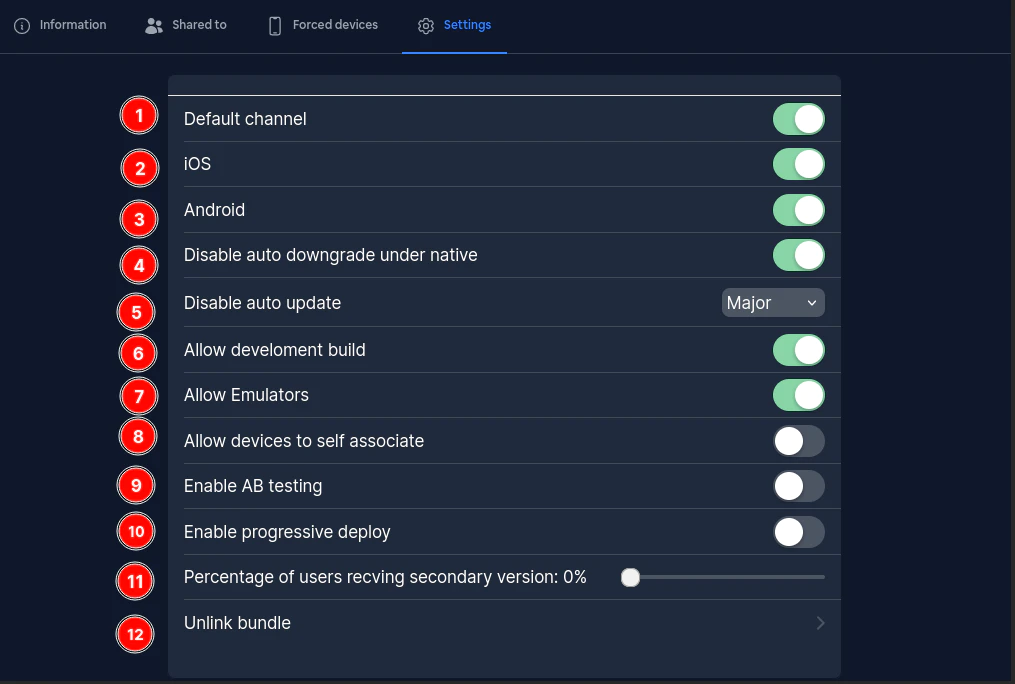
The channel settings page contains all the configuration options for your channel. Let’s go through each setting.
First the Default channel toggle. When enabled, this channel becomes the default for new devices. For a comprehensive explanation of how default channels work, including how to set up platform-specific defaults (one for iOS, one for Android, and one for Electron), see the Default Channel Configuration section.
Second the IOS setting. This is relatively simple. If this is false then IOS devices will not be allowed to download updates from this channel.
Third is the Android setting. This is similar to IOS. If this is false then Android devices will not be allowed to download updates from this channel.
Fourth is the Electron setting. This is similar to IOS and Android. If this is false then Electron apps will not be allowed to download updates from this channel.
Fifth is the Disable auto downgrade under native setting. If this is true then it will be impossible to downgrade from a native version. This means that if you have uploaded a 1.2.0 version to the app store or play store and try to set the channel version to 1.1.0 then the update (downgrade) will fail.
Sixth is the Disable auto update. This setting is quite complex, and you can learn more about it here
As for Allow development build. If this is true then development builds will be allowed to download updates from this channel. If not then any update request that has the prod set to false will be rejected. This is mostly useful for testing purposes.
Seventh is the Allow Emulators. If this is false then Capgo will disallow any update request that comes from an emulator. This is mostly useful for testing purposes.
Eight is the Allow devices to self associate. If this is true then the setChannel method will be available. If this is set to false and you try to call the setChannel method with this channel then the call will fail.
Progressive rollouts
Section titled “Progressive rollouts”The channel Information tab includes a Progressive rollout section. Set a target bundle, choose the percentage and decision-cache duration, then enable the rollout. From the same section you can pause or resume exposure, promote the target to stable, roll it back, or configure an automatic pause, rollback, or notification when failure signals cross a threshold.
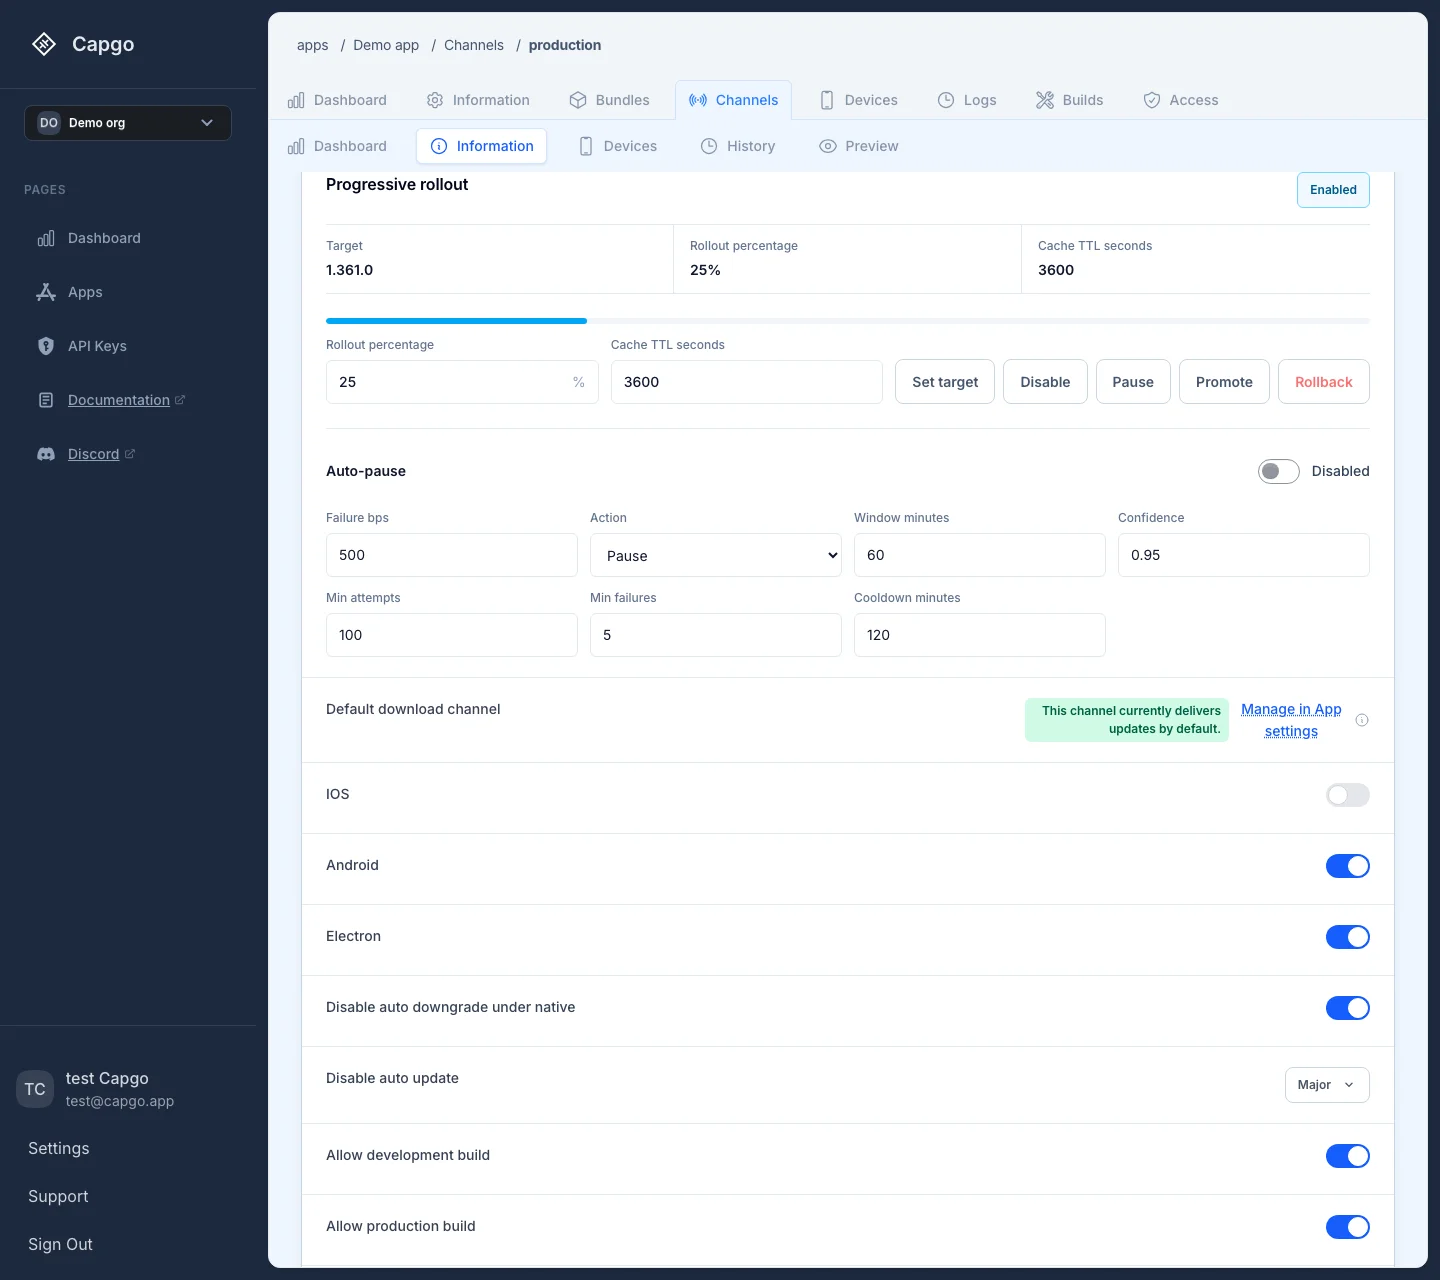
Read Progressive rollouts before enabling one. It explains sticky cohorts, safe percentage changes, and auto-pause behavior.
Keep going from Channels
Section titled “Keep going from Channels”If you are using Channels to plan channel routing and staged rollout, connect it with Channels for the implementation detail in Channels, Channels for the implementation detail in Channels, Beta Testing Solution for the product workflow in Beta Testing Solution, Version Targeting Solution for the product workflow in Version Targeting Solution, and Capgo Environment Best Practices: Staging with One Mobile App ID for the practical context in Capgo Environment Best Practices: Staging with One Mobile App ID.