Google-Anmeldung auf Android
Ein Einrichtungsvorschlag mit den Installationsanweisungen und der vollständigen Markdown-Guide für diesen Plugin kopieren.
Einführung
Abschnitt mit dem Titel „Einführung“In dieser Anleitung lernen Sie, wie Sie Google-Anmeldung mit Capgo Social Login für Android einrichten. Ich gehe davon aus, dass Sie bereits die allgemeine Einrichtungsanleitung.
Google-Anmeldung auf Android
Abschnitt mit dem Titel „Google-Anmeldung auf Android“In diesem Teil lernen Sie, wie Sie Google-Anmeldung in Android einrichten.
-
Erstelle einen Android-Kunden-ID.
-
Klicken Sie auf die Suchleiste

-
Suche nach
credentialsund klicken Sie auf dieAPIs and Serviceseine (Nummer 2 auf dem Screenshot)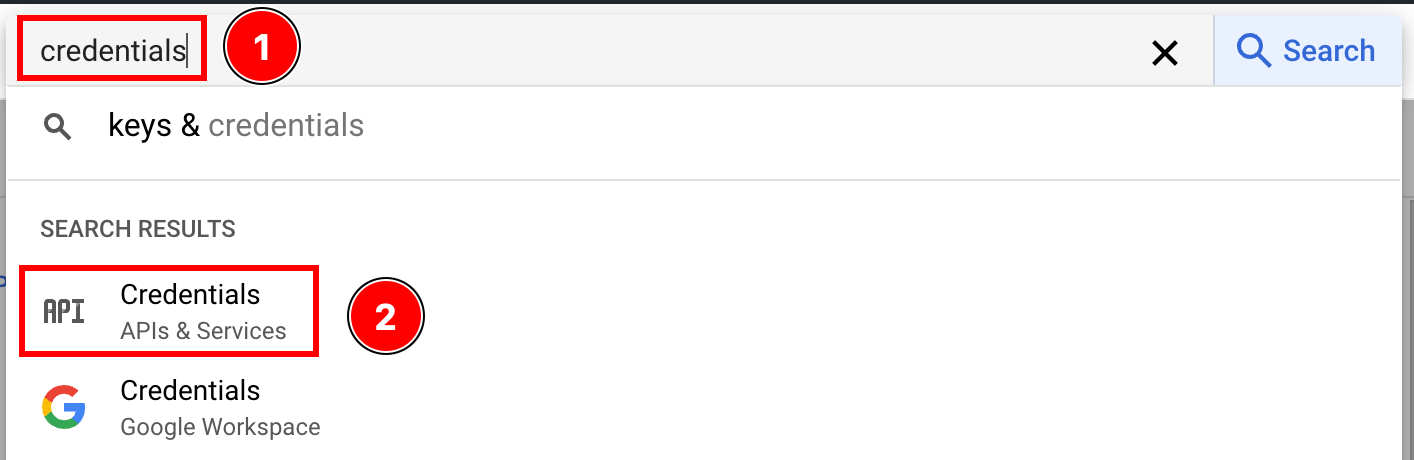
-
Klicken Sie auf die
create credentials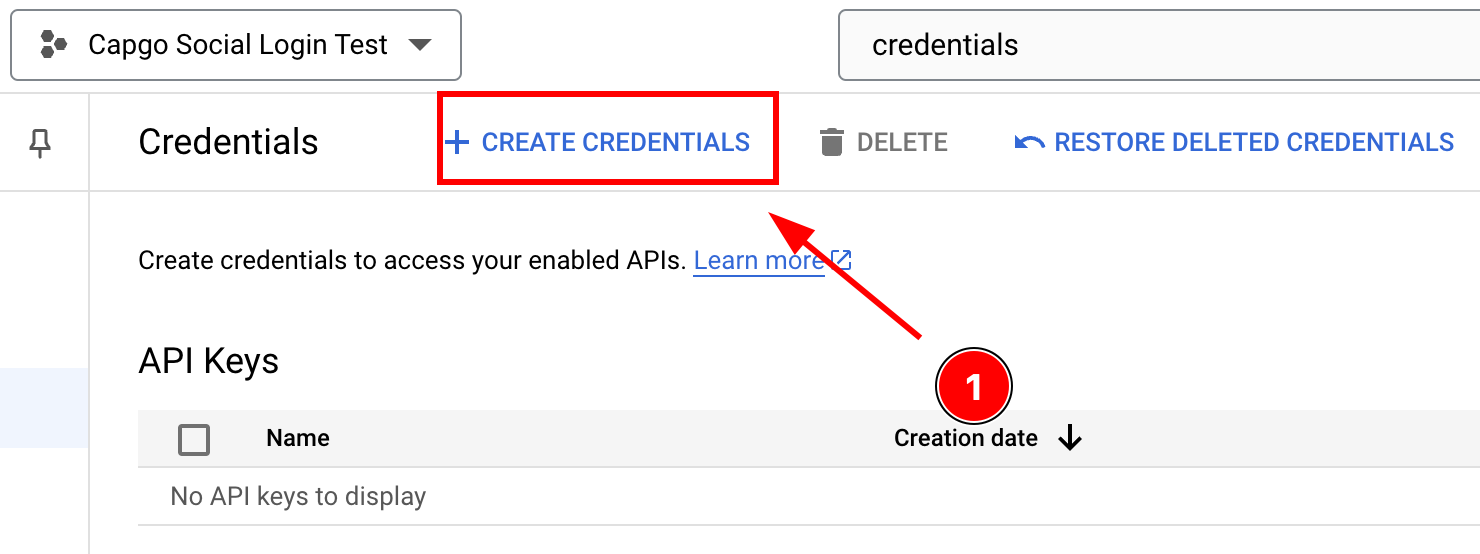
-
Wählen Sie
OAuth client ID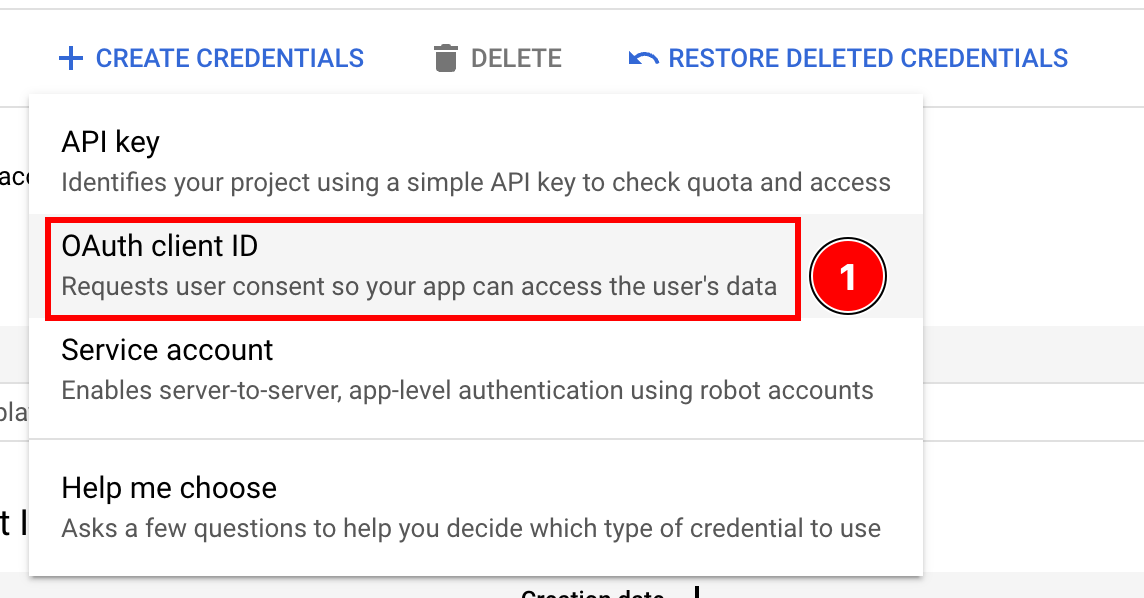
-
Wählen Sie die
AndroidAnwendungsart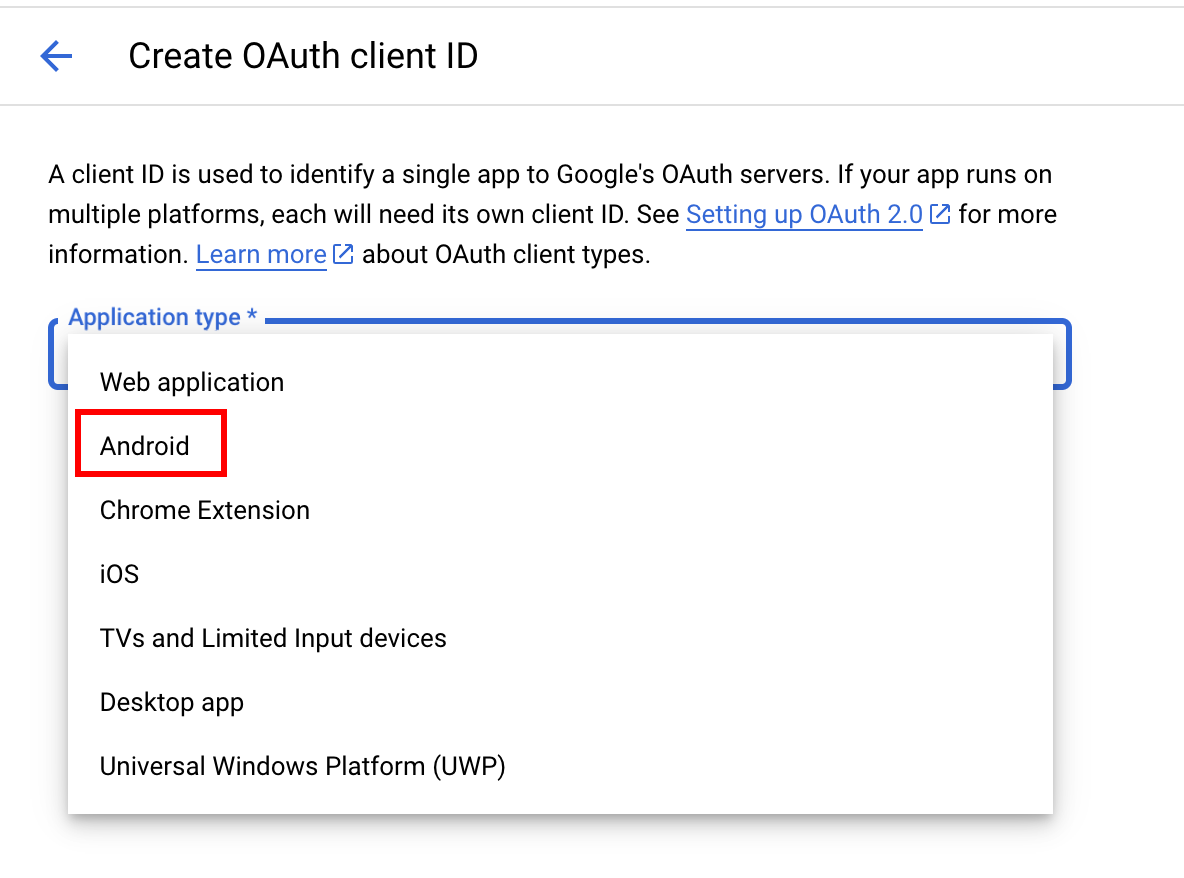
-
Android Studio öffnen
-
Am unteren Ende des Navigators finden Sie die
Gradle Scripts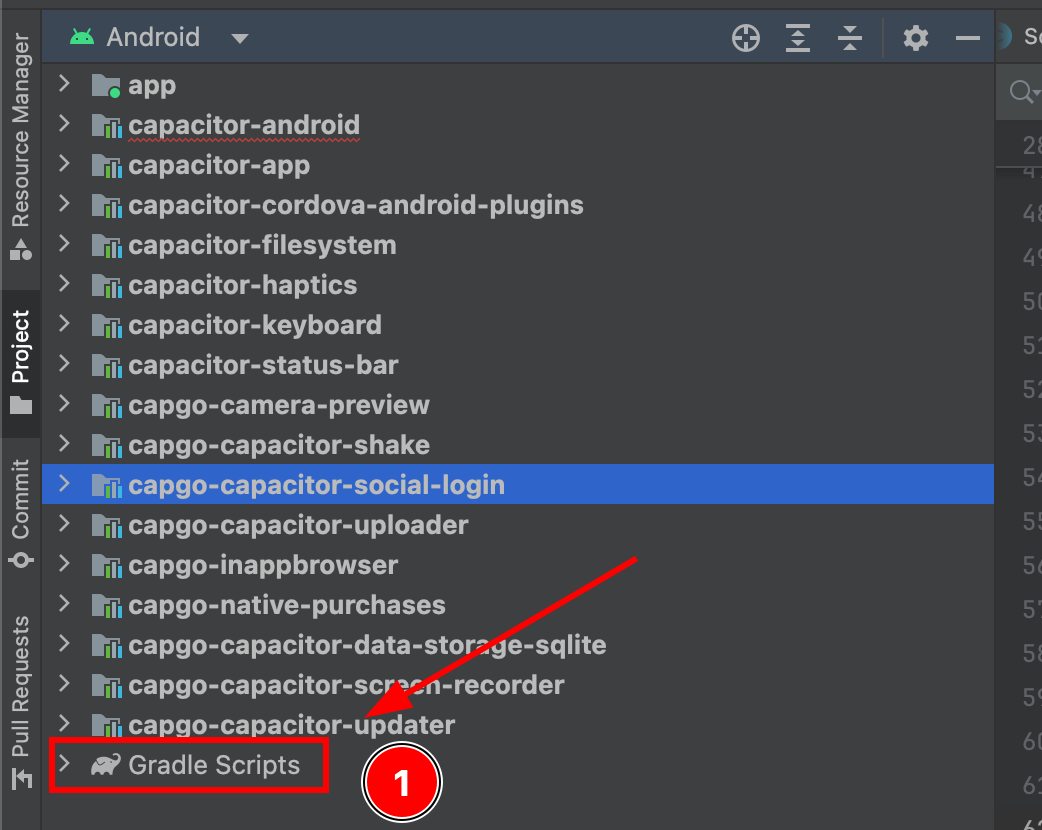
-
Finden
build.gradlefür das Modulapp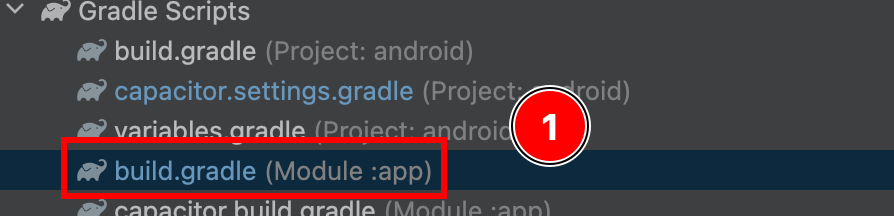
-
Die
android.defaultConfig.applicationIdDies wird Ihrepackage namein der Google-Konsole
-
Now, öffnen Sie das Terminal. Stellen Sie sicher, dass Sie sich im Verzeichnis Ihrer App befinden und führen Sie
androidTerminal zeigt gradlew signInReport-Befehl an./gradlew signInReport

- Terminal-Ausgabe zeigt SHA1-Zertifikatsfingerprint an
SHA1.

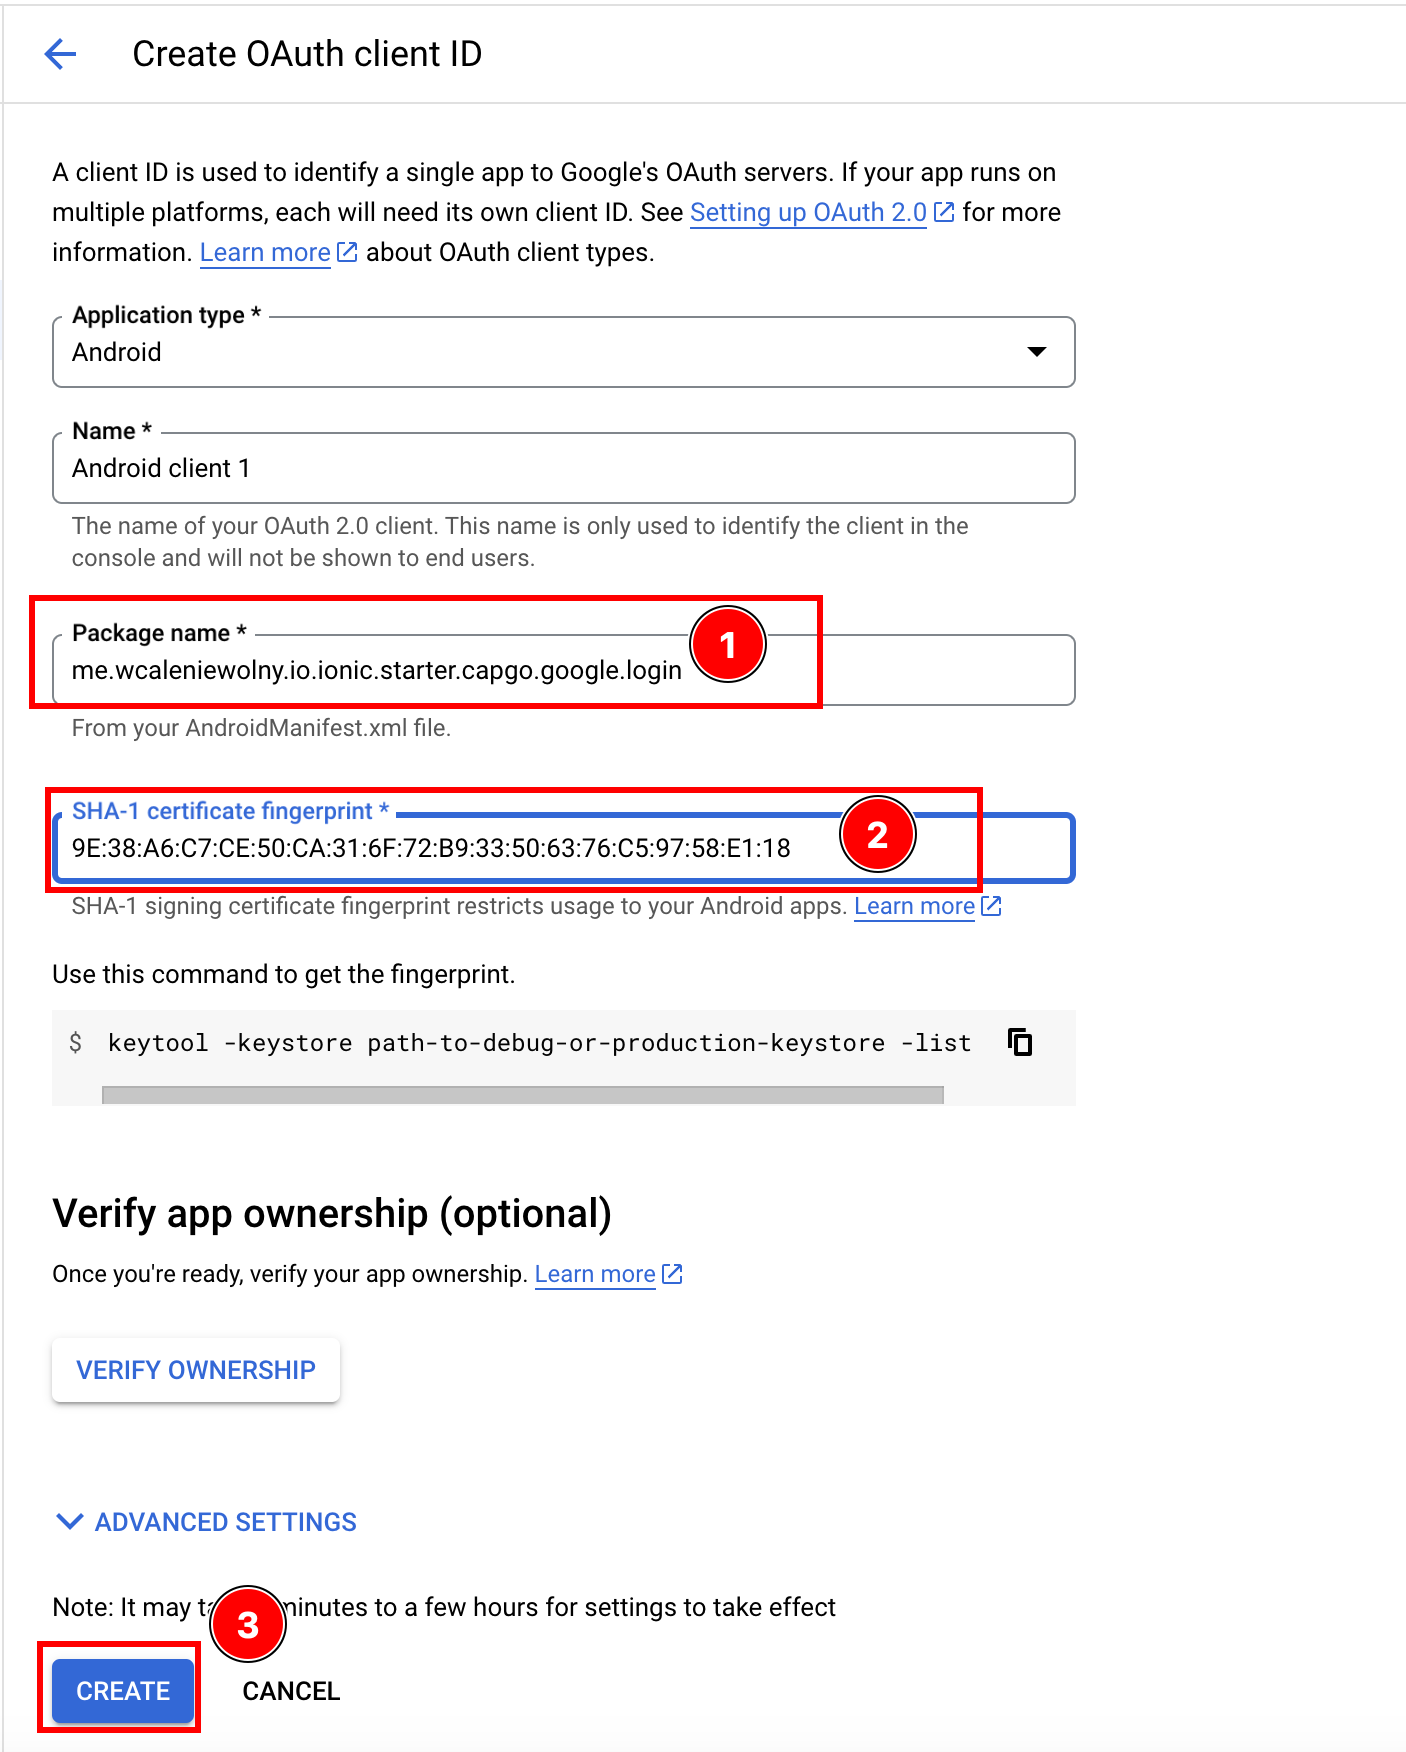
- als das
applicationIdund Ihren SHA1 in das Zertifikatsfeld ein und klicken SiePackage NameAndroid-Client-Erstellungsbildschirm mit Paketnamen und SHA1-Feldern ausgefülltcreate
-
-
Gehen Sie zur
-
Seite in Google-Konsolen
Create credentials__CAPGO_KEEP_0__ -
Anwendungstyp auf "Set application type to"
Web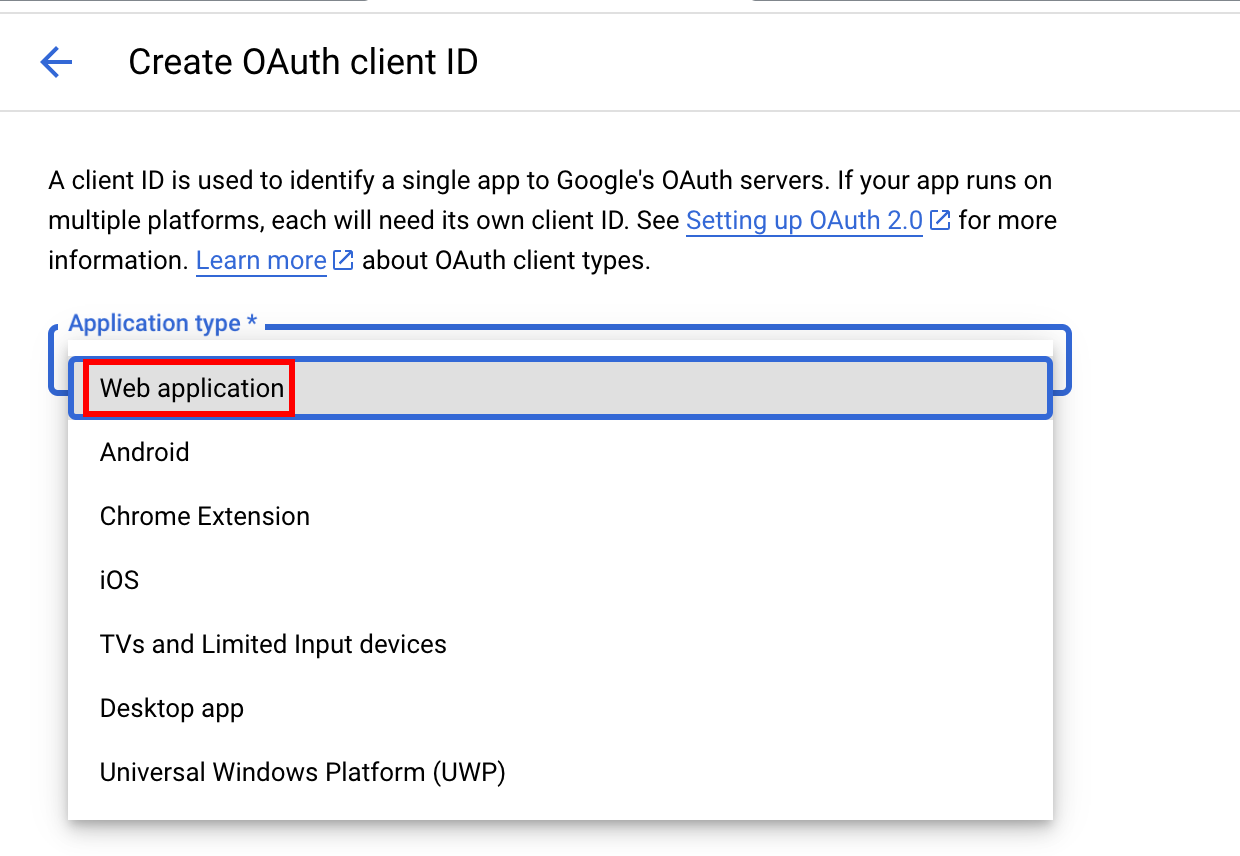
-
Klicken Sie
Create
-
Kopieren Sie die Client-ID, Sie verwenden diese als
webClientIdin Ihrem JS/TS code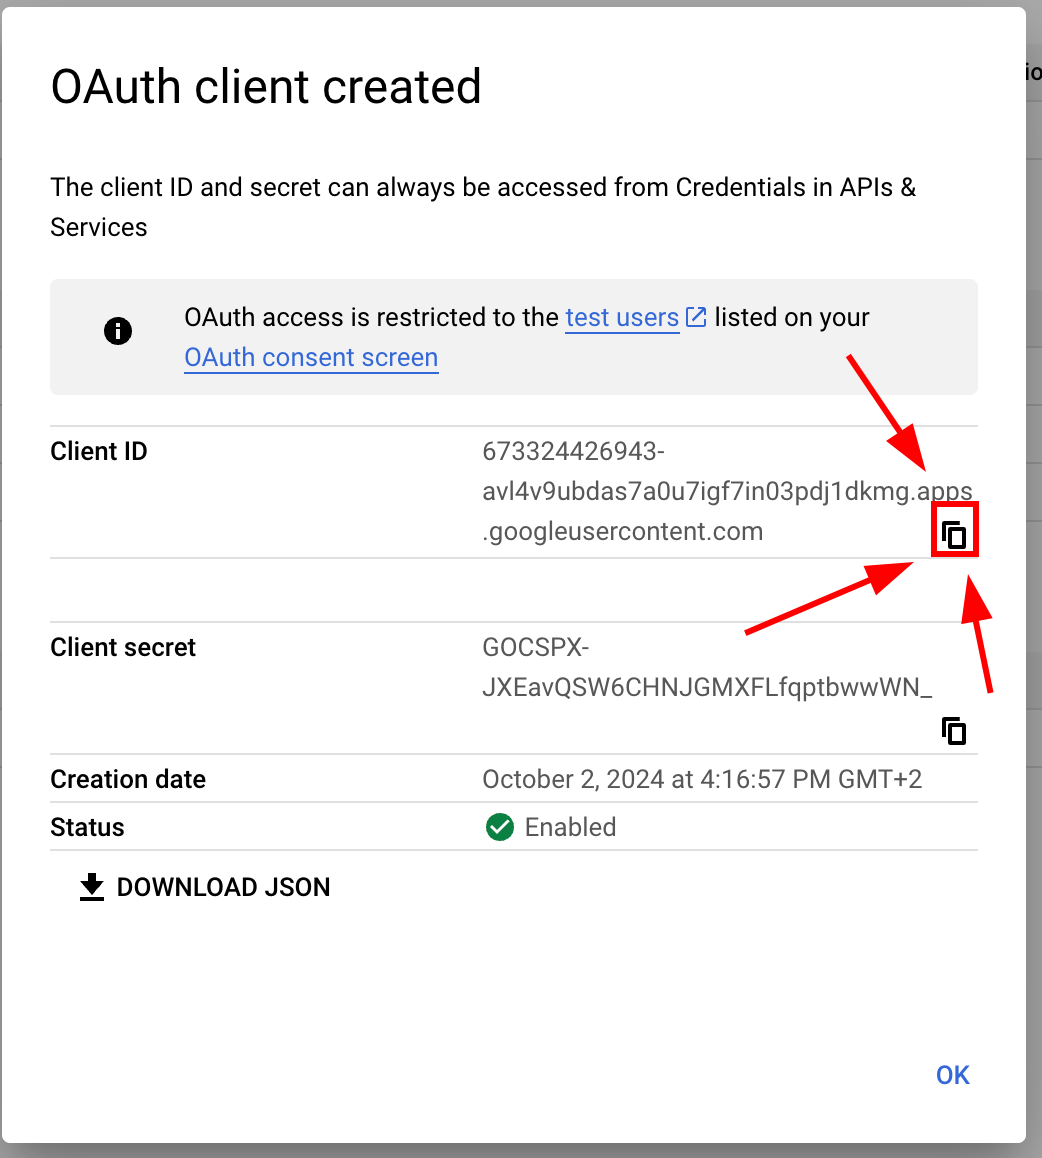
-
-
Ihre
MainActivity-
Bitte öffnen Sie Ihre App in Android Studio. Sie können
cap open android -
Finden Sie
MainActivity.java-
Öffnen Sie das
appOrdner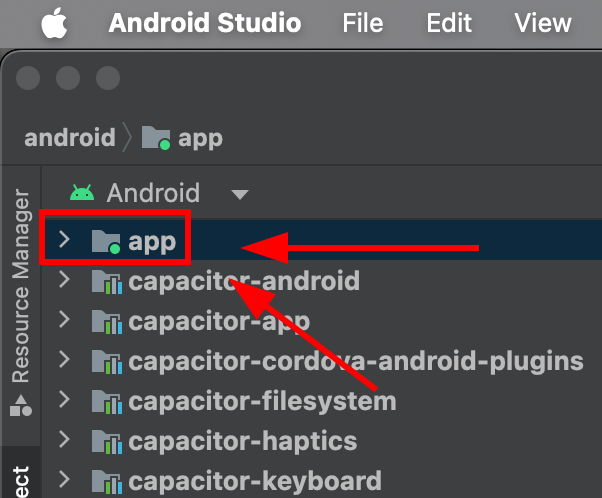
-
Finden
java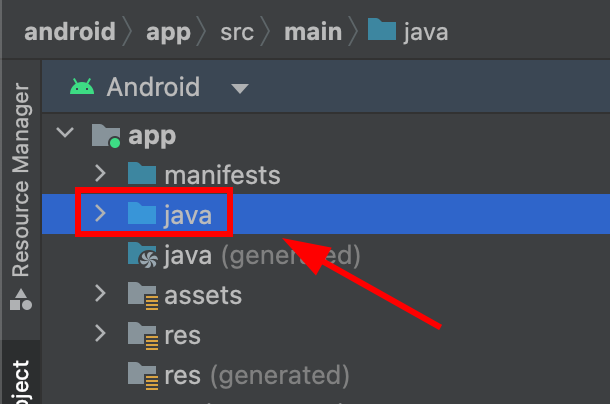
-
Finden Sie Ihr
MainActivity.javaund klicken Sie darauf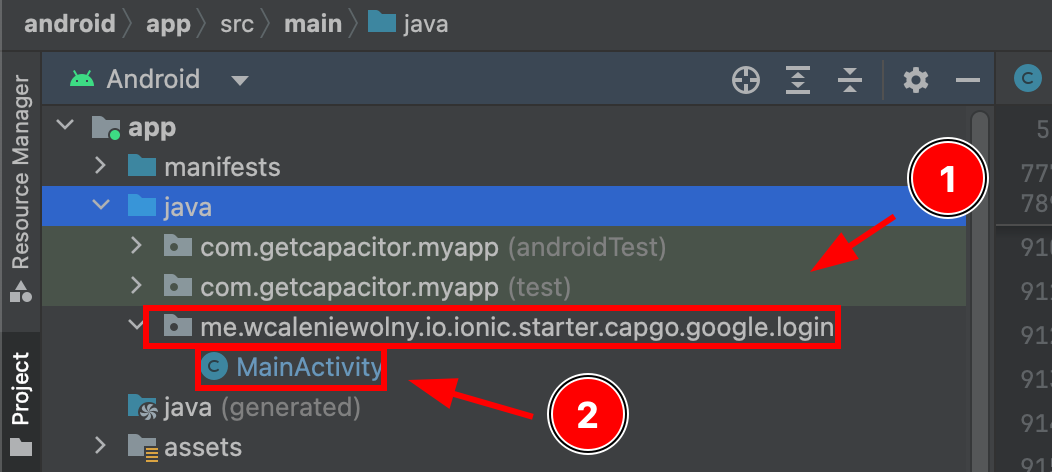
-
-
Ändern
MainActivity.java. Bitte fügen Sie den folgenden code hinzuimport ee.forgr.capacitor.social.login.GoogleProvider;import ee.forgr.capacitor.social.login.SocialLoginPlugin;import ee.forgr.capacitor.social.login.ModifiedMainActivityForSocialLoginPlugin;import com.getcapacitor.PluginHandle;import com.getcapacitor.Plugin;import android.content.Intent;import android.util.Log;import com.getcapacitor.BridgeActivity;// ModifiedMainActivityForSocialLoginPlugin is VERY VERY important !!!!!!public class MainActivity extends BridgeActivity implements ModifiedMainActivityForSocialLoginPlugin {@Overridepublic void onActivityResult(int requestCode, int resultCode, Intent data) {super.onActivityResult(requestCode, resultCode, data);if (requestCode >= GoogleProvider.REQUEST_AUTHORIZE_GOOGLE_MIN && requestCode < GoogleProvider.REQUEST_AUTHORIZE_GOOGLE_MAX) {PluginHandle pluginHandle = getBridge().getPlugin("SocialLogin");if (pluginHandle == null) {Log.i("Google Activity Result", "SocialLogin login handle is null");return;}Plugin plugin = pluginHandle.getInstance();if (!(plugin instanceof SocialLoginPlugin)) {Log.i("Google Activity Result", "SocialLogin plugin instance is not SocialLoginPlugin");return;}((SocialLoginPlugin) plugin).handleGoogleLoginIntent(requestCode, data);}}// This function will never be called, leave it empty@Overridepublic void IHaveModifiedTheMainActivityForTheUseWithSocialLoginPlugin() {}} -
Speichern Sie das Datei
-
-
Verwenden Sie Google-Login in Ihrer Anwendung
-
Zuerst importieren
SocialLoginimport { SocialLogin } from '@capgo/capacitor-social-login'; -
Rufen Sie initialize auf. Dies sollte nur einmal aufgerufen werden.
// onMounted is Vue specific// webClientId is the client ID you got in the web client creation step not the android client ID.onMounted(() => {SocialLogin.initialize({google: {webClientId: '673324426943-avl4v9ubdas7a0u7igf7in03pdj1dkmg.apps.googleusercontent.com',}})}) -
Aufrufen
SocialLogin.login. Erstellen Sie einen Button und führen Sie folgenden code auf Klick aus.const res = await SocialLogin.login({provider: 'google',options: {}})// handle the responseconsole.log(JSON.stringify(res))
-
-
Konfigurieren Sie den Emulator für die Testung
-
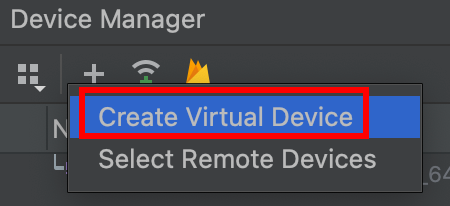
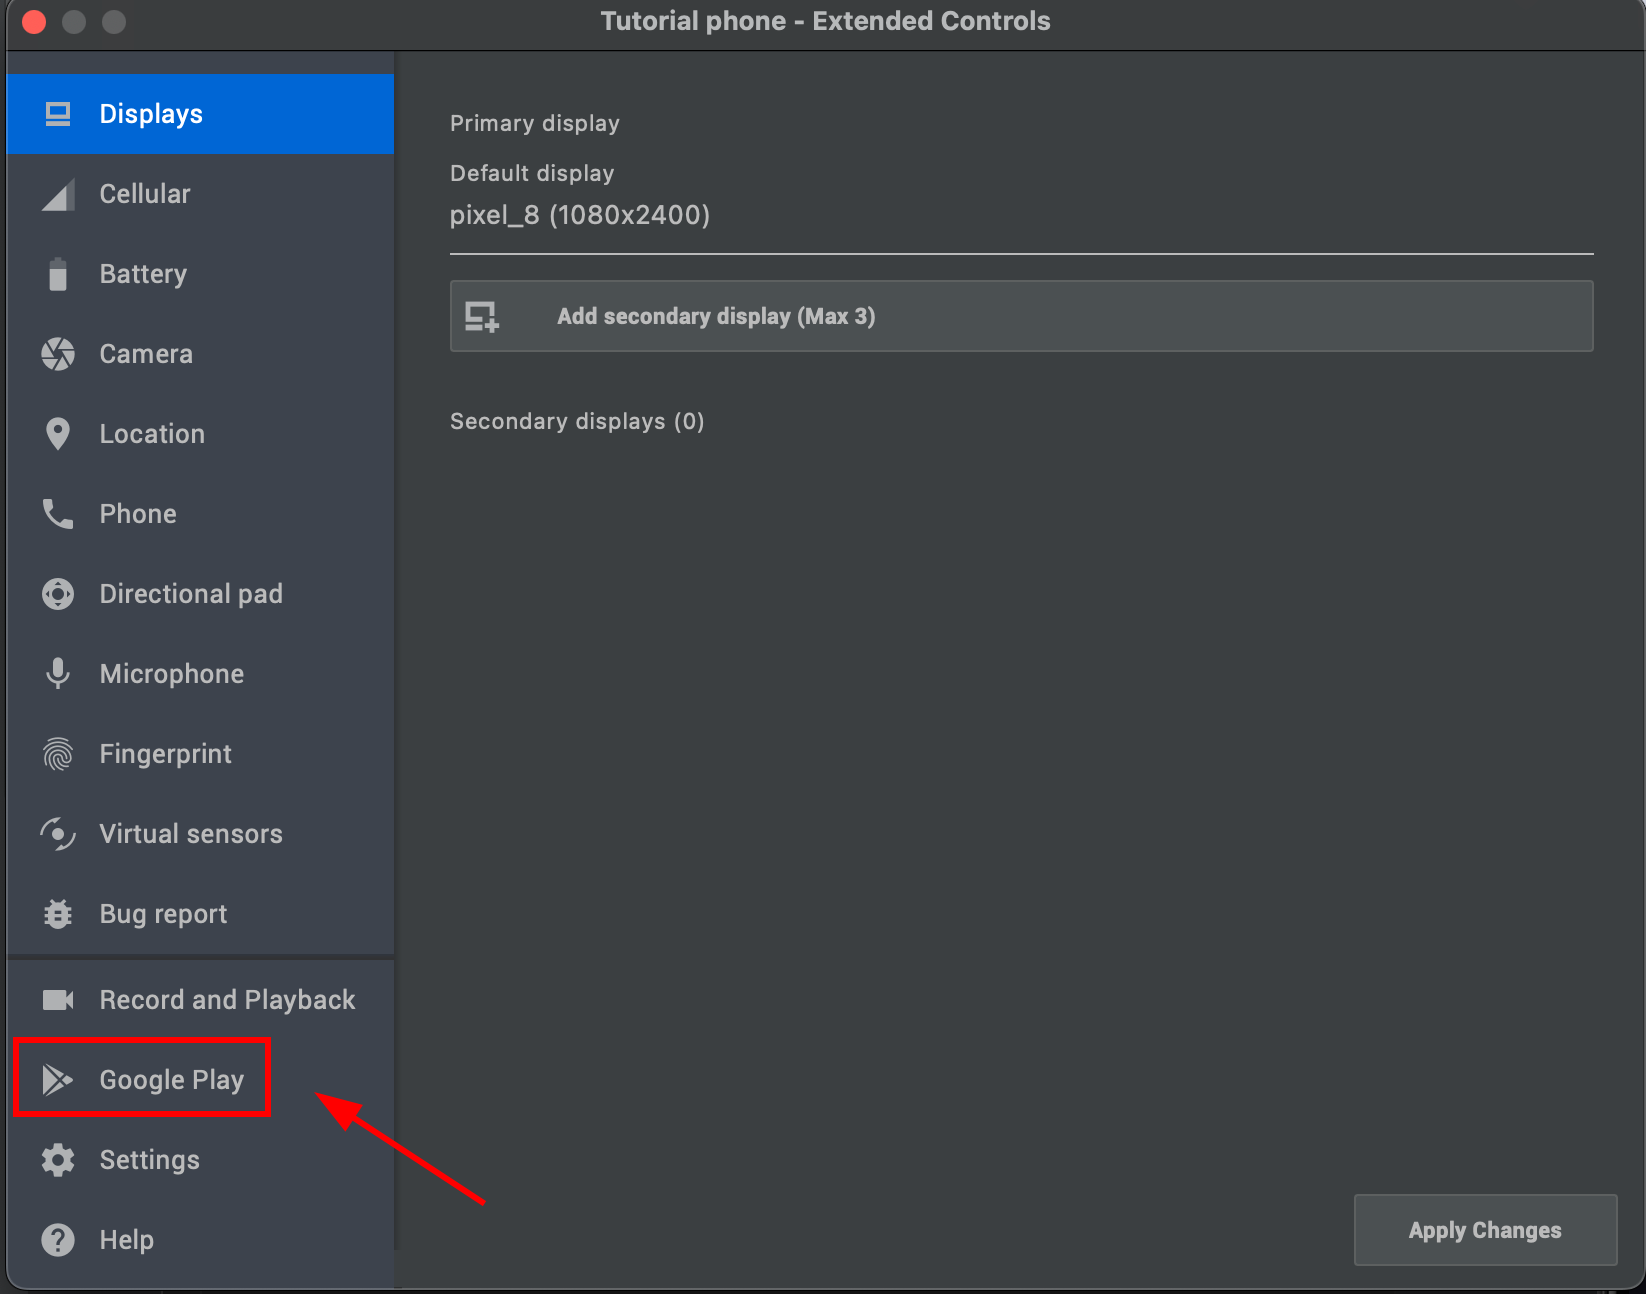
Gehe in
Device managerund klicke auf die Plus-Taste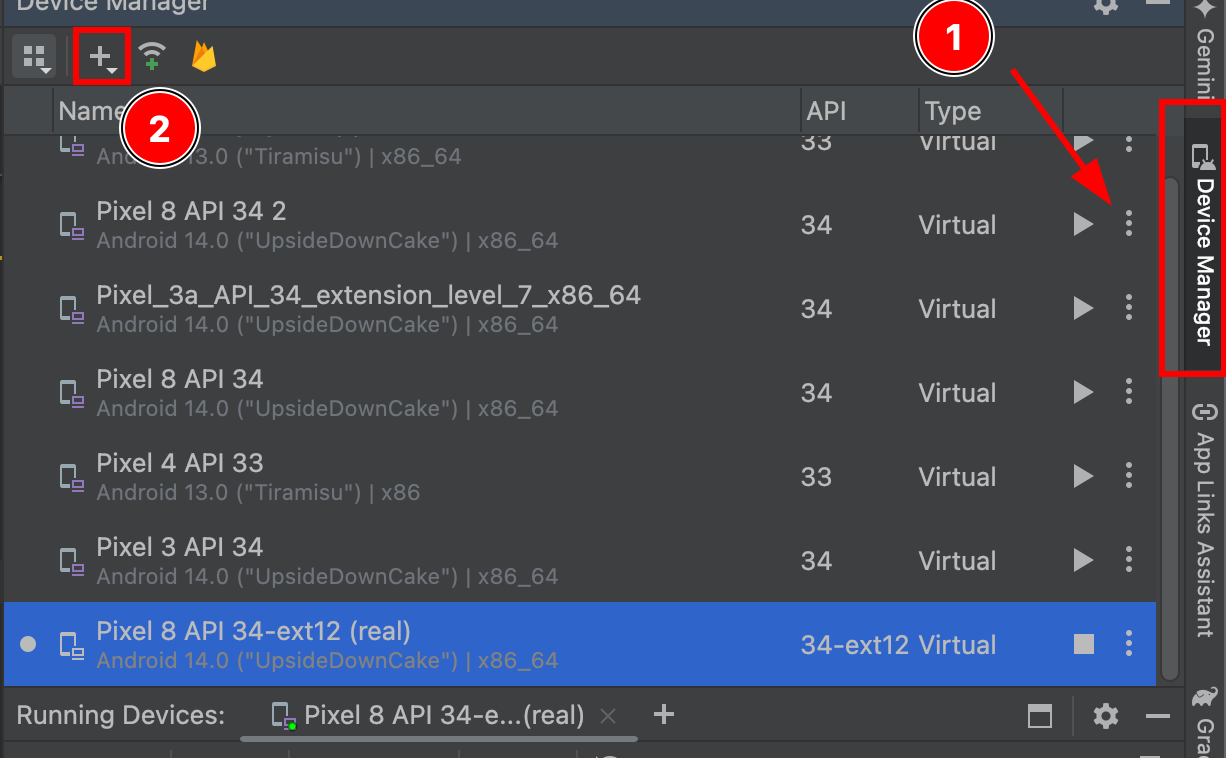
-
Erstelle ein virtuelles Gerät
-
Wähle jedes Gerät mit einem
Play StoreSymbol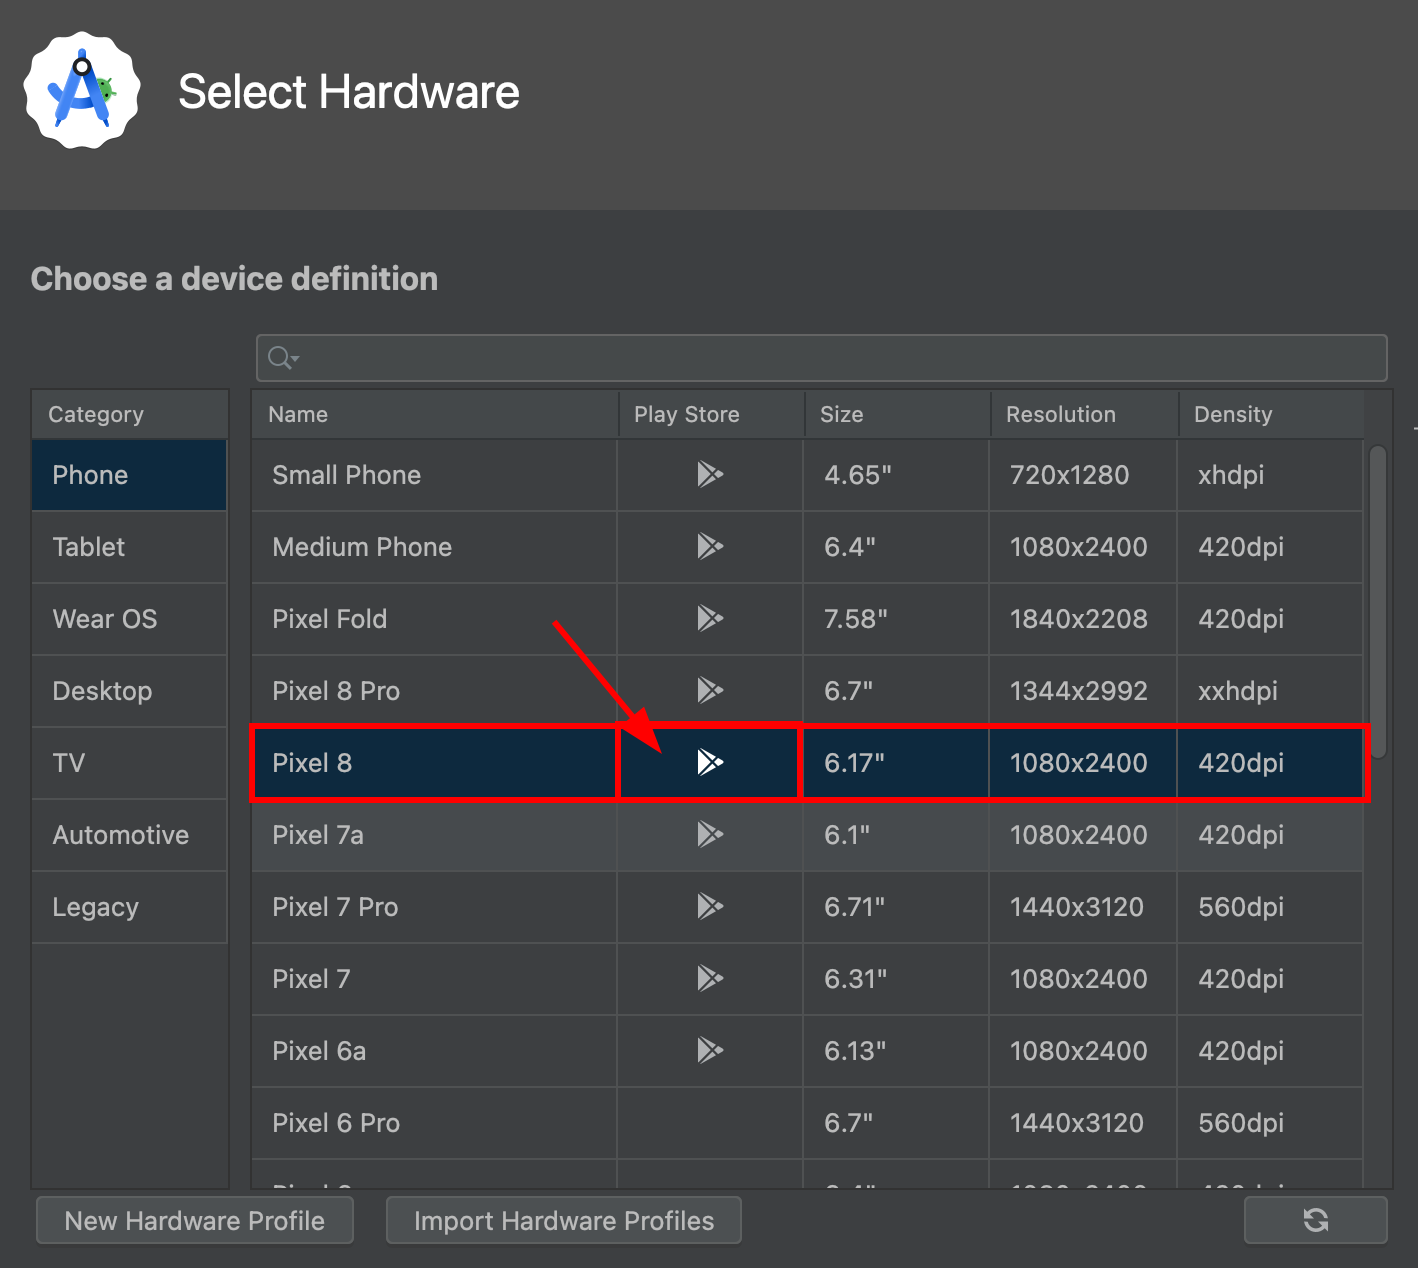
Sie sehen, dass das
pixel 8diePlay StoreDienste -
Klicken
next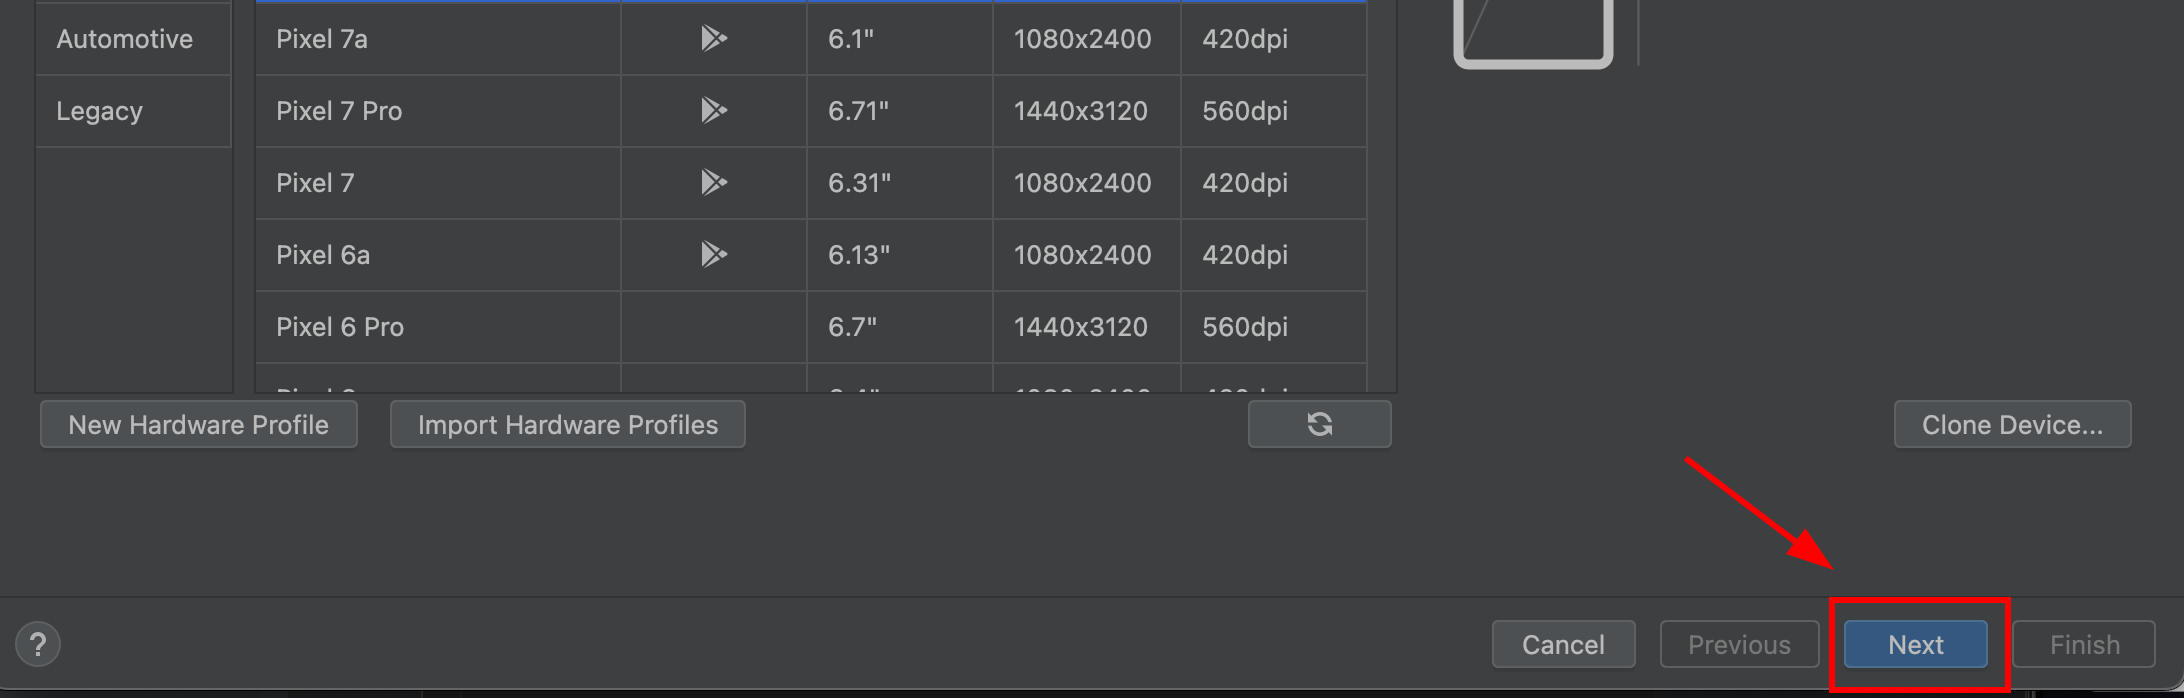
-
Stellen Sie sicher, dass das Betriebssystem-Image vom Typ
Google Play. ES MUSSEN sei vom TypGoogle Play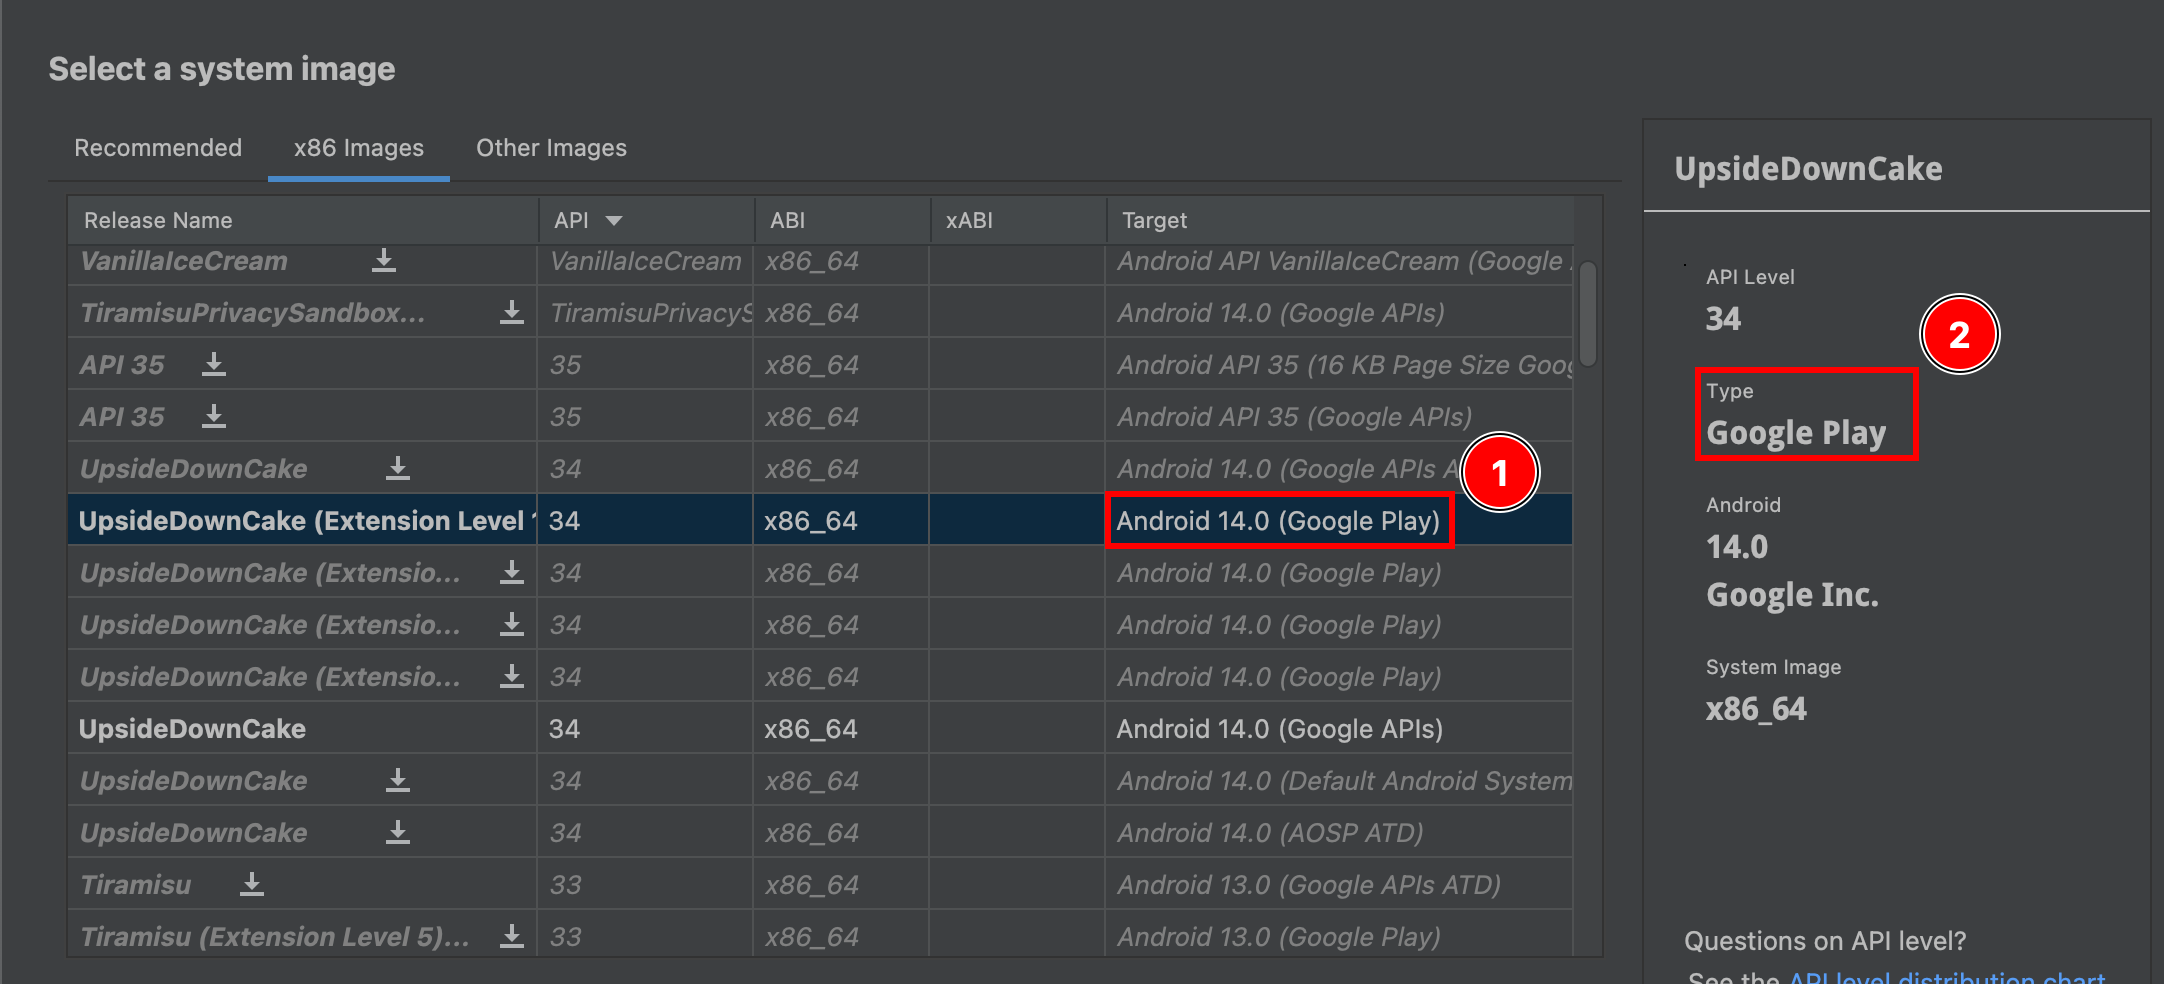
-
Klicken Sie auf nächsten
-
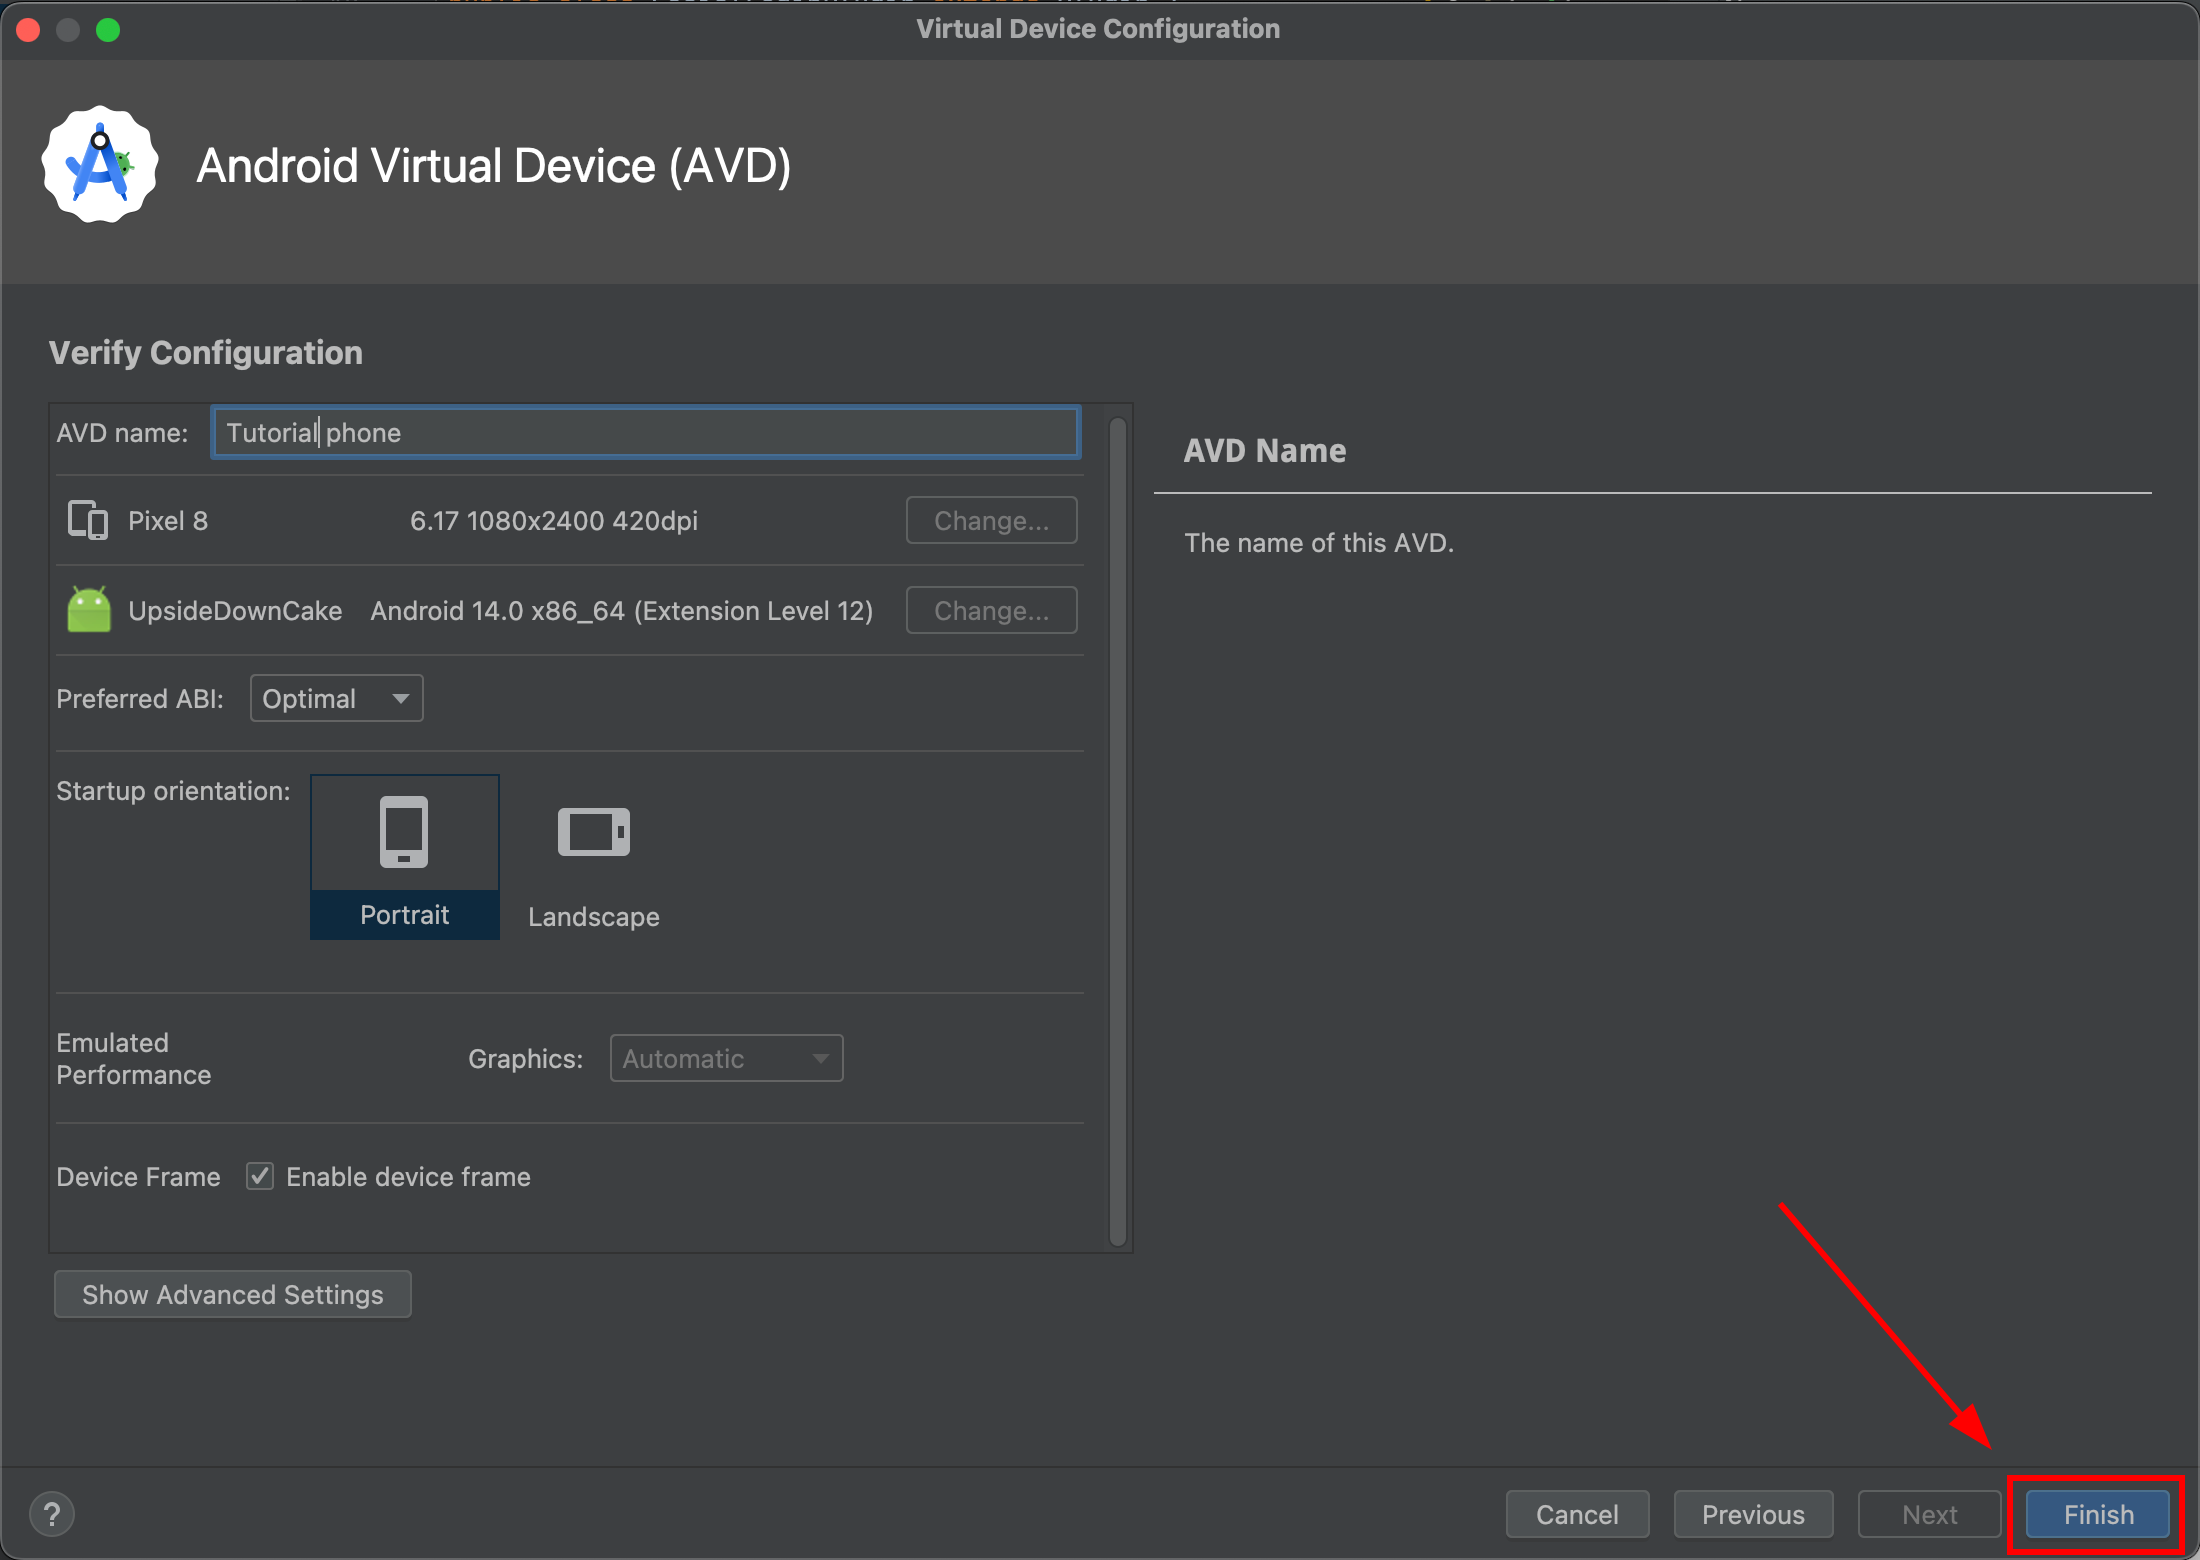
Bestätigen Sie Ihr Gerät. Sie können Ihrem Emulator einen Namen geben, wie Sie möchten
-
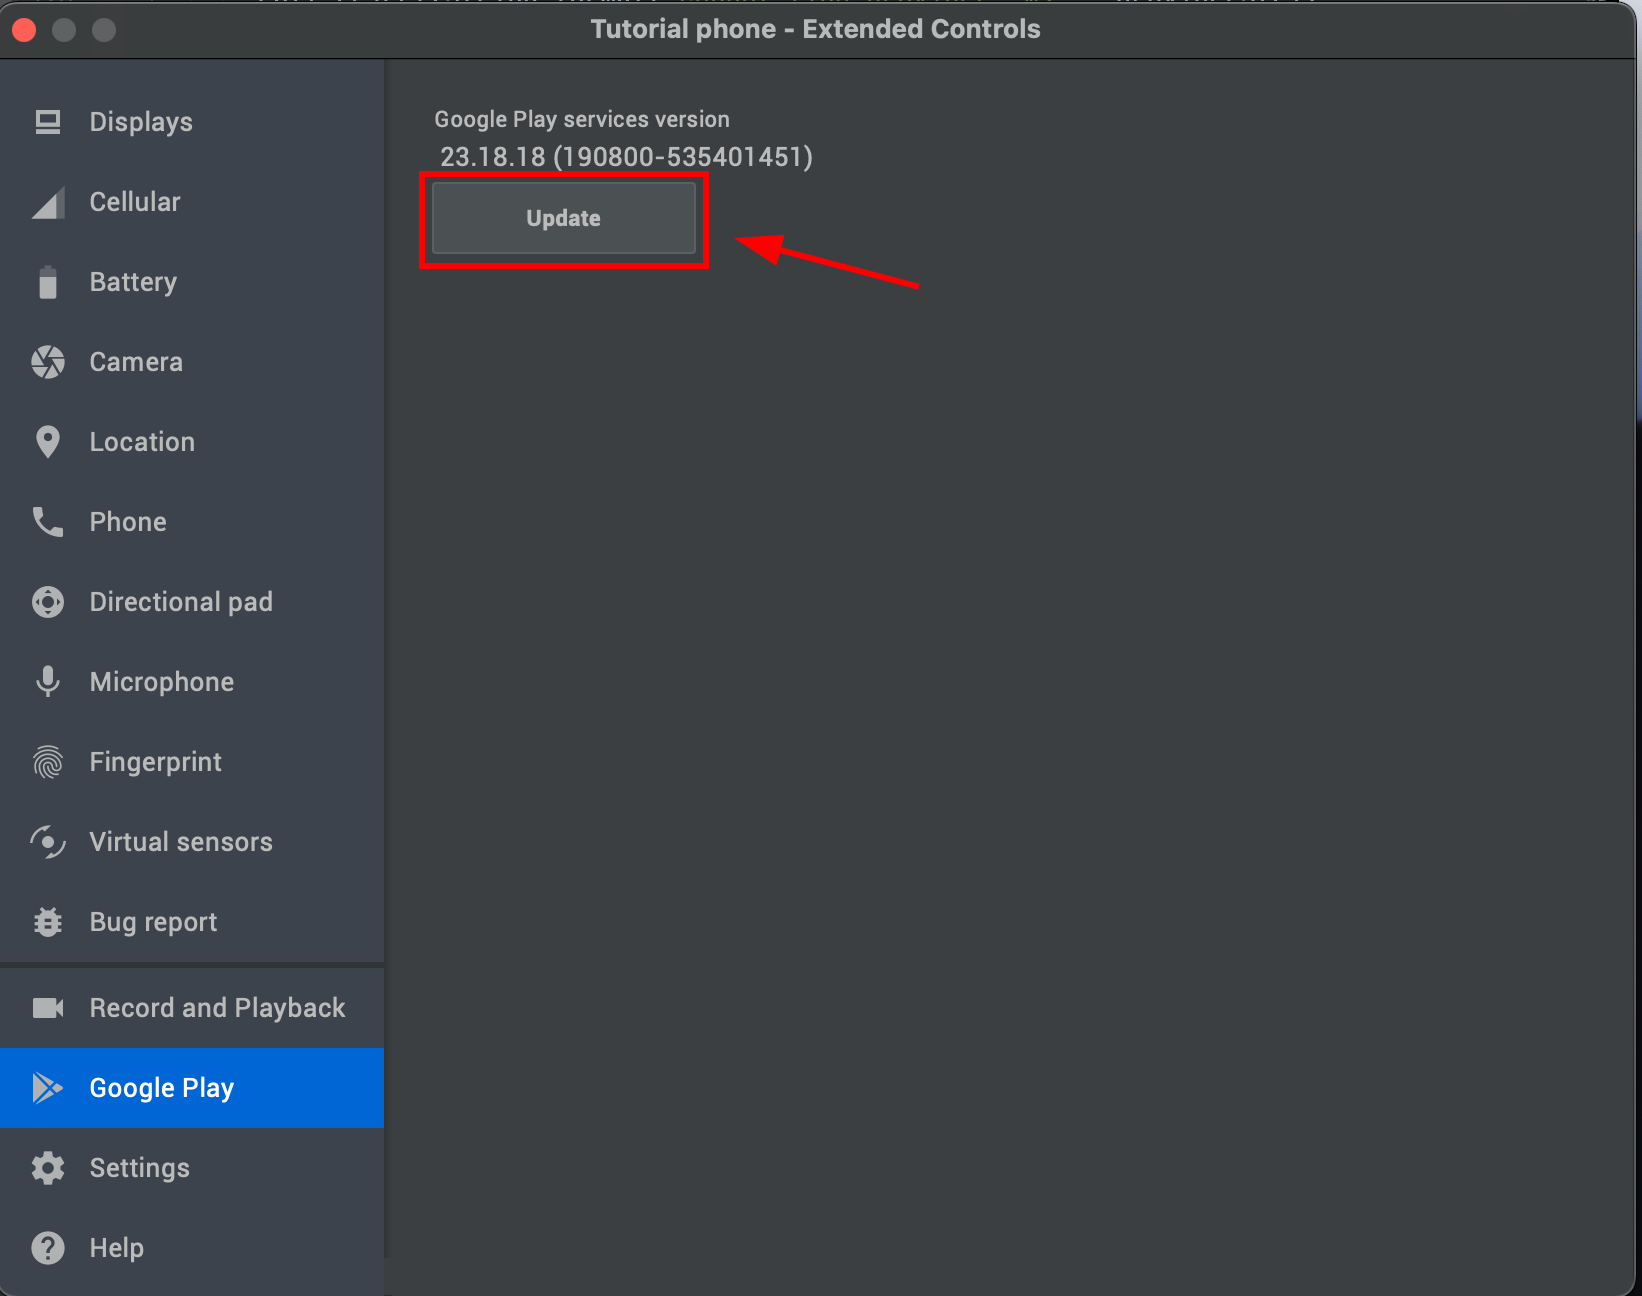
Gehe in
Device Managerund starten Sie Ihren Simulator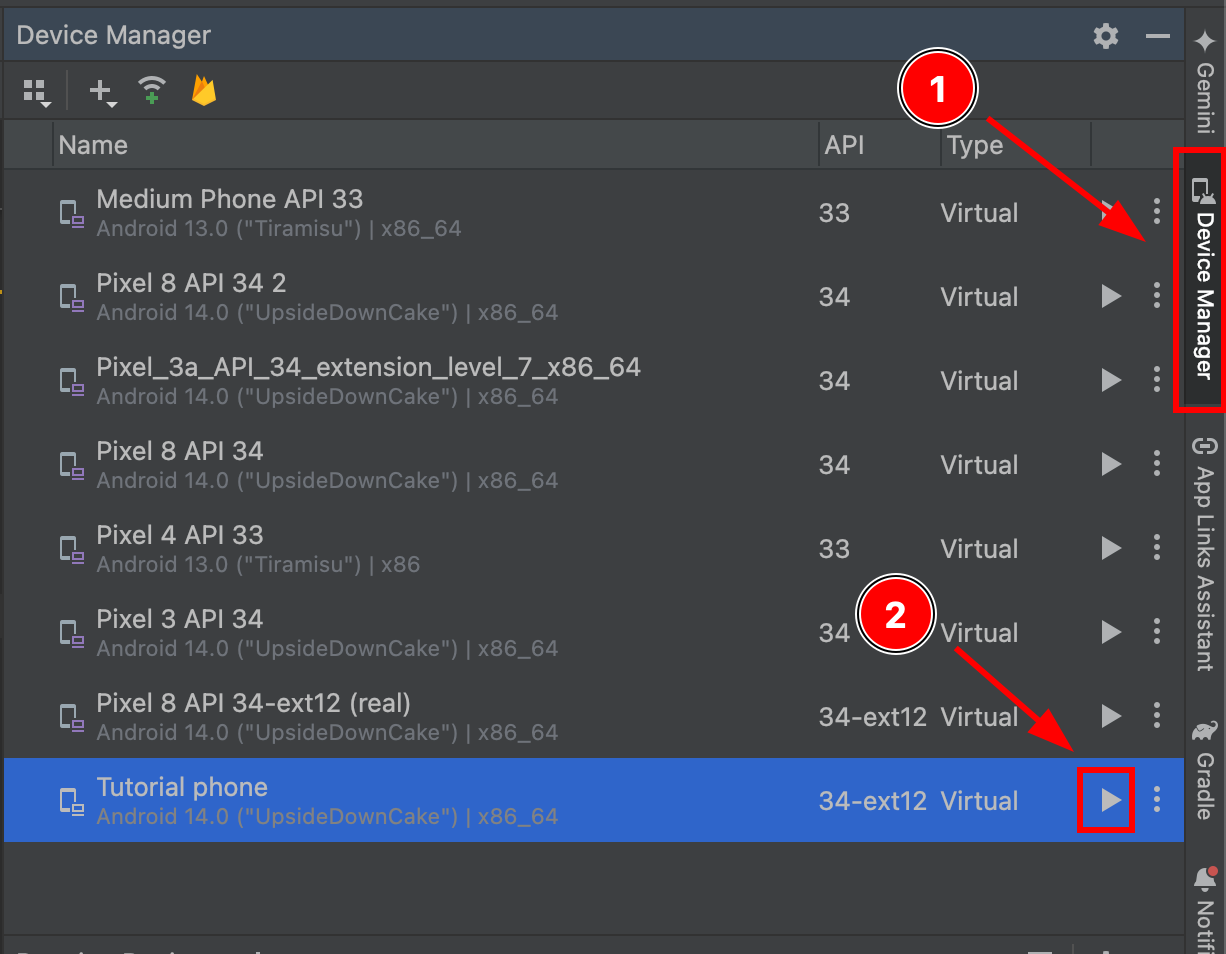
-
Geht nach dem Start des Simulators in dessen Einstellungen
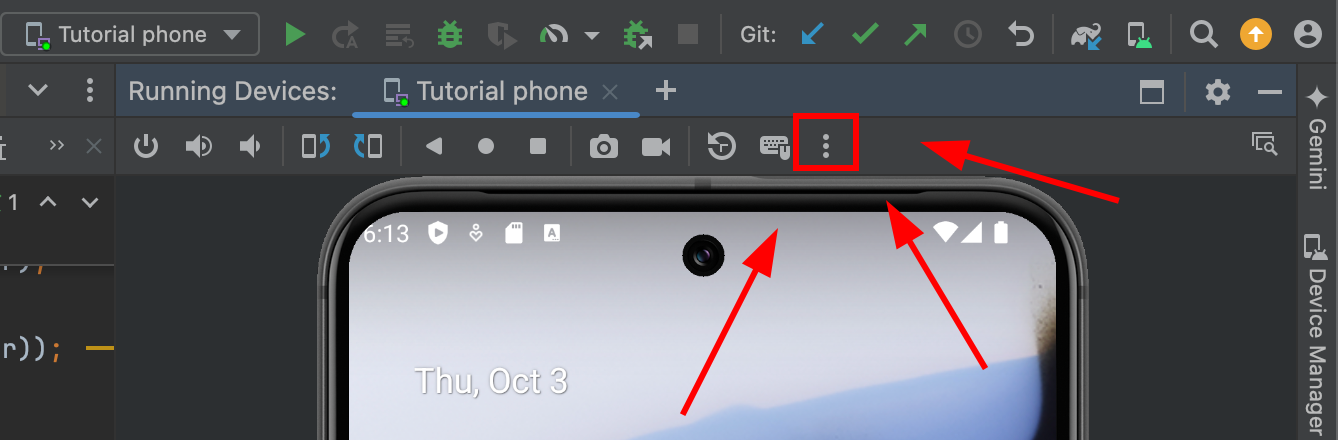
-
Geht in
Google Play
- Klicken Sie
Updateund warten Sie etwa 60 Sekunden
-
-
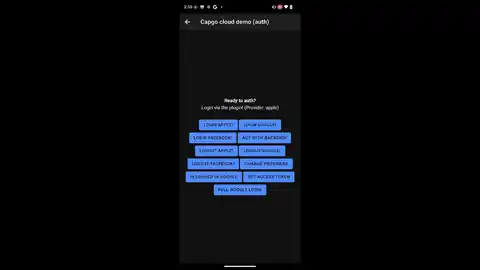
Testen Sie Ihre Anwendung
Wenn Sie alles richtig gemacht haben, sollten Sie das Google-Login-Flow korrekt funktionieren sehen:
Problembehandlung
Sektion mit dem Titel “Problembehandlung”Wenn Sie Probleme haben, zögern Sie bitte nicht, die Github Probleme.
Die Probleme mit Google-Login sind IMMER mit dem SHA1-Zertifikat verbunden.
Wenn Sie das Entwickler-SHA1-Zertifikat nicht erhalten können, versuchen Sie, ein benutzerdefiniertes Keystore zu verwenden. Hier ist ein Kommentar, der erklärt, wie Sie ein Keystore zu Ihrem Projekt hinzufügen können.
Fortsetzen Sie von Google-Login auf Android
Sektion mit dem Titel “Fortsetzen Sie von Google-Login auf Android”Wenn Sie Google Login auf Android für die Planung der Authentifizierung und der Kontoflows verwenden Using @capgo/capacitor-social-login Verwenden Sie @capgo/capacitor-social-login für die native Fähigkeit in Verwenden Sie @capgo/capacitor-social-login, @capgo/capacitor-social-login für die Implementierungsdetails in @capgo/capacitor-social-login, @capgo/capacitor-passkey für die Implementierungsdetails in @capgo/capacitor-passkey, @capgo/capacitor-native-biometric für die Implementierungsdetails in @__CAPGO_KEEP_0__/__CAPGO_KEEP_1__-native-biometric, und das Zwei-Faktor-Authentifizierungsprotokoll für die Implementierungsdetails in der Zwei-Faktor-Authentifizierung.