Android Builds
Build and submit Android apps to Google Play Store using Capgo’s dedicated infrastructure.
What you will learn
Section titled “What you will learn”- You will learn how to upload your app via Capgo Native build
- You will learn how to configure the credentials for Capgo Native Build
Prerequisites
Section titled “Prerequisites”- You need to have an active Google Developer account
- You need to have Android Studio installed
- Your app must be able to build successfully with Android Studio
The first manual build
Section titled “The first manual build”Before we can start thinking about building the app with Capgo, we should first set it up, and do a first Android build by hand. There are some advantages to doing a manual build first:
- You will prepare the credentials for the later Capgo build
- You will create a record on the Play Store Console
Building the app manually with Android Studio
Section titled “Building the app manually with Android Studio”Before we can start building the app with Capgo, we need to build the app manually with Android Studio.
-
Open Android Studio
Run
bunx cap open androidto open the Android Studio project. -
Click on
Build->Generate Signed App Bundles / APKs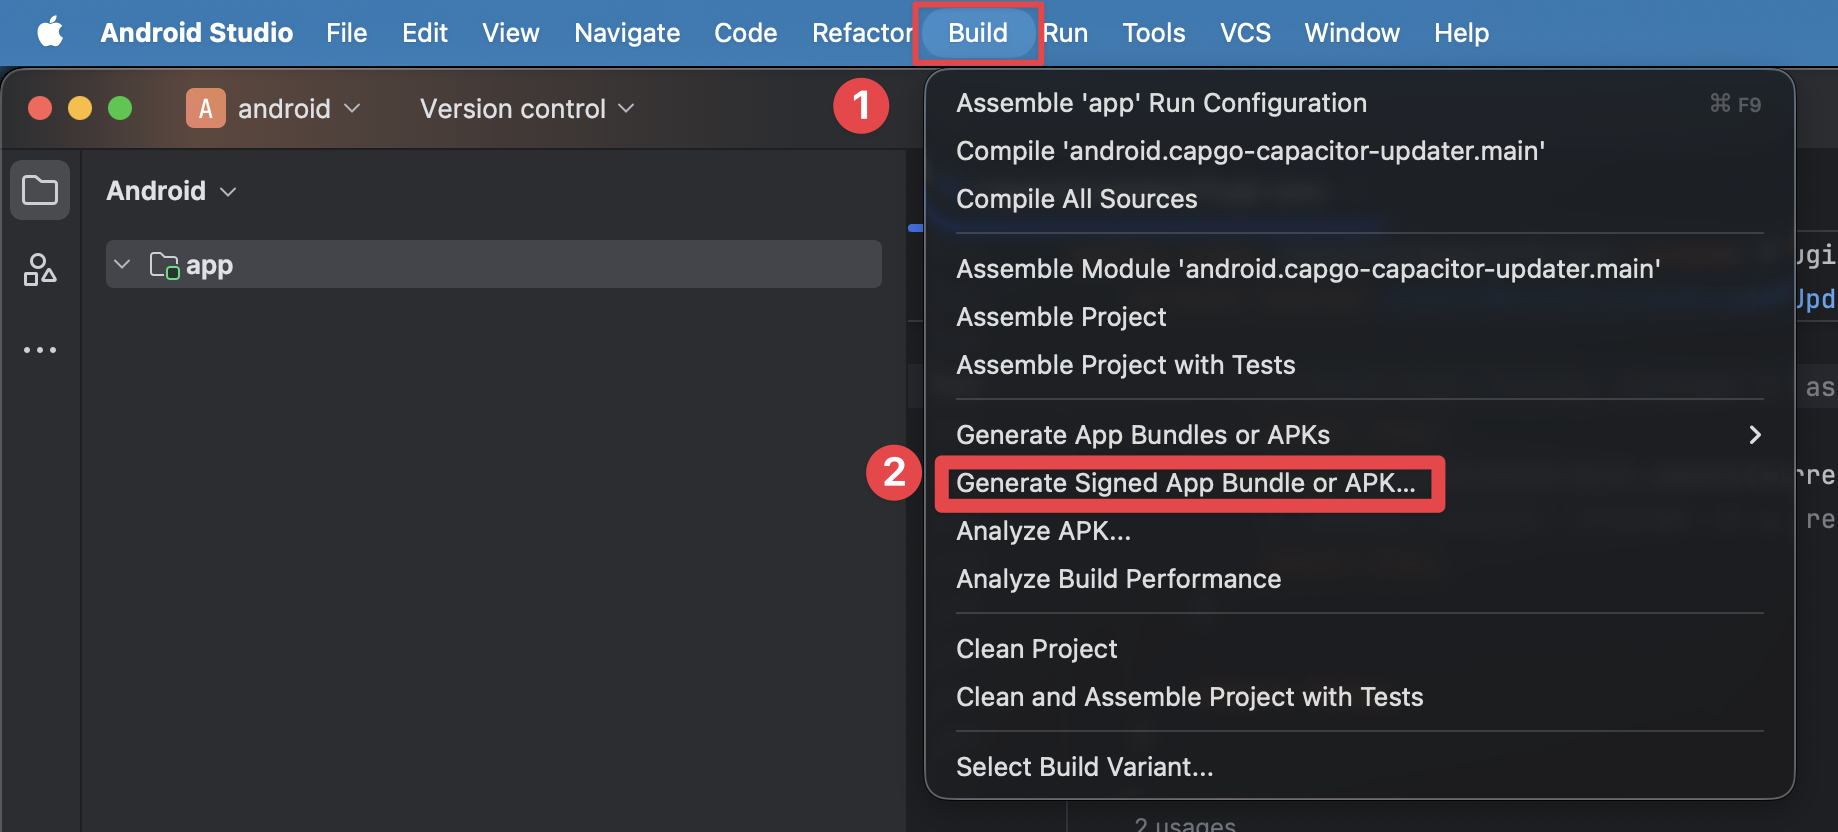
-
Select
Android App Bundleand click onNext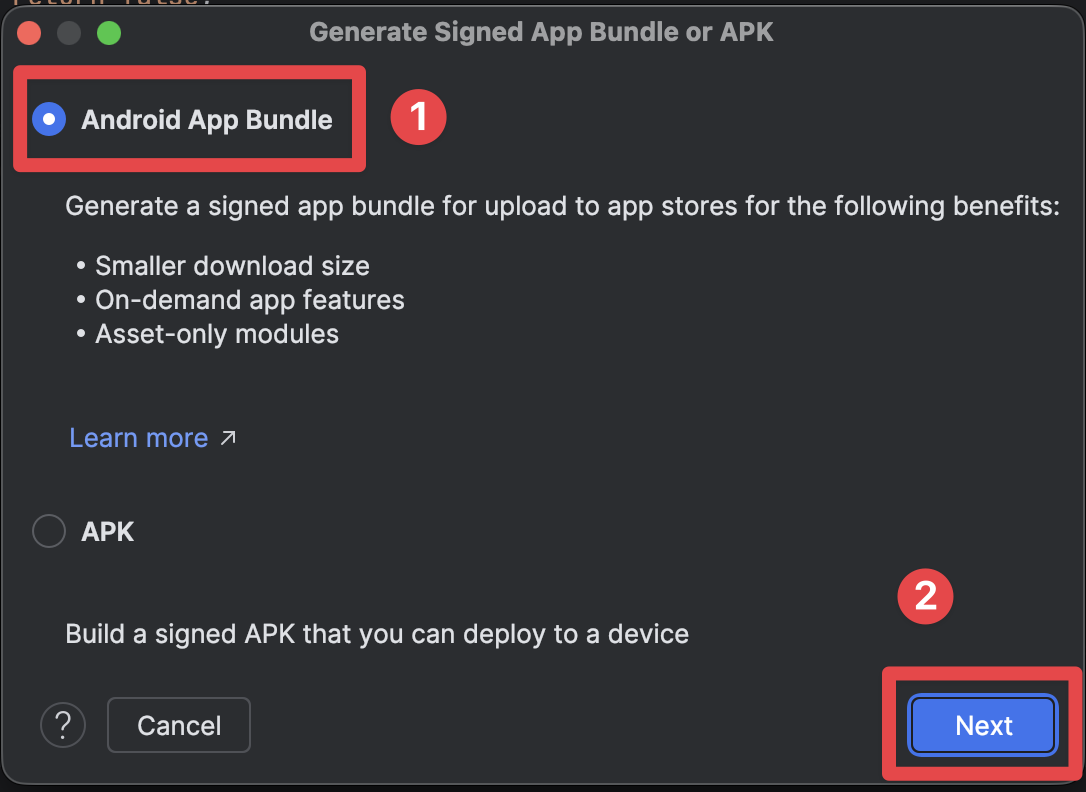
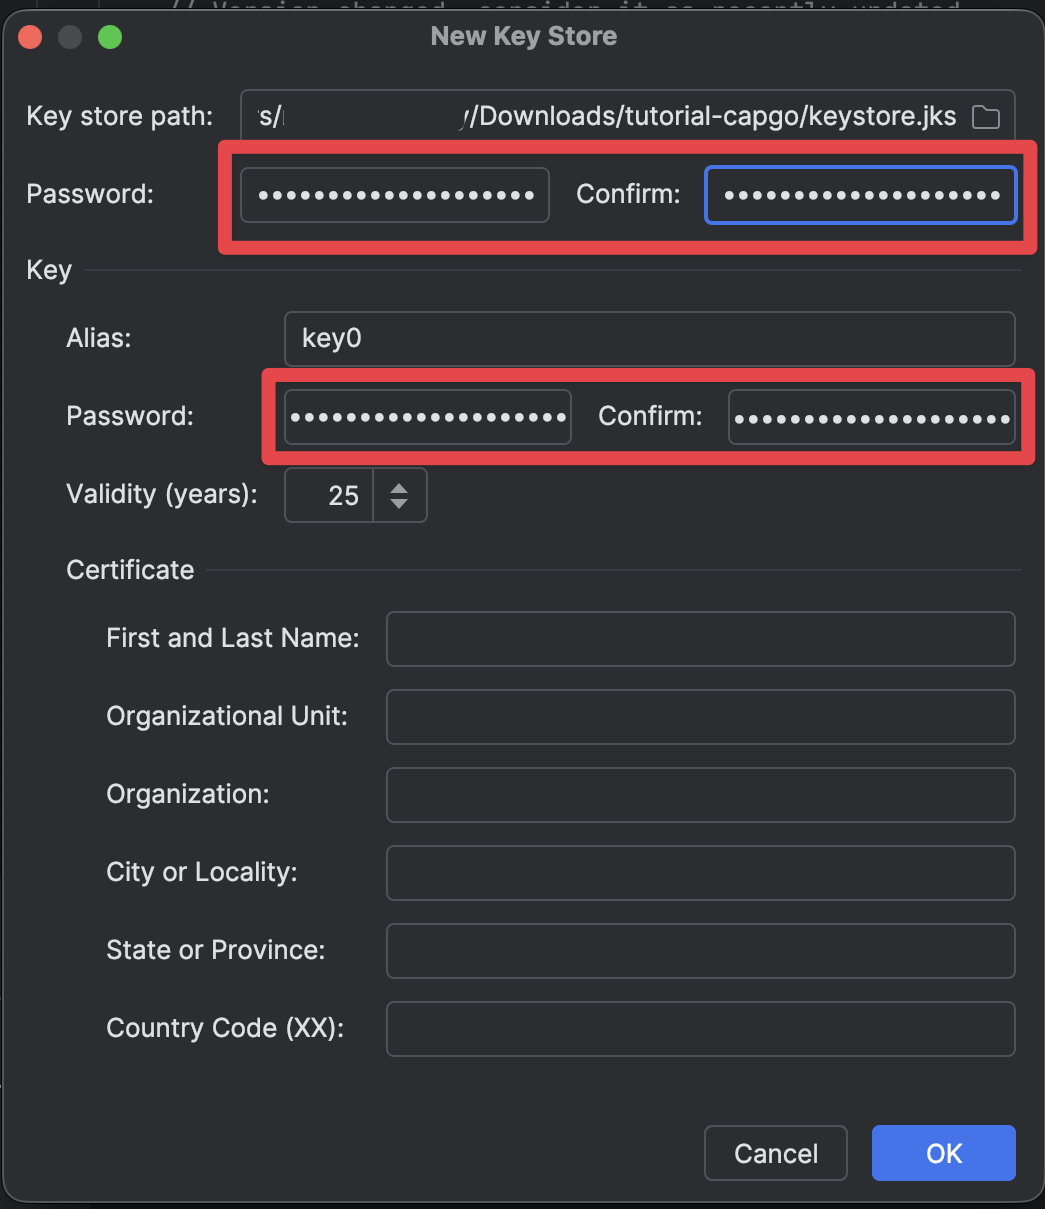
Creating a Keystore
Section titled “Creating a Keystore”Right now, you are missing the keystore file. This file is used to sign your app, which lets Google know that it’s you who built the app. To generate it, we will use the GUI method provided by Android Studio. There is also a way to do this with the command line, but we will not cover that in this tutorial.
-
Click on
Create new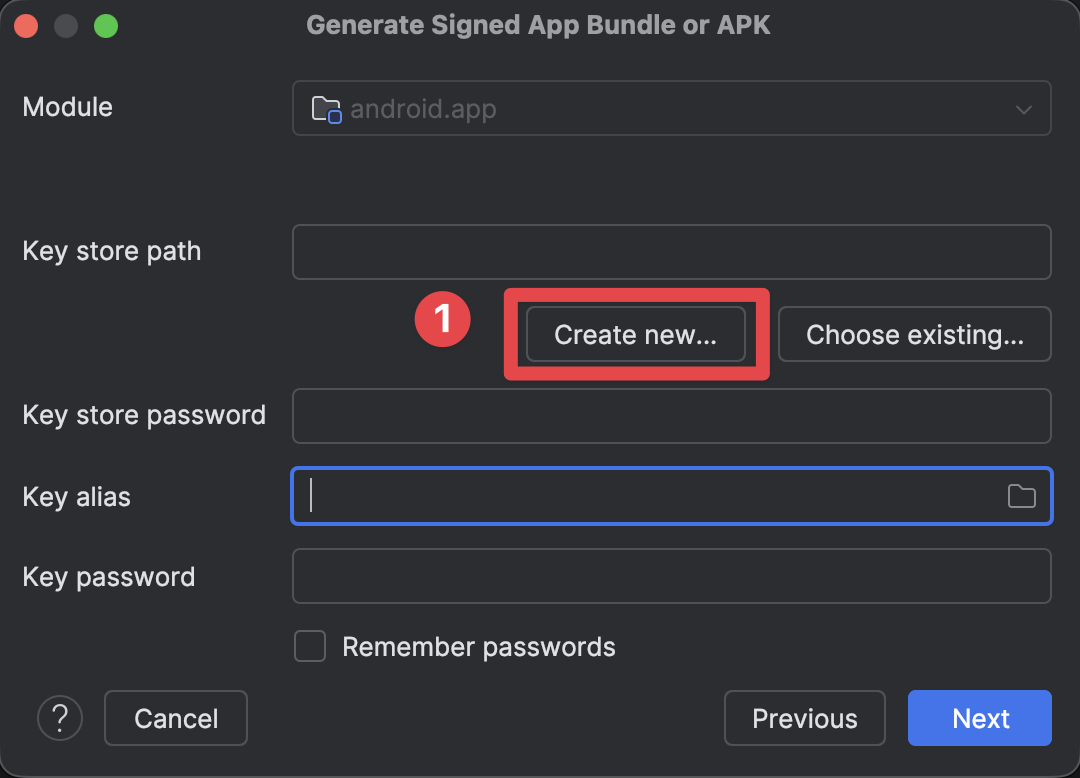
-
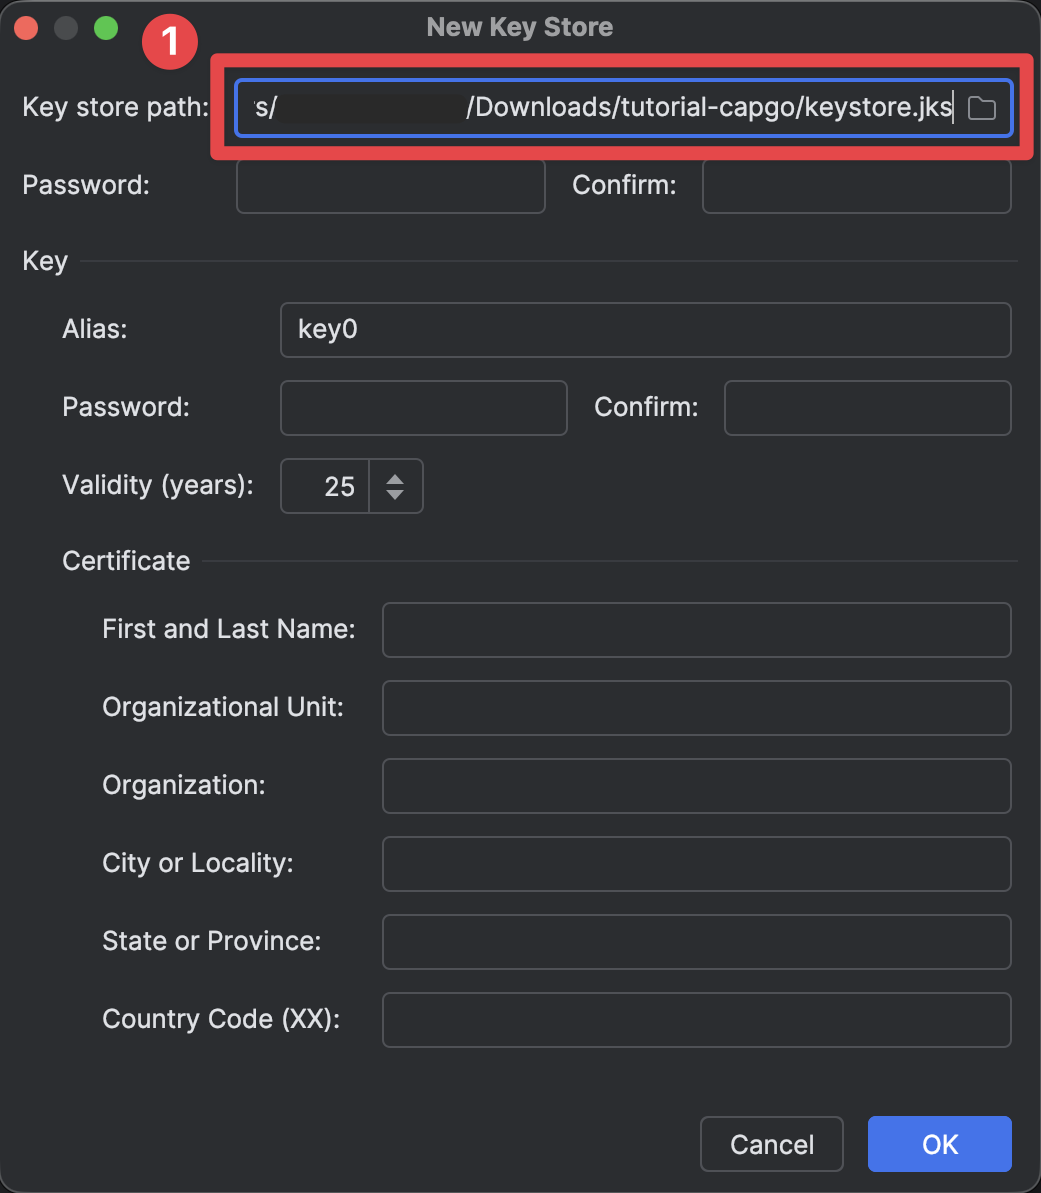
Fill in the Key Store path
-
Set the Key Store password
-
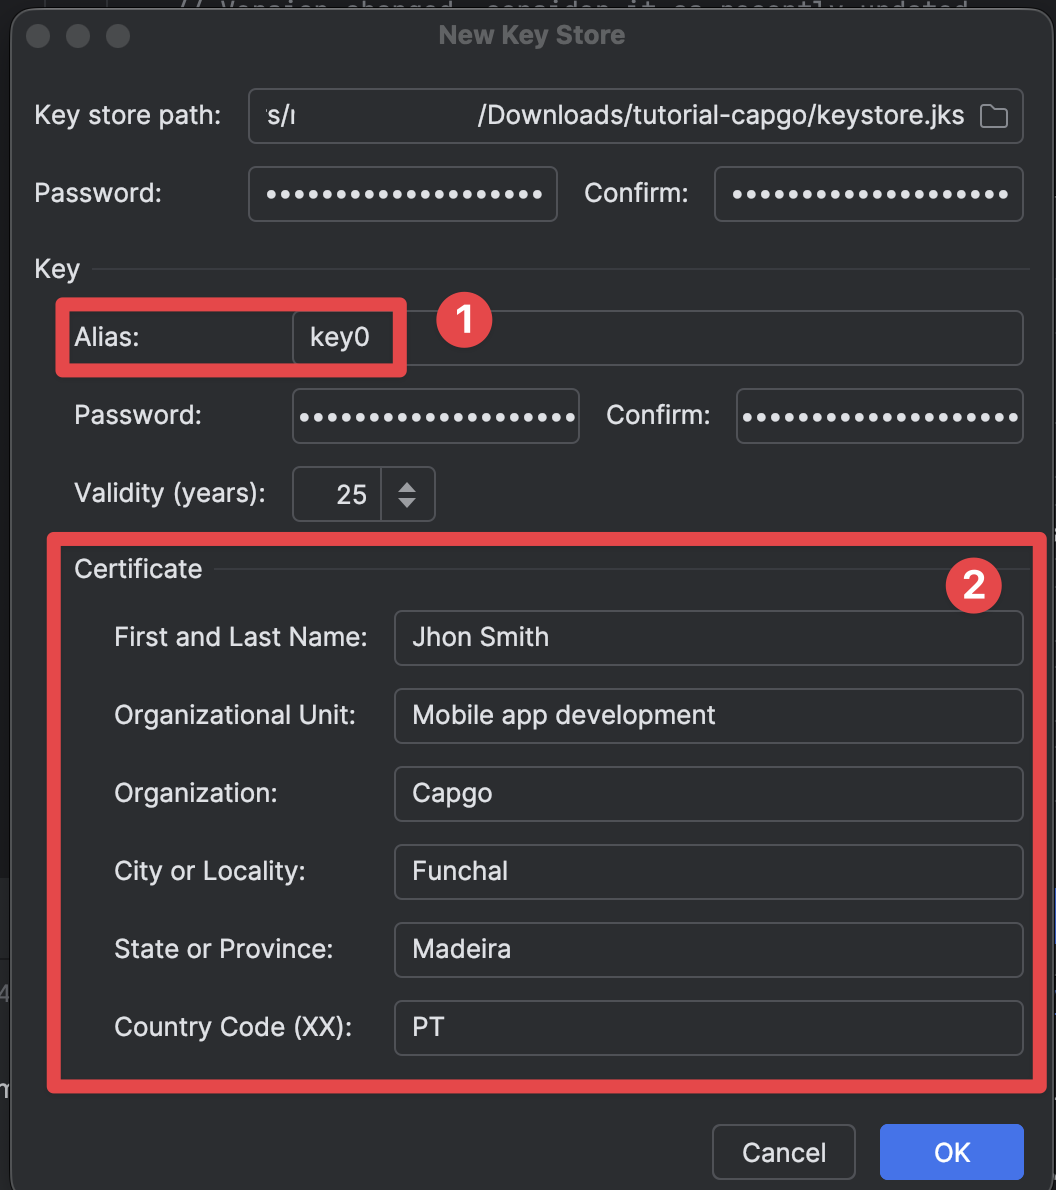
Fill the rest of the form
- Keep the Key Alias as is (key0)
- Fill the certificate details. I have filled it with fake details, but you should fill it with your own details.
-
Click on
OK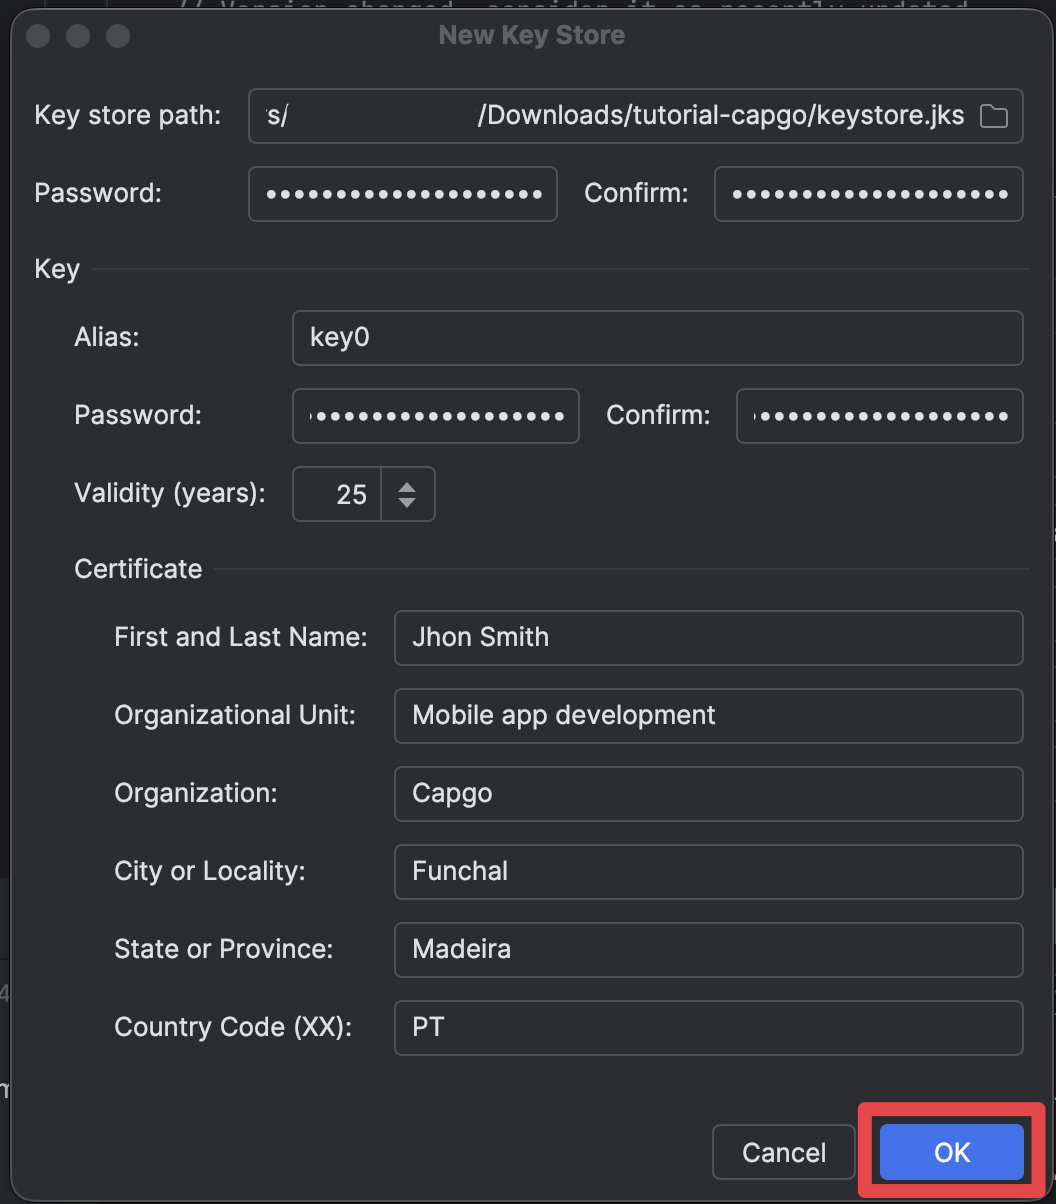
Finishing the manual build
Section titled “Finishing the manual build”-
Make sure all of the details for the keystore have been filled in correctly and click on
Next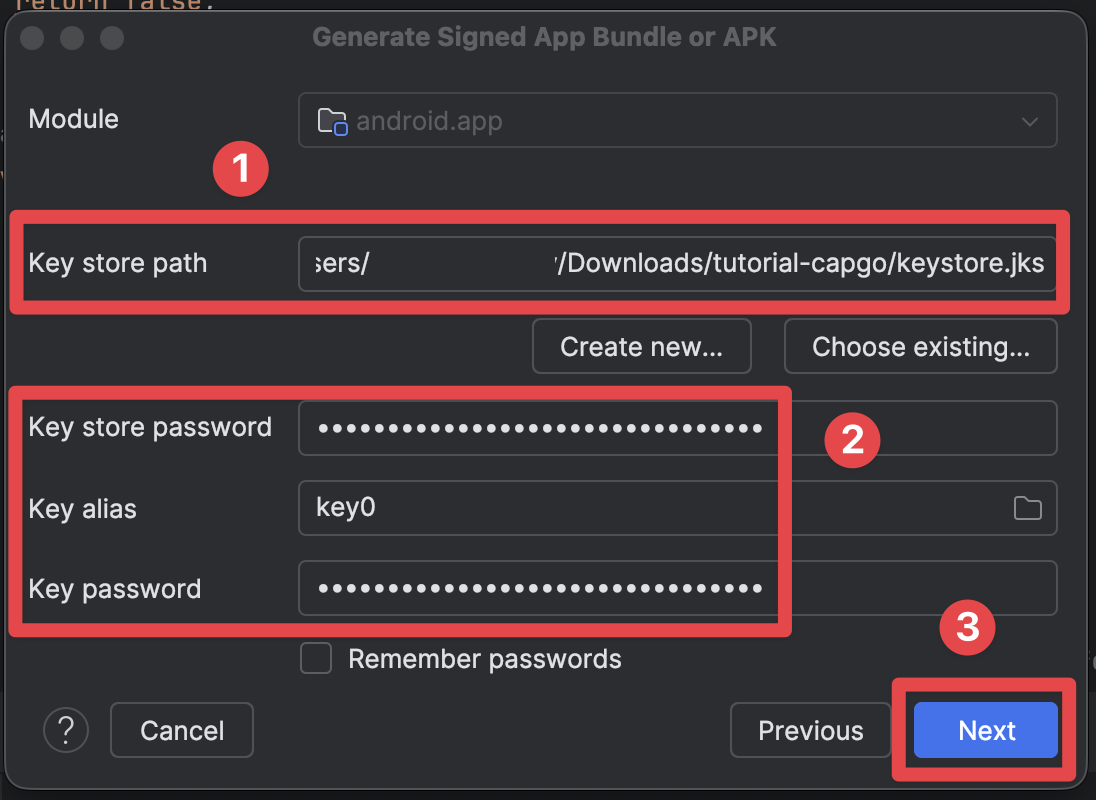
-
Select the
releasebuild variant and click onCreate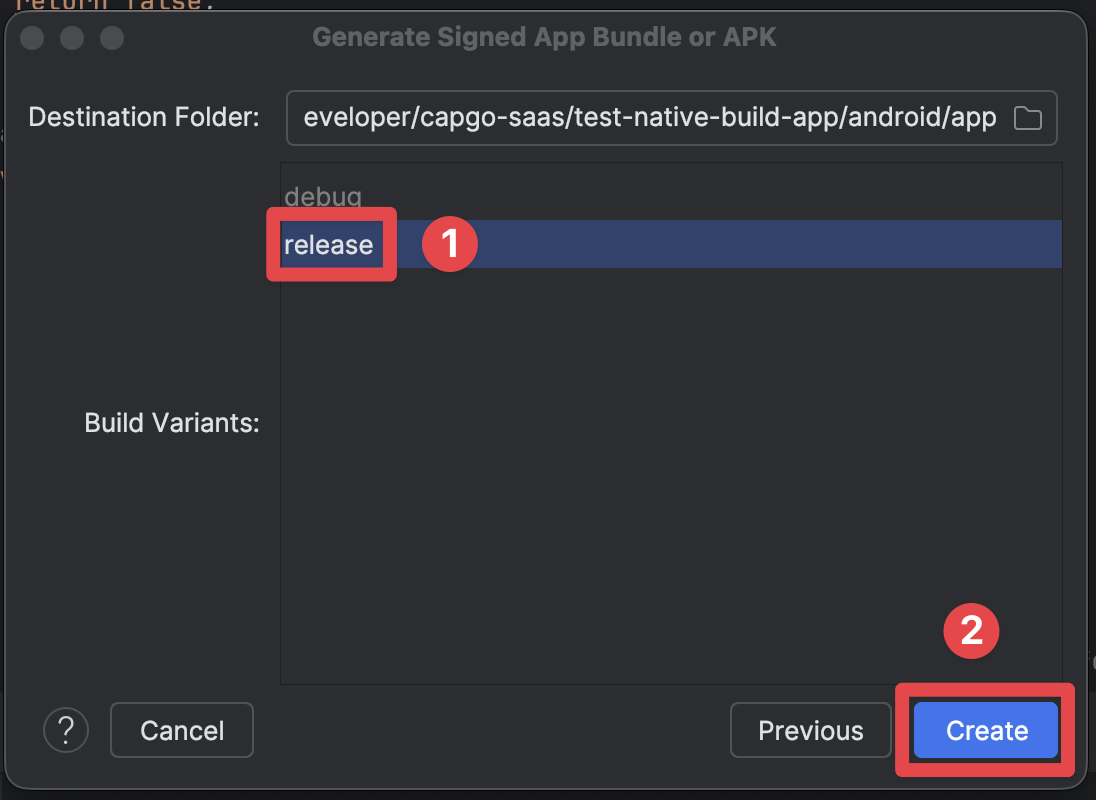
-
After the build succeeds, you should see the following screen
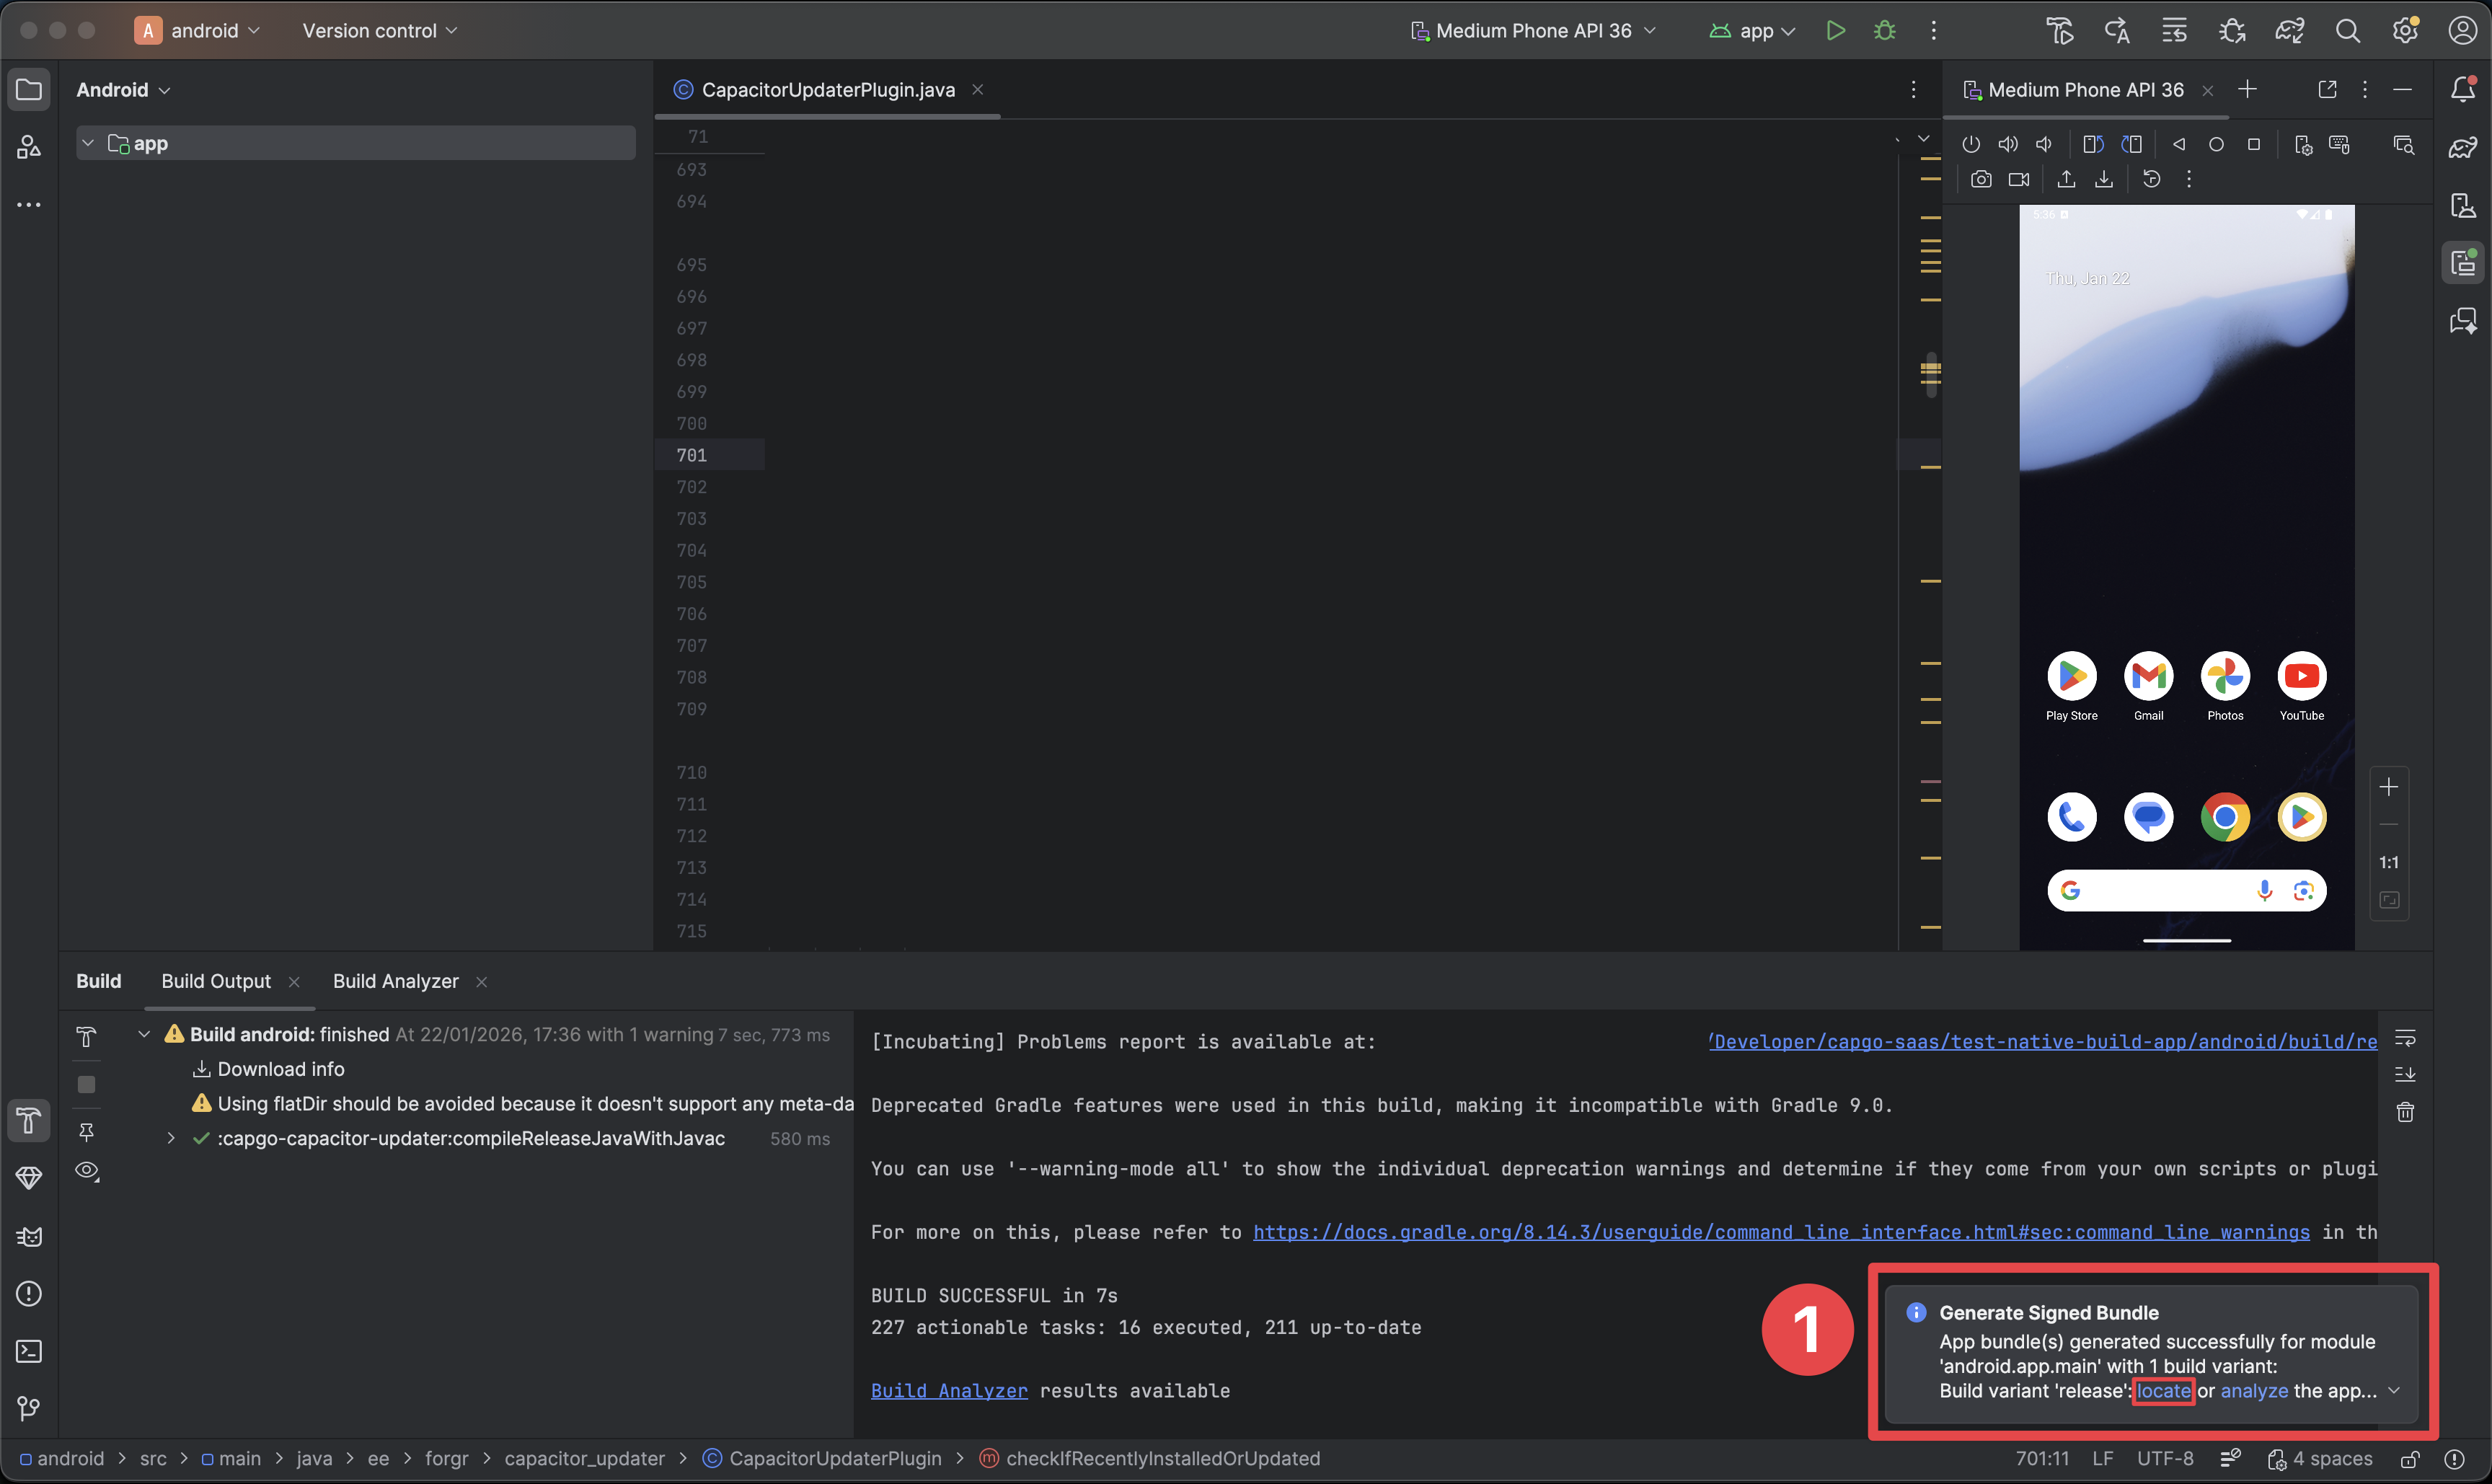
- This popup indicates that the build succeeded.
- Click on the
locatebutton - this will open the file explorer and you should see the build there.
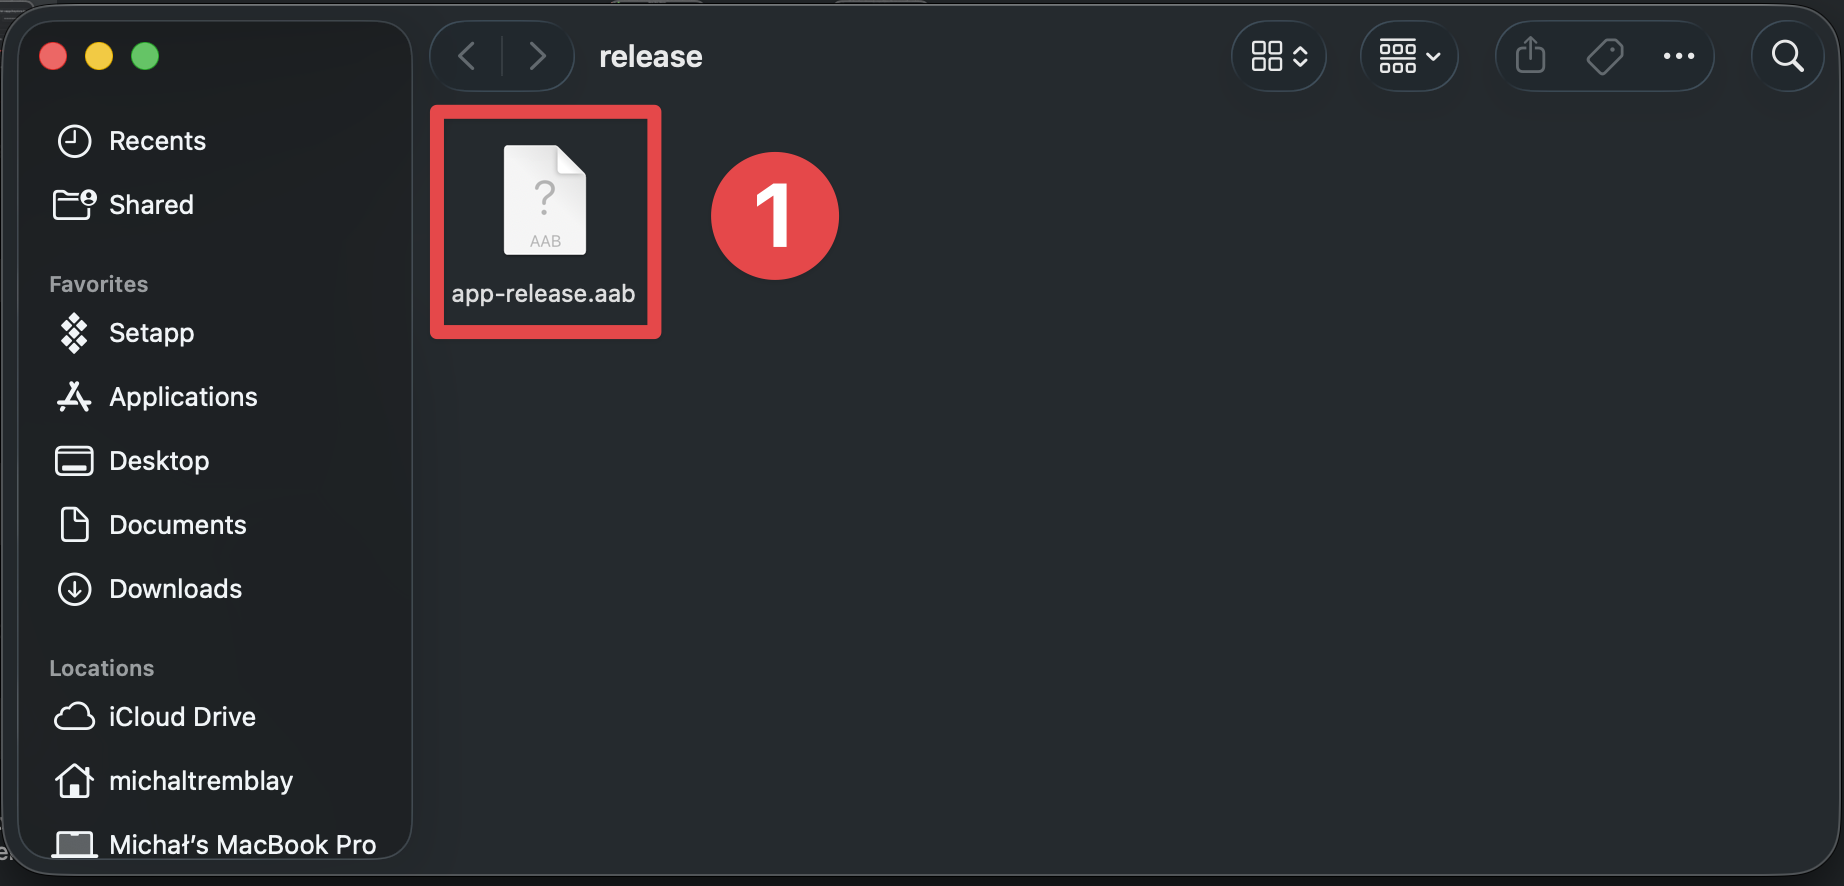
-
Make sure you can see the build in the file explorer
Creating the app on the Play Store Console
Section titled “Creating the app on the Play Store Console”-
Go to Google Play Console
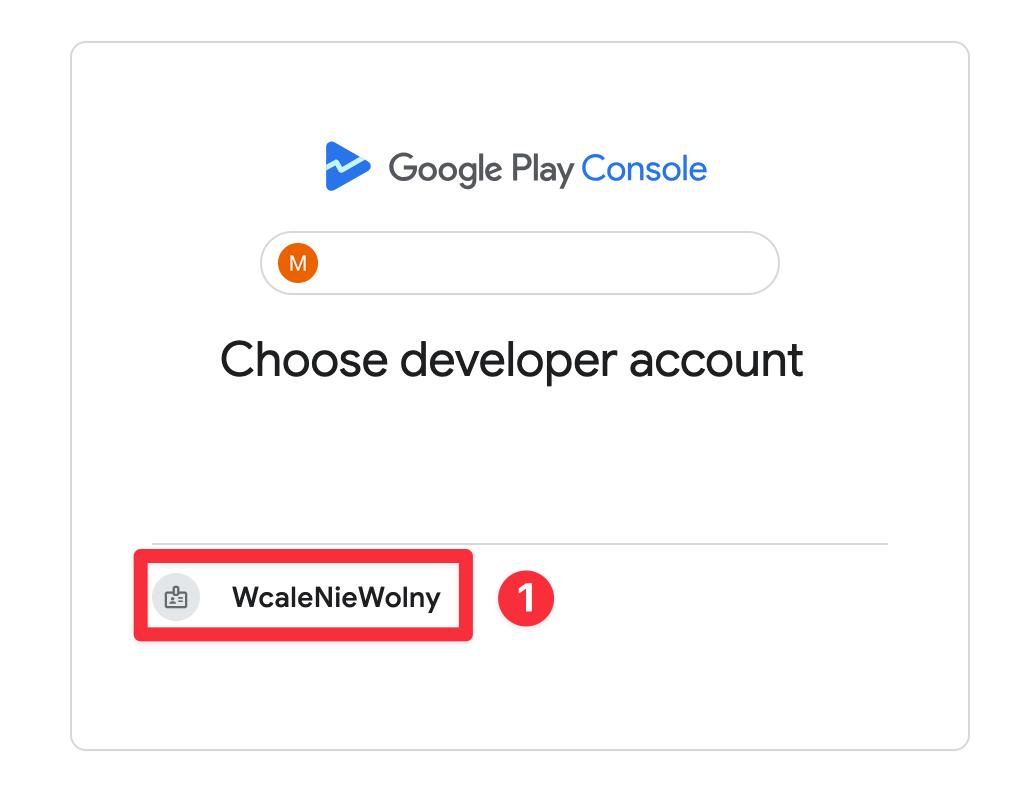
-
Select the correct developer account
-
Click on
Create app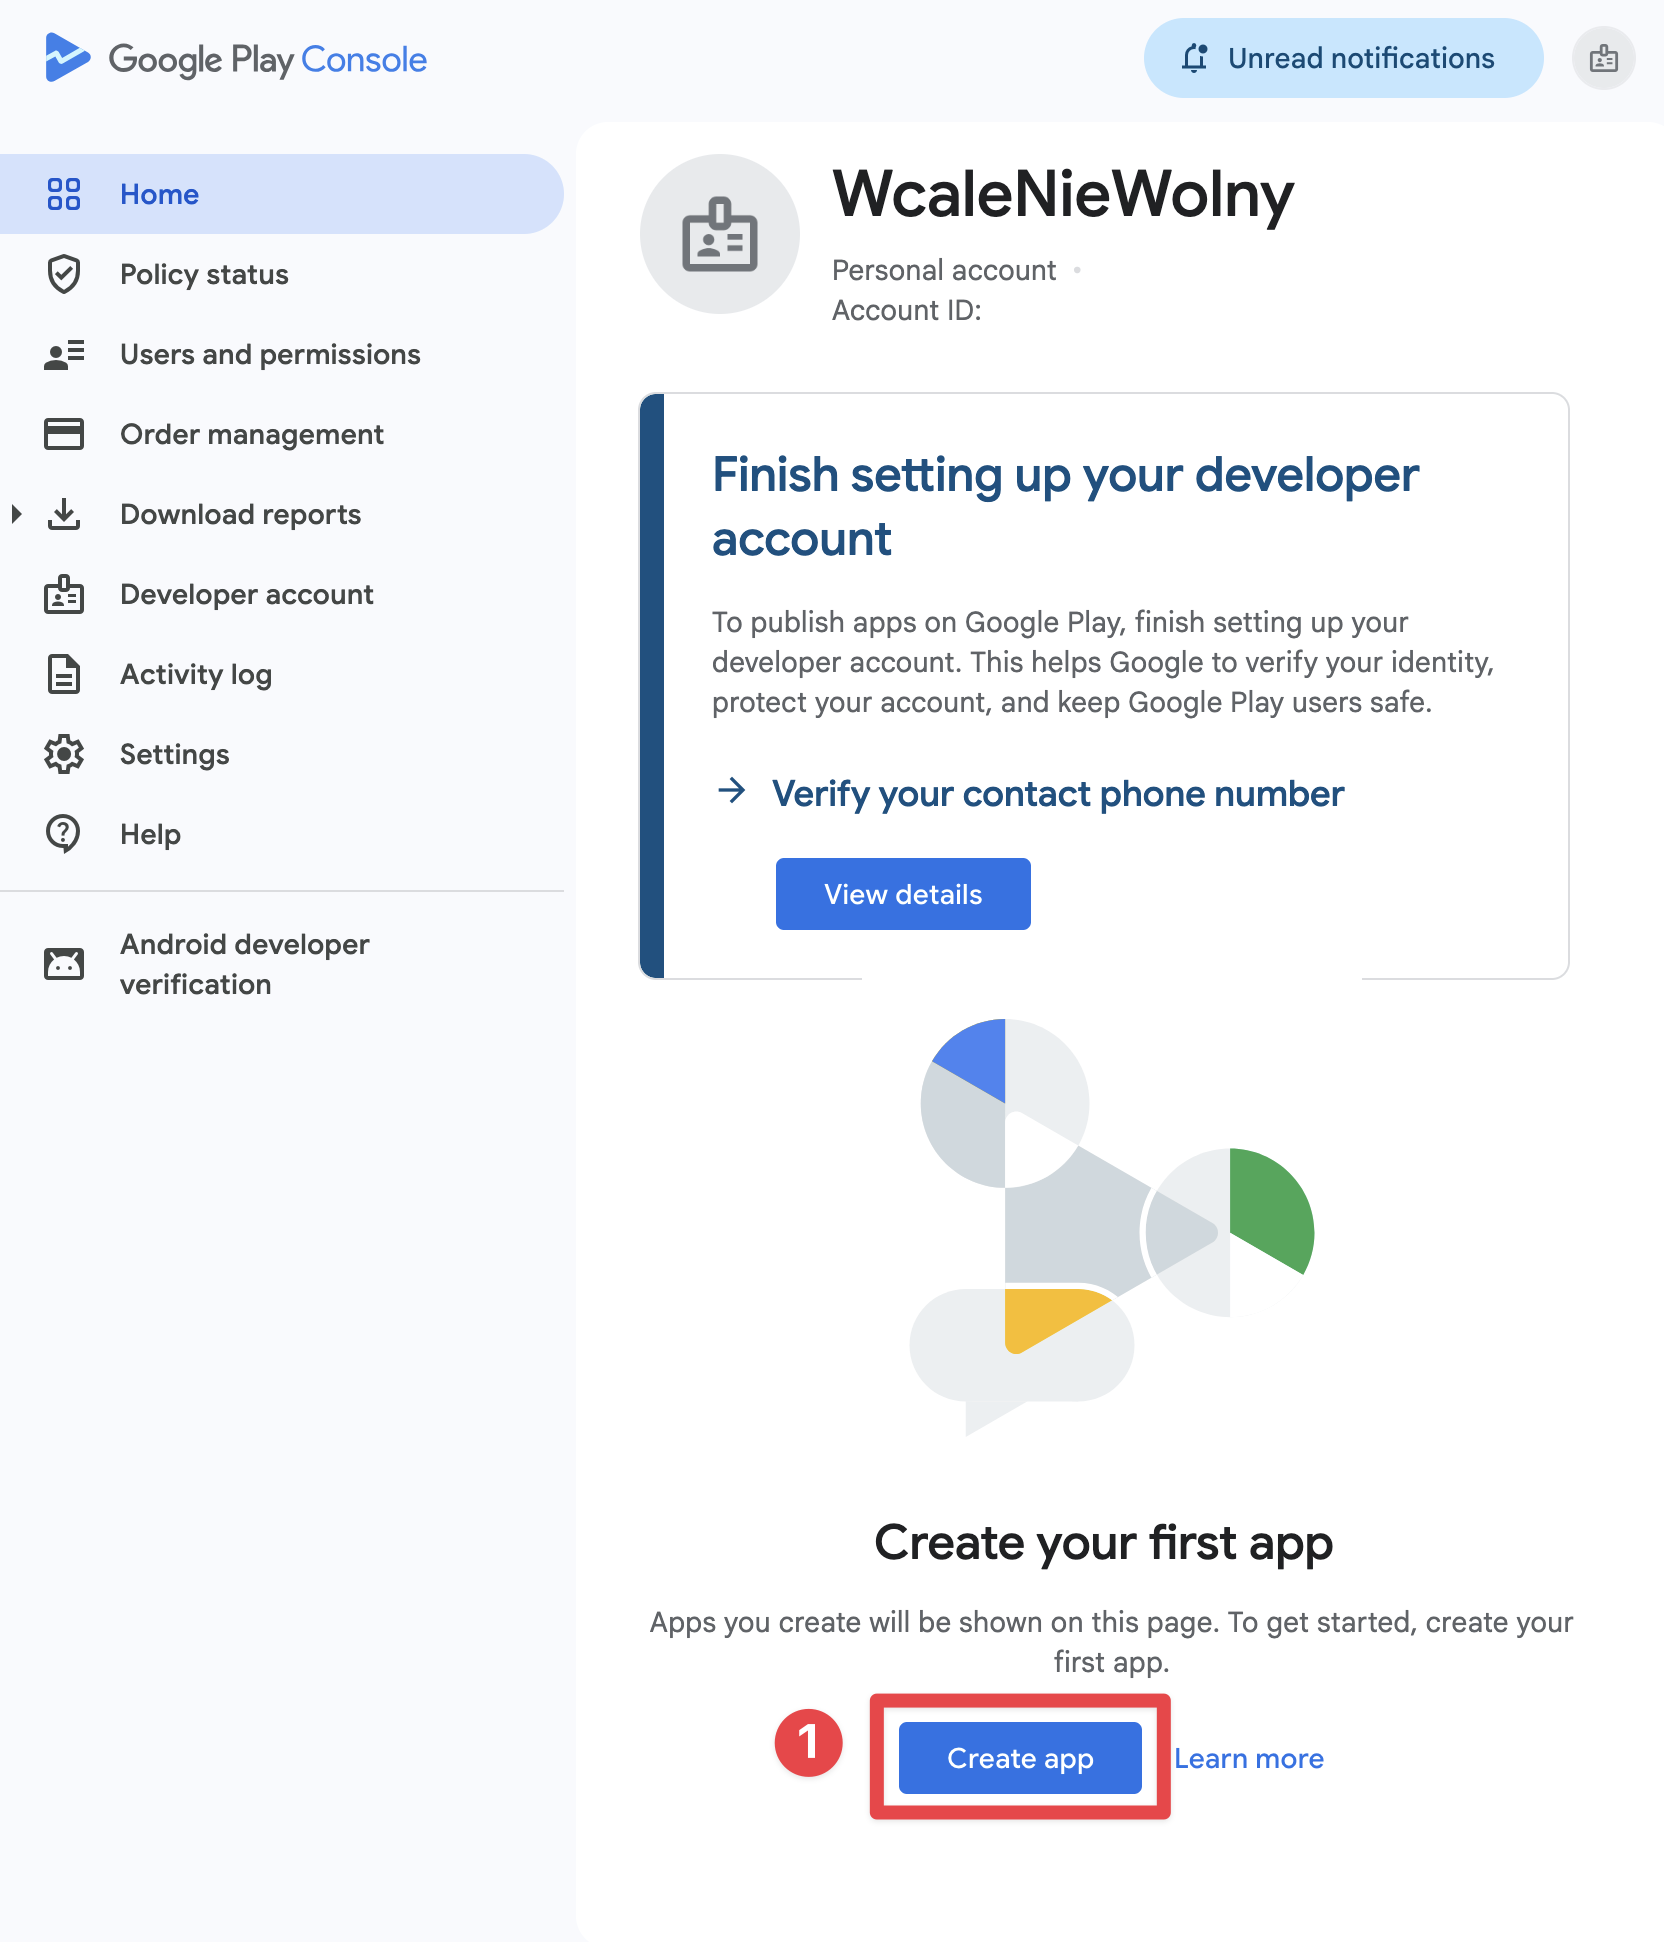
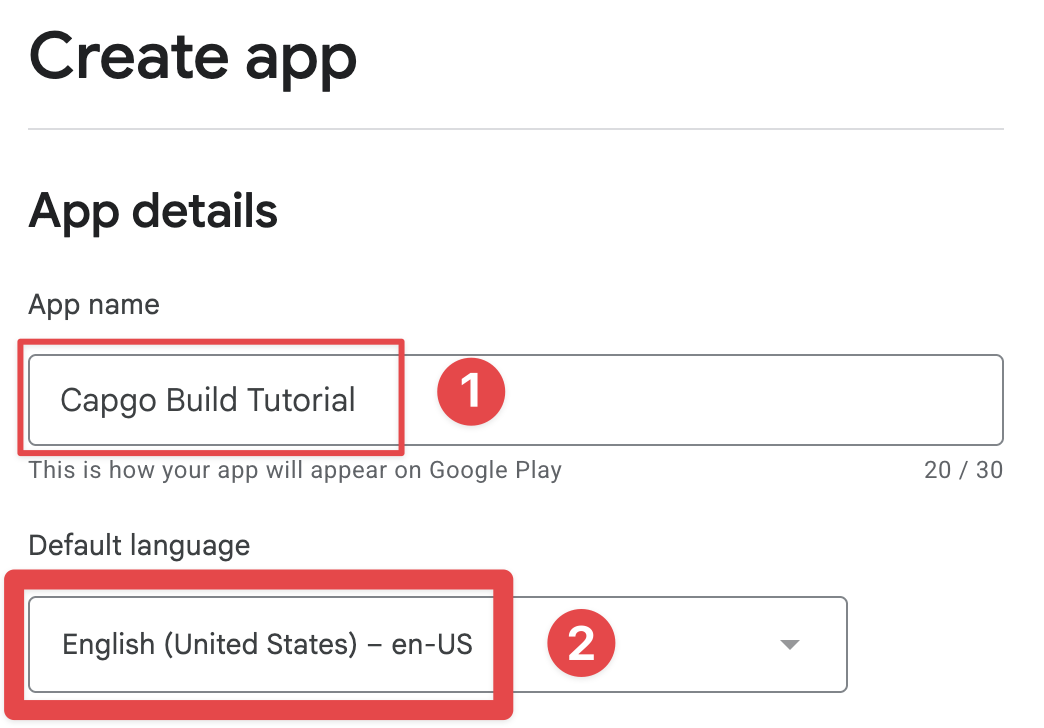
-
Choose the app name and the language
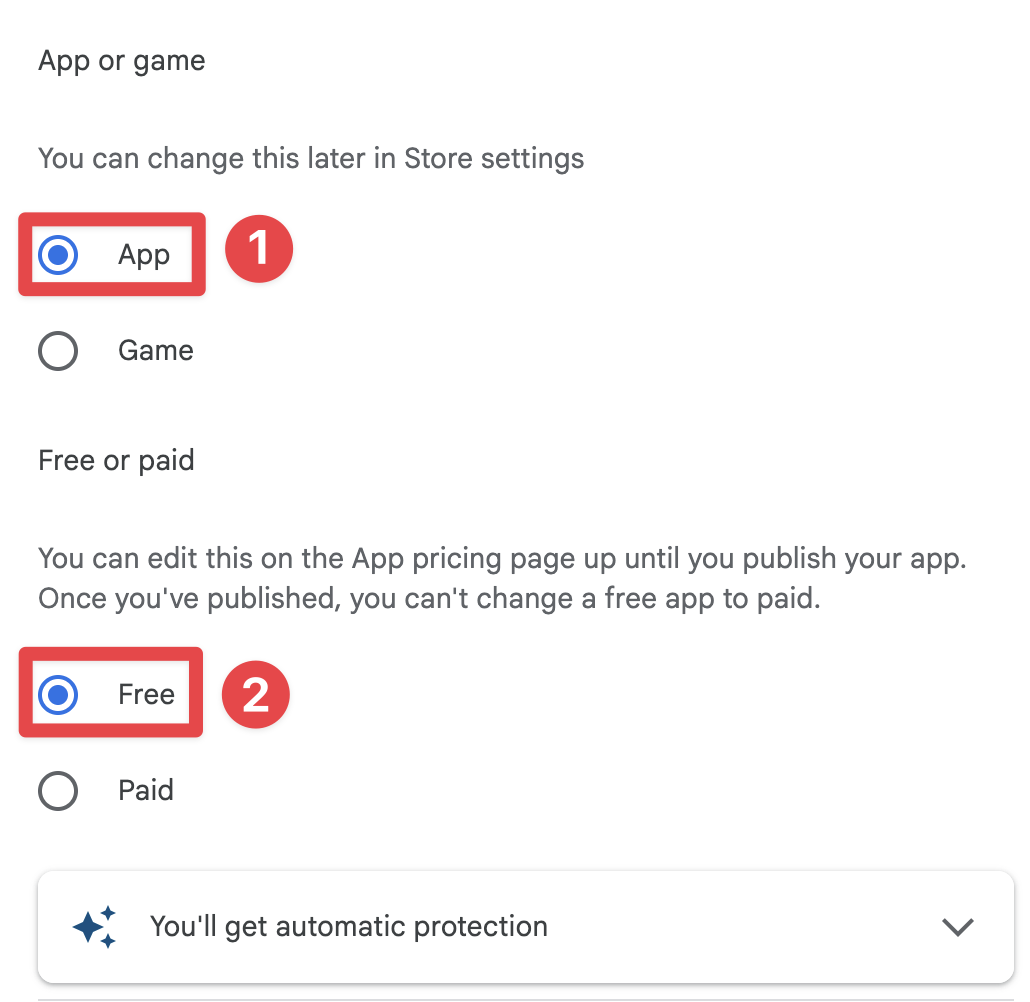
-
Select the app category and if the app is paid or free
-
Accept the terms and conditions
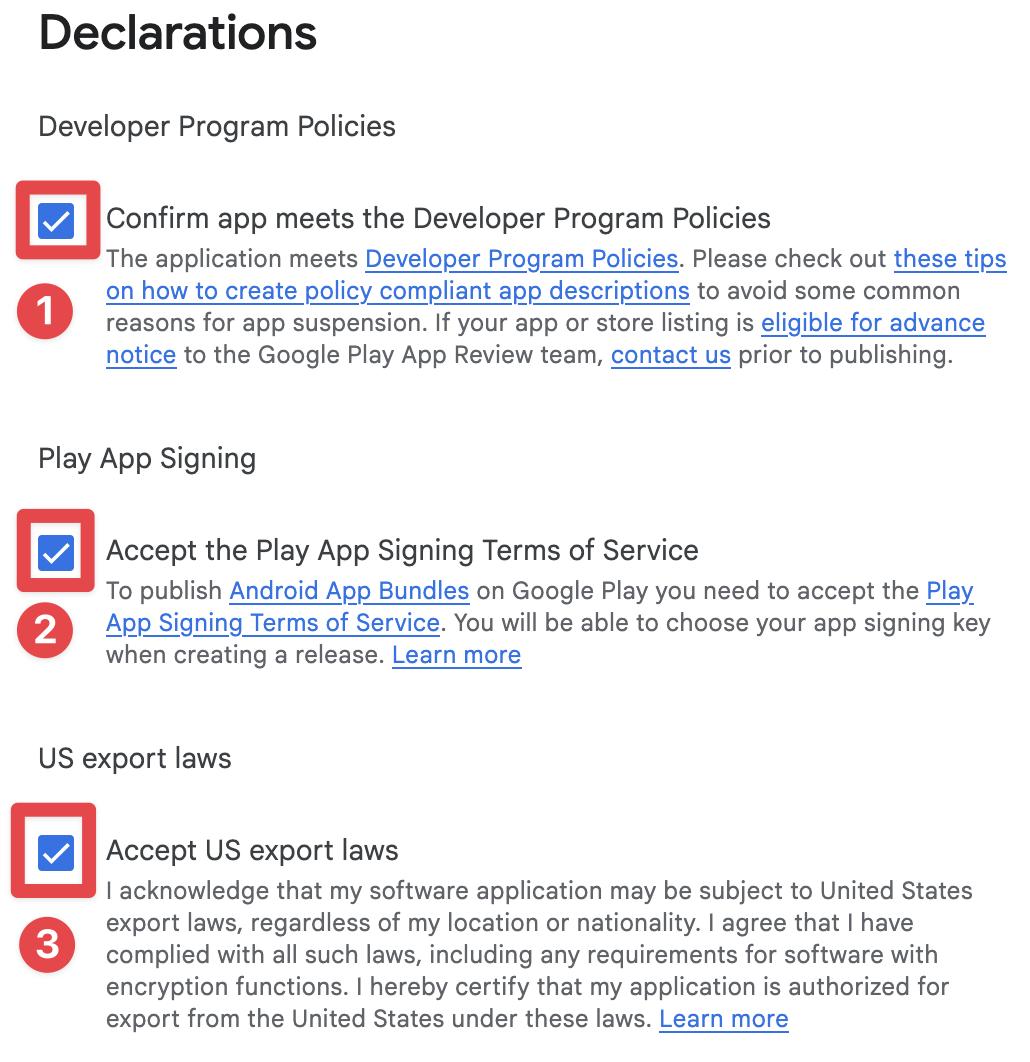
-
Click on
Create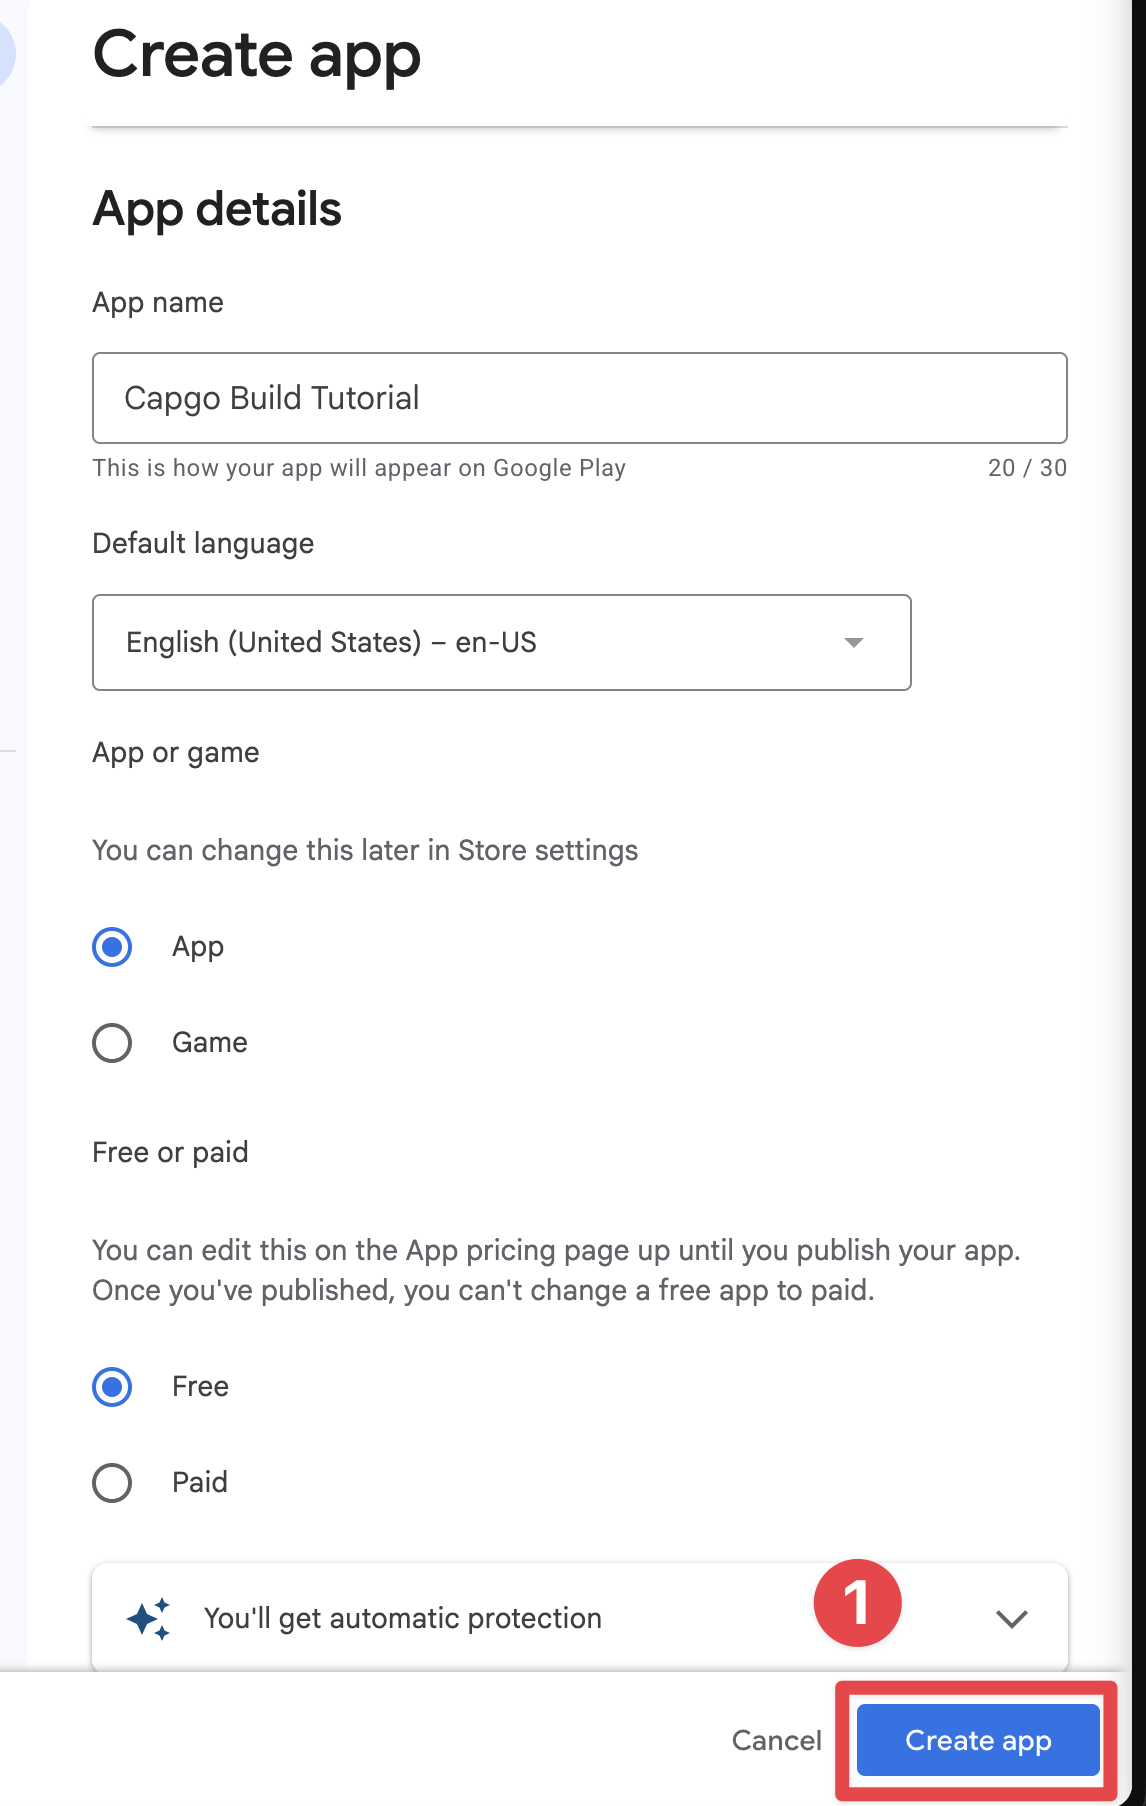
Creating the internal testing group
Section titled “Creating the internal testing group”Now that you have created the app, you can create an internal testing group. Since I won’t actually publish the app for everyone on Play Store, I will need to create an internal testing group. However, if you are going to publish the app for everyone, you can likely skip this step, although I don’t recommend it.
-
Go to
internal testingClick onTest and release->Testing->Internal testing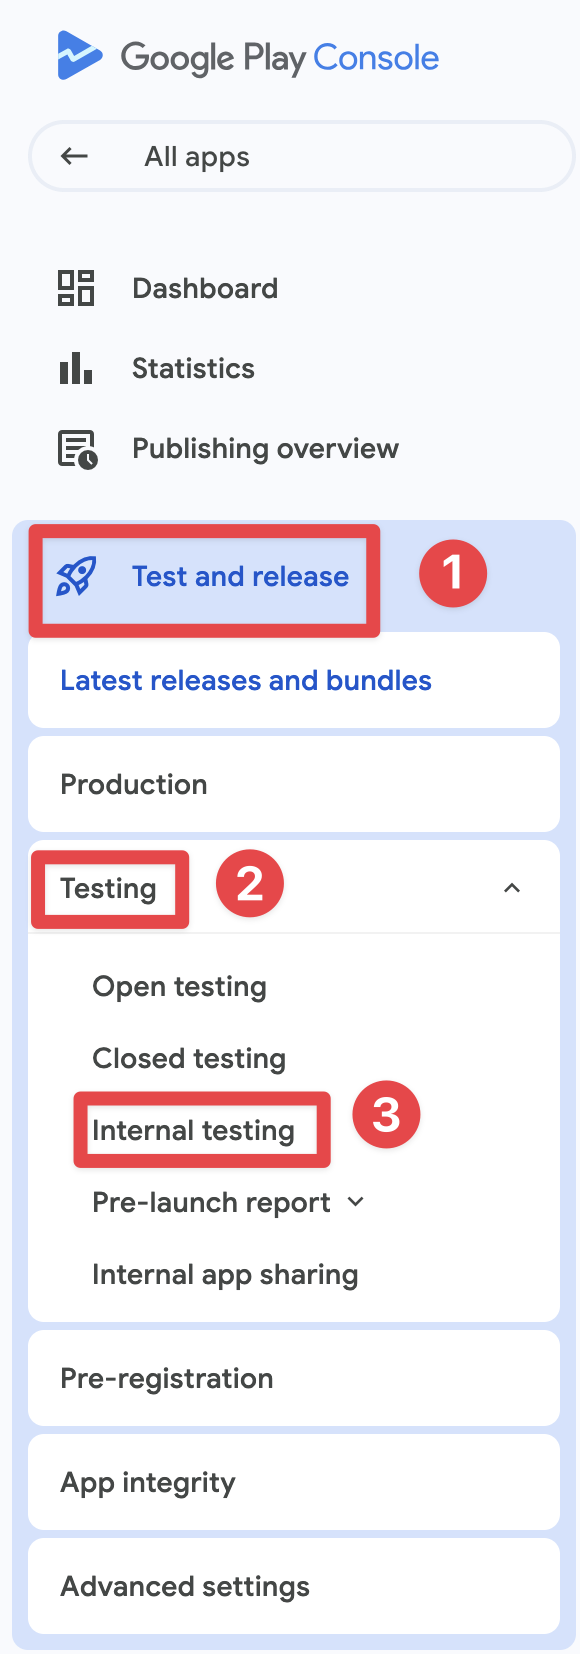
-
Click on
Testers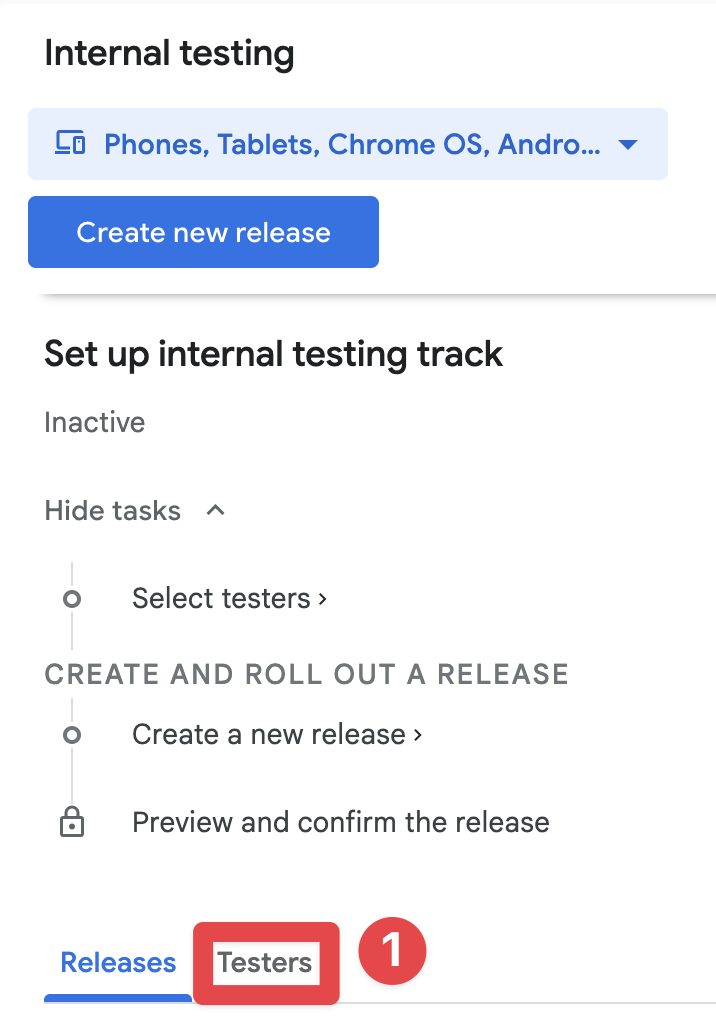
-
Click on
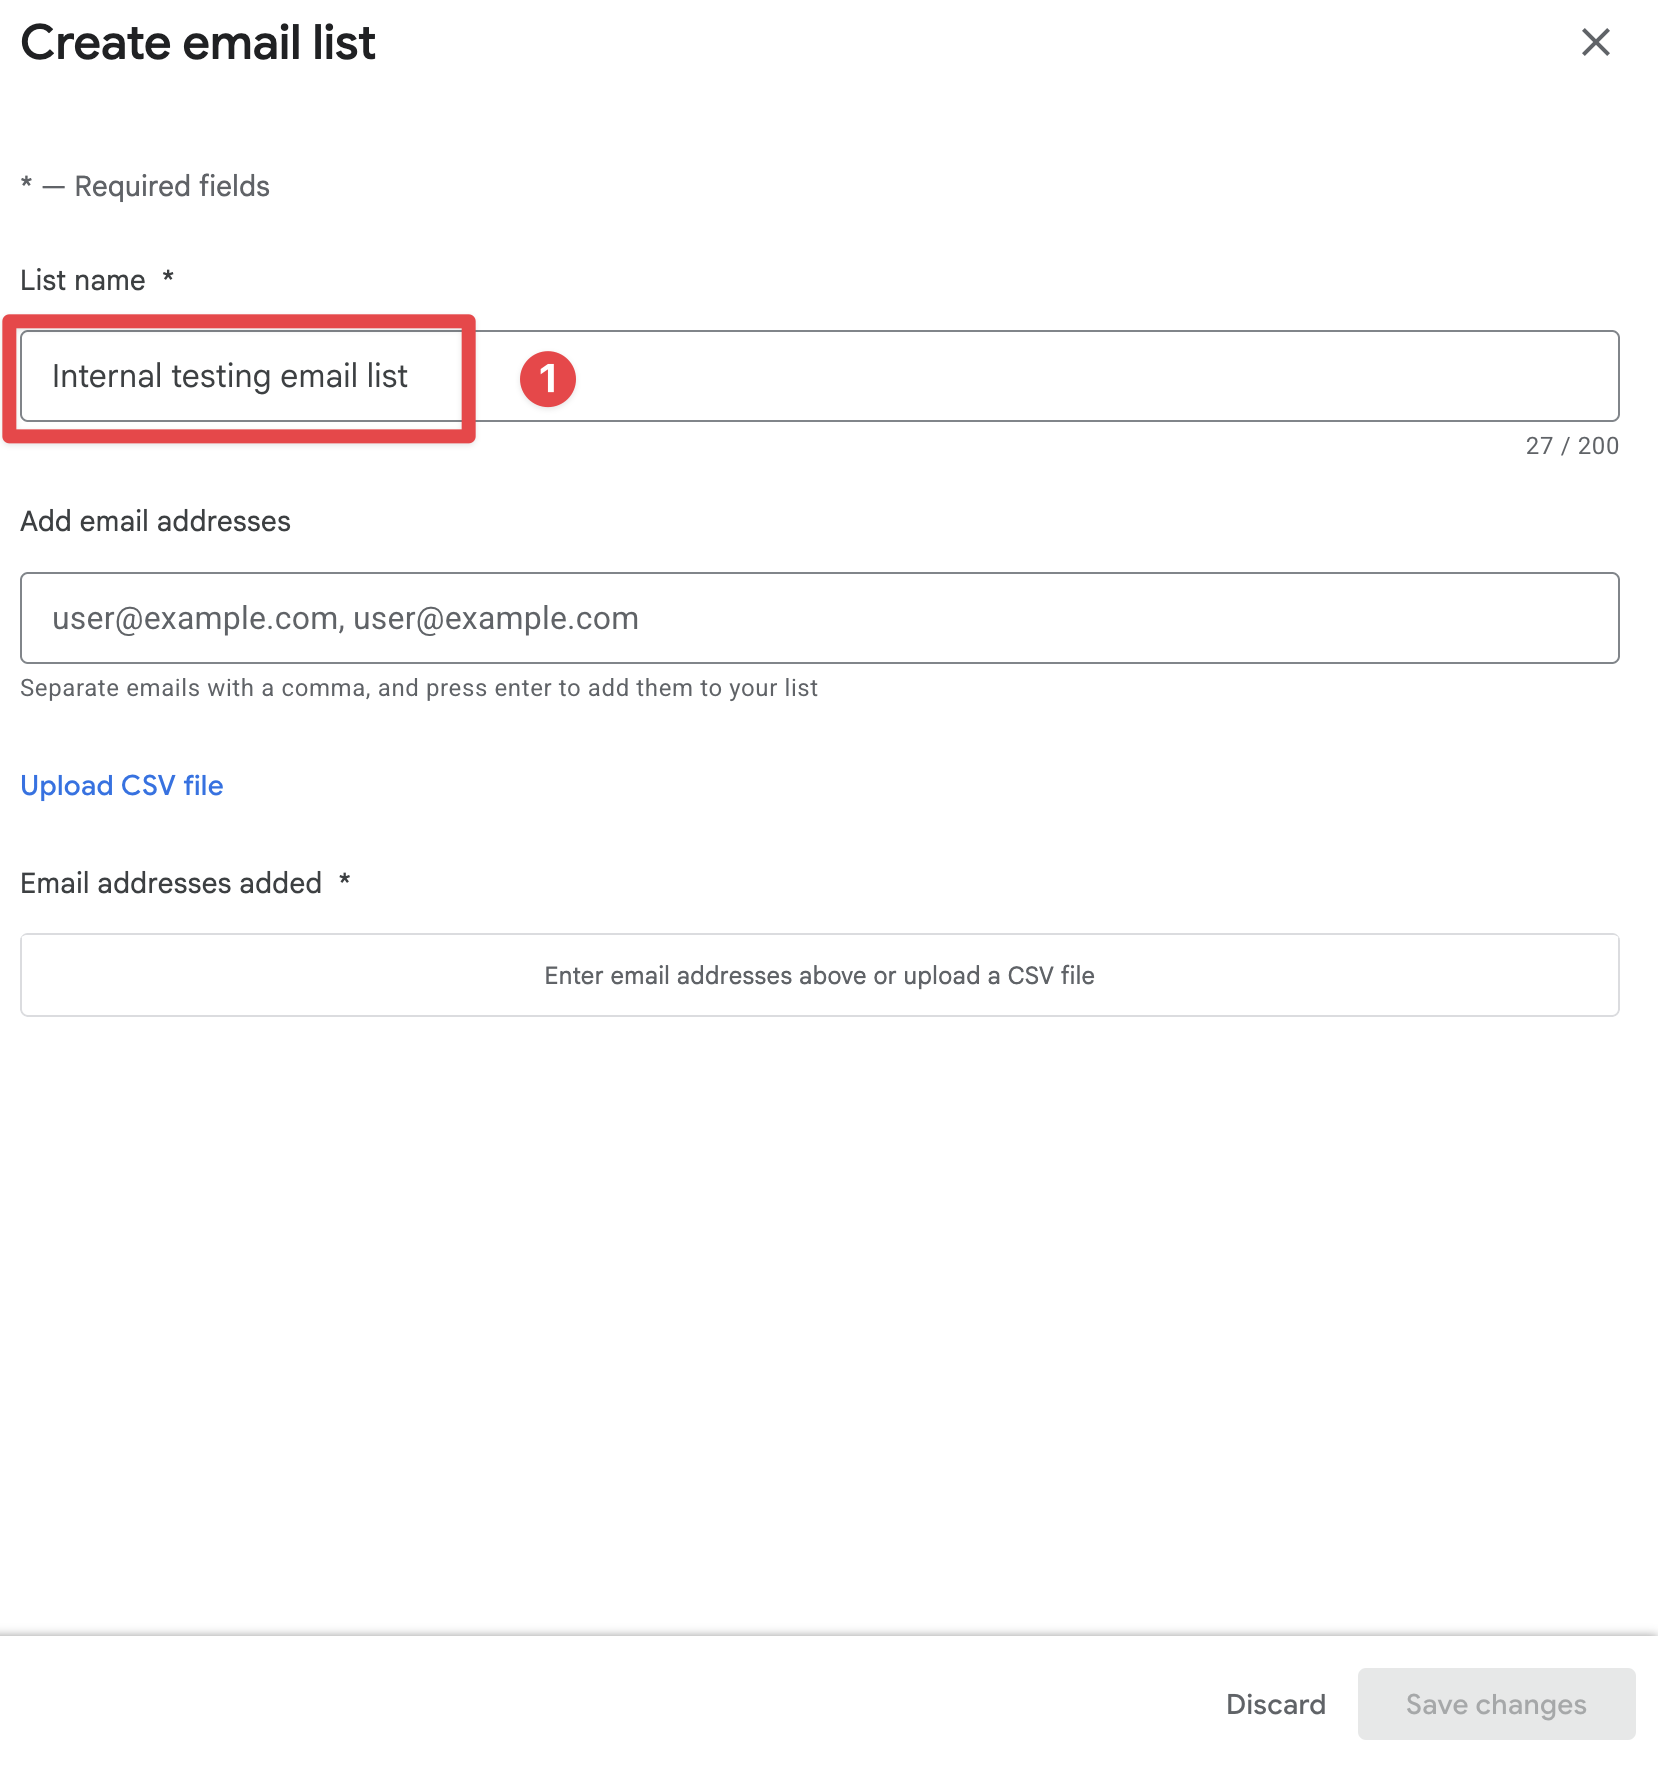
Create email list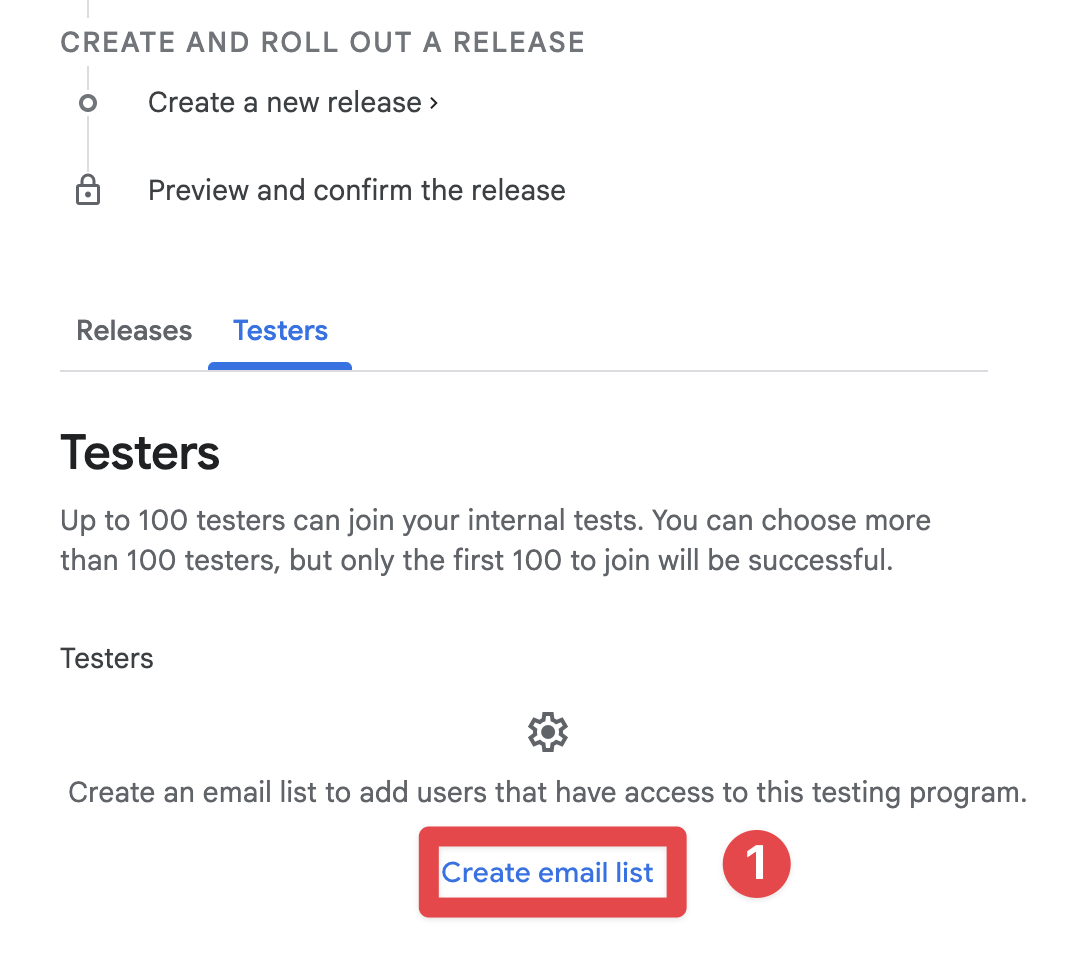
-
Name the email list
-
Add the email addresses of the testers
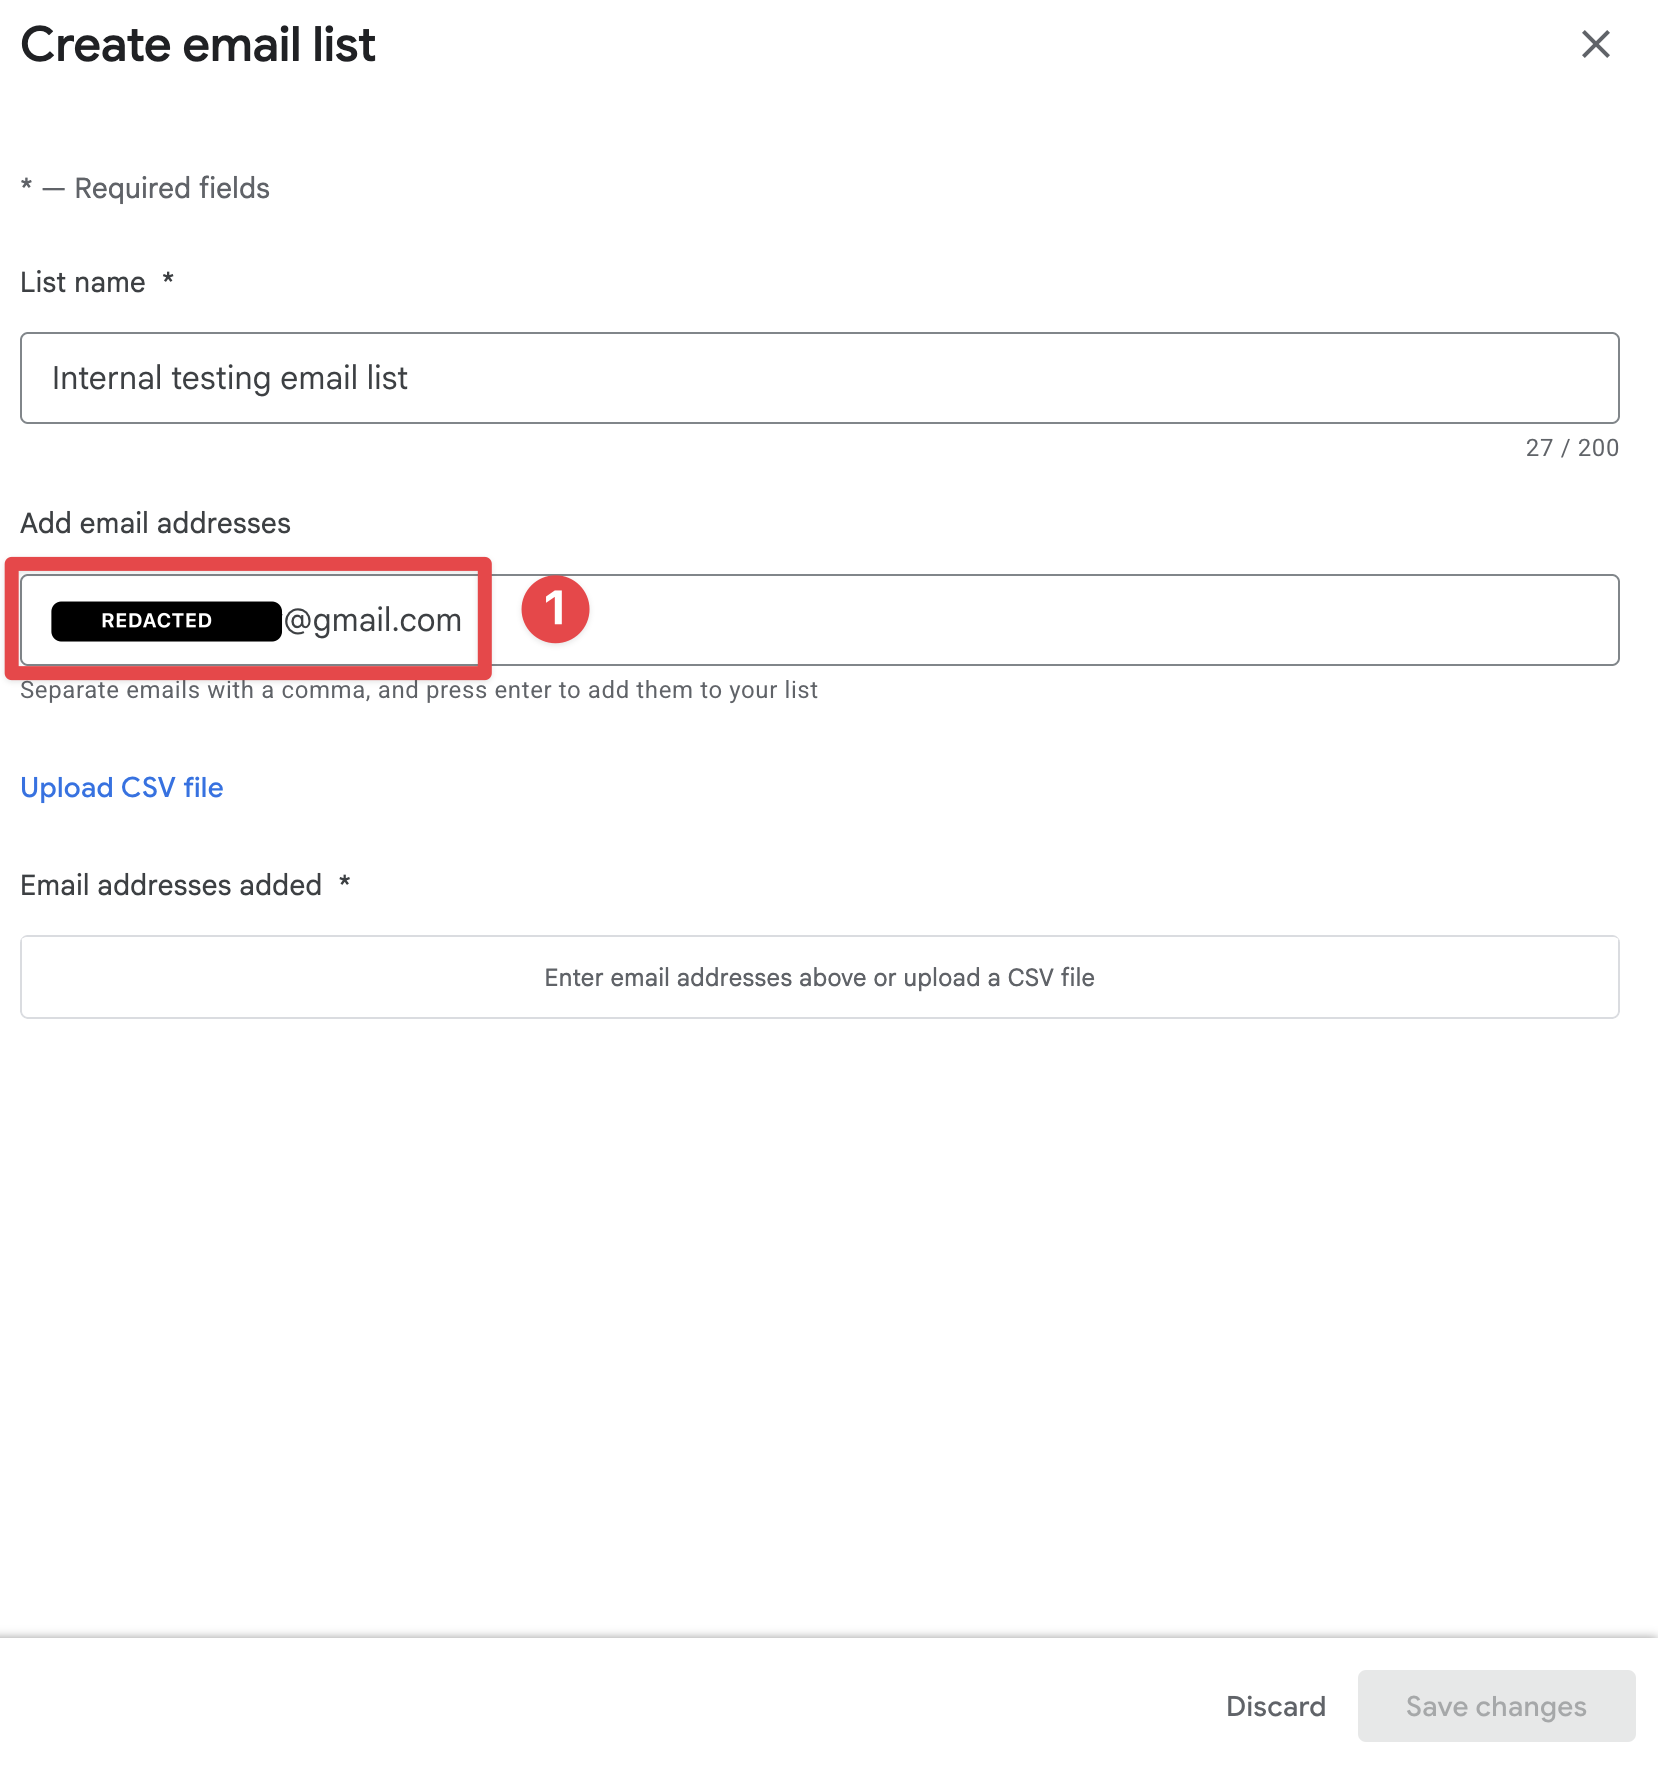
-
Press
Enterand click onSave
-
Click on
Create group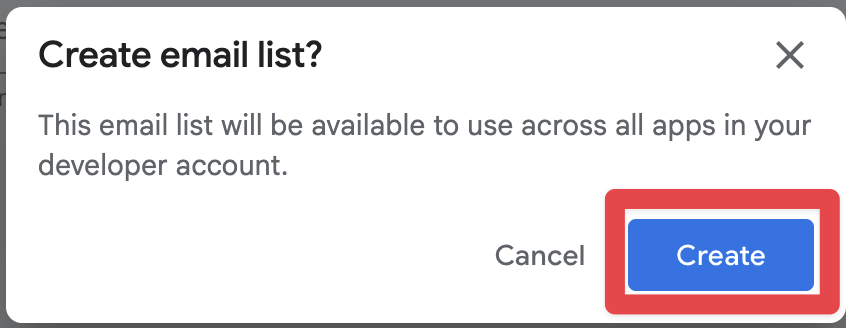
-
Make sure that the new list is selected and click on
Save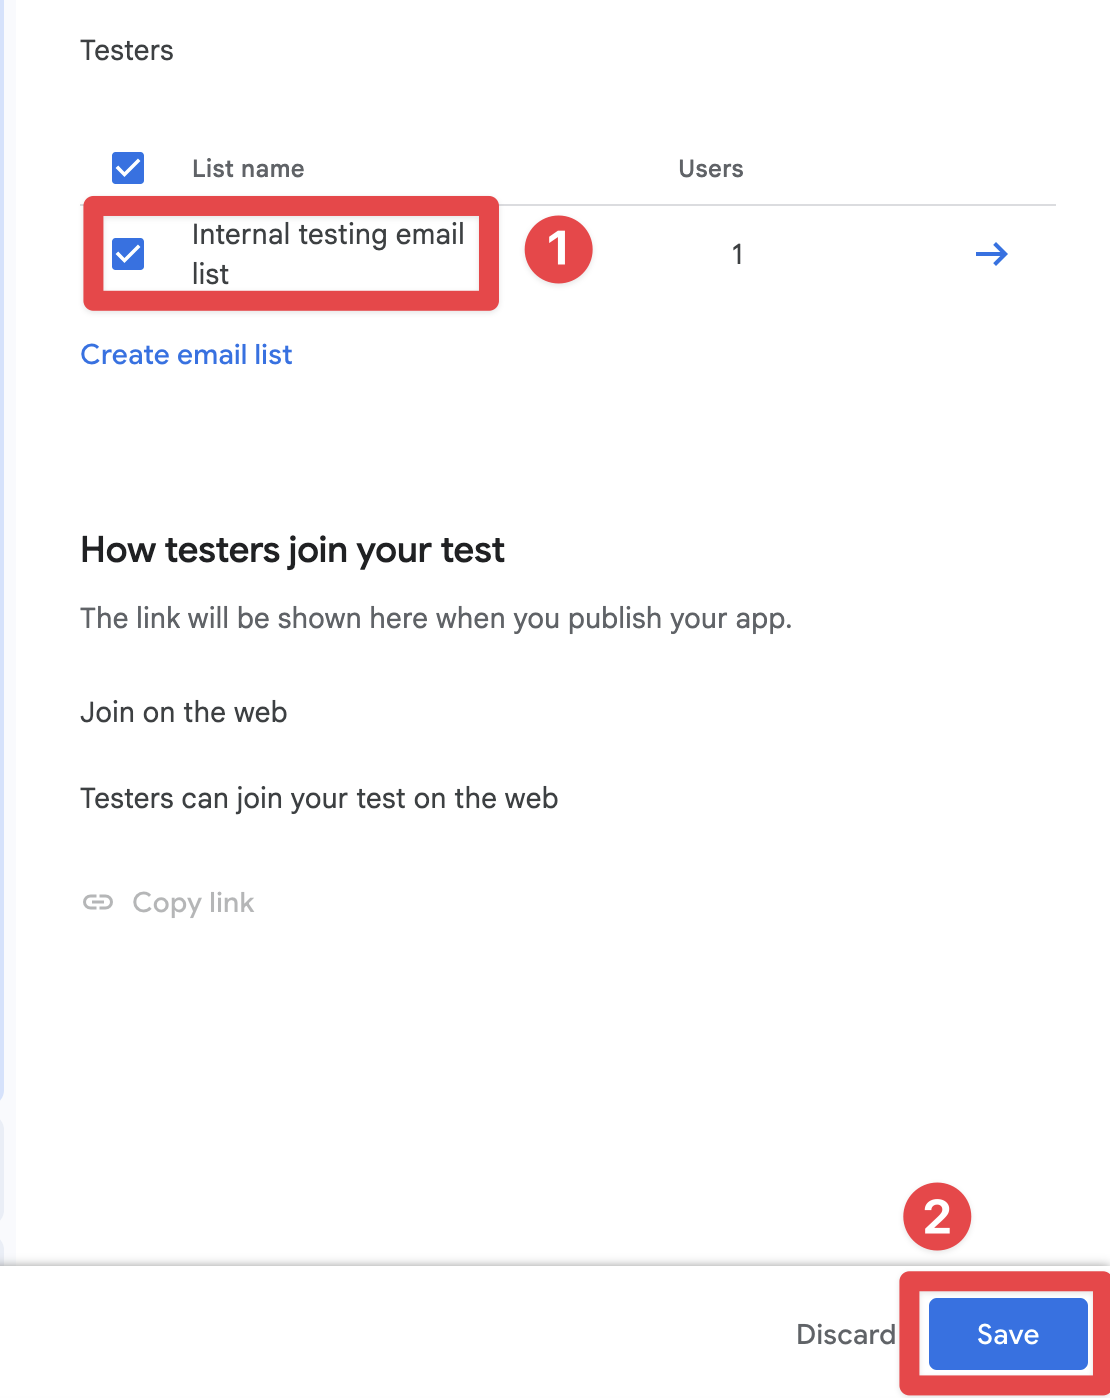
Uploading the app to the internal testing group
Section titled “Uploading the app to the internal testing group”Now that you have created the internal testing group, you can upload the app to the internal testing group.
-
Go to
Test and release->Testing->Internal testing -
Click on the
Releasesbutton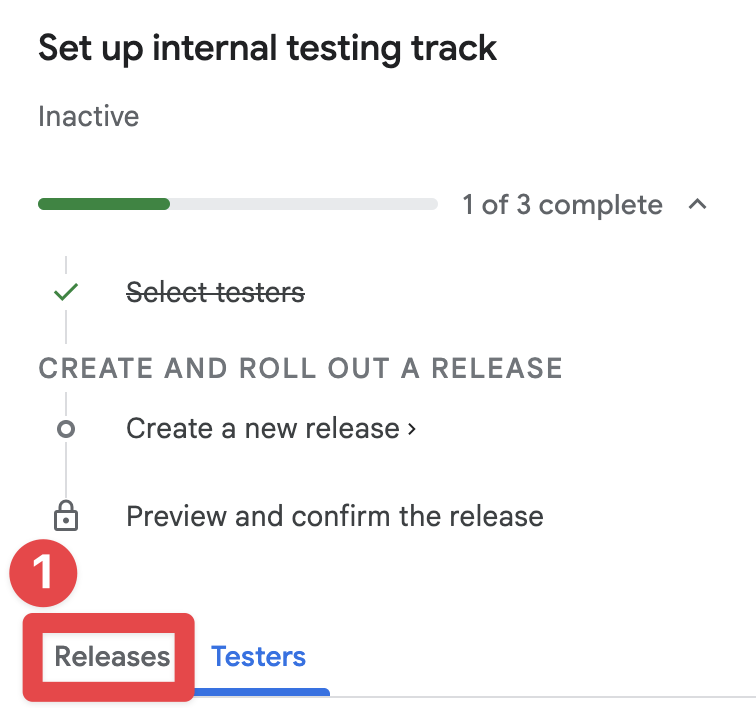
-
Click on
Create new release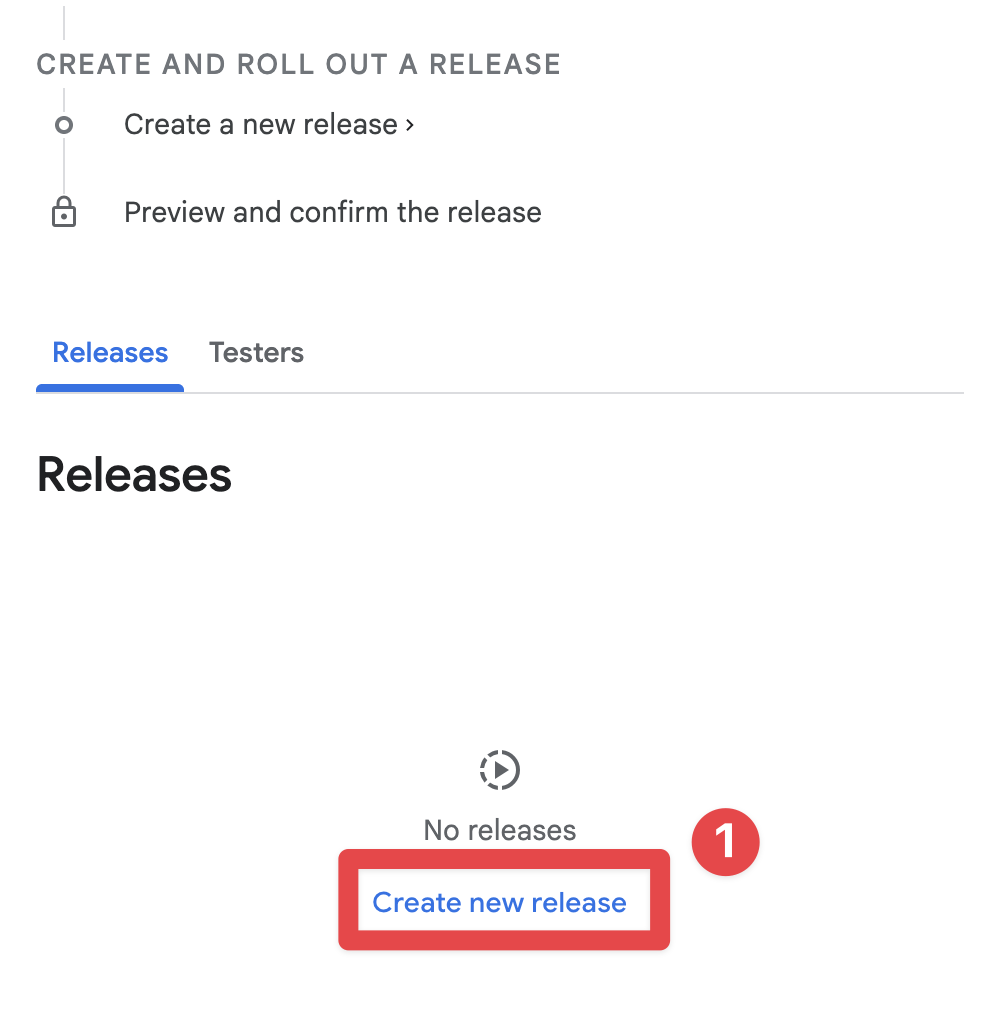
-
Click on
Upload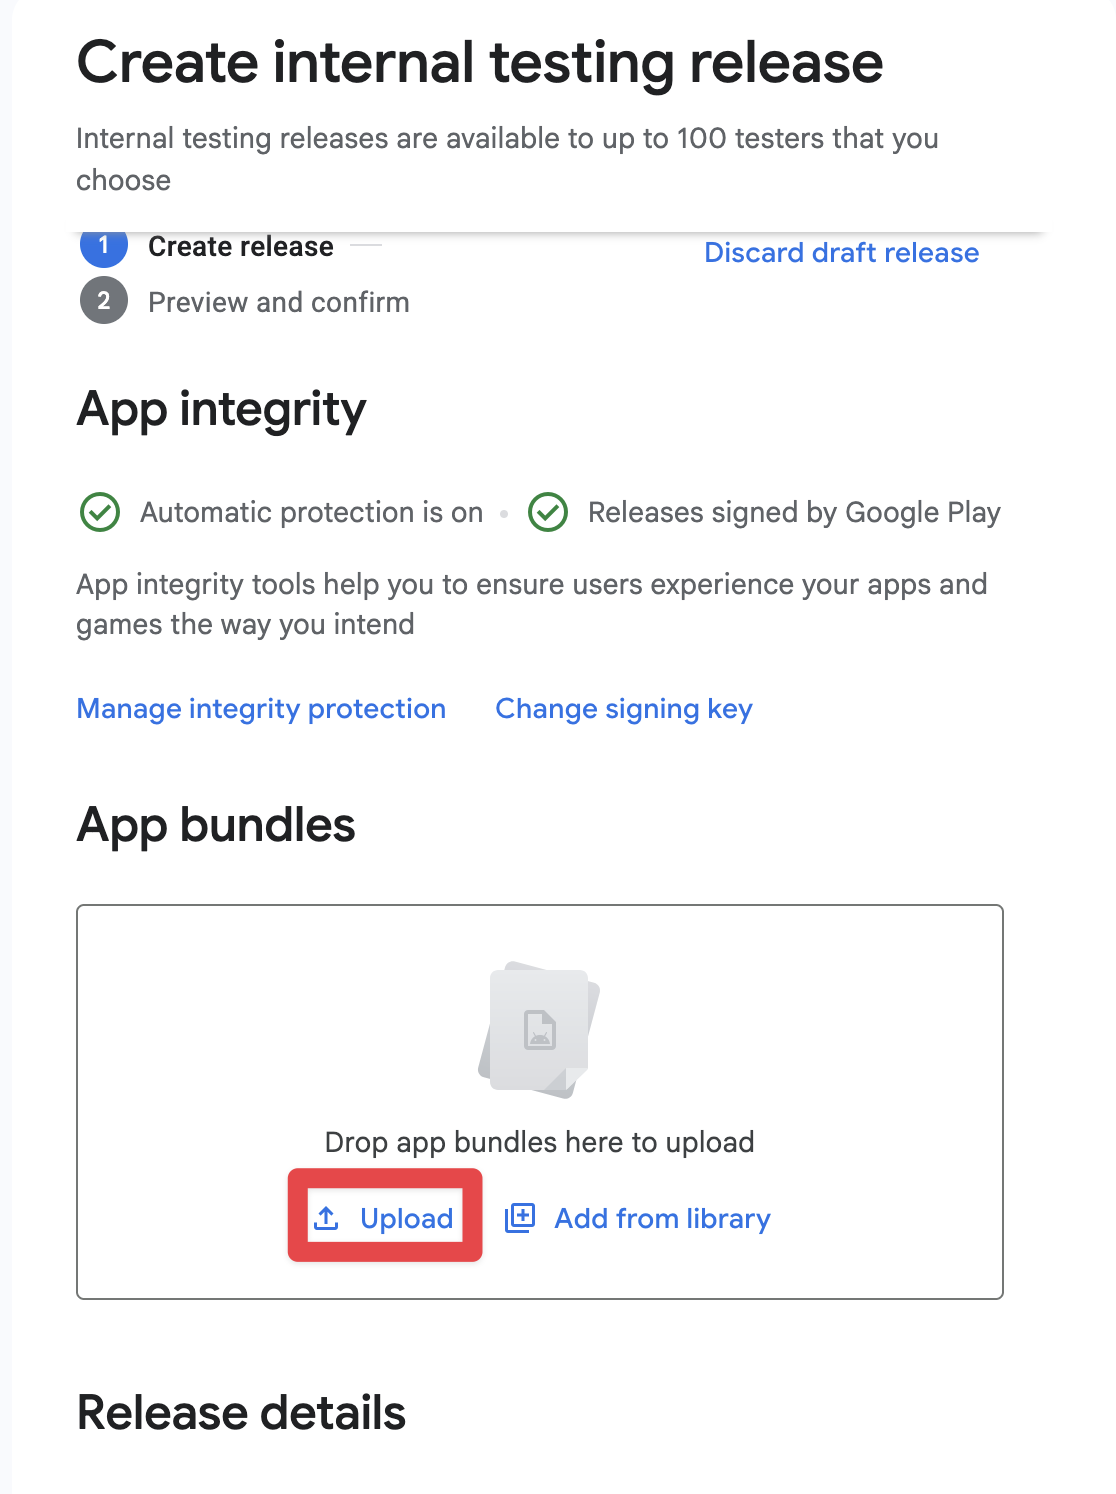
-
Select the AAB (or APK) file
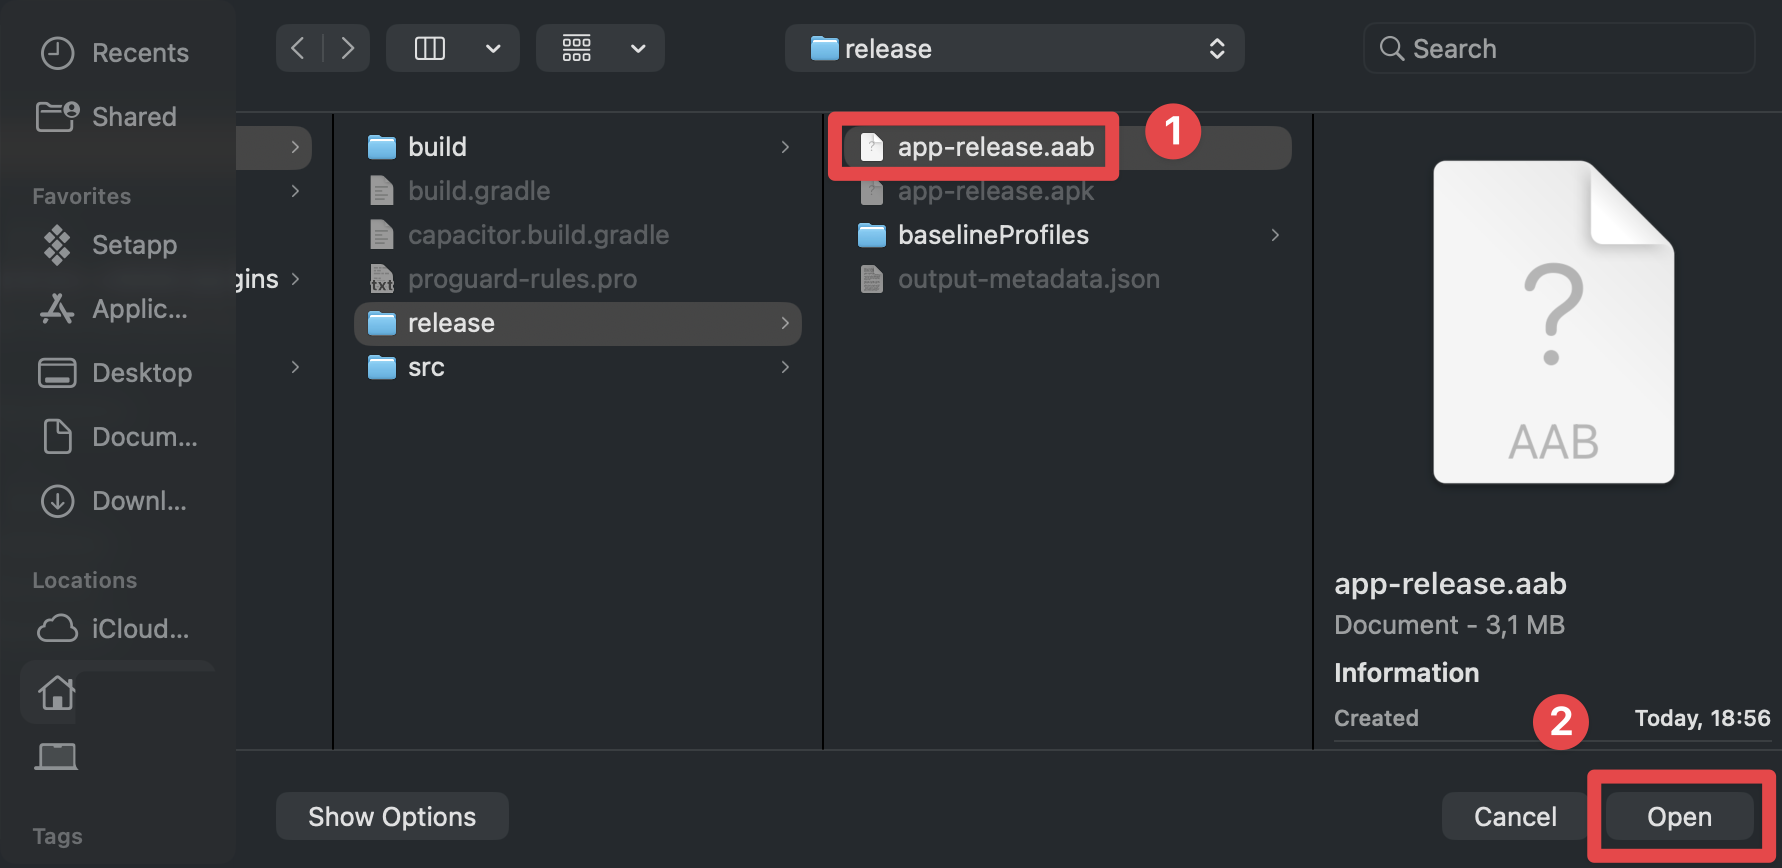
-
Wait for the AAB (or APK) file to be uploaded
-
Click on
Next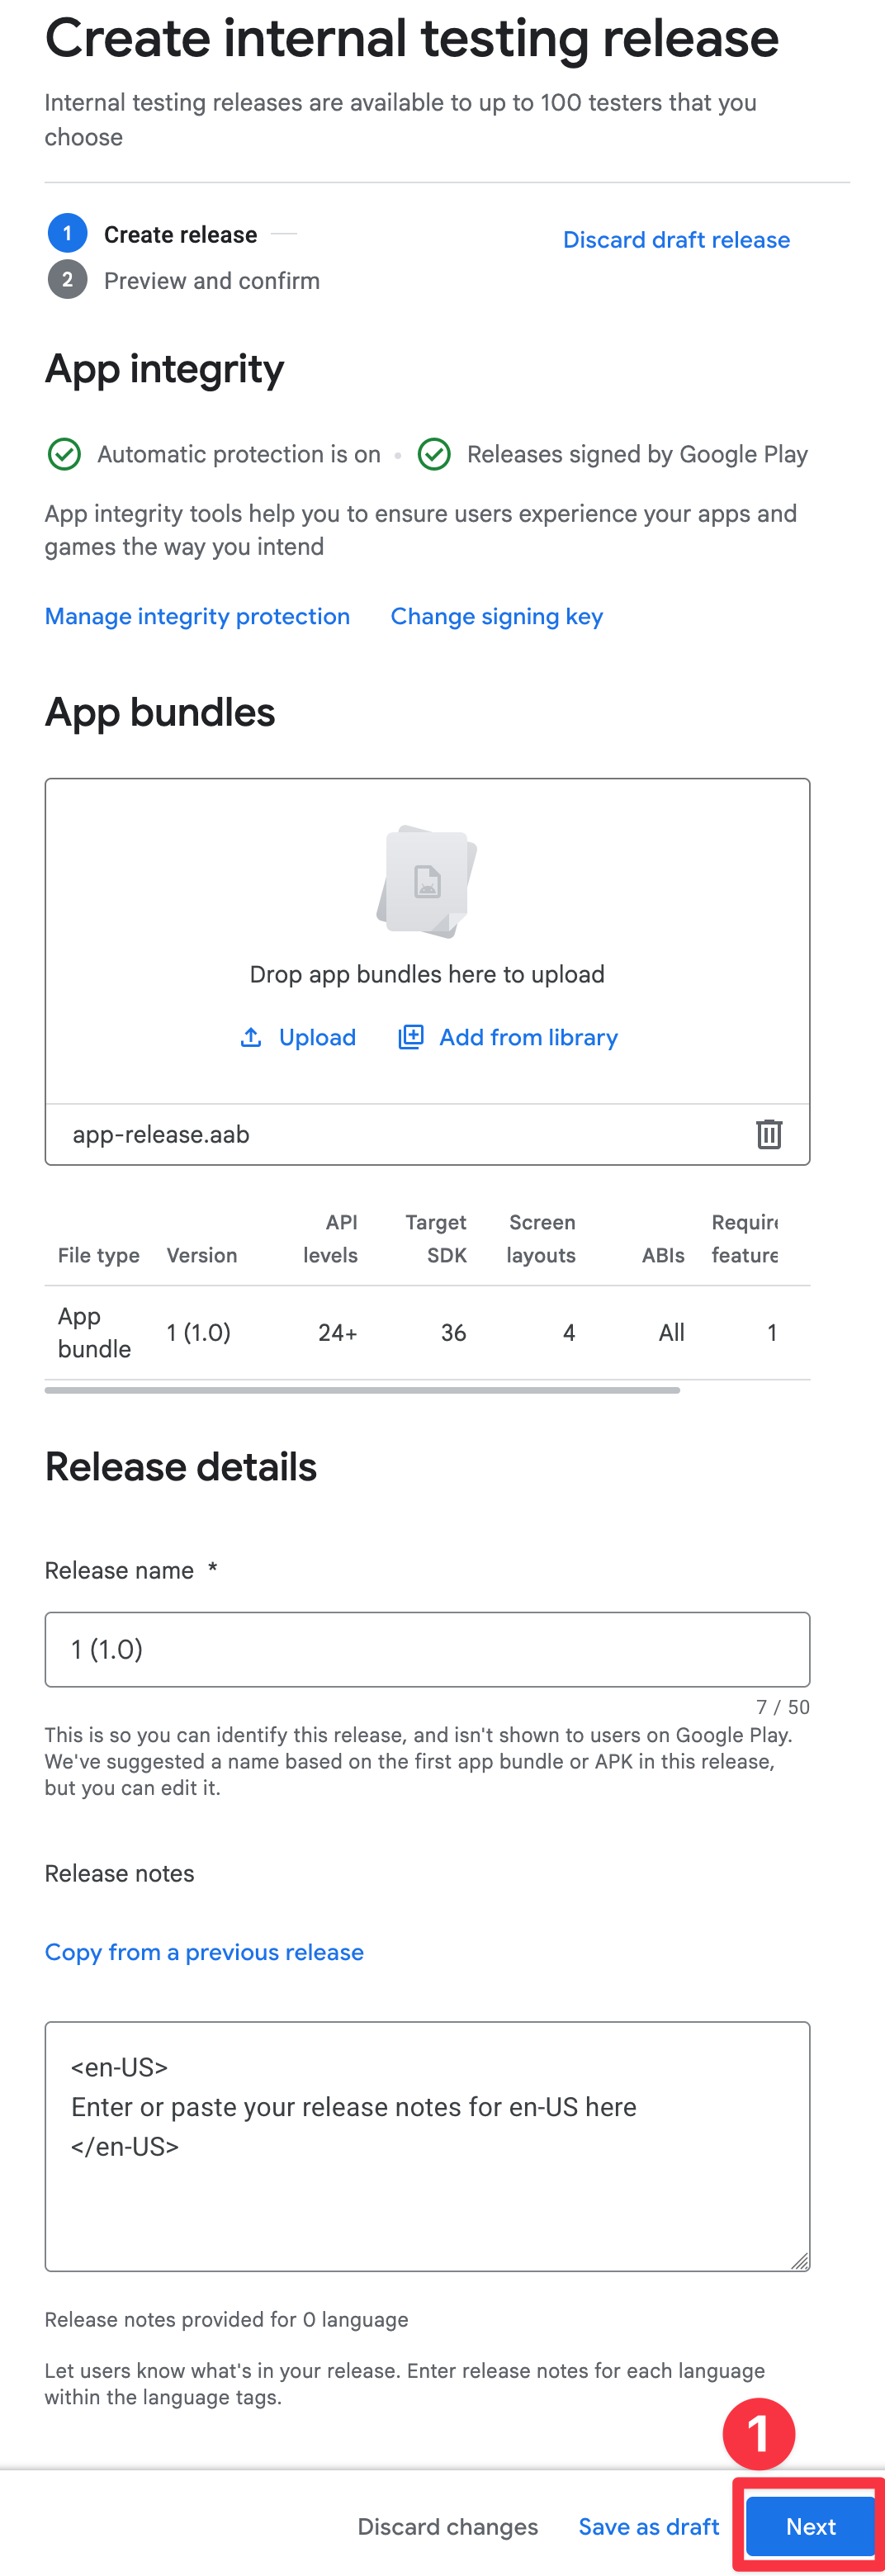
-
Fix the errors
Personally, at this stage I see this error
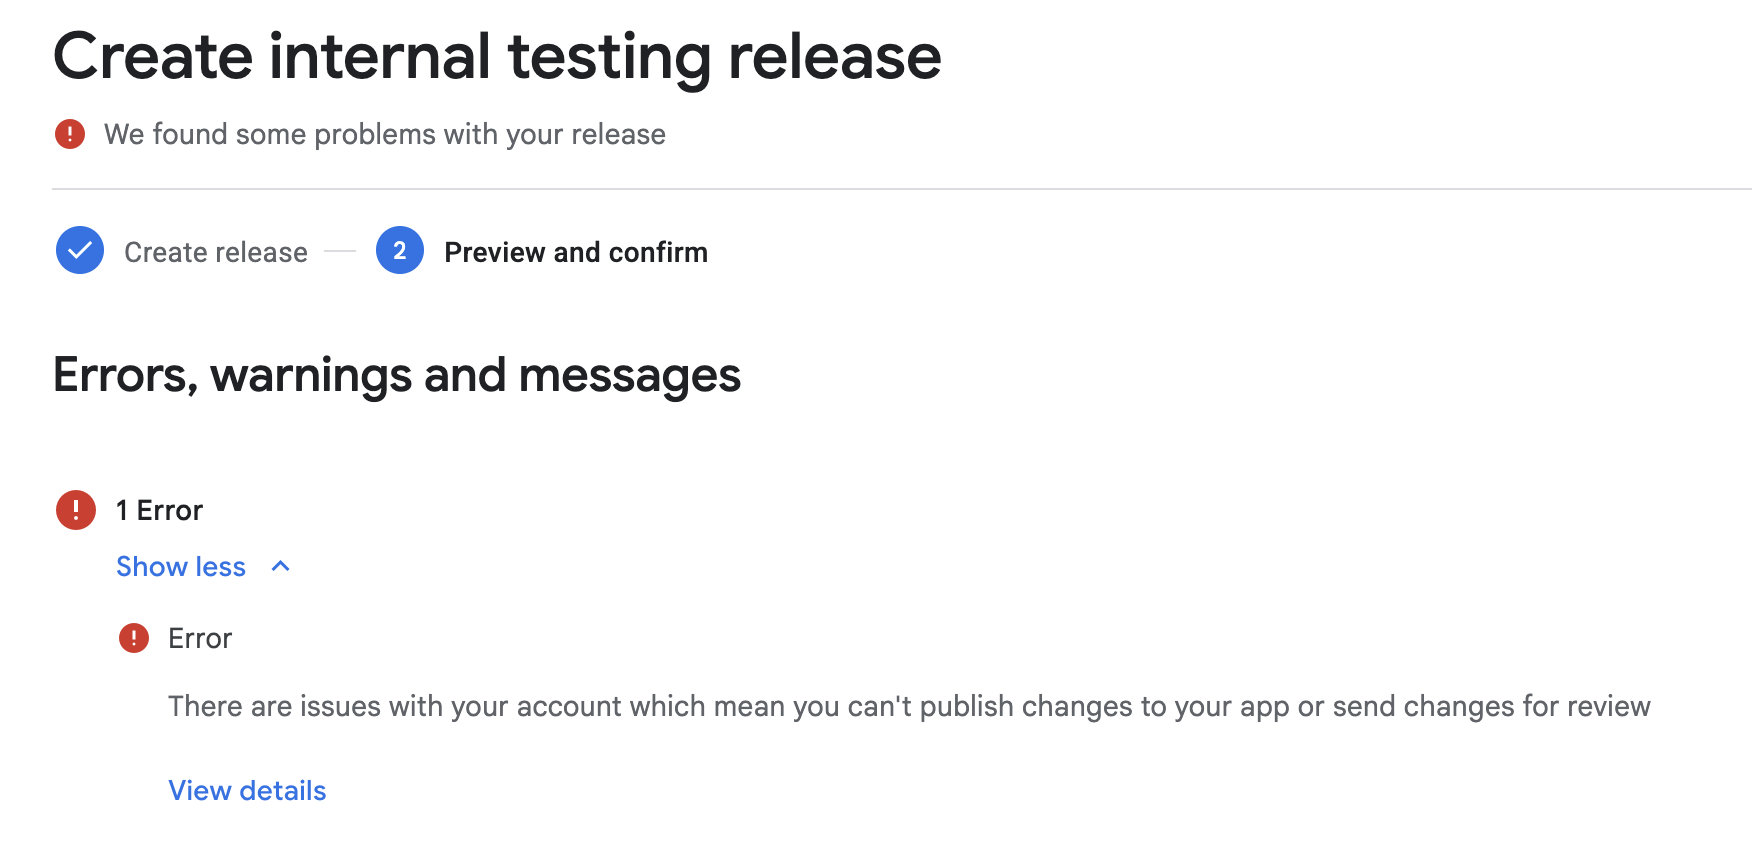
This is because I haven’t verified my phone number yet. I will do that and continue the tutorial.
-
Click on
Save and publishThis will publish the app to the internal testing group.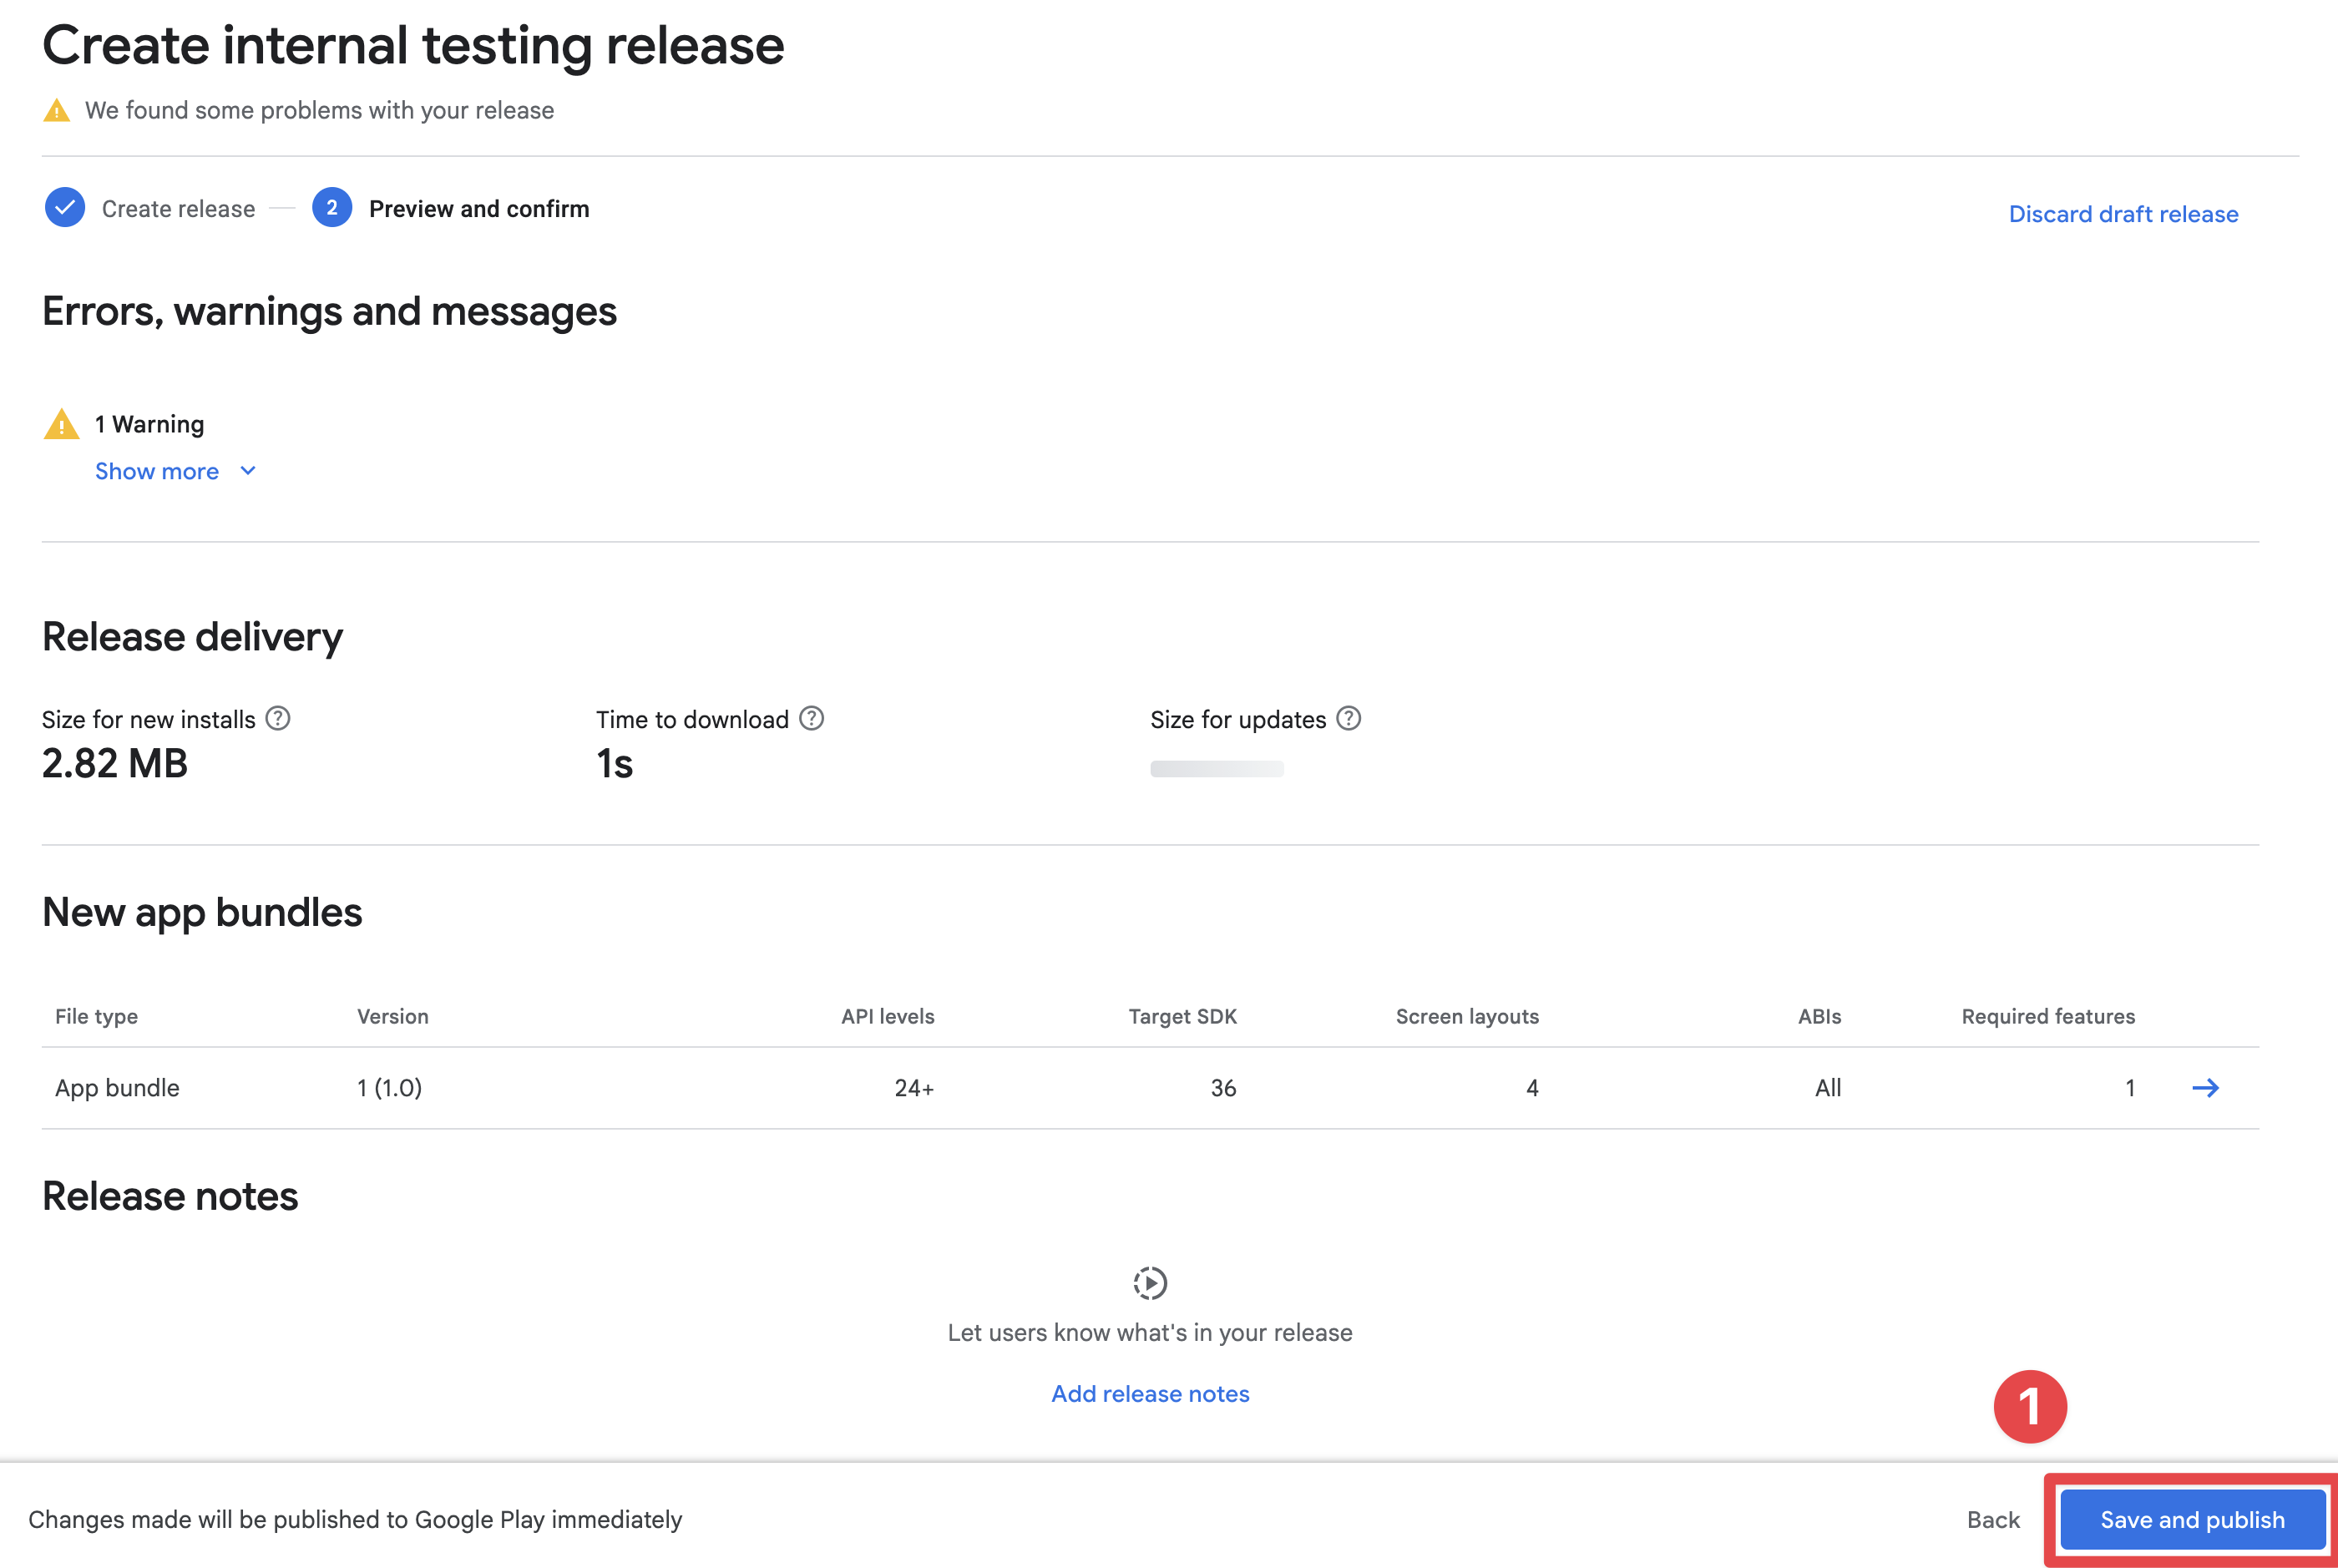
-
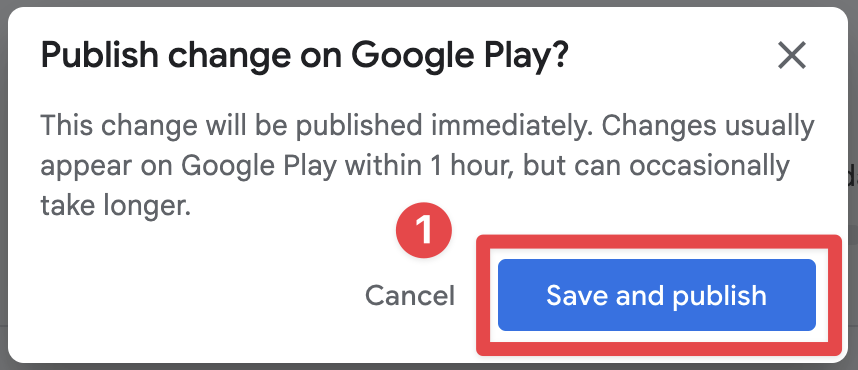
Confirm the publication
-
Make sure the app is published
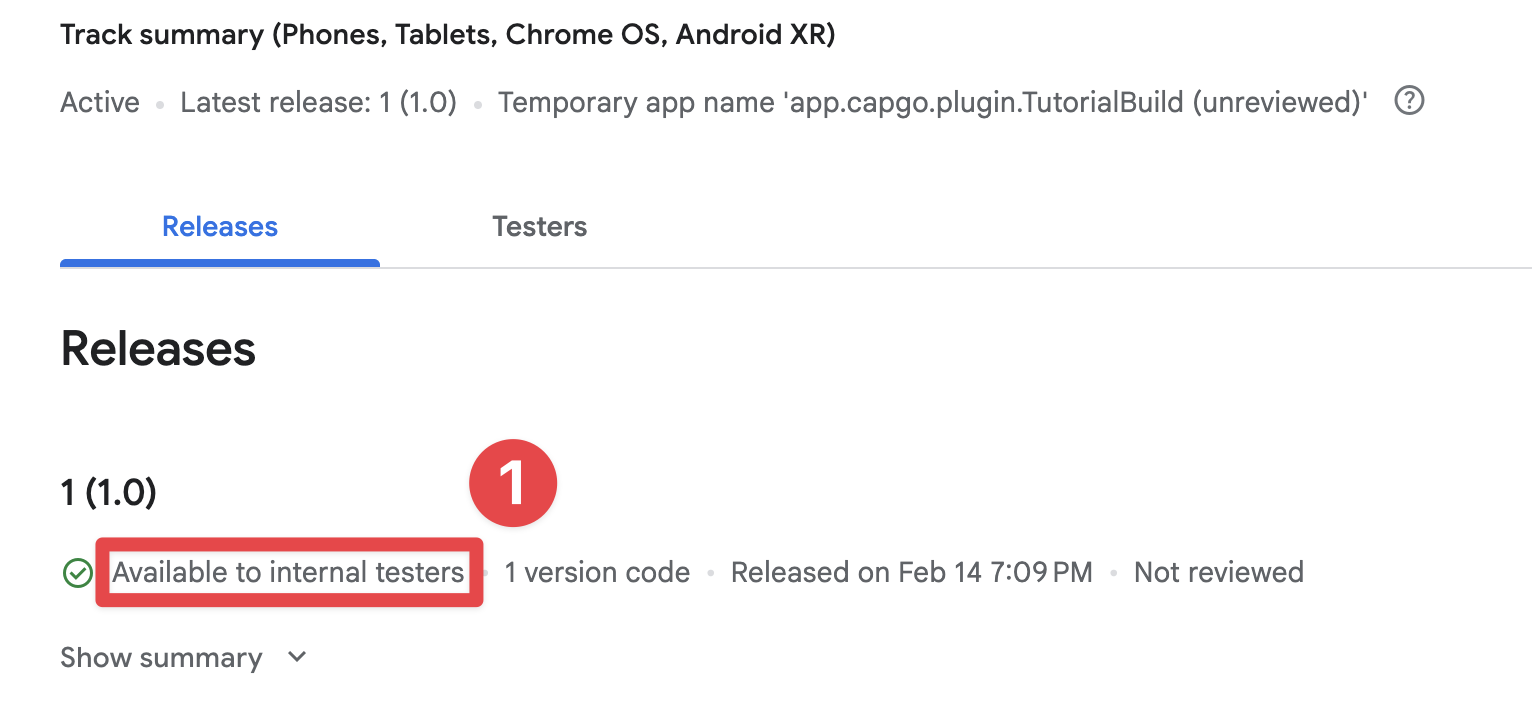
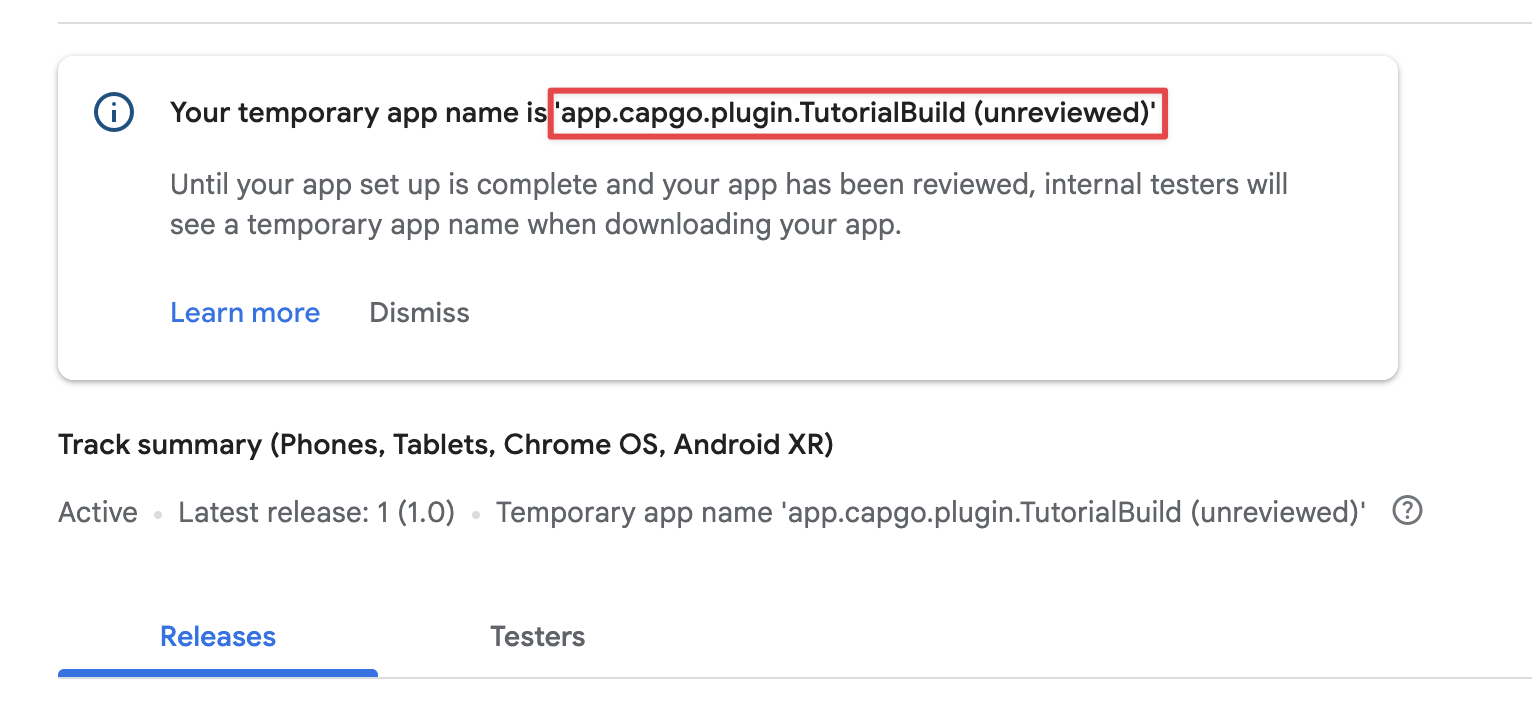
-
Get your temporary app name
Accept the invitation to internal testing group
Section titled “Accept the invitation to internal testing group”Now that you have uploaded the app to the internal testing group, you can accept the invitation to the internal testing group.
-
Go to
Test and release->Testing->Internal testing -
Click on
Testers -
Click on
Copy link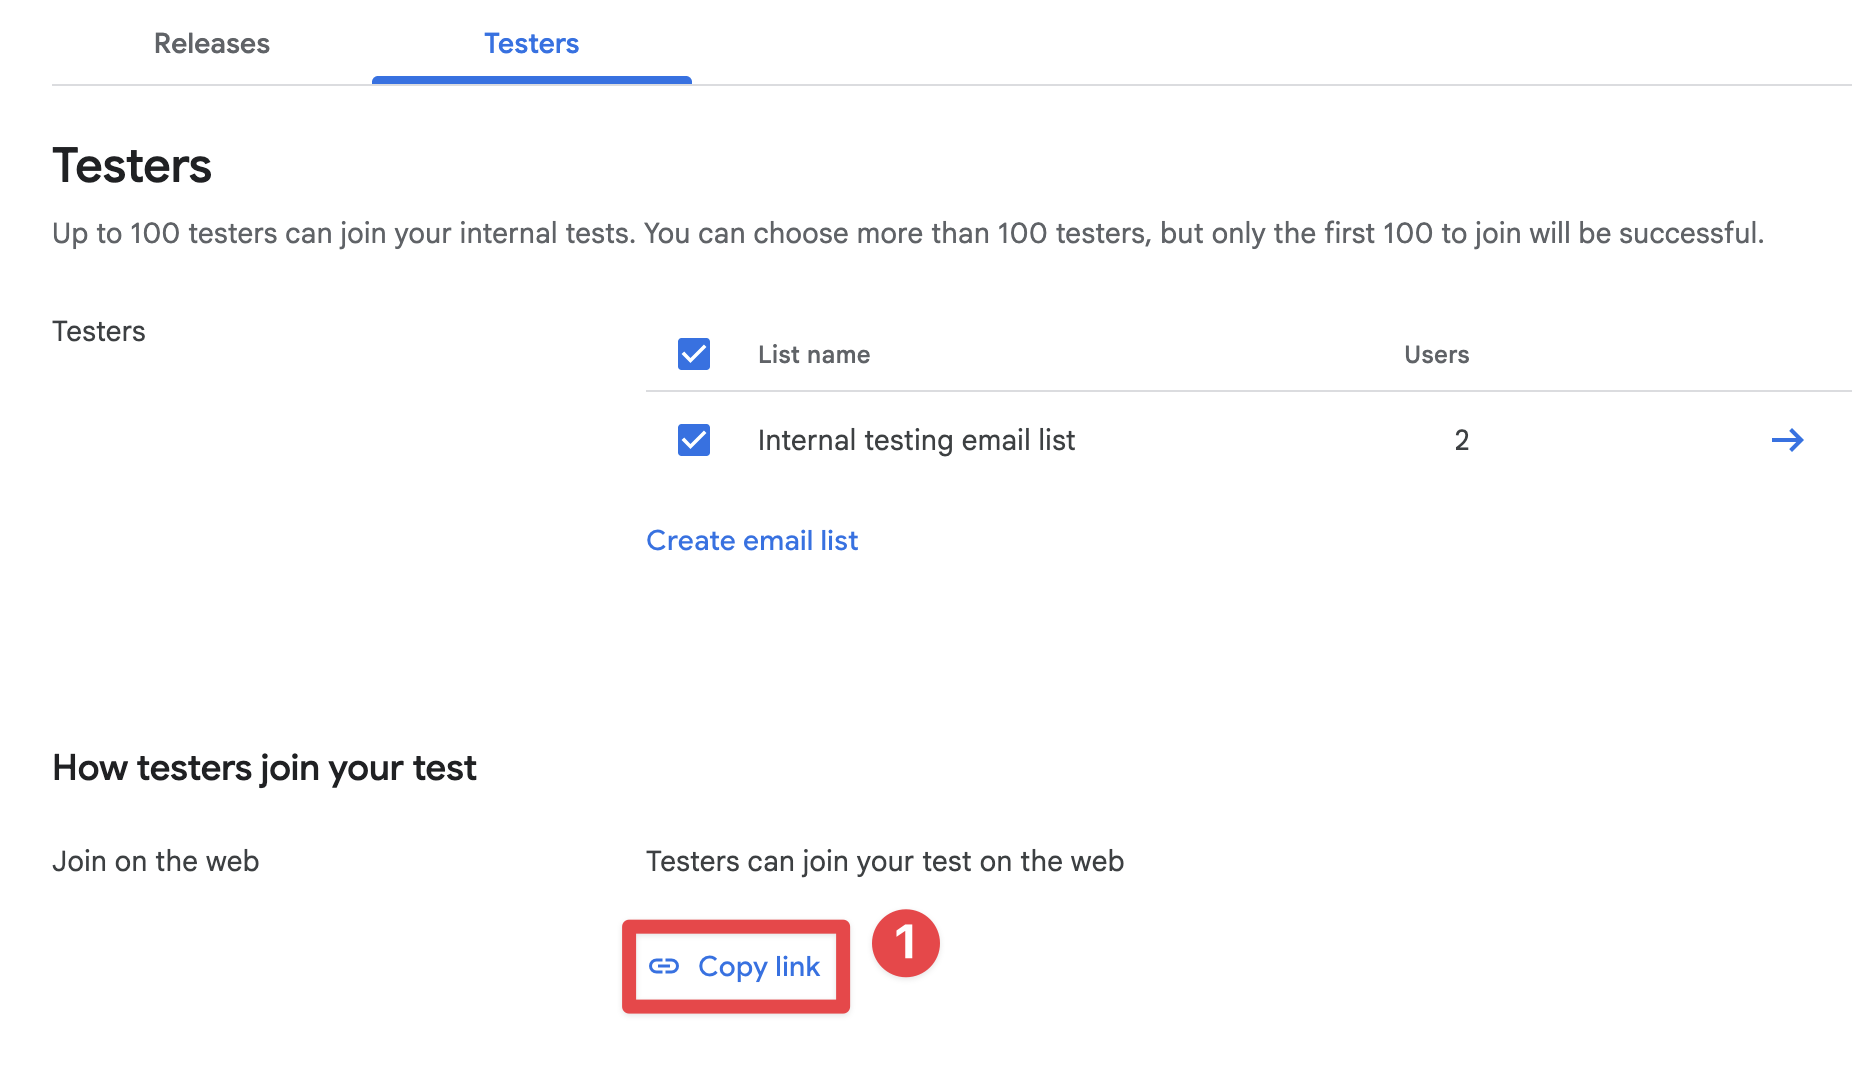
-
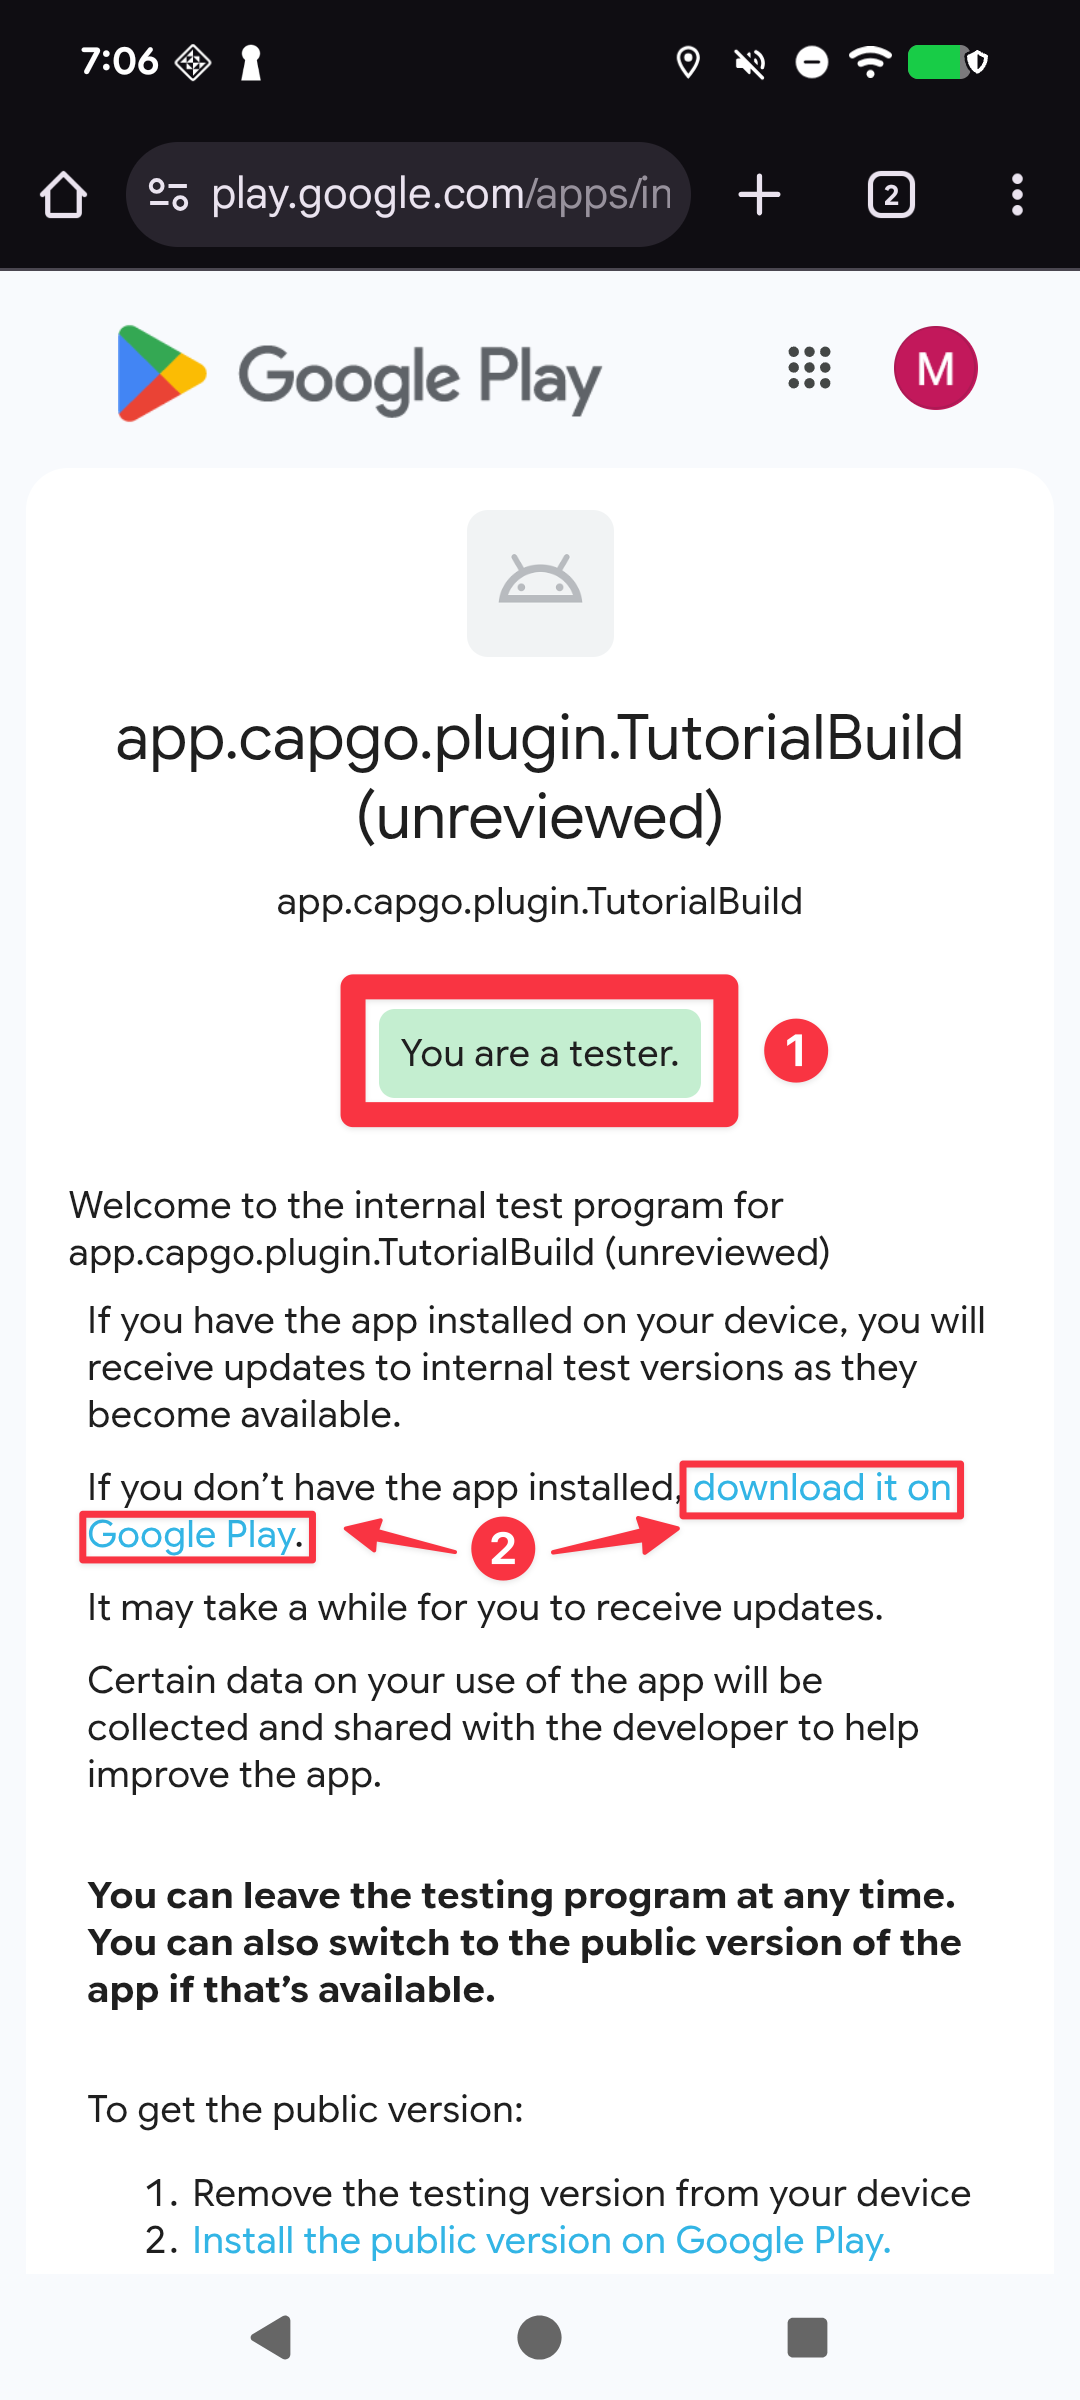
Send the link to your phone, open it in the browser and click on
Accept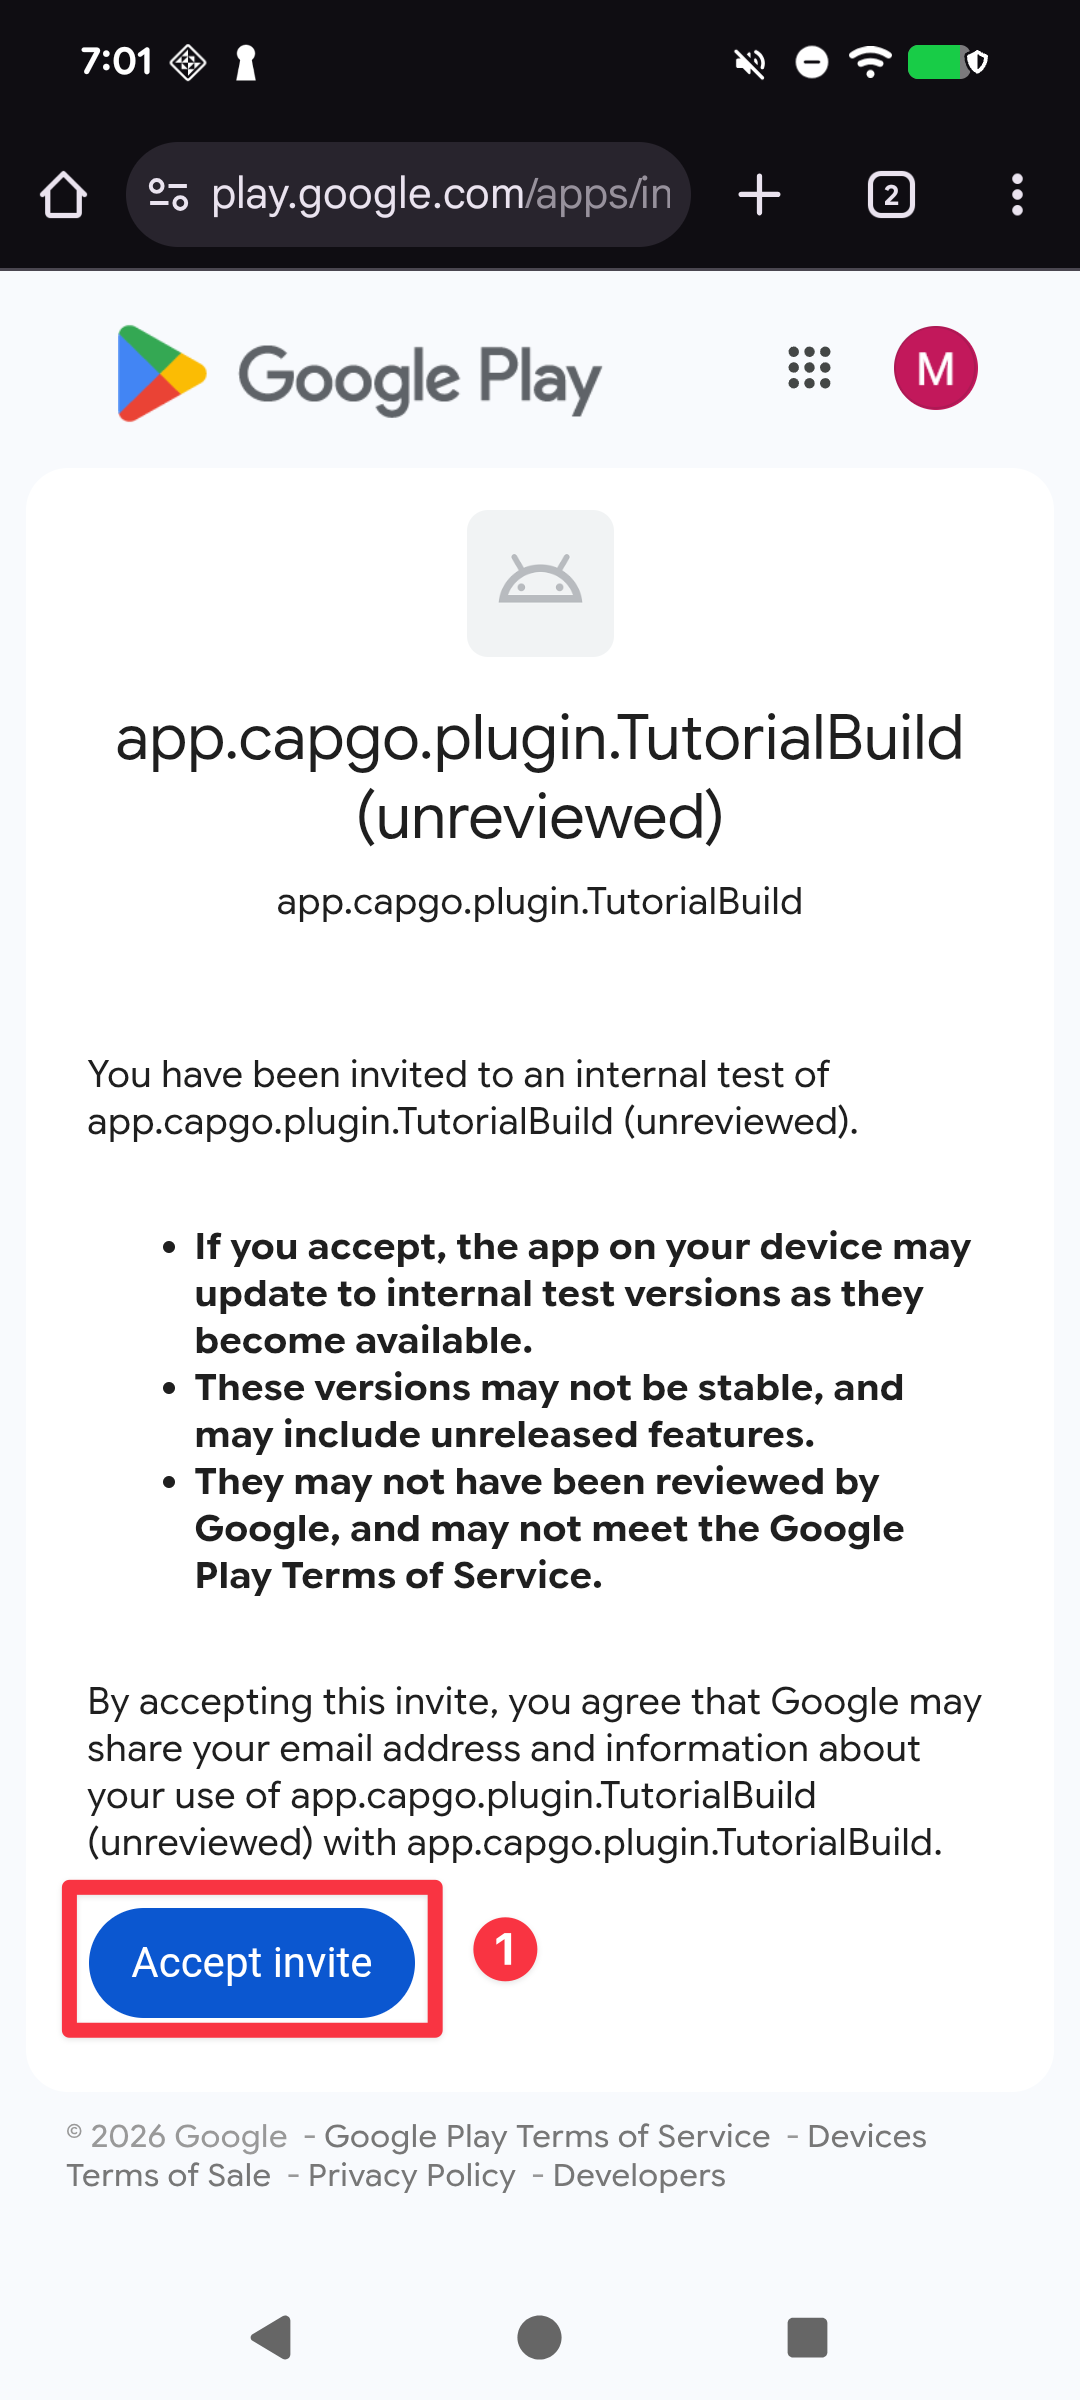
-
Confirm the invitation has been accepted and click on “download it on Play Store”
-
Install the app
- If you had installed the app before using Android Studio, click on the
uninstallbutton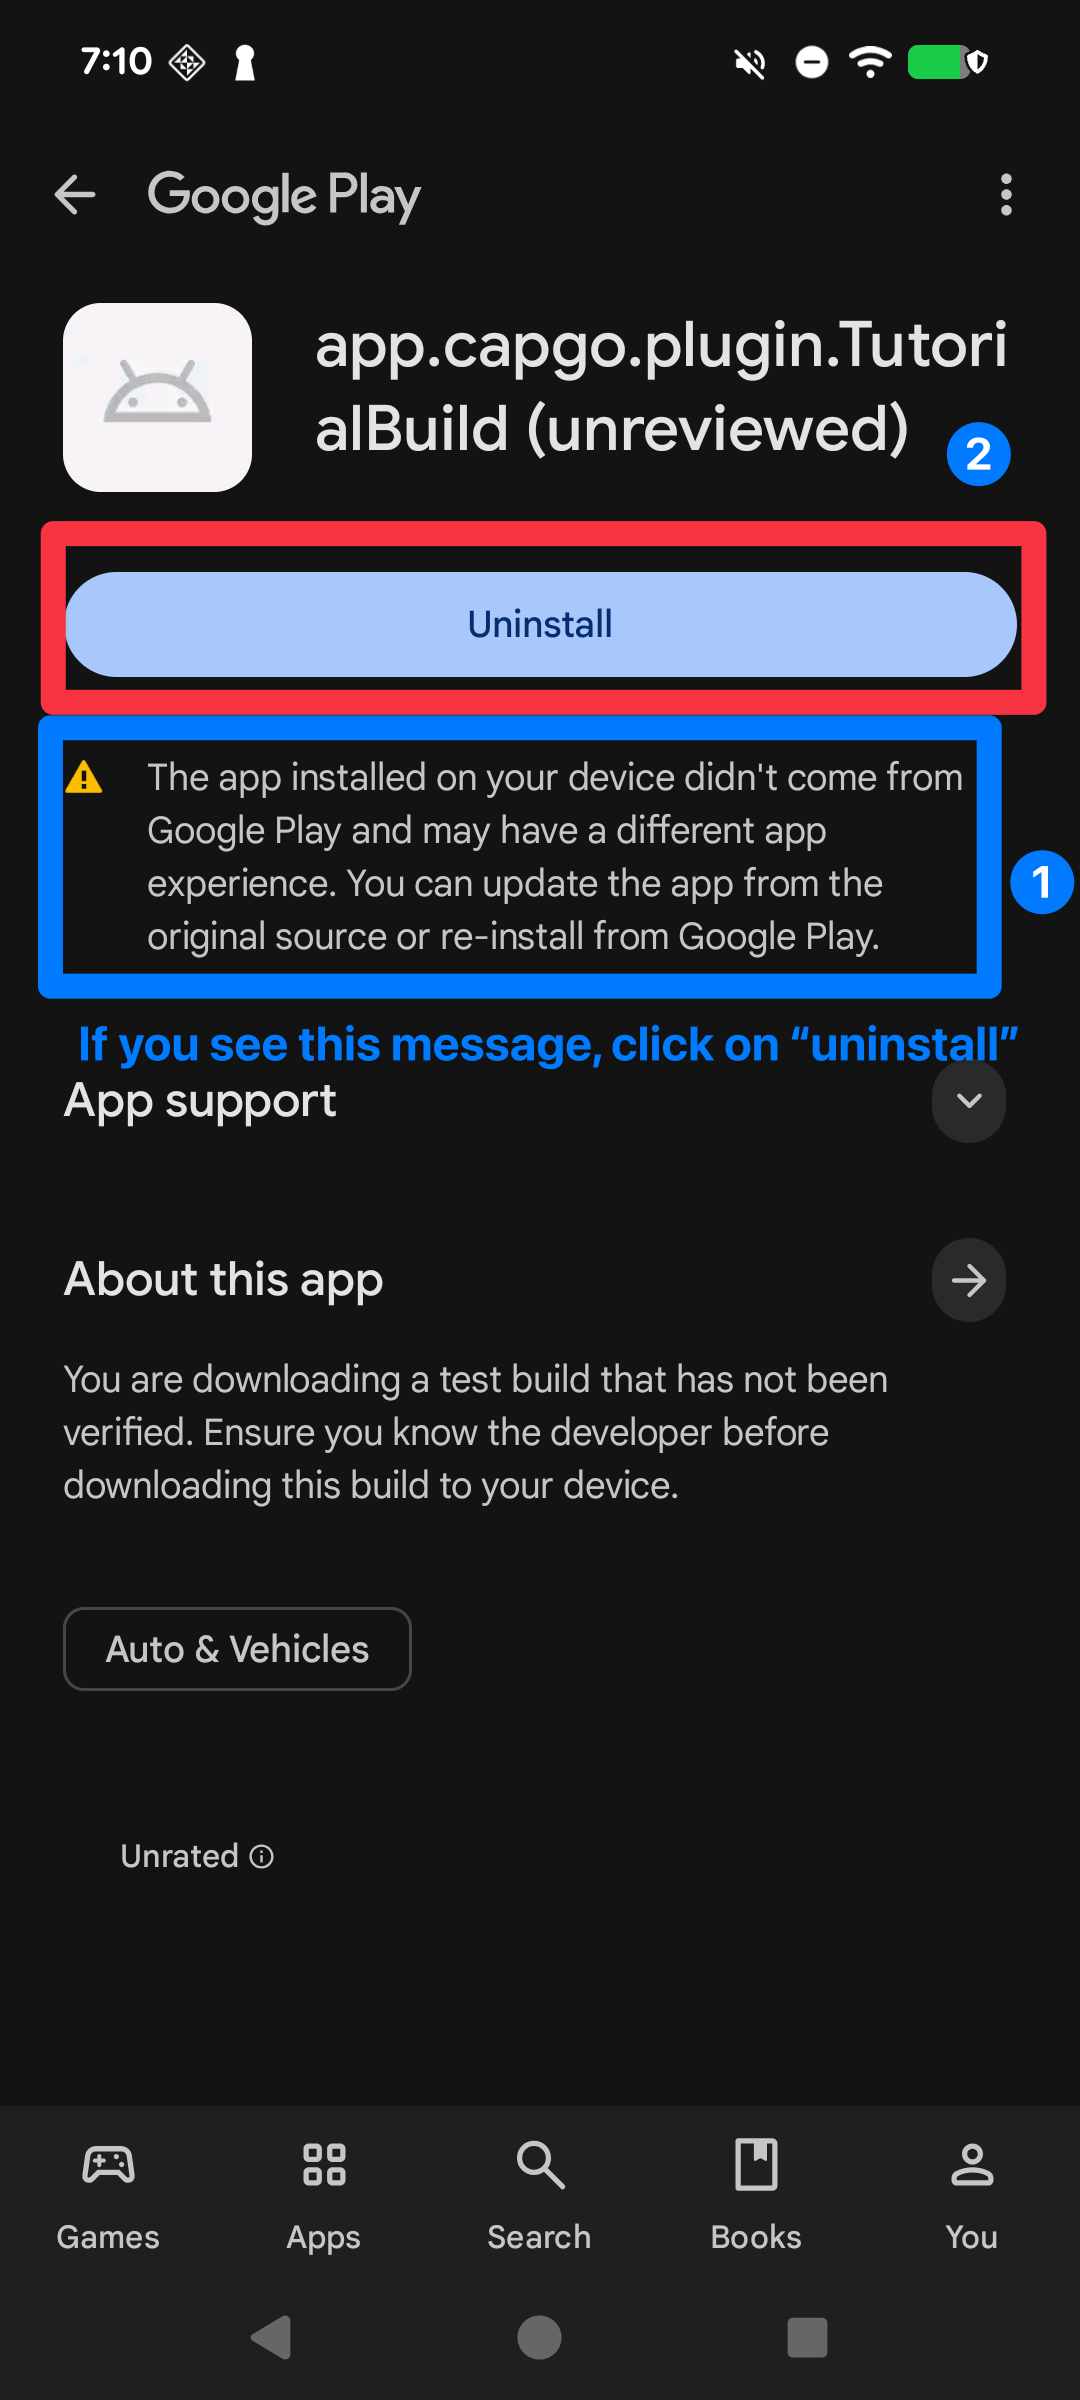
- Click on the
installbutton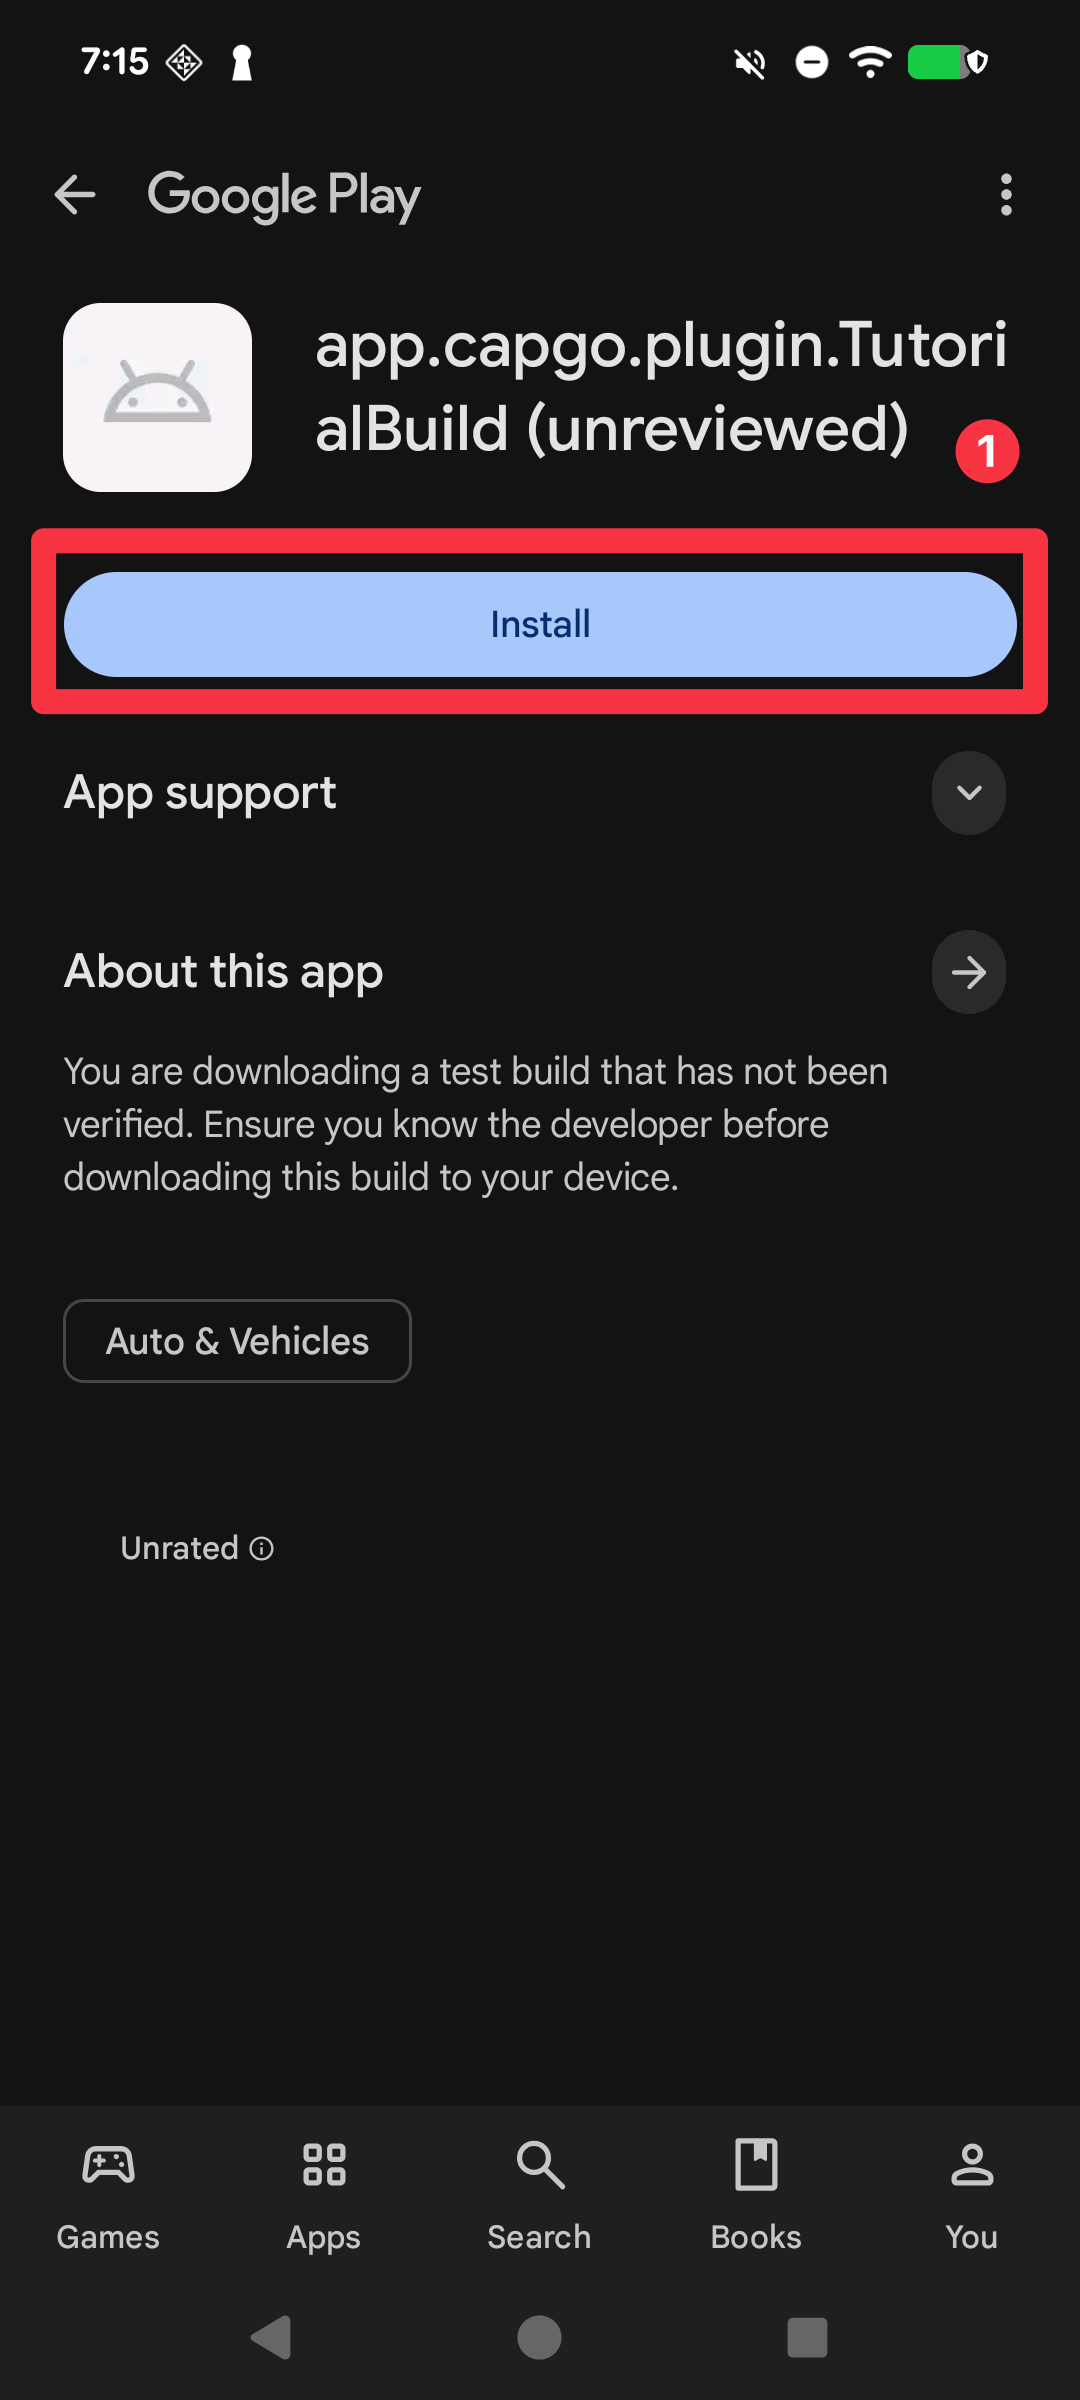
- Open the app and confirm it has downloaded successfully
- If you had installed the app before using Android Studio, click on the
Configuring Capgo Native Build (Android)
Section titled “Configuring Capgo Native Build (Android)”Now, you are ready to start the setup of Capgo Native Build. Congratulations 🎉!
| Requirement | Flag | Description | Required |
|---|---|---|---|
| Keystore file | --keystore <path> | Path to your .jks/.keystore file used to sign the APK/AAB. | Yes |
| Keystore alias | --keystore-alias <alias> | Alias name of the key inside the keystore. | Yes |
| Keystore key password | --keystore-key-password <password> | Password for the key. If key/store passwords match, you can provide only one. | Look at the note below |
| Keystore store password | --keystore-store-password <password> | Password for the keystore. If key/store passwords match, you can provide only one. | Look at the note below |
| Google Play service account | --play-config <path> | JSON service account file for Play Store uploads. | Yes |
bunx @capgo/cli build credentials save --platform android \ --keystore ./path/to/keystore.jks \ --keystore-alias "your-alias" \ --keystore-key-password "key-password" \ --keystore-store-password "store-password" \ --play-config ./play-store-service-account.jsonKeystore, keystore password, keystore key password, keystore alias
Section titled “Keystore, keystore password, keystore key password, keystore alias”If you have followed the manual build instructions, you should have the keystore already generated. If you have not followed the instructions, please follow them to generate the keystore.
Google Play service account
Section titled “Google Play service account”Generating the Google Play service account is a manual and complex process. Yet, it is required to upload your app to Google Play. Please keep in mind the following things:
- You NEED to be the owner of the Developer Account. Otherwise, you will not be able to setup the service account.
- You will need to create a new Google Cloud Project (separate from your Google Play Account)
Let’s begin.
-
Go to Google Cloud Console
-
Click on the project selector
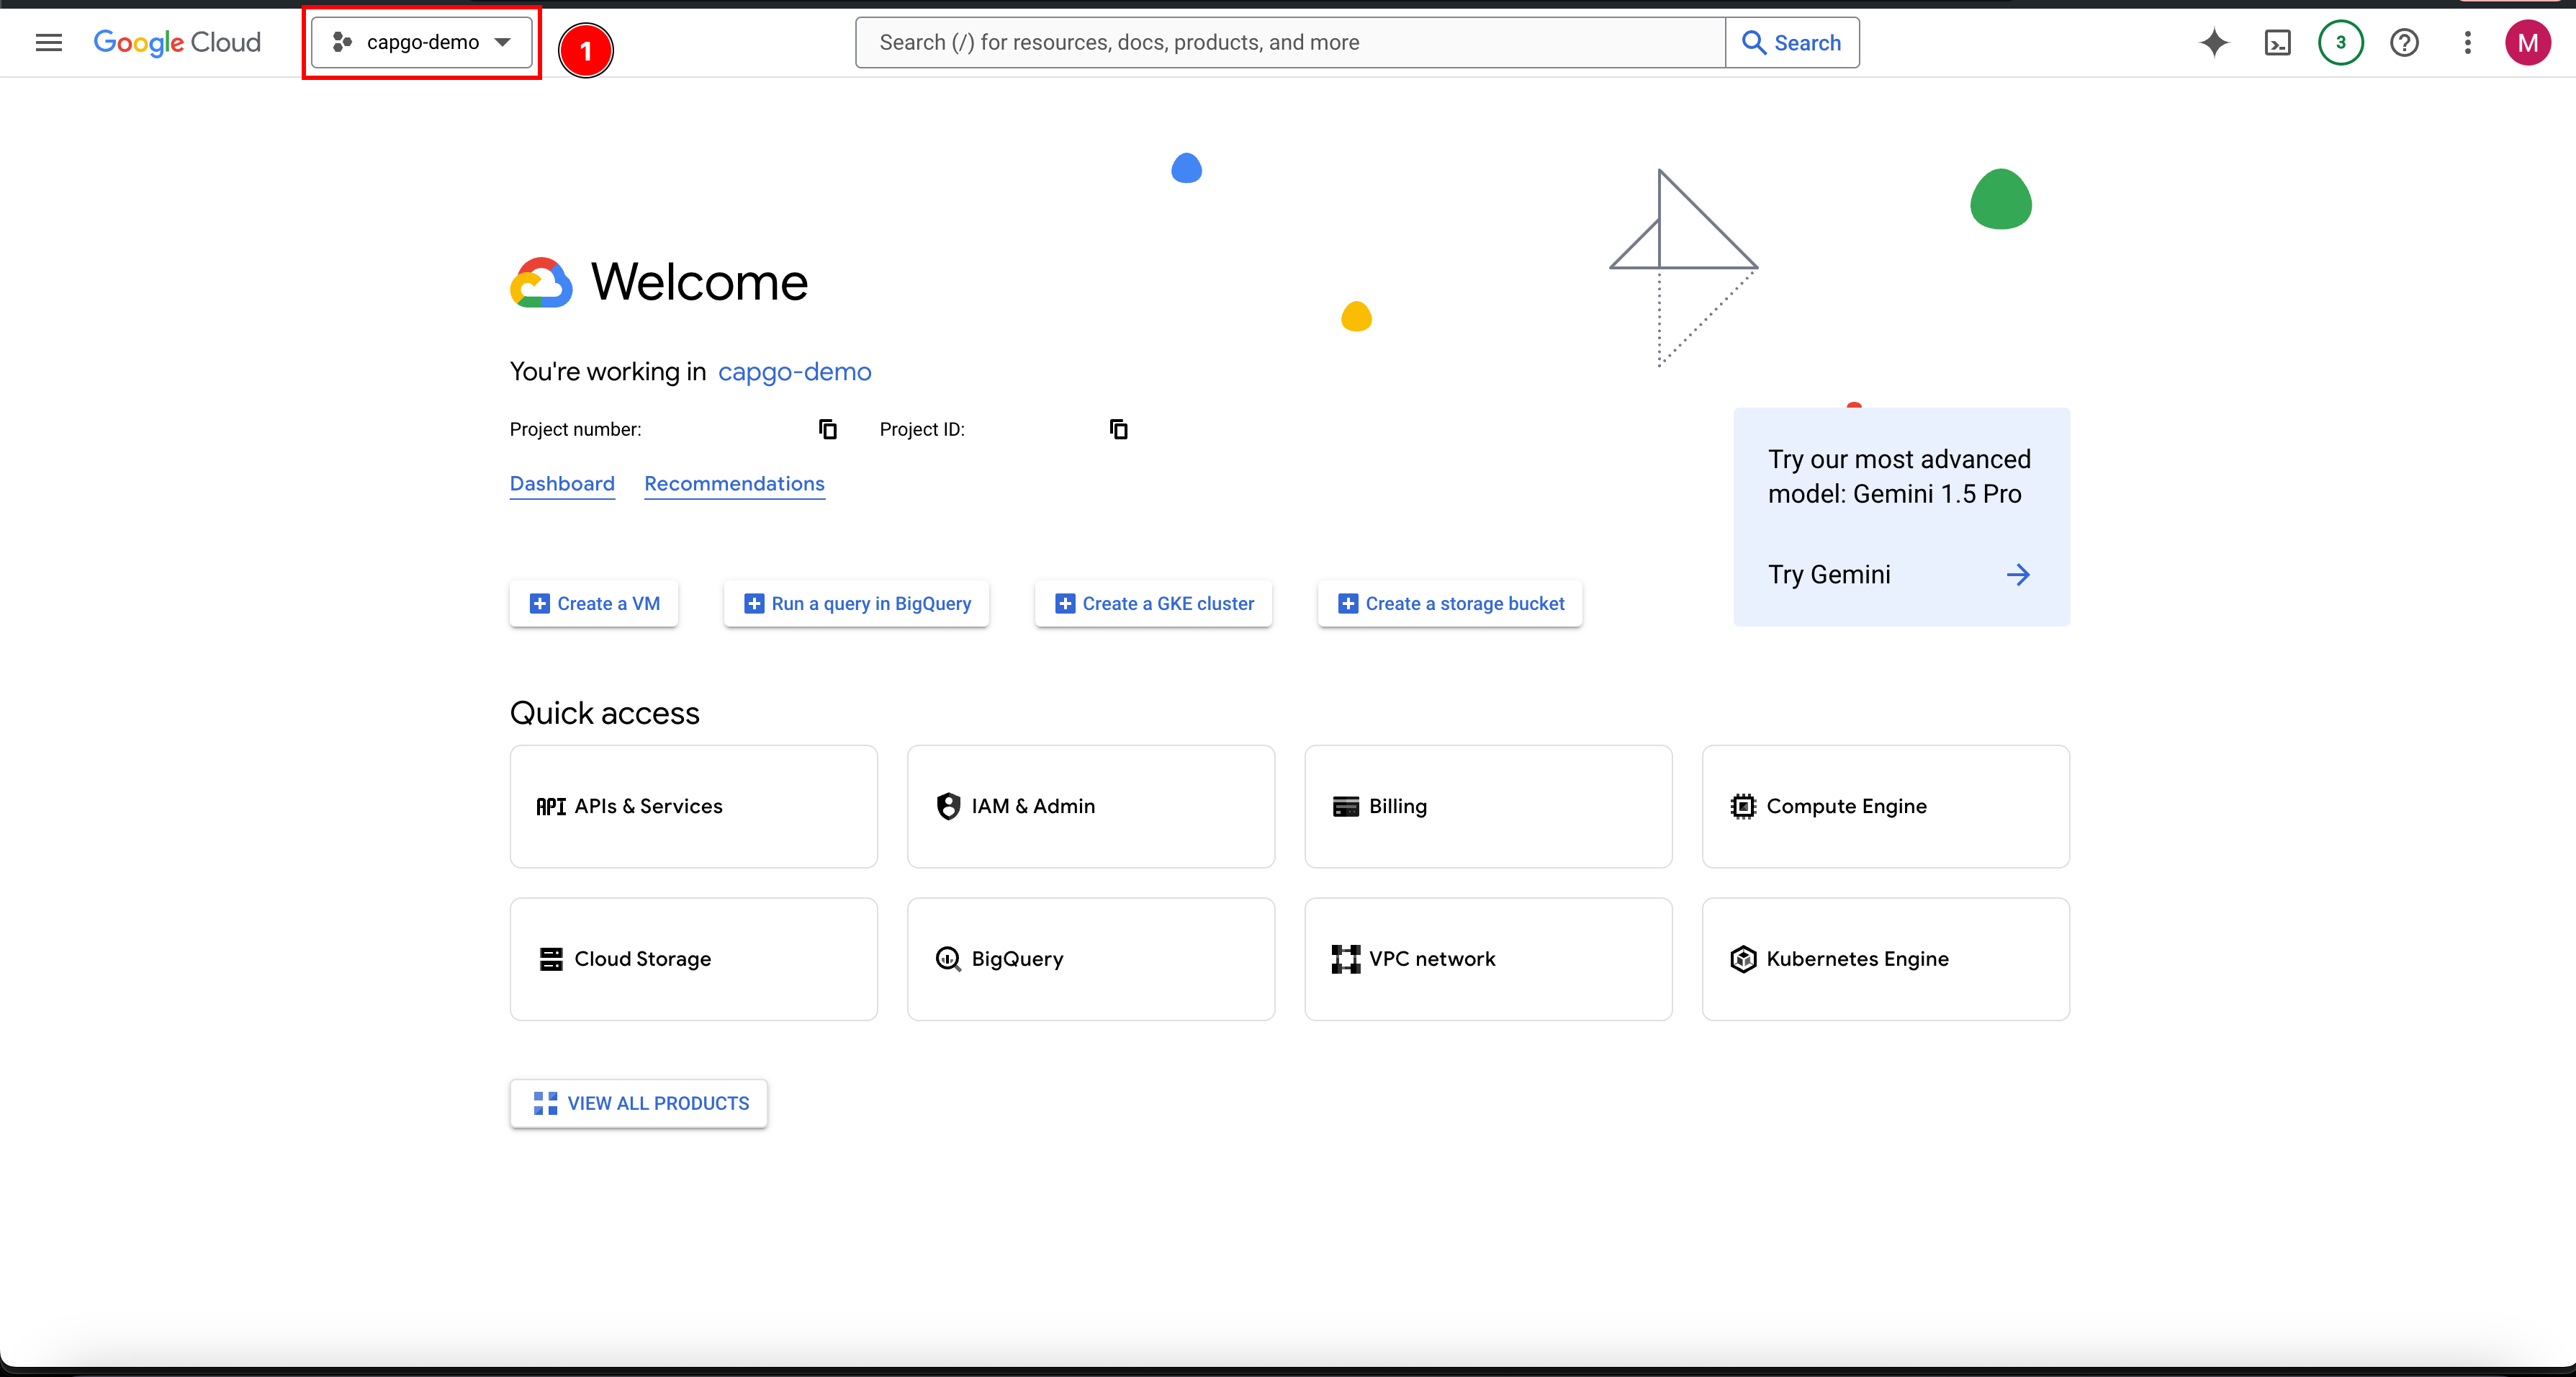
-
If you already have a project, select it. Otherwise, create a new project:
- Click on
New project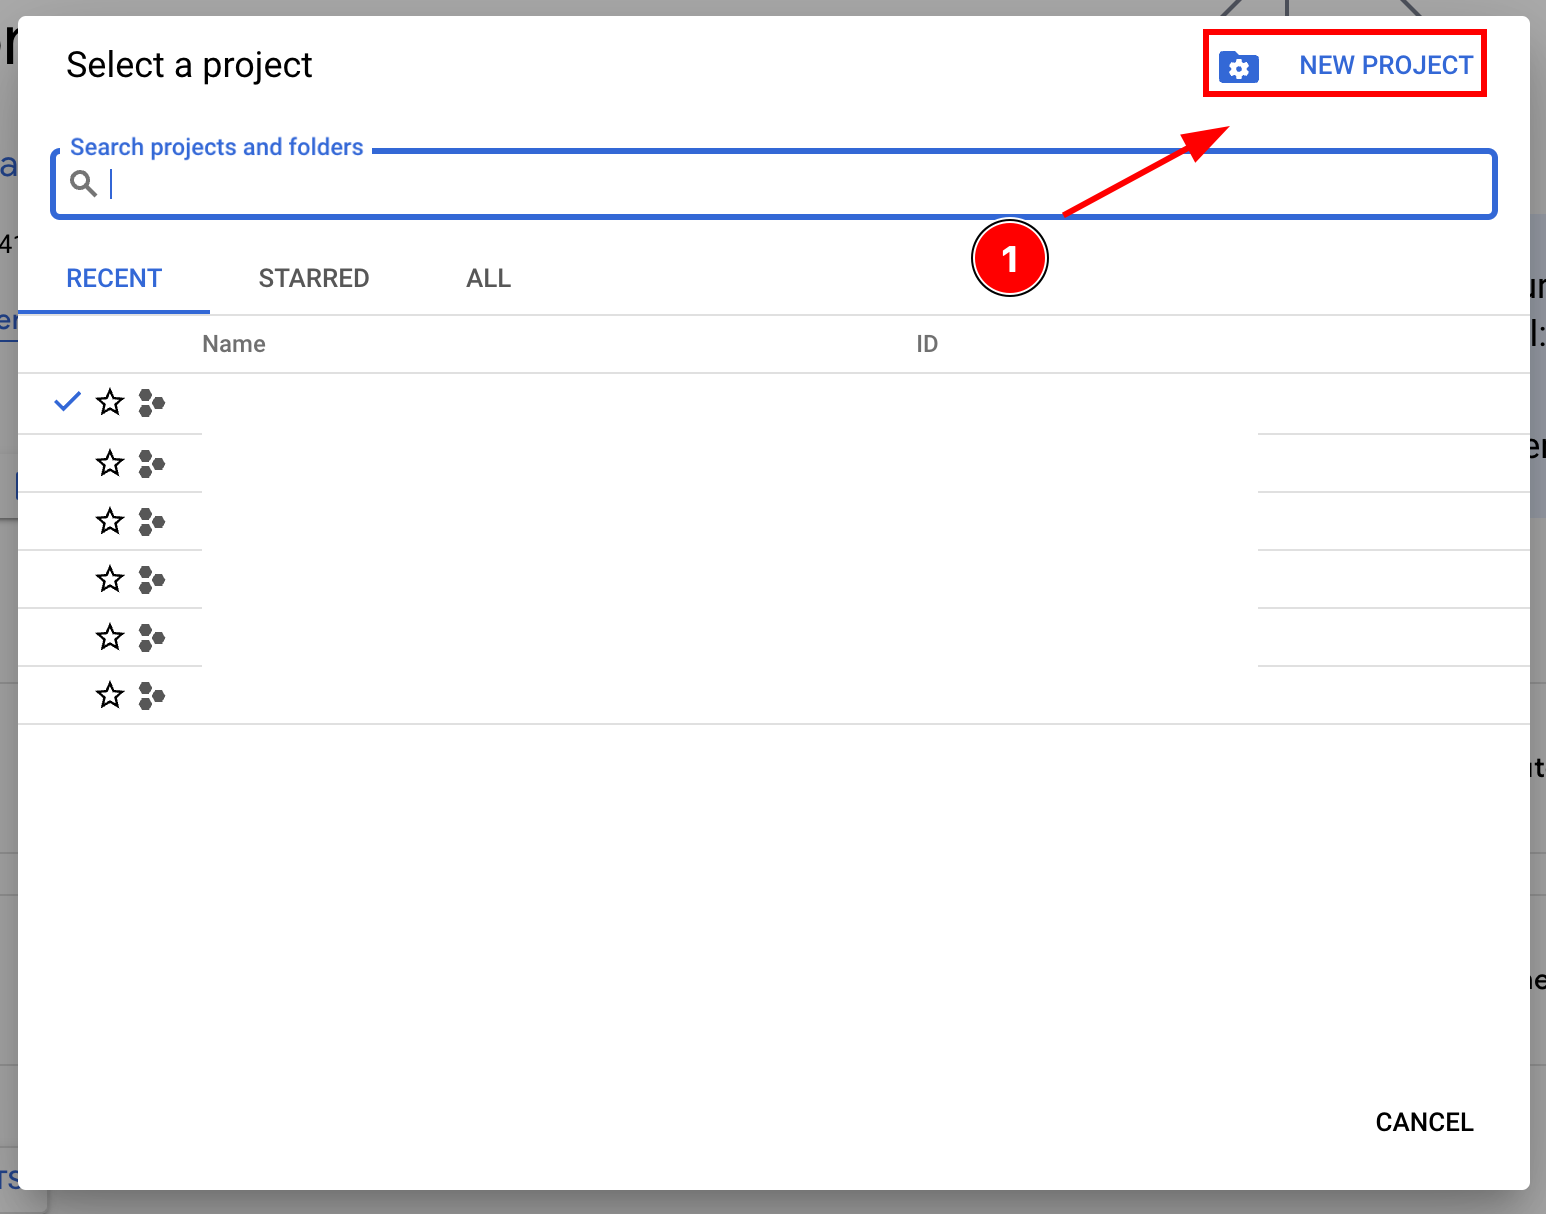
- Name your project and click
Create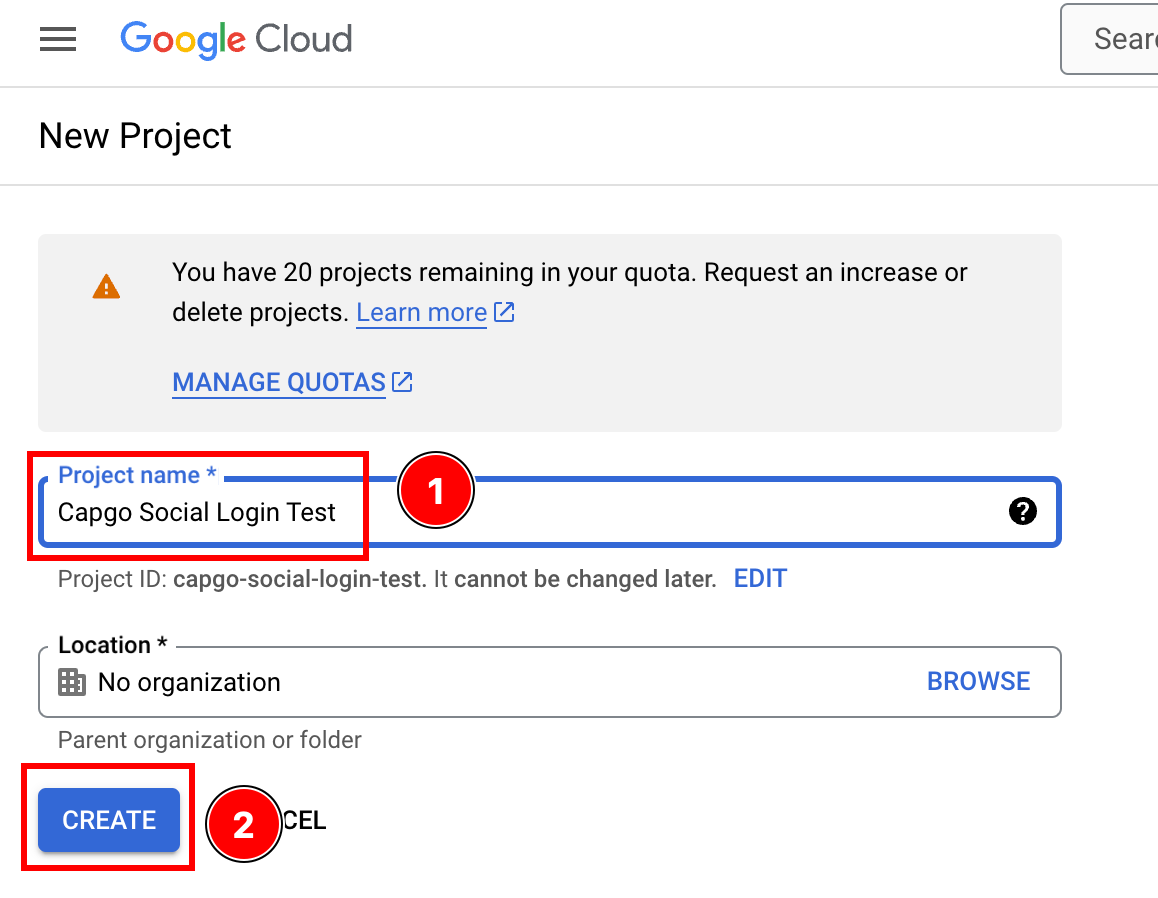
- Ensure that you are on the right project
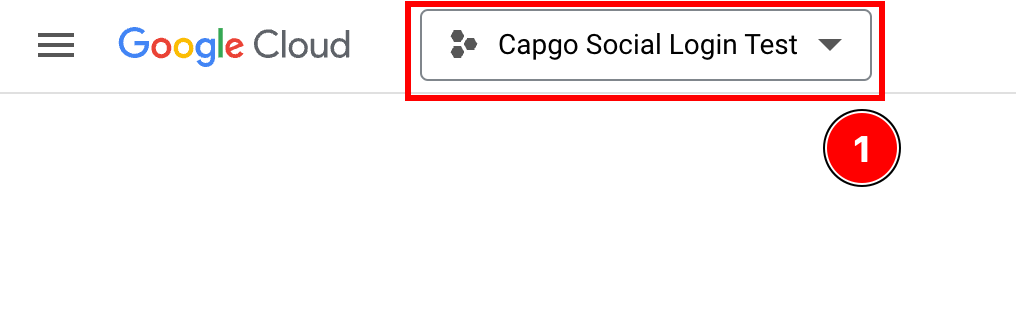
- Click on
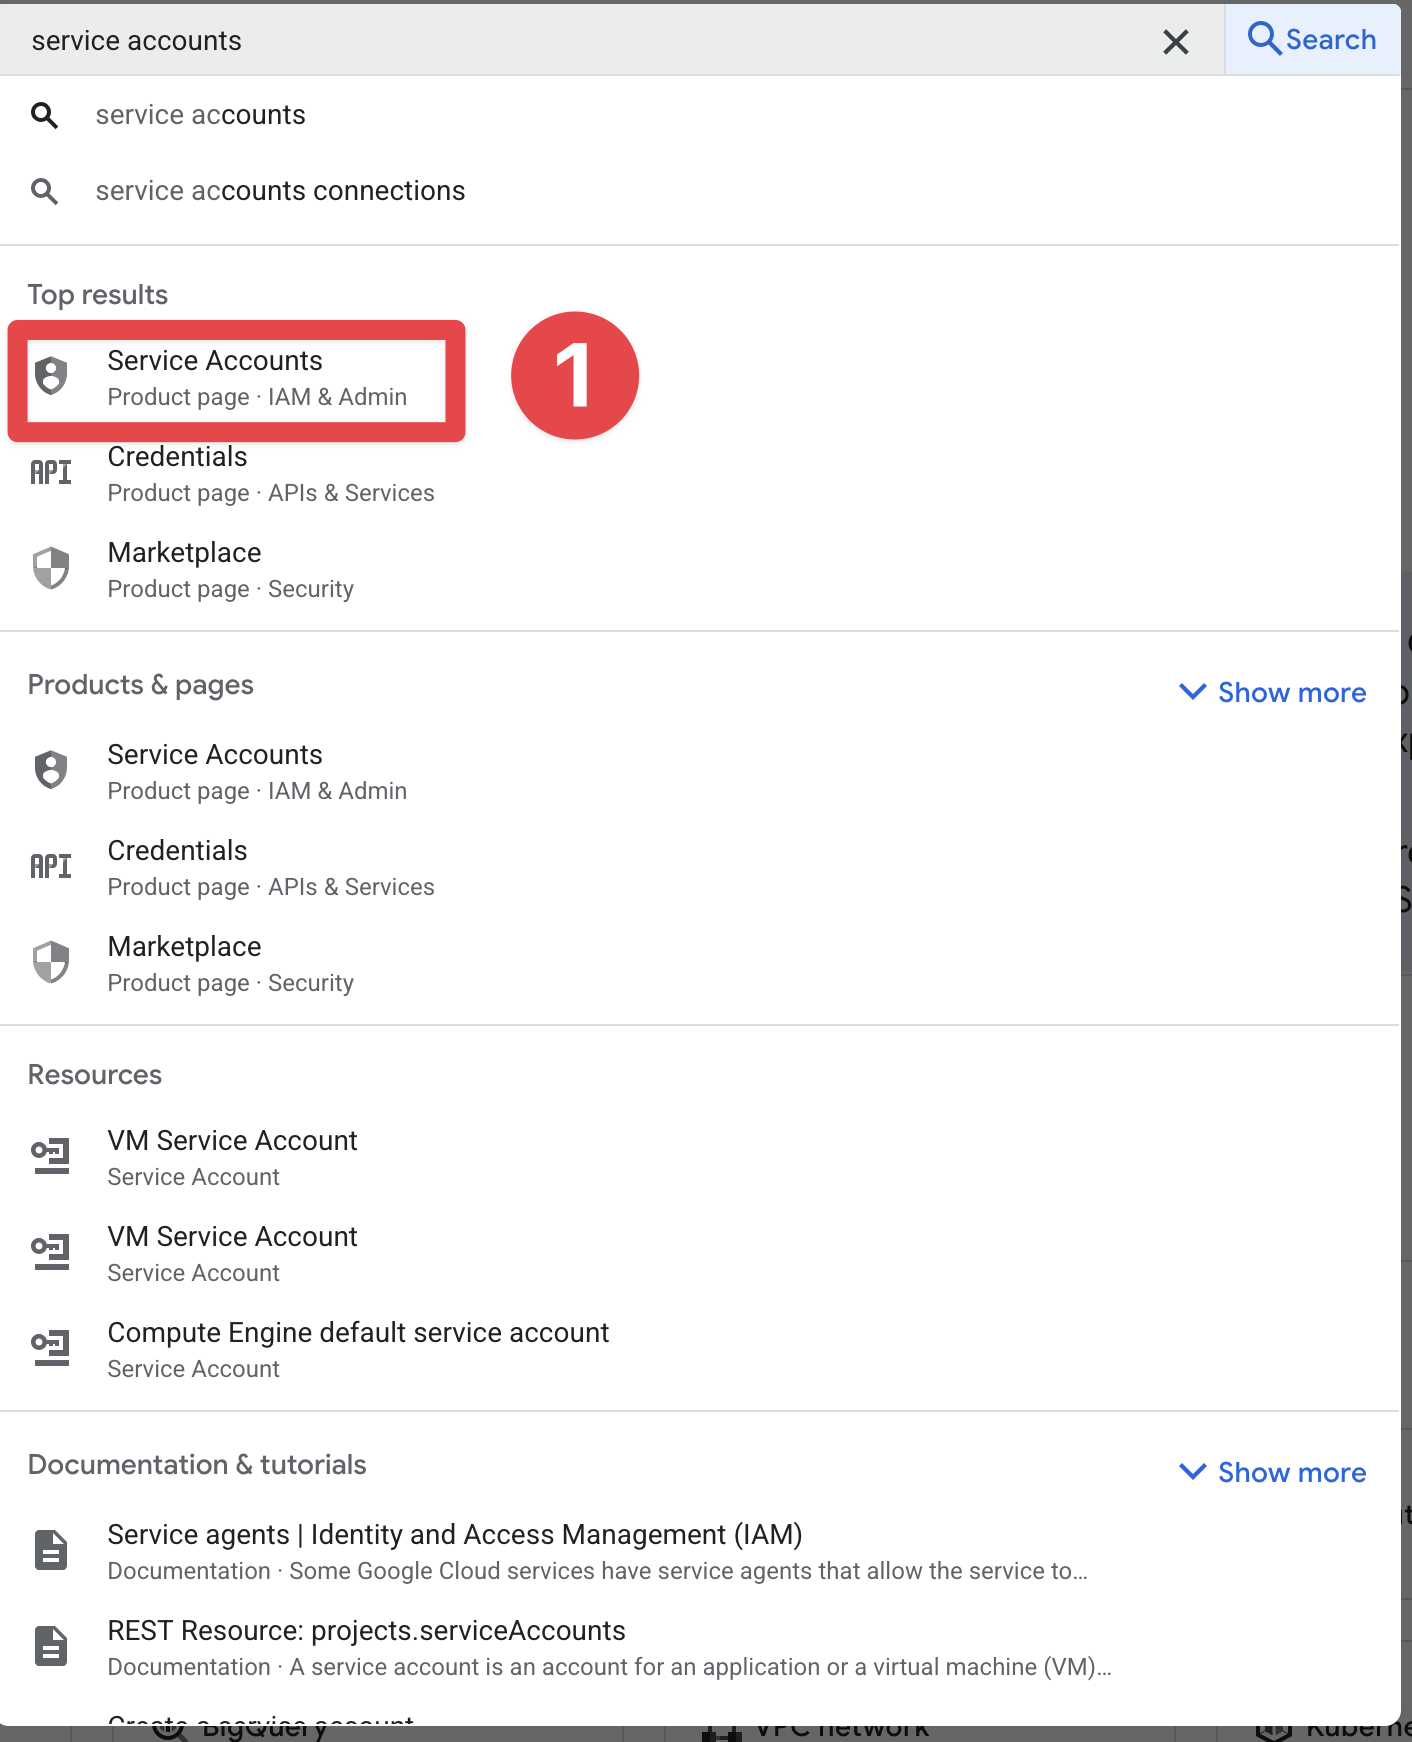
-
Let’s click on the search bar and search for
service accountsand click on it
-
Let’s click on
Create service account
-
Fill in the form for the service account and click on
Done- I recommend setting the name to
Capgo Native Build Service Account - For the Service Account ID, I recommend setting it to
capgo-native-build-service-acc - As for the description, you don’t have to fill it in, but I recommend filling it with
Allows Capgo Native Build to build and submit the app to the Play Store
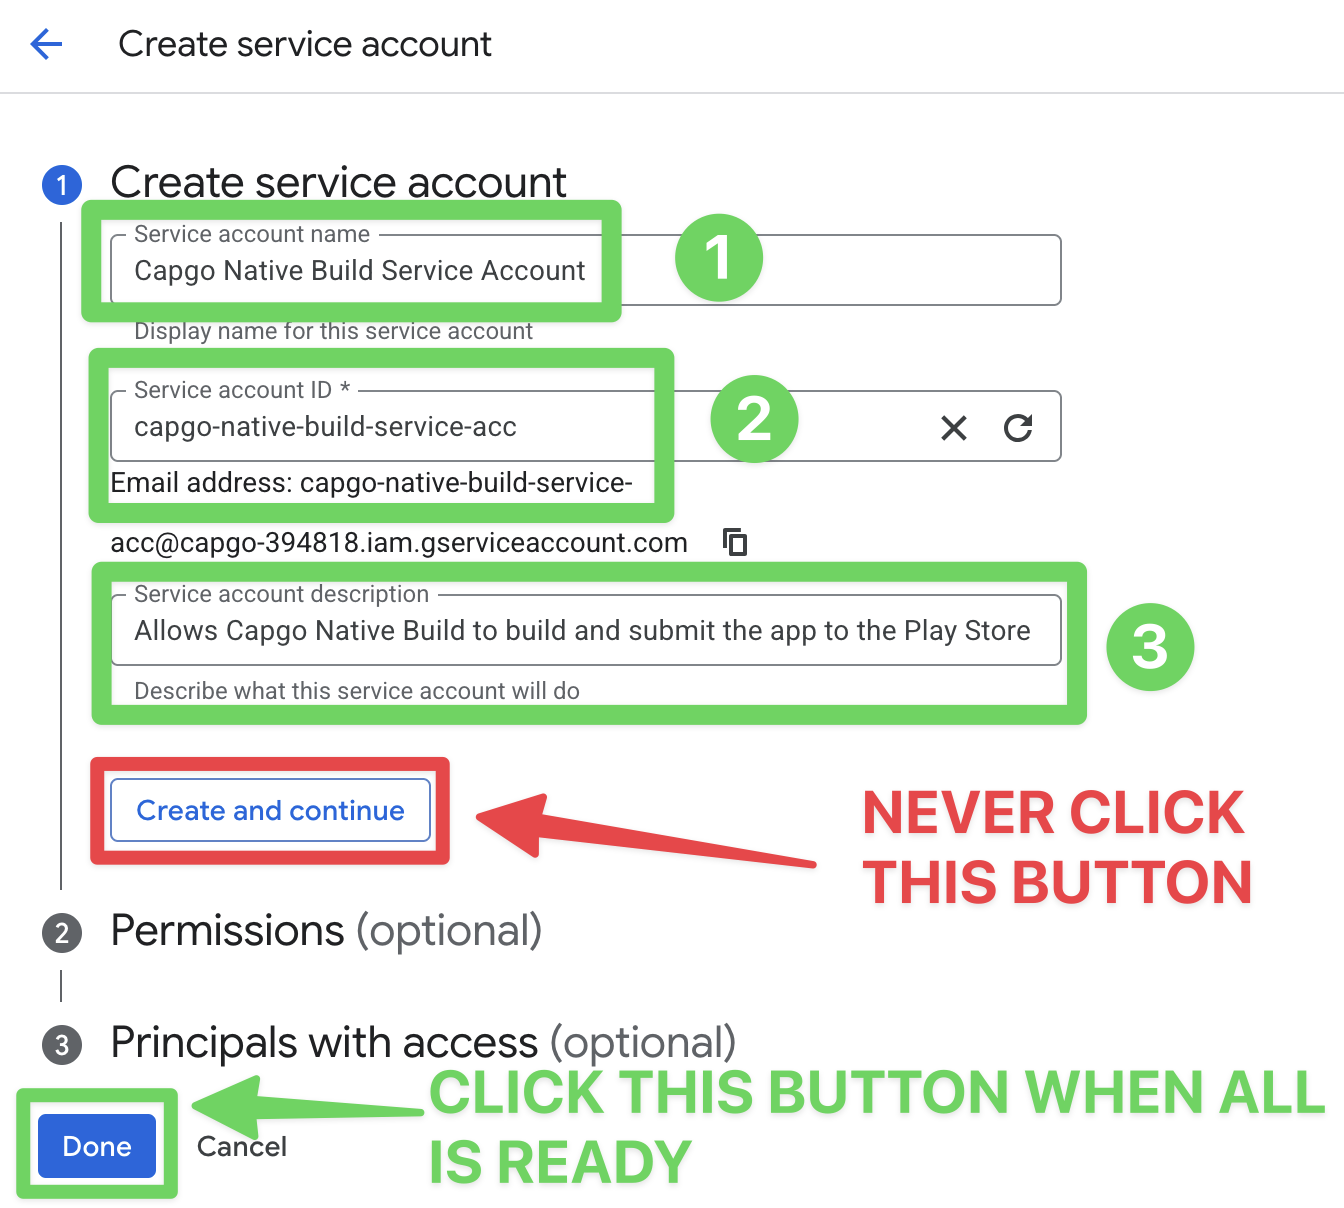
- I recommend setting the name to
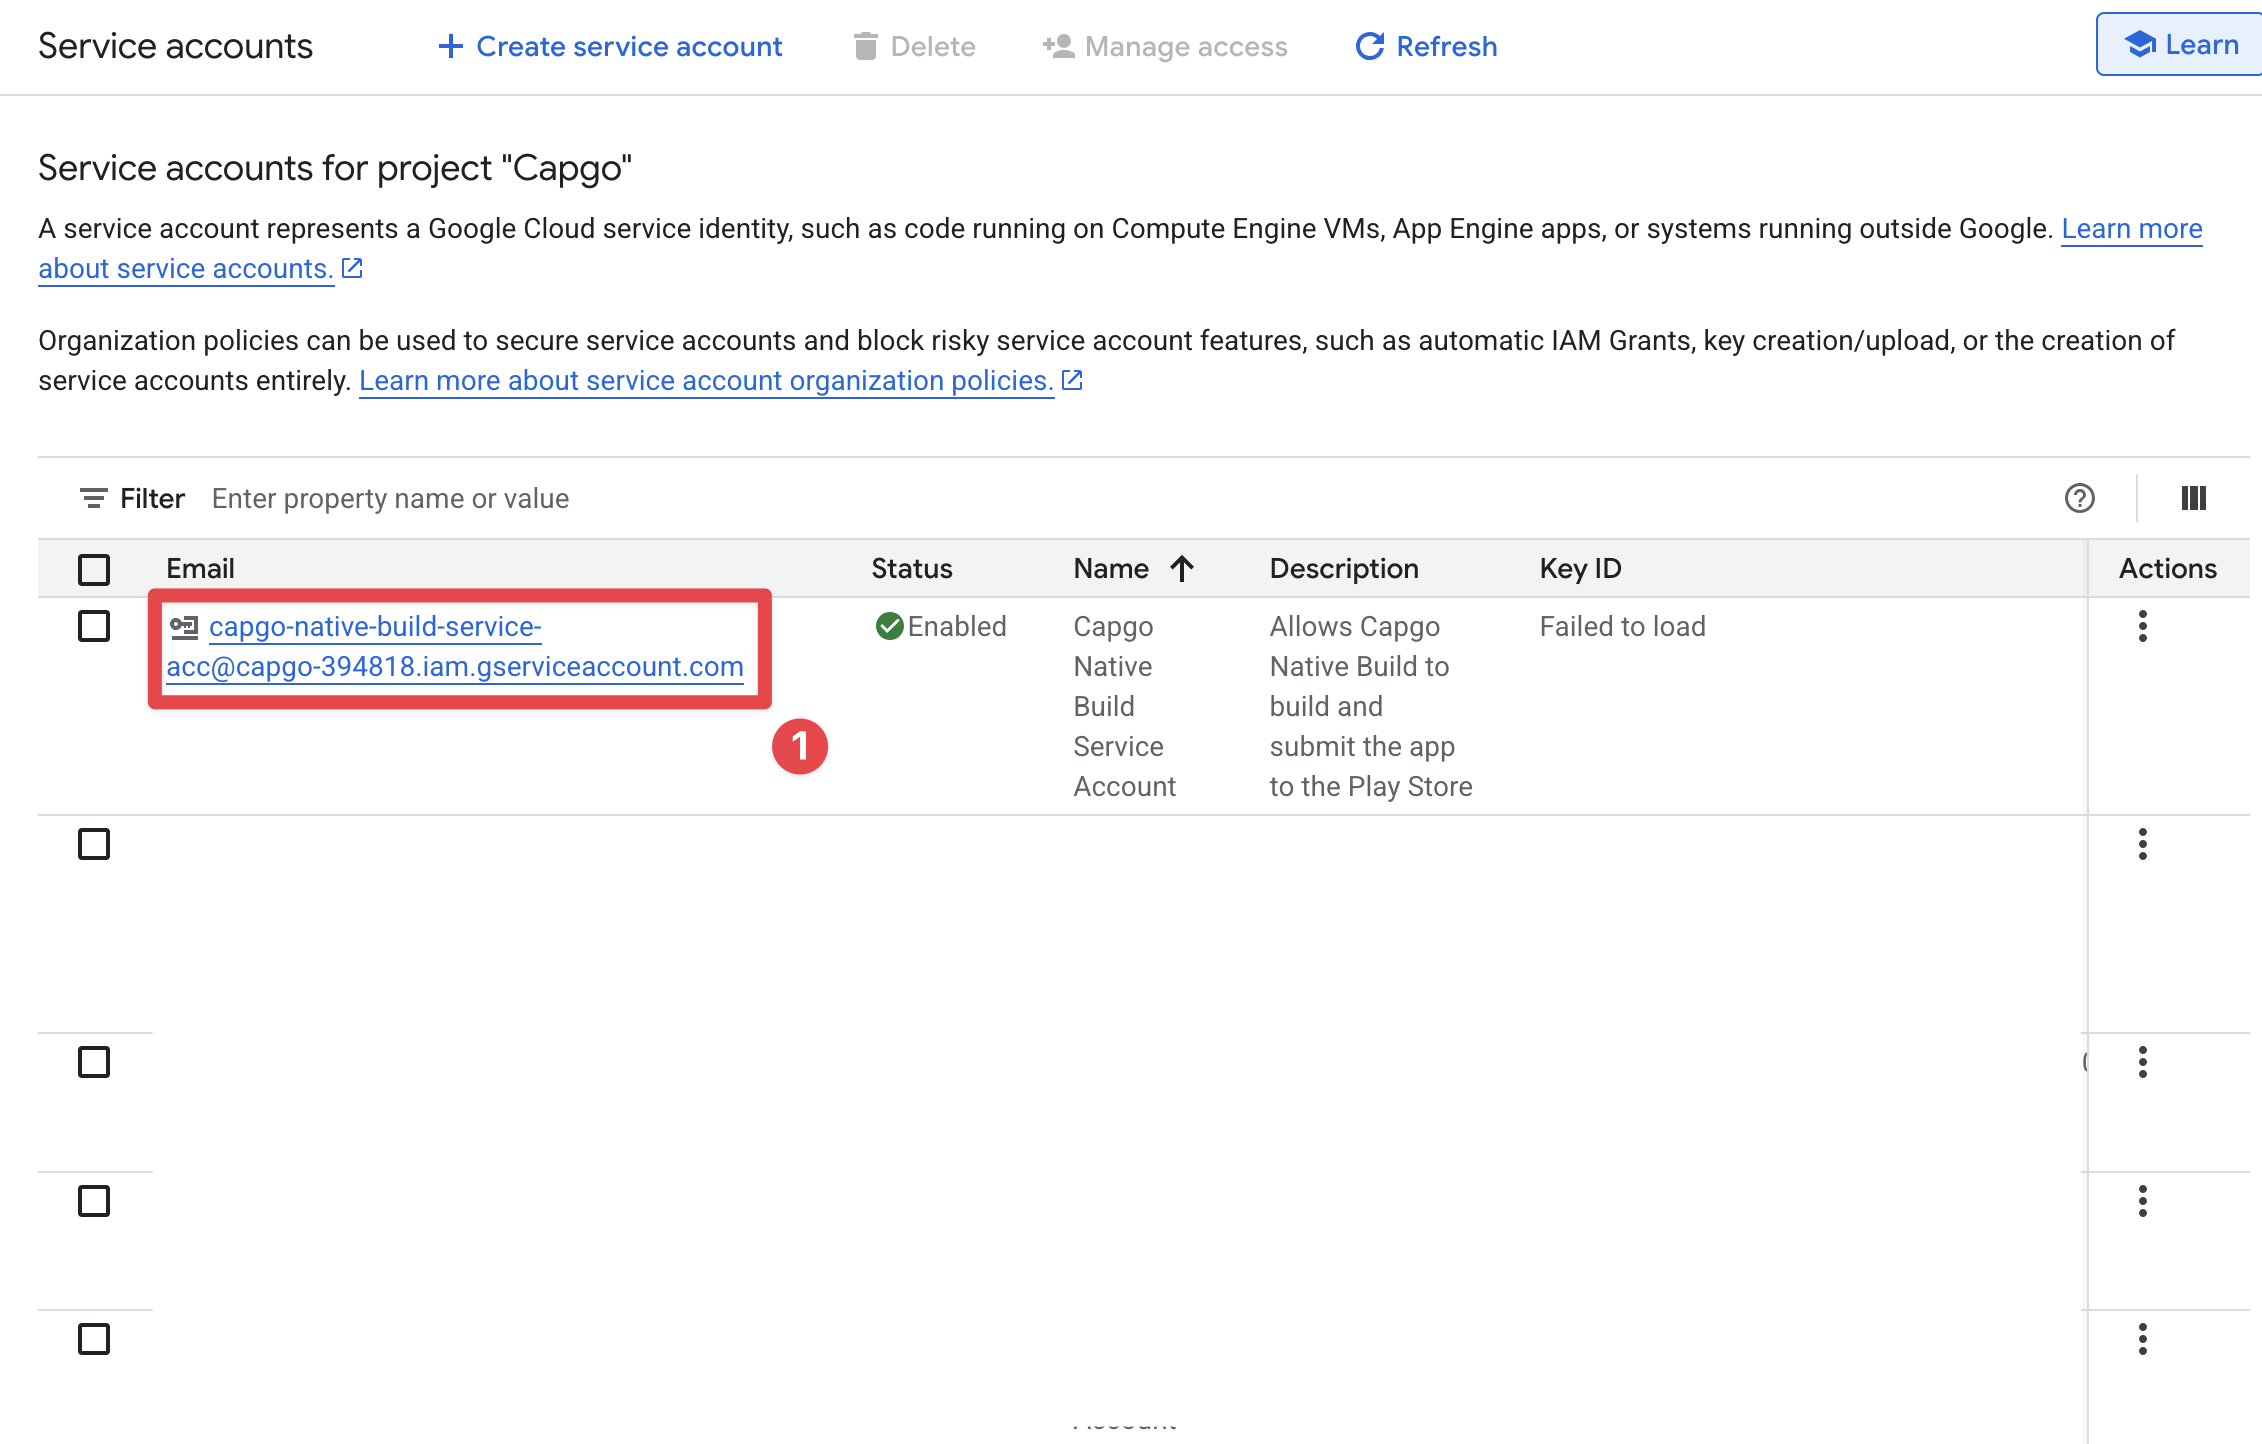
-
Click on the newly created service account You should now see the newly created service account in the list. Click on it.
-
Click on the
Keystab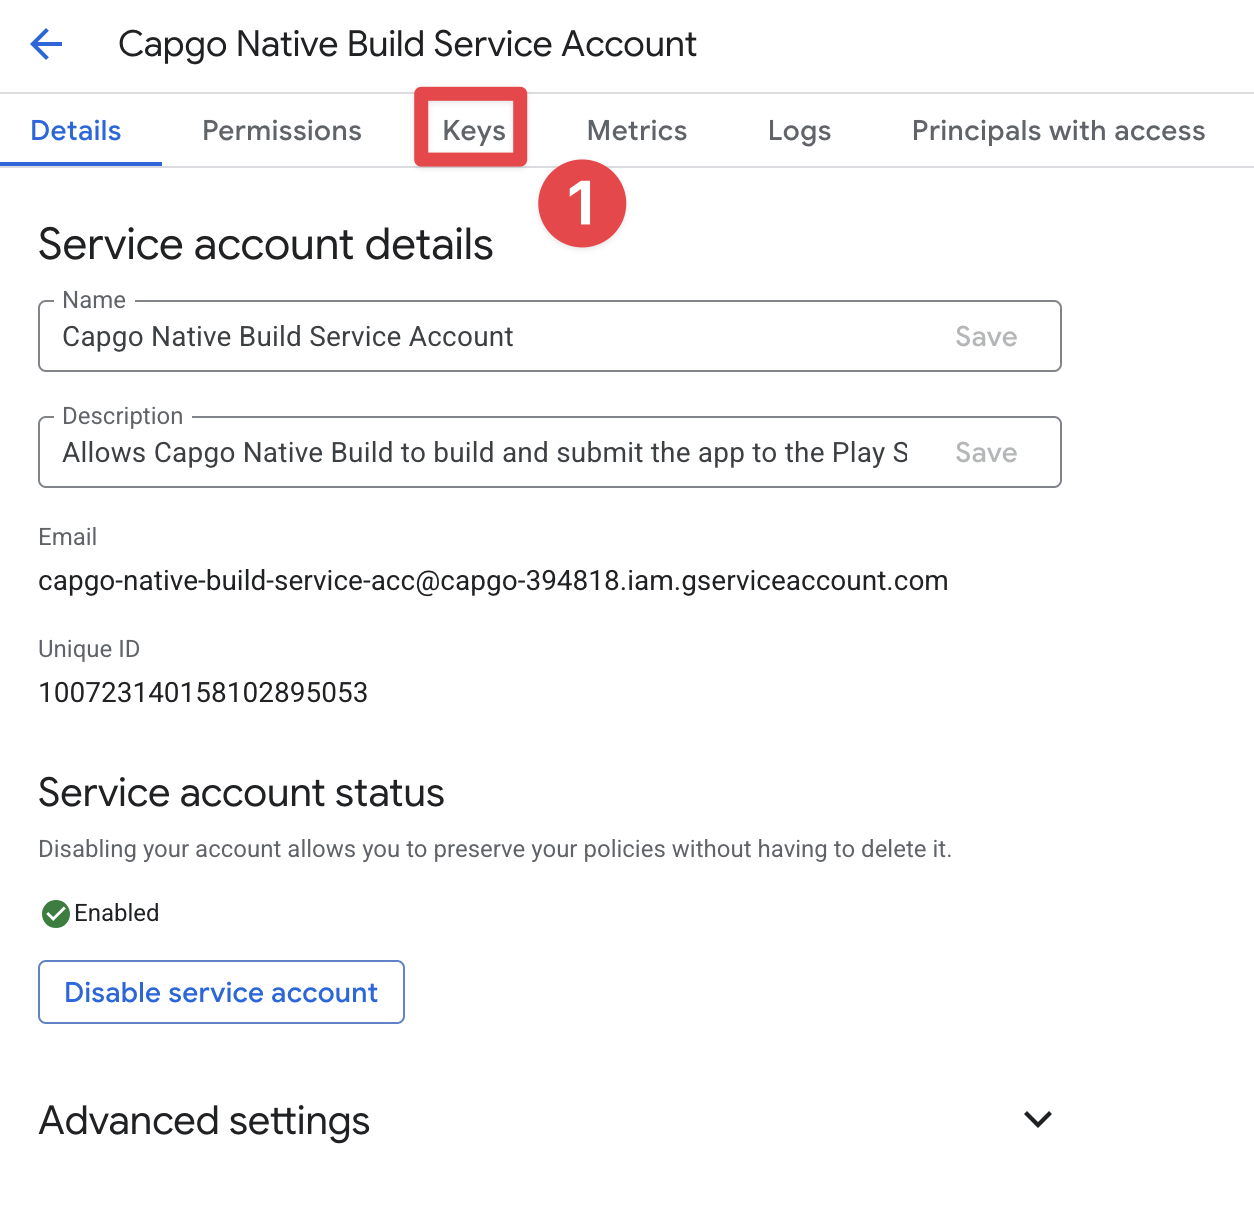
-
Click on
Add KeyandCreate new key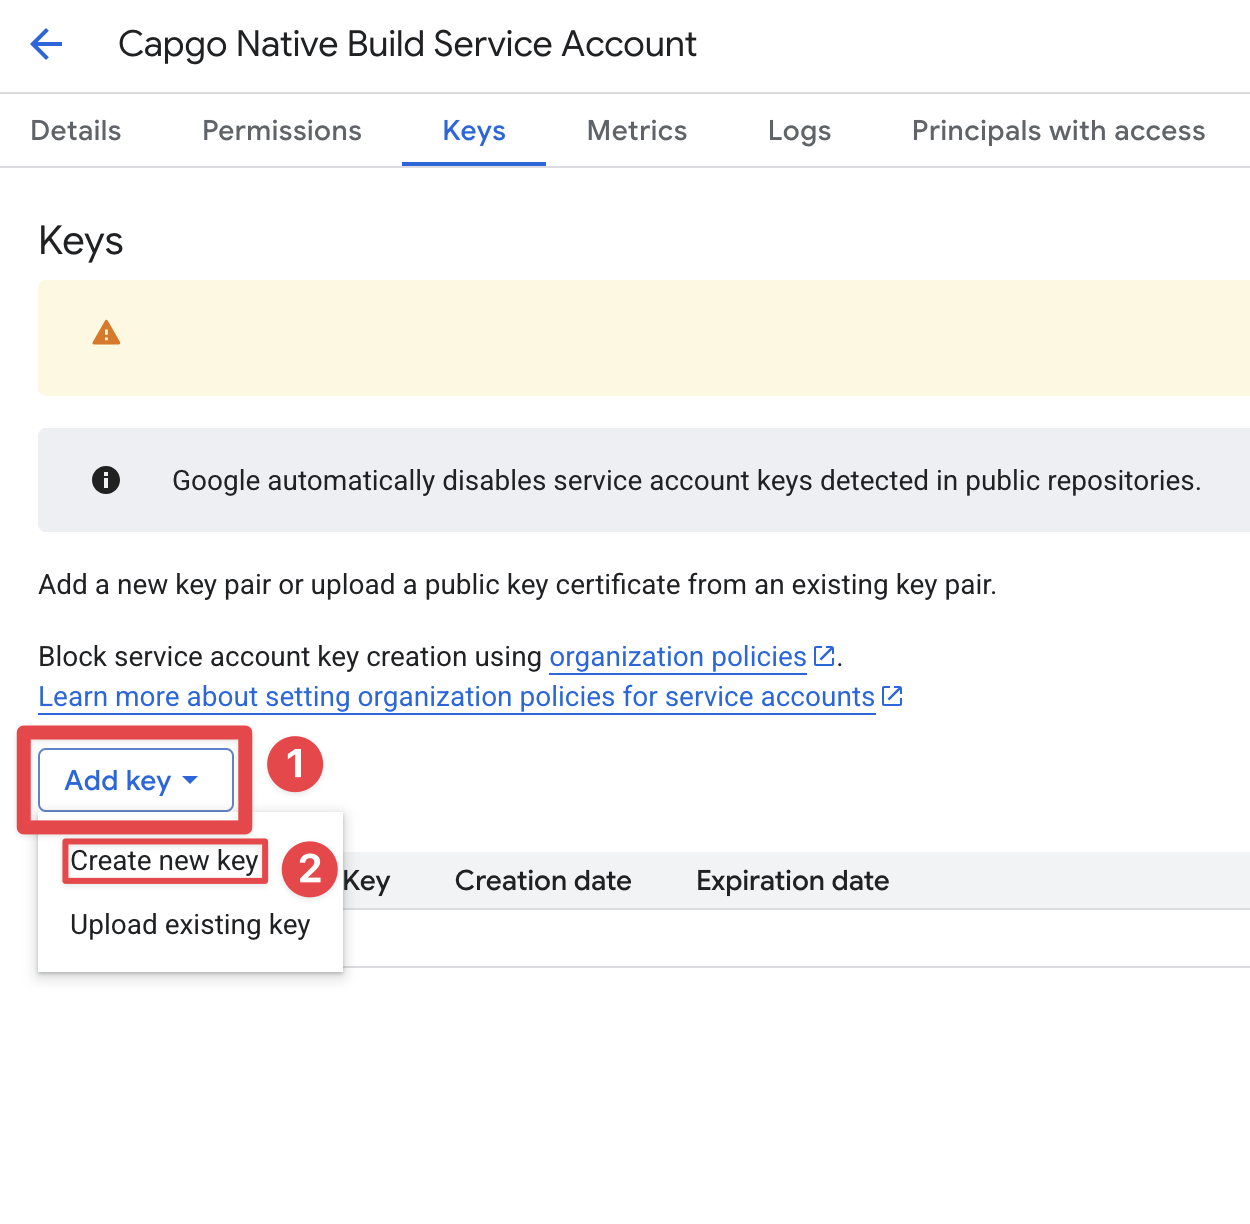
-
Click on
JSONandCreate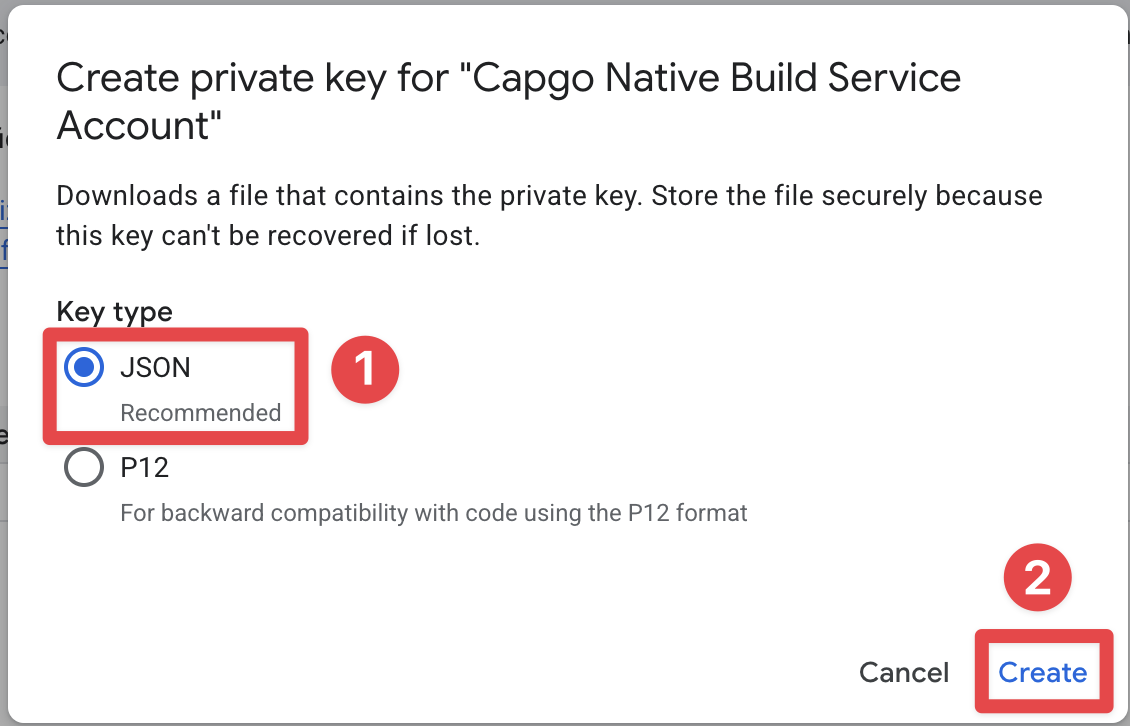
-
Download the JSON file The JSON file should have been downloaded automatically. You can click on
closeto close the window.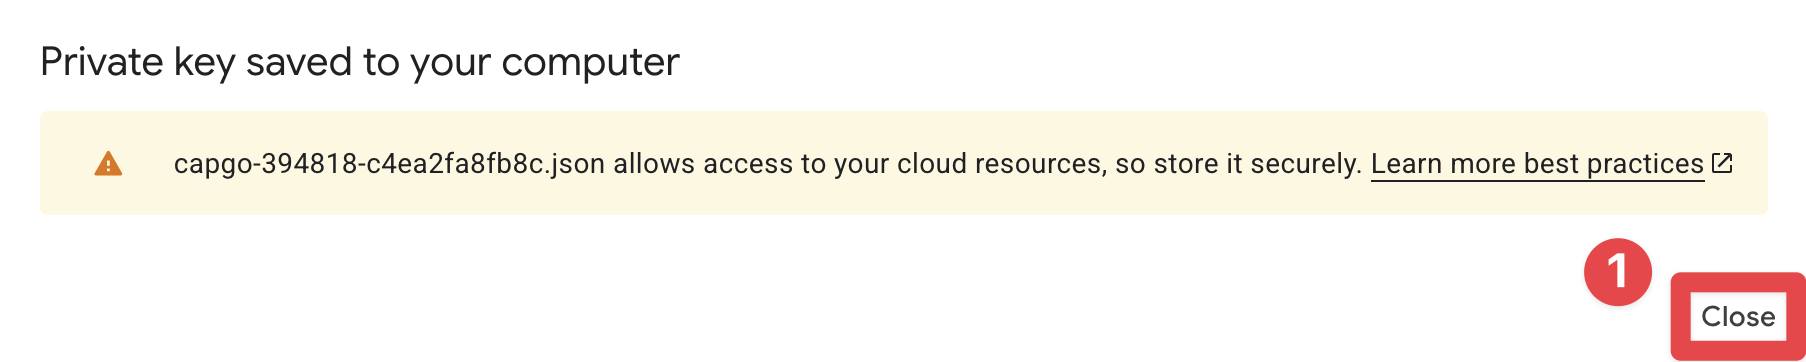
Granting Play Store API access to the service account
Section titled “Granting Play Store API access to the service account”The newly created service account does not yet have access to the Play Store API. To grant it, head to the Play Store Console.
- Go to Google Play Console
- Select the correct developer account
- Click on
Users and permissions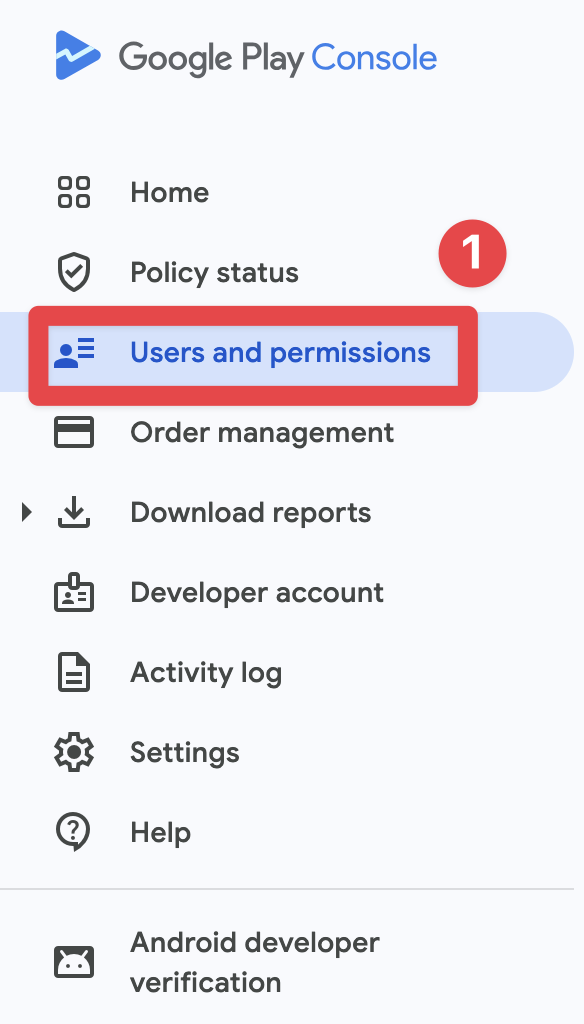
- Click on
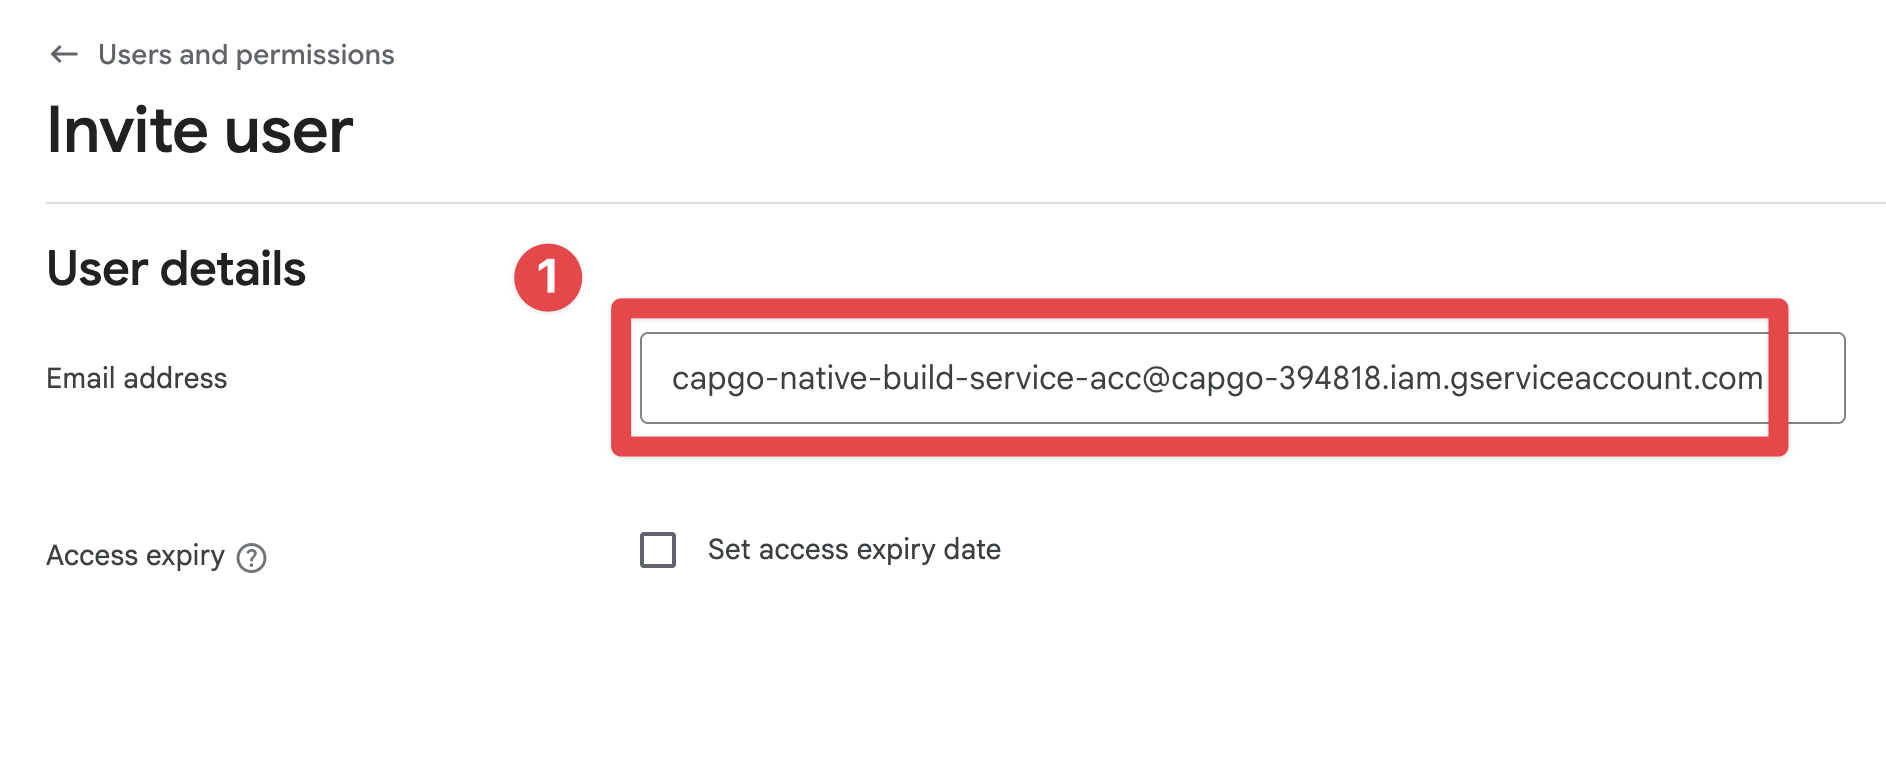
Invite new users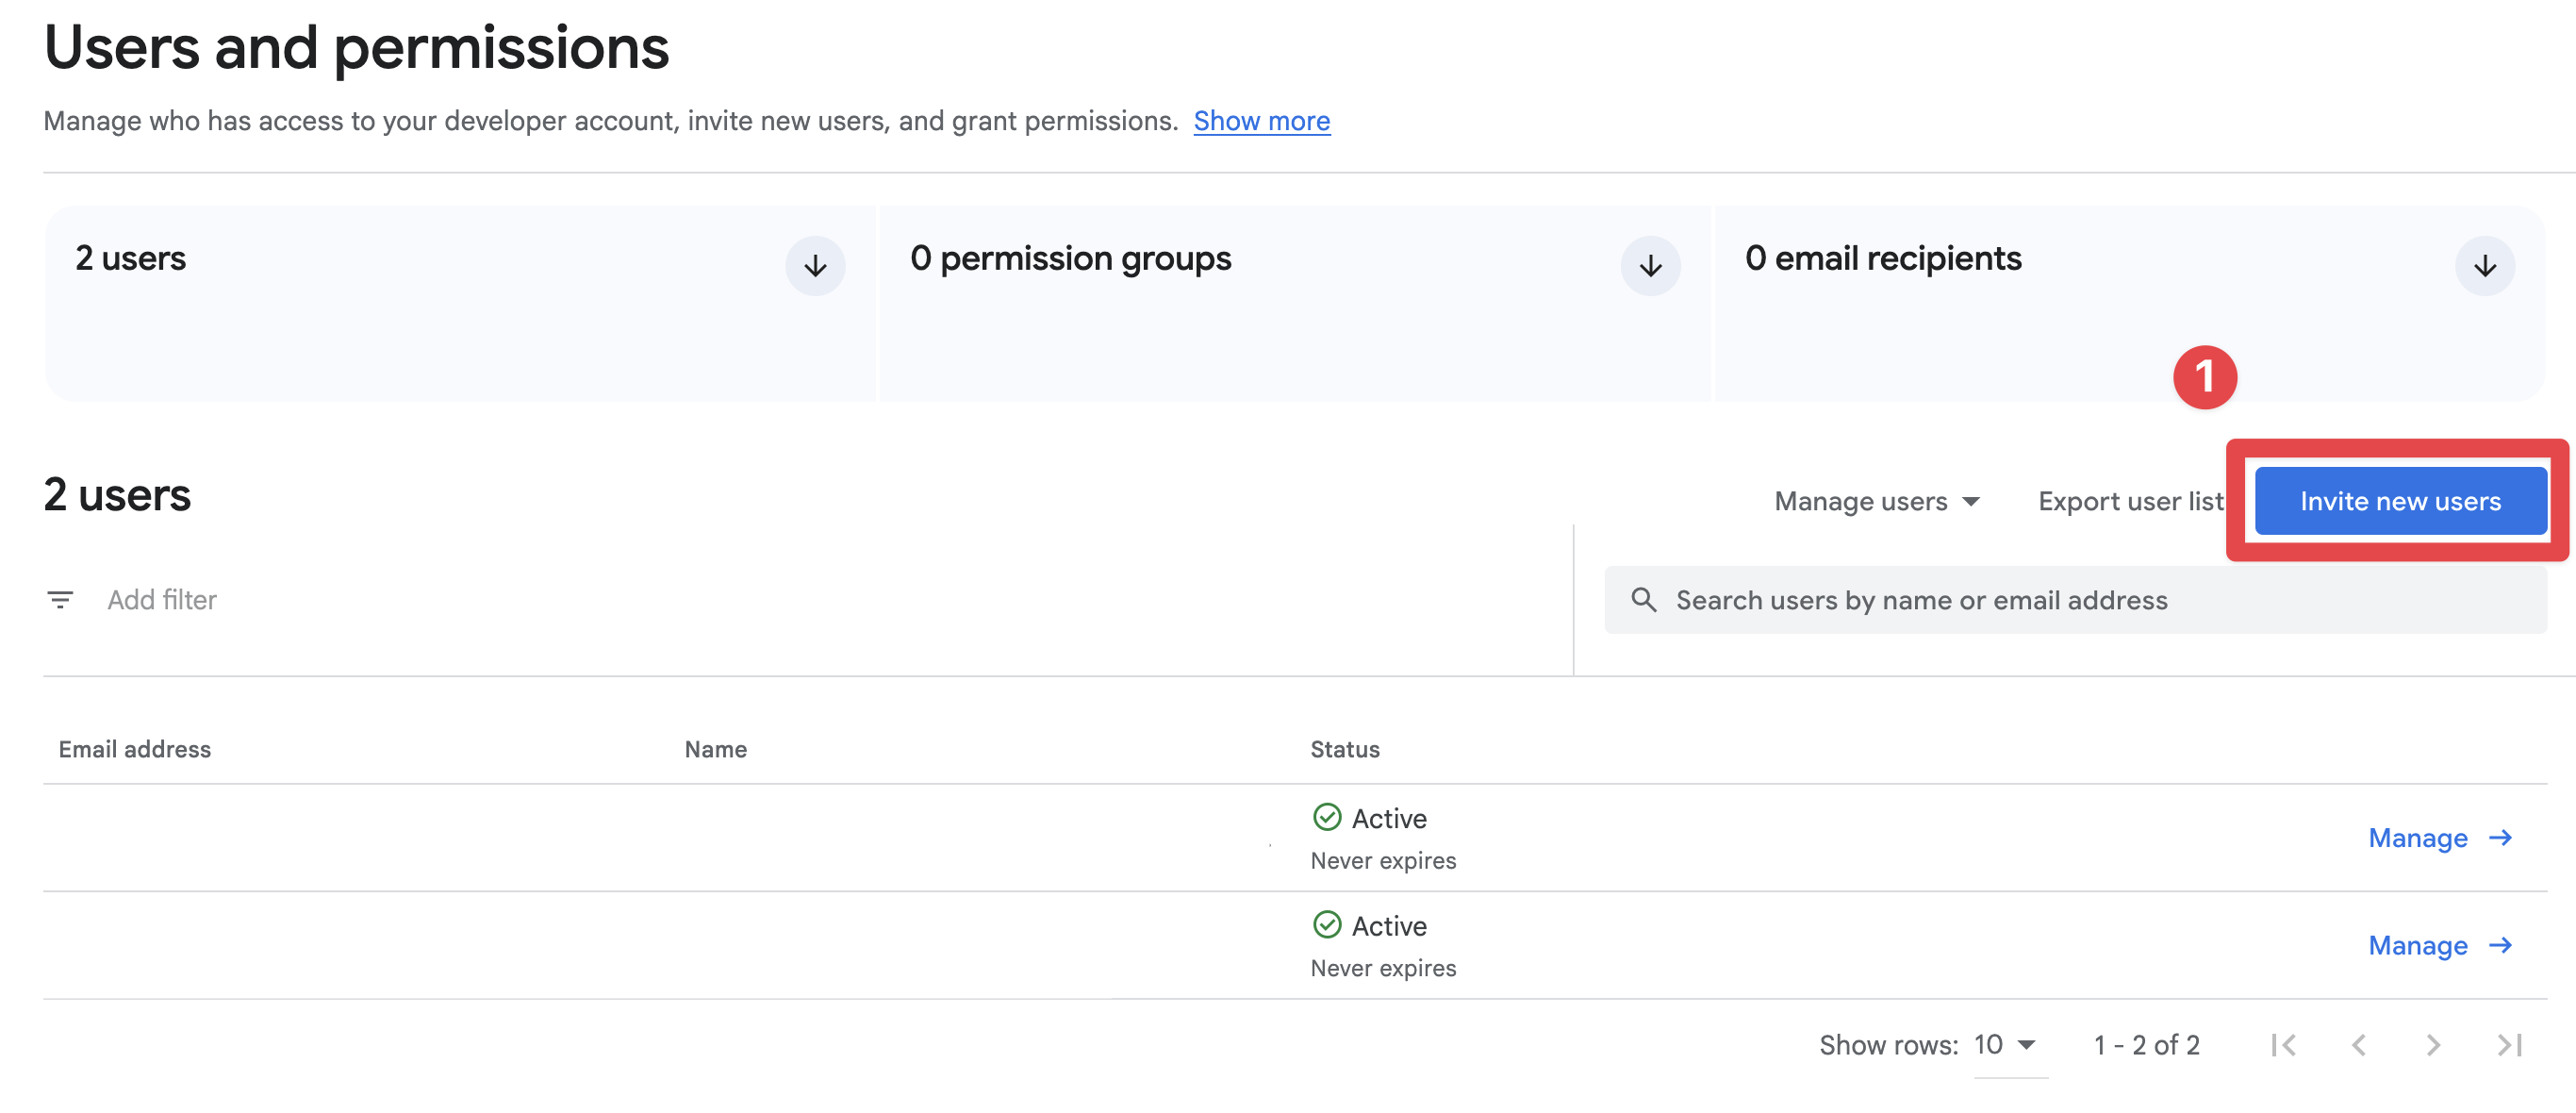
- Copy the email address of the service account
- Go to
Account permissionsand grant the minimum required permissions:- In
App permissions, grant access to your app. - In
Releases, enableCreate, edit, and roll out releases. - If your workflow uses Play App Signing, enable the related signing permission.
- If you are unsure, use
Adminonly during setup, then reduce permissions afterward.
- In
- Click on
Invite user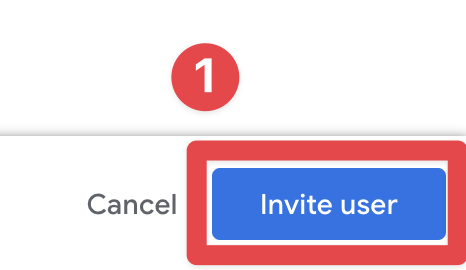
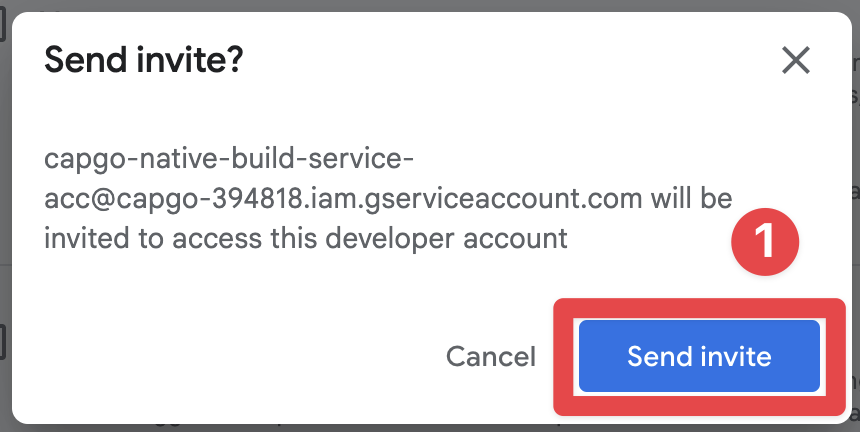
- Confirm the invitation
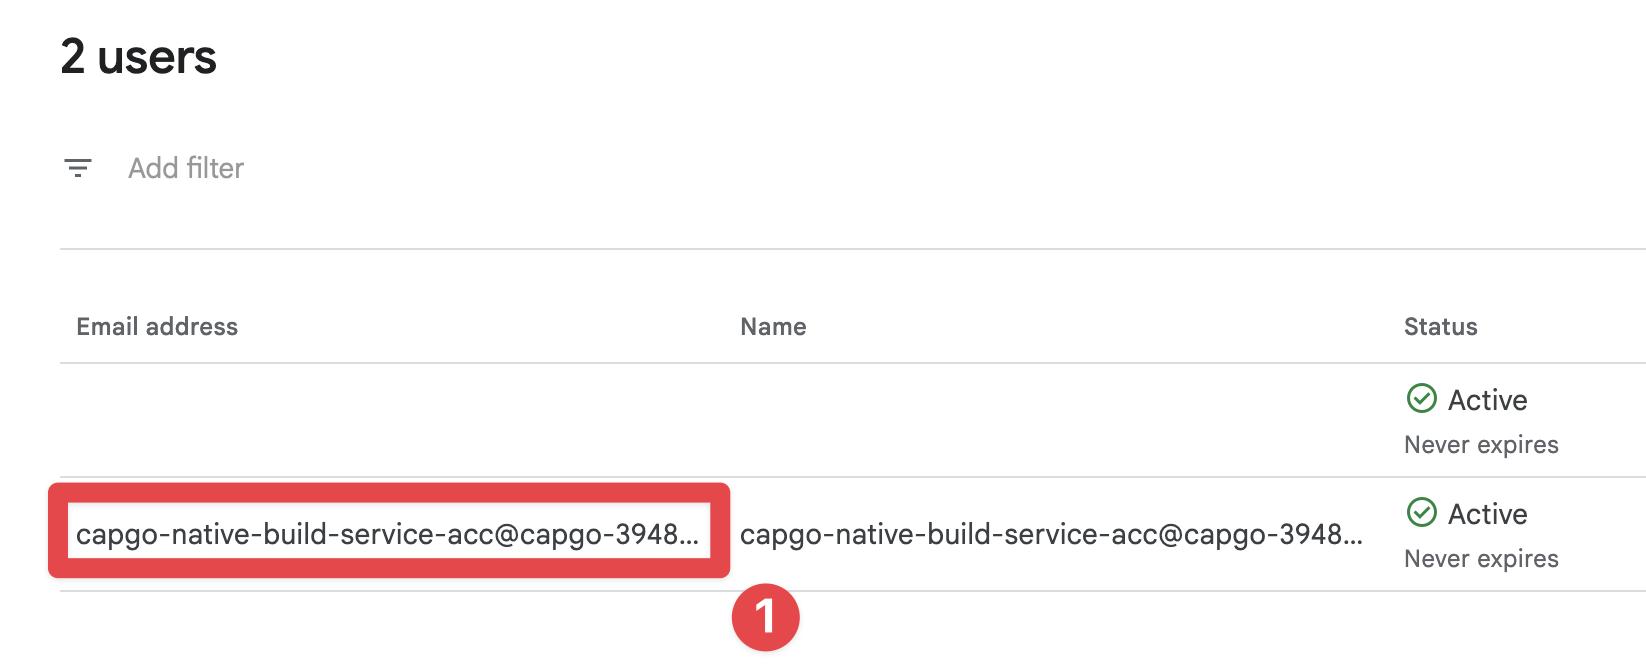
- Confirm that the user has been invited
Saving the credentials
Section titled “Saving the credentials”You are now ready to save the credentials and run your first build. You can save the credentials using the following command:
bunx @capgo/cli build credentials save --platform android \ --keystore ./path/to/keystore.jks \ --keystore-alias "your-alias" \ --keystore-key-password "key-password" \ --keystore-store-password "store-password" \ --play-config ./play-store-service-account.jsonCI/CD setup (GitHub Actions)
Section titled “CI/CD setup (GitHub Actions)”If you already completed Keystore, keystore password, keystore key password, keystore alias and Google Play service account, you already have everything needed for CI/CD. This section only covers how to pass those values as GitHub Actions secrets and environment variables.
1) Convert credential files to single-line base64
Section titled “1) Convert credential files to single-line base64”# Android keystore (.jks or .keystore)base64 -i ./path/to/keystore.jks | tr -d '\n' > keystore_base64.txt
# Google Play service account JSONbase64 -i ./play-store-service-account.json | tr -d '\n' > play_config_base64.txt2) Create repository secrets
Section titled “2) Create repository secrets”In GitHub > Repository > Settings > Secrets and variables > Actions, add:
| Secret name | Value |
|---|---|
CAPGO_TOKEN | Your Capgo API token |
APP_ID | Your Capgo app ID (example: com.example.app) |
ANDROID_KEYSTORE_FILE | Content of keystore_base64.txt |
KEYSTORE_KEY_ALIAS | Keystore alias from Keystore, keystore password, keystore key password, keystore alias |
KEYSTORE_KEY_PASSWORD | Keystore key password |
KEYSTORE_STORE_PASSWORD | Keystore store password |
PLAY_CONFIG_JSON | Content of play_config_base64.txt |
3) Use env vars in your GitHub Actions workflow
Section titled “3) Use env vars in your GitHub Actions workflow”name: Android Cloud Build
on: workflow_dispatch: push: branches: [main]
jobs: android-build: runs-on: ubuntu-latest steps: - uses: actions/checkout@v4 - uses: oven-sh/setup-bun@v2 with: bun-version: latest - name: Request Android build with Capgo run: bunx @capgo/cli@latest build ${{ secrets.APP_ID }} --platform android env: CAPGO_TOKEN: ${{ secrets.CAPGO_TOKEN }} ANDROID_KEYSTORE_FILE: ${{ secrets.ANDROID_KEYSTORE_FILE }} KEYSTORE_KEY_ALIAS: ${{ secrets.KEYSTORE_KEY_ALIAS }} KEYSTORE_KEY_PASSWORD: ${{ secrets.KEYSTORE_KEY_PASSWORD }} KEYSTORE_STORE_PASSWORD: ${{ secrets.KEYSTORE_STORE_PASSWORD }} PLAY_CONFIG_JSON: ${{ secrets.PLAY_CONFIG_JSON }}Running the build
Section titled “Running the build”Congratulations 🎉! You are now ready to run your first build.
Run:
bunx @capgo/cli build com.example.app --platform androidAnd this will start the build process 🍾🥂