Google Login auf iOS
Einführung
Section titled “Einführung”In diesem Leitfaden lernen Sie, wie Sie Google Login mit Capgo Social Login für iOS einrichten. Ich gehe davon aus, dass Sie die allgemeine Einrichtungsanleitung bereits gelesen haben.
Verwendung von Google Login auf iOS
Section titled “Verwendung von Google Login auf iOS”In diesem Teil lernen Sie, wie Sie Google Login in iOS einrichten.
-
Erstellen Sie eine iOS-Client-ID in der Google Console
-
Klicken Sie auf die Suchleiste

-
Suchen Sie nach
credentialsund klicken Sie auf dieAPIs and ServicesOption (Nummer 2 auf dem Screenshot)
-
Klicken Sie auf
create credentials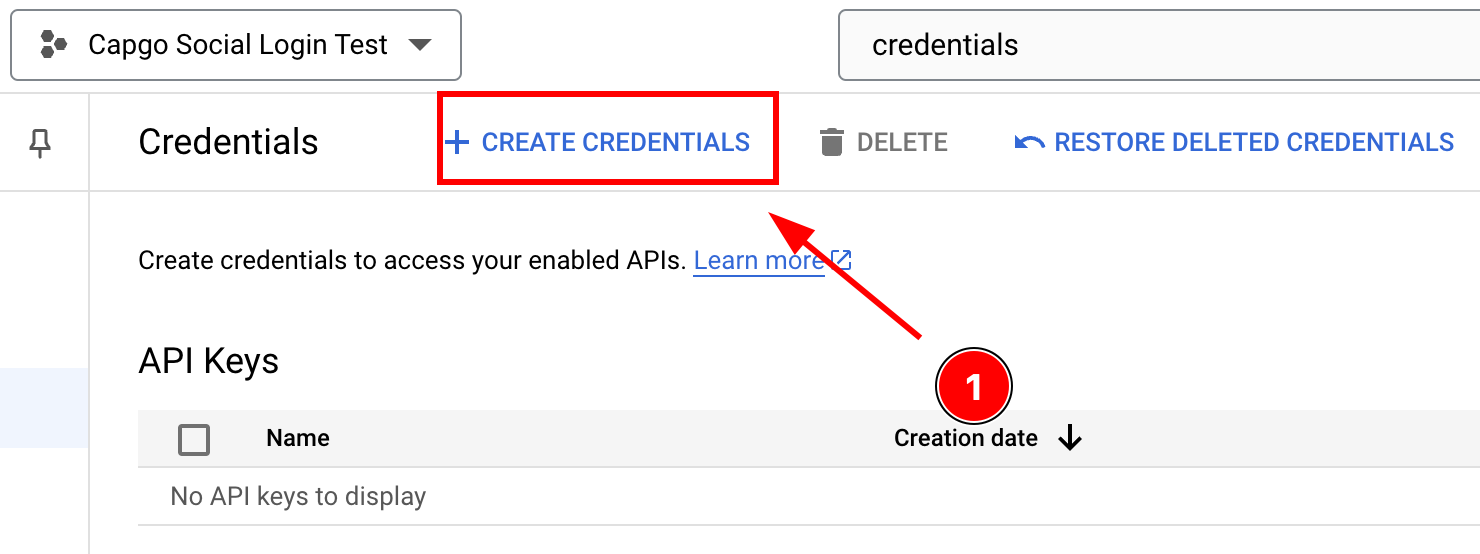
-
Wählen Sie
OAuth client ID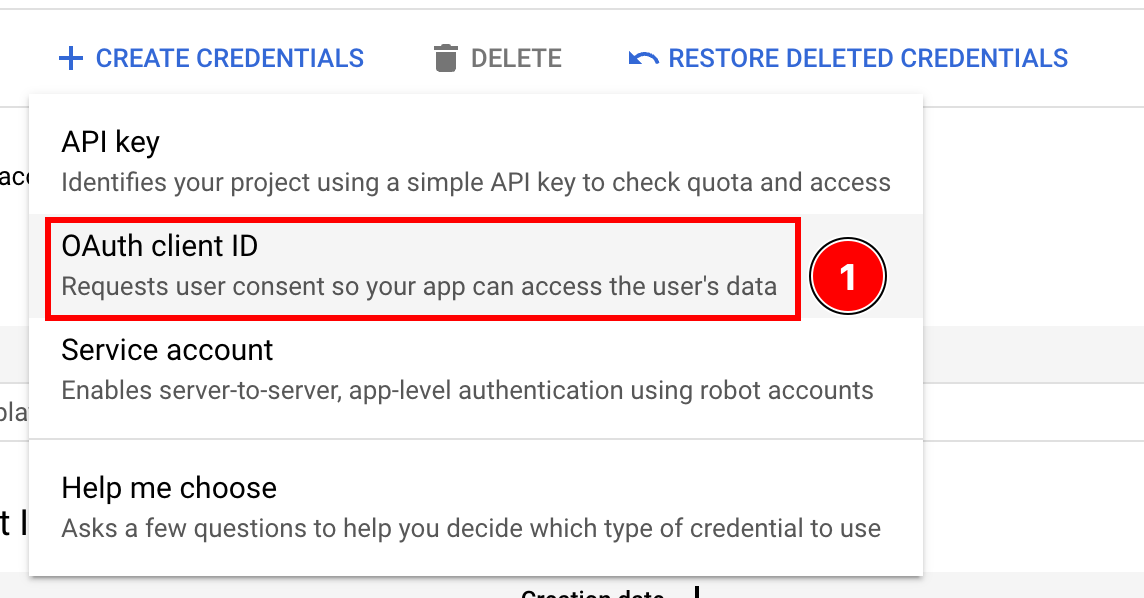
-
Wählen Sie den
Application typeaufiOS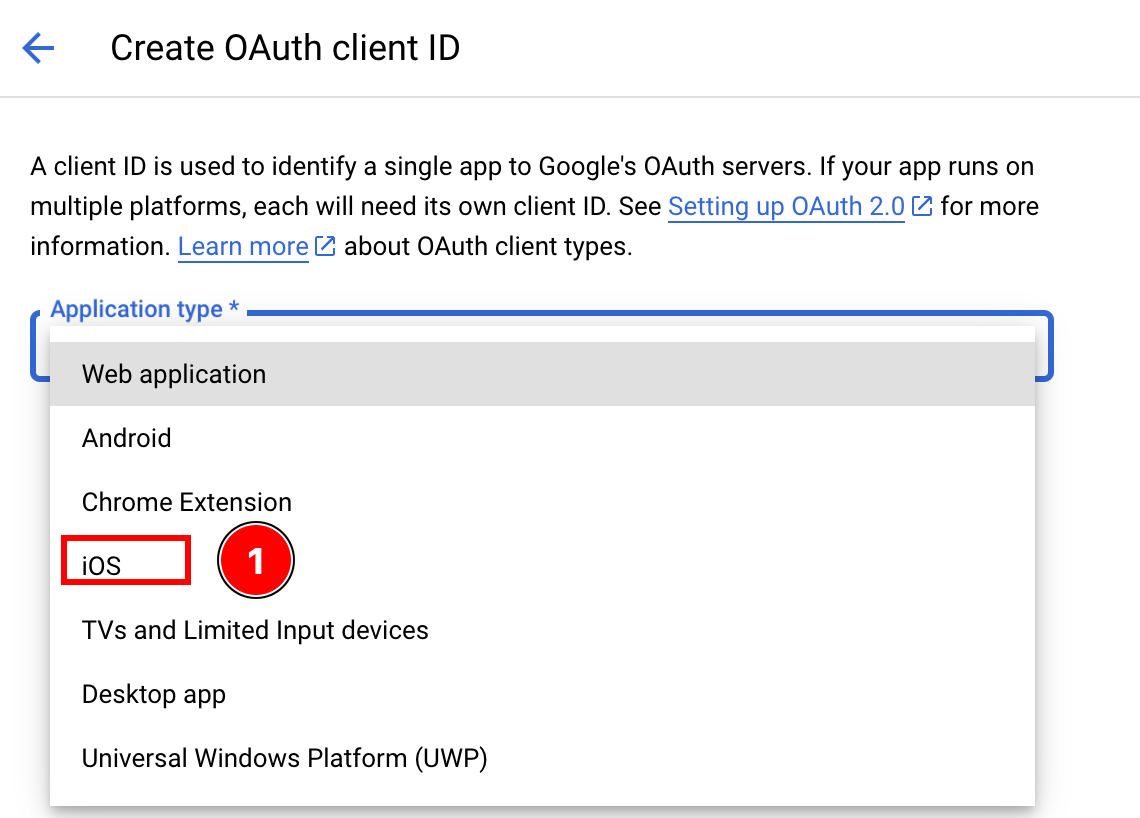
-
Finden Sie die Bundle ID
-
Öffnen Sie Xcode
-
Doppelklicken Sie auf
App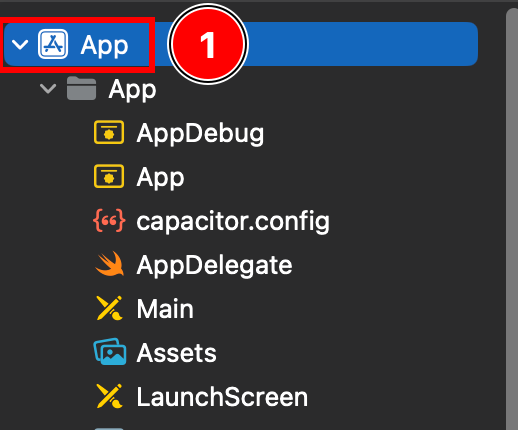
-
Stellen Sie sicher, dass Sie sich bei
Targets -> Appbefinden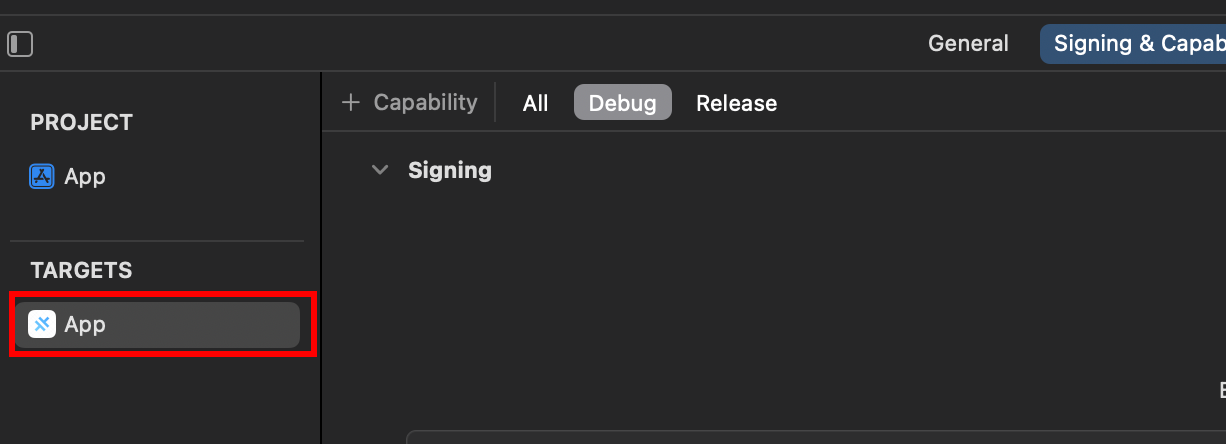
-
Finden Sie Ihre
Bundle Identifier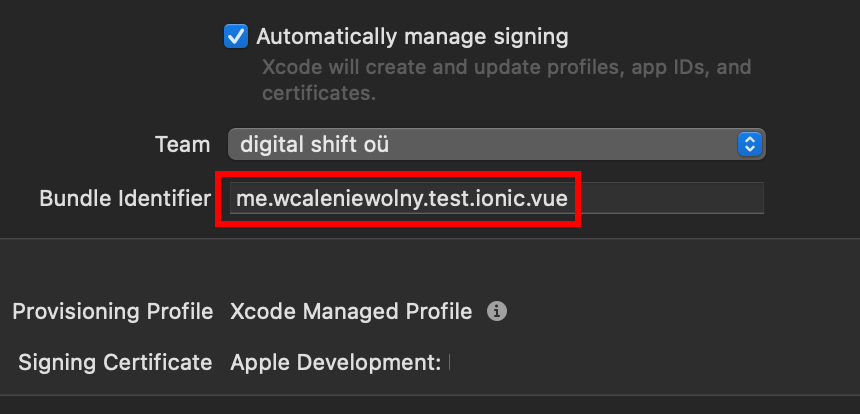
-
Gehen Sie zurück zur Google Console und fügen Sie Ihre
Bundle IdentifierinBundle IDein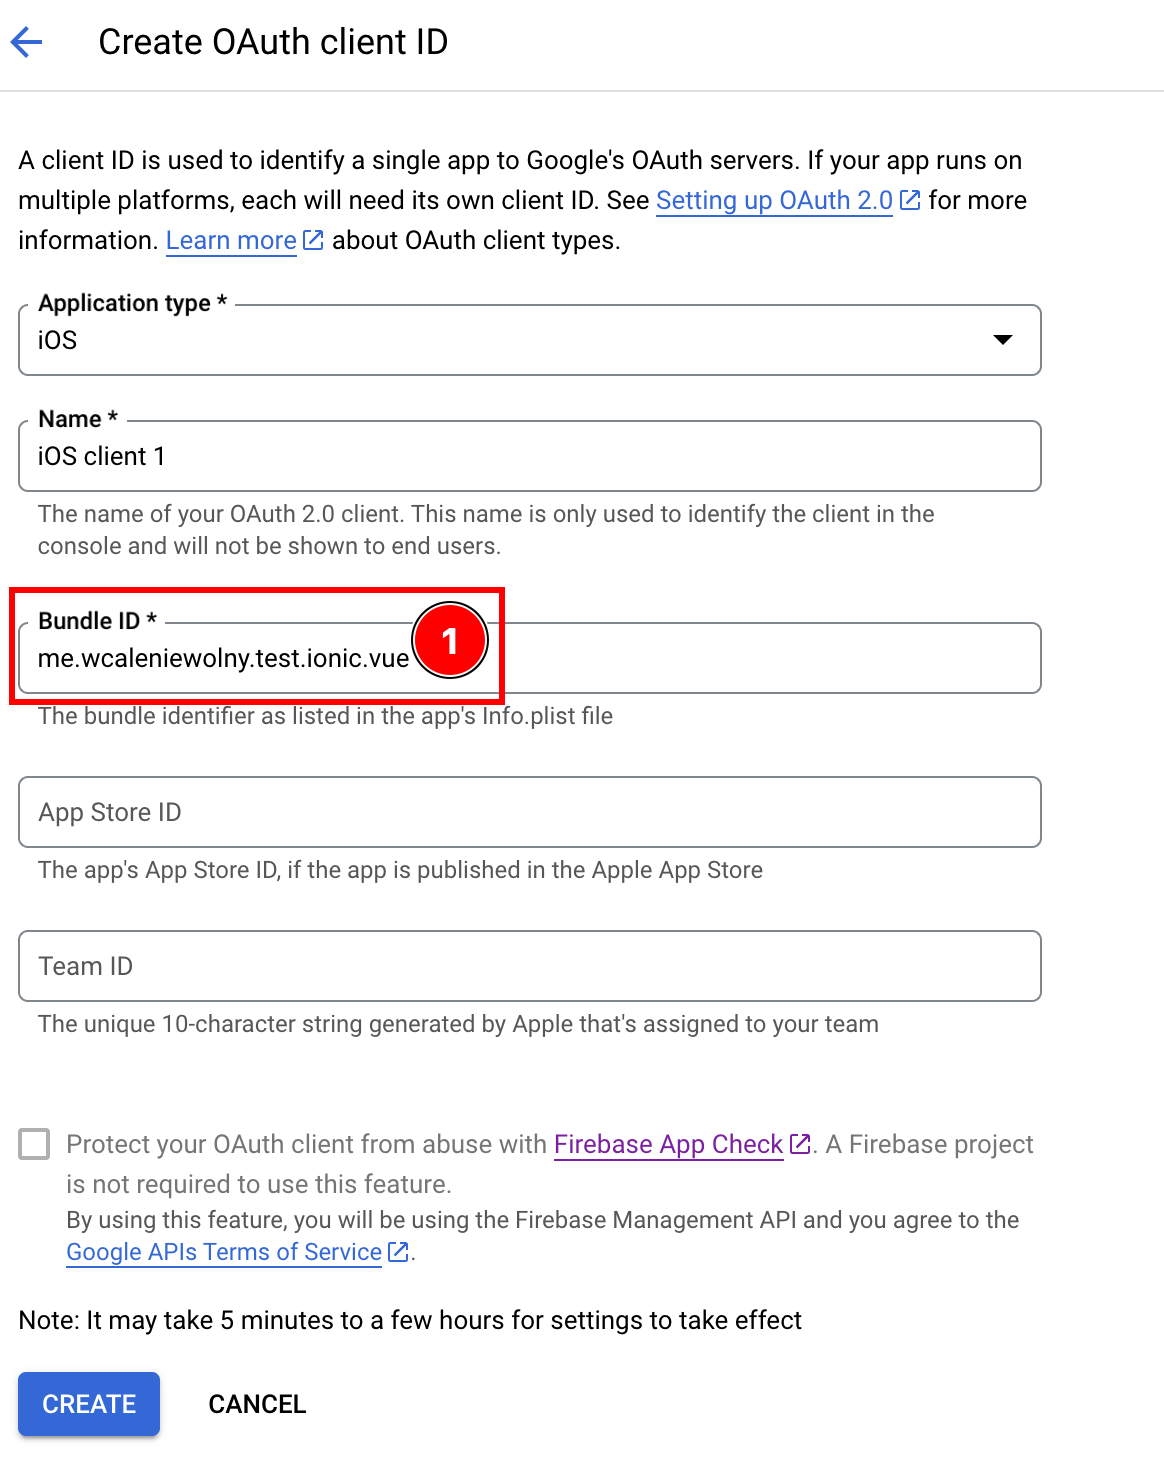
-
-
Optional fügen Sie Ihre
App Store IDoderTeam IDzur Client-ID hinzu, wenn Sie Ihre App im App Store veröffentlicht haben -
Nachdem Sie alle Details ausgefüllt haben, klicken Sie auf
create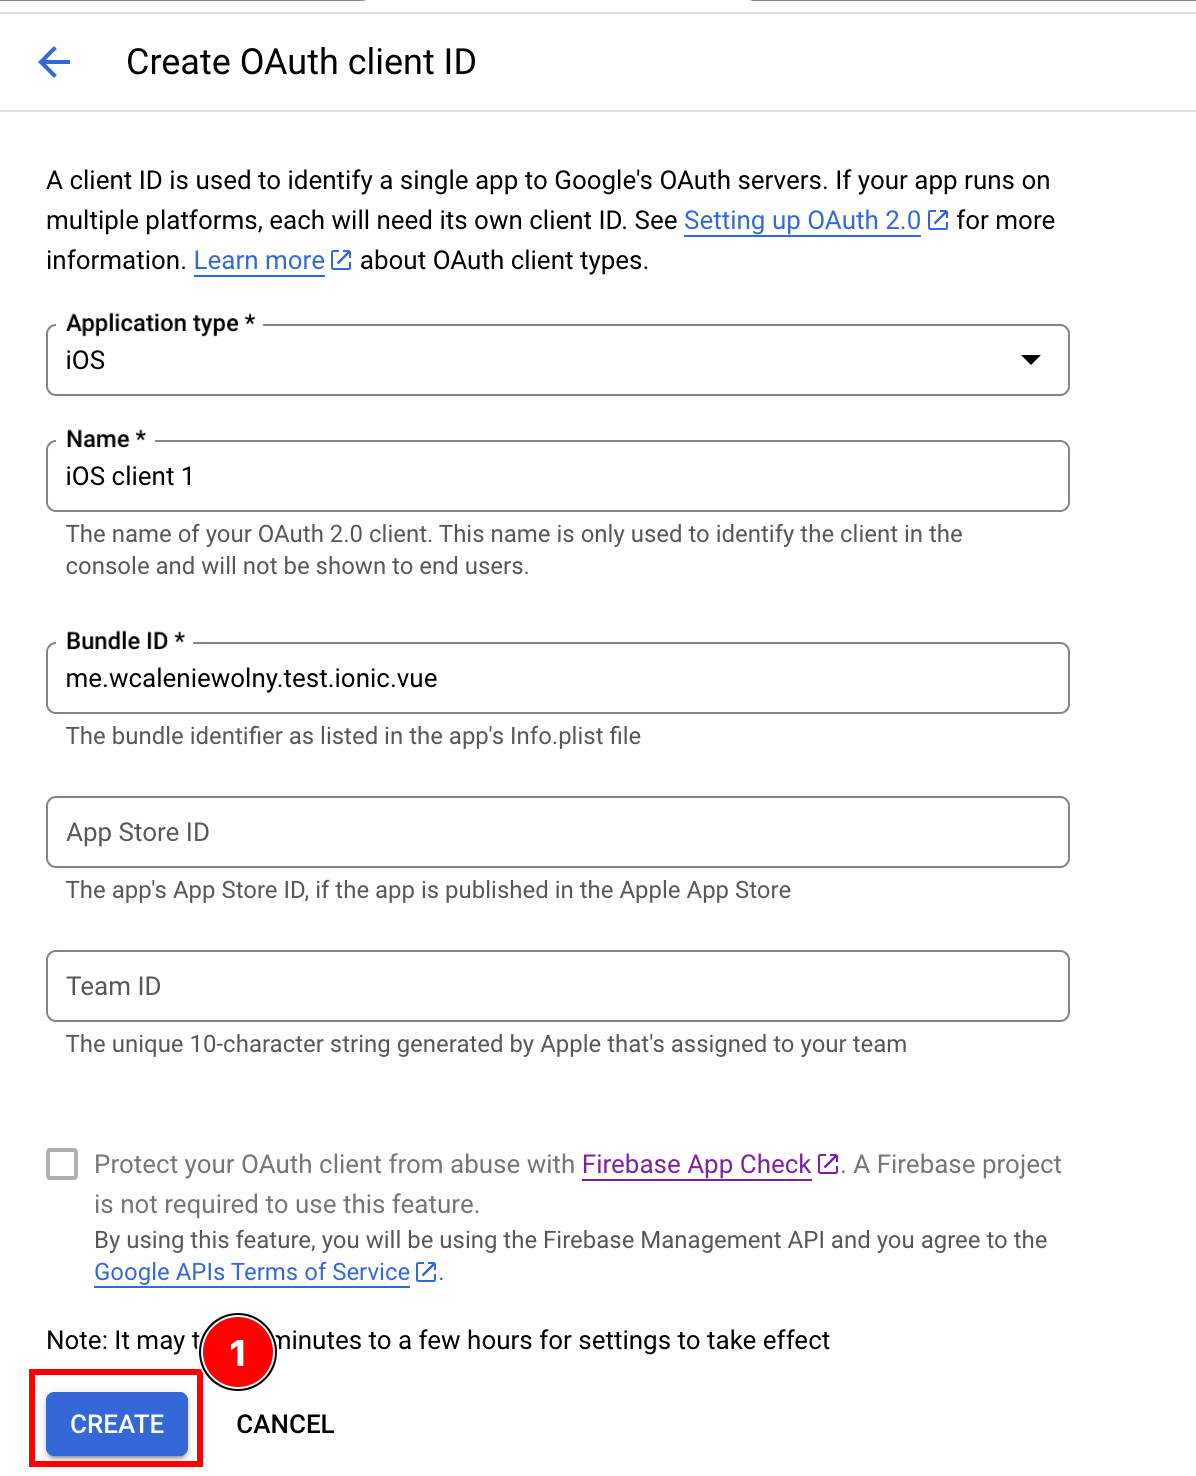
-
Klicken Sie auf
OK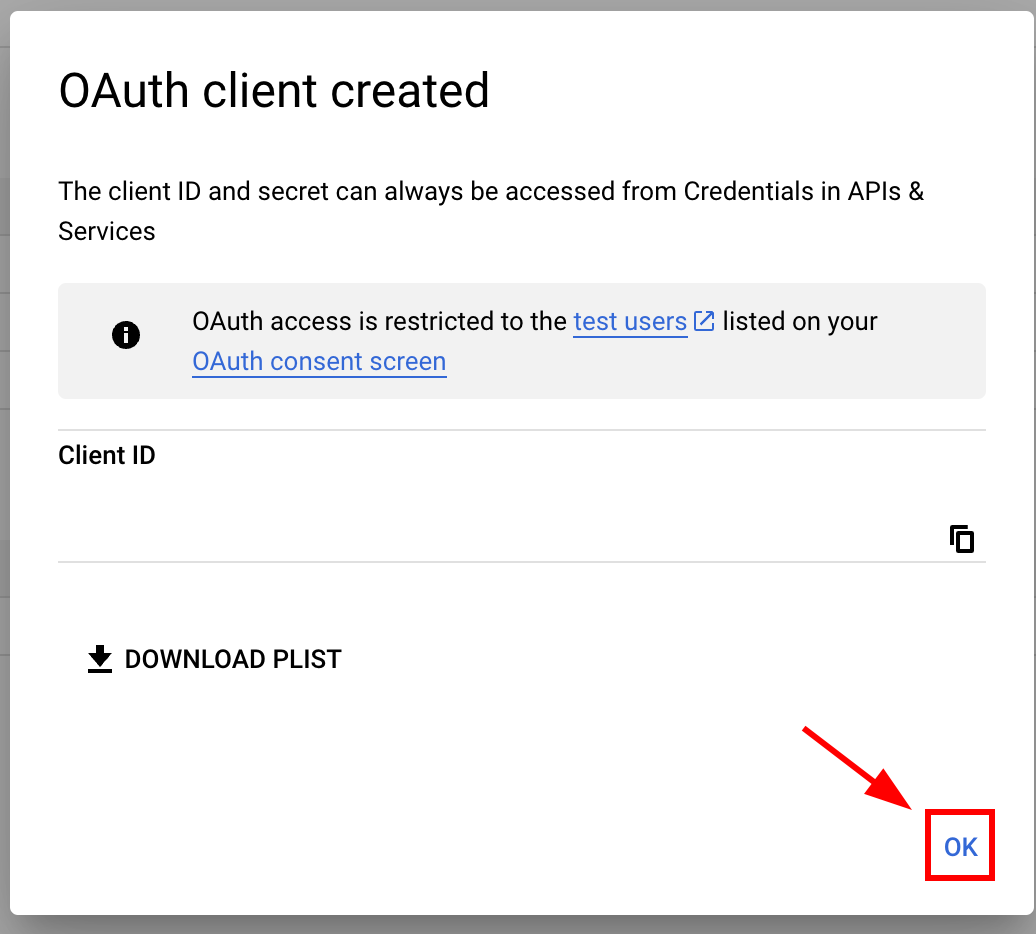
-
Öffnen Sie den neu erstellten iOS-Client
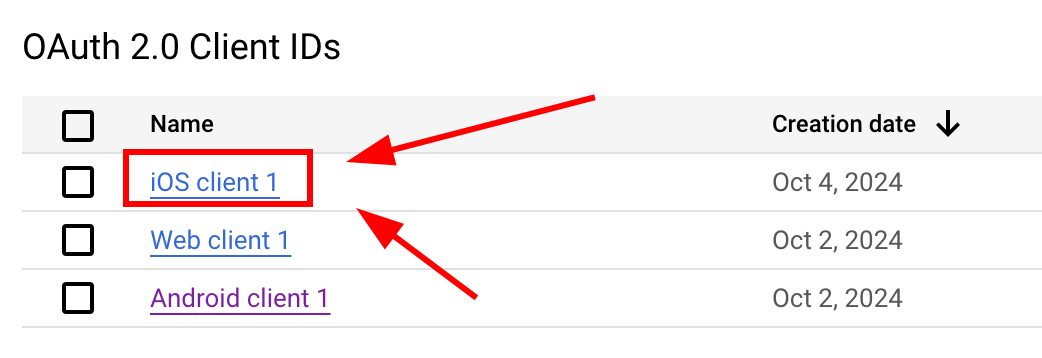
-
Kopieren Sie die folgenden Daten

-
-
Ändern Sie die Info.plist Ihrer App
-
Öffnen Sie Xcode und finden Sie die
Info.plistDatei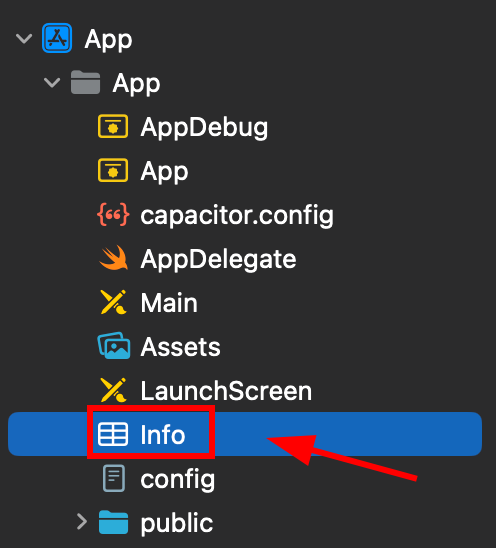
-
Rechtsklicken Sie auf diese Datei und öffnen Sie sie als Quellcode
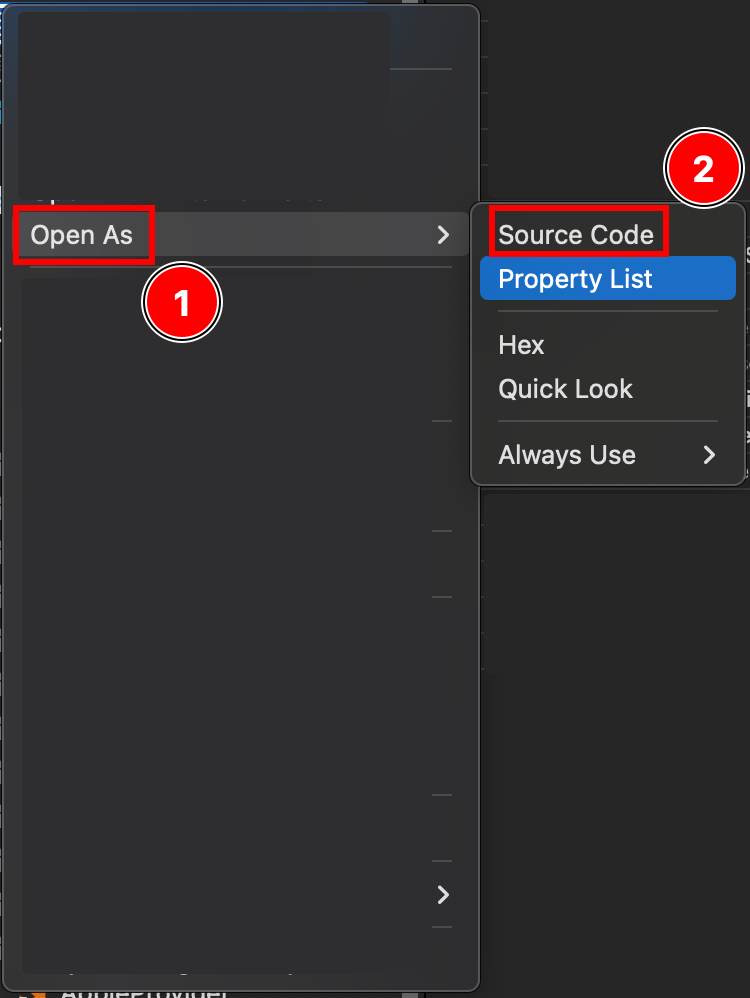
-
Am Ende Ihrer
PlistDatei sehen Sie ein</dict>Tag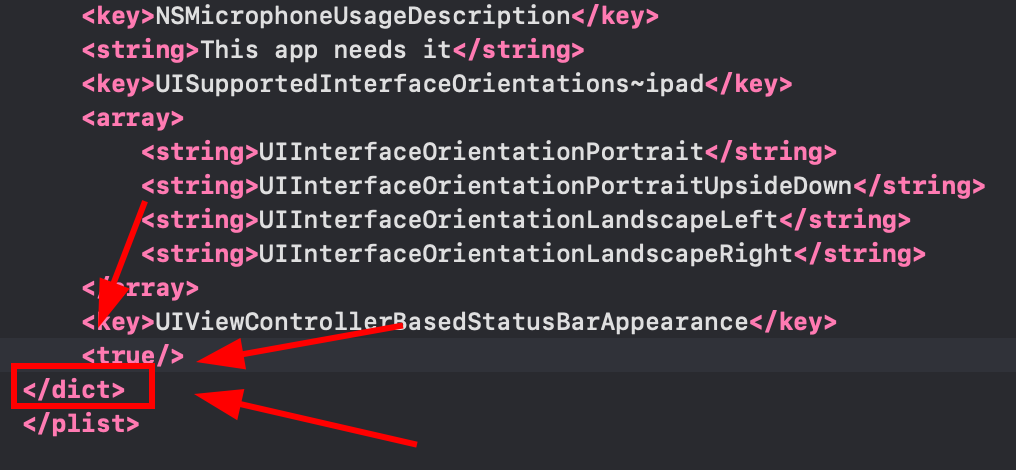
-
Fügen Sie das folgende Fragment direkt vor dem schließenden
</dict>Tag ein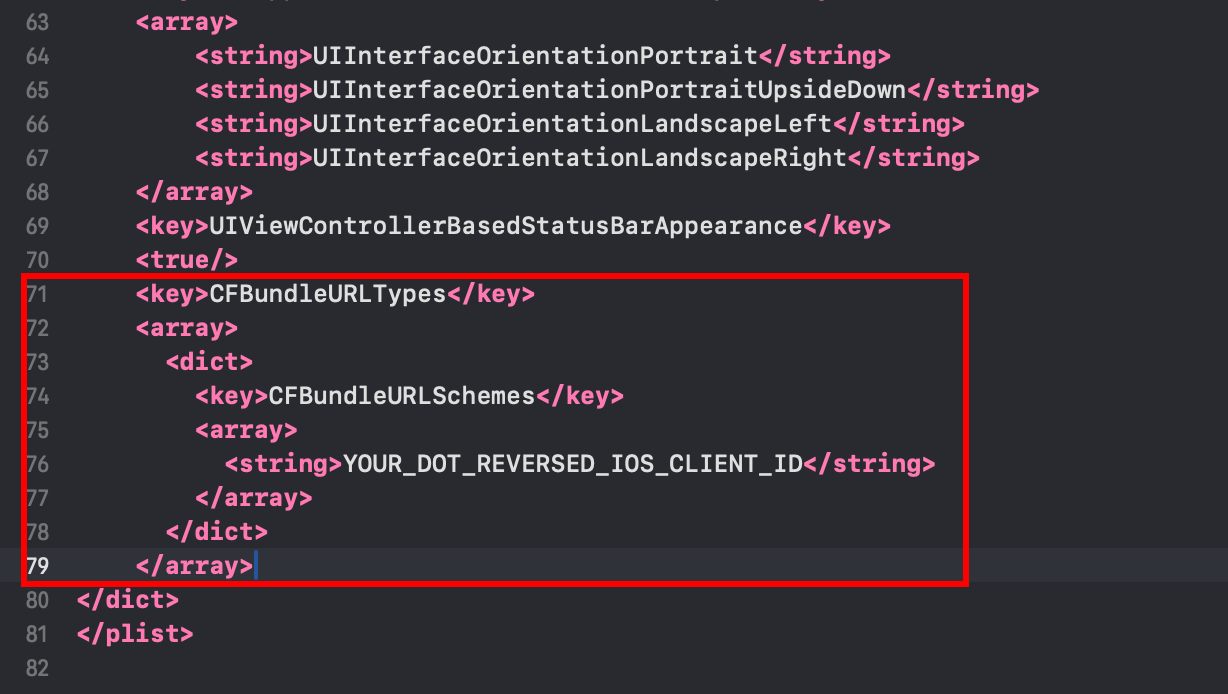 <key>CFBundleURLTypes</key><array><dict><key>CFBundleURLSchemes</key><array><string>YOUR_DOT_REVERSED_IOS_CLIENT_ID</string></array></dict></array>
 -
Ändern Sie die
YOUR_DOT_REVERSED_IOS_CLIENT_IDin den im vorherigen Schritt kopierten Wert
-
Speichern Sie die Datei mit
Command + S
-
-
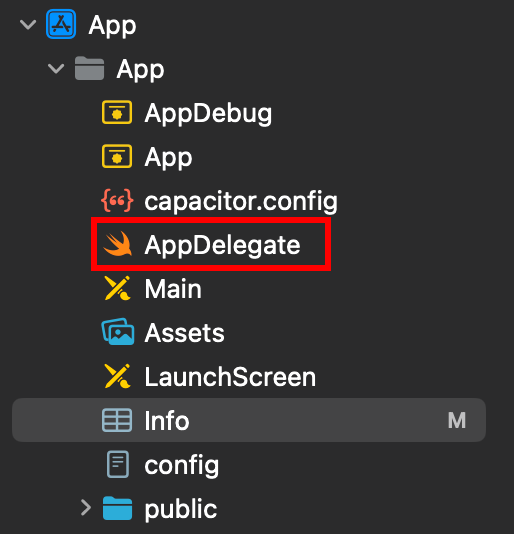
Ändern Sie die
AppDelegate.swift-
Öffnen Sie das AppDelegate
-
Fügen Sie
import GoogleSignInam Anfang der Datei ein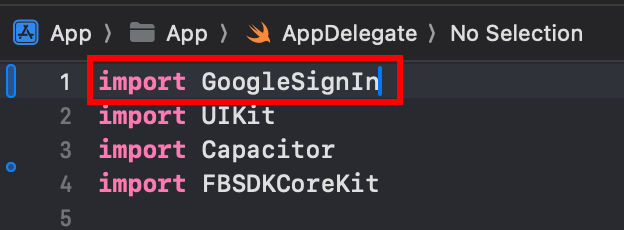
-
Finden Sie die
func application(_ app: UIApplication, open url: URL, options: [UIApplication.OpenURLOptionsKey: Any] = [:])Funktion
-
Ändern Sie die Funktion so, dass sie folgendermaßen aussieht
func application(_ app: UIApplication, open url: URL, options: [UIApplication.OpenURLOptionsKey: Any] = [:]) -> Bool {// Called when the app was launched with a url. Feel free to add additional processing here,// but if you want the App API to support tracking app url opens, make sure to keep this callvar handled: Boolhandled = GIDSignIn.sharedInstance.handle(url)if handled {return true}return ApplicationDelegateProxy.shared.application(app, open: url, options: options)}
-
Speichern Sie die Datei mit
Command + S
-
-
Richten Sie Google Login in Ihrem JavaScript/TypeScript Code ein
-
Importieren Sie
SocialLoginundCapacitorimport { SocialLogin } from '@capgo/capacitor-social-login';import { Capacitor } from '@capacitor/core'; -
Rufen Sie die initialize Methode auf (dies sollte nur einmal aufgerufen werden)
Grundlegende Einrichtung (Online-Modus - empfohlen für die meisten Apps):
// onMounted ist Vue-spezifischonMounted(() => {SocialLogin.initialize({google: {iOSClientId: '673324426943-redacted.apps.googleusercontent.com',mode: 'online' // Standard-Modus}})})Erweiterte Einrichtung mit zusätzlichen Client-IDs:
onMounted(() => {SocialLogin.initialize({google: {webClientId: 'YOUR_WEB_CLIENT_ID', // Optional: für Web-Plattform-UnterstützungiOSClientId: 'YOUR_IOS_CLIENT_ID', // Erforderlich: aus Schritt 1iOSServerClientId: 'YOUR_WEB_CLIENT_ID', // Optional: gleicher Wert wie webClientId, benötigt für einige erweiterte Funktionenmode: 'online' // 'online' oder 'offline'}})}) -
Implementieren Sie die Login-Funktion. Erstellen Sie eine Schaltfläche und führen Sie den folgenden Code beim Klicken aus
Für Online-Modus:
const res = await SocialLogin.login({provider: 'google',options: {}})// Antwort verarbeiten - enthält Benutzerdatenconsole.log(JSON.stringify(res))Für Offline-Modus:
const res = await SocialLogin.login({provider: 'google',options: {forceRefreshToken: true // Empfohlen für Offline-Modus}})// res enthält serverAuthCode, keine Benutzerdaten// Senden Sie serverAuthCode an Ihr Backend, um Benutzerinformationen zu erhaltenconsole.log('Server Auth Code:', res.result.serverAuthCode)
-
-
Testen Sie Ihre Anwendung
-
Bauen Sie Ihre App und führen Sie
cap syncaus -
Wenn Sie alles richtig gemacht haben, sollten Sie sehen, dass der Google-Login-Ablauf ordnungsgemäß funktioniert
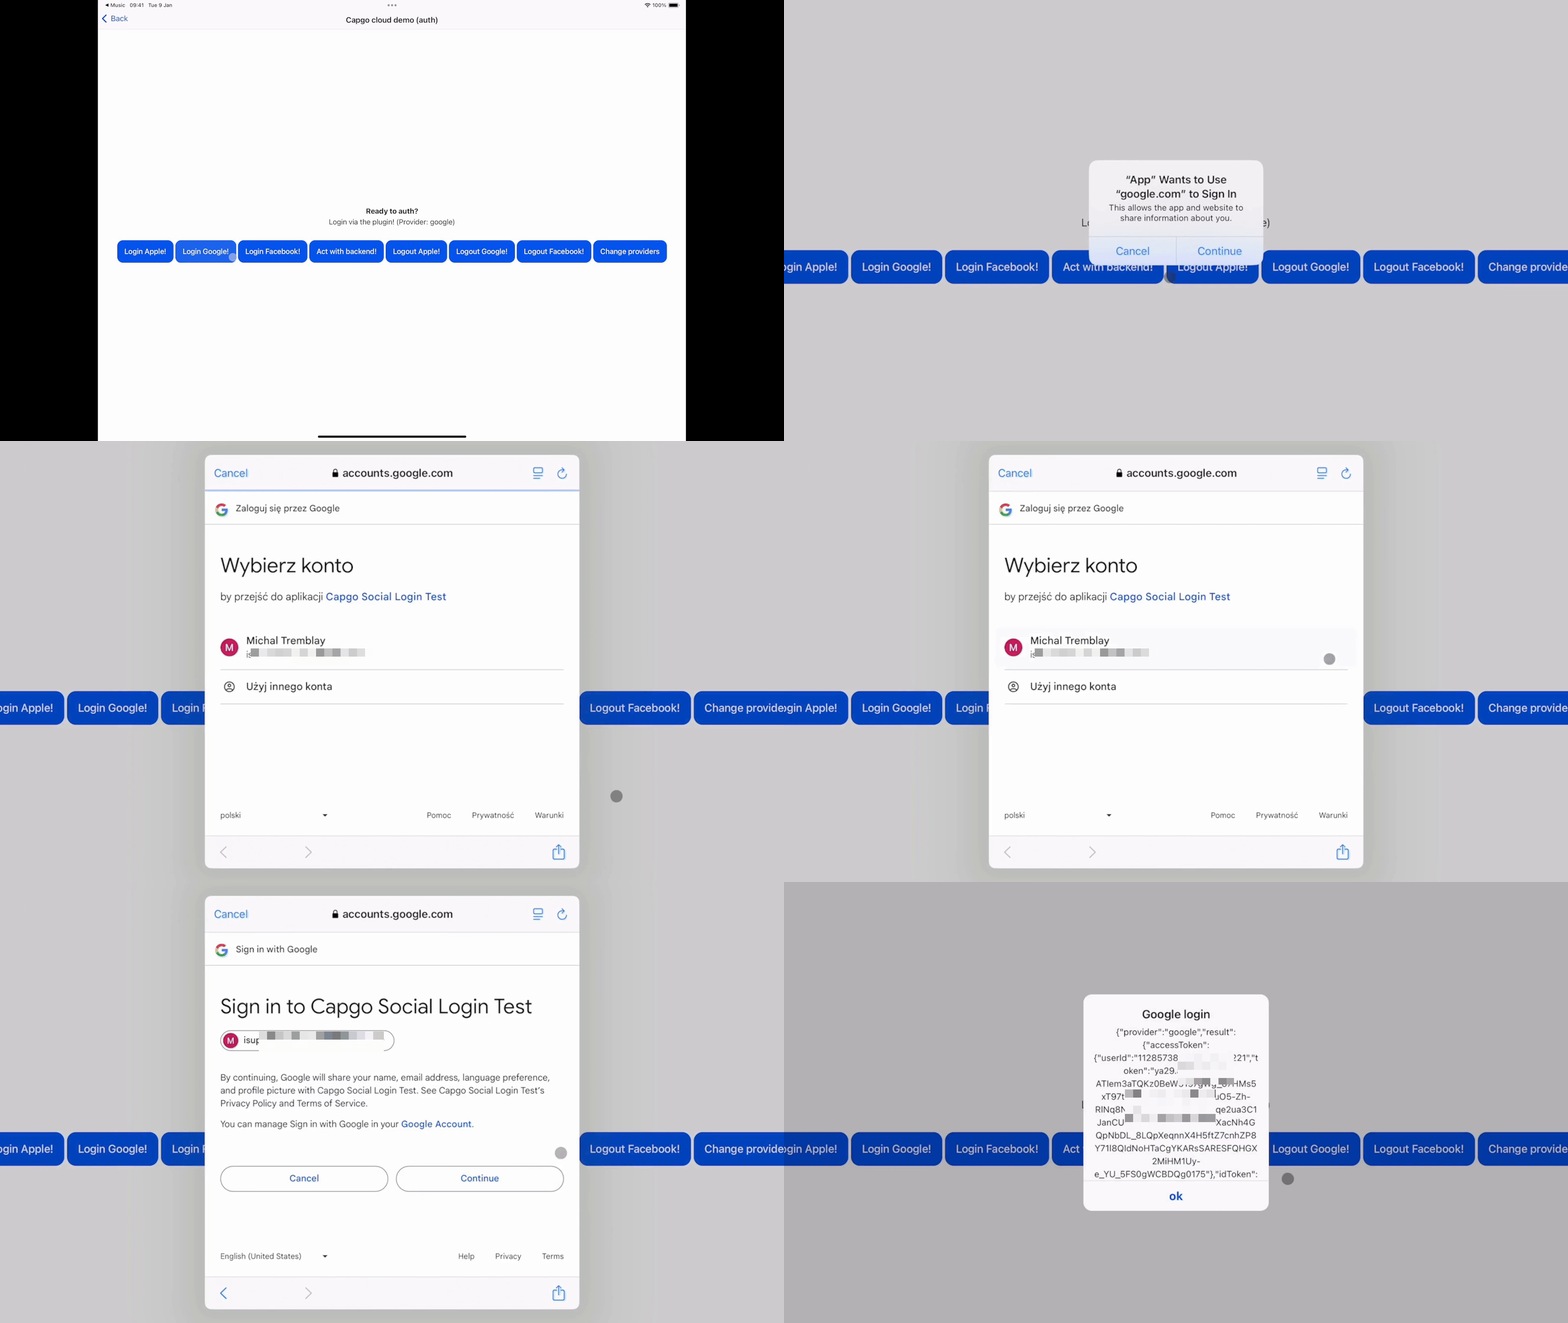
-
Bekannte Probleme
Section titled “Bekannte Probleme”Privacy Screen Plugin Inkompatibilität
Section titled “Privacy Screen Plugin Inkompatibilität”Das Google Login Plugin ist inkompatibel mit @capacitor/privacy-screen. Wenn beide Plugins zusammen verwendet werden, wird die Google-Login-Webansicht durch den Datenschutzbildschirm unterbrochen.
Workaround: Rufen Sie await PrivacyScreen.disable(); auf, bevor Sie die Login-Funktion aufrufen:
import { PrivacyScreen } from '@capacitor/privacy-screen';import { SocialLogin } from '@capgo/capacitor-social-login';
await PrivacyScreen.disable();await SocialLogin.login({  provider: 'google',  options: {}});