Anfangen
Kopieren Sie eine Einrichtungsanweisung mit den Installationsanweisungen und der vollständigen Markdown-Guideline für diesen Plugin.
        Set up this Capacitor plugin in the project.

Use the package manager already used by the project.
Install these package(s): `@capgo/capacitor-updater`
Run the required Capacitor sync/update step after installation.
Read this markdown guide for the full setup steps: https://raw.githubusercontent.com/Cap-go/website/refs/heads/main/apps/docs/src/content/docs/docs/plugins/updater/local-dev/getting-started.mdx
Use that guide for platform-specific steps, native file edits, permissions, config changes, imports, and usage setup.
If that guide references other docs pages, read them too.
Was wird in diesem Tutorial behandelt?
Abschnitt mit dem Titel „Was wird in diesem Tutorial behandelt?“Dieses Tutorial zeigt, wie man Supabase von Grund auf startet sowie Edge-Funktionen startet.
Anforderungen
Abschnitt mit dem Titel „Anforderungen“Um loszulegen führen Sie
supabase startNächstes sollte wie folgt aussehen:
Started supabase local development setup.
         API URL: http://localhost:54321     GraphQL URL: http://localhost:54321/graphql/v1          DB URL: postgresql://postgres:postgres@localhost:54322/postgres      Studio URL: http://localhost:54323    Inbucket URL: http://localhost:54324      JWT secret: [truncated]        anon key: supa_key_anonservice_role key: supa_key_admin
Nächstes öffnen configs.json und setzen Sie die folgenden Werte:
{ "base_domain": { "prod": "console.capgo.app", "development": "development.console.capgo.app", "local": "localhost:3332" }, "supa_anon": { "prod": "supa_key_anon", "development": "supa_key_anon", "local": "supa_key_anon" }, "supa_url": { "prod": "http://localhost:54321", "development": "http://localhost:54321", "local": "http://localhost:54321" }}wo supa_key_anon der Wert aus dem vorherigen Schritt ist.
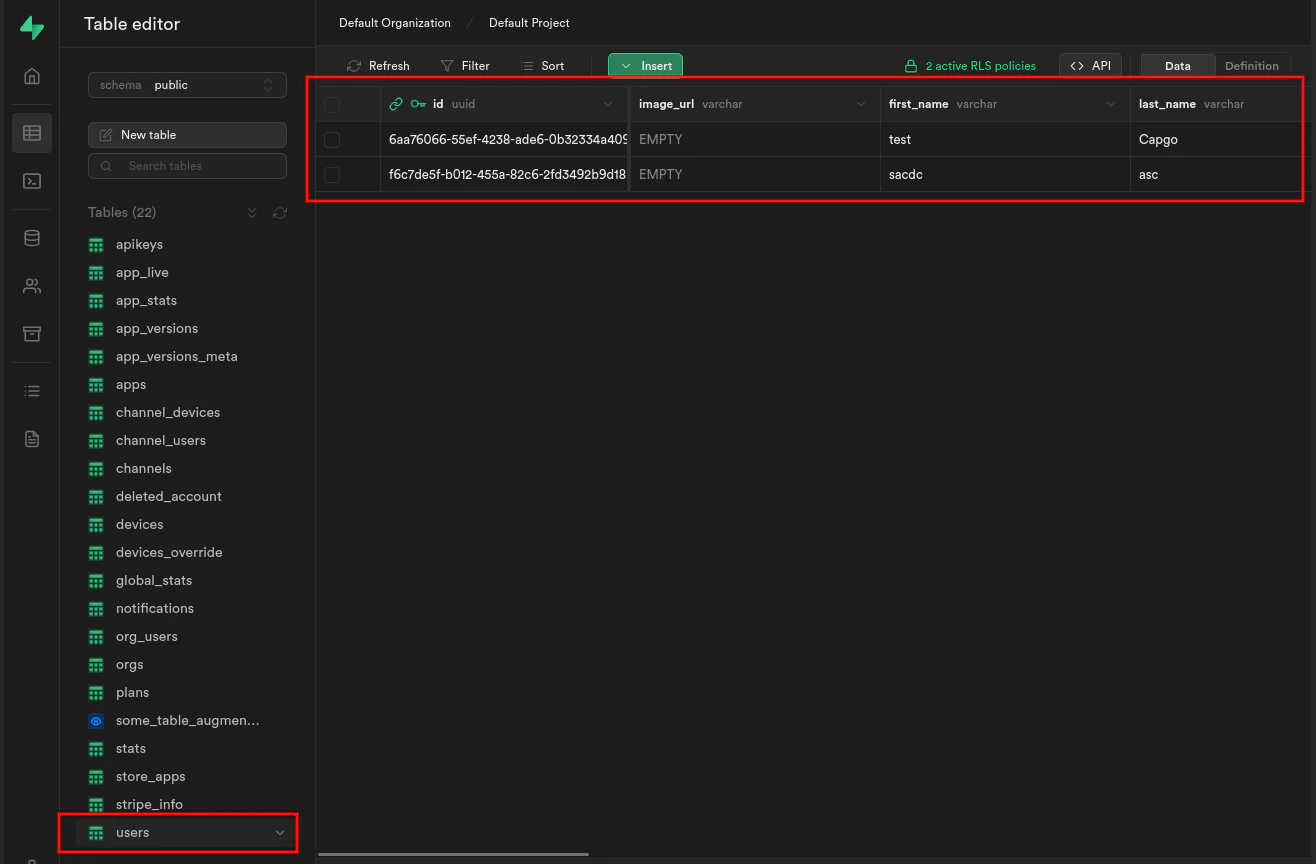
Nächstens überprüfen Sie, ob Sie auf localhost:54323 und ob die Tabelle users wie folgt aussieht
Wenn es funktioniert, starten Sie Edge-Funktionen, indem Sie
supabase functions serveund starten Sie die Frontend-Anwendung, indem Sie
bun run serveWeiter von Getting started
Abschnitt mit dem Titel “Weiter von Getting started”Wenn Sie Using verwenden Getting started um native Plugin-Arbeit zu planen, verbinden Sie es mit Mit @capgo/capacitor-Updater für die native Fähigkeit in Mit @capgo/capacitor-Updater, Capgo-Plugin-Verzeichnis für den Produktworkflow in Capgo-Plugin-Verzeichnis, Capacitor-Plugins von Capgo für die Implementierungsdetails in Capacitor Plugins durch Capgo, Plugins hinzufügen oder aktualisieren für die Implementierungsdetails in Plugins hinzufügen oder aktualisieren, und Alternativen zu Ionic Enterprise Plugins für das Produktworkflow in Alternativen zu Ionic Enterprise Plugins.