Supabase Google Masuk - Pengaturan Umum
Pendahuluan
Section titled “Pendahuluan”Panduan ini akan memandu Anda dalam mengintegrasikan Google Masuk dengan Supabase Otentikasi menggunakan plugin Capacitor Login Sosial. Penyiapan ini memungkinkan Anda menggunakan Masuk Google asli pada platform seluler sambil memanfaatkan Supabase Auth untuk autentikasi backend.
Prasyarat
Section titled “Prasyarat”Sebelum memulai, pastikan Anda memiliki:
-
Baca panduan Google Pengaturan Umum Login untuk menyiapkan kredensial Google OAuth
-
Ikuti panduan khusus platform masing-masing untuk menyiapkan kredensial Google OAuth untuk platform target Anda:
Mengaktifkan penyedia Google OAuth di Supabase
Section titled “Mengaktifkan penyedia Google OAuth di Supabase”-
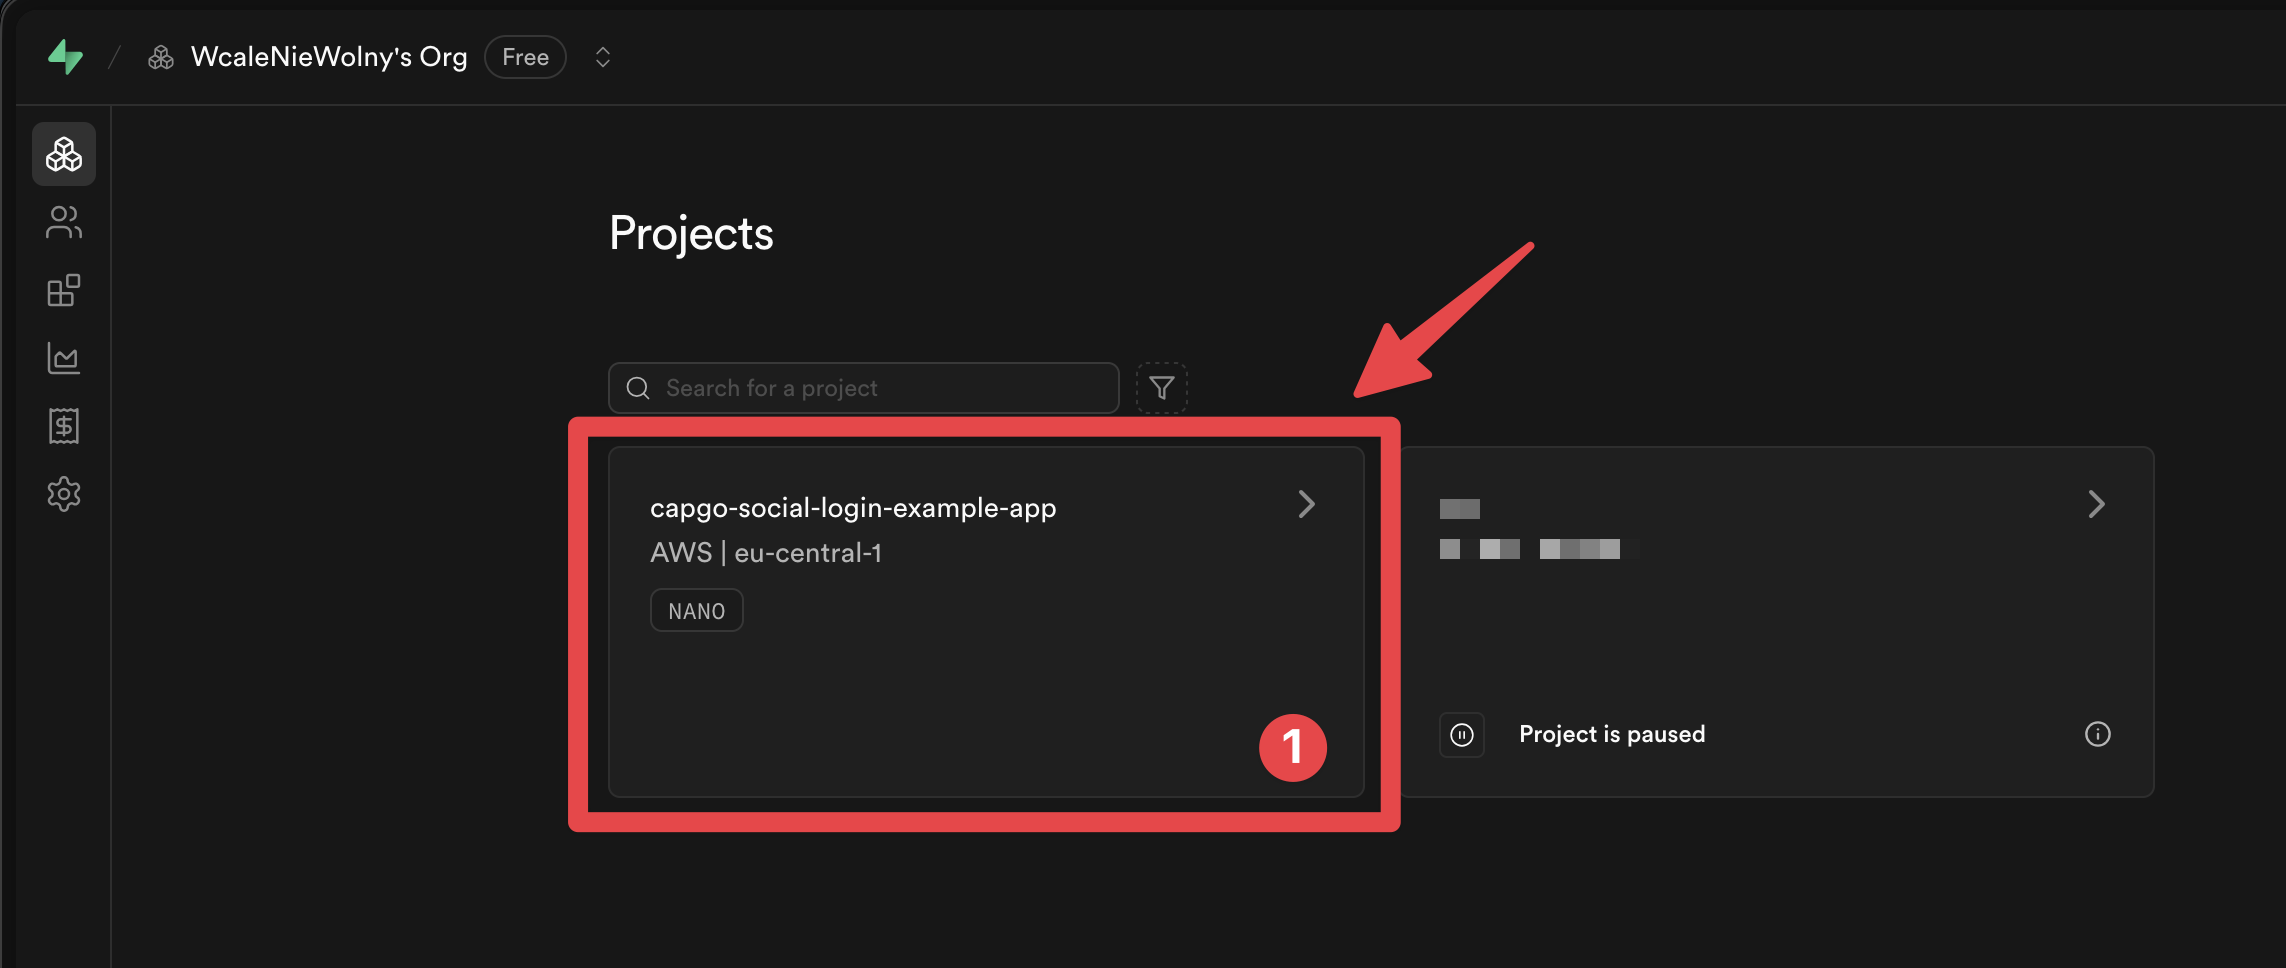
Buka Dasbor Supabase Anda
-
Klik pada proyek Anda
-
Do go to the
Authenticationmenu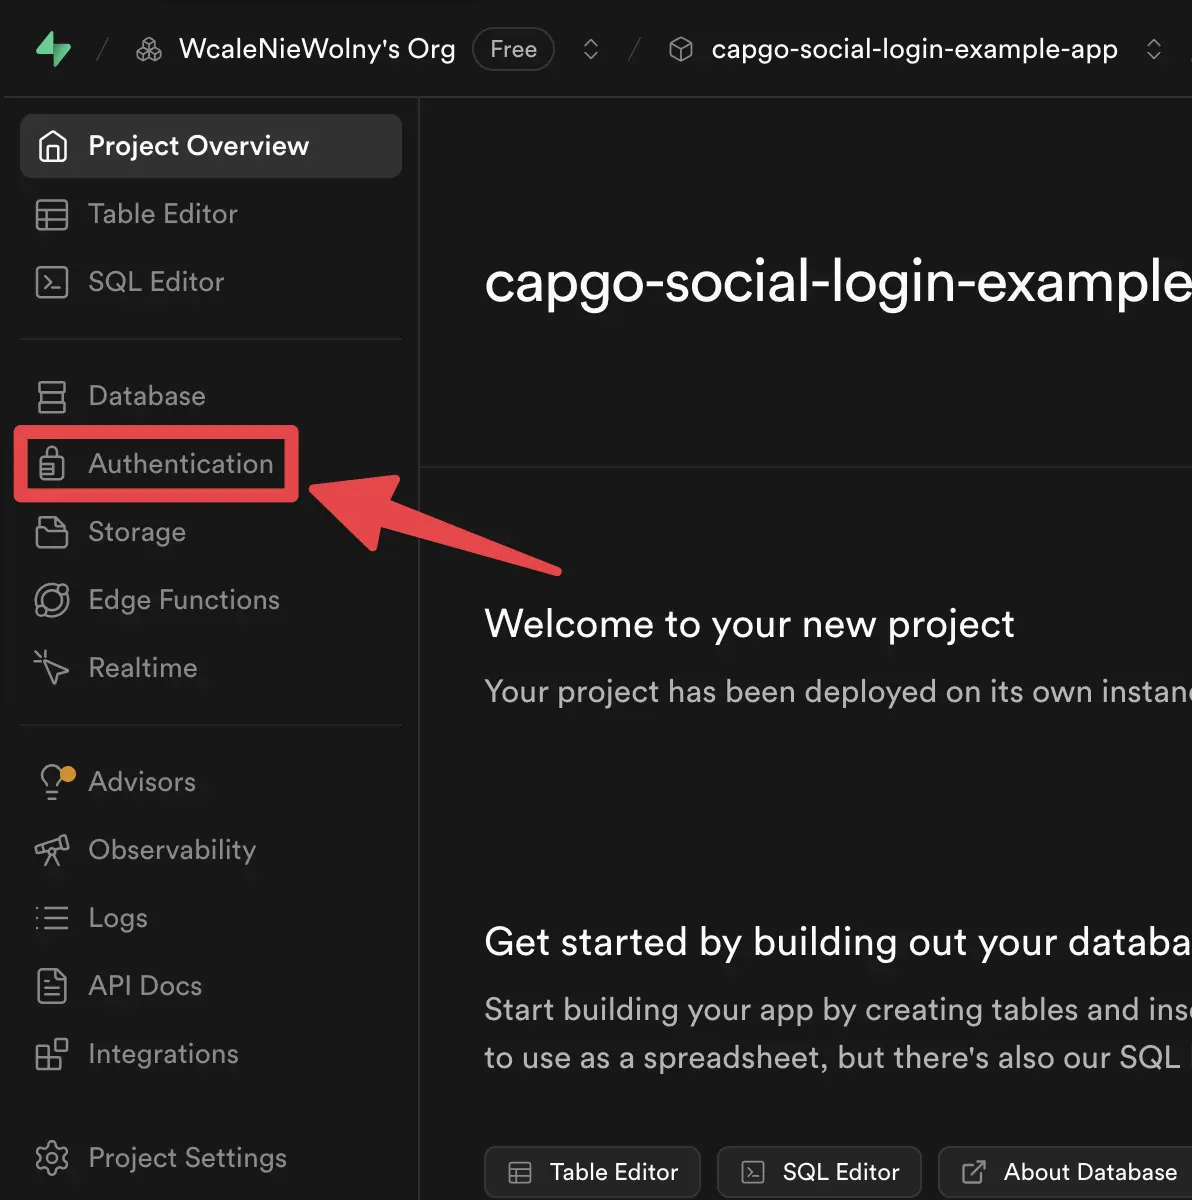
-
Click on the
Providerstab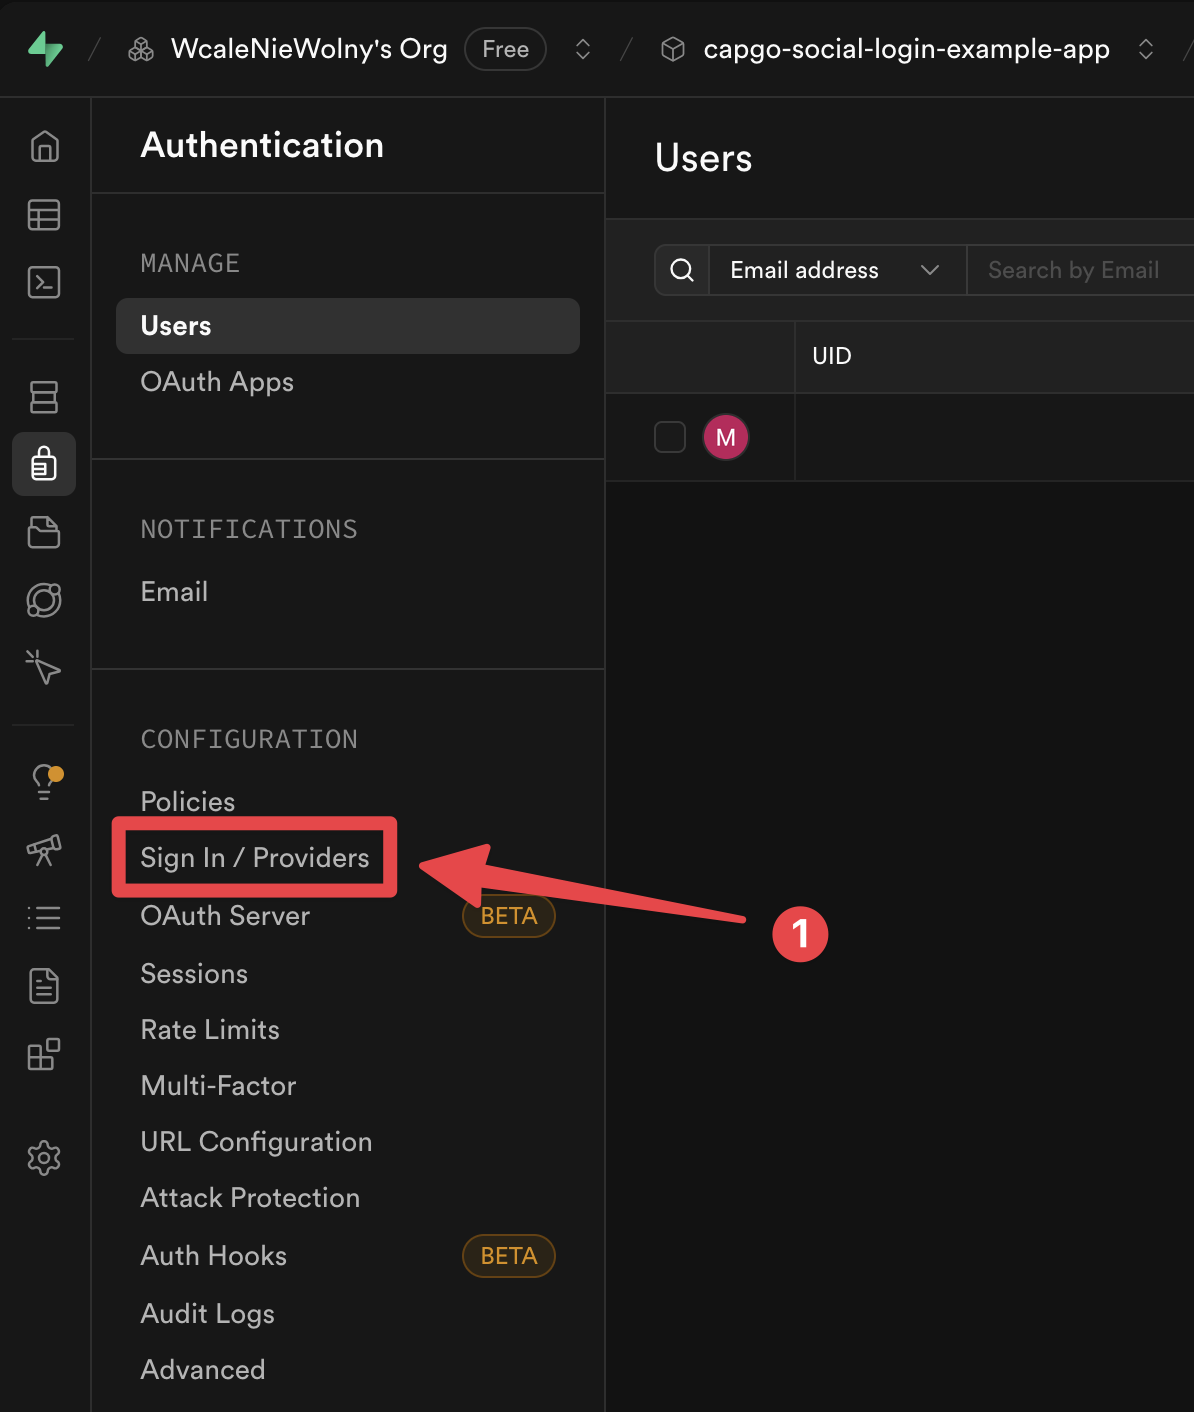
-
Find the
Googleprovider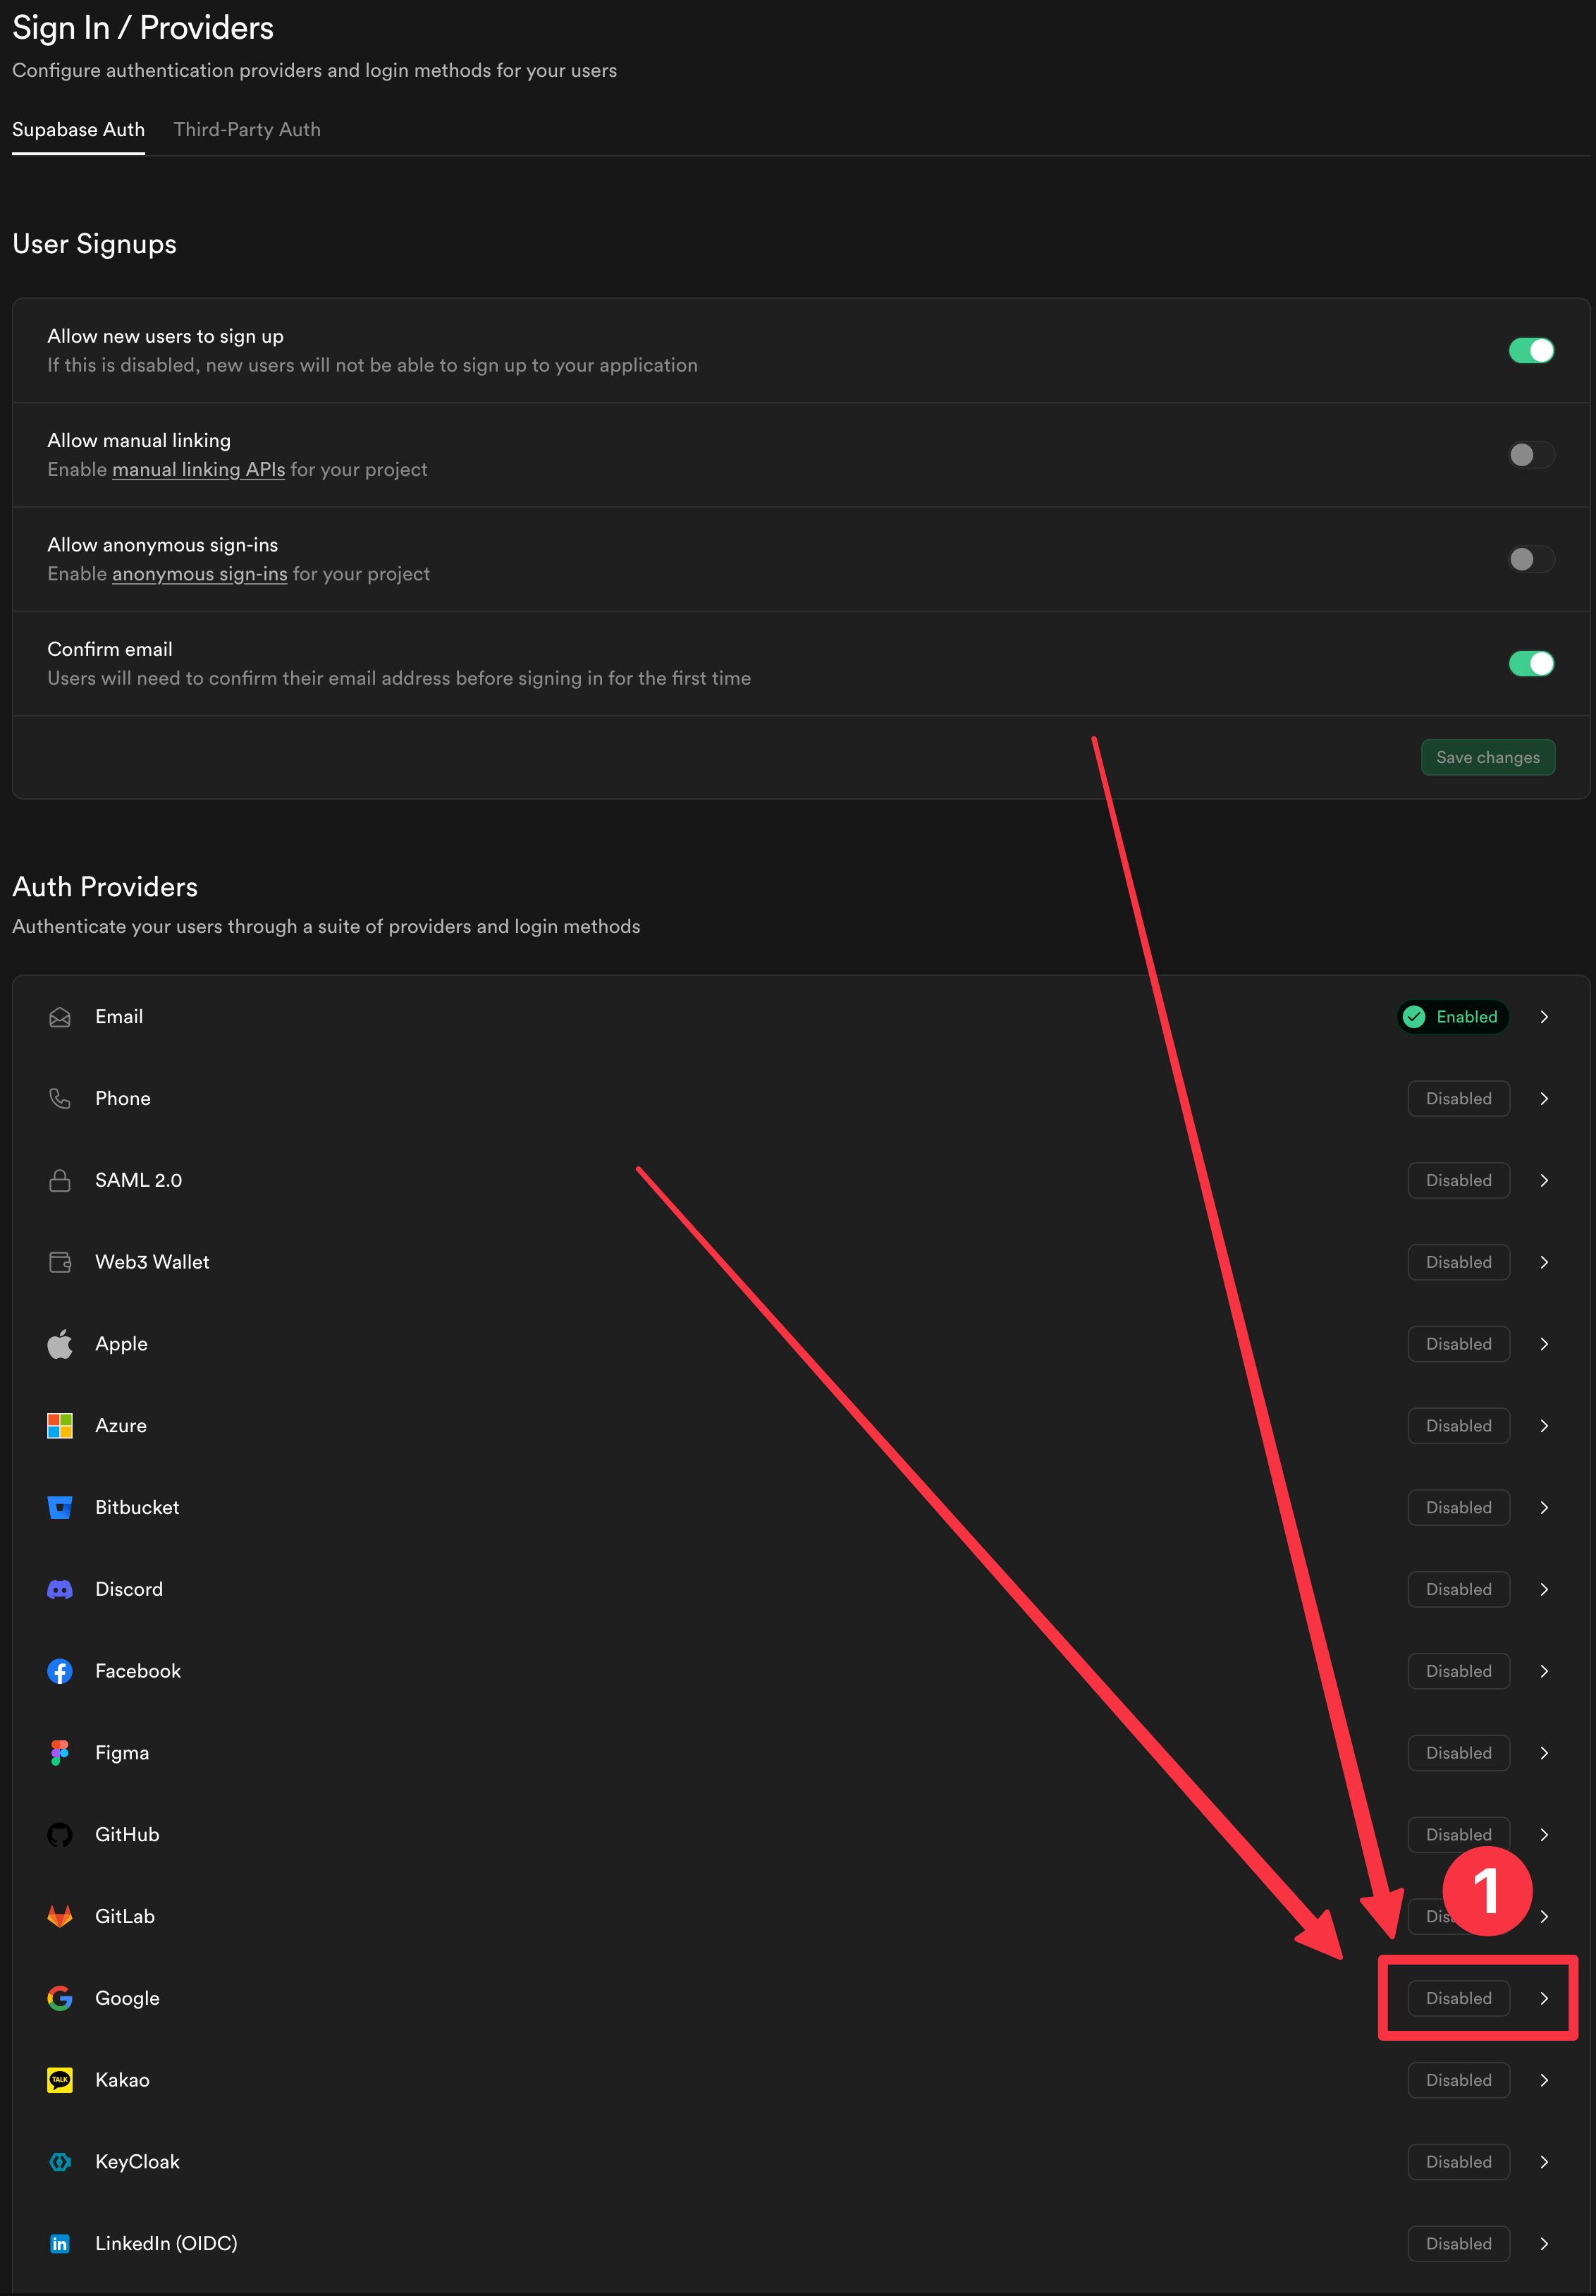
-
Aktifkan penyedia
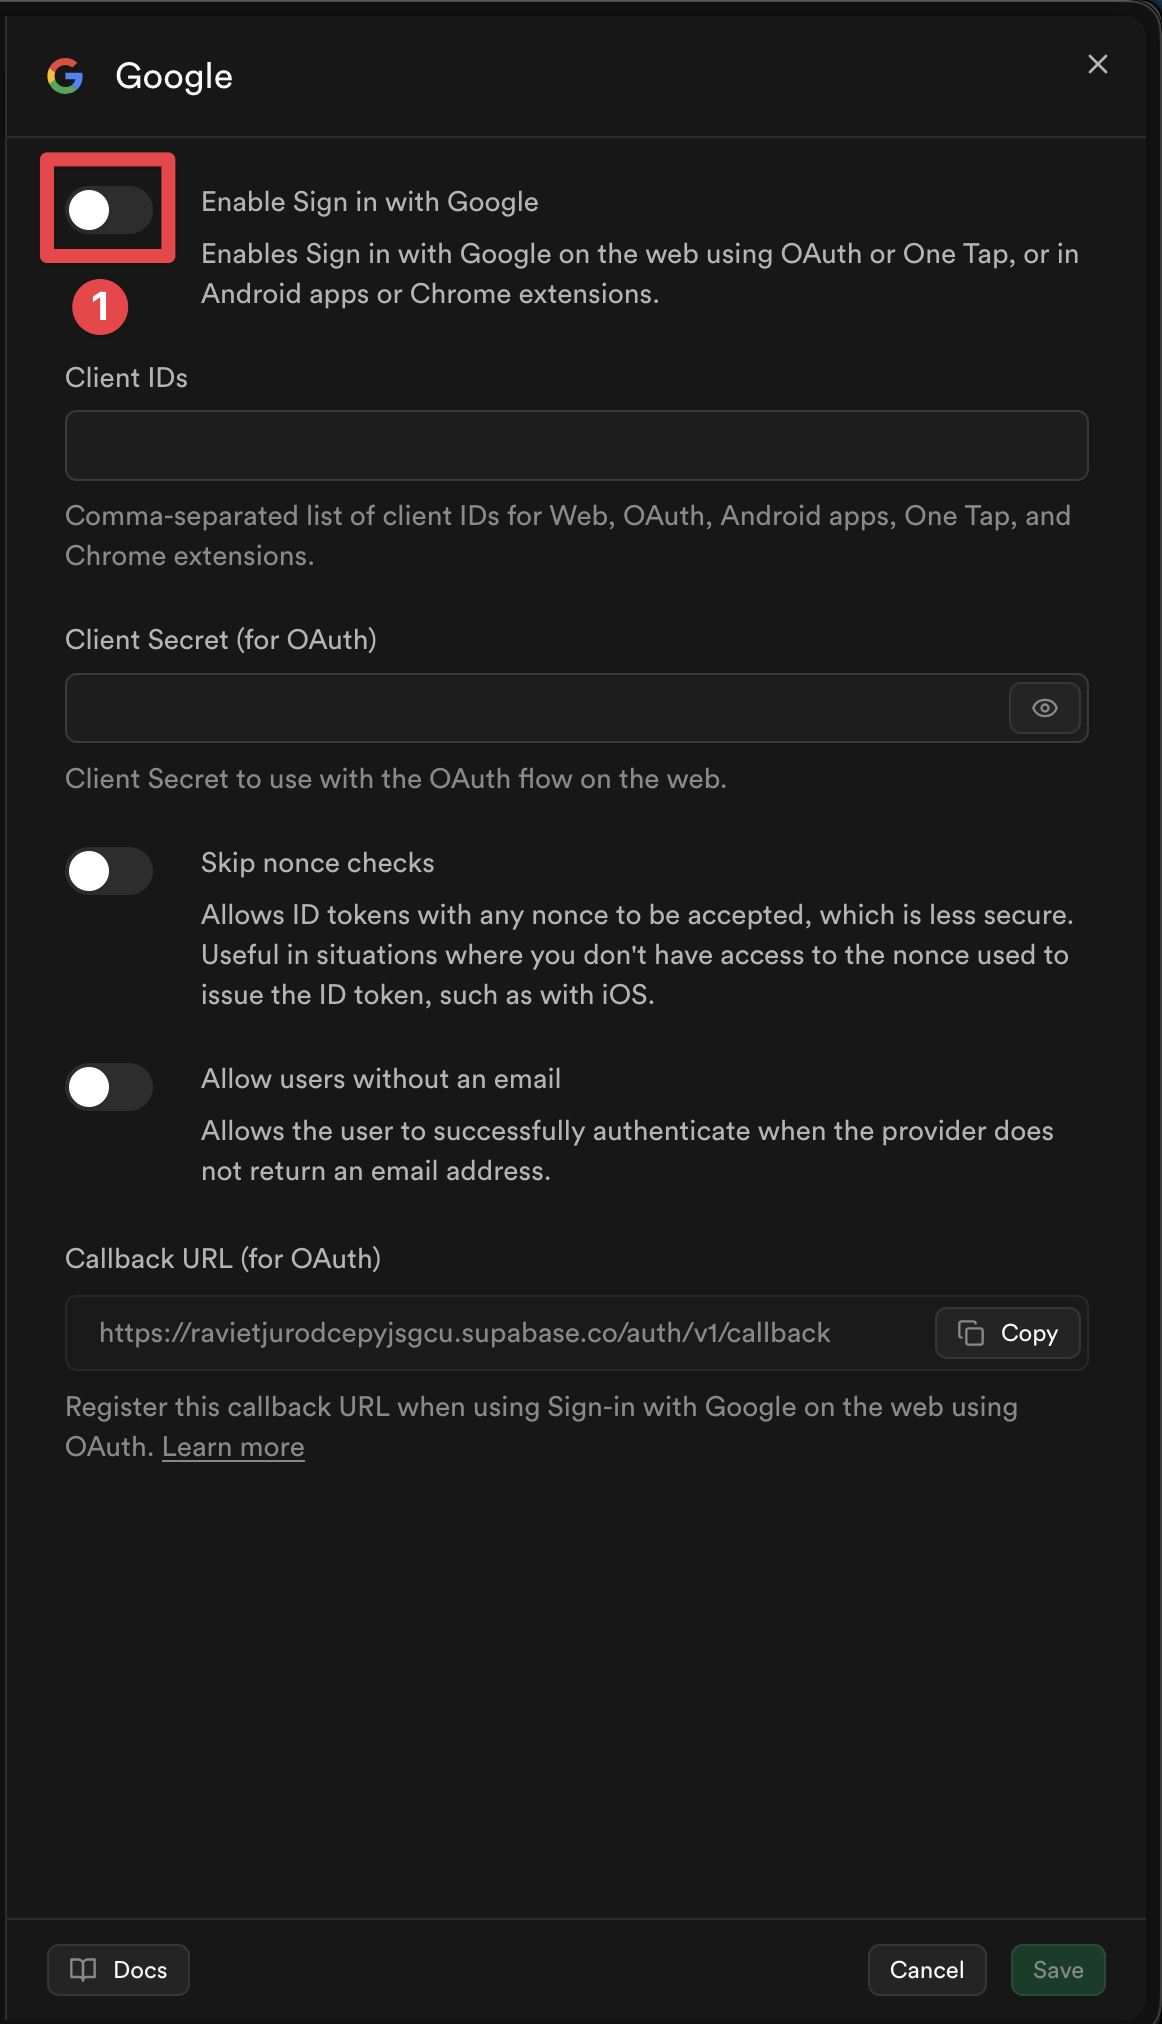
-
Tambahkan ID klien untuk platform yang ingin Anda gunakan

-
Click on the
Savebutton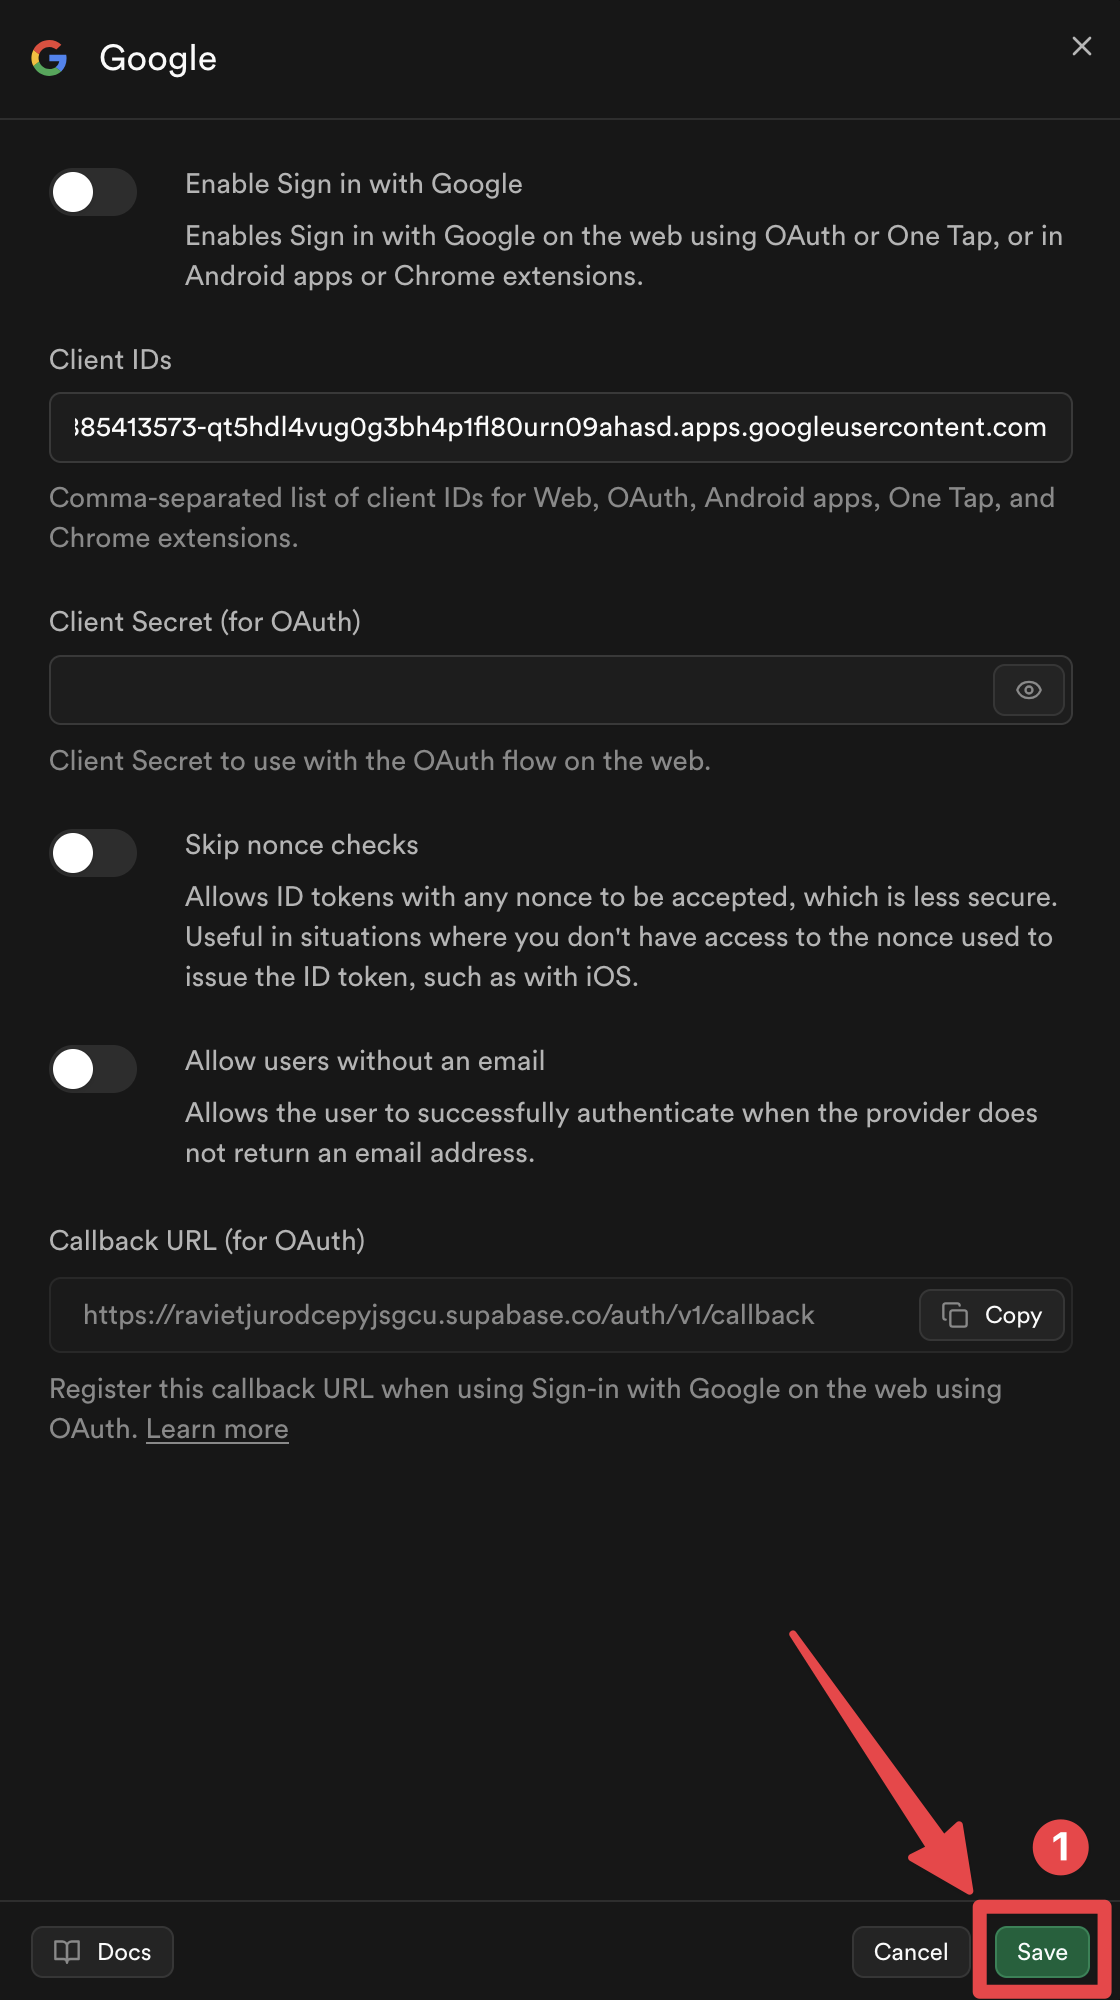
Voila, Anda sekarang telah mengaktifkan Google Masuk dengan Supabase Otentikasi 🎉
Cara Kerja Google Masuk dengan Supabase Pembantu Otentikasi
Section titled “Cara Kerja Google Masuk dengan Supabase Pembantu Otentikasi”Bagian ini menjelaskan cara kerja integrasi Masuk Google dengan Supabase. Memahami alur ini akan membantu Anda menerapkan dan memecahkan masalah proses autentikasi.
1. Nonce Generation
Section titled “1. Nonce Generation”Implementasinya menghasilkan pasangan nonce aman yang mengikuti Supabase persyaratan nonce:
// Generate URL-safe random noncefunction getUrlSafeNonce(): string {  const array = new Uint8Array(32);  crypto.getRandomValues(array);  return Array.from(array, (byte) => byte.toString(16).padStart(2, '0')).join('');}
// Hash the nonce with SHA-256async function sha256Hash(message: string): Promise<string> {  const encoder = new TextEncoder();  const data = encoder.encode(message);  const hashBuffer = await crypto.subtle.digest('SHA-256', data);  const hashArray = Array.from(new Uint8Array(hashBuffer));  return hashArray.map((b) => b.toString(16).padStart(2, '0')).join('');}
// Generate nonce pairasync function getNonce(): Promise<{ rawNonce: string; nonceDigest: string }> {  const rawNonce = getUrlSafeNonce();  const nonceDigest = await sha256Hash(rawNonce);  return { rawNonce, nonceDigest };}
Flow:
rawNonce: string acak aman-URL (64 karakter hex)nonceDigest: hash SHA-256 darirawNonce(dikodekan hex)nonceDigestditeruskan ke Google Masuk → Google menyertakan intisari nonce dalam token IDrawNoncediteruskan ke Supabase → Supabase melakukan hash pada nonce mentah dan membandingkannya dengan nonce token
2. Google Sign-InFungsi ini menginisialisasi plugin dan masuk dengan Google:
Section titled “2. Google Sign-InFungsi ini menginisialisasi plugin dan masuk dengan Google:”await SocialLogin.initialize({ google: { webClientId: 'YOUR_WEB_CLIENT_ID.apps.googleusercontent.com', // iOS only: iOSClientId: 'YOUR_IOS_CLIENT_ID.apps.googleusercontent.com', mode: 'online', // Required to get idToken },});
const response = await SocialLogin.login({ provider: 'google', options: { scopes: ['email', 'profile'], nonce: nonceDigest, // Pass the SHA-256 hashed nonce },});3. JWT Validasi
Section titled “3. JWT Validasi”Sebelum mengirim token ke Supabase, implementasi memvalidasi token JWT:
function validateJWTToken(idToken: string, expectedNonceDigest: string): { valid: boolean; error?: string } {  const decodedToken = decodeJWT(idToken);
  // Check audience matches your Google Client IDs  const audience = decodedToken.aud;  if (!VALID_GOOGLE_CLIENT_IDS.includes(audience)) {    return { valid: false, error: 'Invalid audience' };  }
  // Check nonce matches  const tokenNonce = decodedToken.nonce;  if (tokenNonce && tokenNonce !== expectedNonceDigest) {    return { valid: false, error: 'Nonce mismatch' };  }
  return { valid: true };}
Mengapa memvalidasi sebelum Supabase?
Memvalidasi token JWT sebelum mengirim token ke Supabase memiliki beberapa tujuan penting:
-
Mencegah Permintaan Tidak Valid: Jika token memiliki audiens yang salah atau ketidakcocokan, Supabase akan tetap menolak token tersebut. Memvalidasi terlebih dahulu menghindari panggilan API yang tidak perlu dan memberikan pesan kesalahan yang lebih jelas.
-
Masalah Caching Token: Pada beberapa platform (terutama iOS), Google Masuk SDK dapat menyimpan token untuk kinerja. Ketika token yang di-cache dikembalikan, token yang di-cache mungkin dibuat dengan nonce yang berbeda (atau tanpa nonce sama sekali), menyebabkan Supabase menolak token dengan kesalahan “nonce mismatch”. Dengan memvalidasi sebelum mengirim ke Supabase, kami dapat mendeteksi masalah ini lebih awal dan secara otomatis mencoba lagi dengan token baru.
-
Keamanan (iOS): Pada iOS, validasi memastikan token dikeluarkan untuk ID Klien Google spesifik Anda, sehingga mencegah potensi masalah keamanan dalam penggunaan token yang ditujukan untuk aplikasi lain.
-
Penanganan Kesalahan yang Lebih Baik: Mendeteksi masalah sebelum Supabase memungkinkan logika percobaan ulang otomatis, yang penting untuk menangani masalah cache iOS secara transparan.
Jika validasi gagal, fungsinya secara otomatis:
- Keluar dari Google (menghapus token yang disimpan dalam cache - penting pada iOS)
- Mencoba kembali autentikasi satu kali (memaksa pembuatan token baru dengan nonce yang benar)
- Jika percobaan ulang juga gagal, akan muncul kesalahan
4. Supabase Masuk
Section titled “4. Supabase Masuk”Terakhir, token yang divalidasi dikirim ke Supabase:
const { data, error } = await supabase.auth.signInWithIdToken({ provider: 'google', token: googleResponse.idToken, nonce: rawNonce, // Pass the raw (unhashed) nonce});Referensi Kode Lengkap
Section titled “Referensi Kode Lengkap”Implementasi lengkapnya tersedia di file aplikasi contoh supabaseAuthUtils.ts, yang meliputi:
getUrlSafeNonce()- Menghasilkan nonce acak yang aman untuk URLsha256Hash()- Hash string dengan SHA-256getNonce()- Menghasilkan pasangan noncedecodeJWT()- Mendekode token JWTvalidateJWTToken()- Memvalidasi JWT audiens dan nonceauthenticateWithGoogleSupabase()- Fungsi otentikasi utama dengan coba lagi otomatis
File Contoh Tambahan
Section titled “File Contoh Tambahan”- SupabasePage.tsx - Contoh komponen dengan penanganan pengalihan (Web)
- SupabaseCreateAccountPage.tsx - Contoh halaman pembuatan akun
Langkah Selanjutnya
Section titled “Langkah Selanjutnya”Silakan lanjutkan ke panduan pengaturan khusus platform untuk platform target Anda: