Login Google su iOS
Copia un prompt di configurazione con i passaggi di installazione e la guida markdown completa per questo plugin.
Introduzione
Sottosezione intitolata “Introduzione”In questo guide, imparerai a configurare il login con Google con Capgo Social Login per iOS. Assumo che tu abbia già letto la guida di configurazione generale.
Utilizzare il login di Google su iOS
Sottosezione intitolata “Utilizzare il login di Google su iOS”In questo capitolo, imparerai a configurare il login di Google su iOS.
-
Creare un ID client iOS nel console di Google
-
Cliccare sulla barra di ricerca

-
Cercare
credentialse cliccare sulAPIs and Servicesuno (numero 2 nella schermata)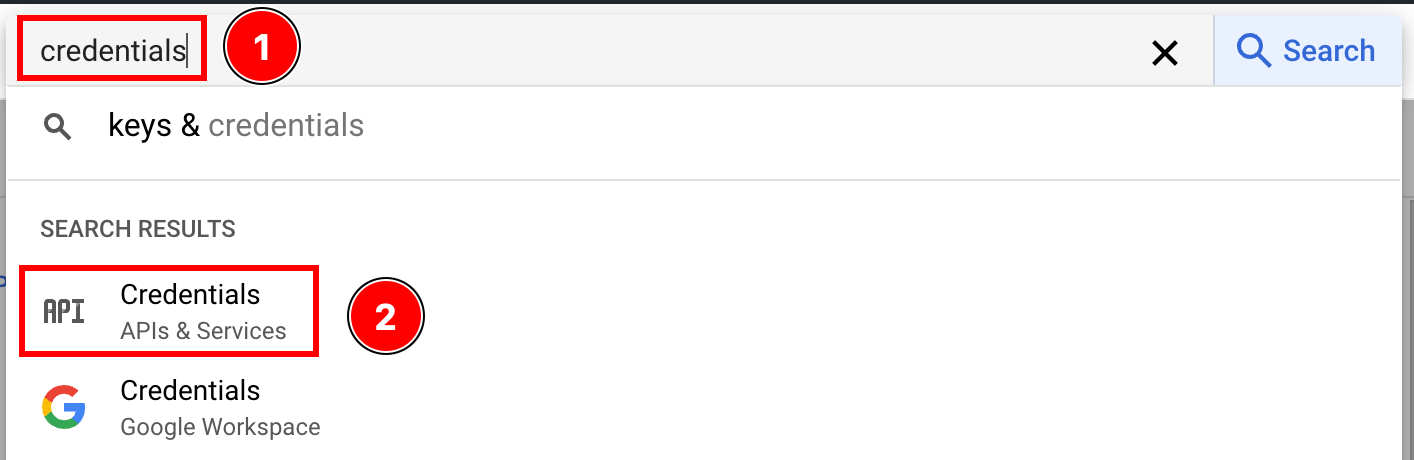
-
Cliccare sul
create credentials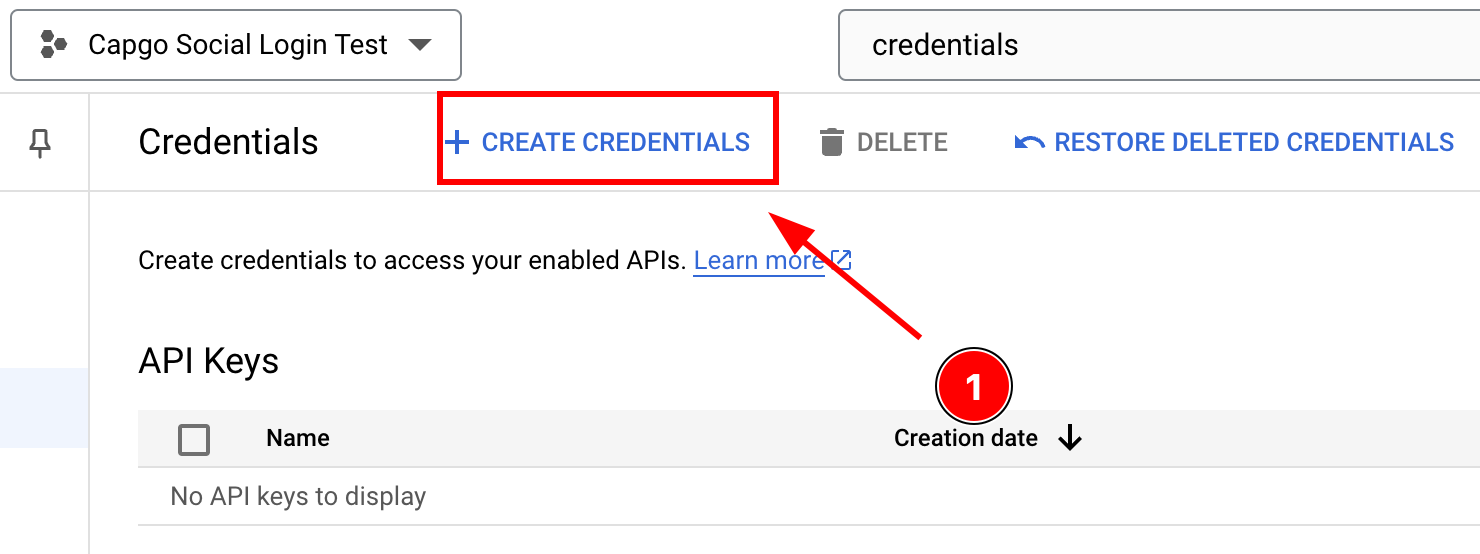
-
Seleziona
OAuth client ID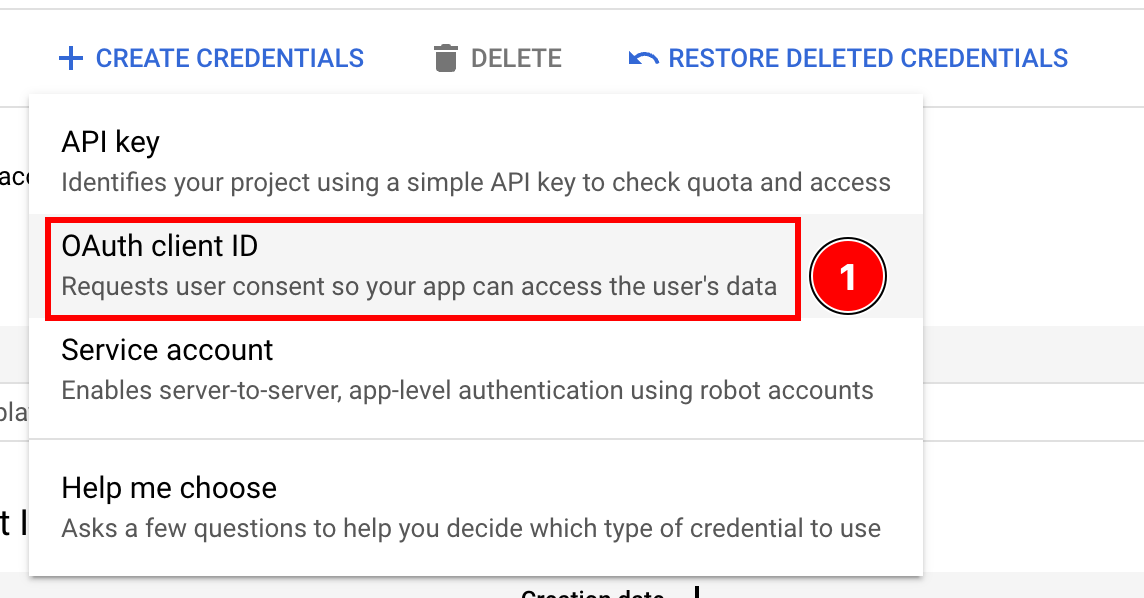
-
Seleziona il
Application typeperiOS
-
Trova l'ID del bundle
-
Apri Xcode
-
Doppio clic su
App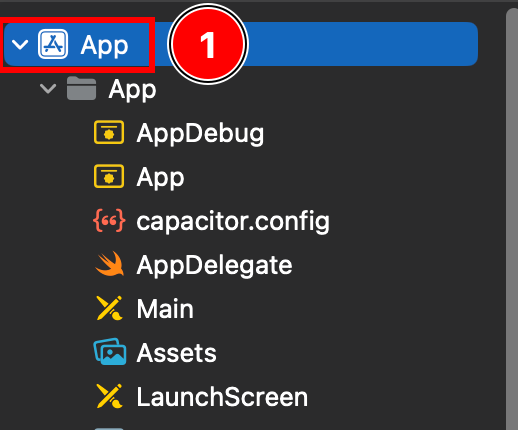
-
Assicurati di essere su
Targets -> App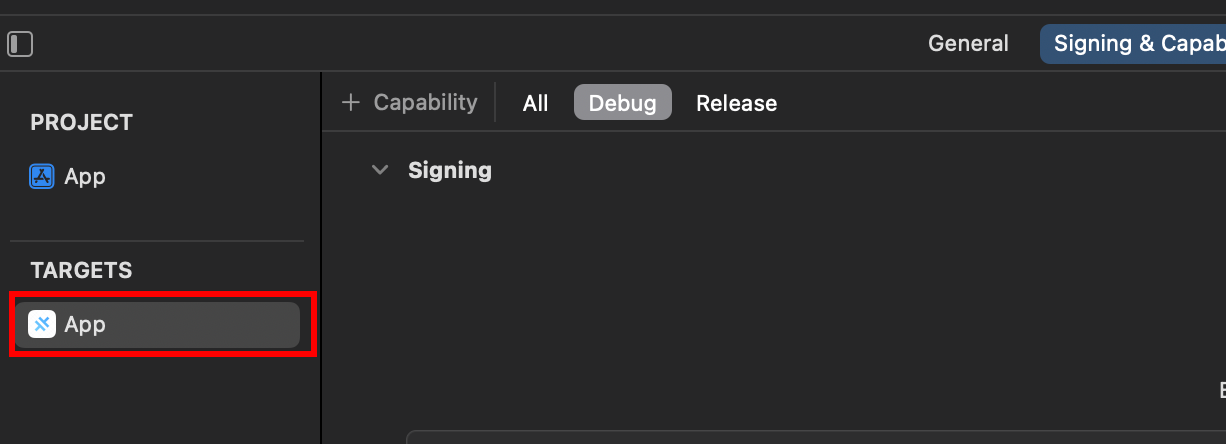
-
Trova il tuo
Bundle Identifier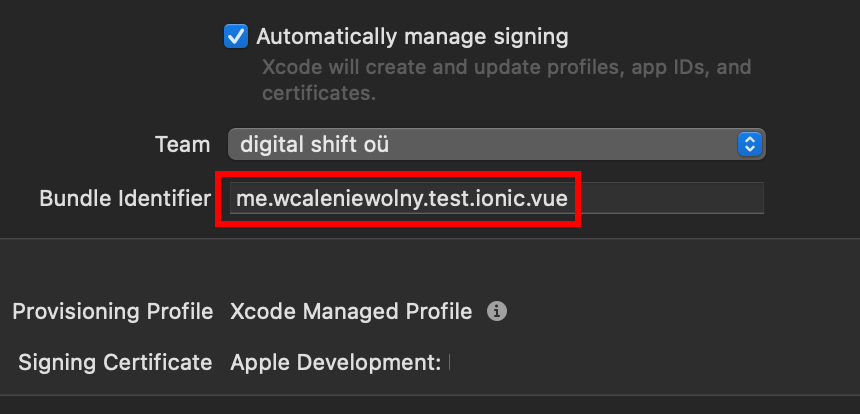
-
Torna al Console di Google e incolla il tuo
Bundle IdentifierinBundle ID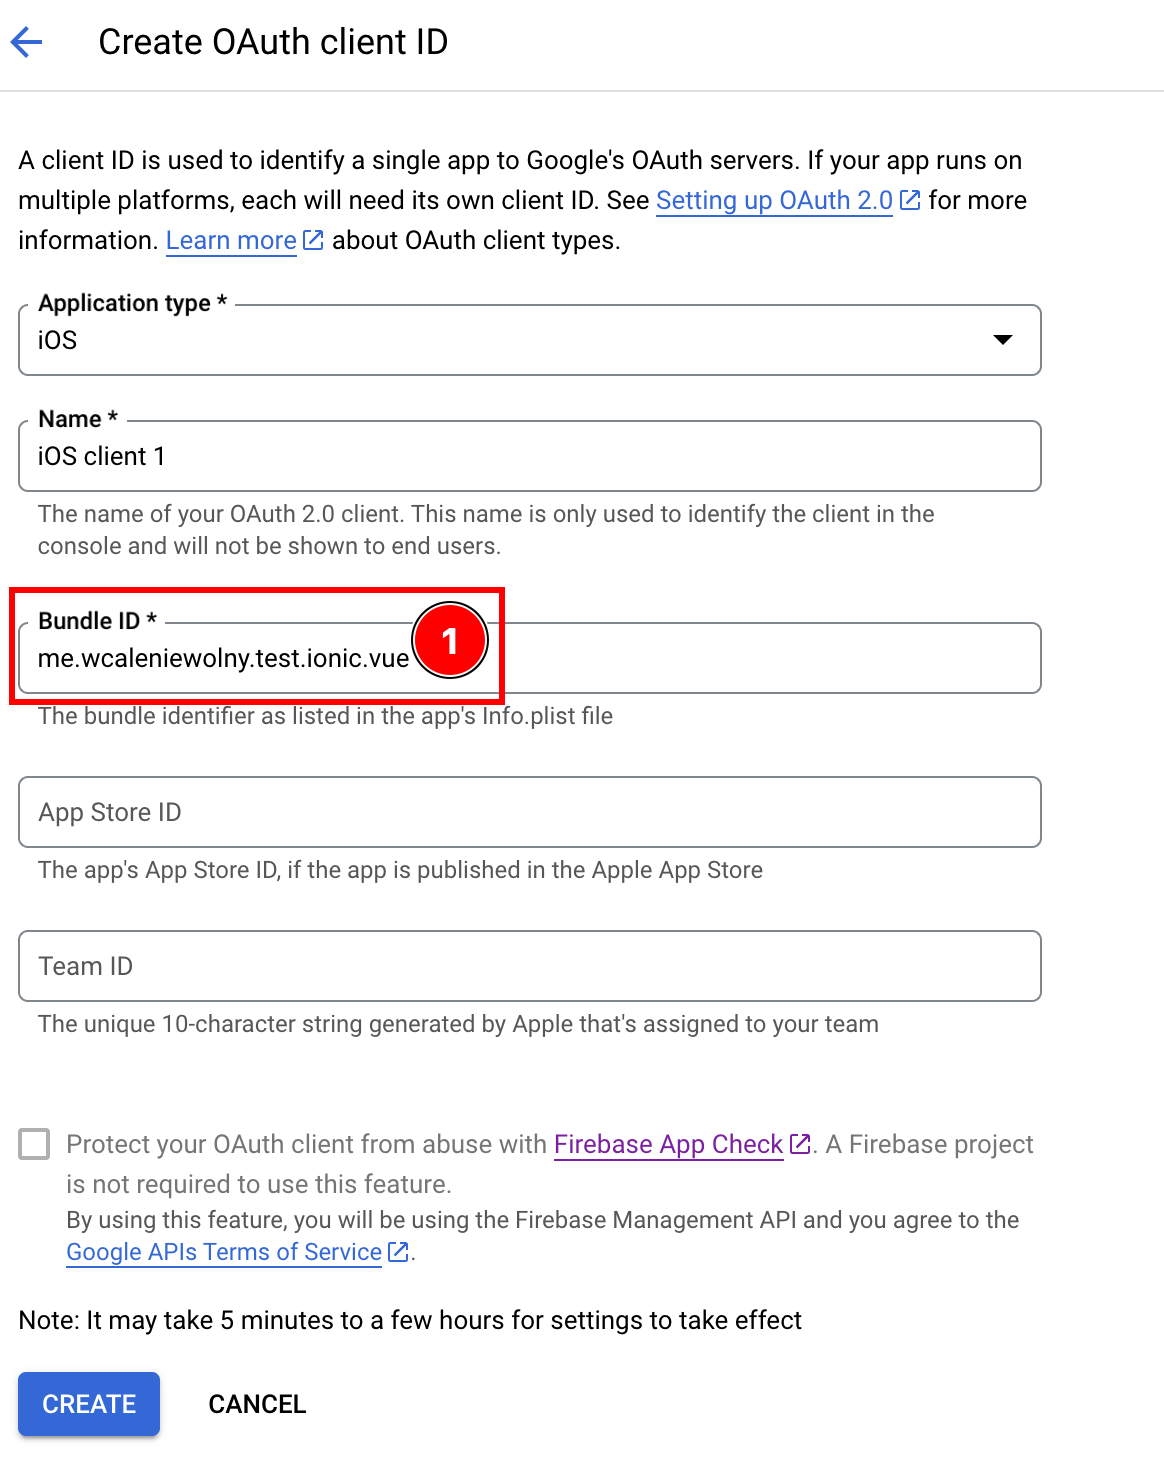
-
-
Facoltativamente, aggiungi il tuo
App Store IDoTeam IDnel campo ID client se hai pubblicato il tuo app su App Store -
Dopo aver riempito tutti i dettagli, clicca
create
-
Clicca
OK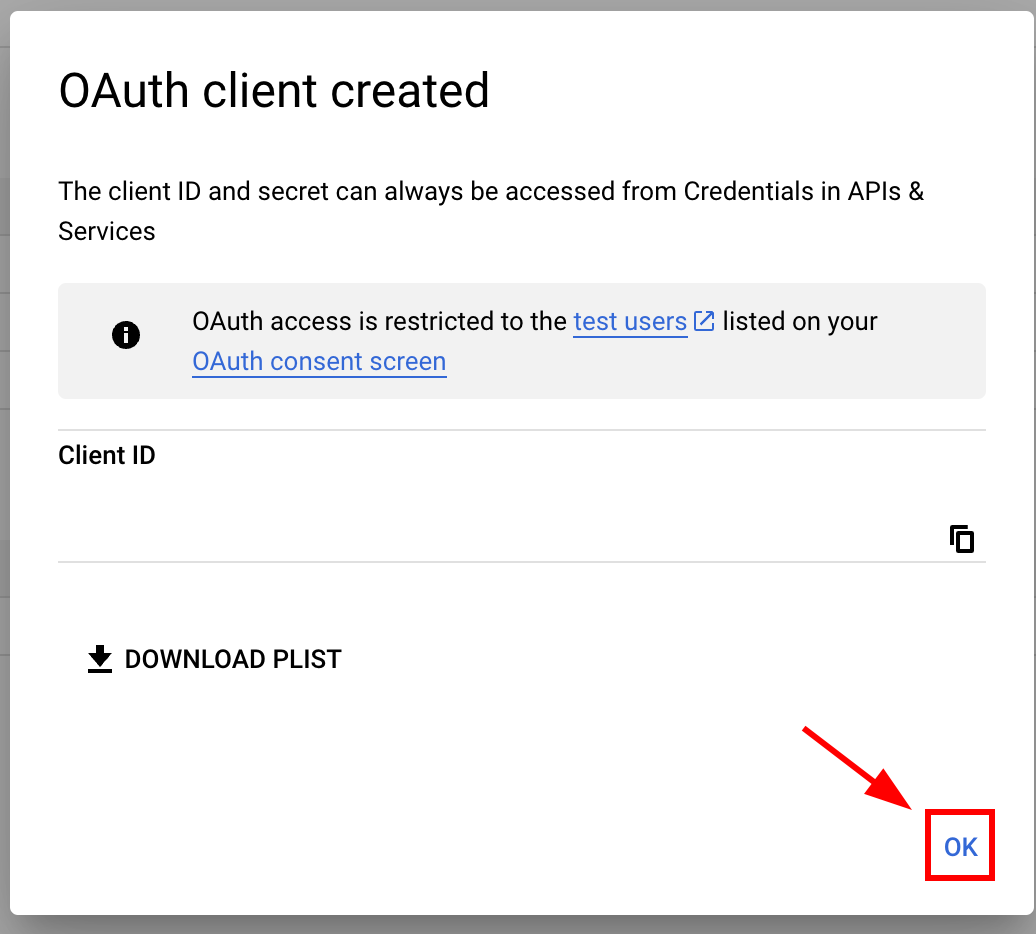
-
Apri il nuovo client iOS creato

-
Copia i seguenti dati

-
-
Modifica il file Info.plist della tua app
-
Apri Xcode e trova il
Info.plistfile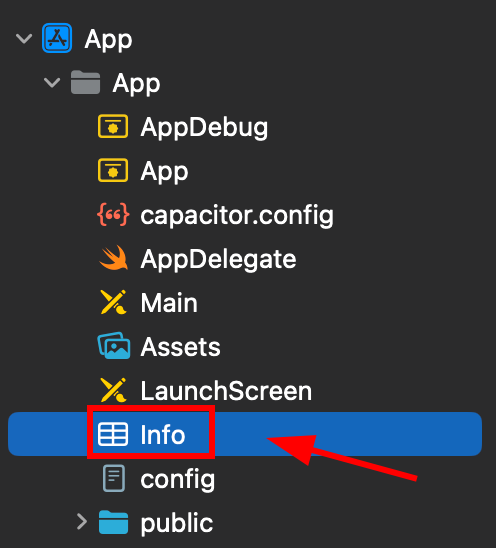
-
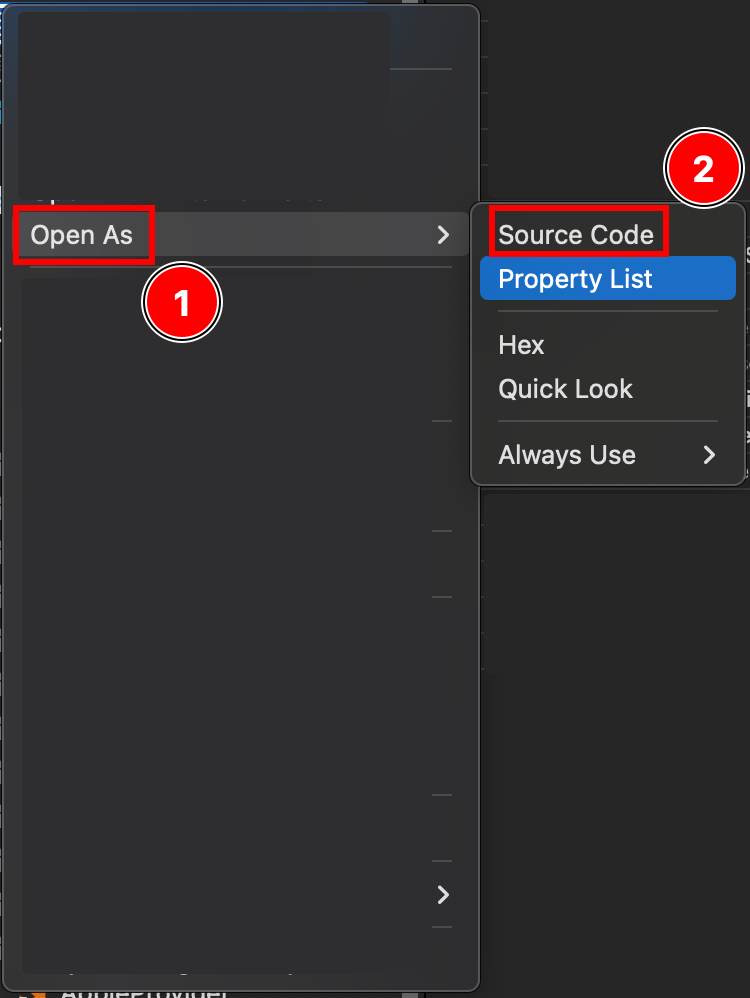
Clicca con il tasto destro su questo file e aprilo come fonte code
-
Al fondo del tuo
Plistfile, vedrai una</dict>tag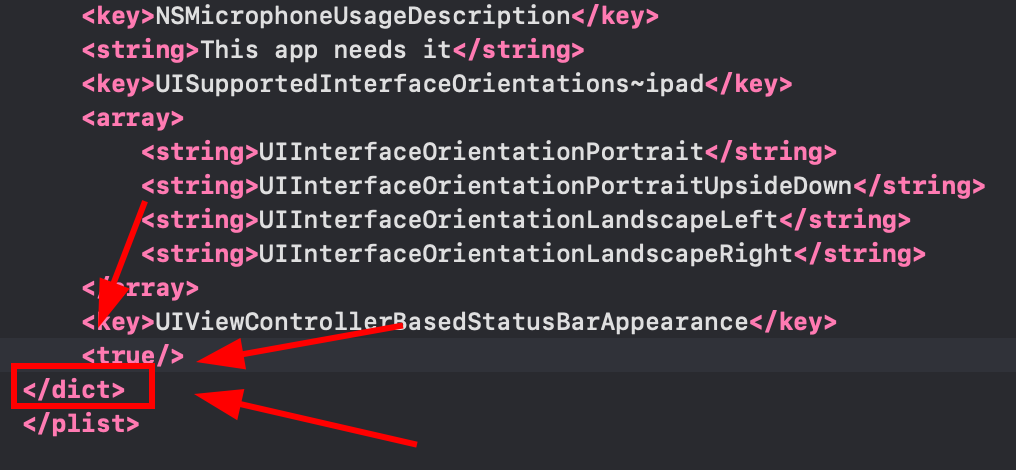
-
Inserisci il seguente frammento prima della tag di chiusura
</dict>Info.plist con URL schemes __CAPGO_KEEP_0__ inserito prima della tag di chiusura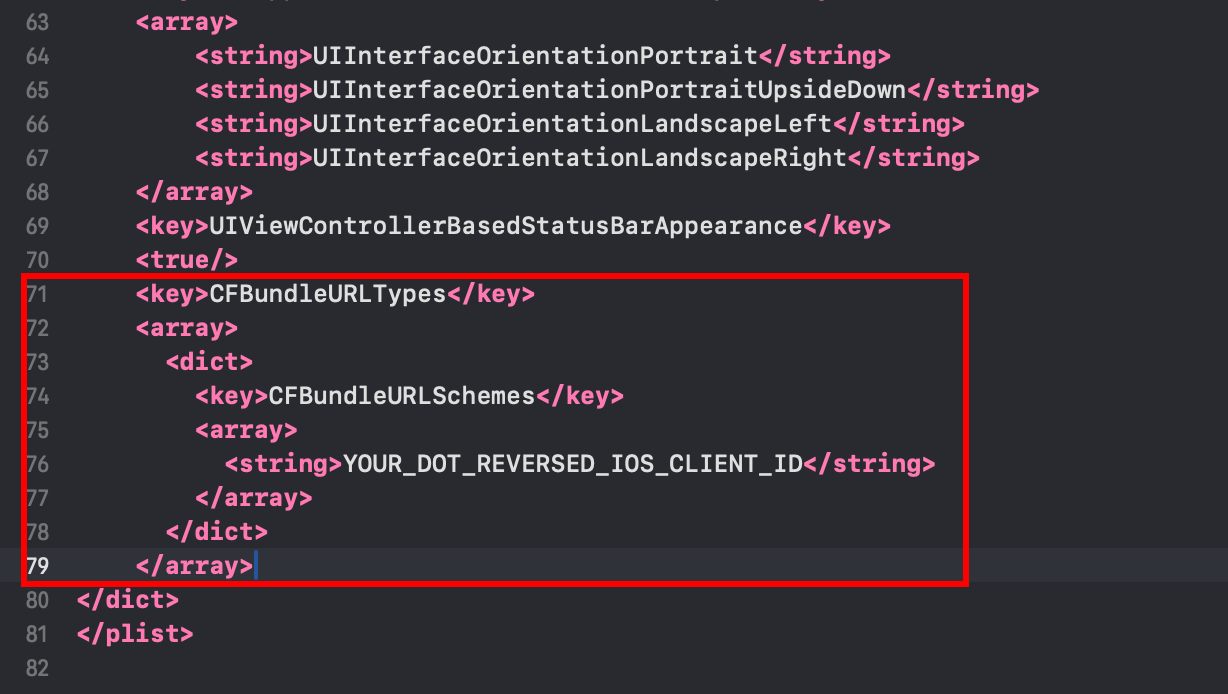 <key>CFBundleURLTypes</key><array><dict><key>CFBundleURLSchemes</key><array><string>YOUR_DOT_REVERSED_IOS_CLIENT_ID</string></array></dict></array>
 -
Cambia il
YOUR_DOT_REVERSED_IOS_CLIENT_IDin il valore copiato nel passaggio precedente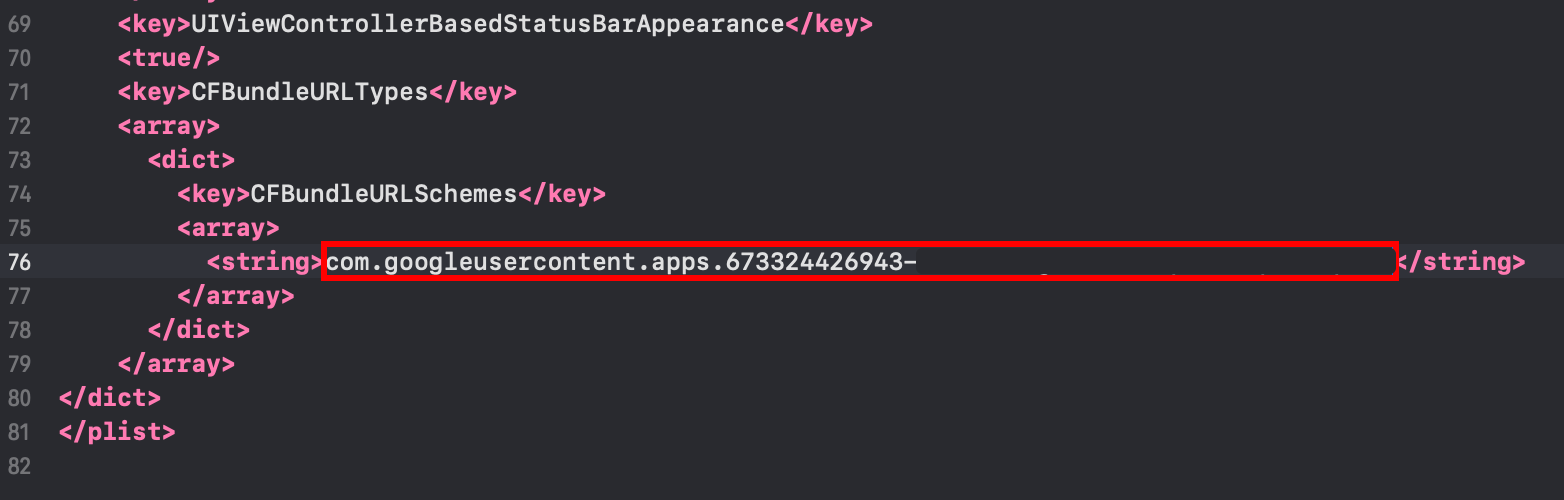
-
Salva il file con
Command + S
-
-
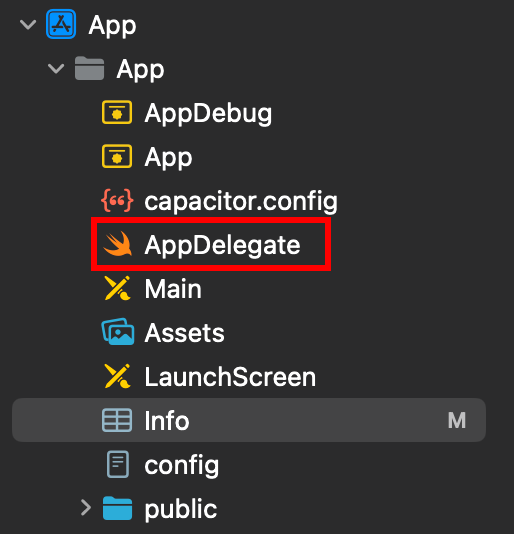
Modifica il
AppDelegate.swift-
Apri il AppDelegate
-
Inserisci
import GoogleSignInall'inizio del file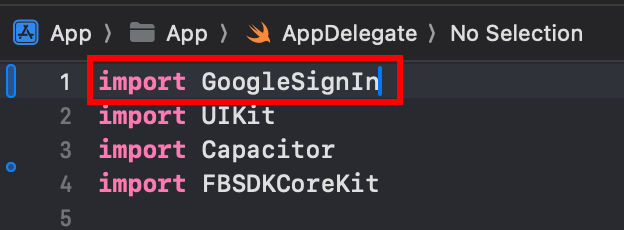
-
Cerca il
func application(_ app: UIApplication, open url: URL, options: [UIApplication.OpenURLOptionsKey: Any] = [:])funzione
-
Modifica la funzione per farla assomigliare a questa
func application(_ app: UIApplication, open url: URL, options: [UIApplication.OpenURLOptionsKey: Any] = [:]) -> Bool {// Called when the app was launched with a url. Feel free to add additional processing here,// but if you want the App API to support tracking app url opens, make sure to keep this callvar handled: Boolhandled = GIDSignIn.sharedInstance.handle(url)if handled {return true}return ApplicationDelegateProxy.shared.application(app, open: url, options: options)}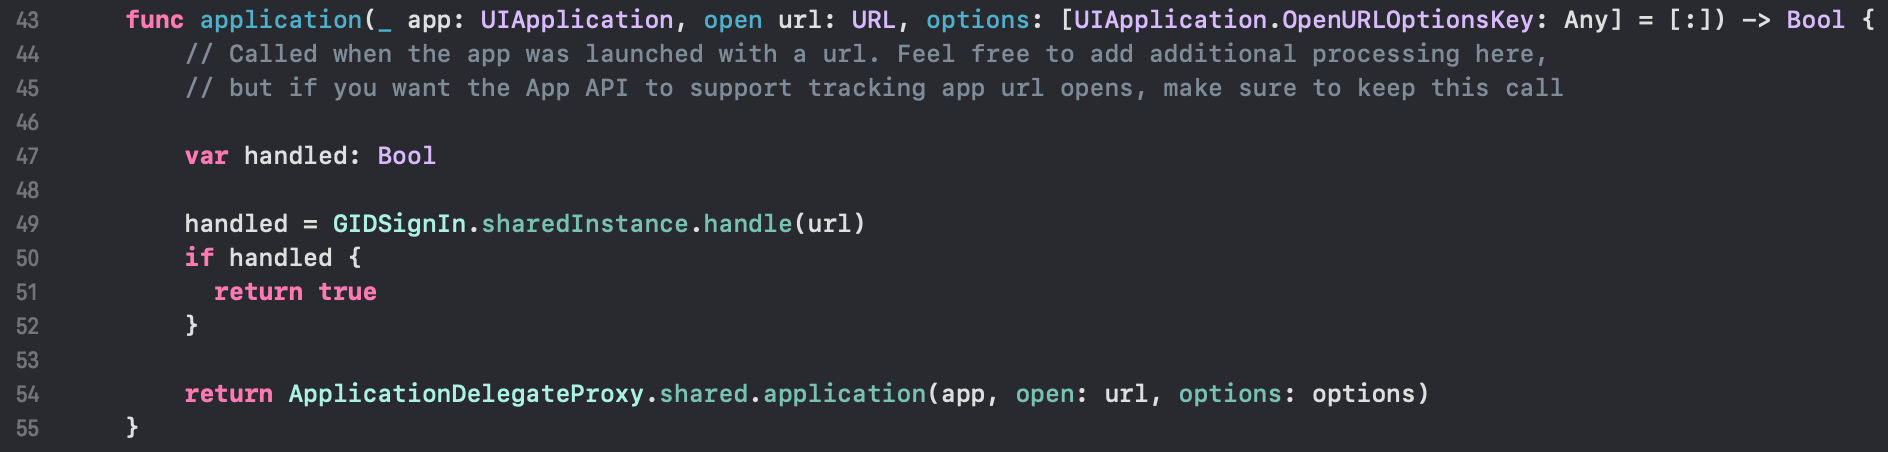
-
Salva il file con
Command + S
-
-
Configura il login con Google nel tuo JavaScript/TypeScript code
-
Importa
SocialLogineCapacitorimport { SocialLogin } from '@capgo/capacitor-social-login';import { Capacitor } from '@capacitor/core'; -
Chiamare il metodo di inizializzazione (questo dovrebbe essere chiamato solo una volta)
Configurazione base (modalità online - consigliata per la maggior parte degli app):
// onMounted is Vue specificonMounted(() => {SocialLogin.initialize({google: {iOSClientId: '673324426943-redacted.apps.googleusercontent.com',mode: 'online' // Default mode}})})Configurazione avanzata con ID client aggiuntivi:
onMounted(() => {SocialLogin.initialize({google: {webClientId: 'YOUR_WEB_CLIENT_ID', // Optional: for web platform supportiOSClientId: 'YOUR_IOS_CLIENT_ID', // Required: from step 1iOSServerClientId: 'YOUR_WEB_CLIENT_ID', // Optional: same as webClientId, needed for some advanced featuresmode: 'online' // 'online' or 'offline'}})}) -
Implement the login function. Create a button and run the following code on click
Implementa la funzione di accesso. Crea un pulsante e esegui il seguente __CAPGO_KEEP_0__ al click
const res = await SocialLogin.login({provider: 'google',options: {}})// handle the response - contains user dataconsole.log(JSON.stringify(res))Per modalità offline:
const res = await SocialLogin.login({provider: 'google',options: {forceRefreshToken: true // Recommended for offline mode}})// res contains serverAuthCode, not user data// Send serverAuthCode to your backend to get user information// Do not call SocialLogin.refresh() in offline modeconsole.log('Server auth code:', res.result.serverAuthCode)
-
-
Testa la tua applicazione
-
Costruisci l'applicazione e eseguila
cap sync -
Se hai fatto tutto correttamente, dovresti vedere il flusso di login di Google che funziona correttamente
-
Problemi noti
Sezione intitolata “Problemi noti”Incompatibilità dello schermo di privacy Plugin
Sezione intitolata “Incompatibilità del plugin della schermata di privacy”Il plugin di accesso Google è incompatibile con @capacitor/privacy-screen. Quando si utilizzano entrambi i plugin insieme, la schermata di login web di Google verrà interrotta dalla schermata di privacy.
Soluzione di contorno: Chiamare await PrivacyScreen.disable(); prima di chiamare la funzione di login:
import { PrivacyScreen } from '@capacitor/privacy-screen';import { SocialLogin } from '@capgo/capacitor-social-login';
await PrivacyScreen.disable();await SocialLogin.login({  provider: 'google',  options: {}});
Continua da Google Login su iOS
Sezione intitolata “Continua da Google Login su iOS”Se stai utilizzando Google Login su iOS per pianificare l'autenticazione e le flussi di account, connettilo con Usando @capgo/capacitor-login-social per la capacità nativa in Usando @capgo/capacitor-login-social, @capgo/capacitor-login-social per la dettaglio di implementazione in @capgo/capacitor-login-social, @capgo/capacitor-passkey per la dettaglio di implementazione in @capgo/capacitor-passkey, @capgo/capacitor-biometric-nativo per la dettaglio di implementazione in @capgo/capacitor-biometric-nativo, e L'autenticazione a due fattori per la dettaglio di implementazione in L'autenticazione a due fattori.