Apple 登录 Android
Apple 在 Android 上登录很麻烦。 Apple 在 Android 上没有对 Sign in with Apple 的官方支持,因此该解决方案有点hacky。
Android 目前使用 Chrome 选项卡来显示 OAuth2 网站。这种方法面临以下挑战:
- 困难的配置
- 需要后端
了解 Android 上的流程。
Section titled “了解 Android 上的流程。”我用一张图来解释一下android上的流程:
flowchart TD
    A("await SocialLogin.login()") -->|插件中处理|B(生成登录URL)
    B --> |传递链接| C(打开Chrome浏览器)
    C --> D(等待用户登录)
    D --> |Apple 重定向到您的后端|E(处理从 Apple 返回的数据)
    E --> F(重定向回应用程序)
    F --> G(返回JS)
现在您已经了解了挑战和流程,让我们开始配置。
创建服务ID
Section titled “创建服务ID”-
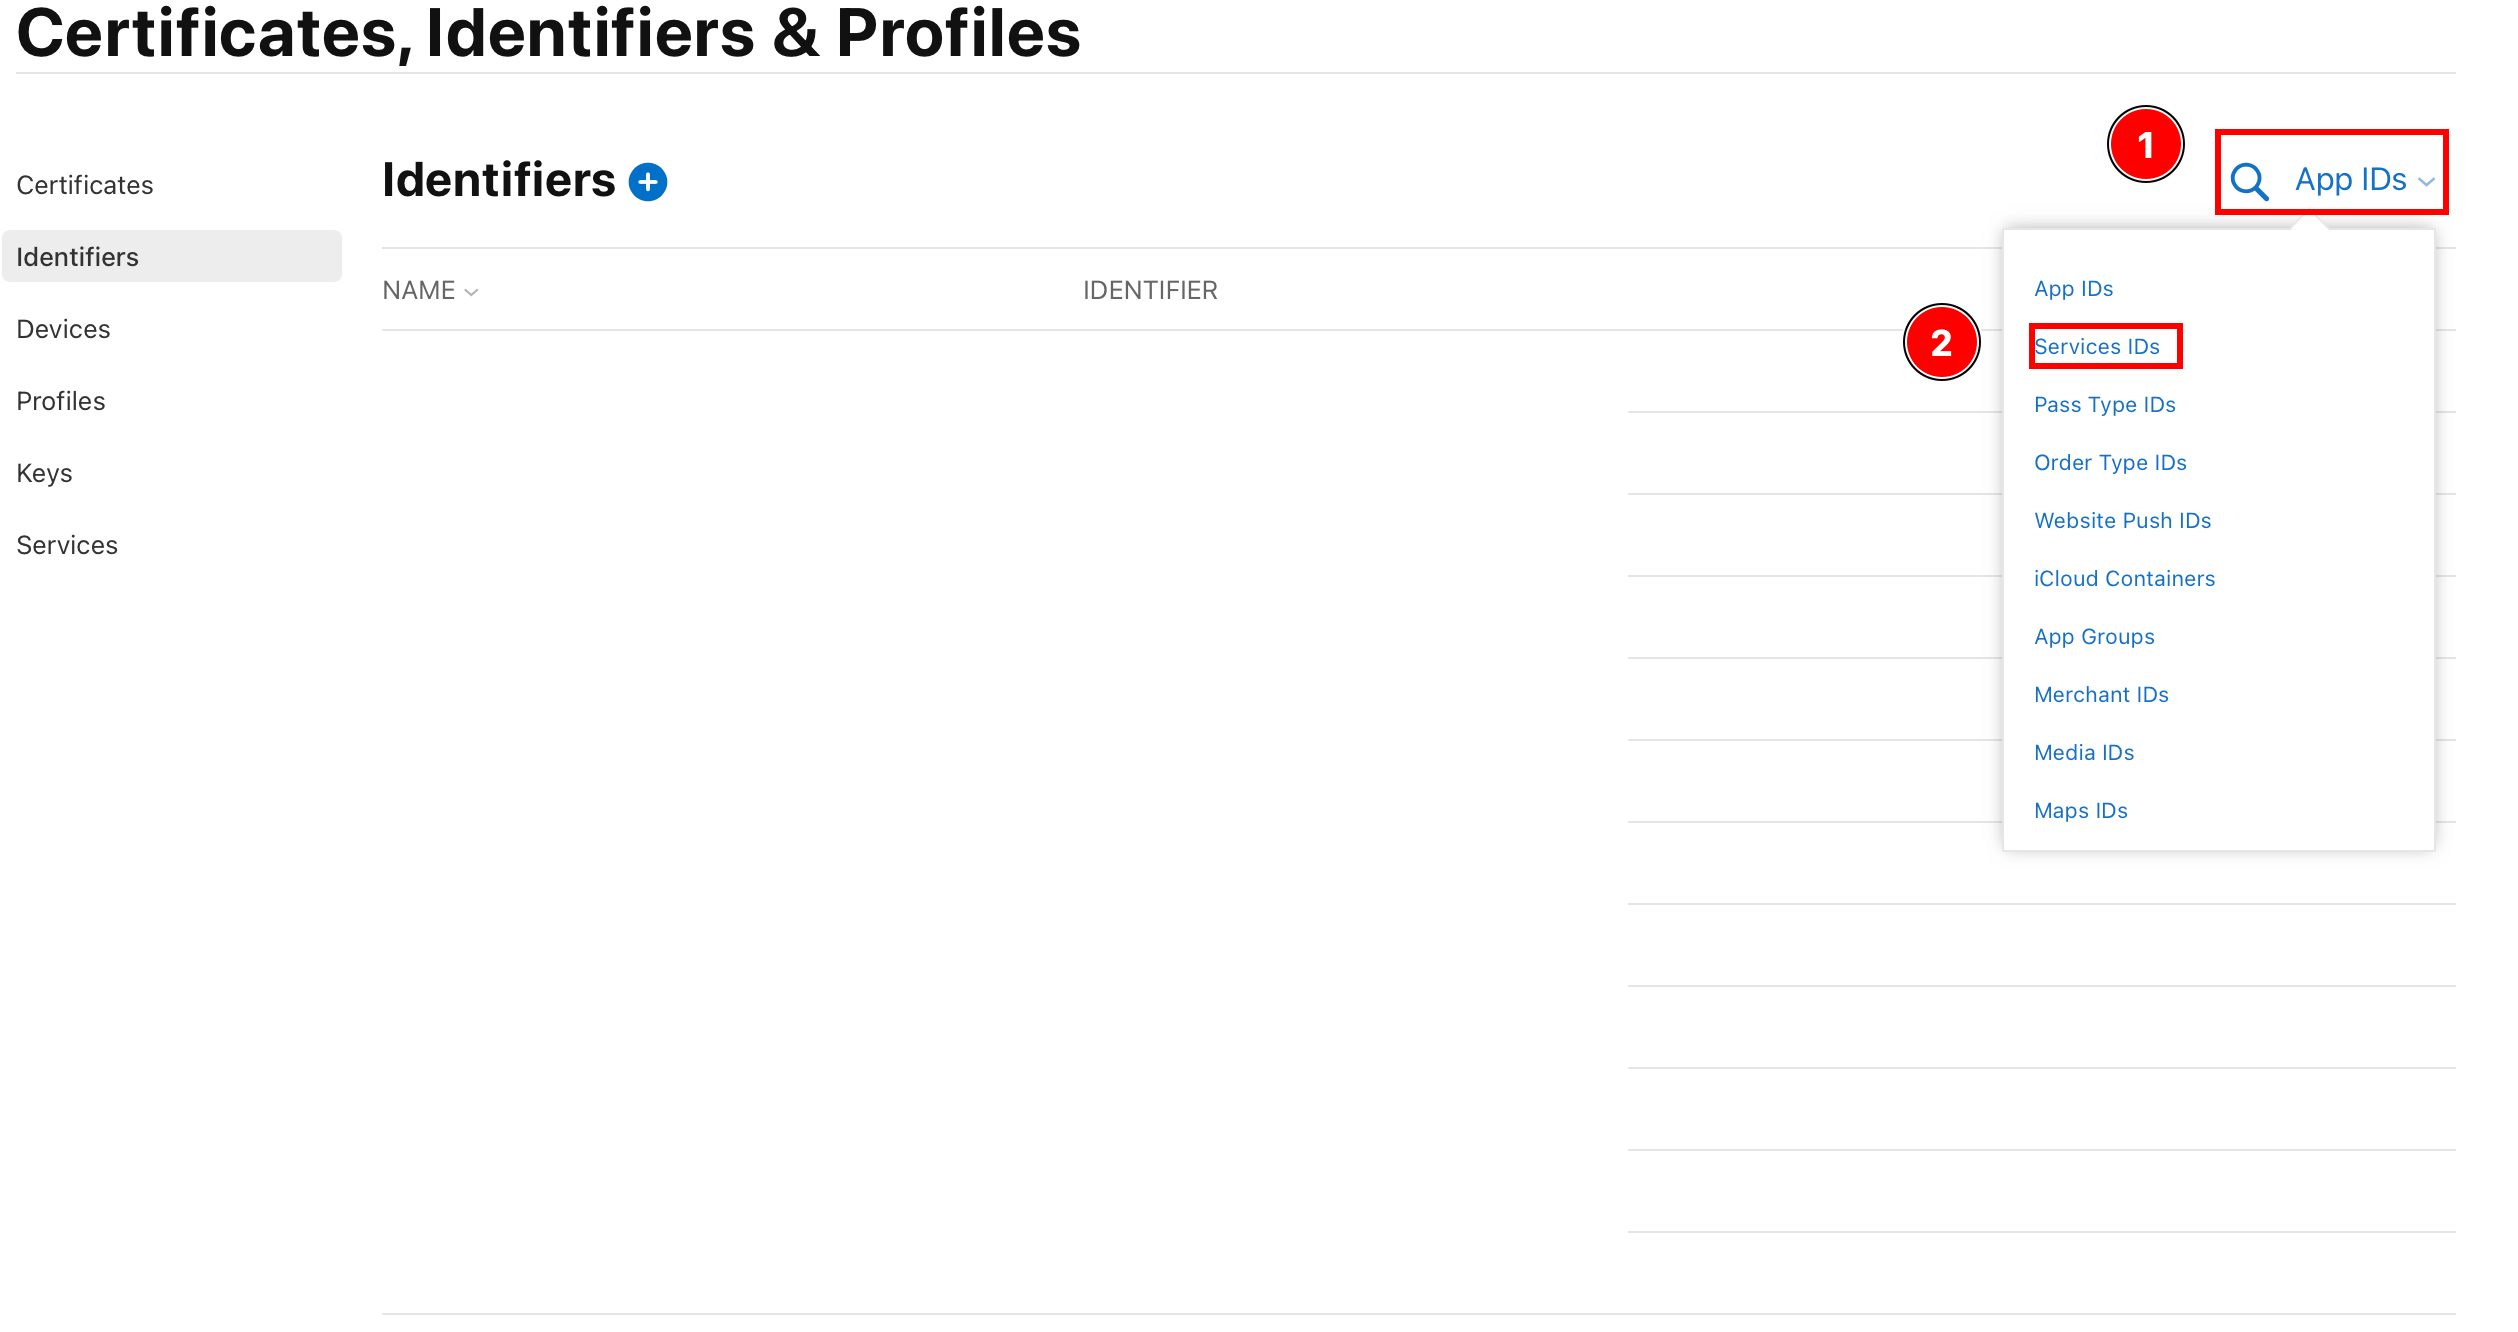
登录 Apple 开发者门户。
-
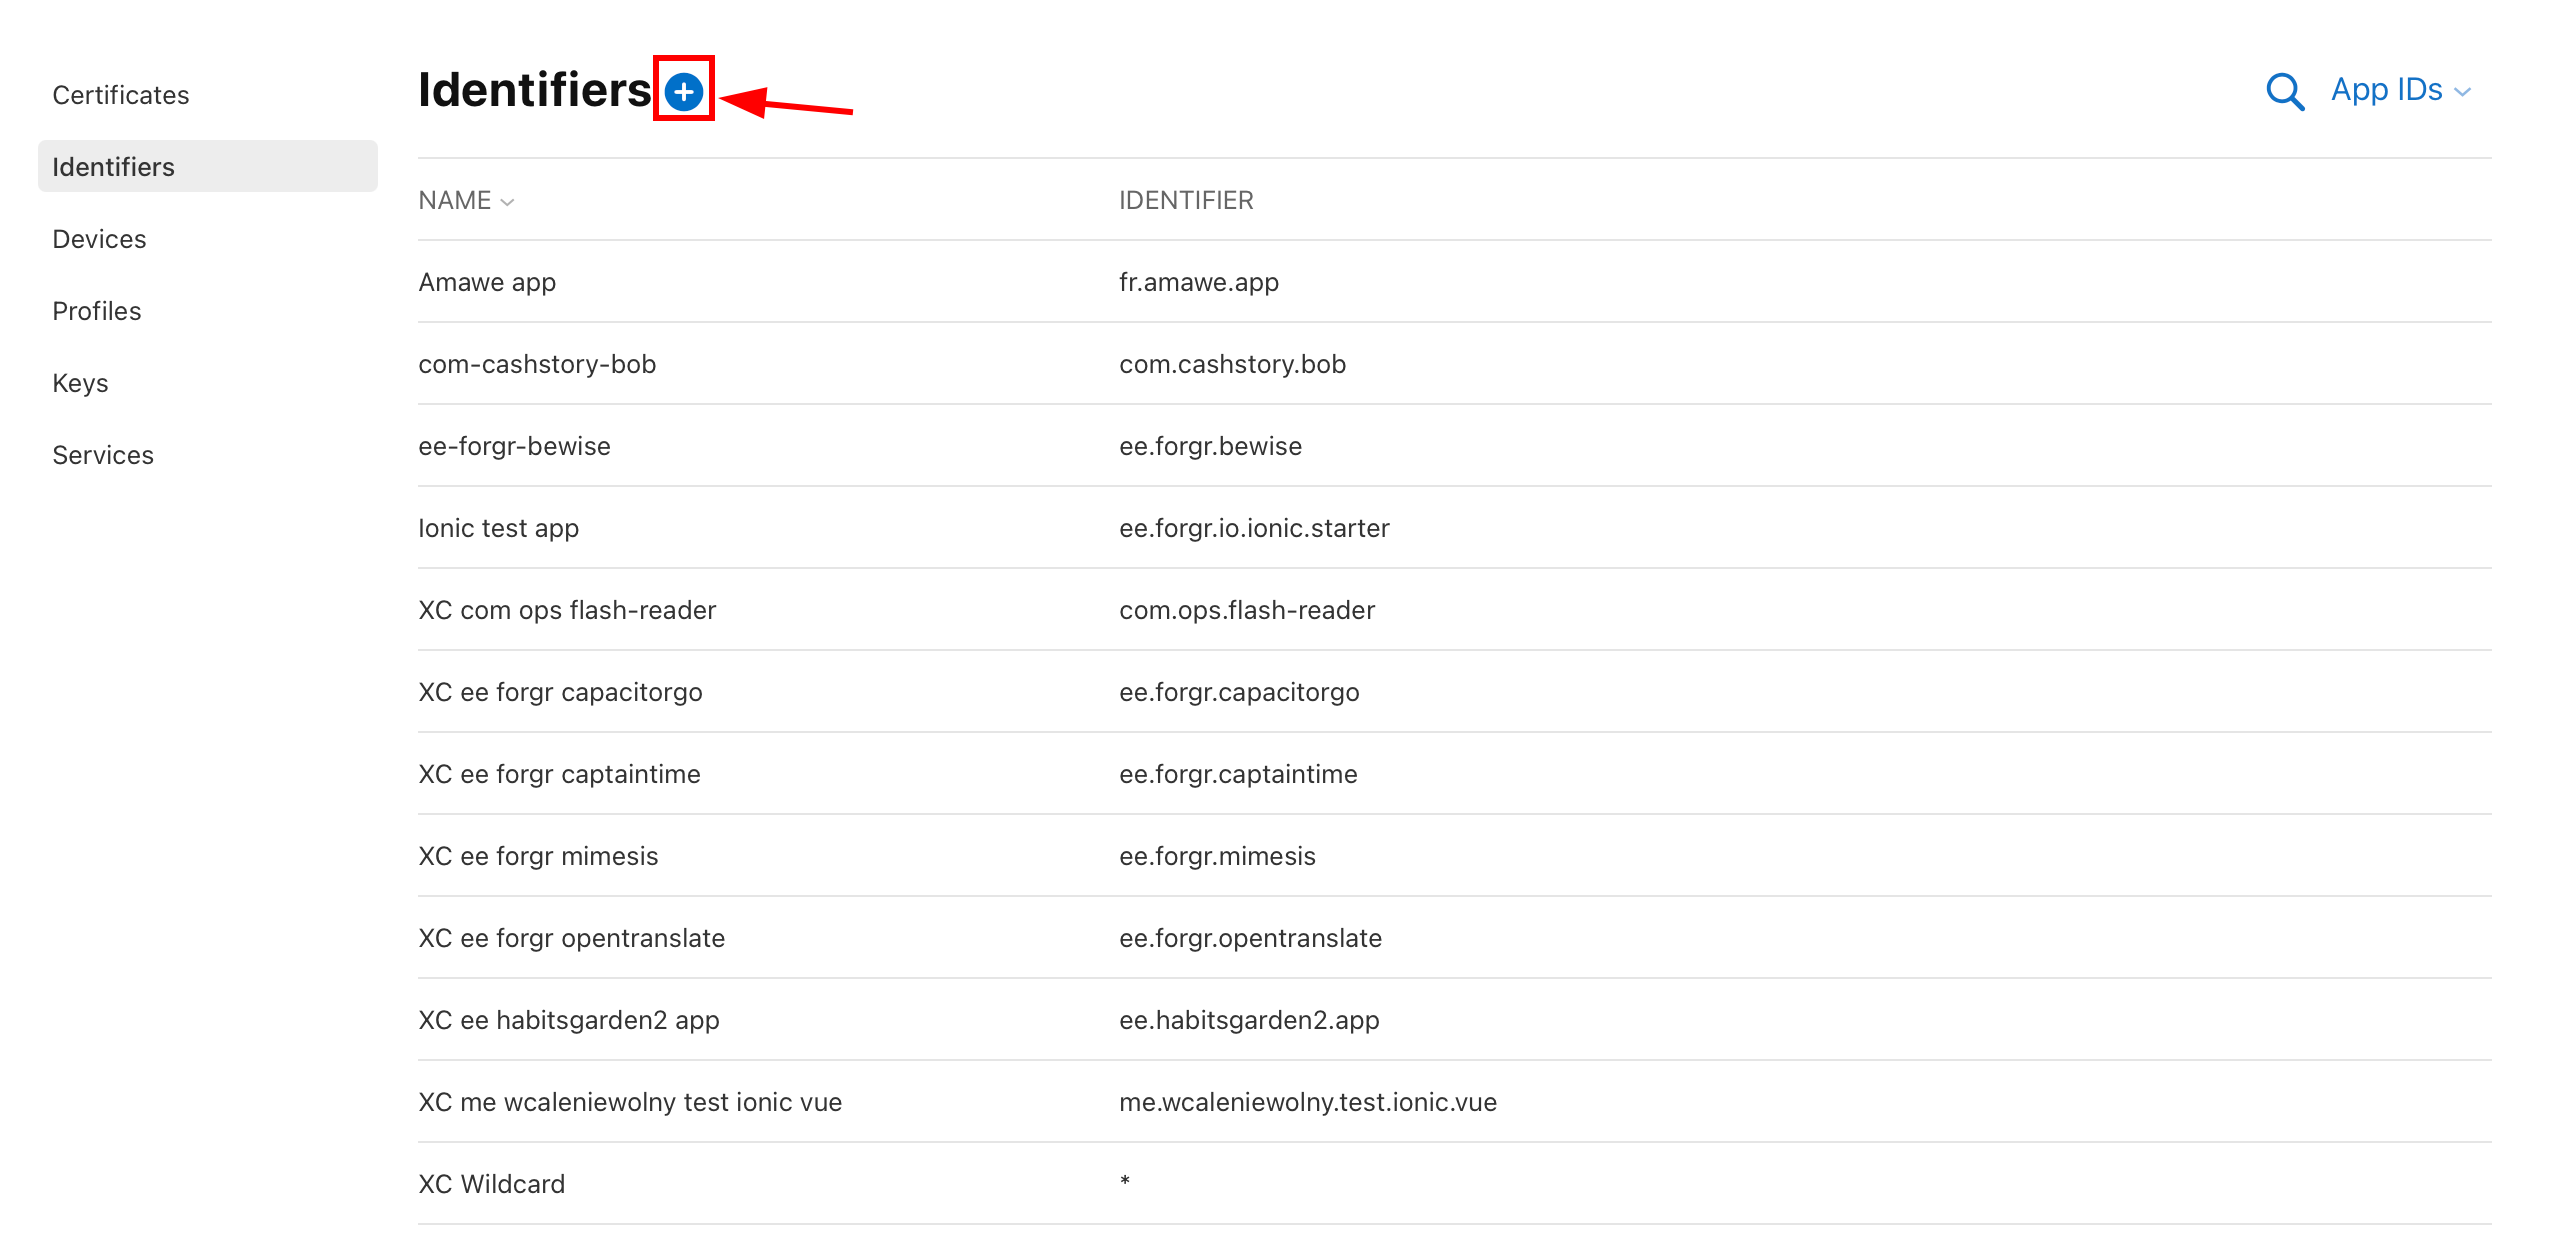
单击
Identifiers。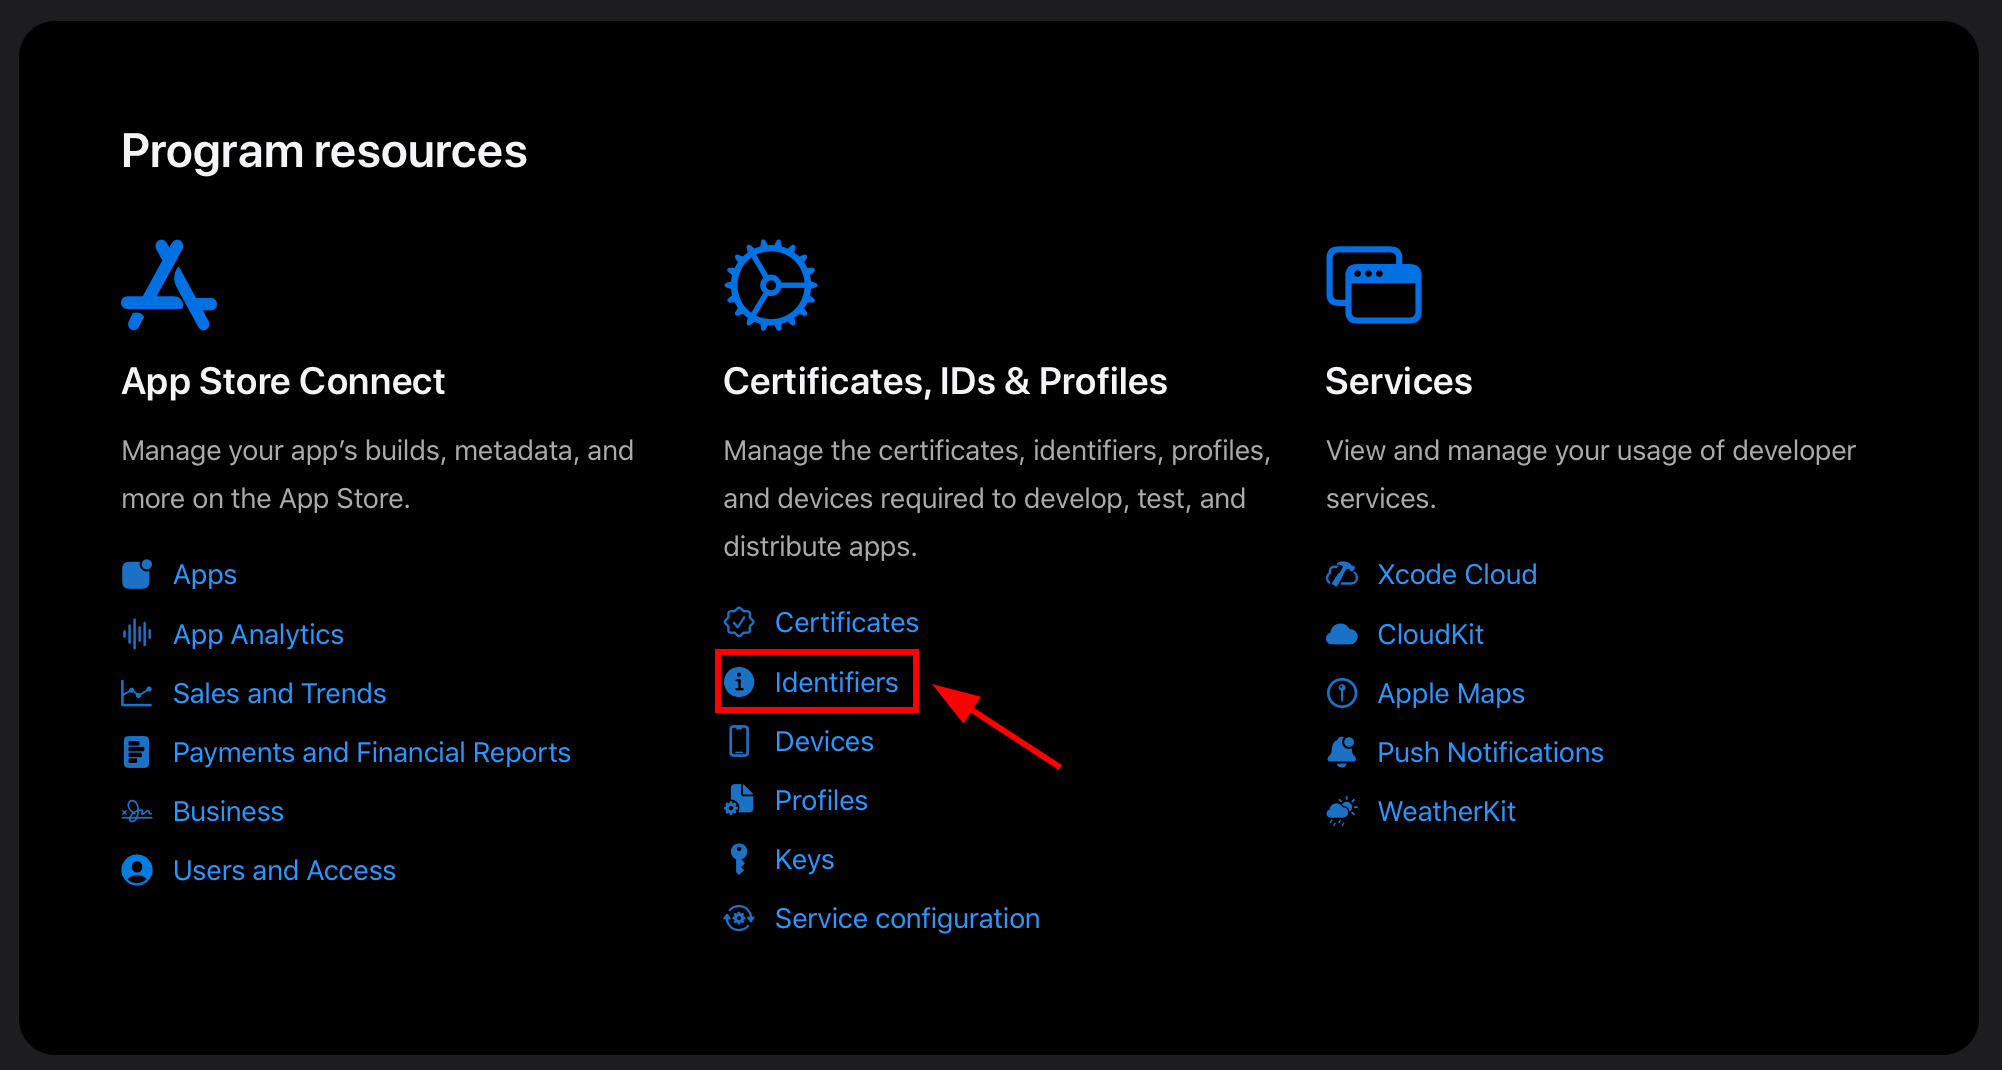
您应该看到如下所示的屏幕:
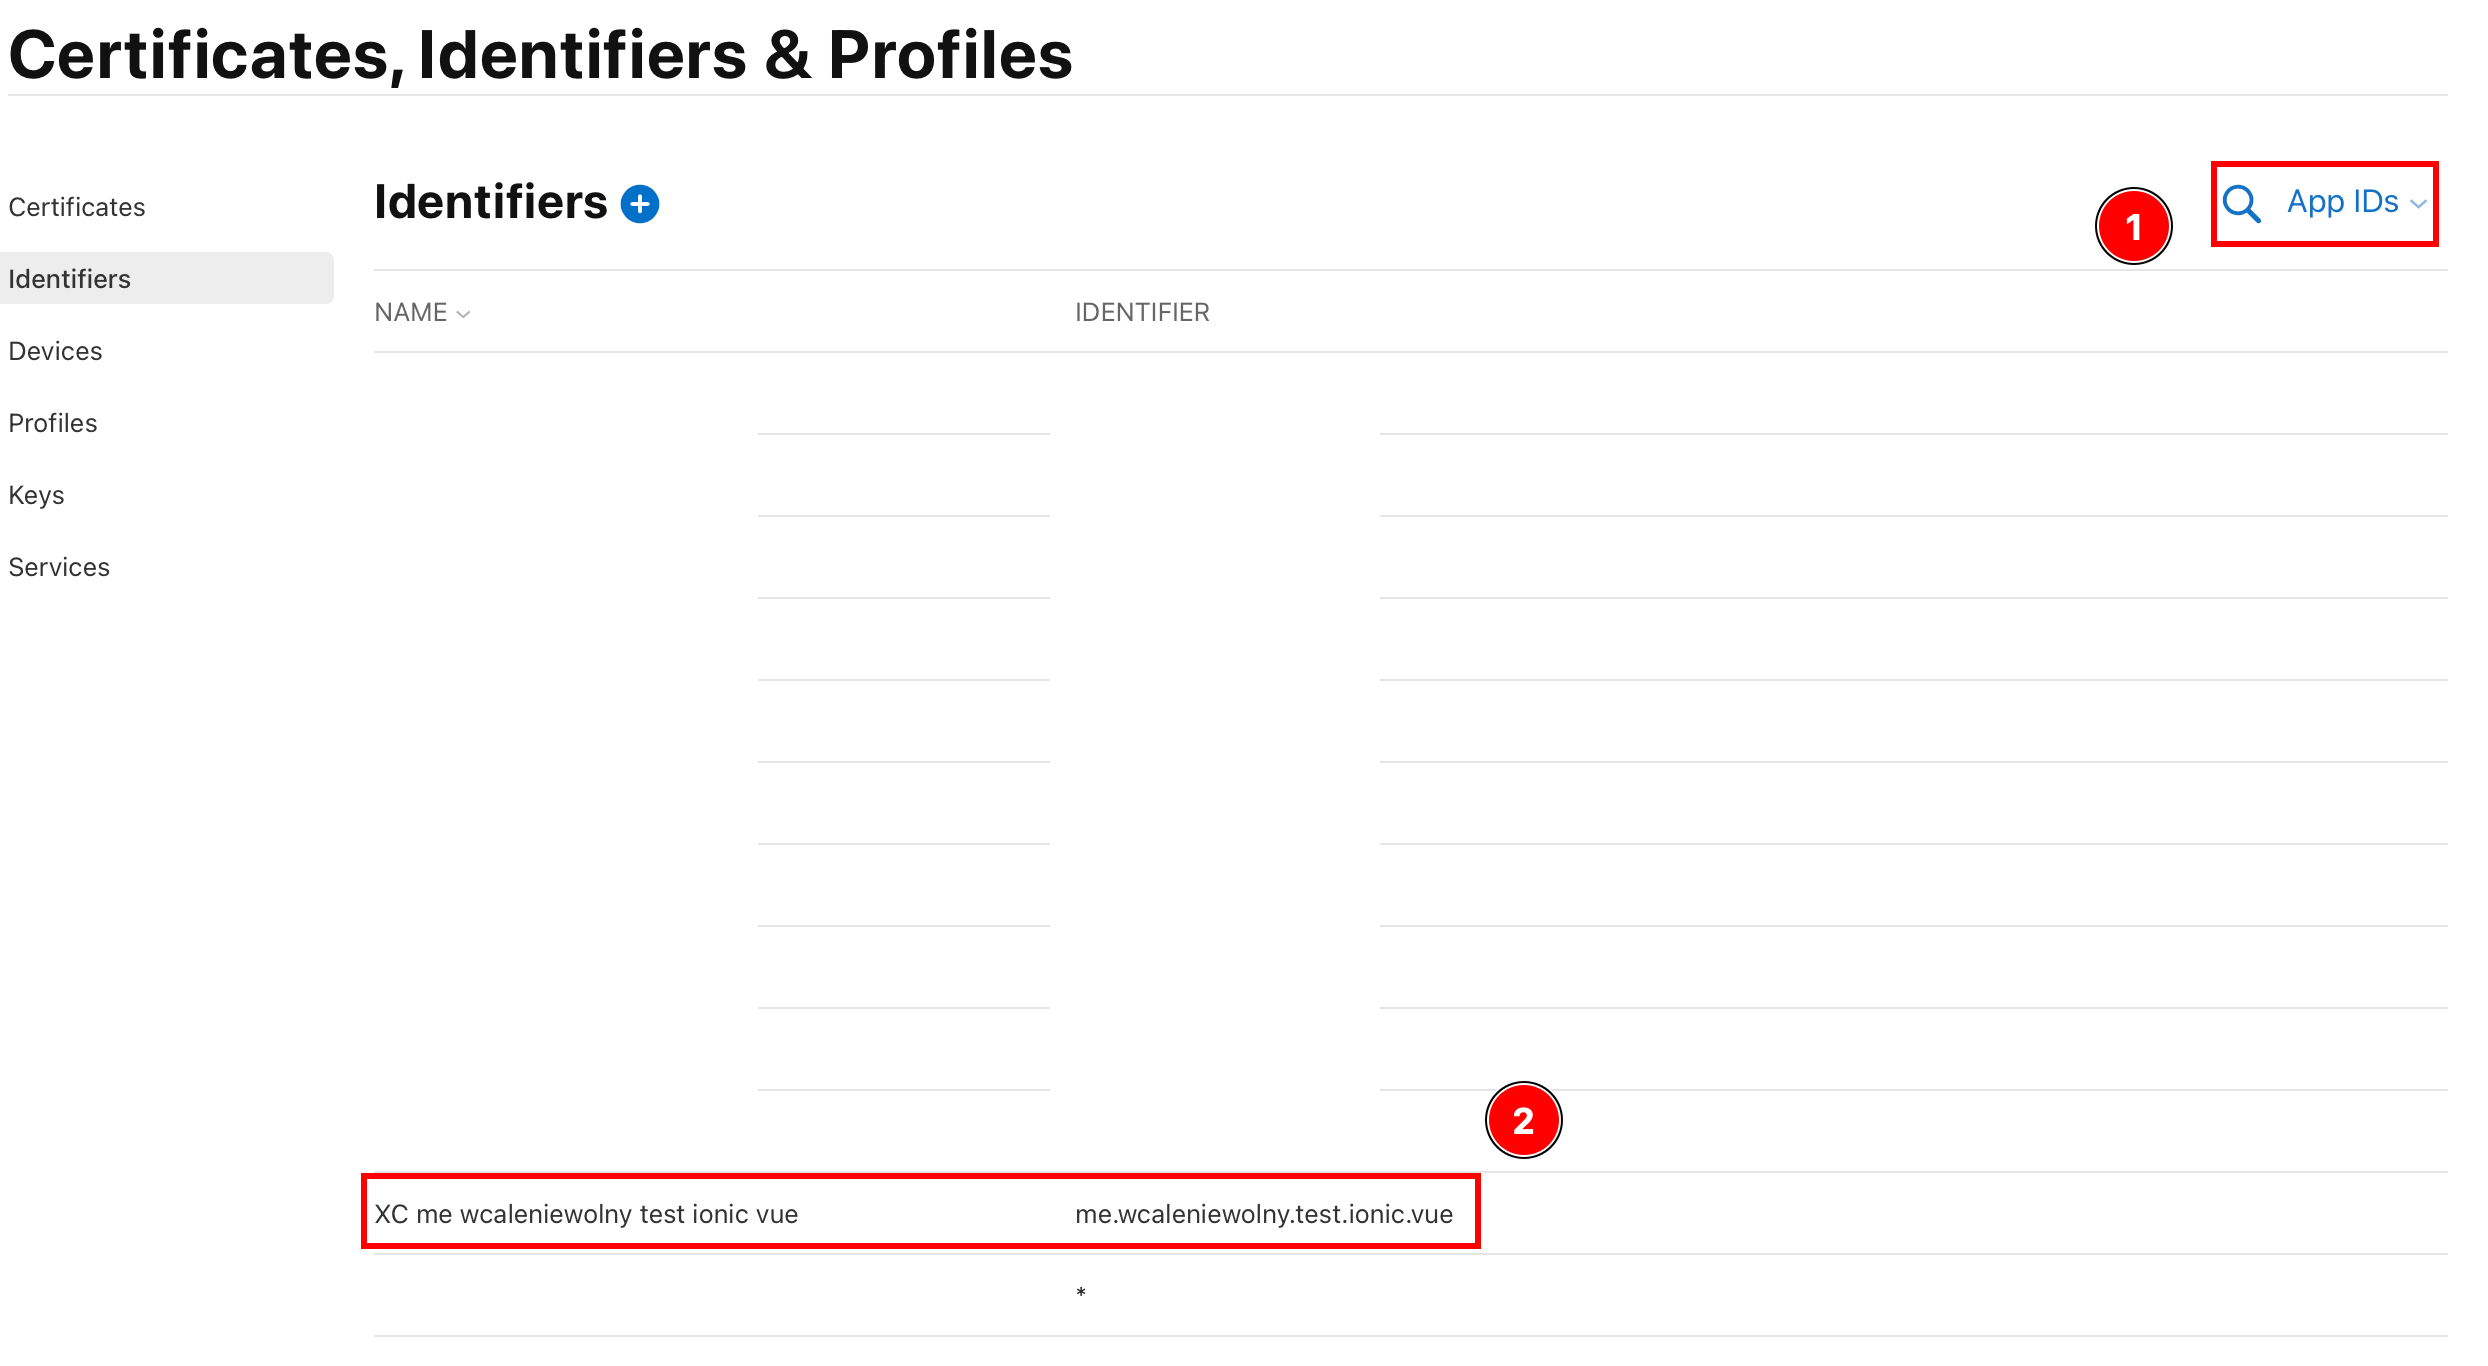
- 确保此字段显示
App IDs - 确保您可以找到您的App ID。
:::注意
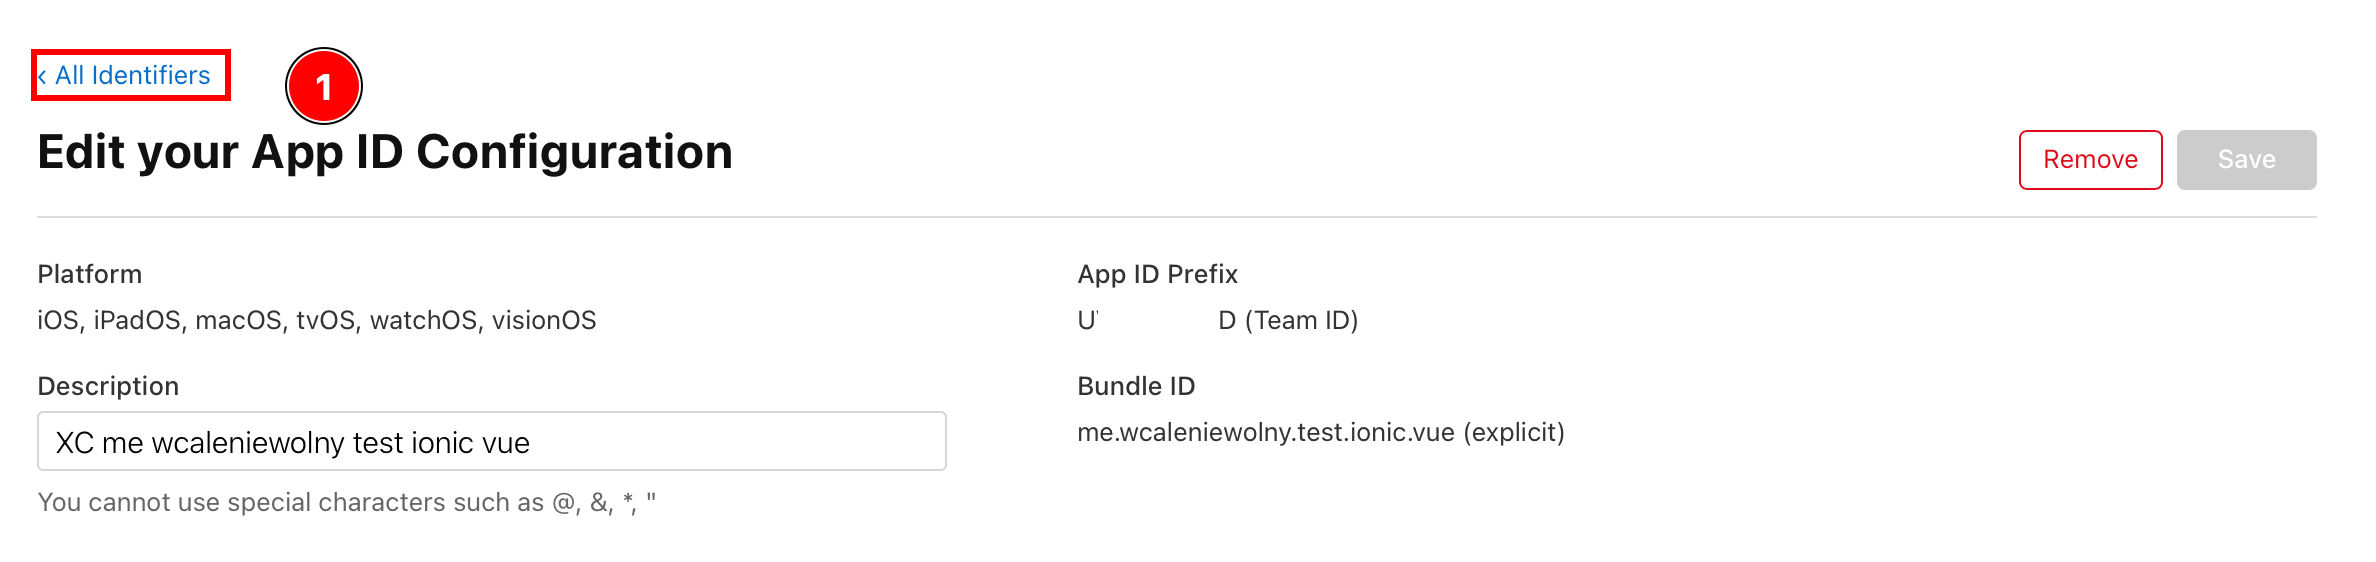
如果您尚未配置 IOS 的 Apple 登录,则必须创建一个。对我来说,我已经创建了一个。我将使用的应用程序 ID 是
me.wcaleniewolny.test.ionic.vue。如果您没有,请使用创建应用程序步骤 创建一个。 :::
- 确保此字段显示
-
确保您的应用启用了
Sign in with Apple功能- 单击您的应用程序
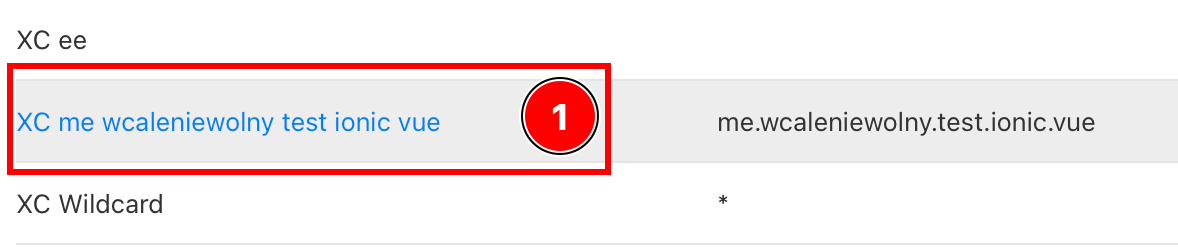
- 确保启用
Sign in with Apple功能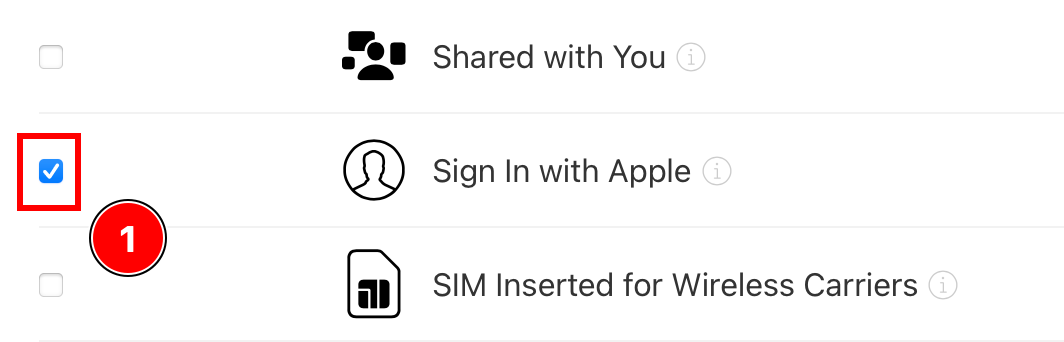
- 如果未启用,请将其启用。
- 单击您的应用程序
-
返回所有“所有标识符”
-
单击“应用程序 ID”并转到“服务 ID”
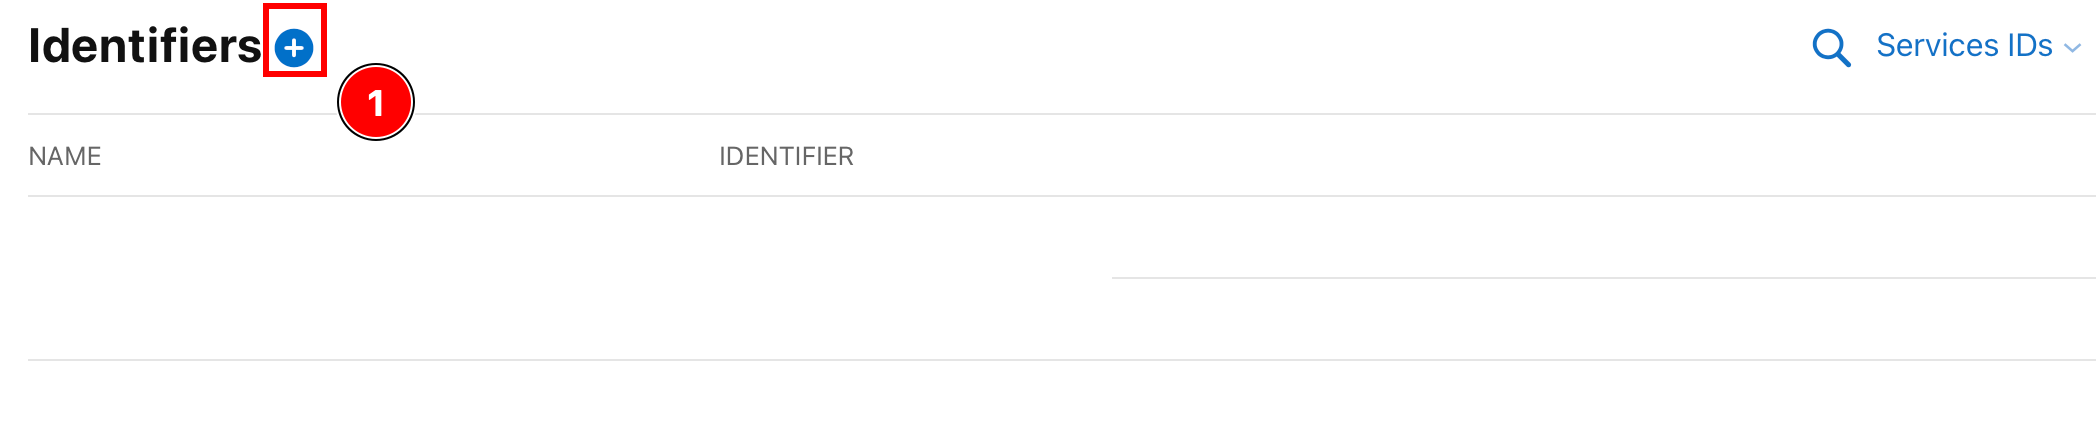
-
创建一个新的标识符
-
单击加号按钮
-
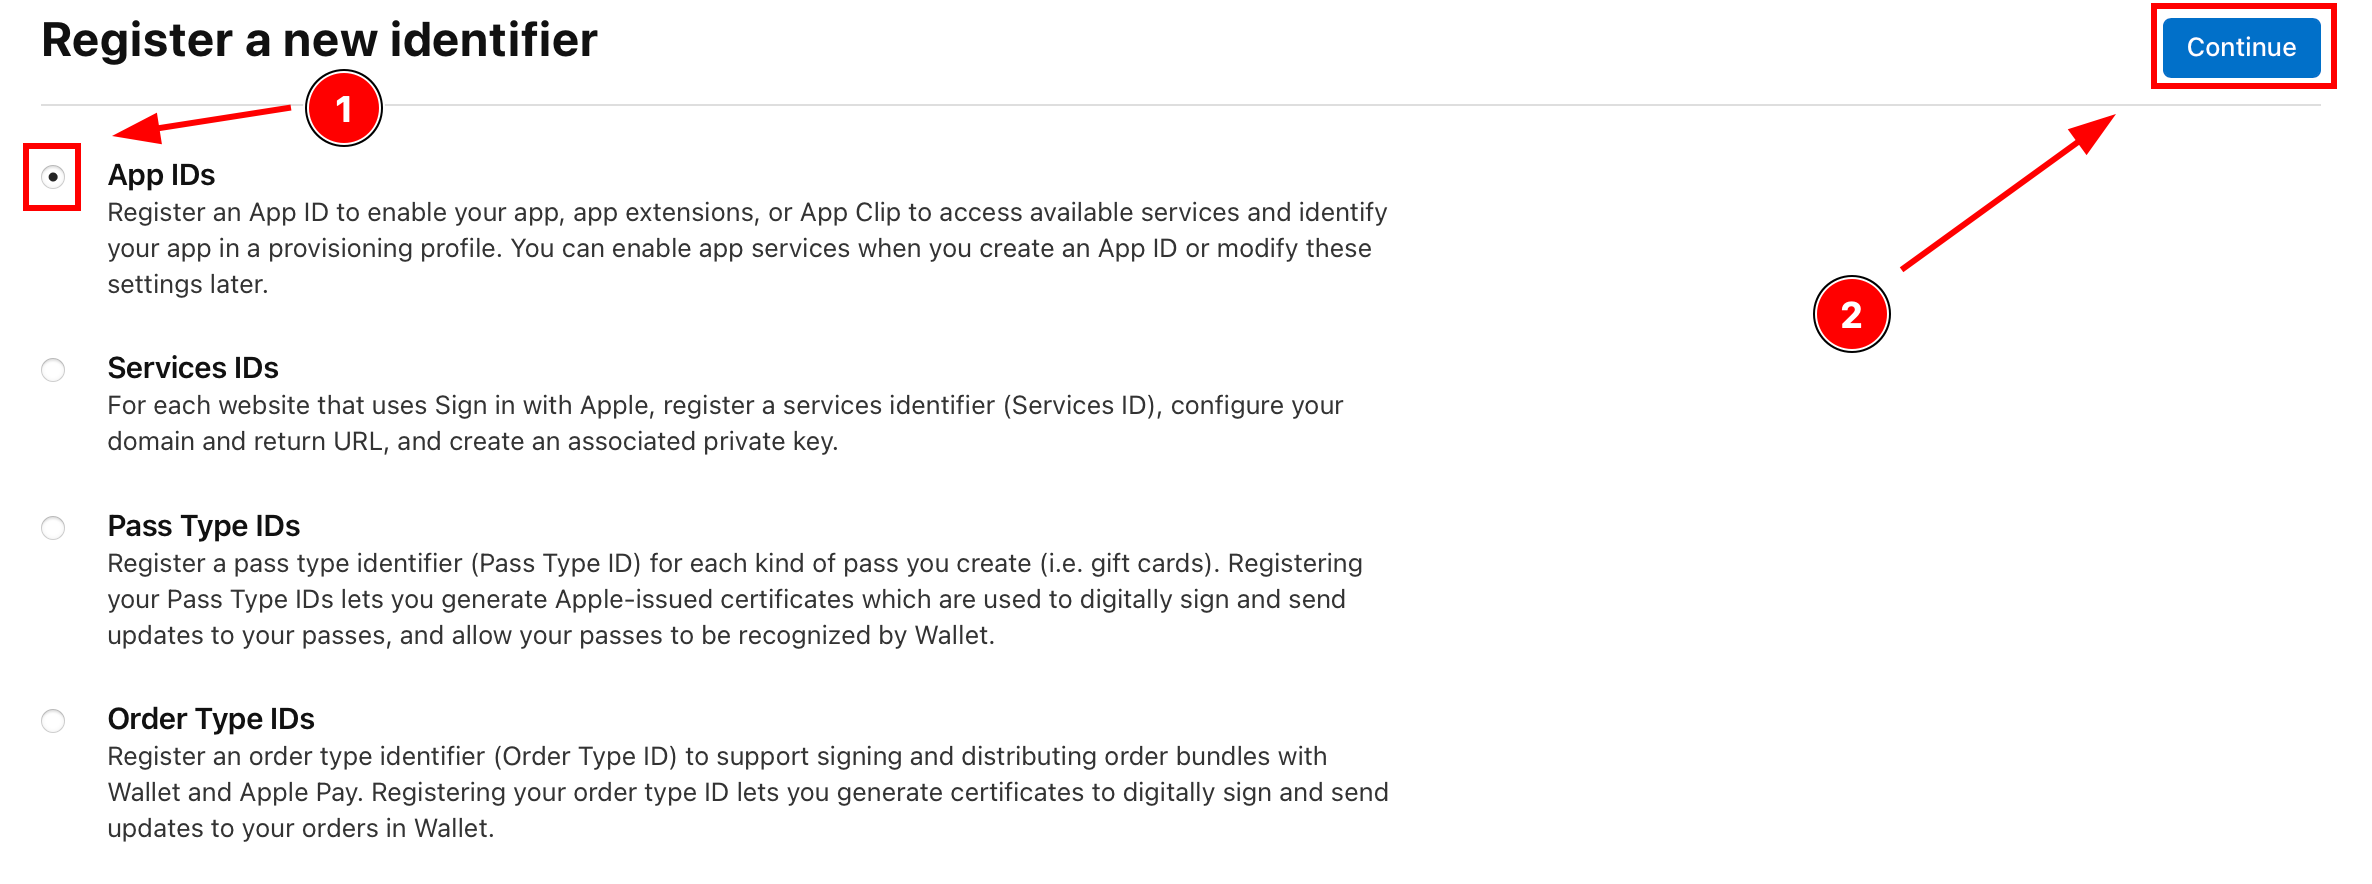
选择“服务 ID”并单击
Continue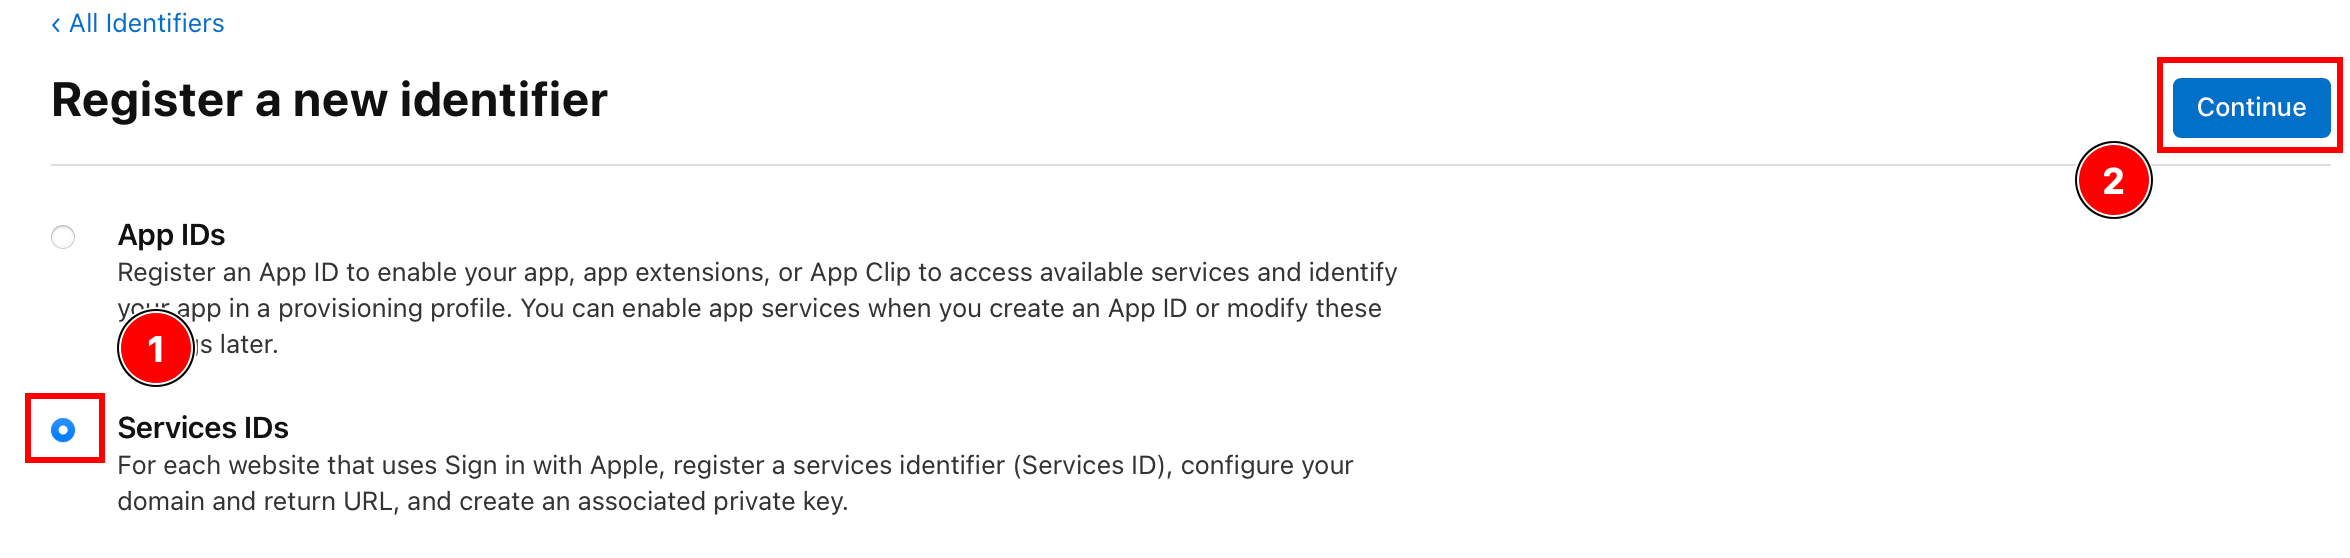
-
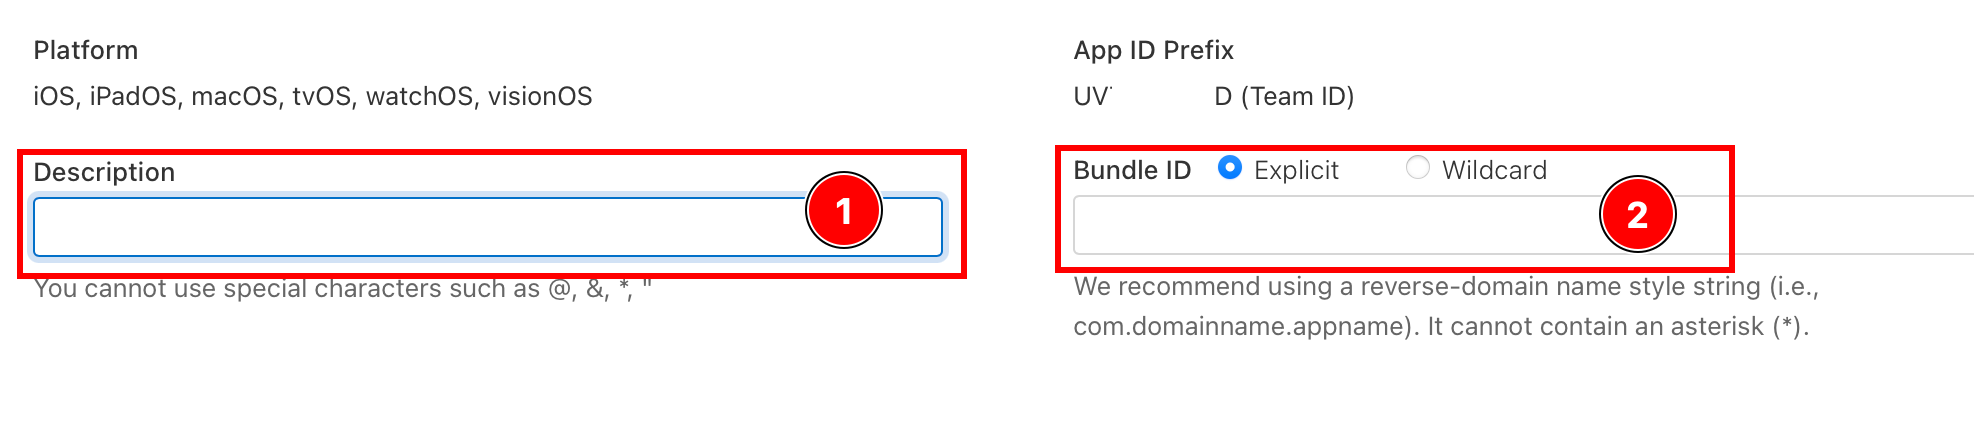
输入描述和标识符,然后单击
Continuie。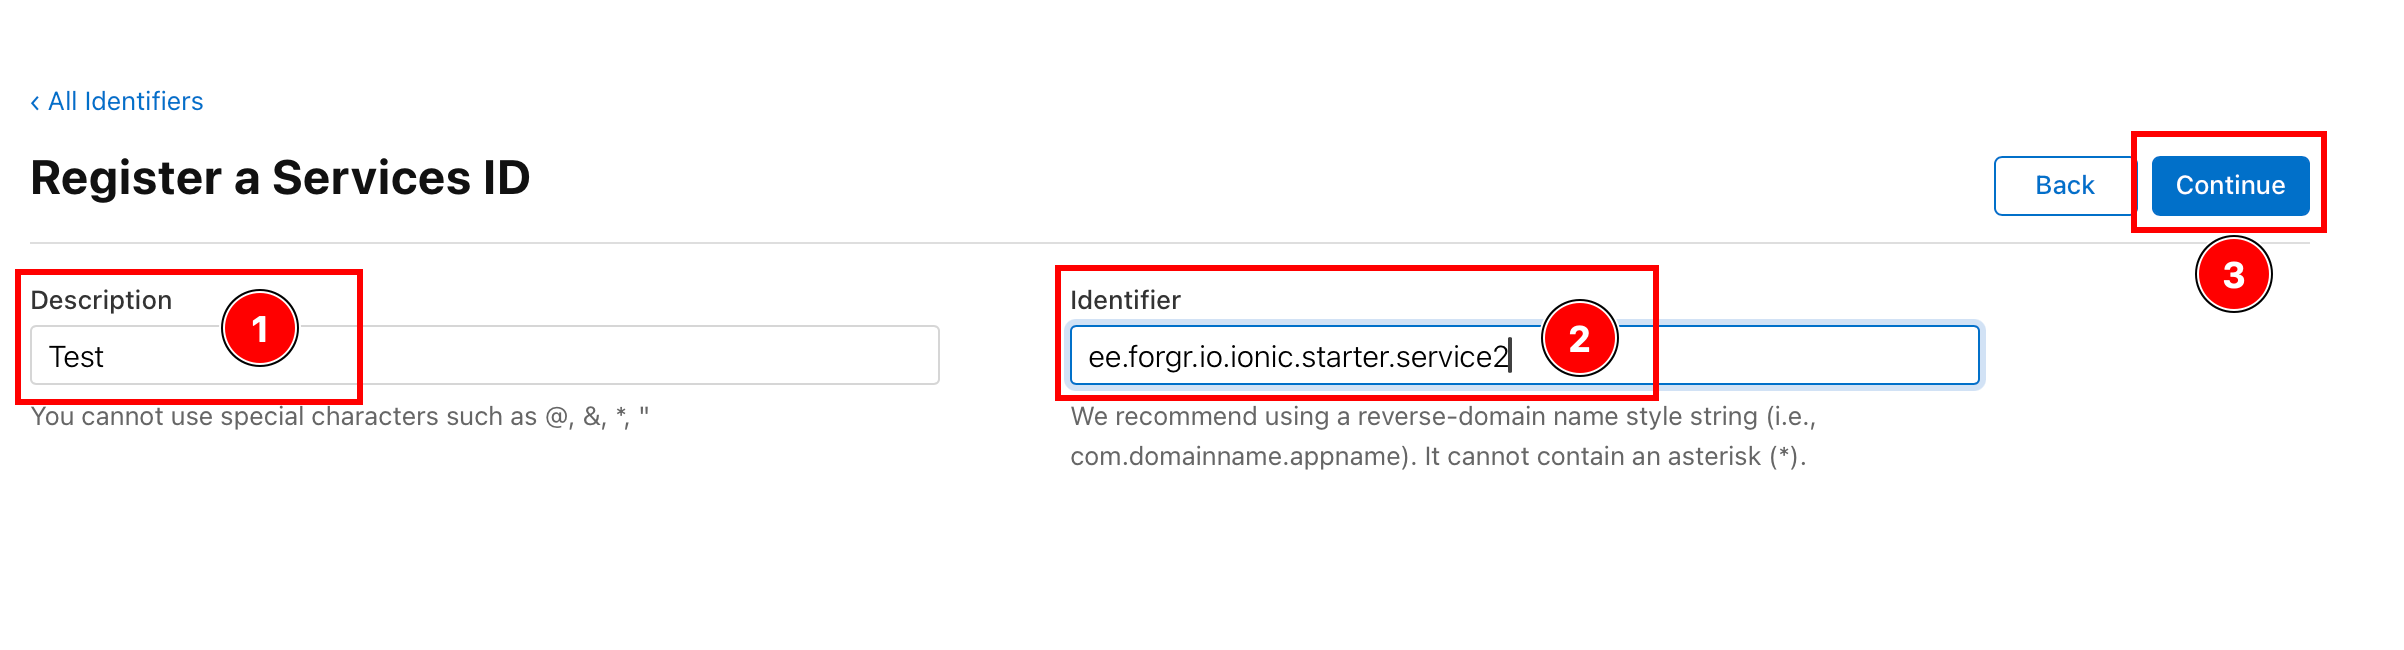
:::注意 这个
identifiers将成为clientId,您将在initialize函数和ANDROID_SERVICE_ID中传递给后端。请保存! :::
:::注意 服务 ID 不必与应用程序 ID 匹配,但我建议将服务 ID 设置为
YOUR_APP_ID.service。提醒一下,我使用me.wcaleniewolny.test.ionic.vue作为我的应用程序 ID,但我使用ee.forgr.io.ionic.service2作为服务 ID。 ::: -
请验证详细信息并点击
Register
-
点击刚刚创建的服务

-
启用
Sign in with Apple选项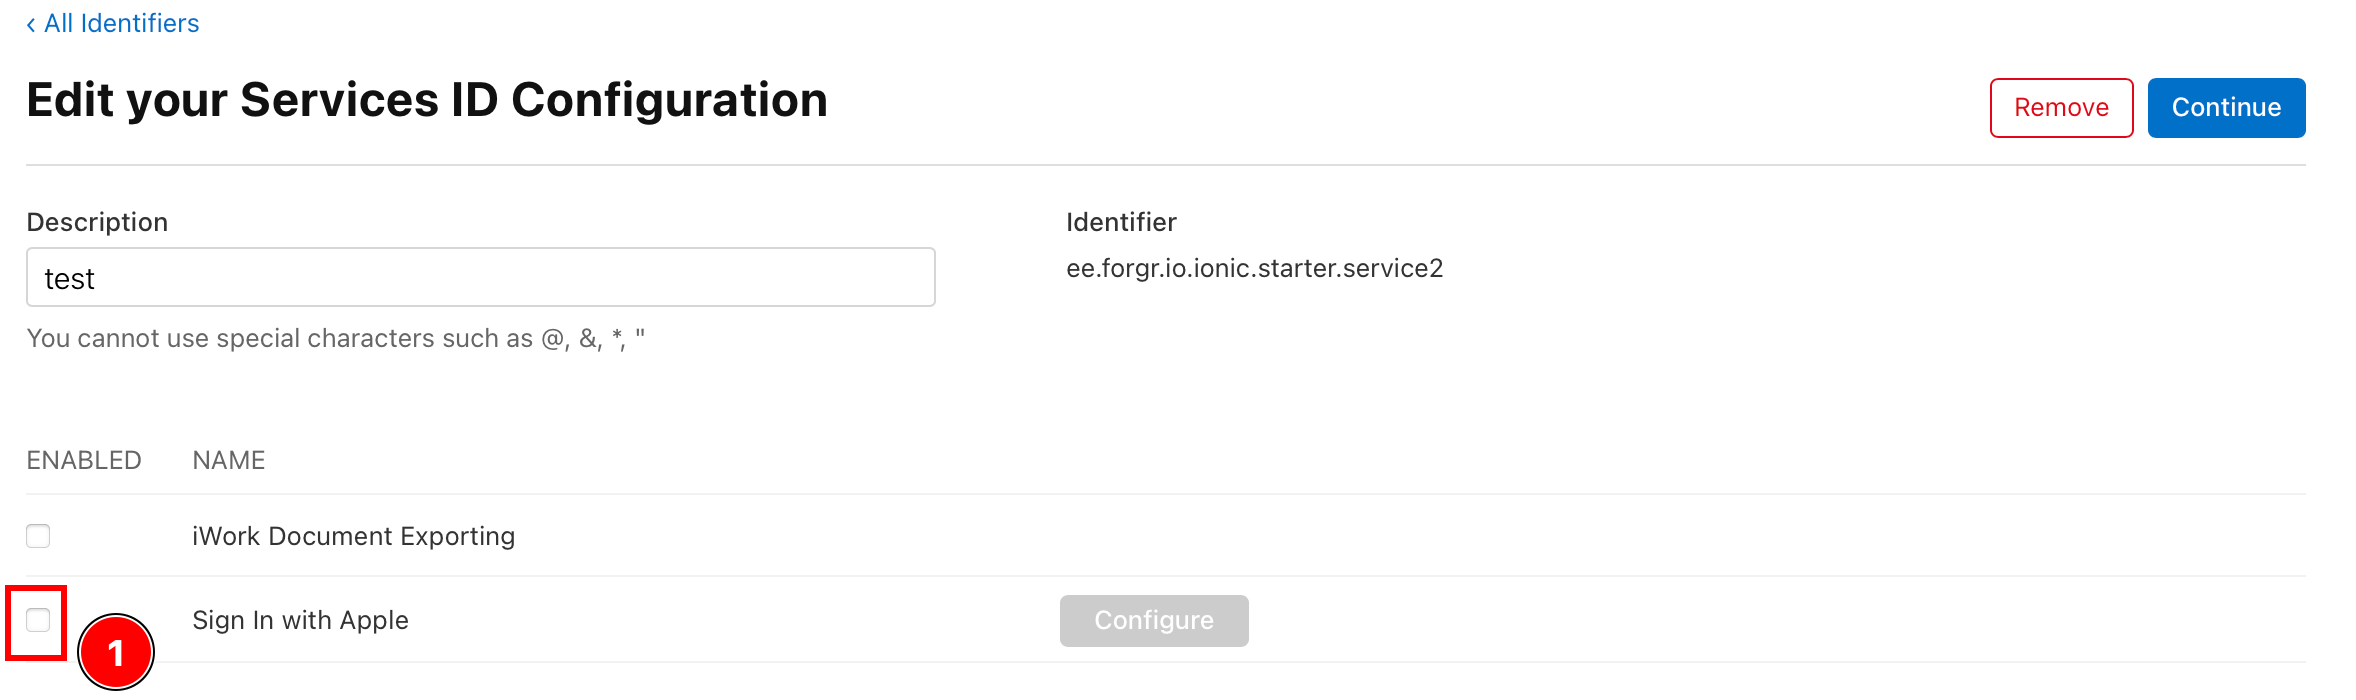
-
配置
Sign In with Apple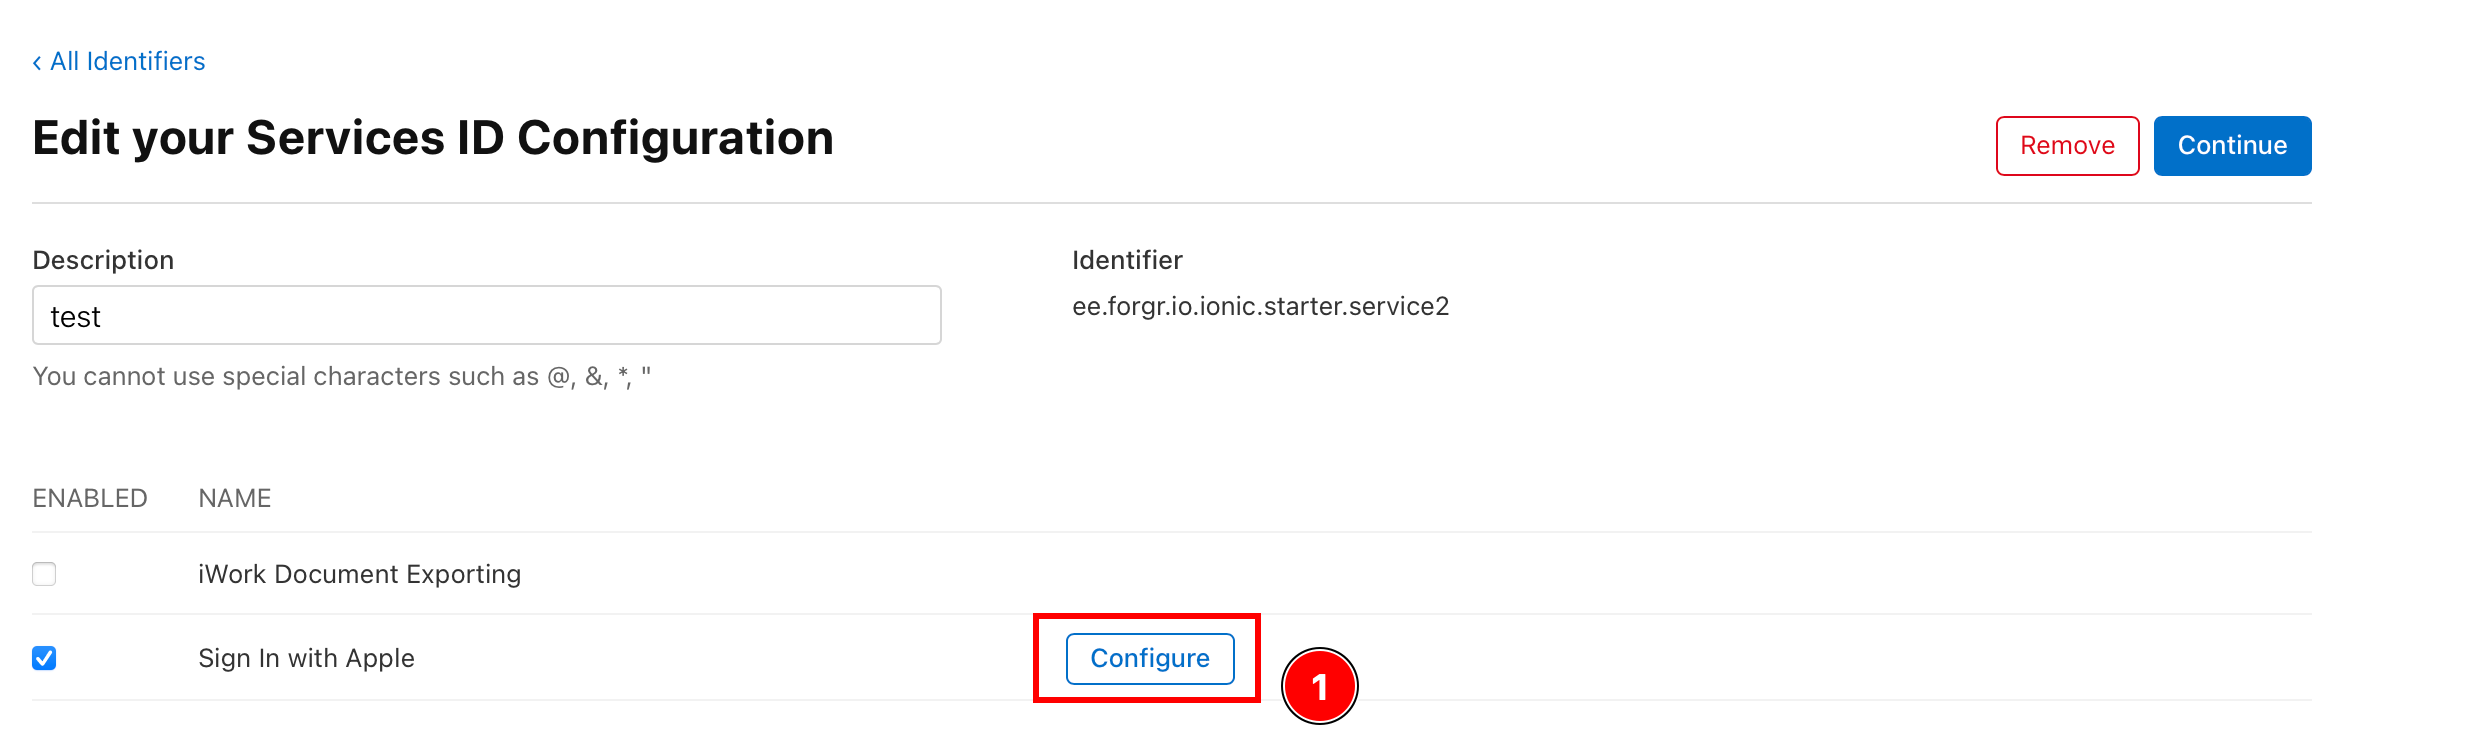
-
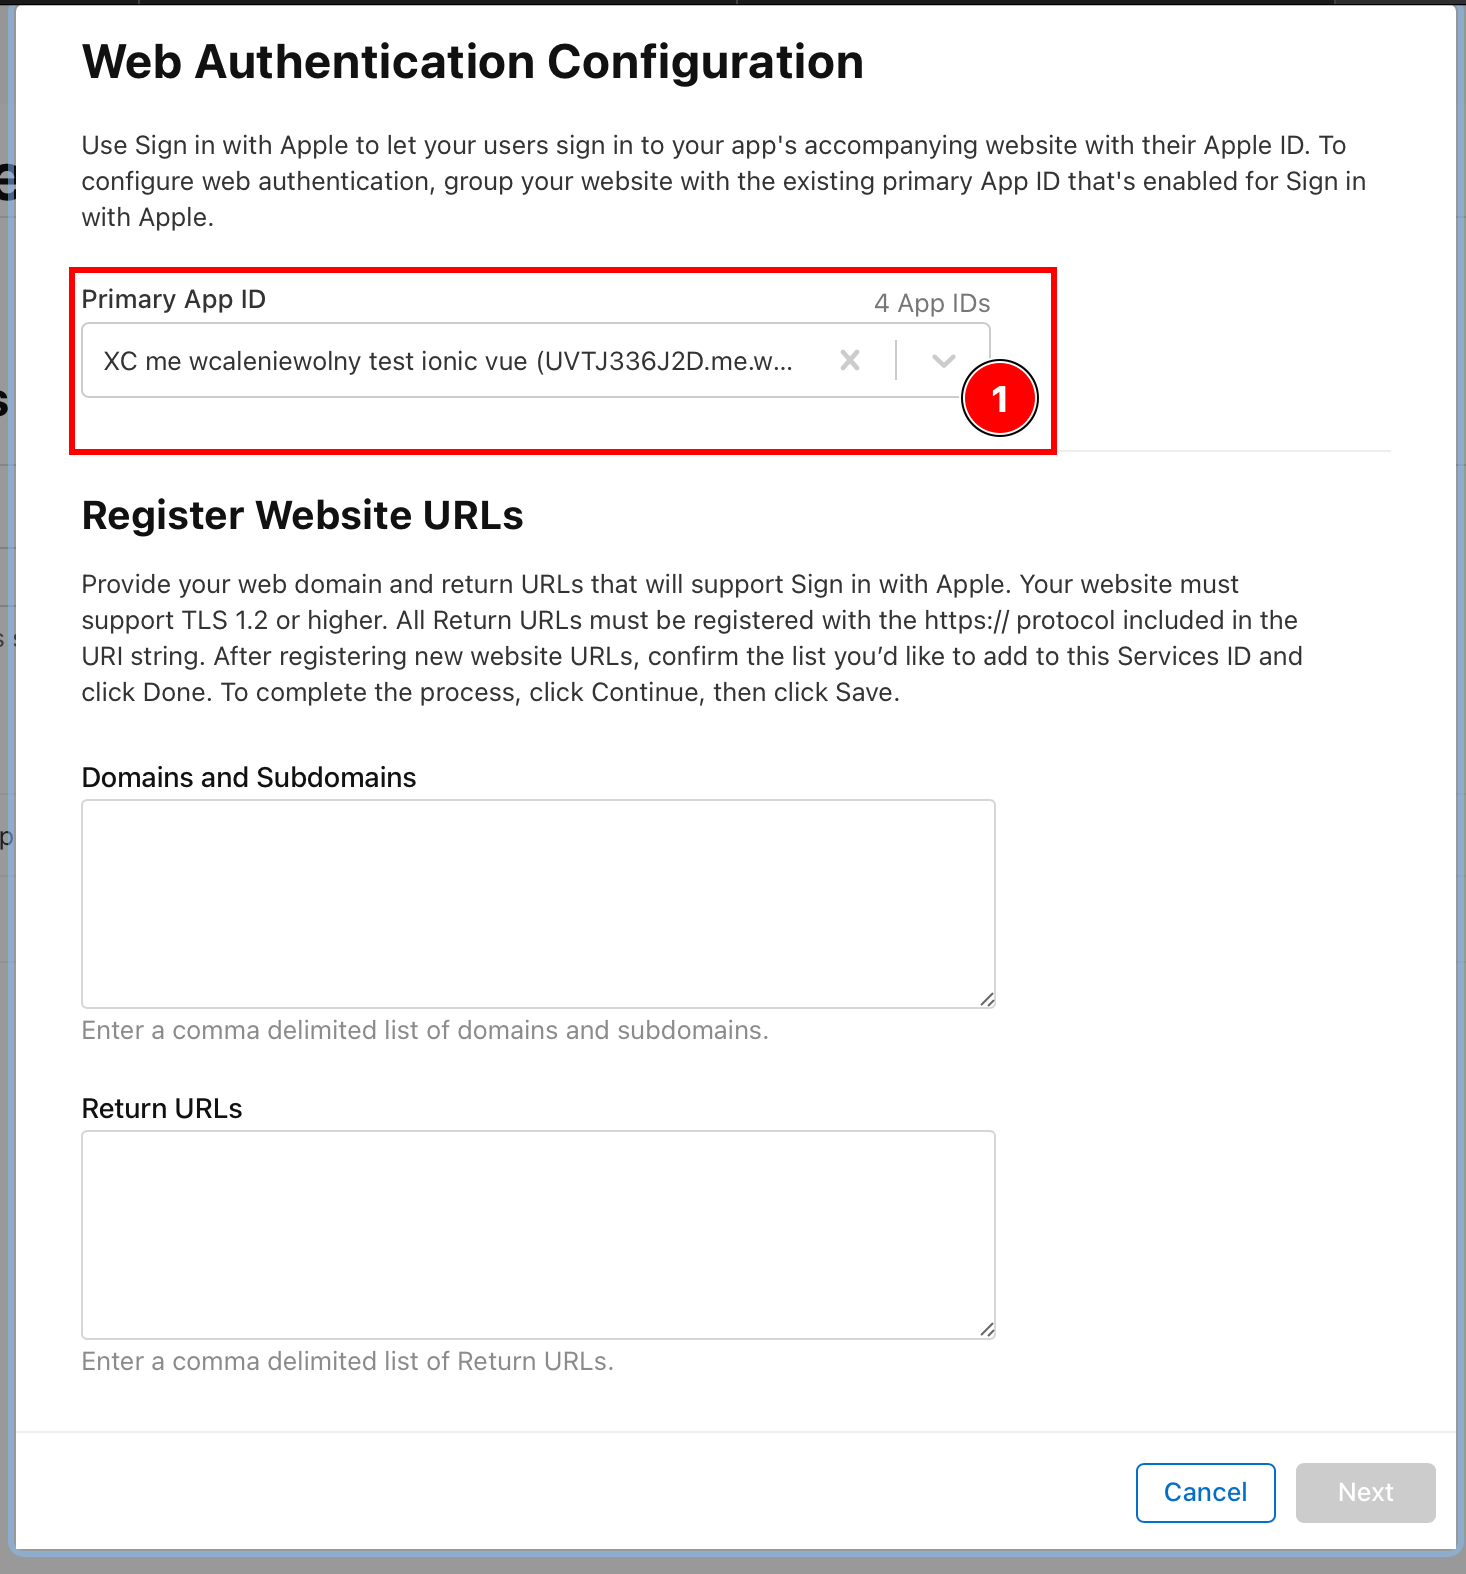
确保“主应用程序 ID”设置为上一步中配置的应用程序 ID
-
添加您要托管后端的域。
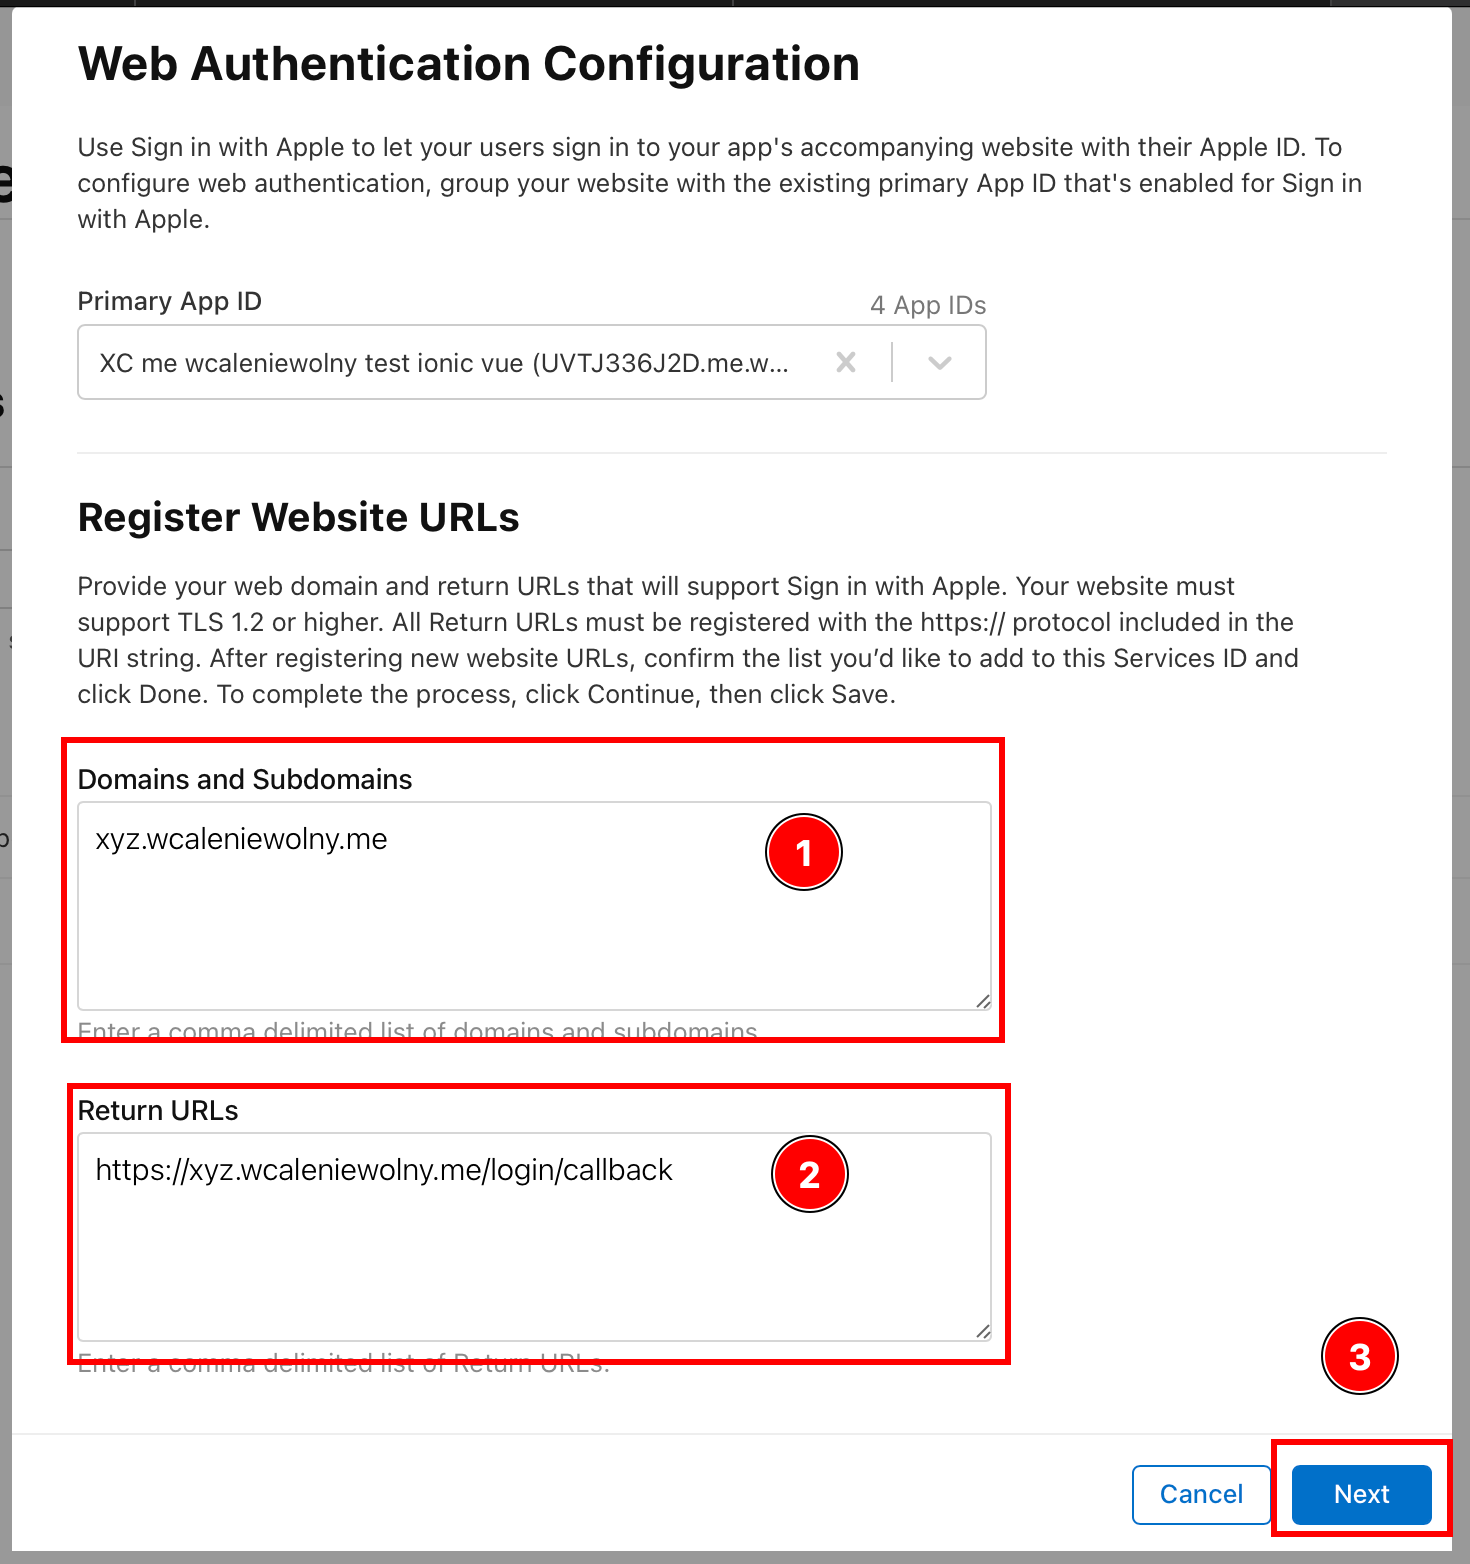
:::注意 该后端必须在 HTTPS 上运行。至于“返回 URL”,您可能希望在阅读本教程的下一部分并配置后端后返回到此。出于本教程的目的,我将使用
https://xyz.wcaleniewolny.me/login/callback作为返回 URL,使用xyz.wcaleniewolny.me作为域。按下一步。 ::: -
确认数据并点击
Done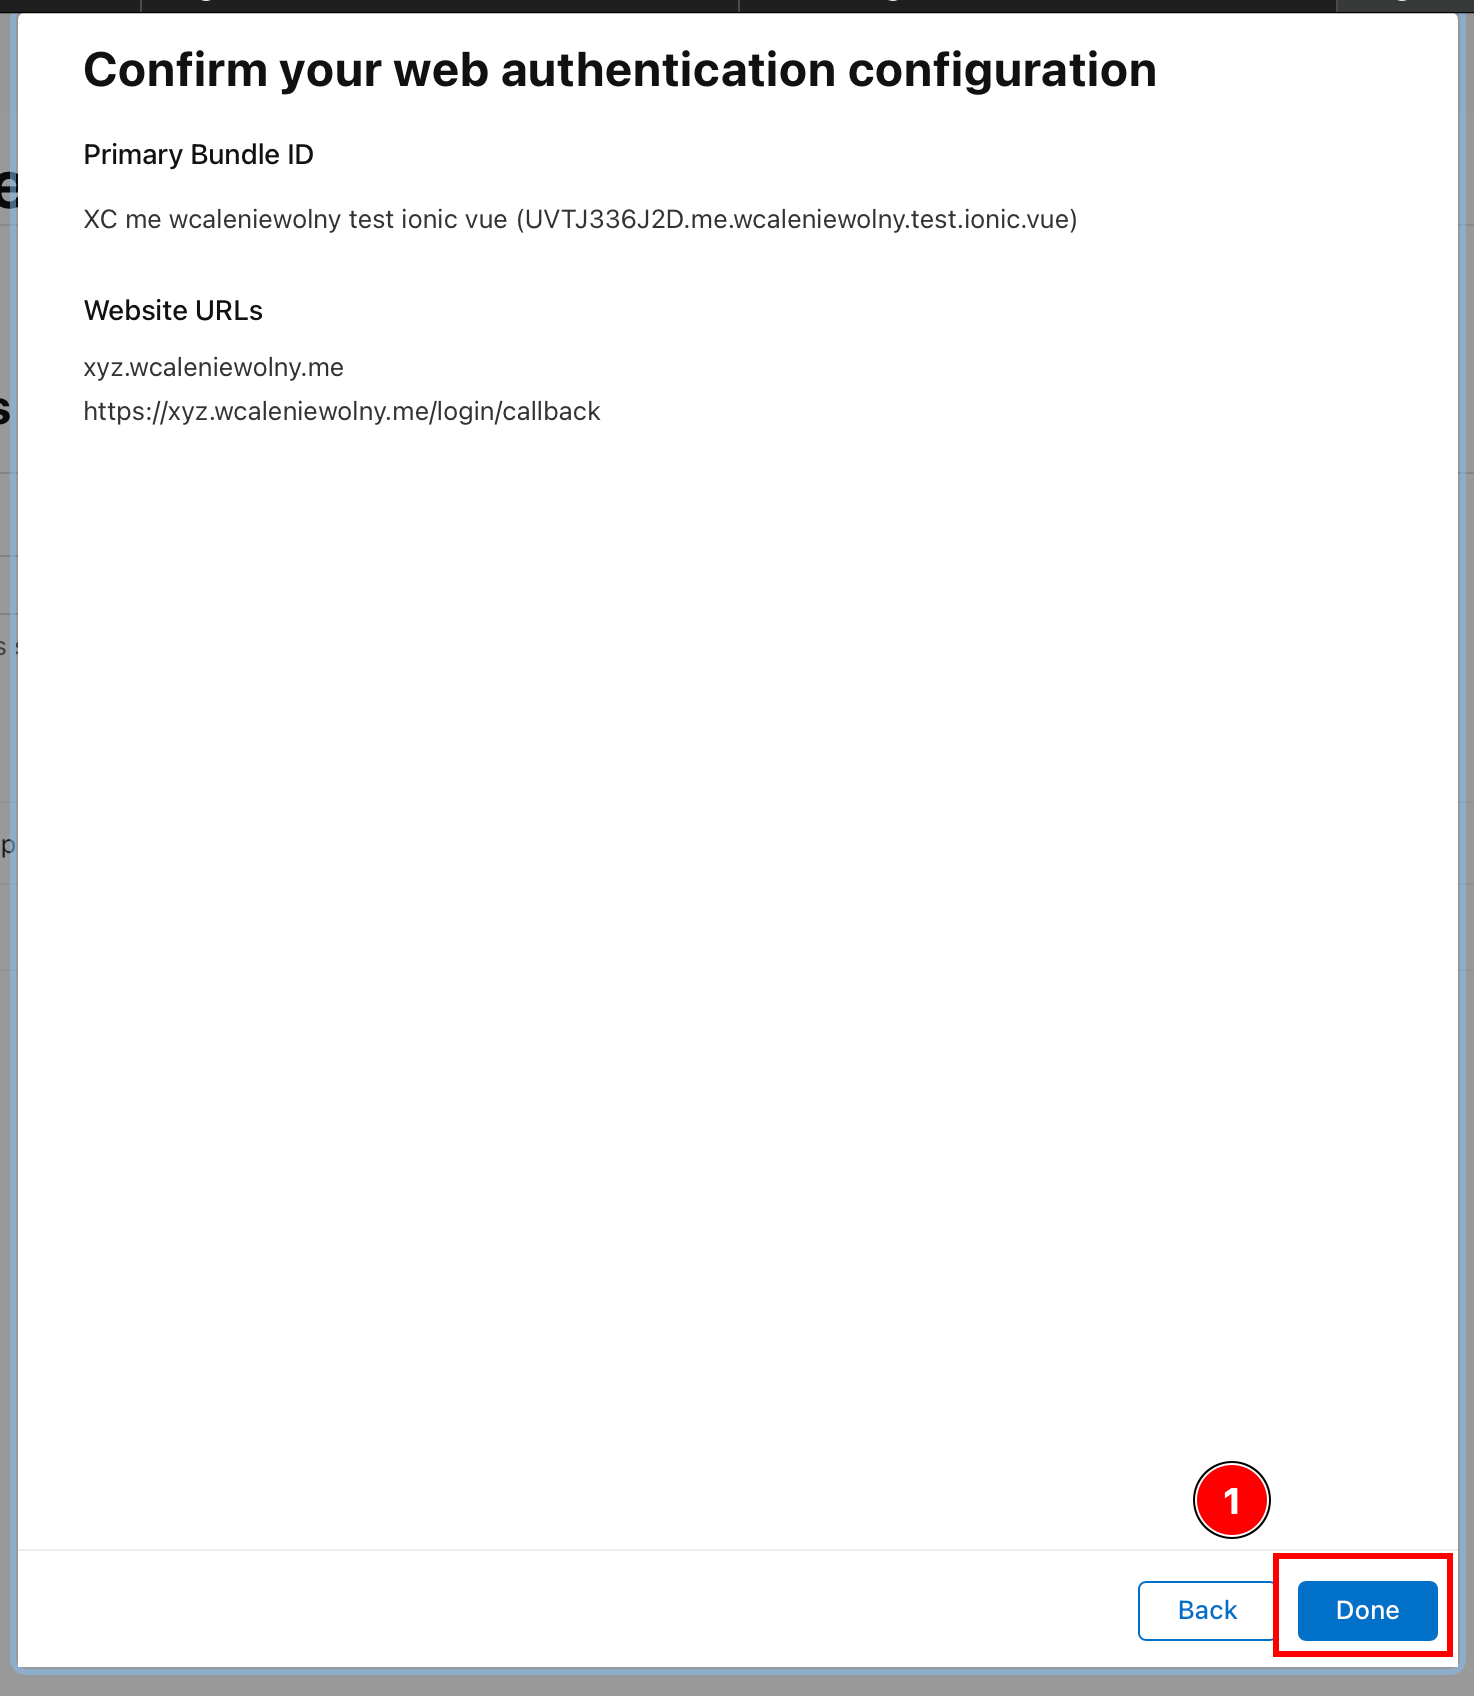
-
点击
Continue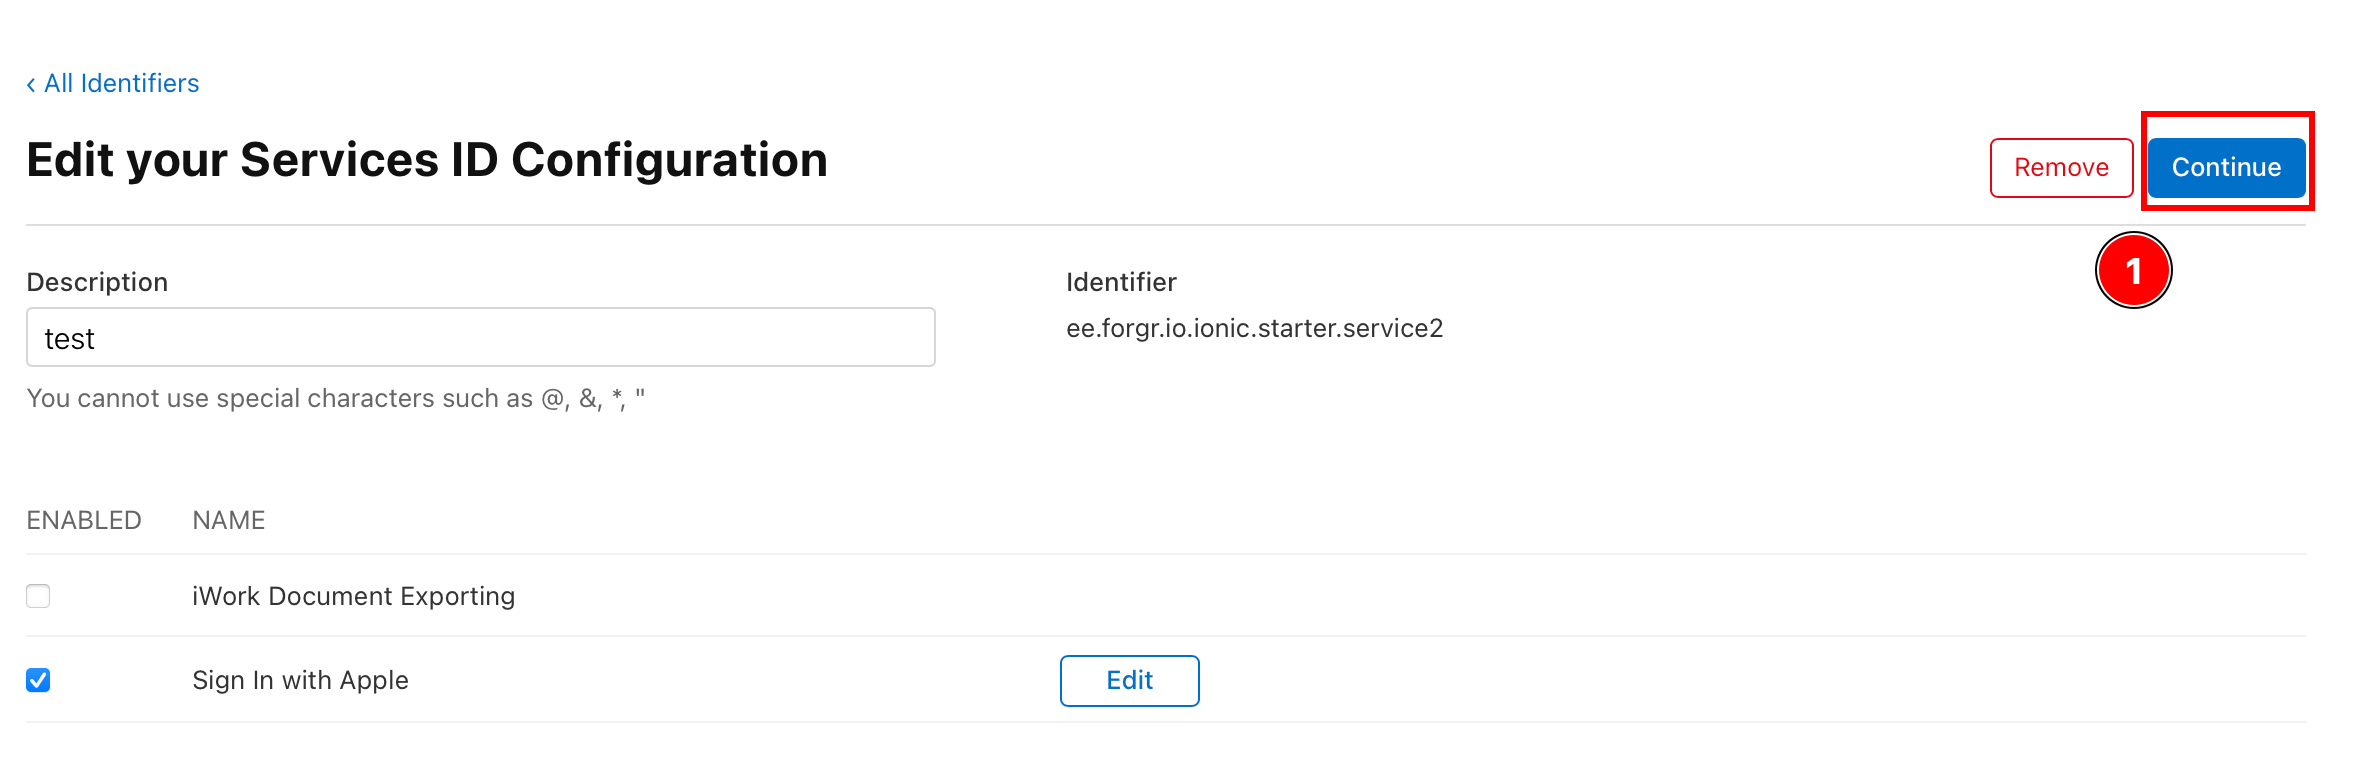
-
点击
Save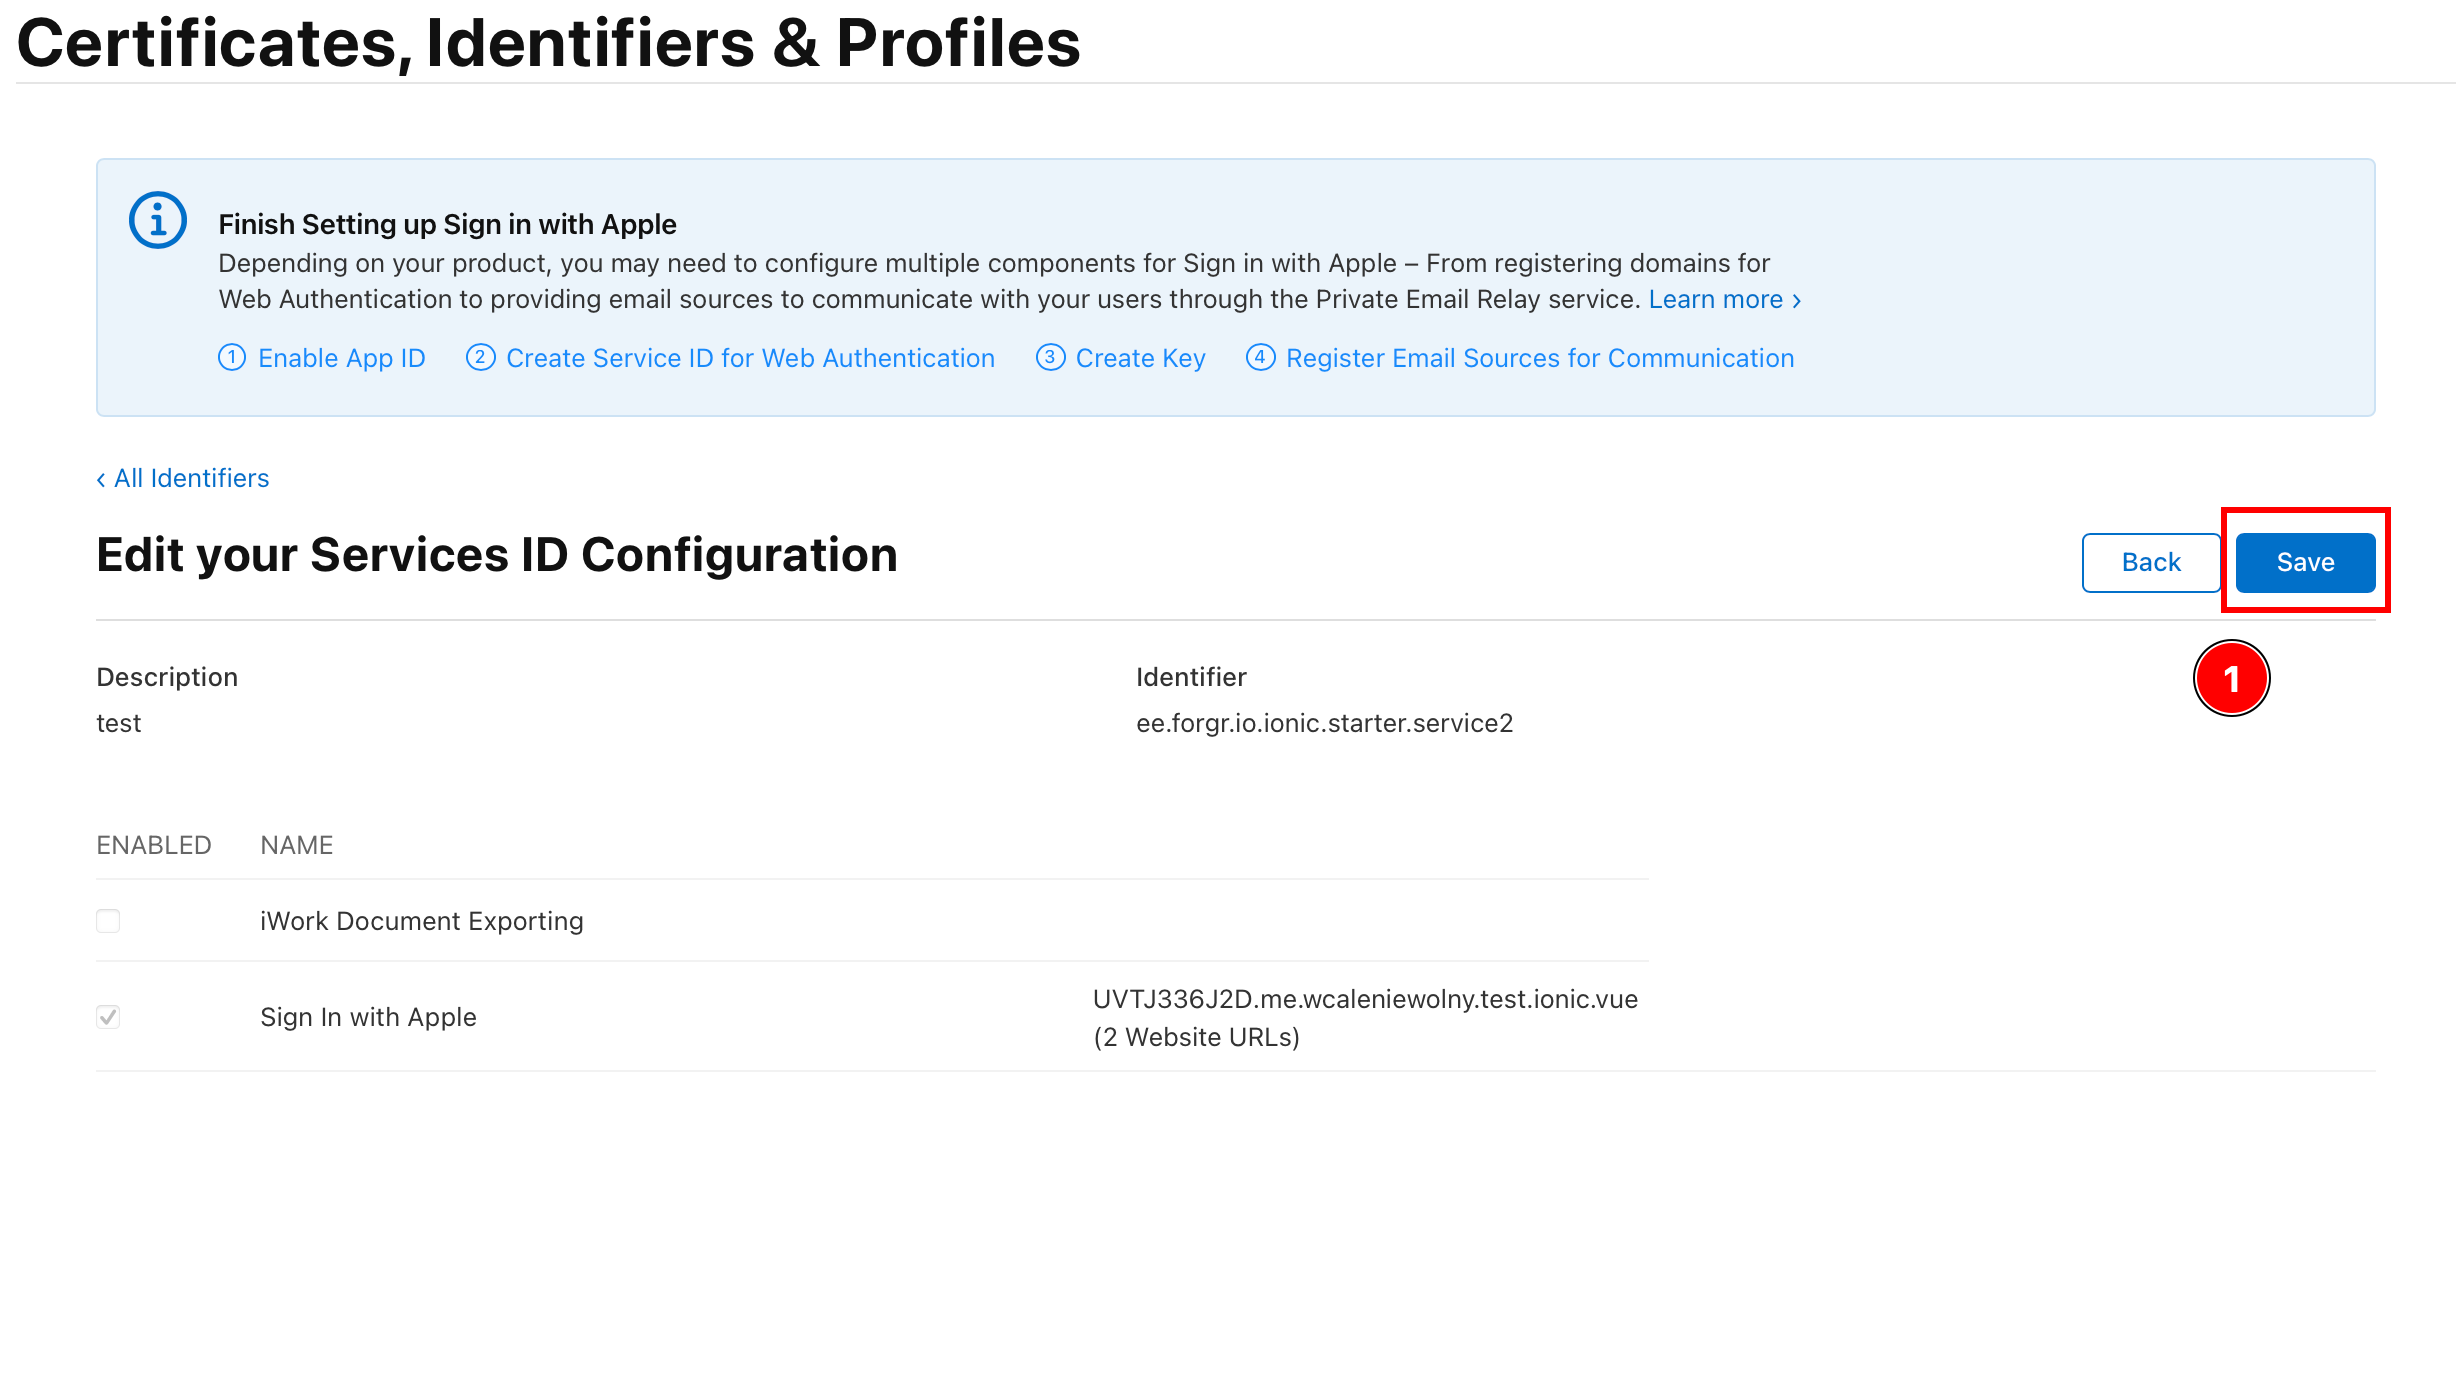
-
-
返回所有“所有标识符”
-
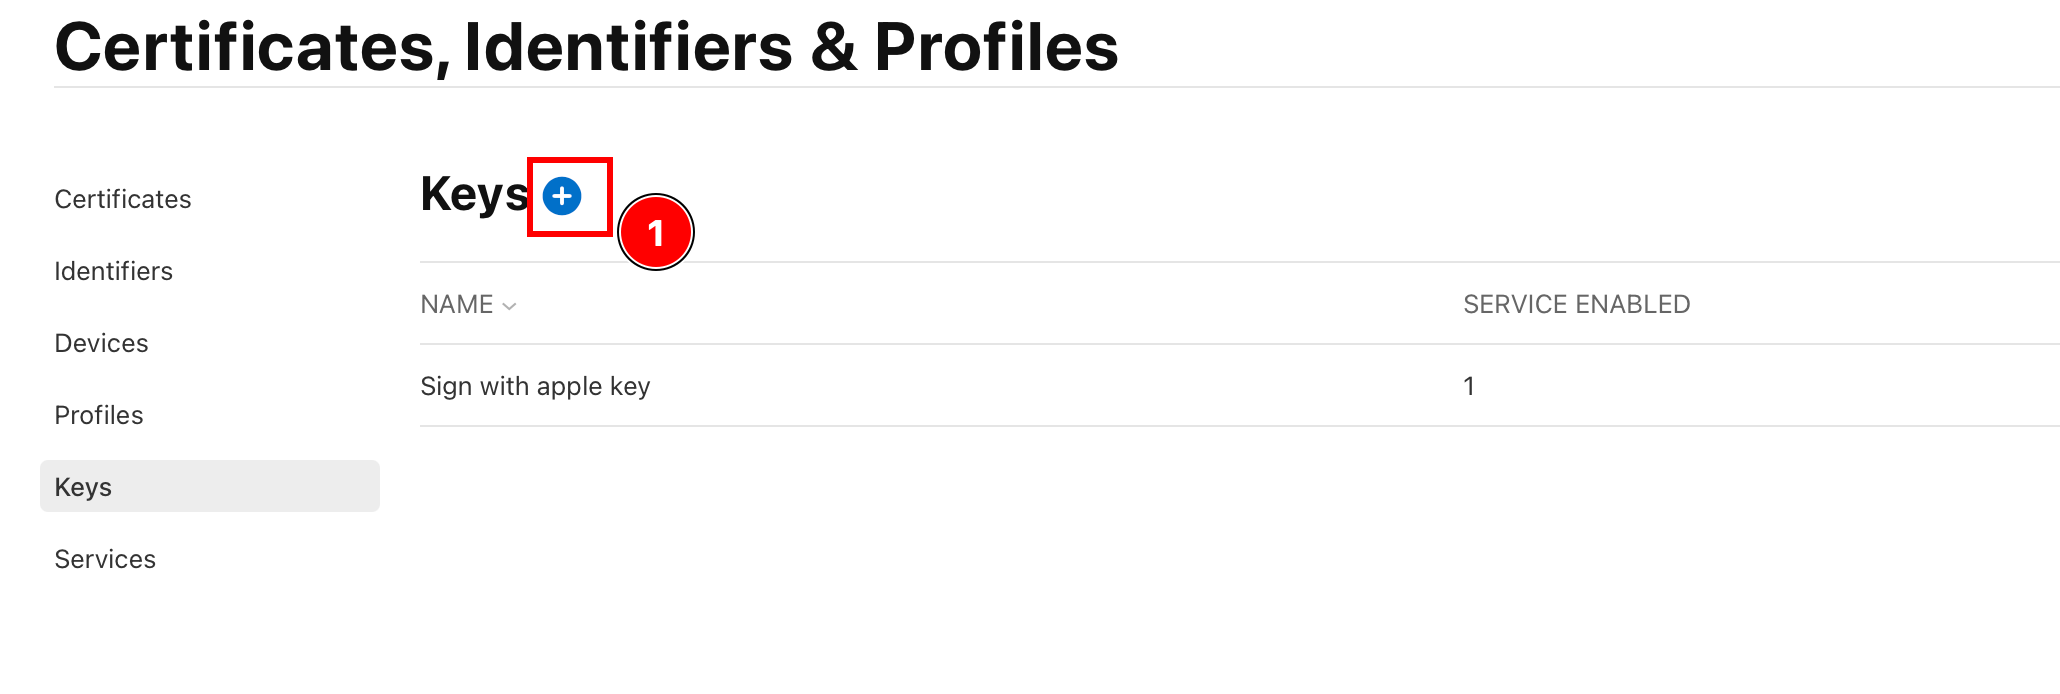
单击
Keys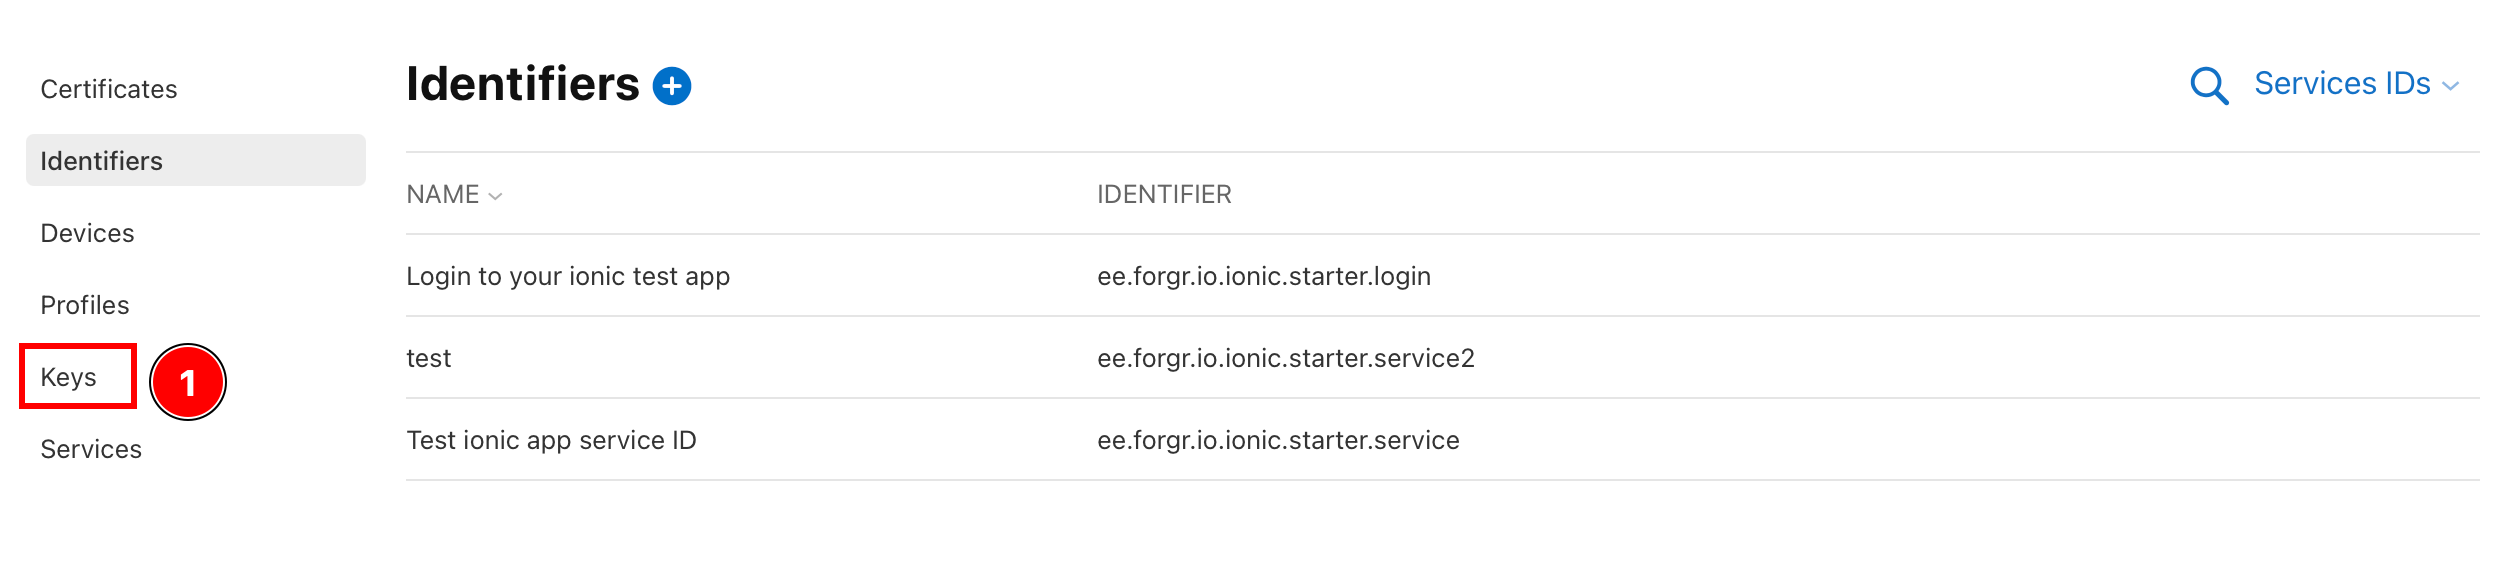
-
单击加号图标
-
为您的密钥命名

:::注意 这个名字并不重要,你可以输入任何内容。 :::
-
选择
Sign in with Apple并单击Configure
-
选择主应用程序 ID,然后按
Save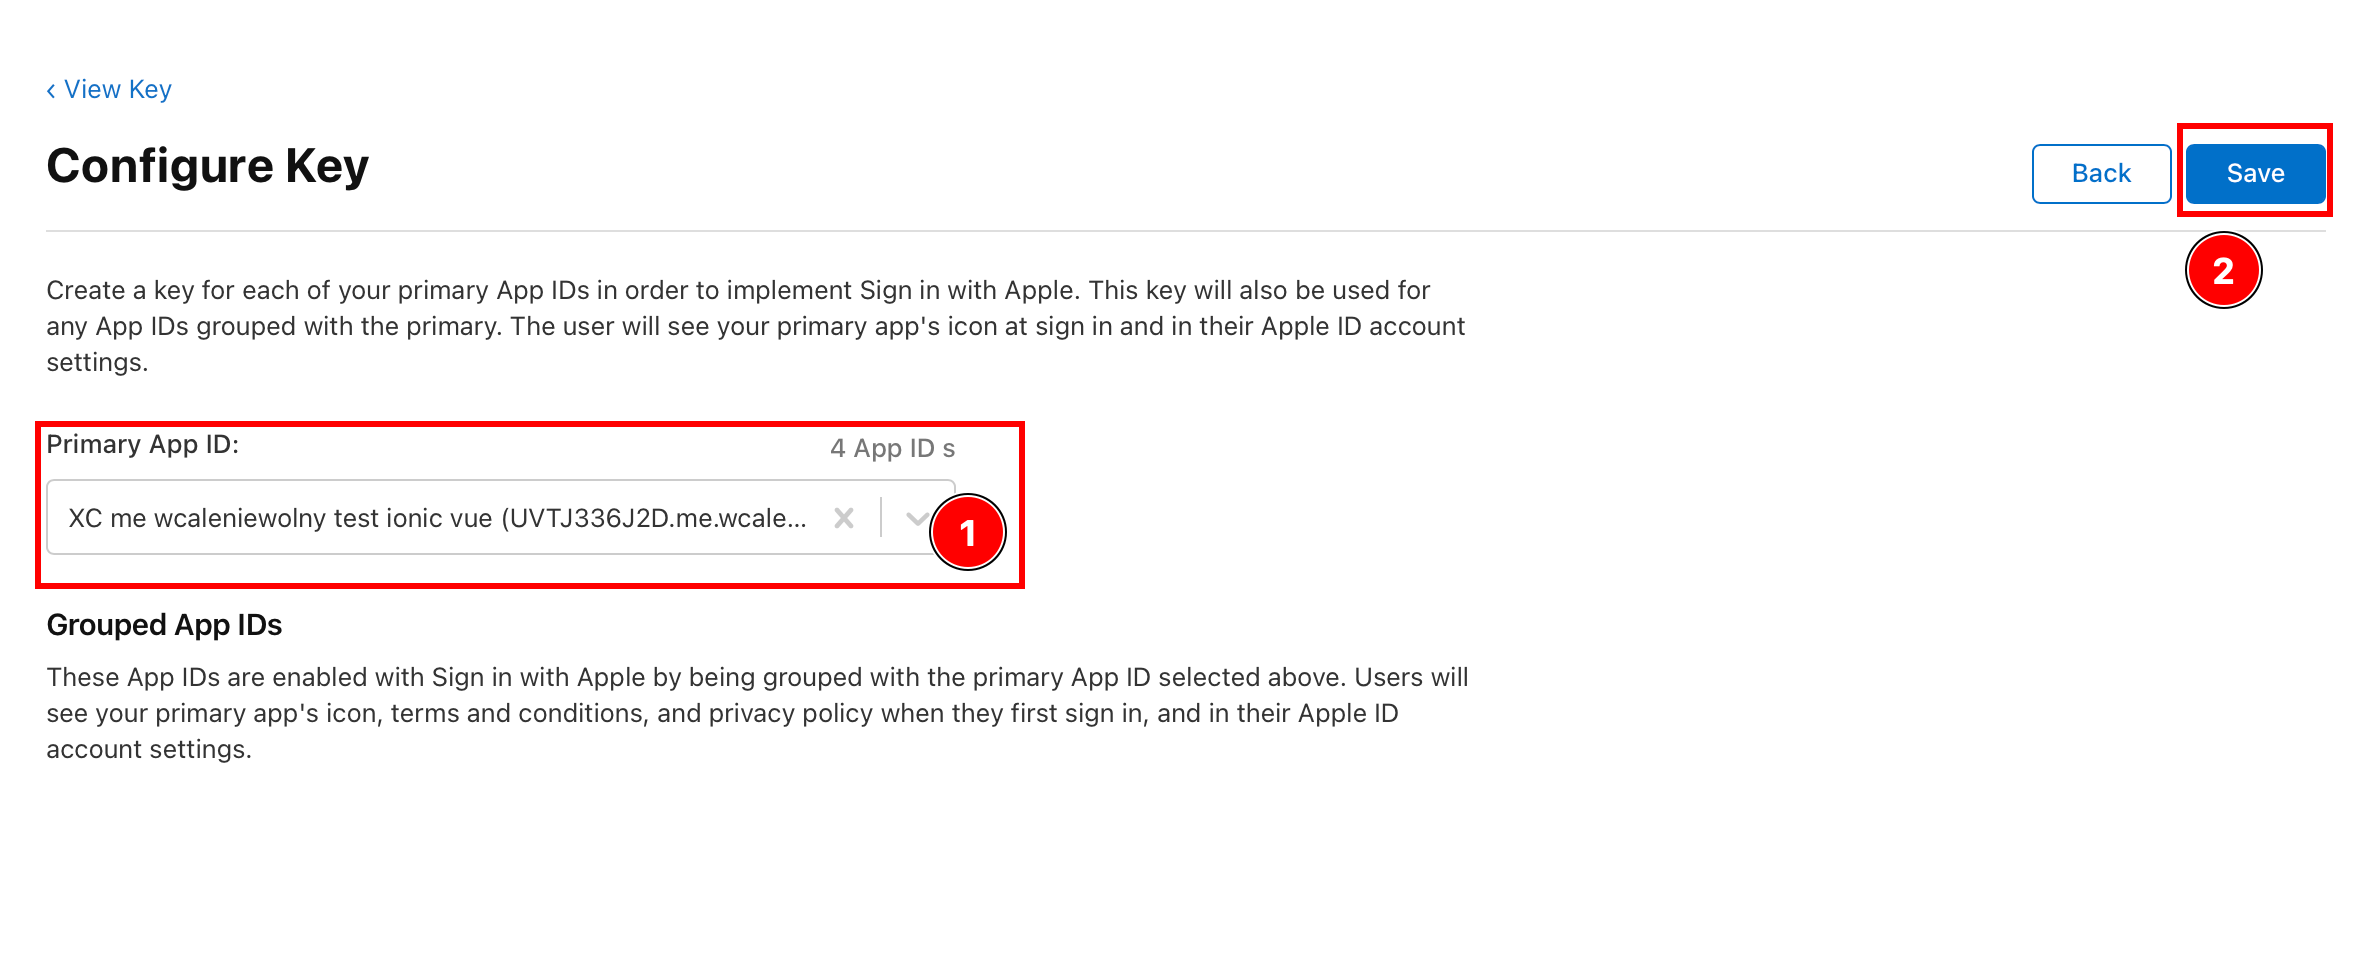
:::注意 该应用程序 ID 必须与前面步骤中的 ID 相同。 :::
-
单击
Continue
-
单击
Register
-
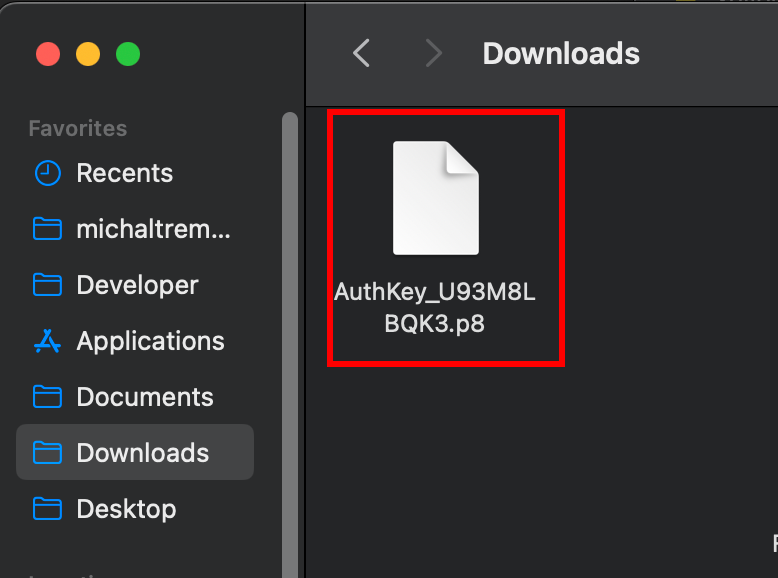
复制密钥 ID 并下载密钥。
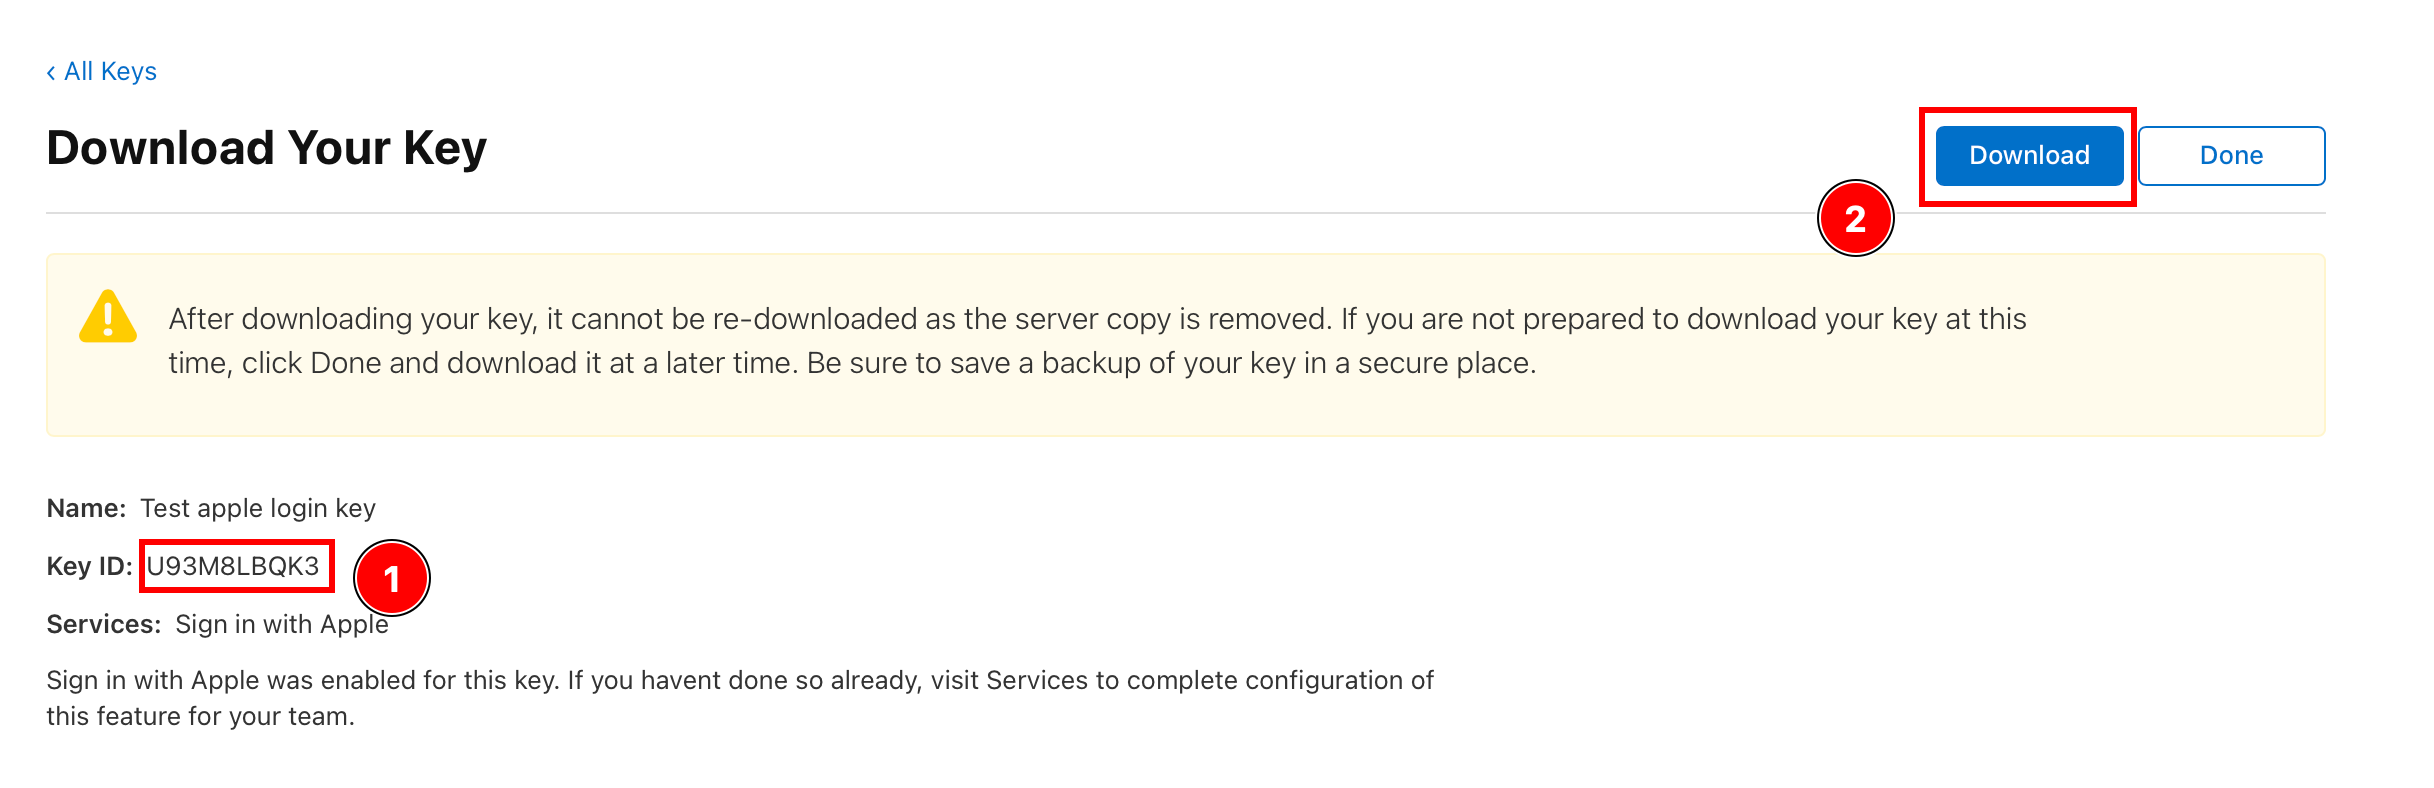
:::注意 重要: 保存此 ID,在后端它将被称为
KEY_ID。下载密钥。确保永远不要共享此密钥。 ::: -
找到下载的密钥并将其保存在后端文件夹中。
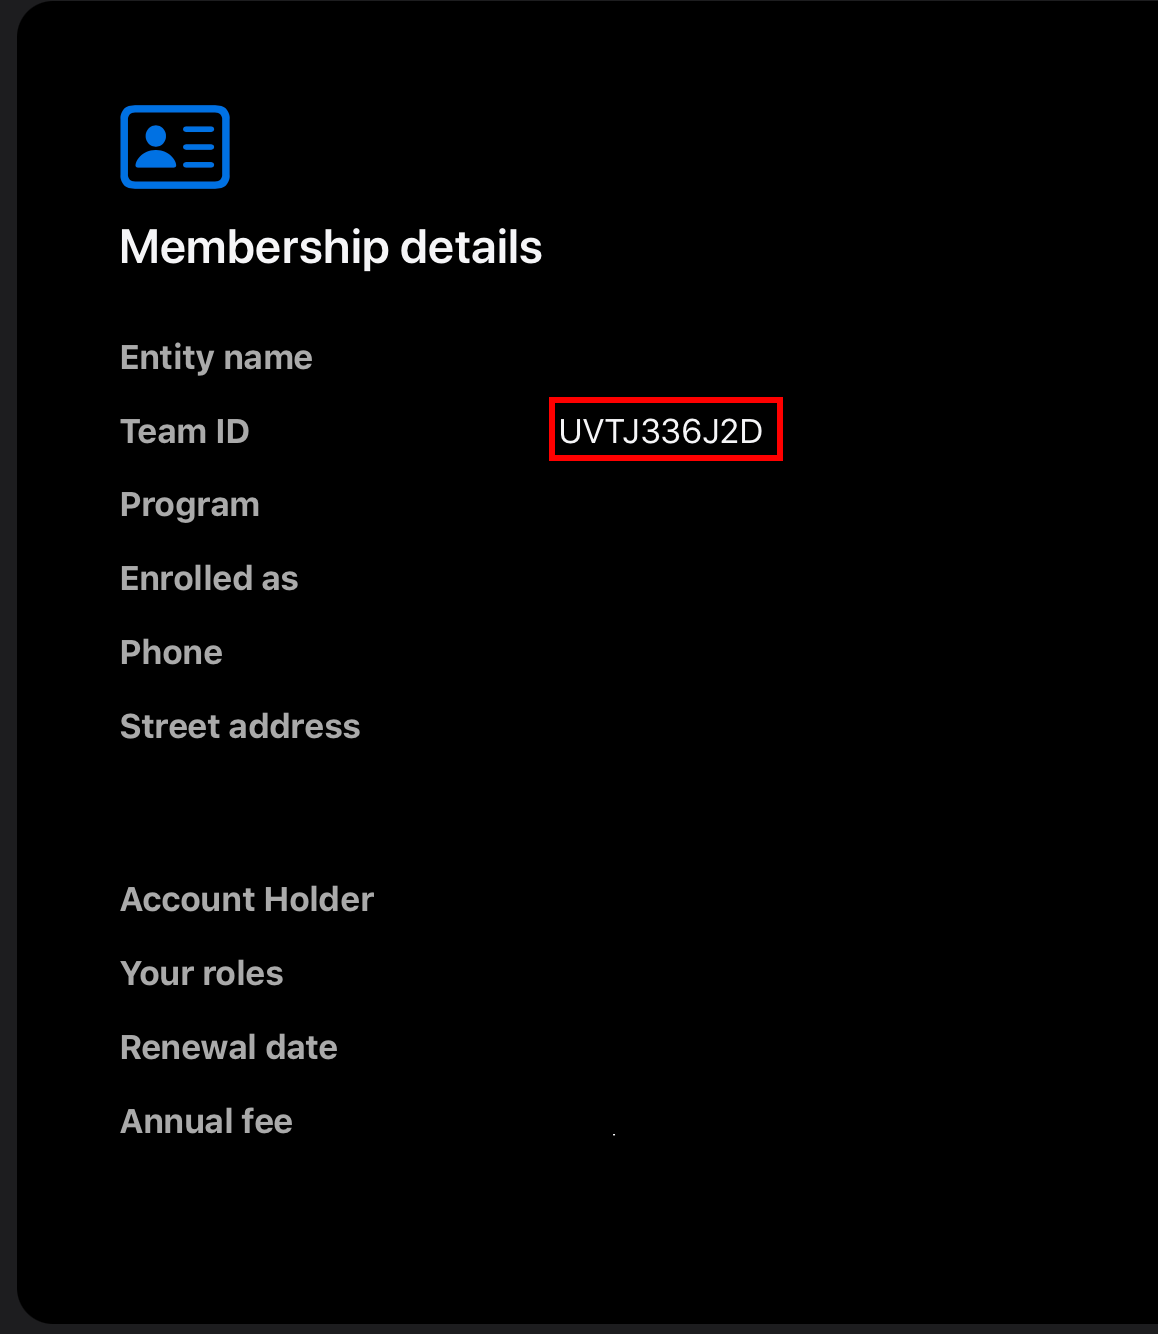
获取团队ID
Section titled “获取团队ID”为了在 Android 上使用 Login with Apple,您需要获取“团队 ID”。它将在后端使用。
-
转到此网站 并向下滚动
-
找到“团队ID”
配置应用程序重定向
Section titled “配置应用程序重定向”正如您在图中看到的,后端执行一个名为“重定向回应用程序”的步骤。这需要手动更改您的应用程序。
- 修改
AndroidManifest.xml-
打开文件,我将使用
AndroidStudio
-
找到
MainActivity并添加以下 Intent 过滤器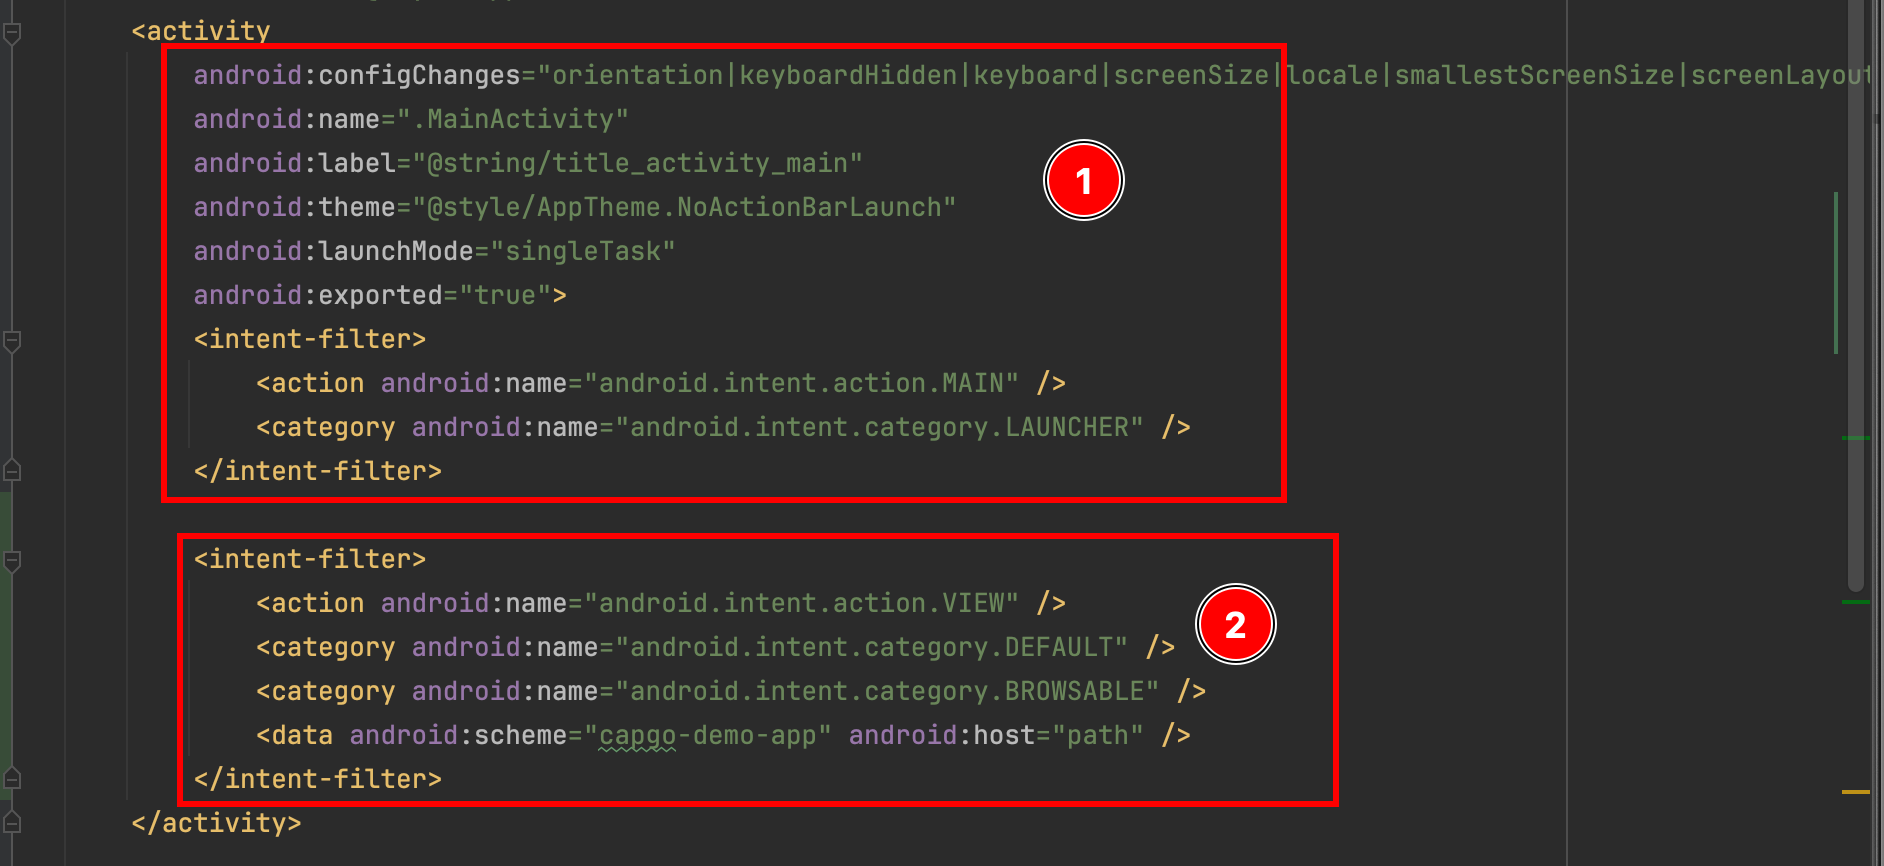 <intent-filter><action android:name="android.intent.action.VIEW" /><category android:name="android.intent.category.DEFAULT" /><category android:name="android.intent.category.BROWSABLE" /><data android:scheme="capgo-demo-app" android:host="path" /></intent-filter>
-
- 修改
MainActivity-
请打开
MainActivity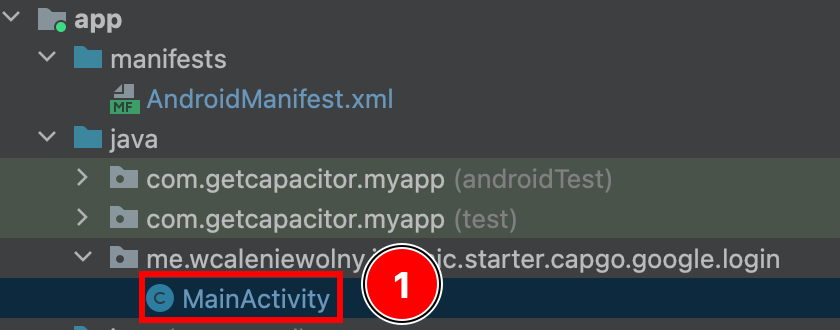
-
添加以下代码:
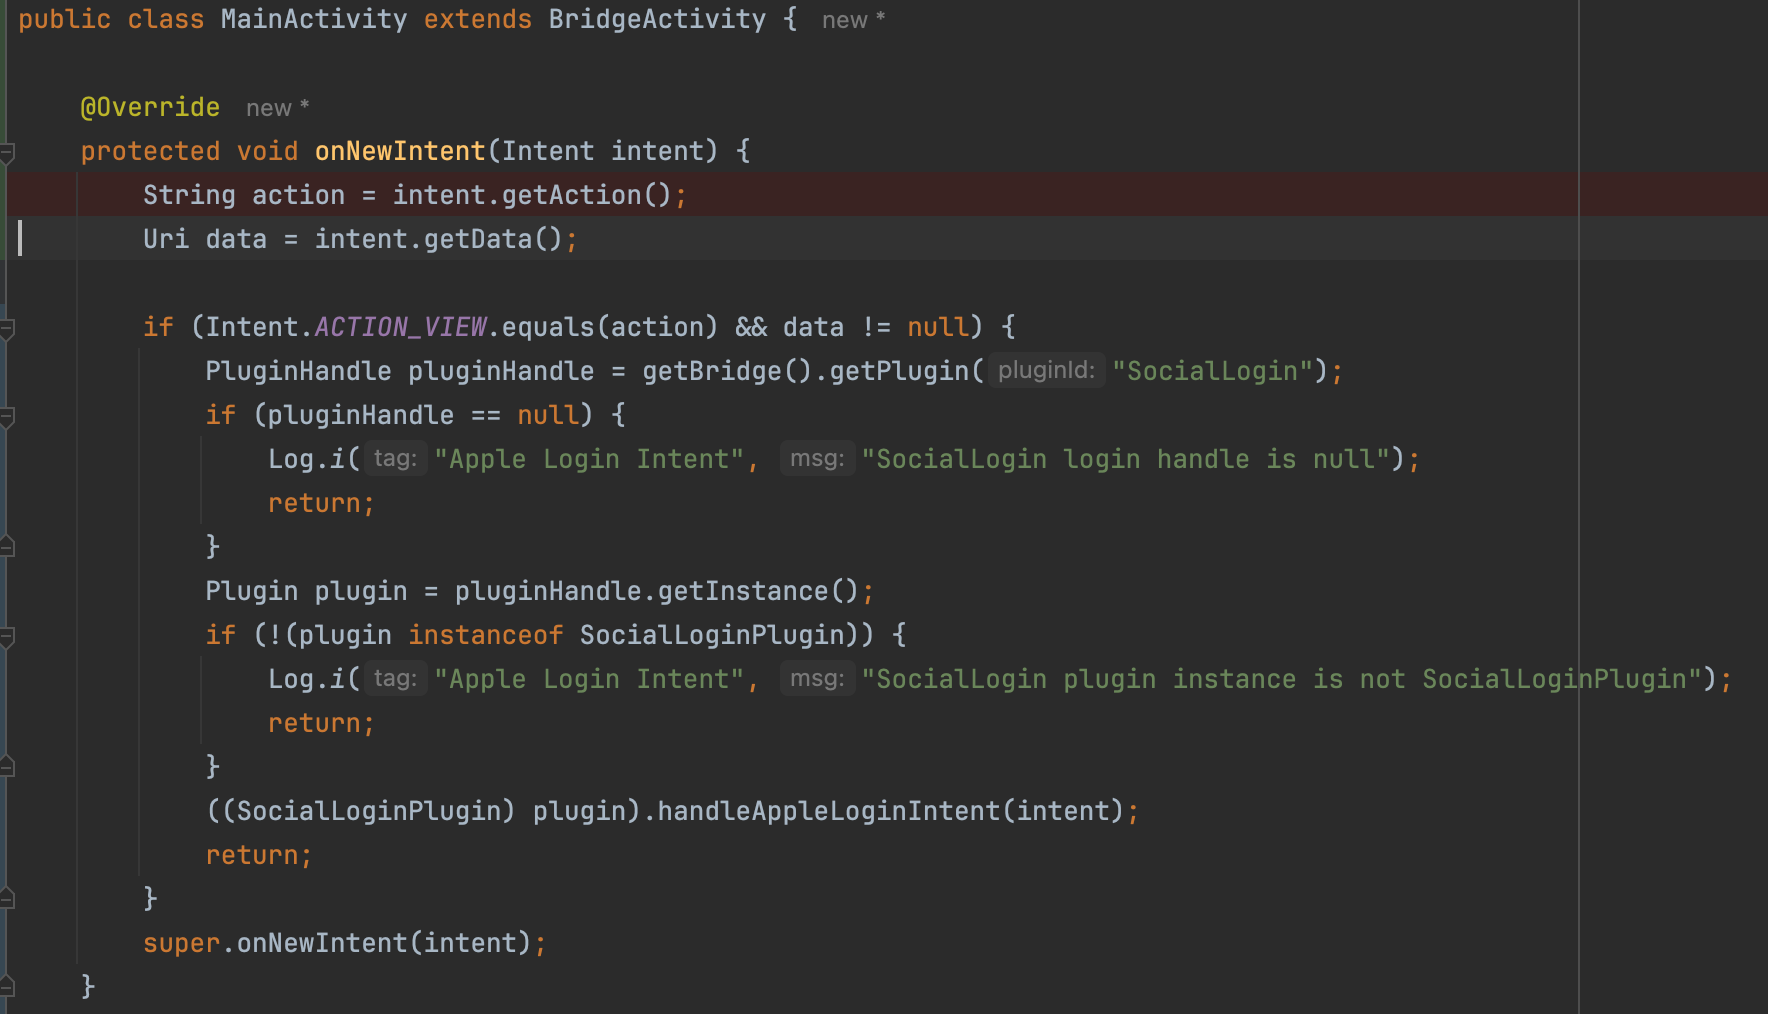 @Overrideprotected void onNewIntent(Intent intent) {String action = intent.getAction();Uri data = intent.getData();if (Intent.ACTION_VIEW.equals(action) && data != null) {PluginHandle pluginHandle = getBridge().getPlugin("SocialLogin");if (pluginHandle == null) {Log.i("Apple Login Intent", "SocialLogin login handle is null");return;}Plugin plugin = pluginHandle.getInstance();if (!(plugin instanceof SocialLoginPlugin)) {Log.i("Apple Login Intent", "SocialLogin plugin instance is not SocialLoginPlugin");return;}((SocialLoginPlugin) plugin).handleAppleLoginIntent(intent);return;}super.onNewIntent(intent);}
:::注意 此示例假设您没有配置任何深层链接。如果是这样,请调整代码 :::
-
Android 需要后端,但配置后端也会影响 IOS。 [此处]提供了一个示例后端(https://github.com/WcaleNieWolny/capgo-social-login-backend-demo/blob/main/index.ts)此示例提供以下内容:
- 一个简单的 JSON 数据库
- 一种从 Apple 服务器请求 JWT 的方法
- 一个简单的 JWT 验证
鉴于我在本教程中所说的一切,env 部分的外观如下:
ANDROID_SERVICE_ID= 服务 IDIOS_SERVICE_ID= 应用程序 ID
env: { PRIVATE_KEY_FILE: "AuthKey_U93M8LBQK3.p8", KEY_ID: "U93M8LBQK3", TEAM_ID: "UVTJ336J2D", ANDROID_SERVICE_ID: "ee.forgr.io.ionic.starter.service2", IOS_SERVICE_ID: "me.wcaleniewolny.test.ionic.vue", PORT: 3000, REDIRECT_URI: "https://xyz.wcaleniewolny.me/login/callback", BASE_REDIRECT_URL: "capgo-demo-app://path"}login函数的用法没有变化,和IOS一样。请查看该部分以获取更多信息。 然而,initialize 方法发生了一些变化。
await SocialLogin.initialize({ apple: { clientId: 'ee.forgr.io.ionic.starter.service2', redirectUrl: 'https://appleloginvps.wcaleniewolny.me/login/callback' }})创建应用程序
Section titled “创建应用程序”-
如果您还没有应用程序 ID,请单击加号按钮
-
选择“应用程序 ID”并单击“继续”
-
单击类型
App,然后单击Continue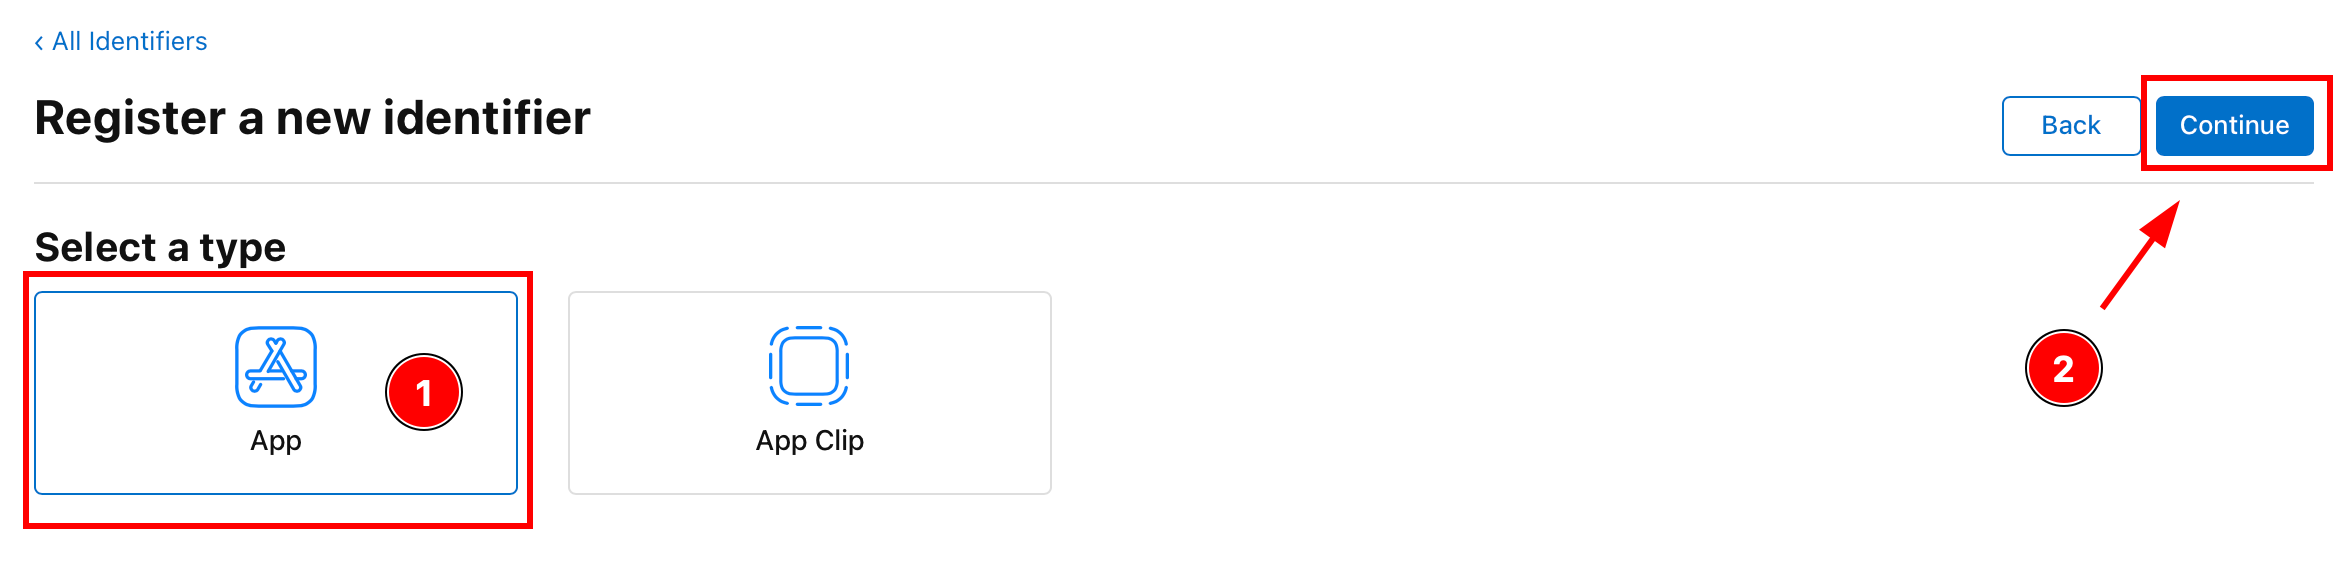
-
输入描述和应用程序 ID
-
启用
Sign with Apple功能
-
单击
Continue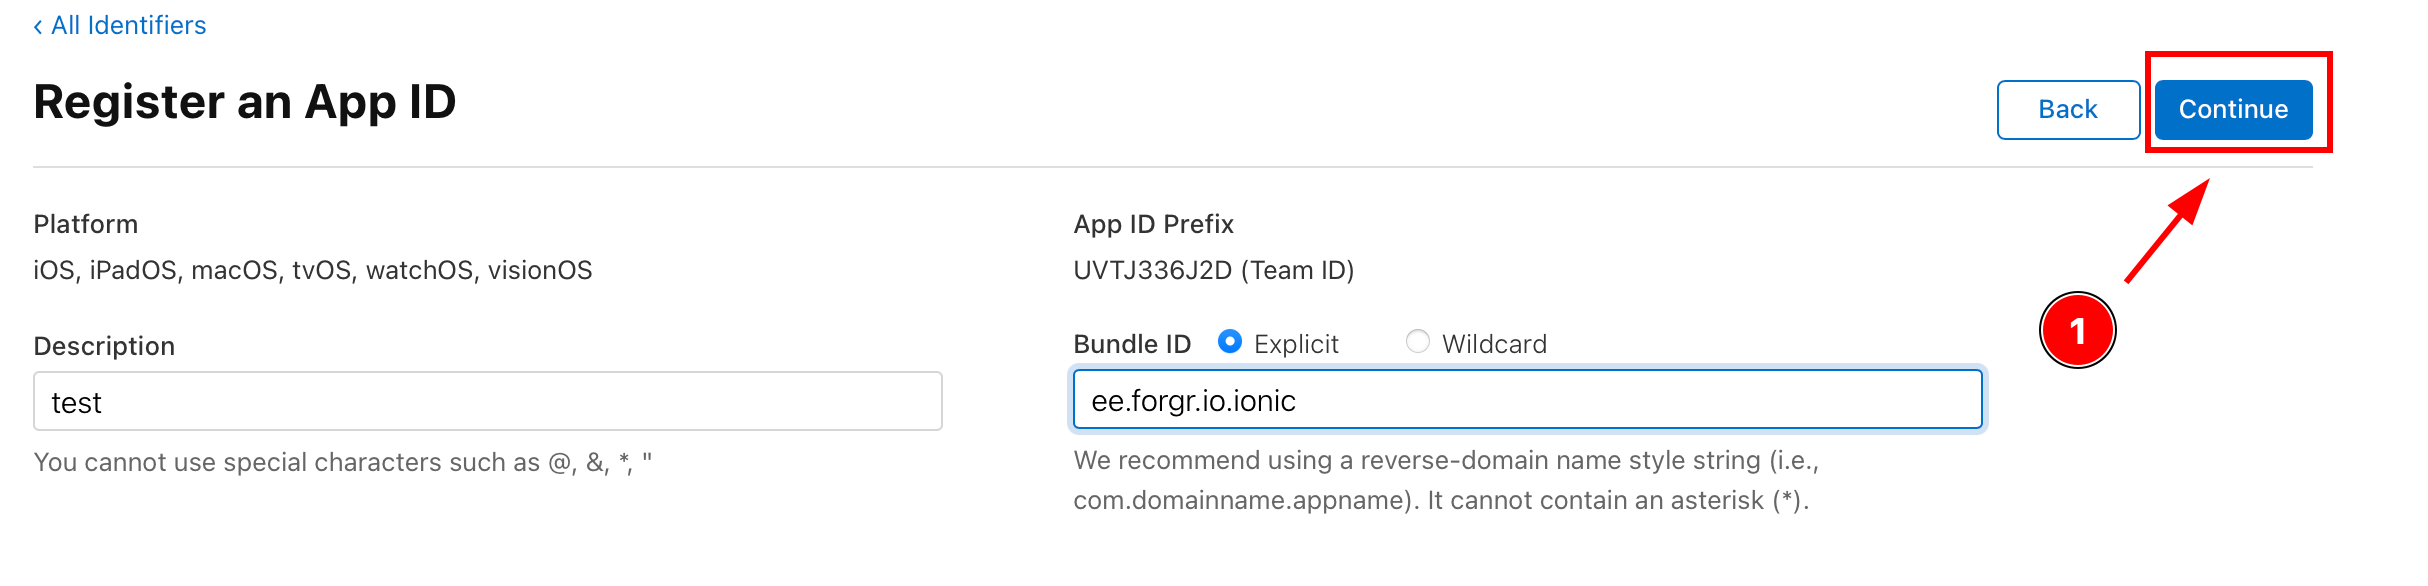
-
确认详细信息并点击
Register