Google 登录 Android
在本指南中,您将了解如何为 Android 设置 Google 使用 Capgo 社交登录登录。 我假设您已经阅读了一般设置指南。
使用 Google 登录 Android
Section titled “使用 Google 登录 Android”在本部分中,您将学习如何在 Android 中设置 Google 登录。
-
创建 Android 客户端 ID。
-
点击搜索栏

-
搜索
credentials并单击“API 和服务”(屏幕截图中的数字 2)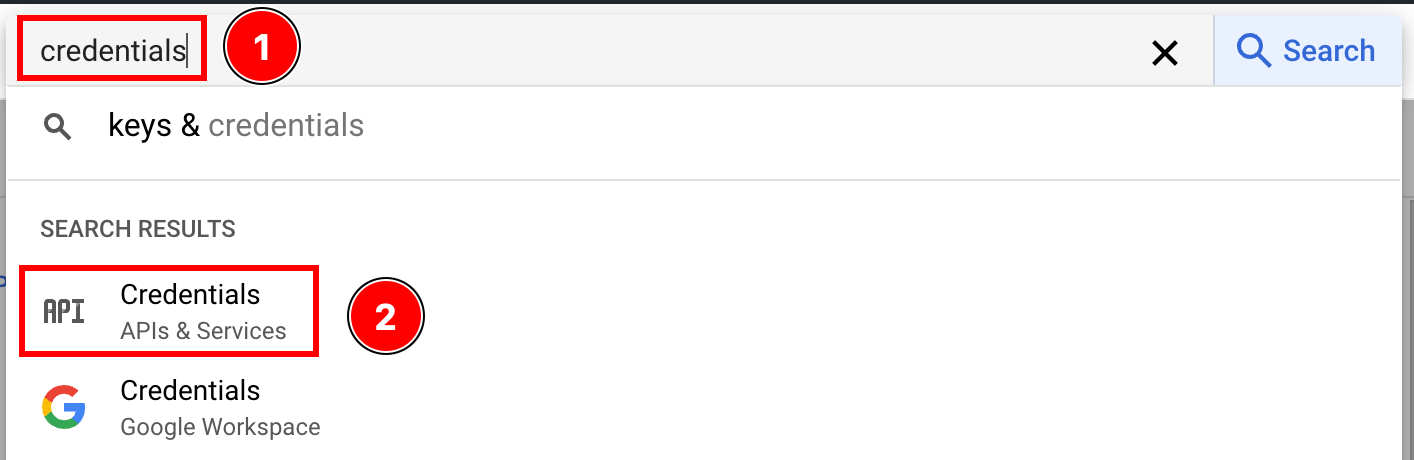
-
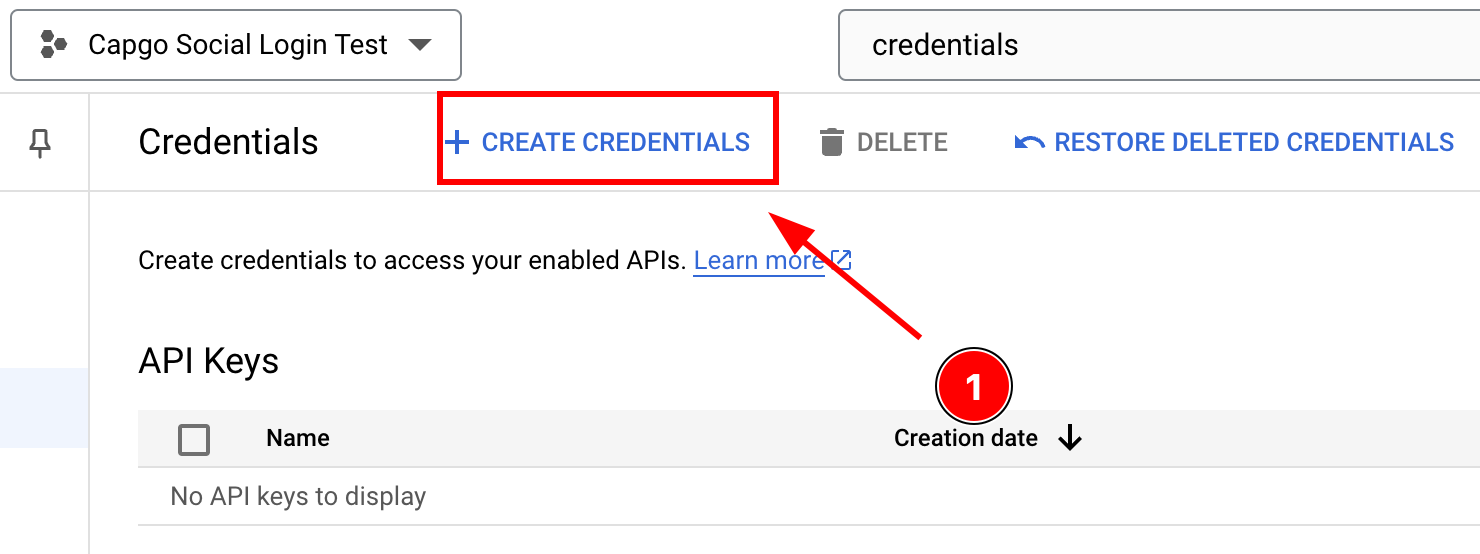
单击“创建凭据”
-
选择
OAuth client ID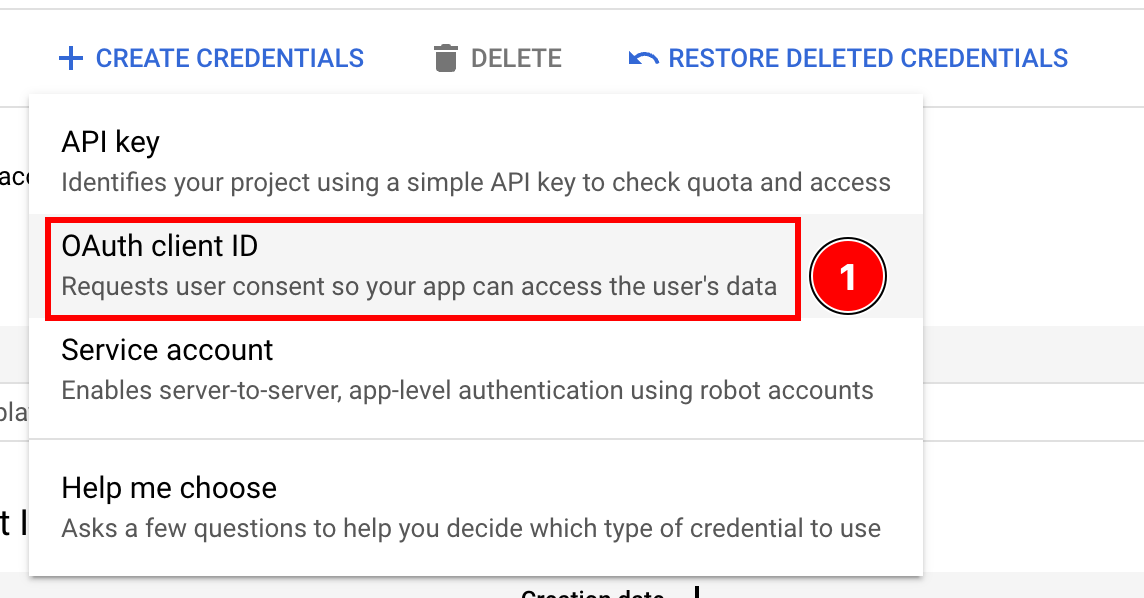
-
选择
Android应用程序类型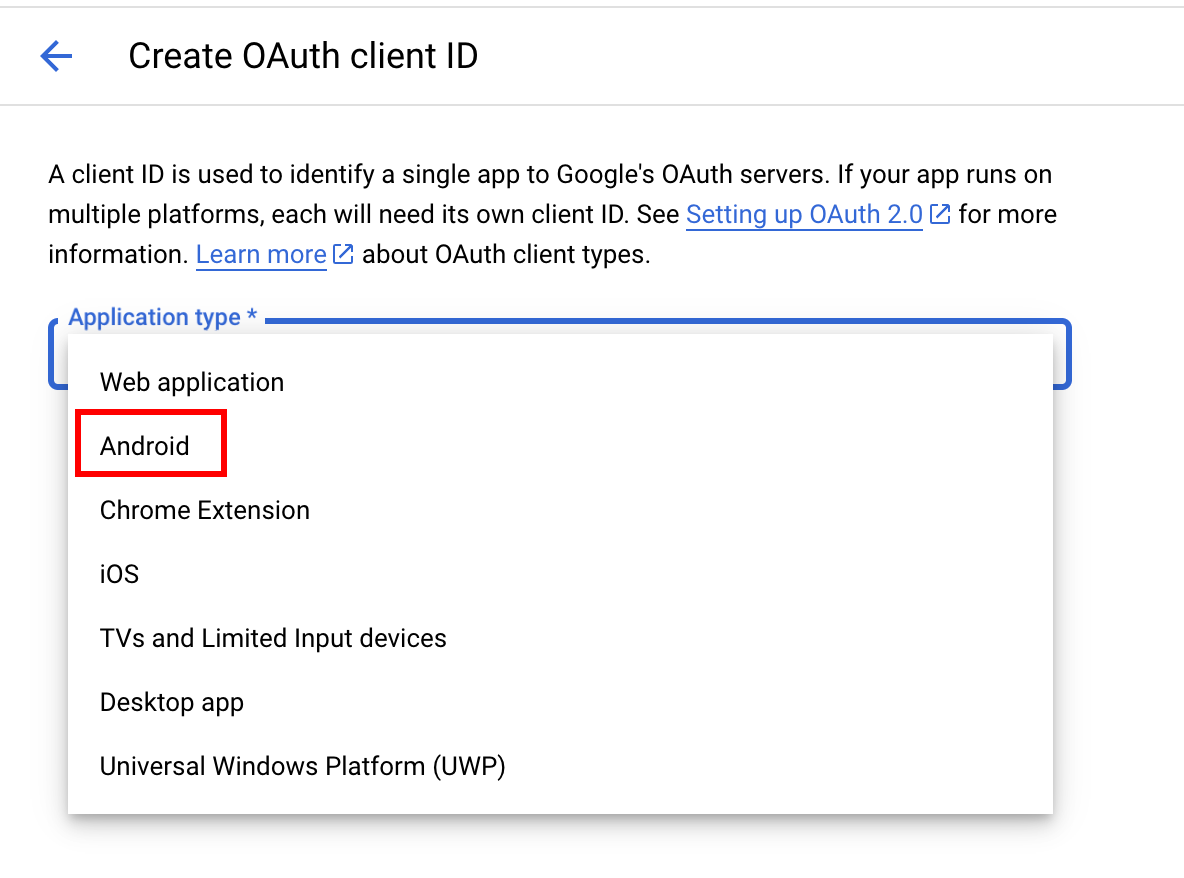
-
打开 Android Studio
-
在导航器的最底部,找到“Gradle Scripts”
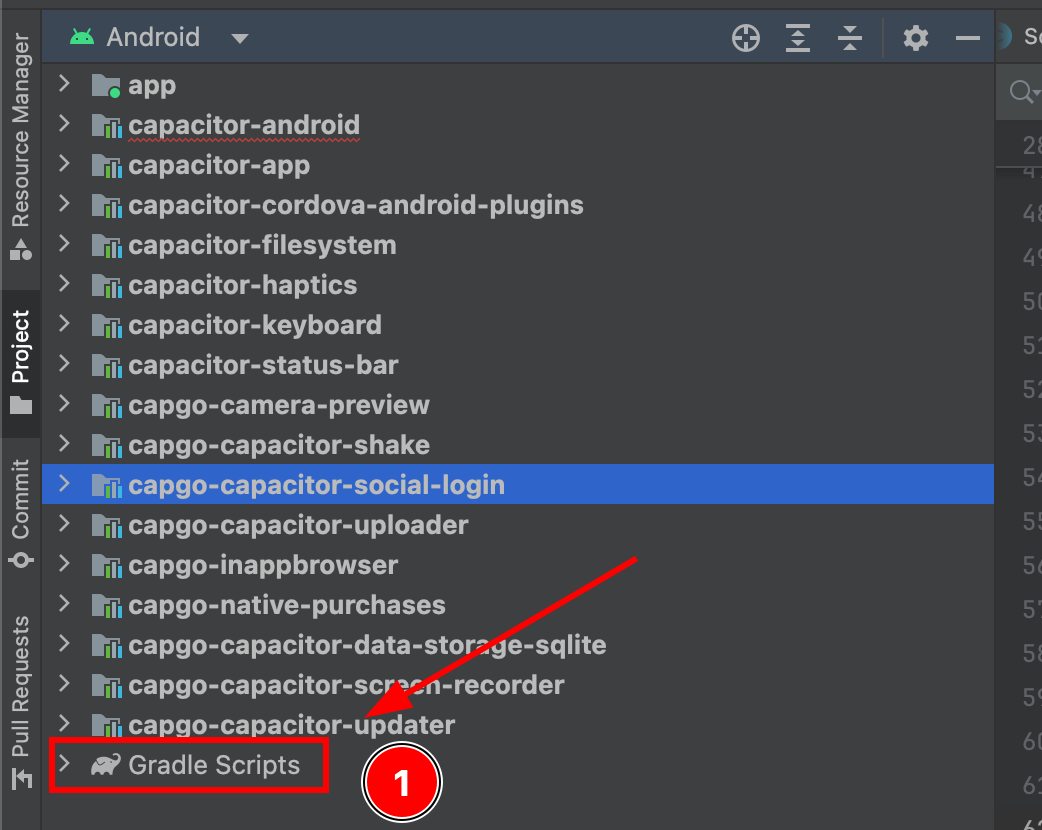
-
找到模块
app的build.gradle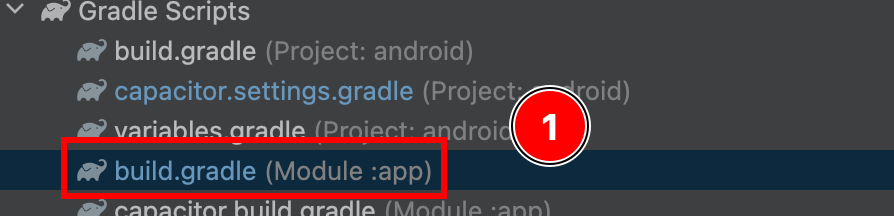
-
复制
android.defaultConfig.applicationId。这将是您在 Google 控制台中的“包名称”
-
现在,打开终端。确保您位于应用程序的
android文件夹中并运行./gradlew signInReport

- 滚动到该命令的顶部。您应该看到以下内容。复制
SHA1。

- 现在,返回 Google 控制台。在证书字段中输入您的
applicationId作为“包名称”和 SHA1,然后单击create
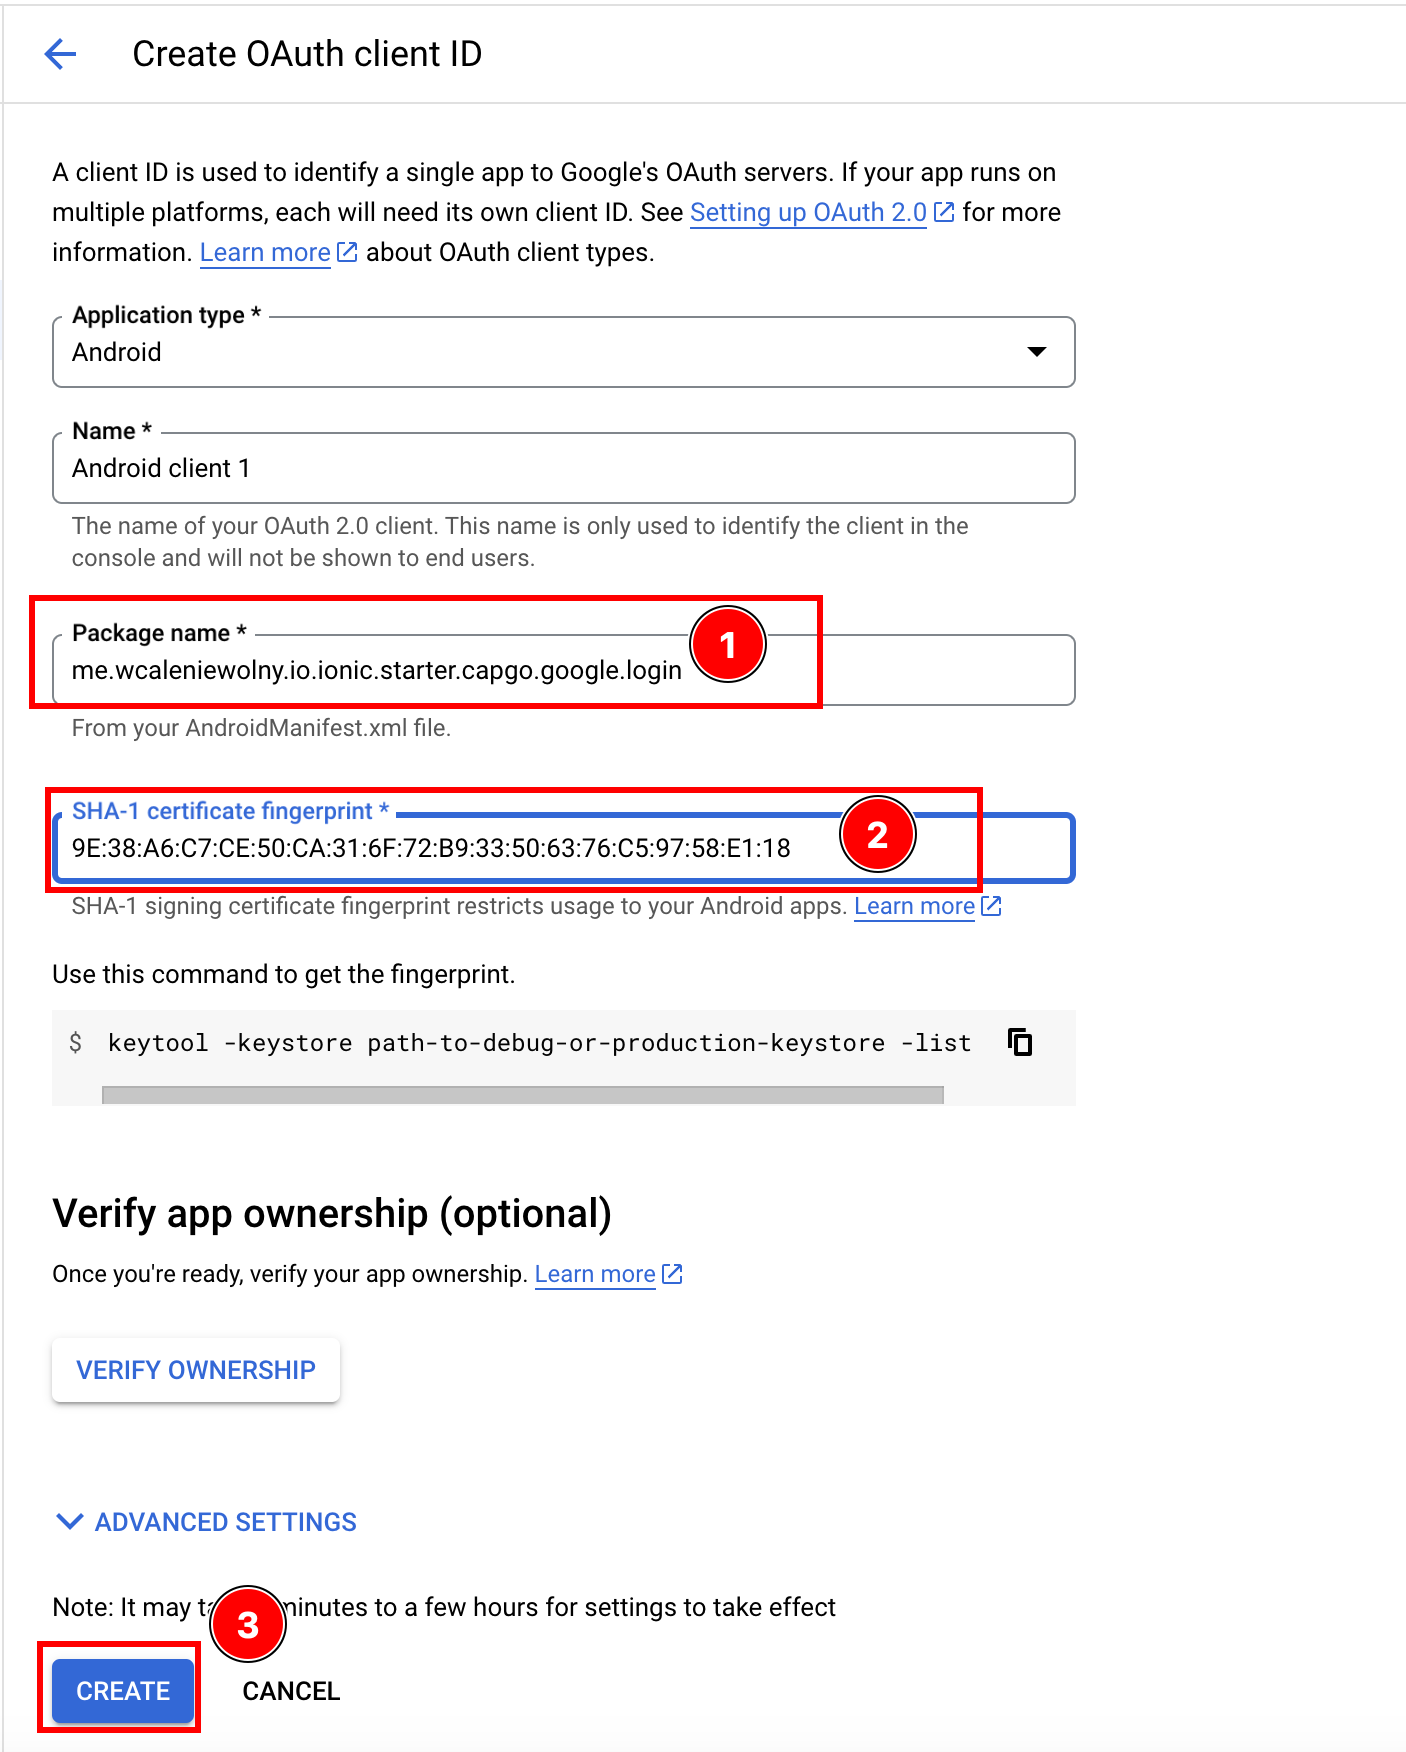
-
-
创建一个 Web 客户端(Android 需要此)
-
转到 Google 控制台中的“创建凭证”页面
-
将应用程序类型设置为
Web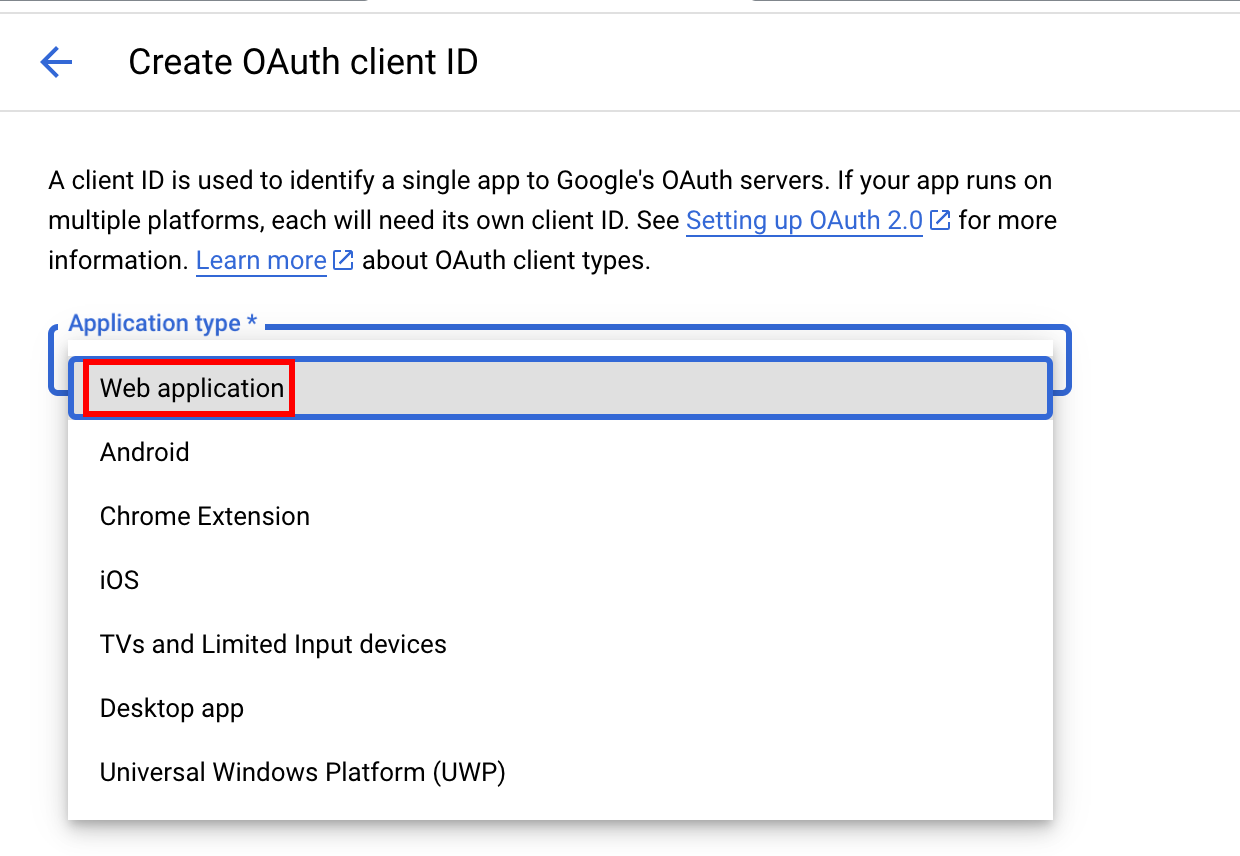
-
单击
Create
-
复制客户端 ID,您将在 JS/TS 代码中使用它作为
webClientId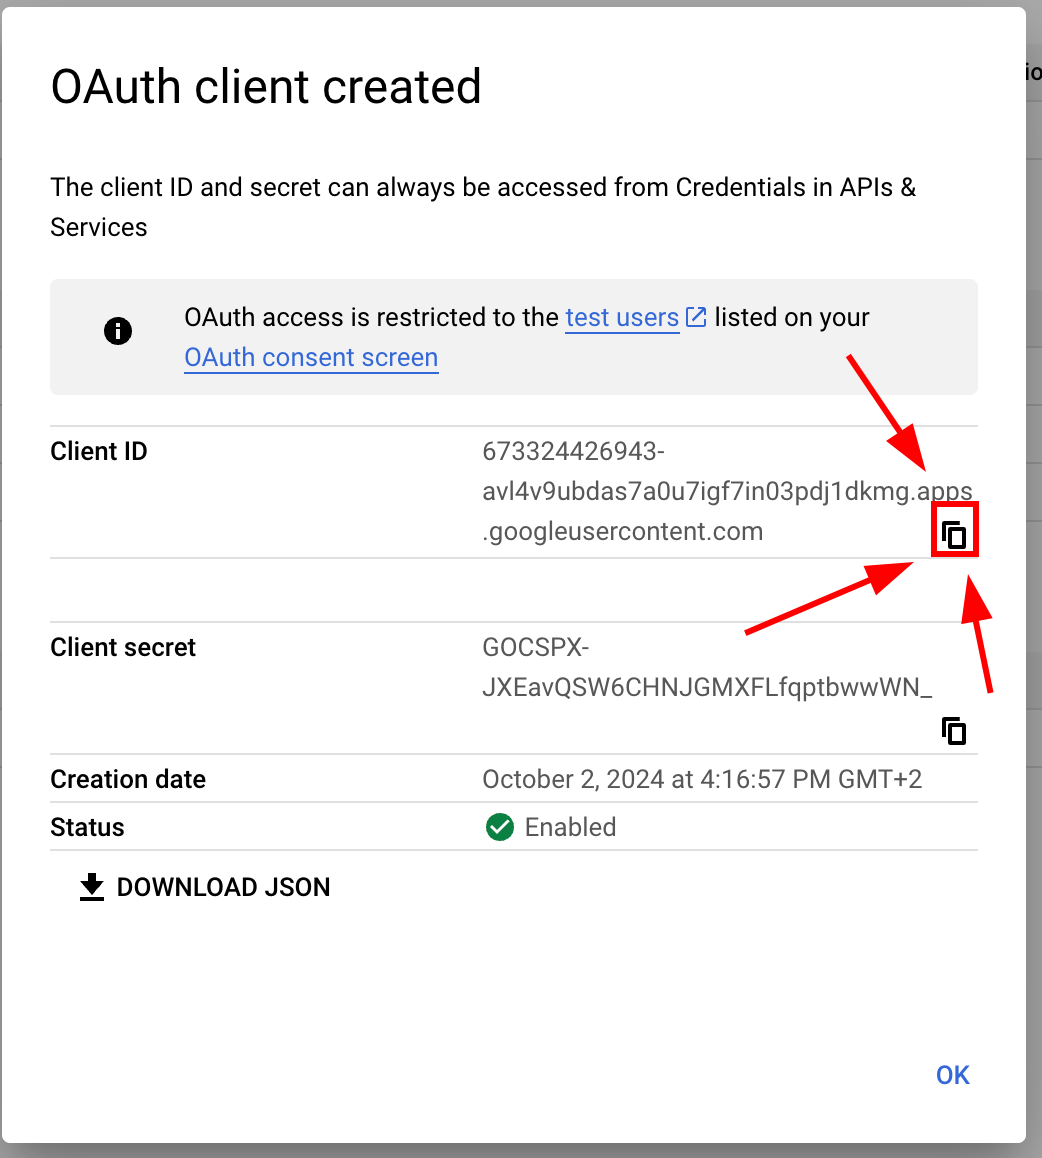
-
-
修改您的
MainActivity-
请在 Android Studio 中打开您的应用程序。您可以运行
cap open android -
找到
MainActivity.java-
打开
app文件夹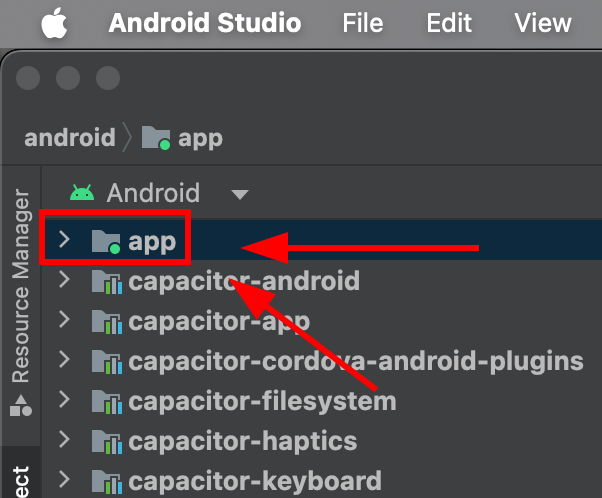
-
找到
java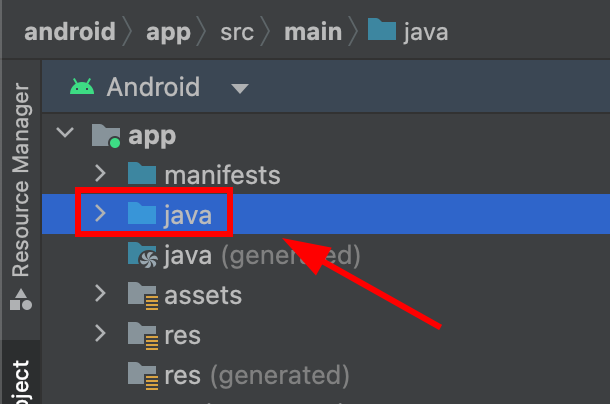
-
找到您的
MainActivity.java并单击它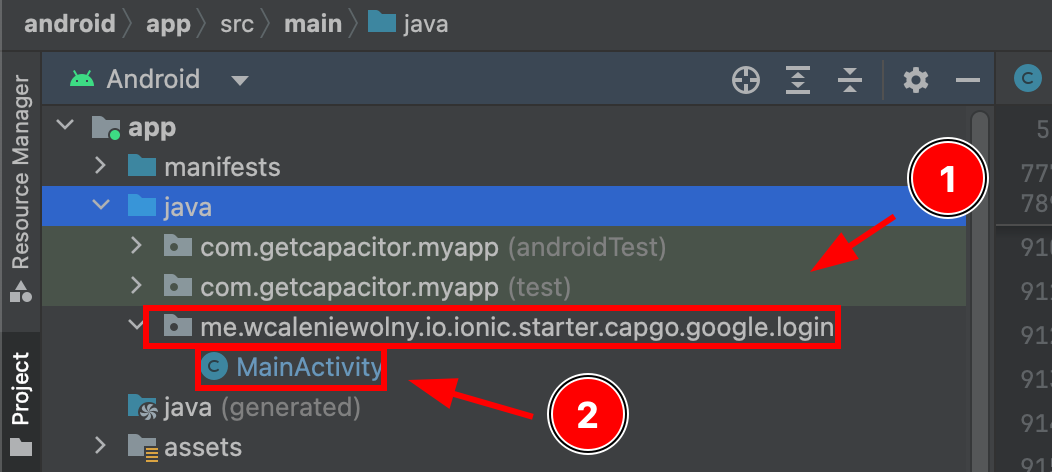
-
-
修改
MainActivity.java。请添加以下代码import ee.forgr.capacitor.social.login.GoogleProvider;import ee.forgr.capacitor.social.login.SocialLoginPlugin;import ee.forgr.capacitor.social.login.ModifiedMainActivityForSocialLoginPlugin;import com.getcapacitor.PluginHandle;import com.getcapacitor.Plugin;import android.content.Intent;import android.util.Log;import com.getcapacitor.BridgeActivity;// ModifiedMainActivityForSocialLoginPlugin is VERY VERY important !!!!!!public class MainActivity extends BridgeActivity implements ModifiedMainActivityForSocialLoginPlugin {@Overridepublic void onActivityResult(int requestCode, int resultCode, Intent data) {super.onActivityResult(requestCode, resultCode, data);if (requestCode >= GoogleProvider.REQUEST_AUTHORIZE_GOOGLE_MIN && requestCode < GoogleProvider.REQUEST_AUTHORIZE_GOOGLE_MAX) {PluginHandle pluginHandle = getBridge().getPlugin("SocialLogin");if (pluginHandle == null) {Log.i("Google Activity Result", "SocialLogin login handle is null");return;}Plugin plugin = pluginHandle.getInstance();if (!(plugin instanceof SocialLoginPlugin)) {Log.i("Google Activity Result", "SocialLogin plugin instance is not SocialLoginPlugin");return;}((SocialLoginPlugin) plugin).handleGoogleLoginIntent(requestCode, data);}}// This function will never be called, leave it empty@Overridepublic void IHaveModifiedTheMainActivityForTheUseWithSocialLoginPlugin() {}} -
保存文件
-
-
在您的应用程序中使用 Google 登录
-
首先导入
SocialLoginimport { SocialLogin } from '@capgo/capacitor-social-login'; -
调用初始化。这应该只被调用一次。
// onMounted is Vue specific// webClientId is the client ID you got in the web client creation step not the android client ID.onMounted(() => {SocialLogin.initialize({google: {webClientId: '673324426943-avl4v9ubdas7a0u7igf7in03pdj1dkmg.apps.googleusercontent.com',}})}) -
致电
SocialLogin.login。创建一个按钮并在单击时运行以下代码。const res = await SocialLogin.login({provider: 'google',options: {}})// handle the responseconsole.log(JSON.stringify(res))
-
-
配置模拟器进行测试
-
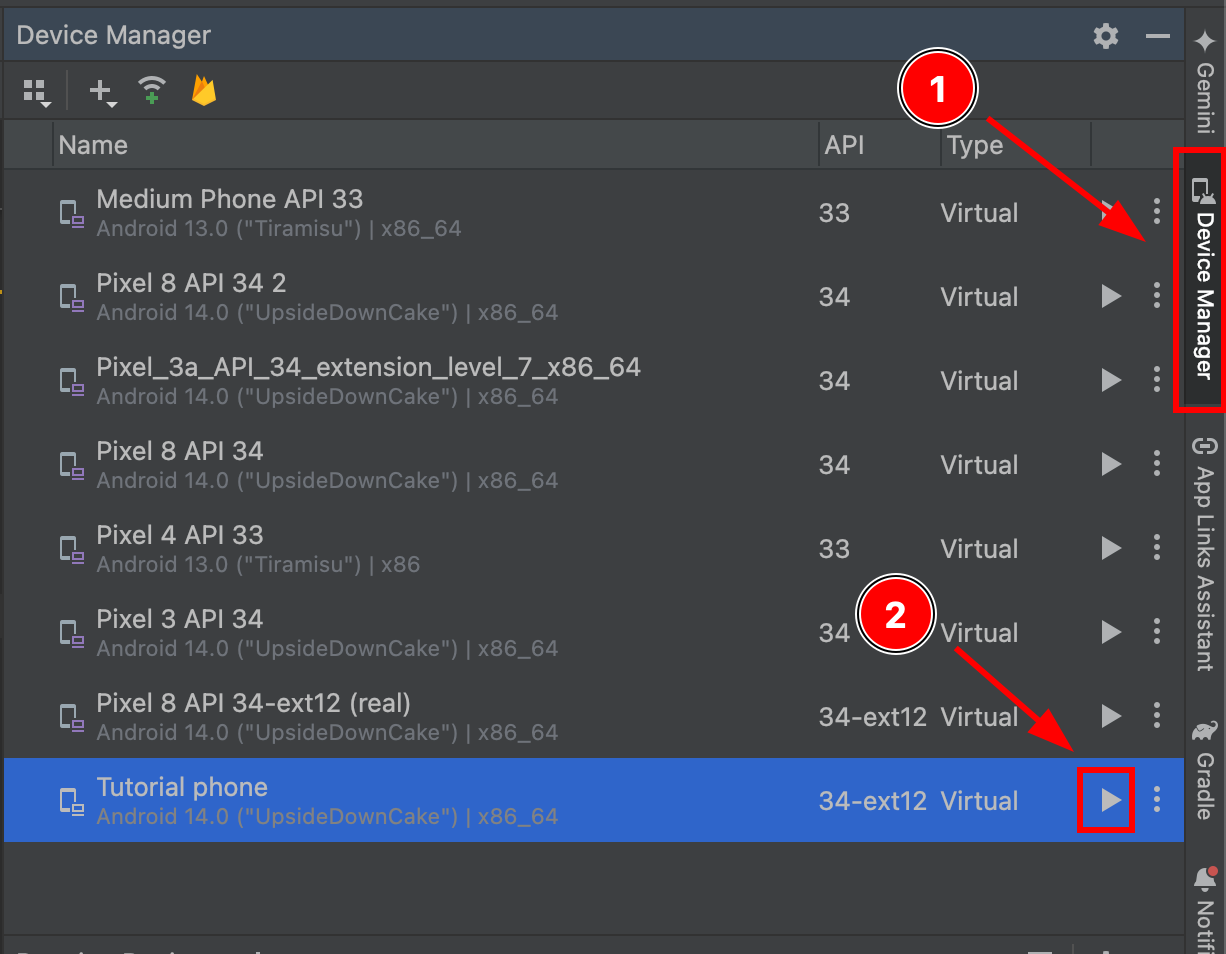
进入“设备管理器”并单击加号按钮
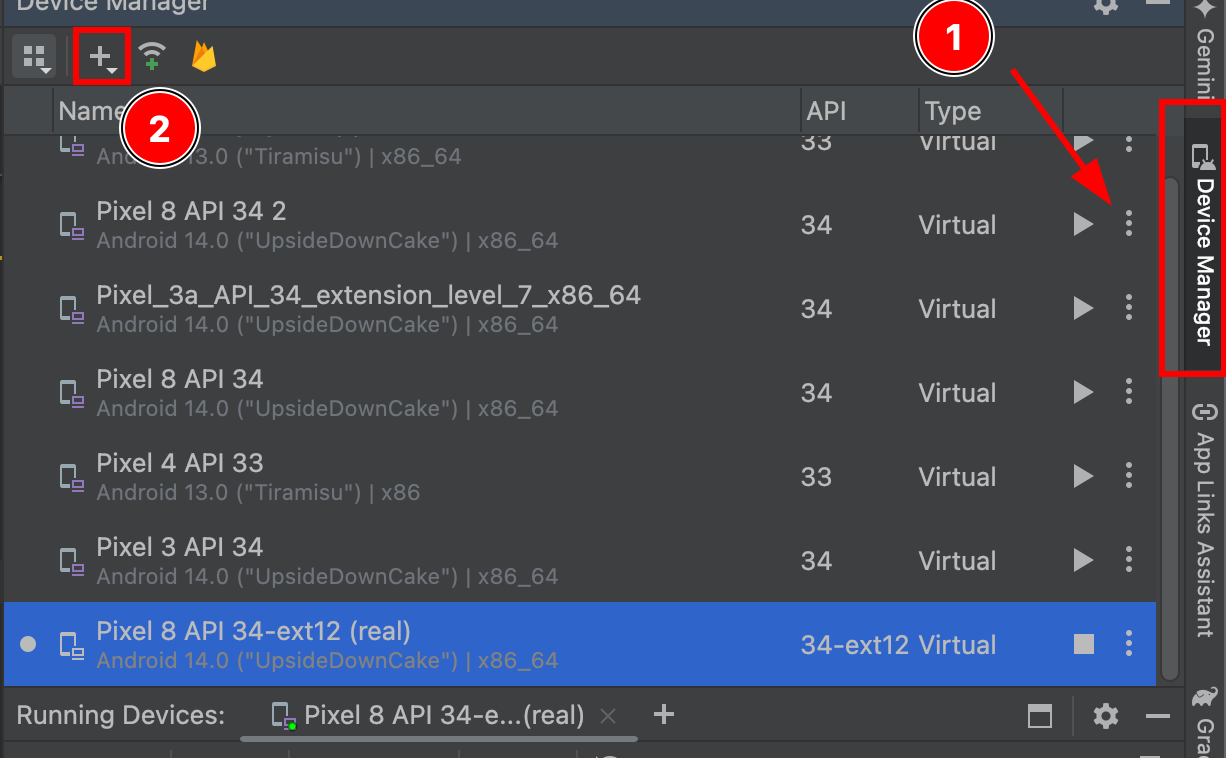
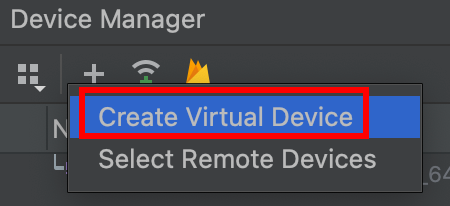
-
创建虚拟设备
-
选择任何带有
Play Store图标的设备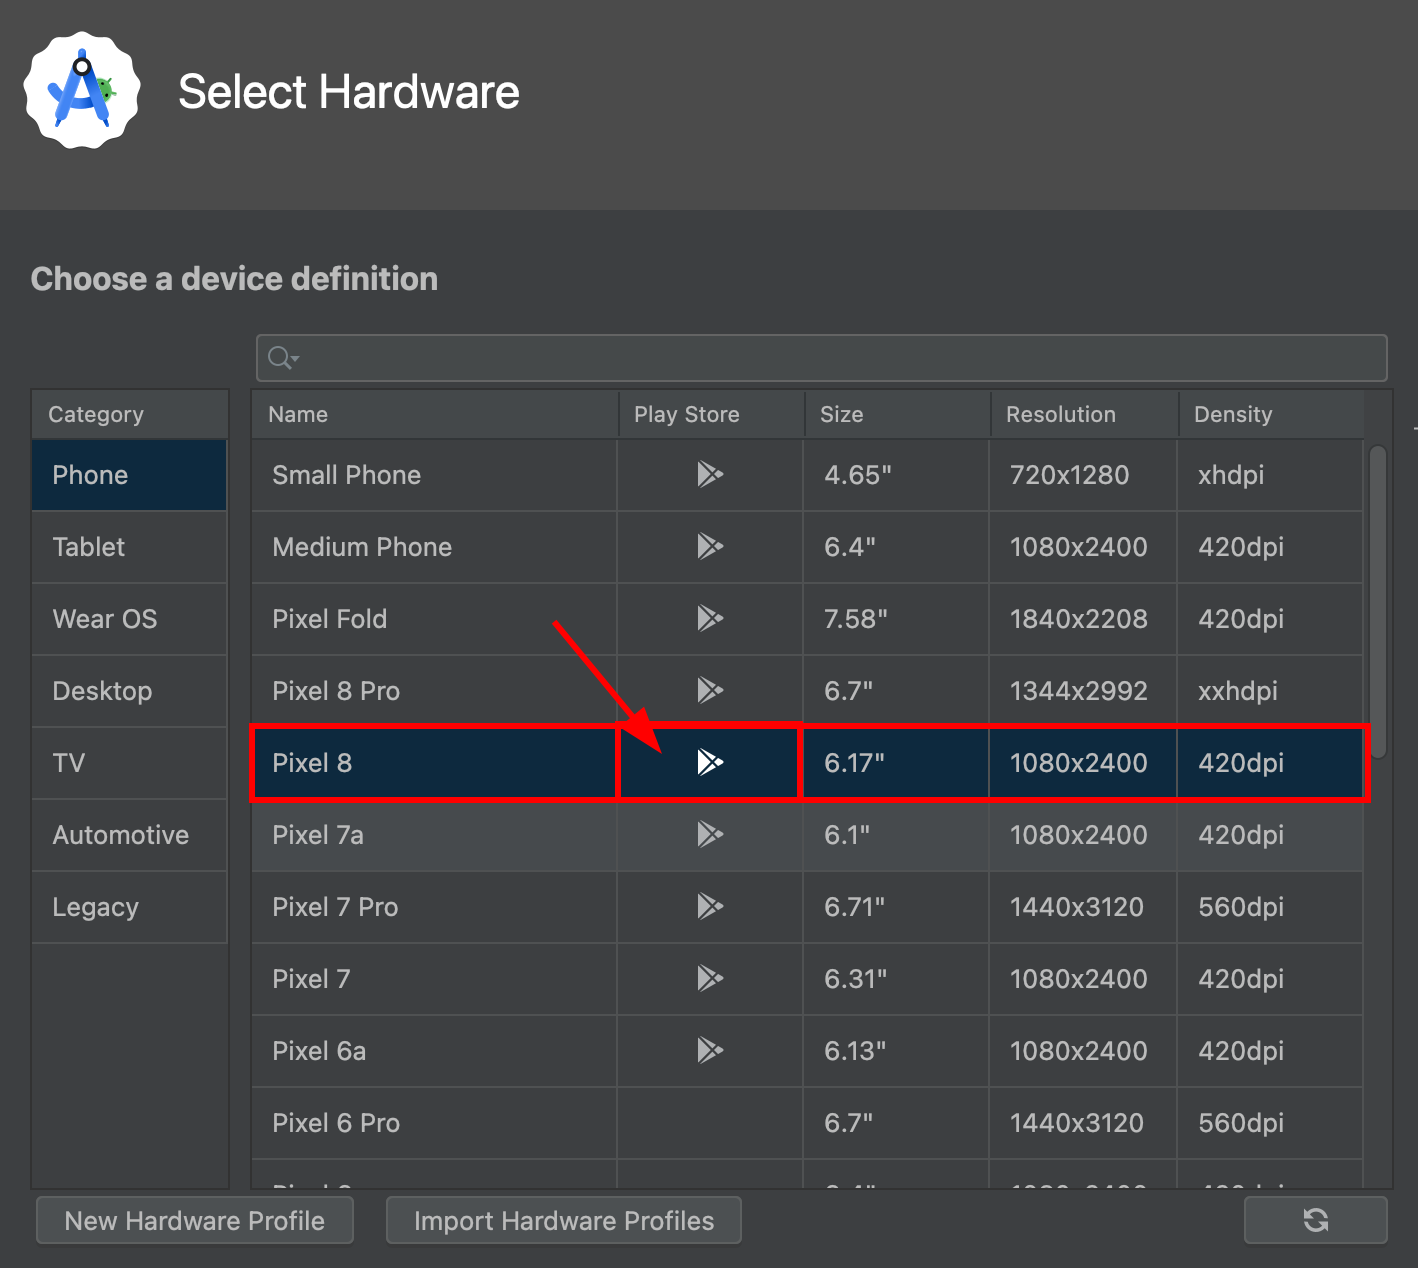
如您所见,
pixel 8支持Play Store服务 -
单击
next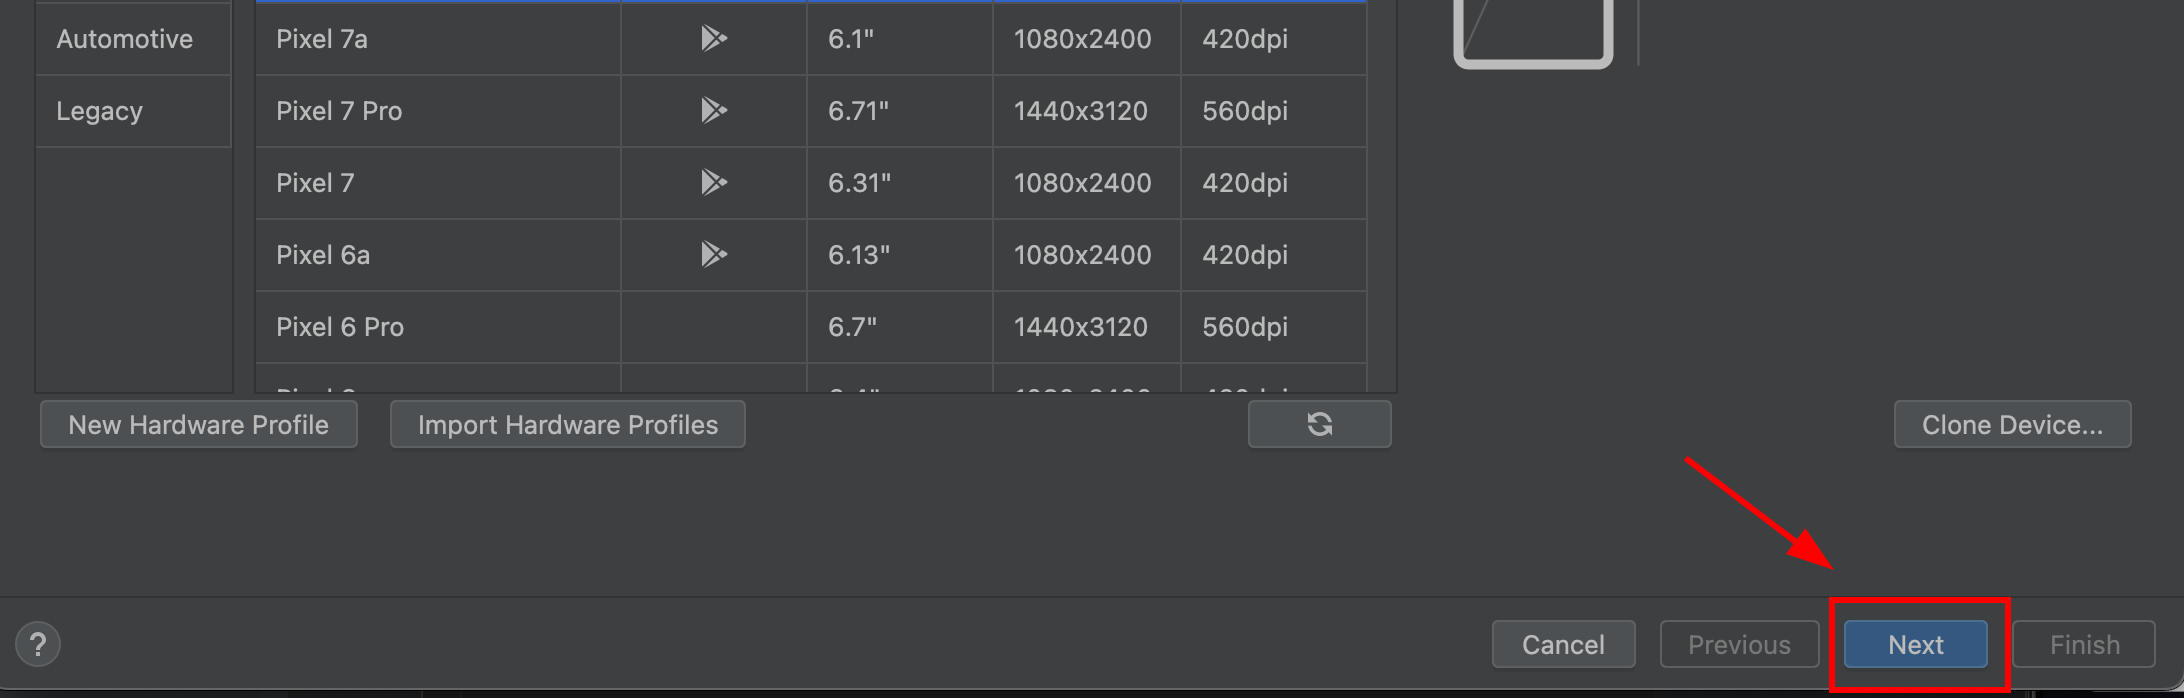
-
确保操作系统映像的类型为
Google Play。 它必须是Google Play类型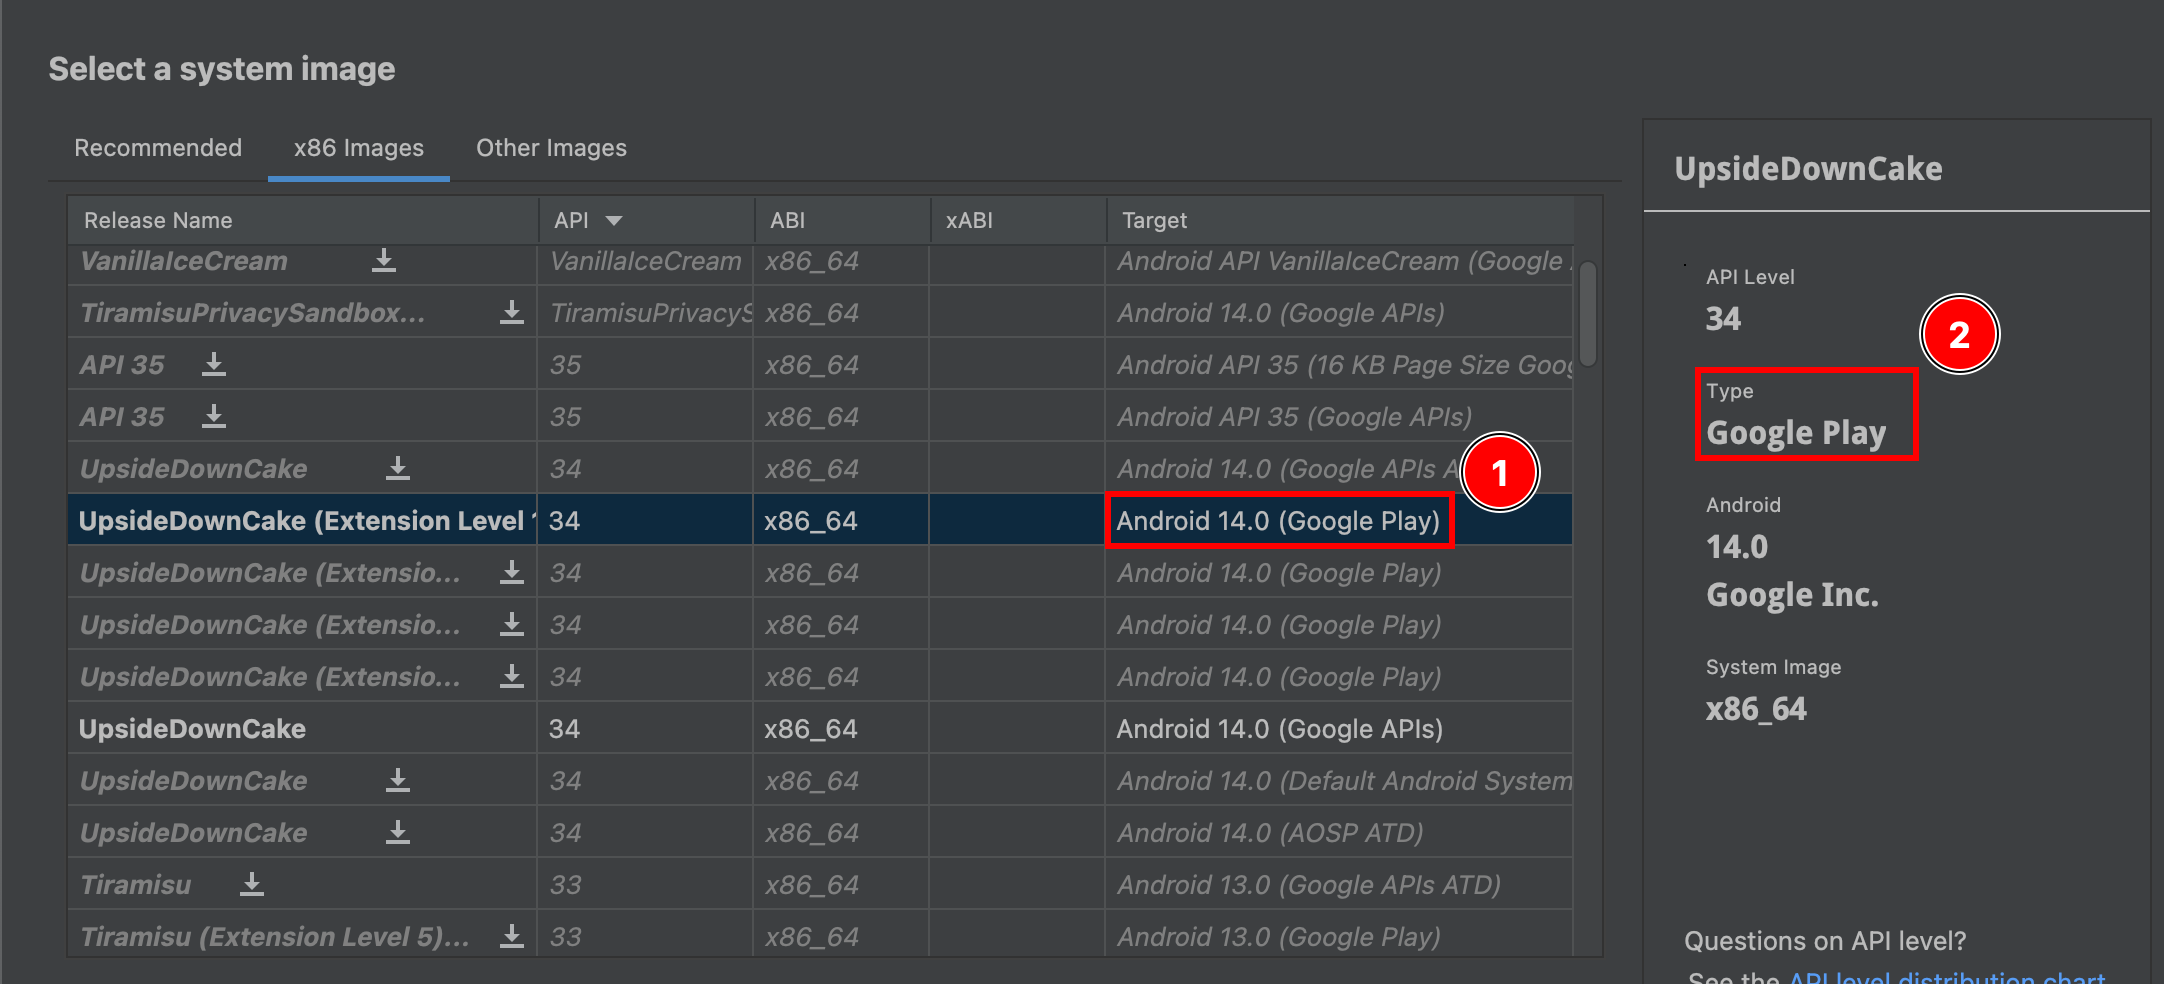
-
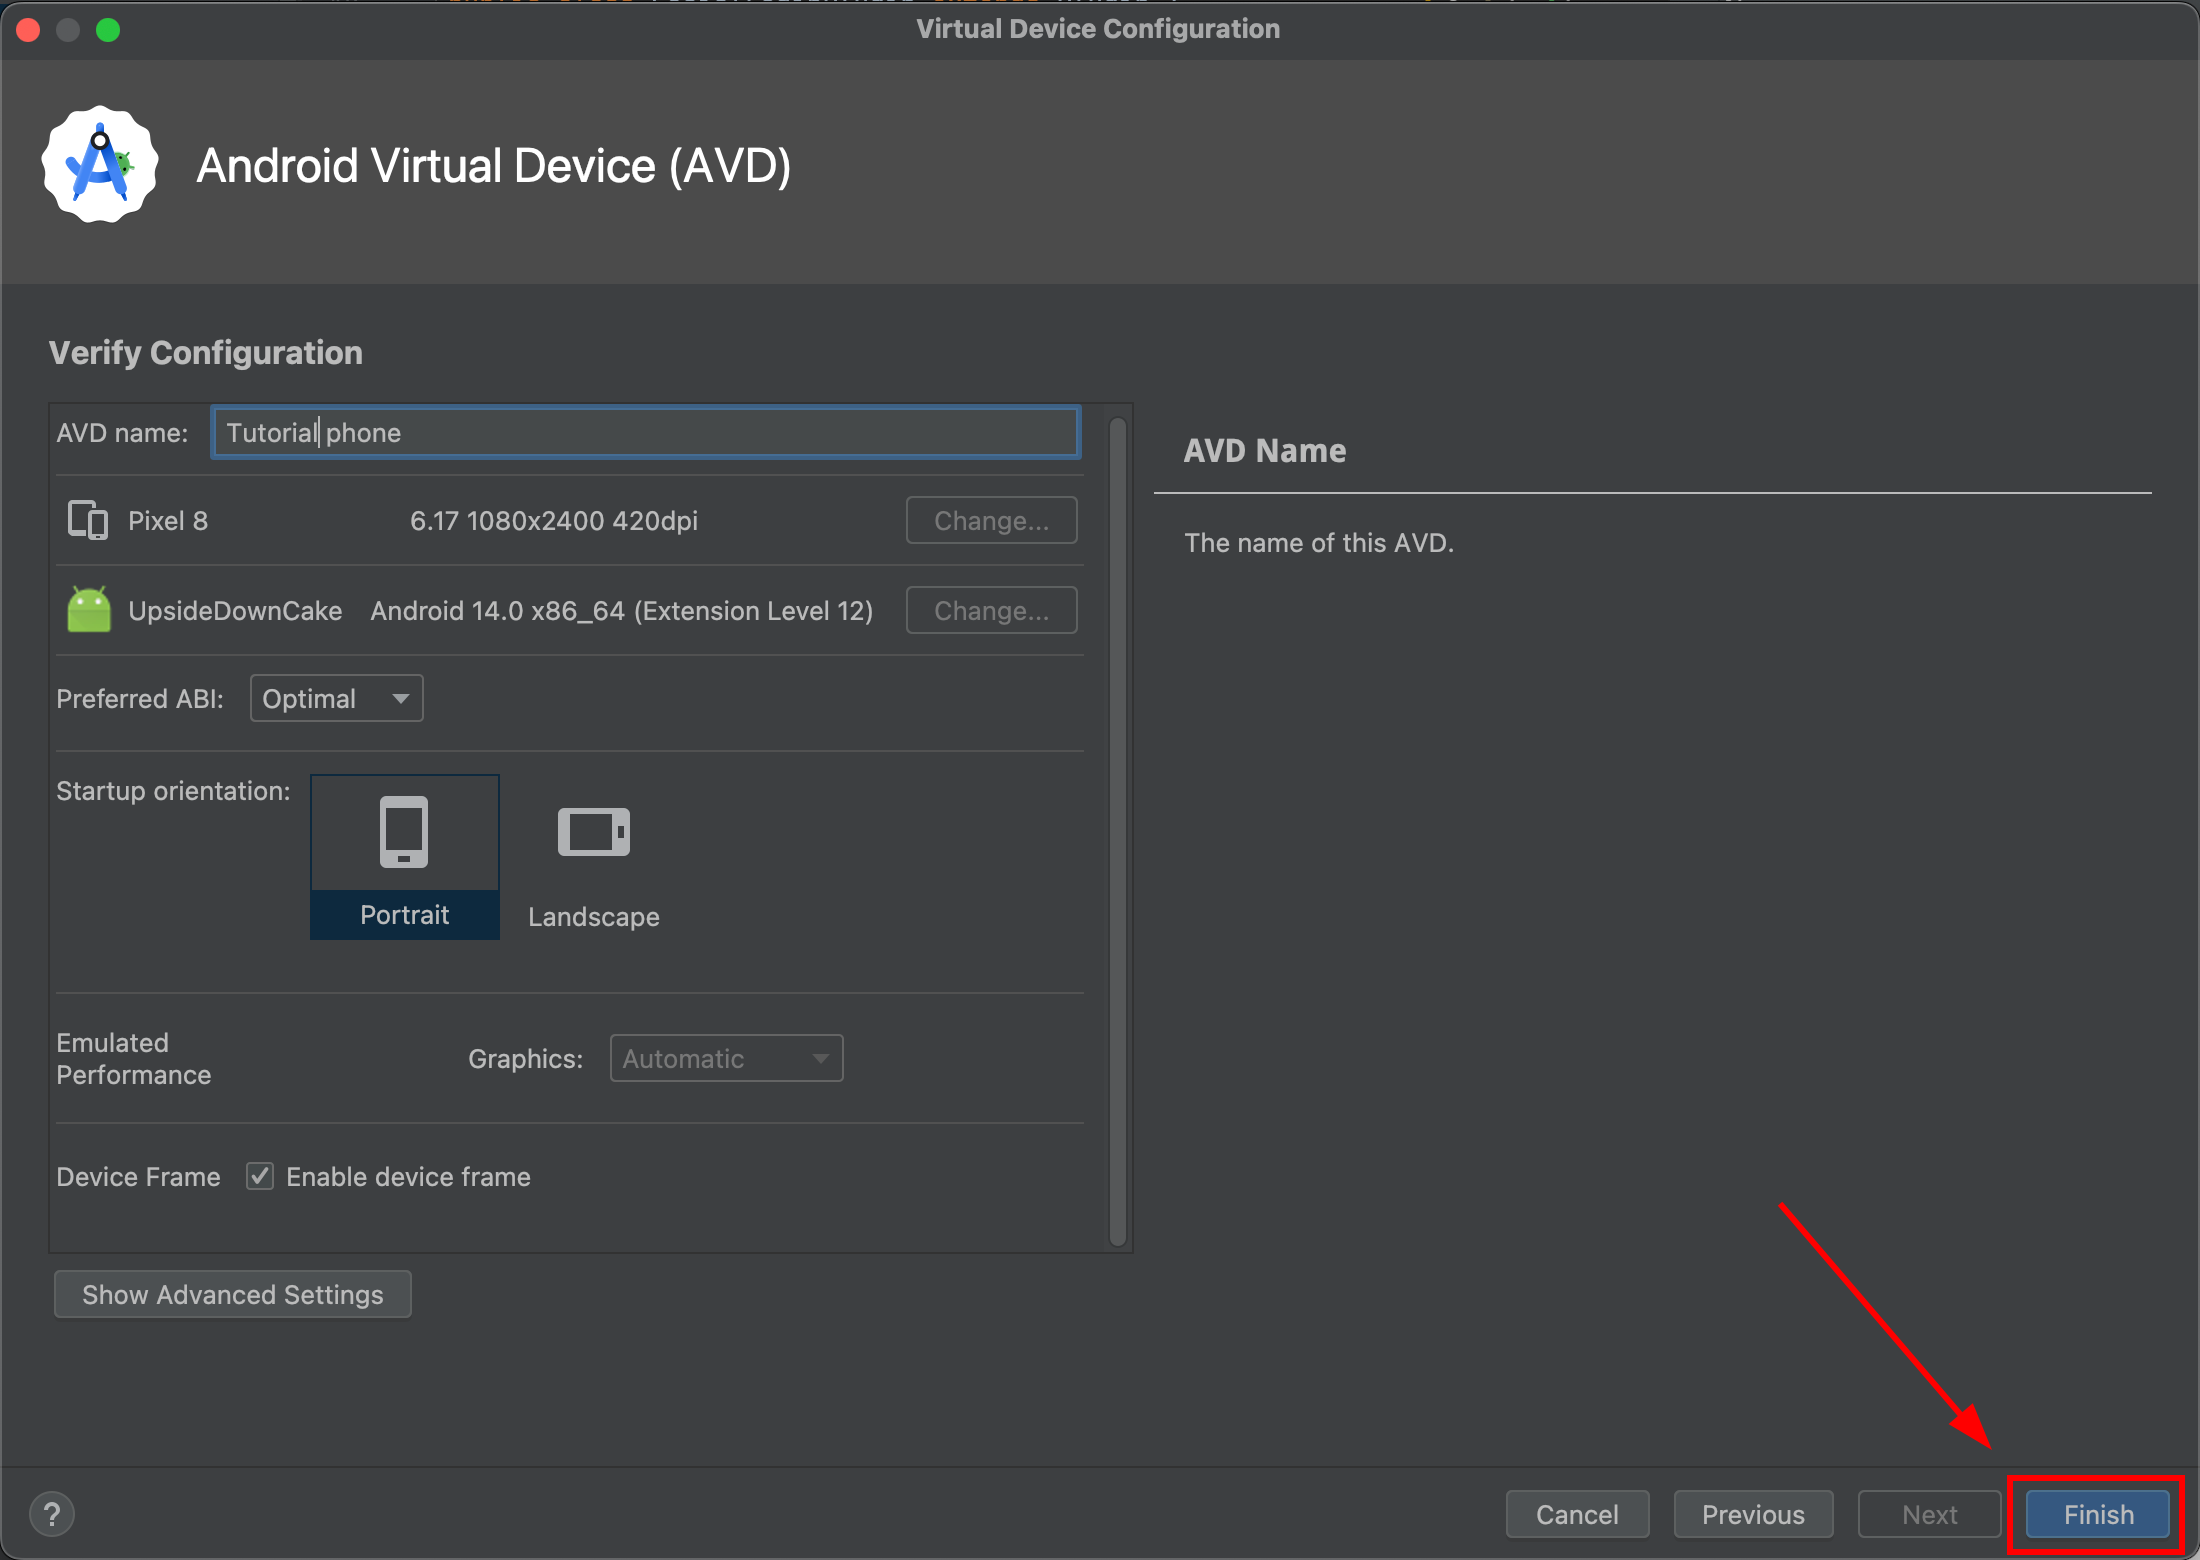
点击下一步
-
确认您的设备。您可以根据自己的喜好命名您的模拟器
-
进入“设备管理器”并启动模拟器
-
模拟器启动后,进入其设置
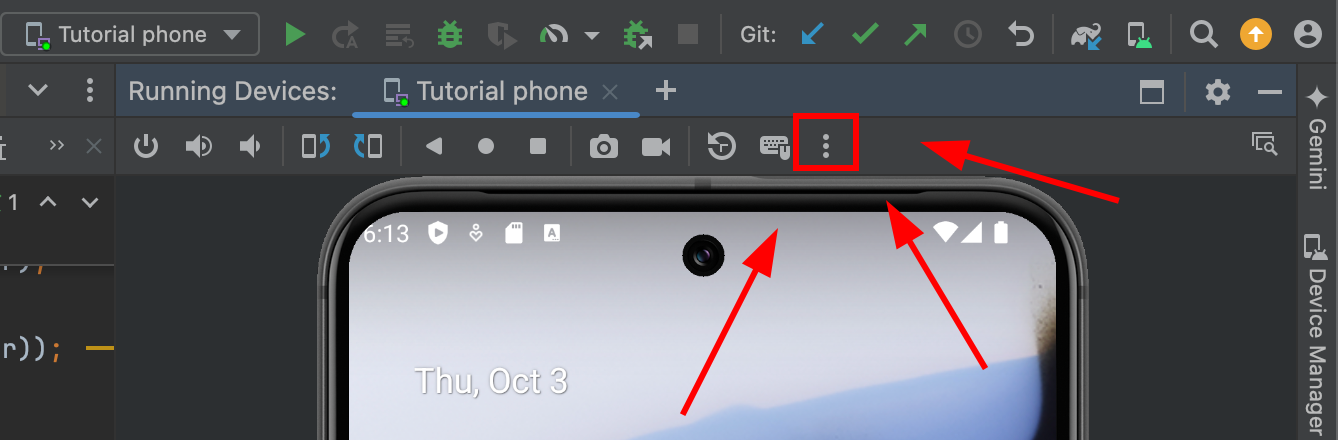
-
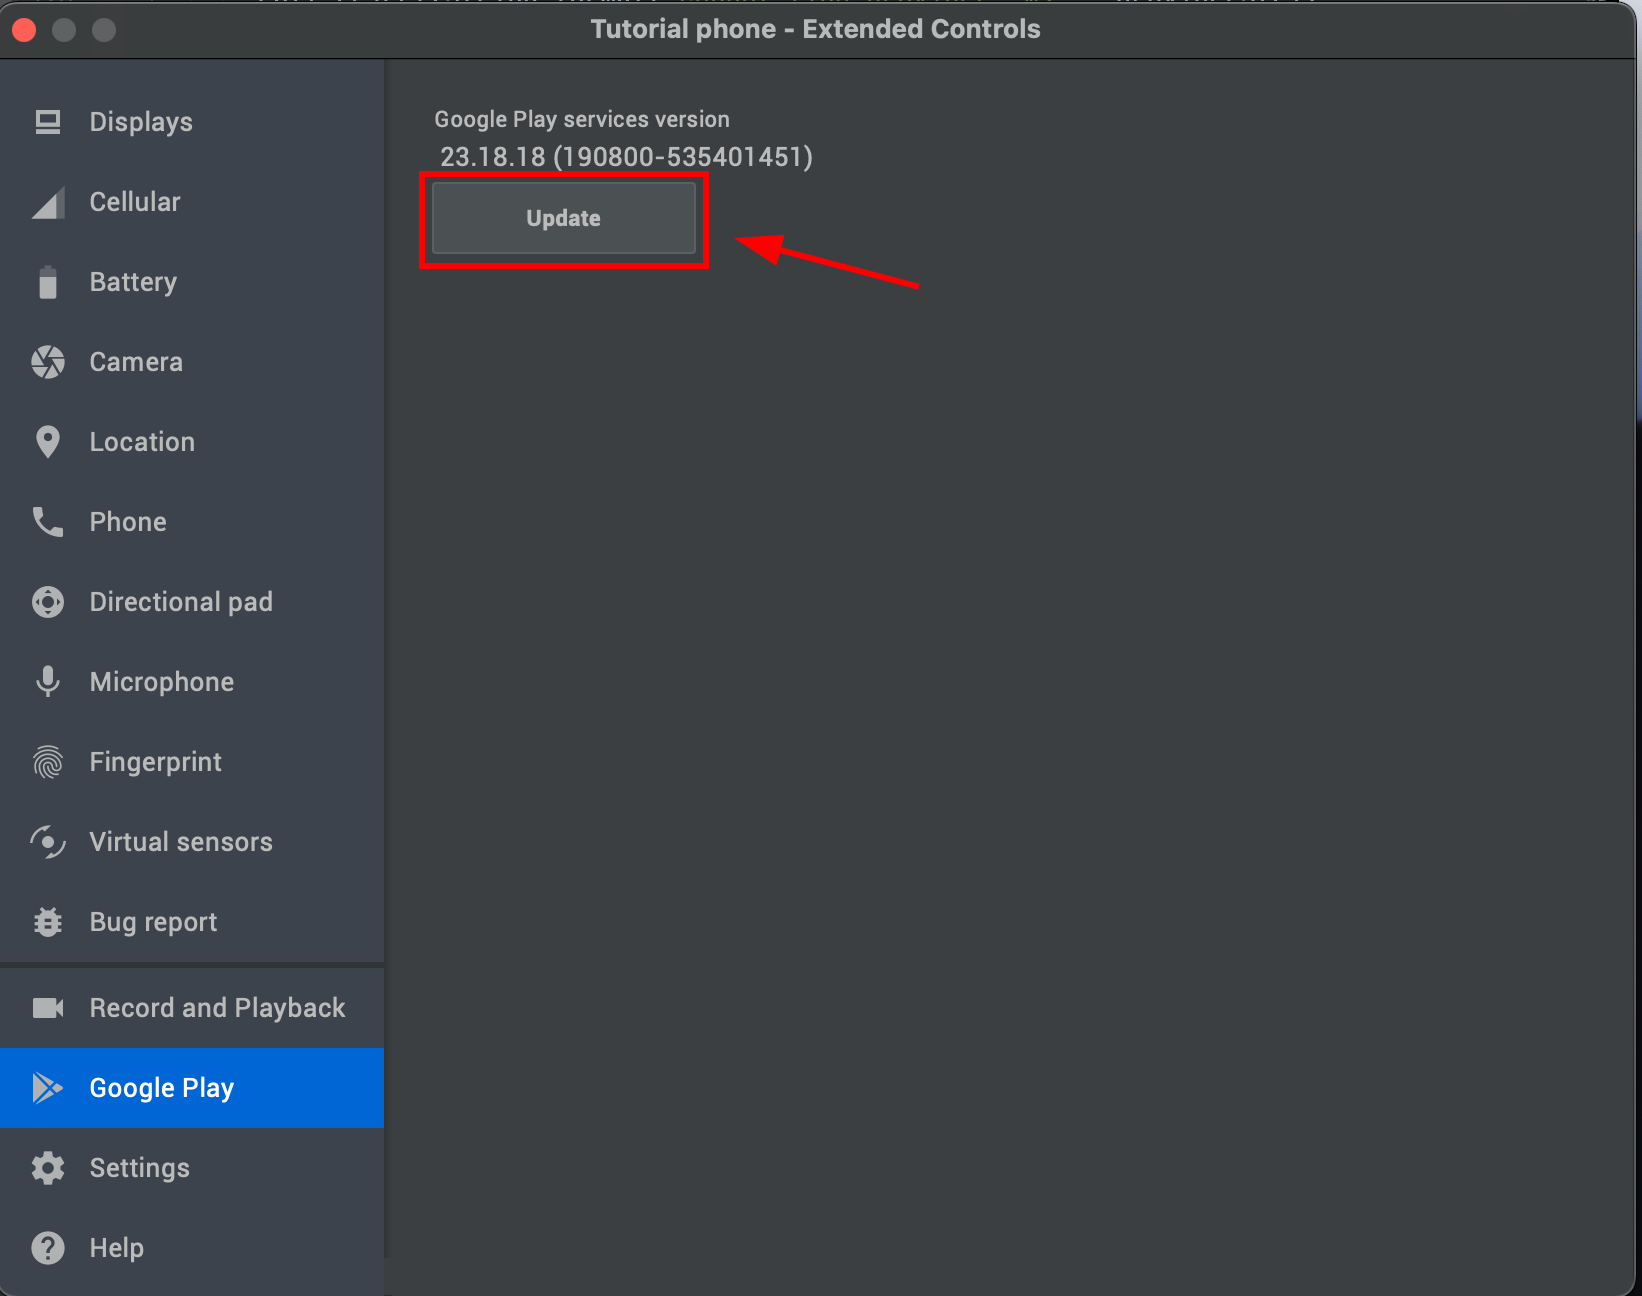
进入
Google Play
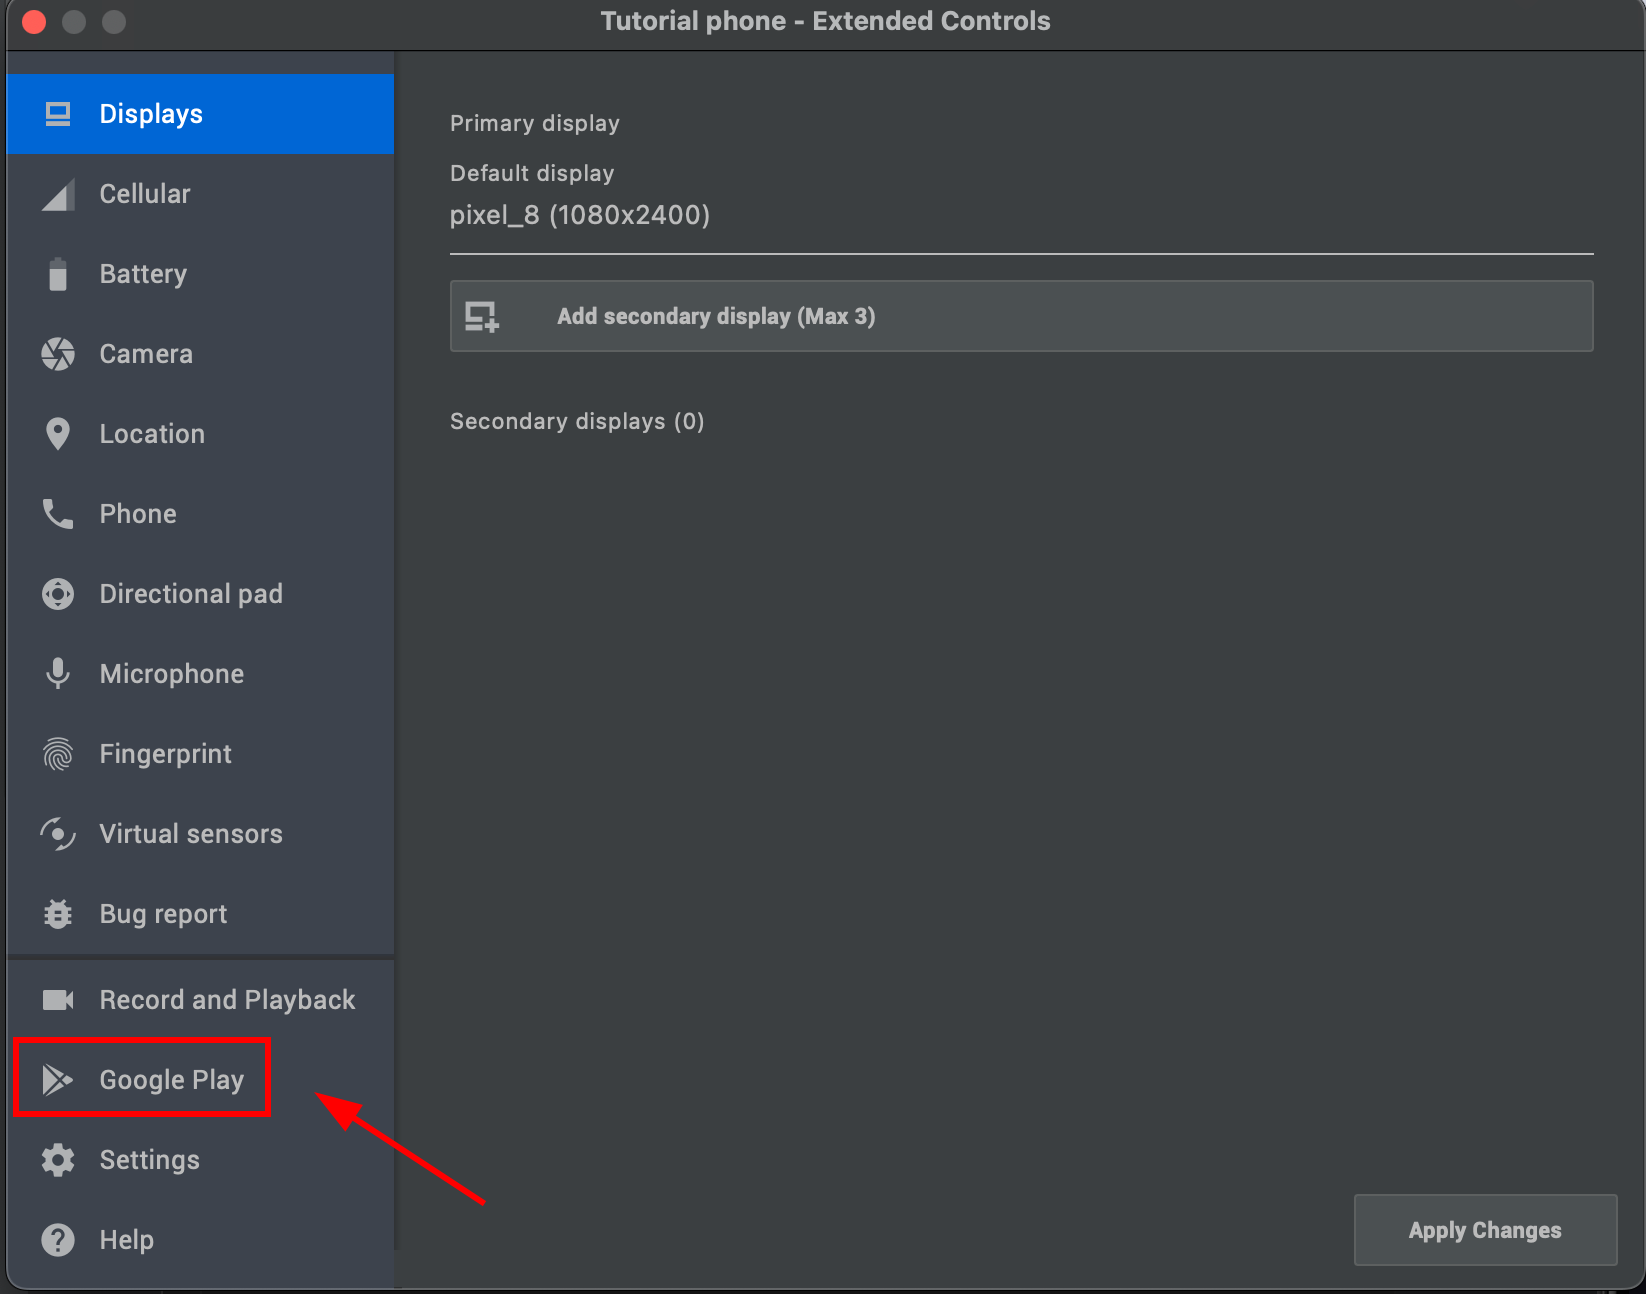
- 点击
Update并等待大约 60 秒
-
-
测试您的应用程序
如果您所做的一切正确,您应该会看到 Google 登录流程正常工作:

如果您有任何问题,请查看 Github issues。
Google 登录问题始终与 SHA1 证书相关。
如果无法获取开发 SHA1 证书,请尝试使用自定义密钥库。 此处 是一条注释,解释如何将密钥库添加到您的项目中。