채널
Gestión de canales
Section titled “Gestión de canales”Primero, echemos un vistazo a la página de canales. Puedes acceder a ella haciendo clic en tu aplicación y luego haciendo clic en la pestaña de canales

Crear un canal
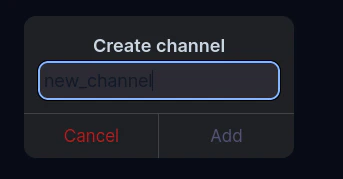
Section titled “Crear un canal”Como puedes ver, existe un botón más en la esquina inferior derecha (1 en la imagen). Al hacer clic en él se abrirá un modal donde puedes crear un nuevo canal

Después de hacer clic en Añadir un nuevo canal debería aparecer en la lista

¿Qué significa mal configurado?
Section titled “¿Qué significa mal configurado?”A veces la configuración de un canal no es válida. En ese caso, recibirás una advertencia grande y la columna Mal configurado dirá Sí para uno o más de los canales.
Puedes aprender más sobre esto aquí
Eliminar un canal
Section titled “Eliminar un canal”Eliminar un canal es sencillo. Solo haz clic en el ícono de la papelera y confirma la eliminación (2 en la imagen)
Gestionar un canal
Section titled “Gestionar un canal”Hacer clic en el nombre del canal abrirá un modal donde puedes gestionar la configuración del canal (3 en la imagen).

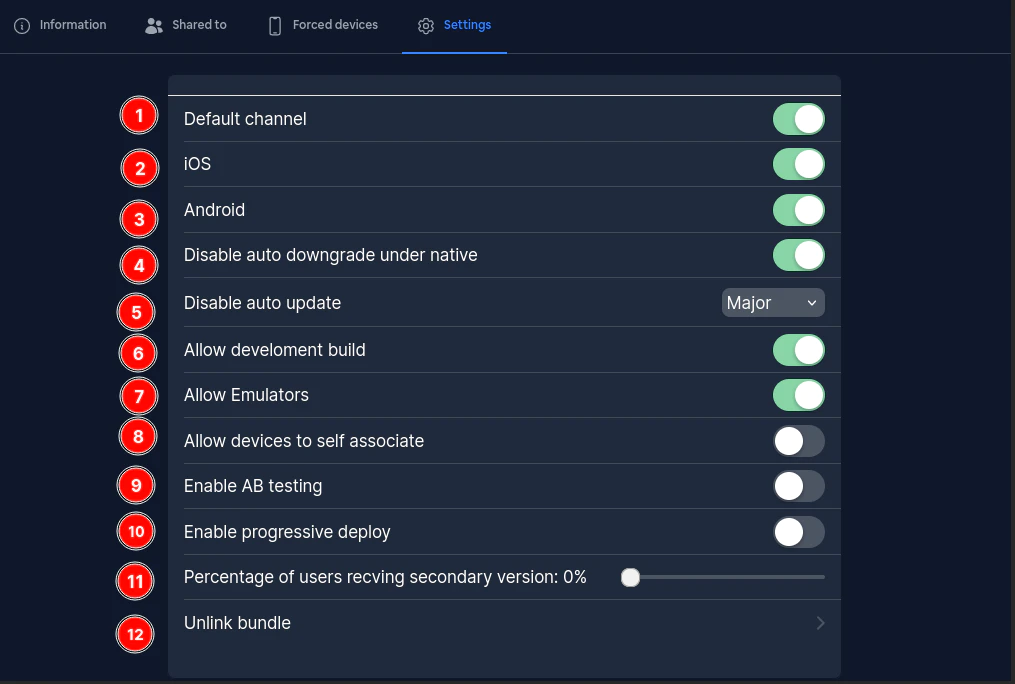
La página de configuración del canal contiene todas las opciones de configuración para tu canal. Veamos cada configuración.
Primero el toggle de Canal predeterminado. Cuando está habilitado, este canal se convierte en el predeterminado para nuevos dispositivos. Para una explicación completa de cómo funcionan los canales predeterminados, incluyendo cómo configurar valores predeterminados específicos por plataforma (uno para iOS, uno para Android), consulta la sección Configuración del Canal Predeterminado.
Segundo la configuración de IOS. Esto es relativamente simple. Si es falso, entonces los dispositivos IOS no podrán descargar actualizaciones de este canal
Tercero es la configuración de Android. Esto es similar a IOS. Si es falso, entonces los dispositivos Android no podrán descargar actualizaciones de este canal
Cuarto es la configuración Deshabilitar auto degradación bajo nativo. Si esto es verdadero entonces será imposible degradar desde una versión nativa. Esto significa que si has subido una versión 120 a la Aplicación Store o Play Store e intentas establecer la versión del canal a 110 entonces la actualización (degradación) fallará
Quinto es Deshabilitar auto actualización. Esta configuración es bastante compleja, y puedes aprender más sobre ella aquí
En cuanto a Permitir compilación de desarrollo. Si esto es verdadero entonces las compilaciones de desarrollo podrán descargar actualizaciones de este canal. Si no, entonces cualquier solicitud de actualización que tenga el prod establecido en falso será rechazada. Esto es principalmente útil para propósitos de prueba
Séptimo es Permitir Emuladores. Si esto es falso entonces Capgo rechazará cualquier solicitud de actualización que provenga de un emulador. Esto es principalmente útil para propósitos de prueba
Octavo es Permitir que los dispositivos se auto asocien. Si esto es verdadero entonces el método setChannel estará disponible. Si esto está establecido en falso e intentas llamar al método setChannel con este canal entonces la llamada fallará
