Apple Connexion on Android
Apple login on android is hacky. Apple has no official support for Sign in with Apple on Android, so the solution is slightly hacky.
Android currently uses a chrome tabs to display an OAuth2 website. This approach has the challenges:
- Difficult Configuration
- A backend is required
Understanding the flow on Android.
Section titled “Understanding the flow on Android.”Let me use a diagram to explain the flow on Android:
flowchart TD
    A("await SocialLogin.login()") -->|Handled in the plugin|B(Generate the login URL)
    B --> |Pass the link| C(Open the Chrome browser)
    C --> D(Wait for the user to login)
    D --> |Apple redirects to your backend|E(Handle the data returned from Apple)
    E --> F(Redirect back to the app)
    F --> G(Return to JS)
Now that you are aware of the challlanges and the flow, let’s begin the Configuration.
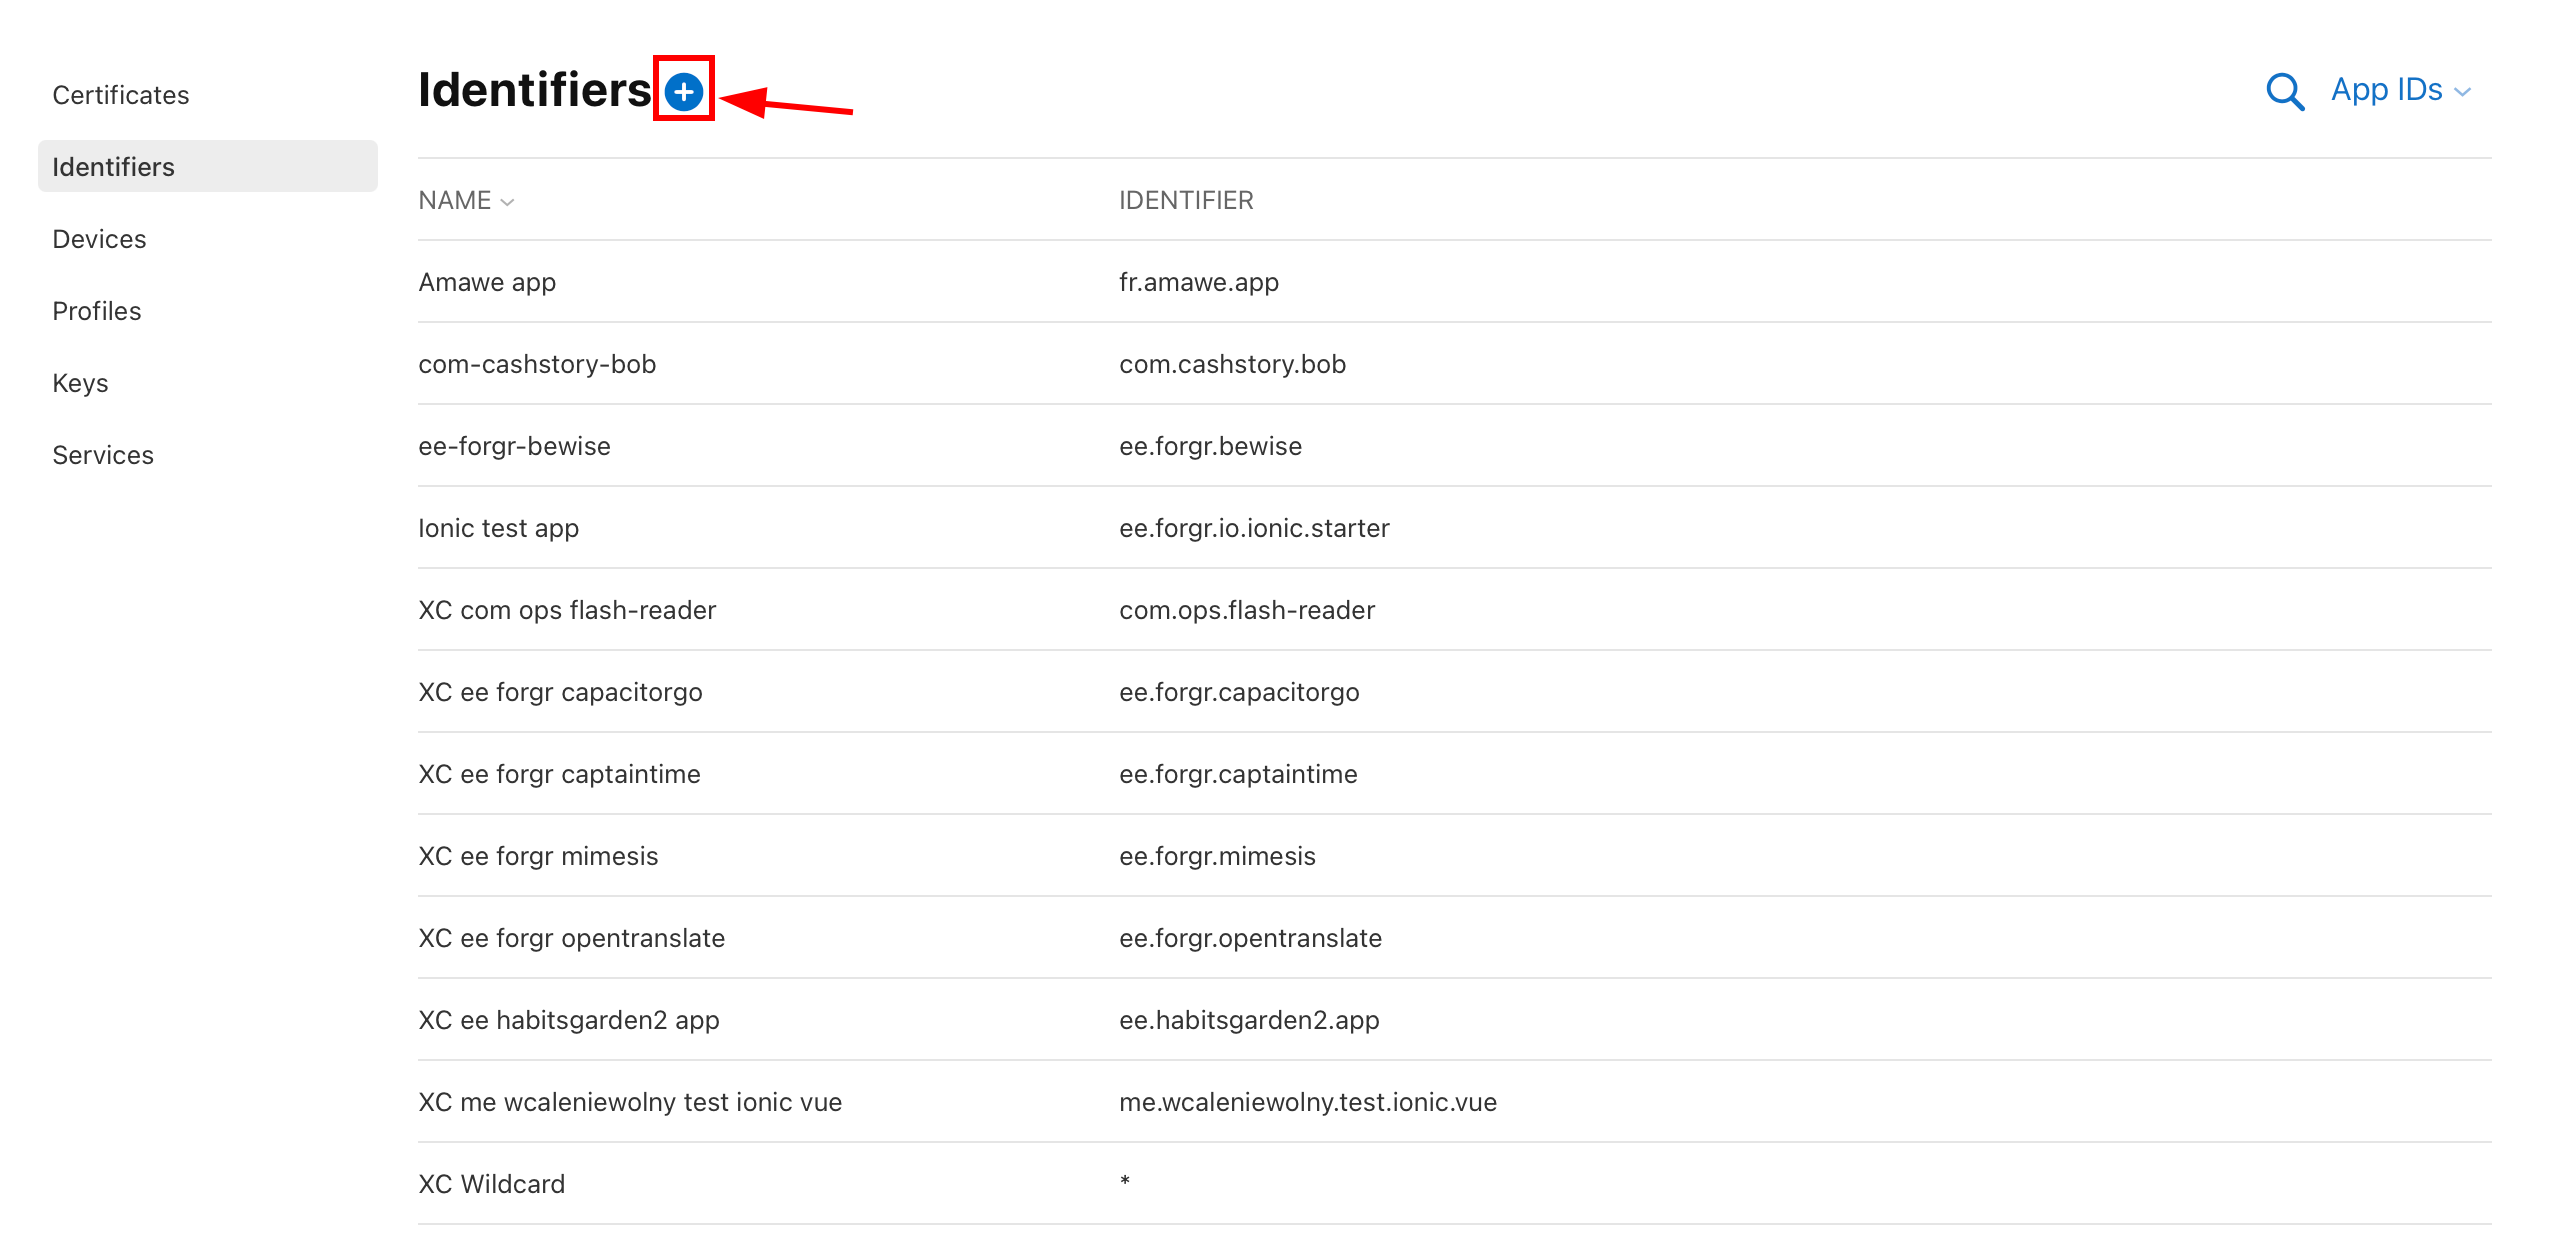
Creating the service ID
Section titled “Creating the service ID”-
Connexion into the Apple Developer Portal.
-
Click on
Identifiers.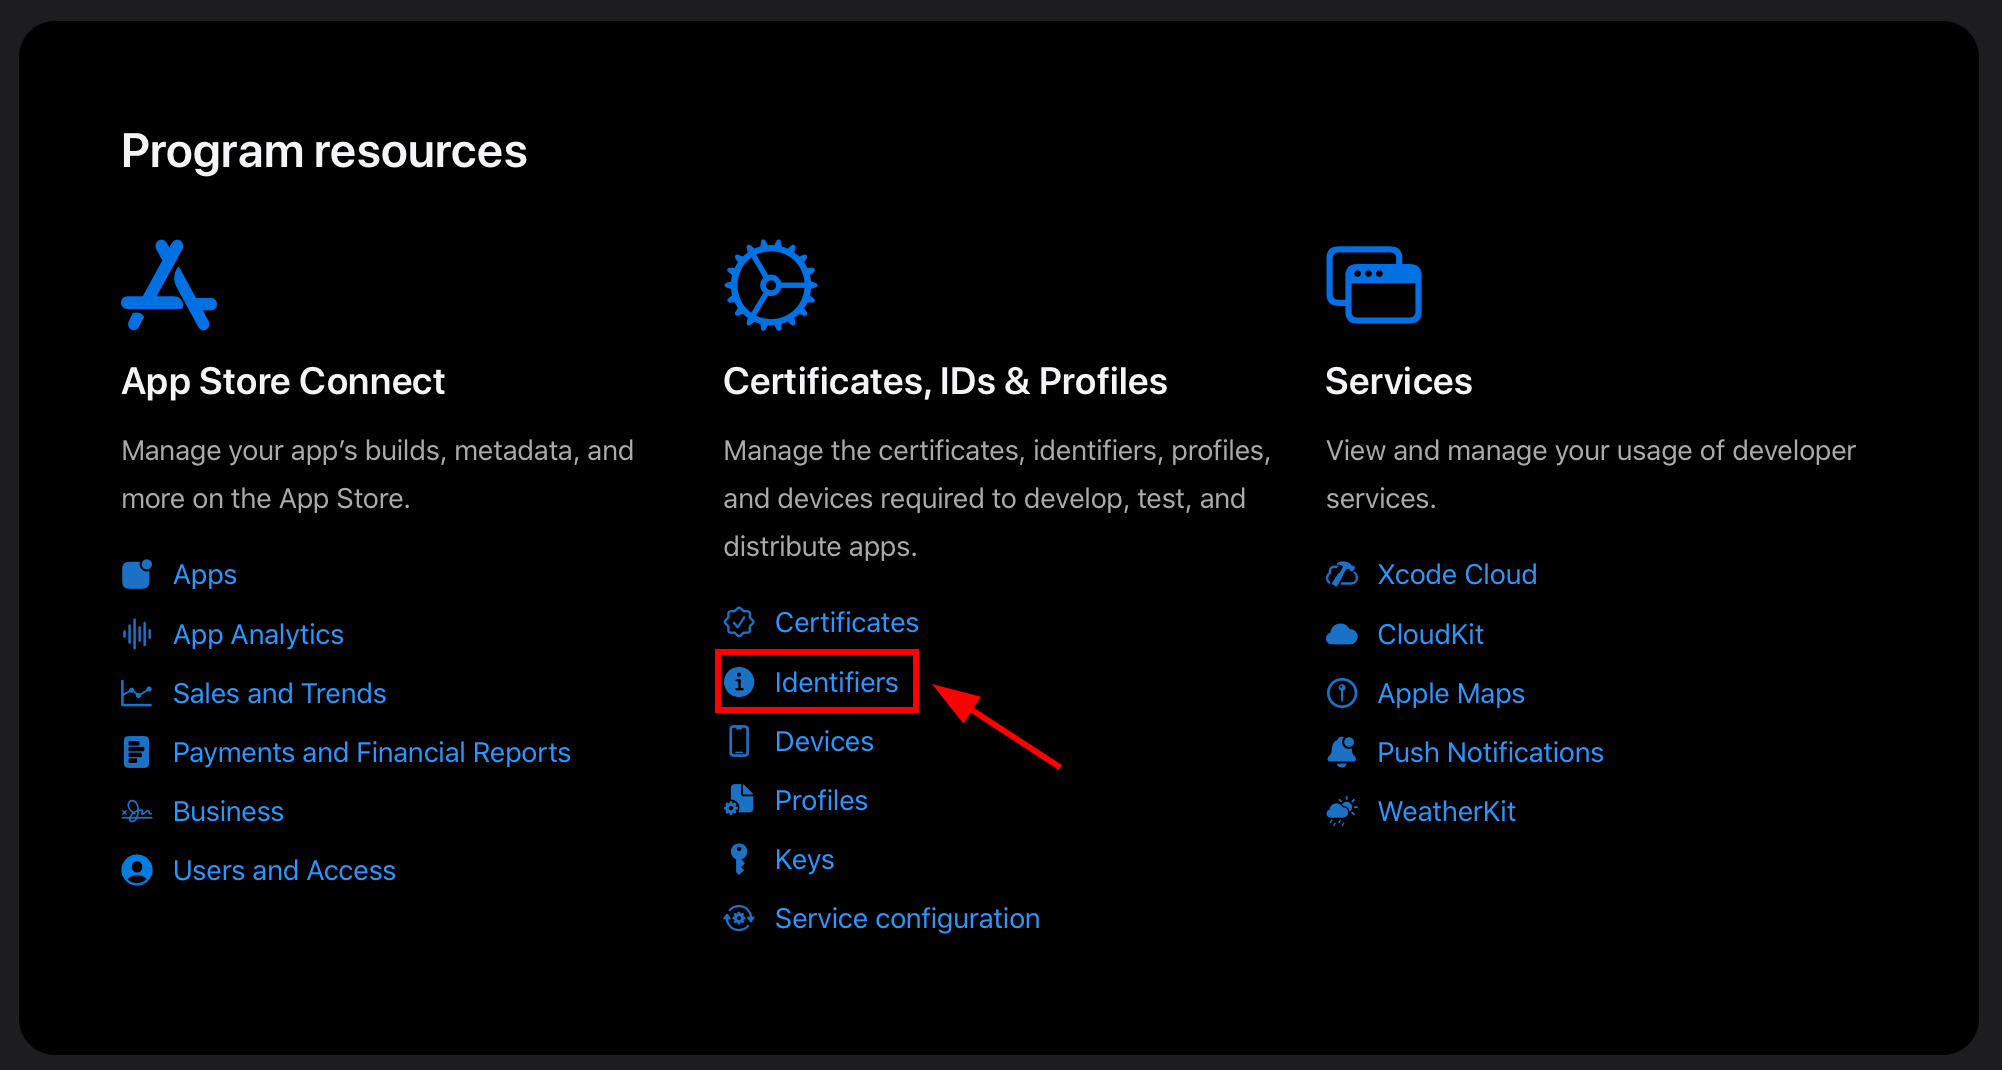
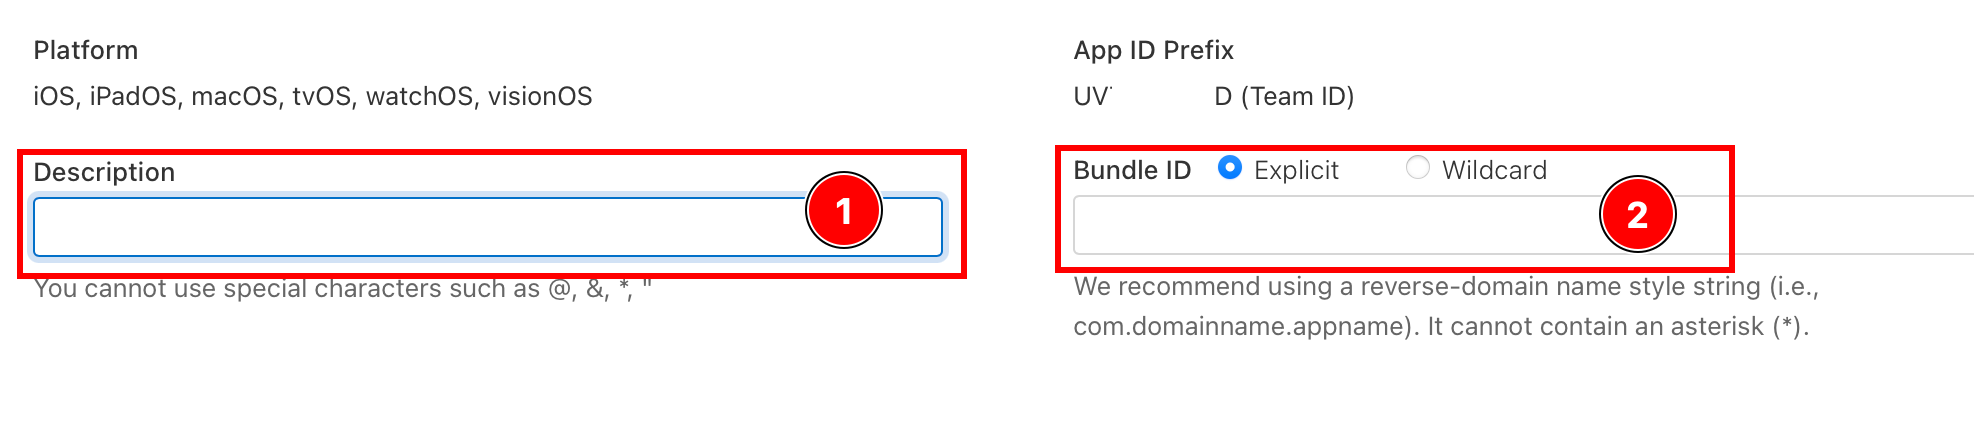
You should see a screen that looks like this:
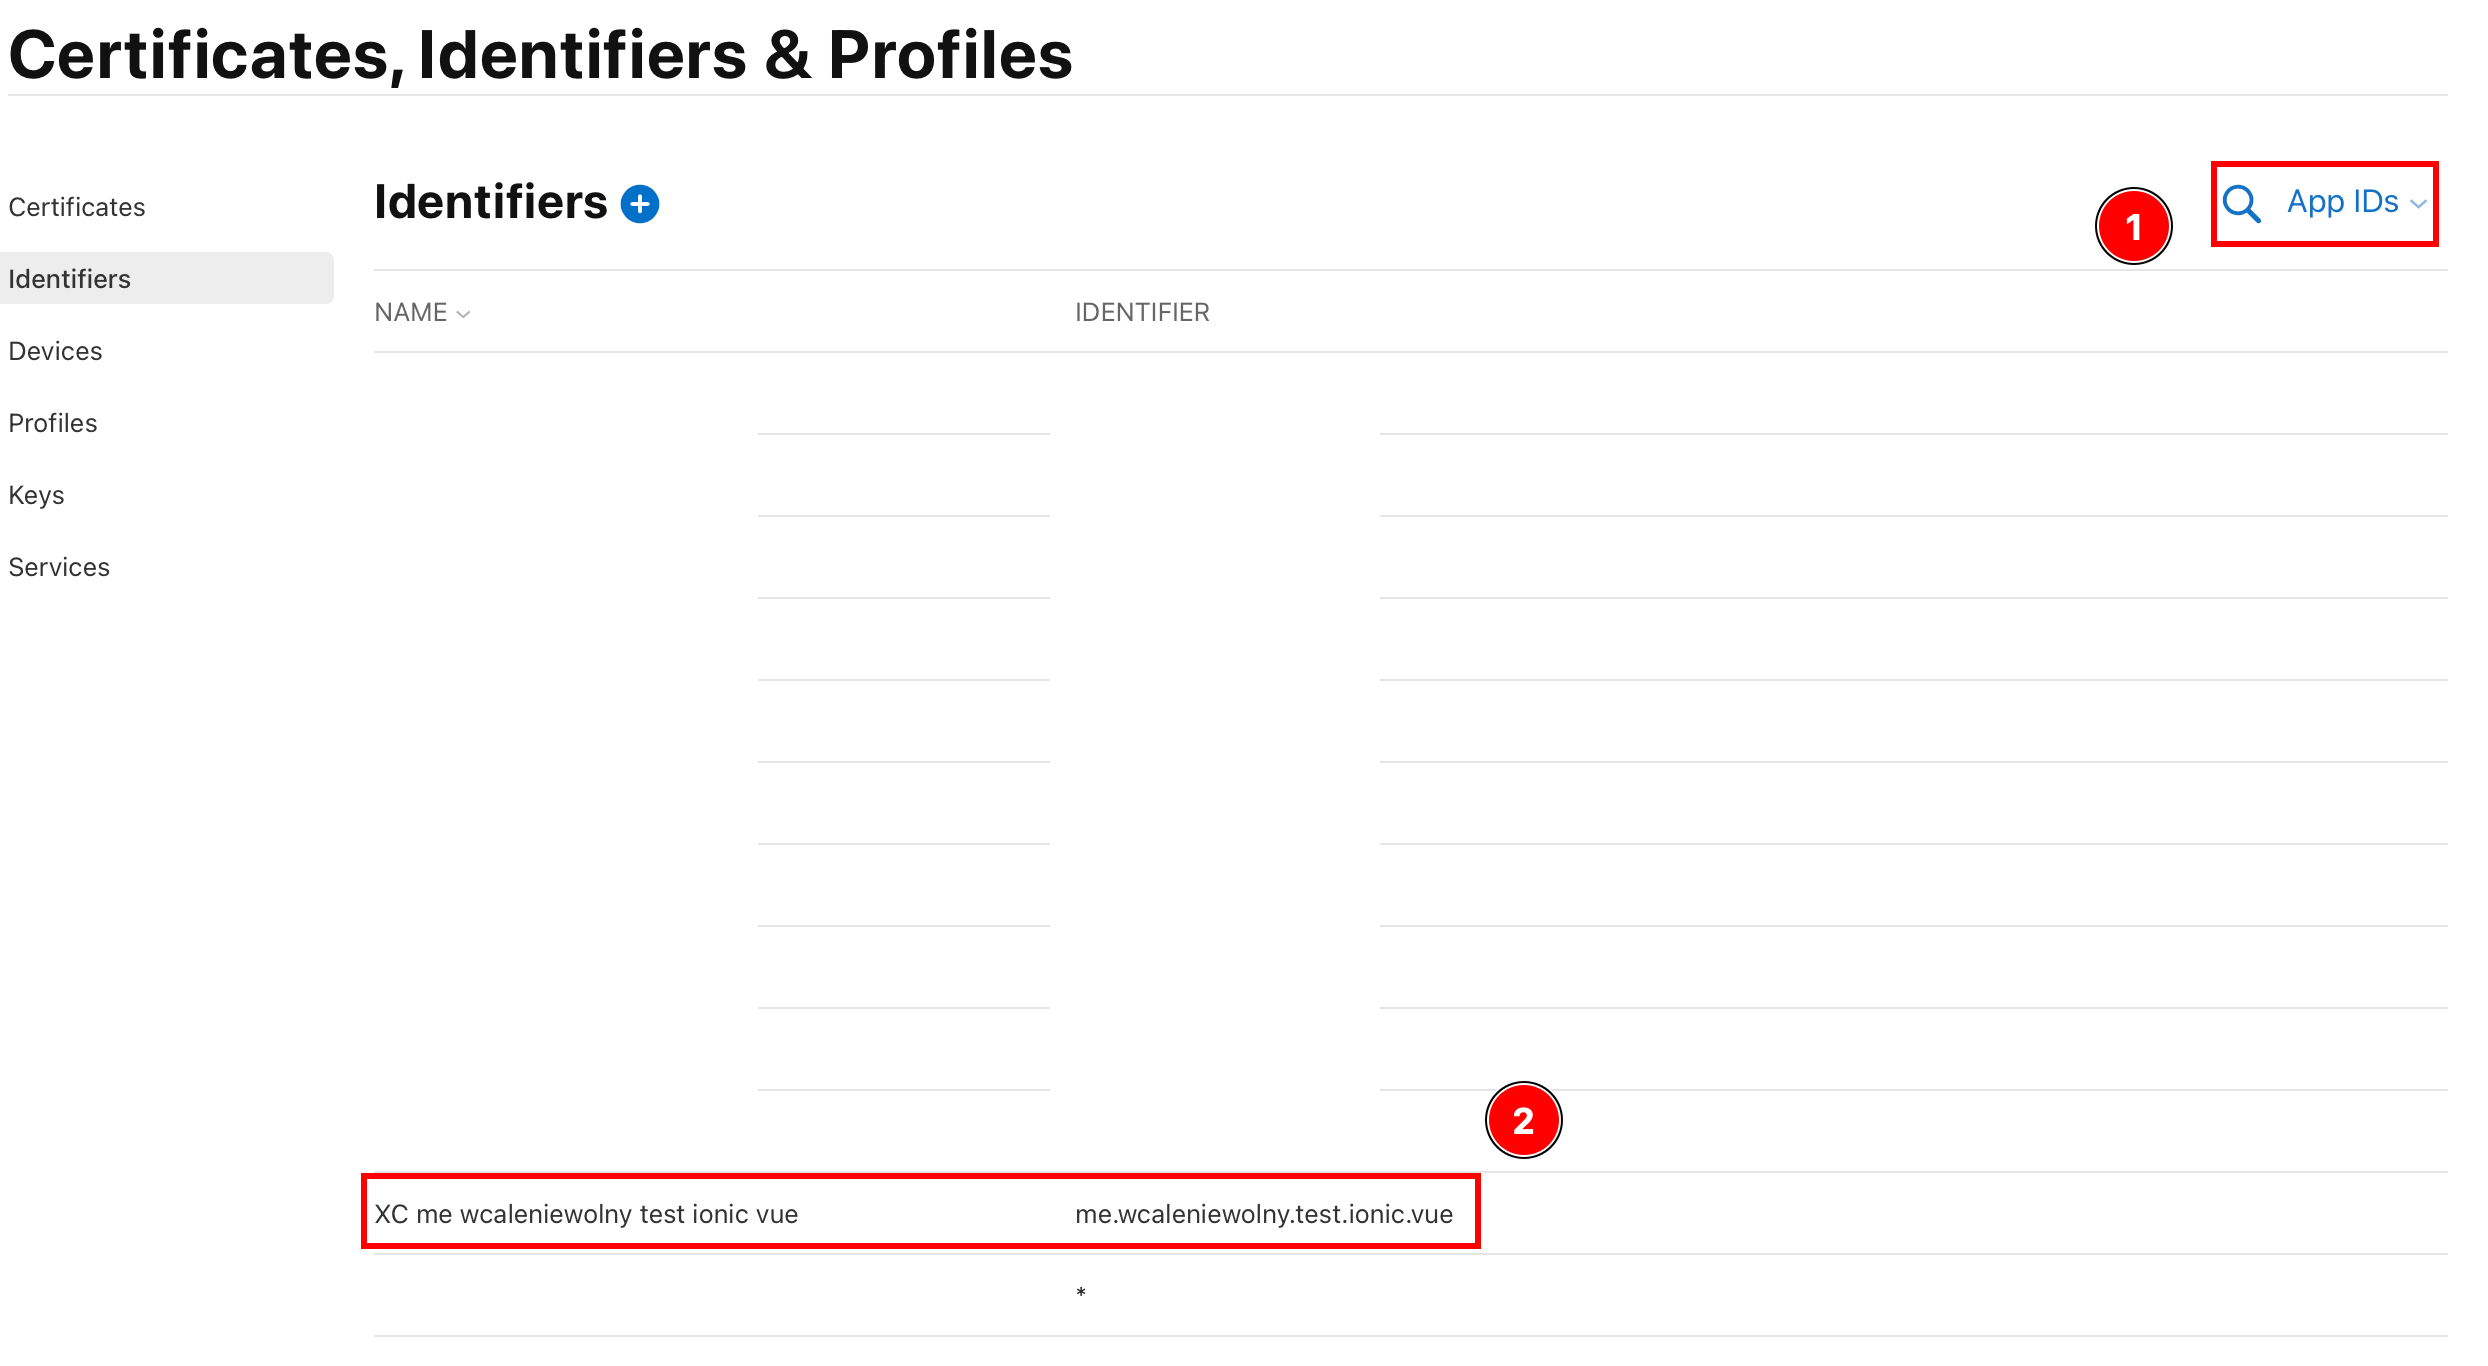
- Ensure that this field says
Application IDs - Make sure that you can find your Application ID.
If you don’t have configured Apple Login for IOS, you will have to create one. For me, I already have one created. The app ID I will use is
me.wcaleniewolny.test.ionic.vue. If you don’t have one, please create one using the create app step.
- Ensure that this field says
-
Make sure that the
Sign in with Applecapability is enabled for your app- Click on your Application
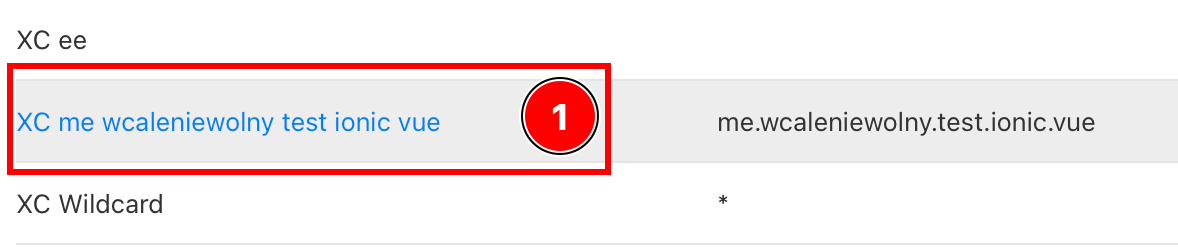
- Ensure that the
Sign in with Applecapability is enabled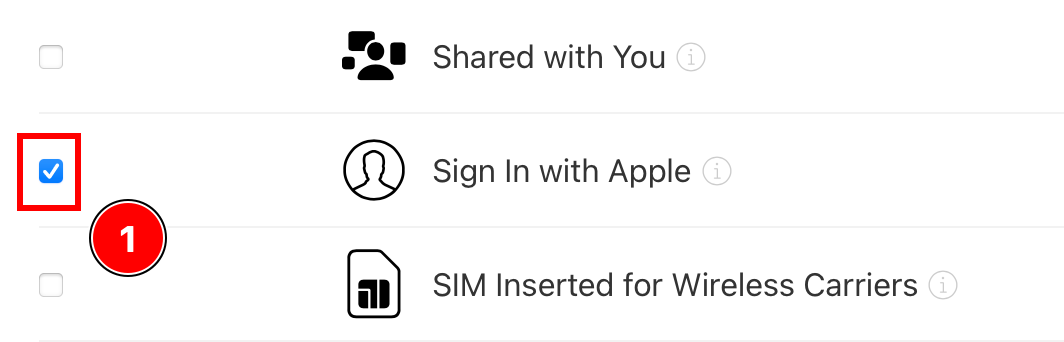
- If it isn’t enabled, Activer it.
- Click on your Application
-
Go back to all
All Identifiers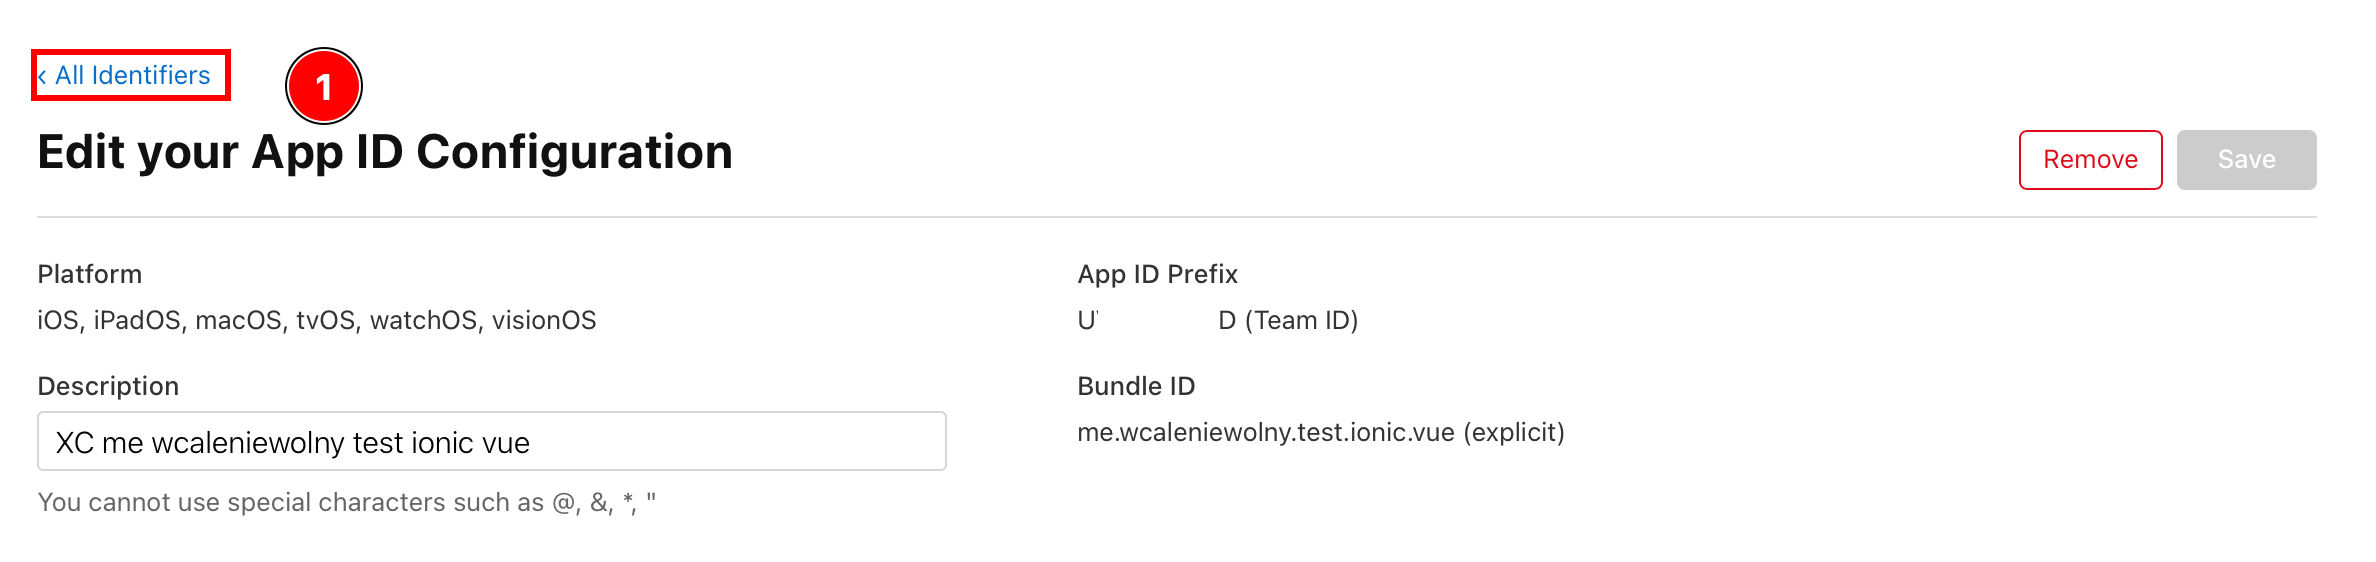
-
Click on
App Idsand go toServices IDs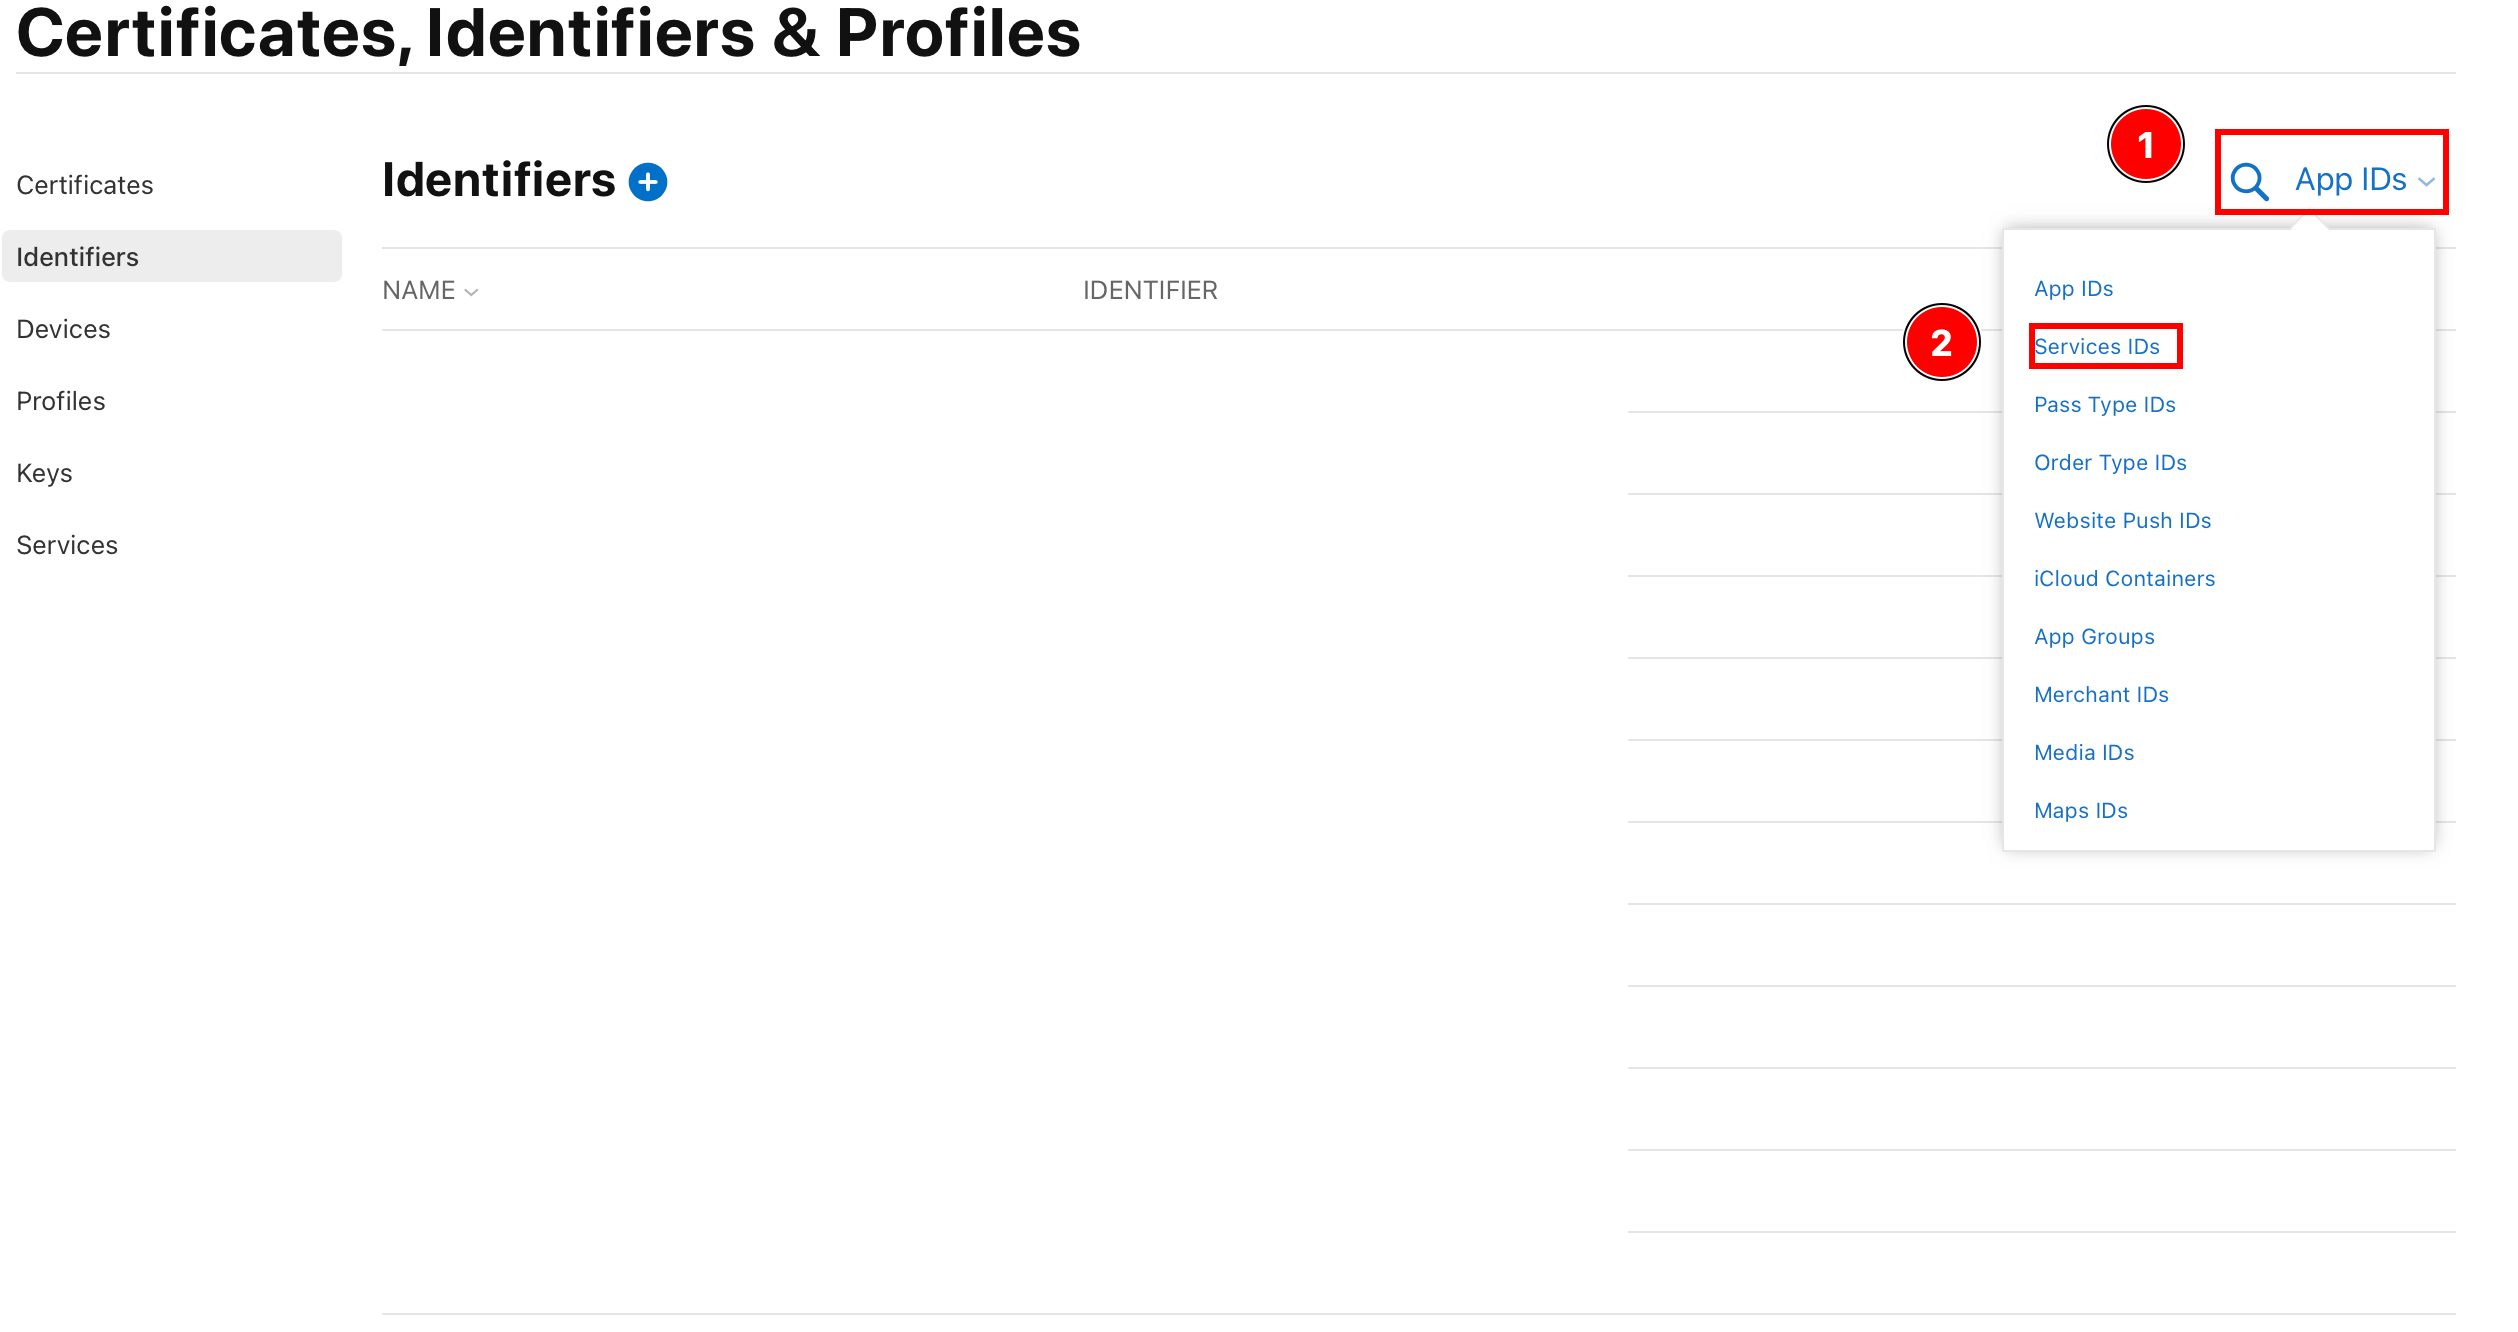
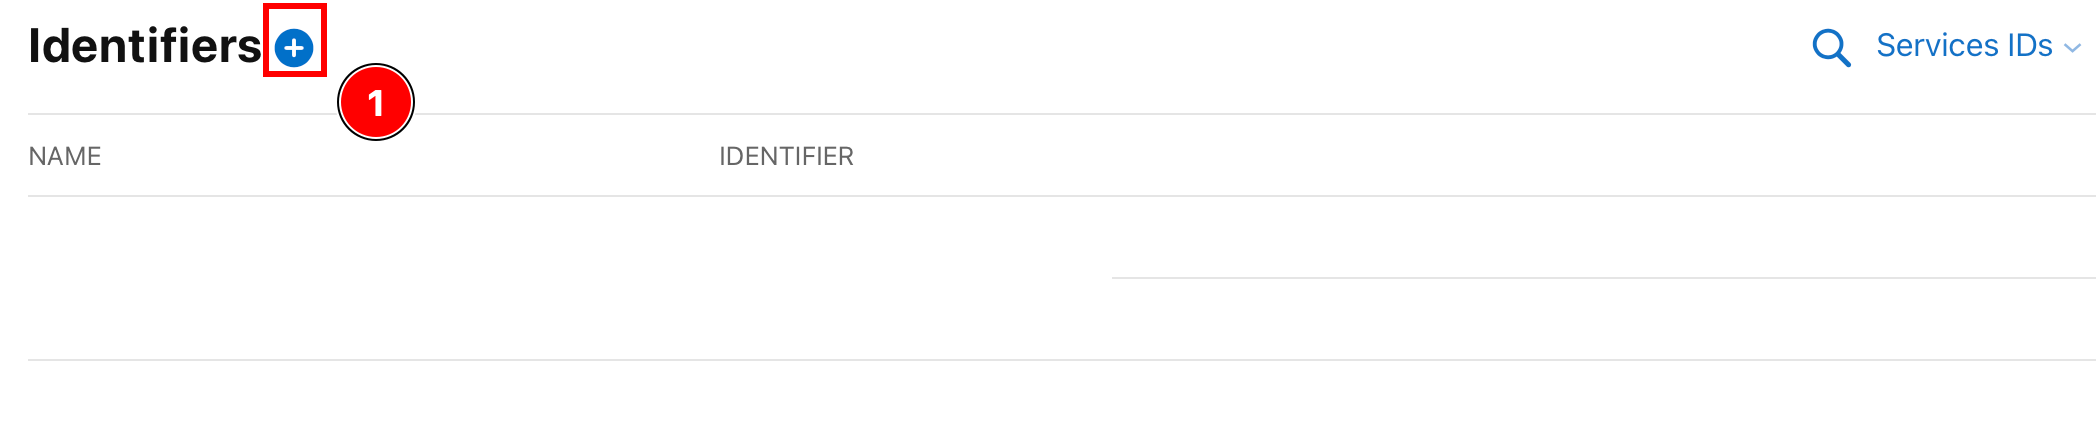
-
Creare a Nouveau identifier
-
Click on the plus button
-
Select
Servcice IDsand clickContinue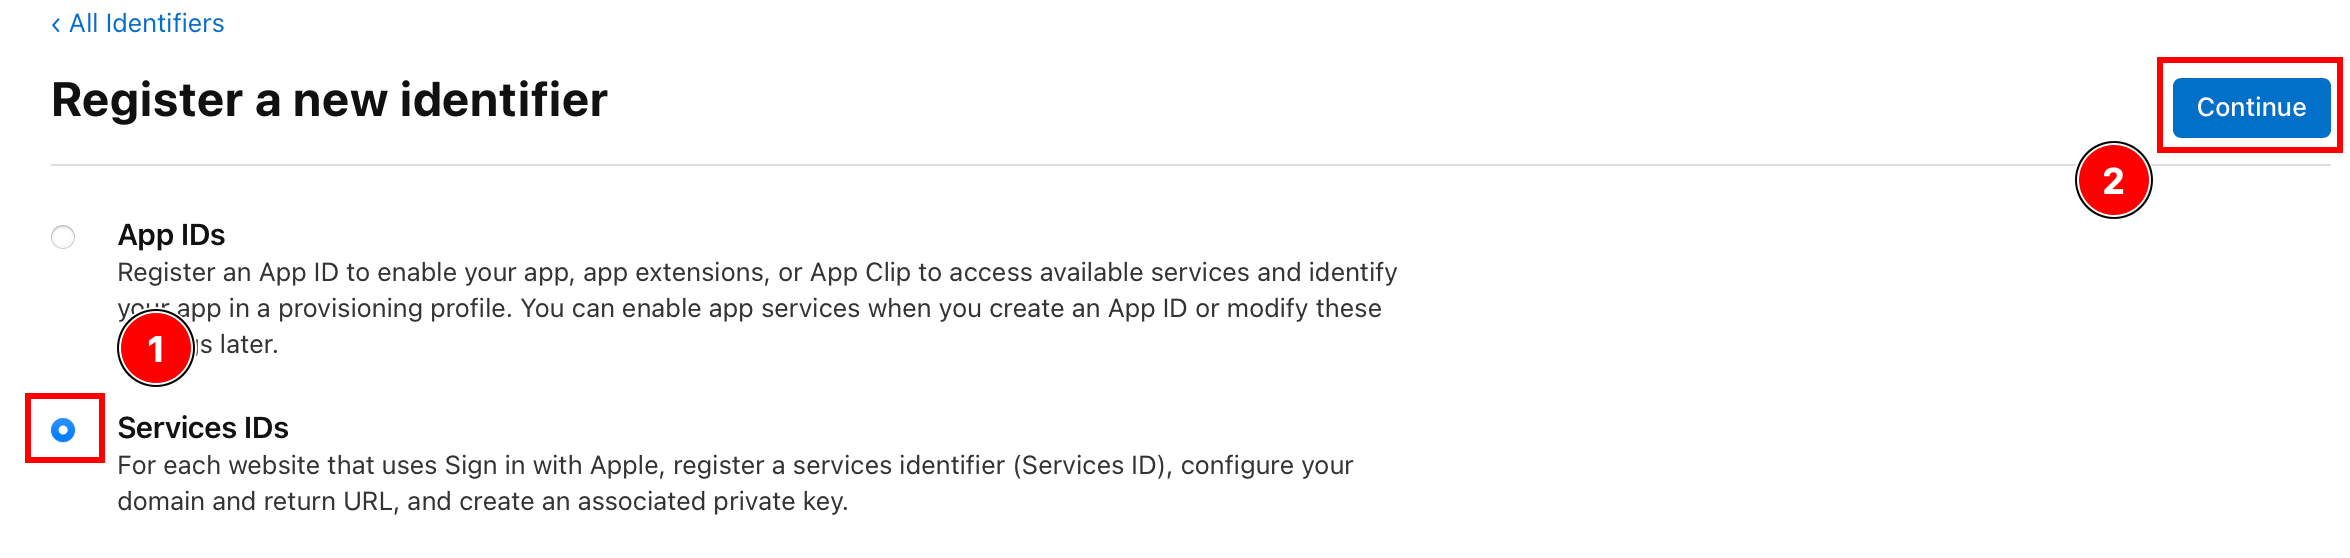
-
Enter a description and a identifiers and click
Continuie.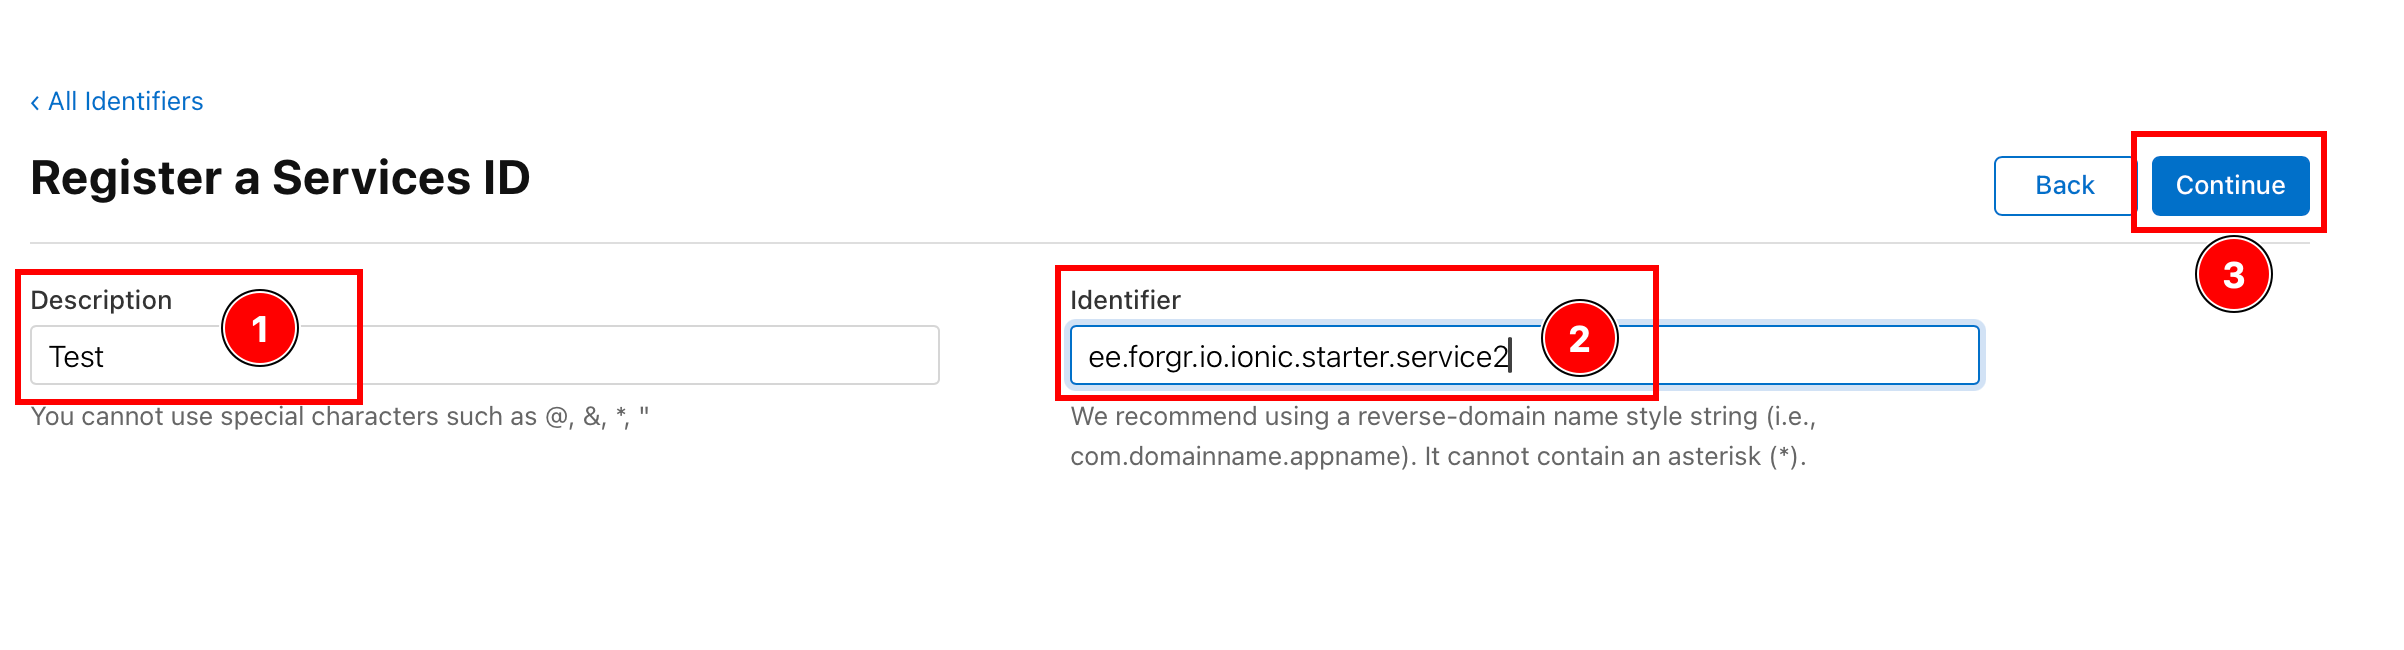
This
identifierswill become theclientIdthat you will pass in theinitializefunction ANDANDROID_SERVICE_IDfor the backend.Please save it!!!
Service ID doesn’t have to match the App ID, but I recommend setting the service ID to
YOUR_APP_ID.service. As a reminder, I am usingme.wcaleniewolny.test.ionic.vuefor my app ID but I am usingee.forgr.io.ionic.service2as the service ID. -
Please verify the details and click
Register
-
Click on the the newly created service

-
Enable the
Sign in with Appleoption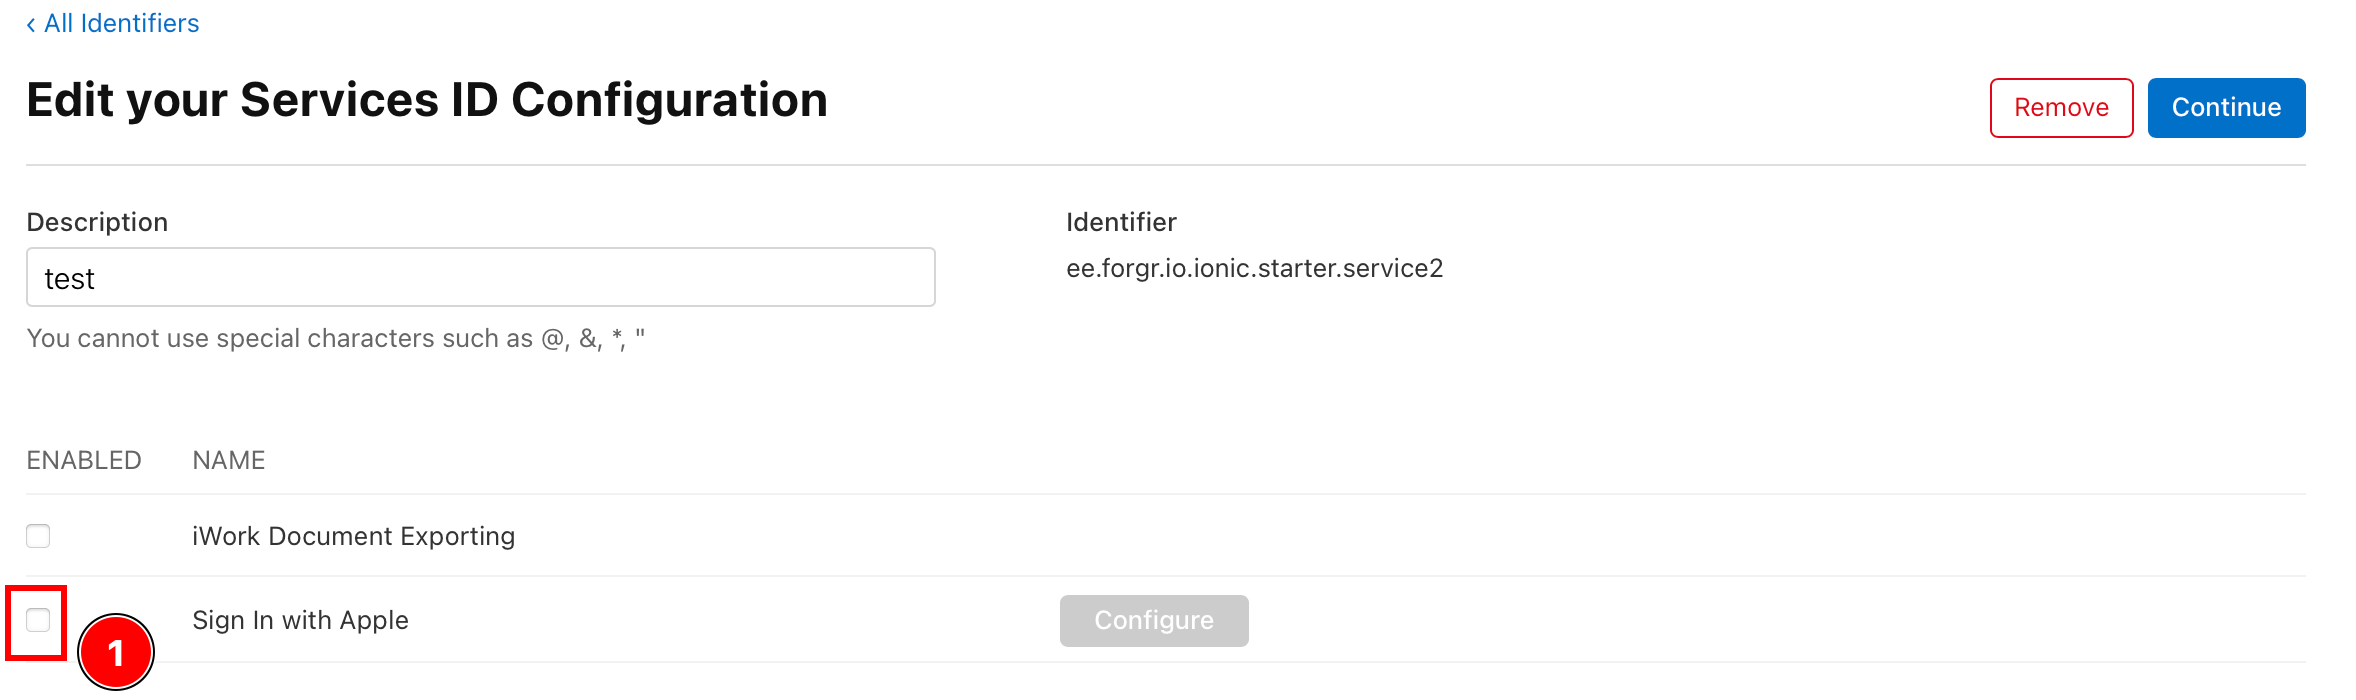
-
Configure the
Sign In with Apple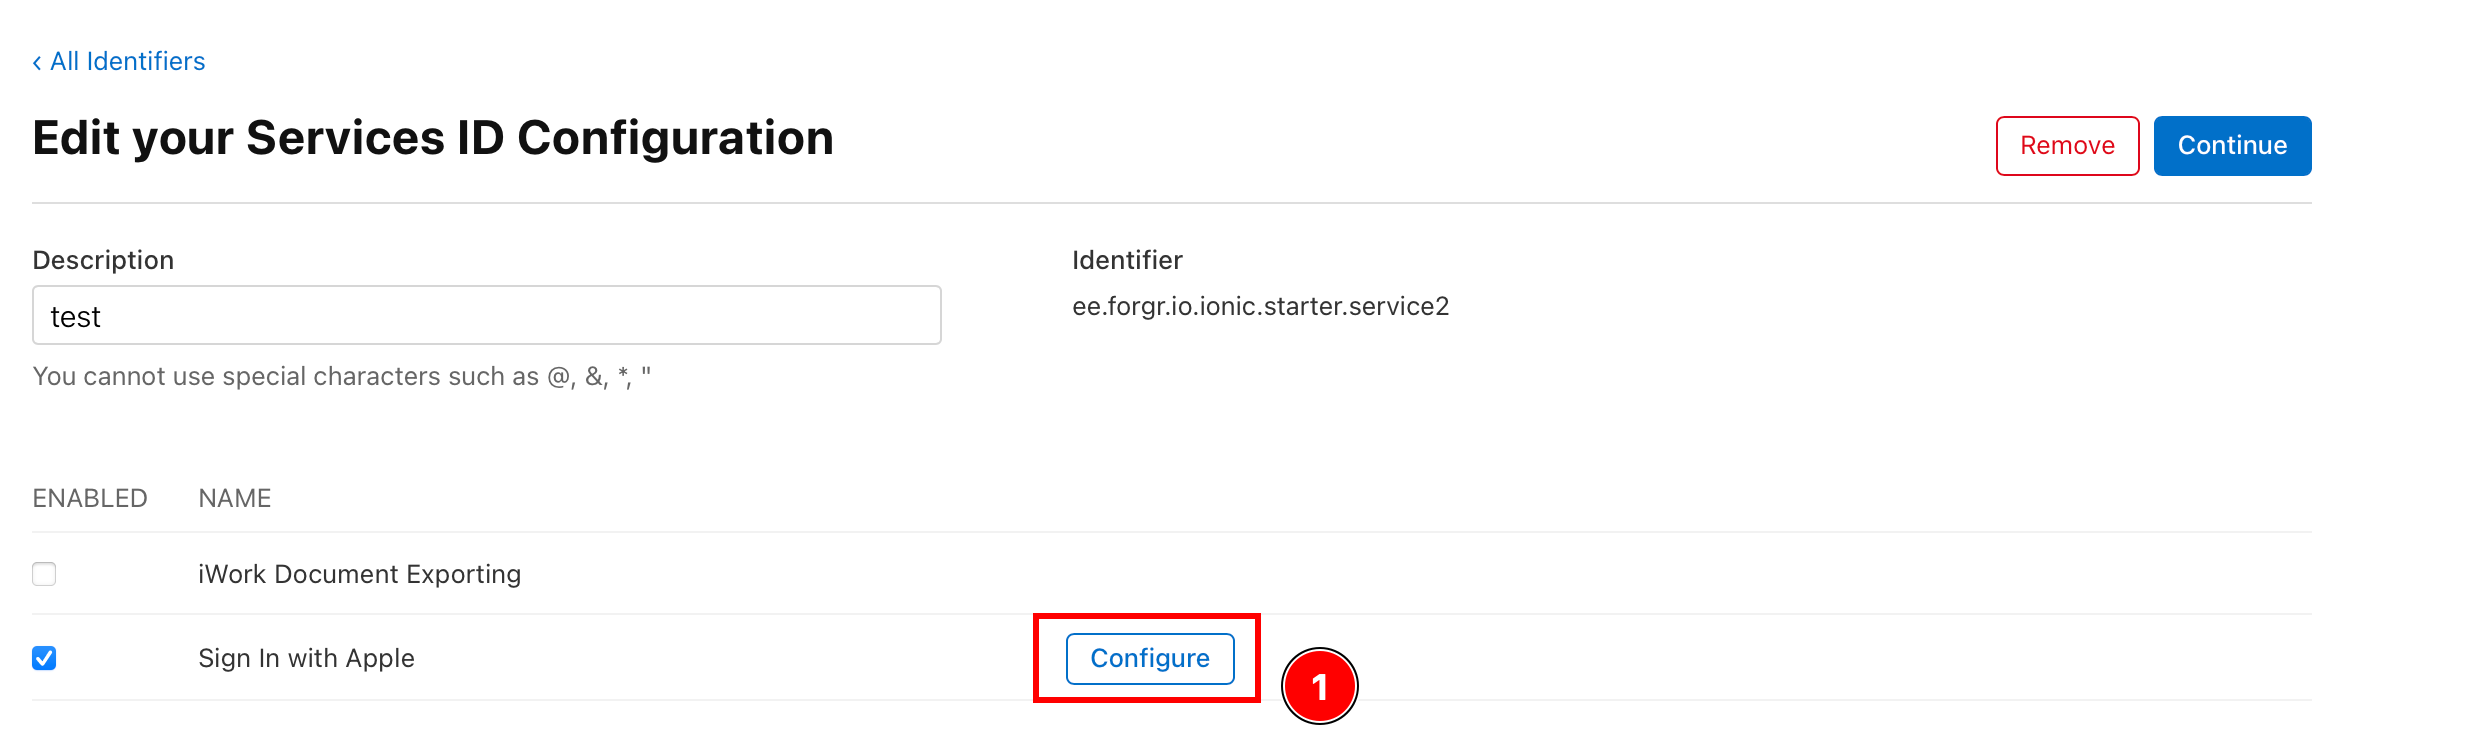
-
Ensure that the
Primary App IDis set to the App ID configured in the previous step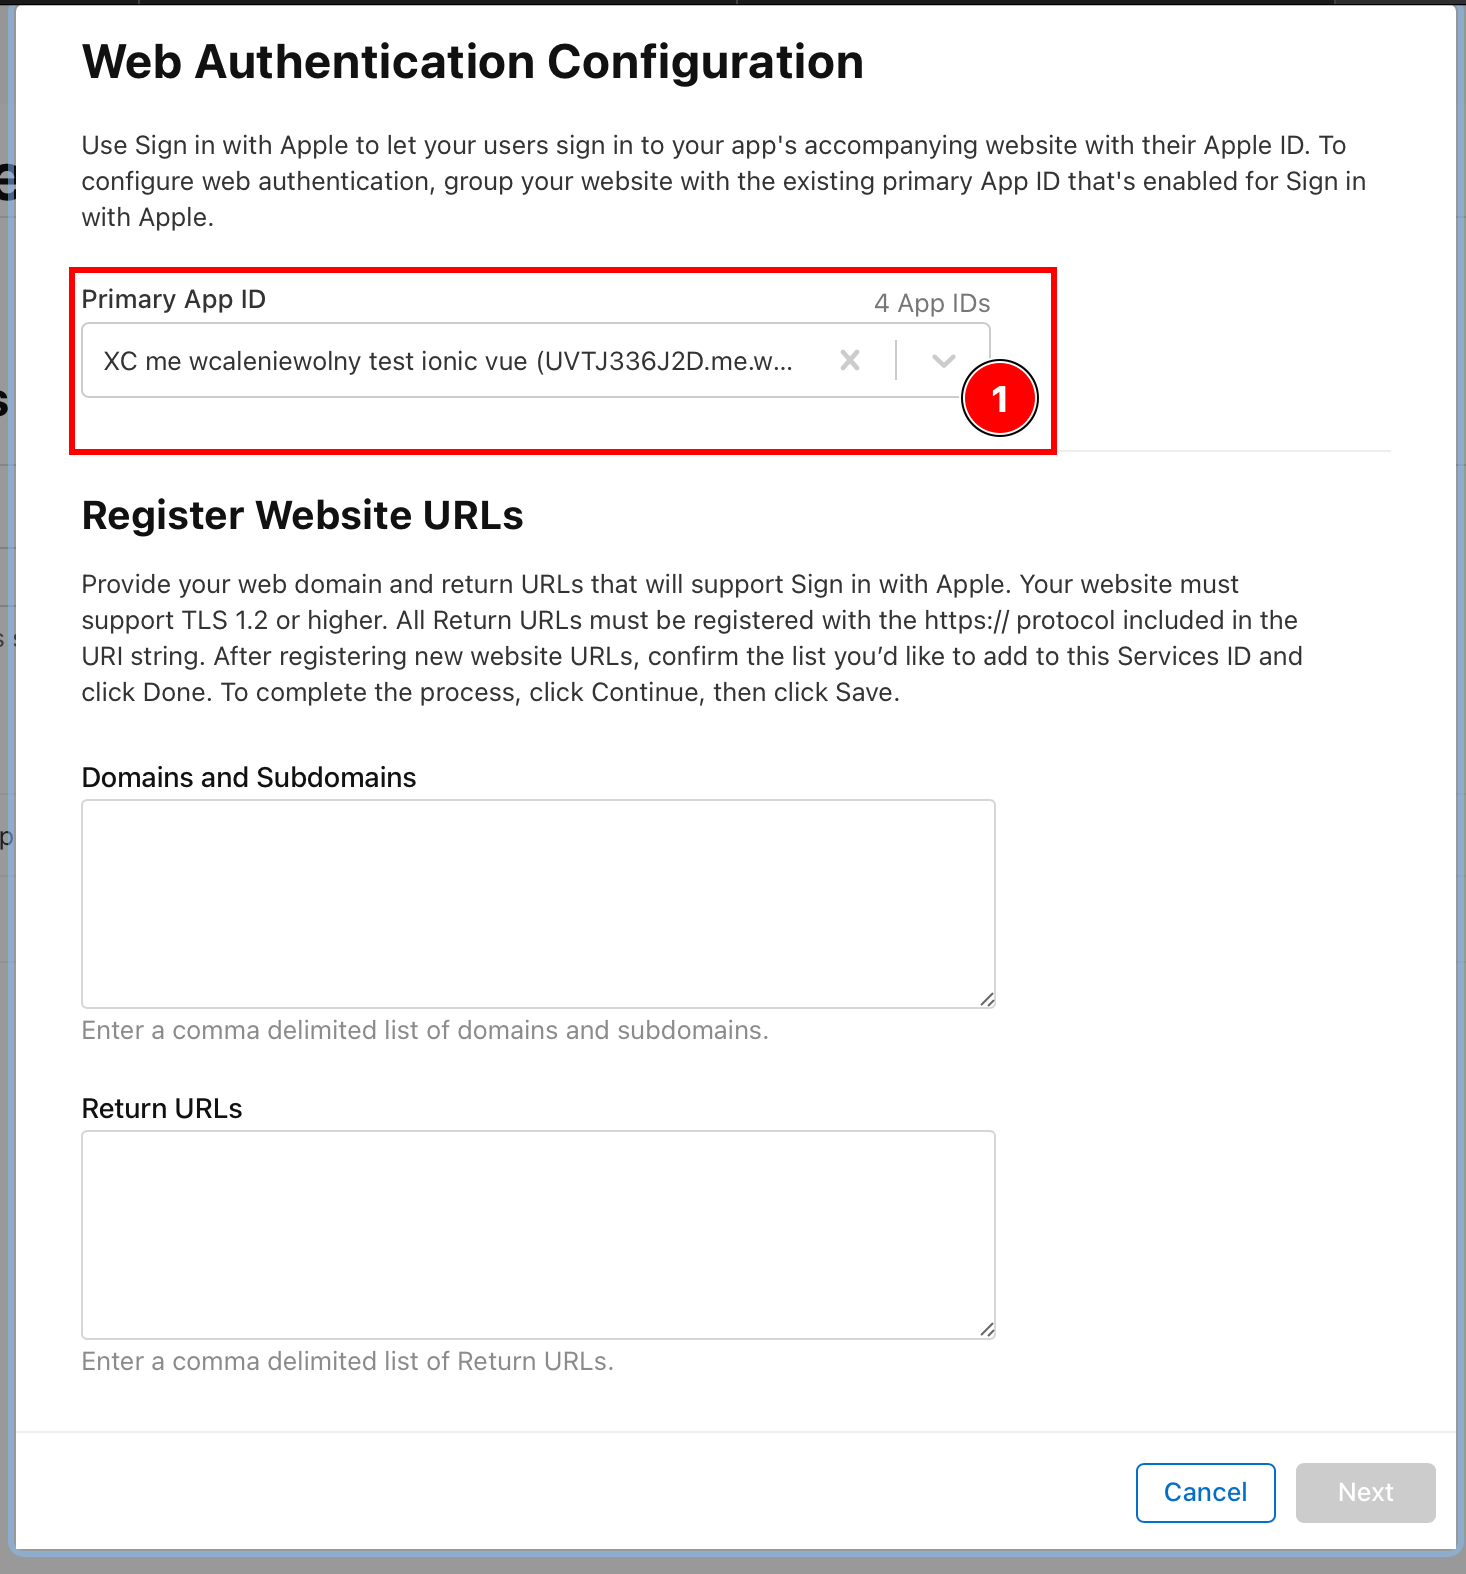
-
Ajouter the domain that you are going to host you backend on.
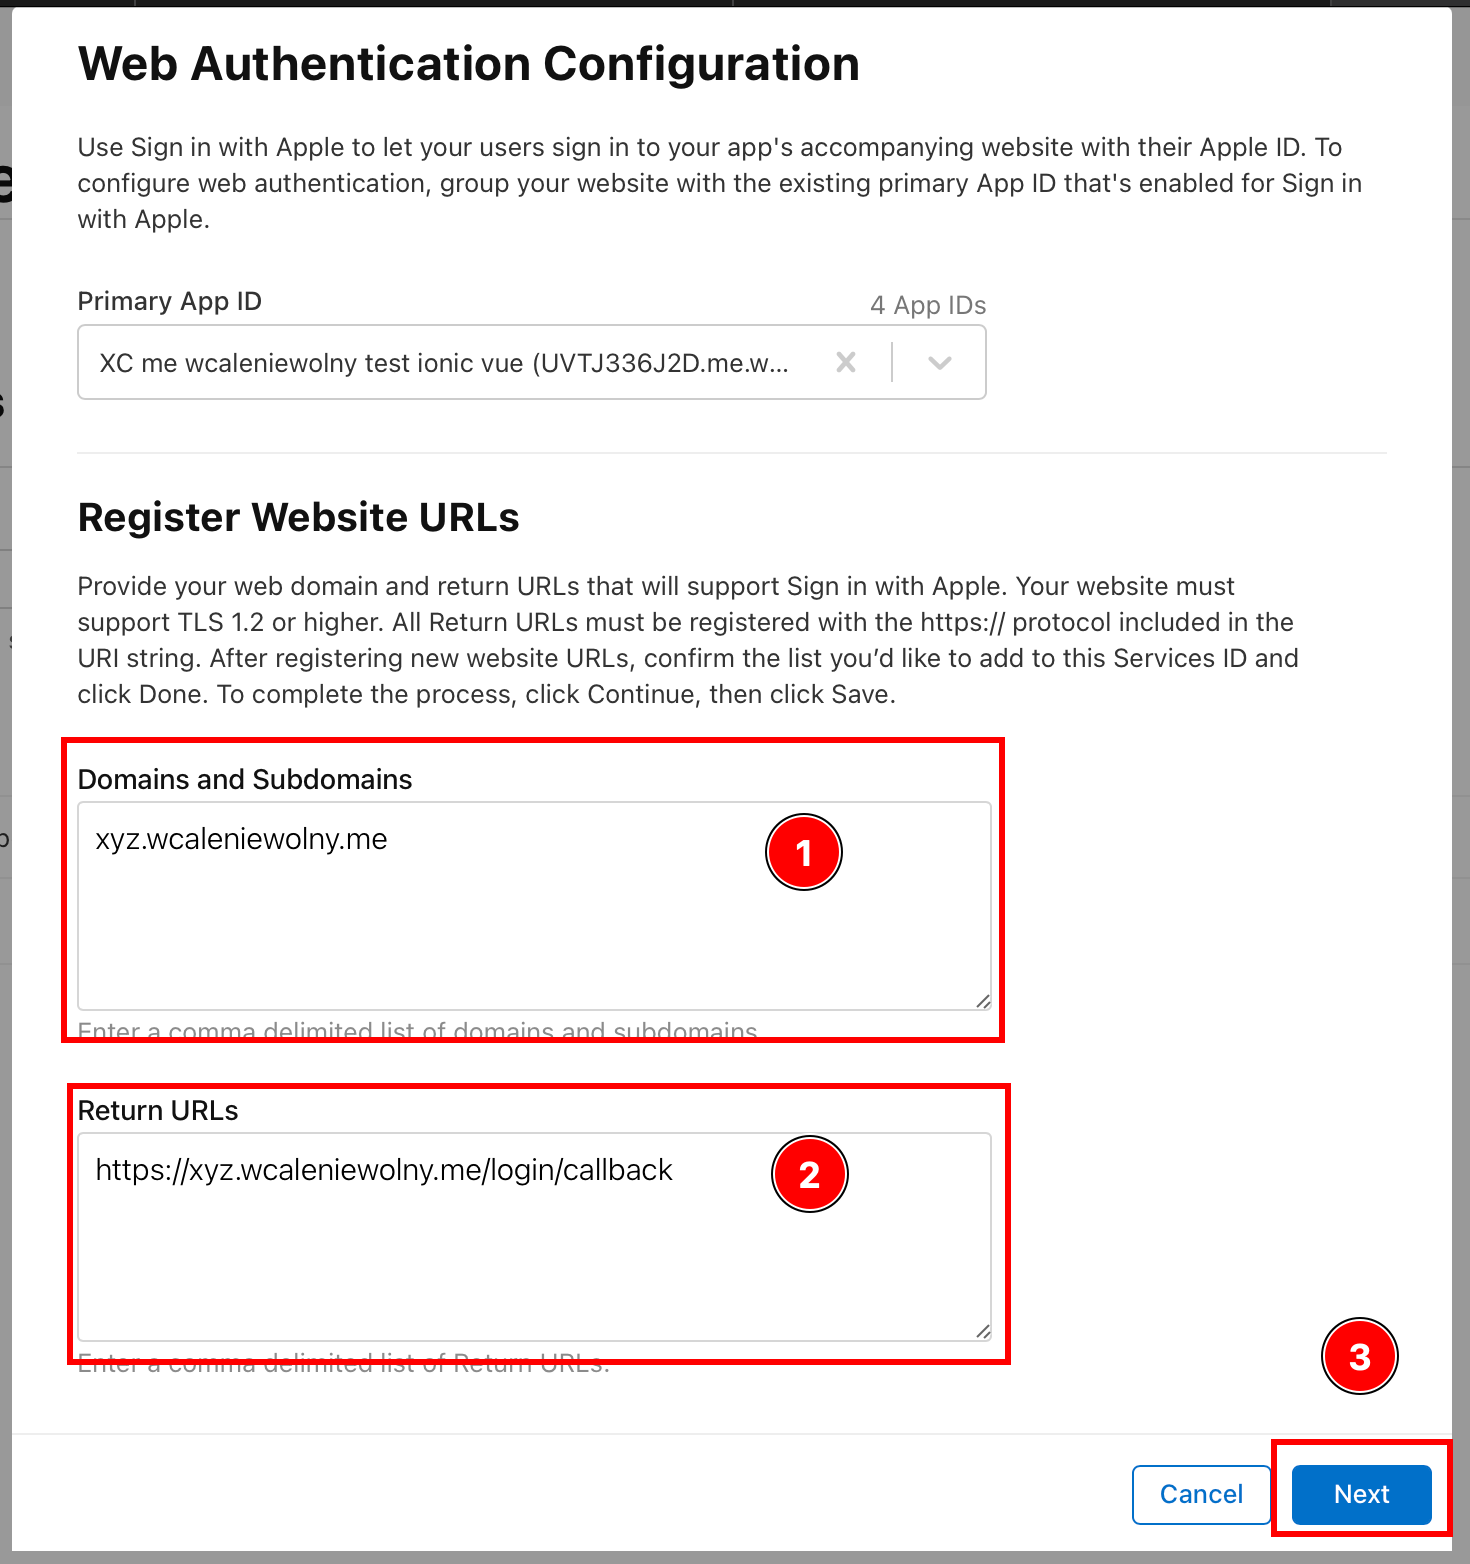
This backend has to be running on HTTPS. As for the
Return URLs, you might want to come back to this after reading the next section of this tutorial and after configuring the backend. For the purposes of this tutorial, I will usehttps://xyz.wcaleniewolny.me/login/callbackfor the return URL andxyz.wcaleniewolny.methe domain. Press next. -
Confirm the data and click
Done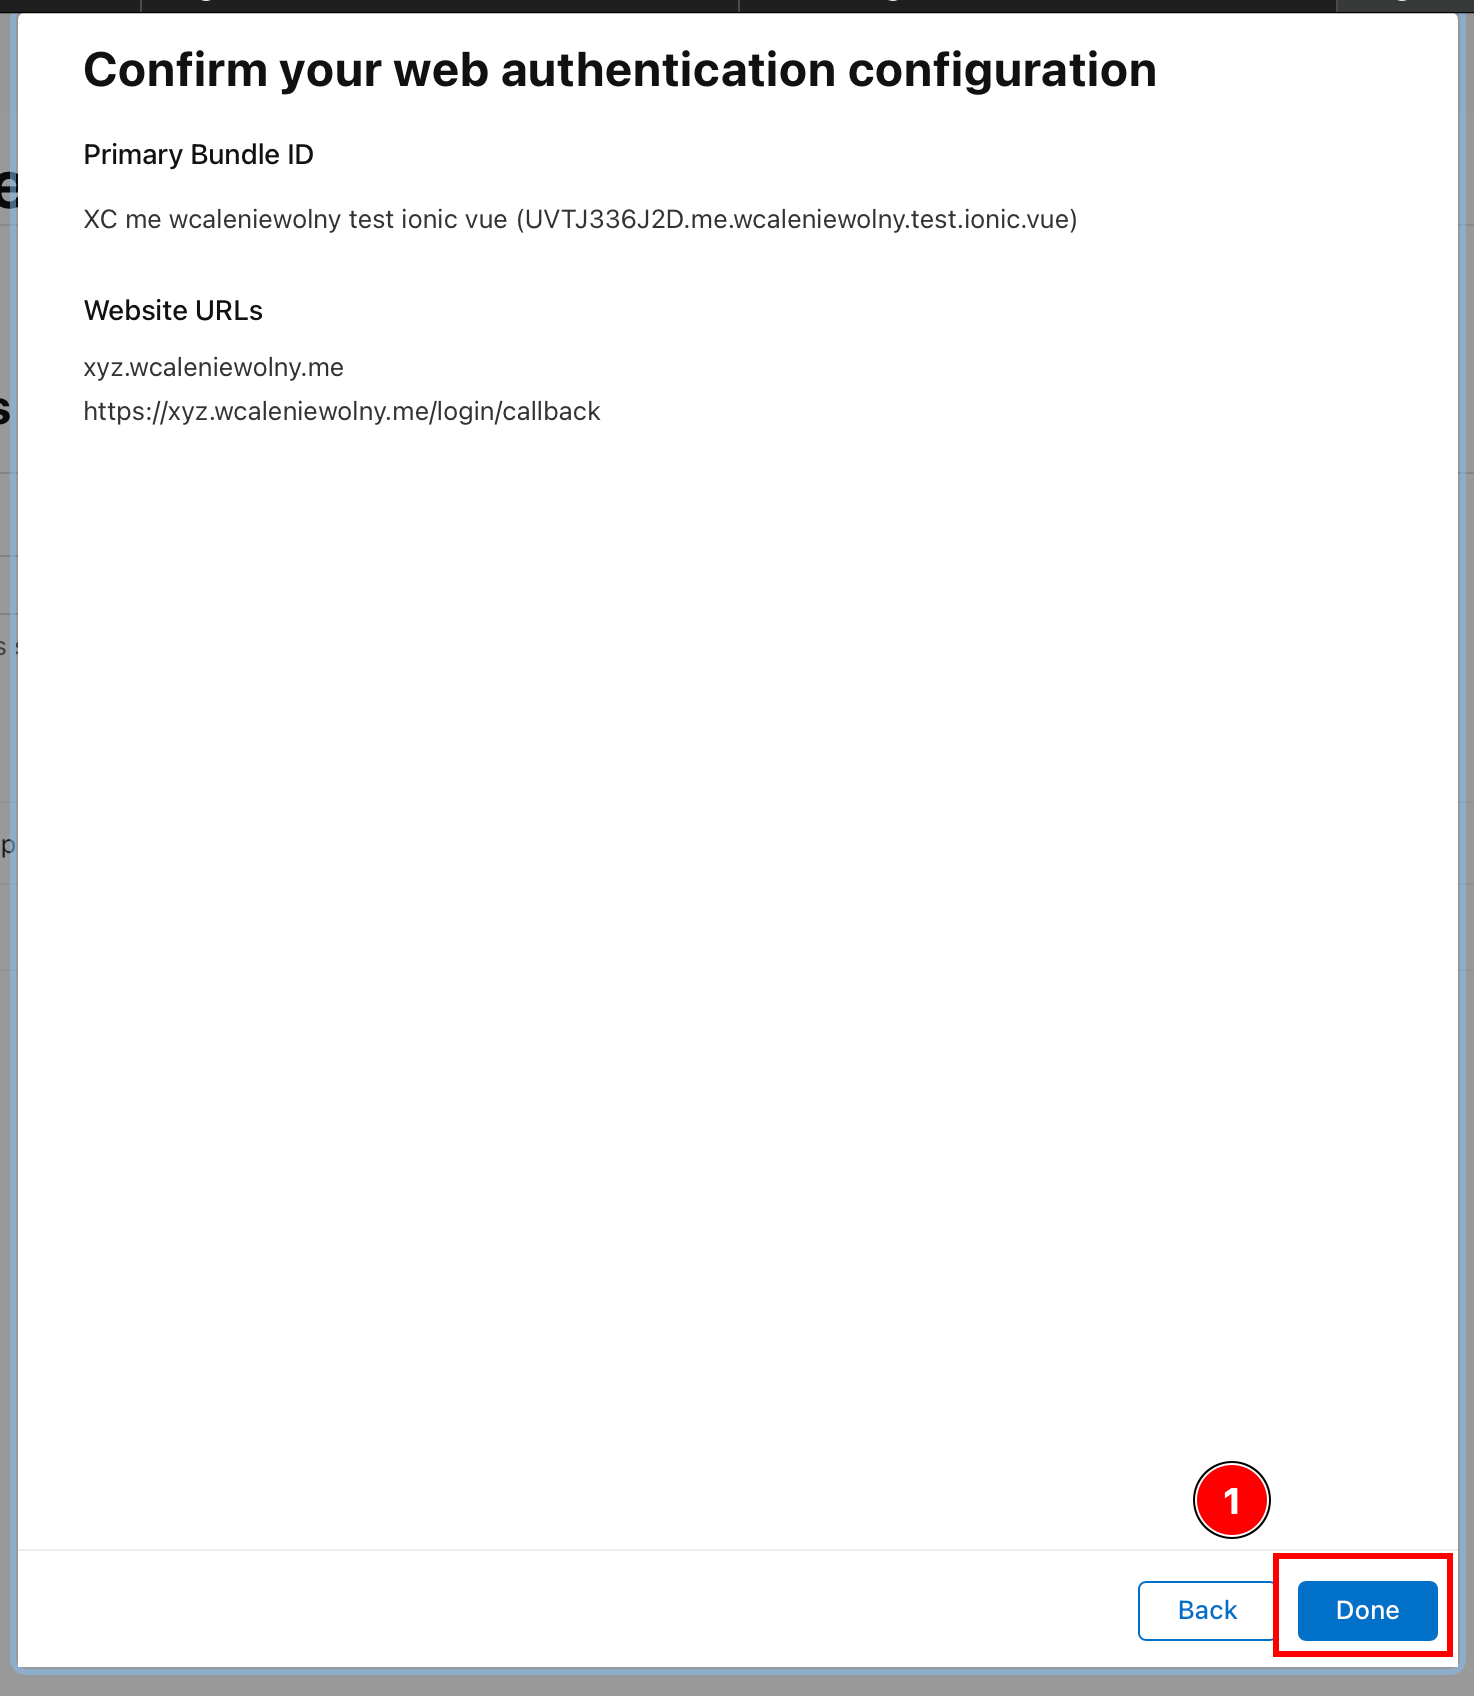
-
Click on
Continue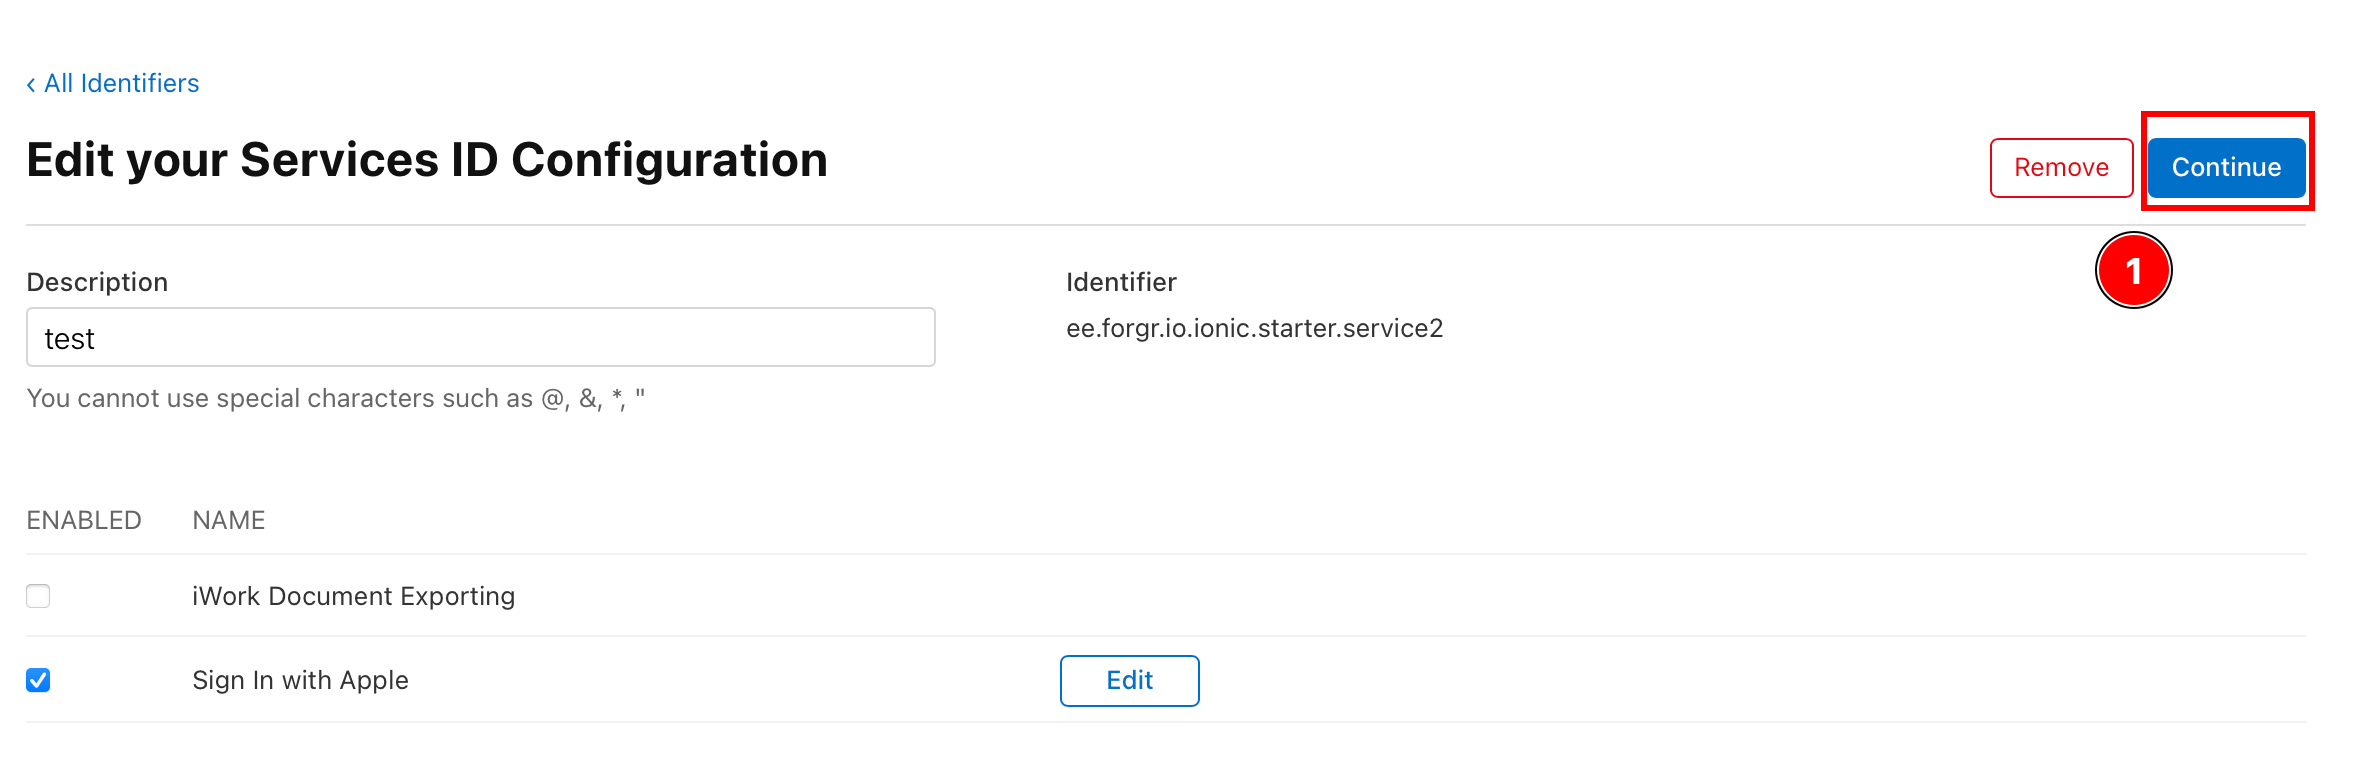
-
Click on
Save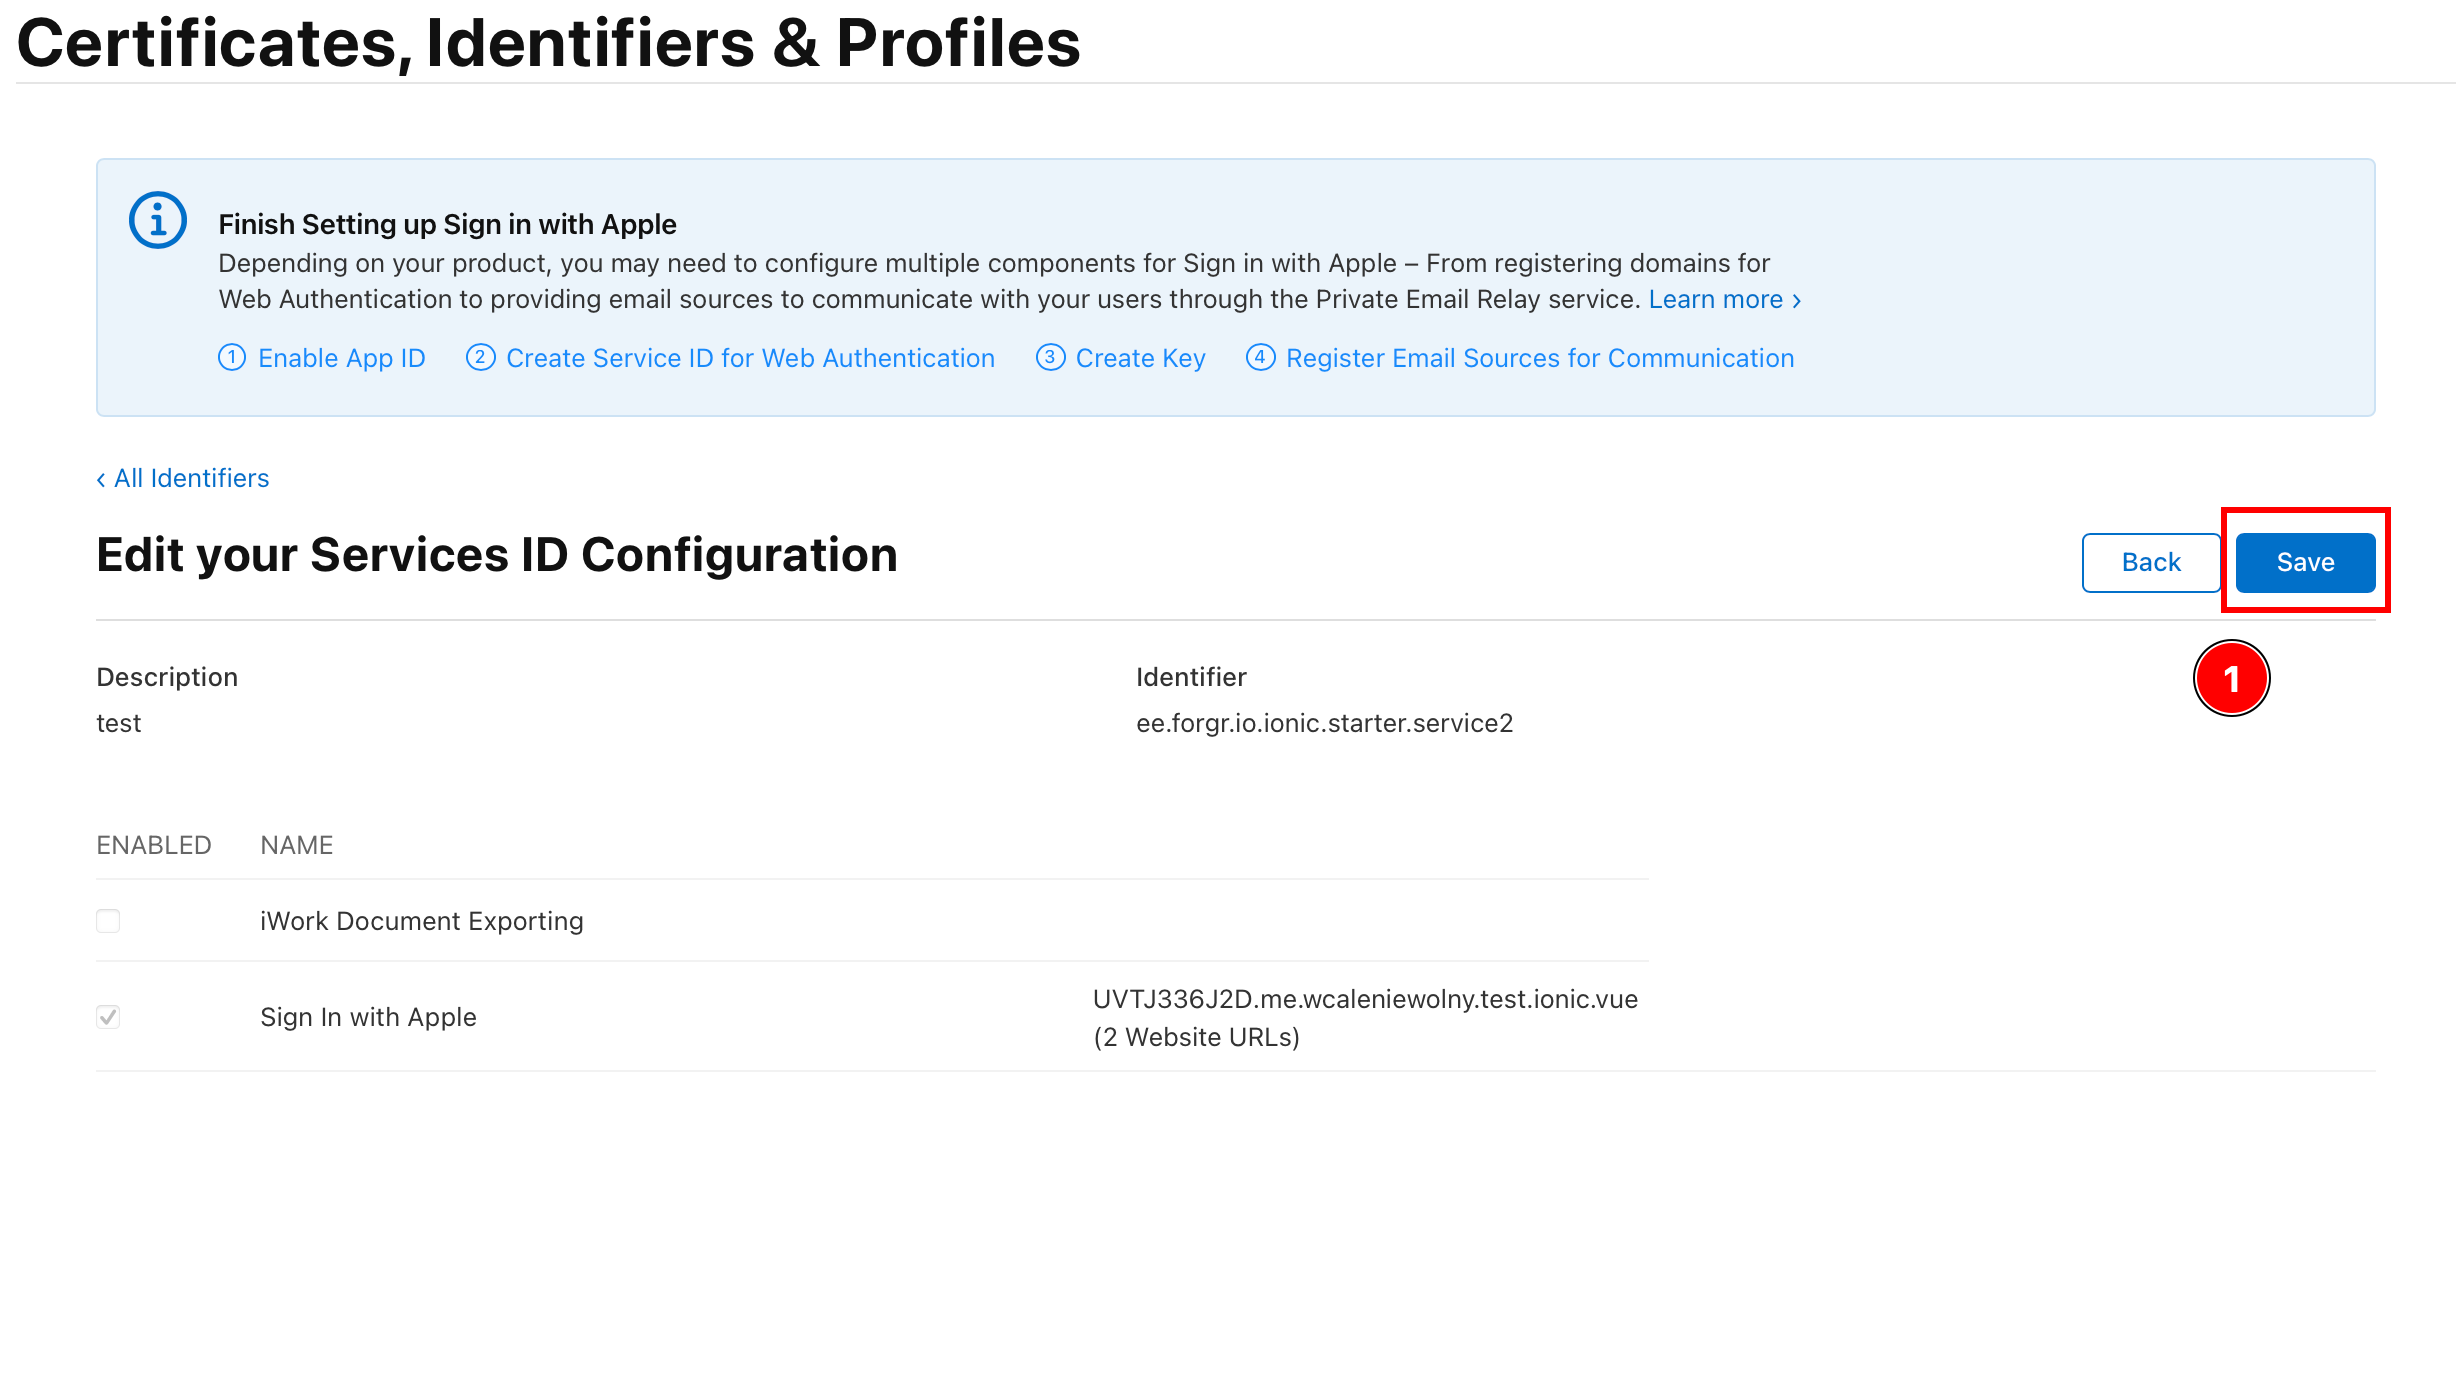
-
Creating the key
Section titled “Creating the key”-
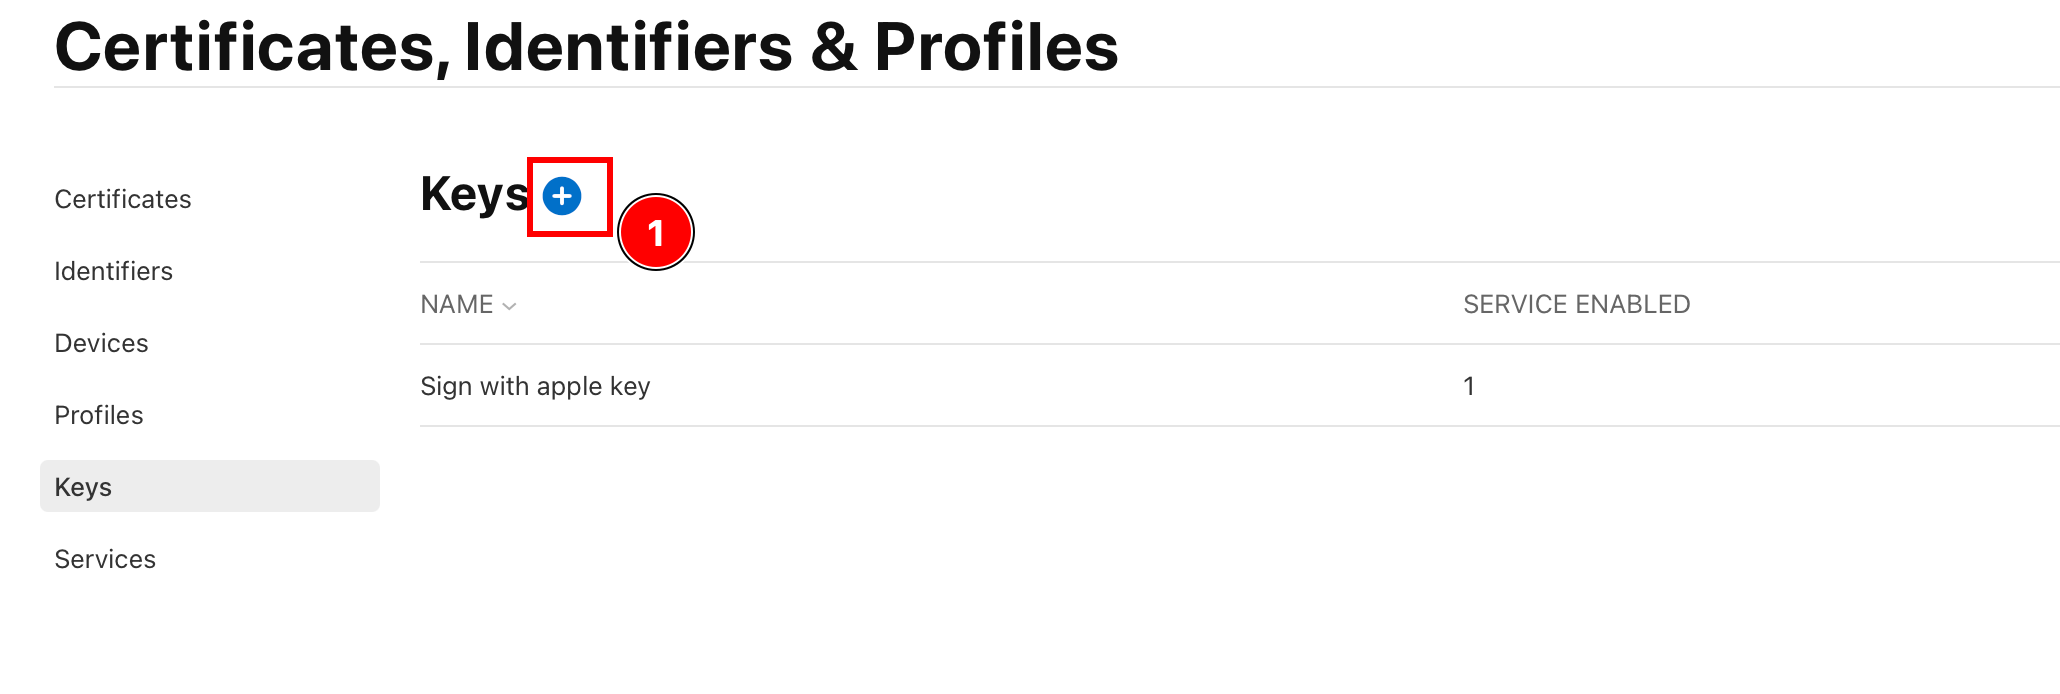
Go back to all
All Identifiers -
Click on
Keys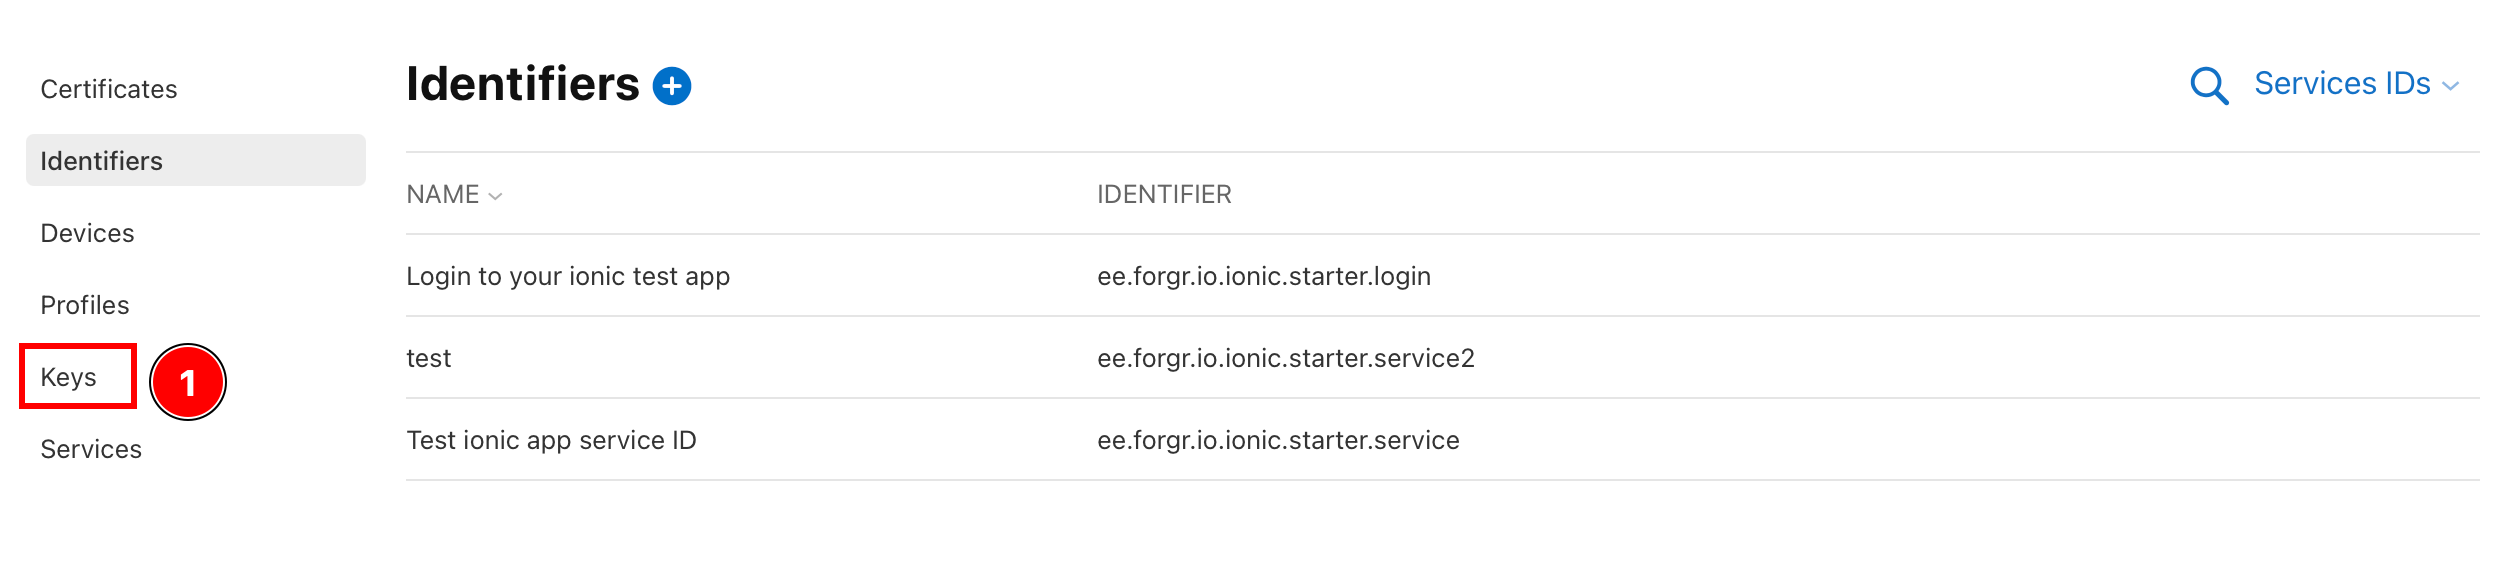
-
Click on the plus icon
-
Name your key

This name isn’t Important, you can put anything.
-
Select
Sign in with Appleand clickConfigure
-
Select the primary App ID, and press
Save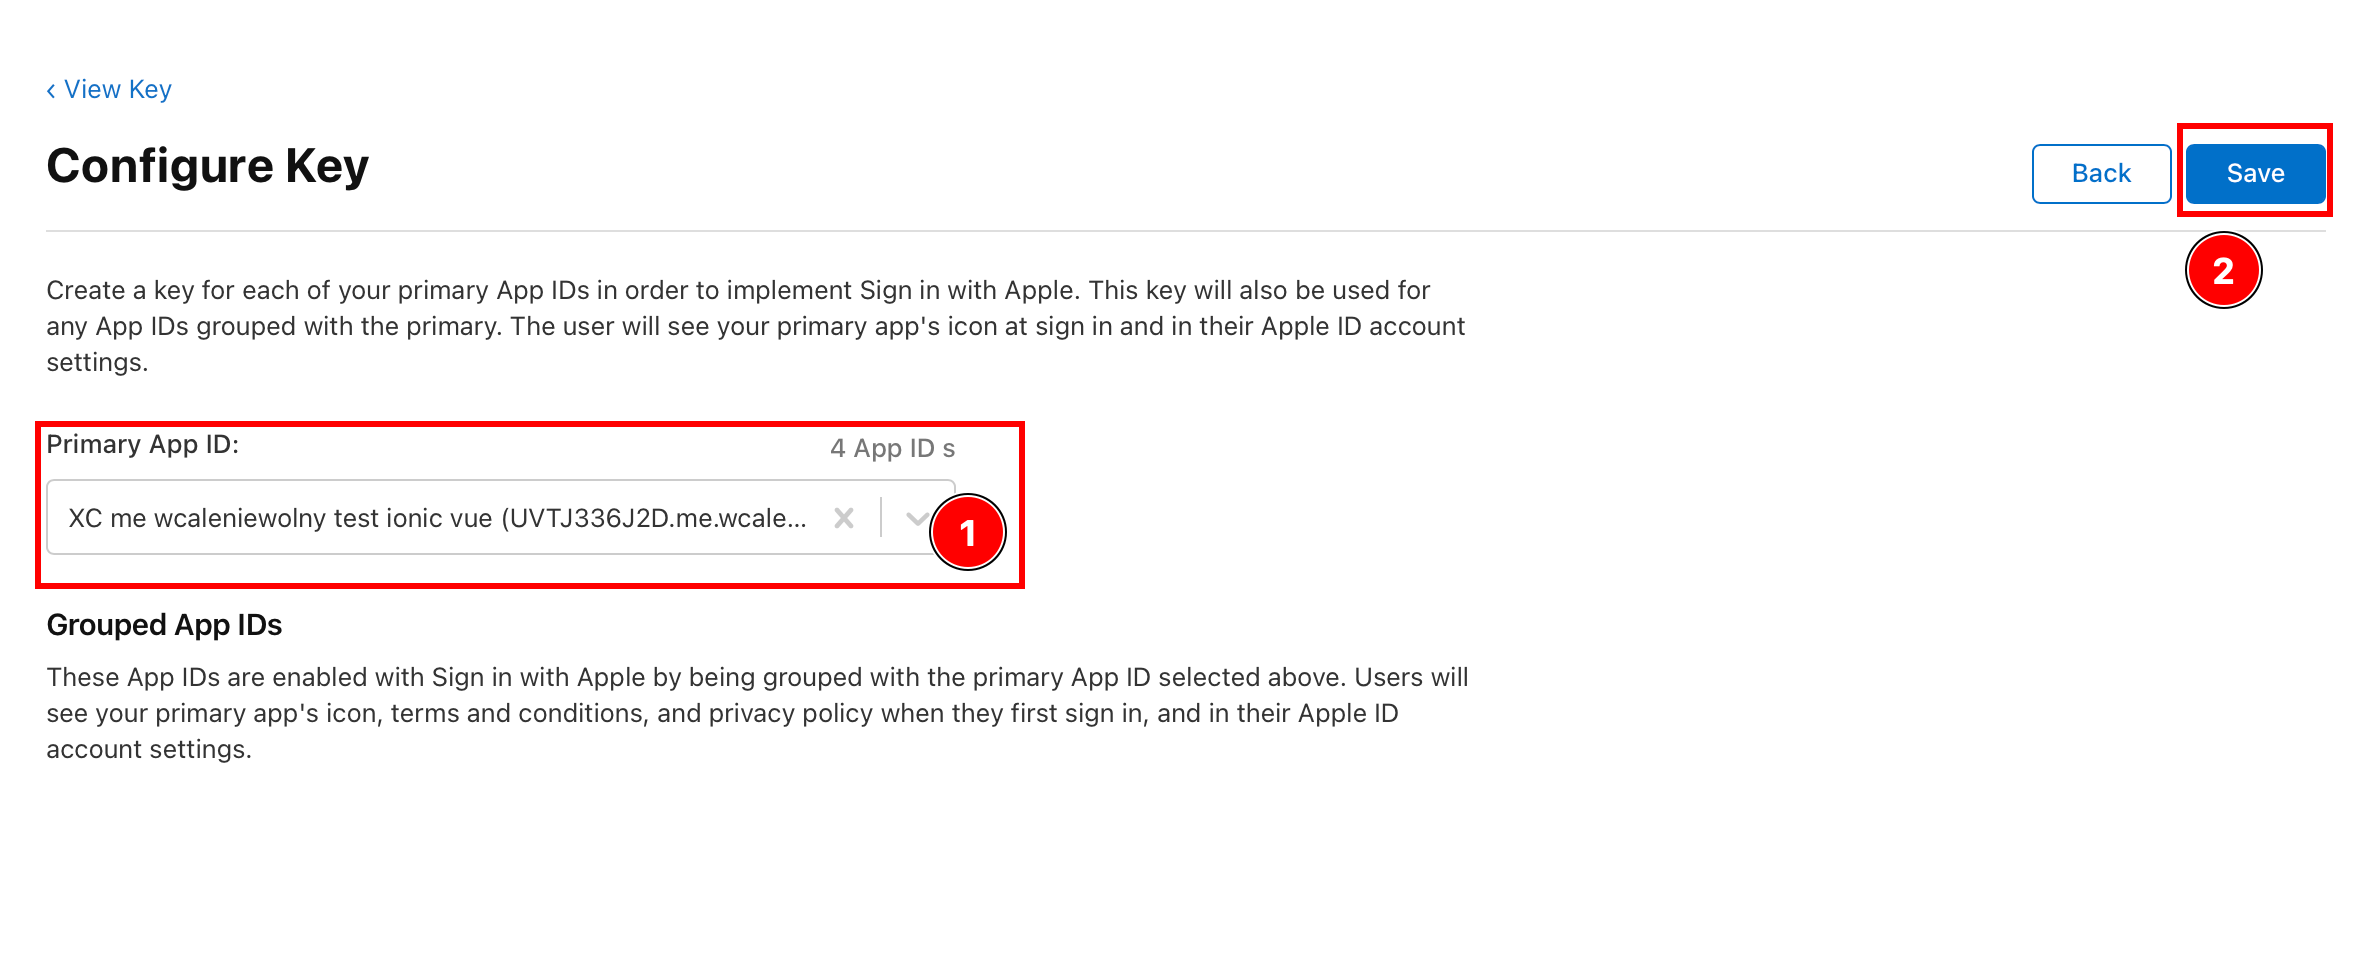
This must be the same Application ID as the ID in the Précédent steps.
-
Click on
Continue
-
Click on
Register
-
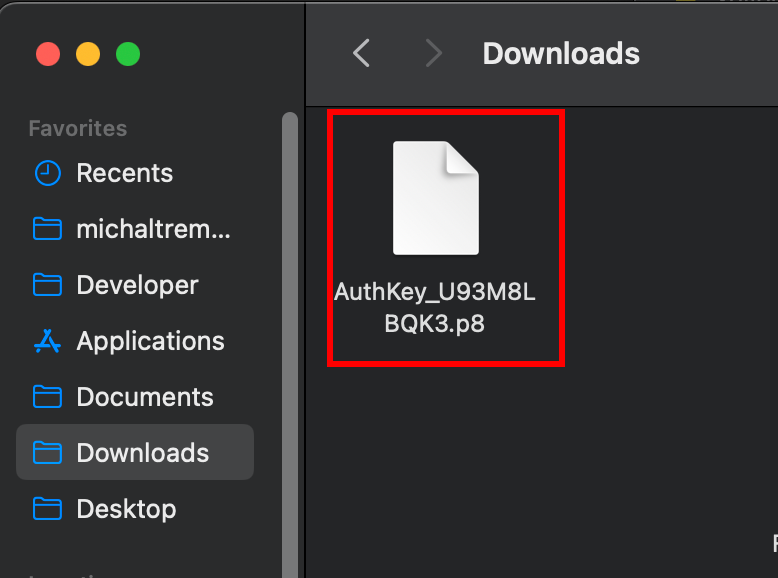
Copy the key ID and Télécharger the key.
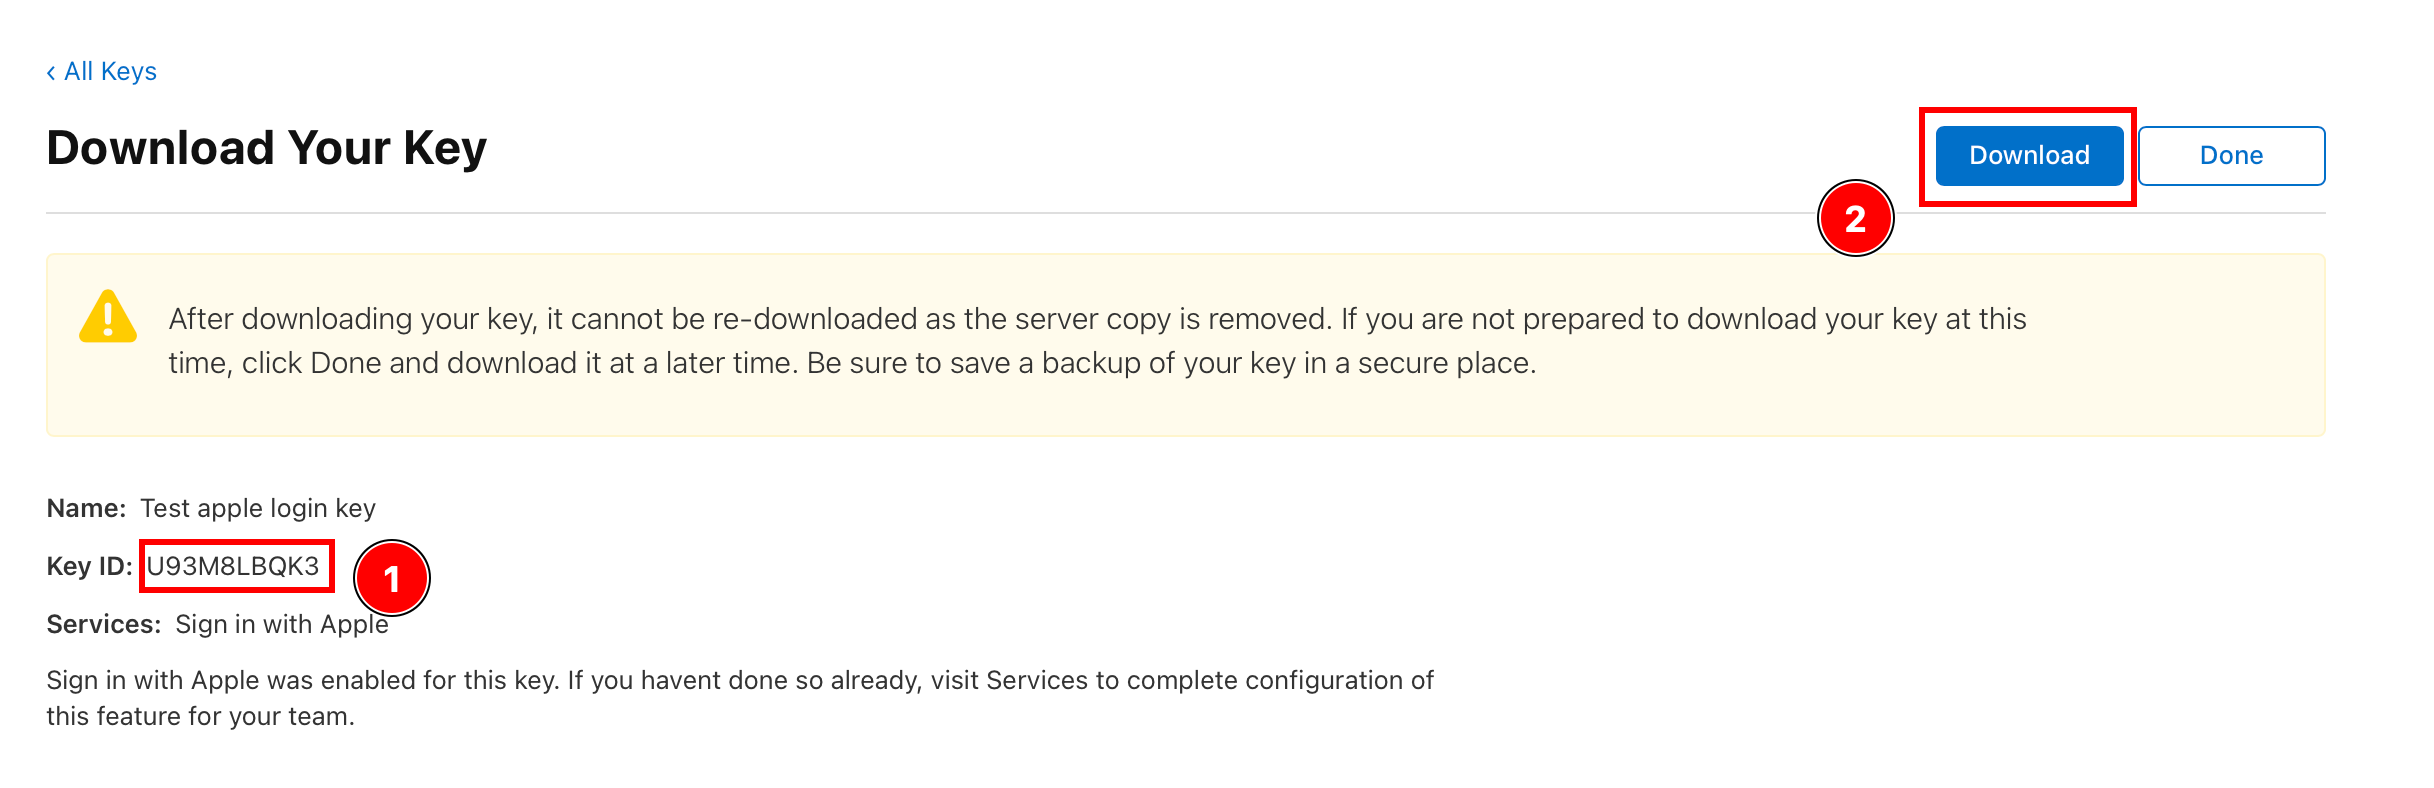
IMPORTANT: Save this ID, in the backend it will be called
KEY_ID. Download the key. Make sure to never share this key. -
Find the downloaded key and Enregistrer it in the backend folder.
Getting the Team ID
Section titled “Getting the Team ID”In order to use Login with Apple on Android, you need to get the Team ID. It will be used in the backend.
-
Go to this website and scroll down
-
Find the
Team ID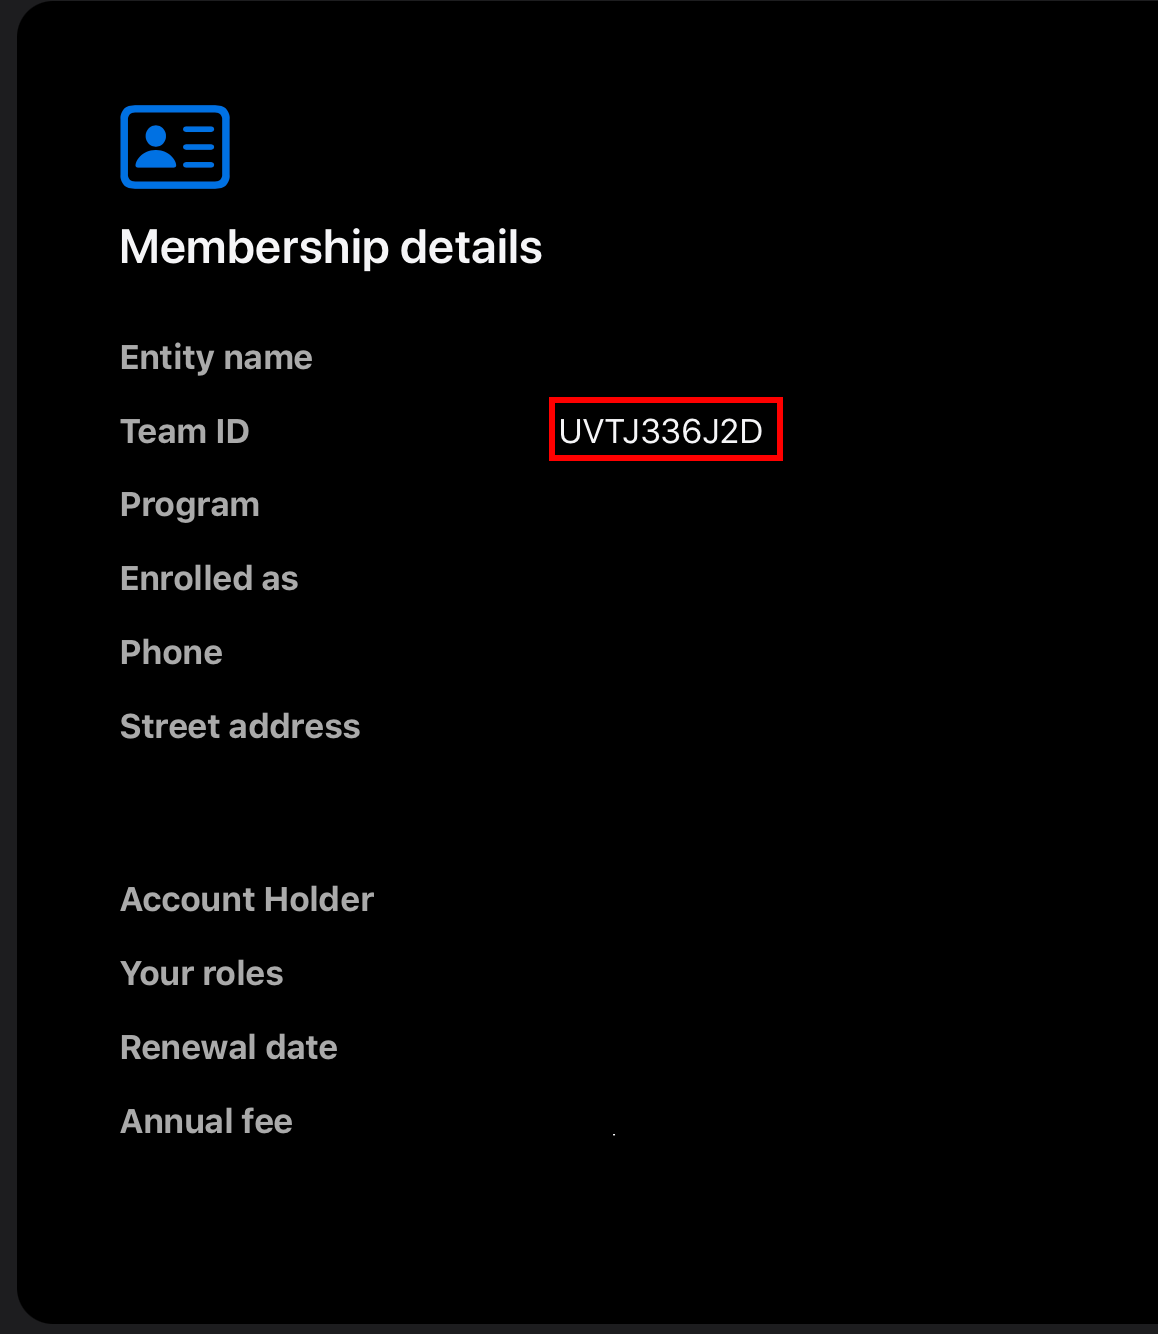
Configuring the Application redirect
Section titled “Configuring the Application redirect”As you saw in the diagram, the backend performs a step called Redirect back to the app. This requires manual changes to your app.
- Modify the
AndroidManifest.xml-
Open the file, I will use
AndroidStudio
-
Find the
MainActivityand add the following Intent filter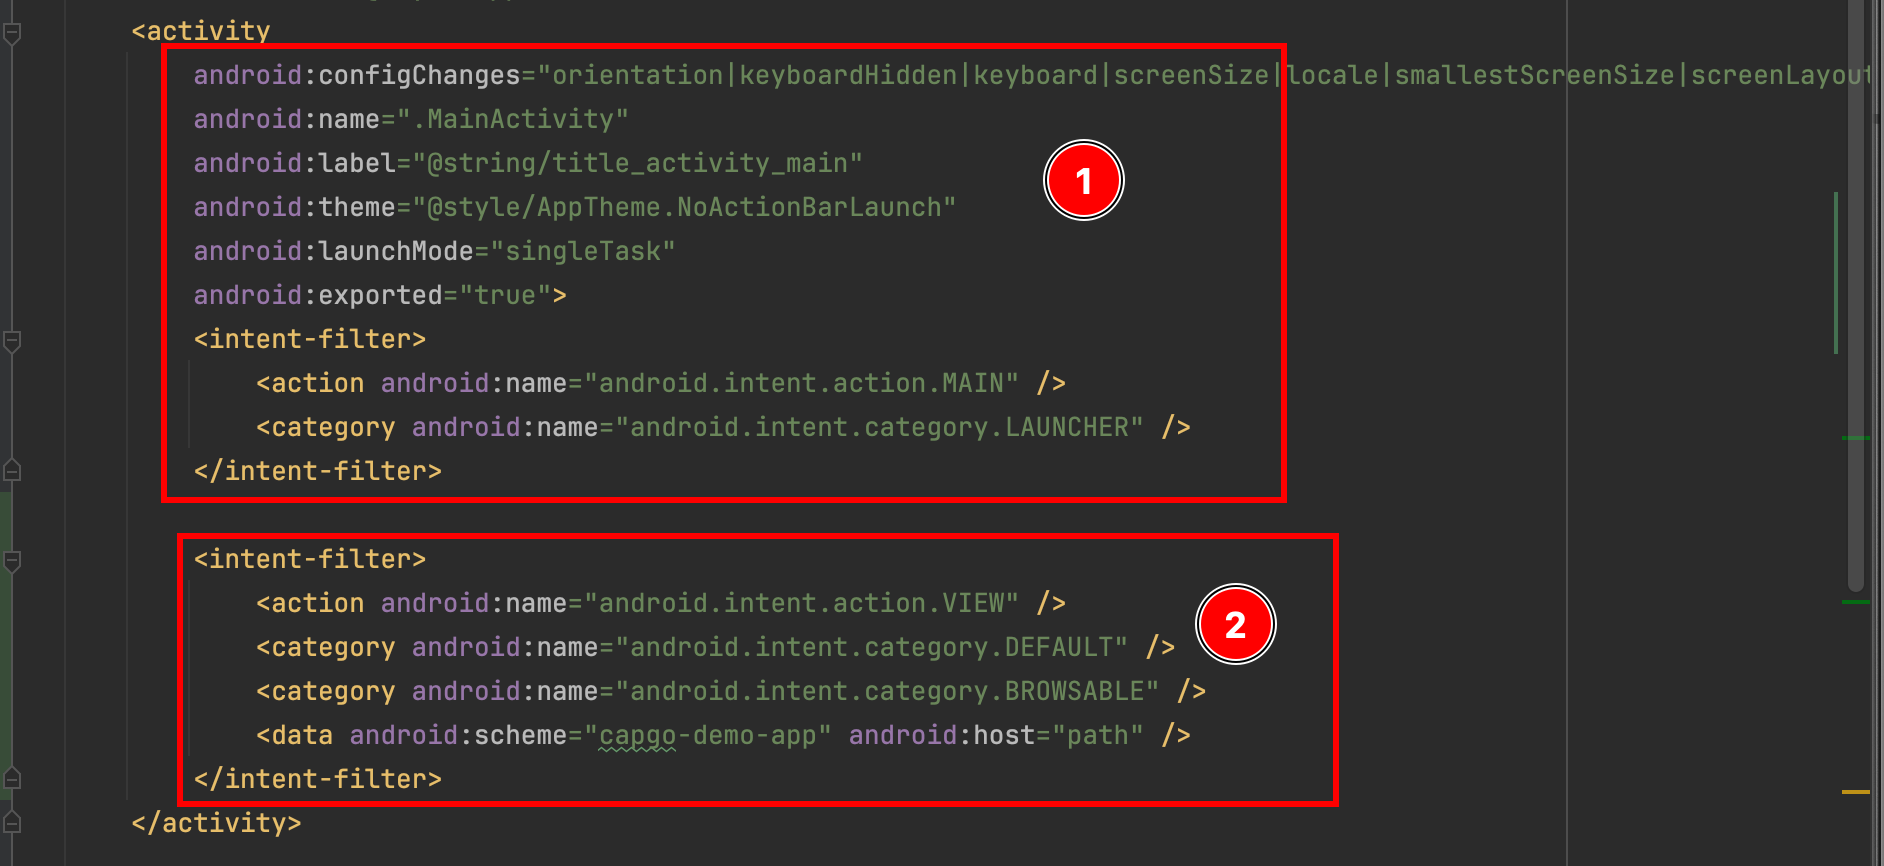 <intent-filter><action android:name="android.intent.action.VIEW" /><category android:name="android.intent.category.DEFAULT" /><category android:name="android.intent.category.BROWSABLE" /><data android:scheme="capgo-demo-app" android:host="path" /></intent-filter>
-
- Modify the
MainActivity-
Please open the
MainActivity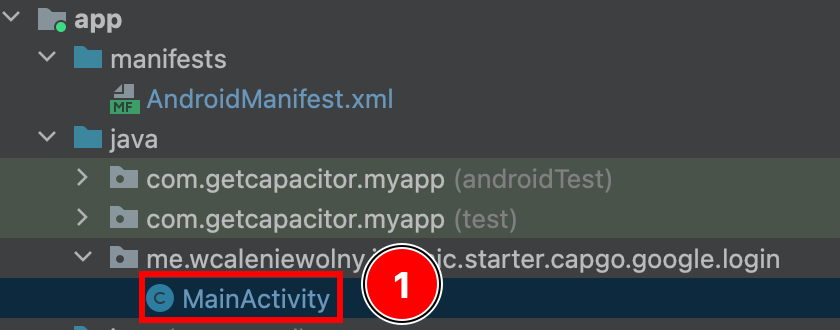
-
Ajouter the following code:
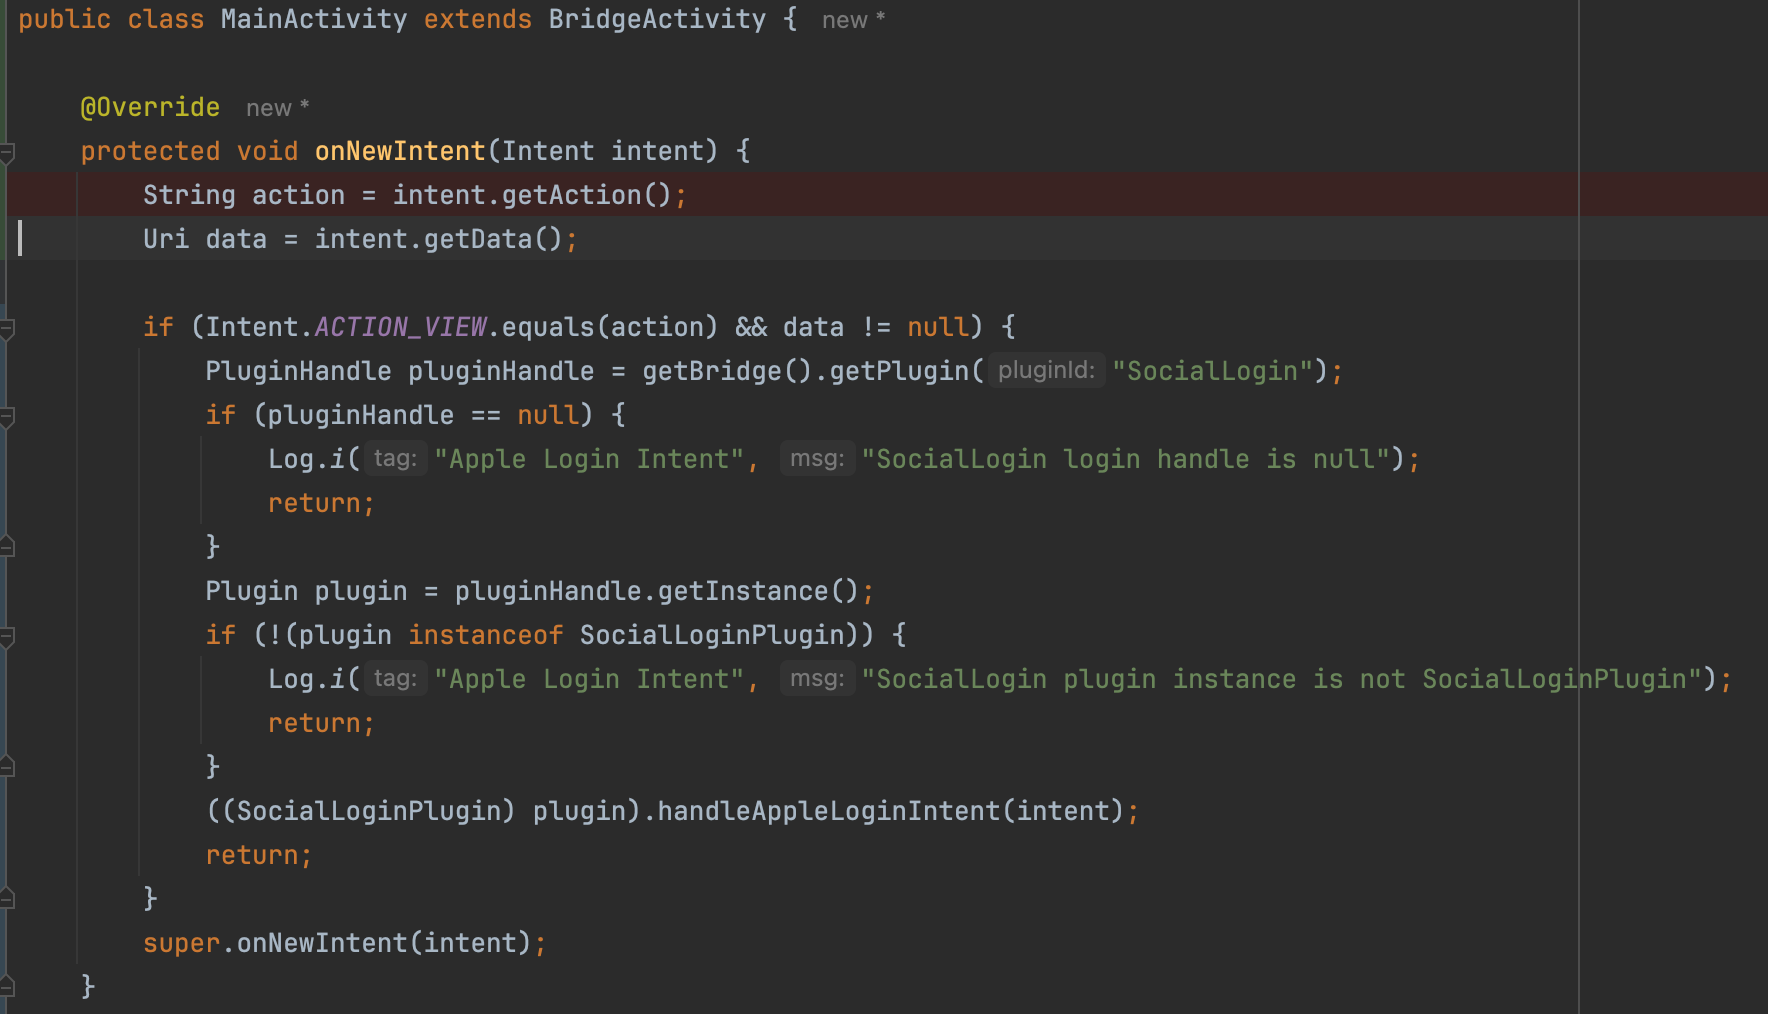 @Overrideprotected void onNewIntent(Intent intent) {String action = intent.getAction();Uri data = intent.getData();if (Intent.ACTION_VIEW.equals(action) && data != null) {PluginHandle pluginHandle = getBridge().getPlugin("SocialLogin");if (pluginHandle == null) {Log.i("Apple Login Intent", "SocialLogin login handle is null");return;}Plugin plugin = pluginHandle.getInstance();if (!(plugin instanceof SocialLoginPlugin)) {Log.i("Apple Login Intent", "SocialLogin plugin instance is not SocialLoginPlugin");return;}((SocialLoginPlugin) plugin).handleAppleLoginIntent(intent);return;}super.onNewIntent(intent);}
This Exemple assumes that you don’t have any deep links configured. If you do, please adjust the code
-
You have just added a new deep link into your app. The deep link will look something like this: capgo-demo-app://path. You can change the android:scheme and the android:host to modify how this deep link looks.
Important: In the backend configuration, this deep link will become BASE_REDIRECT_URL
Backend Configuration
Section titled “Backend Configuration”A backend is required for Android, but configuring a backend will also impact iOS. An Exemple backend is provided here
This Exemple provides the following:
- A simple JSON database
- A way to request the JWT from Apple’s servers
- A simple JWT verification
I use PM2 in order to host this example. An example ecosystem.config.js can be found here
Given everything that I said in this tutorial, here is how the env section would look:
ANDROID_SERVICE_ID= Service IDIOS_SERVICE_ID= App ID
env: { PRIVATE_KEY_FILE: "AuthKey_U93M8LBQK3.p8", KEY_ID: "U93M8LBQK3", TEAM_ID: "UVTJ336J2D", ANDROID_SERVICE_ID: "ee.forgr.io.ionic.starter.service2", IOS_SERVICE_ID: "me.wcaleniewolny.test.ionic.vue", PORT: 3000, REDIRECT_URI: "https://xyz.wcaleniewolny.me/login/callback", BASE_REDIRECT_URL: "capgo-demo-app://path"}Using the plugin
Section titled “Using the plugin”The usage of the login function doesn’t change, it’s the same as IOS. Please take a look at that section for more info. HOWEVER, the initialize method changes a bit.
await SocialLogin.initialize({ apple: { clientId: 'ee.forgr.io.ionic.starter.service2', redirectUrl: 'https://appleloginvps.wcaleniewolny.me/login/callback' }})Creating the Application
Section titled “Creating the Application”If you already have an Application ID, you can skip this step. Don’t follow this step if you have configured Apple Connexion for iOS.
-
If you don’t already have an Application ID, click on the plus button
-
Select
App IDsand click continue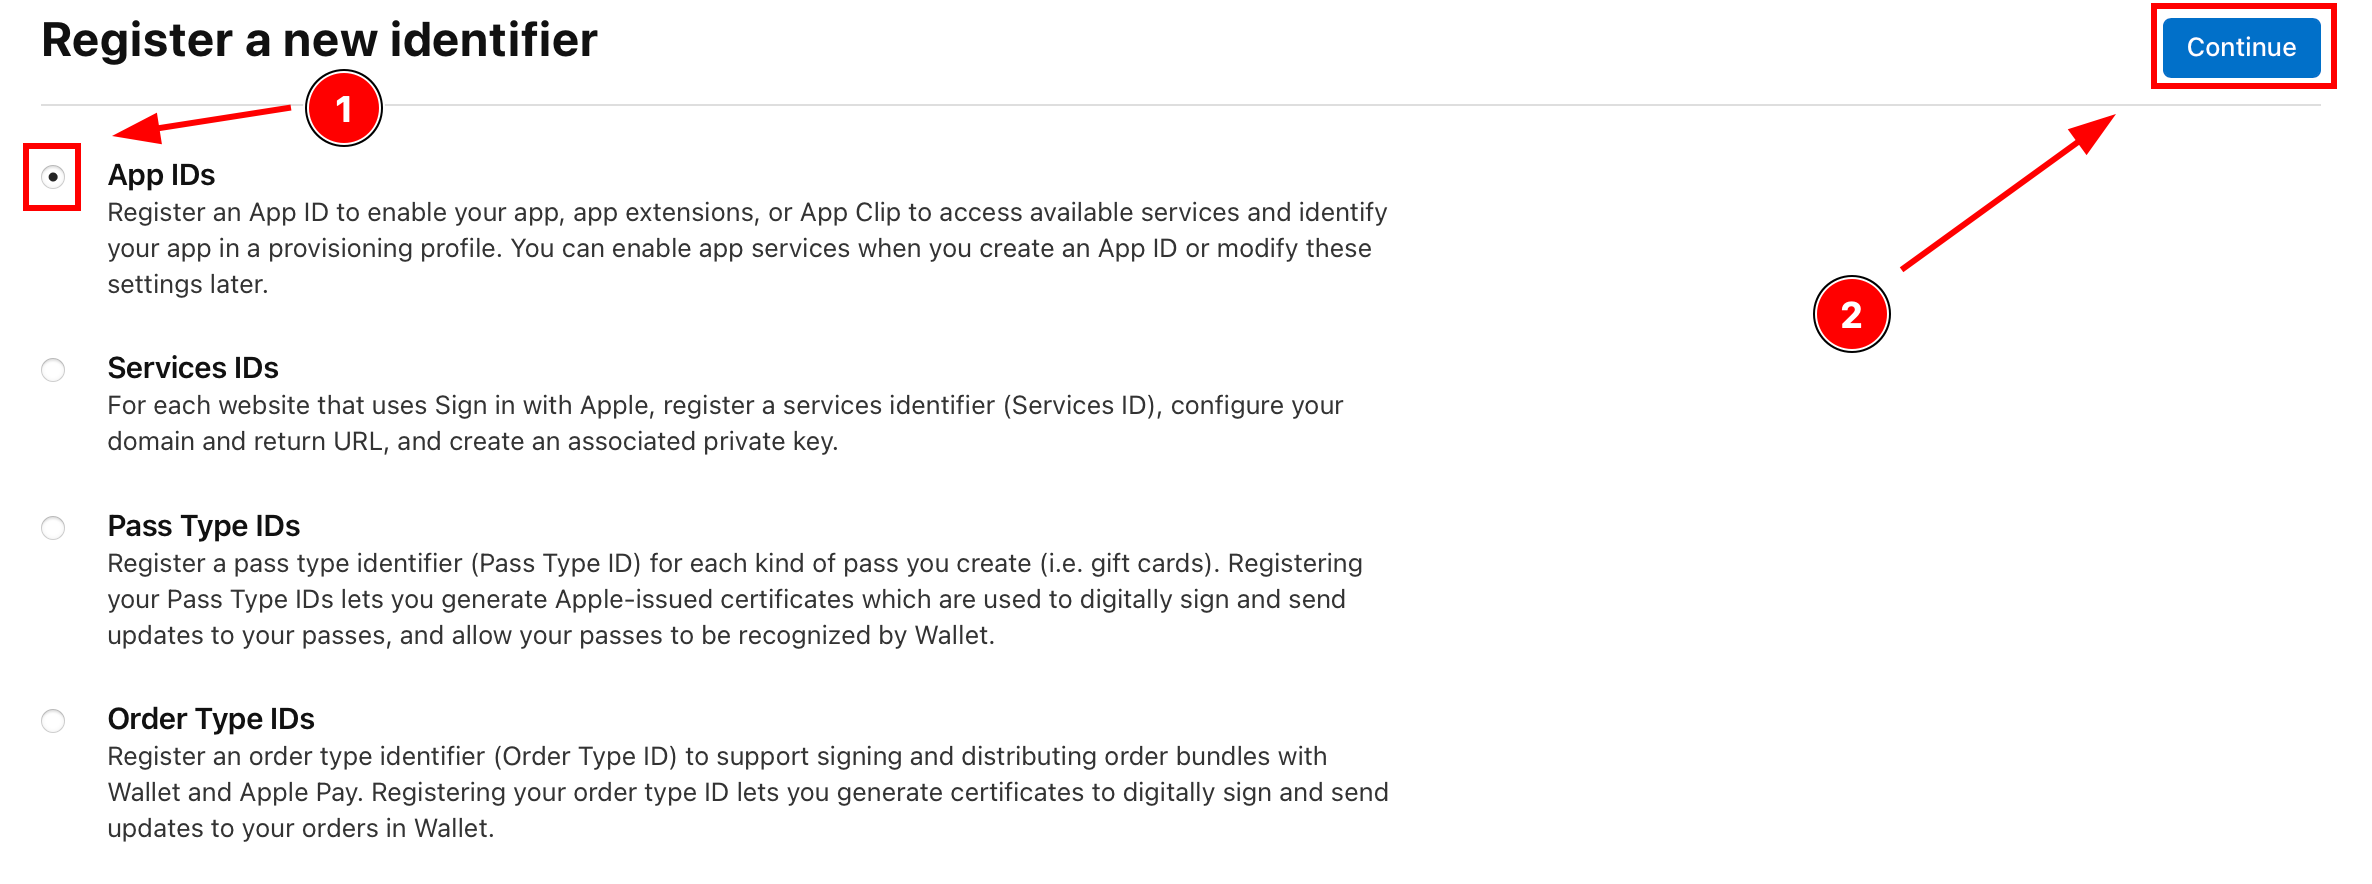
-
Click on type
Appand clickContinue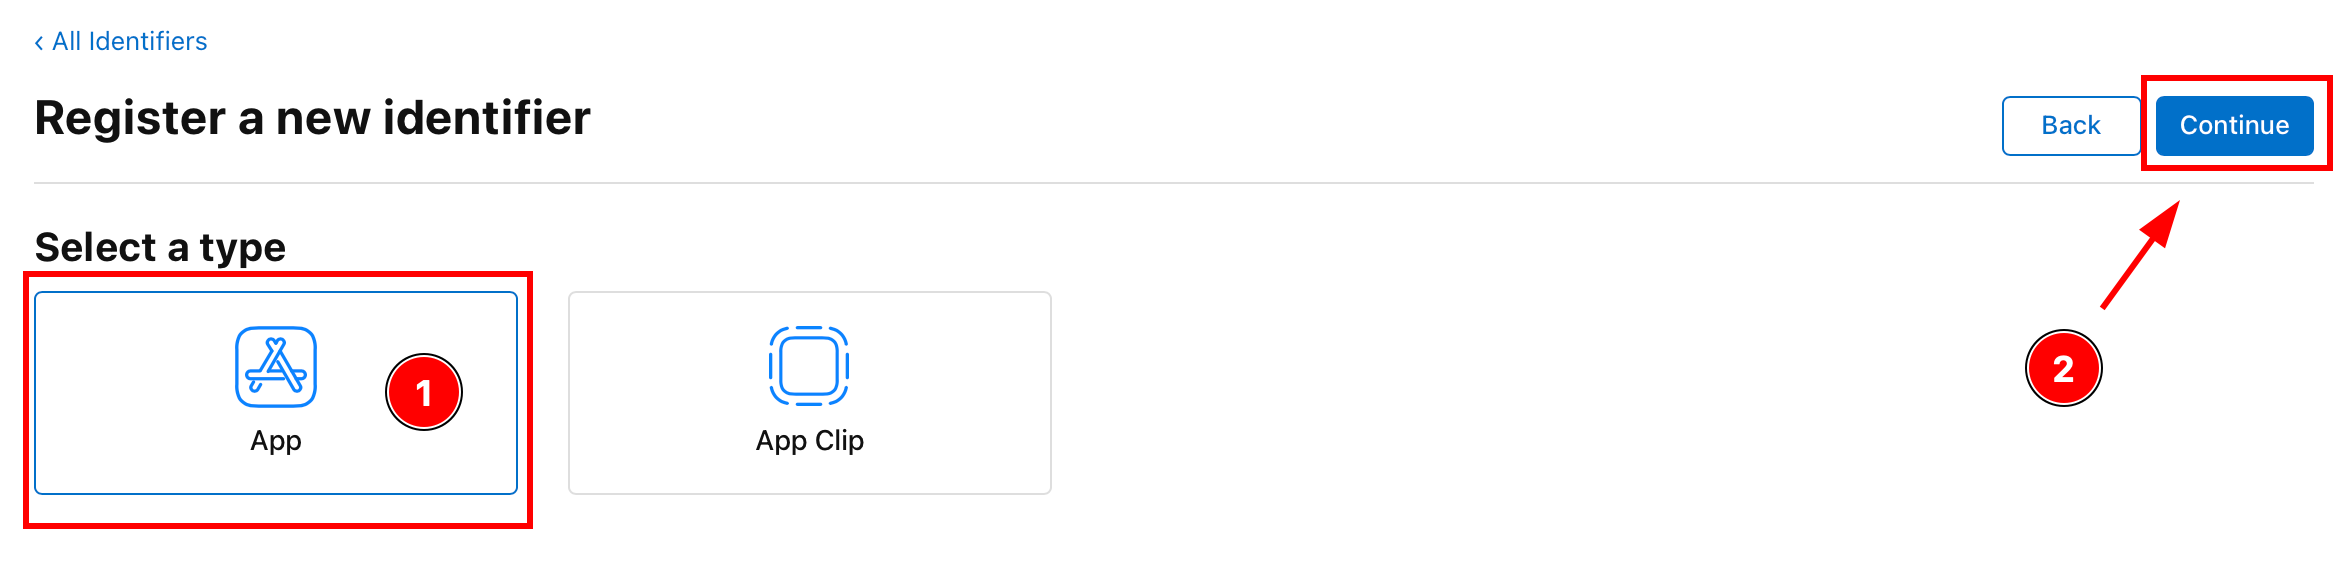
-
Enter the description and the Application ID
-
Enable
Sign with Applecapability
-
Click
Continue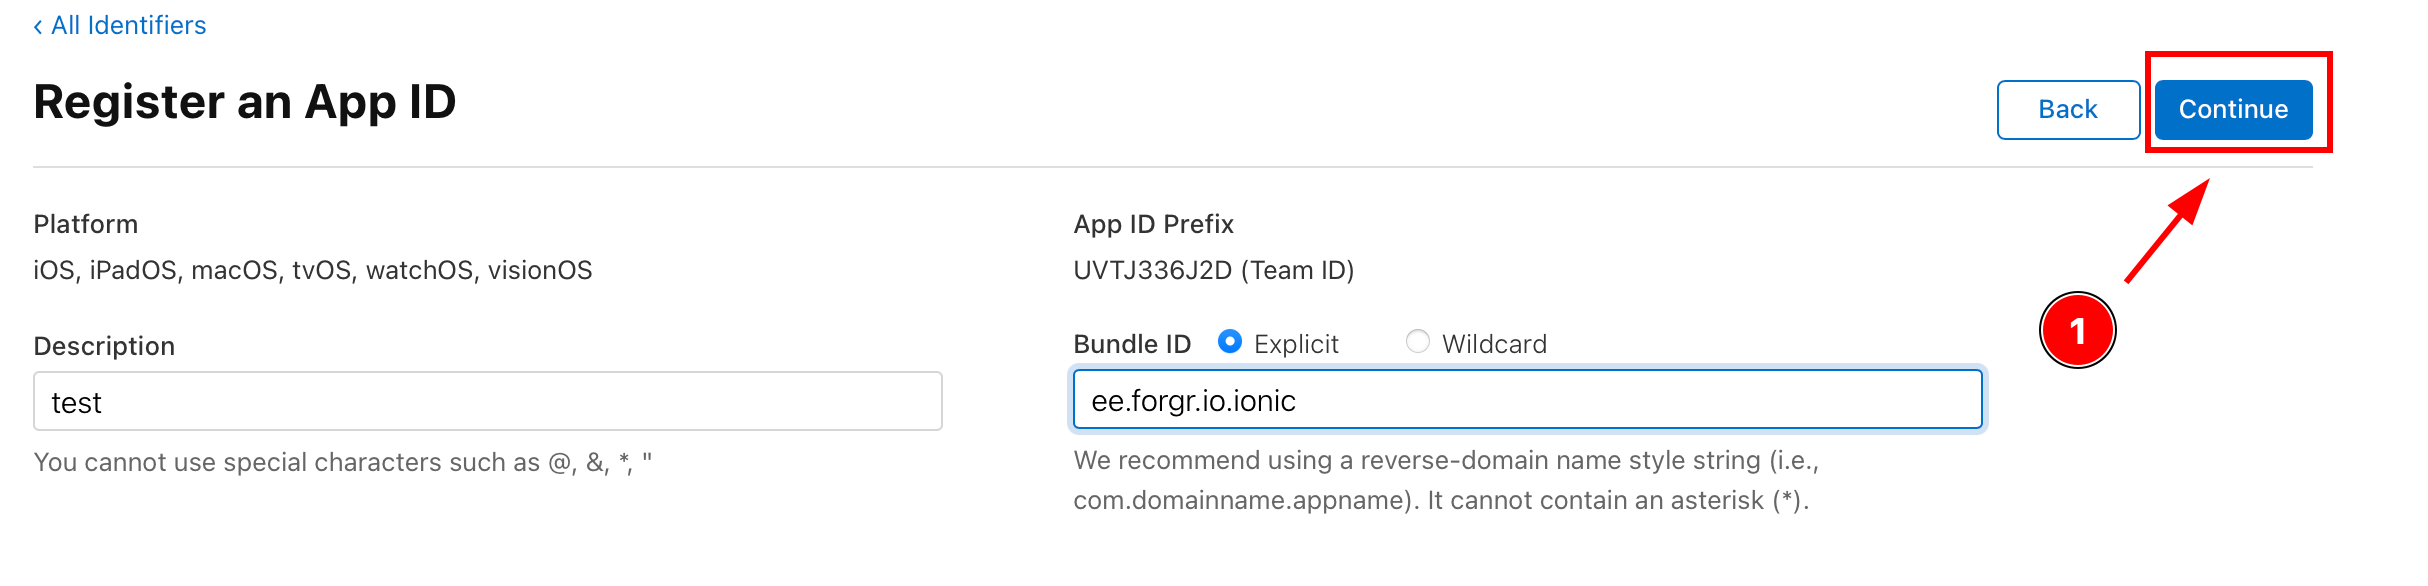
-
Confirm the details and click
Register