Google Login on Android
Copy a setup prompt with the install steps and the full markdown guide for this plugin.
Introduction
Section titled “Introduction”In this guide, you will learn how to setup Google Login with Capgo Social Login for Android. I assume that you have already read the general setup guide.
Using Google login on Android
Section titled “Using Google login on Android”In this part, you will learn how to setup Google login in Android.
-
Create an Android client ID.
-
Click on the search bar

-
Search for
credentialsand click on theAPIs and Servicesone (number 2 on the screenshot)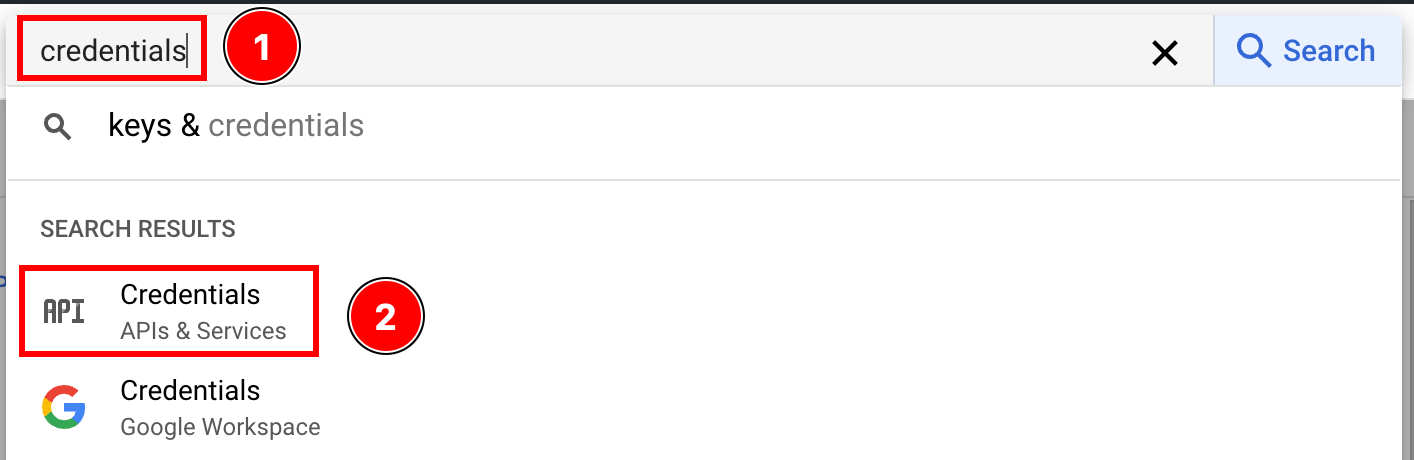
-
Click on the
create credentials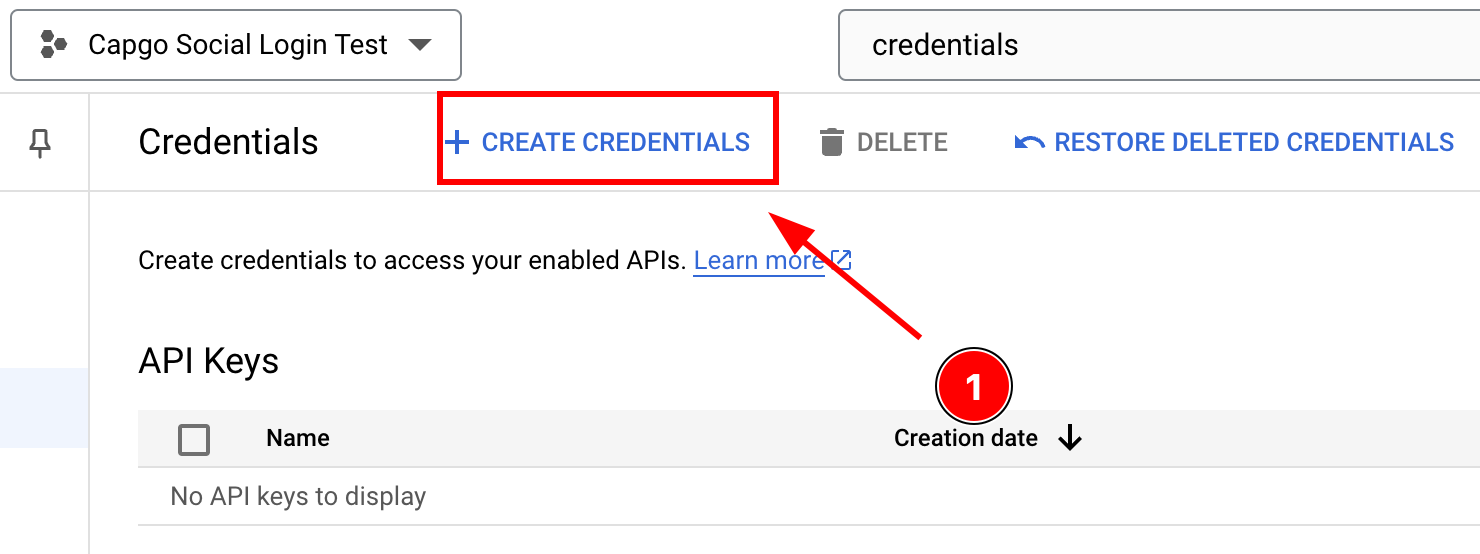
-
Select
OAuth client ID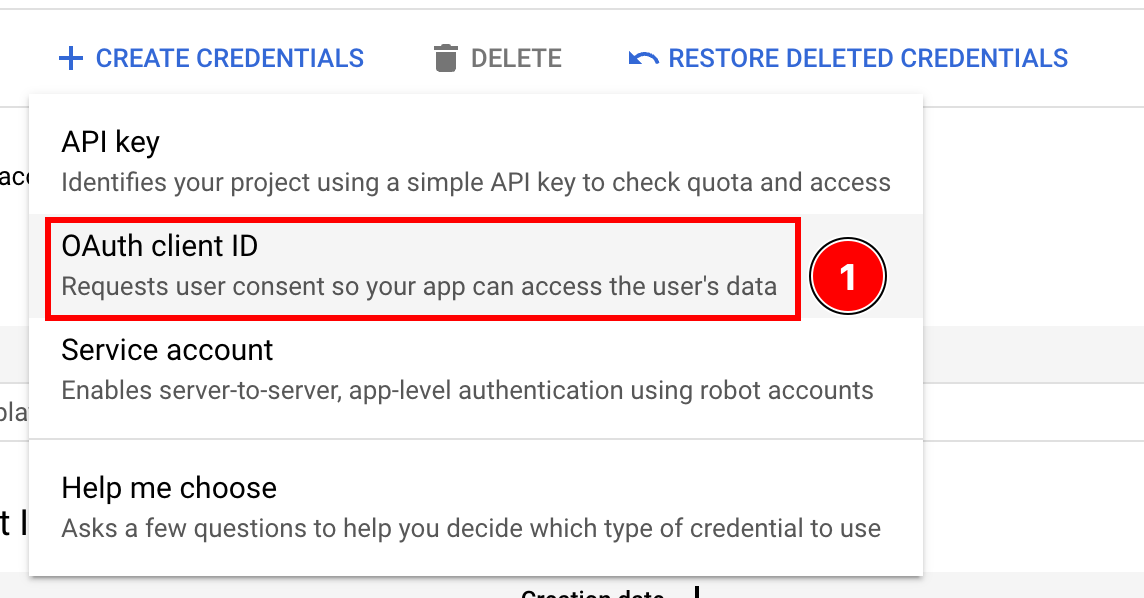
-
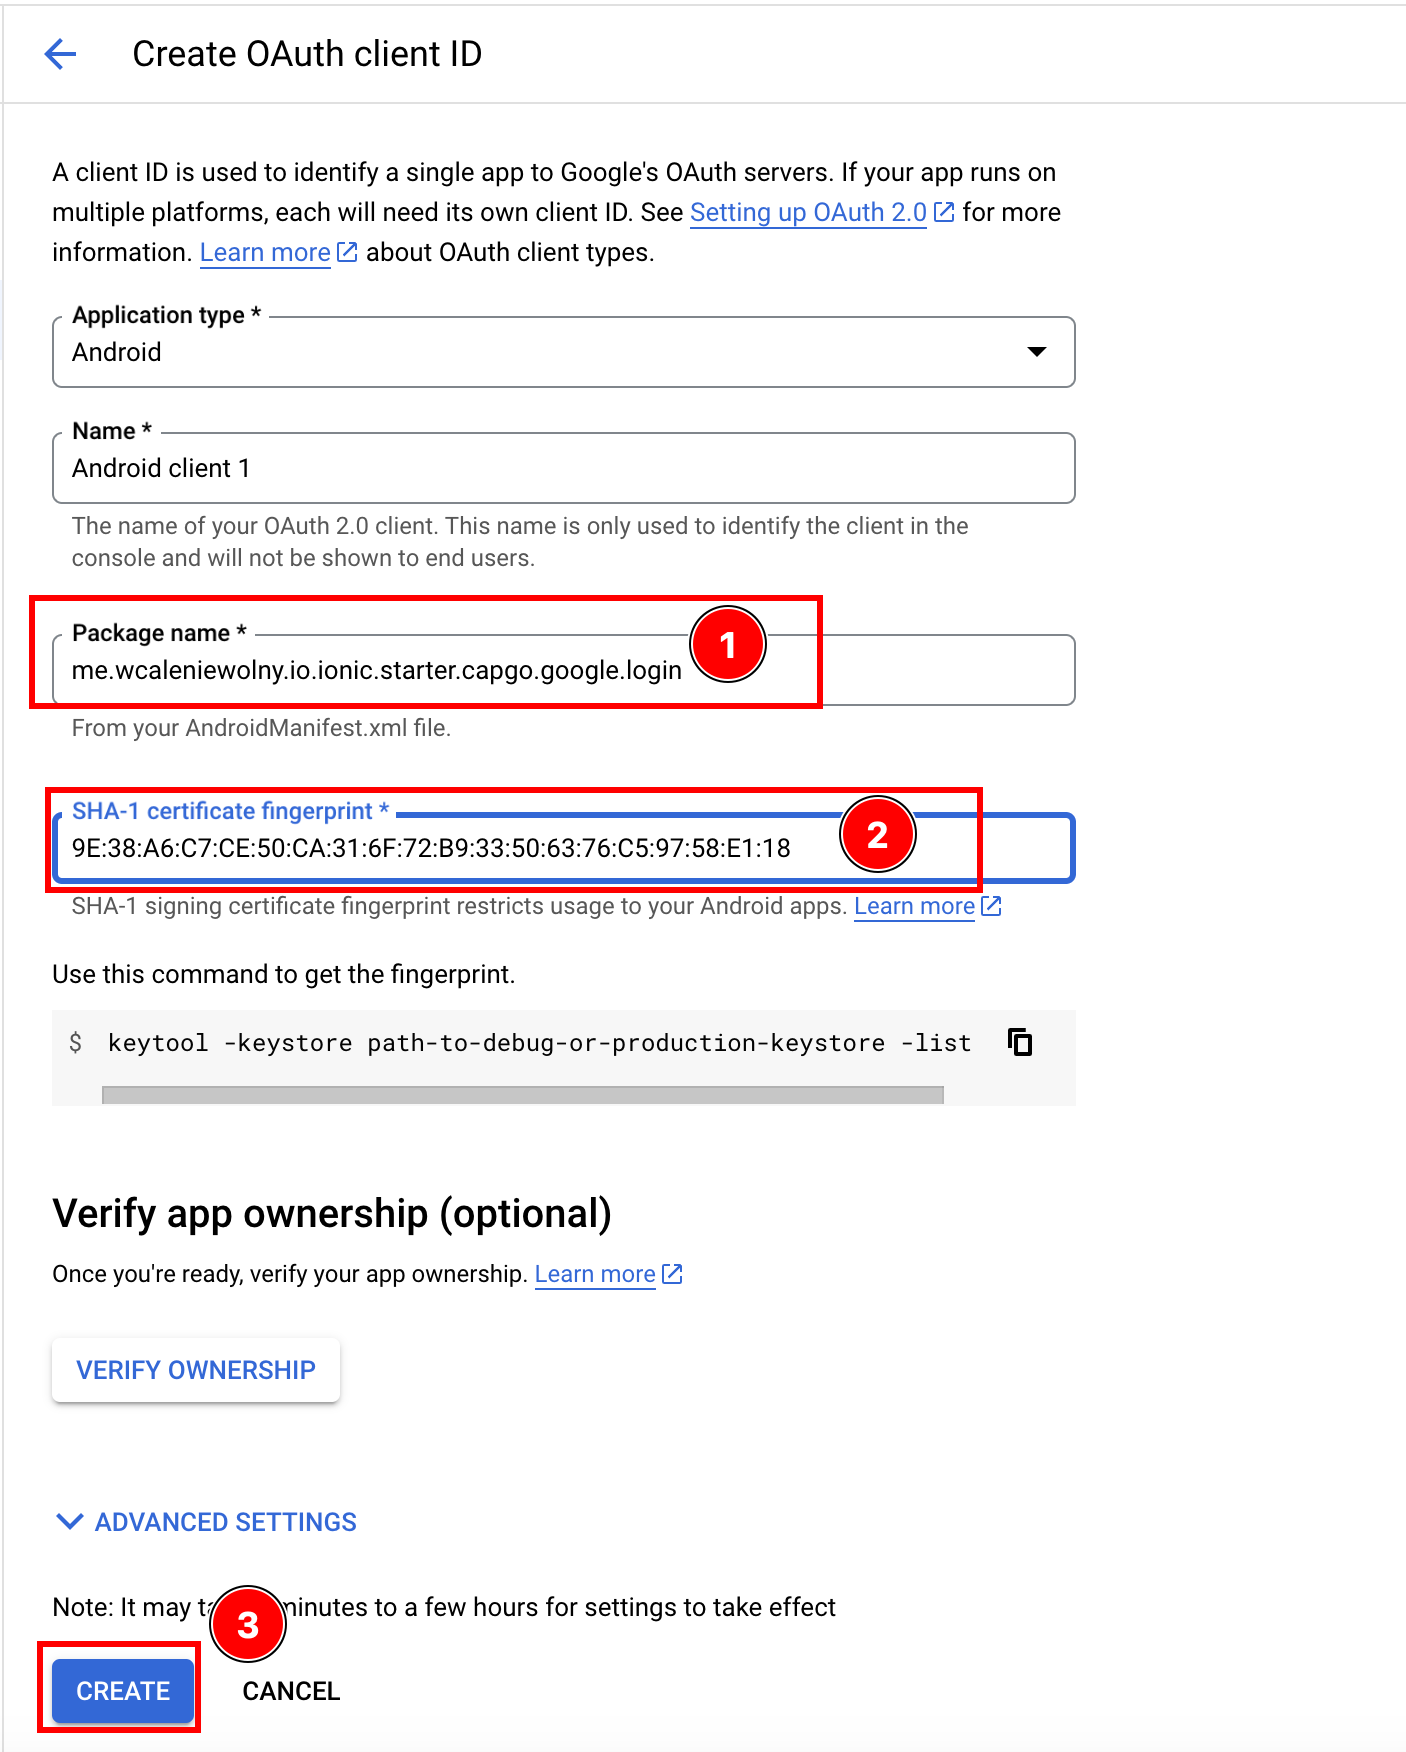
Select the
Androidapplication type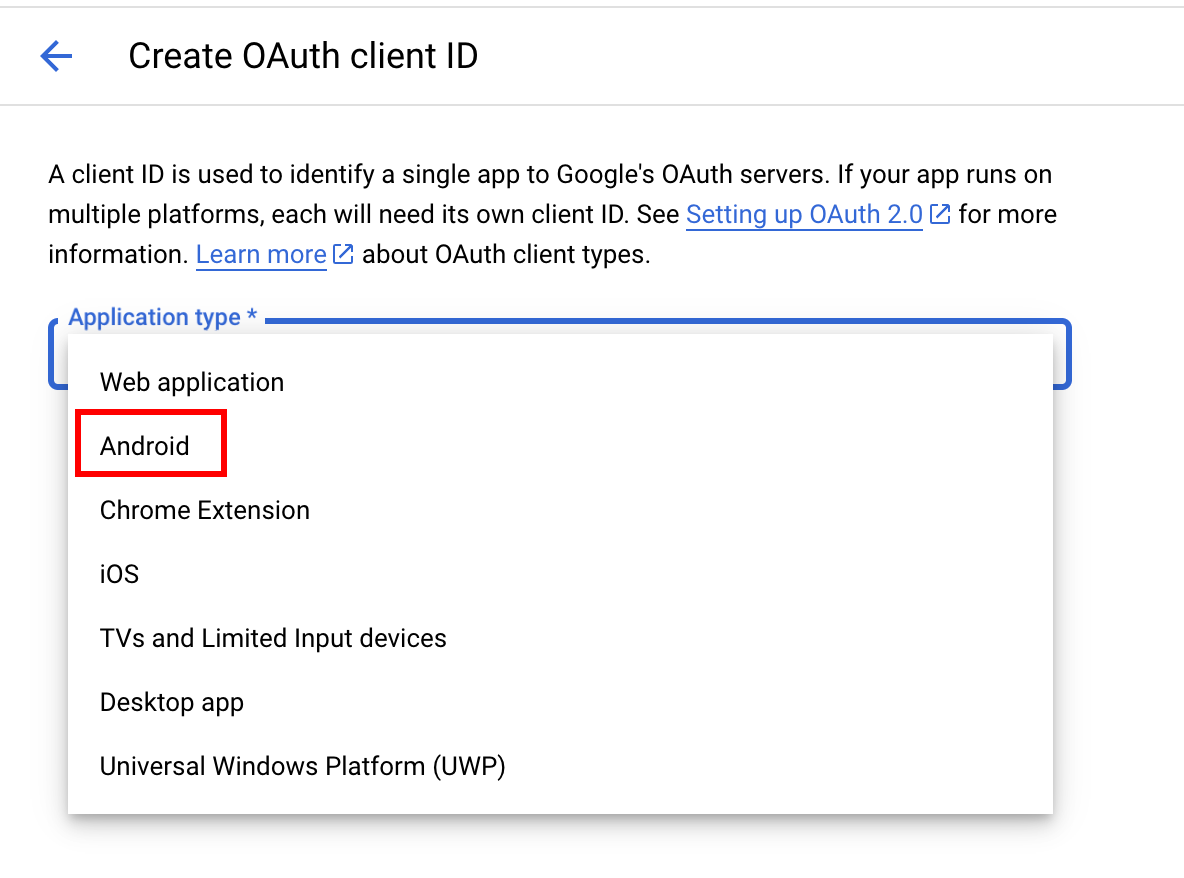
-
Open Android Studio
-
At the very bottom of the navigator, find the
Gradle Scripts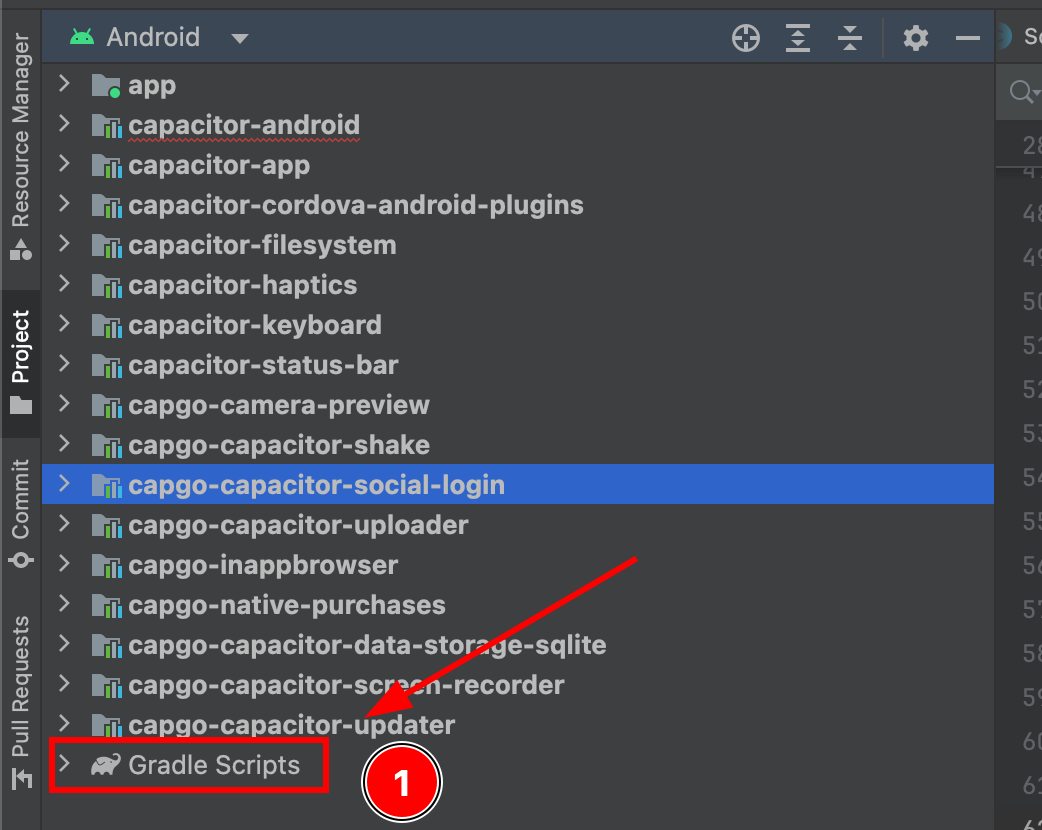
-
Find
build.gradlefor the moduleapp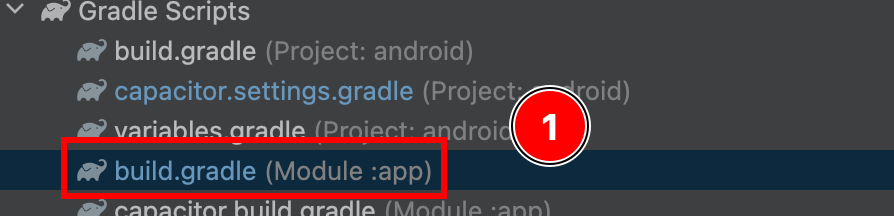
-
Copy the
android.defaultConfig.applicationId. This will be yourpackage namein the Google console
-
Now, open the terminal. Make sure that you are in the
androidfolder of your app and run./gradlew signInReport

- Scroll to the top of this command. You should see the following. Copy the
SHA1.

- Now, go back to the Google Console. Enter your
applicationIdas thePackage Nameand your SHA1 in the certificate field and clickcreate
-
-
Create a web client (this is required for Android)
-
Go to the
Create credentialspage in Google Console -
Set application type to
Web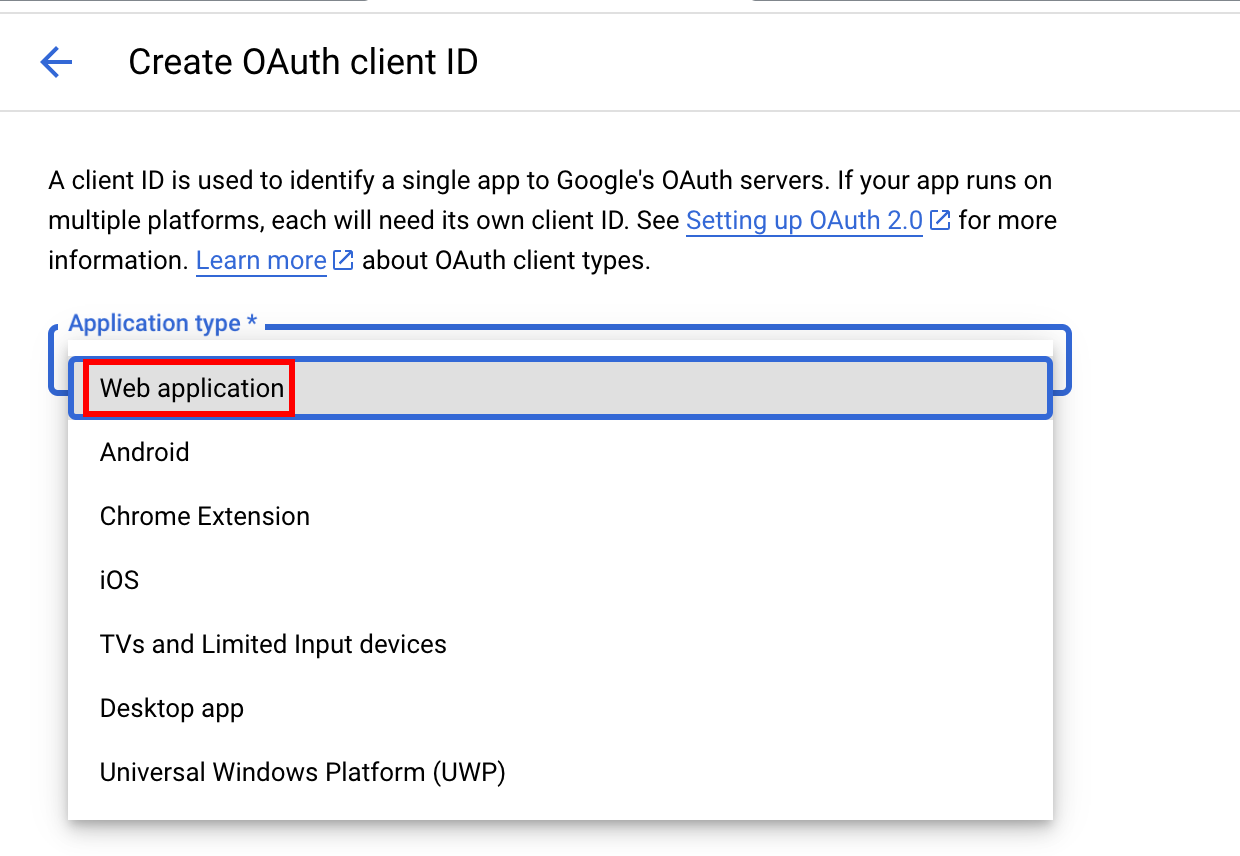
-
Click
Create
-
Copy the client ID, you’ll use this as the
webClientIdin your JS/TS code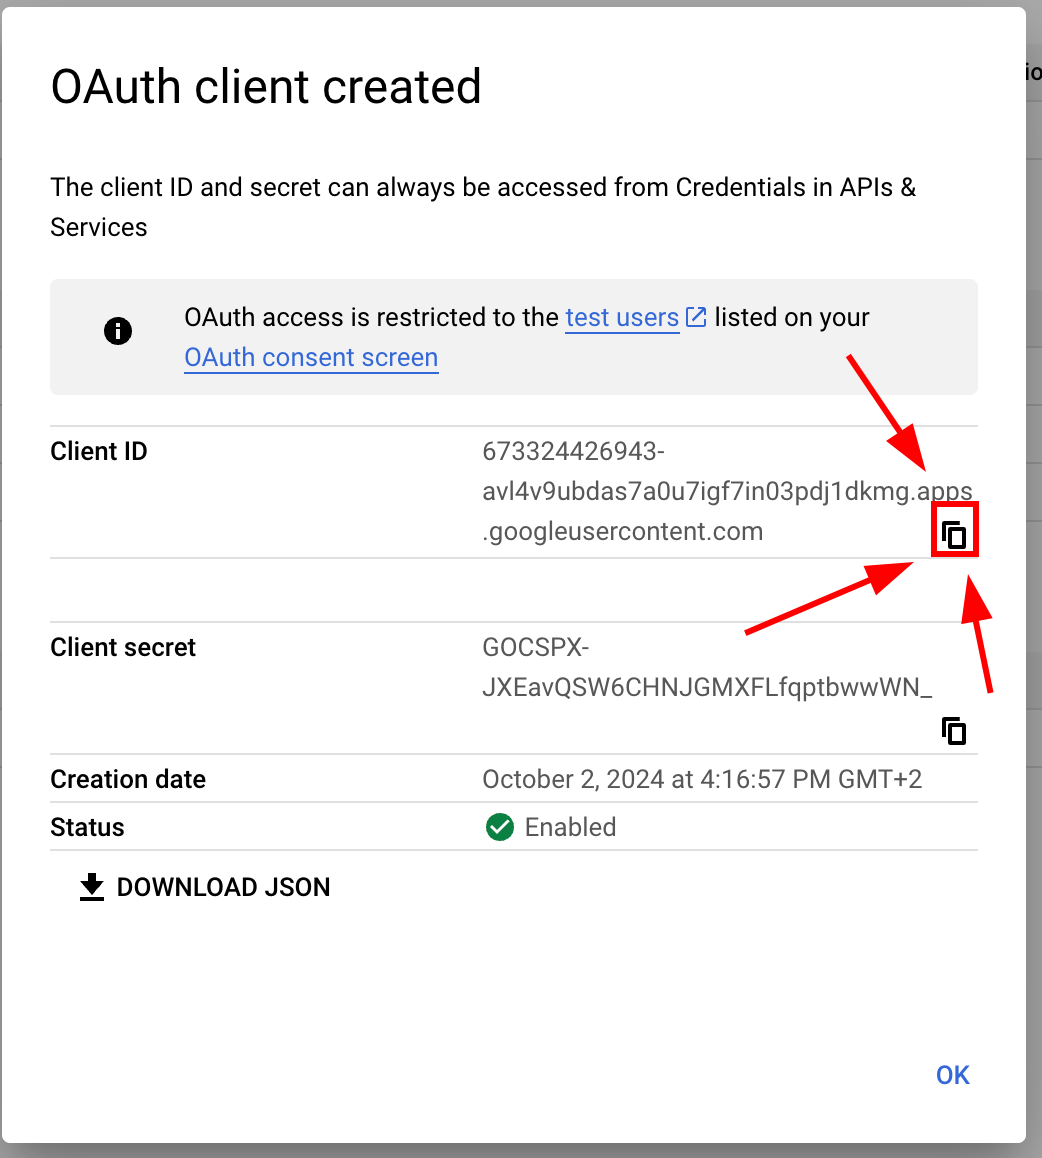
-
-
Modify your
MainActivity-
Please open your app in Android Studio. You can run
cap open android -
Find
MainActivity.java-
Open the
appfolder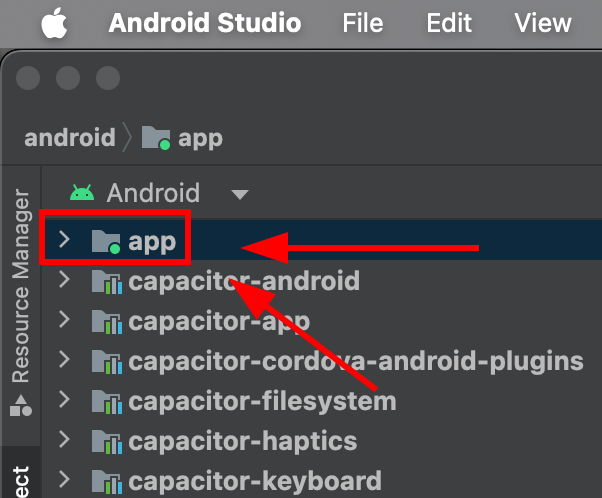
-
Find
java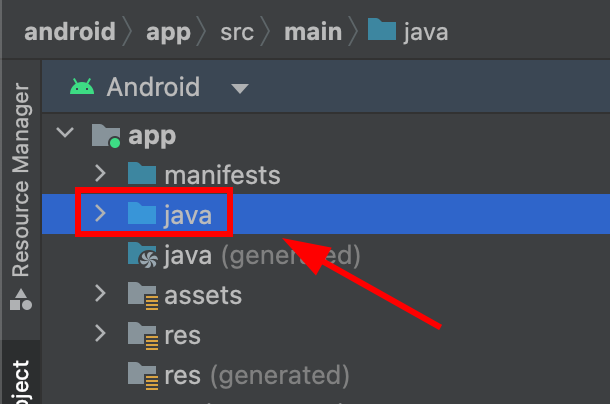
-
Find your
MainActivity.javaand click on it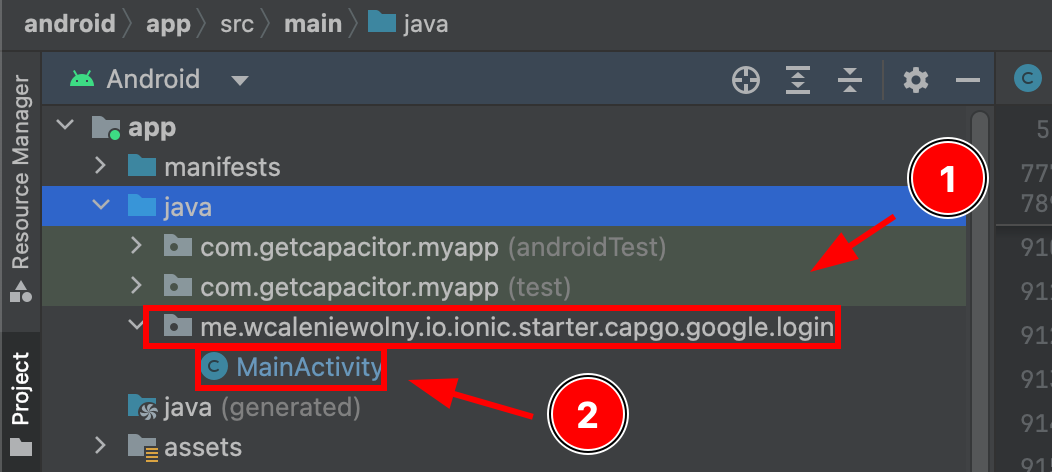
-
-
Modify
MainActivity.java. Please add the following codeimport ee.forgr.capacitor.social.login.GoogleProvider;import ee.forgr.capacitor.social.login.SocialLoginPlugin;import ee.forgr.capacitor.social.login.ModifiedMainActivityForSocialLoginPlugin;import com.getcapacitor.PluginHandle;import com.getcapacitor.Plugin;import android.content.Intent;import android.util.Log;import com.getcapacitor.BridgeActivity;// ModifiedMainActivityForSocialLoginPlugin is VERY VERY important !!!!!!public class MainActivity extends BridgeActivity implements ModifiedMainActivityForSocialLoginPlugin {@Overridepublic void onActivityResult(int requestCode, int resultCode, Intent data) {super.onActivityResult(requestCode, resultCode, data);if (requestCode >= GoogleProvider.REQUEST_AUTHORIZE_GOOGLE_MIN && requestCode < GoogleProvider.REQUEST_AUTHORIZE_GOOGLE_MAX) {PluginHandle pluginHandle = getBridge().getPlugin("SocialLogin");if (pluginHandle == null) {Log.i("Google Activity Result", "SocialLogin login handle is null");return;}Plugin plugin = pluginHandle.getInstance();if (!(plugin instanceof SocialLoginPlugin)) {Log.i("Google Activity Result", "SocialLogin plugin instance is not SocialLoginPlugin");return;}((SocialLoginPlugin) plugin).handleGoogleLoginIntent(requestCode, data);}}// This function will never be called, leave it empty@Overridepublic void IHaveModifiedTheMainActivityForTheUseWithSocialLoginPlugin() {}} -
Save the file
-
-
Use Google Login in your application
-
First, import
SocialLoginimport { SocialLogin } from '@capgo/capacitor-social-login'; -
Call initialize. This should be called only once.
// onMounted is Vue specific// webClientId is the client ID you got in the web client creation step not the android client ID.onMounted(() => {SocialLogin.initialize({google: {webClientId: '673324426943-avl4v9ubdas7a0u7igf7in03pdj1dkmg.apps.googleusercontent.com',}})}) -
Call
SocialLogin.login. Create a button and run the following code on click.const res = await SocialLogin.login({provider: 'google',options: {}})// handle the responseconsole.log(JSON.stringify(res))
-
-
Configure the emulator for testing
-
Go into
Device managerand click the plus button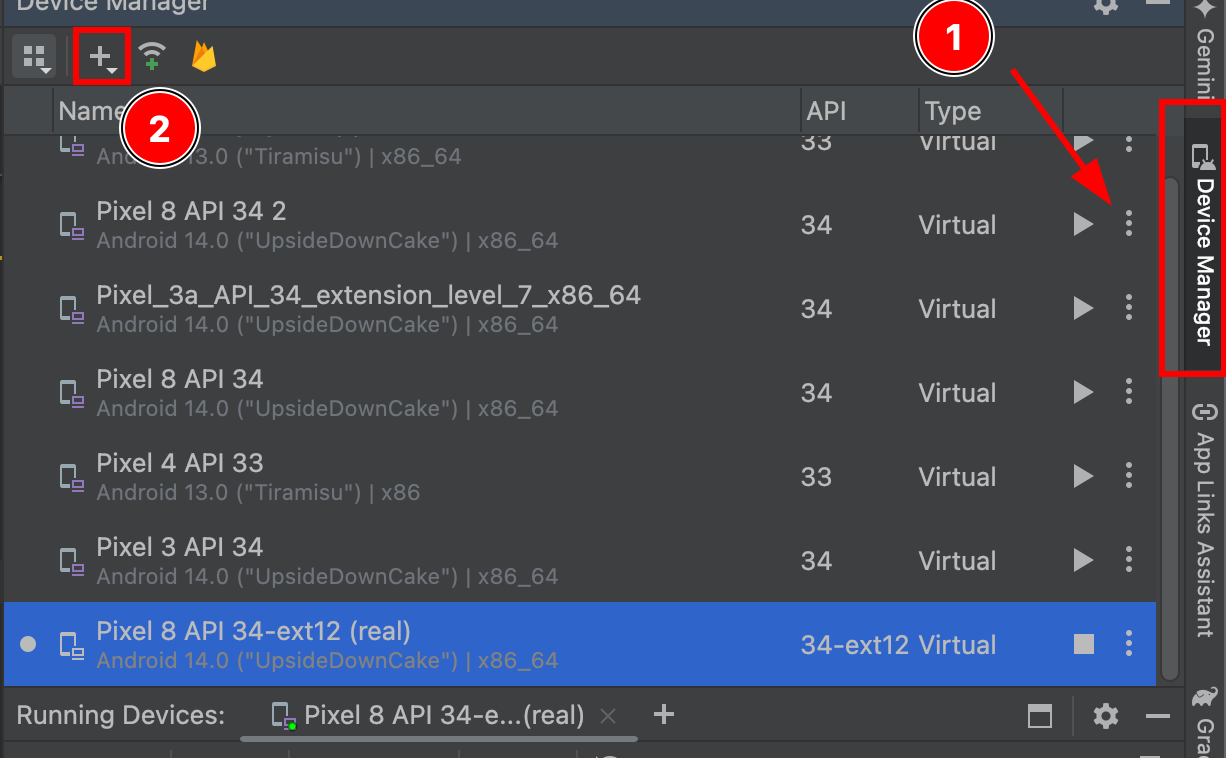
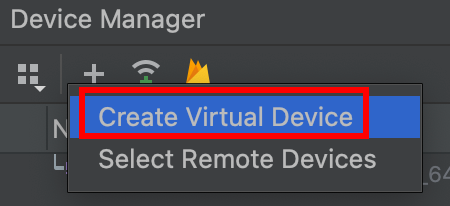
-
Create a virtual device
-
Select any device with a
Play Storeicon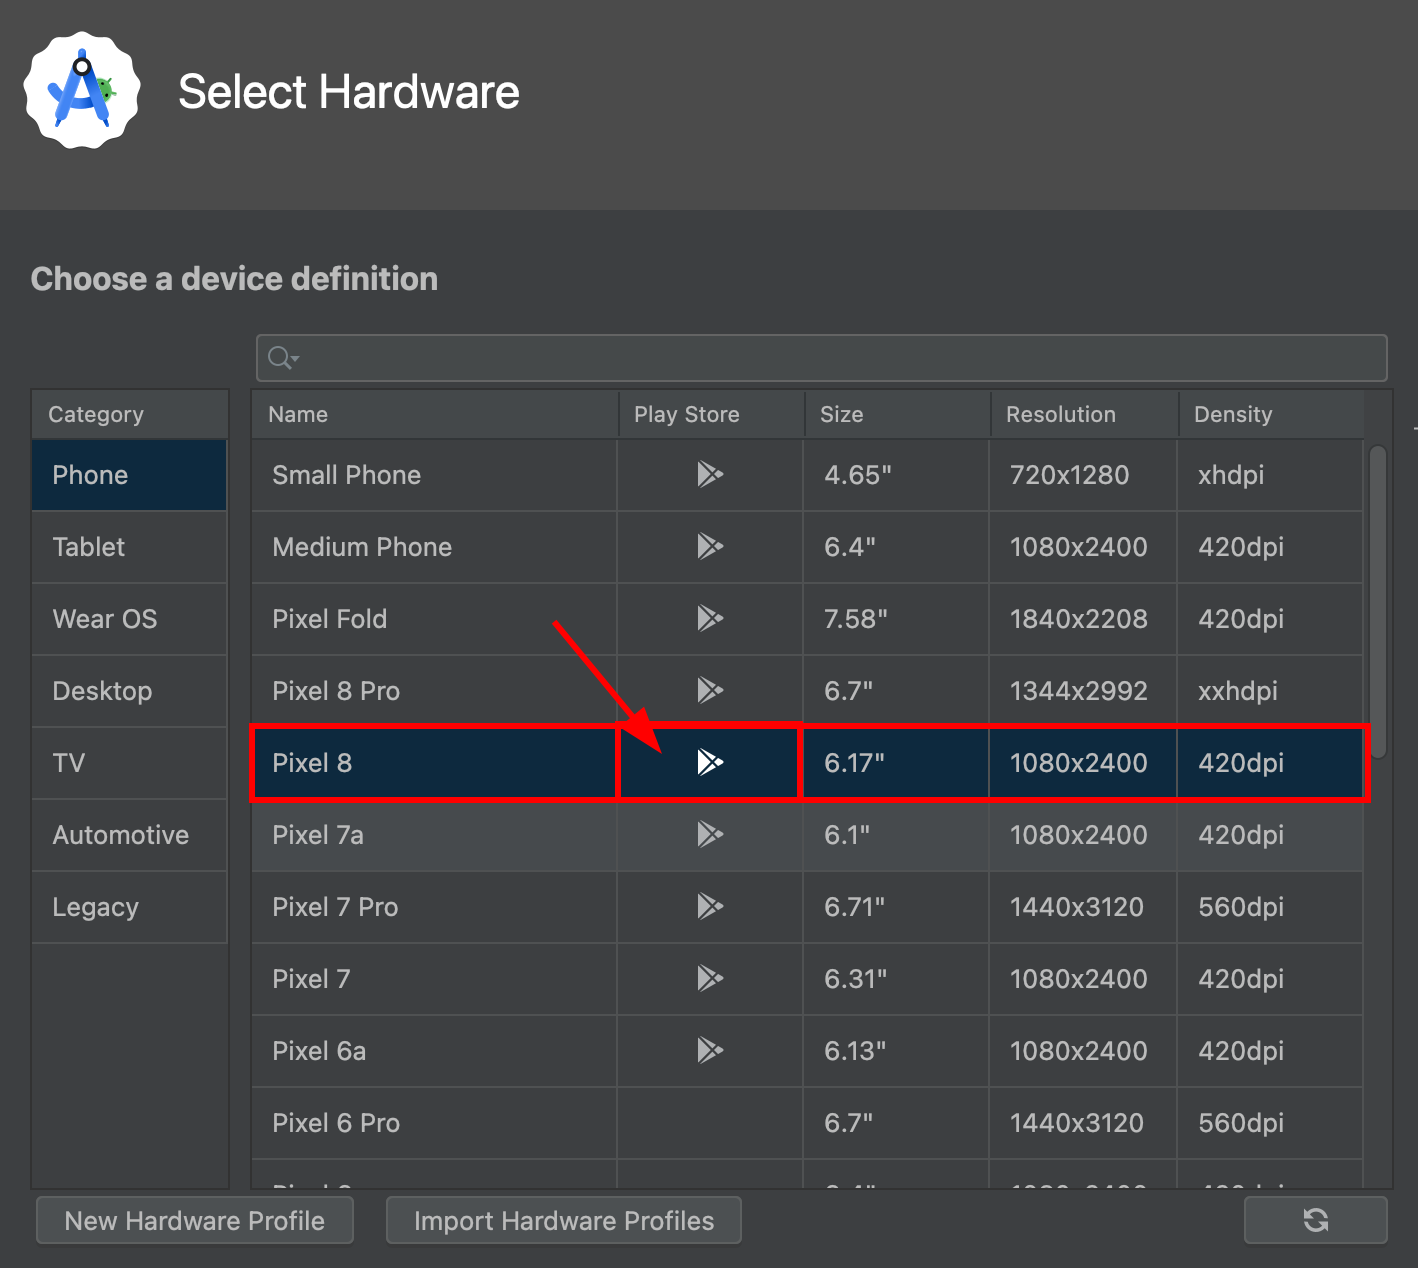
As you can see, the
pixel 8supports thePlay Storeservices -
Click
next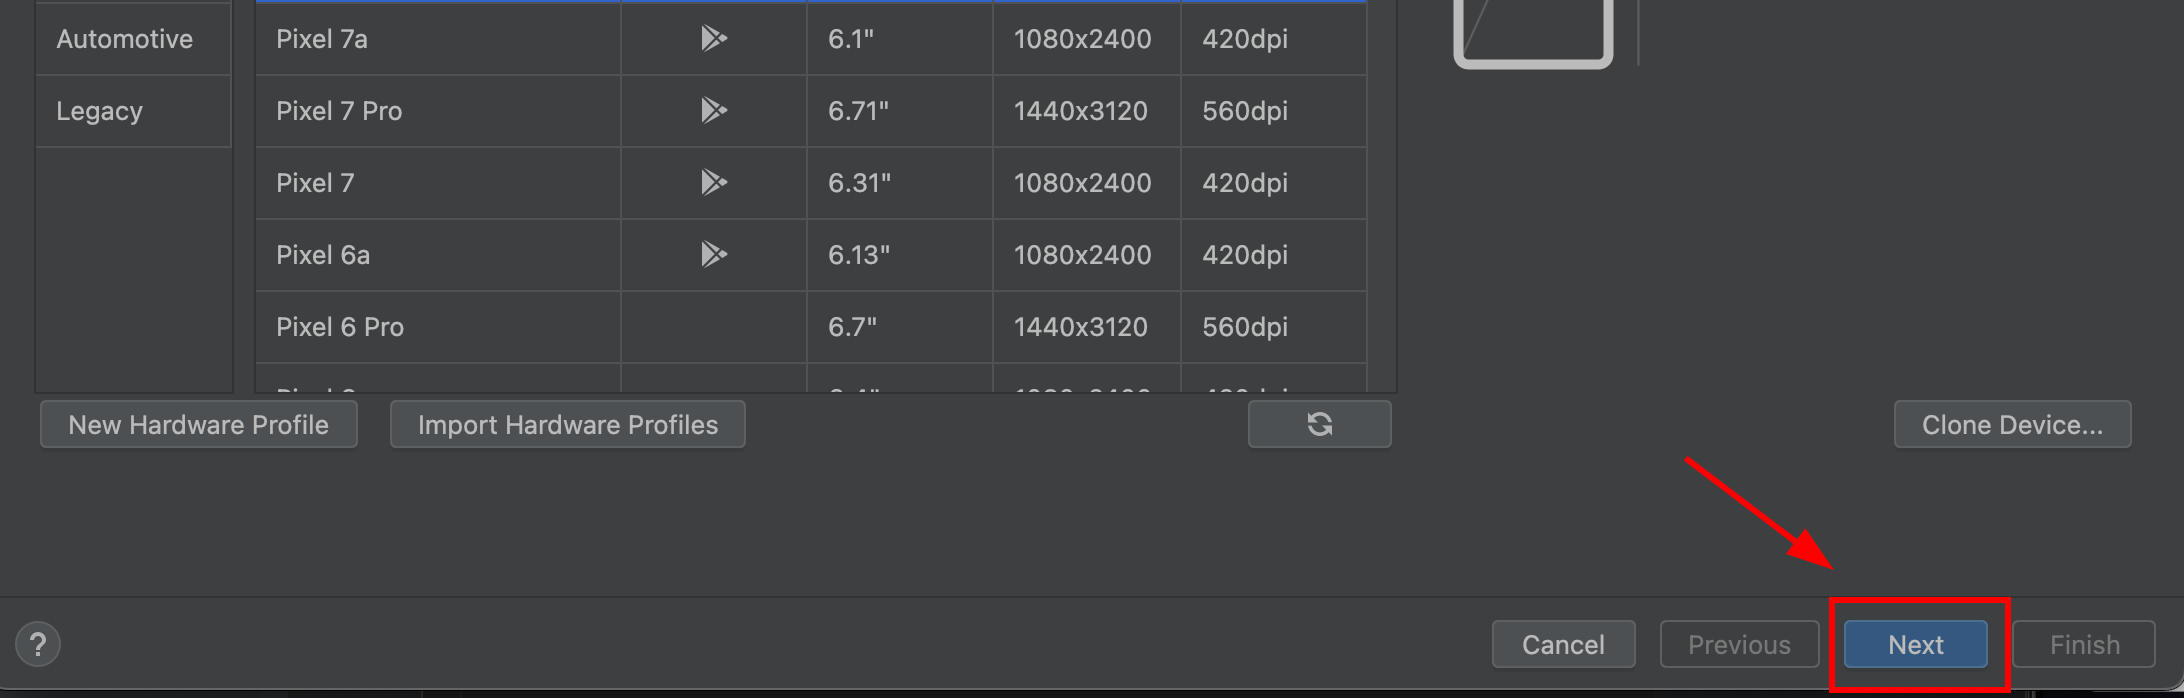
-
Make sure that the OS image is of type
Google Play. IT MUST be of typeGoogle Play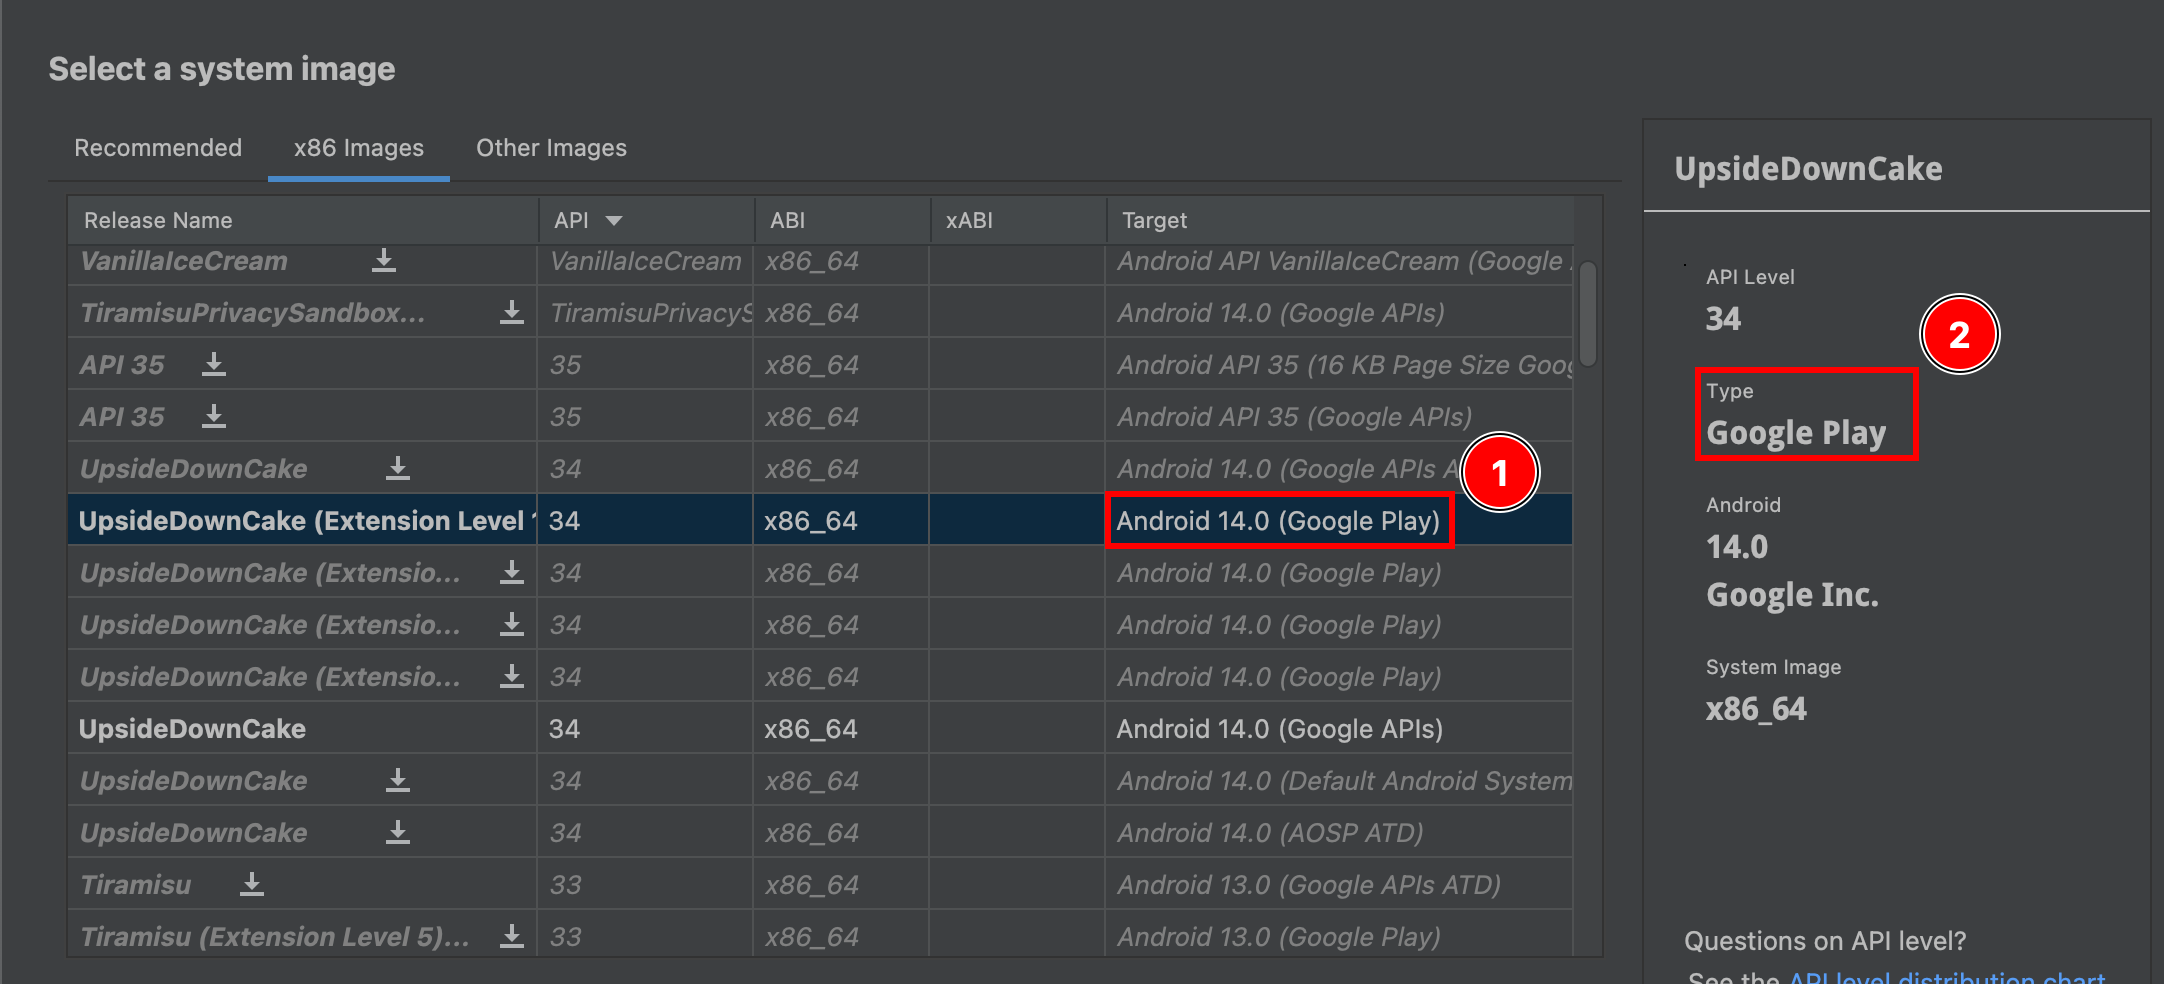
-
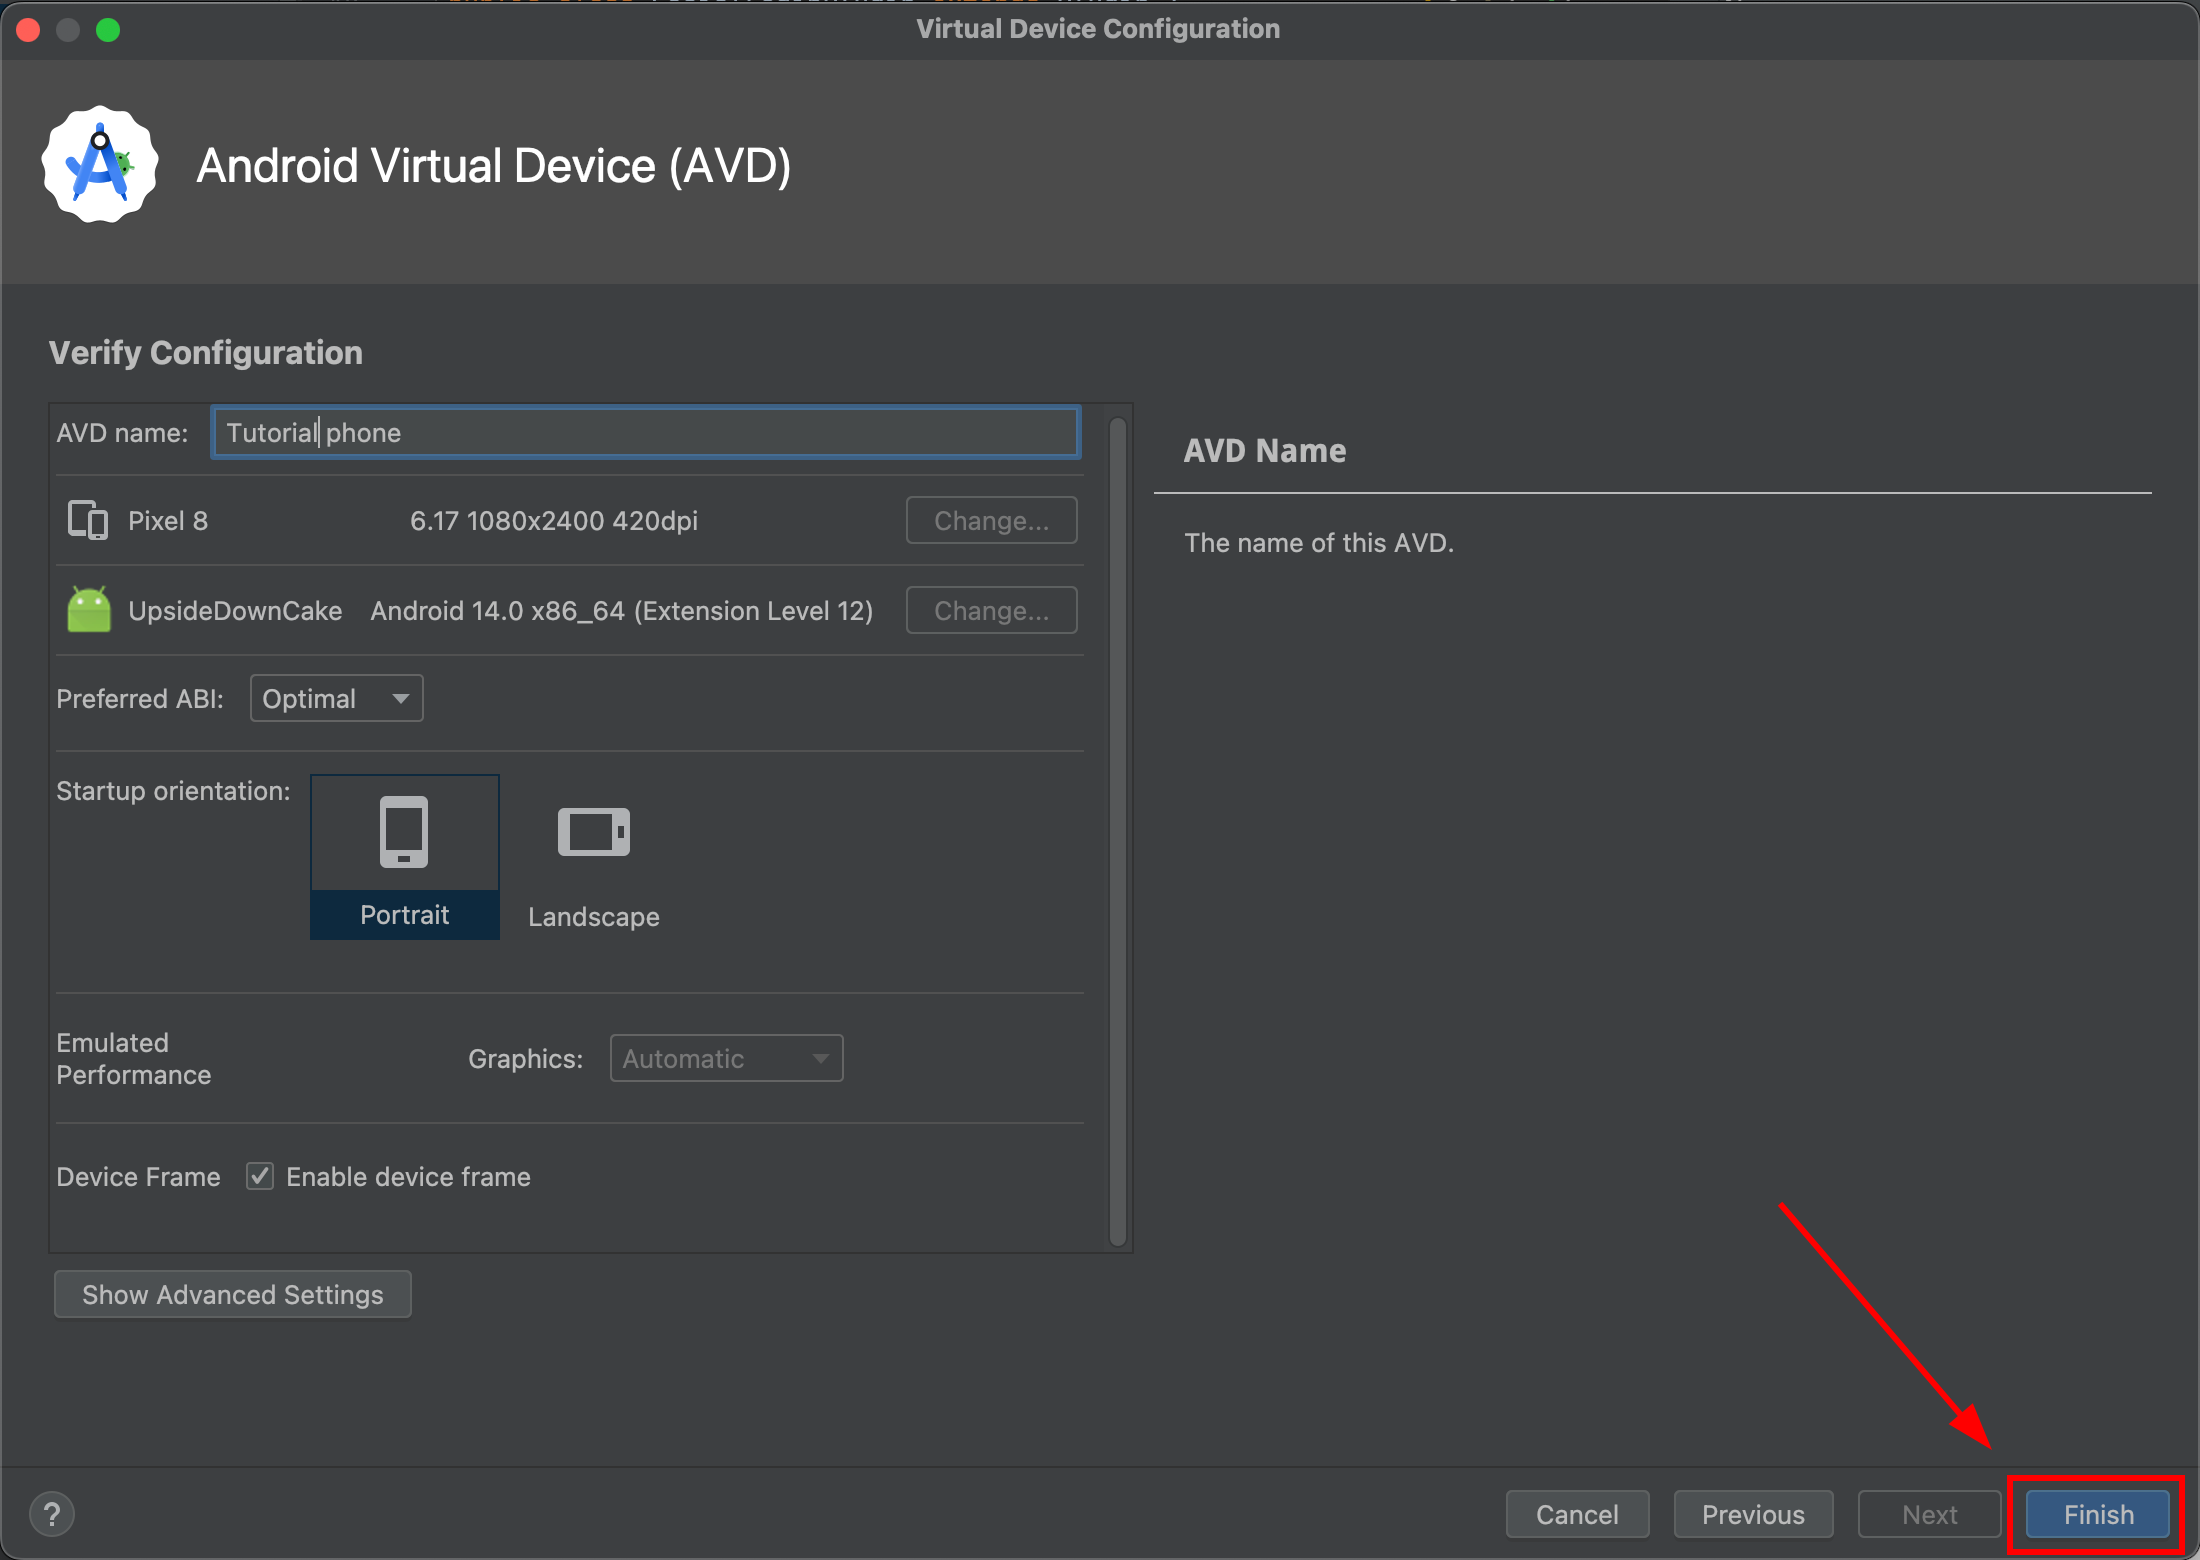
Click next
-
Confirm your device. You can name your emulator as you prefer
-
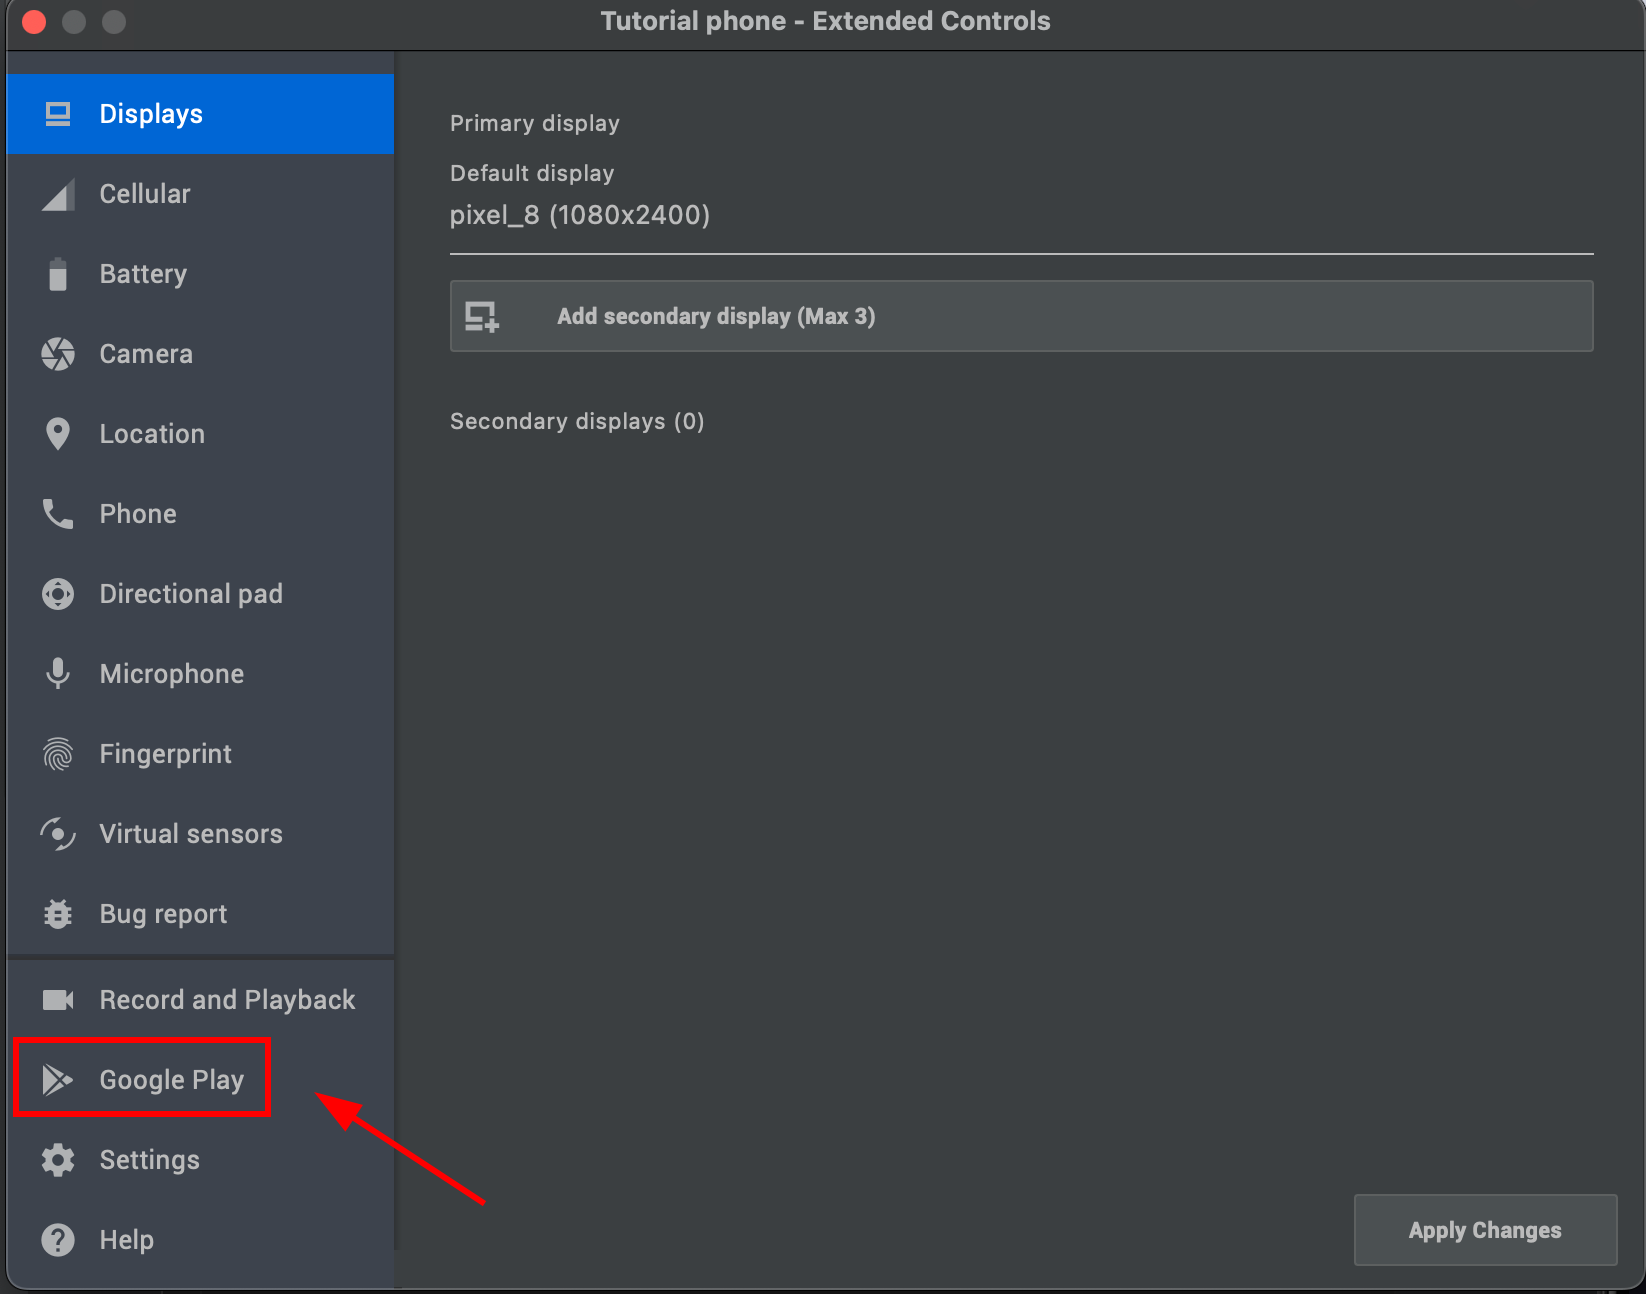
Go into
Device Managerand boot up your simulator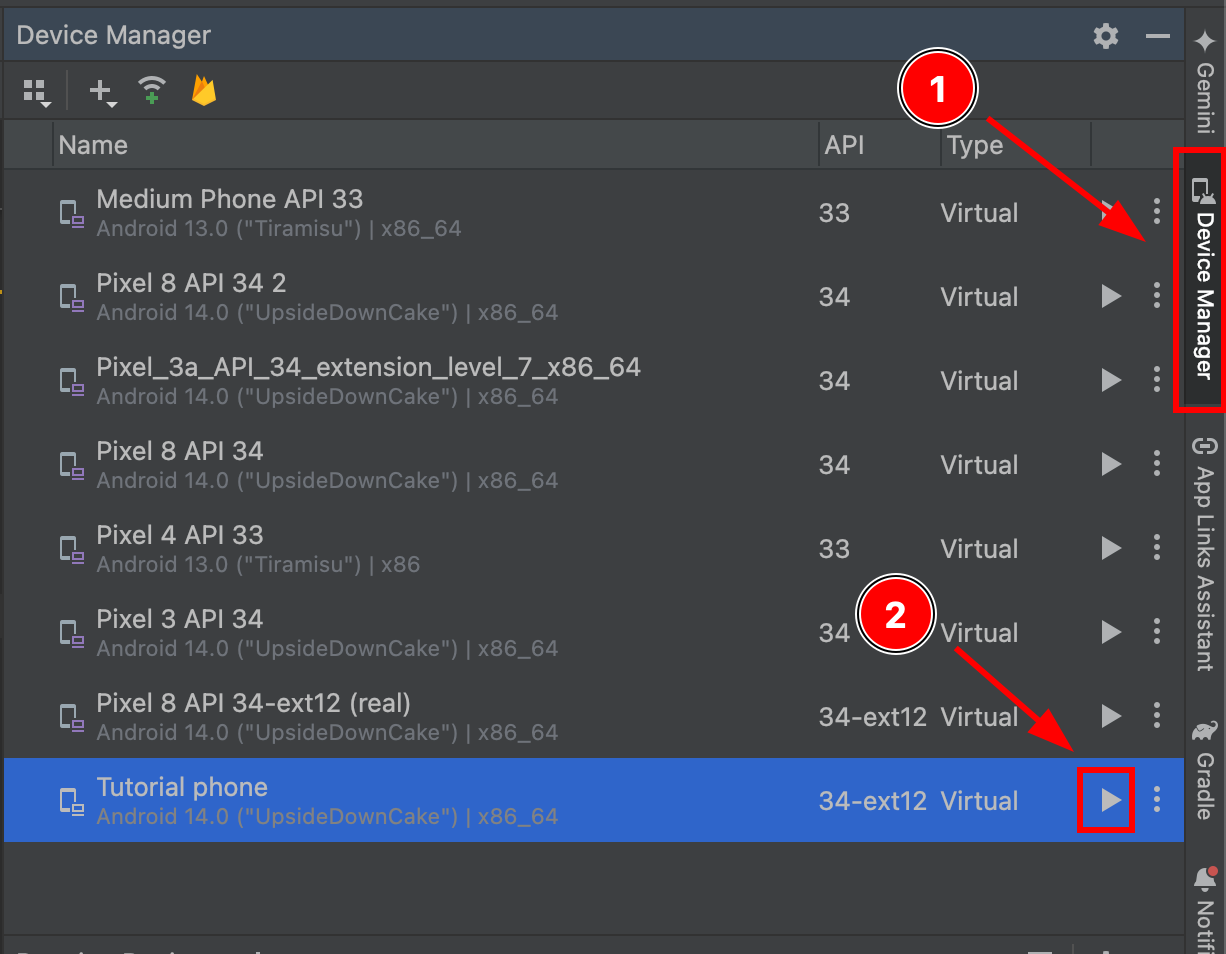
-
After the simulator boots up, go into its settings
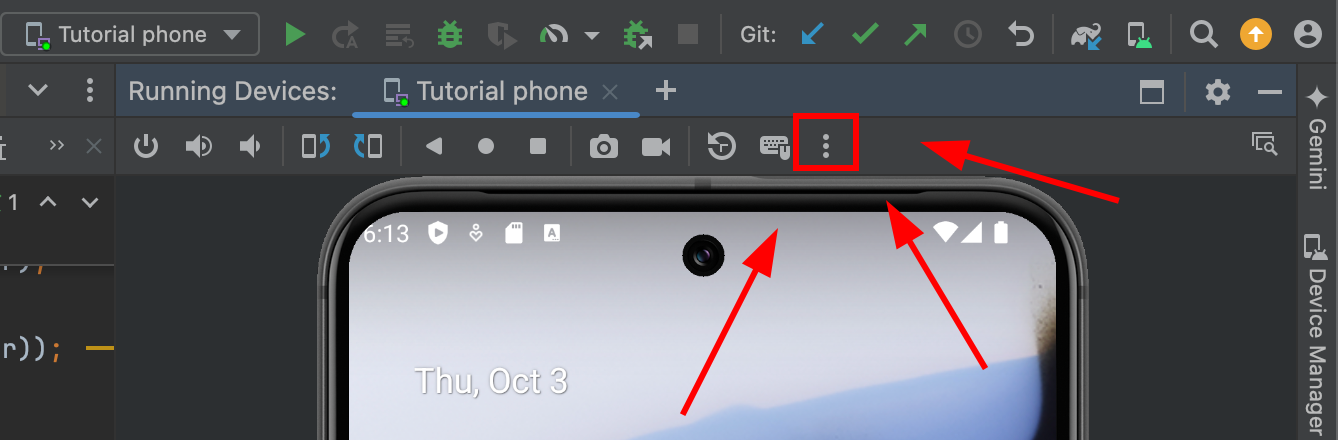
-
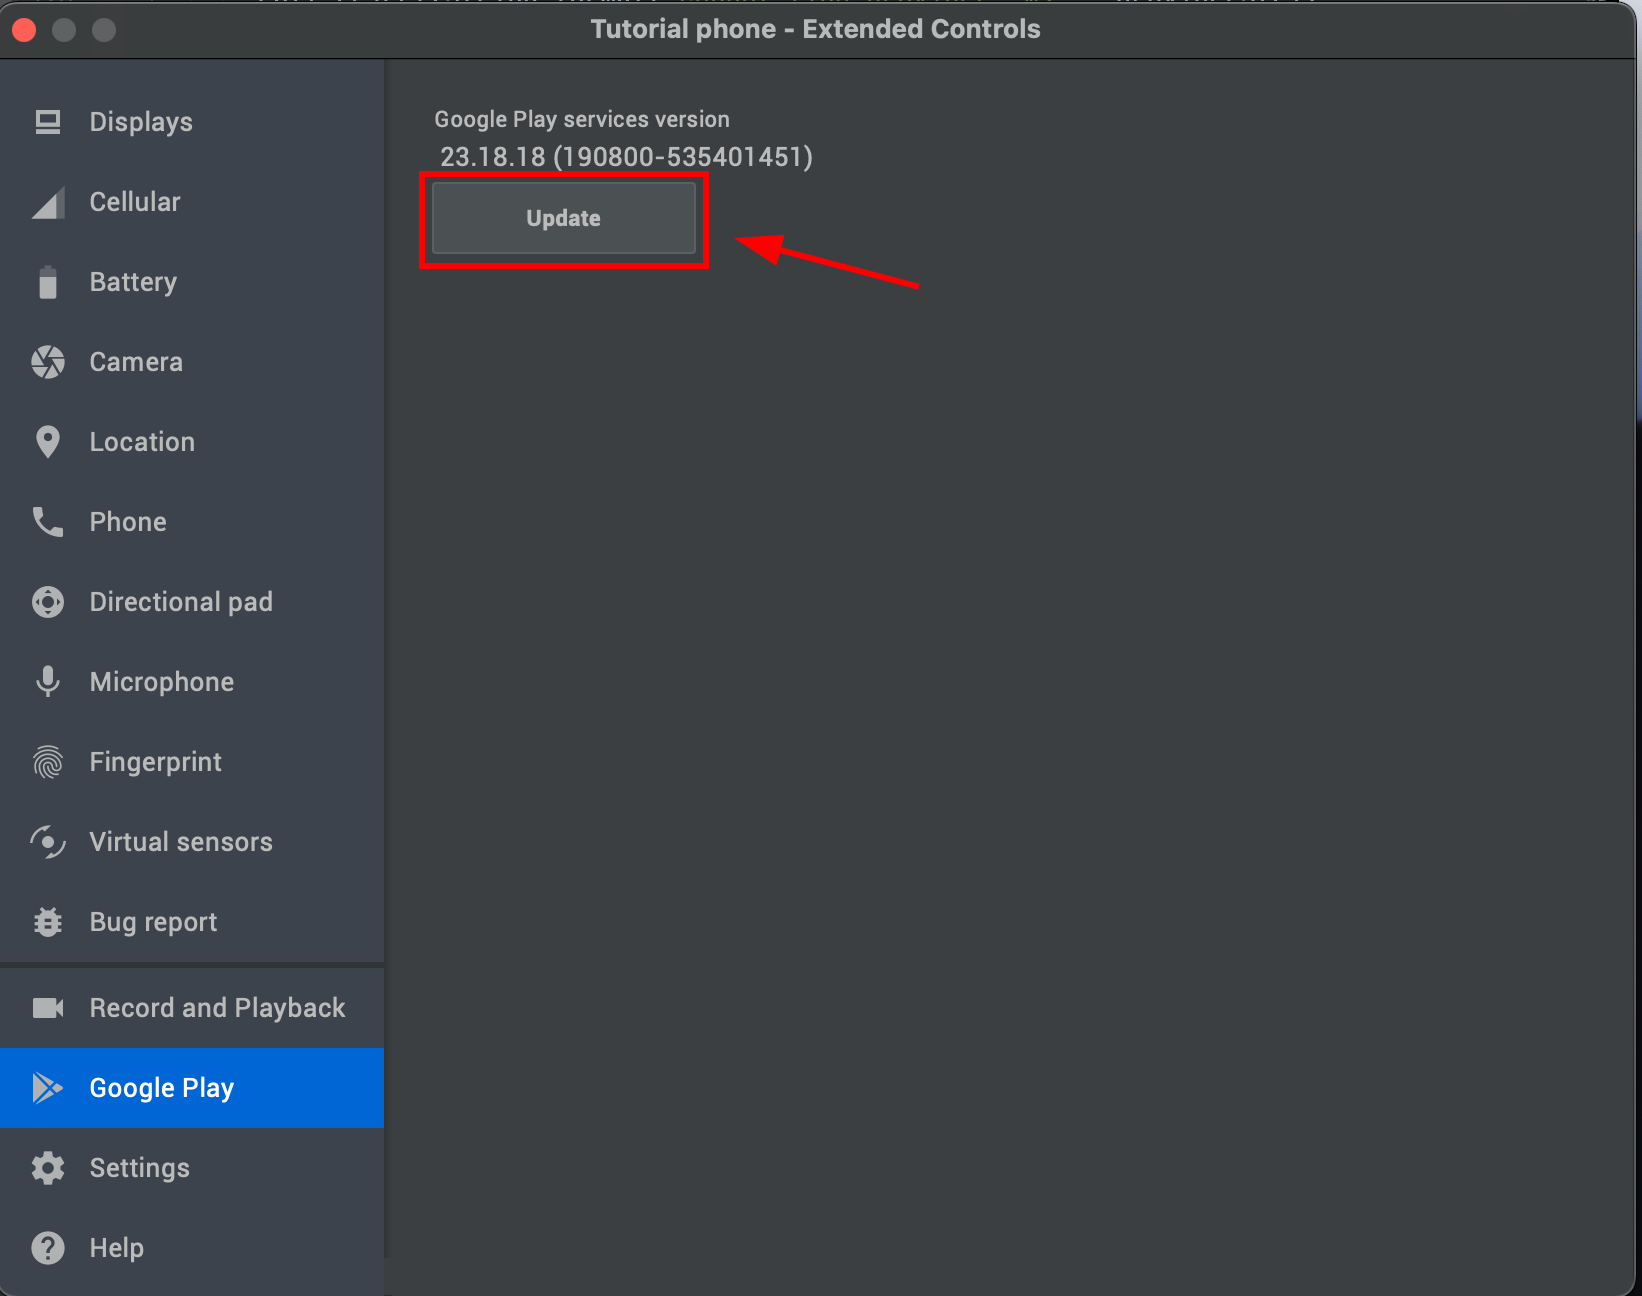
Go into
Google Play
- Click
Updateand wait about 60 seconds
-
-
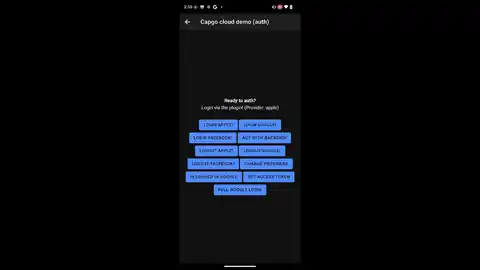
Test your application
If you did everything correctly, you should see the Google login flow working properly:
Troubleshooting
Section titled “Troubleshooting”If you have any issues, please look at the Github issues.
The issues with Google login are ALWAYS related to the SHA1 certificate.
If you cannot get the development SHA1 certificate, try to use a custom keystore. Here is a comment explaining how to add keystore to your project.