iOS上のGoogleログイン
このプラグインのインストール手順とフルマークダウンガイドを含むセットアッププロンプトをコピーします。
このガイドでは、Capgo Social Login for iOSとGoogle Loginをセットアップする方法を学びます。 既に一般的なセットアップガイドを読んだと想定しています。 インストール手順とフルマークダウンガイドを含むセットアッププロンプトをコピーします。.
iOS上でGoogleログインを使用する
iOS上でGoogleログインを使用するこのセクションでは、iOSでGoogleログインを設定する方法を学びます。
-
GoogleコンソールでiOSクライアントIDを作成する
-
検索バーをクリックする

-
検索する
credentialsクリックしてAPIs and Servicesスクリーンショットの2番目のアイテム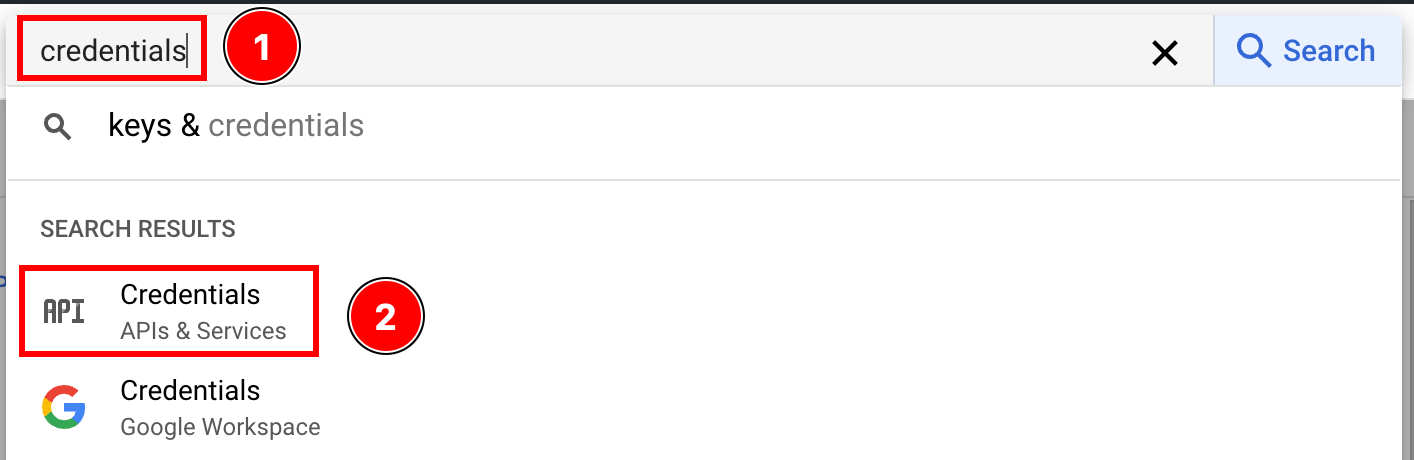
-
クリックして
create credentials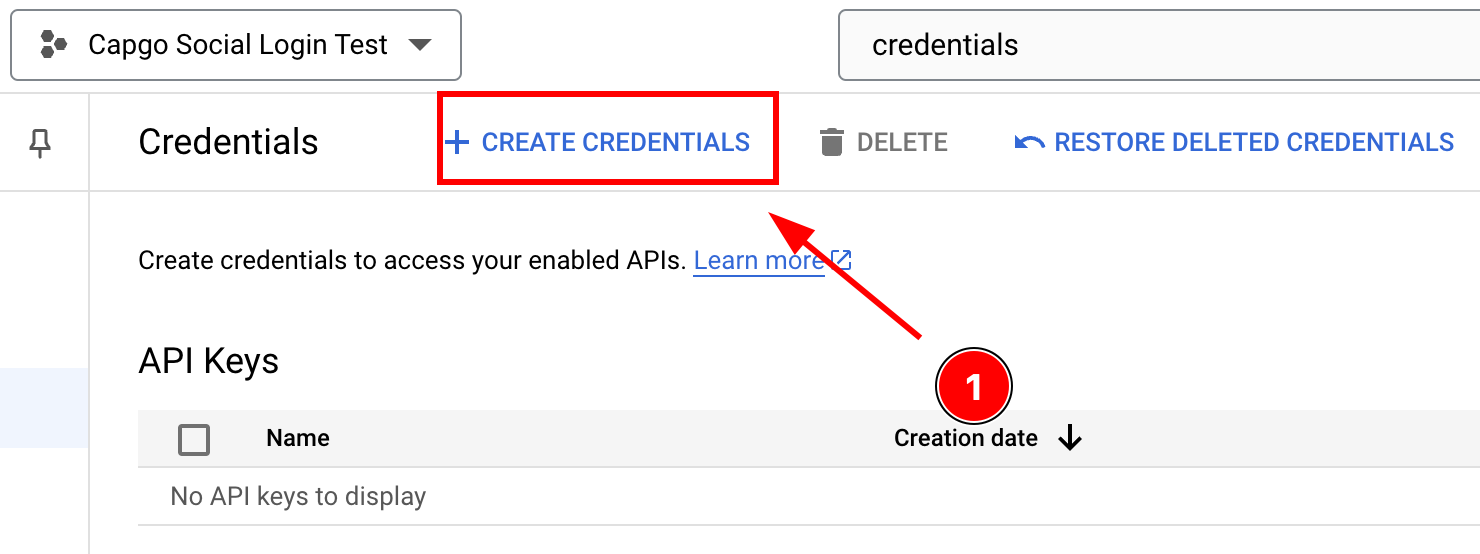
-
選択
OAuth client ID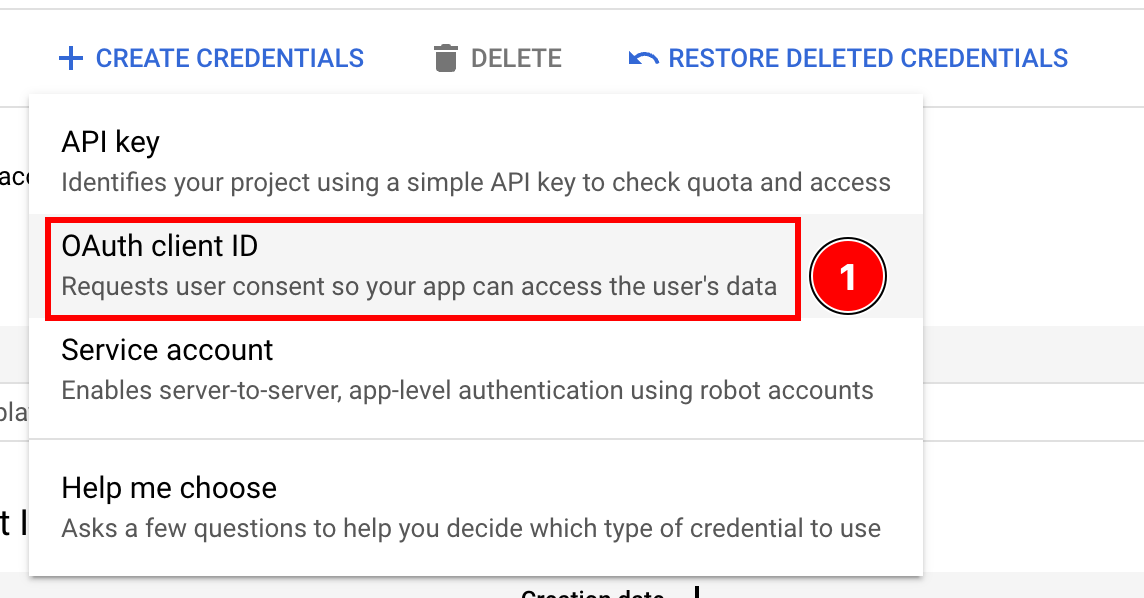
-
を選択してください
Application typeとiOS
-
iOSが強調表示されている
-
バンドルIDを探してください
-
Xcodeを開いてください
App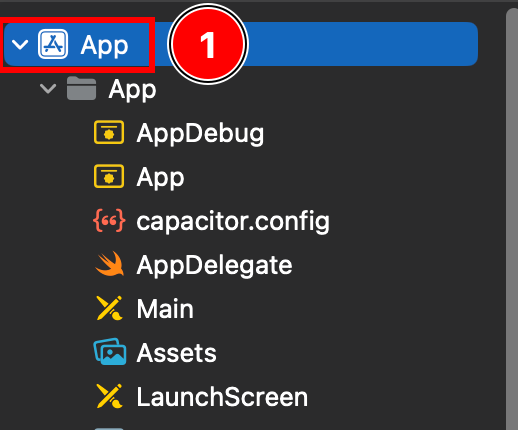
-
Xcodeプロジェクトナビゲータのアプリターゲット
Targets -> App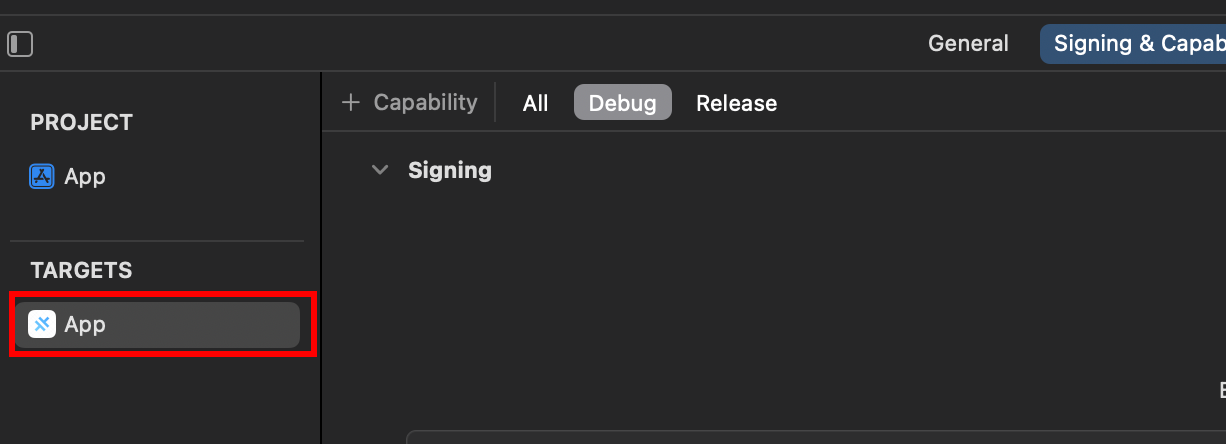
-
ターゲットセクション
Bundle Identifier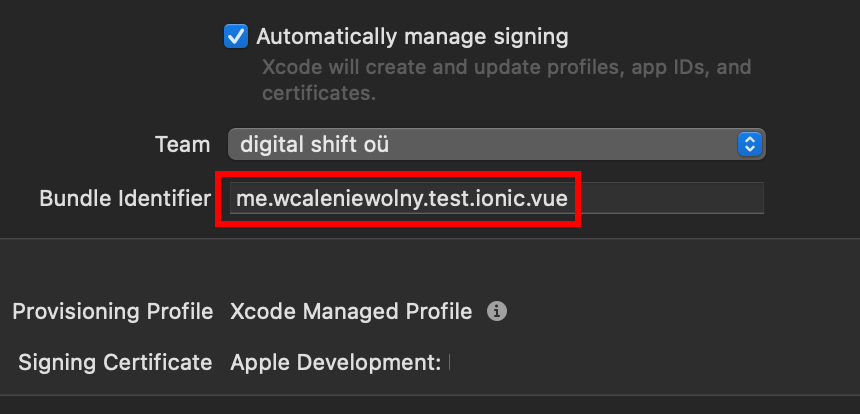
-
Googleコンソールに戻り、
Bundle IdentifierにペーストしてくださいBundle ID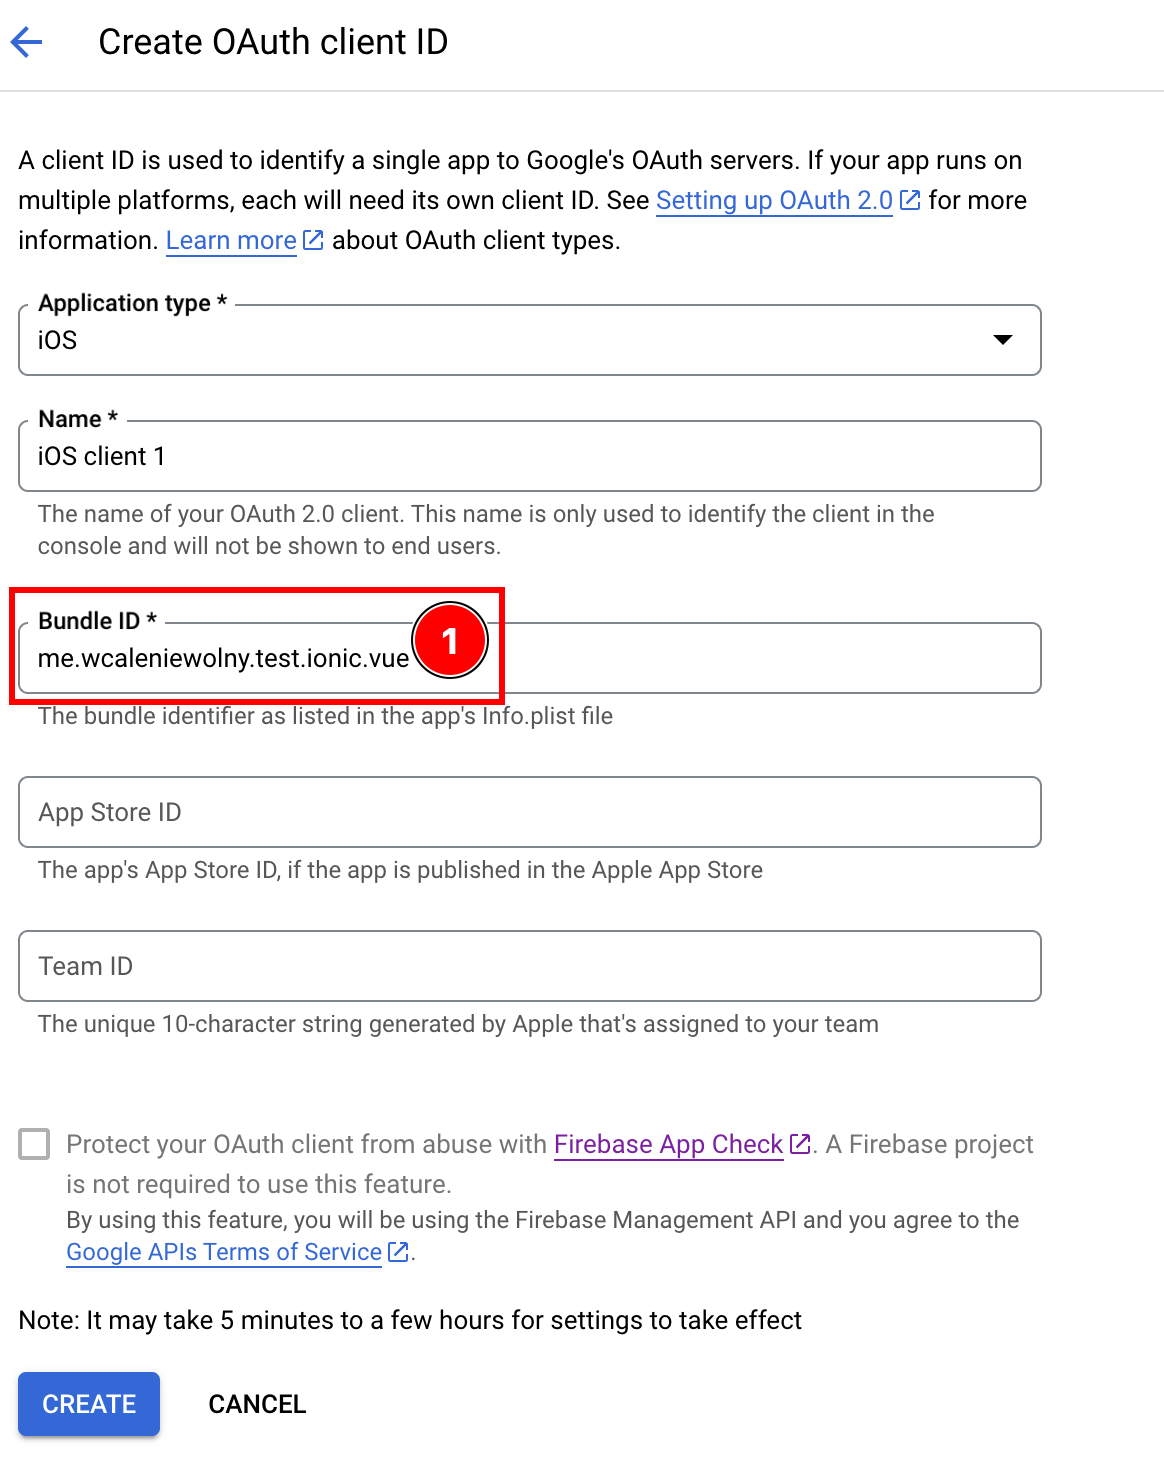
-
-
オプションで、
App Store IDまたはTeam IDApp Storeにアプリを公開した場合は、クライアントIDに -
すべての詳細を入力したら、iOSクライアント作成フォームの下部にある
create
-
クライアントID作成確認ダイアログの
OK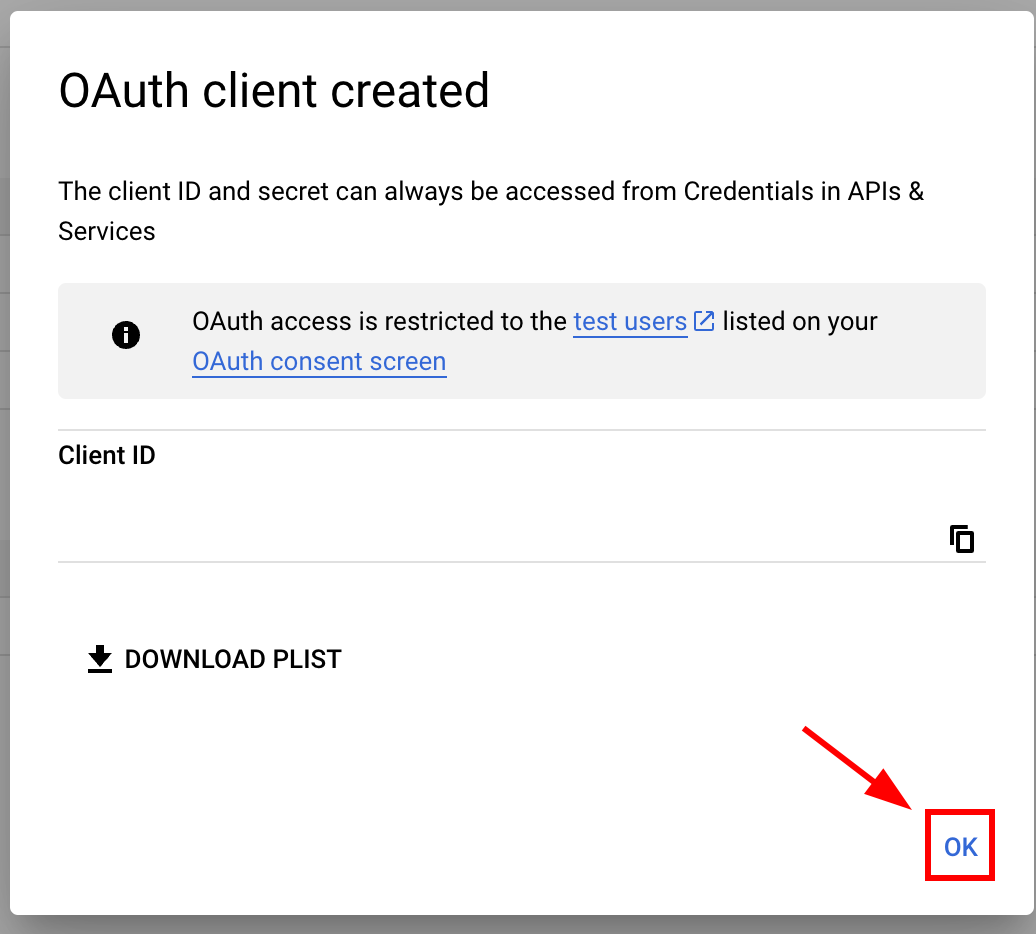
-
iOSクライアントを作成

-
__CAPGO_KEEP_0__をコピーしてください

-
-
アプリのInfo.plistを修正してください
-
Xcodeを開いて、
Info.plistファイル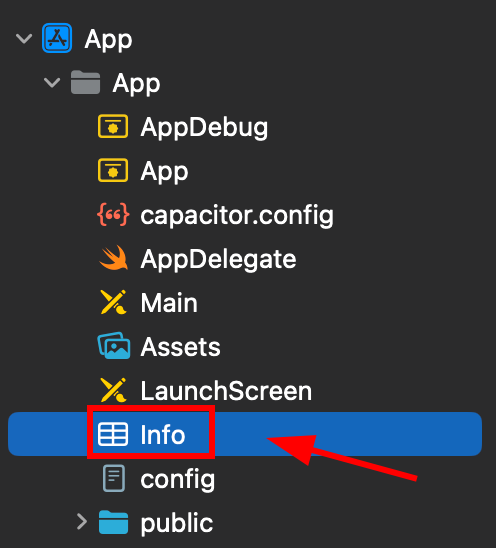
-
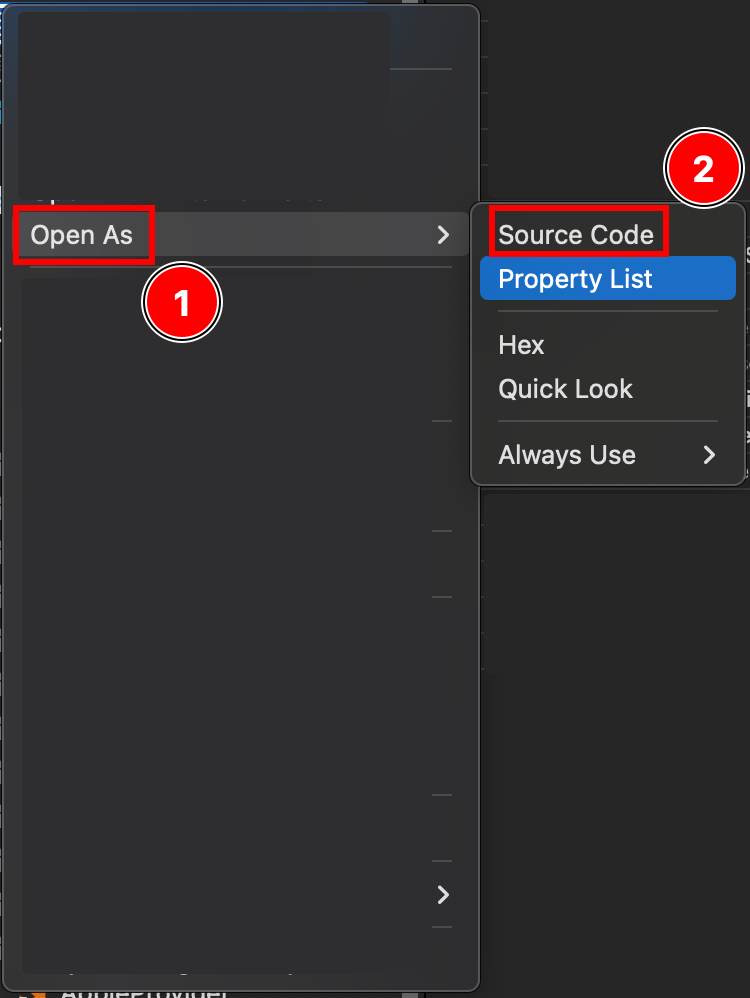
Right click this file and open it as source code
-
下部の
Plistファイル</dict>タグ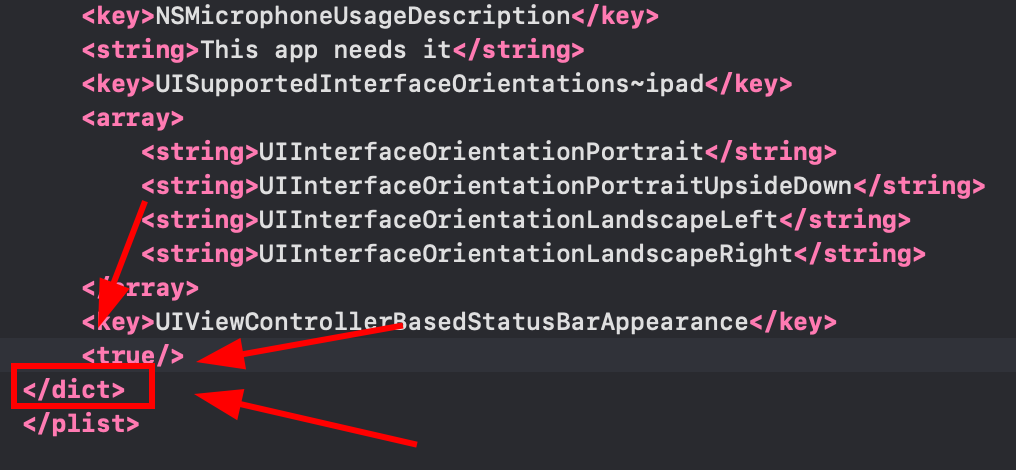
-
タグの直前に、以下のフラグメントを挿入
</dict>URLスキームを含むInfo.plist __CAPGO_KEEP_0__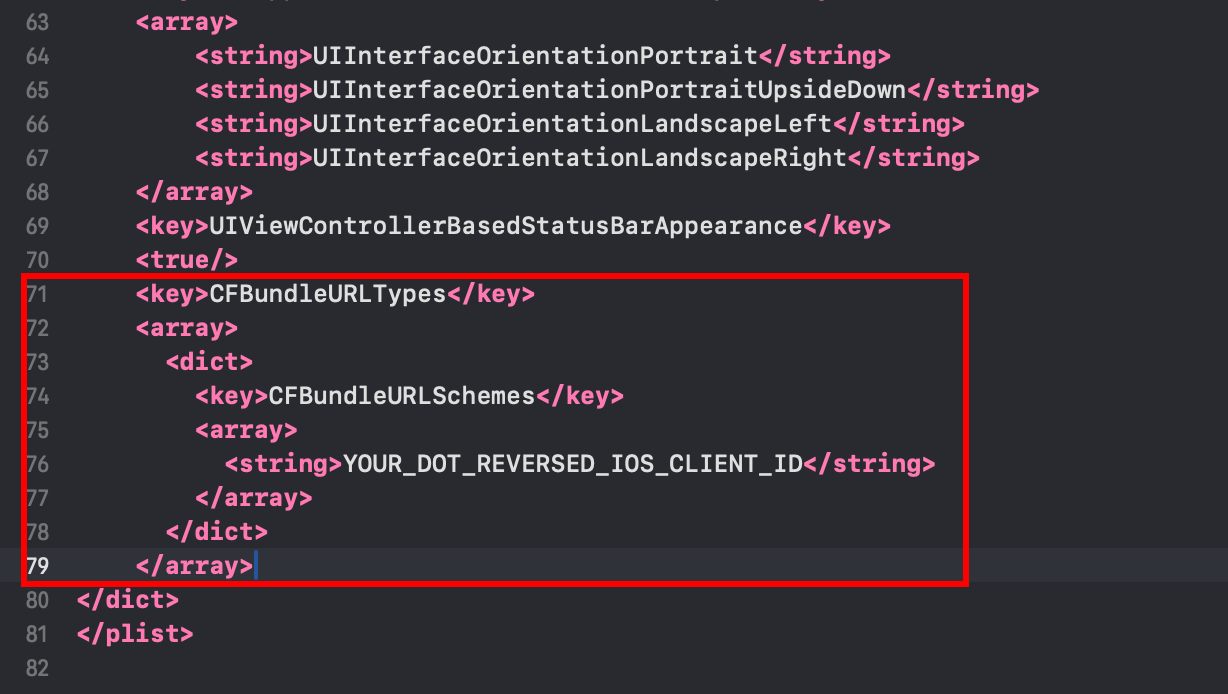 <key>CFBundleURLTypes</key><array><dict><key>CFBundleURLSchemes</key><array><string>YOUR_DOT_REVERSED_IOS_CLIENT_ID</string></array></dict></array>
 -
をに変更
YOUR_DOT_REVERSED_IOS_CLIENT_IDの値を前のステップでコピーした値に設定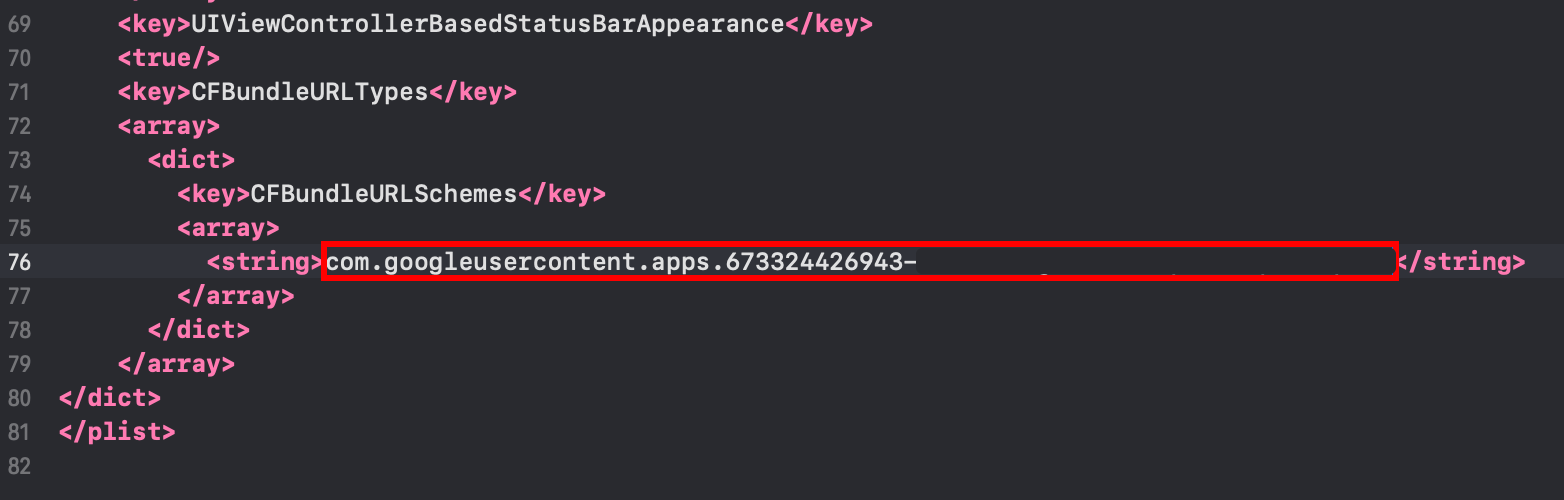
-
ファイルを保存
Command + S
-
-
を変更
AppDelegate.swift-
AppDelegateを開く
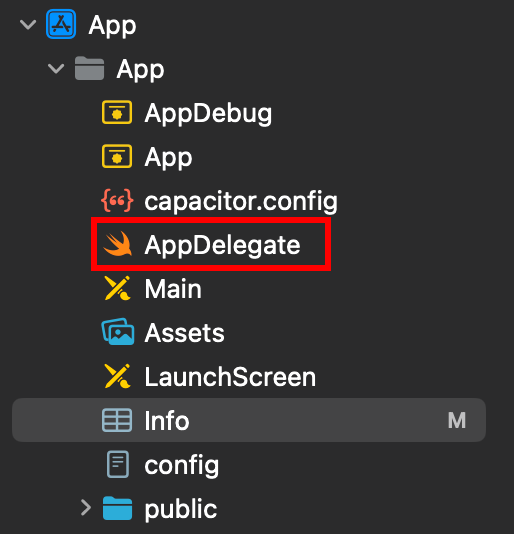
-
挿入
import GoogleSignInファイルの先頭に追加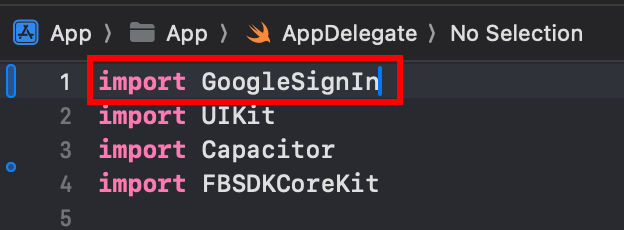
-
以下の
func application(_ app: UIApplication, open url: URL, options: [UIApplication.OpenURLOptionsKey: Any] = [:])関数
-
関数を次のように変更
func application(_ app: UIApplication, open url: URL, options: [UIApplication.OpenURLOptionsKey: Any] = [:]) -> Bool {// Called when the app was launched with a url. Feel free to add additional processing here,// but if you want the App API to support tracking app url opens, make sure to keep this callvar handled: Boolhandled = GIDSignIn.sharedInstance.handle(url)if handled {return true}return ApplicationDelegateProxy.shared.application(app, open: url, options: options)}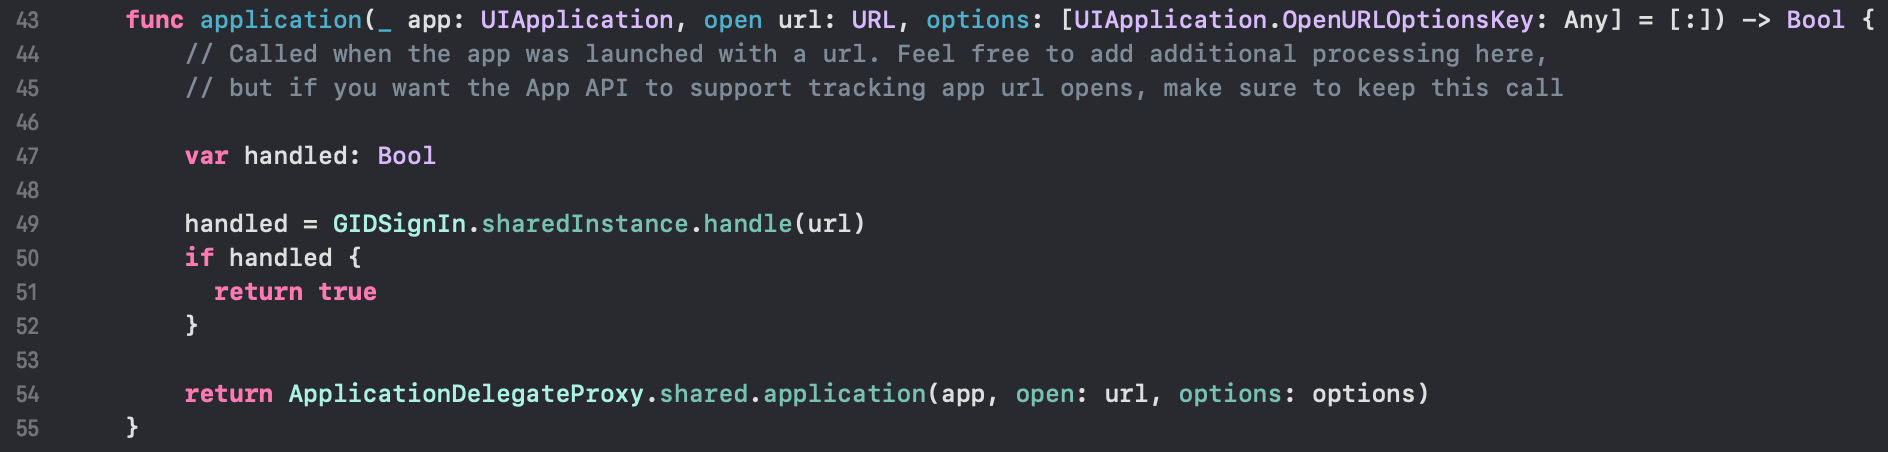
-
JavaScript/TypeScriptの__CAPGO_KEEP_0__でGoogleログインを設定
Command + S
-
-
Setup Google login in your JavaScript/TypeScript code
-
インポート
SocialLoginとCapacitorimport { SocialLogin } from '@capgo/capacitor-social-login';import { Capacitor } from '@capacitor/core'; -
初期化メソッドを呼び出してください (これは、1度だけ呼び出してください)
基本設定 (オンラインモード - 大多数のアプリケーション向けに推奨)
// onMounted is Vue specificonMounted(() => {SocialLogin.initialize({google: {iOSClientId: '673324426943-redacted.apps.googleusercontent.com',mode: 'online' // Default mode}})})追加のクライアントIDを使用した高度な設定:
onMounted(() => {SocialLogin.initialize({google: {webClientId: 'YOUR_WEB_CLIENT_ID', // Optional: for web platform supportiOSClientId: 'YOUR_IOS_CLIENT_ID', // Required: from step 1iOSServerClientId: 'YOUR_WEB_CLIENT_ID', // Optional: same as webClientId, needed for some advanced featuresmode: 'online' // 'online' or 'offline'}})}) -
Implement the login function. Create a button and run the following code on click
クリップボードにコピー
const res = await SocialLogin.login({provider: 'google',options: {}})// handle the response - contains user dataconsole.log(JSON.stringify(res))オフラインモードの場合:
const res = await SocialLogin.login({provider: 'google',options: {forceRefreshToken: true // Recommended for offline mode}})// res contains serverAuthCode, not user data// Send serverAuthCode to your backend to get user information// Do not call SocialLogin.refresh() in offline modeconsole.log('Server auth code:', res.result.serverAuthCode)
-
-
アプリケーションをテストする
-
アプリをビルドして実行する
cap sync -
すべてが正しく行われたら、Google ログインフローが正常に動作しているはずです
-
知られている問題
「知られている問題」のセクションプライバシースクリーン プラグインの不互換性
プライバシースクリーン プラグイン不互換性Google ログイン プラグインは @capacitor/privacy-screenプライバシースクリーンが表示されるため、Google ログイン ウェブビューが中断されます。
対策: 呼び出し await PrivacyScreen.disable(); ログイン関数を呼び出す前に呼び出してください:
import { PrivacyScreen } from '@capacitor/privacy-screen';import { SocialLogin } from '@capgo/capacitor-social-login';
await PrivacyScreen.disable();await SocialLogin.login({  provider: 'google',  options: {}});