
웹 브라우저에서 Apple 로그인
이 플러그인의 설치 단계와 전체 마크다운 가이드를 포함한 설정 명령어를 복사하십시오.
설치, Sync 및 소스 마크다운 가이드가 포함됩니다. Sign in with Apple 웹 로그인 설정은 iOS 설정보다 더 어려우며 Android 설정보다 더 어려운 것입니다. Sign in with Apple Android에서 작동합니다.
서비스 생성
서비스 생성 섹션설정을 완료하려면 이 안내서를 따라야 합니다. 여기 서비스를 생성하려면 이 안내서를 따라야 합니다.
설정하기 Return URLs
리턴 URL을 설정하는 방법-
서비스 ID 설정을 위해
In the 여기서, 이동하여
Identifiers>Services IDs그리고 서비스 ID를 클릭하세요. -
애플과 함께 로그인 구성
클릭하세요
Configure애플Sign in with Apple.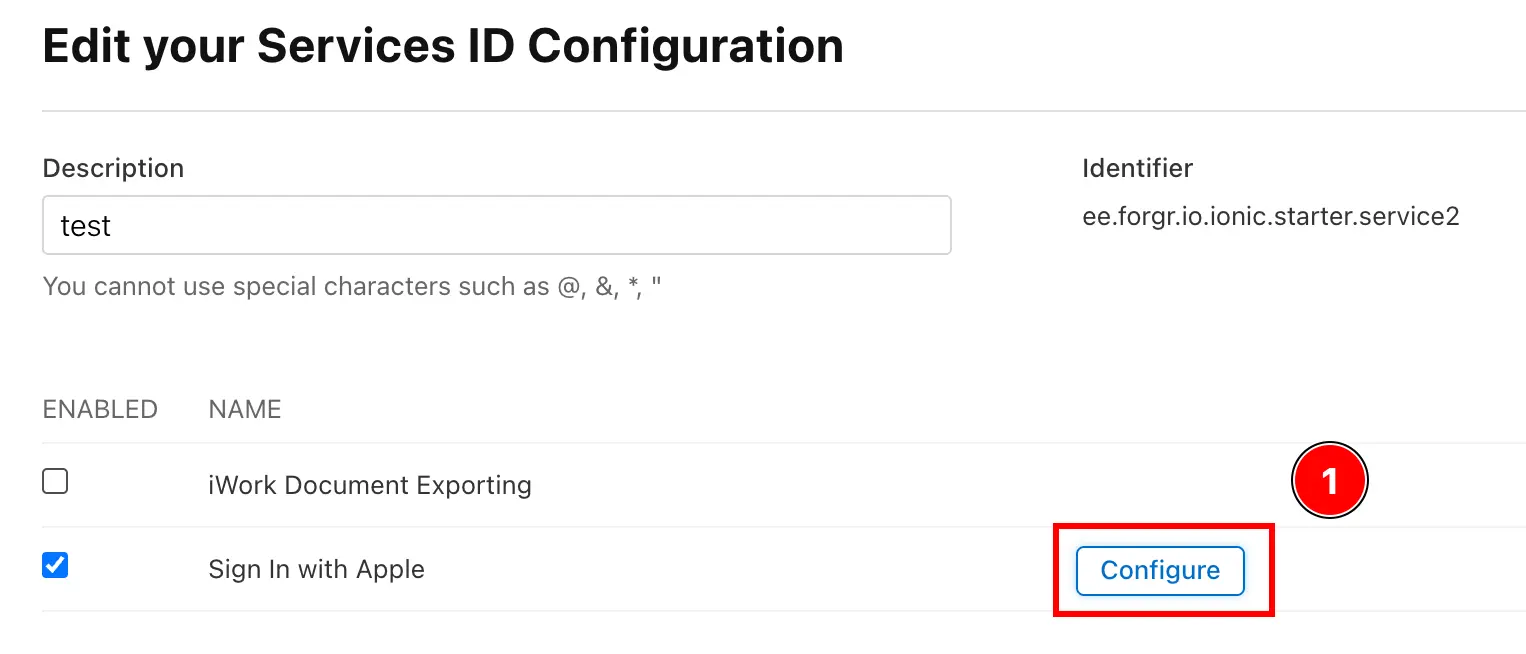
-
로그인 URL을 추가하세요
클릭하세요
+button을 클릭하여 새로운 로그인 URL을 추가하세요.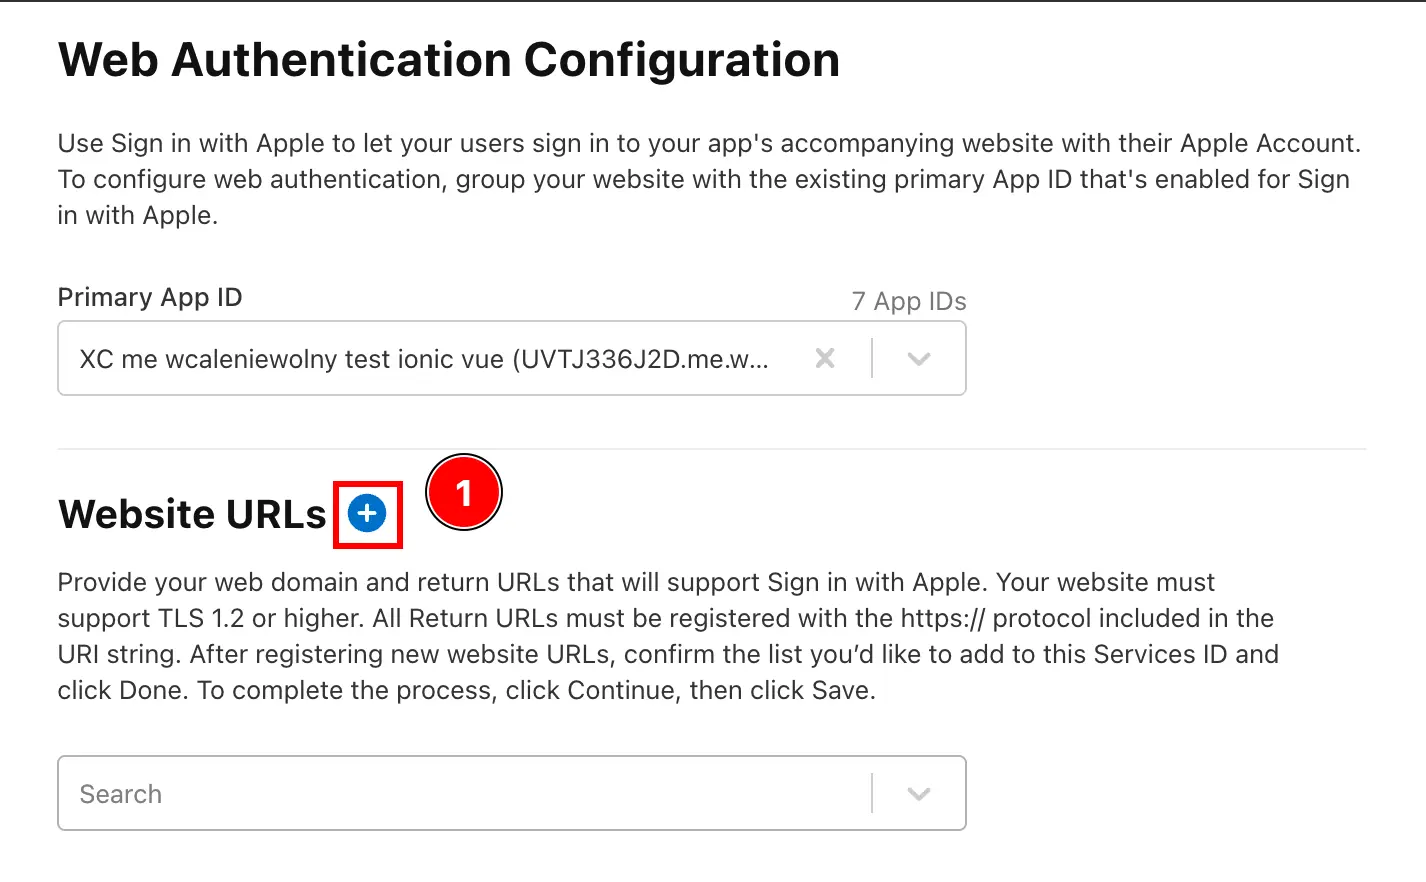
-
로그인 URL을 추가하세요
웹 애플리케이션의 도메인을 추가하세요.
Domains and Subdomains.prefix와
https://그리고https://my-app.com애플 로그인/login예를 들어https://my-app.com/login당신의 도메인은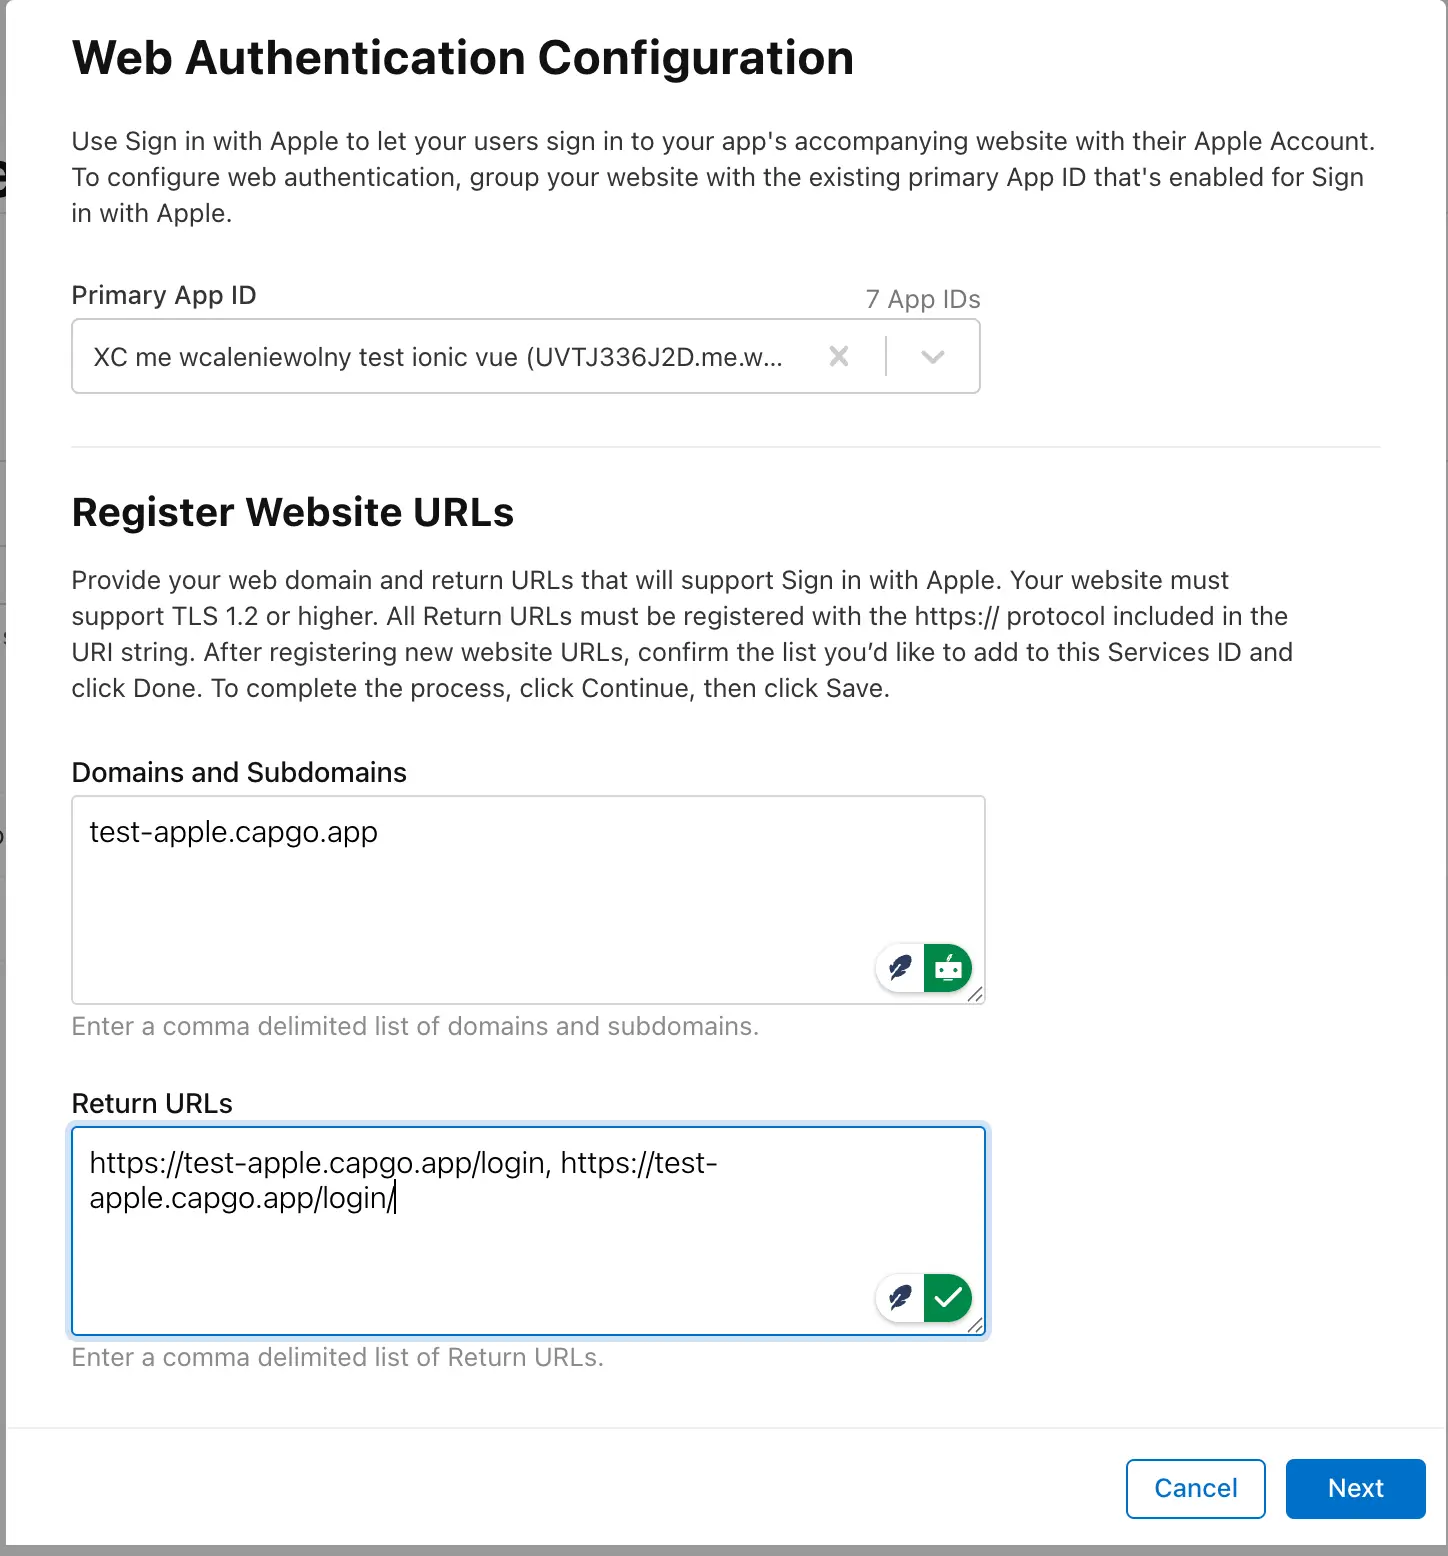
-
변경 사항을 저장하세요
- 변경 사항을 저장하기 위해 버튼을 클릭하세요.
Next자바스크립트 로그인 테스트를 위해 준비가 되었는지 확인하세요. localhost에서 테스트할 수 없습니다. - 변경 사항을 저장하기 위해 버튼을 클릭하세요.
Save자바스크립트 로그인 테스트를 위해 준비가 되었는지 확인하세요. localhost에서 테스트할 수 없습니다.
- 변경 사항을 저장하기 위해 버튼을 클릭하세요.
-
애플 로그인에서 계속 진행하세요.
애플 로그인에서 계속
애플 로그인 웹 브라우저에서 계속하기만약에 웹 브라우저에서 애플 로그인을 사용하고 있다면 인증 및 계정 흐름을 계획하고 그것을 @capgo/capacitor-social-login과 연결하세요 Using @capgo/capacitor-social-login의 네이티브 기능을 위해 @capgo/capacitor-social-login을 사용하세요 Using @capgo/capacitor-social-login Using @capgo/capacitor-social-login의 구현 세부 정보를 위해 @capgo/capacitor-social-login을 사용하세요 Using @capgo/capacitor-passkey Using @capgo/capacitor-passkey의 구현 세부 정보를 위해 @capgo/capacitor-passkey을 사용하세요 Using @capgo/capacitor-native-biometric Using @capgo/capacitor-native-biometric의 구현 세부 정보를 위해 @capgo/capacitor-native-biometric을 사용하세요 두 단계 인증 두 단계 인증 구현 세부 사항에 대한
Capacitor 앱을 배포하세요 기다리지 않아도
AI 코딩 에이전트와 함께 빌드하고, 몇 분 만에 수정을 배포하고, 맥 없이 iOS 및 Android 빌드하고, 모든 릴리즈를 관찰하세요.


무료로 14일 동안 무제한 사용. 신용 카드가 필요하지 않습니다. 기업용이 필요하세요?